Design, Development and Implementation of Online Programme on Evaluation of T...
Industrial Training
1. INDUSTRIAL TRAINING
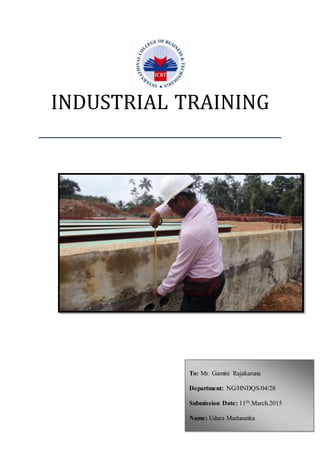
To: Mr. Gamini Rajakaruna
Department: NG/HNDQS/04/28
Submission Date: 11th.March.2015
Name: Udara Madusanka
2. Industrial Training
1 Udara Madusanka
ICBT Campus| HND in QS, Batch No: 04
Acknowledgement
I would like to express my deepest appreciation to all those who provided me the possibility
to complete this Industrial Training. A special gratitude I give to CEO Mr. Bandula
Jayarathna and Project Manager Mr. Vipul Semasinghe at SAW Engineering (Pvt) Ltd.,
whose gave me professional Quantity Surveying tasks to achieve and complete this Industrial
Training.
I take this opportunity to express my profound gratitude and deep regards to my guide Mr.
Gamini Rajakaruna for his exemplary guidance, monitoring and constant encouragement
throughout this Industrial Training.
Furthermore I would also like to acknowledge with much appreciation for my parents and
colleagues who helped me to complete this Industrial Training and gather experiences
towards Quantity Surveying. Last but not least, many thanks go to Course Co- Coordinator,
Mr. Madushan who given much guidance in this Industrial Training. Thank you very much.
3. Industrial Training
2 Udara Madusanka
ICBT Campus| HND in QS, Batch No: 04
Table of Contents
Acknowledgement…………………………………………………………………………………….
List of abbreviations………………………………………………………………………………….
List of illustrations………………………………………………………….……………………...…
Executive Summary…………………...……………………..…………..…………………………...
1.0 Introduction…...……………………..……………..………………………………………..…
2.0 Chapter One: Introduction about the company……………..…………..…………………...…
3.0 Chapter Two: Mabima Steel Factory Building Site ………….………..……………..……..…
3.1 Rock Drilling and Blasting………………………………………………………………
3.2 Excavation, Filling and Compaction…………………………………………………….
3.3 Column Bases……………………………………………………………………….
3.4 Column shaft………………………………………………………………………….
3.5 Rubble Wall, Tie Beam and Formwork………………………………………………
3.6 Steel Beams, Columns and Trusses……………………………………………….
4.0 Chapter Three: Ceylon Grain Elevator PLC (Prima) Site............................................................
5.0 Chapter Four: ……………...…………..…………….
6.0 Chapter Five: ……….……..…
Conclusion ……………………………………………………………………………………….…..
References…………………………………………………………………….………………………
APPENDIX-A………………………………………………………………………………………..
4. Industrial Training
3 Udara Madusanka
ICBT Campus| HND in QS, Batch No: 04
List of abbreviations
I. QS- Quantity Surveyor
II. CEO- Chief Executive Officer
III. PM- Project Manager
IV. OH & S- Occupational Health and Safety
V. MS- Microsoft
5. Industrial Training
4 Udara Madusanka
ICBT Campus| HND in QS, Batch No: 04
List of illustrations
Figure 1: Organizational Hierarchy.................................................................................................8
Figure 2: Quality Objectives...........................................................................................................9
Figure 3: ISO Color Code................................................................................................................ 9
Figure 4: Box File of Mabima Site................................................................................................. 11
Figure 5: Table of Content of the Box File..................................................................................... 11
Figure 6: File Cupboards.............................................................................................................. 12
Figure 7: Plan of the Mabima Site................................................................................................ 13
Figure 8: Column Arrangement Plan ............................................................................................ 13
Figure 9: Column Arrangement Plan ............................................................................................ 14
Figure 10: Column Layout Plan .................................................................................................... 14
Figure 11: Bar Schedule............................................................................................................... 15
Figure 12: Bar Schedule............................................................................................................... 15
Figure 13: Purchase Requisition Form.......................................................................................... 16
Figure 14: Goods Receiving Note (GRN)........................................................................................ 17
Figure 15: Site Office and Store ................................................................................................... 17
Figure 16: Inside of the Site Office ............................................................................................... 18
Figure 17: Constructing the Site Store.......................................................................................... 18
Figure 18: Drilling of the Rock...................................................................................................... 20
Figure 19: Number Mark on Drilled Holes..................................................................................... 21
Figure 20: Ignite for Blasting........................................................................................................ 21
Figure 21: Clearing the Blasted Rocks........................................................................................... 22
Figure 22: Excavating the hill for gain soil..................................................................................... 23
Figure 23: Make the ground to a level by wheel loader................................................................. 23
Figure 24: Compact the soil by using a Vaquer.............................................................................. 24
Figure 25: excavation for Base Pits............................................................................................... 25
Figure 26: Mark the centers of the Base Pits................................................................................. 25
Figure 27: Screed Concrete for Base............................................................................................. 26
Figure 28: Top and Bottom Net of the Base.................................................................................. 26
Figure 29: Rock Anchoring........................................................................................................... 27
Figure 30: Fill Cebex 100 to Drilled holes...................................................................................... 27
Figure 31: RE 500 Chemical ......................................................................................................... 28
Figure 32: CEBEX 100 .................................................................................................................. 28
Figure 33: Curing the Concrete.................................................................................................... 28
Figure 34: Anchor Plate on top of the Column Shaft...................................................................... 29
Figure 35: Verify the Centers of the Anchor Plate ......................................................................... 29
Figure 36: Level the Anchor Bolts by using a water level................................................................ 30
Figure 37: Cover Blocks............................................................................................................... 30
Figure 38: Formwork of the Tie Beam .......................................................................................... 31
Figure 39: Class 3 Timber Supports .............................................................................................. 32
Figure 40: Apply Grease to the Plywood Board............................................................................. 32
6. Industrial Training
5 Udara Madusanka
ICBT Campus| HND in QS, Batch No: 04
Figure 41: Finished Tie Beam Formwork....................................................................................... 32
Figure 42: Make the right space to the Tie Beam Formwork.......................................................... 33
Figure 43: Thread Bars to the Form Work..................................................................................... 33
Figure 44: Thread Bars to the Formwork...................................................................................... 34
Figure 45: check the Level of verticality of the formwork .............................................................. 34
Figure 46: Apply Red Primer to the Steel...................................................................................... 35
Figure 47: A column which has painted with Zinc Phosphate......................................................... 35
Figure 48: PunchedNumber Mark on the Steel............................................................................. 36
Figure 49: Steel Roof Trusses....................................................................................................... 36
Figure 50: Demolishing the concrete............................................................................................ 37
Figure 51: Clearing the Debris...................................................................................................... 38
Figure 52: While constructing the floor slab ................................................................................. 38
Figure 53: Monitoring the Project................................................................................................ 39
Figure 54: Box file of the Prima Site ............................................................................................. 39
Figure 55: Layout Plan of the Site................................................................................................. 40
Figure 56: Section of the Floor Slab.............................................................................................. 40
Figure 57: Keeping Plywood Boards for the groove....................................................................... 41
Figure 58: 10 mm steel bars for the Top and Bottom Net.............................................................. 41
Figure 59: Ready Mix Concrete for the Floor Slab.......................................................................... 42
Figure 60: While Using a Vibrator (Poker)..................................................................................... 42
Figure 61: After Laying the Ready Mix Concrete............................................................................ 43
Figure 62: Rate Breakdown ......................................................................................................... 44
Figure 63: NBRO Test Cube Report............................................................................................... 45
Figure 64: Delivery Notes of the Ready Mix Supplier..................................................................... 45
Figure 65: Test Results of the Report ........................................................................................... 46
Figure 66: Making the Groove by using a Asphalt Cutter ............................................................... 47
Figure 67: Clear the Groove before pour Asphalts......................................................................... 47
Figure 68: Making the Cover Slab Frame before concreting........................................................... 48
Figure 69: KeepPVC pipes for drain holes of the cover slab........................................................... 48
9. Industrial Training
8 Udara Madusanka
ICBT Campus| HND in QS, Batch No: 04
2.0 Introduction about the company
I have done my Industrial Training at SAW Engineering (Pvt) Ltd, Kiribathgoda. I trained in
two construction sites under this company. They are as follows;
1. Mabima Steel Factory Building
2. Mattakkuliya Ceylon Green Elevator (Prima) (PLC) Site- 30 KN/m2 compressive
strength Concrete Floor Slab
This company is categorized as a Grade C3 company by ICTAD. As well as they have E1
grade in Electrical construction works. This company has two divisions in Civil and
Electrical. I worked for civil division as a Trainee Quantity Surveyor. They have adopted a
good organization structure as below image.
Figure 1: Organizational Hierarchy
This company has many Quality objectives to achieve their future goals to become a leading
construction company in the island.
10. Industrial Training
9 Udara Madusanka
ICBT Campus| HND in QS, Batch No: 04
Figure 2: Quality Objectives
SAW Engineering Company has gained ISO 9001 standard and therefore documents should
be well maintained according to ISO Standards. They have adopted a color code for all files
in construction and other.
Figure 3: ISO Color Code
11. Industrial Training
1
0
Udara Madusanka
ICBT Campus| HND in QS, Batch No: 04
According to these ISO Standards I have to fill many documents at the site.
1. Daily Progress Report
2. Inspection Sheet on Milestone
3. Job Order Form
4. Weather Chart
12. Industrial Training
1
1
Udara Madusanka
ICBT Campus| HND in QS, Batch No: 04
Files and documents are to be very neat and clear according to the ISO Standards hence I had
to maintain these files very well as if below images are shown.
Figure 4: Box File of Mabima Site
In the file there is a table of content to recognize find each documents easily.
Figure 5: Table of Content of the Box File
14. Industrial Training
1
3
Udara Madusanka
ICBT Campus| HND in QS, Batch No: 04
3.0 Mabima Steel Factory Building Site
I had all the plans, specifications in particular steel building at Mabima.
Figure 7: Plan of the Mabima Site
Figure 8: Column Arrangement Plan
According below these plans I have to be very certain whether construction at the site is
precise. As well as I measured all the columns, beams for Interim Payments.
15. Industrial Training
1
4
Udara Madusanka
ICBT Campus| HND in QS, Batch No: 04
Figure 9: Column Arrangement Plan
As a practice I marked finished column, Column Bases, Tie Beams in the end of each day
and measured them. Also I have calculated the volume, Area and Quantities of materials
used. As a Trainee Quantity Surveyor I use Measurement sheets, Bar Schedules for
Calculations.
Figure 10: Column Layout Plan
16. Industrial Training
1
5
Udara Madusanka
ICBT Campus| HND in QS, Batch No: 04
I have prepared Bar Schedules for Tie Beams, Columns, Bases and etc. In the end of the
month I have prepared Sub Contractors payment Certificates with the help of Senior Quantity
Surveyors.
Figure 11: Bar Schedule
Figure 12: Bar Schedule
17. Industrial Training
1
6
Udara Madusanka
ICBT Campus| HND in QS, Batch No: 04
Usually Quantity Surveyors do not Purchase materials. But in urgent and specific cases we
can purchase materials for construction.
1. Initially I prepare a Bar Schedule and Measurement sheets for gain the Quantities of
materials
2. Then I prepare Purchase Requisition Form if materials are not available in the ware
house after inquiring the warehouse officer. If Some Materials are available in the
warehouse I would write a MRF (Material Requisition Form).
3. Then I sent the PR forms to Project manger to get the approval.
4. After he approved the PR form and verify the Quantities are correct I sent them to
managing director to further approval.
5. Then after I sent them to Account Department for purchasing them. I receive a dully
duplicate after they signed it.
6. Account Department officers are keep in touch with me until receive the material to
the site.
7. When materials are received to the site I verify the Quality and Quantities are whether
as per the PR form. If Quality of the materials is low I would return them. If Quality
and Quantities are comply with the PR Form I fill GRN (Good Receiving Notes) and
attach them to the file.
Figure 13: Purchase Requisition Form
18. Industrial Training
1
7
Udara Madusanka
ICBT Campus| HND in QS, Batch No: 04
Figure 14: Goods Receiving Note (GRN)
This proposed Steel Building is located on a little rock hilltop. One side of the site had a big
rock and which made difficult to make the ground to a level. At initial stage of the
construction we built the site office, Stores, Security hut and Labor huts. I have to be very
certain of site overhead with complied with the BOQ.
Figure 15: Site Office and Store
20. Industrial Training
1
9
Udara Madusanka
ICBT Campus| HND in QS, Batch No: 04
I worked at many stages in initial to the erection of steel stage. We can categorize these
stages are as follows:
1. Rock Drilling and Blasting
2. Excavation, Filling and compaction
3. Column Base
4. Column Shaft
5. Rubble works, Tie Beam and Formwork
6. Steel Beams, Columns and Trusses
21. Industrial Training
2
0
Udara Madusanka
ICBT Campus| HND in QS, Batch No: 04
3.1.1 Rock Drilling and Blasting
Due to the rocky area of the site it was very difficult to make the ground to a level. But on the
other hand it was very advantageous because we use blasted rock stones for Rubble Works
after Broke them into roughly 6”*9” rubbles. We subcontracted to blast the rock.
They use Gelanite Rods to blast the rock. To insert the Gelanite Rod into rock they drill the
rock 3ft or 6ft. Then they ignite the thread. But considering health and safety of the people
we have to do the blast works in a safer way. Therefore we put weights on the hole to
minimize the damage. We use Heavy Tires to as weights.
Figure 18: Drilling of the Rock
We instruct the drillers to wear gloves considering health and Safety of the people.
24. Industrial Training
2
3
Udara Madusanka
ICBT Campus| HND in QS, Batch No: 04
3.1.2 Excavation Filling and Compaction
This site has a little hill and it was very advantageous to have soil. Already has Rock and soil
decreases the cost of the project by huge amount.
Figure 22: Excavating the hill for gain soil
Using Wheel Loaders, Vaquers and etc we made the ground to a level. Also with help of
NBRO (National Building Organization) we assure the compaction is good by having a
Proctor Compaction Test. As well as I have to very careful about the cost of these tests.
Figure 23: Make the ground to a level by wheel loader
26. Industrial Training
2
5
Udara Madusanka
ICBT Campus| HND in QS, Batch No: 04
3.1.3 Column Bases
In this stage we constructed Column Bases. We excavated Base pits initially as per the
column bases arrangement plans.
Figure 25: excavation for Base Pits
Using the Measure Tape and Plumb Mob we marked the centers of the column bases.
Column Bases are in center to center 6000mm distance.
Figure 26: Mark the centers of the Base Pits
27. Industrial Training
2
6
Udara Madusanka
ICBT Campus| HND in QS, Batch No: 04
In other area which does not have a rock base we put screed concrete.
Figure 27: Screed Concrete for Base
Then we put RC (Reinforced Concrete) bases. I have to ensure spaces of the Top net and
Bottom and Space between the Base formwork and Nets are right. I measure the concreted
area after put concrete into bases. As well as I prepared Bar Schedules and Measurement
Sheets in this scenario. For Columns and Bases we put Grade 25 Concrete. I have to be vey
certain and checked these mix ratios are well. Also we use 16 mm Steel Bars to the Top and
Bottom Net. I had to prepare a Bar schedule before cut and bending works begin. Also I have
to calculate the Binding wires Quantities used. Normally weight of 750 g Binding wires are
used for 1 ton of Steel Bars.
Figure 28: Top and Bottom Net of the Base
28. Industrial Training
2
7
Udara Madusanka
ICBT Campus| HND in QS, Batch No: 04
In the rocky area we anchored the Anchor rods into the rock. Using RE 500 and Cebex 100
chemicals we anchored these 16 mm rods. This drilled hole is 3ft in depth. We have to fill RE
500 chemical into the hole till one third of depth is full. Using a Hiliti gun we put RE 500
chemical into the drilled hole. Then we fill Cebex 100 and Cement mixed grout into the hole
two third of depth is full which make the Rock-Anchor Rod Bond stronger.
Figure 29: Rock Anchoring
Figure 30: Fill Cebex 100 to Drilled holes
29. Industrial Training
2
8
Udara Madusanka
ICBT Campus| HND in QS, Batch No: 04
Figure 31: RE 500 Chemical
Figure 32: CEBEX 100
After concrete the Column Base we allow cures the concrete using Jute Hessian or Sand.
Figure 33: Curing the Concrete
30. Industrial Training
2
9
Udara Madusanka
ICBT Campus| HND in QS, Batch No: 04
3.1.4 Column Shaft
In next stage we constructed RC column shafts. We have to kept Anchor plates top of the
column shaft because steel columns are to be fixed on this Anchor plate. Also Anchor Bolts
are fixed to the Anchor plate. And those Anchor Plates should be level therefore we check
whether is it horizontally level by using a sprit level. As well as I have to ensure the
alignments of columns are well by using center line threads we check whether these plates
are aligned.
Figure 34: Anchor Plate on top of the Column Shaft
Figure 35: Verify the Centers of the Anchor Plate
31. Industrial Training
3
0
Udara Madusanka
ICBT Campus| HND in QS, Batch No: 04
We check anchor bolts are in level with other anchor bolts too. We use water level for that
check.
Figure 36: Level the Anchor Bolts by using a water level
We have to keep spaces between reinforcement and the formwork for that we use Cover
Blocks. We made Cover Blocks in Cement and Sand with 1:2 ratio.
Figure 37: Cover Blocks
32. Industrial Training
3
1
Udara Madusanka
ICBT Campus| HND in QS, Batch No: 04
3.1.5 Rubble Wall, Tie Beam and Formwork
In this stage we constructed Tie Beams top of the Rubble Wall. This report has provided
sketches of these Tie Beam Formworks. We use best quality Plywoods for these Formworks.
Then we can use them twice or thrice for formworks. We apply grease on the plywood board
to prevent the contact with wet concrete and hence we can use these boards for another
formwork. Also we checked whether these formworks are vertically level. By using Thread
Bars we made the formwork more solid. As well as we insert these Thread Bar into a PVC
pipe to prevent the contact between thread bar and wet concrete and hence we can use these
thread bars again. As the formwork supports I ordered Class 3 Timber supports. As per the
BSR, i have ordered these class 3 timber supports.
Figure 38: Formwork of the Tie Beam
33. Industrial Training
3
2
Udara Madusanka
ICBT Campus| HND in QS, Batch No: 04
Figure 39: Class 3 Timber Supports
Figure 40: Apply Grease to the Plywood Board
Figure 41: Finished Tie Beam Formwork
36. Industrial Training
3
5
Udara Madusanka
ICBT Campus| HND in QS, Batch No: 04
3.1.6 Steel Beams, Columns and Trusses
By using Steel Beams, column and trusses structure is made. For prevent the rust we apply
Red Primer on them after cleaning the surface of the steel by using a wire brush and then
applied Arundel colored Zinc Phosphate paint on the steel to protect the steel from rusting.
Steel Beams, Trusses and Columns producer has punched a number mark on these to identify
where to be these are fixed.
Figure 46: Apply Red Primer to the Steel
Figure 47: A column which has painted with Zinc Phosphate
38. Industrial Training
3
7
Udara Madusanka
ICBT Campus| HND in QS, Batch No: 04
4.0 Ceylon Grain Elevator PLC (Prima) site
I have undertaken another project as well. Under this project we constructed a 200 mm thick
floor slab after demolishing the existing concrete floor slab at Ceylon Grain Elevator PLC
(Prima), Mattakkuliya. We had a huge time constraints to finish this project on time. We had
to do this project only in nights as per the request of the client and which had to be finished
within 5 weeks.
Initially we demolished the existed concrete floor slab by using a Breaker of the Excavator.
Figure 50: Demolishing the concrete
After demolishing of existed Concrete Floor Slab we cleared the Debris by capacity of 2
cubes truck.
39. Industrial Training
3
8
Udara Madusanka
ICBT Campus| HND in QS, Batch No: 04
Figure 51: Clearing the Debris
After demolishing the existing floor slab we fill the ground with Quarry dust to strengthen the
soil to increase the bearing capacity. Then after we laid polythene to prevent water goes out
even before concrete get dried.
Figure 52: While constructing the floor slab
I had to closely monitor the project at the same time doing Quantity Surveying applications.
Which was a tough ask to me but i keenly achieved that particular task.
40. Industrial Training
3
9
Udara Madusanka
ICBT Campus| HND in QS, Batch No: 04
Figure 53: Monitoring the Project
I have maintained a file for this project as well. It contains with layout plans, sections on the
floor slab and project expenses documents and etc.
Figure 54: Box file of the Prima Site
41. Industrial Training
4
0
Udara Madusanka
ICBT Campus| HND in QS, Batch No: 04
Figure 55: Layout Plan of the Site
Figure 56: Section of the Floor Slab
We use Plywood ¾” thick plywood boards for keep the groove. I have to calculate all those
Quantities to be used by using measurement sheets and Bar schedules.
42. Industrial Training
4
1
Udara Madusanka
ICBT Campus| HND in QS, Batch No: 04
Figure 57: Keeping Plywood Boards for the groove
I closely monitored whether spaces for covering are right. Also I prepared a Bar Schedule
before doing Cut and Bending of diameter of 10 mm steel bars.
Figure 58: 10 mm steel bars for the Top and Bottom Net
This Floor Slab has to be in compressive strength of 30 KN/m2. Therefore we used Ready
Mix concrete to assure the strength. Using Vibrators (Pokers) we mix the concrete well to
prevent air traps.
44. Industrial Training
4
3
Udara Madusanka
ICBT Campus| HND in QS, Batch No: 04
Figure 61: After Laying the Ready Mix Concrete
For this particular project I prepared a Rate Breakdown with the help of Quantity Surveyor.
By using previous estimations, Price Lists, BSR I prepared this Rate Break down. After the
approval of Managing Director I sent this Quotation to the Ceylon Grain Elevator PLC
company before start the project. After considering the fair rates they hand over the project
for our company.
45. Industrial Training
4
4
Udara Madusanka
ICBT Campus| HND in QS, Batch No: 04
Figure 62: Rate Breakdown
After concreted the floor I sent the Test cubes (which is done by the Ready Mix supplier) to
the NBRO to test whether compressive strength is there.
46. Industrial Training
4
5
Udara Madusanka
ICBT Campus| HND in QS, Batch No: 04
Figure 63: NBRO Test Cube Report
When Ready mix is received to the site I had to sign these delivery notes as the officer in
charge to make sure ready mix is received on time. Also when Ready mix concrete is supply
is going on I have to ensure the quantity is right before another truck is comes in. Otherwise I
would have to pay if concrete is wasted. Therefore i had to do quick rough calculations to
stop further supplying of ready mix concrete is not necessary.
Figure 64: Delivery Notes of the Ready Mix Supplier
47. Industrial Training
4
6
Udara Madusanka
ICBT Campus| HND in QS, Batch No: 04
After receiving the test report I got a huge blame of not sending the test cubes on time. So as
per the Test Report concrete is failed to fulfill the compressive strength of 30 KN/m2. But the
Managing director advises me to take every possible action to not do that again and I
determined not to.
Figure 65: Test Results of the Report
48. Industrial Training
4
7
Udara Madusanka
ICBT Campus| HND in QS, Batch No: 04
After cured the concrete we start to pour asphalt to the groove. We use an Asphalt Cutter to
make the groove. We pour a mixture of Hot Asphalt and Sand with a ratio of 1:2.
Figure 66: Making the Groove by using a Asphalt Cutter
Figure 67: Clear the Groove before pour Asphalts
49. Industrial Training
4
8
Udara Madusanka
ICBT Campus| HND in QS, Batch No: 04
Also we constructed three cover slabs for Prima Site which was constructed at Mabima Site
and transported it.
Figure 68: Making the Cover Slab Frame before concreting
Figure 69: Keep PVC pipes for drain holes of the cover slab