SlideShare a Scribd company logo
1 of 8
Download to read offline
ASSEMBLY AND ADJUSTMENT
Model TopView-Single-SLV
Model TopView-Single-BLK
Model TopView-Single-WHT
TopView Single
MONITOR ARM
TopView Single Rev A 12/20
2
PLEASE REVIEW these instructions before beginning the assembly and adjustment procedures. Check that
all the parts and tools listed below were provided with your order. Contact your supplier if any materials are
your satisfaction.
TOPVIEW SINGLE MONITOR ARM PARTS AND TOOLS
Base and Monitor Arm Assembly (1) Clamp Pad (1) Grommet Mount Plate (1)
Grommet Bar (1) Grommet Bolt (1)
M4x9M4x10M4x10
Grommet Bolt Washer (1)
M10x27
Grommet Bolt Nut (2)
VESA Plate Screw (4) VESA Locking Screw (1) 180° Locking Screw (1) 14mm Wrench (1)
2mm Allen Key (1) 4mm Allen Key (1) 5mm Allen Key (1)
PARTS AND TOOLS PROVIDED
CAUTION: Hand-tighten screws only. Do not use power tools.
ADDITIONAL TOOLS REQUIRED
• Phillips screwdriver
3x3/8-16”
9/16x3/8-16
3
Clamp Method
The base assembly is shipped with the bottom clamp in the “upper attachment position.” To change to the
“lower attachment position” for thicker work surface, follow this procedure (see illustrations):
• Use the 4mm Allen key to remove the two screws holding the bottom clamp in position.
• Reattach the bottom clamp to the lower two holes. Tighten the screws securely using the Allen wrench.
CAUTION: Do not use a power drill. Clamp screws are rated at 102 in-lbs.
Attach Clamp Pad
• Peel the backing from the adhesive side of the clamp pad and adhere the pad
to the bottom of the base, as shown. The pad protects the work surface.
Install Base Assembly
• Clamp the base assembly to the work surface. Be sure to tighten the knob
securely.
• Proceed to “Monitor Installation” on page 5.
Two Base Assembly Attachment Methods
• Clamp method. The base assembly is clamped to
a table or desk surface that is between 0.6" (15mm)
thick and 3" (76mm) thick. See below.
• Grommet method. The base assembly is secured
through a grommet hole in the work surface, with
a diameter between 0.78" (20mm) and 2" (51mm).
Surface thickness must be between 0.6" (15mm)
and 1.5" (38.1mm). See page 4.
INSTALLATION OF BASE ASSEMBLY TOPVIEW SINGLE MONITOR ARM
Bottom
Clamp
Assembly
Upper Attachment
Position (Standard)
Lower Attachment
Position (Optional)
To Change: 1) Remove
Upper Attachment Screws
2) Re-Install Screws with
Clamp in Lower Position
Bottom
Clamp
Assembly
Remove
Re-Install
Upper
Attachment Lower
Attachment
1.38" – 3"
(35mm – 76mm)
0.6" – 2.2"
(15mm – 56mm)
Grommet
Method
Clamp
Method
Grommet
Method
Clamp
Method
Peel and
Adhere
4
This method can be used for work surfaces that have a grommet hole in an
appropriate position. Surface thickness must be between 0.6" (15mm) and
1.5" (38.1mm), and the grommet hole diameter must be between 0.78" (20mm)
and 2" (51mm).
Remove Clamp Assembly
• Remove the standard clamp assembly from the base
assembly. Use the 4mm Allen key to remove the three
screws holding the clamp assembly in position. Retain
the three screws.
Attach Grommet Assembly
• Place the grommet bolt in the large center hole on the
grommet mount plate.
• With the grommet bolt in position, fasten the grommet
mount plate and bolt to the monitor arm base with the
three screws previously removed. As before, use the
4mm Allen key.
Attach Clamp Pad
• Peel the backing from the adhesive side of the clamp pad and adhere the
pad to the bottom of the grommet mount plate, as shown. The pad protects
the work surface.
Install Base Assembly
• Place the base assembly over the grommet hole, with the bolt centered.
• The bolt must extend under the work surface a minimum of 1.3" (33mm).
• Secure the base assembly as illustrated.
— Secure the grommet bar and washer with one of the grommet bolt nuts.
Use the provided wrench to tighten the nut securely.
—
• Proceed to “Monitor Installation” on page 5.
0.6" – 1.5"
(15mm – 38.1mm)
TOPVIEW SINGLE MONITOR ARM
Grommet Method
INSTALLATION OF BASE ASSEMBLY
Remove
Clamp
Assembly
Attach
Grommet
Assembly
Peel and
Adhere
Base
Assembly
Grommet
Bar
Washer
Nuts Wrench
5
MONITOR INSTALLATION	 TOPVIEW SINGLE MONITOR ARM
Attach Monitor to VESA Mount
•	 Remove the VESA plate from the VESA mount by pressing
down on the plastic tab to release the lock. Pull the plate
upward to remove.
Attach VESA Plate to Monitor
•	 Place the monitor face down on a flat surface. Align
the VESA plate holes with the holes on the back of the
monitor. Attach the VESA plate using the four VESA
plate screws provided.
—	 There are two sets of four holes on the VESA plate.
One set has holes 3.9" (100mm) apart, the other
set has holes 3" (75mm) apart. Use the set that
matches the holes on the monitor.
Attach Monitor and VESA plate
•	 Slide the VESA plate (with monitor attached) back onto the VESA mount. Make sure the VESA plate clicks
securely in place.
—	 Optional: Install a VESA locking screw behind the VESA plate to prevent the tab on the VESA mount
from releasing the monitors.
VESA
Plate
Screw VESA Plate
3.9"
(100mm)
3"
(75mm)
Monitor
(Face Down)
Upward
VESA
Plate
1.
2.
VESA
Locking
Screw
(Optional)
6
• Pinch the cable clip to remove it from the motion arm,
and again when re-installing it with the cables captured.
•
back in with the cables captured.
Tension Adjustments
1. Monitor swivel adjustment
— Use the 2mm Allen key to adjust the set screw for the desired ease of monitor rotation.
2. Motion arm swivel adjustment
— Use the 2mm Allen key to adjust the set screw for the desired ease of motion arm rotation.
3. Fixed arm swivel adjustment
— Use the 2mm Allen key
4. Monitor tilt adjustment
— Use the 4mm Allen key to adjust the set screw for the appropriate monitor weight.
5. Monitor arm weight adjustment
— Use the 5mm Allen key to adjust the set screw for the appropriate monitor weight.
— Weight capacity per arm is 6.5 lbs to 17.6 lbs (2.95 kg to 7.98 kg). Capacity may be reduced if monitor
size is greater than 26" (66cm) or depth is greater than 2.17" (55mm).
TOPVIEW SINGLE MONITOR ARM
Cable Management
Use the cable clip and cable cover to help manage the
monitor cables.
FINAL ADJUSTMENTS
Motion
Arm
Cable Cover
Cable
Clip
Fixed
Arm
Tension Adjustments
Behind
VESA
Plate
1
2
3
5
4
7
180° Lock-Out Feature
•	 Use the 2mm Allen key to secure the 180° locking screw into
the base assembly, below the fixed arm. The locking screw
limits arm rotation to 180°. Fully tighten the screw, then back
out one full turn.
FINAL ADJUSTMENTS	 TOPVIEW SINGLE MONITOR ARM
Allen Key Storage
•	 Insert the Allen keys into the holes behind the VESA plate to store
for future adjustment.
—	 Insert the two smaller Allen keys into the same hole.
Store
Allen Keys
for Future
Adjustments
180°
Locking
Screw
14260 NE 21st Street
Bellevue, WA 98007
(888)888)88)208-6770 or
(425) 999-3550
iMovR.com
© 2020 iMovr. All rights reserved. TopView Single Rev A 12/20

More Related Content

What's hot

Tempo tread top-office_chair_manual
Tempo tread top-office_chair_manualTempo tread top-office_chair_manual
Tempo tread top-office_chair_manualiMovR
 
ZipView Unison Dual Monitor Arm with Handle User Manual
ZipView Unison Dual Monitor Arm with Handle User ManualZipView Unison Dual Monitor Arm with Handle User Manual
ZipView Unison Dual Monitor Arm with Handle User ManualiMovR
 
Spacer kit instructions
Spacer kit instructions Spacer kit instructions
Spacer kit instructions iMovR
 
iMovR ZipView Unison Dual Monitor Arm with Handle - Instruction Manual
iMovR ZipView Unison Dual Monitor Arm with Handle - Instruction ManualiMovR ZipView Unison Dual Monitor Arm with Handle - Instruction Manual
iMovR ZipView Unison Dual Monitor Arm with Handle - Instruction ManualiMovR
 
iMovR Cadence Standing Desk Converter Installation Manual
iMovR Cadence Standing Desk Converter Installation ManualiMovR Cadence Standing Desk Converter Installation Manual
iMovR Cadence Standing Desk Converter Installation ManualiMovR
 
Tempo Light, Heavy, Dual Screen Manuals
Tempo Light, Heavy, Dual Screen ManualsTempo Light, Heavy, Dual Screen Manuals
Tempo Light, Heavy, Dual Screen ManualsiMovR
 
iMovR TopView Max Unison Monitor Arm
iMovR TopView Max Unison Monitor ArmiMovR TopView Max Unison Monitor Arm
iMovR TopView Max Unison Monitor ArmiMovR
 
iMovR Cadence Express Standing Desk Converter Installation Manual
iMovR Cadence Express Standing Desk Converter Installation ManualiMovR Cadence Express Standing Desk Converter Installation Manual
iMovR Cadence Express Standing Desk Converter Installation ManualiMovR
 
iMovR Lander L-Desk Instruction Manual (w or w/o built-in SteadyType Keyboard...
iMovR Lander L-Desk Instruction Manual (w or w/o built-in SteadyType Keyboard...iMovR Lander L-Desk Instruction Manual (w or w/o built-in SteadyType Keyboard...
iMovR Lander L-Desk Instruction Manual (w or w/o built-in SteadyType Keyboard...iMovR
 
Trackless keyboardtray manual
Trackless keyboardtray manualTrackless keyboardtray manual
Trackless keyboardtray manualiMovR
 
iMovR Xtend Monitor Arm Manual
iMovR Xtend Monitor Arm ManualiMovR Xtend Monitor Arm Manual
iMovR Xtend Monitor Arm ManualiMovR
 
Cadence plus installation manual
Cadence plus installation manualCadence plus installation manual
Cadence plus installation manualiMovR
 
Lander Lite DIY Assembly Instructions Rev
Lander Lite DIY Assembly Instructions RevLander Lite DIY Assembly Instructions Rev
Lander Lite DIY Assembly Instructions ReviMovR
 
SteadyType Exo Ergodynamic Keyboard Tray User Instructions
SteadyType Exo Ergodynamic Keyboard Tray User InstructionsSteadyType Exo Ergodynamic Keyboard Tray User Instructions
SteadyType Exo Ergodynamic Keyboard Tray User InstructionsiMovR
 
Lander Lite Standing Desk User Manual
Lander Lite Standing Desk User ManualLander Lite Standing Desk User Manual
Lander Lite Standing Desk User ManualiMovR
 
Freedom Manual (Cascade and Energize)
Freedom Manual (Cascade and Energize)Freedom Manual (Cascade and Energize)
Freedom Manual (Cascade and Energize)iMovR
 
UpTown Adjustable-Height Desk System Installation Manual
UpTown Adjustable-Height Desk System Installation ManualUpTown Adjustable-Height Desk System Installation Manual
UpTown Adjustable-Height Desk System Installation ManualiMovR
 
The Ensign's Standing Desk Installation and User Manual
The Ensign's Standing Desk Installation and User ManualThe Ensign's Standing Desk Installation and User Manual
The Ensign's Standing Desk Installation and User ManualiMovR
 
Lander L-Desk with SteadyType Installation Manual
Lander L-Desk with SteadyType Installation ManualLander L-Desk with SteadyType Installation Manual
Lander L-Desk with SteadyType Installation ManualiMovR
 
MANUFACTURING TECHNOLOGY-II - UNIT-2- Over View
MANUFACTURING TECHNOLOGY-II - UNIT-2- Over ViewMANUFACTURING TECHNOLOGY-II - UNIT-2- Over View
MANUFACTURING TECHNOLOGY-II - UNIT-2- Over ViewS. Sathishkumar
 

What's hot (20)

Tempo tread top-office_chair_manual
Tempo tread top-office_chair_manualTempo tread top-office_chair_manual
Tempo tread top-office_chair_manual
 
ZipView Unison Dual Monitor Arm with Handle User Manual
ZipView Unison Dual Monitor Arm with Handle User ManualZipView Unison Dual Monitor Arm with Handle User Manual
ZipView Unison Dual Monitor Arm with Handle User Manual
 
Spacer kit instructions
Spacer kit instructions Spacer kit instructions
Spacer kit instructions
 
iMovR ZipView Unison Dual Monitor Arm with Handle - Instruction Manual
iMovR ZipView Unison Dual Monitor Arm with Handle - Instruction ManualiMovR ZipView Unison Dual Monitor Arm with Handle - Instruction Manual
iMovR ZipView Unison Dual Monitor Arm with Handle - Instruction Manual
 
iMovR Cadence Standing Desk Converter Installation Manual
iMovR Cadence Standing Desk Converter Installation ManualiMovR Cadence Standing Desk Converter Installation Manual
iMovR Cadence Standing Desk Converter Installation Manual
 
Tempo Light, Heavy, Dual Screen Manuals
Tempo Light, Heavy, Dual Screen ManualsTempo Light, Heavy, Dual Screen Manuals
Tempo Light, Heavy, Dual Screen Manuals
 
iMovR TopView Max Unison Monitor Arm
iMovR TopView Max Unison Monitor ArmiMovR TopView Max Unison Monitor Arm
iMovR TopView Max Unison Monitor Arm
 
iMovR Cadence Express Standing Desk Converter Installation Manual
iMovR Cadence Express Standing Desk Converter Installation ManualiMovR Cadence Express Standing Desk Converter Installation Manual
iMovR Cadence Express Standing Desk Converter Installation Manual
 
iMovR Lander L-Desk Instruction Manual (w or w/o built-in SteadyType Keyboard...
iMovR Lander L-Desk Instruction Manual (w or w/o built-in SteadyType Keyboard...iMovR Lander L-Desk Instruction Manual (w or w/o built-in SteadyType Keyboard...
iMovR Lander L-Desk Instruction Manual (w or w/o built-in SteadyType Keyboard...
 
Trackless keyboardtray manual
Trackless keyboardtray manualTrackless keyboardtray manual
Trackless keyboardtray manual
 
iMovR Xtend Monitor Arm Manual
iMovR Xtend Monitor Arm ManualiMovR Xtend Monitor Arm Manual
iMovR Xtend Monitor Arm Manual
 
Cadence plus installation manual
Cadence plus installation manualCadence plus installation manual
Cadence plus installation manual
 
Lander Lite DIY Assembly Instructions Rev
Lander Lite DIY Assembly Instructions RevLander Lite DIY Assembly Instructions Rev
Lander Lite DIY Assembly Instructions Rev
 
SteadyType Exo Ergodynamic Keyboard Tray User Instructions
SteadyType Exo Ergodynamic Keyboard Tray User InstructionsSteadyType Exo Ergodynamic Keyboard Tray User Instructions
SteadyType Exo Ergodynamic Keyboard Tray User Instructions
 
Lander Lite Standing Desk User Manual
Lander Lite Standing Desk User ManualLander Lite Standing Desk User Manual
Lander Lite Standing Desk User Manual
 
Freedom Manual (Cascade and Energize)
Freedom Manual (Cascade and Energize)Freedom Manual (Cascade and Energize)
Freedom Manual (Cascade and Energize)
 
UpTown Adjustable-Height Desk System Installation Manual
UpTown Adjustable-Height Desk System Installation ManualUpTown Adjustable-Height Desk System Installation Manual
UpTown Adjustable-Height Desk System Installation Manual
 
The Ensign's Standing Desk Installation and User Manual
The Ensign's Standing Desk Installation and User ManualThe Ensign's Standing Desk Installation and User Manual
The Ensign's Standing Desk Installation and User Manual
 
Lander L-Desk with SteadyType Installation Manual
Lander L-Desk with SteadyType Installation ManualLander L-Desk with SteadyType Installation Manual
Lander L-Desk with SteadyType Installation Manual
 
MANUFACTURING TECHNOLOGY-II - UNIT-2- Over View
MANUFACTURING TECHNOLOGY-II - UNIT-2- Over ViewMANUFACTURING TECHNOLOGY-II - UNIT-2- Over View
MANUFACTURING TECHNOLOGY-II - UNIT-2- Over View
 

Similar to iMovR TopView Single Monitor Arm Instructions

Alignment Tips for the AutoX750 Extensometer
Alignment Tips for the AutoX750 ExtensometerAlignment Tips for the AutoX750 Extensometer
Alignment Tips for the AutoX750 ExtensometerInstron
 
Omega Denali Adjustable-Height Desk Manual
Omega Denali Adjustable-Height Desk ManualOmega Denali Adjustable-Height Desk Manual
Omega Denali Adjustable-Height Desk ManualiMovR
 
Ms200 Install Asphalt
Ms200 Install AsphaltMs200 Install Asphalt
Ms200 Install Asphaltdteich
 
Installation Manual: Height Adjustable Table - Two Leg Kit
Installation Manual: Height Adjustable Table - Two Leg KitInstallation Manual: Height Adjustable Table - Two Leg Kit
Installation Manual: Height Adjustable Table - Two Leg KitiMovR
 
New microsoft office word document
New microsoft office word documentNew microsoft office word document
New microsoft office word documentSandeep Mothe
 
Toughbox-Assembly-Instructions
Toughbox-Assembly-InstructionsToughbox-Assembly-Instructions
Toughbox-Assembly-InstructionsGlenda Hernandez
 
Tplo Tibial Plateau Leveling Osteotomy) surgical instruments
Tplo Tibial Plateau Leveling Osteotomy) surgical instruments Tplo Tibial Plateau Leveling Osteotomy) surgical instruments
Tplo Tibial Plateau Leveling Osteotomy) surgical instruments GerMedUSA Inc
 
Instruction Manual | C-More RTS2 Red Dot Sights | Optics Trade
Instruction Manual | C-More RTS2 Red Dot Sights | Optics TradeInstruction Manual | C-More RTS2 Red Dot Sights | Optics Trade
Instruction Manual | C-More RTS2 Red Dot Sights | Optics TradeOptics-Trade
 
Instructions VORTEX RAZOR Red Dot | Optics Trade
Instructions VORTEX RAZOR Red Dot | Optics TradeInstructions VORTEX RAZOR Red Dot | Optics Trade
Instructions VORTEX RAZOR Red Dot | Optics TradeOptics-Trade
 
Gt lts disk brakes-
Gt lts disk brakes-Gt lts disk brakes-
Gt lts disk brakes-betoh00
 
1 introduction to guide right compnents single implant
1 introduction to guide right compnents single implant1 introduction to guide right compnents single implant
1 introduction to guide right compnents single implantDePlaque
 
V belt installation and tensioning 1.08 (1)
V belt installation and tensioning 1.08 (1)V belt installation and tensioning 1.08 (1)
V belt installation and tensioning 1.08 (1)Abuubakr Abdelwahab
 
iMovR Vigor: 2 Leg Kit Installation Manual
iMovR Vigor: 2 Leg Kit Installation ManualiMovR Vigor: 2 Leg Kit Installation Manual
iMovR Vigor: 2 Leg Kit Installation ManualiMovR
 
Adjustment Tutorial
Adjustment TutorialAdjustment Tutorial
Adjustment TutorialScott Stubbs
 
ThermoDesk ELEMENTAL Base (ModTable) Assembly Manual - 8000s version 4.7
ThermoDesk ELEMENTAL Base (ModTable) Assembly Manual - 8000s version 4.7ThermoDesk ELEMENTAL Base (ModTable) Assembly Manual - 8000s version 4.7
ThermoDesk ELEMENTAL Base (ModTable) Assembly Manual - 8000s version 4.7iMovR
 
Cantilever Heavy Duty Ladder plus Work Platform
Cantilever Heavy Duty Ladder plus Work PlatformCantilever Heavy Duty Ladder plus Work Platform
Cantilever Heavy Duty Ladder plus Work PlatformJanine O
 
Hyster d007 (h210 xl) forklift service repair manual
Hyster d007 (h210 xl) forklift service repair manualHyster d007 (h210 xl) forklift service repair manual
Hyster d007 (h210 xl) forklift service repair manualufdujjsjekkemme
 
Hyster d007 (h165 xl) forklift service repair manual
Hyster d007 (h165 xl) forklift service repair manualHyster d007 (h165 xl) forklift service repair manual
Hyster d007 (h165 xl) forklift service repair manualusuejjskkemme
 
Hyster d007 (h210 xl) forklift service repair manual
Hyster d007 (h210 xl) forklift service repair manualHyster d007 (h210 xl) forklift service repair manual
Hyster d007 (h210 xl) forklift service repair manualjfksekmmdme
 

Similar to iMovR TopView Single Monitor Arm Instructions (20)

Alignment Tips for the AutoX750 Extensometer
Alignment Tips for the AutoX750 ExtensometerAlignment Tips for the AutoX750 Extensometer
Alignment Tips for the AutoX750 Extensometer
 
Omega Denali Adjustable-Height Desk Manual
Omega Denali Adjustable-Height Desk ManualOmega Denali Adjustable-Height Desk Manual
Omega Denali Adjustable-Height Desk Manual
 
Ms200 Install Asphalt
Ms200 Install AsphaltMs200 Install Asphalt
Ms200 Install Asphalt
 
Installation Manual: Height Adjustable Table - Two Leg Kit
Installation Manual: Height Adjustable Table - Two Leg KitInstallation Manual: Height Adjustable Table - Two Leg Kit
Installation Manual: Height Adjustable Table - Two Leg Kit
 
New microsoft office word document
New microsoft office word documentNew microsoft office word document
New microsoft office word document
 
Toughbox-Assembly-Instructions
Toughbox-Assembly-InstructionsToughbox-Assembly-Instructions
Toughbox-Assembly-Instructions
 
Tplo Tibial Plateau Leveling Osteotomy) surgical instruments
Tplo Tibial Plateau Leveling Osteotomy) surgical instruments Tplo Tibial Plateau Leveling Osteotomy) surgical instruments
Tplo Tibial Plateau Leveling Osteotomy) surgical instruments
 
Instruction Manual | C-More RTS2 Red Dot Sights | Optics Trade
Instruction Manual | C-More RTS2 Red Dot Sights | Optics TradeInstruction Manual | C-More RTS2 Red Dot Sights | Optics Trade
Instruction Manual | C-More RTS2 Red Dot Sights | Optics Trade
 
Instructions VORTEX RAZOR Red Dot | Optics Trade
Instructions VORTEX RAZOR Red Dot | Optics TradeInstructions VORTEX RAZOR Red Dot | Optics Trade
Instructions VORTEX RAZOR Red Dot | Optics Trade
 
Gt lts disk brakes-
Gt lts disk brakes-Gt lts disk brakes-
Gt lts disk brakes-
 
1 introduction to guide right compnents single implant
1 introduction to guide right compnents single implant1 introduction to guide right compnents single implant
1 introduction to guide right compnents single implant
 
Monza-SGT.Altus-Spine.pdf
Monza-SGT.Altus-Spine.pdfMonza-SGT.Altus-Spine.pdf
Monza-SGT.Altus-Spine.pdf
 
V belt installation and tensioning 1.08 (1)
V belt installation and tensioning 1.08 (1)V belt installation and tensioning 1.08 (1)
V belt installation and tensioning 1.08 (1)
 
iMovR Vigor: 2 Leg Kit Installation Manual
iMovR Vigor: 2 Leg Kit Installation ManualiMovR Vigor: 2 Leg Kit Installation Manual
iMovR Vigor: 2 Leg Kit Installation Manual
 
Adjustment Tutorial
Adjustment TutorialAdjustment Tutorial
Adjustment Tutorial
 
ThermoDesk ELEMENTAL Base (ModTable) Assembly Manual - 8000s version 4.7
ThermoDesk ELEMENTAL Base (ModTable) Assembly Manual - 8000s version 4.7ThermoDesk ELEMENTAL Base (ModTable) Assembly Manual - 8000s version 4.7
ThermoDesk ELEMENTAL Base (ModTable) Assembly Manual - 8000s version 4.7
 
Cantilever Heavy Duty Ladder plus Work Platform
Cantilever Heavy Duty Ladder plus Work PlatformCantilever Heavy Duty Ladder plus Work Platform
Cantilever Heavy Duty Ladder plus Work Platform
 
Hyster d007 (h210 xl) forklift service repair manual
Hyster d007 (h210 xl) forklift service repair manualHyster d007 (h210 xl) forklift service repair manual
Hyster d007 (h210 xl) forklift service repair manual
 
Hyster d007 (h165 xl) forklift service repair manual
Hyster d007 (h165 xl) forklift service repair manualHyster d007 (h165 xl) forklift service repair manual
Hyster d007 (h165 xl) forklift service repair manual
 
Hyster d007 (h210 xl) forklift service repair manual
Hyster d007 (h210 xl) forklift service repair manualHyster d007 (h210 xl) forklift service repair manual
Hyster d007 (h210 xl) forklift service repair manual
 

More from iMovR

Lander Desk DIY Assembly Manual
Lander Desk DIY Assembly ManualLander Desk DIY Assembly Manual
Lander Desk DIY Assembly ManualiMovR
 
Lander L- & U-Desk Assembly Instructions and User Manual
Lander L- & U-Desk Assembly Instructions and User ManualLander L- & U-Desk Assembly Instructions and User Manual
Lander L- & U-Desk Assembly Instructions and User ManualiMovR
 
Lander Standing Desk User Manual
Lander Standing Desk User ManualLander Standing Desk User Manual
Lander Standing Desk User ManualiMovR
 
iMovR Premium Drawer Drill Template
iMovR Premium Drawer Drill TemplateiMovR Premium Drawer Drill Template
iMovR Premium Drawer Drill TemplateiMovR
 
Lander DIY Assembly Guide
Lander DIY Assembly GuideLander DIY Assembly Guide
Lander DIY Assembly GuideiMovR
 
Tech Dock Instruction Manual
Tech Dock Instruction ManualTech Dock Instruction Manual
Tech Dock Instruction ManualiMovR
 
Standing mat-study-texas-am-university-2013
Standing mat-study-texas-am-university-2013Standing mat-study-texas-am-university-2013
Standing mat-study-texas-am-university-2013iMovR
 
INSTALLATION INSTRUCTIONS RONDO MICRO PASS-THROUGH GROMMET WITH COVER (NO POWER)
INSTALLATION INSTRUCTIONS RONDO MICRO PASS-THROUGH GROMMET WITH COVER (NO POWER)INSTALLATION INSTRUCTIONS RONDO MICRO PASS-THROUGH GROMMET WITH COVER (NO POWER)
INSTALLATION INSTRUCTIONS RONDO MICRO PASS-THROUGH GROMMET WITH COVER (NO POWER)iMovR
 
Installation Instructions for Rondo Micro USB-C 18W and 60W
Installation Instructions for Rondo Micro USB-C 18W and 60WInstallation Instructions for Rondo Micro USB-C 18W and 60W
Installation Instructions for Rondo Micro USB-C 18W and 60WiMovR
 
Captains Desk Instruction Manual
 Captains Desk Instruction Manual  Captains Desk Instruction Manual
Captains Desk Instruction Manual iMovR
 
Rondo Micro USB-C 18W Instruction Manual
Rondo Micro USB-C 18W Instruction ManualRondo Micro USB-C 18W Instruction Manual
Rondo Micro USB-C 18W Instruction ManualiMovR
 
Rondo Micro AC Outlet Instruction Manual
Rondo Micro AC Outlet Instruction ManualRondo Micro AC Outlet Instruction Manual
Rondo Micro AC Outlet Instruction ManualiMovR
 
Captain's Desk Standing Desk Instruction Manual
Captain's Desk Standing Desk Instruction ManualCaptain's Desk Standing Desk Instruction Manual
Captain's Desk Standing Desk Instruction ManualiMovR
 
Stowaway Ergonomic Keyboard Tray Installation Manual
Stowaway Ergonomic Keyboard Tray Installation ManualStowaway Ergonomic Keyboard Tray Installation Manual
Stowaway Ergonomic Keyboard Tray Installation ManualiMovR
 
Neemo Ergonomic Chair User Guide
Neemo Ergonomic Chair User GuideNeemo Ergonomic Chair User Guide
Neemo Ergonomic Chair User GuideiMovR
 
iMovR's McHale Advanced Ergonomic Chair User Guide
iMovR's McHale Advanced Ergonomic Chair User GuideiMovR's McHale Advanced Ergonomic Chair User Guide
iMovR's McHale Advanced Ergonomic Chair User GuideiMovR
 
iMovR TopView Max Unison Monitor Arm
iMovR TopView Max Unison Monitor ArmiMovR TopView Max Unison Monitor Arm
iMovR TopView Max Unison Monitor ArmiMovR
 
iMovR TopView Max Monitor Arm
iMovR TopView Max Monitor ArmiMovR TopView Max Monitor Arm
iMovR TopView Max Monitor ArmiMovR
 

More from iMovR (18)

Lander Desk DIY Assembly Manual
Lander Desk DIY Assembly ManualLander Desk DIY Assembly Manual
Lander Desk DIY Assembly Manual
 
Lander L- & U-Desk Assembly Instructions and User Manual
Lander L- & U-Desk Assembly Instructions and User ManualLander L- & U-Desk Assembly Instructions and User Manual
Lander L- & U-Desk Assembly Instructions and User Manual
 
Lander Standing Desk User Manual
Lander Standing Desk User ManualLander Standing Desk User Manual
Lander Standing Desk User Manual
 
iMovR Premium Drawer Drill Template
iMovR Premium Drawer Drill TemplateiMovR Premium Drawer Drill Template
iMovR Premium Drawer Drill Template
 
Lander DIY Assembly Guide
Lander DIY Assembly GuideLander DIY Assembly Guide
Lander DIY Assembly Guide
 
Tech Dock Instruction Manual
Tech Dock Instruction ManualTech Dock Instruction Manual
Tech Dock Instruction Manual
 
Standing mat-study-texas-am-university-2013
Standing mat-study-texas-am-university-2013Standing mat-study-texas-am-university-2013
Standing mat-study-texas-am-university-2013
 
INSTALLATION INSTRUCTIONS RONDO MICRO PASS-THROUGH GROMMET WITH COVER (NO POWER)
INSTALLATION INSTRUCTIONS RONDO MICRO PASS-THROUGH GROMMET WITH COVER (NO POWER)INSTALLATION INSTRUCTIONS RONDO MICRO PASS-THROUGH GROMMET WITH COVER (NO POWER)
INSTALLATION INSTRUCTIONS RONDO MICRO PASS-THROUGH GROMMET WITH COVER (NO POWER)
 
Installation Instructions for Rondo Micro USB-C 18W and 60W
Installation Instructions for Rondo Micro USB-C 18W and 60WInstallation Instructions for Rondo Micro USB-C 18W and 60W
Installation Instructions for Rondo Micro USB-C 18W and 60W
 
Captains Desk Instruction Manual
 Captains Desk Instruction Manual  Captains Desk Instruction Manual
Captains Desk Instruction Manual
 
Rondo Micro USB-C 18W Instruction Manual
Rondo Micro USB-C 18W Instruction ManualRondo Micro USB-C 18W Instruction Manual
Rondo Micro USB-C 18W Instruction Manual
 
Rondo Micro AC Outlet Instruction Manual
Rondo Micro AC Outlet Instruction ManualRondo Micro AC Outlet Instruction Manual
Rondo Micro AC Outlet Instruction Manual
 
Captain's Desk Standing Desk Instruction Manual
Captain's Desk Standing Desk Instruction ManualCaptain's Desk Standing Desk Instruction Manual
Captain's Desk Standing Desk Instruction Manual
 
Stowaway Ergonomic Keyboard Tray Installation Manual
Stowaway Ergonomic Keyboard Tray Installation ManualStowaway Ergonomic Keyboard Tray Installation Manual
Stowaway Ergonomic Keyboard Tray Installation Manual
 
Neemo Ergonomic Chair User Guide
Neemo Ergonomic Chair User GuideNeemo Ergonomic Chair User Guide
Neemo Ergonomic Chair User Guide
 
iMovR's McHale Advanced Ergonomic Chair User Guide
iMovR's McHale Advanced Ergonomic Chair User GuideiMovR's McHale Advanced Ergonomic Chair User Guide
iMovR's McHale Advanced Ergonomic Chair User Guide
 
iMovR TopView Max Unison Monitor Arm
iMovR TopView Max Unison Monitor ArmiMovR TopView Max Unison Monitor Arm
iMovR TopView Max Unison Monitor Arm
 
iMovR TopView Max Monitor Arm
iMovR TopView Max Monitor ArmiMovR TopView Max Monitor Arm
iMovR TopView Max Monitor Arm
 

Recently uploaded

BrightonSEO - Addressing SEO & CX - CMDL - Apr 24 .pptx
BrightonSEO -  Addressing SEO & CX - CMDL - Apr 24 .pptxBrightonSEO -  Addressing SEO & CX - CMDL - Apr 24 .pptx
BrightonSEO - Addressing SEO & CX - CMDL - Apr 24 .pptxcollette15
 
Digital Marketing Spotlight: Lifecycle Advertising Strategies.pdf
Digital Marketing Spotlight: Lifecycle Advertising Strategies.pdfDigital Marketing Spotlight: Lifecycle Advertising Strategies.pdf
Digital Marketing Spotlight: Lifecycle Advertising Strategies.pdfDemandbase
 
VIP Call Girls In Green Park 9654467111 Escorts Service
VIP Call Girls In Green Park 9654467111 Escorts ServiceVIP Call Girls In Green Park 9654467111 Escorts Service
VIP Call Girls In Green Park 9654467111 Escorts ServiceSapana Sha
 
定制(ULV毕业证书)拉文大学毕业证成绩单原版一比一
定制(ULV毕业证书)拉文大学毕业证成绩单原版一比一定制(ULV毕业证书)拉文大学毕业证成绩单原版一比一
定制(ULV毕业证书)拉文大学毕业证成绩单原版一比一s SS
 
Brighton SEO April 2024 - The Good, the Bad & the Ugly of SEO Success
Brighton SEO April 2024 - The Good, the Bad & the Ugly of SEO SuccessBrighton SEO April 2024 - The Good, the Bad & the Ugly of SEO Success
Brighton SEO April 2024 - The Good, the Bad & the Ugly of SEO SuccessVarn
 
Snapshot of Consumer Behaviors of March 2024-EOLiSurvey (EN).pdf
Snapshot of Consumer Behaviors of March 2024-EOLiSurvey (EN).pdfSnapshot of Consumer Behaviors of March 2024-EOLiSurvey (EN).pdf
Snapshot of Consumer Behaviors of March 2024-EOLiSurvey (EN).pdfEastern Online-iSURVEY
 
SORA AI: Will It Be the Future of Video Creation?
SORA AI: Will It Be the Future of Video Creation?SORA AI: Will It Be the Future of Video Creation?
SORA AI: Will It Be the Future of Video Creation?Searchable Design
 
DGR_Digital Advertising Strategies for a Cookieless World_Presentation.pdf
DGR_Digital Advertising Strategies for a Cookieless World_Presentation.pdfDGR_Digital Advertising Strategies for a Cookieless World_Presentation.pdf
DGR_Digital Advertising Strategies for a Cookieless World_Presentation.pdfDemandbase
 
DIGITAL MARKETING STRATEGY_INFOGRAPHIC IMAGE.pdf
DIGITAL MARKETING STRATEGY_INFOGRAPHIC IMAGE.pdfDIGITAL MARKETING STRATEGY_INFOGRAPHIC IMAGE.pdf
DIGITAL MARKETING STRATEGY_INFOGRAPHIC IMAGE.pdfmayanksharma0441
 
VIP 7001035870 Find & Meet Hyderabad Call Girls Film Nagar high-profile Call ...
VIP 7001035870 Find & Meet Hyderabad Call Girls Film Nagar high-profile Call ...VIP 7001035870 Find & Meet Hyderabad Call Girls Film Nagar high-profile Call ...
VIP 7001035870 Find & Meet Hyderabad Call Girls Film Nagar high-profile Call ...aditipandeya
 
The Impact of Digital Technologies
The Impact of Digital Technologies The Impact of Digital Technologies
The Impact of Digital Technologies bruguardarib
 
marketing strategy of tanishq word PPROJECT.pdf
marketing strategy of tanishq word PPROJECT.pdfmarketing strategy of tanishq word PPROJECT.pdf
marketing strategy of tanishq word PPROJECT.pdfarsathsahil
 
Branding strategies of new company .pptx
Branding strategies of new company .pptxBranding strategies of new company .pptx
Branding strategies of new company .pptxVikasTiwari846641
 
Social Samosa Guidebook for SAMMIES 2024.pdf
Social Samosa Guidebook for SAMMIES 2024.pdfSocial Samosa Guidebook for SAMMIES 2024.pdf
Social Samosa Guidebook for SAMMIES 2024.pdfSocial Samosa
 
Best Persuasive selling skills presentation.pptx
Best Persuasive selling skills  presentation.pptxBest Persuasive selling skills  presentation.pptx
Best Persuasive selling skills presentation.pptxMasterPhil1
 
TAM AdEx 2023 Cross Media Advertising Recap - Auto Sector
TAM AdEx 2023 Cross Media Advertising Recap - Auto SectorTAM AdEx 2023 Cross Media Advertising Recap - Auto Sector
TAM AdEx 2023 Cross Media Advertising Recap - Auto SectorSocial Samosa
 
CALL ON ➥8923113531 🔝Call Girls Hazratganj Lucknow best sexual service Online
CALL ON ➥8923113531 🔝Call Girls Hazratganj Lucknow best sexual service OnlineCALL ON ➥8923113531 🔝Call Girls Hazratganj Lucknow best sexual service Online
CALL ON ➥8923113531 🔝Call Girls Hazratganj Lucknow best sexual service Onlineanilsa9823
 
BLOOM_April2024. Balmer Lawrie Online Monthly Bulletin
BLOOM_April2024. Balmer Lawrie Online Monthly BulletinBLOOM_April2024. Balmer Lawrie Online Monthly Bulletin
BLOOM_April2024. Balmer Lawrie Online Monthly BulletinBalmerLawrie
 
How videos can elevate your Google rankings and improve your EEAT - Benjamin ...
How videos can elevate your Google rankings and improve your EEAT - Benjamin ...How videos can elevate your Google rankings and improve your EEAT - Benjamin ...
How videos can elevate your Google rankings and improve your EEAT - Benjamin ...Benjamin Szturmaj
 

Recently uploaded (20)

BrightonSEO - Addressing SEO & CX - CMDL - Apr 24 .pptx
BrightonSEO -  Addressing SEO & CX - CMDL - Apr 24 .pptxBrightonSEO -  Addressing SEO & CX - CMDL - Apr 24 .pptx
BrightonSEO - Addressing SEO & CX - CMDL - Apr 24 .pptx
 
Digital Marketing Spotlight: Lifecycle Advertising Strategies.pdf
Digital Marketing Spotlight: Lifecycle Advertising Strategies.pdfDigital Marketing Spotlight: Lifecycle Advertising Strategies.pdf
Digital Marketing Spotlight: Lifecycle Advertising Strategies.pdf
 
VIP Call Girls In Green Park 9654467111 Escorts Service
VIP Call Girls In Green Park 9654467111 Escorts ServiceVIP Call Girls In Green Park 9654467111 Escorts Service
VIP Call Girls In Green Park 9654467111 Escorts Service
 
BUY GMAIL ACCOUNTS PVA USA IP INDIAN IP GMAIL
BUY GMAIL ACCOUNTS PVA USA IP INDIAN IP GMAILBUY GMAIL ACCOUNTS PVA USA IP INDIAN IP GMAIL
BUY GMAIL ACCOUNTS PVA USA IP INDIAN IP GMAIL
 
定制(ULV毕业证书)拉文大学毕业证成绩单原版一比一
定制(ULV毕业证书)拉文大学毕业证成绩单原版一比一定制(ULV毕业证书)拉文大学毕业证成绩单原版一比一
定制(ULV毕业证书)拉文大学毕业证成绩单原版一比一
 
Brighton SEO April 2024 - The Good, the Bad & the Ugly of SEO Success
Brighton SEO April 2024 - The Good, the Bad & the Ugly of SEO SuccessBrighton SEO April 2024 - The Good, the Bad & the Ugly of SEO Success
Brighton SEO April 2024 - The Good, the Bad & the Ugly of SEO Success
 
Snapshot of Consumer Behaviors of March 2024-EOLiSurvey (EN).pdf
Snapshot of Consumer Behaviors of March 2024-EOLiSurvey (EN).pdfSnapshot of Consumer Behaviors of March 2024-EOLiSurvey (EN).pdf
Snapshot of Consumer Behaviors of March 2024-EOLiSurvey (EN).pdf
 
SORA AI: Will It Be the Future of Video Creation?
SORA AI: Will It Be the Future of Video Creation?SORA AI: Will It Be the Future of Video Creation?
SORA AI: Will It Be the Future of Video Creation?
 
DGR_Digital Advertising Strategies for a Cookieless World_Presentation.pdf
DGR_Digital Advertising Strategies for a Cookieless World_Presentation.pdfDGR_Digital Advertising Strategies for a Cookieless World_Presentation.pdf
DGR_Digital Advertising Strategies for a Cookieless World_Presentation.pdf
 
DIGITAL MARKETING STRATEGY_INFOGRAPHIC IMAGE.pdf
DIGITAL MARKETING STRATEGY_INFOGRAPHIC IMAGE.pdfDIGITAL MARKETING STRATEGY_INFOGRAPHIC IMAGE.pdf
DIGITAL MARKETING STRATEGY_INFOGRAPHIC IMAGE.pdf
 
VIP 7001035870 Find & Meet Hyderabad Call Girls Film Nagar high-profile Call ...
VIP 7001035870 Find & Meet Hyderabad Call Girls Film Nagar high-profile Call ...VIP 7001035870 Find & Meet Hyderabad Call Girls Film Nagar high-profile Call ...
VIP 7001035870 Find & Meet Hyderabad Call Girls Film Nagar high-profile Call ...
 
The Impact of Digital Technologies
The Impact of Digital Technologies The Impact of Digital Technologies
The Impact of Digital Technologies
 
marketing strategy of tanishq word PPROJECT.pdf
marketing strategy of tanishq word PPROJECT.pdfmarketing strategy of tanishq word PPROJECT.pdf
marketing strategy of tanishq word PPROJECT.pdf
 
Branding strategies of new company .pptx
Branding strategies of new company .pptxBranding strategies of new company .pptx
Branding strategies of new company .pptx
 
Social Samosa Guidebook for SAMMIES 2024.pdf
Social Samosa Guidebook for SAMMIES 2024.pdfSocial Samosa Guidebook for SAMMIES 2024.pdf
Social Samosa Guidebook for SAMMIES 2024.pdf
 
Best Persuasive selling skills presentation.pptx
Best Persuasive selling skills  presentation.pptxBest Persuasive selling skills  presentation.pptx
Best Persuasive selling skills presentation.pptx
 
TAM AdEx 2023 Cross Media Advertising Recap - Auto Sector
TAM AdEx 2023 Cross Media Advertising Recap - Auto SectorTAM AdEx 2023 Cross Media Advertising Recap - Auto Sector
TAM AdEx 2023 Cross Media Advertising Recap - Auto Sector
 
CALL ON ➥8923113531 🔝Call Girls Hazratganj Lucknow best sexual service Online
CALL ON ➥8923113531 🔝Call Girls Hazratganj Lucknow best sexual service OnlineCALL ON ➥8923113531 🔝Call Girls Hazratganj Lucknow best sexual service Online
CALL ON ➥8923113531 🔝Call Girls Hazratganj Lucknow best sexual service Online
 
BLOOM_April2024. Balmer Lawrie Online Monthly Bulletin
BLOOM_April2024. Balmer Lawrie Online Monthly BulletinBLOOM_April2024. Balmer Lawrie Online Monthly Bulletin
BLOOM_April2024. Balmer Lawrie Online Monthly Bulletin
 
How videos can elevate your Google rankings and improve your EEAT - Benjamin ...
How videos can elevate your Google rankings and improve your EEAT - Benjamin ...How videos can elevate your Google rankings and improve your EEAT - Benjamin ...
How videos can elevate your Google rankings and improve your EEAT - Benjamin ...
 

iMovR TopView Single Monitor Arm Instructions

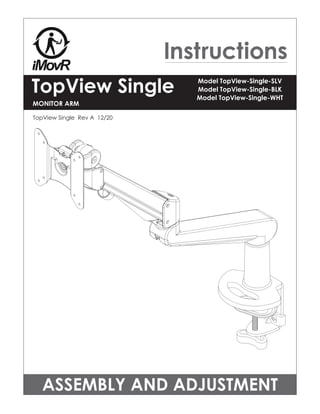
  • 1. ASSEMBLY AND ADJUSTMENT Model TopView-Single-SLV Model TopView-Single-BLK Model TopView-Single-WHT TopView Single MONITOR ARM TopView Single Rev A 12/20
  • 2. 2 PLEASE REVIEW these instructions before beginning the assembly and adjustment procedures. Check that all the parts and tools listed below were provided with your order. Contact your supplier if any materials are your satisfaction. TOPVIEW SINGLE MONITOR ARM PARTS AND TOOLS Base and Monitor Arm Assembly (1) Clamp Pad (1) Grommet Mount Plate (1) Grommet Bar (1) Grommet Bolt (1) M4x9M4x10M4x10 Grommet Bolt Washer (1) M10x27 Grommet Bolt Nut (2) VESA Plate Screw (4) VESA Locking Screw (1) 180° Locking Screw (1) 14mm Wrench (1) 2mm Allen Key (1) 4mm Allen Key (1) 5mm Allen Key (1) PARTS AND TOOLS PROVIDED CAUTION: Hand-tighten screws only. Do not use power tools. ADDITIONAL TOOLS REQUIRED • Phillips screwdriver 3x3/8-16” 9/16x3/8-16
  • 3. 3 Clamp Method The base assembly is shipped with the bottom clamp in the “upper attachment position.” To change to the “lower attachment position” for thicker work surface, follow this procedure (see illustrations): • Use the 4mm Allen key to remove the two screws holding the bottom clamp in position. • Reattach the bottom clamp to the lower two holes. Tighten the screws securely using the Allen wrench. CAUTION: Do not use a power drill. Clamp screws are rated at 102 in-lbs. Attach Clamp Pad • Peel the backing from the adhesive side of the clamp pad and adhere the pad to the bottom of the base, as shown. The pad protects the work surface. Install Base Assembly • Clamp the base assembly to the work surface. Be sure to tighten the knob securely. • Proceed to “Monitor Installation” on page 5. Two Base Assembly Attachment Methods • Clamp method. The base assembly is clamped to a table or desk surface that is between 0.6" (15mm) thick and 3" (76mm) thick. See below. • Grommet method. The base assembly is secured through a grommet hole in the work surface, with a diameter between 0.78" (20mm) and 2" (51mm). Surface thickness must be between 0.6" (15mm) and 1.5" (38.1mm). See page 4. INSTALLATION OF BASE ASSEMBLY TOPVIEW SINGLE MONITOR ARM Bottom Clamp Assembly Upper Attachment Position (Standard) Lower Attachment Position (Optional) To Change: 1) Remove Upper Attachment Screws 2) Re-Install Screws with Clamp in Lower Position Bottom Clamp Assembly Remove Re-Install Upper Attachment Lower Attachment 1.38" – 3" (35mm – 76mm) 0.6" – 2.2" (15mm – 56mm) Grommet Method Clamp Method Grommet Method Clamp Method Peel and Adhere
  • 4. 4 This method can be used for work surfaces that have a grommet hole in an appropriate position. Surface thickness must be between 0.6" (15mm) and 1.5" (38.1mm), and the grommet hole diameter must be between 0.78" (20mm) and 2" (51mm). Remove Clamp Assembly • Remove the standard clamp assembly from the base assembly. Use the 4mm Allen key to remove the three screws holding the clamp assembly in position. Retain the three screws. Attach Grommet Assembly • Place the grommet bolt in the large center hole on the grommet mount plate. • With the grommet bolt in position, fasten the grommet mount plate and bolt to the monitor arm base with the three screws previously removed. As before, use the 4mm Allen key. Attach Clamp Pad • Peel the backing from the adhesive side of the clamp pad and adhere the pad to the bottom of the grommet mount plate, as shown. The pad protects the work surface. Install Base Assembly • Place the base assembly over the grommet hole, with the bolt centered. • The bolt must extend under the work surface a minimum of 1.3" (33mm). • Secure the base assembly as illustrated. — Secure the grommet bar and washer with one of the grommet bolt nuts. Use the provided wrench to tighten the nut securely. — • Proceed to “Monitor Installation” on page 5. 0.6" – 1.5" (15mm – 38.1mm) TOPVIEW SINGLE MONITOR ARM Grommet Method INSTALLATION OF BASE ASSEMBLY Remove Clamp Assembly Attach Grommet Assembly Peel and Adhere Base Assembly Grommet Bar Washer Nuts Wrench
  • 5. 5 MONITOR INSTALLATION TOPVIEW SINGLE MONITOR ARM Attach Monitor to VESA Mount • Remove the VESA plate from the VESA mount by pressing down on the plastic tab to release the lock. Pull the plate upward to remove. Attach VESA Plate to Monitor • Place the monitor face down on a flat surface. Align the VESA plate holes with the holes on the back of the monitor. Attach the VESA plate using the four VESA plate screws provided. — There are two sets of four holes on the VESA plate. One set has holes 3.9" (100mm) apart, the other set has holes 3" (75mm) apart. Use the set that matches the holes on the monitor. Attach Monitor and VESA plate • Slide the VESA plate (with monitor attached) back onto the VESA mount. Make sure the VESA plate clicks securely in place. — Optional: Install a VESA locking screw behind the VESA plate to prevent the tab on the VESA mount from releasing the monitors. VESA Plate Screw VESA Plate 3.9" (100mm) 3" (75mm) Monitor (Face Down) Upward VESA Plate 1. 2. VESA Locking Screw (Optional)
  • 6. 6 • Pinch the cable clip to remove it from the motion arm, and again when re-installing it with the cables captured. • back in with the cables captured. Tension Adjustments 1. Monitor swivel adjustment — Use the 2mm Allen key to adjust the set screw for the desired ease of monitor rotation. 2. Motion arm swivel adjustment — Use the 2mm Allen key to adjust the set screw for the desired ease of motion arm rotation. 3. Fixed arm swivel adjustment — Use the 2mm Allen key 4. Monitor tilt adjustment — Use the 4mm Allen key to adjust the set screw for the appropriate monitor weight. 5. Monitor arm weight adjustment — Use the 5mm Allen key to adjust the set screw for the appropriate monitor weight. — Weight capacity per arm is 6.5 lbs to 17.6 lbs (2.95 kg to 7.98 kg). Capacity may be reduced if monitor size is greater than 26" (66cm) or depth is greater than 2.17" (55mm). TOPVIEW SINGLE MONITOR ARM Cable Management Use the cable clip and cable cover to help manage the monitor cables. FINAL ADJUSTMENTS Motion Arm Cable Cover Cable Clip Fixed Arm Tension Adjustments Behind VESA Plate 1 2 3 5 4
  • 7. 7 180° Lock-Out Feature • Use the 2mm Allen key to secure the 180° locking screw into the base assembly, below the fixed arm. The locking screw limits arm rotation to 180°. Fully tighten the screw, then back out one full turn. FINAL ADJUSTMENTS TOPVIEW SINGLE MONITOR ARM Allen Key Storage • Insert the Allen keys into the holes behind the VESA plate to store for future adjustment. — Insert the two smaller Allen keys into the same hole. Store Allen Keys for Future Adjustments 180° Locking Screw
  • 8. 14260 NE 21st Street Bellevue, WA 98007 (888)888)88)208-6770 or (425) 999-3550 iMovR.com © 2020 iMovr. All rights reserved. TopView Single Rev A 12/20