Download to read offline

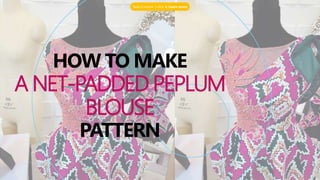

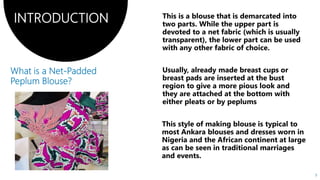

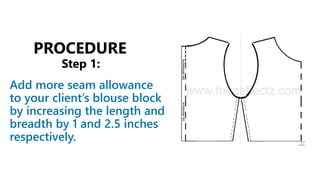
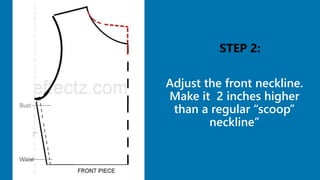
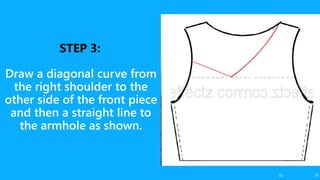
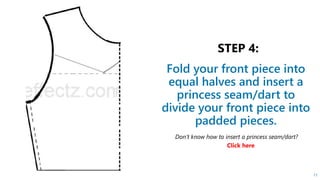
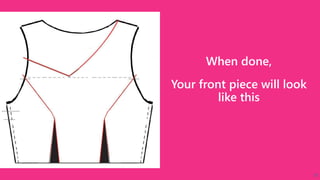


The document provides a step-by-step guide on how to make a net-padded peplum blouse pattern, emphasizing that pattern-making is more manageable than it seems. It outlines the necessary materials and body measurements required to draft the blouse, as well as specific instructions for adjusting the front neckline and inserting a princess seam. The author encourages sewists to engage with tutorials and offers support throughout the learning process.


