Download as PDF, PPTX


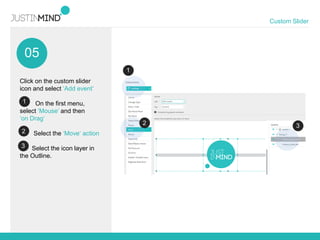
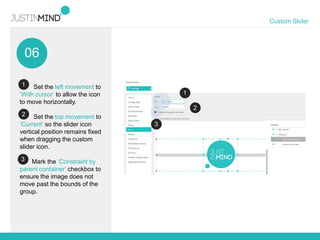


This document outlines a tutorial for designing a custom slider in a wireframe, detailing the steps to create a slider bar and icon. It includes instructions for adding elements, grouping them, and establishing interactions for dragging the slider icon. Users are guided to test the slider functionality using the 'simulate' feature.


