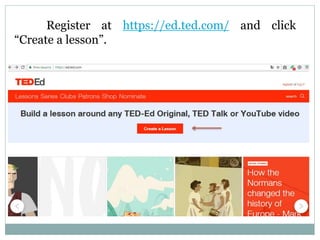
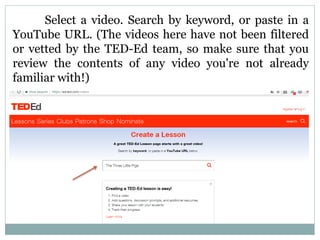
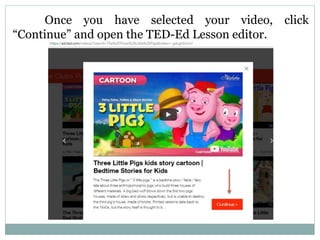
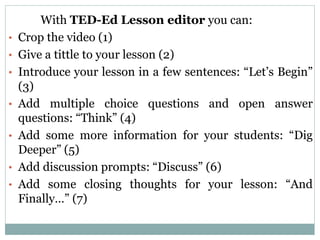
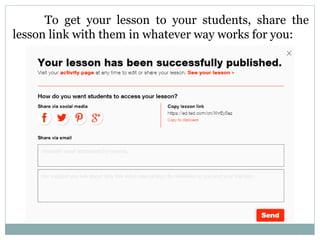
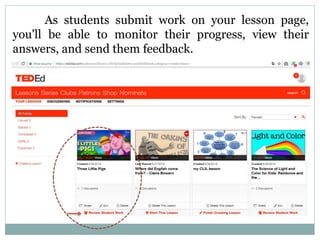
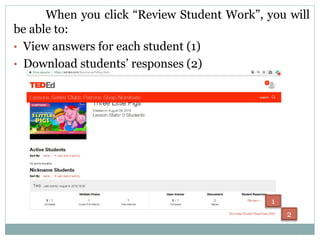
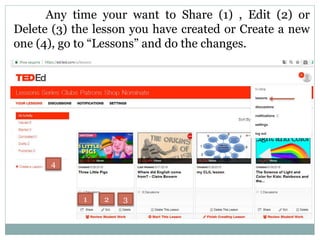
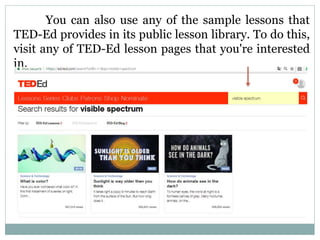
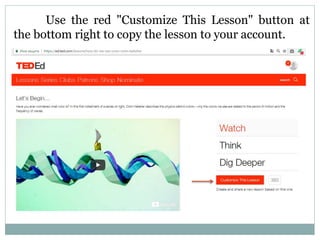
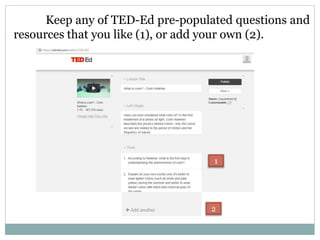
S T E P B Y S T E P G U I D E
How to create TED-Ed lessons
Register at https://ed.ted.com/ and click
“Create a lesson”.
Select a video. Search by keyword, or paste in a
YouTube URL. (The videos here have not been filtered
or vetted by the TED-Ed team, so make sure that you
review the contents of any video you're not already
familiar with!)
Once you have selected your video, click
“Continue” and open the TED-Ed Lesson editor.
With TED-Ed Lesson editor you can:
• Crop the video (1)
• Give a tittle to your lesson (2)
• Introduce your lesson in a few sentences: “Let’s Begin”
(3)
• Add multiple choice questions and open answer
questions: “Think” (4)
• Add some more information for your students: “Dig
Deeper” (5)
• Add discussion prompts: “Discuss” (6)
• Add some closing thoughts for your lesson: “And
Finally…” (7)
1
2
3
4
5
6
7
8
After you publish your lesson (8), you'll receive a
unique URL for your lesson page. Click “Share your
lesson” to get the URL (9).
9
It is up to you how students will access your
lesson:
• Students must log in before they can save responses
on your lesson page. (Only students who are 13 years
of age or older can create a TED-Ed account) (1)
• Students can create a nickname to identify their
responses on your lesson page (2)
1
2
To get your lesson to your students, share the
lesson link with them in whatever way works for you:
As students submit work on your lesson page,
you'll be able to monitor their progress, view their
answers, and send them feedback.
When you click “Review Student Work”, you will
be able to:
• View answers for each student (1)
• Download students’ responses (2)
1
2
Any time your want to Share (1) , Edit (2) or
Delete (3) the lesson you have created or Create a new
one (4), go to “Lessons” and do the changes.
1 2 3
4
You can also use any of the sample lessons that
TED-Ed provides in its public lesson library. To do this,
visit any of TED-Ed lesson pages that you're interested
in.
Use the red "Customize This Lesson" button at
the bottom right to copy the lesson to your account.
Keep any of TED-Ed pre-populated questions and
resources that you like (1), or add your own (2).
1
2
It is your turn now. 
Go to TED-Ed and create your interactive lesson.
Good luck!
Recourses: https://bit.ly/2L45EfV
This presentation has been created by:
Irena Raykova
a primary and an English teacher
at 137 Secondary School “Angel Kanchev”, Sofia, Bulgaria
e-Twinning ambassador
e-mail: irenarajkova@abv.bg

How to create TED-Ed lessons

  • 1.
    S T EP B Y S T E P G U I D E How to create TED-Ed lessons
  • 2.
    Register at https://ed.ted.com/and click “Create a lesson”.
  • 3.
    Select a video.Search by keyword, or paste in a YouTube URL. (The videos here have not been filtered or vetted by the TED-Ed team, so make sure that you review the contents of any video you're not already familiar with!)
  • 4.
    Once you haveselected your video, click “Continue” and open the TED-Ed Lesson editor.
  • 5.
    With TED-Ed Lessoneditor you can: • Crop the video (1) • Give a tittle to your lesson (2) • Introduce your lesson in a few sentences: “Let’s Begin” (3) • Add multiple choice questions and open answer questions: “Think” (4) • Add some more information for your students: “Dig Deeper” (5) • Add discussion prompts: “Discuss” (6) • Add some closing thoughts for your lesson: “And Finally…” (7)
  • 6.
  • 7.
    After you publishyour lesson (8), you'll receive a unique URL for your lesson page. Click “Share your lesson” to get the URL (9). 9
  • 8.
    It is upto you how students will access your lesson: • Students must log in before they can save responses on your lesson page. (Only students who are 13 years of age or older can create a TED-Ed account) (1) • Students can create a nickname to identify their responses on your lesson page (2) 1 2
  • 9.
    To get yourlesson to your students, share the lesson link with them in whatever way works for you:
  • 10.
    As students submitwork on your lesson page, you'll be able to monitor their progress, view their answers, and send them feedback.
  • 11.
    When you click“Review Student Work”, you will be able to: • View answers for each student (1) • Download students’ responses (2) 1 2
  • 12.
    Any time yourwant to Share (1) , Edit (2) or Delete (3) the lesson you have created or Create a new one (4), go to “Lessons” and do the changes. 1 2 3 4
  • 13.
    You can alsouse any of the sample lessons that TED-Ed provides in its public lesson library. To do this, visit any of TED-Ed lesson pages that you're interested in.
  • 14.
    Use the red"Customize This Lesson" button at the bottom right to copy the lesson to your account.
  • 15.
    Keep any ofTED-Ed pre-populated questions and resources that you like (1), or add your own (2). 1 2
  • 16.
    It is yourturn now.  Go to TED-Ed and create your interactive lesson. Good luck! Recourses: https://bit.ly/2L45EfV
  • 17.
    This presentation hasbeen created by: Irena Raykova a primary and an English teacher at 137 Secondary School “Angel Kanchev”, Sofia, Bulgaria e-Twinning ambassador e-mail: irenarajkova@abv.bg