Download to read offline
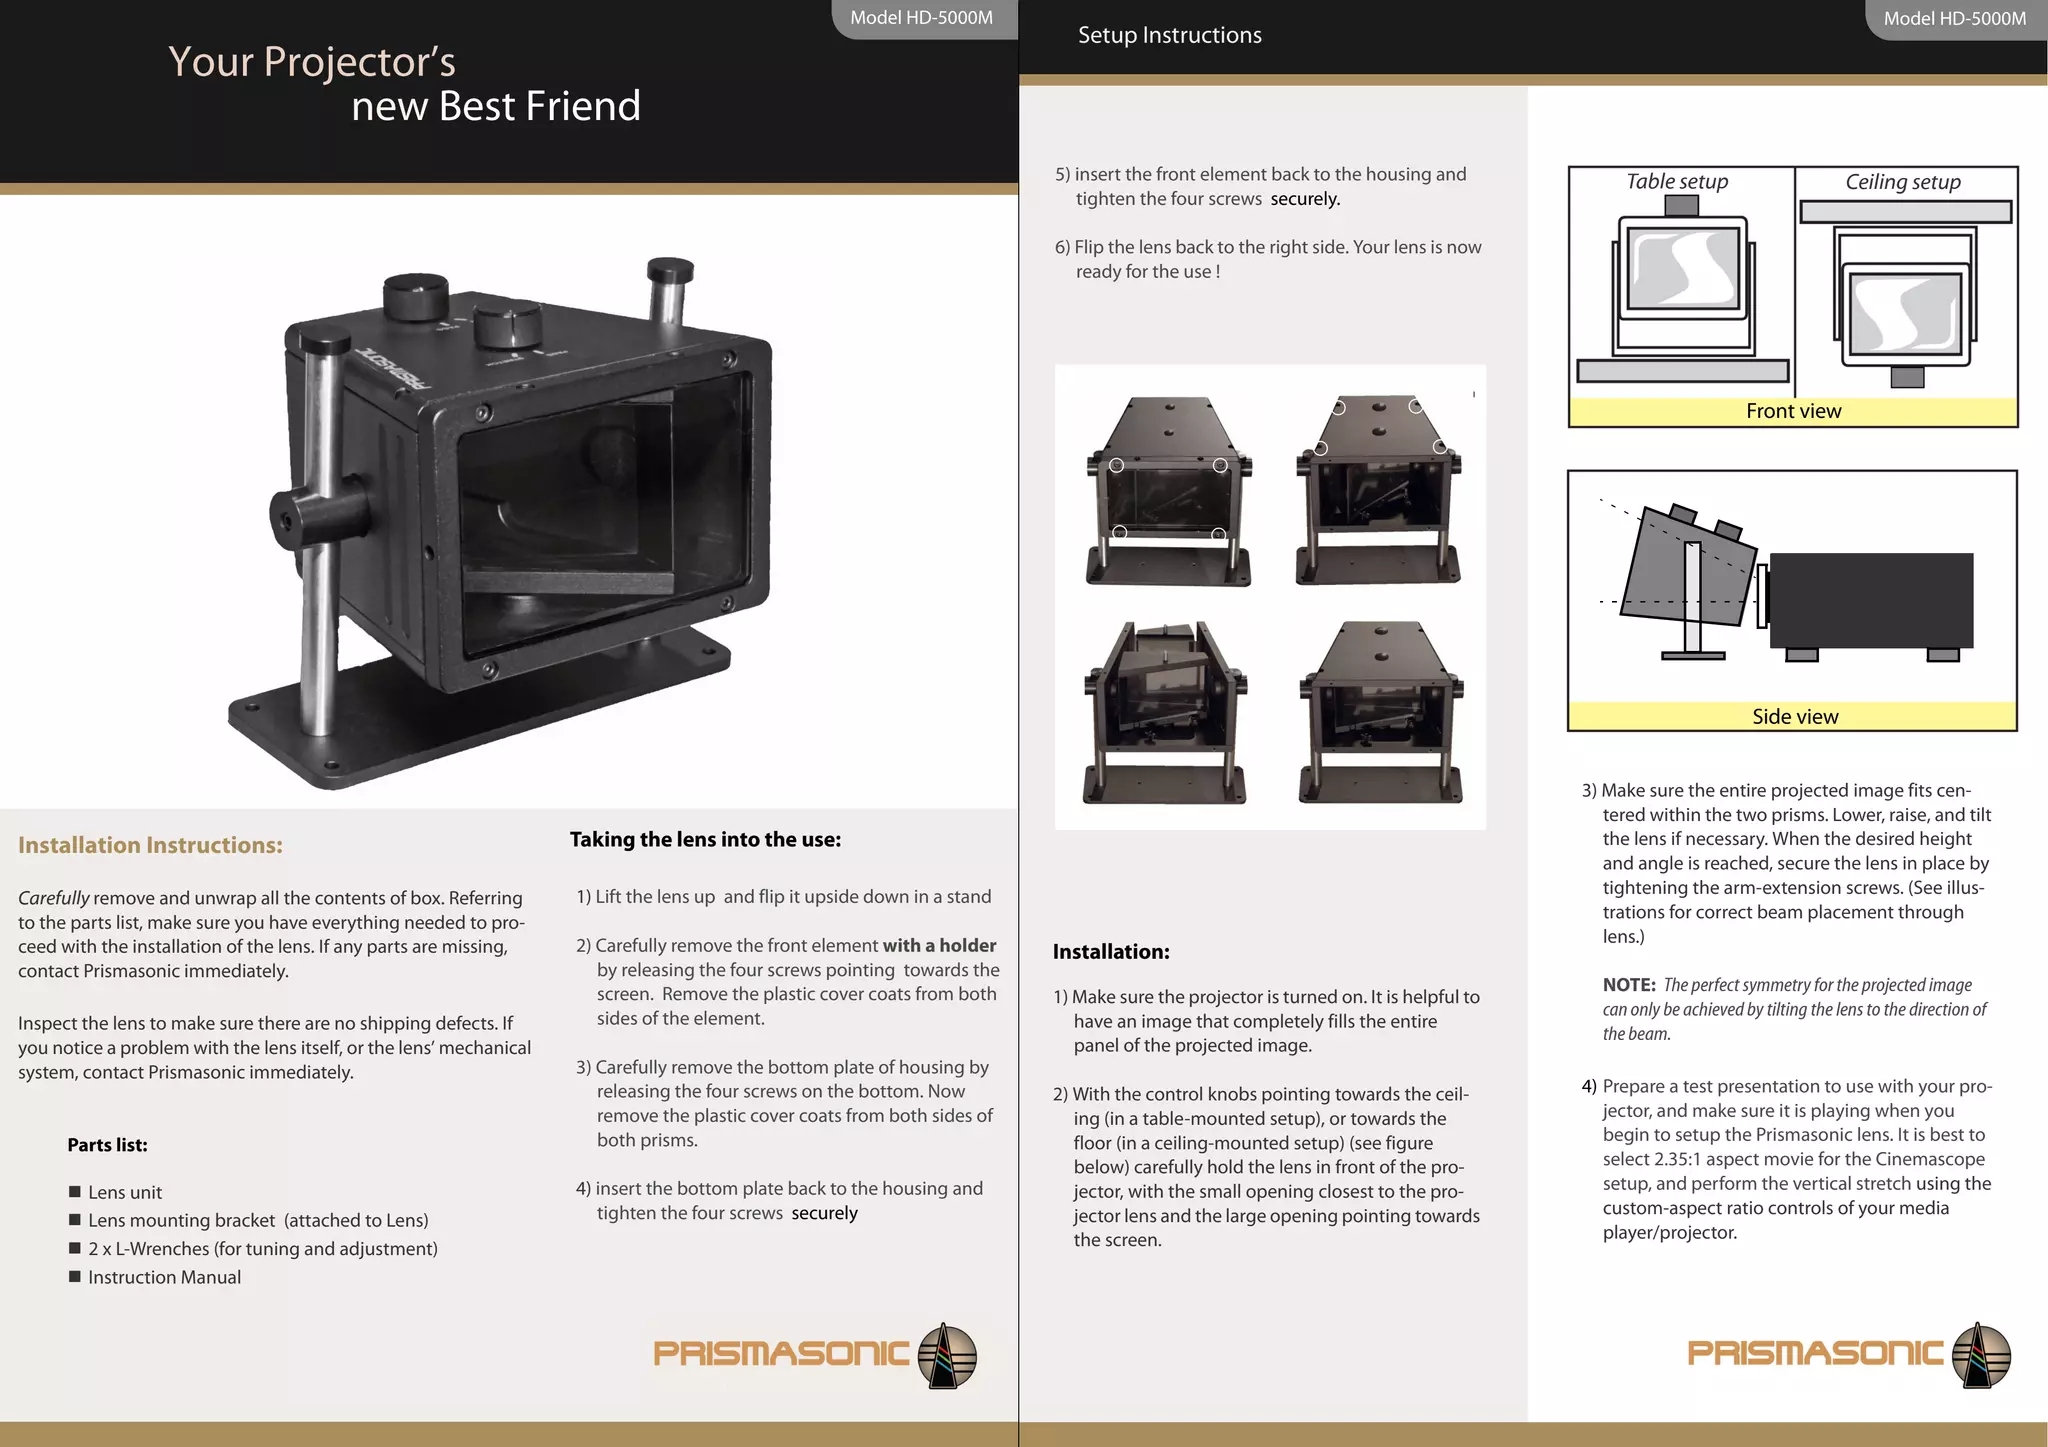

1) The document provides setup instructions for the Model HD-5000M projection lens. 2) Key steps include installing the lens mounting bracket, removing the front element of the lens to access the prisms, adjusting the prisms to achieve the desired aspect ratio, and reinstalling the front element. 3) Tuning involves adjusting removable pinstops inside the lens to match the projected image perfectly to the screen.


