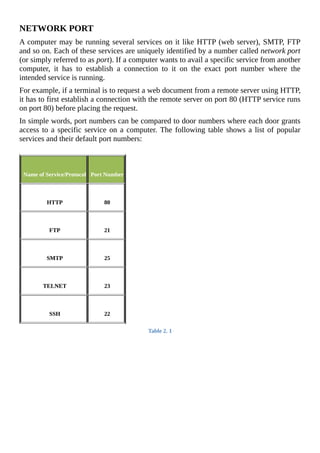
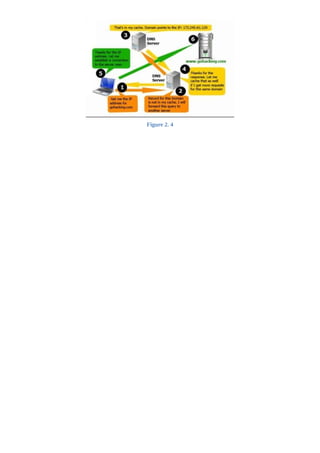
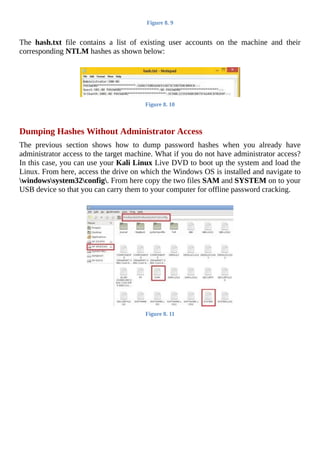
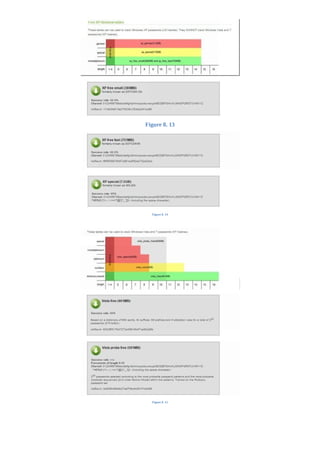
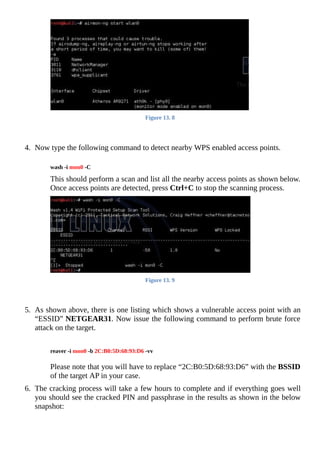
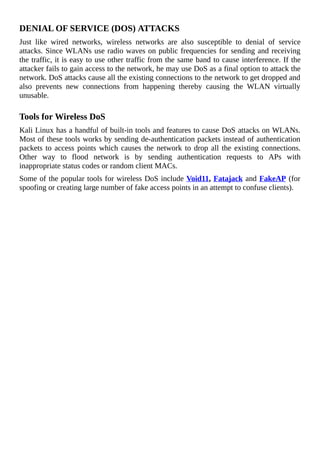
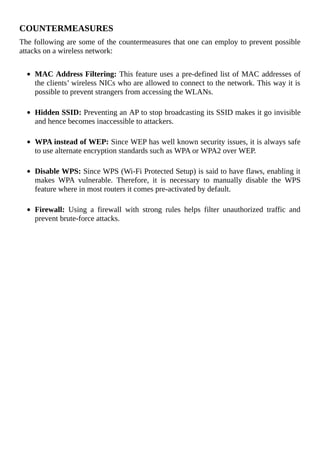
The document is a comprehensive beginner's guide to ethical hacking by Srikanth Ramesh, outlining essential concepts, terminologies, and methodologies related to hacking and cybersecurity. It covers a range of topics from basic networking concepts and computer operating systems to various hacking techniques and countermeasures. The book emphasizes an educational approach for readers with little prior knowledge, aiming to equip them with the skills necessary to think like a hacker and protect their own systems.

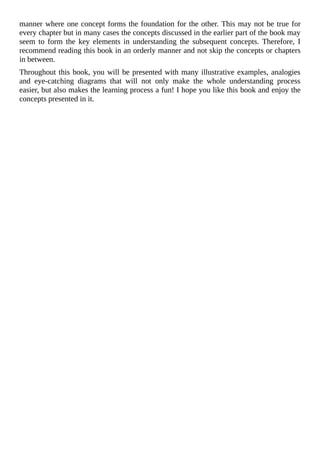

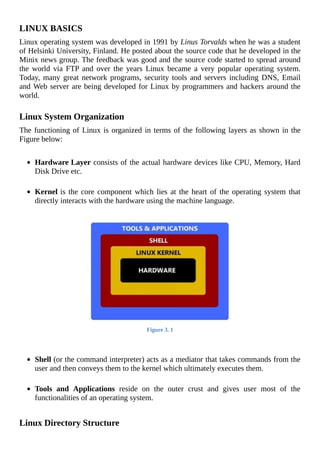


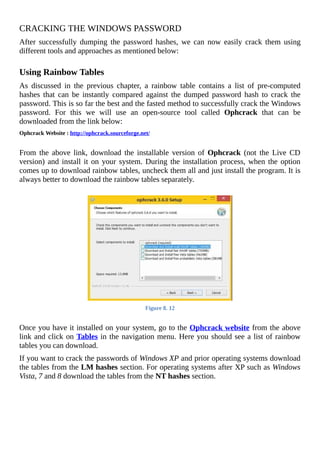
![Figure 8. 1
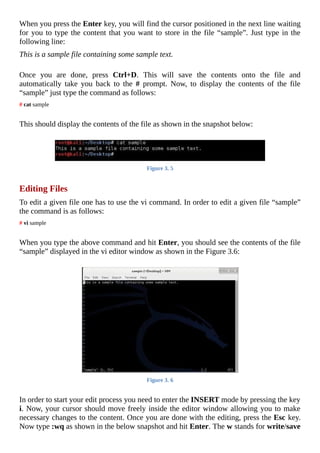
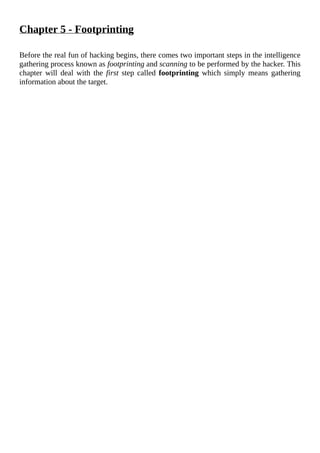
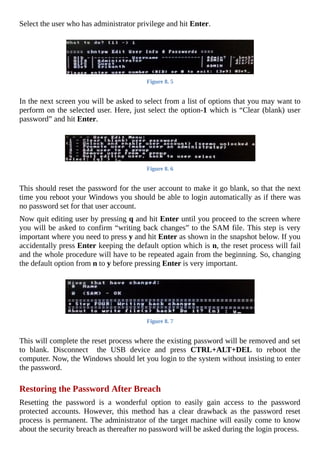
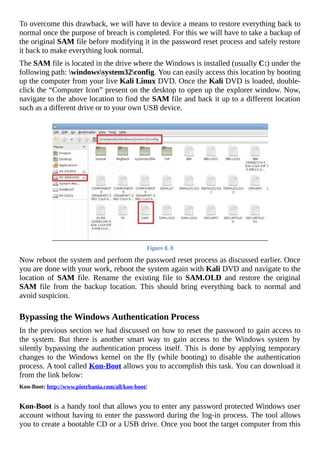
Once the tool is running from your USB device, you should see the screen similar to the
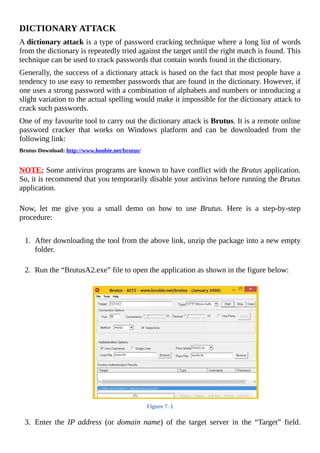
one shown above. Just follow the screen instructions and the tool will automatically detect
the partition on which the Windows is installed. Usually the right options are preloaded in
the square bracket as shown in the below snapshot. So, just pressing Enter key should
work.
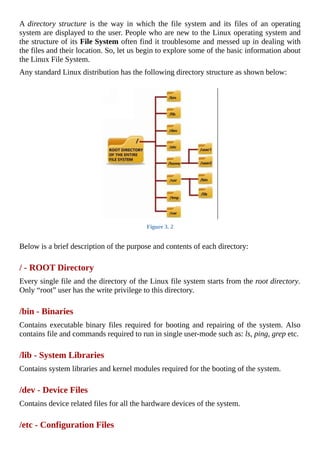
Figure 8. 2
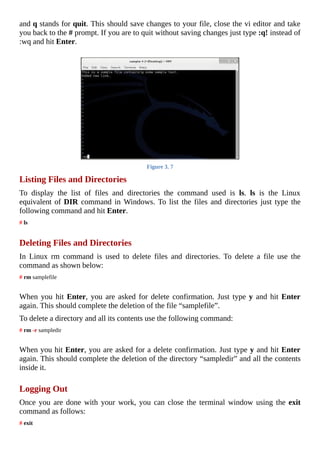
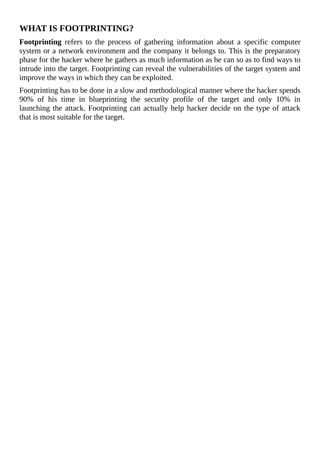
In the next step, you will be asked to “select which part of the registry to load”. You need
to select the option-1 that is “Password rest [sam]” which is preloaded by default as shown
below. So just press Enter to proceed.
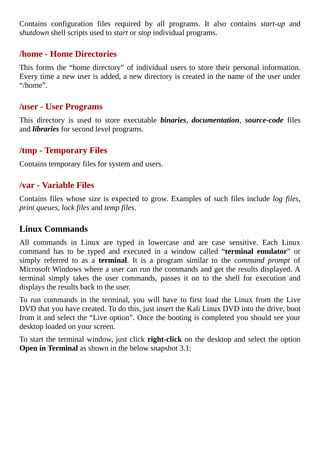
Figure 8. 3
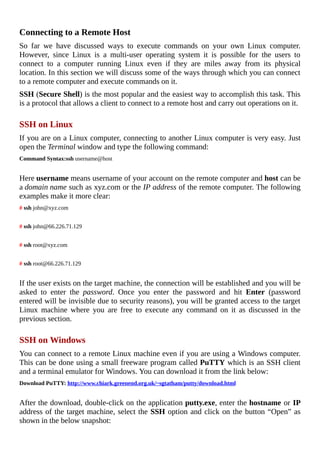
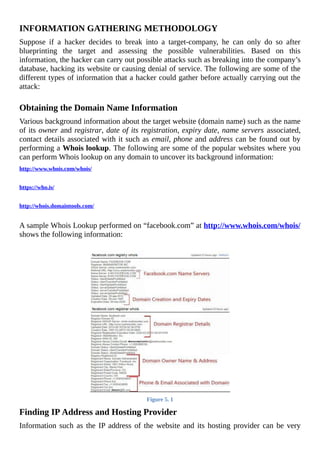
In the next step, select the option-1 which is “Edit user data and passwords” as shown
below and hit Enter.
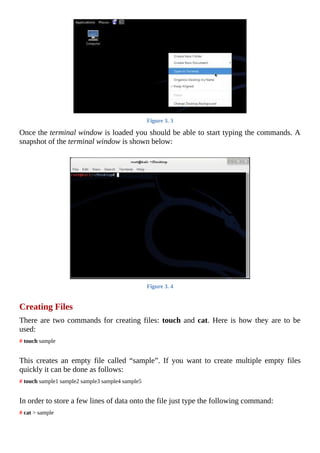
Figure 8. 4
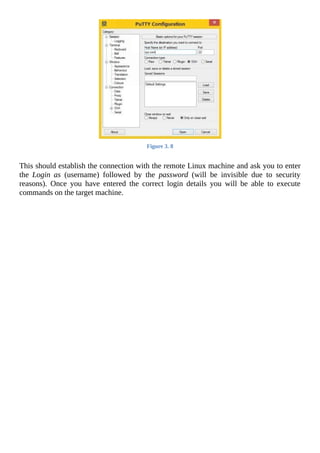
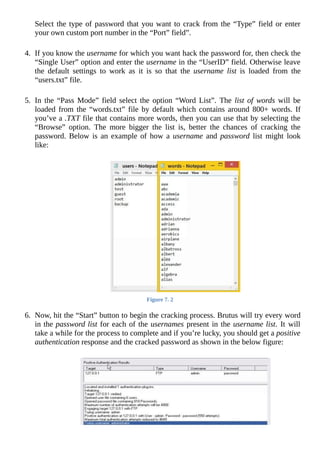
Now, you should see a list of “Usernames” and their “Admin” status being displayed.](https://image.slidesharecdn.com/hackingsecretsexposed-abeginnersguide-january12015-160315173027/85/Hacking-secrets-exposeda-beginner-s-guide-by-ChatKro-com-Pakistani-Chat-Room-77-320.jpg)


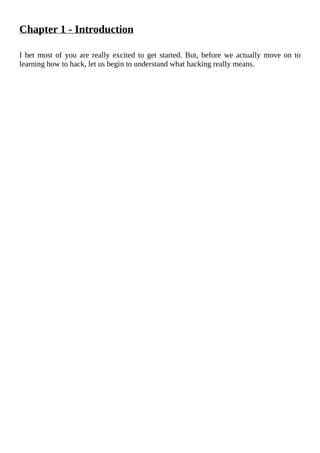
![know where to go back when “FunctionB” finishes its task and this return address (back to
“FunctionA”) is stored in the stack.
Consider the following sample code:
void functionA ()
{
functionB ( ReadUserName (socket) );
}
void functionB (char *name)
{
char name_arr[10];
strcpy (name_arr, name);
}
In the above example, functionA reads the string (user name) from the from the user and
passes it on to the functionB for copying the same to a buffer (name_arr[10]) for which
the size allocated is 10 bytes. When the attacker enters a cleverly devised input name
whose size is larger than 10 bytes, the data can overflow beyond the memory parts
assigned to “name_arr” resulting in a buffer overflow. Remember that a stack also
contains return address for functionA when functionB completes its execution. When the
buffer overflows, the attacker can manipulate the stack to set his own return address to the
point where his malicious program exists in the buffer. In this way, the attacker can exploit
stack overflow vulnerability in web applications to execute his own malicious codes and
take control of the system.
Buffer Overflow Countermeasures
Validate input length of data in forms before passing them on to the functions.
Practice safe and secure coding habits when dealing with buffers.
Use tools like Stack Shield and Stack Guard for Linux systems to defend against
stack overflow attacks.
Directory Traversal
Directory traversal is a type of HTTP vulnerability used by hackers to gain access to
restricted directories and file system on a web server. Directory traversal attack happens
due to the web servers’s inability to validate/filter user inputs. Web applications developed
using programming languages like PHP, Python, Perl, Apache and ColdFusion are
commonly vulnerable to this type of attack.](https://image.slidesharecdn.com/hackingsecretsexposed-abeginnersguide-january12015-160315173027/85/Hacking-secrets-exposeda-beginner-s-guide-by-ChatKro-com-Pakistani-Chat-Room-145-320.jpg)
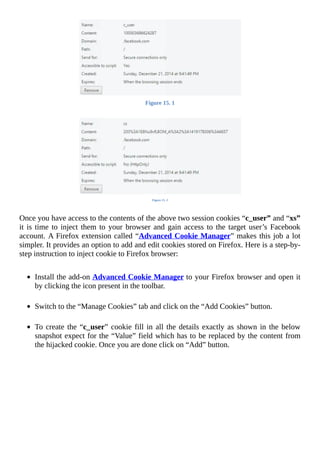


![Hacking ético [Pentest]](https://cdn.slidesharecdn.com/ss_thumbnails/hackingticopentest-131012041746-phpapp02-thumbnail.jpg?width=640&height=640&fit=bounds)


![[Computer] hacking for dummies how to learn to hack in easy steps](https://cdn.slidesharecdn.com/ss_thumbnails/computerhackingfordummies-howtolearntohackineasysteps-121212174510-phpapp01-thumbnail.jpg?width=640&height=640&fit=bounds)
![[Computer] hacking for dummies how to learn to hack in easy steps](https://cdn.slidesharecdn.com/ss_thumbnails/computerhackingfordummies-howtolearntohackineasysteps-121125135247-phpapp02-thumbnail.jpg?width=640&height=640&fit=bounds)


