MA. ANDREA M.LAGMAN
TLE Teacher
Lesson 2:
Prepare and used
fillings
2.
Lesson 2: Prepareand used fillings
LESSON OBJECTIVES:
• Prepare and select fillings
• Fill and assemble slice or layer sponges and
cakes
• Select coatings and sidings
Types of Filling
Considerthe flavor and be sure that
the filling will complement the
cake's flavor.
Take into account the storage of the
cake.
5.
Types of Filling
Ifthe cake will be exposed to warm
temperatures, do not choose a filling
that will melt.
If the cake has to be made a day or
so ahead, be sure the filling will hold
up for that period of time.
6.
Types of Filling
Custard
Custardfilling is a smooth, creamy
type filling similar to pudding.
Cornstarch, Flour and Egg yolks
Vanilla, Lemon and Chocolate
A custard type filling should not
be frozen.
7.
Types of Filling
Fruit
Strawberries,blueberries,
raspberries, peaches, apricots
*piping of frosting - done to hold the
filling in between the layers
*continues to ripen even when refrigerated
*cooked fruit filling that does not contain eggs
- Room temperature for 2 days
8.
Types of Filling
Frosting
*same frosting used to frost the
cakes is used for the filling layers
*This is a great way to add flavor
and moistness to the cake.
*butter cream, cream cheese,
whipped cream
9.
Types of Filling
Jelly
*Jelly,jam, or preserved can be
used to add an easy fruit flavored
filling to a cake
*add flavor without any additional
preparation.
* can be stored at room
temperature for up to 4 days
10.
Types of Filling
WhippedCream
• provides a light fluffy filling
with a delicate flavor.
• stabilized by adding gelatine
• should be refrigerated and
served the same day that it
is made.
11.
Glazes and Syrups
•can also be used as
fillings but will not
provide for a filling
with any thickness.
• They do provide extra
flavor and help seal in the
moisture of the cake
Assembling slice orlayer cakes
Step 2
• Prepare all ingredients
• Cool cake layers
completely.
• Icings and fillings
should be spread out
and at the correct
temperature
15.
Assembling slice orlayer cakes
Step 3
• Trim cake layers, if
necessary
• Slightly rounded tops
are easily covered by
icing, but excessively
large bumps may have
to be cut off.
16.
Assembling slice orlayer cakes
Step 4
• Brush all crumbs
from cakes. Loose
crumbs make icing
difficult.
17.
Assembling slice orlayer cakes
Step 5
• Place the bottom layer upside
down on a cardboard cake
circle of the same diameter
• Place the cake at the
center of a cake turn table
18.
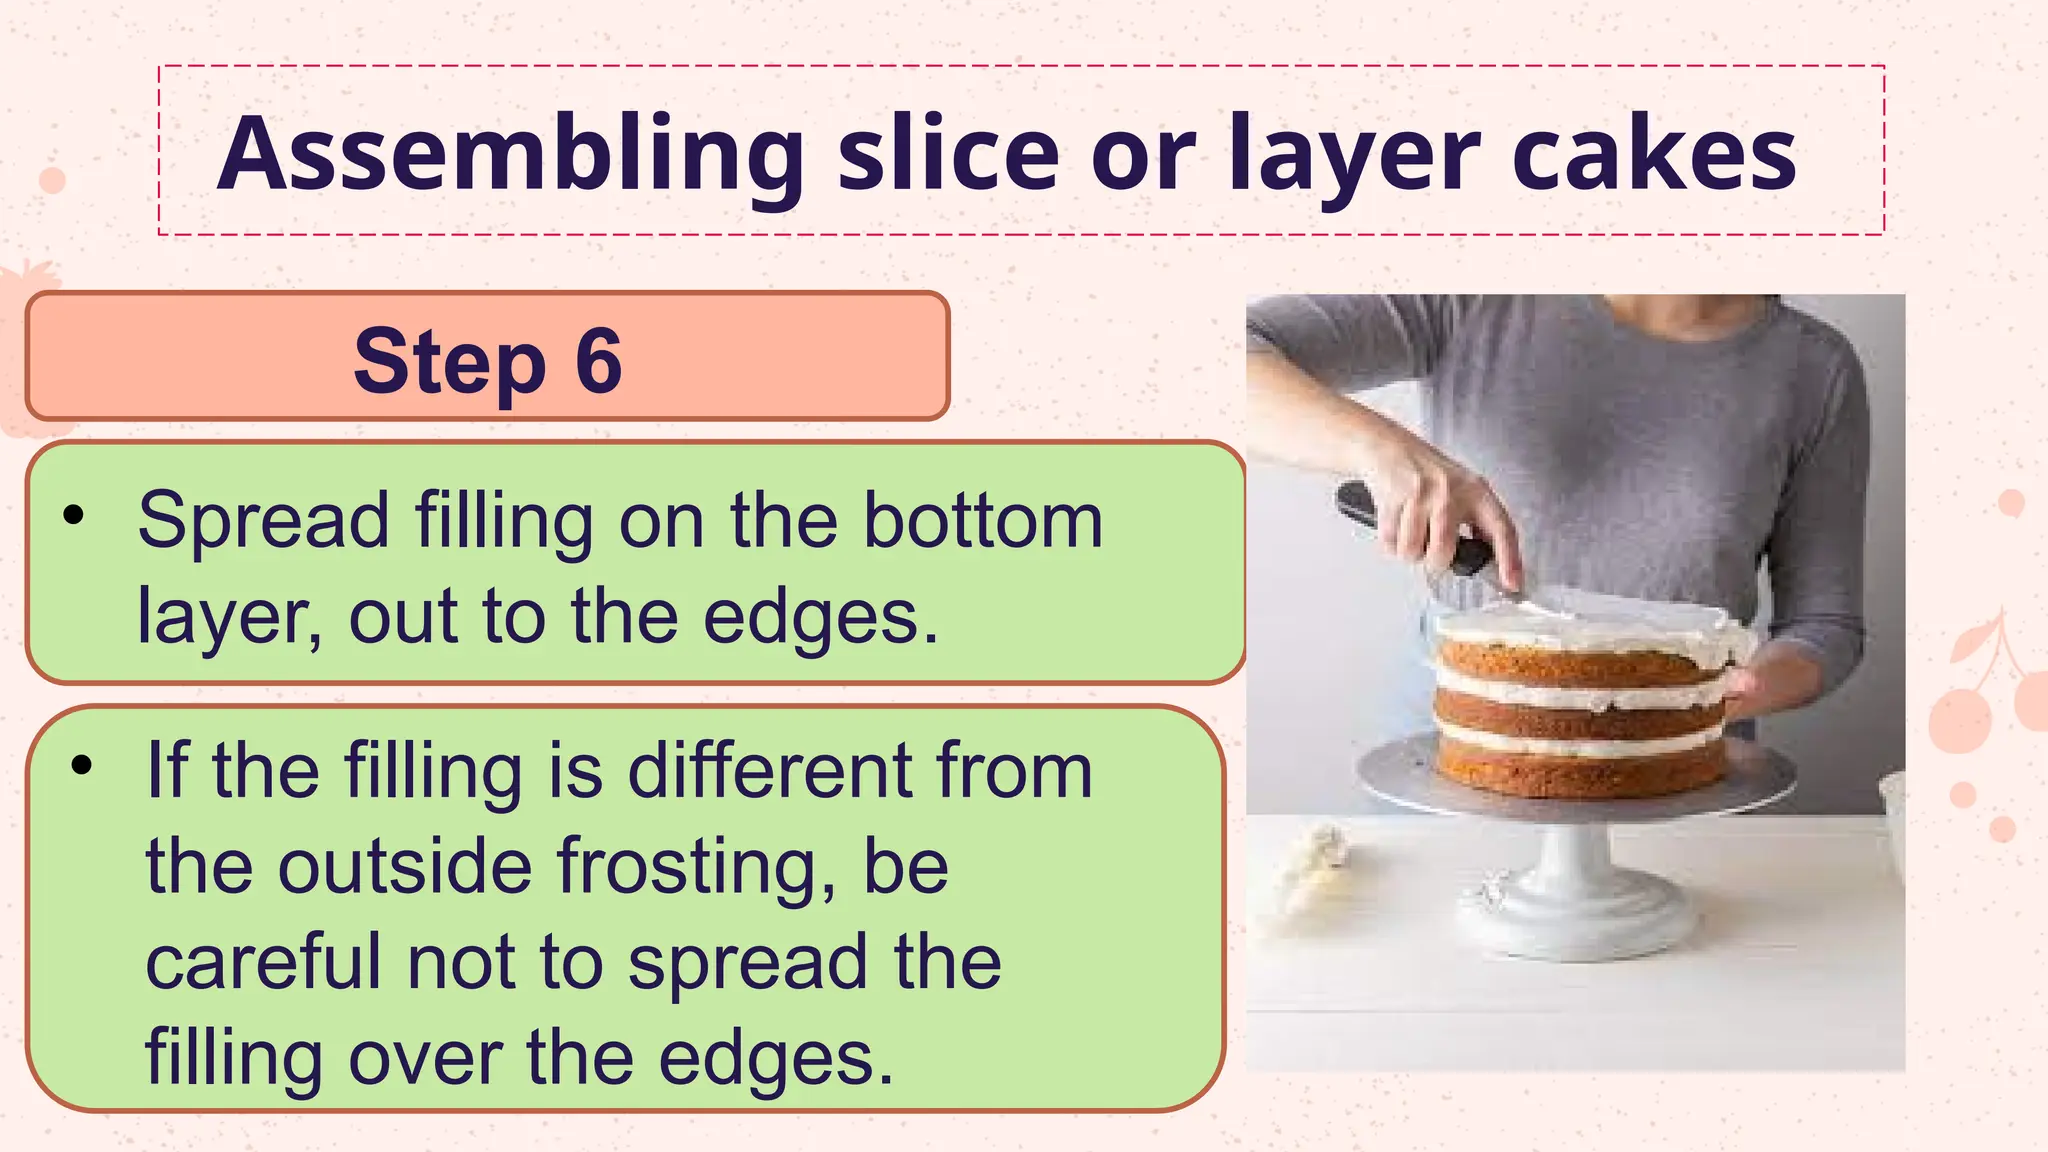
Assembling slice orlayer cakes
Step 6
• Spread filling on the bottom
layer, out to the edges.
• If the filling is different from
the outside frosting, be
careful not to spread the
filling over the edges.
Assembling slice orlayer cakes
Step 8
• Ice the cake
• If a thin or light icing -
center of the cake.
• If a heavy icing is used -
spread the sides first
21.
Assembling slice orlayer cakes
Icing and Frosting
• Frosting - thick and fluffy, and is
used to coat the outside (and often
the inner layers) of a cake
• Icing - thinner and glossier than
frosting, and can be used as a
glaze or for detailed decorating
Filling Cake Layers
Step1
• Fill a decorating bag with
medium consistency icing
and use tip 12 or use the
coupler
• Start with the bottom layer,
leveled side up
• Create a dam