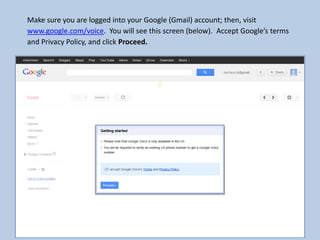
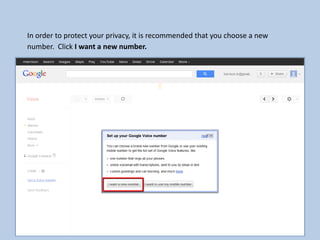
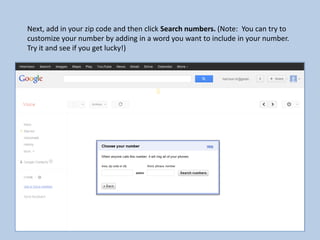
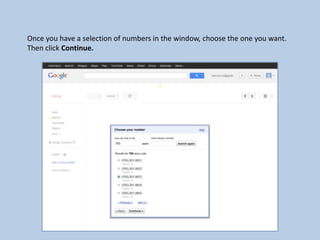
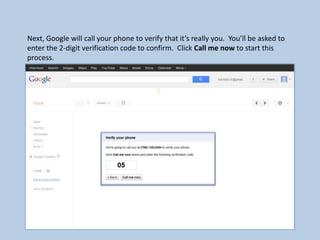
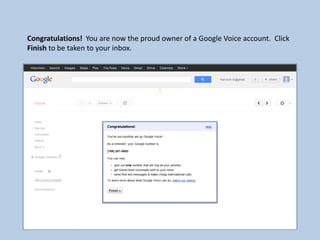
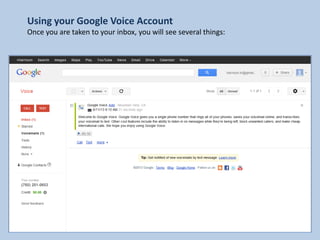
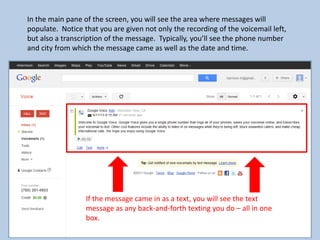
2. Make sure you are logged into your Google (Gmail) account; then, visit
www.google.com/voice. You will see this screen (below). Accept Google’s terms
and Privacy Policy, and click Proceed.
3. In order to protect your privacy, it is recommended that you choose a new
number. Click I want a new number.
4. Next, add in your zip code and then click Search numbers. (Note: You can try to
customize your number by adding in a word you want to include in your number.
Try it and see if you get lucky!)
5. Once you have a selection of numbers in the window, choose the one you want.
Then click Continue.
6. Next, Google wants to know to which phone number you’d like to have your
Google Voice calls forwarded. Enter your first choice. Then, select from the drop-
down menu whether it is a home phone, mobile phone, or work phone.
(*Note: You will be able to add additional phone numbers later.) Click Continue.
7. Next, Google will call your phone to verify that it’s really you. You’ll be asked to
enter the 2-digit verification code to confirm. Click Call me now to start this
process.
9. And here’s what it looks like on my phone. (Do you like my beach scene?)
When I answered, the nice
computer voice prompted
me to enter the 2-digit
verification code on my
computer screen.
10. Congratulations! You are now the proud owner of a Google Voice account. Click
Finish to be taken to your inbox.
11. Using your Google Voice Account
Once you are taken to your inbox, you will see several things:
12. In the main pane of the screen, you will see the area where messages will
populate. Notice that you are given not only the recording of the voicemail left,
but also a transcription of the message. Typically, you’ll see the phone number
and city from which the message came as well as the date and time.
If the message came in as a text, you will see the text
message as any back-and-forth texting you do – all in one
box.
13. Underneath, you have the option to call the student or text them, right from your
computer screen. If you click the More drop-down menu, you’ll see options to
add a note or block the caller.
14. On the right, you’ll see options to call the student back from your computer …
16. Access your settings to customize your Google Voice account. This is where you
will add additional phone numbers (and set when you’d like Google Voice to
forward to that number, and when you would NOT like it to be forwarded); record
your voicemail message and set voicemail notifications; set your voicemail pin;
determine how you want calls from Google Voice to be displayed on your phone
as well as on the phones of those you call; and manage your “Do Not Disturb”
features. And so much more!
17. Explore your Google Voice settings and
set your account up as you would like!
Learn more at
www.google.com/googlevoice/about.html