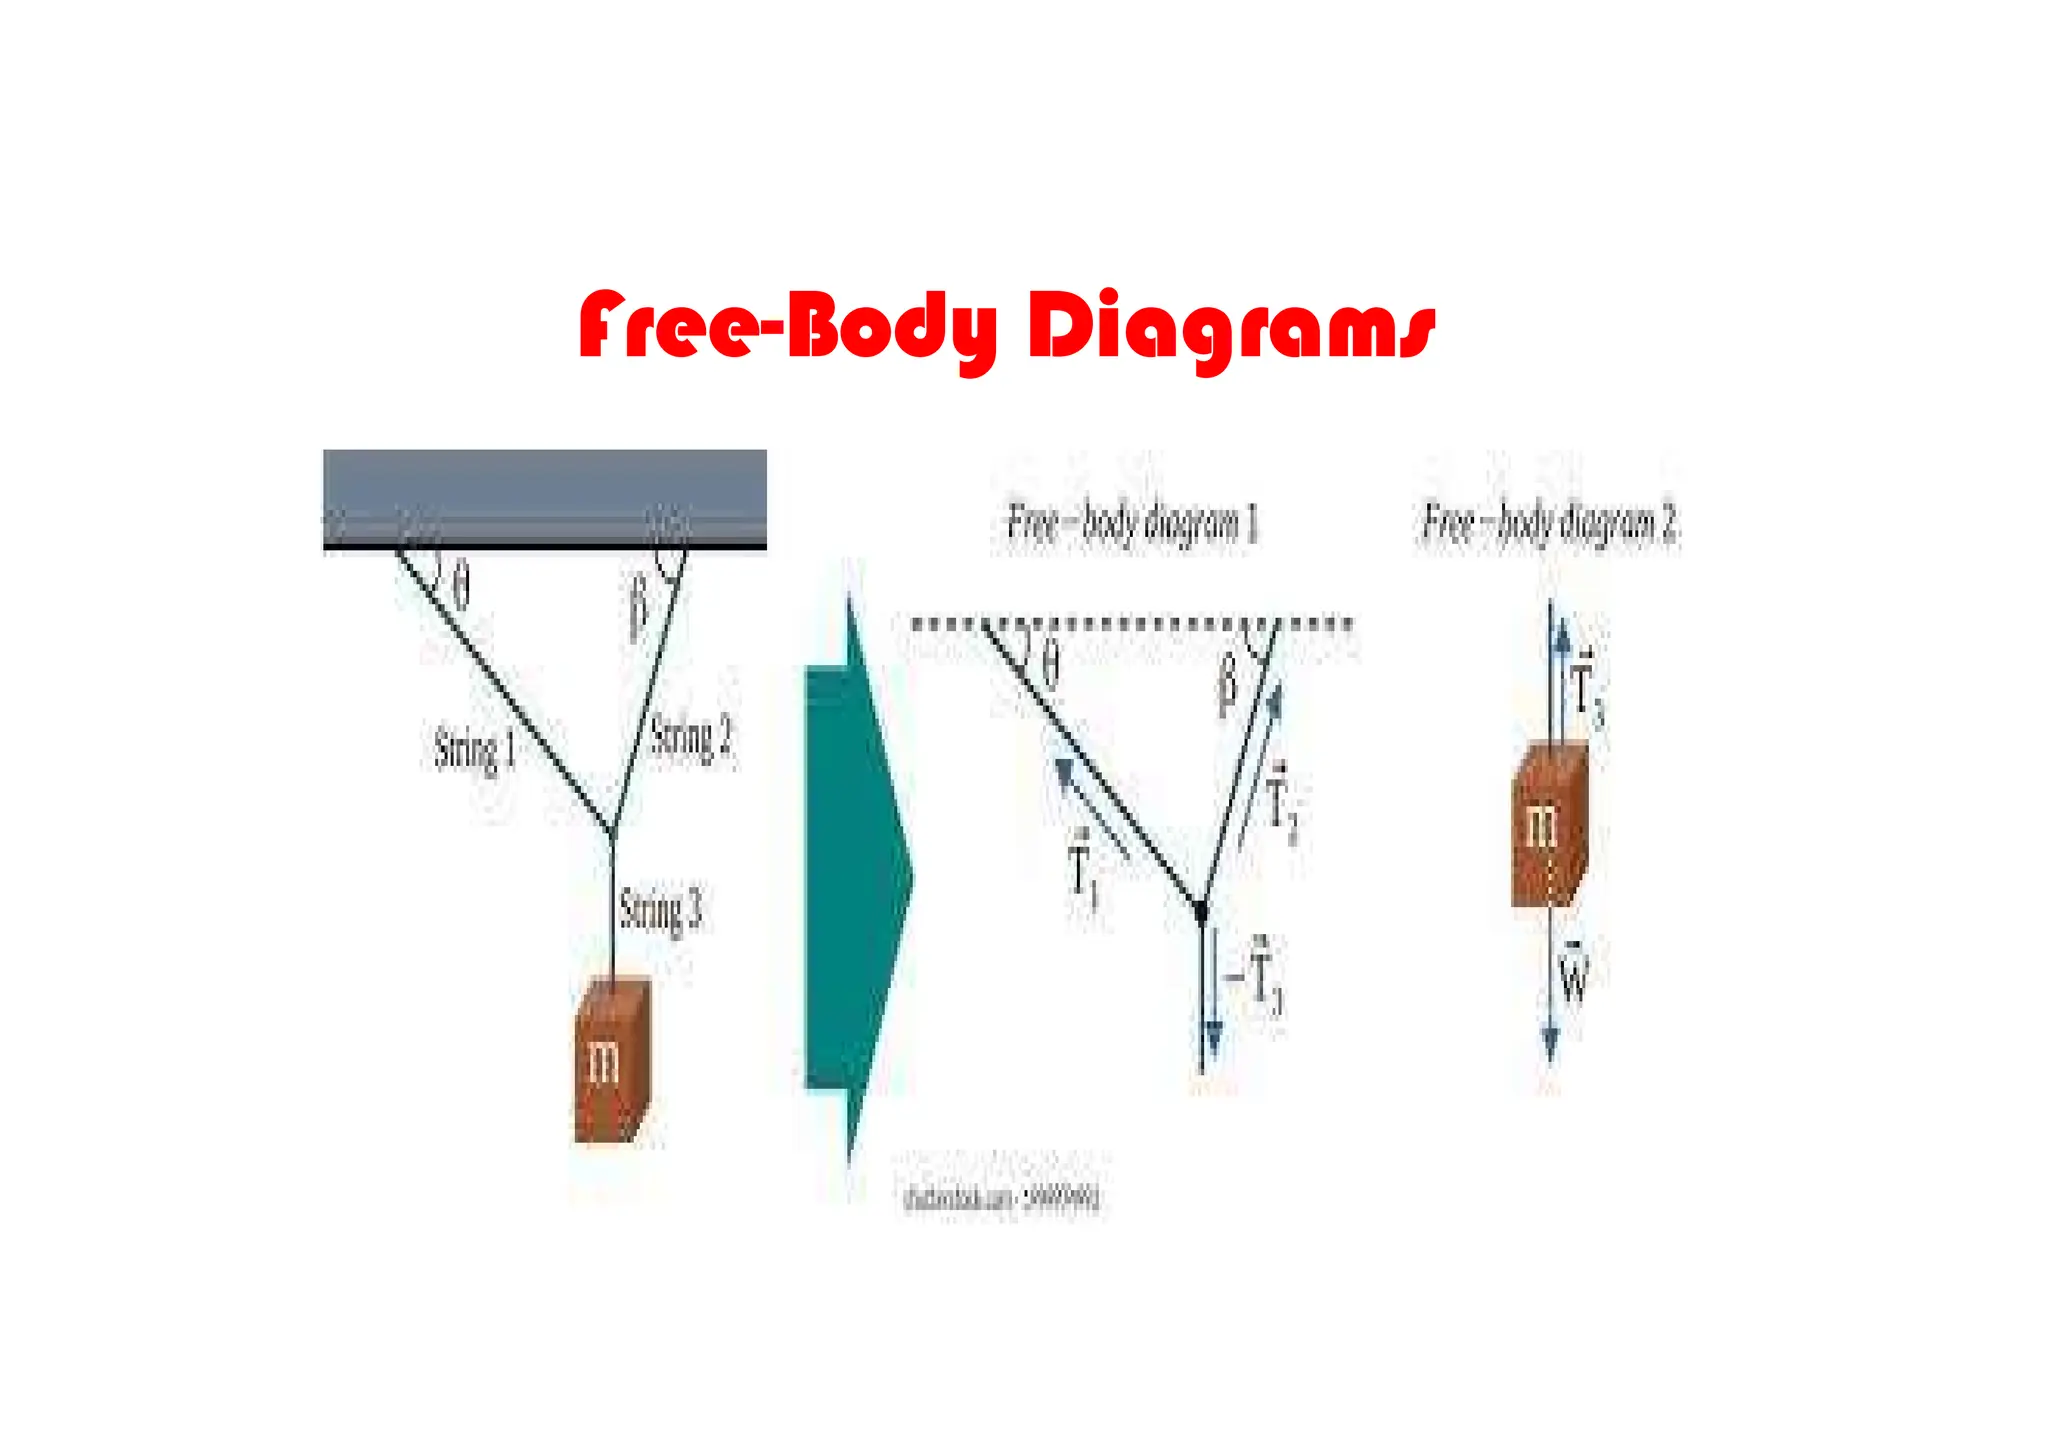
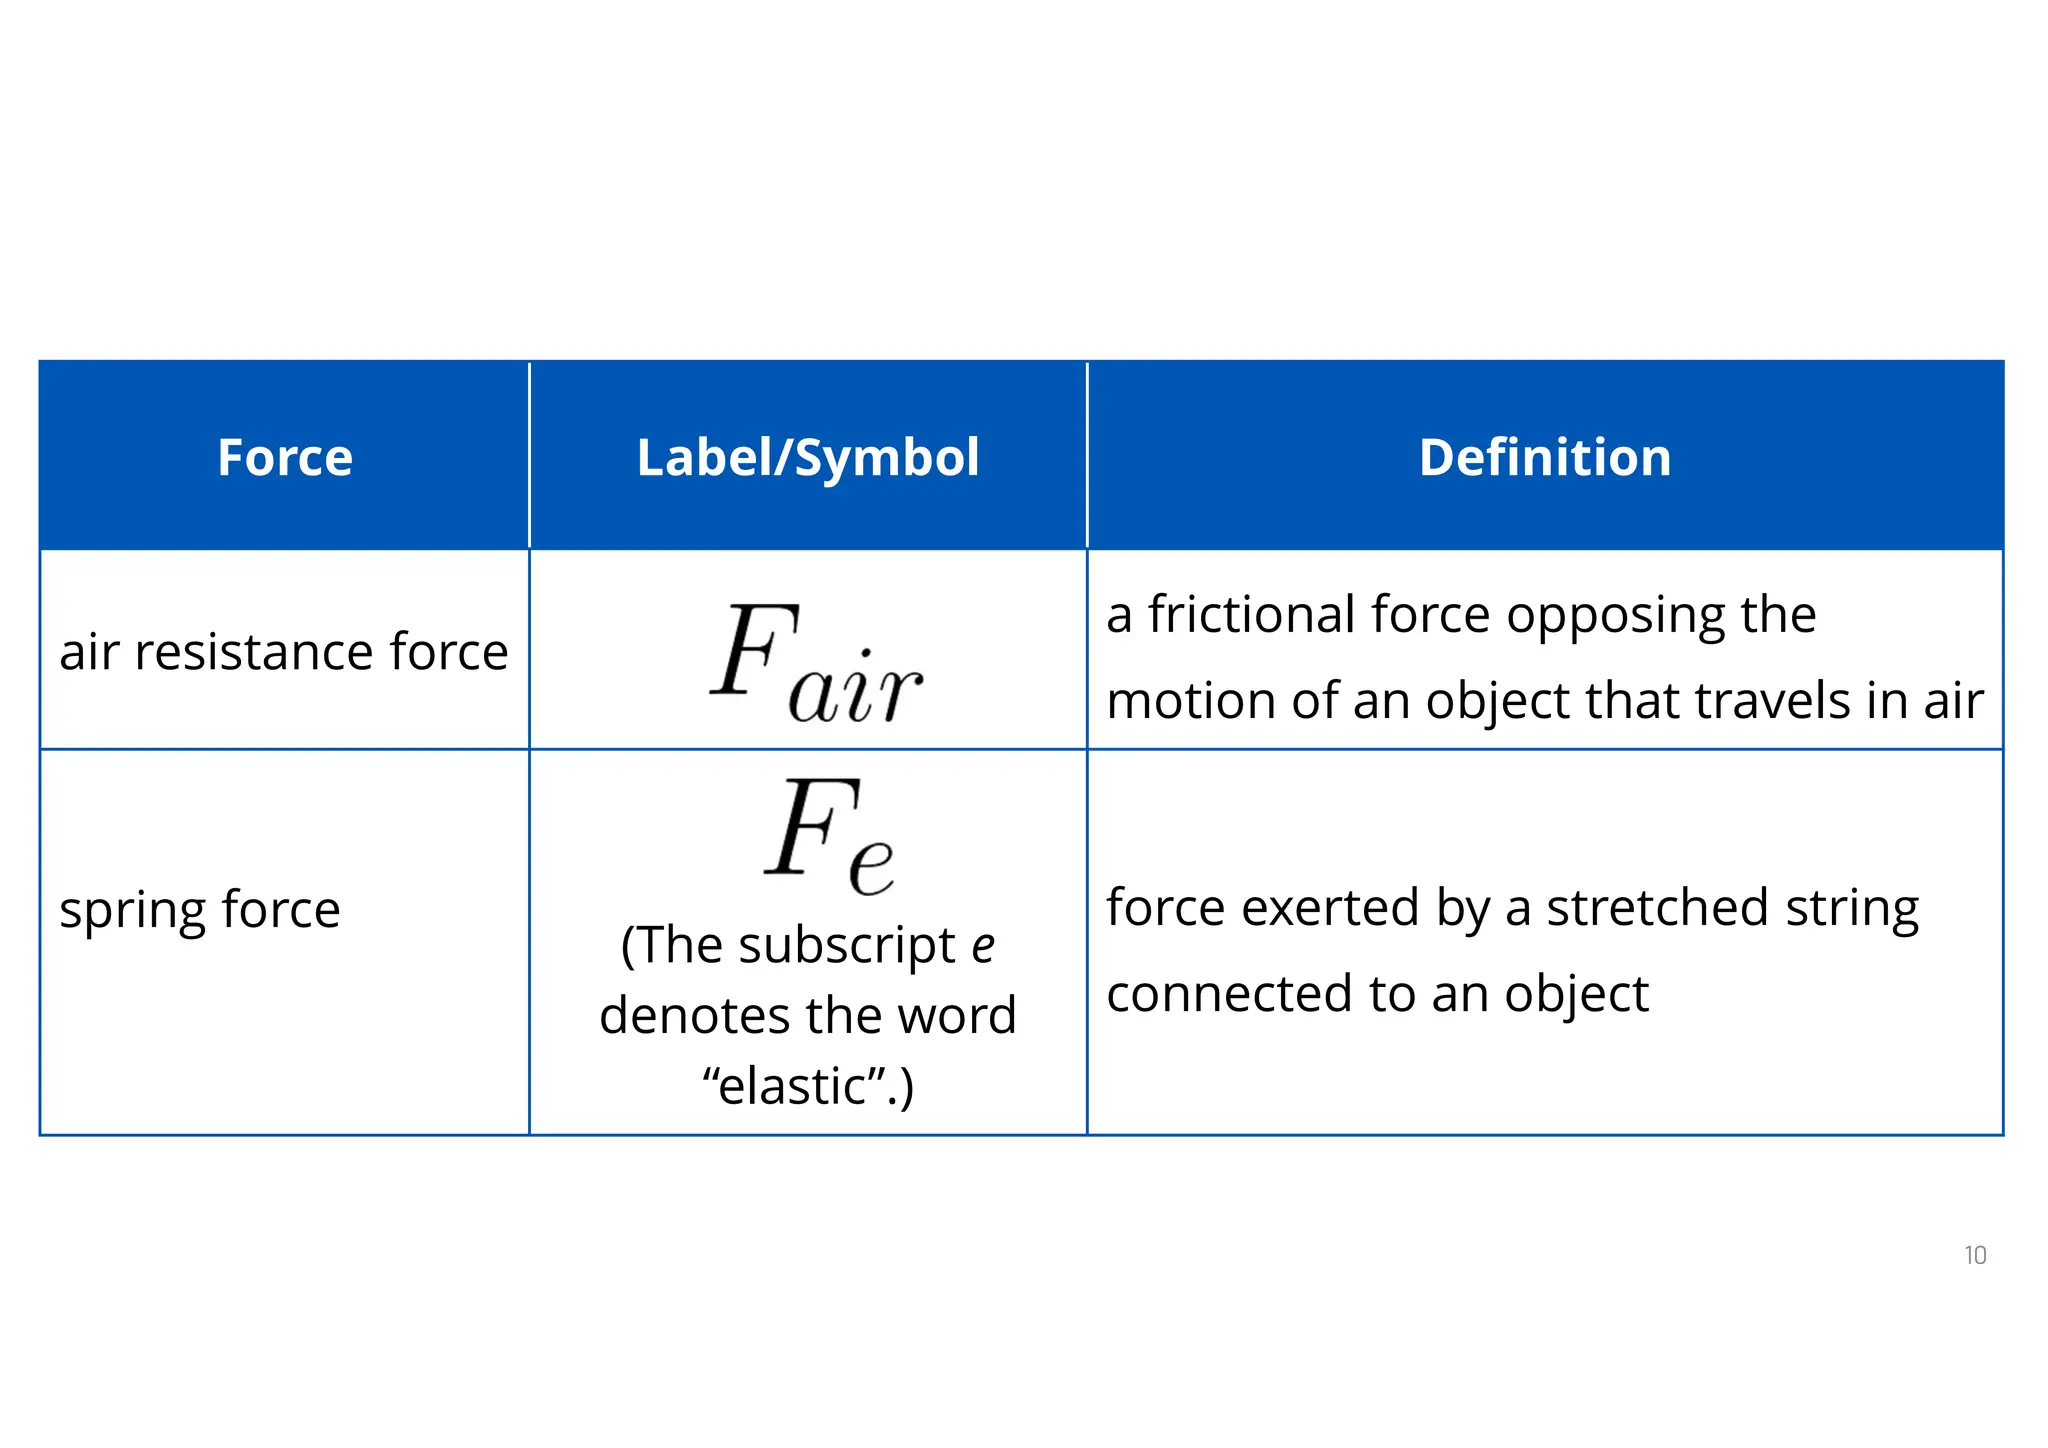
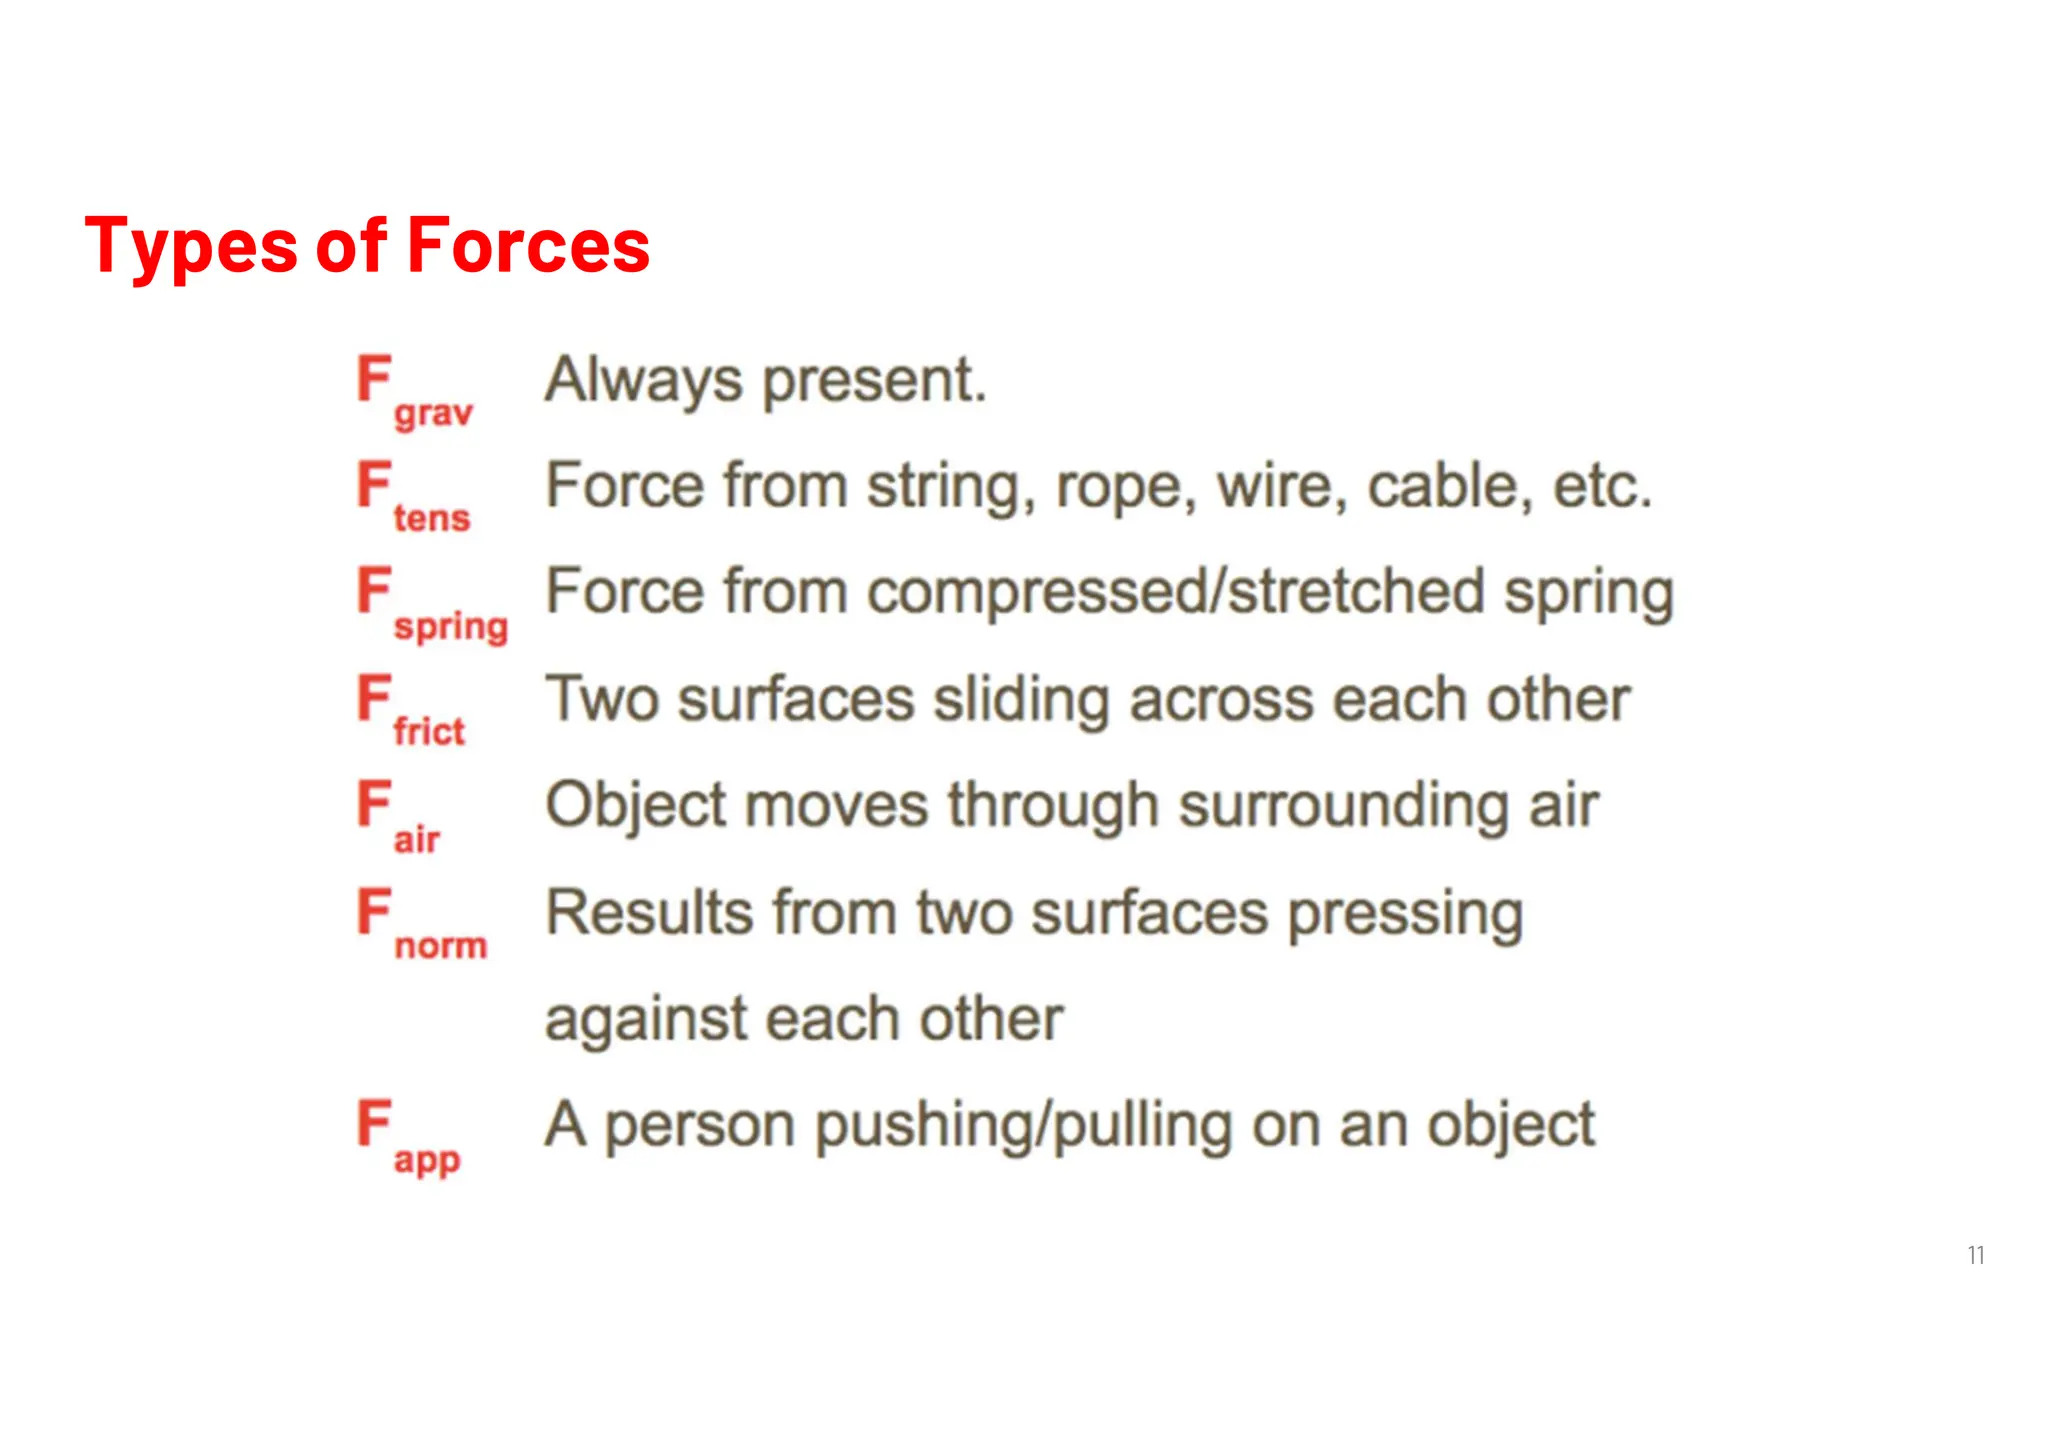
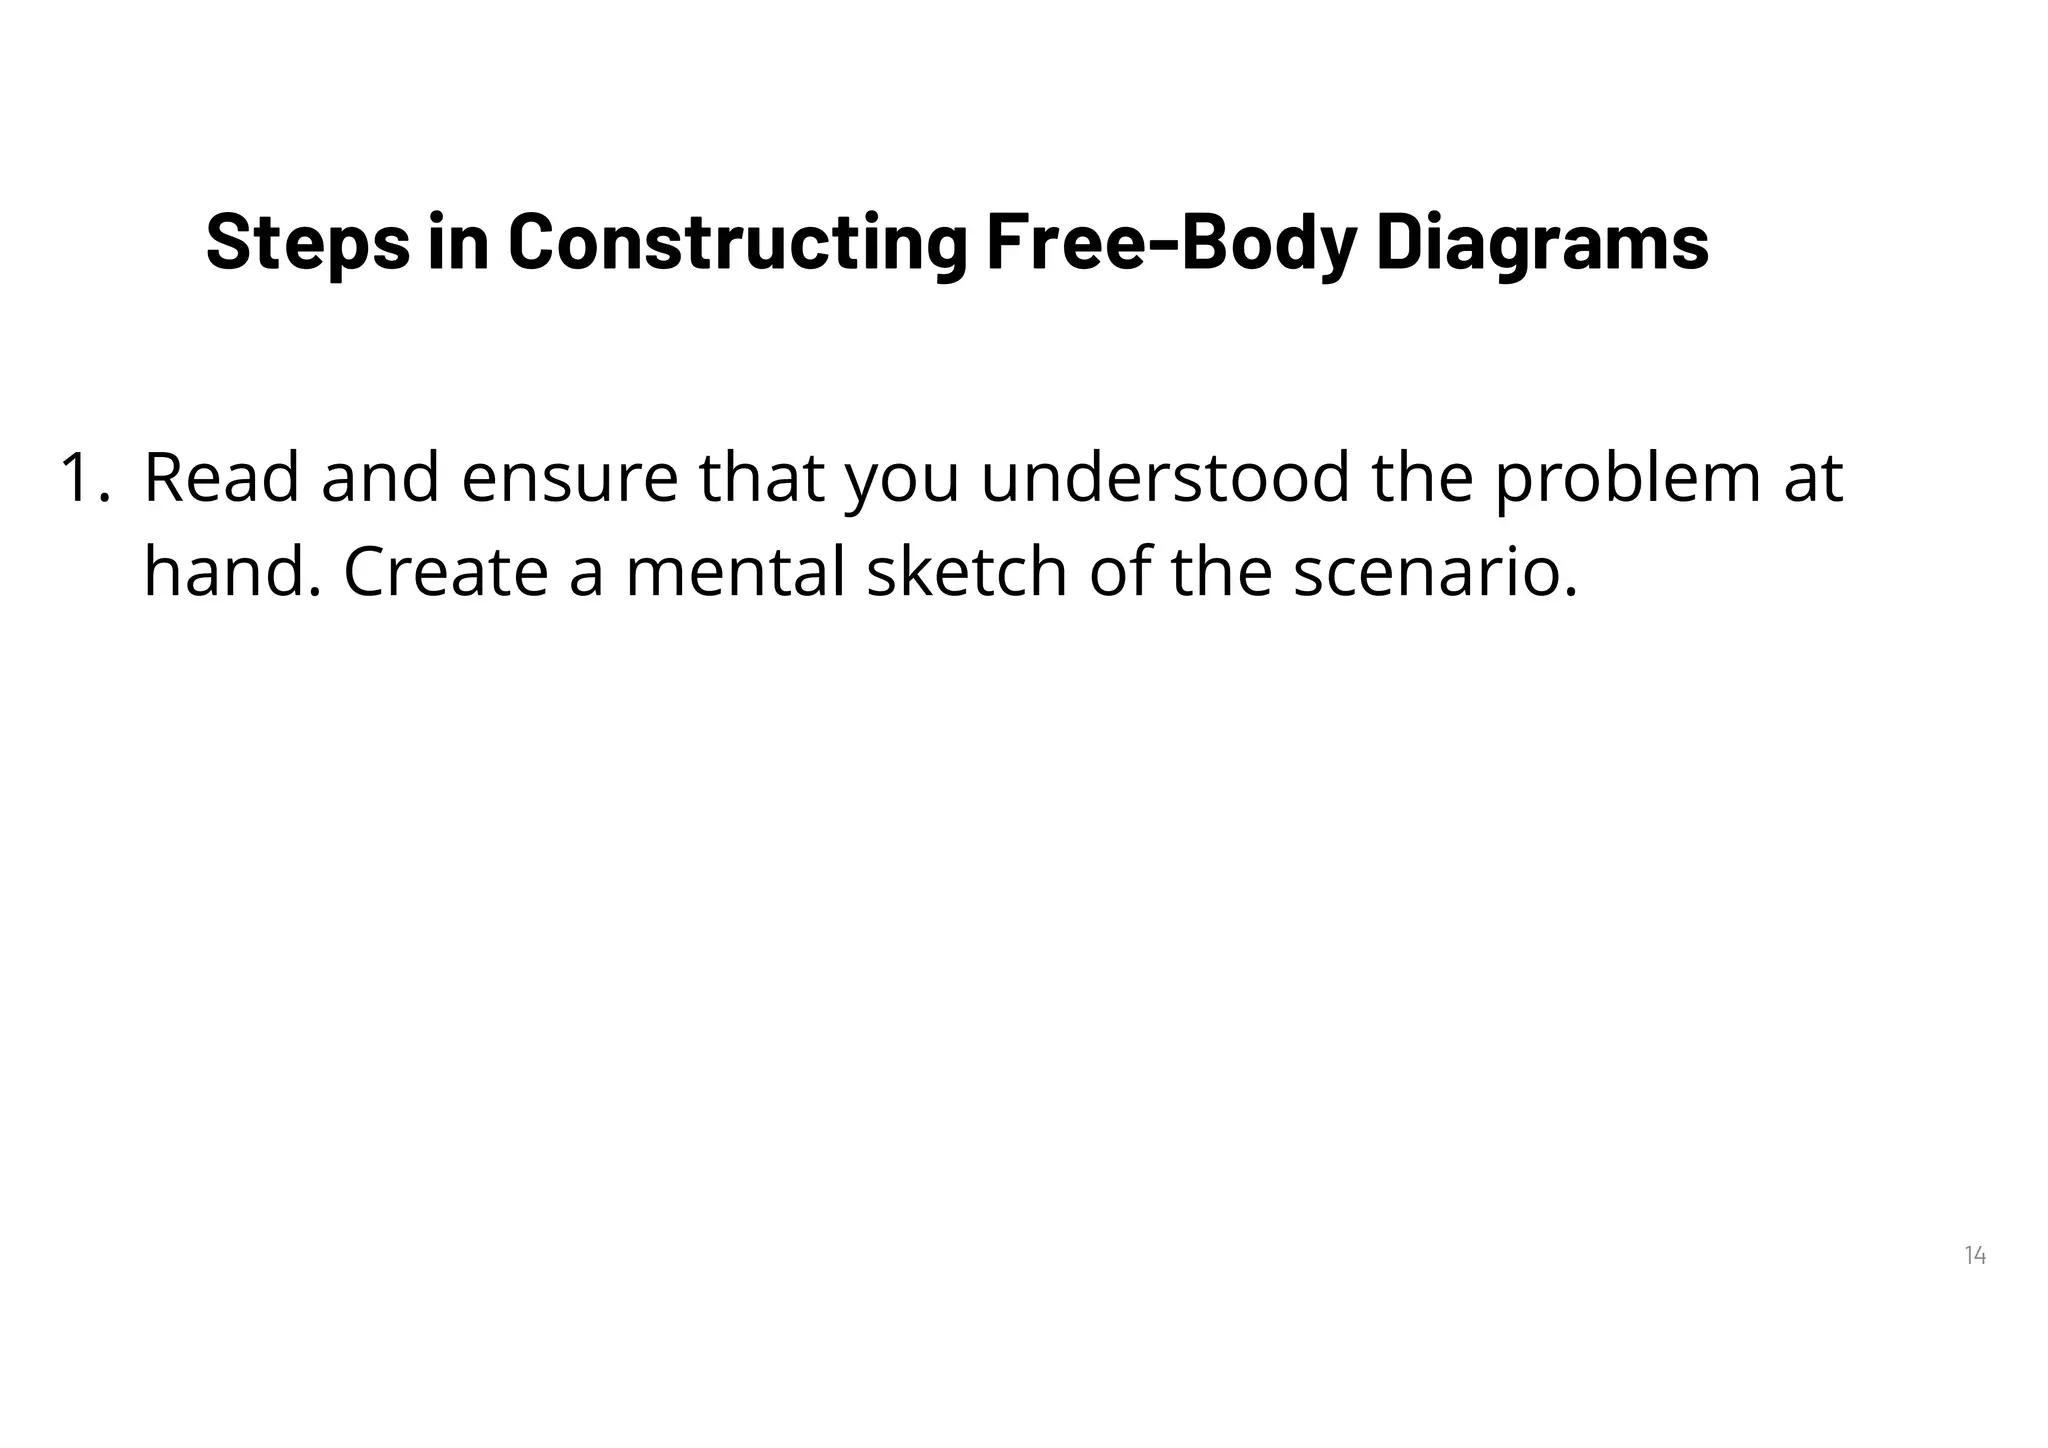
Free-Body Diagrams
Learning Objective:
To draw a free-body diagram that shows the types of
individual forces that act upon an object, their
direction, and their relative strength.
3
Diagrams are vital tools in physics.
4
Through them, you
can visualize concepts
and mathematical
relations, and
illustrate the
interaction of
variables responsible
for a certain action or
phenomenon.
5
One of the most
essential of these is
what we refer to as
free-body diagrams,
which will prove to be
crucial in representing
forces and their
interactions as we
study the different
laws of motion.
6
What is a Free-Body Diagram?
A special type of force diagram that represents all the forces
acting upon an object. Arrows represent the forces. The force
arrows …
• … are labeled according to type,
• … are pointing in the direction of the force,
• … and have a length that is in proportion to their relative
strength (longer arrows are stronger forces).
7
Free-Body Diagrams
Every arrow is labeled
according to the type of
force that it represents.
The arrow’s size signifies
the force’s magnitude,
while the arrow’s direction
signifies which way the
force is acting.
8
Free-Body Diagrams
Definition
Label/Symbol
Force
force applied to an object by another
object
applied force
force with which large bodies (such
as Earth) pulls an object towards
itself
gravitational force
(also called weight)
force exerted upon an object as it
moves across a surface
friction force
9
Free-Body Diagrams
Definition
Label/Symbol
Force
force exerted upon an object found
on a surface
normal force
force exerted by a cord, string, or
rope that is pulled tight
tension force
10
Free-Body Diagrams
Definition
Label/Symbol
Force
a frictional force opposing the
motion of an object that travels in air
air resistance force
force exerted by a stretched string
connected to an object
(The subscript e
denotes the word
“elastic”.)
spring force
11
Types of Forces
12
What is a free-body diagram?
A special type of force diagram that
represents all the forces acting upon
an object.
13
14
Steps in Constructing Free-Body Diagrams
1. Read and ensure that you understood the problem at
hand. Create a mental sketch of the scenario.
15
Steps in Constructing Free-Body Diagrams
1. Read and ensure that you understood the problem at
hand. Create a mental sketch of the scenario.
2. Take one object at a time and draw a free-body diagram for
it that illustrates all the external forces, including the
unknown ones, that act upon that object. The net force, or
the sum total of the forces, does not have to be included in
the diagram.
16
Steps in Constructing Free-Body Diagrams
3. Draw the arrow that corresponds to each force vector
according to its magnitude and direction. Label each
accordingly.
17
Steps in Constructing Free-Body Diagrams
3. Draw the arrow that corresponds to each force vector
according to its magnitude and direction. Label each
accordingly.
4. Then, present the x- and y-components of a particular
force. (This is mostly applicable for problems related to the
first and second laws of motion, and we shall probe this step
further once we discuss those topics.)
18
Steps in Constructing Free-Body Diagrams
3. Draw the arrow that corresponds to each force vector
according to its magnitude and direction. Label each
accordingly.
4. Then, present the x- and y-components of a particular
force. (This is mostly applicable for problems related to the
first and second laws of motion, and we shall probe this step
further once we discuss those topics.)
5. Solve for unknown values.
19
When drawing a free-body diagram, include
only the external forces that influence the
object’s motion. The forces that the object
under consideration exerts upon other objects
must not be included in the free-body diagram.
20
How do you represent forces in
a free-body diagram?
21
Draw a free-body diagram for a paperweight that is
at rest on a desk.
22
Draw a free-body diagram for a paperweight that is
at rest on a desk.
23
23
Construct a free-body diagram of a
coffee mug at rest on a tabletop.
24
24
Construct a free-body diagram of a coffee mug
at rest on a tabletop.
25
25
1. A book is at rest on a
tabletop. A free-body diagram
for this situation looks like
this:
2. A gymnast holding onto a bar, is
suspended motionless in mid-air. The
bar is supported by two ropes that
attach to the ceiling. Diagram the
forces acting on the combination of
gymnast and bar. A free-body diagram
for this situation looks like this:

free-body-diagram in force net solution.pdf

  • 1.
  • 2.
    Learning Objective: To drawa free-body diagram that shows the types of individual forces that act upon an object, their direction, and their relative strength.
  • 3.
    3 Diagrams are vitaltools in physics.
  • 4.
    4 Through them, you canvisualize concepts and mathematical relations, and illustrate the interaction of variables responsible for a certain action or phenomenon.
  • 5.
    5 One of themost essential of these is what we refer to as free-body diagrams, which will prove to be crucial in representing forces and their interactions as we study the different laws of motion.
  • 6.
    6 What is aFree-Body Diagram? A special type of force diagram that represents all the forces acting upon an object. Arrows represent the forces. The force arrows … • … are labeled according to type, • … are pointing in the direction of the force, • … and have a length that is in proportion to their relative strength (longer arrows are stronger forces).
  • 7.
    7 Free-Body Diagrams Every arrowis labeled according to the type of force that it represents. The arrow’s size signifies the force’s magnitude, while the arrow’s direction signifies which way the force is acting.
  • 8.
    8 Free-Body Diagrams Definition Label/Symbol Force force appliedto an object by another object applied force force with which large bodies (such as Earth) pulls an object towards itself gravitational force (also called weight) force exerted upon an object as it moves across a surface friction force
  • 9.
    9 Free-Body Diagrams Definition Label/Symbol Force force exertedupon an object found on a surface normal force force exerted by a cord, string, or rope that is pulled tight tension force
  • 10.
    10 Free-Body Diagrams Definition Label/Symbol Force a frictionalforce opposing the motion of an object that travels in air air resistance force force exerted by a stretched string connected to an object (The subscript e denotes the word “elastic”.) spring force
  • 11.
  • 12.
    12 What is afree-body diagram? A special type of force diagram that represents all the forces acting upon an object.
  • 13.
  • 14.
    14 Steps in ConstructingFree-Body Diagrams 1. Read and ensure that you understood the problem at hand. Create a mental sketch of the scenario.
  • 15.
    15 Steps in ConstructingFree-Body Diagrams 1. Read and ensure that you understood the problem at hand. Create a mental sketch of the scenario. 2. Take one object at a time and draw a free-body diagram for it that illustrates all the external forces, including the unknown ones, that act upon that object. The net force, or the sum total of the forces, does not have to be included in the diagram.
  • 16.
    16 Steps in ConstructingFree-Body Diagrams 3. Draw the arrow that corresponds to each force vector according to its magnitude and direction. Label each accordingly.
  • 17.
    17 Steps in ConstructingFree-Body Diagrams 3. Draw the arrow that corresponds to each force vector according to its magnitude and direction. Label each accordingly. 4. Then, present the x- and y-components of a particular force. (This is mostly applicable for problems related to the first and second laws of motion, and we shall probe this step further once we discuss those topics.)
  • 18.
    18 Steps in ConstructingFree-Body Diagrams 3. Draw the arrow that corresponds to each force vector according to its magnitude and direction. Label each accordingly. 4. Then, present the x- and y-components of a particular force. (This is mostly applicable for problems related to the first and second laws of motion, and we shall probe this step further once we discuss those topics.) 5. Solve for unknown values.
  • 19.
    19 When drawing afree-body diagram, include only the external forces that influence the object’s motion. The forces that the object under consideration exerts upon other objects must not be included in the free-body diagram.
  • 20.
    20 How do yourepresent forces in a free-body diagram?
  • 21.
    21 Draw a free-bodydiagram for a paperweight that is at rest on a desk.
  • 22.
    22 Draw a free-bodydiagram for a paperweight that is at rest on a desk.
  • 23.
    23 23 Construct a free-bodydiagram of a coffee mug at rest on a tabletop.
  • 24.
    24 24 Construct a free-bodydiagram of a coffee mug at rest on a tabletop.
  • 25.
    25 25 1. A bookis at rest on a tabletop. A free-body diagram for this situation looks like this: 2. A gymnast holding onto a bar, is suspended motionless in mid-air. The bar is supported by two ropes that attach to the ceiling. Diagram the forces acting on the combination of gymnast and bar. A free-body diagram for this situation looks like this: