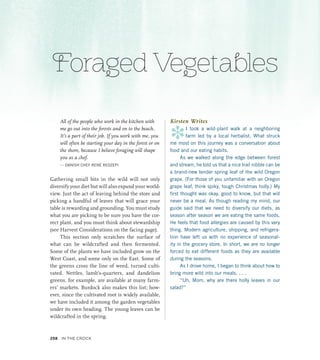
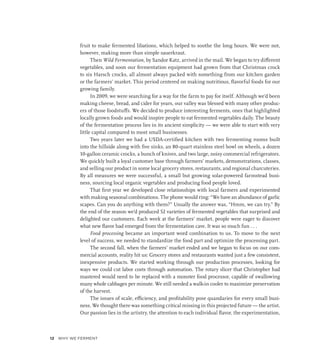
This document provides an introduction and overview of the book Fermented Vegetables by Kirsten K. Shockey and Christopher Shockey. It discusses the authors' journey with fermentation which began in 1999 and evolved into a small commercial fermentation business on their farm in southern Oregon from 2009 to 2011. They realized they were more passionate about the artistry and experimentation of fermentation rather than the commercial and profit-driven aspects, so decided to write this book to share their knowledge and help others answer common questions about fermenting vegetables.
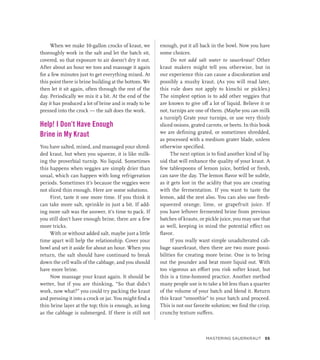
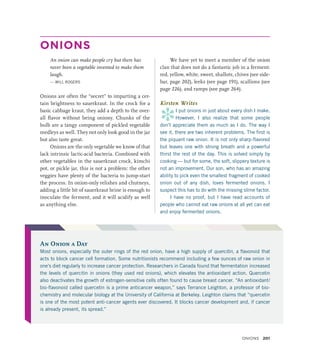
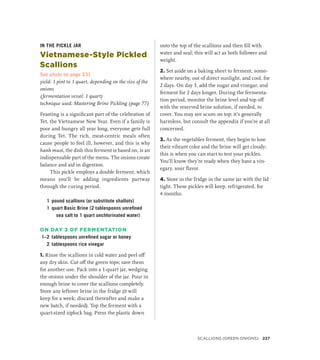
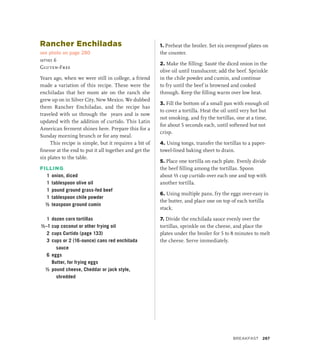
Santificados por el Espíritu - Estudios Espíritu Santo - Timoteo GlasscockEvangélica Bailén
El documento destaca la importancia de la santidad en la vida cristiana, señalando que es una condición indispensable para la comunión con Dios y una característica innegable de la vida cristiana. Explica que la santidad es un imperativo por tres razones: hemos sido comprados por Cristo, debemos ser controlados por el Espíritu, y debemos ser consagrados a Dios de forma incondicional. Finalmente, enfatiza la necesidad de enamorarnos cada vez más de Jesucristo y ser transformados por el Espíritu.
Este documento discute el tema del miedo y cómo puede afectar negativamente la vida de los creyentes. Presenta cuatro temores específicos que debemos conquistar: el miedo al fracaso, al futuro, al pasado y a la comparación. También explica que el miedo es un enemigo que roba el amor, poder y dominio propio, impidiendo vivir libremente. Exhorta a confiar totalmente en Dios y recordar que él tiene el control de todas las cosas para poder enfrentar el miedo.
10 Nivel 3. El Corazón Agradecido de una princesa. Princesa de Dios.Gloria Loupiac
Este documento ofrece lecciones sobre cómo ser una princesa de Dios basada en historias bíblicas y de hadas. Resume las virtudes de princesas como la bondad, humildad, inteligencia y buenos modales. Explica que las princesas de Dios son mujeres fuertes que enfrentan sus responsabilidades, irradian luz y alegría, y mejoran su salud y postura.
The garments of the high priest, as described in Exodus 28:2-43, were elaborate and made of costly materials to signify the holiness of God and purity required of the high priest. The high priest wore a breastplate, ephod, robe, woven tunic, linen turban, and sash. Precious stones were set in the breastplate representing the 12 tribes of Israel. A golden plate with the words "Holiness to the Lord" was worn on the turban. These special garments reinforced that everything about the high priest's role and appearance was to inspire reverence for God.
Este documento resume las diferentes piezas de la armadura espiritual que se menciona en Efesios 6:10-18. Cada parte protege una parte diferente del cuerpo y nos ayuda en la batalla espiritual contra el enemigo. La coraza de justicia protege el corazón y representa la justicia de Cristo. Los pies están protegidos por el evangelio de paz, guiándonos en el camino de Dios. El escudo de la fe nos protege de los ataques de duda e incredulidad. El yelmo de la salvación protege la m
Este documento define al necio como una persona ignorante u obstinada que se aferra a ideas equivocadas y rechaza los consejos de los demás. Un necio carece de sabiduría, piensa que siempre tiene la razón aunque no sea así, y repite sus errores sin aprender de ellos. Sus acciones son dañinas para sí mismo y para los demás.
Undue influence occurs when one person improperly pressures another into entering into a transaction, such as a gift, contract, or guarantee. There are two classes of undue influence claims. Actual undue influence (Class 1) requires proving that improper pressure was exerted. Presumed undue influence (Class 2) involves relationships where influence is presumed, such as parent-child or solicitor-client, unless the other party can prove the transaction was freely entered into with independent advice. The transaction must also manifestly disadvantage the claiming party. Undue influence claims can involve third parties if they had constructive notice of potential influence, such as when a husband acts as an intermediary for his wife guaranteeing his debts.
Este documento presenta varios temas sobre el estudio de la Biblia, incluyendo las razones para estudiarla, aspectos importantes sobre su confiabilidad y autenticidad, y requisitos para un estudio provechoso. También discute por qué muchos no estudian la Biblia y ofrece ayudas para facilitar el estudio bíblico.
The best cookbook on Amazon was going to buy on Amazon with twenty dollars. I give you 5 dollars instead of 20
The best book on Amazon is the same as the book with the best old and modern cook recipes
Get the link here
https://payhip.com/b/bNamazon.comL
This document provides instructions for a science experiment involving balloons and skewers. It begins with questioning why a skewer can be run through an inflated balloon without popping it. It then lists the materials needed and provides step-by-step instructions for coating a skewer tip with petroleum jelly and carefully pushing it through the balloon from one side to the other without popping it. The explanation is that balloons are made of a stretchy polymer material, and the petroleum jelly allows the skewer to glide between polymer molecules instead of puncturing the balloon.
A Little of This, A Little of That: A Wheeling Community Cookbookcorbin19
This community cookbook written by Emma Goldenthal with Corbin T Lanker attempts to paint an image of what foods people love to make and share in Wheeling, West Virginia. Written and printed in 2023, the cookbook is a collection of recipes, stories, photos and illustrations.
This document provides an overview and summary of the first volume of the book Modernist Cuisine: The Art and Science of Cooking. It discusses the origins and evolution of cooking techniques from ancient times to modernist cuisine. It also covers the fundamentals of microbiology, food safety, nutrition, thermodynamics, and the physics of food and water. The first volume lays the scientific foundation for the advanced cooking techniques shown in the subsequent volumes, such as sous vide, spherification, and advanced methods of thickening, gelling, emulsifying, and foaming ingredients.
The document provides options for refreshments, breakfast items, lunches, and other food items that can be served for events. It includes selections for tea and coffee, healthier items, chilled beverages, baked goods, sandwiches, platters, finger foods, curries, canapés, street food, and private dining menus. Refreshment options range from biscuits and pastries to fresh fruit and yogurt. Lunch options include sandwiches, salads, and hot buffets. Private dining menus offer three courses including appetizers, entrees, and desserts.
This document contains recipes and menus for Native American health programs. It includes a 3-week sample menu plan with recipes for meals, snacks, soups and desserts. The menus aim to use whole, unprocessed foods and avoid common food additives. Instructions are provided for food service staff on recommended food supplies, meal preparation, and avoiding certain chemicals in prepared foods.
Guide to Growing School Gardens in Alberta
`
For more information, Please see websites below:
`
Organic Edible Schoolyards & Gardening with Children
http://scribd.com/doc/239851214
`
Double Food Production from your School Garden with Organic Tech
http://scribd.com/doc/239851079
`
Free School Gardening Art Posters
http://scribd.com/doc/239851159`
`
Companion Planting Increases Food Production from School Gardens
http://scribd.com/doc/239851159
`
Healthy Foods Dramatically Improves Student Academic Success
http://scribd.com/doc/239851348
`
City Chickens for your Organic School Garden
http://scribd.com/doc/239850440
`
Simple Square Foot Gardening for Schools - Teacher Guide
http://scribd.com/doc/239851110
This teacher guide provides activities and recipes to teach young children about food and healthy eating. The activities are designed to integrate with early childhood education curriculum and involve children in food identification, preparation, origins, and culture. Sample activities include a fruit and vegetable mystery bag game, imaginary cooking, exploring food origins, and comparing tables from around the world. The guide also includes recipes and instructions for cooking simple, nutritious foods with children in a safe kitchen environment.
This document provides an introduction to the book "Sour Beef & Cheesecake: A Food & Family Memoir" by Grace Kenneth Collins. The introduction explains that the book aims to preserve family recipes from the author's grandmother's cookbook while also starting her own legacy. It shares stories from the author's life in the context of family traditions, experiences, and recipes. The introduction presents the book as both a memoir and a cookbook, combining stories with recipes. It expresses the author's hope that readers will enjoy the food, family, and recipes within.
This document provides recipes for 53 dishes, with each recipe presented in 1-2 paragraphs and including a list of ingredients and instructions. The recipes cover a variety of categories including appetizers, salads, main dishes, breads, desserts and more. The document aims to provide readers with a sampling of prize-winning recipes from various cooking competitions. It begins with a table of contents listing each recipe by title.
This document provides information about the book "Red-Spotted Ox - A Pokot Life" which is an autobiography of a Pokot pastoralist in East Africa named Domonguria. The book was collected, translated and edited by Pat Robbins and published in 2010 by IWGIA. It consists of 396 pages including Domonguria's life story from childhood to adulthood, covering topics like clan systems, cattle raising, encounters with enemies like the Turkana and Karamojong, and changes experienced with colonialism and modernization. Maps, diagrams, photographs and a bibliography are also included.
This document contains information about a reading workbook published by Teacher Created Resources, Inc. It includes a copyright notice, table of contents, and introduction. The workbook is divided into fiction and nonfiction sections covering various topics. It is intended to help students in grade 3 improve their reading comprehension skills on a daily basis through short passages and questions.
Custom Keto Cookbook-Exclusive 60+Recipes FreeAshutosh C
Custom Keto Cookbook-Exclusive 60+Recipes Free
This document is geared towards providing exact and reliable information in regards to the topic and issue covered. The publication is sold with the idea that the publisher is not required to render accounting, officially permitted, or otherwise, qualified services. If advice is necessary, legal or professional, a practiced individual in the profession should be ordered.
Bay Friendly Gardening: From Your Backyard to the BayKardatou54a
The Bay-Friendly Gardening Program was developed to encourage environmentally friendly gardening choices that reduce waste and protect local watersheds. It teaches gardening practices that work with nature, such as composting organic matter on-site rather than sending it to landfills. This helps restore soil health and reduces pollutants from entering the San Francisco Bay through stormwater runoff. The program provides resources to Alameda County residents and aims to improve soil, conserve water resources, and support local wildlife through gardening.
The document discusses the Bay-Friendly Gardening Program, which was developed to encourage environmentally friendly gardening choices that reduce waste and protect local watersheds. The program is run by the Alameda County Waste Management Authority and provides various resources to residents, such as workshops, tours, and training. It aims to educate the public on gardening practices that are sustainable and protect the San Francisco Bay.
The document is the 2012 catalog for Seed Savers Exchange, a non-profit organization dedicated to preserving heirloom and open-pollinated plant varieties. It contains over 600 varieties of seeds for sale, including many heirloom vegetables, flowers, herbs and grains. Proceeds from seed sales help fund Seed Savers Exchange's mission of maintaining a large non-governmental seed bank and facilitating an international seed exchange network to protect agricultural diversity globally. The catalog provides information on the organization's work and encourages readers to visit their site to learn more and get involved in their efforts to conserve heirloom varieties for future generations.
Keto cookbook with 60+ recipes for personal enjoyment. These are easy everyday ingredients recipes that everyone can easily make. May you have fun losing weight. Cheers.
.
This document provides guidance for parents on helping their children learn science. It discusses how everyday experiences can provide opportunities for scientific learning and offers science-related activities parents can do at home with their children from preschool through 5th grade. The activities involve common household materials and are designed to be fun while developing skills. The document also provides information on science resources in the community like zoos, museums, and farms that can support children's science education.
6. “Here, try this,” we’d say as we thrust some new creation at our
sometimes-skeptical children on the other side of the fork.
It became habit for them, just something they did in our house
with two fermentistas on the loose. Now and then they’d
ask, hopefully, if we were ready to move on to become bakers or
chocolatiers. Still, they always opened up and gave us their
honest assessment and support.
Thank you, Jakob, Kelton, Dmitri, and Ariana.
LOVE, MOM POP
12. Why We Ferment
Every artist was first an amateur.
— RALPH WALDO EMERSON
There’s more to fermented vegetables than probiotics, nutrient density, and food pres-
ervation. These three attributes are piquing people’s interest, but to be honest, that’s not
enough. Just because you know something is good for you doesn’t mean you’re going to eat it.
You have to want to eat fermented vegetables, to crave them, and the reason you will is flavor.
You’ll eat fermented vegetables because you want to, not because you should. Availability and
ease of preparation are important, but incorporating fermented foods into your diet is, we
believe, all about taste.
By fermenting, you’ll unlock new, unimagined, complex, deep flavors. You’ll experience
the unique flavor that comes from time and place with each delicious batch.
We also know that no matter how delicious something is, if it’s not easy to prepare at the
end of a busy day, it won’t make it to the dinner table. That’s where fermentation comes in:
You can make delicious, nutrient-dense fermented vegetables whenever you have the time.
Later, when there are no fresh veggies in the crisper drawer, or you don’t have the time to
cook up something quick, you’ll have instant side dishes, salads, or flavorful foods around
which to build a meal. Fermented vegetables are the ultimate convenience food!
We were introduced to the Nourishing Traditions cookbook and the Weston A. Price
Foundation on Christmas Eve in 1999, with an unusual gift from Kirsten’s mother. This
cookbook and the foundation marked the beginning of a growing interest in traditional foods
such as whole raw milk, real butter, and fermented foods. That evening we’d eaten weiss-
wurst and potato salad, a holiday tradition from Kirsten’s Bavarian father. We were seated
around the candlelit tree, passing around simple gifts, when Kirsten’s mother handed us
Sally Fallon’s cookbook and a heavy box. “Be careful; keep it upright,” she said, smiling. We
opened the box to a crock full of bubbling fermenting cabbage. Despite her German heritage,
Kirsten was a bit surprised. The fragrance soon overcame the pine scent of the tree, and the
children’s faces, lit by the candles, exhibited concern.
Little did we know that this was the beginning of our fermentation journey.
Five years later our homestead in southern Oregon was humming along. By then we
were making our own cheeses and yogurts from the milk of our cows and goats. Our fruit
trees produced enough apples, plums, and pears for long nights of canning preserves for our
four children, who seemed to inhale jam. Christopher sometimes squirreled away enough
11
13. fruit to make fermented libations, which helped to soothe the long hours. We were not,
however, making more than simple sauerkraut.
Then Wild Fermentation, by Sandor Katz, arrived in the mail. We began to try different
vegetables, and soon our fermentation equipment had grown from that Christmas crock
to six Harsch crocks, all almost always packed with something from our kitchen garden
or the farmers’ market. This period centered on making nutritious, flavorful foods for our
growing family.
In 2009, we were searching for a way for the farm to pay for itself. Although we’d been
making cheese, bread, and cider for years, our valley was blessed with many other produc-
ers of those foodstuffs. We decided to produce interesting ferments, ones that highlighted
locally grown foods and would inspire people to eat fermented vegetables daily. The beauty
of the fermentation process lies in its ancient simplicity — we were able to start with very
little capital compared to most small businesses.
Two years later we had a USDA-certified kitchen with two fermenting rooms built
into the hillside along with five sinks, an 80-quart stainless steel bowl on wheels, a dozen
10-gallon ceramic crocks, a bunch of knives, and two large, noisy commercial refrigerators.
We quickly built a loyal customer base through farmers’ markets, demonstrations, classes,
and selling our product in some local grocery stores, restaurants, and regional charcuteries.
By all measures we were successful, a small but growing solar-powered farmstead busi-
ness, sourcing local organic vegetables and producing food people loved.
That first year we developed close relationships with local farmers and experimented
with making seasonal combinations. The phone would ring: “We have an abundance of garlic
scapes. Can you do anything with them?” Usually the answer was, “Hmm, we can try.” By
the end of the season we’d produced 52 varieties of fermented vegetables that surprised and
delighted our customers. Each week at the farmers’ market, people were eager to discover
what new flavor had emerged from the fermentation cave. It was so much fun . . .
Food processing became an important word combination to us. To move to the next
level of success, we needed to standardize the food part and optimize the processing part.
The second fall, when the farmers’ market ended and we began to focus on our com-
mercial accounts, reality hit us: Grocery stores and restaurants wanted just a few consistent,
inexpensive products. We started working through our production processes, looking for
ways we could cut labor costs through automation. The rotary slicer that Christopher had
mastered would need to be replaced with a monster food processor, capable of swallowing
many whole cabbages per minute. We still needed a walk-in cooler to maximize preservation
of the harvest.
The issues of scale, efficiency, and profitability pose quandaries for every small busi-
ness. We thought there was something critical missing in this projected future — the artist.
Our passion lies in the artistry, the attention to each individual flavor, the experimentation,
12
WHY WE FERMENT
14. and the discovery of tastes and colors that arise from concoctions that are put in the crock
by either necessity or serendipity. One day we looked at each other and realized we couldn’t
continue down this commercial road.
We had, by this time, learned a lot about fermenting, and also a lot about what people
look for in this artisan category of food. We decided to write a book to help you answer the
three big questions we heard in our classes, at demo tables, and at our farmers’ market stand:
What are the secrets to making a great batch?
Which veggies play well together in the crock, and which just shouldn’t be fermented?
Because probiotic foods are so good for us, how can we enjoy them with every meal?
Fermenting vegetables is simple once you know the tricks. We believe that all of us
should be making our own krauts and pickles and condiments.
About the Book
In part 1, Dipping into the Brine: Fermentation Fundamentals, you’ll learn the scientific
nuts and bolts of fermentation. You’ll read about what’s happening under the brine and
why this salty liquid is essential. There is a discussion on salt, which is really the only
ingredient you’ll need other than vegetables. We’ll share some thoughts on fermentation
as preservation and introduce you to the tools of the trade.
Part 2, Mastering the Basics: Kraut, Condiments, Pickles, and Kimchi, is a thorough
tutorial on the ins and outs of fermenting vegetables. We’ll guide you with words and pic-
tures from the traditional — mastering sauerkraut, brine pickling, and kimchi — to the
more contemporary condiments. This section also provides a troubleshooting guide, one
based on years of answering questions in our fermentation classrooms.
In part 3, In the Crock: Fermenting Vegetables A to Z, you’ll learn how a variety of
vegetables (including foraged and sea vegetables) and a few fruits perform in the crock.
Along with recipes, we’ll share suggestions and tips. This section will present a lot of ideas
to inspire your own creations and let you in on our sometimes-humbling experiences in
the kitchen and fermentation cave.
Part 4, On the Plate, gets us to the really good stuff: the eating. We had fun coming up
with these recipes, sometimes just to hear our kids say, often woefully, “You’re not going
to put a ferment in that, are you?” We aim to rock sauerkraut’s rap as a hot dog food and
introduce new flavor profiles that will delight you and your family.
Throughout the book there are stories and recipes highlighting some of the profes-
sional fermentistas who bring this artisanal food to tables throughout the country.
Whether you’re new to fermented vegetables or a lifelong devotee of the crock, this
book has something for everyone. Let’s get started.
Why We Ferment 13
18. Our society is built upon a hodgepodge of eating habits and cultural traditions,
both lost and found. Everything from processed foods to whole foods and empty
foods is available, and we see our health growing better or worse, depending on our
choices. People have made lifestyle changes and tried diet after diet to find health. The
1970s brought us the back-to-the-land movement, Diet for a Small Planet (by Frances Moore
Lappé), and macrobiotics. More recently, people have tried high-protein, low-carb recipes
with the Atkins and Paleo diets, and fruitarians eat raw fruit only. At the same time, chefs
around the country are taking foods to new places with flavor and textures.
Food celebrities such as Alice Waters of Chez Panisse and the food writer Mark
Bittman have shown what’s possible with simple but seasonal foods cooked to perfection,
and Michael Pollan continues to push us to look squarely at how we grow and consume
our food. The locavore movement and farm-to-table eating aim to address everything from
small-farm economics and food safety and quality to eating seasonal foods produced locally.
In 1999, Sally Fallon’s Nourishing Traditions prescribed eating traditional foods prepared
in time-honored ways. That same year Hawthorne Valley Farm in Columbia County, New
York, likely started one of this generation’s first farmstead sauerkraut cellars. The revival
of lost culinary methods and arts, like fermentation, started to attract a wide audience.
Fermentation became more than just a method for making wine and cheese; it branched
out to vegetables, which are now a legitimate artisanal food, honoring traditional methods
and science to preserve food for flavor and color. This goes beyond keeping food from
spoiling (the original use) and differs significantly from preservation techniques that erode
flavor and nutritive value.
What is this book not about? It’s not about wine and cheese, beer and sourdough, kom-
bucha and chocolate; these are the already well-known and sexy members of the fermented-
food club. It’s also not about pickling with vinegar or using starter cultures and whey.
What you have in front of you is a book about lacto-fermenting modest, humble veg-
etables by the oldest, most straightforward method: with salt (and sometimes water). As
you explore the recipes, you’ll experience tang, zest, effervescence, and pizzazz.
And all you’ll need to unlock the power and flavor of high-quality produce is a few jars
or a crock, a bit of salt, and fresh veggies. This book is your passport to a culinary adven-
ture. Bon voyage!
Dipping into the Brine 17
19.
20. Back to the Future
VEGETABLE FERMENTATION AS PRESERVATION
Fermenting vegetables is a simple, inexpensive
process that was used reliably for a few thousand
years. Then, in the early 1900s, technical inno-
vations promised things the crock just couldn’t
deliver. Canned jars of food remain stable on a
shelf for years. Blanch your veggies, toss into a
bag, and store in the freezer — what could be
easier? No heavy crocks to clean, no time spent
monitoring and skimming off any impurities; it
was all very modern and clean and safe.
Only in more recent years have nutritionists
begun to understand what all that sterilizing and
freezing did to the vitamins and minerals that
make vegetables good for us — not to mention
the flavor. Enter fermentation, or, to be accurate,
reenter fermentation.
Now fermented foods are considered arti-
sanal, a combination of traditional methods and
scientific knowledge used to preserve food for fla-
vor, color, and nutritive value.
When we bring vegetables into the kitchen,
we hope to preserve them long enough to enjoy
them, so we wash them and keep them at the
proper temperature. Despite that, a 2004 study by
the University of Arizona found that 40 percent
of the food grown in the United States goes to
waste, and a large portion of that is what consum-
ers let spoil in their fridge. Every year the aver-
age household sends $600 in food to the landfill
(for some of us that is actually the compost pile or
out to the chickens). So if you couldn’t resist that
beautiful bunch of turnips at the farm stand but
have no idea how to prepare them, think fermen-
tation. Lactic-acid fermentation is an ideal way to
preserve the bounty while retaining nutrients and
deepening the flavor profile.
Sauerkraut belongs in a barrel, not a can.
Our American mania for sterile packaging
has removed the flavor from most of our foods.
Butter is no longer sold out of a wooden tub,
and a whole generation thinks butter tastes
like paper. There was never a perfume like
an old-time grocery store. Now they smell like
drugstores, which don’t even smell like drug-
stores anymore.
— CARY GRANT AS DR. NOAH PRAETORIUS,
IN PEOPLE WILL TALK (1951)
¡,J,!
CHAPTER 1
19
21. Preserving the Harvest
Many batches of fermented vegetables that you
make will be consumed within a few days or
weeks — you won’t be able to help yourself — but
fermentation is also a live, nutrition-enhancing,
long-term preservation method for the bounty
that comes from your vegetable patch, local farm-
ers, and the farmers’ market. If you’re serious
about pickling everything in your garden, con-
sider a ferment refrigerator, which is simply an
old refrigerator you set in an out-of-the-way corner
and fill with your finished ferments. It will allow
you to catch your ferments’ flavors just where you
like them and effectively keep them there.
Two refrigerators might seem lavish, but it’s
cheaper than digging a root cellar. And it’s all rel-
ative: modern Koreans, who traditionally buried
their onggi pots in soil or under straw for preser-
vation, consider their kimchi refrigerator a basic
household appliance.
At our stand at the farmers’ market, custom-
ers told us many a story about barrels of kraut
in their grandparents’ basement. One woman
said that when she was a child in Wisconsin, her
grandmother would give her a bowl and send her
down the stairs, through a dark cellar, to get a
portion of sauerkraut. She remembered remov-
ing the lid of the sauerkraut barrel and then care-
fully folding back a thick mat of mold. She’d fill
the bowl, pat down the remaining kraut, carefully
replace the mold mat, and cover with the lid. This
mold mat sounds awful, right?, but it kept the
kraut anaerobic — that is, alive without oxygen —
and therefore safe to eat (see Going Off the Grid:
Non-Refrigerated Storage, page 97).
Christopher Writes
*It was at our first farmers’ market that the
questions started coming. “So are you guys
sauerkraut makers?” people asked. The question
stumped us. Technically yes, but we also made kim-
chi. Later in the summer we added a line of crack-
ers made from brine. More questions arose when
we began serving assorted brines in shot glasses;
at that point we were makers of sauerkraut, kimchi,
and crackers and bartenders of the brine.
“Traditional food preservationist” seemed like
someone who would work in a museum. I’ve seen
“fermentationist,” but that’s quite a mouthful. A
“zymurgologist”? Zymurgy is the branch of chemis-
try relating to fermentation, and although the word
is super cool, it’s appropriate for the brewing arts.
“Pickler” is the traditional word for the occupation,
but that only confused folks. People assumed this
meant we made cucumber pickles. Which would
mean that for most of the year we were picklers
sans pickles.
One frosty day, after we’d set up for the day’s
market, I headed to Noble Coffee for our morning
brew. As Daniel prepared the drinks, he asked what
I did. I told him we followed the season, combining
the best of the vegetables as they came in from the
fields. I rhapsodized about the difference between
an early crisp beet and one overwintered and ooz-
ing sugars.
“Sounds like a barista to me,” he said, as he
handed me two steaming cups.
“You know what we are?” I asked Kirsten, as I
handed her a cup of coffee.
“Hungry?” she guessed, passing me a break-
fast burrito.
“Fermentistas,” I said proudly.
20 Dipping into the Brine
22. Health and Well-Being
Science is in the nascent stages of understanding
how our physical and mental health is interlocked
with the vitality of the population of bacteria that
live with us. We know fermented vegetables are
a piece of the puzzle not only in keeping probiot-
ics in our diet, and therefore in our gut, but also
in the changes that overcome the vegetables that
make their nutrients more available for our bodies
to absorb.
Many discussions of vegetable fermentation
mention that Captain Cook kept scurvy at bay on
his ships with mandatory servings of sauerkraut;
it worked, as we know now, because fermentation
increases the cabbage’s vitamin C. Now we also
know that fermentation increases other vitamins
and minerals as well. For example, in 2005, a
study published in Food Microbiology found that
when homemade vegetable juices are fermented,
their iron is 16 percent more soluble than in the
raw juice.
Among many other nutrients critical for the
body’s well-being are B12 and folate. Vitamin B12 is
difficult to come by for people on a strict vegetarian
or vegan diet, as it’s present only in animal-based
foods. Fermented vegetables, however, contain
B12; the bacterium Lactobacillus reuteri produces
it during the process. This friendly microorgan-
ism also munches away on the vegetable sugars,
converting the carbohydrates into acid, which is
important for people watching their blood sugar.
There are social benefits attached to this culi-
nary art as well. When you cook with family or
friends you create a bond — from the food prepa-
ration (which can start as early as choosing seeds
to grow) to gathering daily at the table. Food keeps
us connected both tangibly and immeasurably.
Consider fermenting vegetables as a group
activity. Enlist the kids, your significant other,
friends, and guests to chop, slice, or grate; salt;
and massage, pound, or press vegetables into a
crock. No experience is necessary, so even the
youngest member can participate. And for the
I-don’t-like-kraut set, they’re sure to at least taste
the ferment they helped make.
The Perks of Fermenting Vegetables
Fermentation preserves vegetables raw and without heat, so it retains their vitamins, minerals, and
enzymes. But did you know it often enhances them? And the organisms that enable fermentation are
themselves beneficial. Here’s how fermentation helps:
»
» It preserves and enhances B and C vitamins.
»
» It makes nutrients more readily available.
»
» It aids in digestion.
»
» It doesn’t call for chemical preservatives.
»
» It supports the immune system.
Back to the Future 21
23.
24. The Inner Life of
Pickling
THE SCIENCE BEHIND VEGETABLE FERMENTATION
The recipes in this book all use the simple process
of lacto-fermentation to acidify vegetables, not cul-
turing. Yes, these pickled veggies develop flavor
and a healthy population of probiotic goodness —
they have got culture, for sure. However, semanti-
cally speaking, “culturing” implies the adding of
a culture, a starter dose of a desired strain of bac-
teria. This is quite important in cheese making,
especially if you are looking to make a specific
variety. But in pickling, with the simple encour-
agement of salt, everything you need is right there
on the (preferably organic) fresh vegetable.
Within vegetable fermentation there are three
slightly different procedures that will give you
the same end result — a lacto-fermented pickled
vegetable. First there is kraut making (sometimes
called dry salting, which can seem like a misnomer
because it is anything but dry) and its condiment
variations, described in chapters 4 and 5; the second
is brine pickling, in chapter 6; and the third proce-
dure is a melding of the two, which you will learn
about with kimchi in chapter 7. In this chapter,
we’ll explain how these processes work, what is
really going on in your crock, and why it is safe.
Vegetables + Microbes: A Lacto-
Fermentation Starter Kit
Fresh fruits and vegetables are naturally covered
in microorganisms, especially those grown using
organic methods. That is a good thing. These
little guys come from plant surfaces, soil, water,
and air. Some of them are pathogens. It’s not
just bacteria, mind you, that are clinging to our
future meals. Molds and yeasts are there too, in
fact in larger numbers than the friendly lactic-acid
bacteria that we want to encourage in our lacto-
fermented vegetables. All are held in check while
the plant is living. But as soon as it’s harvested, it’s
a race against time as these microorganisms cling
to and grow on any place on the plant that’s cut,
damaged, or bruised. That’s why it’s so important
that the fruits and vegetables are washed well and
kept cold to retard the microorganisms’ growth.
¡,J,!
CHAPTER 2
23
25. When we bring these veggies in from the gar-
den or home from the market, it is our responsi-
bility to preserve the nutrients until we eat them.
Lactic-acid fermentation is a noble way to deal
with nutrient and flavor preservation. Once veg-
etables are preserved this way, you can eat them
as slowly as you like, and here’s why: All those
microorganisms we mentioned clinging to the
plant, good and bad, are just waiting for their turn
to alter the vegetables. When you ferment vegeta-
bles, you are choosing sides; you are electing the
“good guys.” Through a simple process that hasn’t
changed in thousands of years, we allow the lactic-
acid–
forming bacteria to take over permanently.
For krauts, kimchis, and condiments, we will
shred (or micro-thin slice) these vegetables. We do
this to break down the cell structure, which helps
the salt do its job more efficiently. Shredding also
frees up the plants’ sugars, which is what lactic-
acid bacteria (the good guys) feed on. For brine
pickling, we use the vegetables whole or cut in
larger pieces.
How Salt Works
How cool is it that just a little salt can preserve
fresh vegetables with vitamins intact for months,
even years? But don’t let this simple ingredient
cause confusion; it is actually not very compli-
cated. The first purpose of salt is to draw juices
out of the vegetable’s cells, which is how our all-
important brine is created. This brine is crucial
because the lactic-acid bacteria (LAB) are anaer-
obic, meaning they don’t need oxygen. Because
many of their competitors need oxygen, we want
to move this whole operation underwater or, in
this case, under brine.
Salt also acts to enhance the texture of your
preserved vegetables because it hardens the pec-
tin in the cells of the vegetables; this helps retain
crispness.
Another purpose of salt is to increase salinity,
which gives the bacteria we want the upper hand,
as the correct saline environment does not inhibit
the LAB we are encouraging but does inhibit the
forces that decay (or possibly make us sick) — that
is, undesirable bacteria and yeasts. This bacterial
Lactose Intolerance and Lacto-Fermentation
We get this question a lot: “I am lactose intolerant. Can I eat lacto-fermented vegetables?”
The answer is yes. Fermented vegetables contain no lactose or casein. The term lacto-fermented causes
a lot of bewilderment to people trying to navigate food intolerances. To begin with, the words are similar.
Lactose is milk sugar. Lacto refers to the lactic acid that is produced by the action of the lactobacillus bac-
teria. Additional confusion arises because it is the lactobacillus family of bacteria that make milk acidic to
form dairy ferments such as yogurt and cheese.
Many sauerkraut recipes, in other publications or on the Web, further the confusion for fermented veg-
etables because they call for whey (see page 56) as a starter culture, because it contains lactic acid. Since
whey is not needed, no dairy need ever get near a lacto-fermented kraut, kimchi, or pickle.
24 Dipping into the Brine
26. process, which begins with salting, is what pro-
duces enough lactic acid to preserve and enhance
our vegetables.
Remember that sugars are breaking down, or
decomposing as some like to point out, to create
lactic acid. Proteins, carbohydrates, and bacteria
are being created. Without salt this list of vari-
ables has a higher likelihood of causing putrefac-
tion. Salt also inhibits yeasts, which break down
the sugars into alcohol instead of lactic acid. A
mere 0.8 percent salt to vegetable weight will pre-
vent the type of decomposition you don’t want.
Ideally this percentage is kept a little higher;
otherwise you will risk a softer texture. Our stan-
dard is around 1.5 percent, which for a hundred
pounds of shredded cabbage (a mountain heaped
way above the rim of an 80-quart bowl) means a
little more than 2 cups of salt. For comparison, the
salinity of seawater is 3.5 percent.
It is also important to understand that too low
a sodium content doesn’t provide the advantage
for the friendly microorganisms, and you can end
up with a rotting crock; conversely, too much salt
will stop lactic-acid bacteria in their tiny tracks,
inhibiting fermentation. With salting, modera-
tion is the key, and your taste buds are your best
guide (see page 44).
SALT IN BRINE PICKLING
Vegetables for brine pickling are either whole or
cut into larger pieces. These are then immersed
in a prepared salt brine. Unlike shredded or thinly
sliced veggies, these whole vegetables cannot cre-
ate their own brine. The vegetables suspended in
the salt water interact with the brine in the process
of osmosis, which dehydrates the vegetables’ own
cells, such that the water is replaced by salt water;
this begins the lactic-acid fermentation process.
Whole Vegetables in Salt Brine
The Inner Life of Pickling 25
27. So You Want to Ferment without Salt?
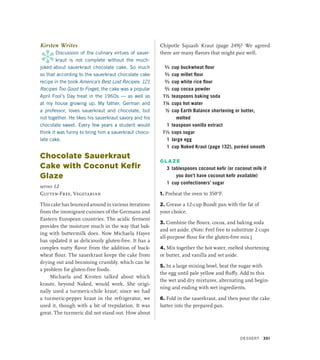
Any serious fermentista will encounter salt-phobic people who try to make salt-free sauerkraut or want
to convince you to do the same. There are certainly a lot of recipes out there on the Web; some require
a blender, some use seaweed or celery seeds in place of salt. With care and luck, fermentation can be
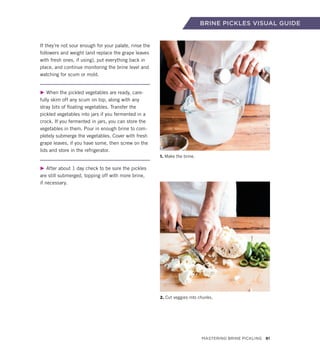
accomplished without the salt, and some people do so successfully. Expect these ferments to be softer and
at times mushy.
But why not use salt in your ferments? Our bodies need salt anyway. Without it we die. A study pub-
lished in the American Journal of Medicine in 2006 reads, “Sodium intake of less than 2300 mg [the daily
recommended allowance] was associated with a 37% increase in cardiovascular disease mortality and a
28% increase of all-cause mortality.” In other words, without the correct balance of salt and water, the
systems in our body stop functioning. As with most things, common sense and balance are key.
28. For brine pickling, brine strength needs to
be more exact and salt content a bit higher than
for krauts. For example, cucumbers in too weak a
salt brine solution will probably have a soft instead
of crunchy texture due to the cucumbers’ own
enzymes or yeasts and molds getting too much of
a foothold. They also will not last as long under cold
storage. Too high a salt percentage (say, over 10 per-
cent) can also prevent proper fermentation. These
cucumbers not only are very salty but will take
much longer to ferment, develop a harder texture,
tend to bloat, and become hollow inside. The sweet
spot for a crunchy, tasty, sour cucumber pickle that
will stand the test of time is salinity around 3 per-
cent — that is, ¾ of cup salt per gallon of pickles.
We’ve come across a lot of salt-averse folks in
our time as fermentistas, and to them and to you
we say: combining good vegetables with good salt
keeps the process simple and safe. We need salt
to survive. This is as good a place as any to get it.
Let’s not forget the simple fact that salt is a flavor
enhancer; fermented vegetables taste so much
better with a little salt. Besides, there are so many
other processed, corporately produced, salt-laden
Packing It In: More Salt Is Not Better
You’ve probably seen recipes or descriptions of fermented or pickled foods that contain the phrase “packed
in salt.” Many recipes suggest layering salt and the vegetable; this inevitably leads to a kraut or pickle that
is way too salty, even inedible. There are two things at play here. One is that our forebears made saltier
krauts, as they had no refrigeration and their health and nutritional needs often depended on the salt in their
preserved foods. These salty preserves were also an important flavoring component of the bland, unsalted
starches that were the bulk of their meals.
The second factor is that fledgling sauerkraut makers often think that more salt will assure safety. It
is a misconception that salt alone preserves. Let’s forget about “packed in salt” and remember that salt
draws out the liquid from what is being preserved. This liquid becomes the brine, and only enough salt is
required to make the brine more hospitable to friendly lactic-acid bacteria that acidify the vegetables. This
acidification is the preservative.
More than once, folks came to our market stand asking if we gave advice. They’d confess they’d made
a batch of kraut on their own that was too salty to eat, and they were still waiting for it to mellow out. In
one case a husband needed us to tell his wife to throw away the salty kraut that had been in a crock in the
basement for three and a half years. It’s always hard to break the news that this kraut isn’t going to get any
more palatable. It does not get less salty as it ferments and ages; if anything, as brine evaporates, the salt
becomes more concentrated.
If you have a too-salty batch in your history, or if you’ve never made sauerkraut, the recipes in this book
will guide you to the proper amounts of salt. Know that the key to success is to add salt gradually and taste
as you go. You’ll read more about this in chapter 4’s Adding Salt section.
The Inner Life of Pickling 27
29. foods that are less worth eating if you’re trying to
reduce salt intake.
Thinking Outside the Crock: Your
Fermenting Environment
The environment for your active ferment (prior to
storage) includes temperature, light, oxygen, pH,
and time. Temperature and light are the external
conditions that affect all the magic going on inside
the crock. Within the crock, we will explore the
significance of oxygen, pH, and that ever-
slippery
fish: time. These elements are not only a part of
the fermentation process, they are the steps in the
recipes you’ll follow later in the book.
TEMPERATURE AND LIGHT
Most recommendations for temperature are to fer-
ment between 55 and 75°F; this range is especially
conducive to L. plantarum and L. brevis, some of
the rock stars of the lactobacillus community.
Keeping the temperature relatively consistent is
important to encourage fermentation. The higher
the temperature, the quicker the acid develops,
resulting in a shorter fermentation time. When
the temperature is too high, everything speeds
up and the organisms don’t have time to develop
properly, which is evident in underdeveloped acid-
ity and off-flavors. Conversely, when the ferment
is too cold in the early stages, the LAB are slug-
gish and can’t reproduce fast enough to develop
the acidity that keeps the rotting organisms out
of the crock.
Ideally it is best to keep your ferment in a dark
place and certainly out of direct sunlight, which
could cause light damage and temperature fluc-
tuations in your crock and thus disrupt the bac-
teria’s work. Dark doesn’t have to be pitch black
and in a cave (though cave fermenting is nice);
the ferment can be in the corner of a counter, out
of direct sunlight. Despite the imperfections of a
counter for fermenting, we still recommend hav-
ing the crock or jar nearby so you can easily keep
an eye on it, especially when you’re first learn-
ing. They say a watched pot doesn’t boil, but an
unwatched crock will bubble over.
EXHALING: CO2, OXYGEN, AND YOUR FERMENT
As we discussed in the salt section earlier, we
need to keep our veggies submerged in brine in
order to create an oxygen-free environment where
the lactobacilli can thrive and the undesirable
bacteria and yeast cannot. Pickles are periodi-
cally topped up with fresh brine, and krauts are
sometimes repeatedly pressed down to keep them
submerged. Additionally, if the brine surface is
not tightly covered, yeasts, molds, and aerobic (air-
requiring) bacteria will form. Most of the time
any mold and bacteria (in the form of scum) can
be skimmed off, leaving a safe and fresh ferment
underneath. But here is the balancing act during
this process: we don’t want to disturb the ferment
too much, as this can also invite yeast spores and
oxygen. At a certain point, the aerobic bacteria
will lower the brine acidity by eating the lactic
acid, and the result will be a spoiled jar or crock.
During fermentation, the most important
task is to show the CO2 out the door, usually
by pressing on the weight (see Followers and
Weights, pages 36–39). When the air bubbles are
pushed out, brine replaces that space, keeping
oxygen from moving in.
A TICKING CROCK: TIME AND YOUR FERMENT
Fermenting takes time, and time is the cooking
in terms of fermentation. It is with time that
28 Dipping into the Brine
30. the chemistry silently changes, melding flavors,
breaking down starches, and enhancing the food’s
digestibility. Think about the bread-making pro-
cess as an instructive analogy to the curing times
of your fermentations. In a bread recipe there is
the fairly concrete baking time — 45 minutes at
350°F — but then there is the rise time, when the
dough must rise in a warm, draft-free place until
it has doubled in size. If you bake bread you know
this amount of time depends on the temperature,
quality of yeast, quality of water, and other factors.
In both cases you are waiting for a live biological
process to work diligently at what it does best —
process sugar. So, instead of until doubled, you will
have until sour as your guide. For example, smaller
vessels at warmer temperatures will mean shorter
fermentation cycles; larger crocks and cooler tem-
peratures will take longer.
We are often asked when optimum pro-
biotic content is achieved. It seems there is not
a standard formula. There is a progression of
diverse bacterial species as they move through
the cycle. Different colonies peak at distinctive
points during fermentation. There are also sea-
sonal conditions and types of vegetables to con-
sider. Ultimately the thing to understand is that
you will get the benefits whenever you choose to
eat your fermented vegetables. If they taste great,
then you will eat them, and that alone will make
them infinitely healthier than anything that the
curing time or process can deliver.
In technical terms, your vegetables are con-
sidered properly fermented when they are below
a pH of 4.6. Remember from science class that
pH is a measure of the acidity and alkalinity of
a solution — in our case, the brine — that is a
number on a scale of 0 to 14. The value of 7 rep-
resents neutrality; the lower numbers indicate
increased acidity, and higher numbers, increased
alkalinity. When the pH is closer to neutral, the
solution is more welcoming to the growth of many
microorganisms, though not always the ones we
want; we want only the acid-loving LAB to find the
brine hospitable, so we are aiming for numbers
below 4.6.
While acidity level can be objectively deter-
mined with a pH test, in our experience the
proper acidity development is clear to the taste
buds (and incidentally, all the ferments that we’ve
double-checked with pH strips were well below
4.6). That said, we want you to be comfortable and
successful, so if it will put you at ease to know
the pH level, consider using pH test strips (see
page 44).
LET’S HEAD TO THE KITCHEN
You may be new to vegetable fermentation. Maybe
you’ve heard rumors of nasty smells and scum.
You know there are bacteria, and haven’t you been
told your whole life bacteria make you sick? Turns
out, science tells us, we are the sum of all of our
good bacteria, and not enough of it in our system
can make us sicker. Fermented vegetables are a
live food and sometimes react in ways you may
not expect. You may encounter unfamiliar odors,
tastes, and textures. Throughout this book we will
present you with information that will give you
the opportunity to understand your experiences
and learn the artistry of vegetable fermentation.
The Inner Life of Pickling 29
31.
32. Crocks and Rocks
THE TOOLS OF THE TRADE
One of the attractive qualities of vegetable fermenta-
tion as a culinary art is its minimalism. Less kitchen
equipment is required than for most culinary pur-
suits — no special pots, pans, or kettles, not even a
stove. To pickle, you need only a bowl, a knife, a cut-
ting board, a jar or crock, some kind of weight, and
a bit of salt. (Okay, you will need some vegetables
too.) You can of course elaborate on this list and
buy the swanky homemade crocks, hand-turned
hardwood tampers, and round glass weights. This
section will help you navigate the tools of the trade,
including salt, the only rock you can eat.
Material Considerations: Preparing,
Curing, and Eating Fermented Foods
You will often hear never touch your sauerkraut with
metal, or some such warning. Why? Fermentation
works as a preservative by acidifying. As vegeta-
bles ferment and become acidic, certain kitchen
implements may chemically react with the devel-
oping acid. This can cause strange flavors, off-
textures, or bad kraut. Metal and plastic are two
common materials in the kitchen that can work
for and against the fermentista.
METALS
Let’s start with preparation. When you are pre-
paring vegetables they are not acidic and there-
fore won’t react with your utensils. At this point
it is nice to have a container big enough to toss,
mix, massage, or pound the ingredients in, since
your initial vegetable volume is often double that
of your final product. Go ahead and use your large
stainless steel bowl.
The next phase of concern is during fermen-
tation. The acidifying process is beginning, so
until your ferment is ready to eat you want to make
sure you use nonreactive materials; these are often
stoneware (the crocks), glassware, wood, hard plas-
tics, silicone, and high-quality stainless steel.
So let’s talk about what not to use. Common
reactive metals to avoid with acidified foods are
aluminum, copper, cast iron, and low-grade stain-
less steel. Because stainless steel is an alloy, the
quality of metals used in its composition can vary.
Much of the stainless cookware available will
react with the salts and acids in fermenting food.
The best type of stainless steel for the fermenting
stage is a high-grade surgical quality.
¡,J,!
CHAPTER 3
31
33. Some housewives are in the habit of using
copper vessels for pickle making because copper
gives a good color to pickles. Never use a copper
kettle because the copper salts which give this
color and which are transferred to the pickles are
poisonous. . . . If proper methods are followed,
the salt and acids in the brine produce the
desired firmness without any additions.
— A 1918 TENNESSEE EXTENSION PUBLICATION
Using pots or implements made of these reac-
tive materials will result in metals, like chrome
and nickel, leaching into your ferment. Don’t use
them during fermentation, for storage, or when
cooking this acidic food. We once cooked a potato
soup using brine broth in our favorite cast iron
soup pot. The soup turned gray-lavender and
tasted like metal; it was inedible.
However, when it’s time to eat your creations,
there’s no need to hunt for wooden forks every
time — once your ferment is done, serving and
eating with stainless steel cutlery is fine.
PLASTICS
Plastics are next in the group of reactive materi-
als. In the simplest terms the more malleable a
plastic, the more volatile it is. For example, soft
flexible plastic wrap exchanges synthetic ions
with food more quickly than a #2 plastic water
jug, and a more rigid plastic bowl is even less reac-
tive. It is the polyvinyl chloride (PVC) typically
found in plastics, especially wrap, that leaches
toxins, including the hormone-disrupting toxin
diethylhexyl adipate (DEHA), into the surface lay-
ers of food. Another ingredient in many plastics
is bisphenol A (BPA), which has received a lot of
press for the damage it can do to our health.
In this book we use plastics sparingly, espe-
cially since it is a nonrenewable resource. In some
cases plastic products can be the simplest choice
for a successful ferment — in some condiment
recipes, we use water-filled ziplock bags as a
weight. Freezer bags don’t contain phthalates or
BPA (they are actually a rigid, not stretchy, plas-
tic) and won’t degrade in acid or salt. Heavy-duty
freezer bags can be carefully washed and reused.
If you want to get away from plastic alto-
gether, with a little ingenuity you can ferment
without it. For the flexibility of plastic you might
try nonreactive silicone for strainers and other
utensils used with acidic krauts and pickles. We
have also used round silicone mats, which have a
long, reusable life, as primary followers directly
on top of the ferment. Silicone is sold in differ-
ent shapes and sizes and you can cut it to fit your
crock if you can’t find the right size. Small glass
or ceramic disks that fit in jars (see the resources,
page 360) can replace plastic in smaller ferments.
Fermentation Vessels
As with any trade, having the right tool for the
job can save a lot of frustration. Outfitting your
kitchen for fermenting vegetables is easy. There
is a lot of bling available, but ultimately all you
need is a vessel — whether it’s a glass jar or one
good crock.
Ceramic vessels have proven themselves over
time for the art of fermenting. They keep your fer-
ment in a cool and dark environment, which is
just what the bacteria need to survive. That said,
you might not want to use your grandparents’ old
stoneware crock that has been holding utensils or
dried flower arrangements, at least without test-
ing it for lead first (many older glazes had lead in
them). You can take your crock to a lab near you
32 Dipping into the Brine
35. Looking into a water-seal crock; water in the rim
creates an airlock when the lid is in place
for a test or do it yourself. Follow the instructions
on a lead paint test kit, available at a hardware
store. Find an area on the outside of the crock,
preferably along the bottom, and scratch the sur-
face to take a sample for testing. Also check your
crock for hairline cracks, as they can be a source
of contamination.
A few years ago new crocks were difficult
to obtain, but now there are crocks available in
many sizes at many hardware, garden, and cook-
ing stores. Unfortunately, not all of them come
with lids or followers, which we will explain in a
moment. For large batches, straight-sided crocks
are your best bet for a low-cost, large vessel that is
not plastic. They are a great medium for excellent
flavor, but they are heavy. Simple furniture dol-
lies work well for moving crocks when they are
crammed full and for keeping the more porous
unglazed crock bottoms off the ground, prevent-
ing moisture collection and the formation of mold
there; this mold shouldn’t affect your ferment but
is no fun to deal with.
One thing to consider when shopping for a
crock is how much upper-body strength you’ll
need to move your crock around. Crocks are
heavy. Our 7.5 L Gärtopf crock weighs 19 pounds
empty; completely full, we are lugging 33 pounds.
WATER-SEAL CROCKS
For the serious fermentista, or the cook who
enjoys the beauty of tools, there are the Cadillacs:
German and Polish water-seal crocks. These ves-
sels have an outer deep rim with a trough that
holds water. When the lid is placed in the trough,
the water creates an airlock. The lid has a small
hole in the rim that allows carbon dioxide to
escape without allowing air into the crock. They
come with heavy followers (see page 36) that nest
into the pot, making the crock almost foolproof.
Compared to a simple straight-sided stoneware
crock they are expensive, but they do eliminate
some of the difficulties around controlling the fer-
mentation environment.
Some management of the trough is required.
The water trough can also take some finagling
when you are removing your fermented goodies,
especially if the water has gotten murky. When
the lid and trough are both clean, it is simpler to
remove what is in the crock without contamina-
tion. Here’s how:
»
» Have a plate ready to slip under the lid as
you lift it to prevent trough water from drip-
ping back into the brine.
34 Dipping into the Brine
36. »
» Clean out the water. The easiest way to do
this is with a turkey baster and a towel to sop
up the rest.
»
» When there is brine to remove, use a ladle
instead of trying to lift the crock to pour it off.
ONGGI POTS
For making kimchi the traditional vessel is called
an onggi pot. The type of soil used to make the
clay, which is worked by hand, leaves small air
pores. This creates a breathable pot, which is one
of the unique characteristics of onggi pottery.
Pores in the clay allow fermentation gases to leave,
taking smell and any bitter taste with them and
ensuring the quality of the fermented food inside.
The one drawback is that it’s difficult to find
a follower for these pots, as the opening is smaller
than the surface area you must cover inside.
Traditionally rocks are used.
Until recently these pots were only available
in Korea, but now potters throughout the United
States are creating fermenting crocks of vari-
ous types. Our favorites come from Adam Field
Pottery. (See the resources, page 360.) If you find
one that speaks to you, it is like having a friend in
the kitchen.
JARS
The advantage of using glass jars, rather than
crocks, is that they are cheap, you can watch what
is happening, and you can make small batches.
You can also try unusual vegetable combinations
without committing to a large amount. For this
purpose we almost always use jars. We also like
to use them when the cucumber plants are giving
just enough for a jar of pickles every day, but not
enough to make a full crock. As a day’s worth of
Traditional Onggi Pots
Crocks and Rocks 35
37. cucumbers matures to pickles, it can get sealed
and stored in the same jar.
Jars require some babysitting to keep the fer-
ment under the brine and the brine in the jar. Jars
are harder to weight sufficiently to keep the CO2
from creating air pockets. The tendency is for
the gas to push the brine up and out of the jar.
In the early stages of an active ferment you will
have to gently press on your weight (often several
times a day) to get the brine back down between
the vegetables. The advantage of a jar is that you
can see whether your ferment needs tending.
(Alternatively, in a well-packed water-seal or onggi-
type crock, this constant pressing is not an issue.)
Because we want to keep our light-shy bacteria out
of direct light, it’s a good idea to cover glass vessels
that are actively fermenting with a clean towel.
Jars can also present a disadvantage in a
large-batch situation. It can be unwieldy and
time-consuming to monitor a bunch of individual
ferments of the same batch; you are dealing with
more variables and more surface area, the latter of
which can cause more loss to spoilage. It is more
practical and makes for a more consistent product
to make one large batch of pickles, kraut, or kim-
chi and then transfer the ferment into smaller jars
for long-term storage in the refrigerator.
FOOD-GRADE BUCKETS
While 5-gallon plastic food-grade buckets are a
popular and inexpensive choice for larger home-
scale batches of kraut or pickles, they are not our
first choice as a fermentation vessel. We can taste
a subtle difference in krauts fermented in stone
or glass versus plastic. We do, however, store and
transport large batches of finished ferments in
plastic
buckets — sealed lids and handles are not
overrated.
Followers and Weights
Because keeping your vegetables submerged in
brine is crucial to success, it is essential to find a
method that works best for you to maintain this
anaerobic environment.
In the recipes, we will refer to primary fol-
lowers, secondary followers, and the weight, which
includes weighted followers.
PRIMARY FOLLOWERS
The primary follower goes right on top of your fer-
ment. It acts as a barrier, keeping any small bits of
vegetable from floating out from under the brine.
This can be an outer cabbage leaf, or for a large
crock a few leaves, to create a blanket. Usually this
cabbage-leaf blanket will keep all the small shreds
submerged under the brine. There are many other
acceptable leaves, which you will learn about in
the recipes, but grape or horseradish leaves also
are large and work well (see also page 79).
A primary follower might also be a bit of plas-
tic wrap, some cheesecloth, or a piece of silicone
mat or food-grade plastic drying screen, like you
would see in a food dehydrator, cut to the size of
your crock. Any of these can be tucked under the
secondary follower to keep the vegetables from
floating up out of the brine.
SECONDARY FOLLOWERS
Unless you have a water-seal crock, you will need
to come up with your own solution for a second-
ary follower. It will need to fit the opening of the
container and nestle over as much of the top of
the ferment as possible. Its purpose is to pro-
vide weight to keep the vegetables submerged.
For most crocks, a plate can work; for a larger
opening, check at thrift stores, where you might
find the flat glass plate from a microwave. The
36 Dipping into the Brine
38. direction the plate is used, right side up or upside
down, depends on the shape of the opening and
whichever direction will assist you most in keep-
ing that ferment tucked in place.
You can make your own follower out of wood
by cutting a round piece from a solid piece of
hardwood such as maple, but not aromatic wood
like pine or cedar as this will affect flavor. You’ll
also need to take into consideration that the wood
will soak up brine and expand in the crock.
Christopher Writes
*One man shared a sad story with us of his
first and only batch of sauerkraut that ended
in a shattered mess. He had inherited a beautiful
crock from his grandmother and needed a follower.
He cut one from wood to fit his crock’s opening,
made the batch of kraut, and tucked it out of the
way. A few days later he found a pool of brine accu-
mulating outside his closet door and a prominent
crack running down his beloved heirloom. The cus-
tom wooden follower had swollen in the brine and
eventually cracked the sides of the crock. “I had to
throw it all out,” he told us, “and I never had the
heart to try it again.”
To make a wood follower, mark the dry wood
about ½ inch smaller than the diameter of the
inside of your crock. Drill a small hole in the cen-
ter of the round to allow brine to flow through and
give you something to hold onto when you want
to remove it. Soak the new follower in water for
a day or two to gauge expansion before you try it
in your crock. We like to keep our wooden follow-
ers conditioned by periodically rubbing them with
an ointment made from a little olive oil in melted
beeswax at about a 50:50 ratio.
Various Followers
Wood, Stone, a Plate
Crocks and Rocks 37
39. The German and Polish water-seal crocks
come with a two-piece ceramic follower that fits
snugly down into the crock. These don’t require
extra weight, as the followers are snug and the
carbon dioxide is able to escape cleanly through
the seal created by the water trough. These are
porous and when not in use need to be stored
upright in a way that allows airflow; otherwise
they can become musty. For most other followers,
you will still need some weight (see below).
WEIGHTS
When fermentation begins, the lactic-acid bacte-
ria (LAB) are producing not only lactic acid but
also an abundance of carbon dioxide. That carbon
dioxide will lift even heavy granite followers. The
more weight you have, the better you are able to
keep the brine in the vegetables and not flowing
over the top of the jar or crock.
Options for weights will vary with the size of
your crock or jar. Remember not to use reactive
materials, like that heavy can of organic tomato
paste you got through a buying club. For a wide-
mouth pint or quart jar you can use a water-filled,
sealed pint jar over the primary follower. In this
situation the jar acts as follower and weight.
Some people like to use a beautiful round
river stone. If you find one, just remember you
don’t want one with high lime content. Sterilize it
by boiling it for 10 minutes.
The larger the crock, the more weight you
will need. We initially thought our heavy hand-
made granite followers would have enough weight
on their own, but as the carbon dioxide was cre-
ated our stone began to lift off the kraut and we
had to place three water-filled gallon jars on top of
the stone followers.
THE ZIPLOCK BAG METHOD
One popular way to make a combination follower
and weight is the ziplock bag method. Filled with
liquid and zipped tight, the plastic bag seals like
the primary follower and keeps everything tidy
and weighted down. This all-in-one solution
works extremely well for jars and other small ves-
sels and is our favorite method for our concen-
trates, pastes, chutneys, or any ferment with very
little brine. That said, if you like this method, you
can use it on large ferments, too. We have seen it
used on 55-gallon barrels with much larger bags.
It’s best to use the heavier-gauge freezer bags.
The quart size works well as a weighted follower
for half-pint, pint, and quart jars. A gallon jar
requires a gallon-size bag. Half-gallon jars can
use either size, but if you have enough room, the
extra weight the gallon bag provides is helpful.
For larger crocks, use a 2-gallon or larger bag. To
employ, open the bag and place it in the jar on
top of the vegetables, pressing it onto the surface
and wedging it around the edges. To add weight,
fill the bag with water until there are no more air
pockets; then seal the bag. You can also fill the
bag with brine so that if the bag leaks it won’t
contaminate your ferment as fresh water will; if
you are concerned about leaks, you can fill the
bag over the sink first to test. We have only had a
leak once or twice. If you do experience a leak, the
ferment may not be ruined; only the flavor and
texture will be affected.
Alex Hozven of Berkeley’s Cultured Pickle
Shop shared a technique that provides the weight
needed but ensures that liquid will not acciden-
tally leak into the ferment: rather than water or
brine, she uses clean pebbles in the bag.
As interest in the fermentation arts grows, so
does creativity around it. There are artists making
38 Dipping into the Brine
40. handmade weighted followers for small jars, and
small glass fermenting weights are also abun-
dantly available (see the resources, page 360). If
you are an avid fermentista, these reusable follow-
ers are worth the investment.
Coverings
A covering is something that goes over the
whole followed-and-weighted affair. It lets the
air escape while keeping out dust, bugs, or other
contaminants while you’re actively fermenting.
Cheesecloth, muslin, a kitchen towel, or another
clean cloth, draped over the top of the crock, is
a simple solution. Sometimes, when using a jar,
you can use the lid as your covering, placed on
top but not tightened. We have seen lids made
from wood, which are beautiful, but the downside
is that they cannot cover a weight that might be
sticking above the rim of the crock. Our solution:
homemade cloth shower caps!
Christopher Writes
*My mother offered a dozen times to help in
any way she could with our farmstead kraut
business. We hadn’t come up with anything for
a retired high school art teacher to do. Mom had
sewn for years. So one day when we were trying to
figure out how to make giant shower caps, Kirsten
came up with the idea of asking my mom to sew
these bonnets for us. Mom was thrilled to help us
out. We got cute and functional caps made from
vintage patterned material. They were so charming
that when we commissioned smaller ones for the
1-gallon crocks for one of our classes, we had a bit
of a tussle amongst the students for their favorite
patterned caps. Some fabric, elastic, and a needle
and thread are all you need.
Airlocks
Airlock systems are gaining popularity; as a
friend pointed out, “I find they allow me to neglect
my ferments.” These airlocks affix to the lid of a
jar, keep any new air out of the fermentation
environment, and give the CO2 an opportunity to
escape, often without spilling the brine. Without
the airlock, you must leave your lids loose to let
CO2 escape, which means keeping a closer eye on
oxygen contamination and brine loss. An airlock
certainly can make the job of babysitting your
jars simpler. It can also improve the flavor quality
of the ferment because introduction of “outside
influences” are kept in check.
Well then, you ask, why wouldn’t we just
always use an airlock? Because fermentation is
so simple that you truly don’t need one, and we
want to make sure everyone understands how the
process works. Plus, some of us just don’t want to
purchase, clean, or find room in the drawer for
one more gadget.
There are many commercially available
jar lids with built-in airlocks that are easy to
use, though a little pricier (see the resources,
page 360). One brand, Perfect Pickler, fits quart-
sized mason jar lids. Another jar system, called
Pickl-It, uses bail-style glass jars outfitted with an
airlock. We experienced corrosion of the bail wire,
but the wire does not come in contact with the fer-
ment, so it will not affect the food.
When filling a jar with an airlock, you will
still need to make sure you have not over- or under-
filled the jar. Everything must be snugly pressed
into the jar with a follower to help keep things
in place.
Crocks and Rocks 39
42. Tampers
Tampers, also called pounders, are often turned
blocks of wood that are used to press the ferment
into the vessel. Having something to help com-
pact your ferment is very helpful, as it can be dif-
ficult to maneuver your hand in a small jar and
can turn into a small workout in a larger crock
(see sidebar). In some cases this tool can also be
used to bruise the shredded and salted vegetables
to further release brine. This is a handy tool; how-
ever, as in most things, a little ingenuity and a
look through your utensils can produce a suitable
tamper. For example, the plunger from a Vitamix
blender will work, as will a solid straight-sided
(French or Asian-style) rolling pin.
Kirsten Writes
*Tamping is always my job. Let me tell you,
pressing kraut into a 10-gallon crock is quite
a workout. And note: I said pressing, not pounding.
Pressing is using most of your weight and strength
to push on the kraut to remove air pockets and bring
the brine to the surface. I like to use my fist, which
is pretty demanding. Pressing kraut in a small jar
can be equally as demanding, but on your fingers
instead of your fists, as most people’s hands don’t
fit inside the jar.
Our dear friend Jerry, a retired engineer and
avid whitewater river guide, made our first tamper
from a wooden canoe paddle by replacing the wide
part of the paddle with a beautiful rounded wooden
pounder. Two tools in one! He now sells his tam-
pers and pounders in a variety of sizes (see the
resources, page 360). You can also sometimes find
pounders in antique stores or from local or online
woodworker-fermentistas.
Slicing, Shredding, Chopping
Much of the success of a good batch of kraut is
its finished texture, which is related to how you
prep your cabbage. We had never given texture
much thought when we bought a hand-cranked
rotary slicer; we bought it to avoid hurting our-
selves shredding case after case of cabbage with
a 14½-inch blade of sharpened steel, a knife just
short of a machete. With some of our first earn-
ings we set out to find something safer, and we
discovered a hand-cranked rotary slicer called the
Nemco Easy Slicer.
Crocks and Rocks 41
43. The Nemco was perfect: versatile, affordable,
accommodated most vegetables, and came with
a number of slicing and shredding plates. It was
made in the USA, quiet to operate, and definitely
fit our green, off-the-grid technology.
When the cabbage quarters lined up just
right in the hopper, the slice was beautiful, but we
were left with all the extra bits that didn’t quite go
through, so the total effect was not uniform. We
called the texture “farmhouse,” indicating its rus-
tic handmade character. Our customers told us
many times that they especially liked this texture.
All of this is to say that the people who enjoy
your crock’s bounty will notice and appreci-
ate the consistency of your kraut. So when you
think about slicing your vegetables, consider the
texture you like. A thin slice is easy to brine but
may produce a soft ferment. A large, chunky chop
provides a hearty finish but is difficult to bring
to brine. Find the in-between that works for you.
Meanwhile, let’s look at some of the other tools
you’ll need.
KNIVES
A few good-quality sharp knives are all you need.
The traditional chef’s knife comes in a few sizes.
The larger 10- or 12-inch sizes are nice for cut-
ting through cabbages and thick-skinned squash.
A smaller chef’s knife is good to have for general
chopping, slicing, dicing, and mincing. We also
always keep a good paring knife alongside the
cutting board for cutting out blemishes or other
small tasks.
SLAW BOARDS
Every fermentista gets to a point when the ques-
tion of slaw boards comes up. This happens when
your batch sizes have moved beyond a knife and
a cutting board. When we started making sauer-
kraut, everyone with an old slaw board they had
picked up at a yard sale “donated” it to us. They
are easy to find in antique stores, often without
the sliding box that holds the cabbage while you
move it across the series of blades. They look good
hanging on the wall but can be a danger to the
fingertips when in use.
You can find beautiful new slaw boards in
kitchen stores and online. These boards are the
same as the traditional design, just shiny, com-
plete, and sharp. Unless you find one with a hand
guard you may want to pick up a pair of sturdy
slash-resistant gloves while you are shopping.
42 Dipping into the Brine
44. HAND GRATERS AND PEELERS
Hand graters and slicers come in every shape and
size. We use ours for grating vegetables. A micro-
plane grater/zester is wonderful for garlic cloves,
citrus zest, or ginger and turmeric root.
Peelers are good for making ribbons of hard
vegetables, such as carrots, daikons, beets, or any
other root. We use these ribbons to add whimsical
strips of carrot color to a kraut or to mix up the
texture of a kraut or condiment. Let your imagina-
tion guide you.
MANDOLINES
Mandolines allow the fermentista to experiment
with vegetable texture and to create unique fer-
ments. We have come to love the versatility of
the mandoline with its many attachments, espe-
cially for the demands of our many condiments
(relishes, chutneys, and salsas) that require, for
example, micro-thin slices and tiny dices (see
Mastering Condiments, page 65).
Mandoline slicers, with their shiny, sharp
series of blades, can be intimidating, but most
come with a hand guard that when used prop-
erly makes them safer than a knife. If you have a
mandoline without a hand guard, again we sug-
gest you seek out the sturdy slash-resistant gloves
available in kitchen stores.
FOOD PROCESSORS
Food processors are convenient for various
aspects of grating and slicing certain vegetables.
The grating attachment is perfect for harder root
vegetables like beets, carrots, and celeriac.
We find it doesn’t save any time to slice cab-
bage with the food processor, as it’s a battle just
to get the cabbage small enough to fit down the
hopper and through the slicing blade, at which
point you might as well have sliced it with a knife.
The slicing disc is useful, however, for thinly slic-
ing vegetables and offering texture options (like a
mandoline).
The chopping blade is useful for chopping
herbs and making pastes. For the kimchi sea-
soning paste, for example, we like to mince the
garlic and ginger with the pepper flakes in a food
processor.
Crocks and Rocks 43
45. Other Equipment
Here are a few other gadgets you may want in your
fermentation tool kit.
DEHYDRATORS
Dehydration opens up a whole range of ingredi-
ents that otherwise would spoil a ferment. For
example, fruit, in general, has too much sugar
to ferment well; however, dried cranberries,
dried pears, or raisins are delicious in many fer-
ments. Tomatoes or mushrooms will taste off
if they’re fermented fresh, but the concentrated
dehydrated flavor of these items is delicious in
a ferment. Many fresh fruits and vegetables can
be purchased already dehydrated, but what about
fermented veggies? You might enjoy making your
own probiotic-rich seasonings by dehydrating
already fermented veggies either to sprinkle on a
salad or to flavor a meal (see Seasonings, page 75).
KITCHEN SCALES
Using scales to measure ingredients has become
much more common in the United States, yet
it is still not a widespread trend, a conundrum
which Farhad Manjoo aptly describes in a 2011
New York Times article: “This creates a chicken-
and-egg problem for the kitchen scale. Cooks
don’t own scales because recipes don’t call for
one, and recipes don’t call for one because cooks
don’t own one.”
We used a scale for measuring ingredients in
our large commercial batches, but we want these
recipes to be accessible to everyone. So for larger
quantities of vegetables, we give measurements
by weight because that is often how they are pur-
chased, but for smaller quantities of herbs and
salt, we stick to standard volume measurements.
pH TEST STRIPS
Although we don’t use them, if you are new to fer-
mentation or are extra cautious, you can make sure
kraut is acidic enough by checking the pH level.
A simple way to do this is with pH litmus strips.
They are sold online and in brewing supply stores
as dip sticks in a pack or in a small tape-
dispenser-
like roll. These testers come in all different ranges;
make sure to find the ones that measure with some
degree of accuracy in the acidic range (below 5).
The full-range types aren’t always specific enough.
The strips are simple to use: just dip the end in
your kraut and match the color of your strip to the
color chart on the box. These are inexpensive com-
pared to a pH meter, which is a very complicated
and unnecessary tool for home fermenting (for
more about pH, see A Ticking Crock on page 28).
Salt: Shaking Out the Differences
With just salt (and not very much of it) you can
preserve fresh vegetables and their nutrients for
months, even years. Our ancestors thought this
was pretty great, so much so that armies marched
across ancient landscapes just to be paid in salt.
(Yep, salt is where our word salary comes from.)
In this section you’ll find out which salt to put in
your toolbox for the job of brining and about some
of the many varieties available for the task.
ISN’T ALL SALT THE SAME?
Not too long ago, kosher pickling salt and sea salt
in the bulk bin of a health food store were the only
salt choices. Now we can taste our way around our
planet with the salts of the earth and sea. Salts of
all colors and flavors are available in even the most
common of grocery stores. We can choose red or
black, finishing, milling or cooking salts, in small
crystals or large blocks.
44 Dipping into the Brine
47. With these amazing varieties, there is no rea-
son to settle for kosher pickling salt or other highly
refined salts, which contain additives that are not
helpfultoyourferment.Theserefinedsaltsaresalty
in a way that assaults your taste buds. When people
come to us with tales of too-salty kraut, the first
question we ask is, what kind of salt did you use?
The answer is almost always pickling salt. Many
salts contain a different ratio of sodium chloride
to minerals, which changes the flavor drastically.
In our classes we often begin by passing around
different salts to taste. People are often surprised
at how sweet they can be. All salts are not created
equal. Have fun discovering salts. Find a good-
quality mineral-rich salt that suits your palate.
The subject of minerals is important in this
time of depleted soils. The foods we have are no
longer as rich in essential elements as they were
previously, and it can be challenging to nourish
ourselves properly. We even see it in our farm
animals — keeping a small herd of dairy goats
healthy became all about getting enough miner-
als into their systems. It stands to reason that we
humans, eating from the same soil, should make
sure our diets are mineral-rich. Mineral-rich salt
added to nutrient-dense food is a good solution.
Because all salts are not the same, density,
and therefore weight, will vary according to min-
eral content and coarseness. That is partly why the
amount of salt given in these recipes is not exact.
We have made the same recipe, changing only
the salt variety, and had very different results —
another good reason to taste your ferments when
salting.
WHICH SALT SHOULD I USE?
We like to incorporate mineral-rich salts into our
ferments and our diet and try to stay away from
salts with unnecessary additives. Here are some
of the salts we like to use and those we don’t.
Mineral-Rich Salts of the Land. Redmond Real Salt,
rock salt mined in central Utah, and Himalayan
Crystal Salt, mined in and around Pakistan, are
both salts from remnants of ancient seabeds.
These deposits were subjected to considerable
heat and pressure to form densely compacted
crystals that contain many beneficial trace miner-
als. These salts of the earth have a very low mois-
ture content. Both of these have a beautiful pink
color and are finely ground, which works well for
krauts. We used Redmond salt in our business as
it was more affordable and “local” compared to salt
from Europe or Pakistan. We also delighted in the
subtle sweetness that it gave our krauts. Rock salt
will make pickling brine that is a bit gritty, but
this grit will sink to the bottom of the crock and
will not affect the quality of the vegetable.
Mineral-Rich Salts of the Sea. The most common
artisan sea salts are sel gris, which means gray salt
in French, and fleur de sel, literally flower of salt.
These are commonly known as Celtic sea salt.
They are harvested by evaporating seawater in
large pans, leaving the salt behind. Also left behind
in this unprocessed sea salt are microscopic bits
of plankton, minerals, and micronutrients that are
made more available to our body through fermen-
tation. These salts have a much higher moisture
content. They are quite sweet and wonderful to fer-
ment with. Often, however, these salts are coarse,
which means they are slower to break down as you
work them into the kraut and build the brine. This
can make your job of getting the vegetable to release
the brine more difficult. This is simply solved by
first giving the coarse salt a light crushing.
46 Dipping into the Brine
48. Iodized Salt. There is some confusion around how
iodized salt affects fermentation. It is said that the
antimicrobial properties of iodine inhibit the very
bacteria we are seeking to encourage. Technically
it is possible that industrialized refined salt with
added iodine could inhibit fermentation and cause
a discolored product. A refined salt has had the
minerals leached out, and the amount of iodine
added can be up to 300 percent more than the
amounts occurring naturally in unrefined salt.
Even the unrefined solar-evaporated sea salts lose
a lot of their native iodine through long periods of
exposure to the sun. We are not concerned with
the trace amounts of iodine in unrefined salts.
Kosher Pickling Salt. We believe most recipes
call for kosher pickling salt simply because it has
become convention and the label on the box tells
us it is for pickling. These flaked crystals have
more surface area and are intended to draw the
moisture more efficiently. There is also the notion
that kosher = pure and therefore there are no addi-
tives. True, no iodine has been added. True, it is
99.9 percent refined sodium chloride. So is it pure?
The key word in the last sentence is refined. The salt
begins in a salt deposit in the earth or is dehydrated
out of the seawater. A brine is made by pumping
water into the raw salt. The resulting salt water is
treated with carbon dioxide and sodium hydroxide
to separate out the undesirable solids like calcium.
This refined liquid is boiled off at high heat in open
pans until flaky salt crystals form. Some brands of
kosher salts then add sodium ferrocyanide and
other chemicals as “anti-caking agents.” This does
not sound pure to us.
Crocks and Rocks 47
51. Eat some foods that have been predigested by
bacteria or fungi.
— MICHAEL POLLAN, FOOD RULES: AN EATER’S MANUAL
When we began selling sauerkraut at the market, people sought us out, and it wasn’t
always to buy kraut. Sometimes they just wanted to taste our samples, chat, or learn.
We were happy to oblige, as we encourage people to take an active role in their food. Our
classes were born from this experience, and so was this book.
In this section, you’ll encounter the soul of fermentation and the core of what we share
with customers and students. Mastering the techniques will ensure success whether you
want just plain sauerkraut or to create recipes.
You’ll also find the master processes, illustrated step-by-step with photos, for each
type of ferment: kraut, condiments, brine pickles, and kimchi. (Throughout part 3, we’ll
refer you to these chapters for details and guidance, although once you’ve made the basic
recipes a few times, you won’t need much help.) You’ll also find storage directions, a
troubleshooting section, and an appendix on page 356 to visually guide you through this
thing called scum!
Before You Get Started
Before beginning a fermentation project, wash your hands well with regular soap and
warm water; avoid using antibacterial soaps, as these could inhibit the fermentation pro-
cess (especially once you have both hands elbow-deep in cabbage). Nor do you want to clean
your vegetables with soaps, vegetable washes, or antimicrobial rinses, as these can wash off
the good bacteria that fermentation requires.
And remember, we are not canning here, so there is no need to sterilize your vessels or
tools. Your equipment should be cleaned with warm soapy water, though not with antibac-
terial or other products that will kill our friends — the lactobacilli. Many people do not use
anything but warm water to rinse out their stoneware crocks, believing that this promotes
the most amiable environment — perhaps even aiding in the microbial process.
50 Mastering the Basics
52. The Fermentista’s Mantra: The Path to Success
We give to our students a mantra that helps them with their early batches:
Submerge in brine and all will be fine.
This simple phrase is all you need to remember to keep your ferments safe to eat. We sub-
merge in brine because good bacteria don’t need oxygen. Many of the bad guys do, however,
so we keep veggies well under the brine.
It’s Just a Crock: Your Safety Checklist
Fermenting is a simple process. With some minor variations, all you need is a jar, some
salt, and veggies. Things can go awry (see the Scum Gallery, page 358, for examples), but
if you follow the directions, you’ll end up with fermented vegetables (and some fruits) that
are safe and delicious.
Along with the mantra, keep this checklist in mind.
»
» Clean all work surfaces, tools,
and your hands with warm
soapy water.
»
» Rinse vegetables in cool water
without soap.
»
» Keep everything below
the brine.
»
» During fermentation, put the jar
or crock where the temperature
is a relatively constant 55 to 75°F.
»
» Store cured ferments in the
refrigerator.
»
» Don’t eat if it smells rotten or
looks slimy.
j j
Mastering the Basics 51
53.
54. Mastering
Sauerkraut
In this chapter you’ll learn everything you need to
know about making sauerkraut, and in the next,
its variation, condiments. We’ll walk you through
the process, showing you the steps in photo-
graphic detail, to set you on the path to becoming
a fermentation (c)rock star. When you understand
how the ingredients work, you can make any vari-
ations that strike your fancy.
Kraut making is wonderful for people who
don’t like to measure, who use formal recipes
as a jumping-off point. That said, our recipes do
include measurements, but if you have a bit more
cabbage than the recipe calls for, toss it in; the
ferment won’t suffer.
The ingredients are cabbage and salt. As
a matter of fact, one of us — we won’t name
names — would jump feet-first into the cabbage
and make a barrel of kraut without knowing
any more than that. We want you to make a life-
changing first batch, however, so read on before
you tackle any of the kraut recipes.
We’ll start with the cabbage, then delve
into salting, brining, and curing your budding
ferment.
Cabbage: Your Raw Material
Our essential vegetable, the cabbage, comes in a
variety of sizes. It ranges from a tiny, dense head
bred for single-person households to the size of a
soccer ball.
For our purposes, one cabbage assumes a
2-pound, tightly packed head. If the heads you
have are loose, adjust with some extra leaves. If
the heads are exceptionally large and heavy, use
one and some extra leaves in a recipe that calls
for two.
Then there’s the giant, homegrown cabbage
that’s about to set seed and is loosening for that
reason. The head becomes slightly cone-shaped
and will eventually open, when the core devel-
ops into a flower shoot. At the cone-head stage,
you can still make kraut. If it opens too much,
though, the leaves are drier, tougher, and greener,
and the flavor is different. At that point, it’s just
not kraut-worthy.
¡,J,!
CHAPTER 4
53
55. SELECTING THE CABBAGE
Through the miracle of cold storage and refrig-
erated shipping, you can always find cabbages.
They’re a staple. Unglamorous. Peasant food. But
they’re also quite amazing in their variety: there
are summer cabbages, fall cabbages, and win-
ter cabbages. Cabbages are a hardy cool-season
crop. In northern climates the season begins as
the spring-planted cabbages ripen in June and
July. This season can last through January or
February, but by April cabbages are being shipped
from southern farmlands. This is something to
be aware of when you want to make a big batch
of kraut and are looking for the freshest cabbage
possible. Out-of-season cabbages are likely more
expensive, and they may be dry from long hauling
and storage times.
So what do you look for? You want firm heads
with crisp, shiny leaves. (They look dull as they
lose vitality.) Check for damage on the outer leaves.
If a head is cracked or bruised, chances are there’s
interior damage. Bypass pre-cut, plastic-wrapped
cabbages; they’re already losing nutrients.
If you’re harvesting from the garden, cut a
head right off the root but let some outer leaves
remain. It’ll sprout baby cabbages from the sides
of the root core.
Adding Salt
After coring and shredding the cabbage, it’s time
to add salt. Don’t let this cause you anxiety. While
encouraging bacteria seems like a project for the
science lab, it is an organic process that has a
very tolerant range of what is acceptable. Just as
in cooking, there is a degree of flexibility in the
amount of salt that tastes right in a dish.
Though these recipes all contain a recom-
mended amount, it is best to begin with half that
amount. Taste. You want to taste the salt, but not
be overwhelmed by it. Slowly build up to the rec-
ommended amount, but don’t be afraid to stop
if your mixture is beginning to taste too salty. If
you find it too salty, add more cabbage. If it’s tasty
fresh, it will be delicious fermented.
FERMENTISTA’S TIP
Taste before You Pack!
Please, please, please taste your kraut while
you are making it. It is the simplest way to
ensure success. Make sure you can taste the
salt, but it should not be “briny,” “salty,” or
in any way unpalatable. Remember: If it is
good fresh, it will be excellent fermented.
If it’s a regular or small batch, you can add
the salt after all the cabbage and any accompany-
ing veggies are shredded. If you’re doing a very
large batch, sprinkle in the salt as you shred and
transfer the cabbage to a bowl. This will begin to
break down the cell walls and release the juices
even before mixing and will help ensure that the
salt is spread throughout the batch.
Once the salt is added you’ll massage it in
with your fingers. Be sure you have washed your
hands well in warm soapy water (remember, don’t
use antibacterial soap, as it can interfere with the
fermentation process). Don’t be afraid to use your
fingers. The process of massaging cabbage is
similar to kneading bread dough. Pick some up
in your hands and squeeze it. Think deep-tissue
Swedish massage, not a gentle back rub. Repeat
this process, working through the entire batch.
Almost instantly, the cabbage will start glisten-
ing, looking wet and limp. There will be a puddle
of liquid pooling at the bottom of the bowl. For a
large batch, massaging is more of a workout.
FERMENTISTA’S TIP
54 Mastering the Basics
56. When we make 10-gallon crocks of kraut, we
thoroughly work in the salt and let the batch sit,
covered, so that exposure to air doesn’t dry it out.
After about an hour we toss and massage it again
for a few minutes just to get everything mixed. At
this point there is brine building at the bottom. We
then let it sit again, often through the rest of the
day. Periodically we mix it a bit. At the end of the
day it has produced a lot of brine and is ready to be
pressed into the crock — the salt does the work.
Help! I Don’t Have Enough
Brine in My Kraut
You have salted, mixed, and massaged your shred-
ded kraut, but when you squeeze, it is like milk-
ing the proverbial turnip. No liquid. Sometimes
this happens when veggies are simply drier than
usual, which can happen with long refrigeration
periods. Sometimes it’s because the veggies were
not sliced thin enough. Here are some solutions.
First, taste it one more time. If you think it
can take more salt, sprinkle in just a bit. If add-
ing more salt was the answer, it’s time to pack. If
you still don’t have enough brine, there are a few
more tricks.
With or without added salt, maybe just a little
time apart will help the relationship. Cover your
bowl and set it aside for about an hour. When you
return, the salt should have continued to break
down the cell walls of the cabbage, and you should
have more brine.
Now massage your kraut again. It should be
wetter, but if you are thinking, “So that didn’t
work, now what?” you could try packing the kraut
and pressing it into a crock or jar. You might find a
thin brine layer at the top; thin is enough, as long
as the cabbage is submerged. If there is still not
enough, put it all back in the bowl. Now you have
some choices.
Do not add salt water to sauerkraut! Other
kraut makers might tell you otherwise, but in
our experience this can cause a discoloration and
possibly a mushy kraut. (As you will read later,
this rule does not apply to kimchi or pickles.)
The simplest option is to add other veggies that
are known to give off a lot of liquid. Believe it or
not, turnips are one of them. (Maybe you can milk
a turnip!) Grate your turnips, or use very thinly
sliced onions, grated carrots, or beets. In this book
we are defining grated, or sometimes shredded,
as processed with a medium grater blade, unless
otherwise specified.
The next option is to find another kind of liq-
uid that will enhance the quality of your kraut. A
few tablespoons of lemon juice, bottled or fresh,
can save the day. The lemon flavor will be subtle,
as it gets lost in the acidity that you are creating
with the fermentation. If you want to taste the
lemon, add the zest also. You can also use fresh-
squeezed orange, lime, or grapefruit juice. If
you have leftover fermented brine from previous
batches of krauts, or pickle juice, you may use that
as well, keeping in mind the potential effect on
flavor.
If you really want simple unadulterated cab-
bage sauerkraut, then there are two more possi-
bilities for creating more brine. One is to bring
out the pounder and beat more liquid out. With
too vigorous an effort you risk softer kraut, but
this is a time-honored practice. Another method
many people use is to take a bit less than a quarter
of the volume of your batch and blend it. Return
this kraut “smoothie” to your batch and proceed.
This is not our favorite solution; we find the crisp,
crunchy texture suffers.
Mastering Sauerkraut 55
57. No Whey?
You might be wondering about whey. A lot of sauer
kraut recipes call for whey to inoculate the vegeta-
bles. This will help add to the brine volume.
However, good-quality raw whey can be difficult
to find and we generally don’t recommend it anyway.
It is an unnecessary extra step. Remember, vege-
tables already have the necessary bacteria for fer-
mentation. To use an inoculant such as whey might
in the beginning speed up the process by which the
lactobacilli overwhelm the undesirable bacteria, but
it is by no means necessary. The process will con-
tinue through the same progression of the different
members of the lactic-acid bacteria family without
adding whey. We also avoid using whey because our
priority is flavor, and sometimes whey can leave a
slightly “cheesy” or “sour milk” flavor.
Packing the Crock
Don’t be concerned if the vast contents of your
bowl look like they will never fit into your crock or
jar. Start by placing a small amount in the bottom
of your crock, about an inch or so. Compress this
with your fist, or a flat-bottomed kitchen utensil,
like a straight-sided (French-style) rolling pin,
the plunger from a juicer, or a potato masher (see
Tampers, page 41). When this is compacted, add a
bit more and press again. Make sure that you are
forcing the air bubbles out as you go. As you move
up through the vessel, you will notice that the liq-
uid is increasing. Meanwhile, the volume in your
bowl is decreasing, and you might be wondering
if you made enough. Keep pressing.
Your crock will be full when you have around
4 inches of space between the brine and the top
rim; this is called headspace. In a 5- or
10-gallon
crock, you should aim for around 6 inches of
expansion room. In a jar, the vegetables should
reach just below the shoulder. You need 2 to
3 inches from the top of the jar rim to the top of
the brine — enough room so that even with a fol-
lower and a weight, all your hard-fought-for brine
doesn’t bubble out onto the counter.
FERMENTISTA’S TIP
No room left in the crock and still half a bowl
of limp vegetables? Find an appropriate-sized
jar and follow the same instructions. Or if you
like the taste, it might just be the vegetable
salad side dish you needed for dinner, or a
pre-chopped vegetable for soup.
This is the time for the primary follower (see
page 36), which in this case can be a large outer
cabbage leaf (or a small sheet of plastic wrap); it
will keep the shredded bits from floating above
the brine. Tuck the leaf under the shoulder of the
jar or crock to secure it.
Place your secondary follower and a weight
in your crock or jar. Wedge it into place, with
the brine covering it. Keep that oxygen out. You
should be thinking, “Submerge! Conquers evil
every time.”
If you have a crock with a lid or a jar with an
airlock, you will put this in place. The airlock is
designed to let the CO2 escape. Otherwise cover
the top of the jar or crock loosely with a clean tea
towel or muslin to keep out fruit flies or anything
else that could fall into the brine. If you’re using a
regular jar lid, don’t clamp it down; you want the
CO2 to be able to escape.
Even if you left a lot of headspace, put your
crock or jar on a plate or cookie sheet to catch
escaping brine. Never underestimate the power of
exhaling bacteria. In fact, carefully watch for the
level of kraut rising above the brine. Check every
FERMENTISTA’S TIP
56 Mastering the Basics
58. day during the active phase at the beginning. You
will need to apply pressure to force the air out and
allow the brine to return to the top of the kraut. A
small jar will need to be watched more carefully
to keep the brine over the cabbage.
Placing the Crock
Now there is nothing left to do but to place your
nascent kraut in a corner of your kitchen and wait.
Keep it out of bright or direct light, though we
find it’s better to expose your ferment to a little
bit of light in your daily space than to keep it in
an out-of-the-way closet where it will be forgotten,
especially the small batches.
Most recommendations are to ferment
between 55 and 75°F. Our preferred fermenting
temperature is around 65°F because the ferment
moves more slowly, stays crunchy, and develops
good flavor before eventually becoming very sour.
That said, we have found that if the ferment starts
in the sweet zone for a few days, it can be moved
to below 55°F (in a cellar or garage) and will keep
fermenting at a slower rate, which can have advan-
tages in developing the flavor. If you get below
45°F for sustained periods, it will hold slow and
steady as if it were in a refrigerator.
Practically speaking, what does this mean
in your home? No one knows the climate of your
home better than you. If your kitchen counter is
too warm in the height of summer, then look for
a closet or basement that is cooler. One of our
students puts his crock on a tile floor where the
thermal mass of the floor is enough to keep the
temperature constant. In winter, a crock on the
top of a water heater could help keep fermentation
active in a cold climate.
FERMENTISTA’S TIP
Climate Control
A trick we learned in cheese making is to
control the climate with a portable ice chest.
We would put ripening feta in the cooler and
leave it open outside on the porch during cold
evenings. In the morning we would close it and
put it in a cool spot inside. In the heat of the
summer we would add an ice pack. This was
enough to maintain a relatively stable temper-
ature. Conversely, a cooler can be used to keep
your ferment a bit warmer in a cold situation.
Curing Your Kraut: Maintaining the
Active Ferment
Your crock or jar is in a corner. Things are hap-
pening. You wake up to a pool of brine on your
counter; the bubbling is active. This sign of fer-
mentation is comforting and easy to read. But for
the novice fermentista, questions begin to arise.
Perhaps the bubbling has stopped, or nothing is
happening, or the bubbling never started as far as
you can tell. Possibly something questionable is
forming on top (for this we have provided a scum
gallery; see page 358).
In a perfect world you will begin to see action
in your kraut the day after you’ve packed it. If
you’re fermenting in a jar, you will see the little
bubbles moving up through the cabbage similar
to champagne. If you’re lucky enough to own a
crock with a water seal, you will begin to hear an
occasional bloop as the CO2 escapes. Sometimes,
even though the kraut is actively fermenting,
these signs are less obvious, or they don’t last
very long. This is all within the range of normal.
FERMENTISTA’S TIP
Mastering Sauerkraut 57