This lesson plan aims to teach 8 elementary level students about history through a 90 minute class. It includes warmup activities like discussing what history is and watching a video. Students then learn about dividing historical periods using a timeline and place important events in centuries. They describe people from history using adjectives and end by writing a letter to someone from the past. Scaffolding strategies support students throughout hands-on activities working individually and in pairs.

![their answers on the board. Then, she will say “Good job! Now, let’s watch a video called
What is History? And see what is the speaker’ definition of History.”
https://youtu.be/kRgG2JS02mY
After the video finishes, the teacher will ask “What’s the speaker’s definition of History?
According to her, what is it for? Is it similar or different from yours?” so to start a brief
discussion on the topic. Then, she will play the video again, but this second time, she will ask
students to pay special attention to any keywords related to the other question from the
board, “Where does it come from?”, and how different civilizations have recorded their own
history. It will be discussed at the end of the video.
Transition comment to link each stage of the lesson with the next one:
“Now that we know what history is, what it is for, and where it comes from… How do we
divide the different historical periods?”
PRESENTATION
Timing: 15 minutes
Activity description and instructions as they will be said to students (direct
speech and scaffolding strategies are included):
It will be explained to students that history is divided into different historical periods, and that
one of the most known ways of doing so is with the terms decade, century and millennium.
She will ask “Do you know how many years are there in a decade? And how many decades
are there in a century? Okay, now you tell me… How many years are there in a millennium?
So, how many years are there in a millennium?” while writing their answers on the
whiteboard.
A very big timeline will be displayed on the board (see illustrative example below). The
teacher will say “Here we have our last millennium in a timeline. As you can see it’s divided
into 10 centuries. Do you know in what year each century begins and ends? Let’s start with
the 11th century. When does it begin? It begins around the year 1001. So… if a century lasts
100 years… when does it end? Exactly, in 1100” while writing the years in the timeline. The
process will be repeated until all the centuries are completed.
Comentario [A1]: They might
systematize main ideas.](https://image.slidesharecdn.com/piii-du1lesson1-zentner-pass-210707210155/85/DU1-The-Past-Lesson-1-3-320.jpg)
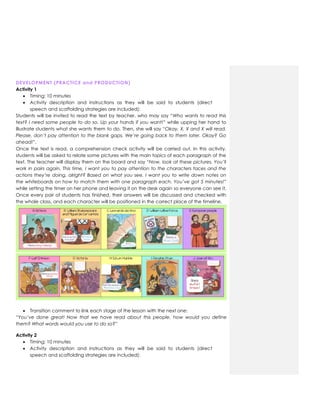
![Illustrative timeline to be presented to the students.
Once this is done, some big cards with some of the most important events and people from
history will be displayed oin the board as well. The teacher will say “I want you to pay
attention ONLY to the years written on each card, okay? You’ll be working with your partner
form on your right, and you’ll have only 3 minutes to decide where each event goes in the
timeline. You can use these whiteboards to write down some notes as you discuss with your
partners.” while giving them the small whiteboards.
Small whiteboards to be given to the students
She will then set the timer on her phone and leave it on the desk so everyone can see it.
Once the timer has stopped, the students’ results will be discussed and checked with the
whole class. As doing so, each card will be placed in the right place in the timeline.
Cards to be displayed on the whiteboard
Transition comment to link each stage of the lesson with the next one:
“Well done, my students! Now, let’s finally read this text and find out what happened in the
last millennium!”
Comentario [A2]: You´ve been
using the present simple
throughout the lesson. Be
consistent.](https://image.slidesharecdn.com/piii-du1lesson1-zentner-pass-210707210155/85/DU1-The-Past-Lesson-1-4-320.jpg)
![I hope to see you soon,
Val.
Letter to be read to the students
Transition comment to link each stage of the lesson with the next one:
“If you had the opportunity to send a letter to any person from the timeline, who would you
write to?”
CLOSURE
Timing: 10 minutes
Activity description and instructions as they will be said to students (direct
speech and scaffolding strategies are included):
The teacher will say “At home, you’ll write a letter to any character from the timeline we
have been working with today. You have the timeline in the Student’s Book, pages 28 and
29 if you need to reread the information, or you can surf the internet so to find more
information about the character you’ll write to” while showing them the two pages
mentioned. Students will be also explained that the phrases to express likes and dislikes they
have talked about, are on page 29, exercise 6 in case they want to use them. Besides, a
letter template will be given to make it easier the writing process. They may use it or not.
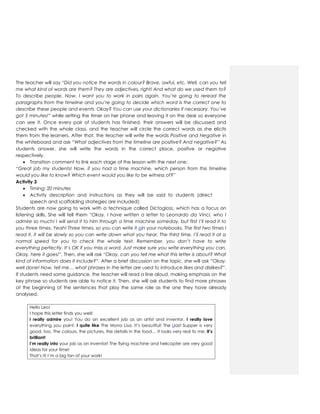
Hello/Hi…
I hope…
I really…
I quite like…
I’m a big fan of…
See you soon/A hug/Hope… ,
____________ .
Letter template to be given to the students
Transition comment to link each stage of the lesson with the next one:
“We’ve finished for today! I’m really looking forward to reading your letters! See you next
time!”
To be completed by your tutor:
Lesson plan
component
Excellent
5
Very
Good
4
Good
3
Acceptable
2
Needs
improvement
1
Visual
organization
X
Comentario [A3]: The closure
stage should be an interesting way
of rounding up the lesson -
recapping main ideas, playing a
game, etc.
You can assign homework before
or after this stage.](https://image.slidesharecdn.com/piii-du1lesson1-zentner-pass-210707210155/85/DU1-The-Past-Lesson-1-7-320.jpg)