Download as PDF, PPTX

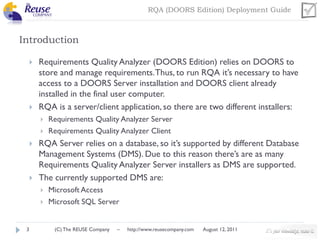
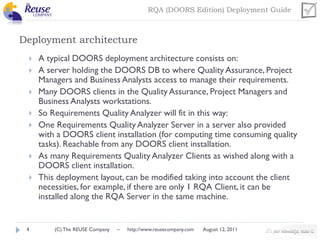
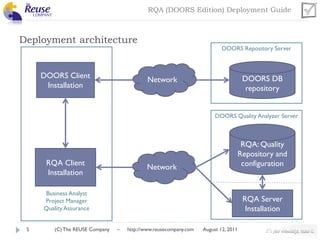


This document provides instructions for deploying Requirements Quality Analyzer (RQA), which includes installing the RQA server software, configuring the server, and installing RQA client software. The RQA server is installed on a dedicated server and connects to a DOORS database. The RQA client allows accessing quality analysis features and is installed on workstations connected to the server.