Downloaded 20 times


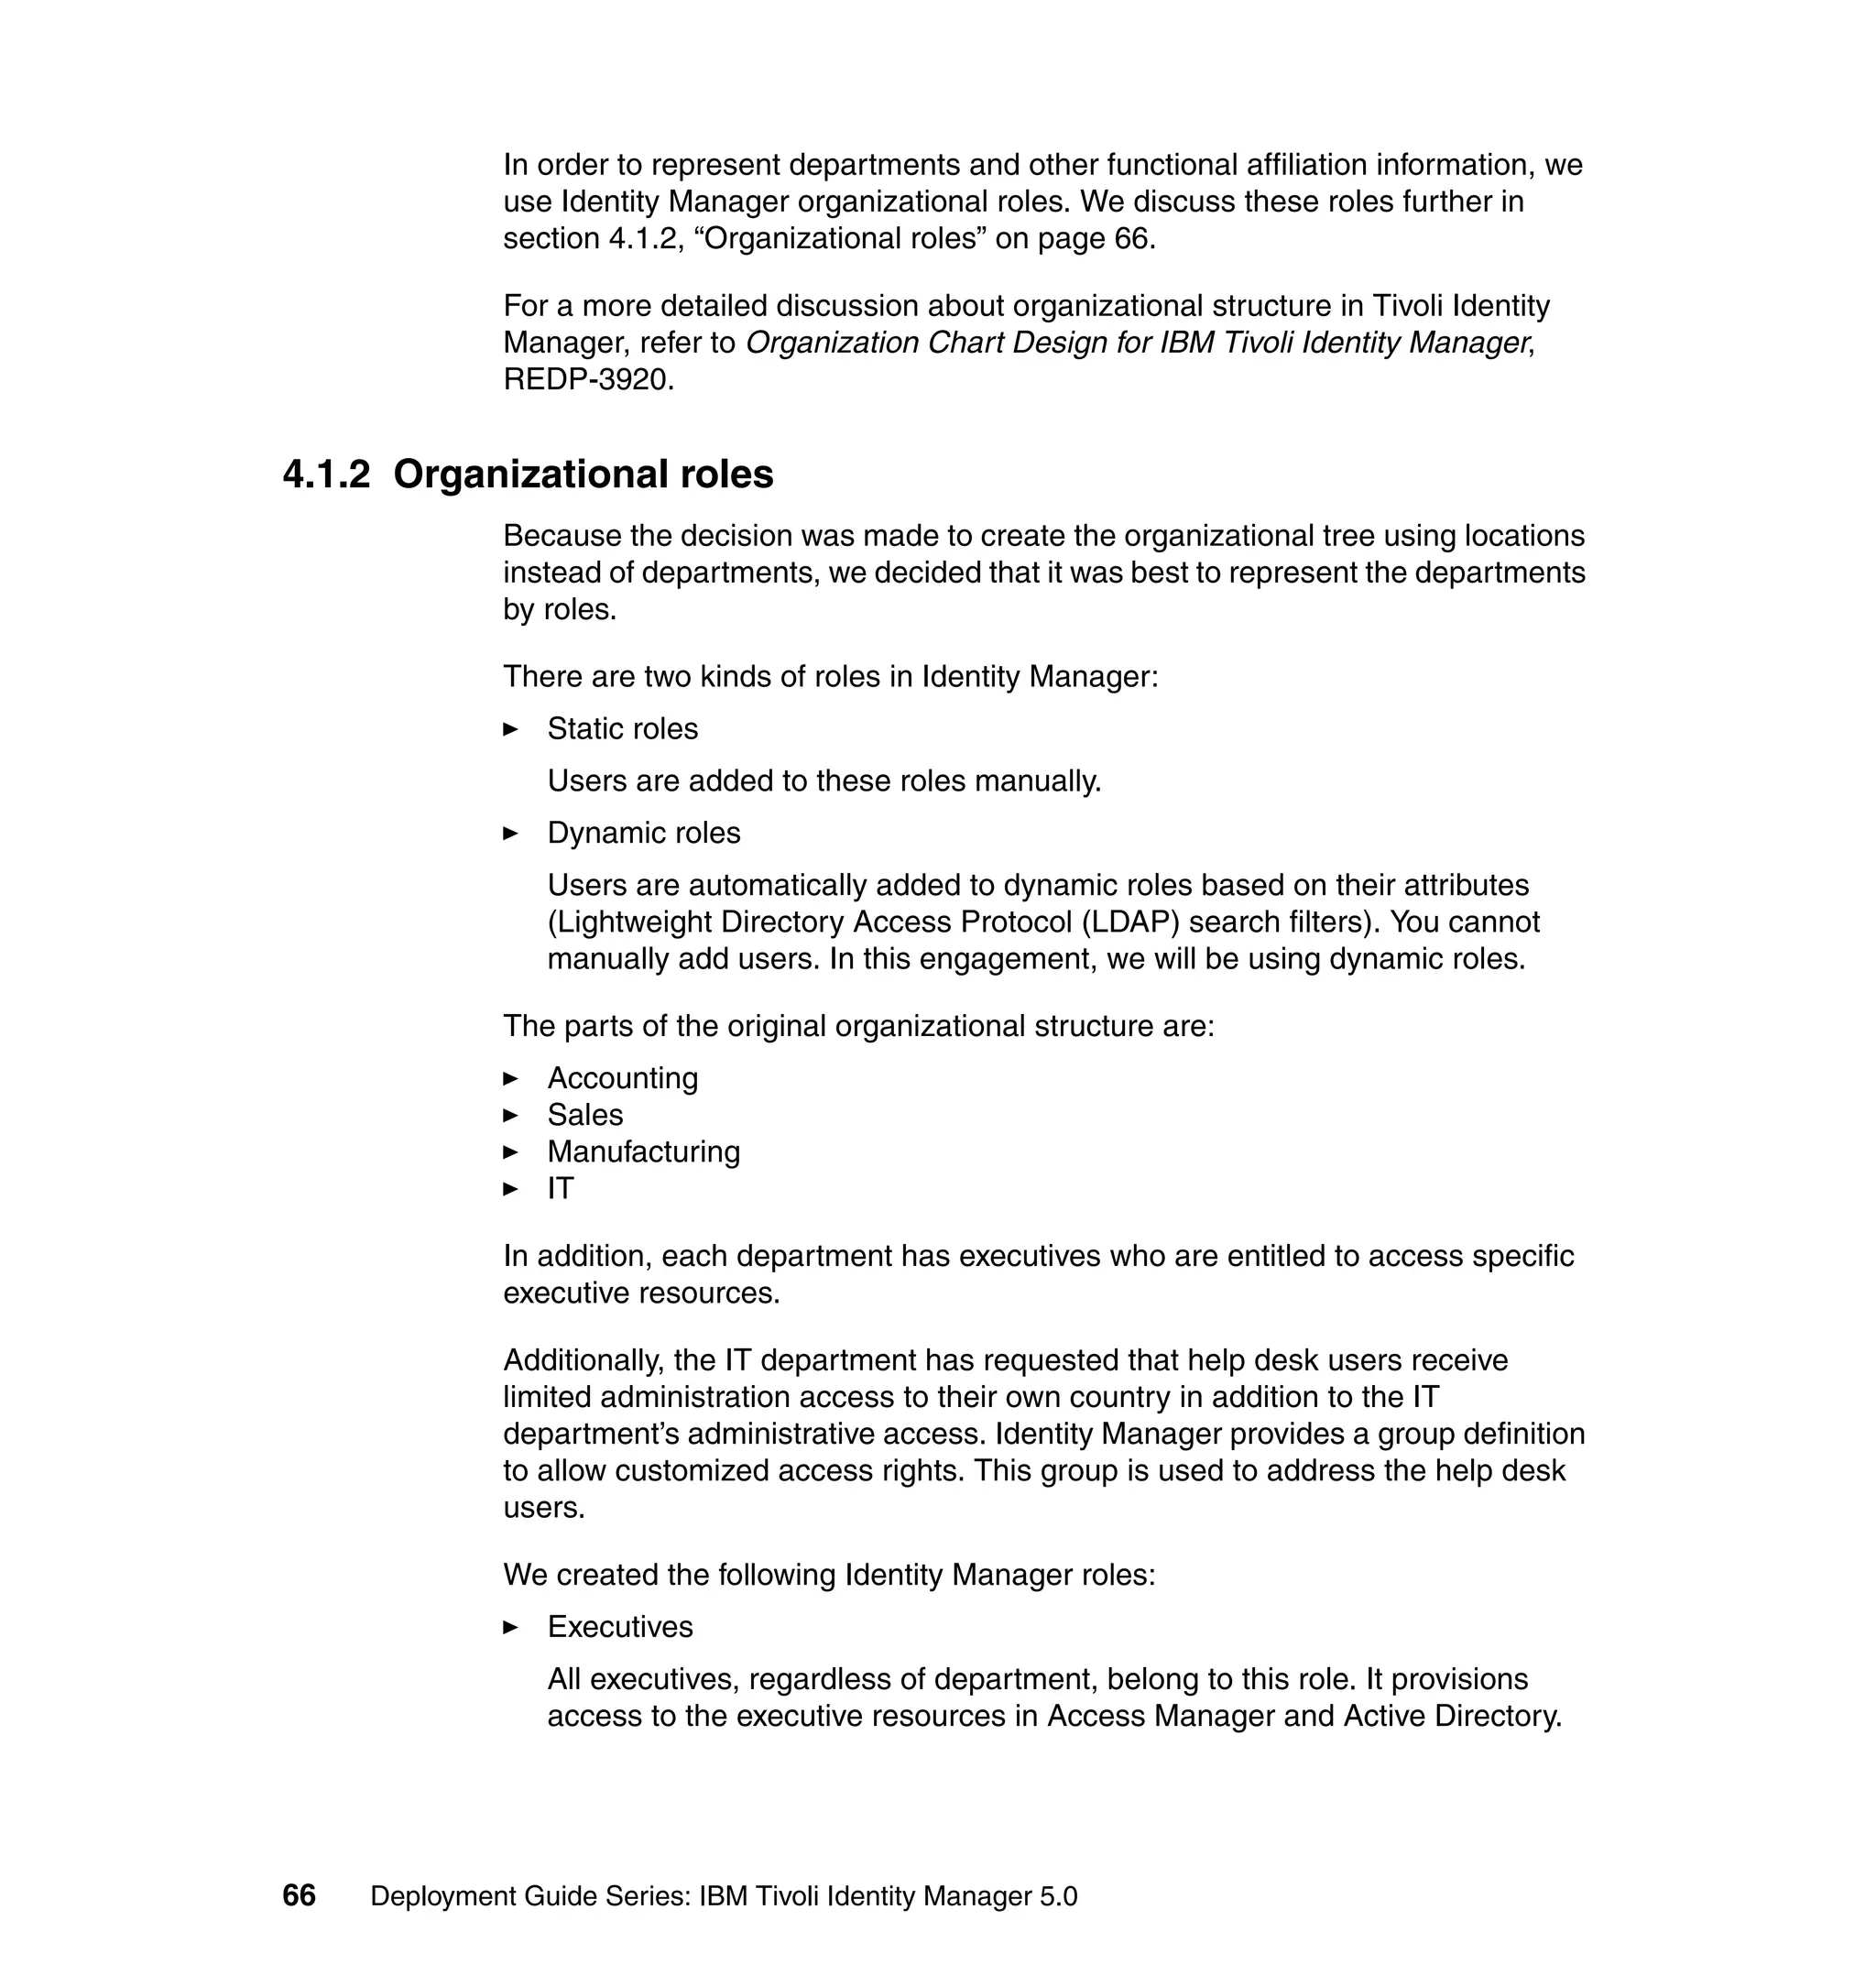


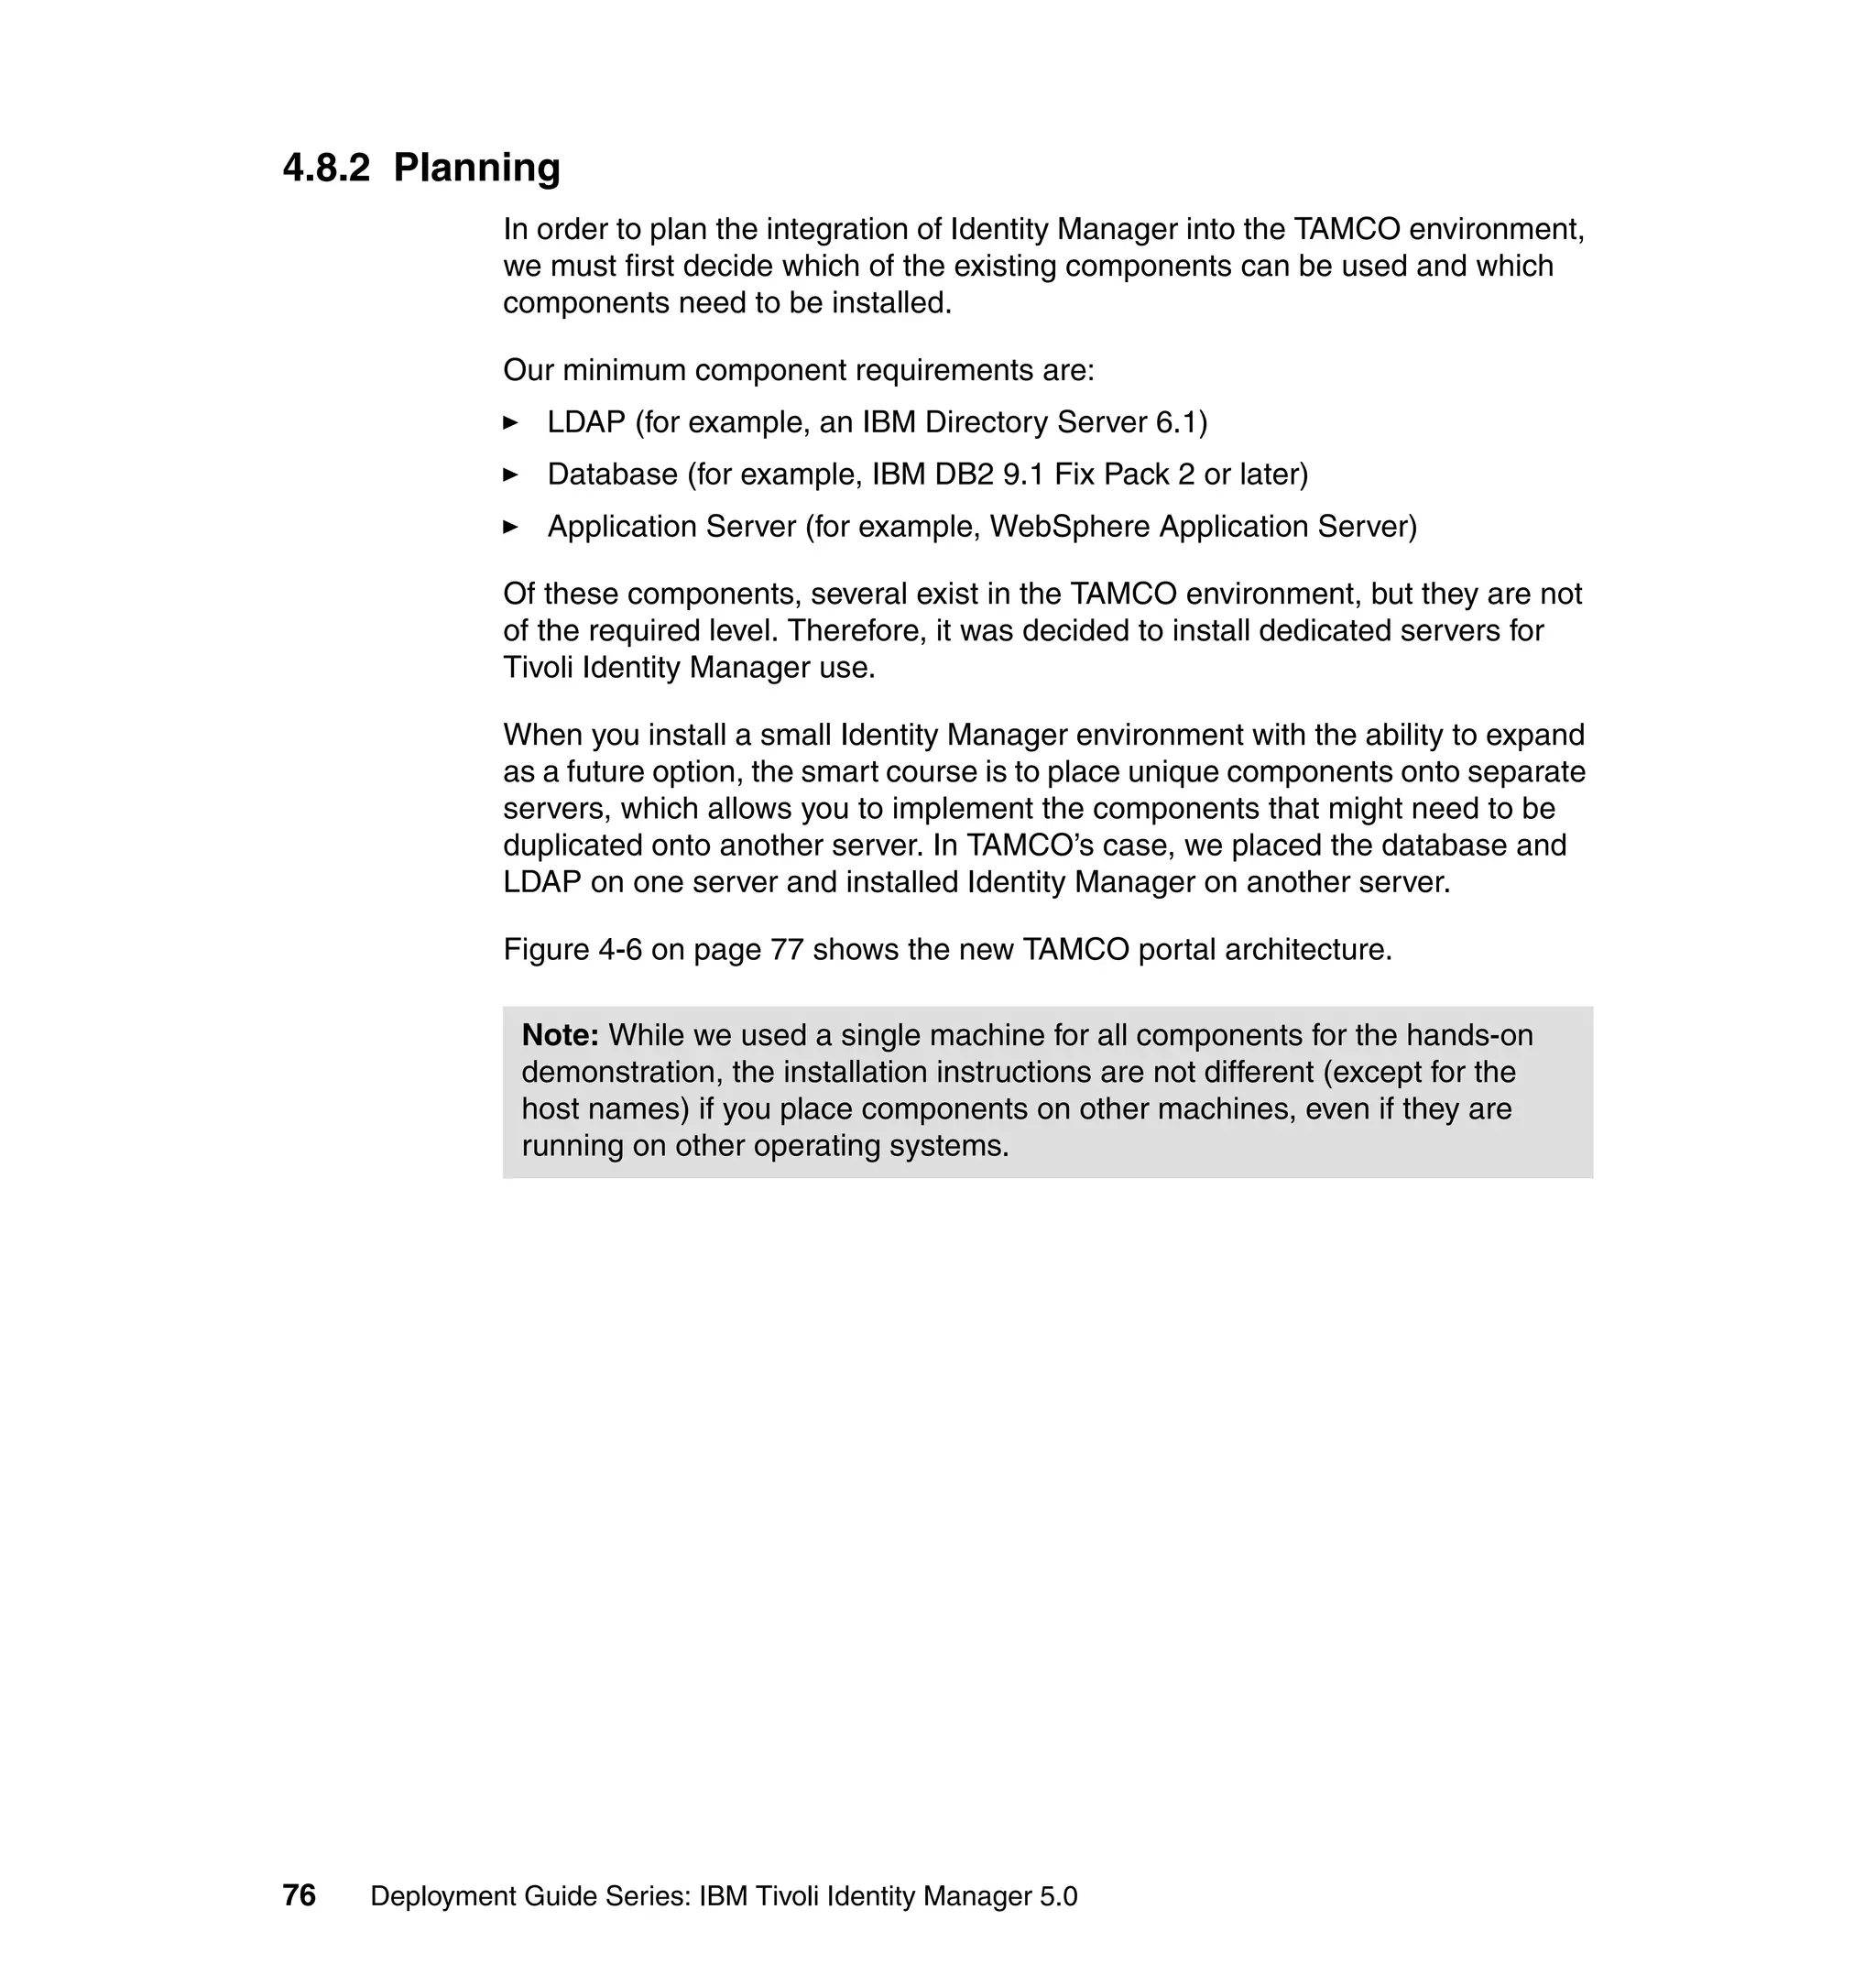


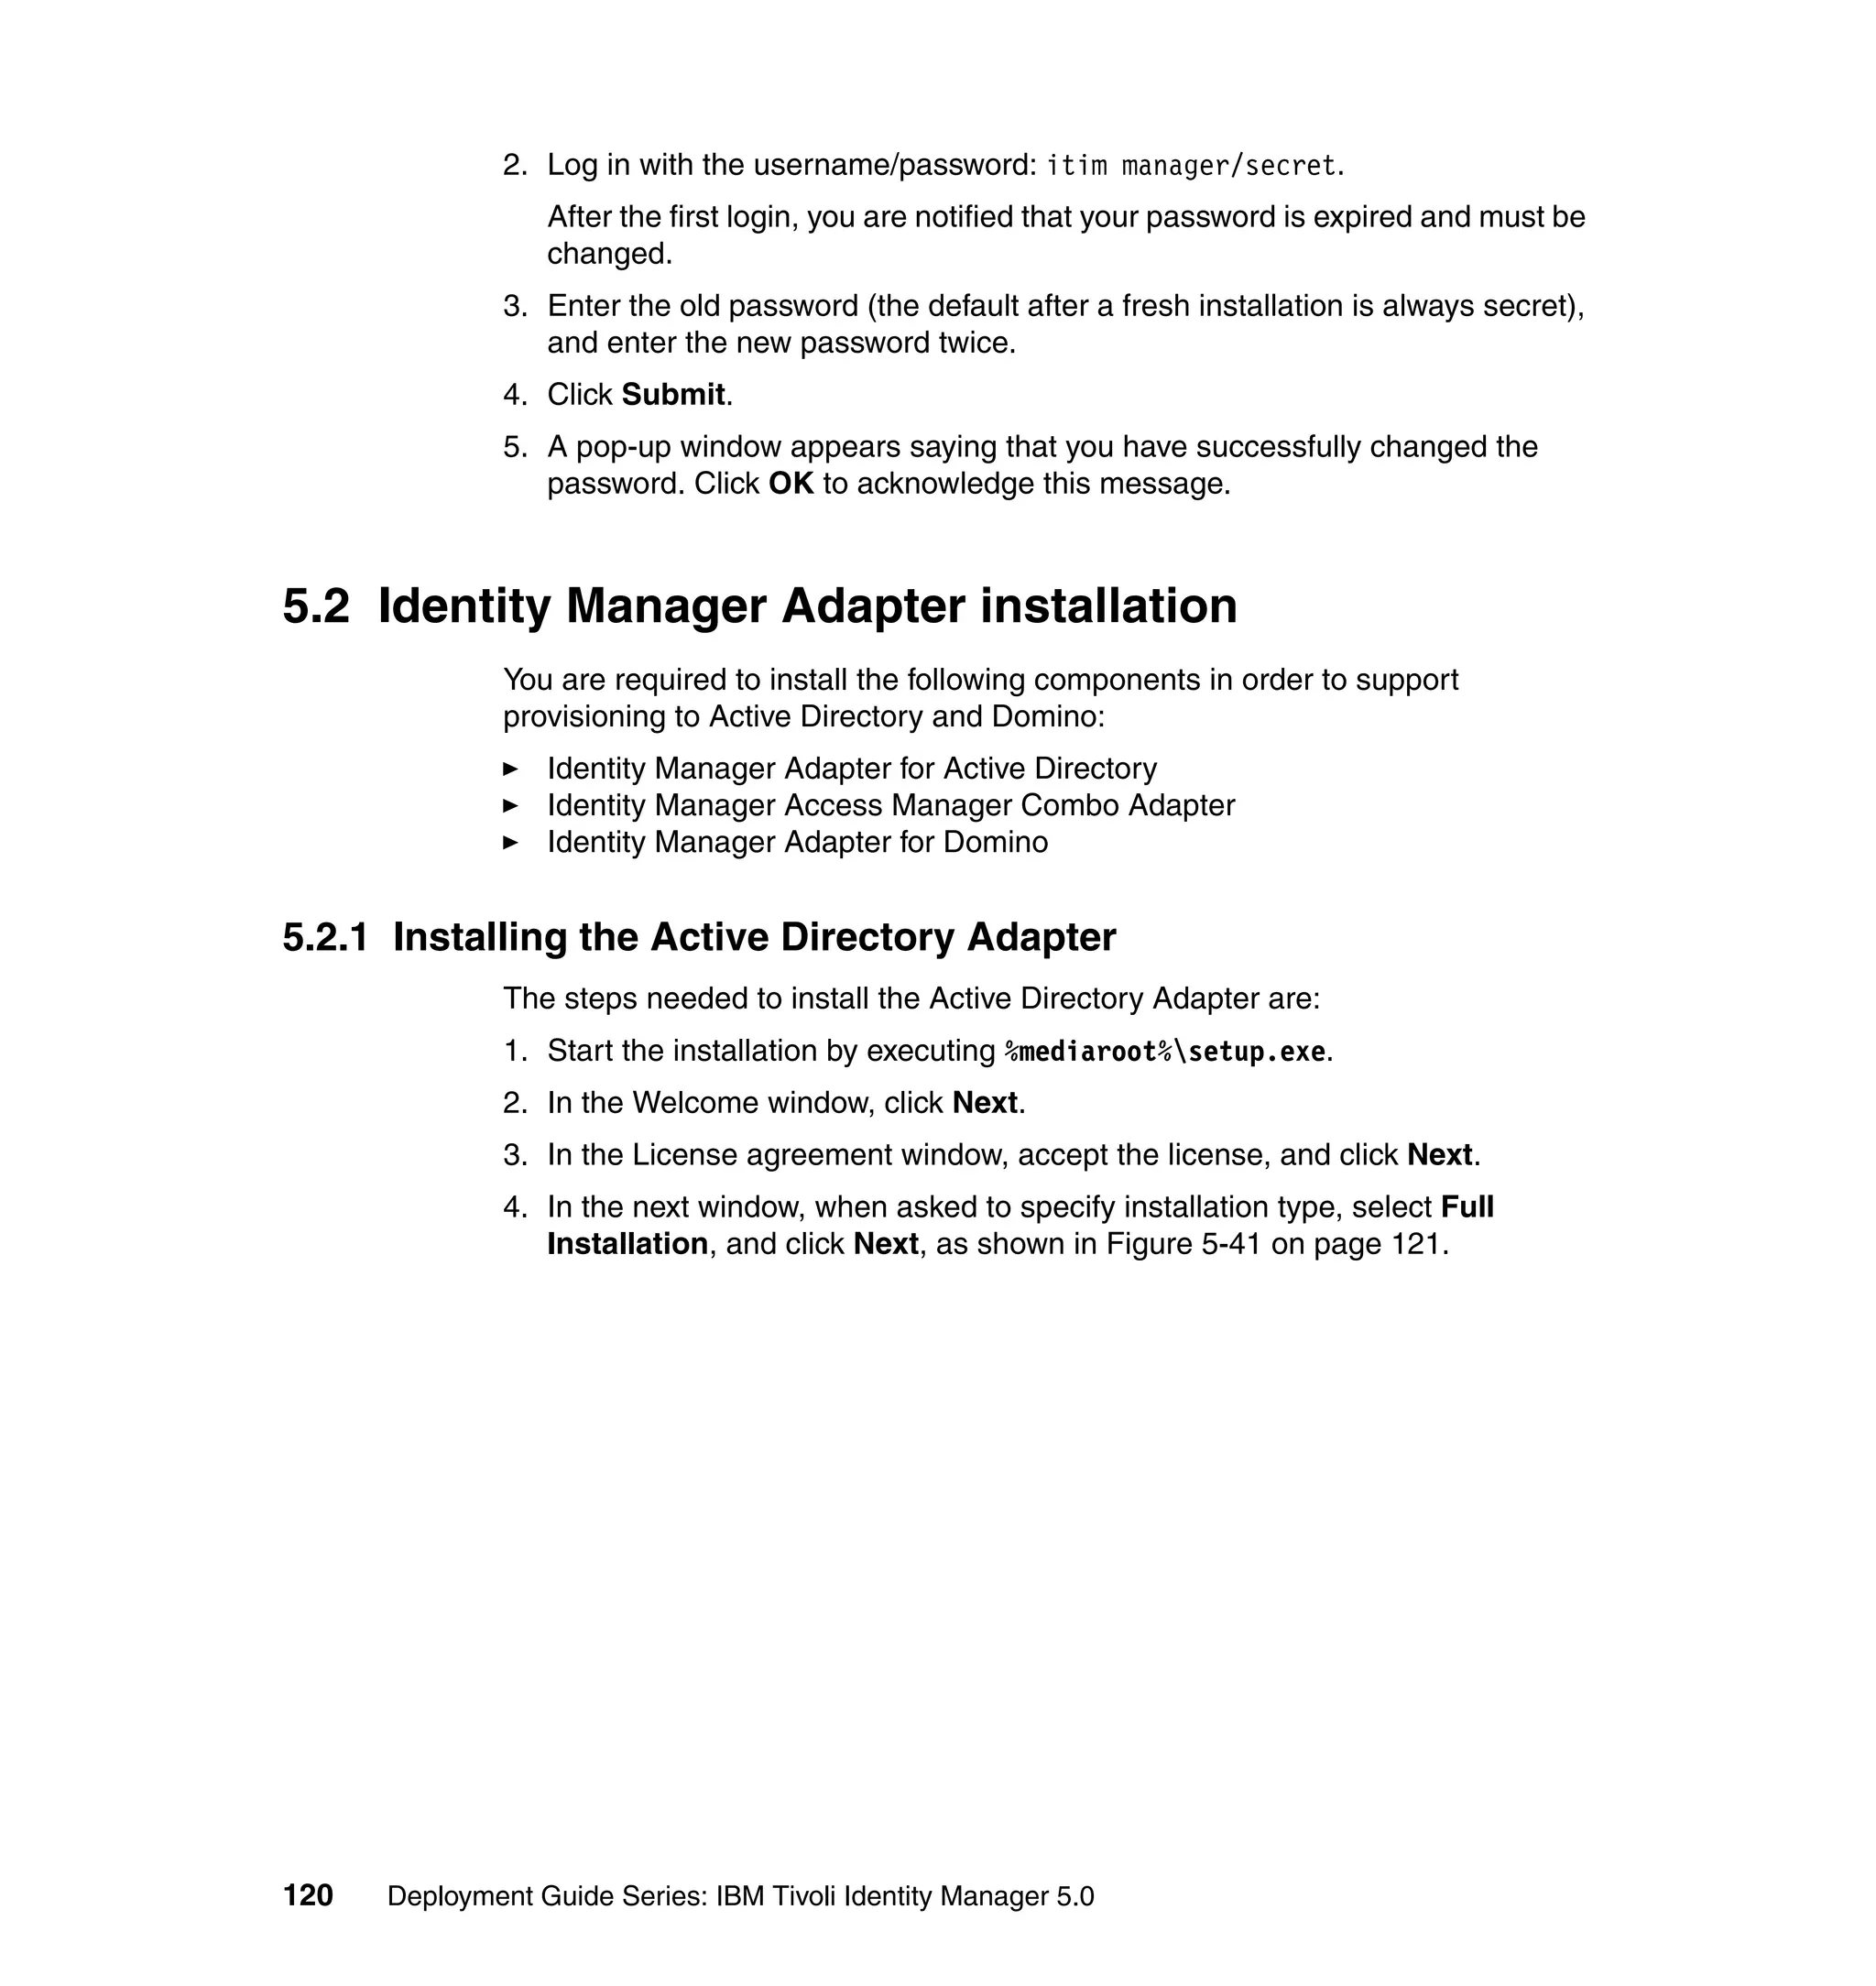


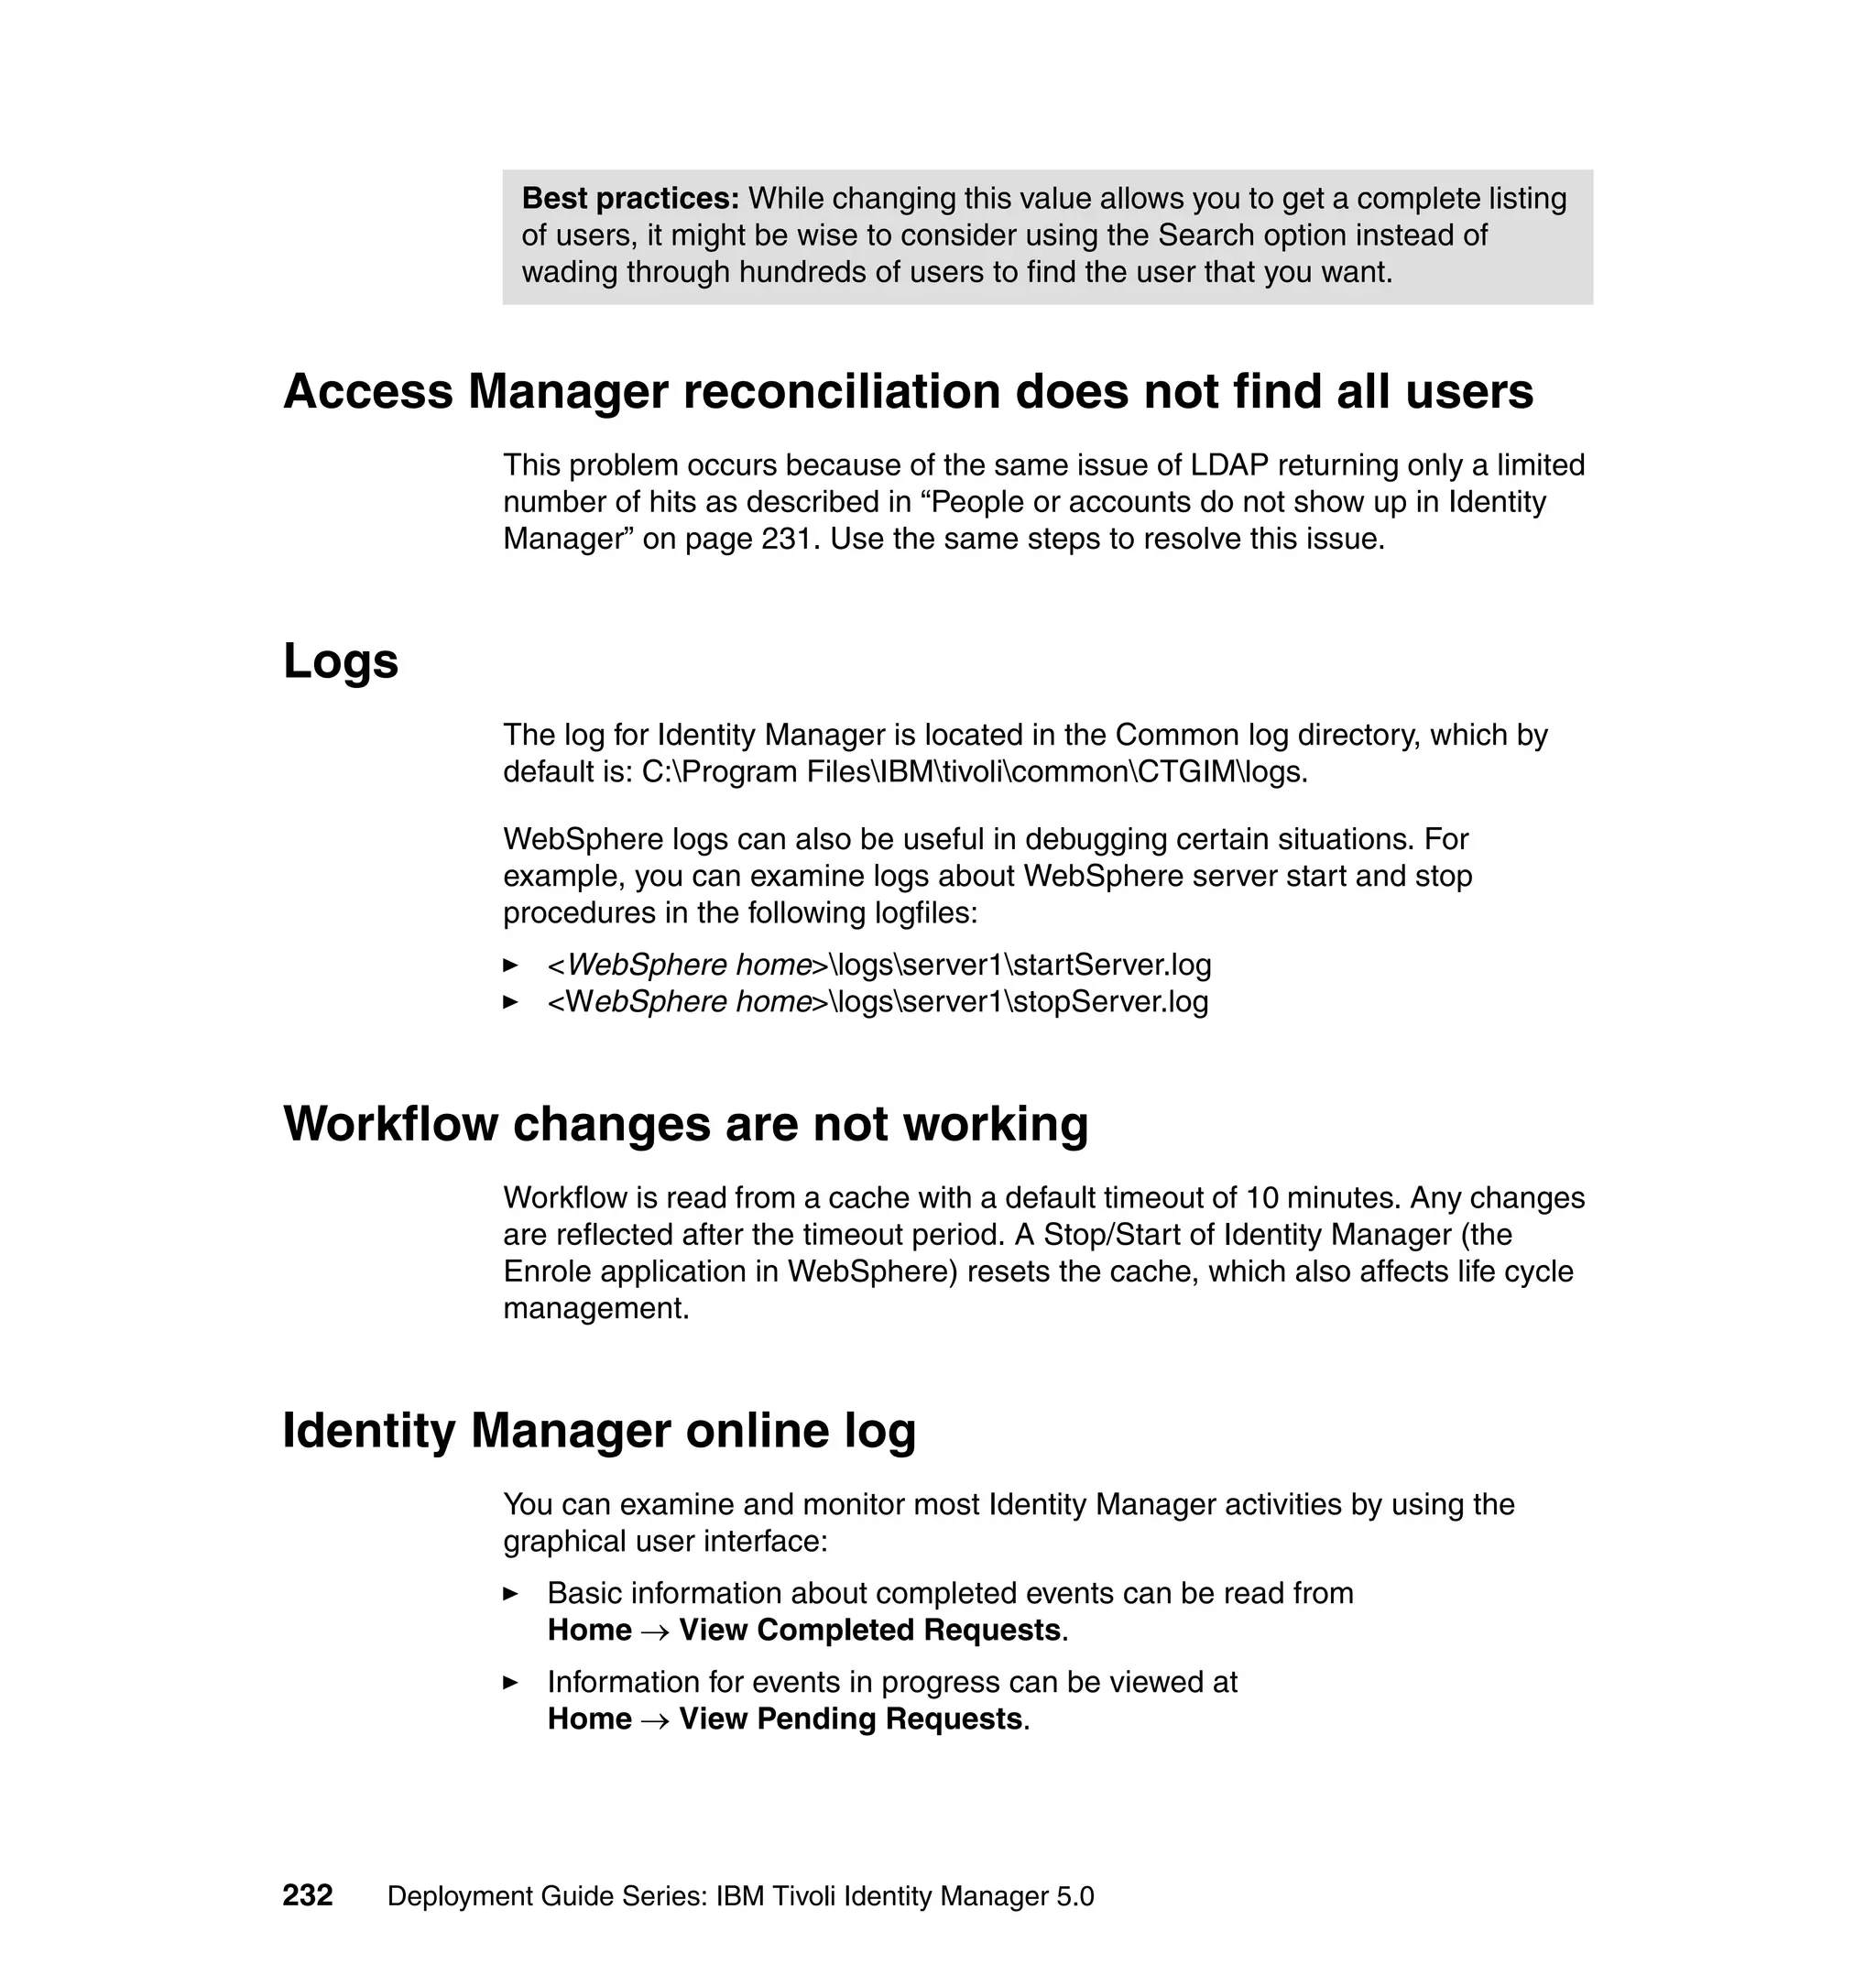
![var idx2 = 0;
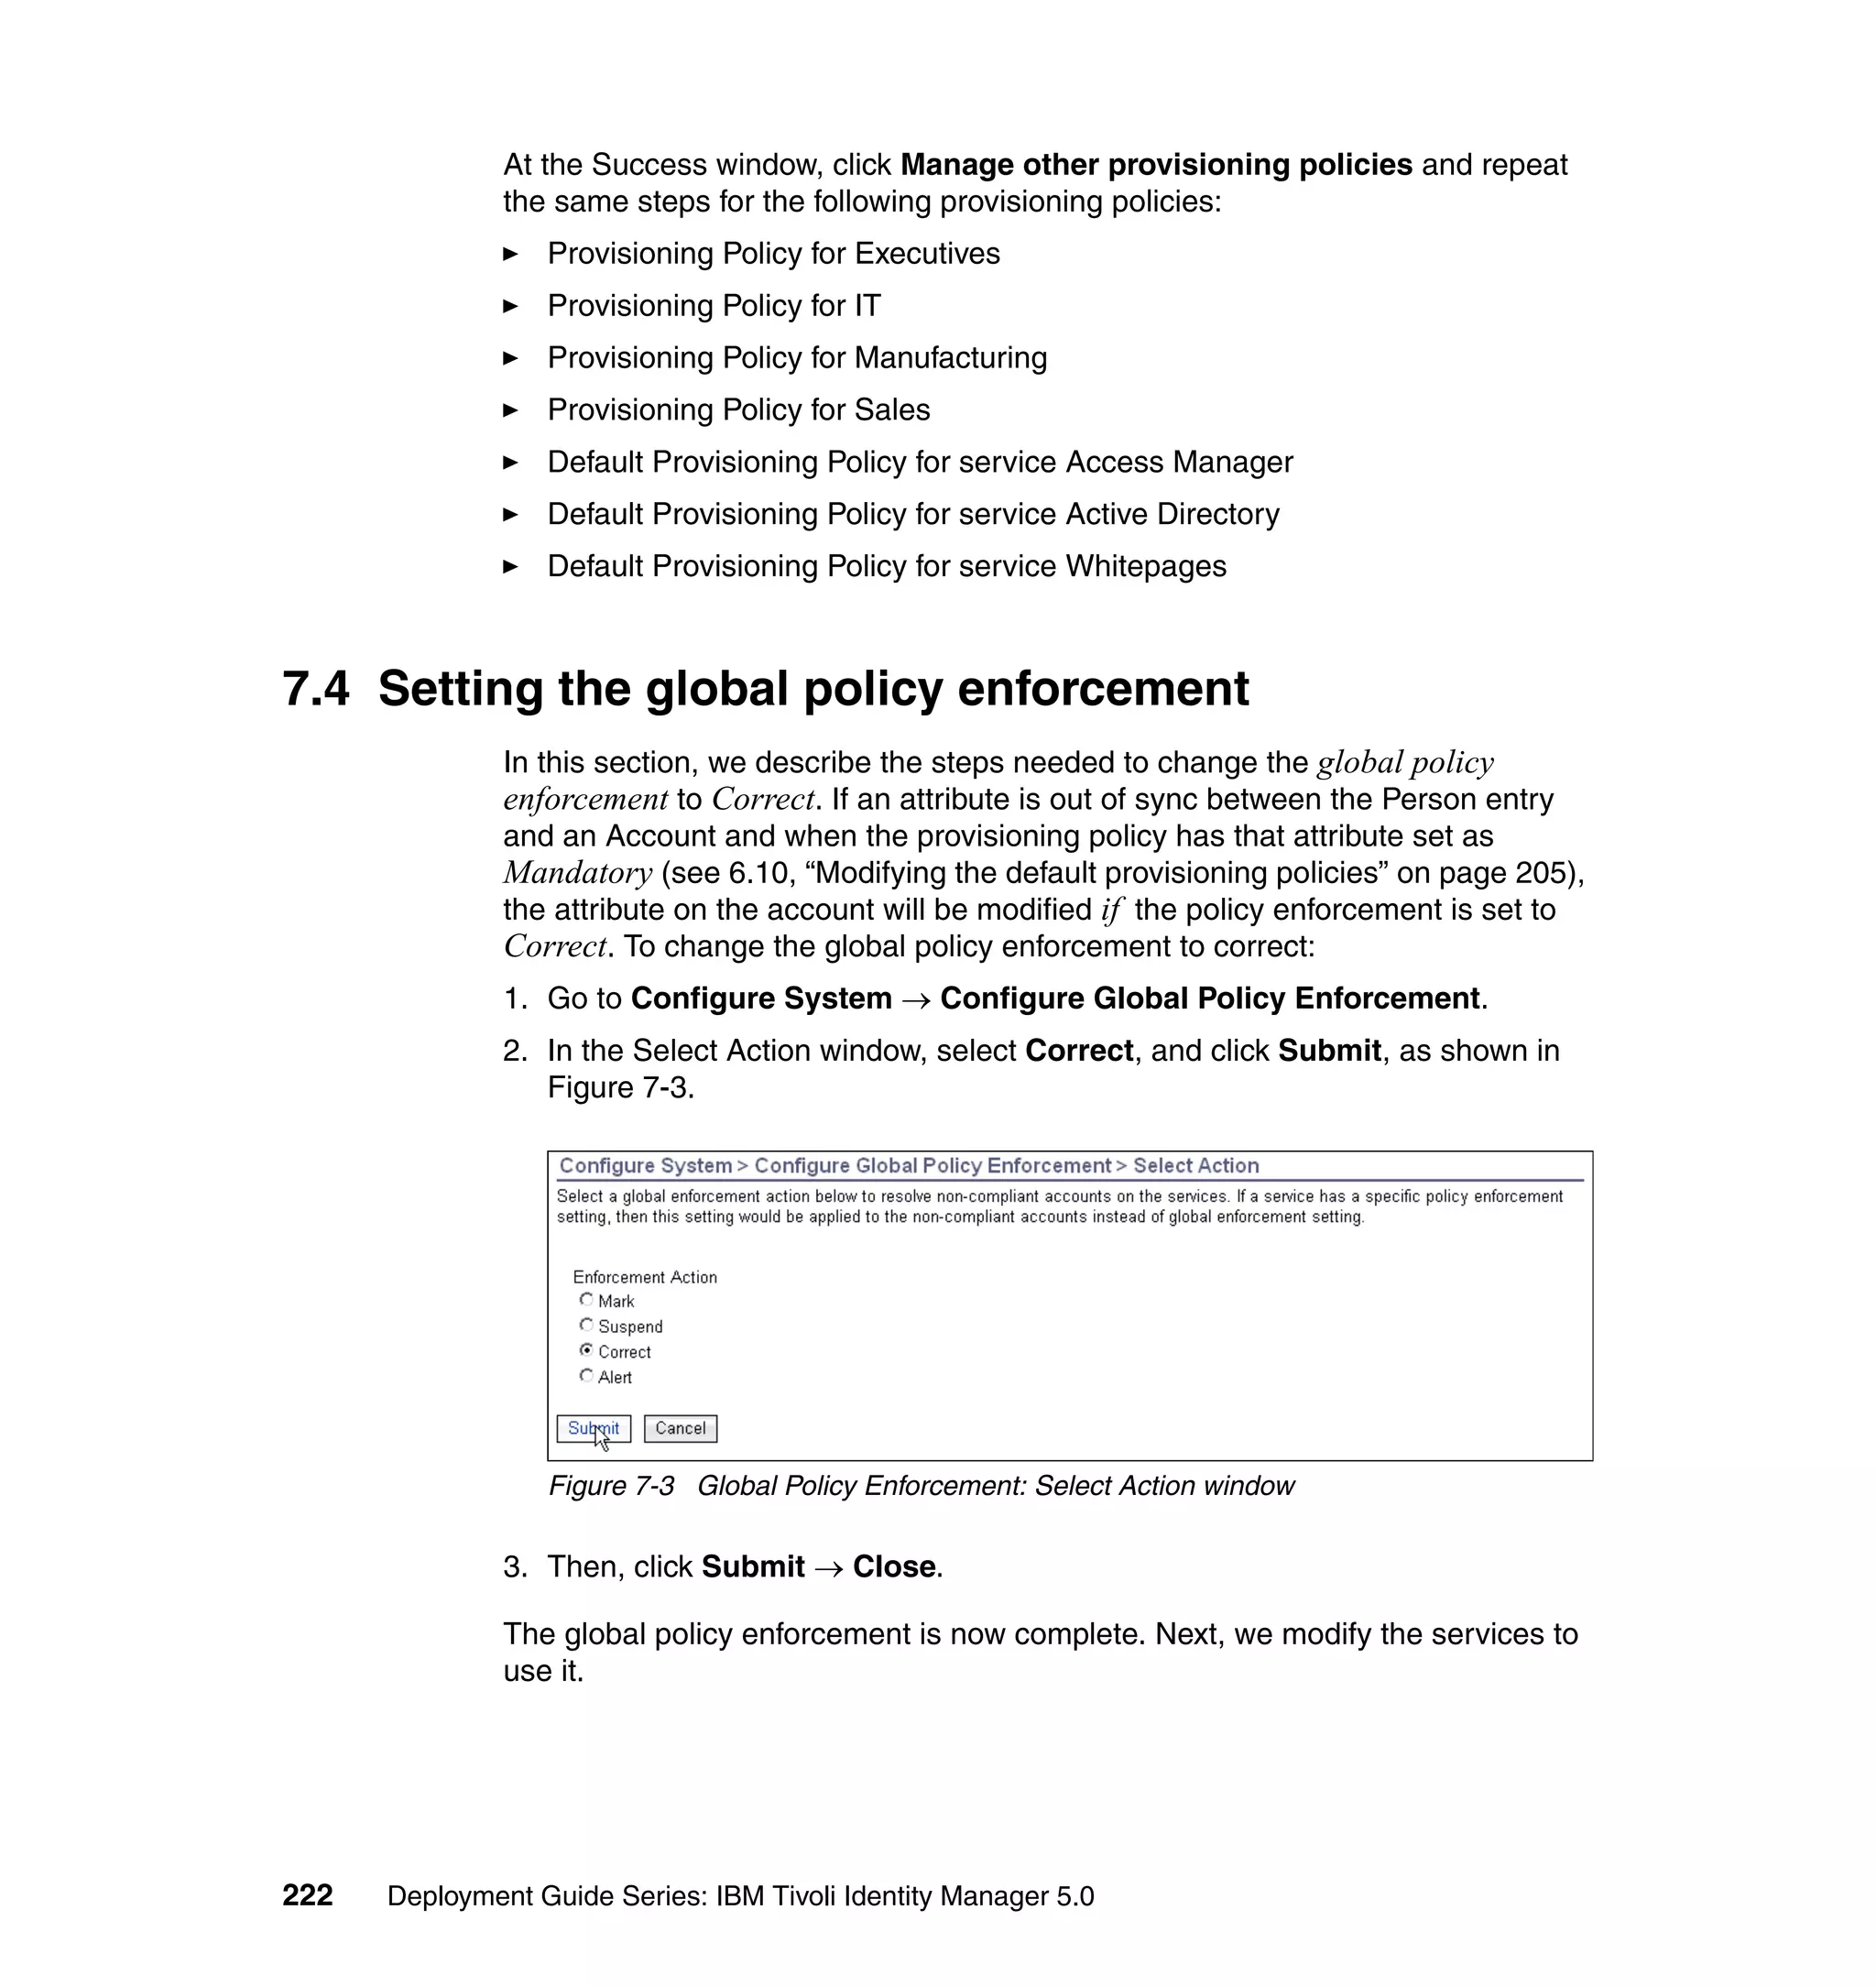
var fCase = 2;
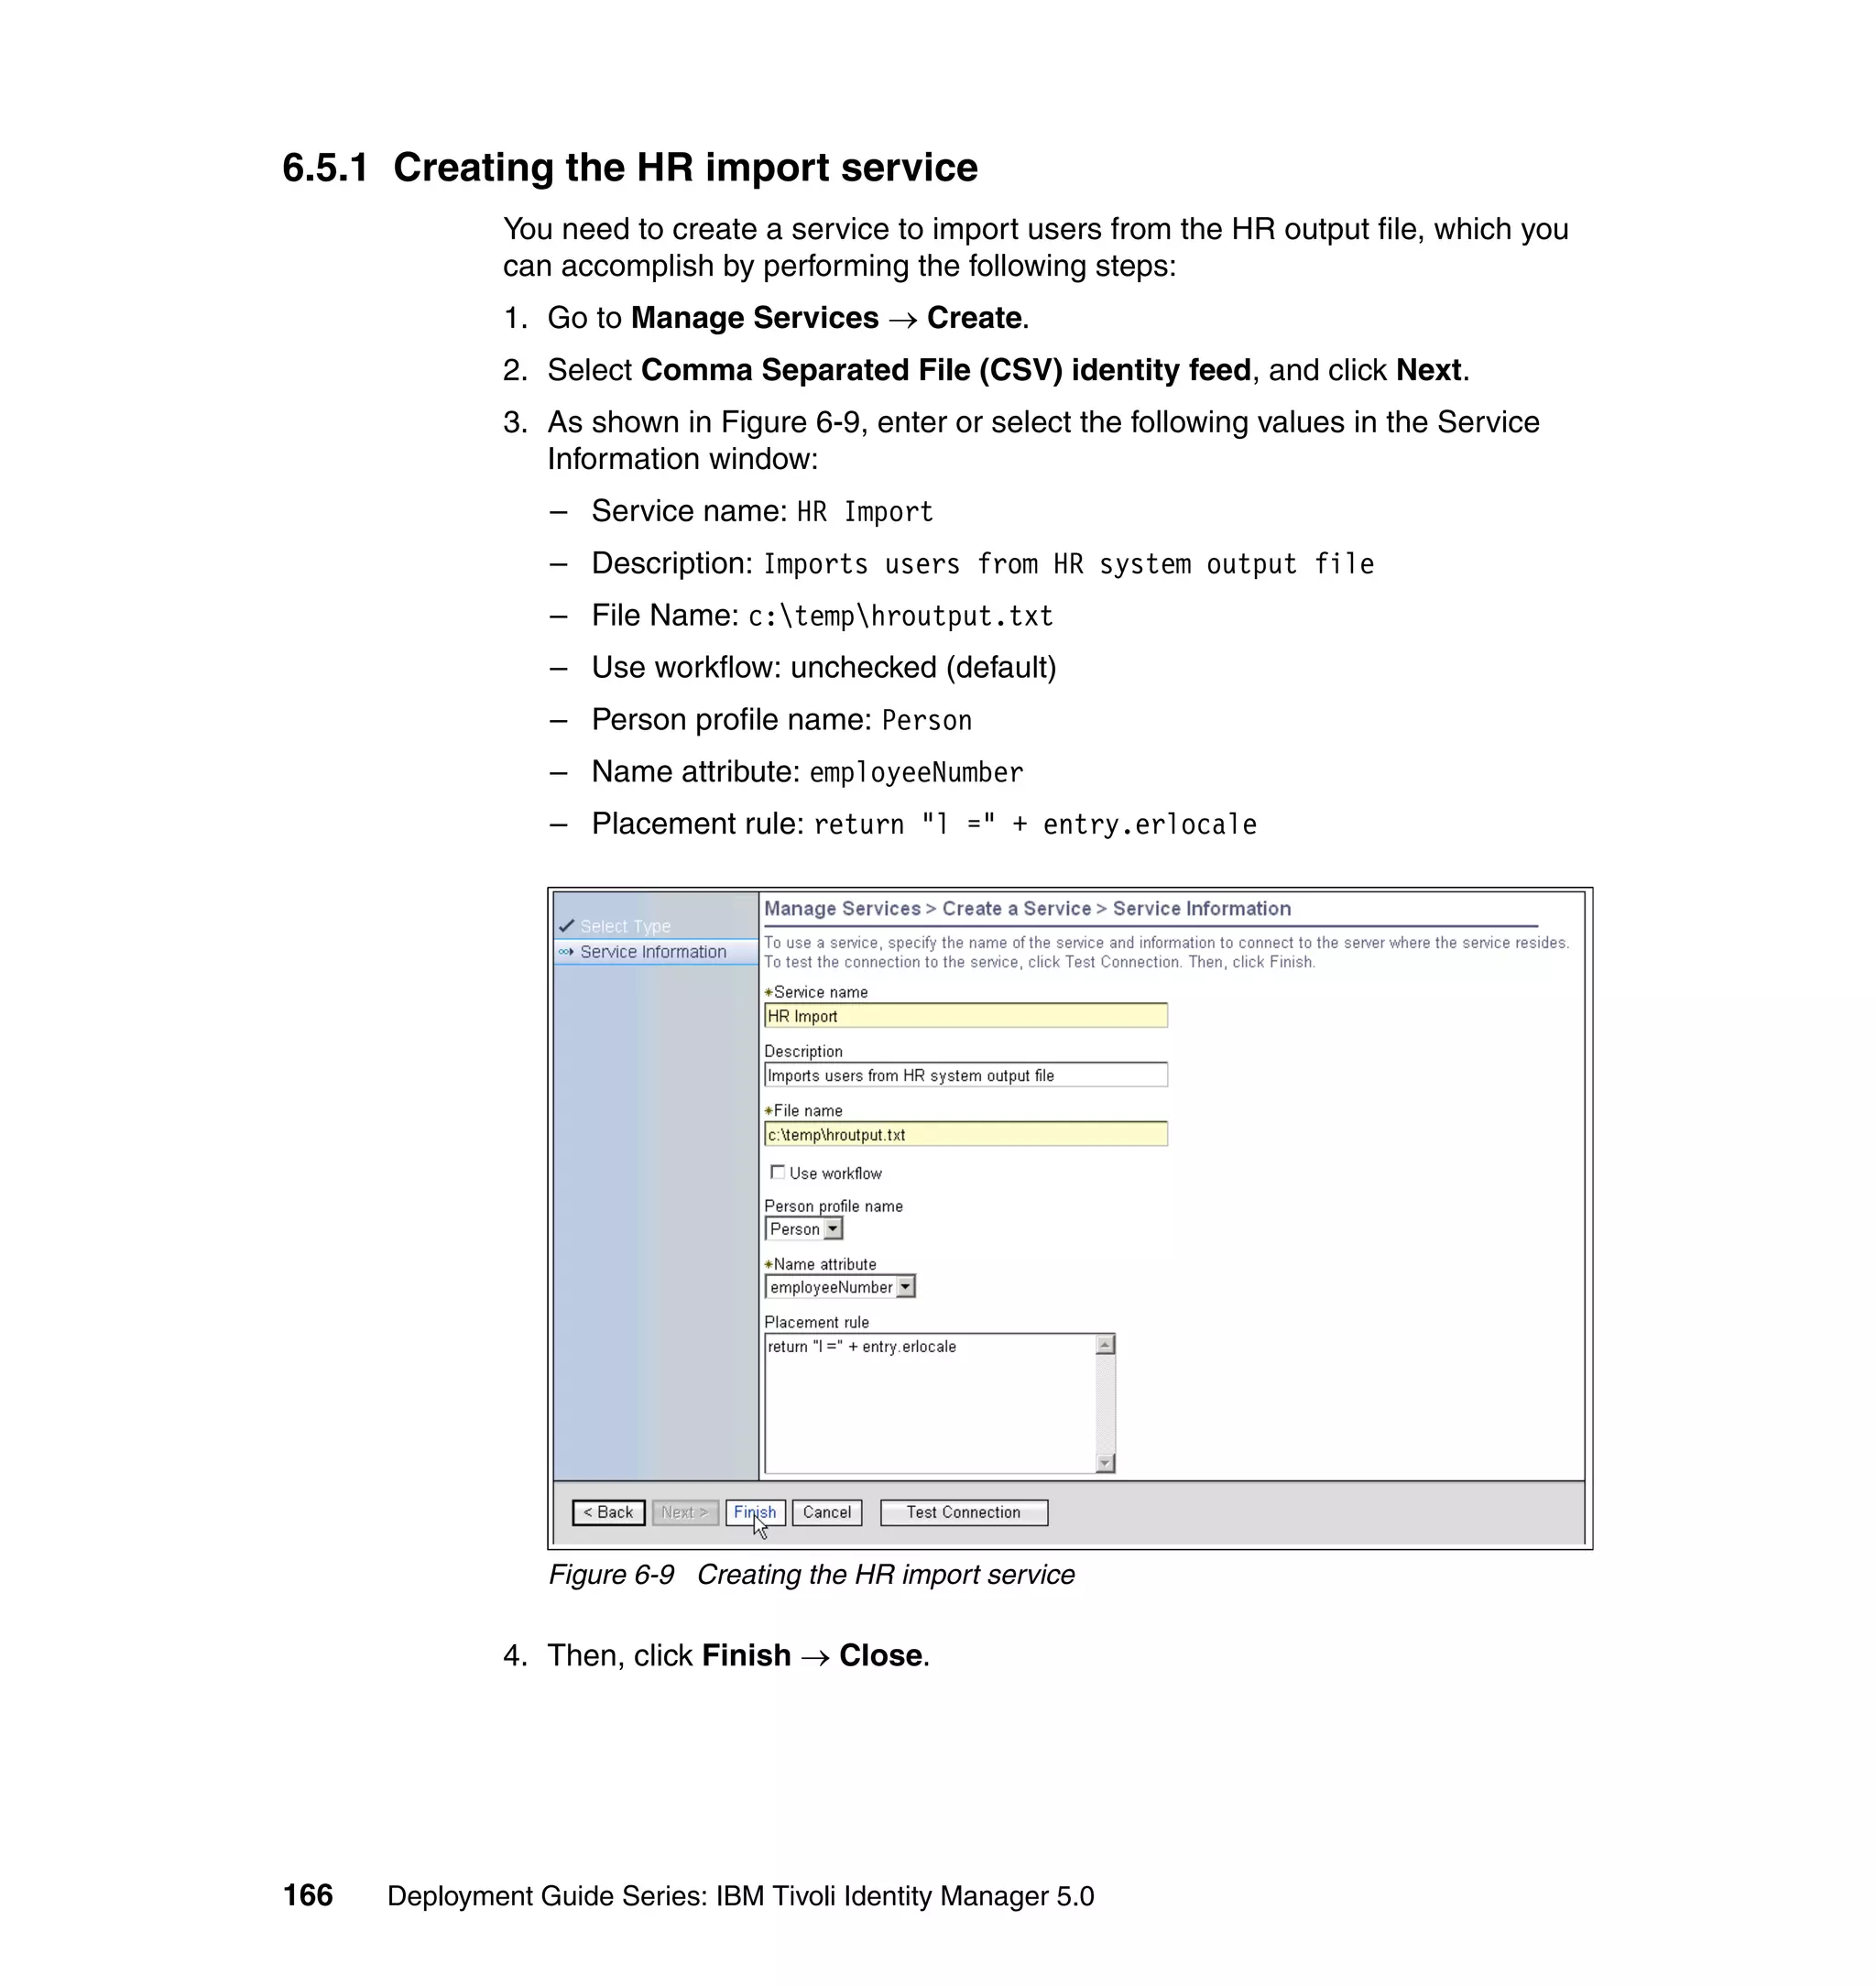
var sCase = 2;
if ((locale != null) && (locale.length > 0)) {
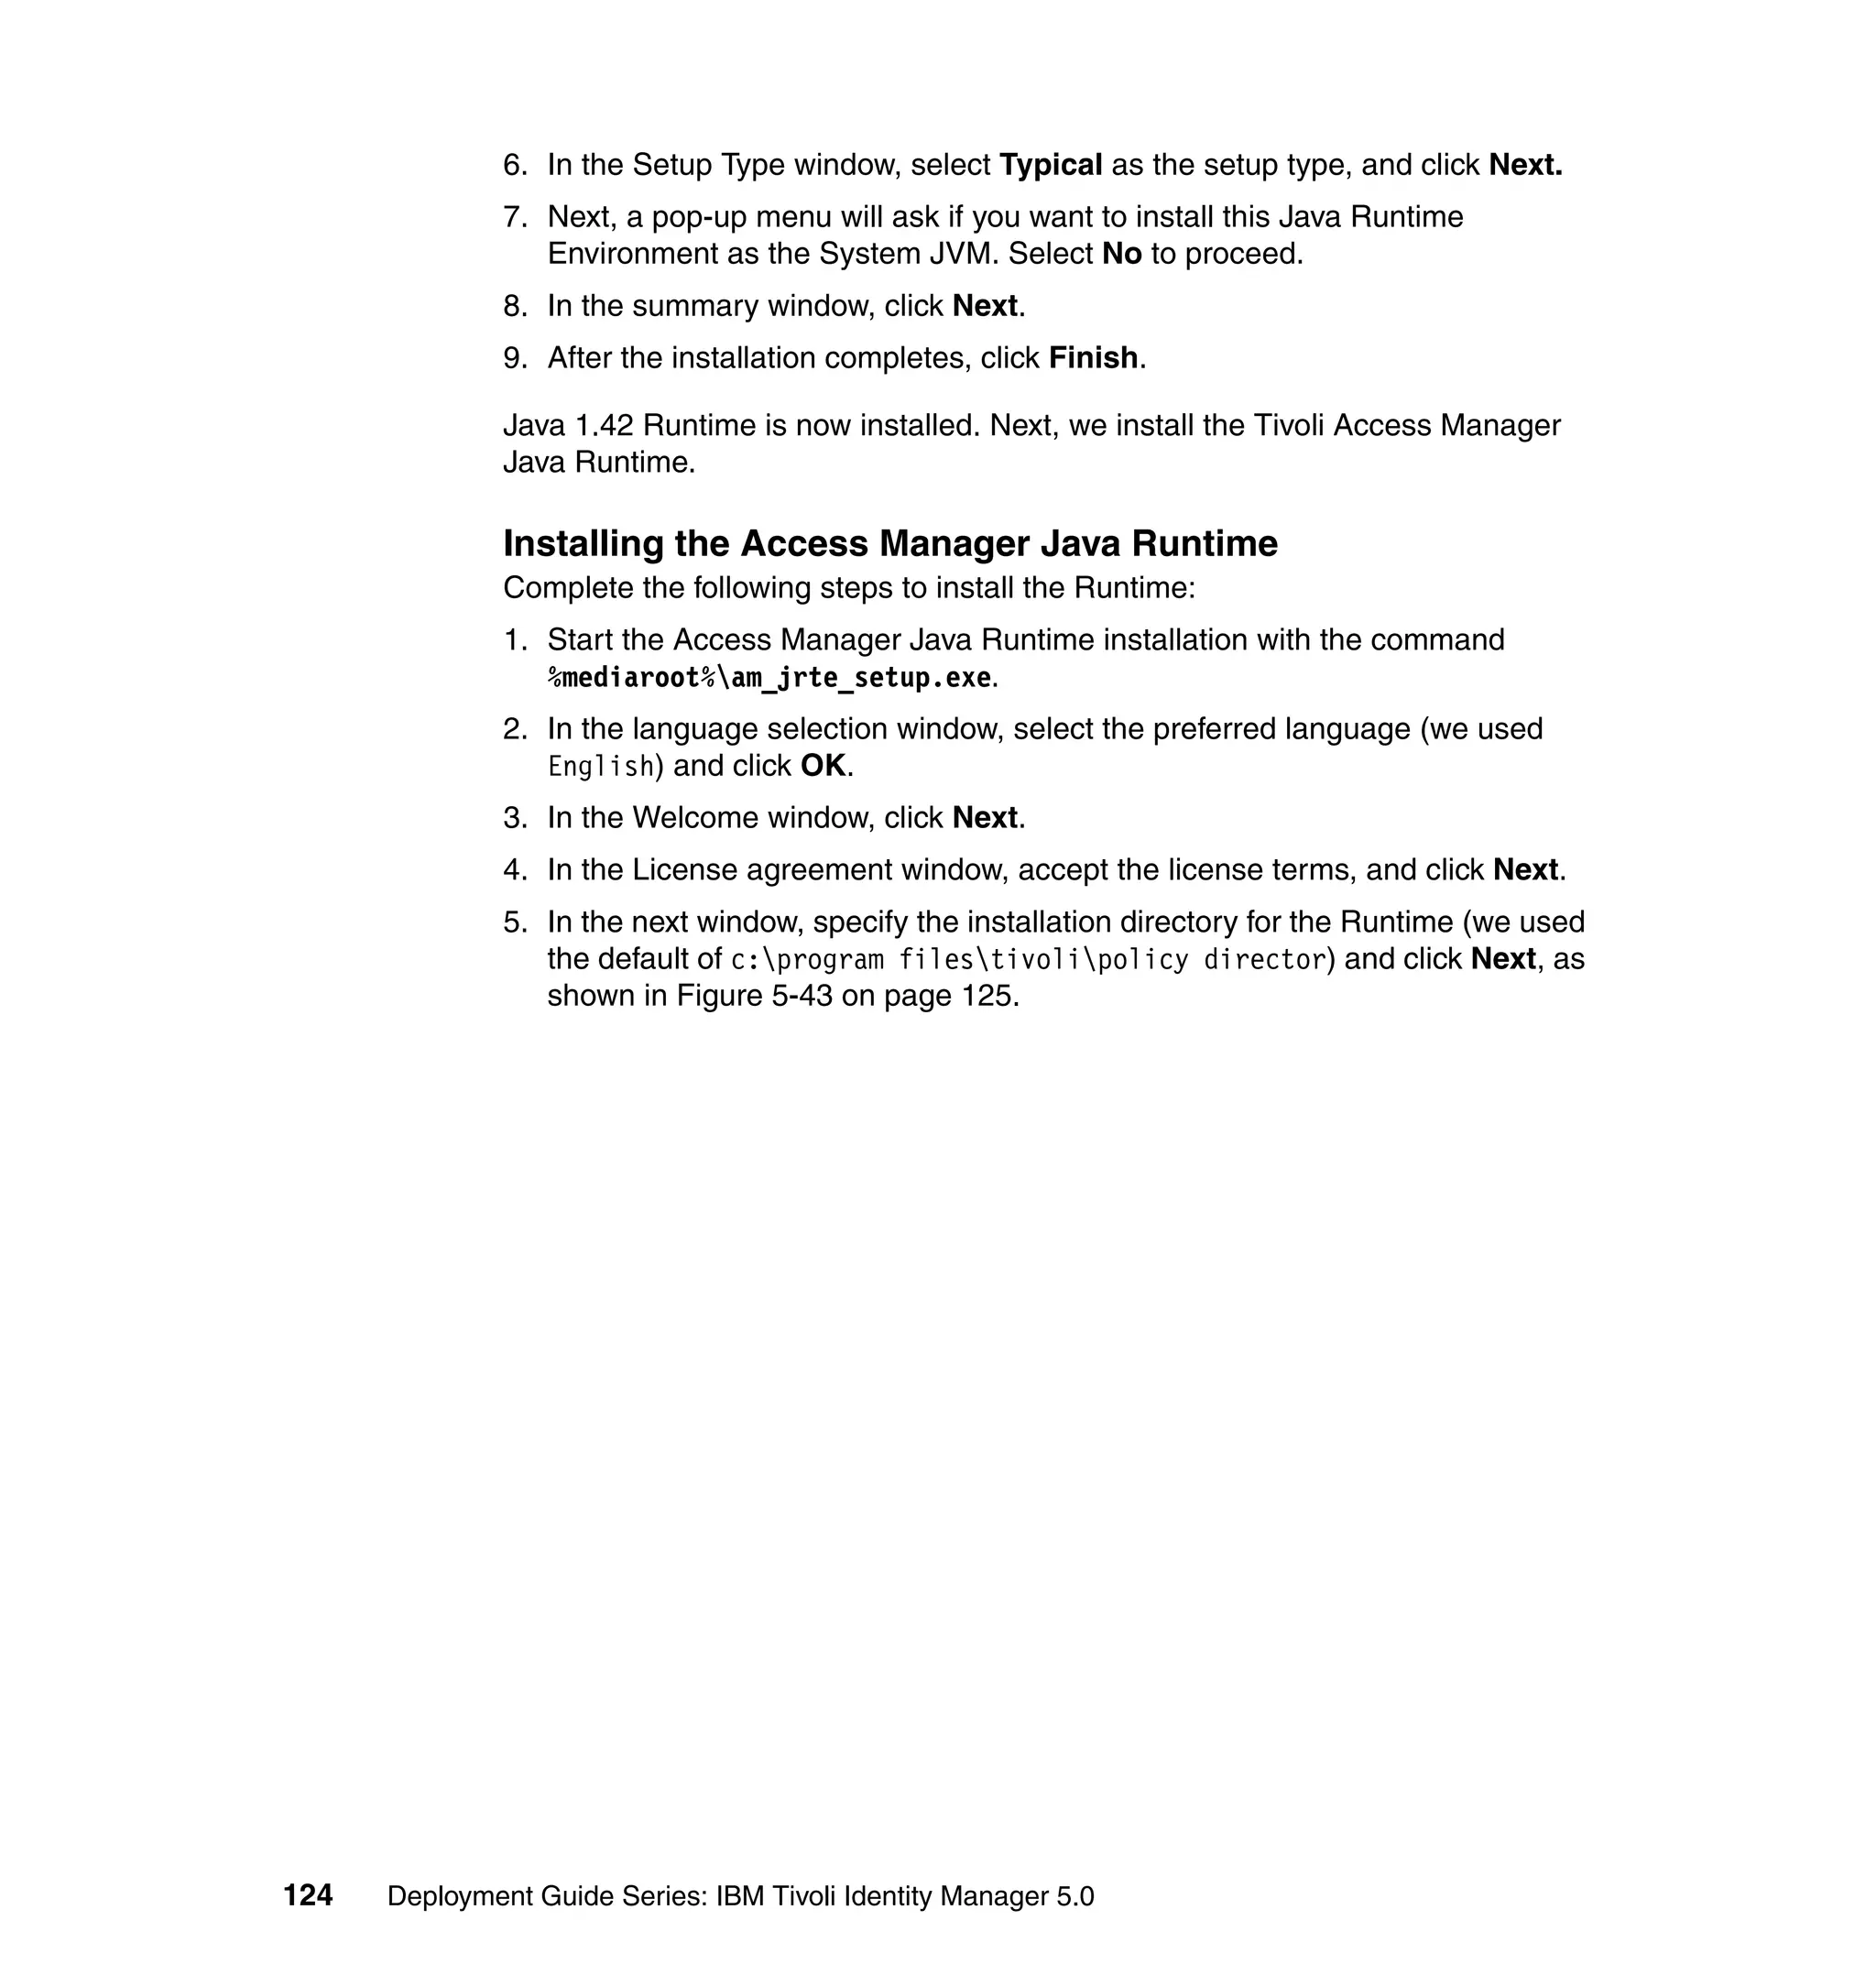
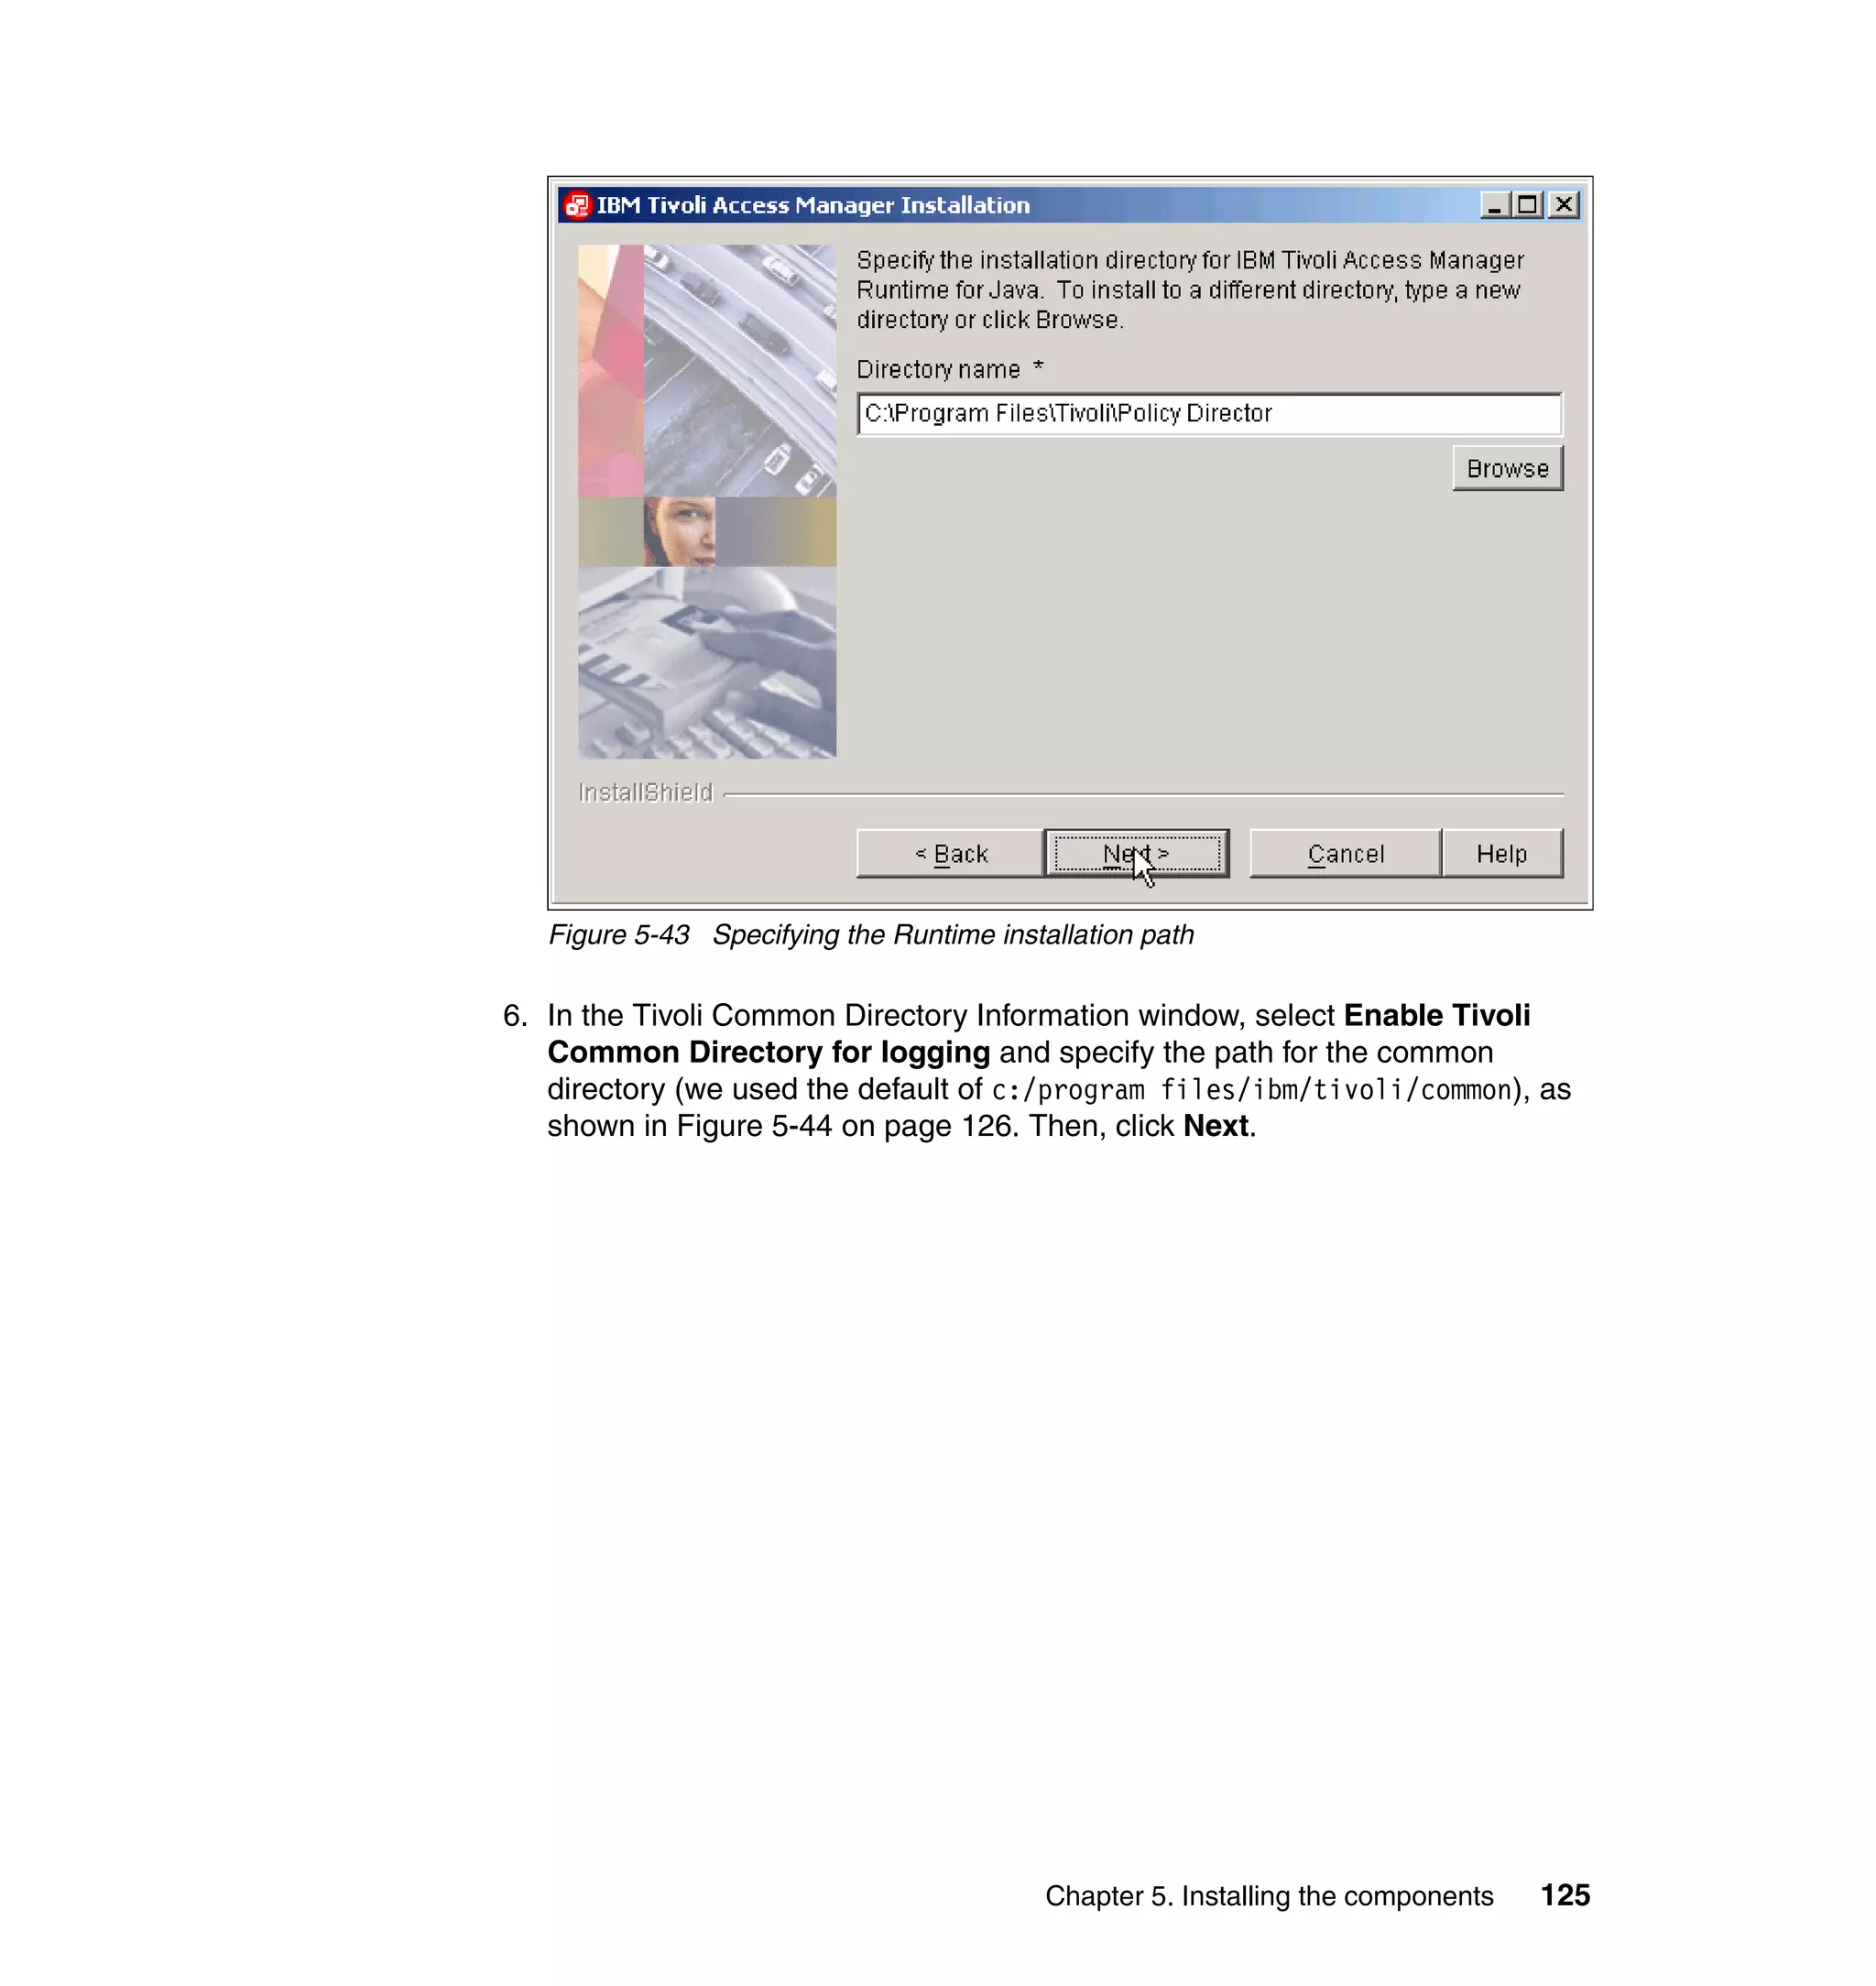
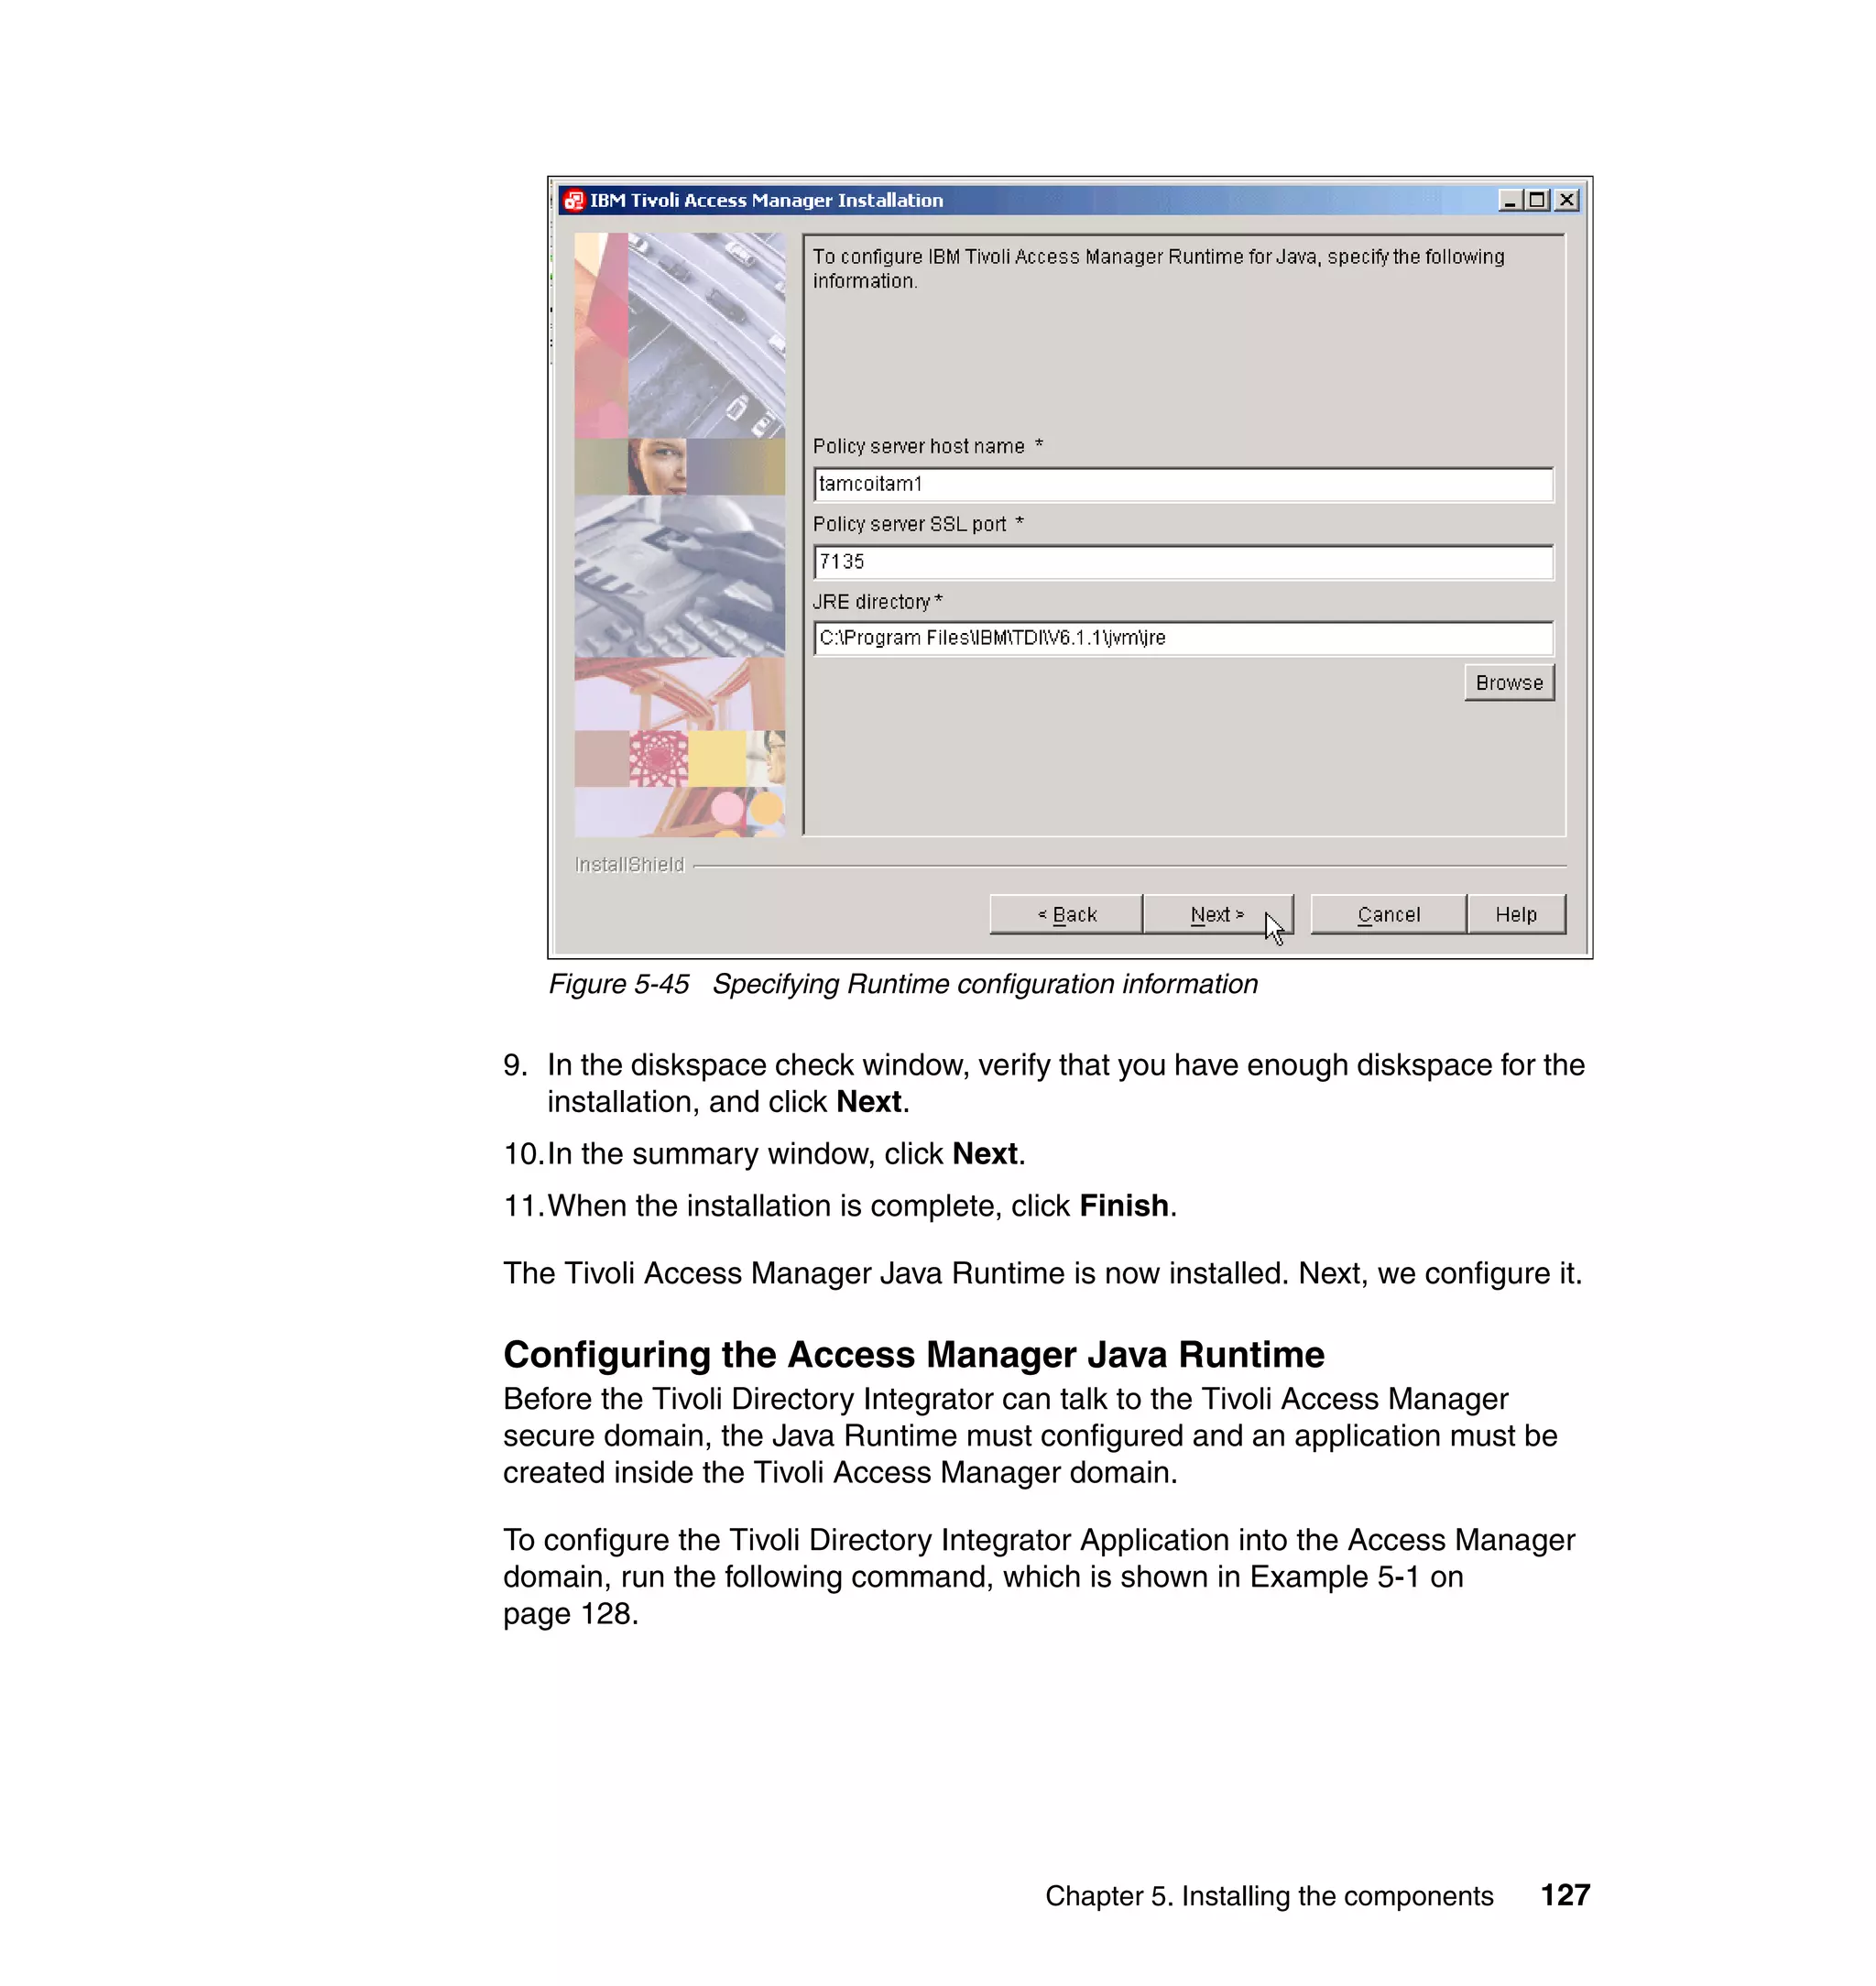
locale = locale[0];
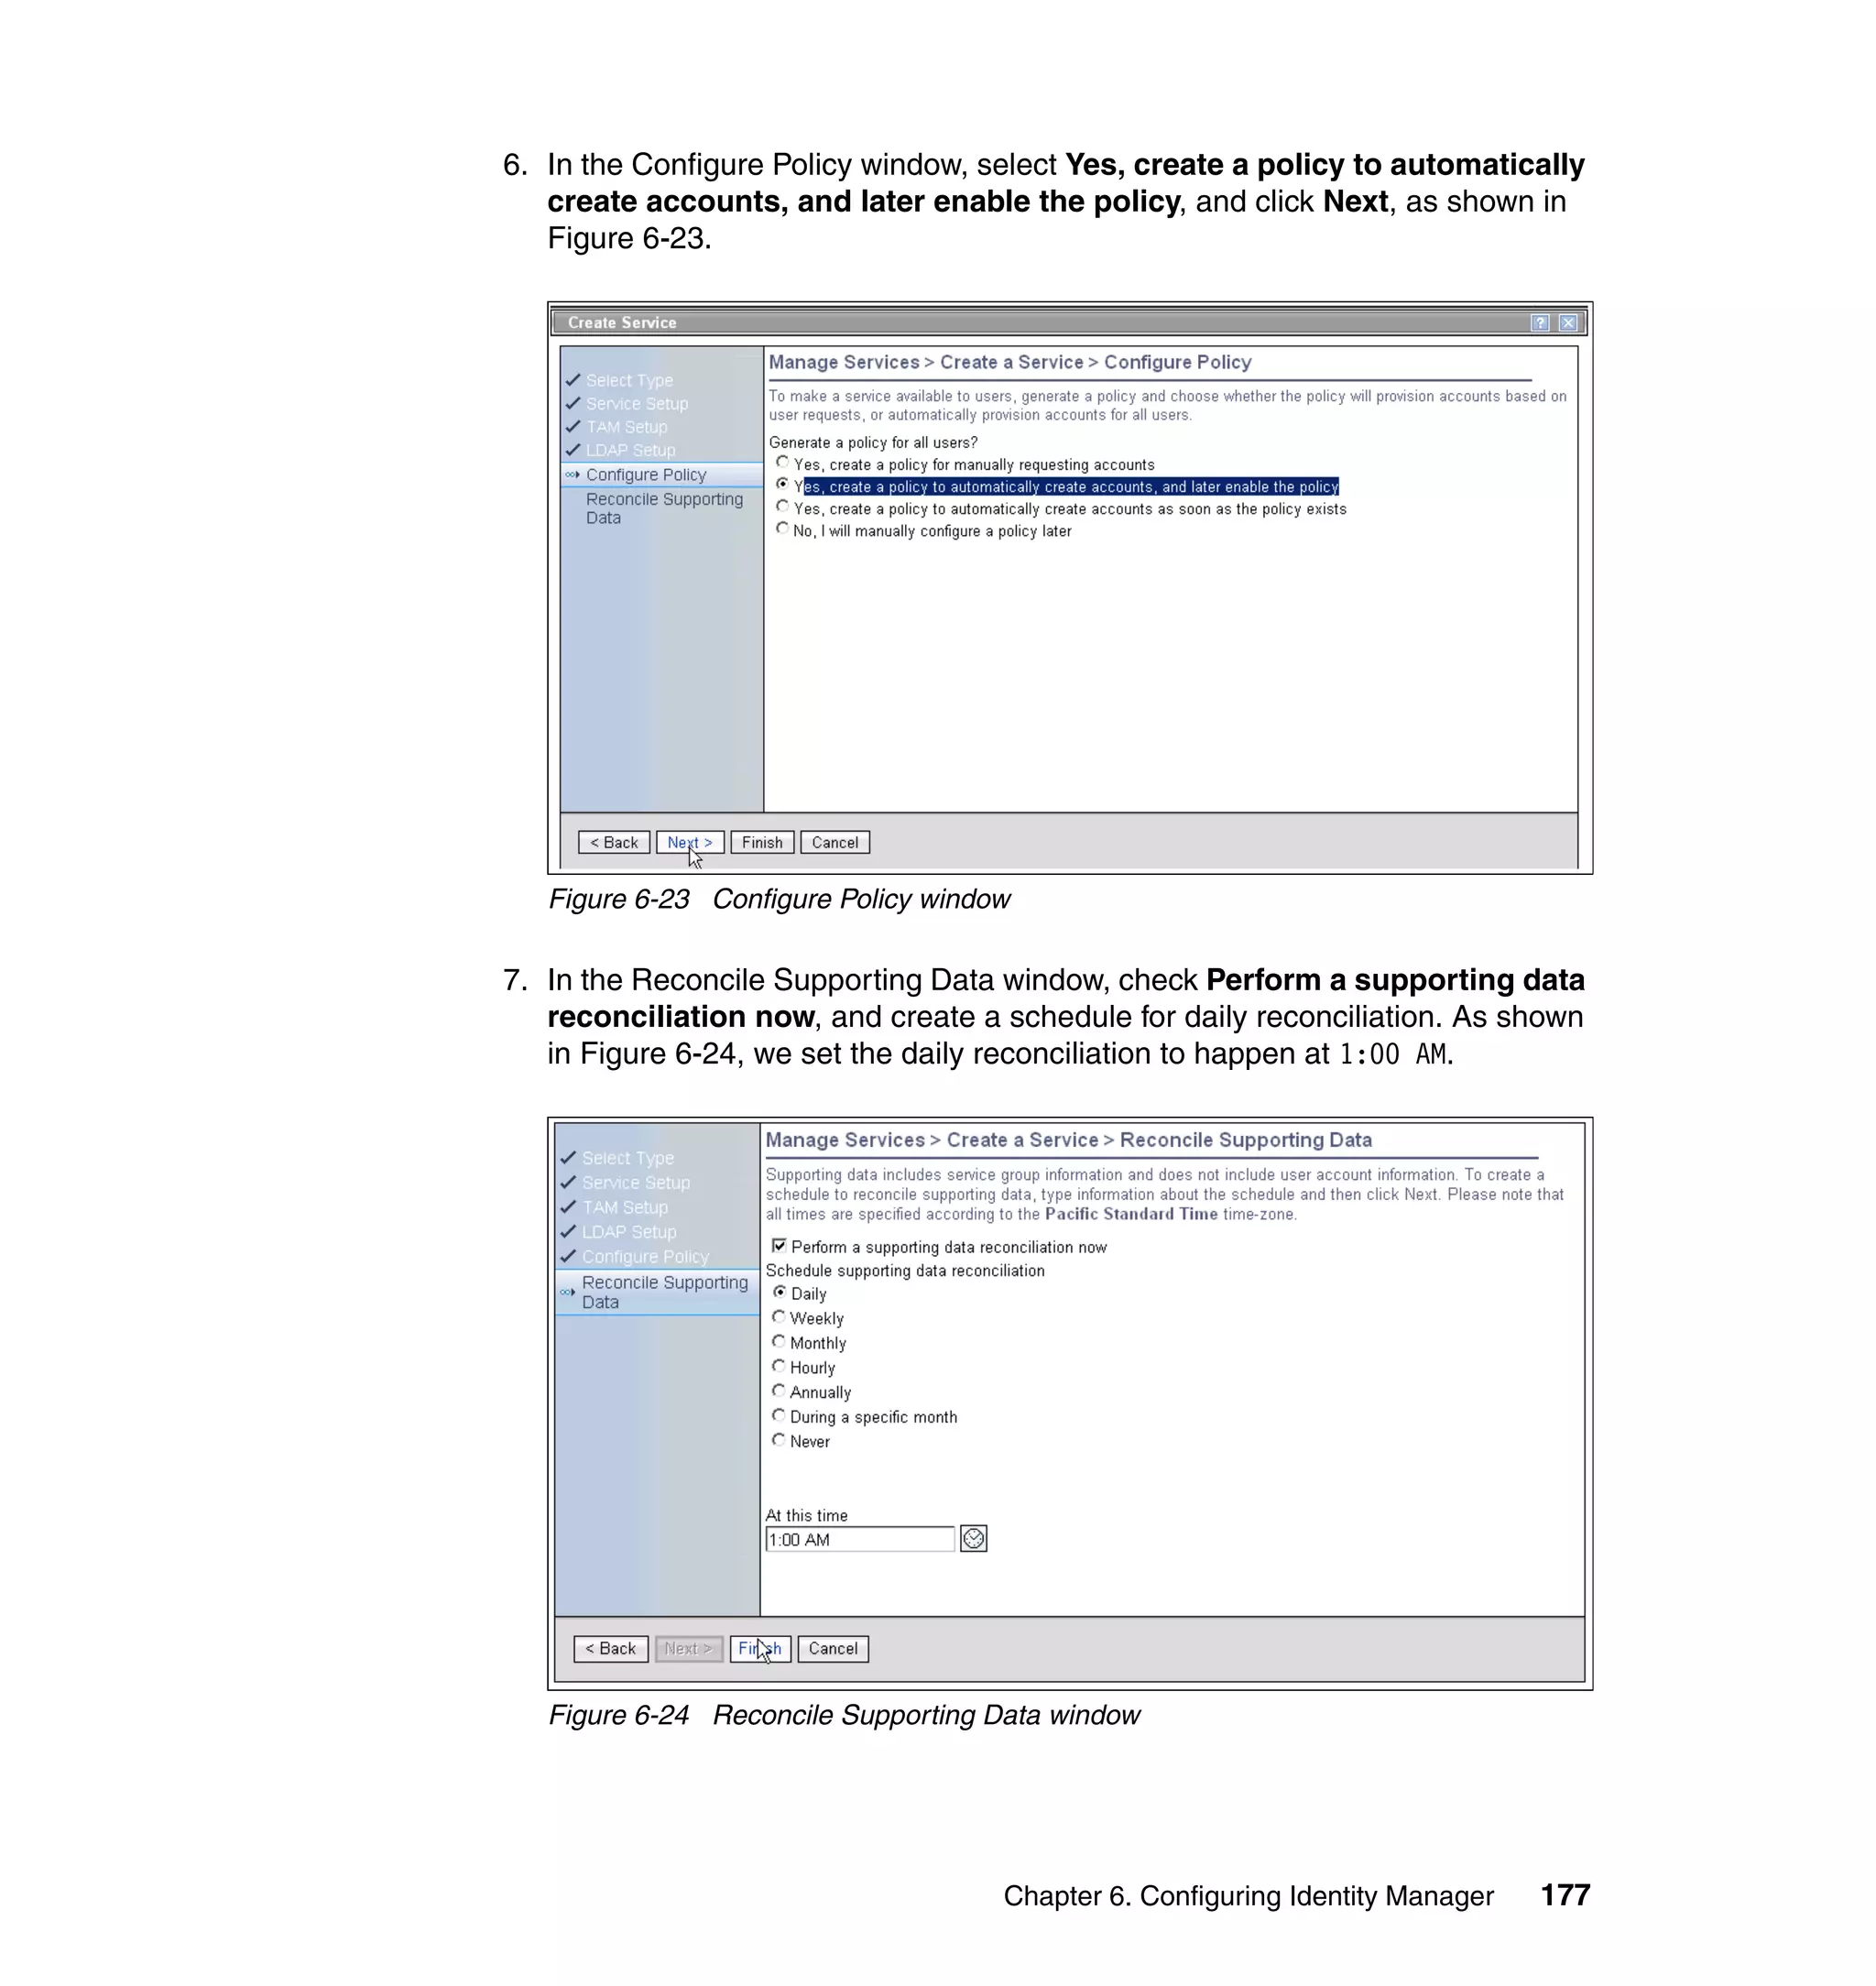
}
if (locale == null || locale.length == 0)
locale = "";
var firstAttribute = "";
var secondAttribute = "";
if (((fAttrKey != null) && (fAttrKey.length > 0)) || ((sAttrkey != null)
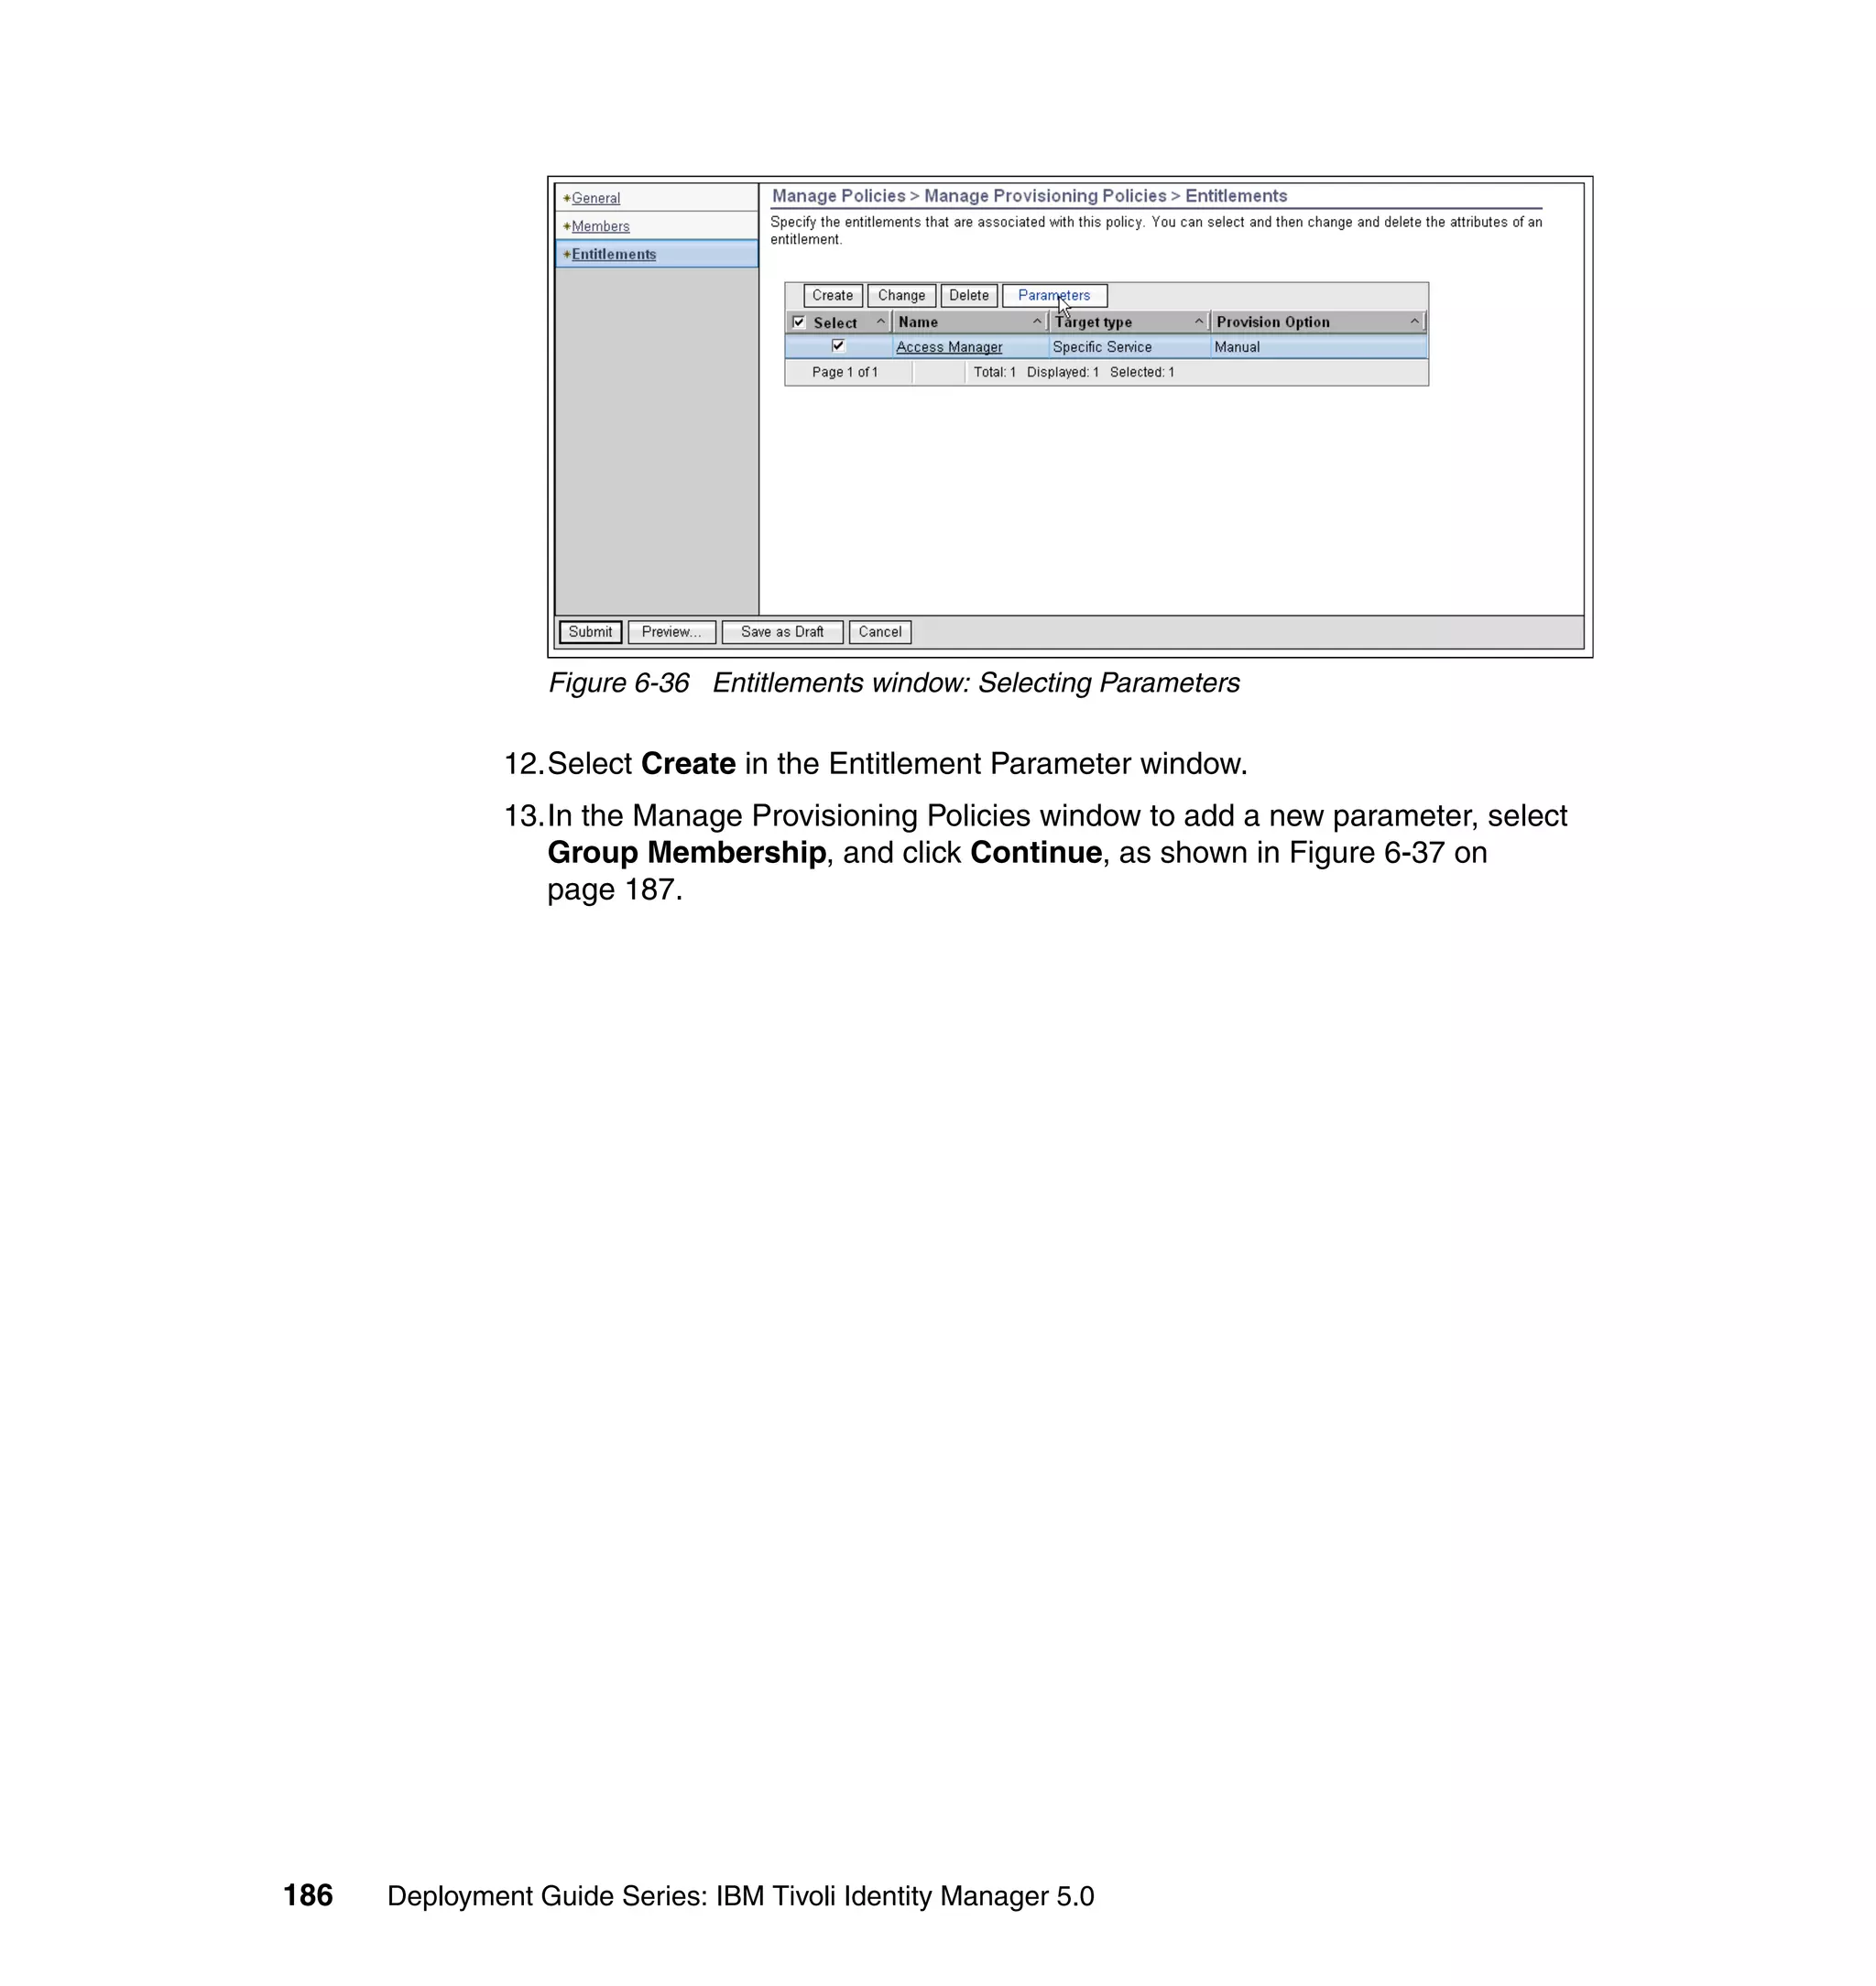
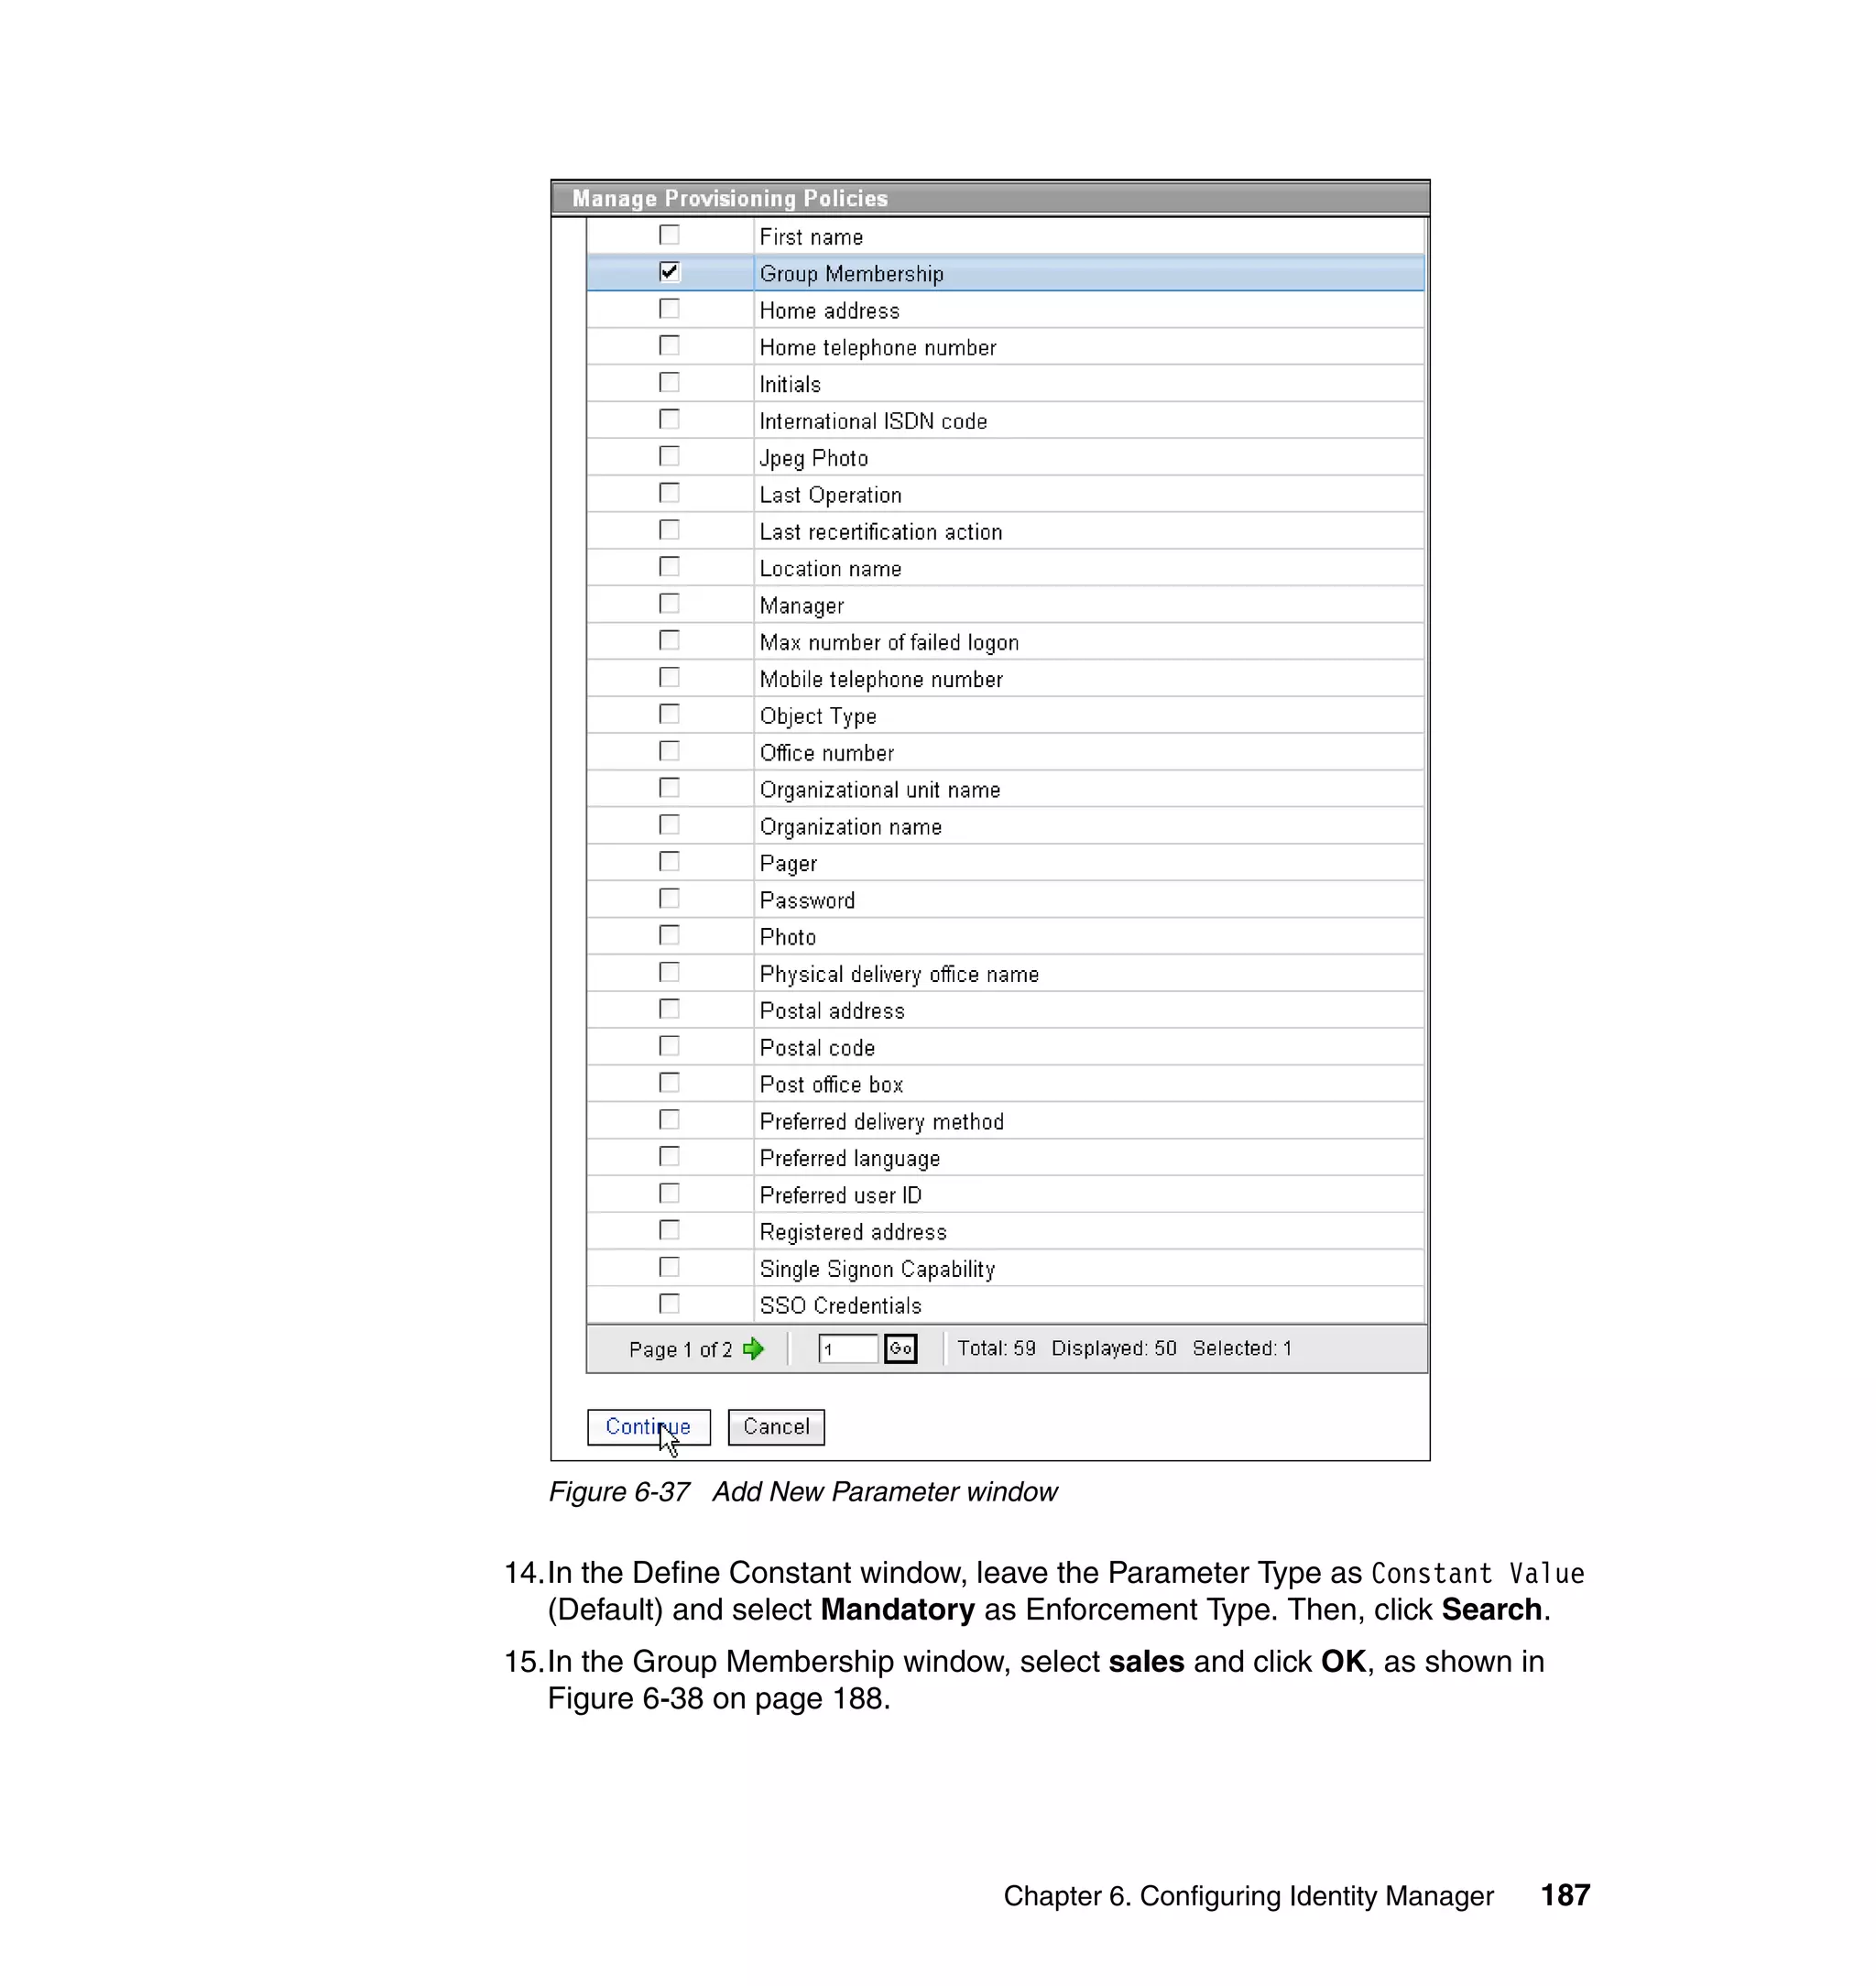
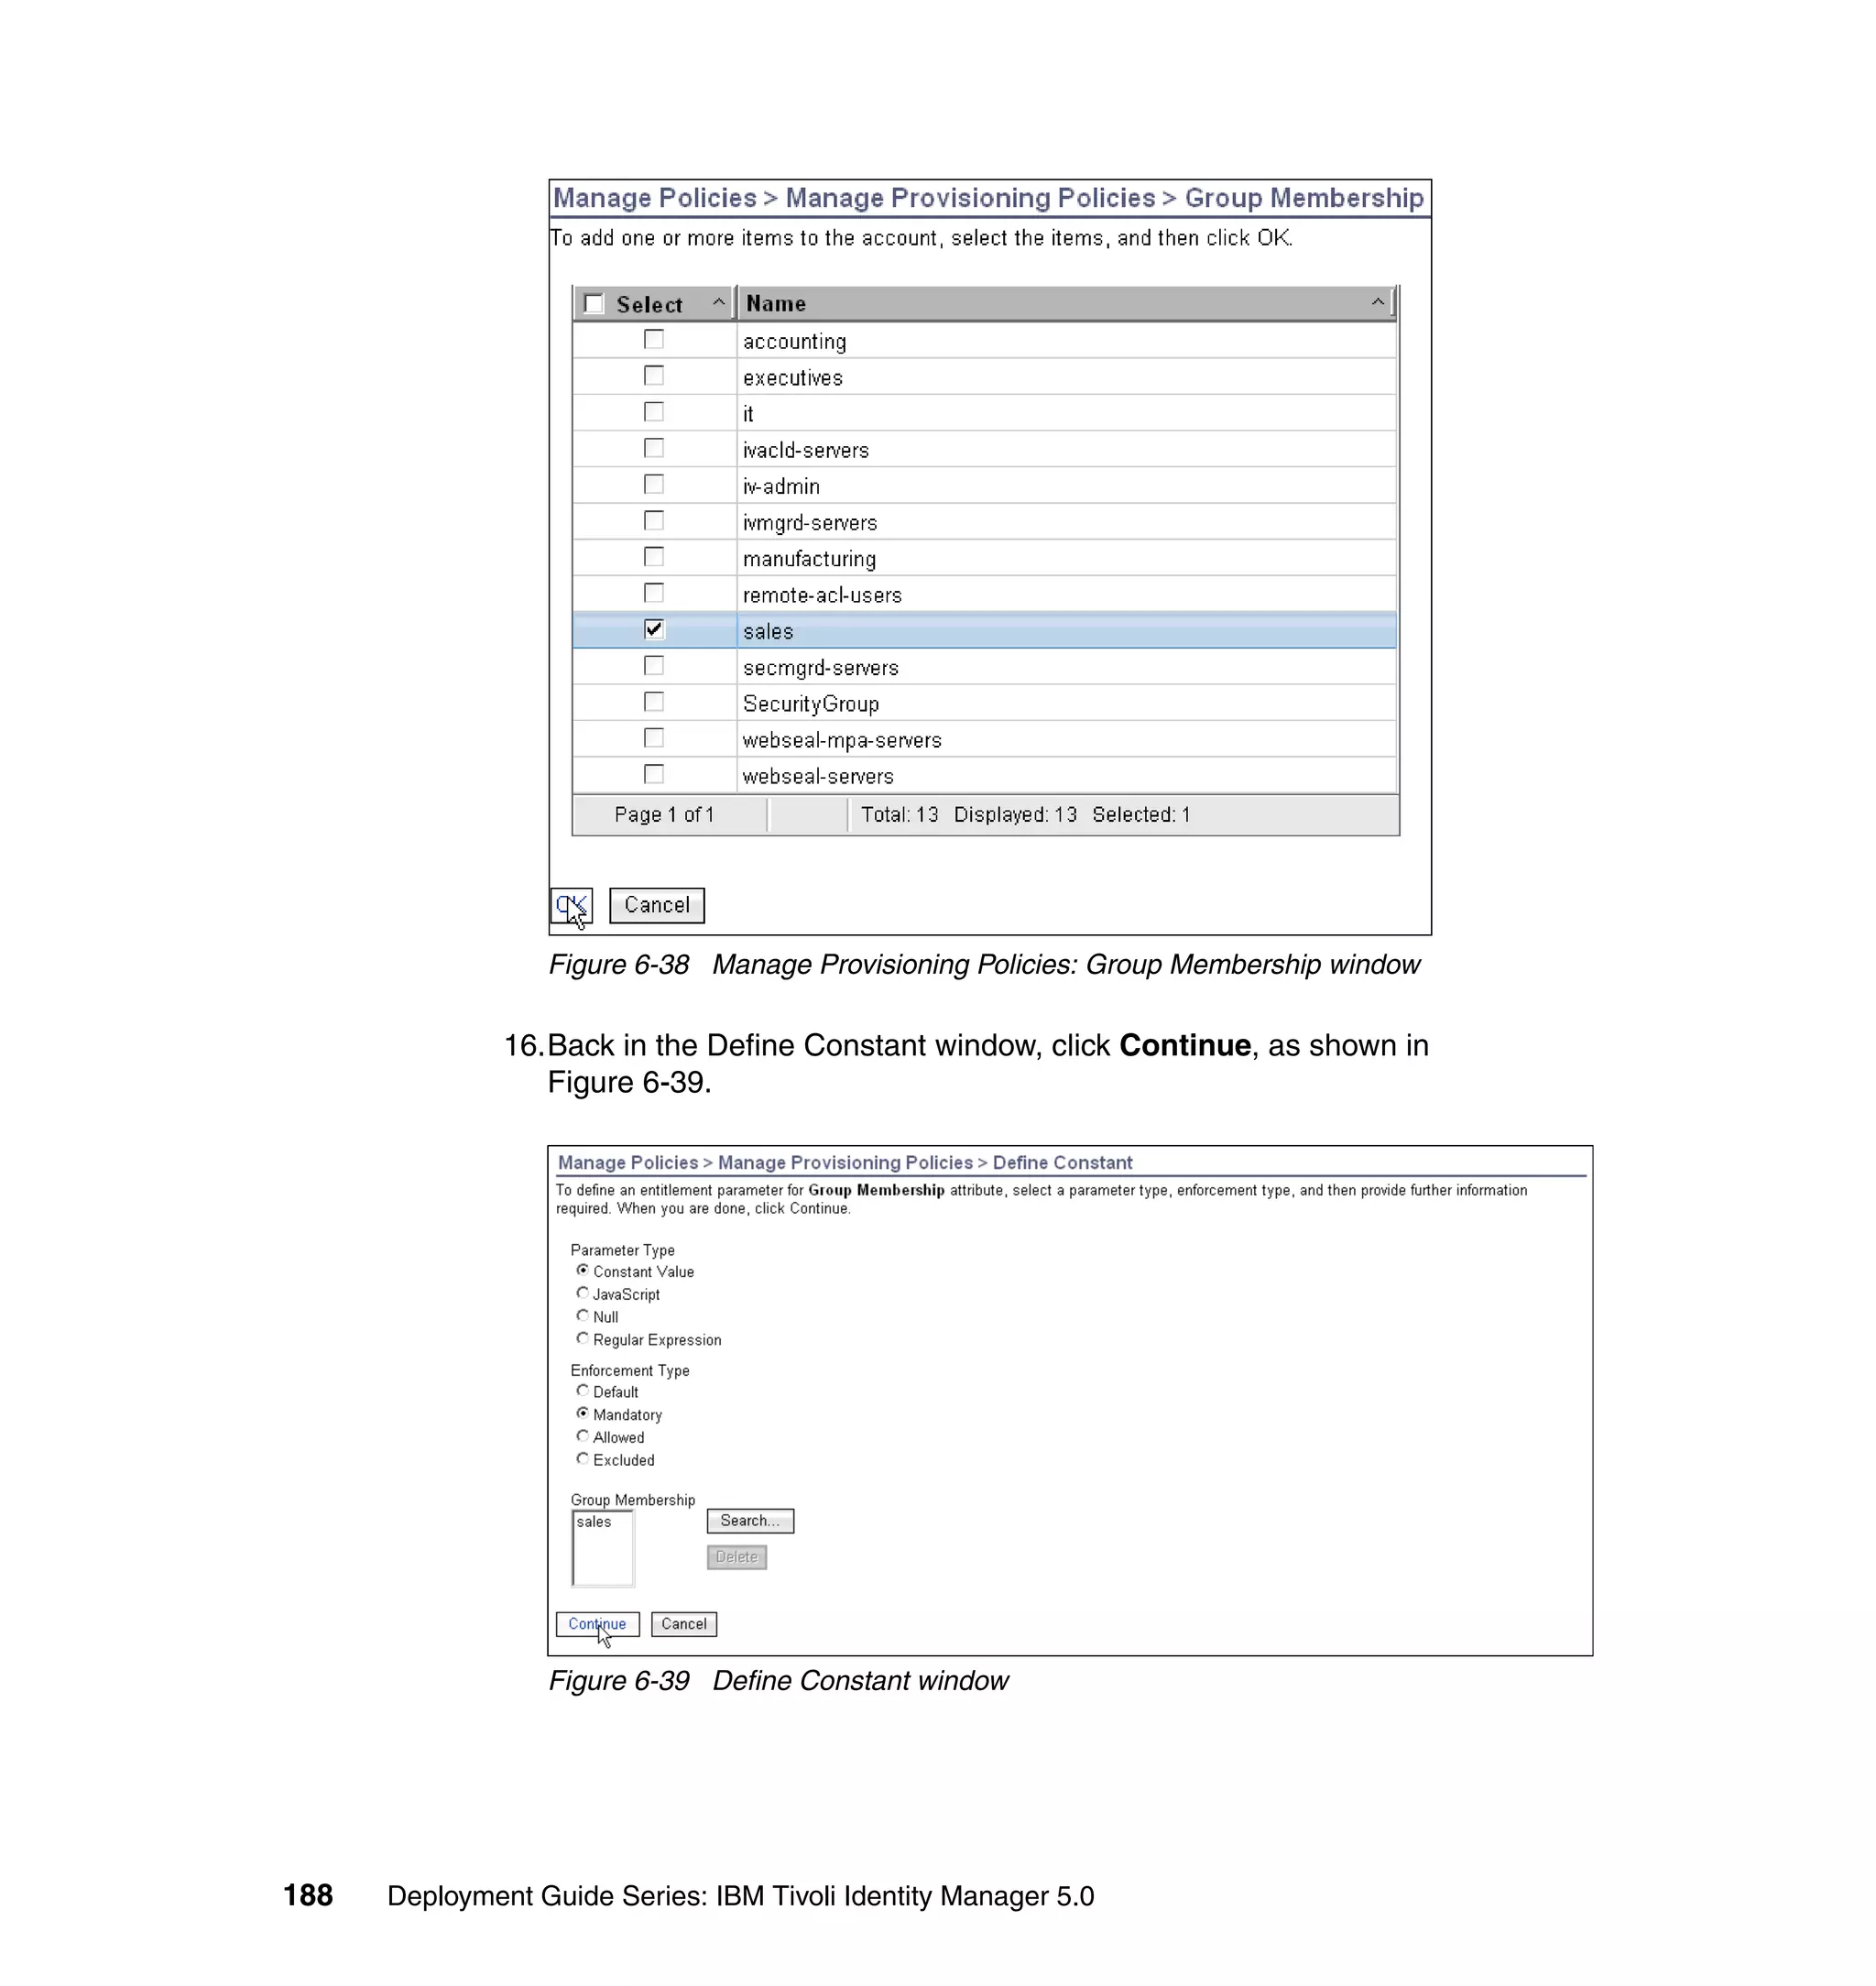
&& (sAttrkey.length > 0))) {
if ((fAttrKey != null) && (fAttrKey.length > 0)) {
firstAttribute = subject.getProperty(fAttrKey);
if (((firstAttribute != null) && (firstAttribute.length > 0)))
firstAttribute = firstAttribute[0];
if (firstAttribute == null || firstAttribute.length == 0)
firstAttribute = "";
else {
firstAttribute = IdentityPolicy.resolveAttribute(fAttrKey,
firstAttribute);
if ((idx1 > firstAttribute.length) || (idx1 == 0))
idx1 = firstAttribute.length;
firstAttribute = firstAttribute.substring(0, idx1);
}
if (fCase == UPPER_CASE)
firstAttribute = firstAttribute.toUpperCase(locale);
else if (fCase == LOWER_CASE)
firstAttribute = firstAttribute.toLowerCase(locale);
}
if ((sAttrKey != null) && (sAttrKey.length > 0)) {
secondAttribute = subject.getProperty(sAttrKey);
if (((secondAttribute != null) && (secondAttribute.length > 0)))
secondAttribute = secondAttribute[0];
if (secondAttribute == null || secondAttribute.length == 0)
secondAttribute = "";
else {
secondAttribute = IdentityPolicy.resolveAttribute(sAttrKey,
secondAttribute);
if ((idx2 > secondAttribute.length) || (idx2 == 0))
idx2 = secondAttribute.length;
secondAttribute = secondAttribute.substring(0, idx2);
}
if (sCase == UPPER_CASE)
secondAttribute = secondAttribute.toUpperCase(locale);
else if (sCase == LOWER_CASE)
secondAttribute = secondAttribute.toLowerCase(locale);
}
baseidentity = firstAttribute + "." + secondAttribute;
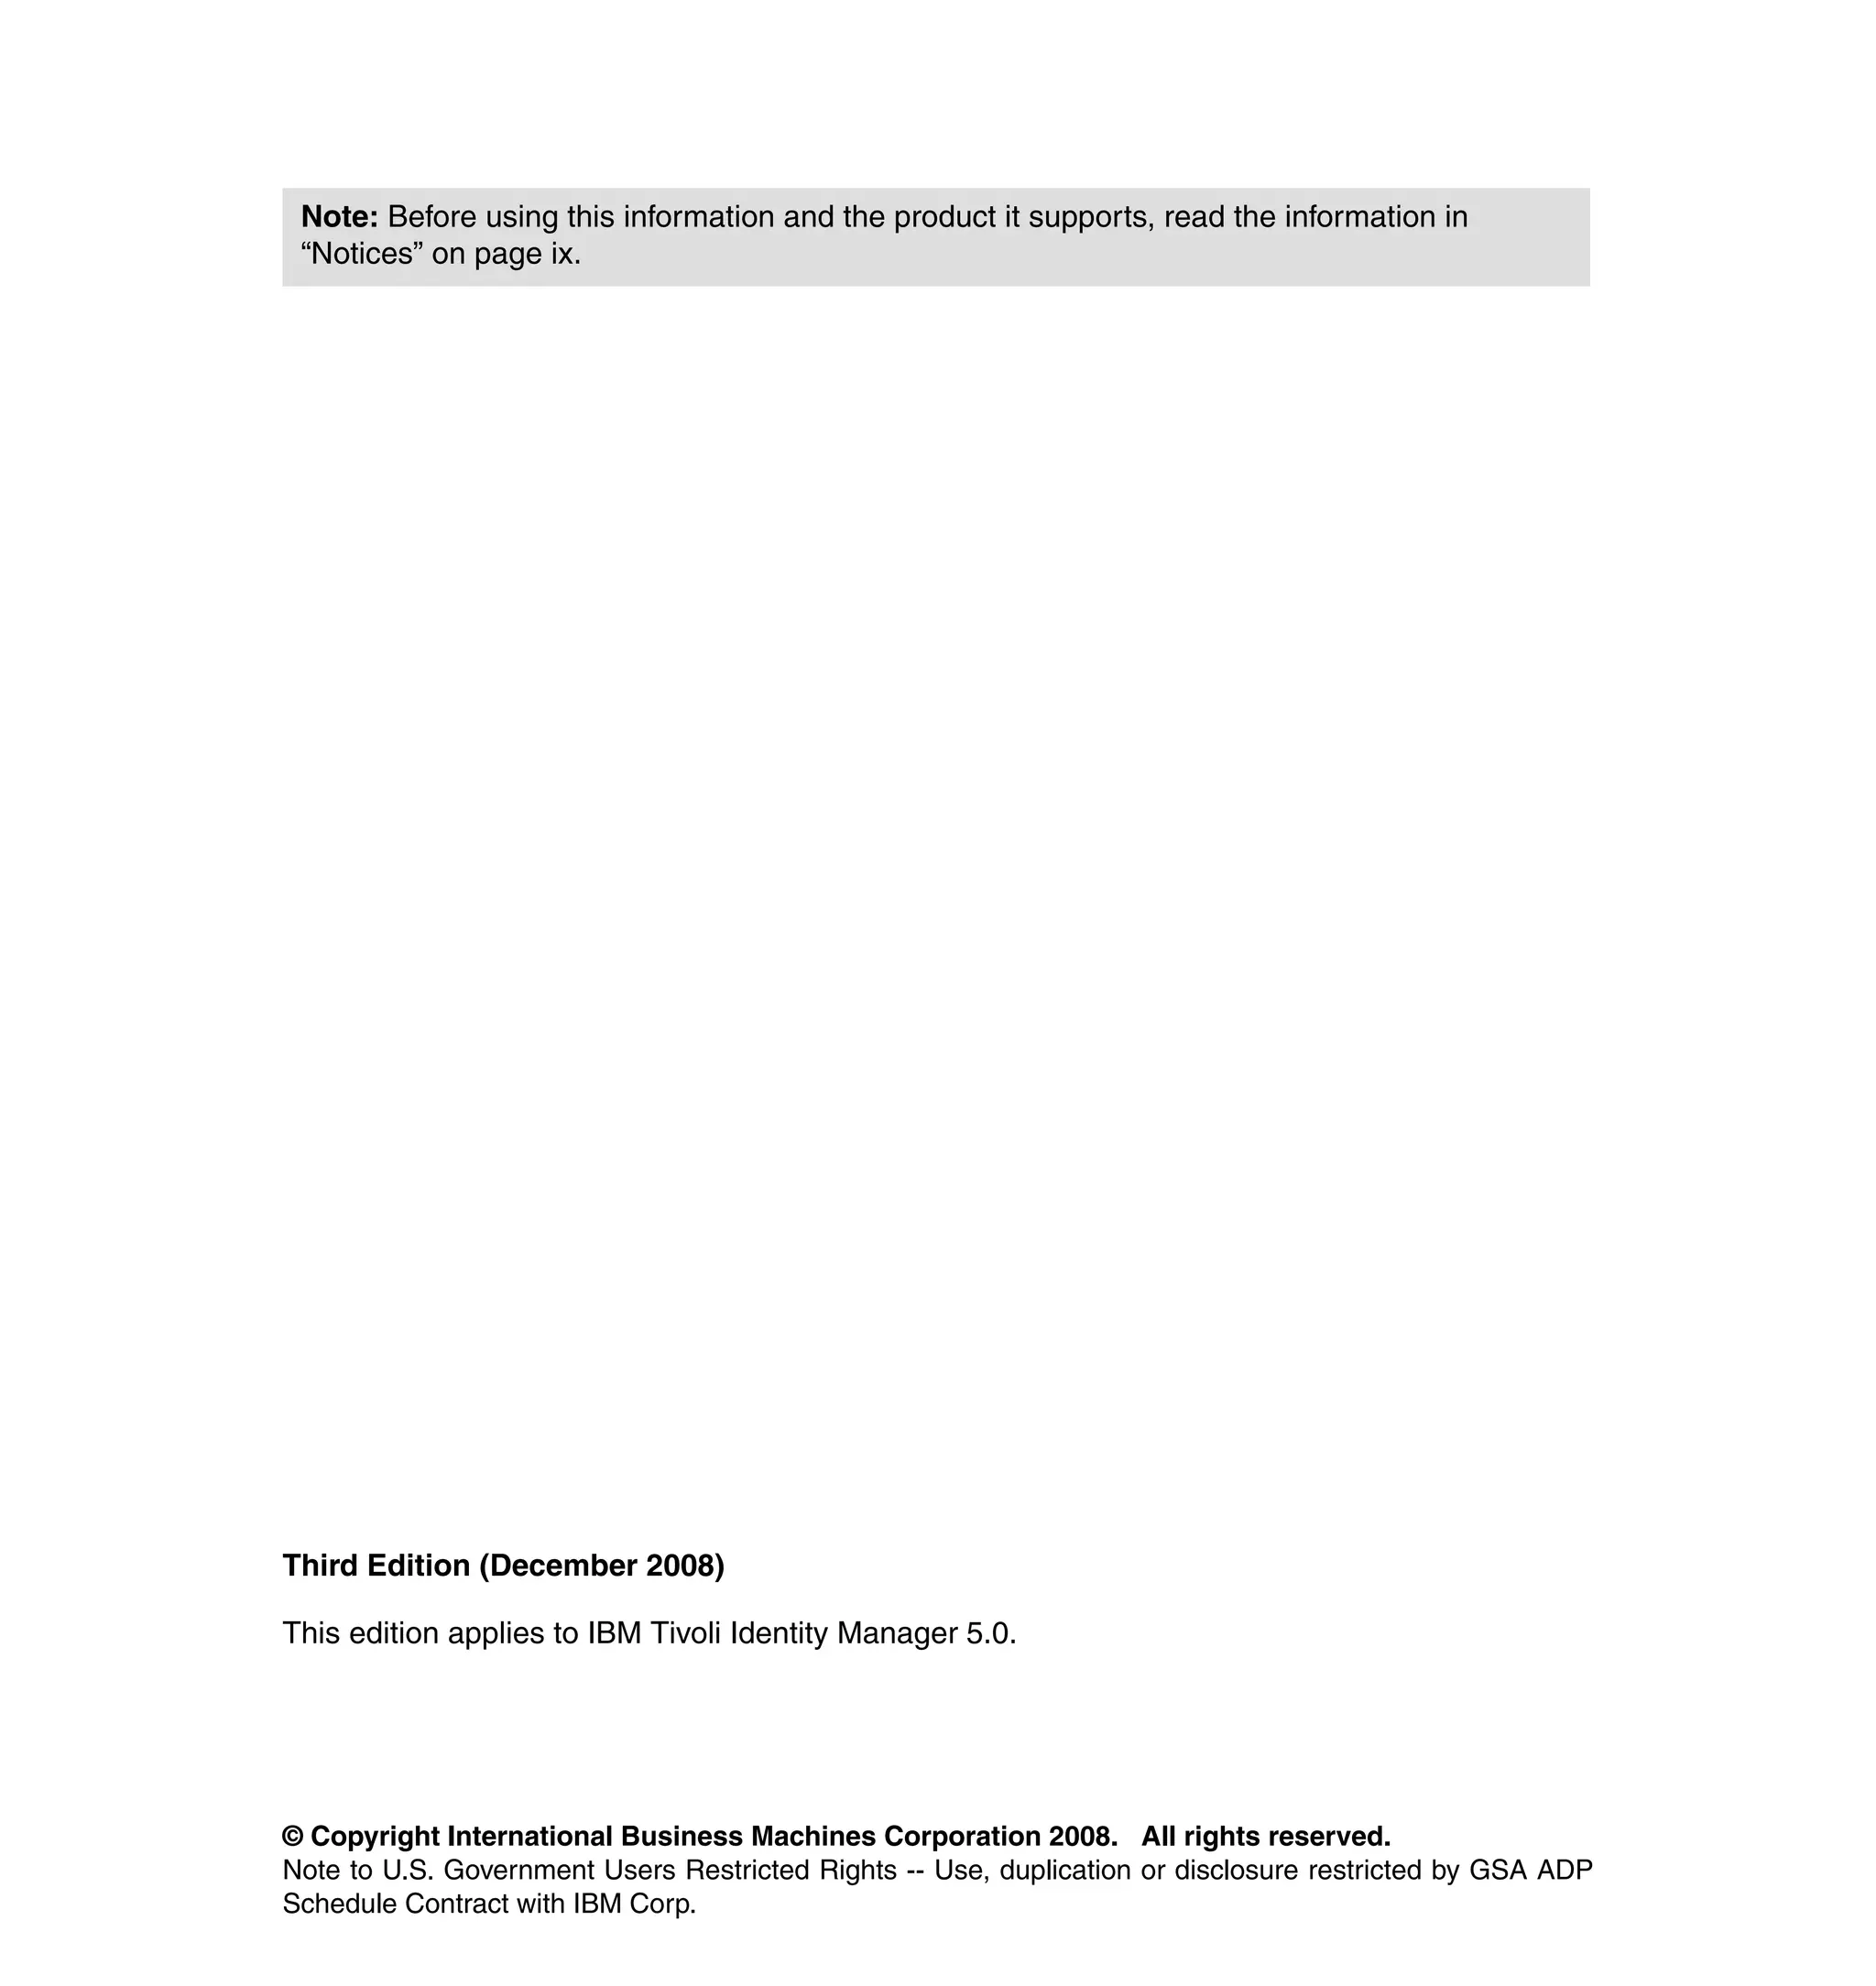
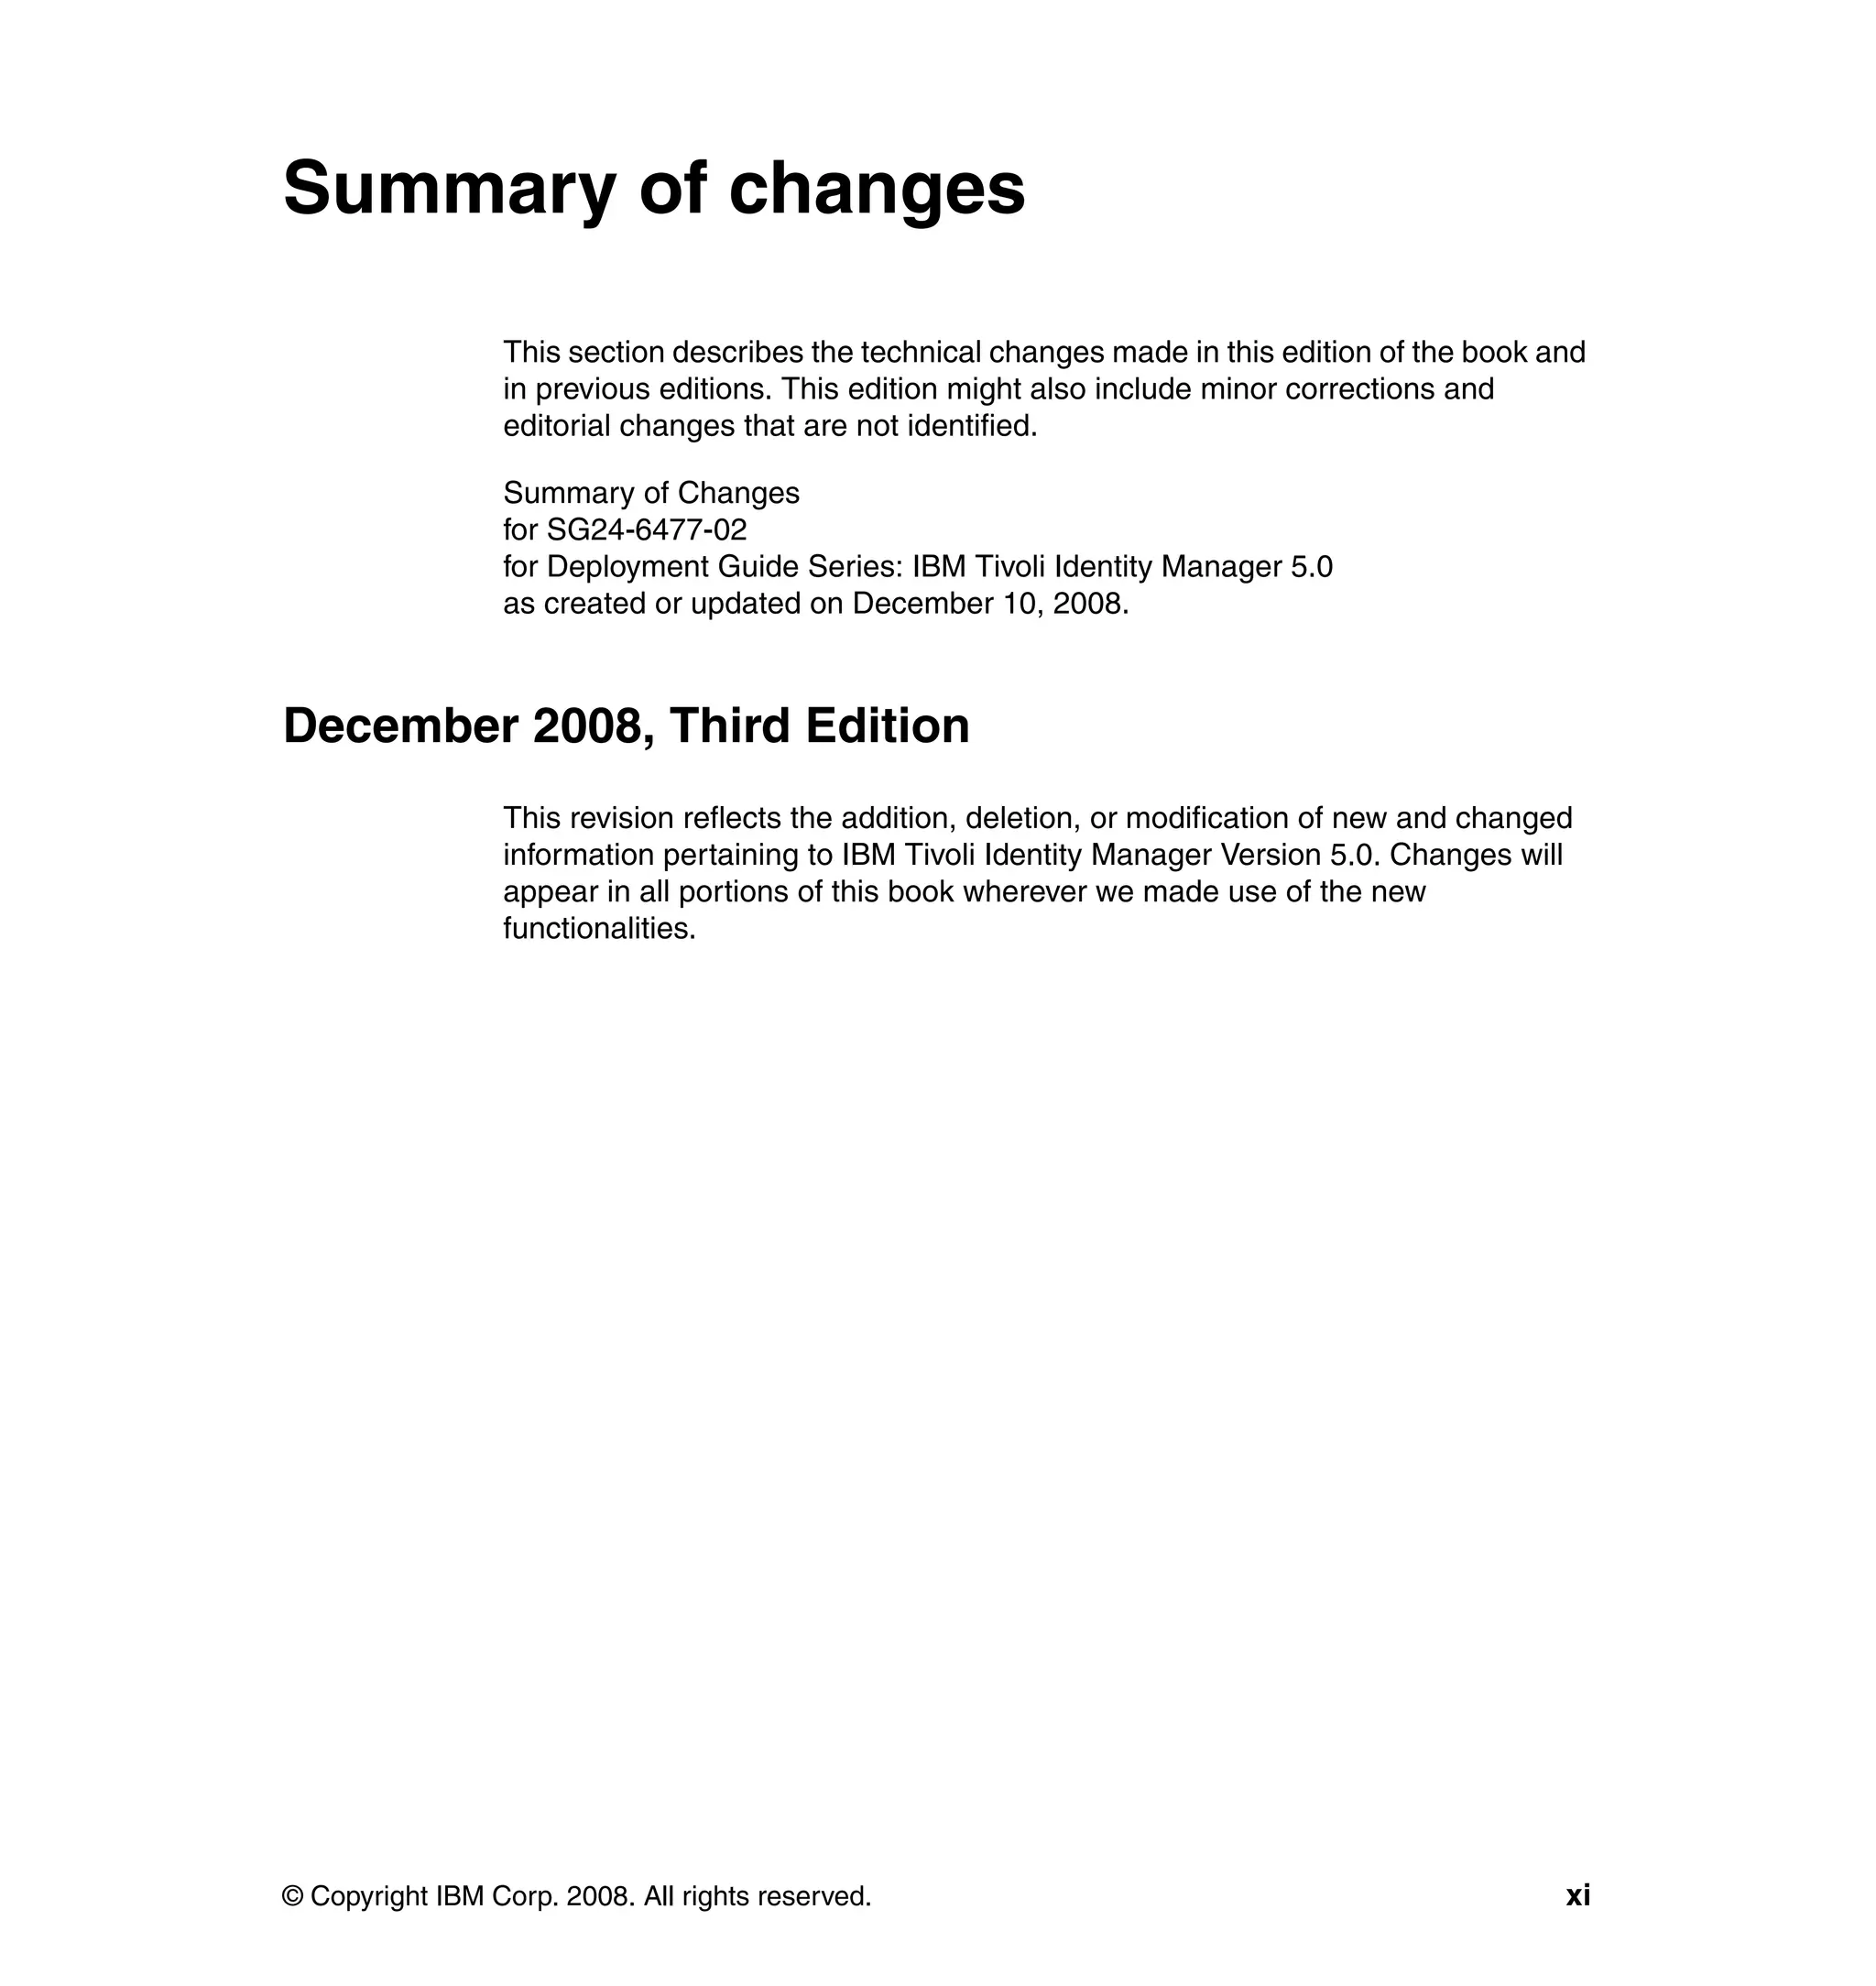
Chapter 6. Configuring Identity Manager 163](https://image.slidesharecdn.com/deploymentguideseriesibmtivoliidentitymanager5-0sg246477-120523195924-phpapp02/75/Deployment-guide-series-ibm-tivoli-identity-manager-5-0-sg246477-181-2048.jpg)
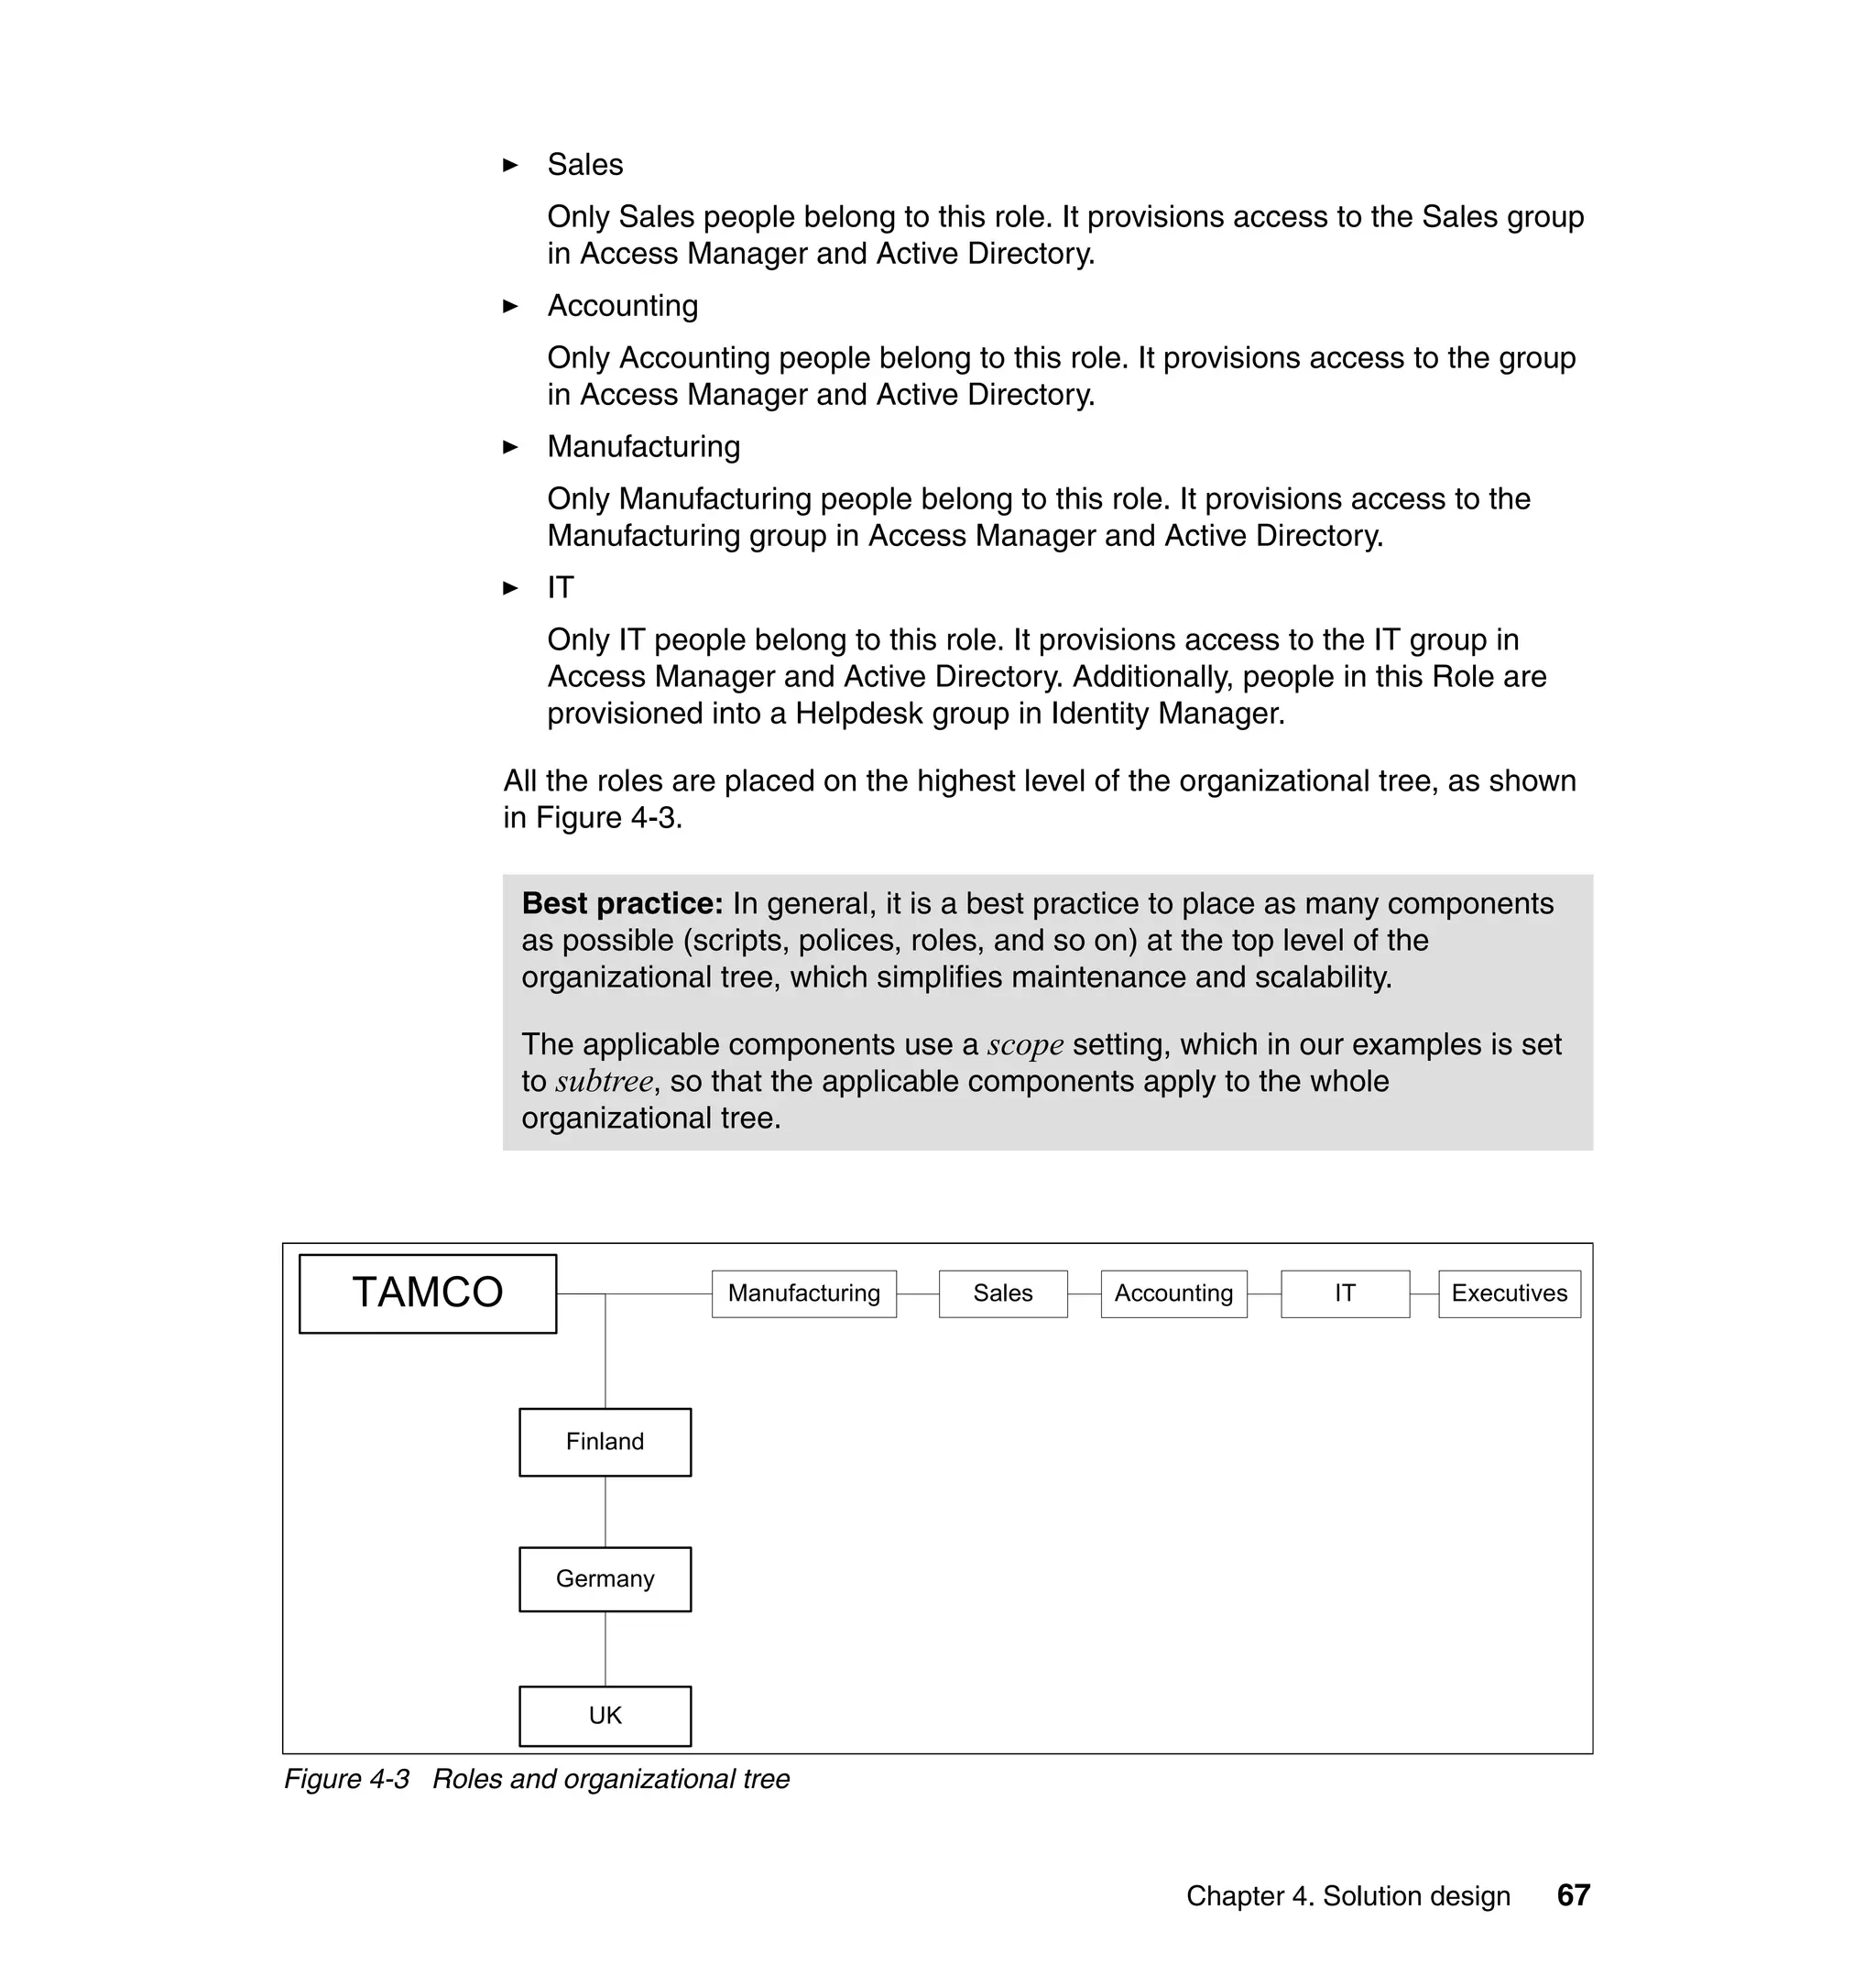
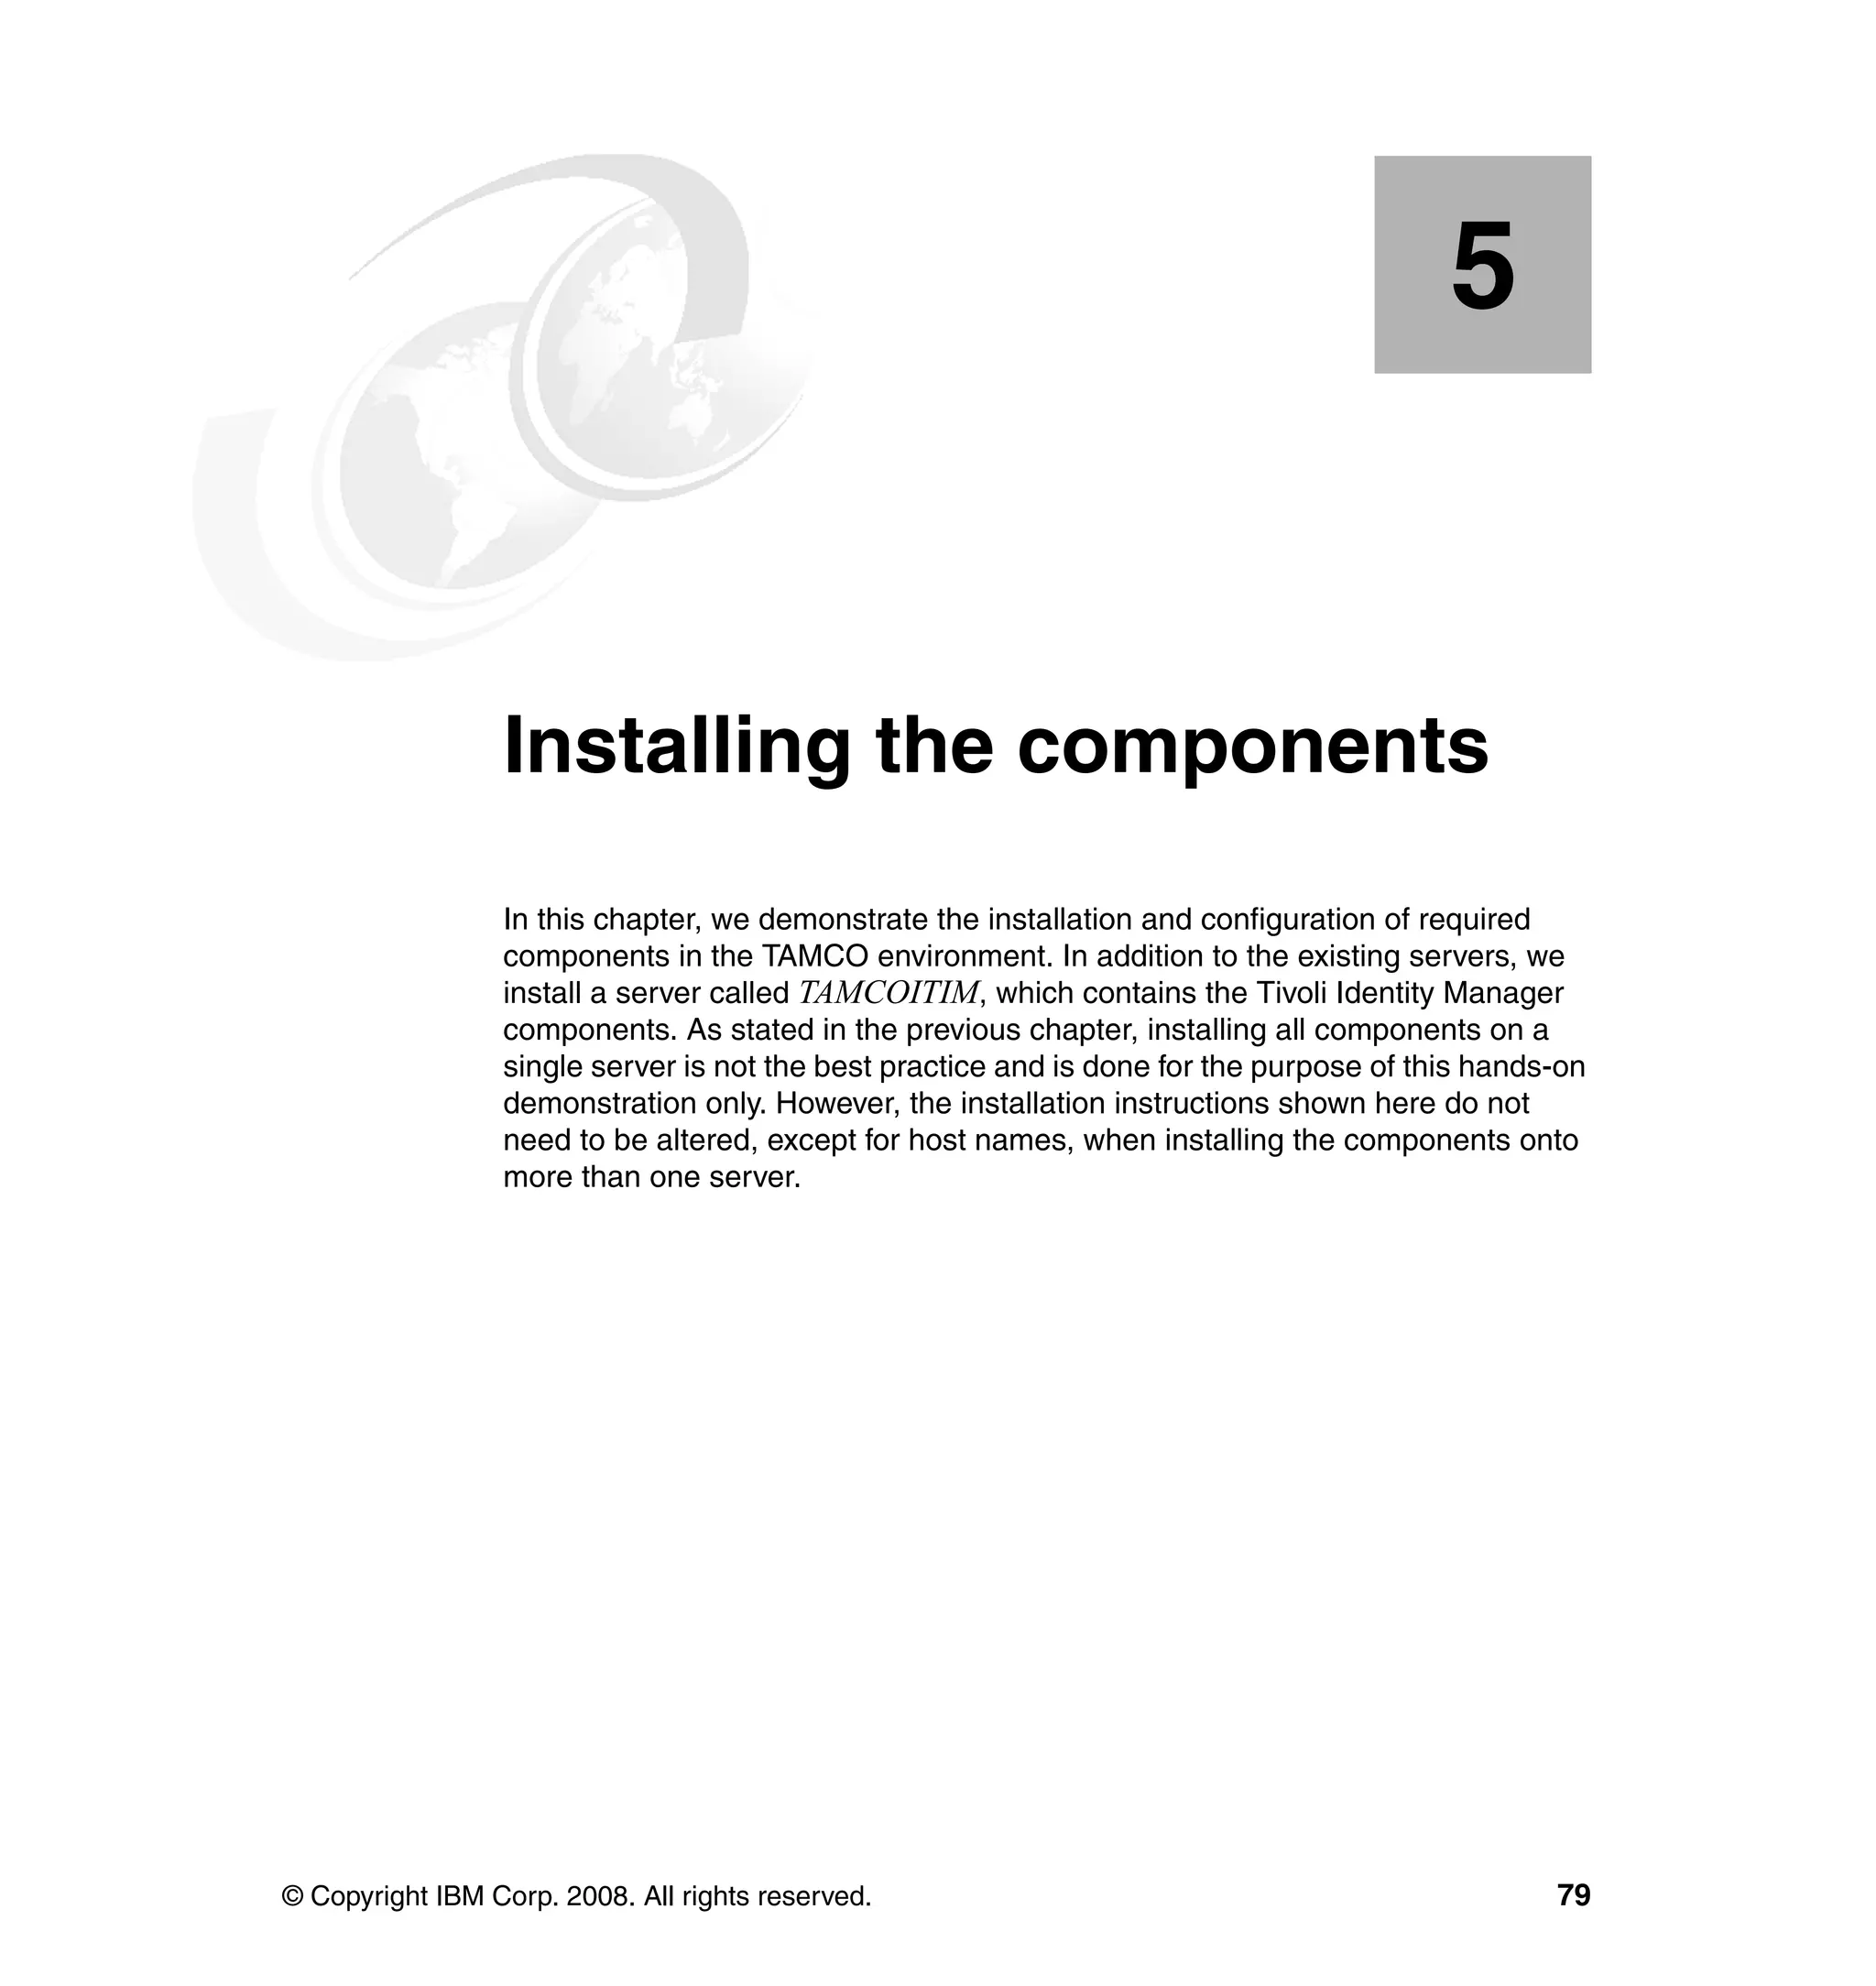
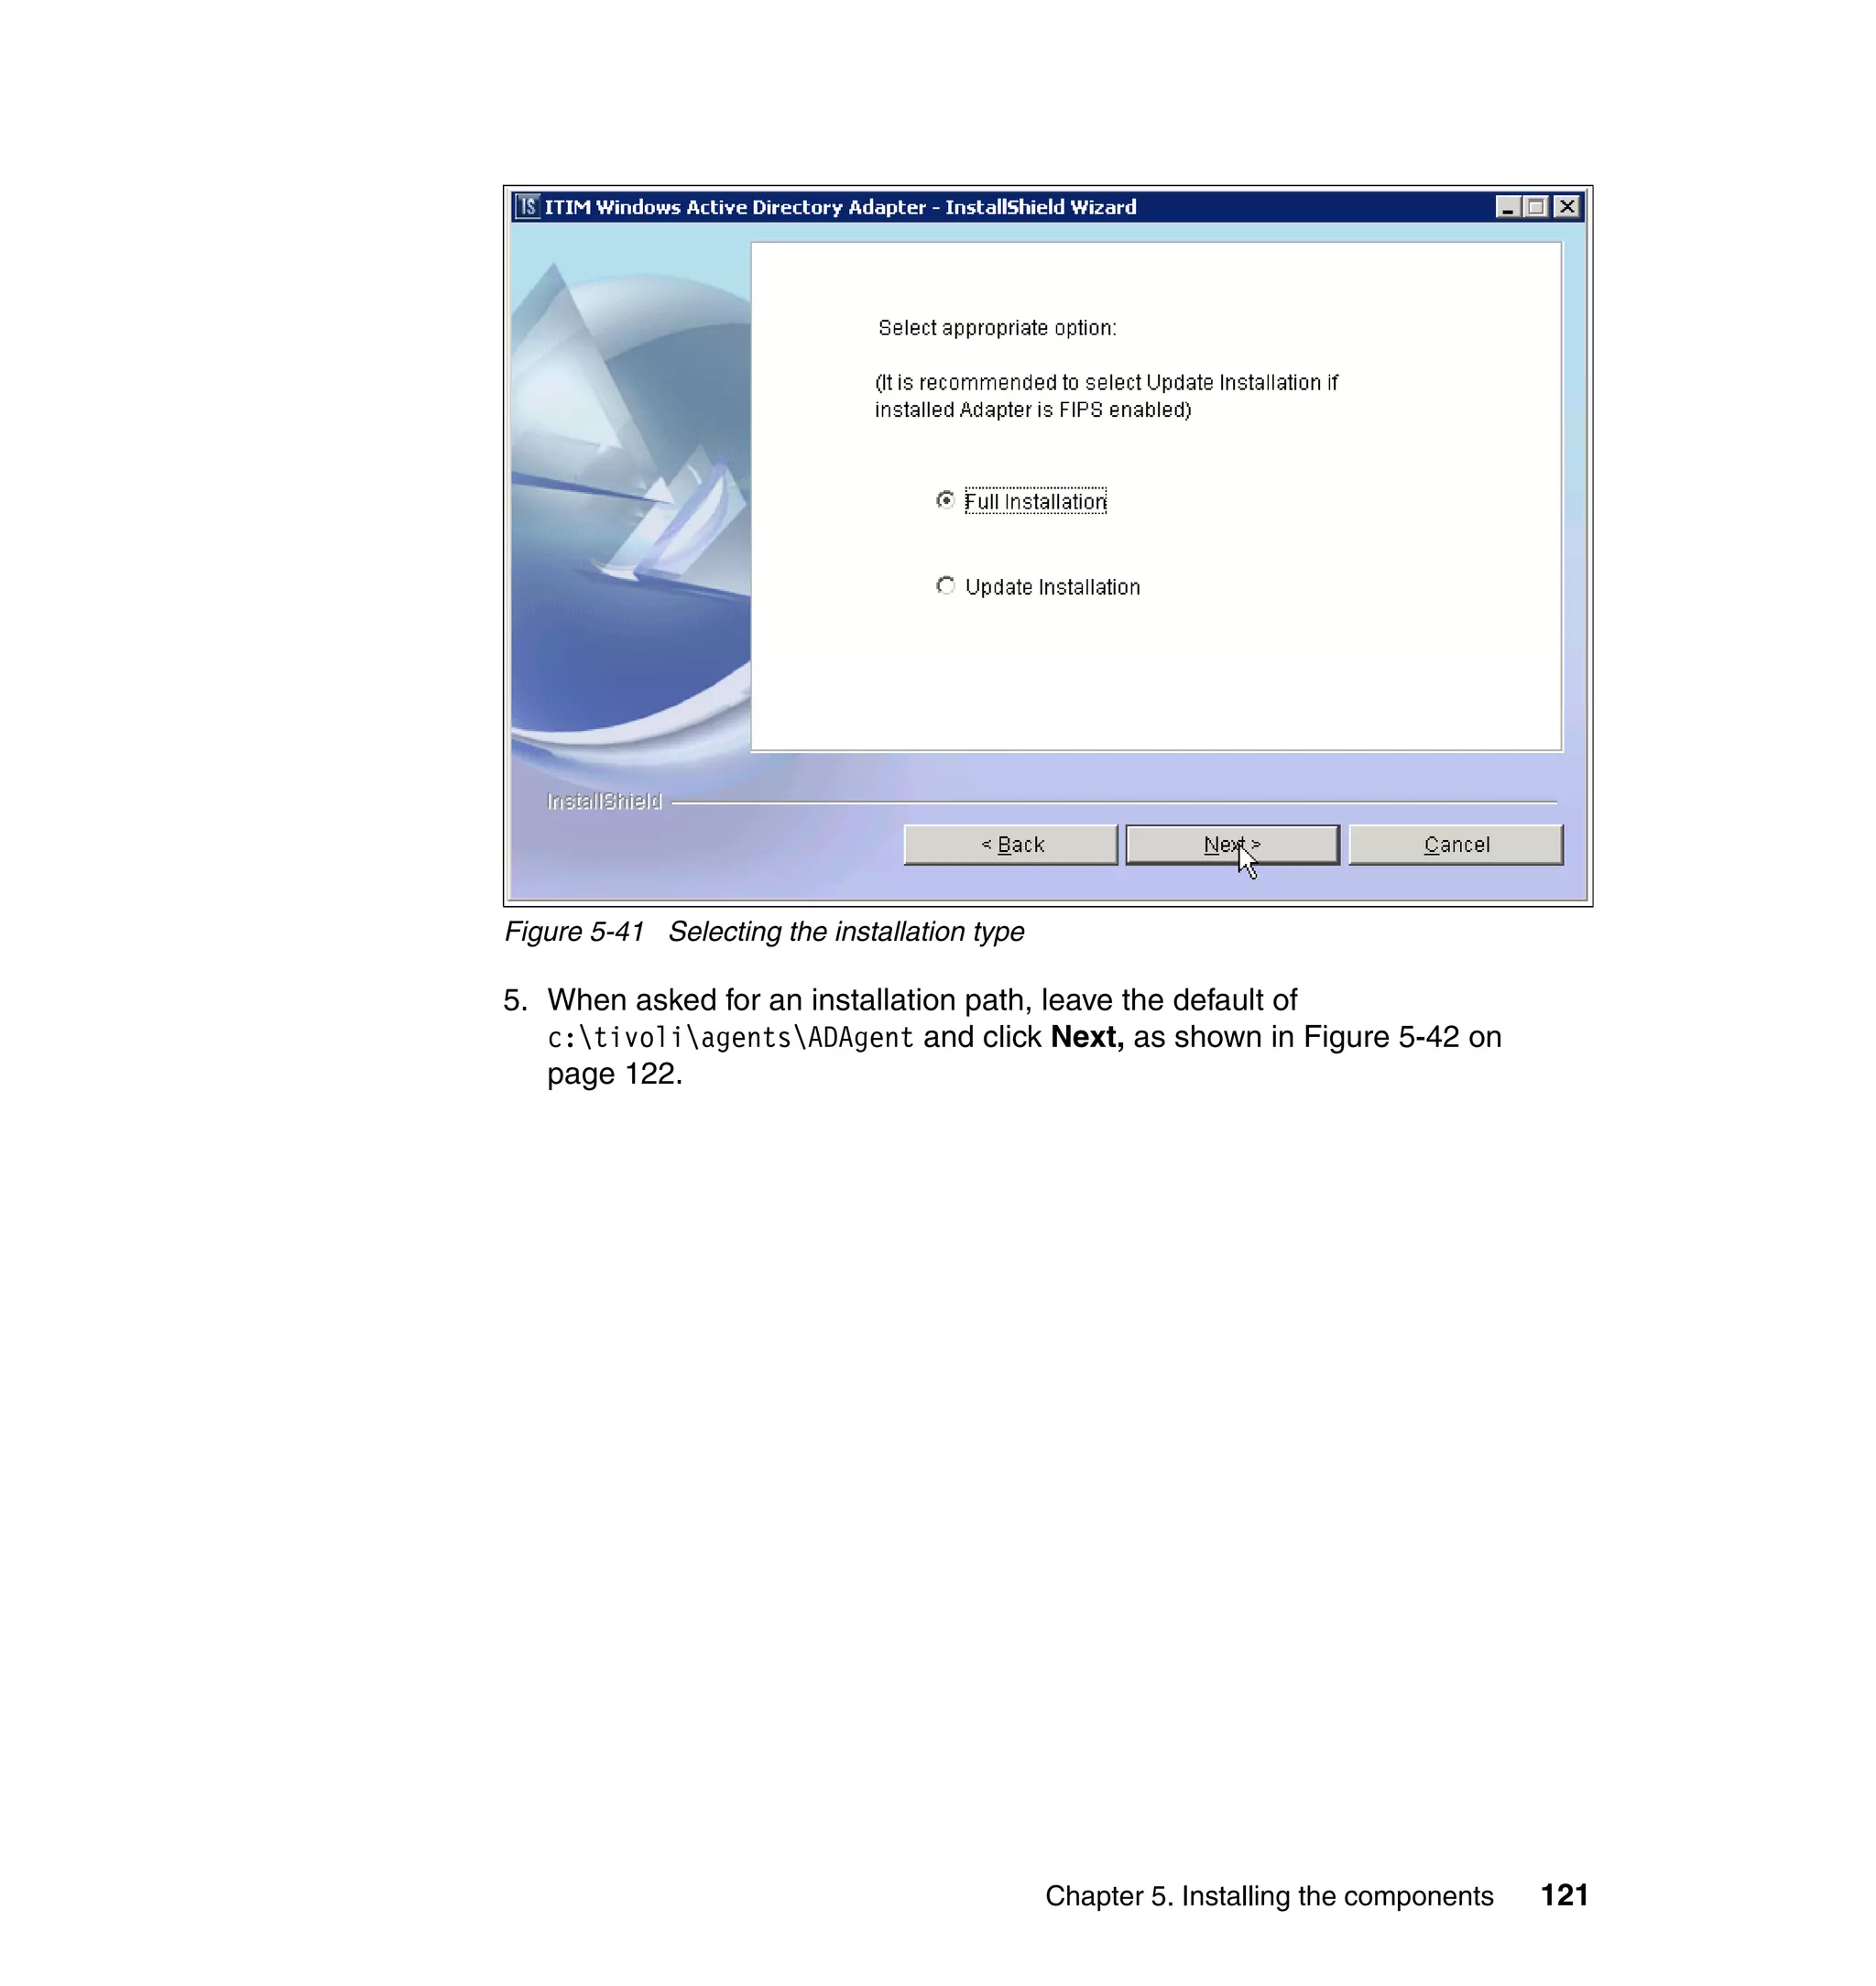
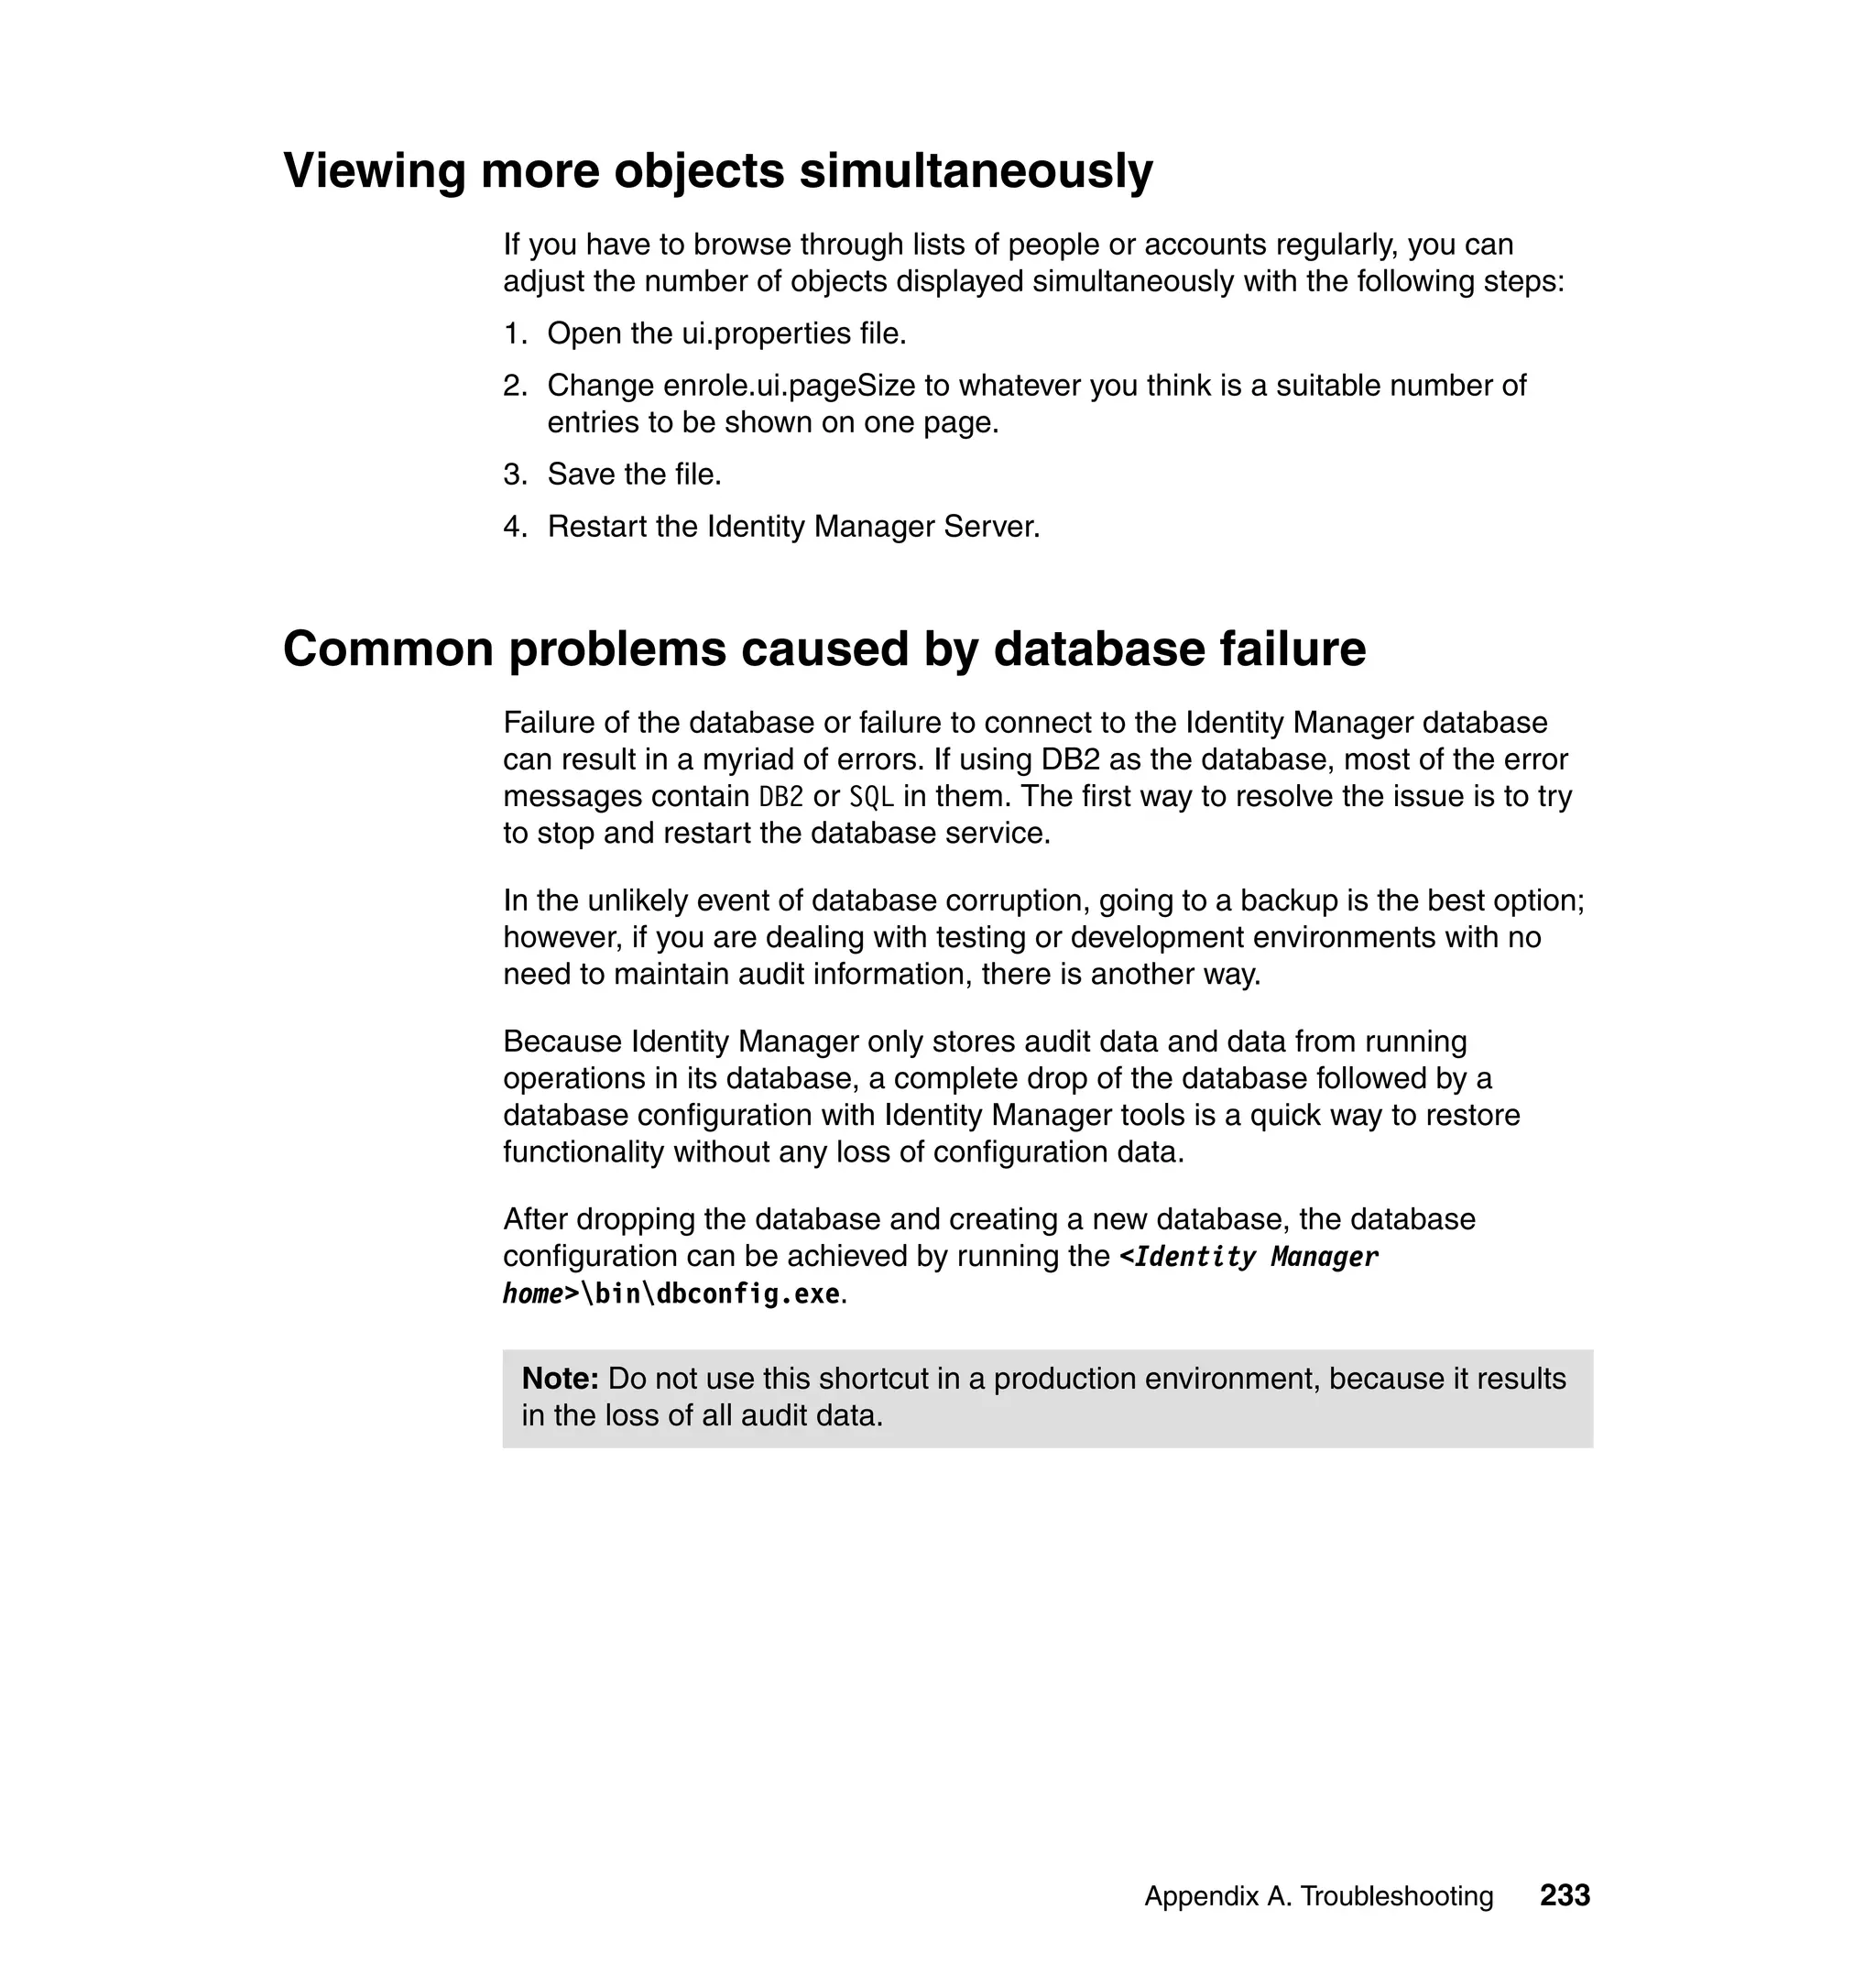
![}
if ((baseidentity == null) || (baseidentity.length == 0)) {
var givenname = subject.getProperty("givenname");
if (((givenname != null) && (givenname.length > 0)))
givenname = givenname[0];
if (givenname == null || givenname.length == 0)
givenname = "";
else
givenname = givenname.substring(0, 1);
baseidentity = givenname + "." + subject.getProperty("sn")[0];
}
tf = IdentityPolicy.userIDExists(baseidentity, false, false);
if (!tf) {
return baseidentity;
}
while (tf) {
counter+=1;
identity = baseidentity + counter;
tf = IdentityPolicy.userIDExists(identity, false, false);
}
return identity;
}
return createIdentity();
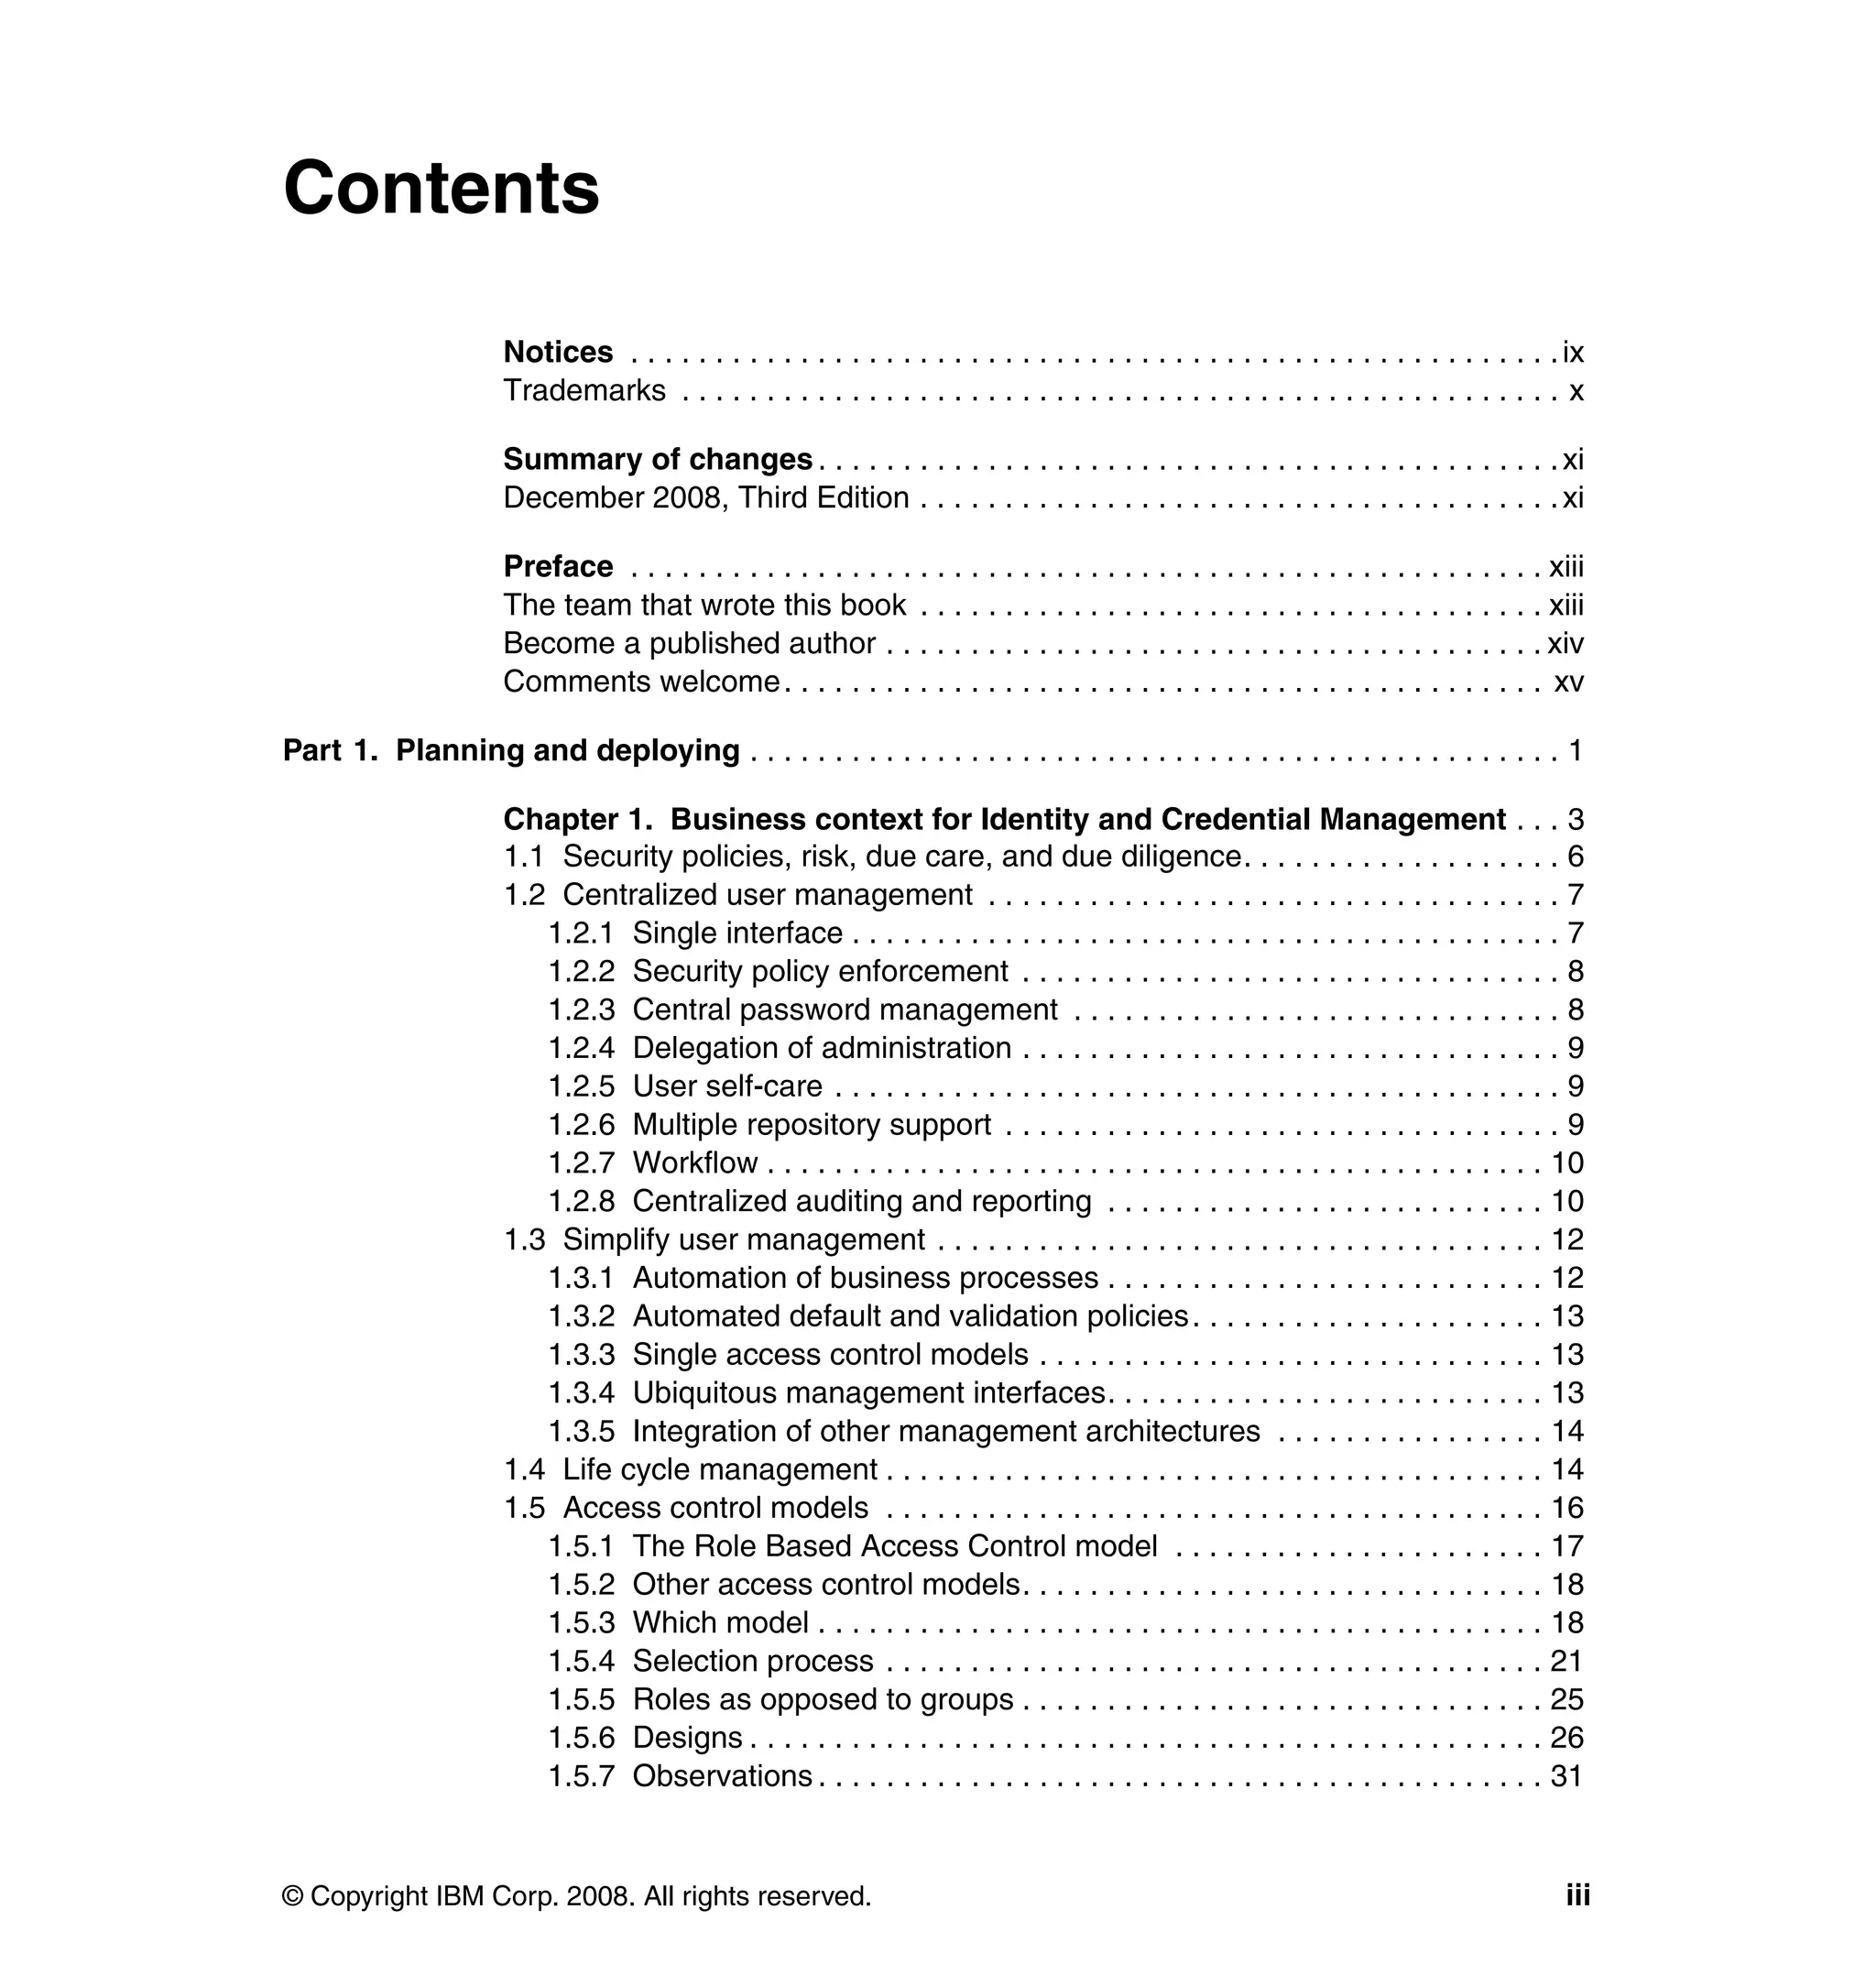
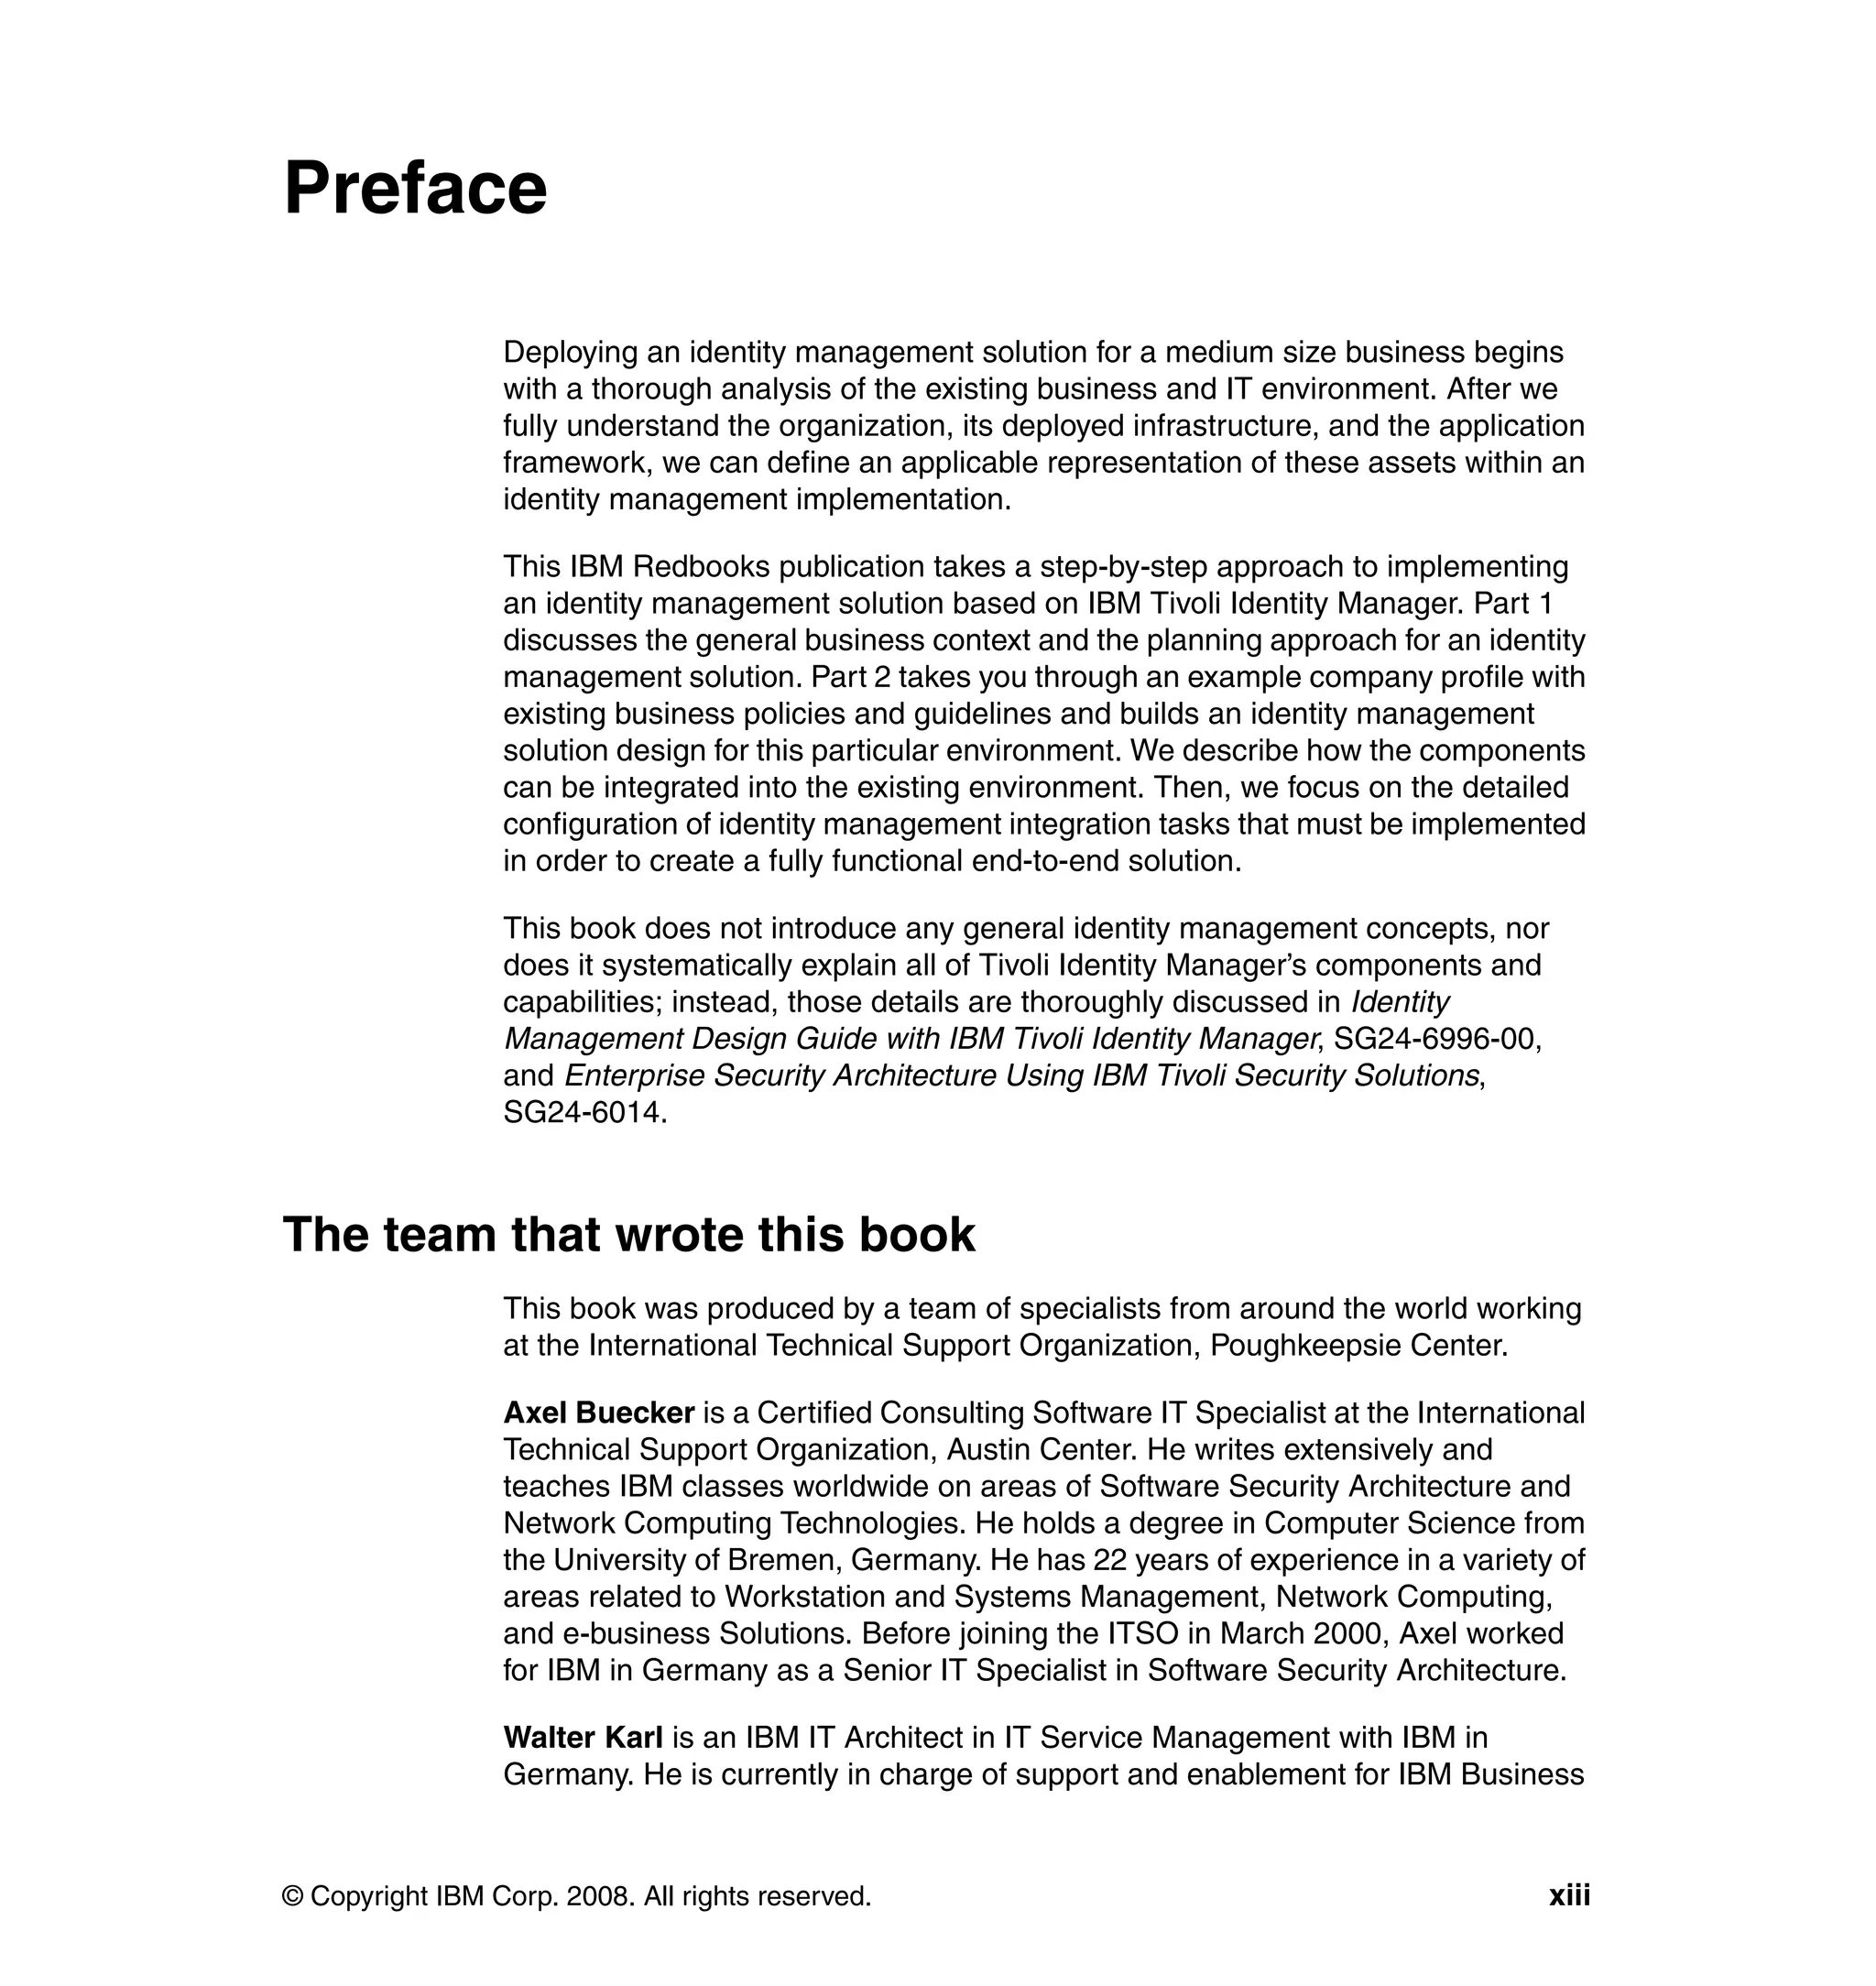
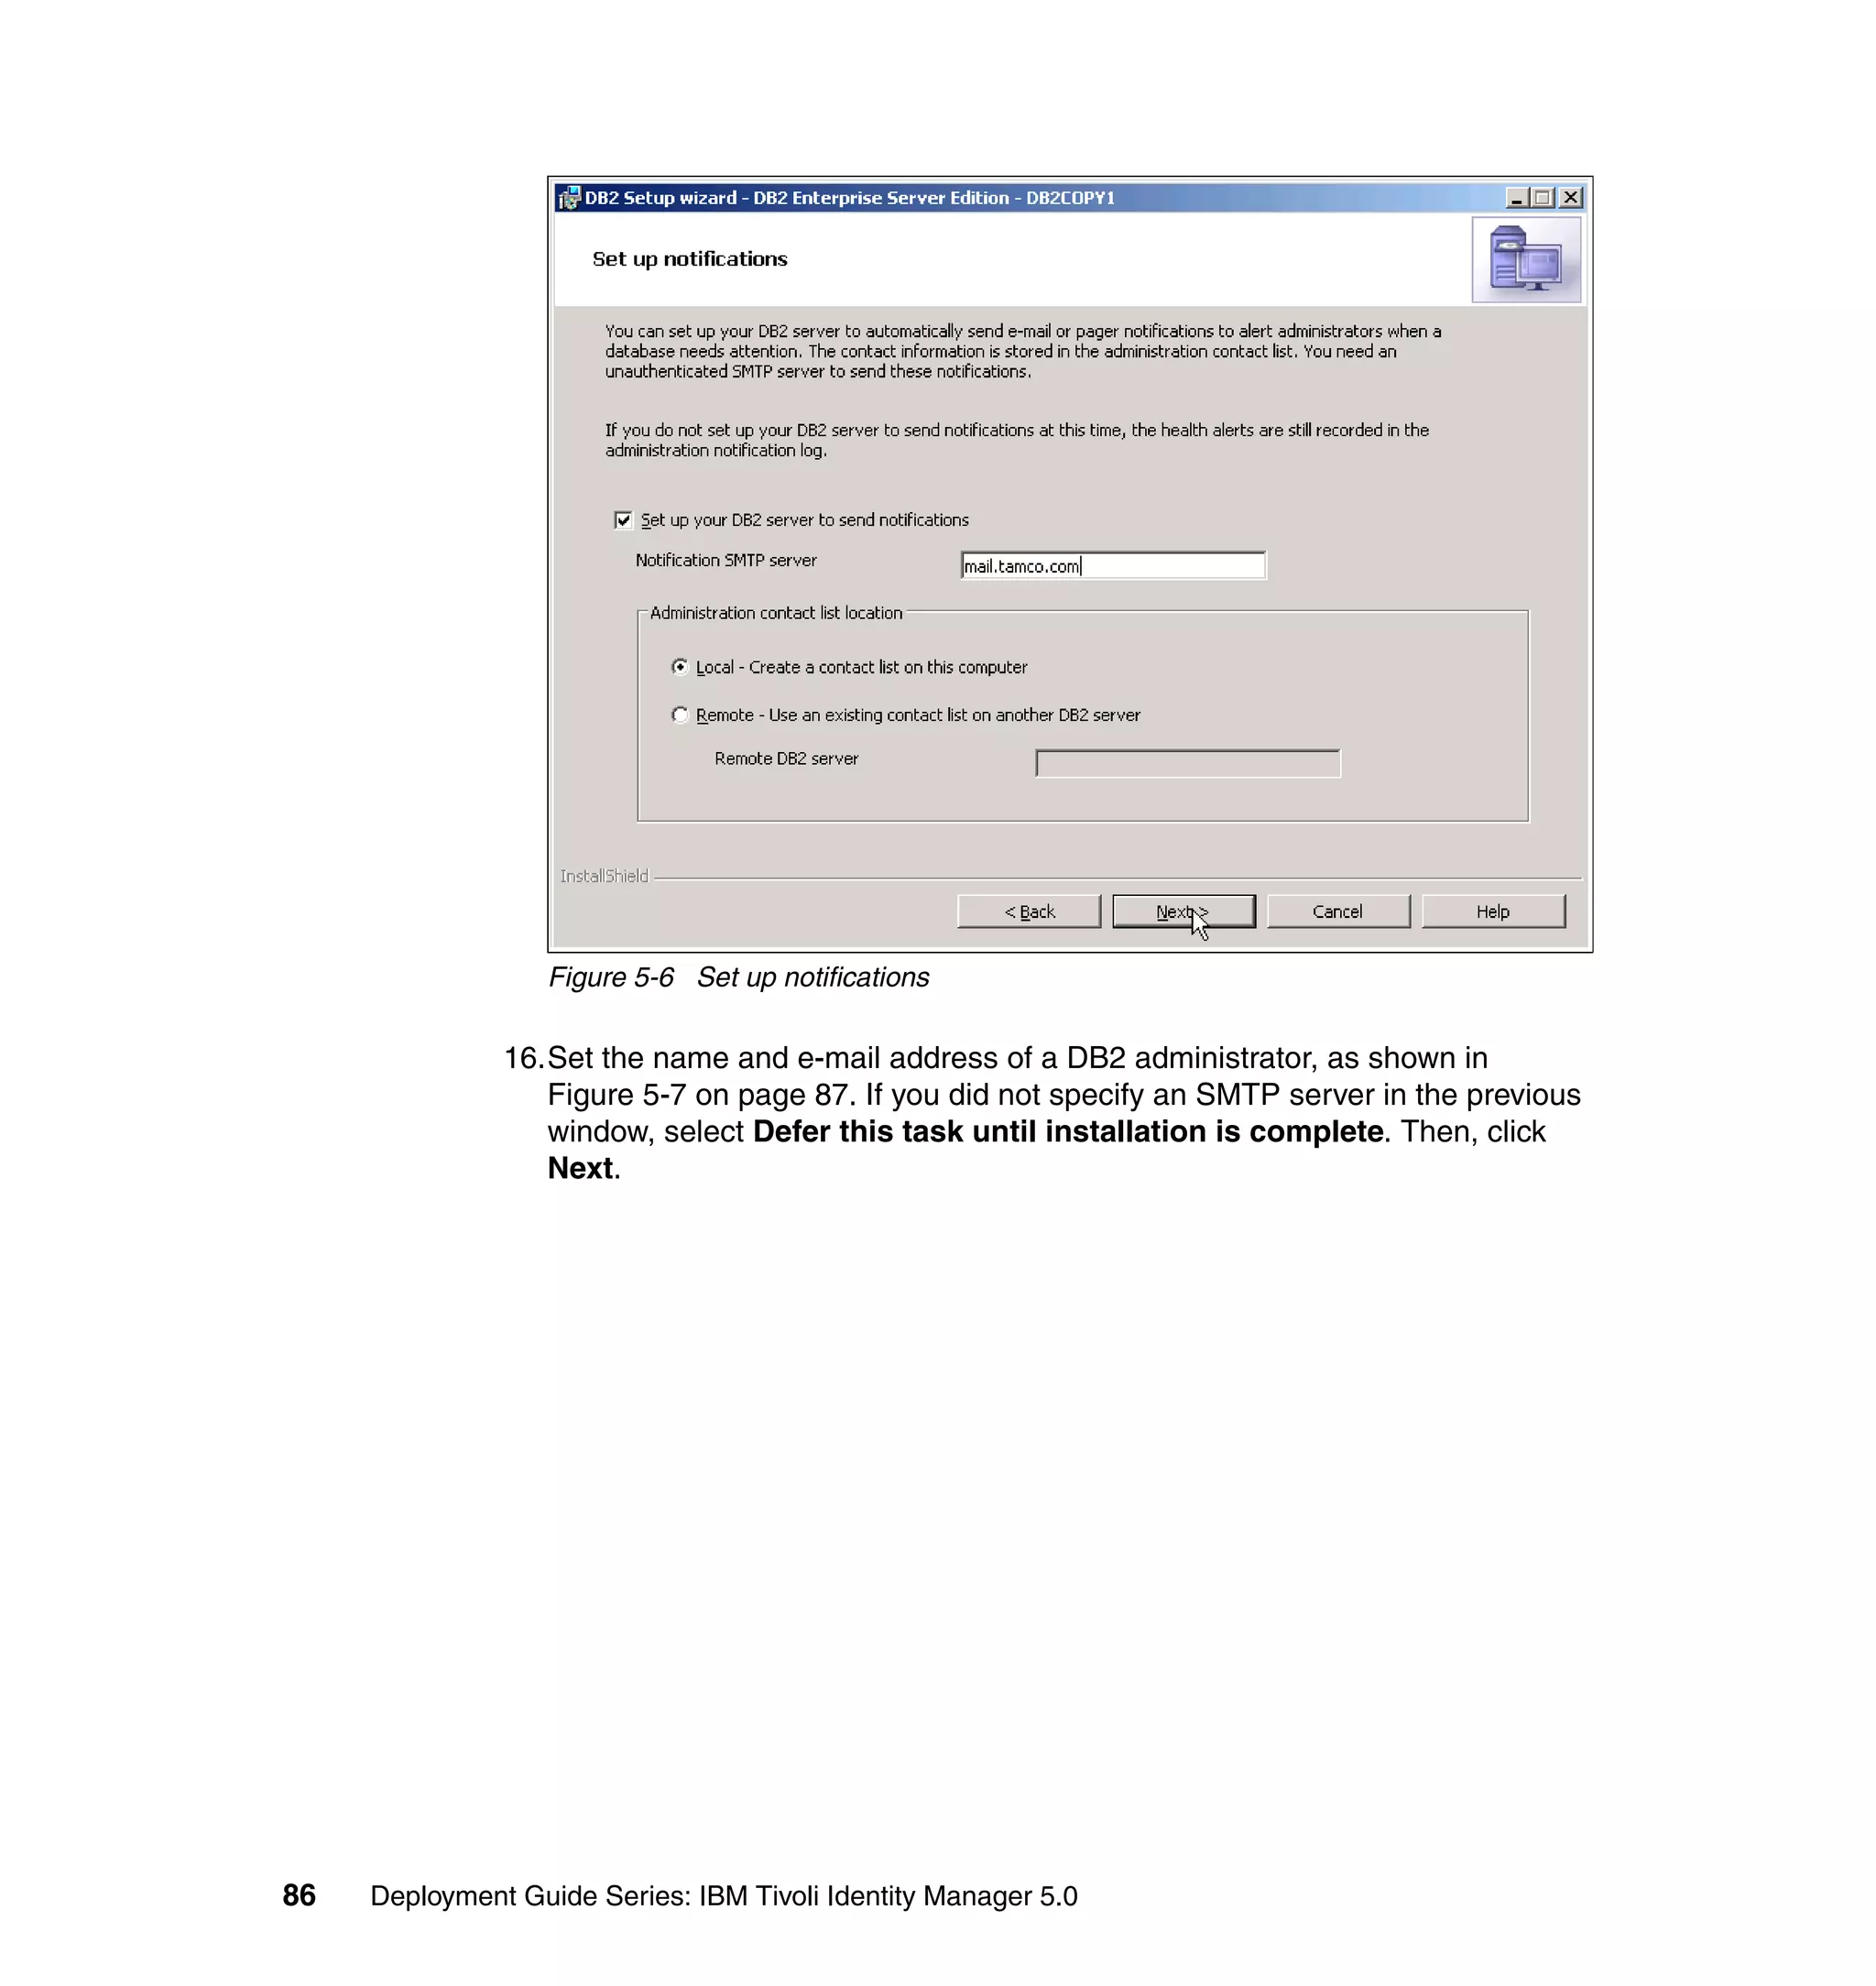
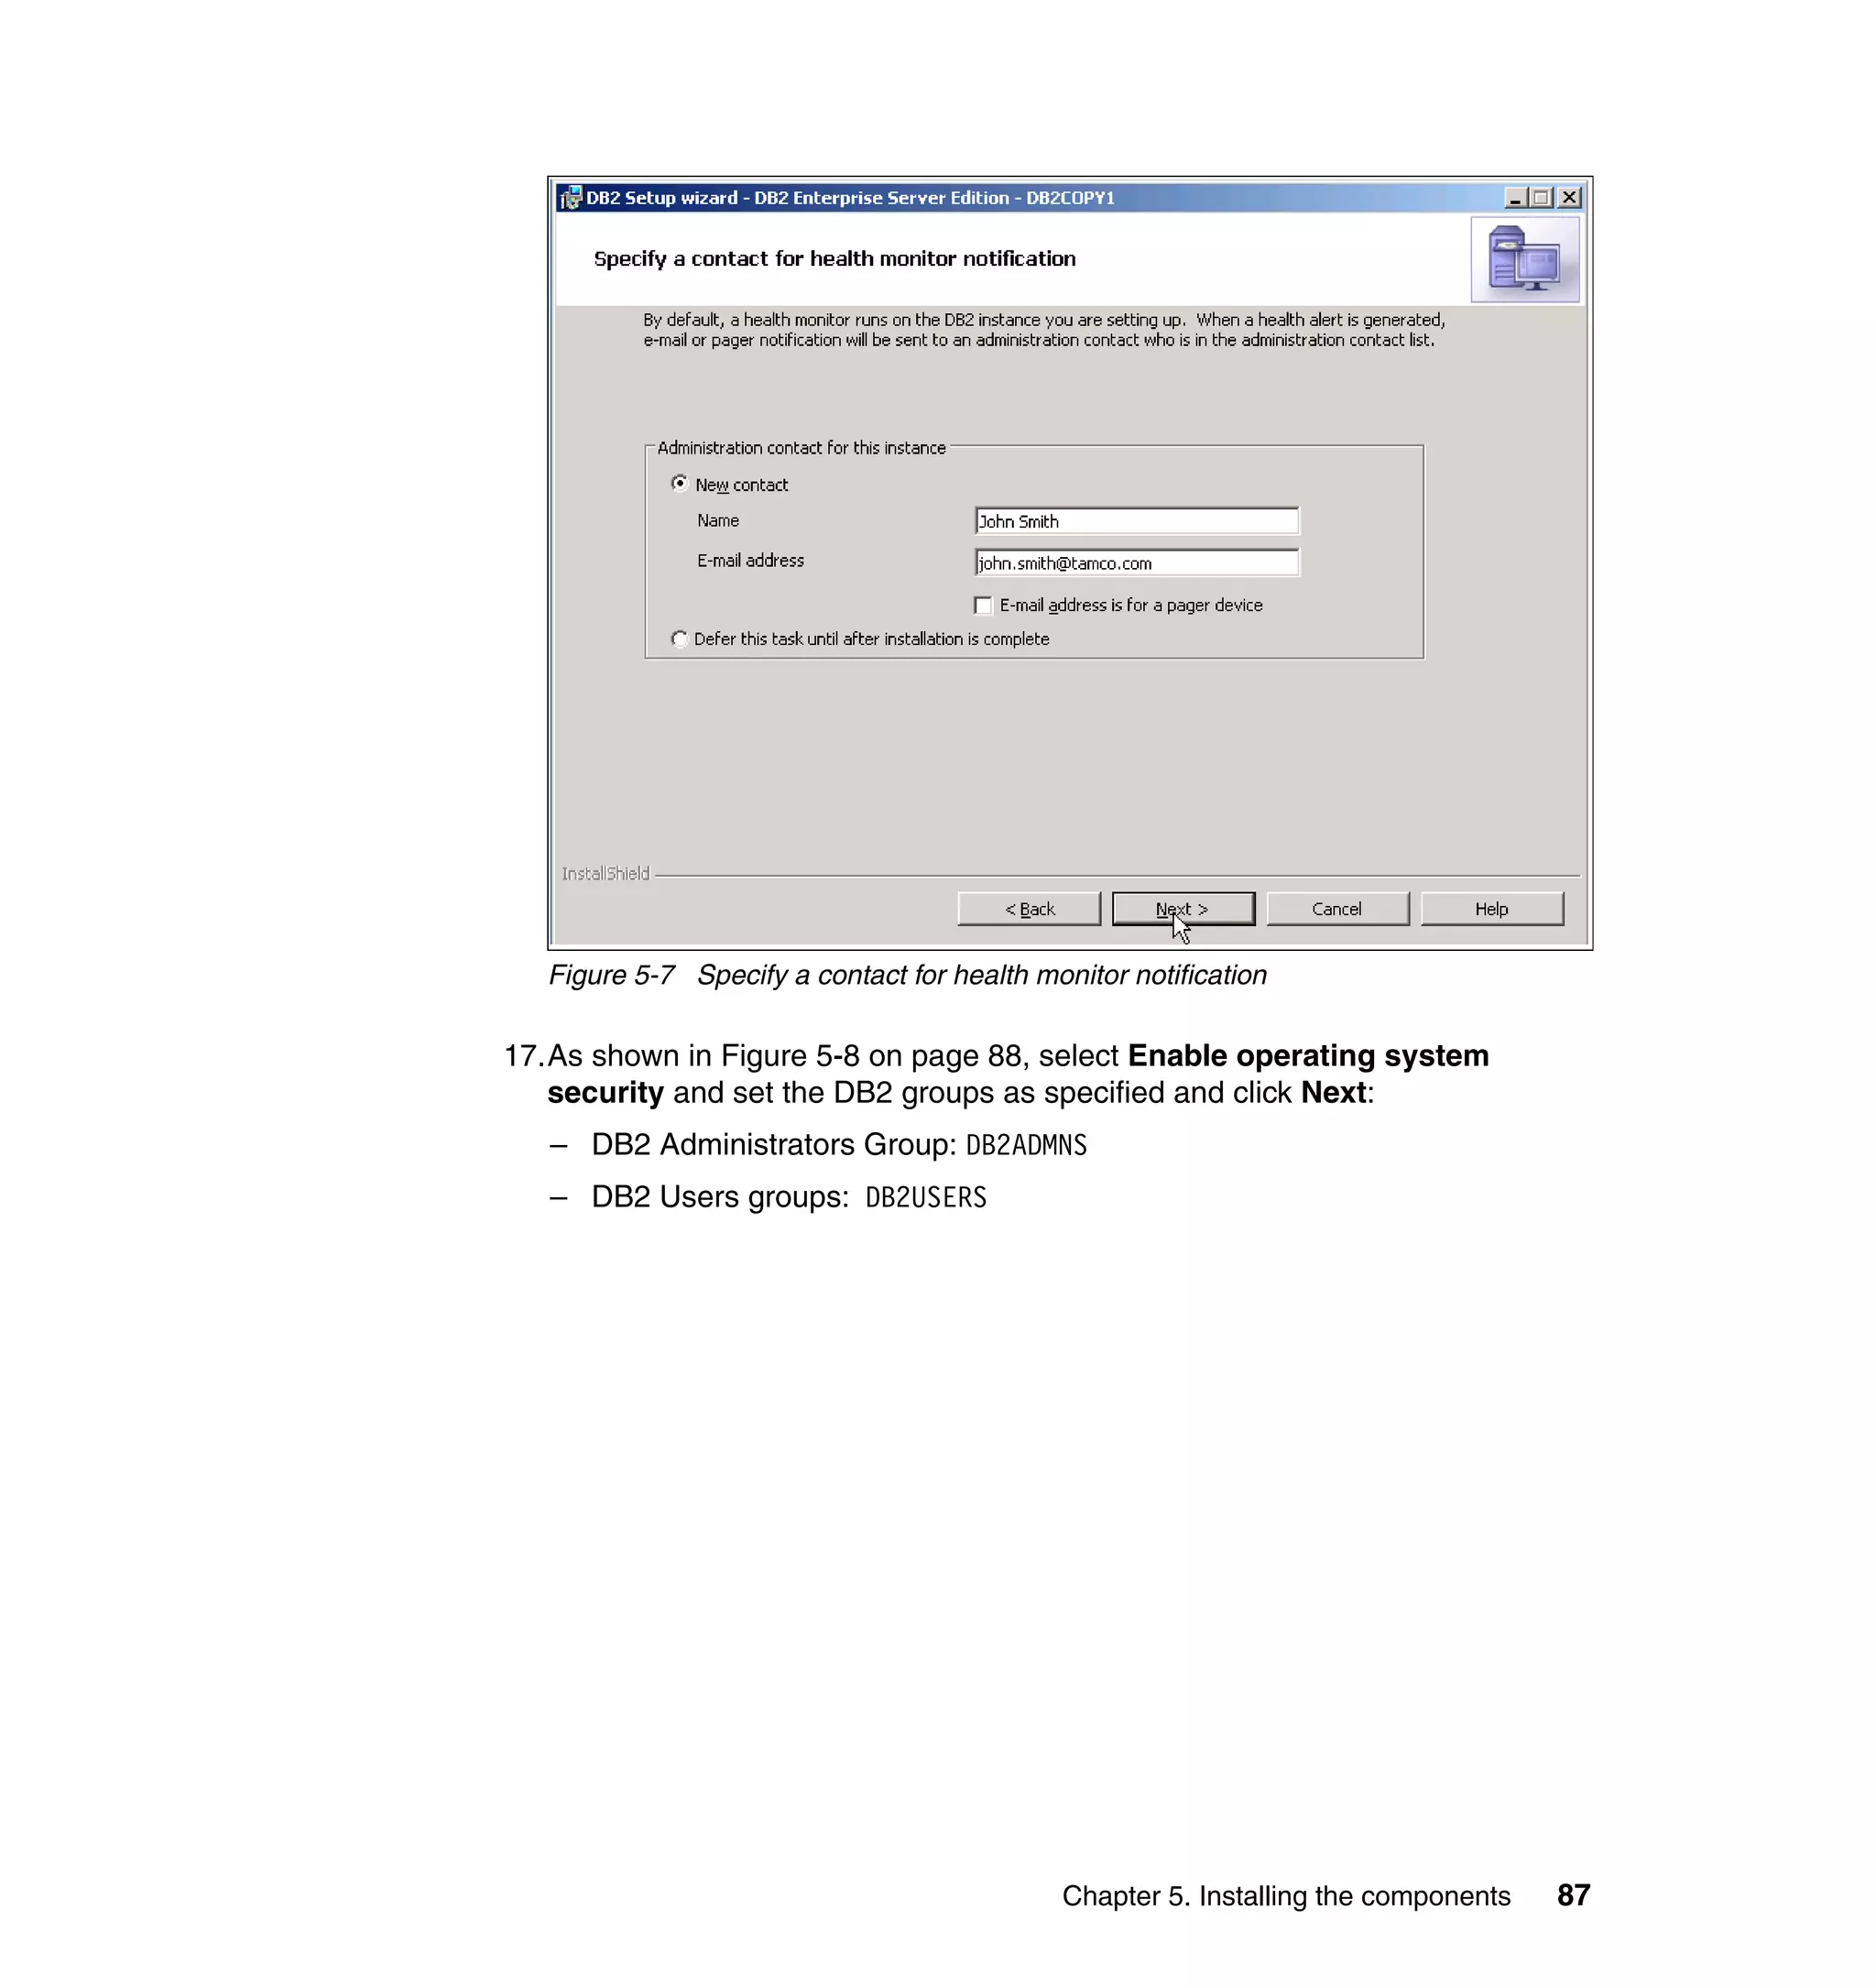
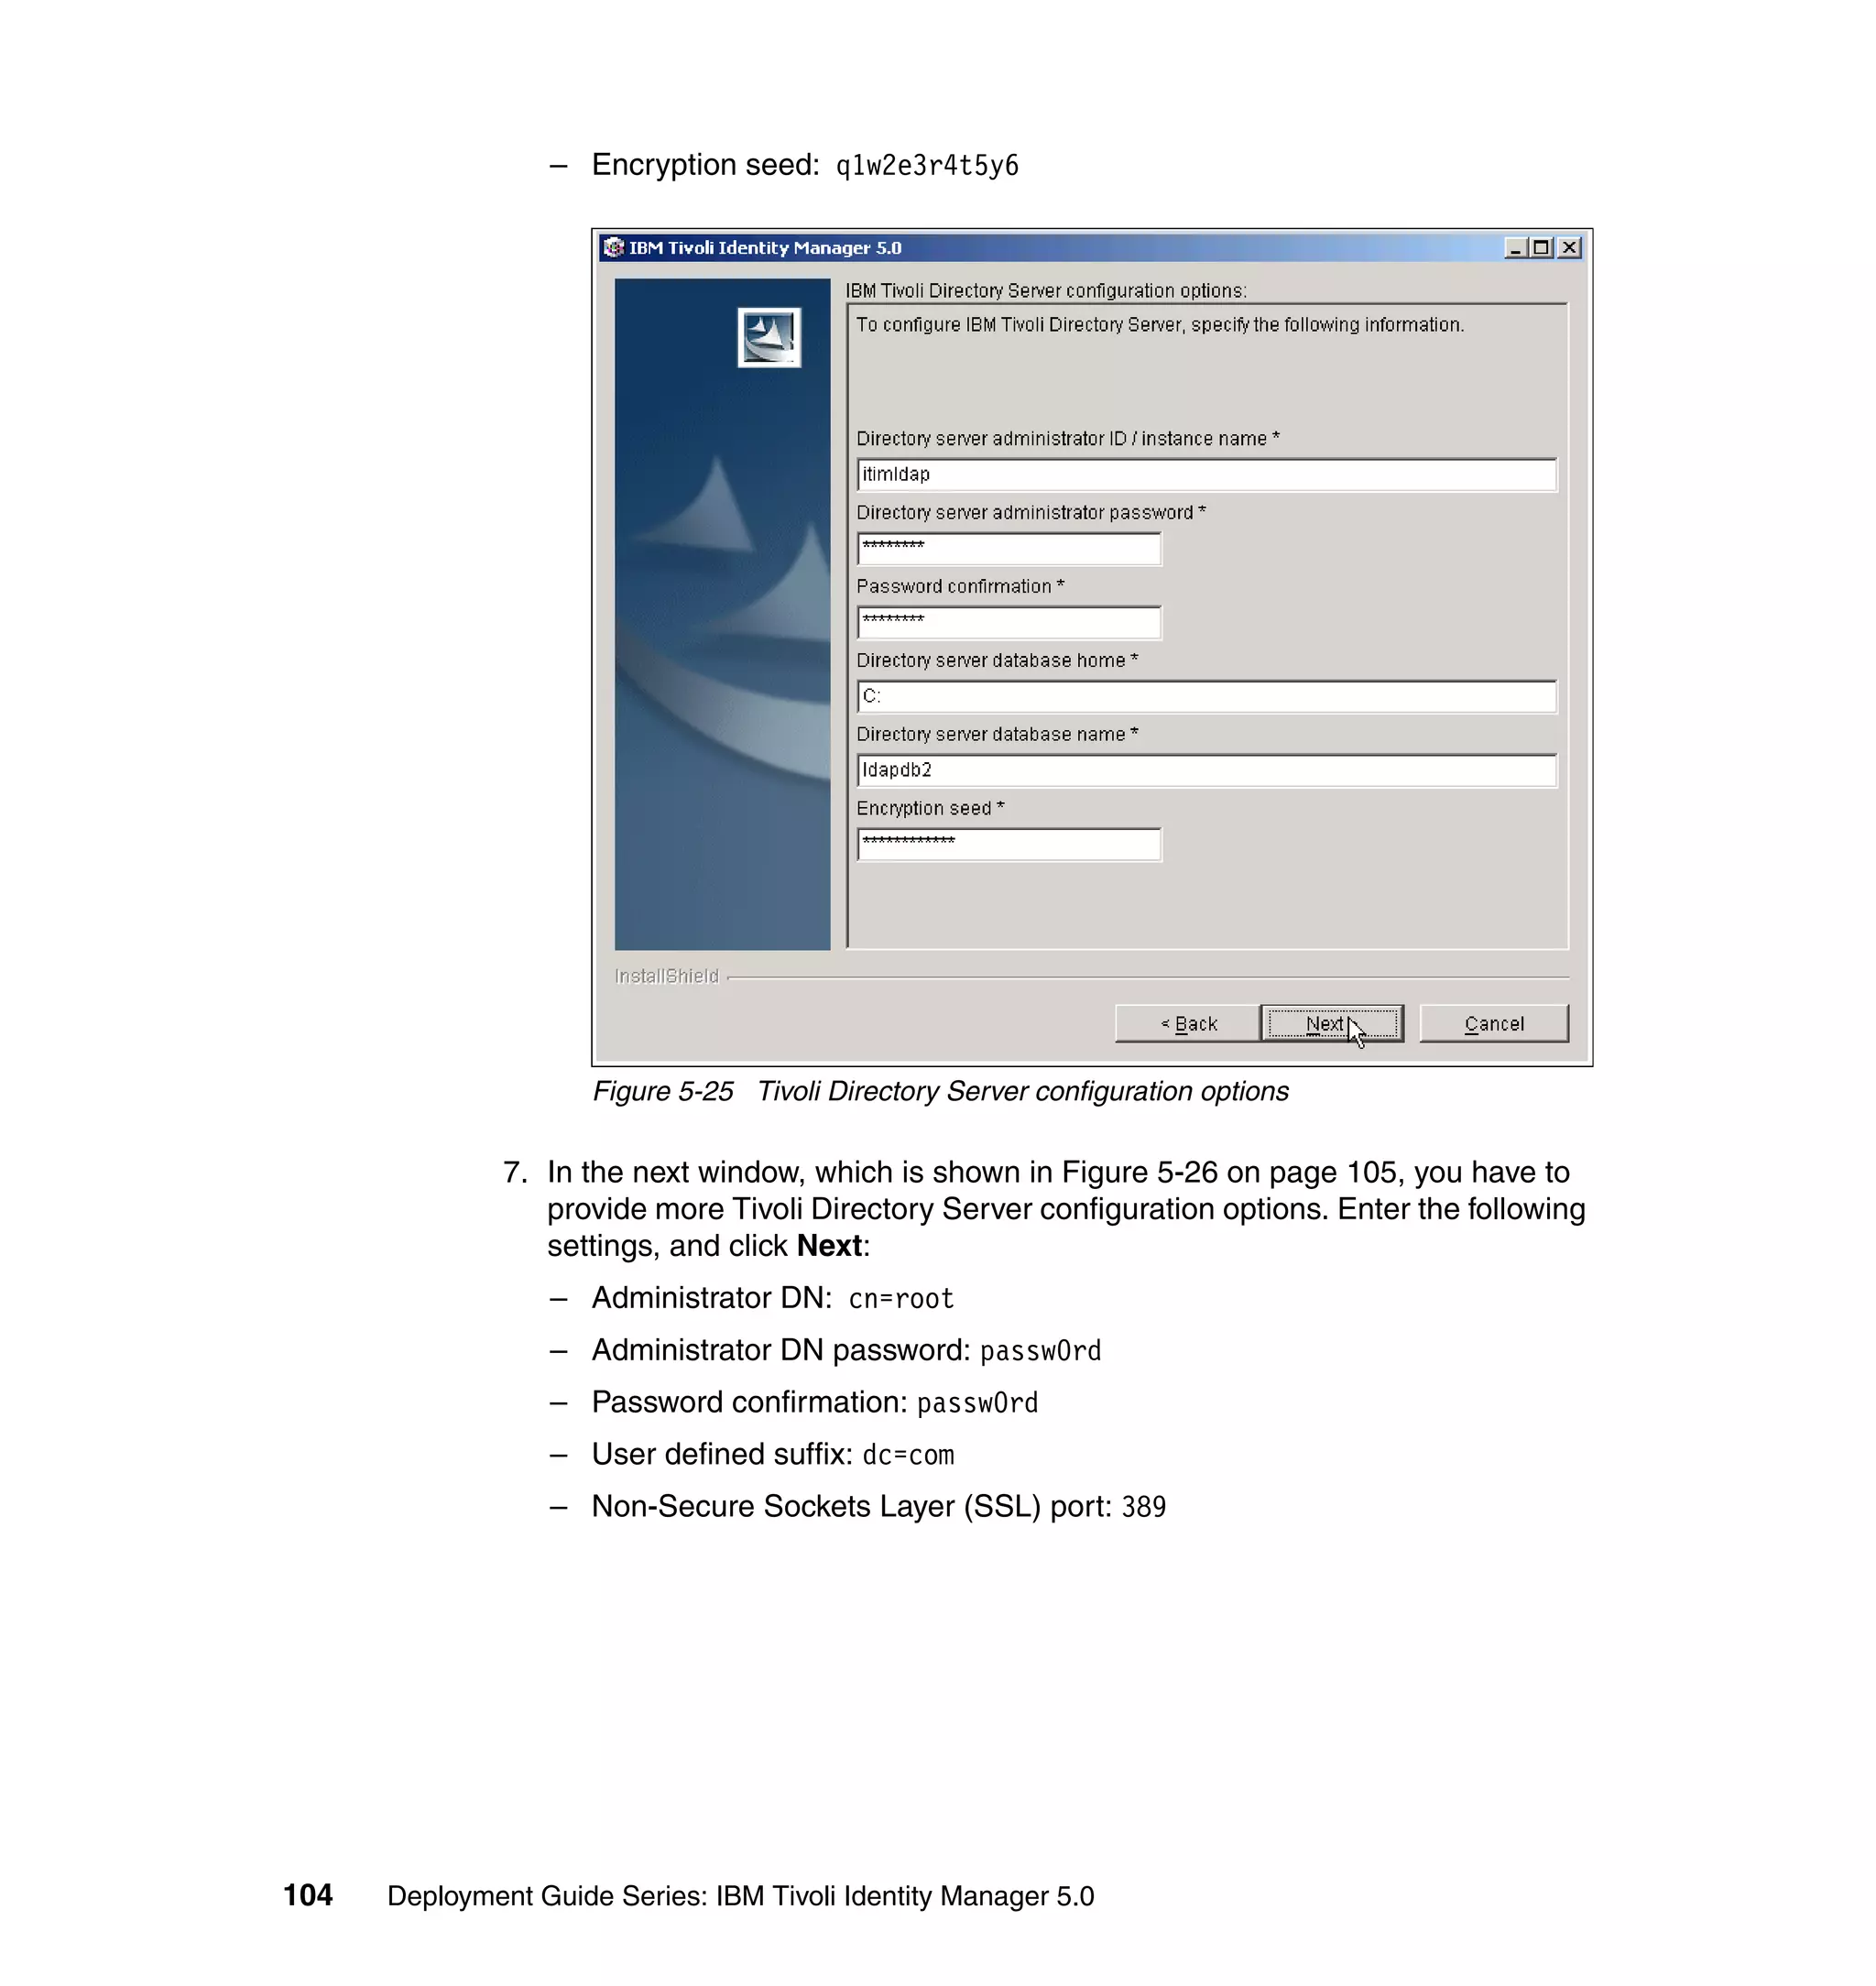
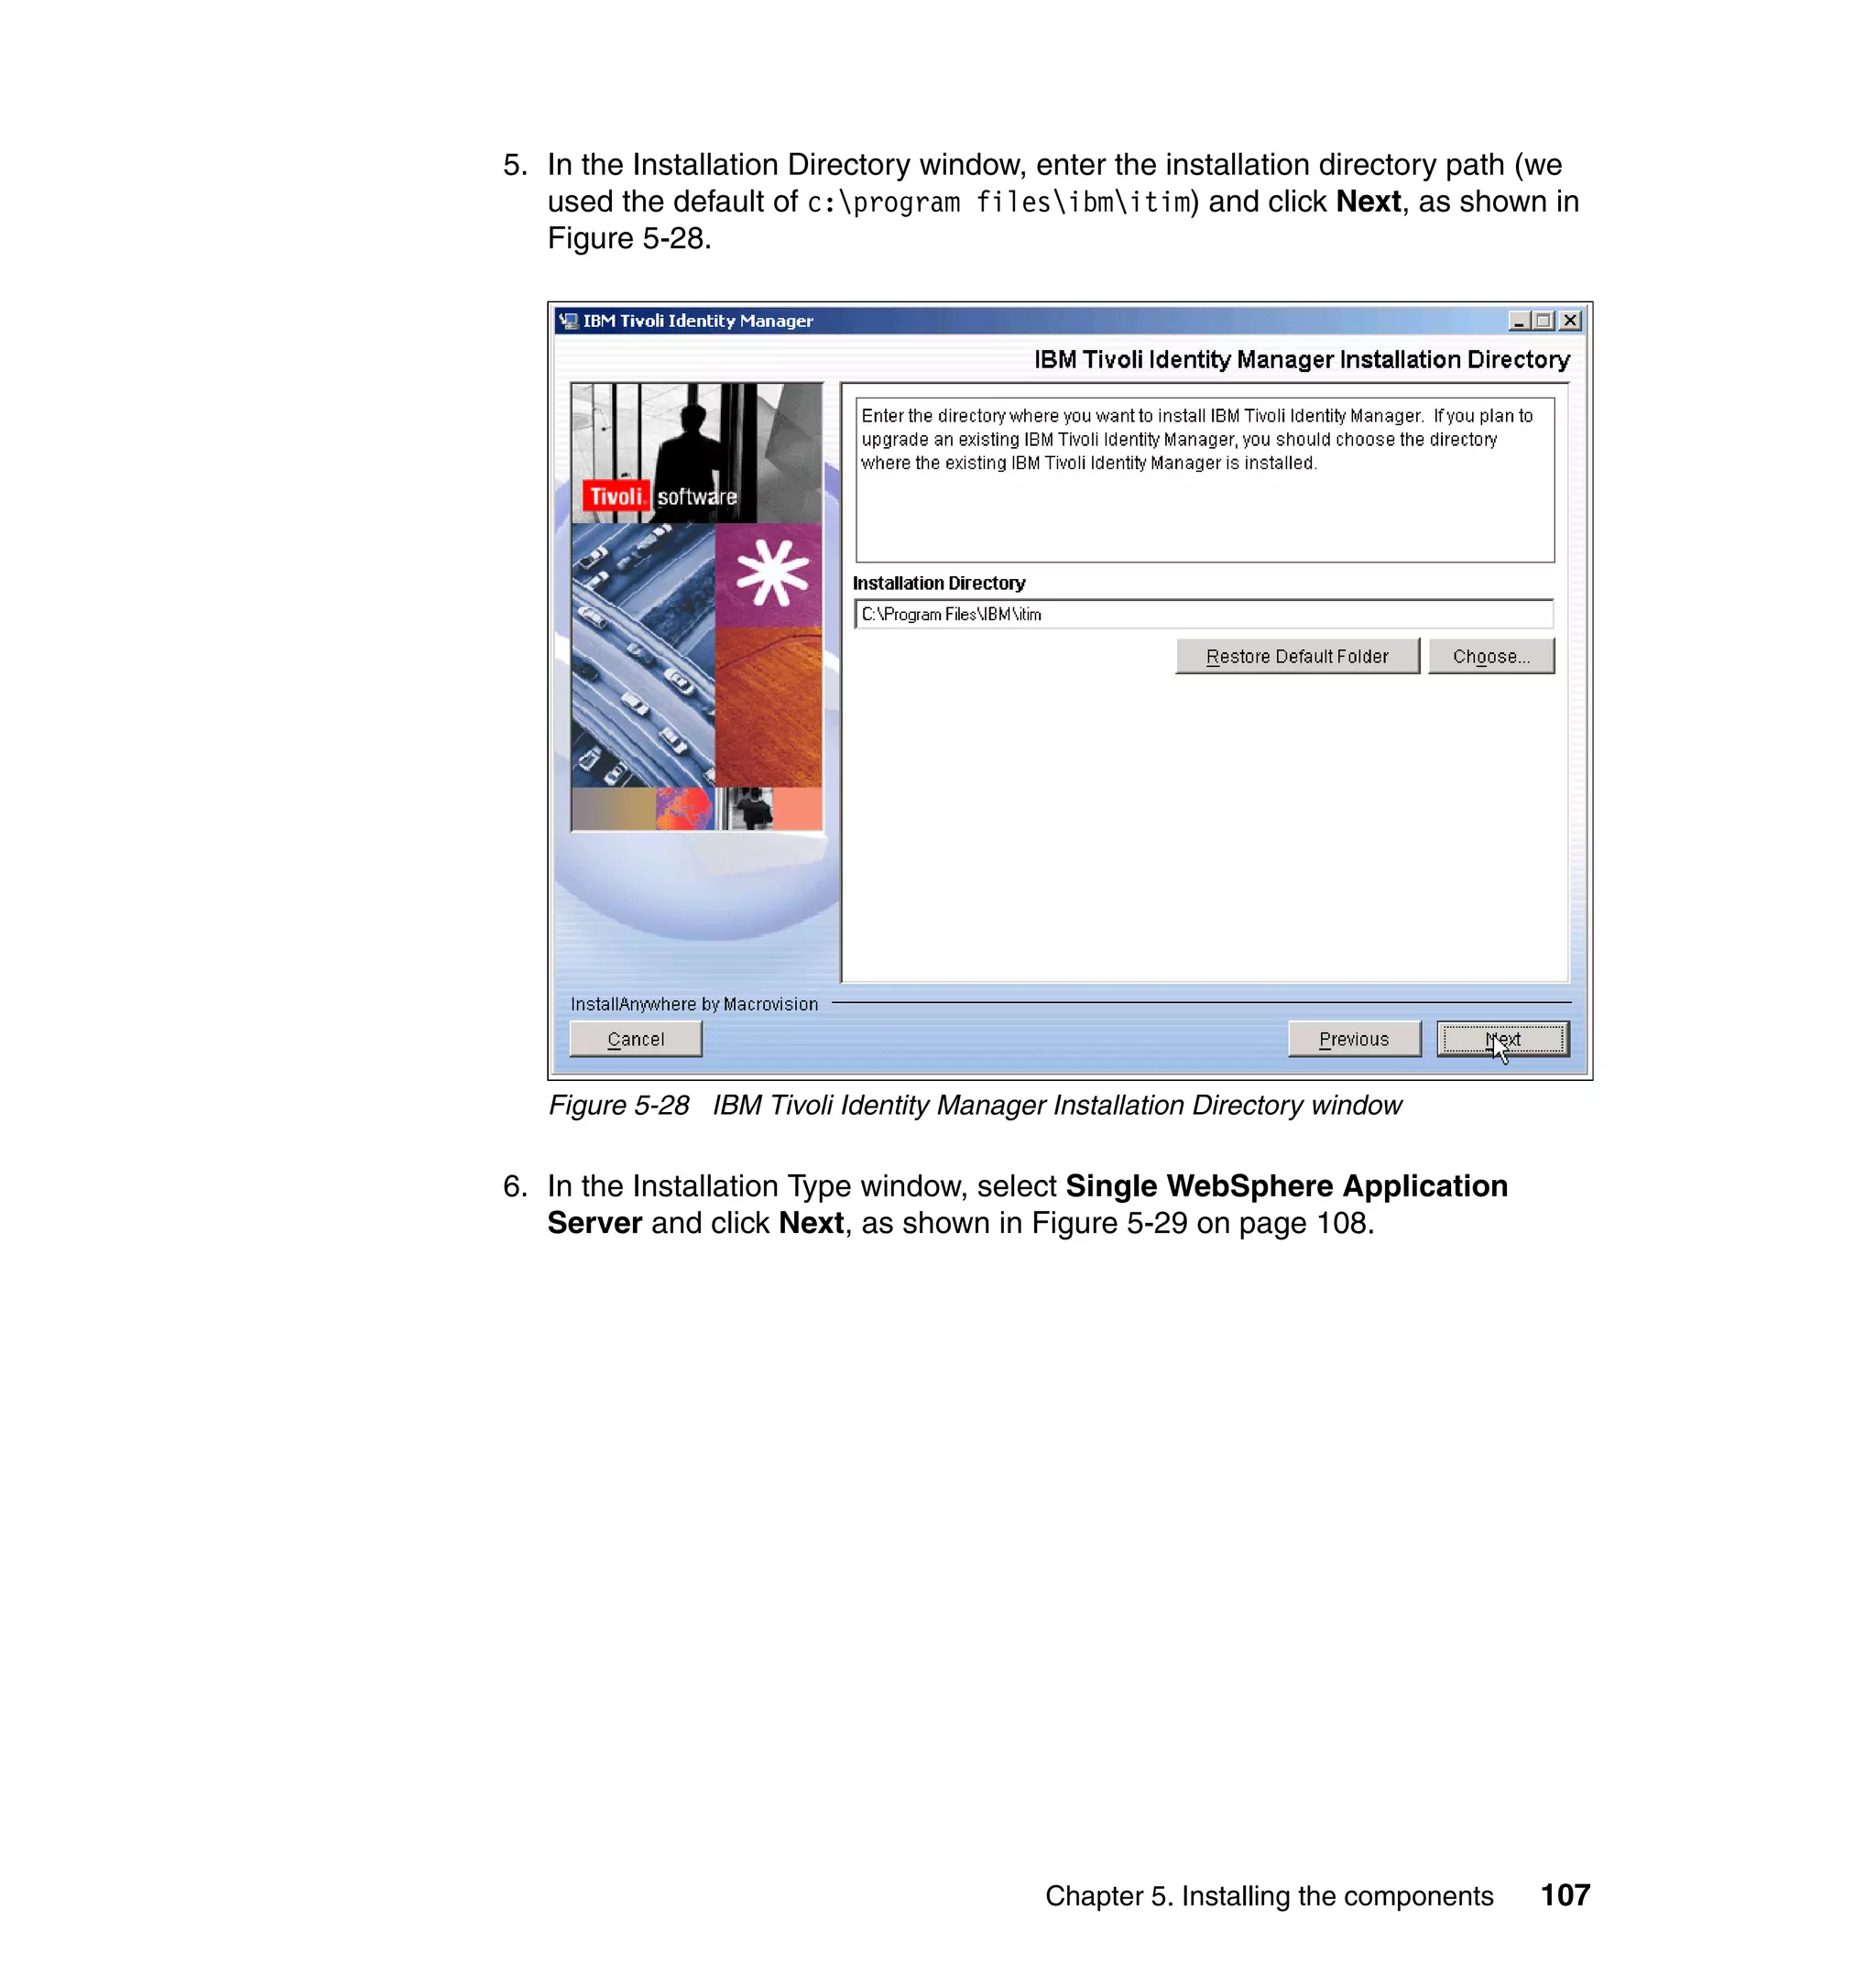
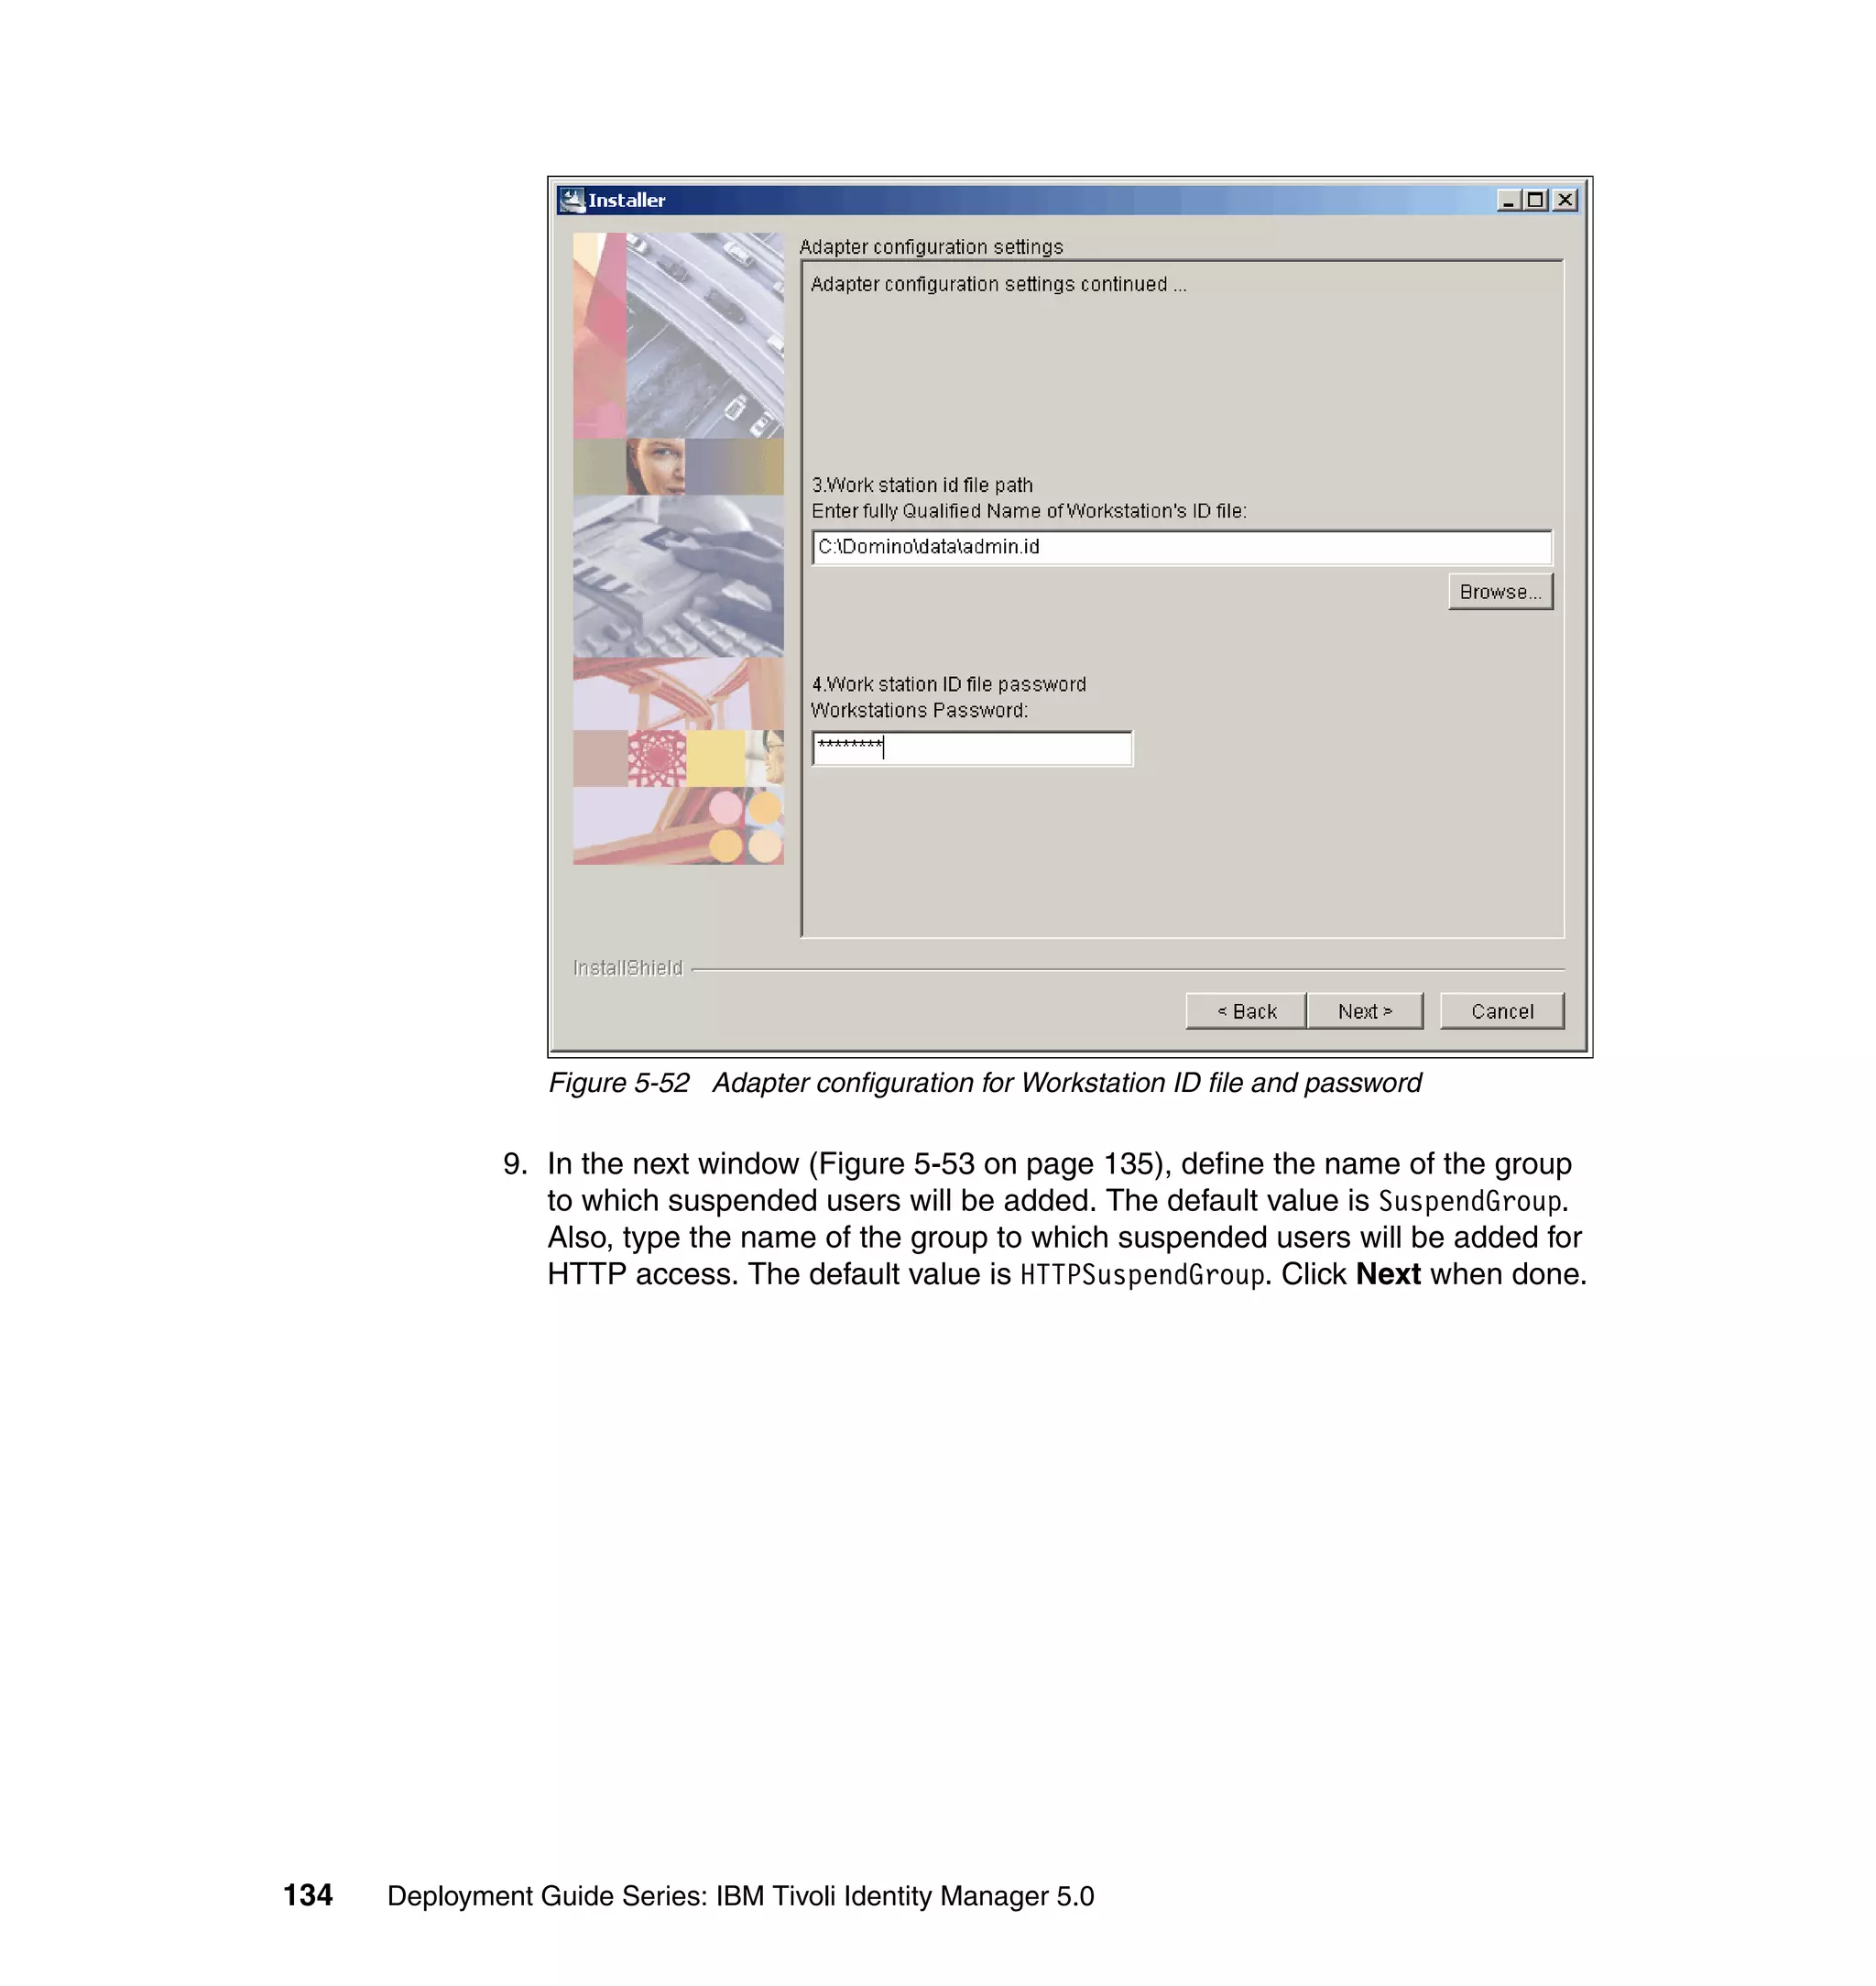
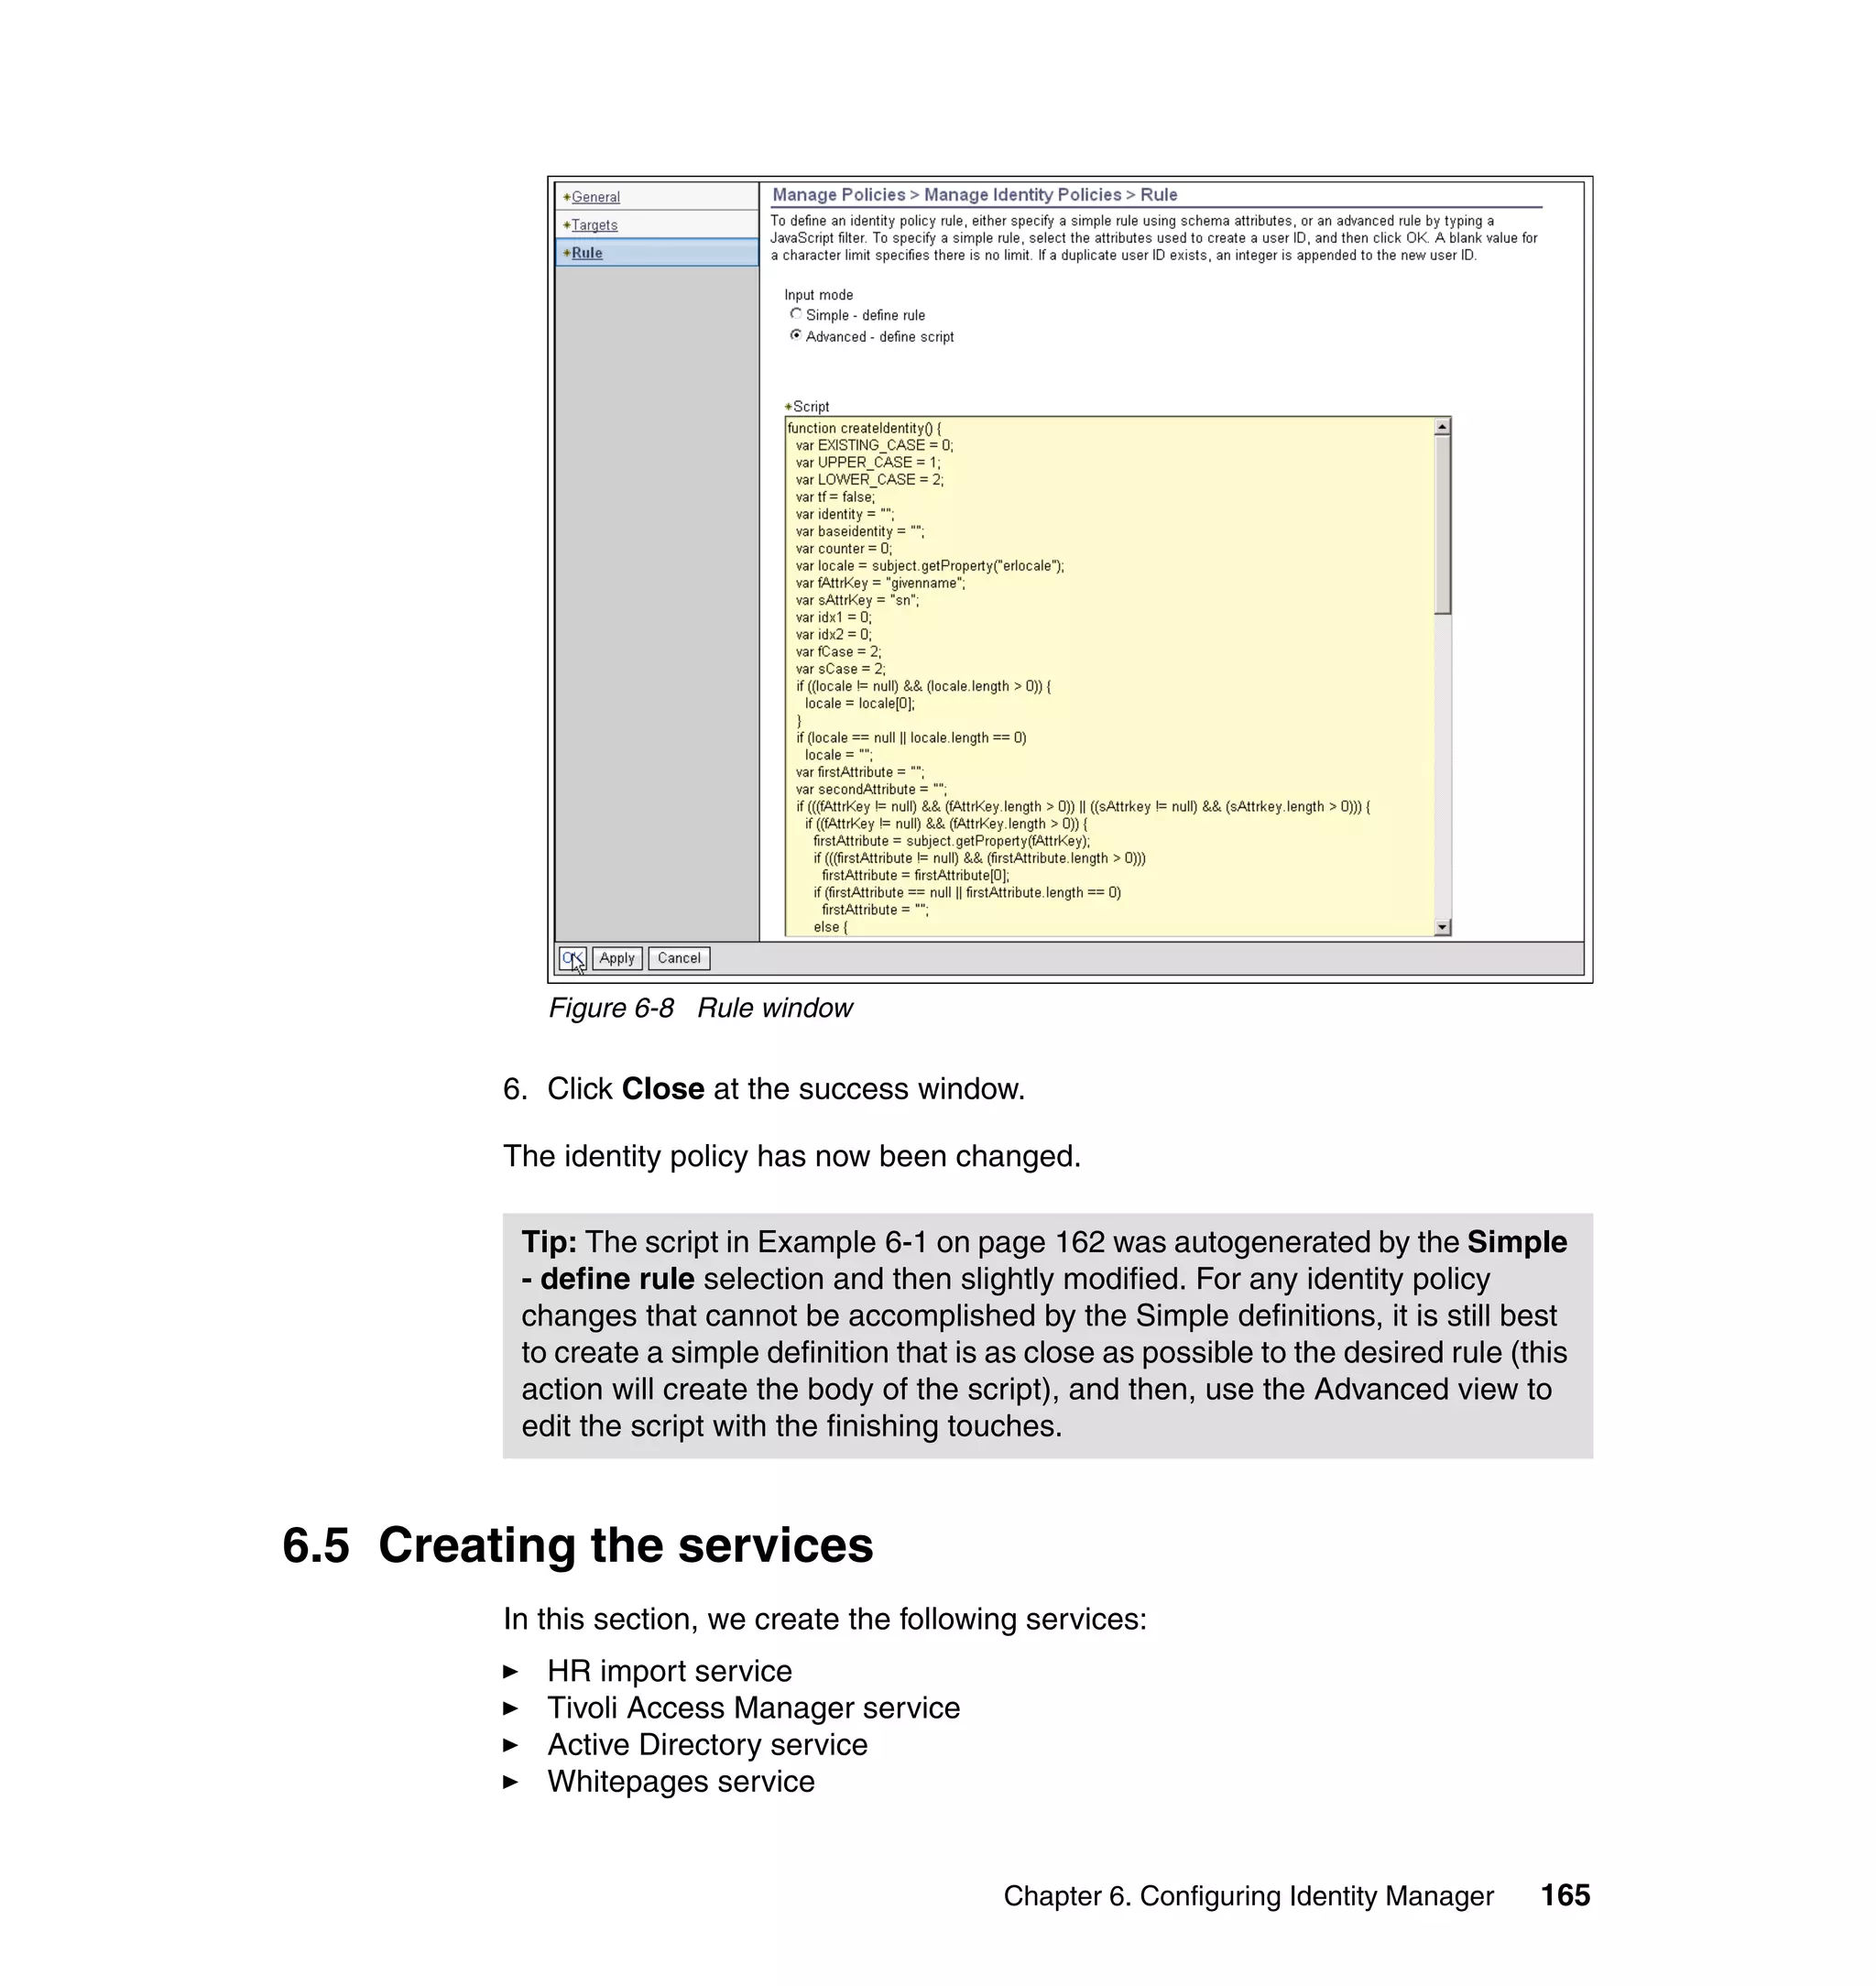
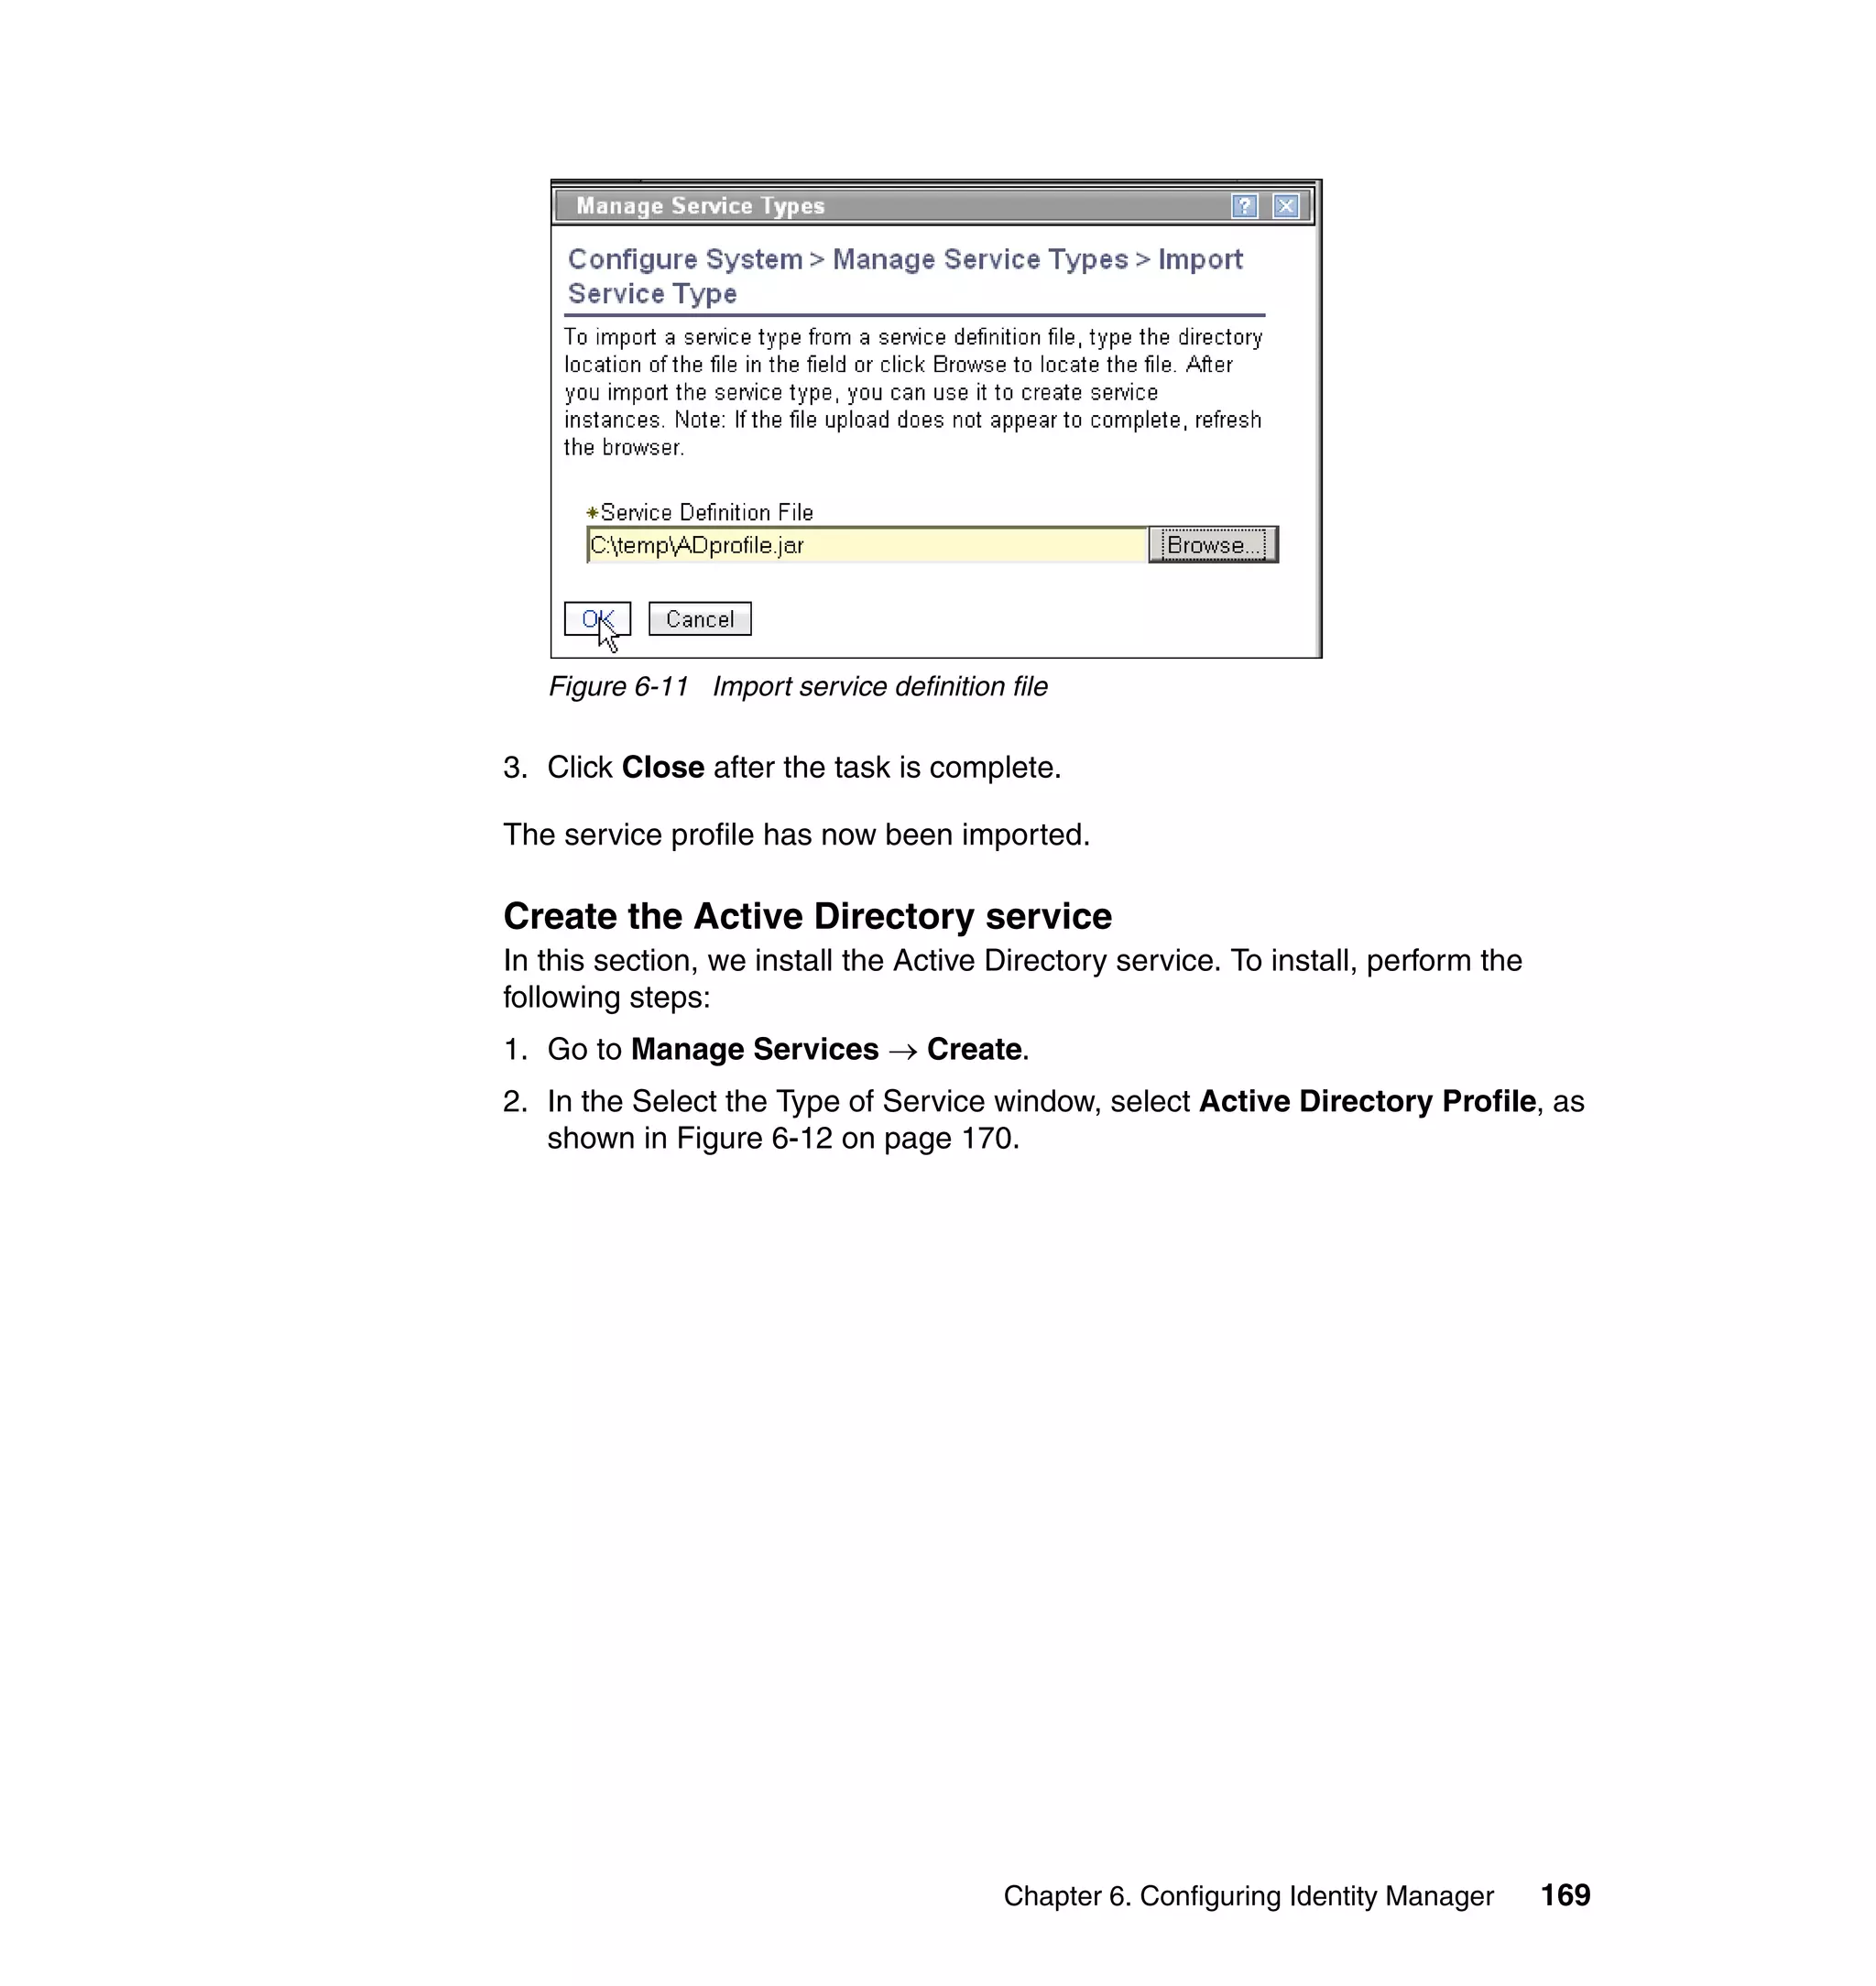
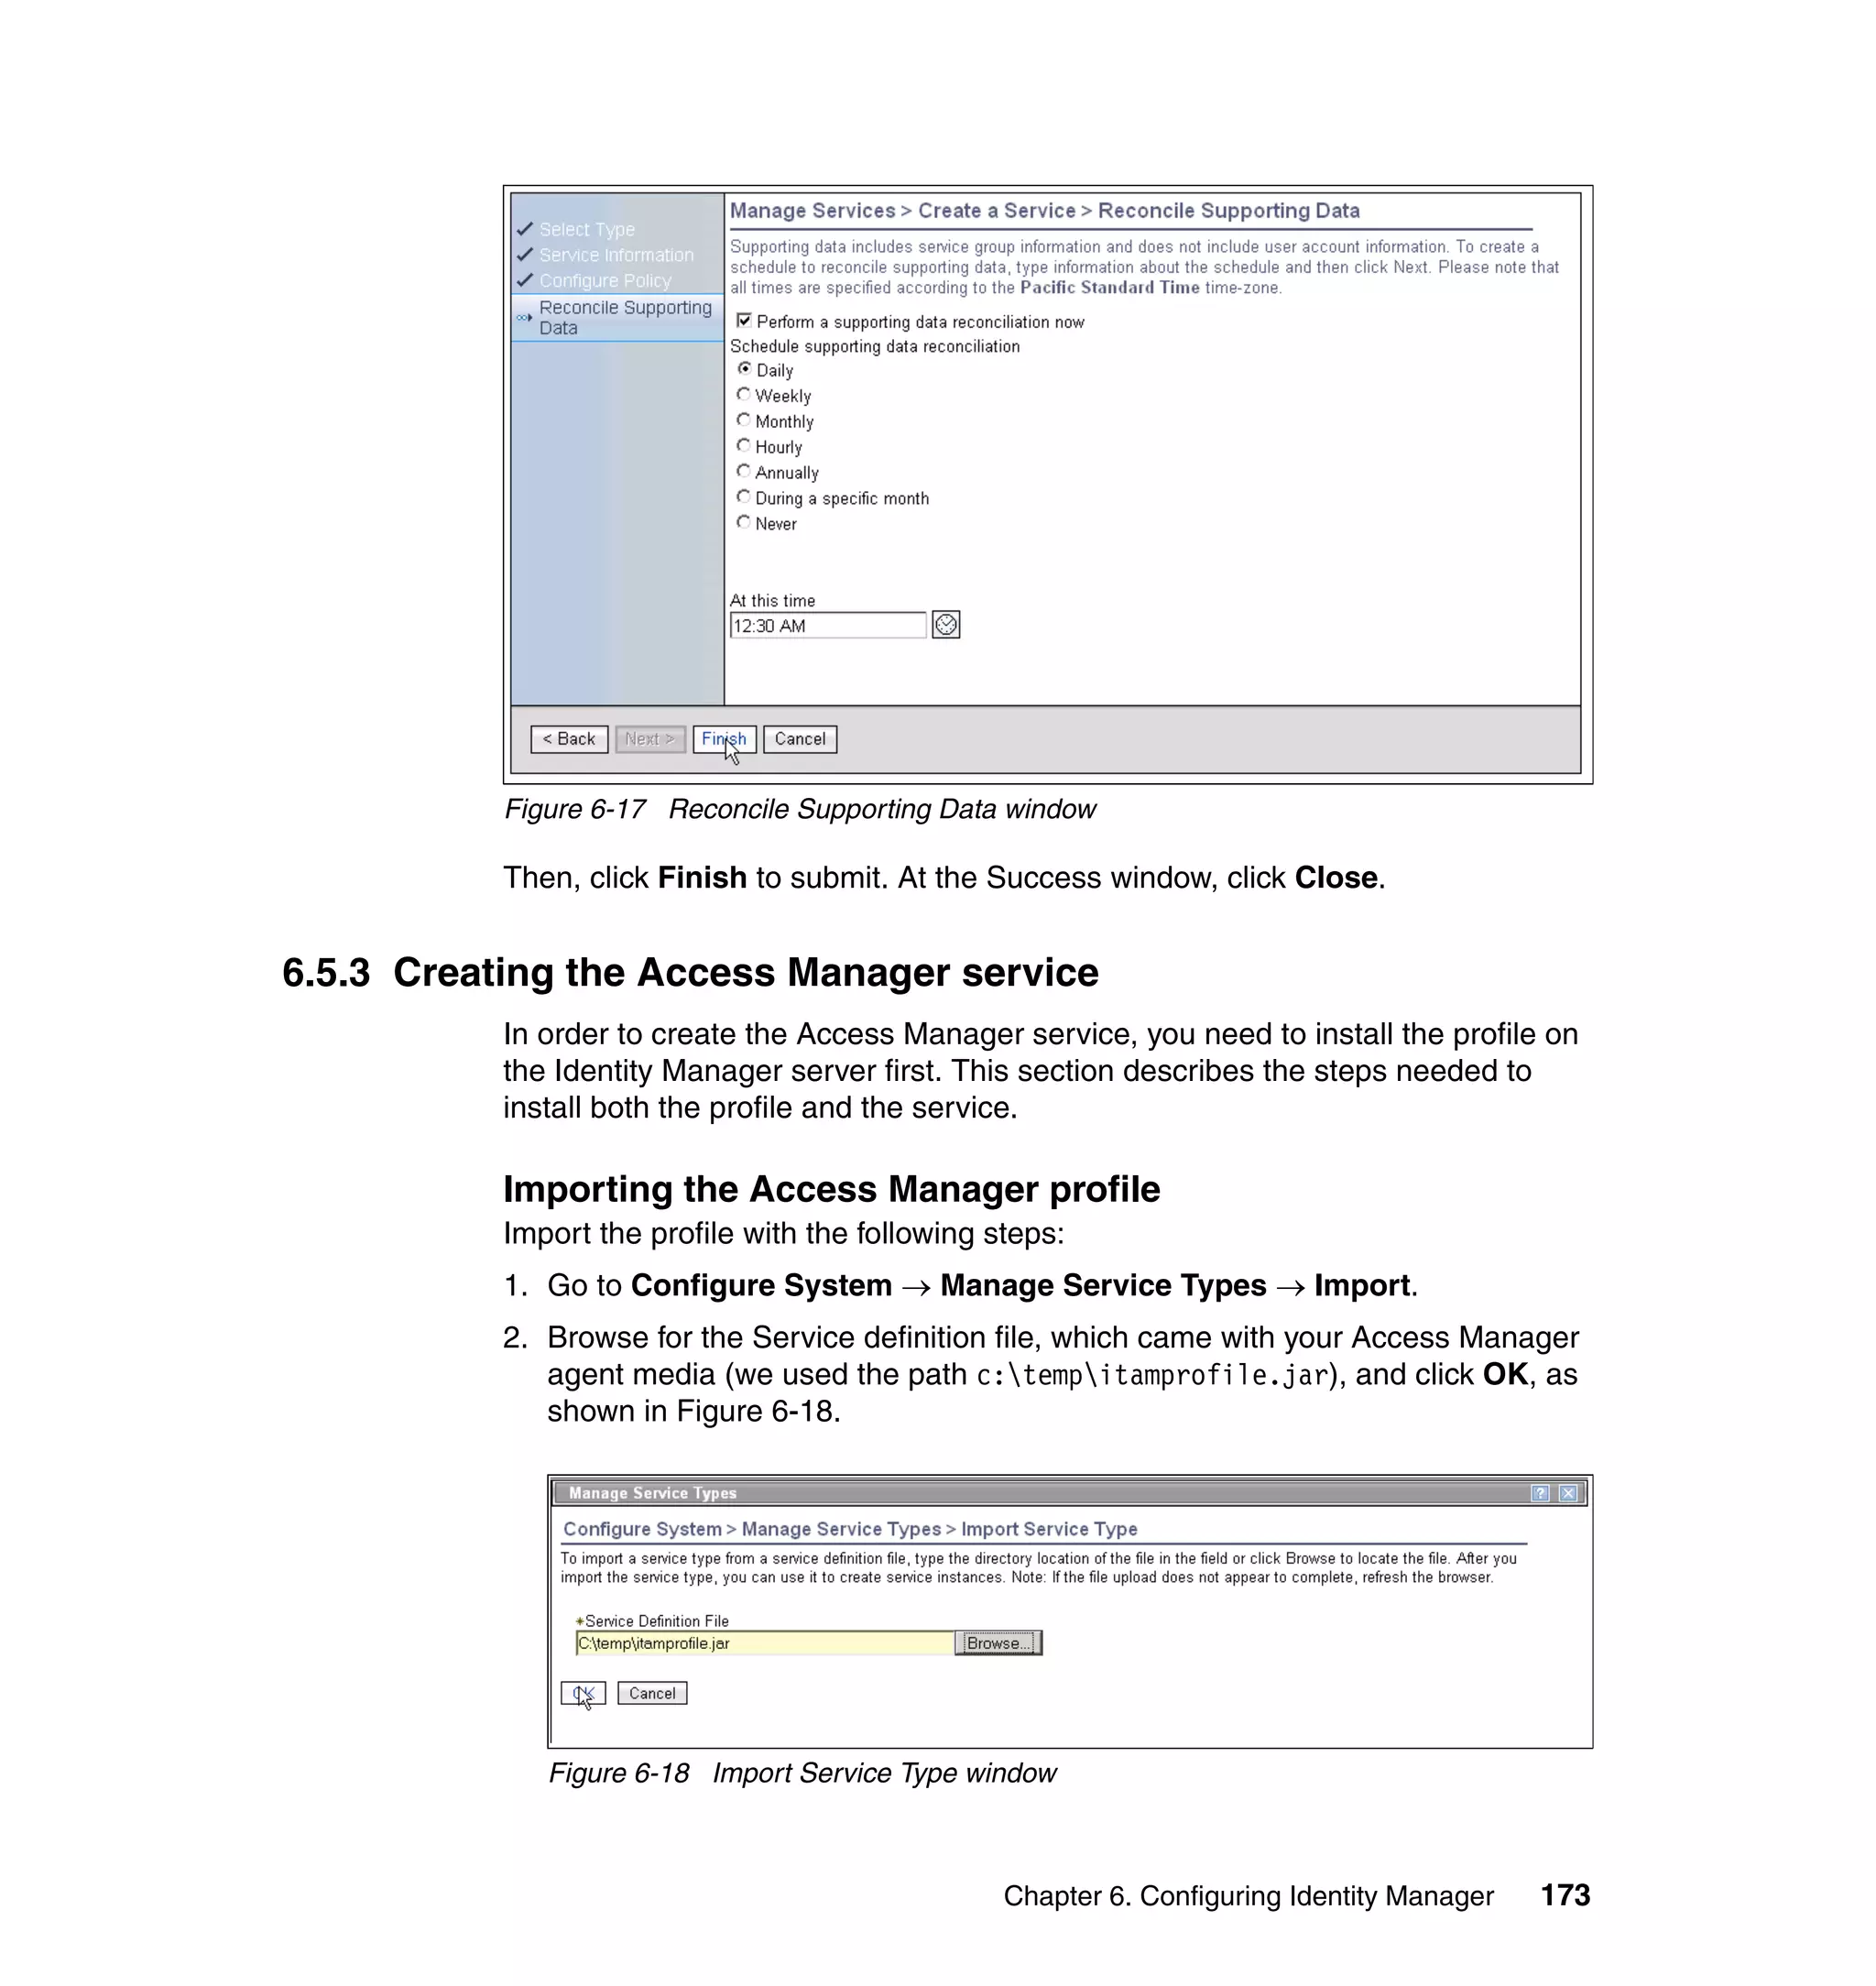
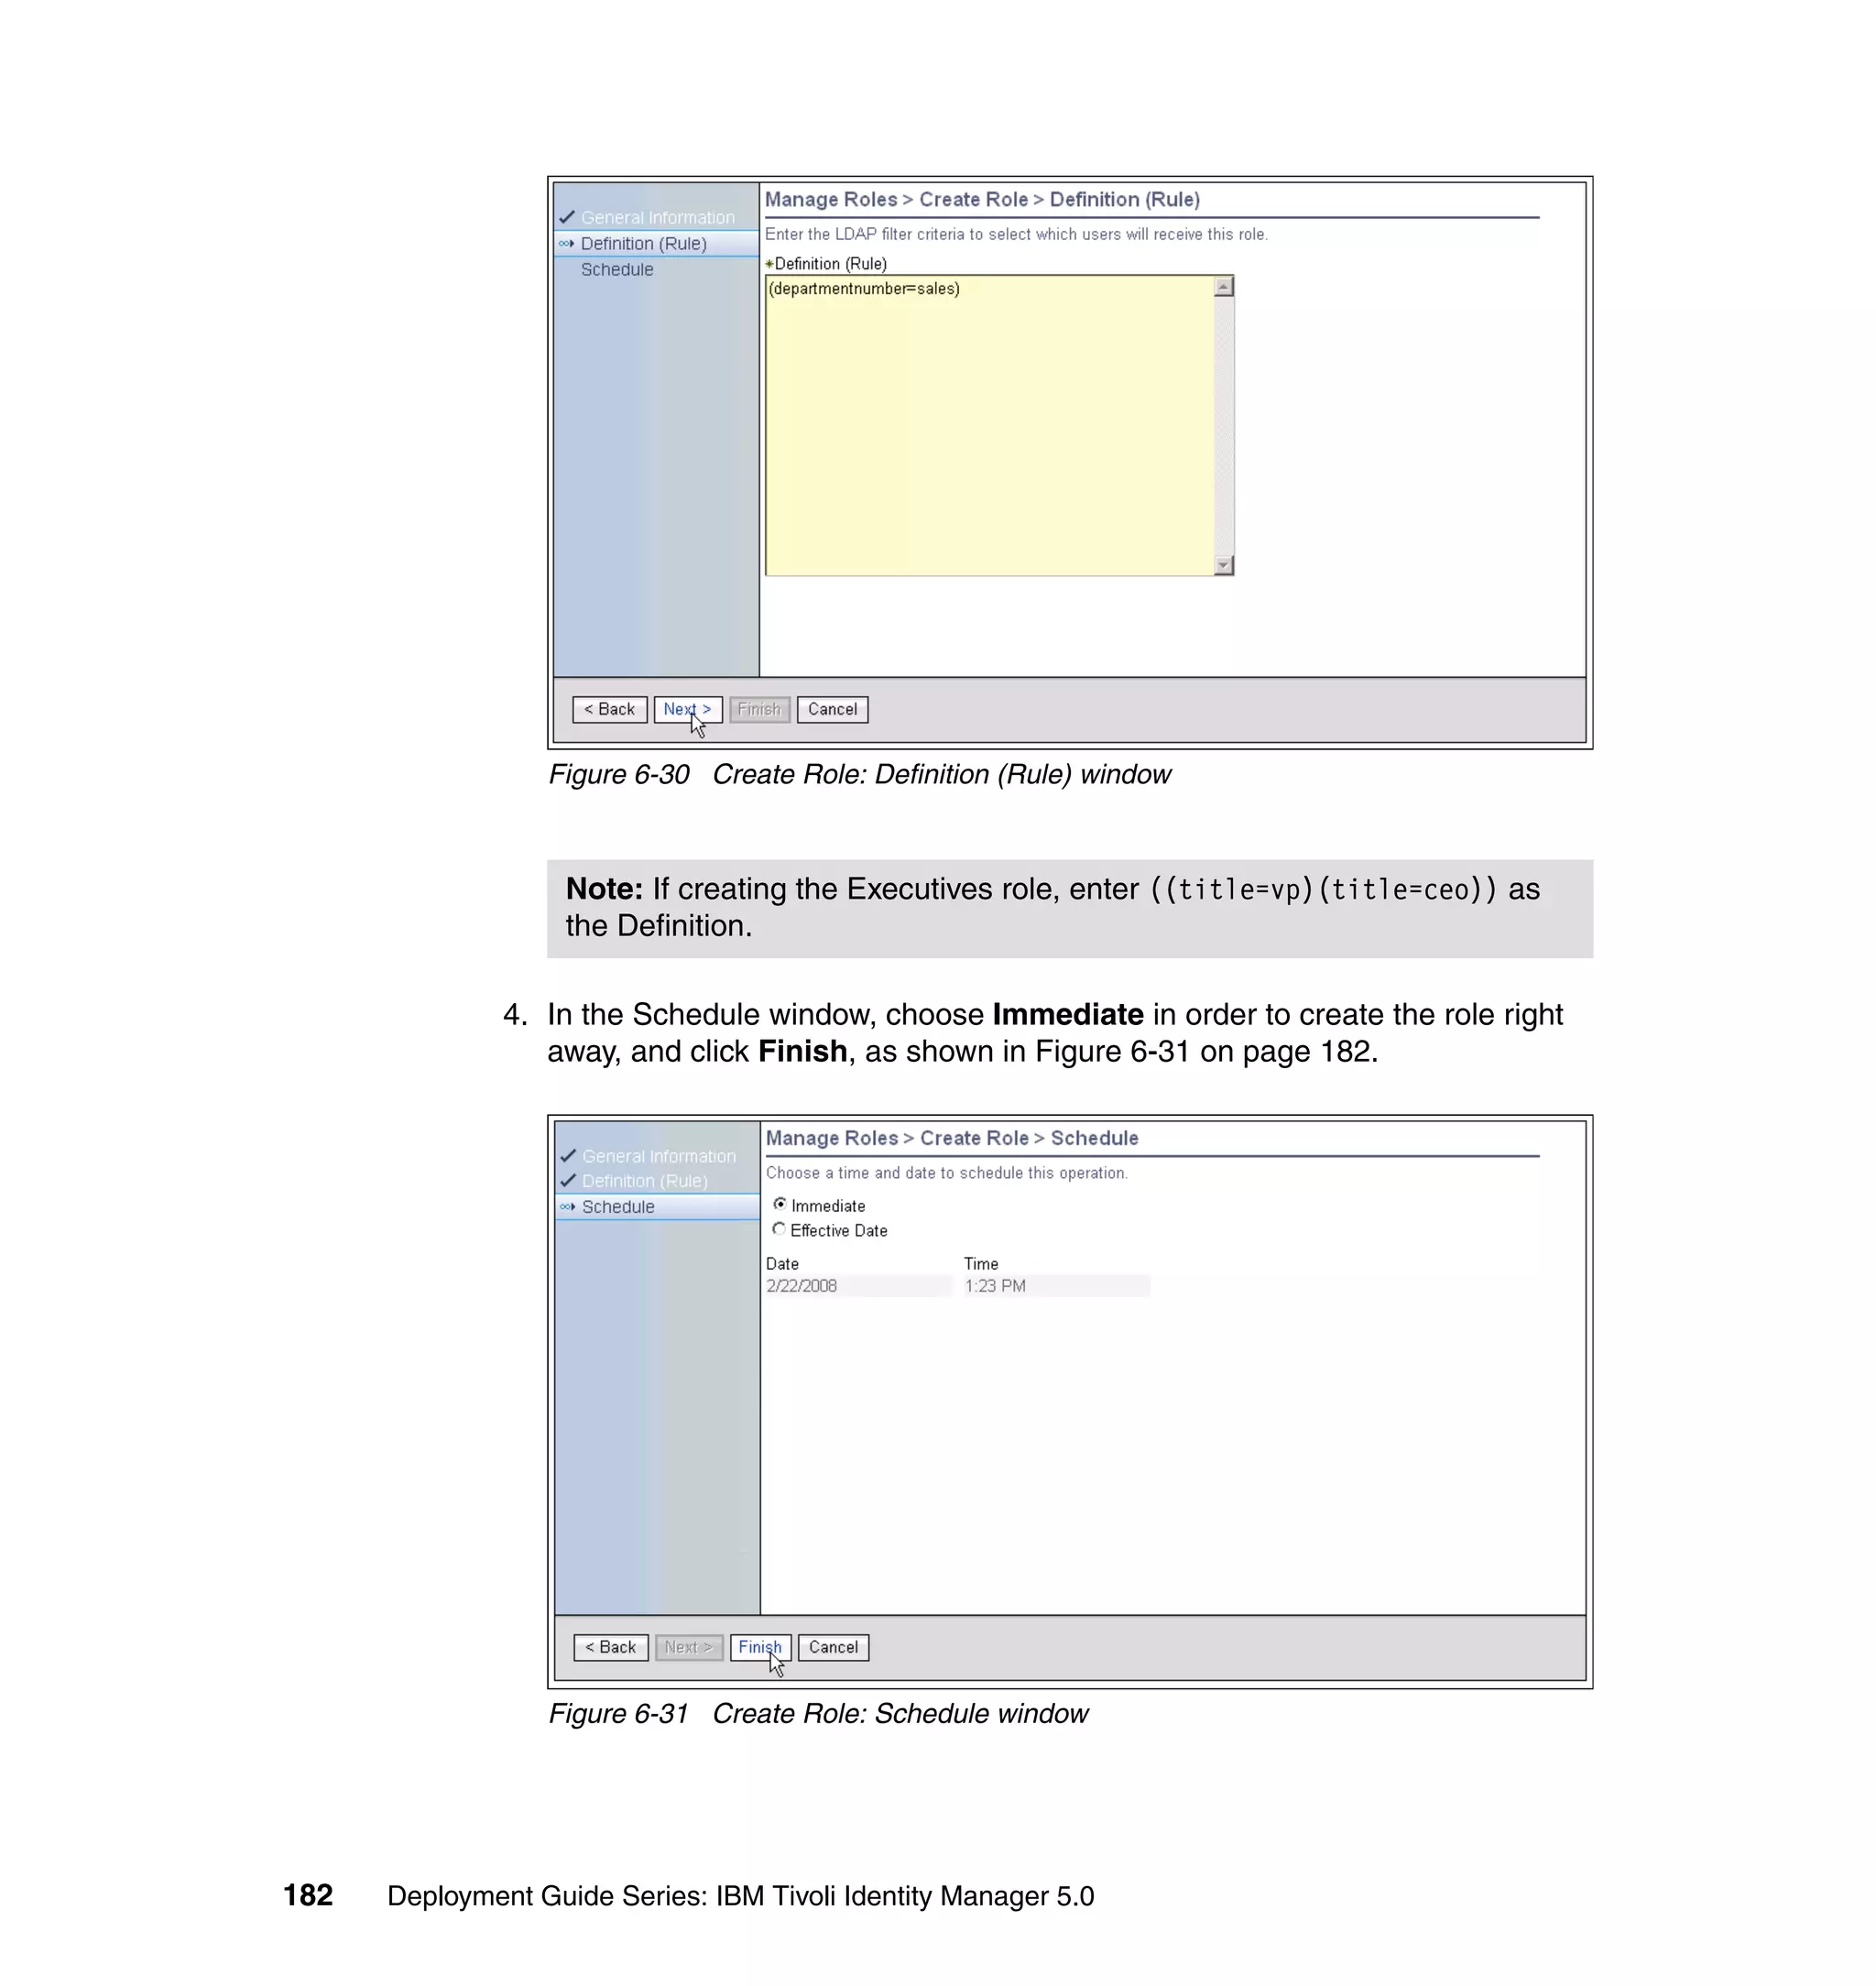
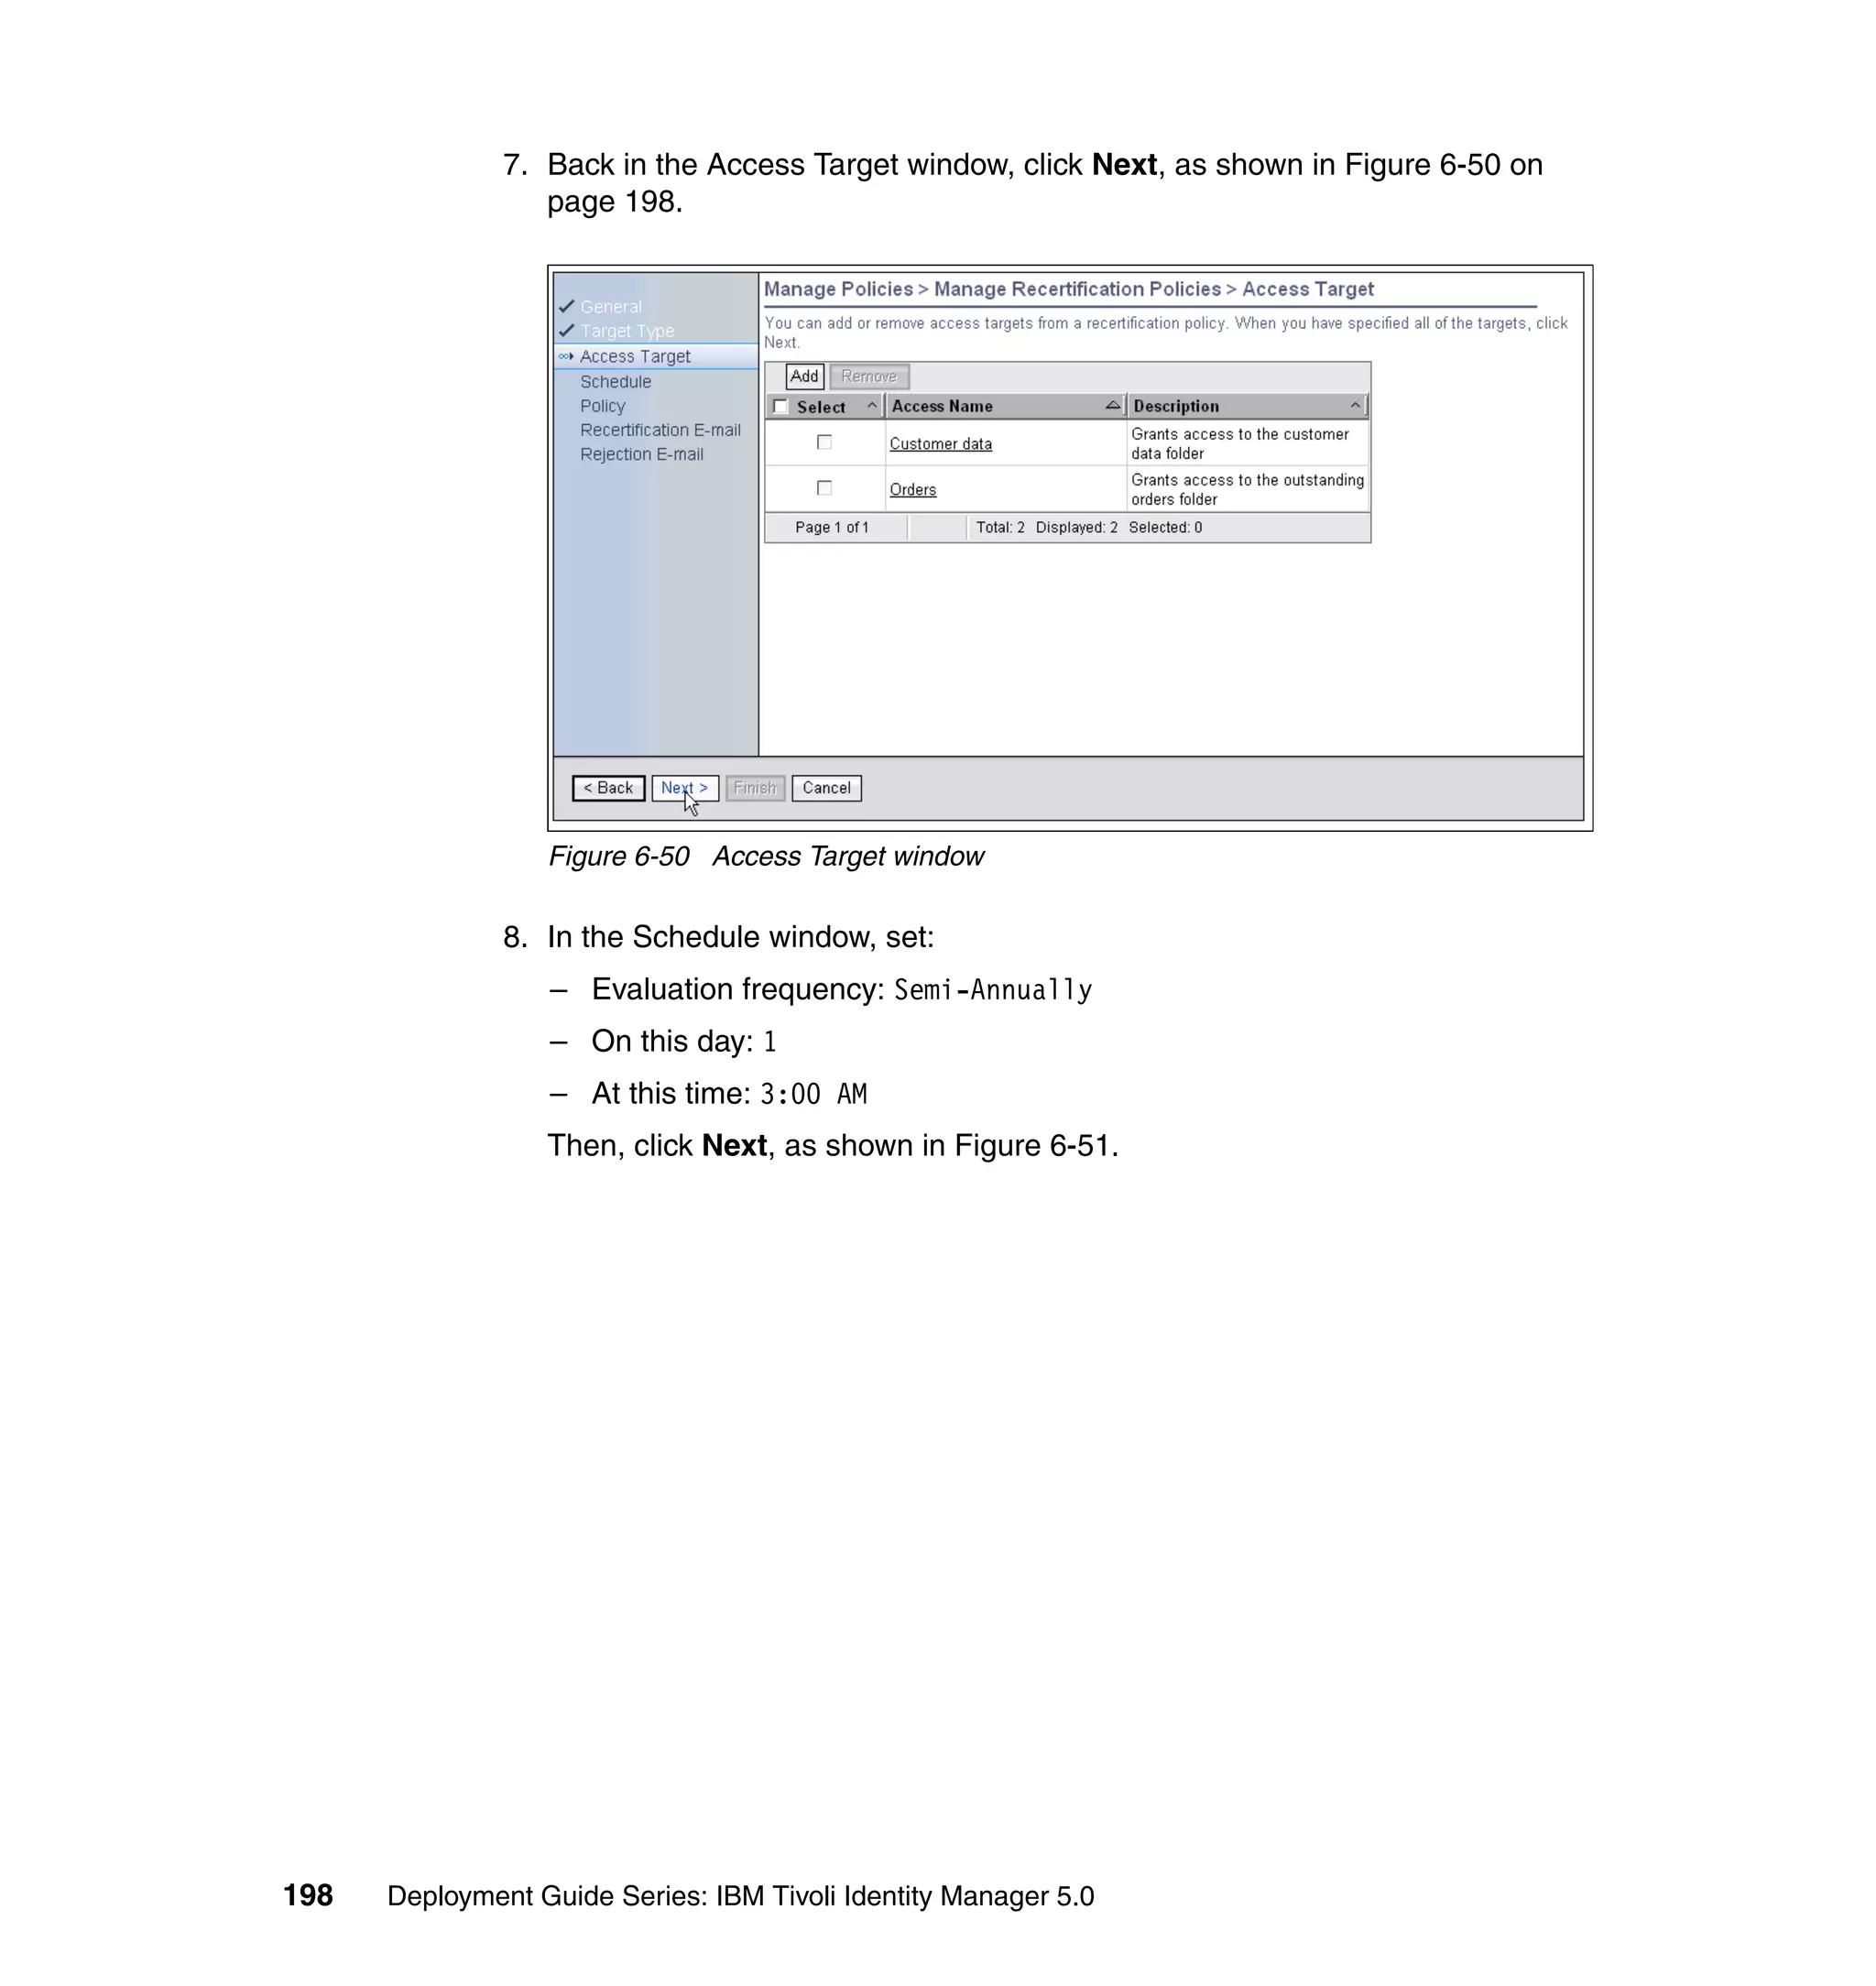
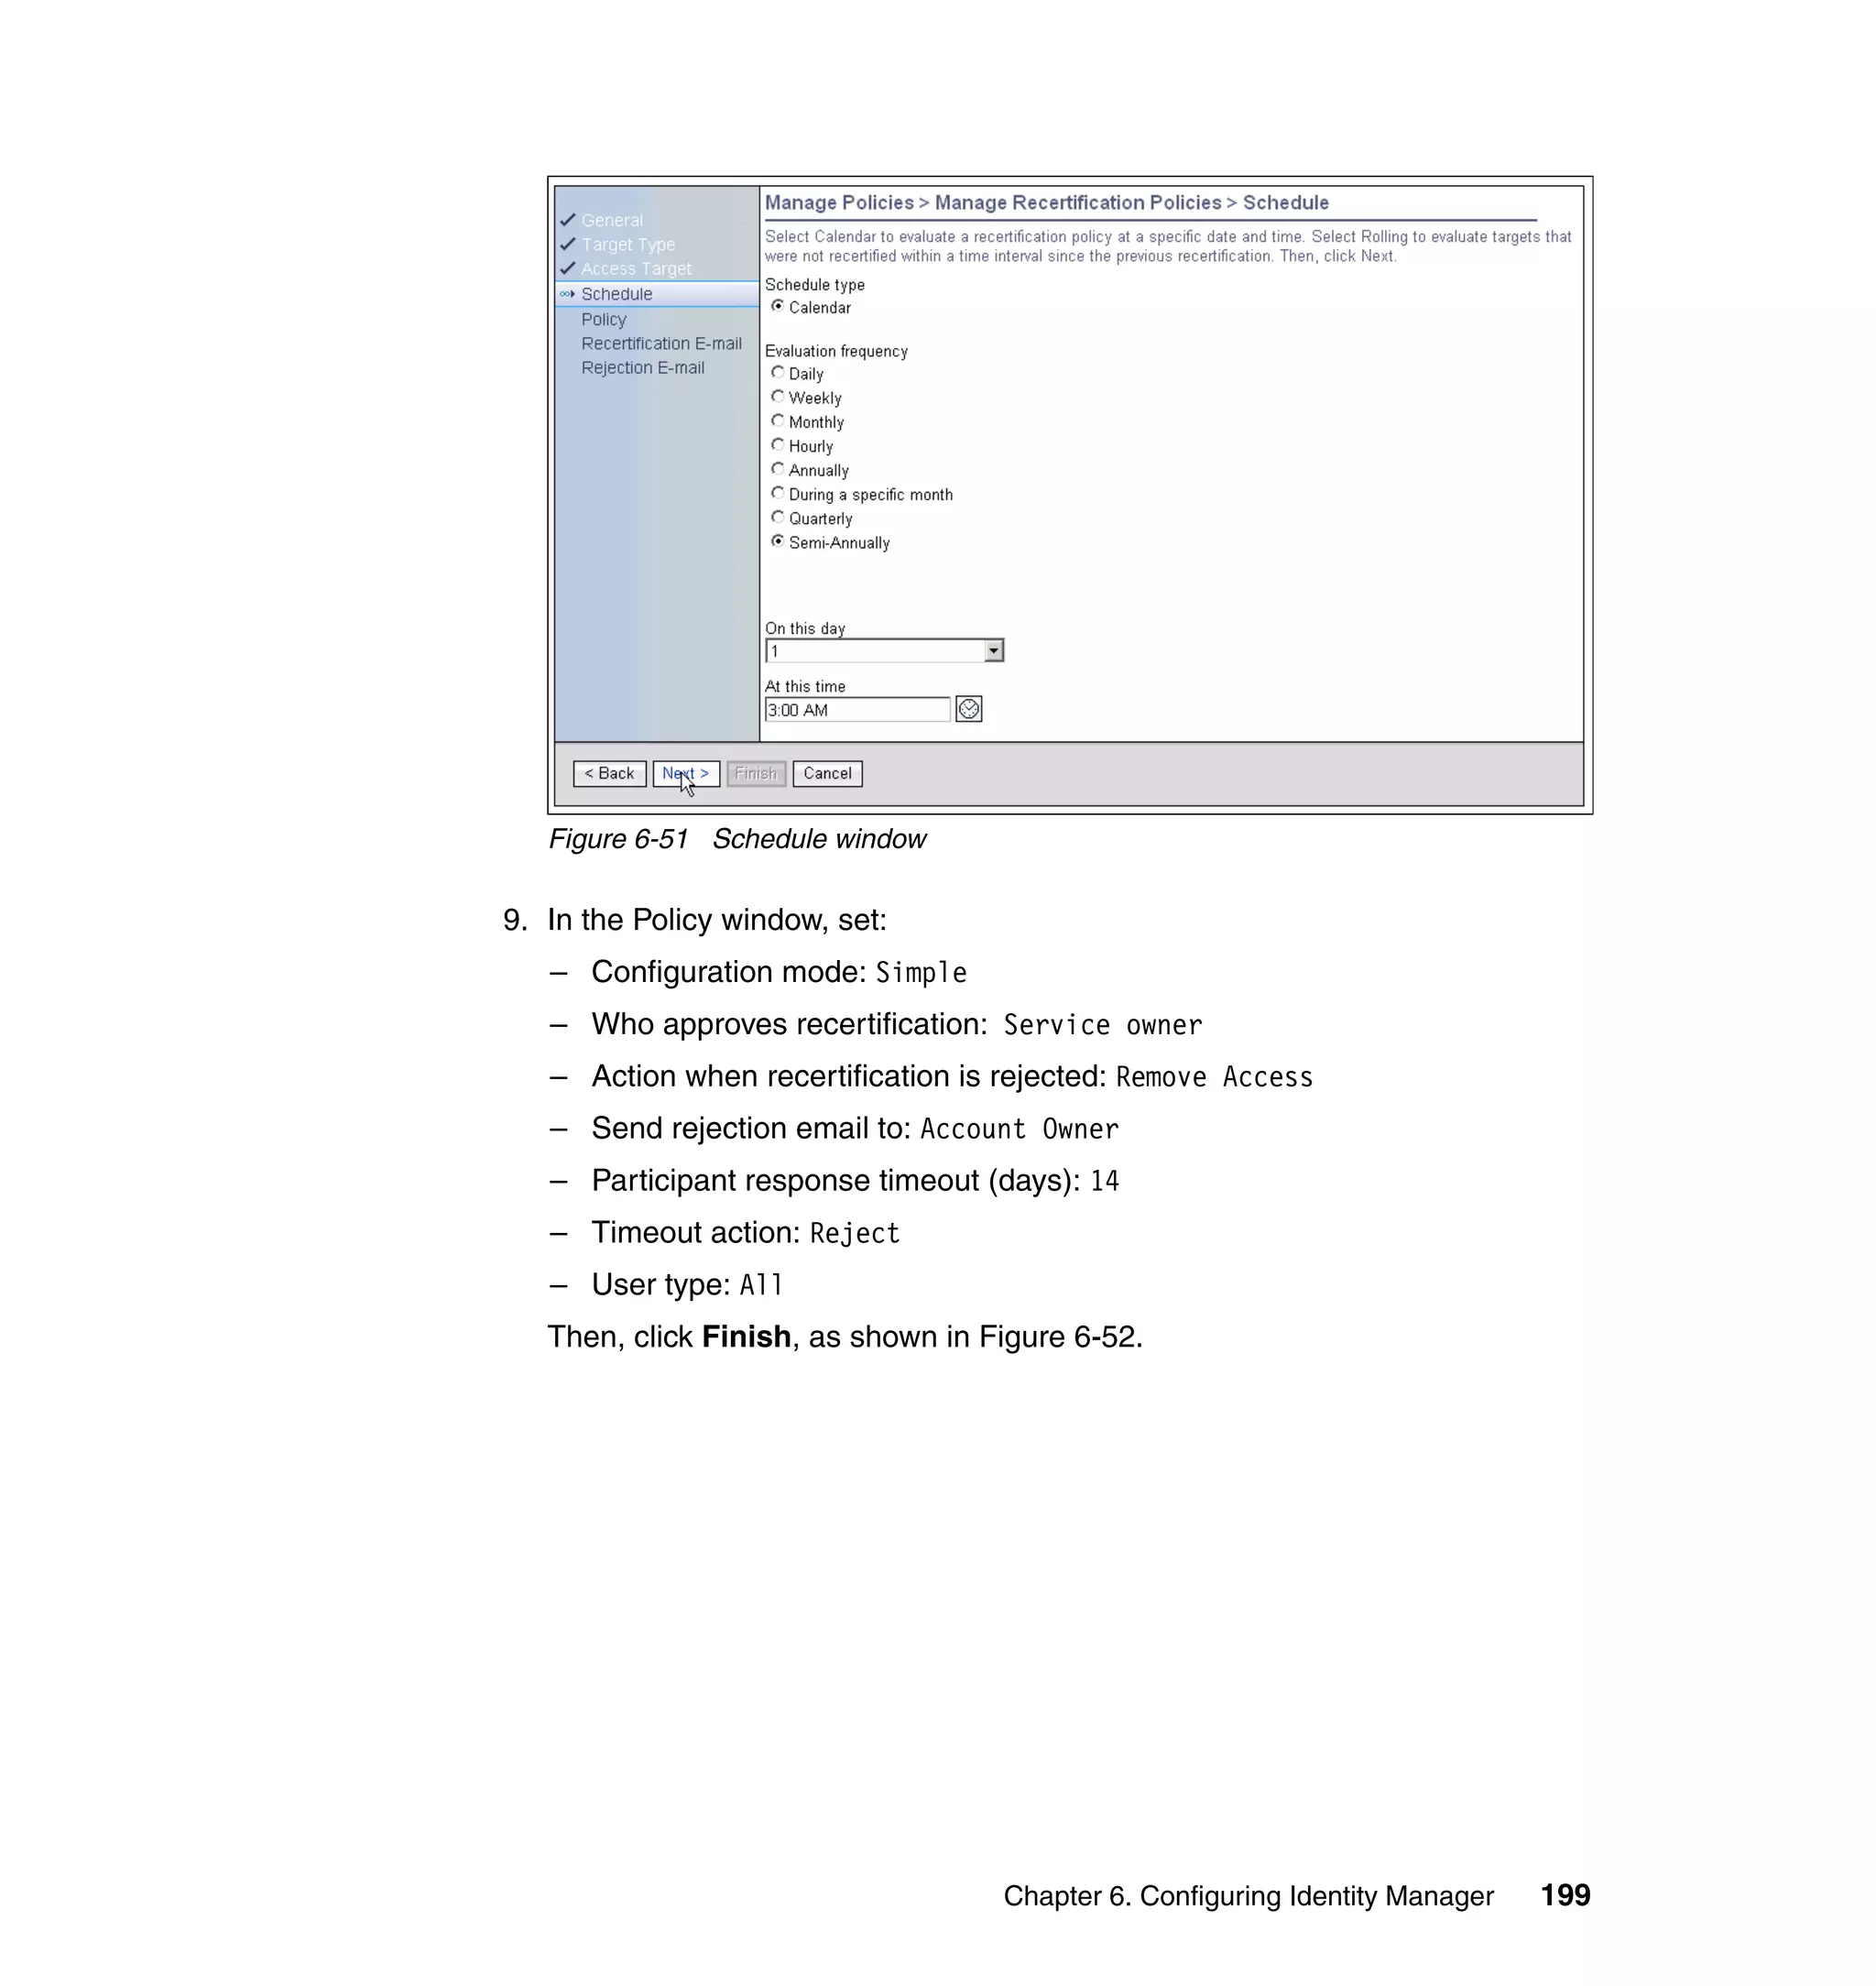
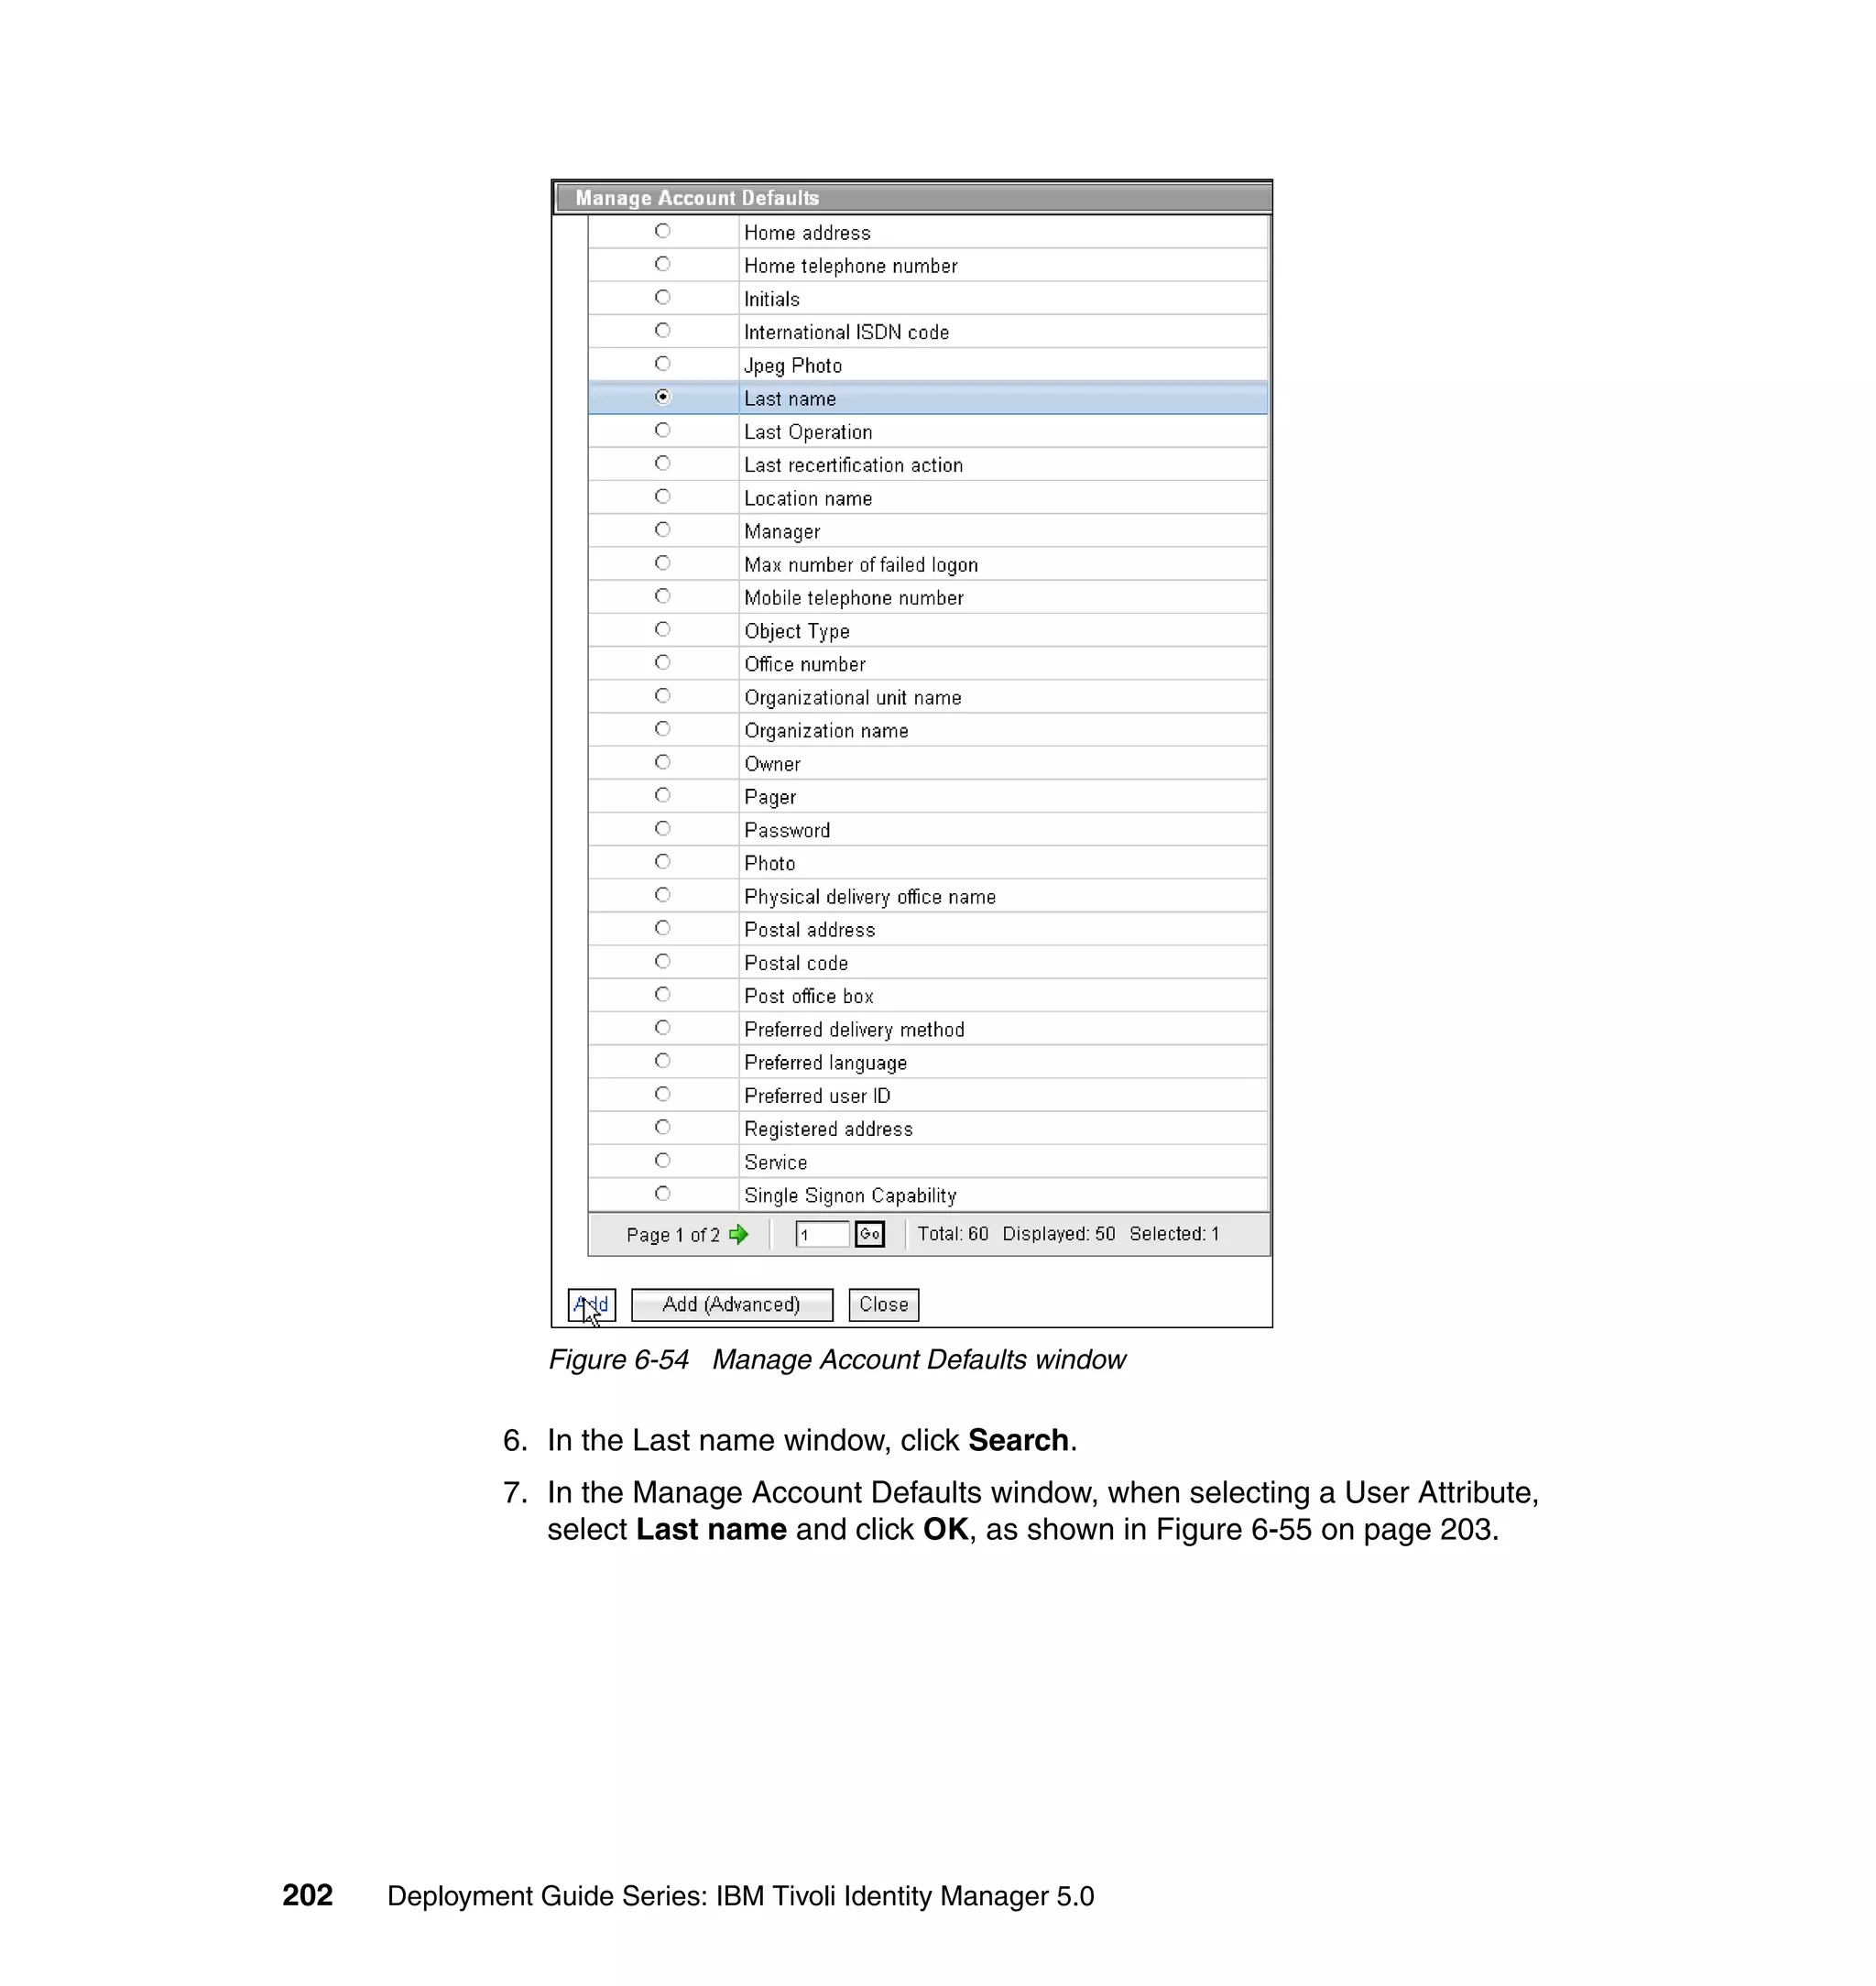
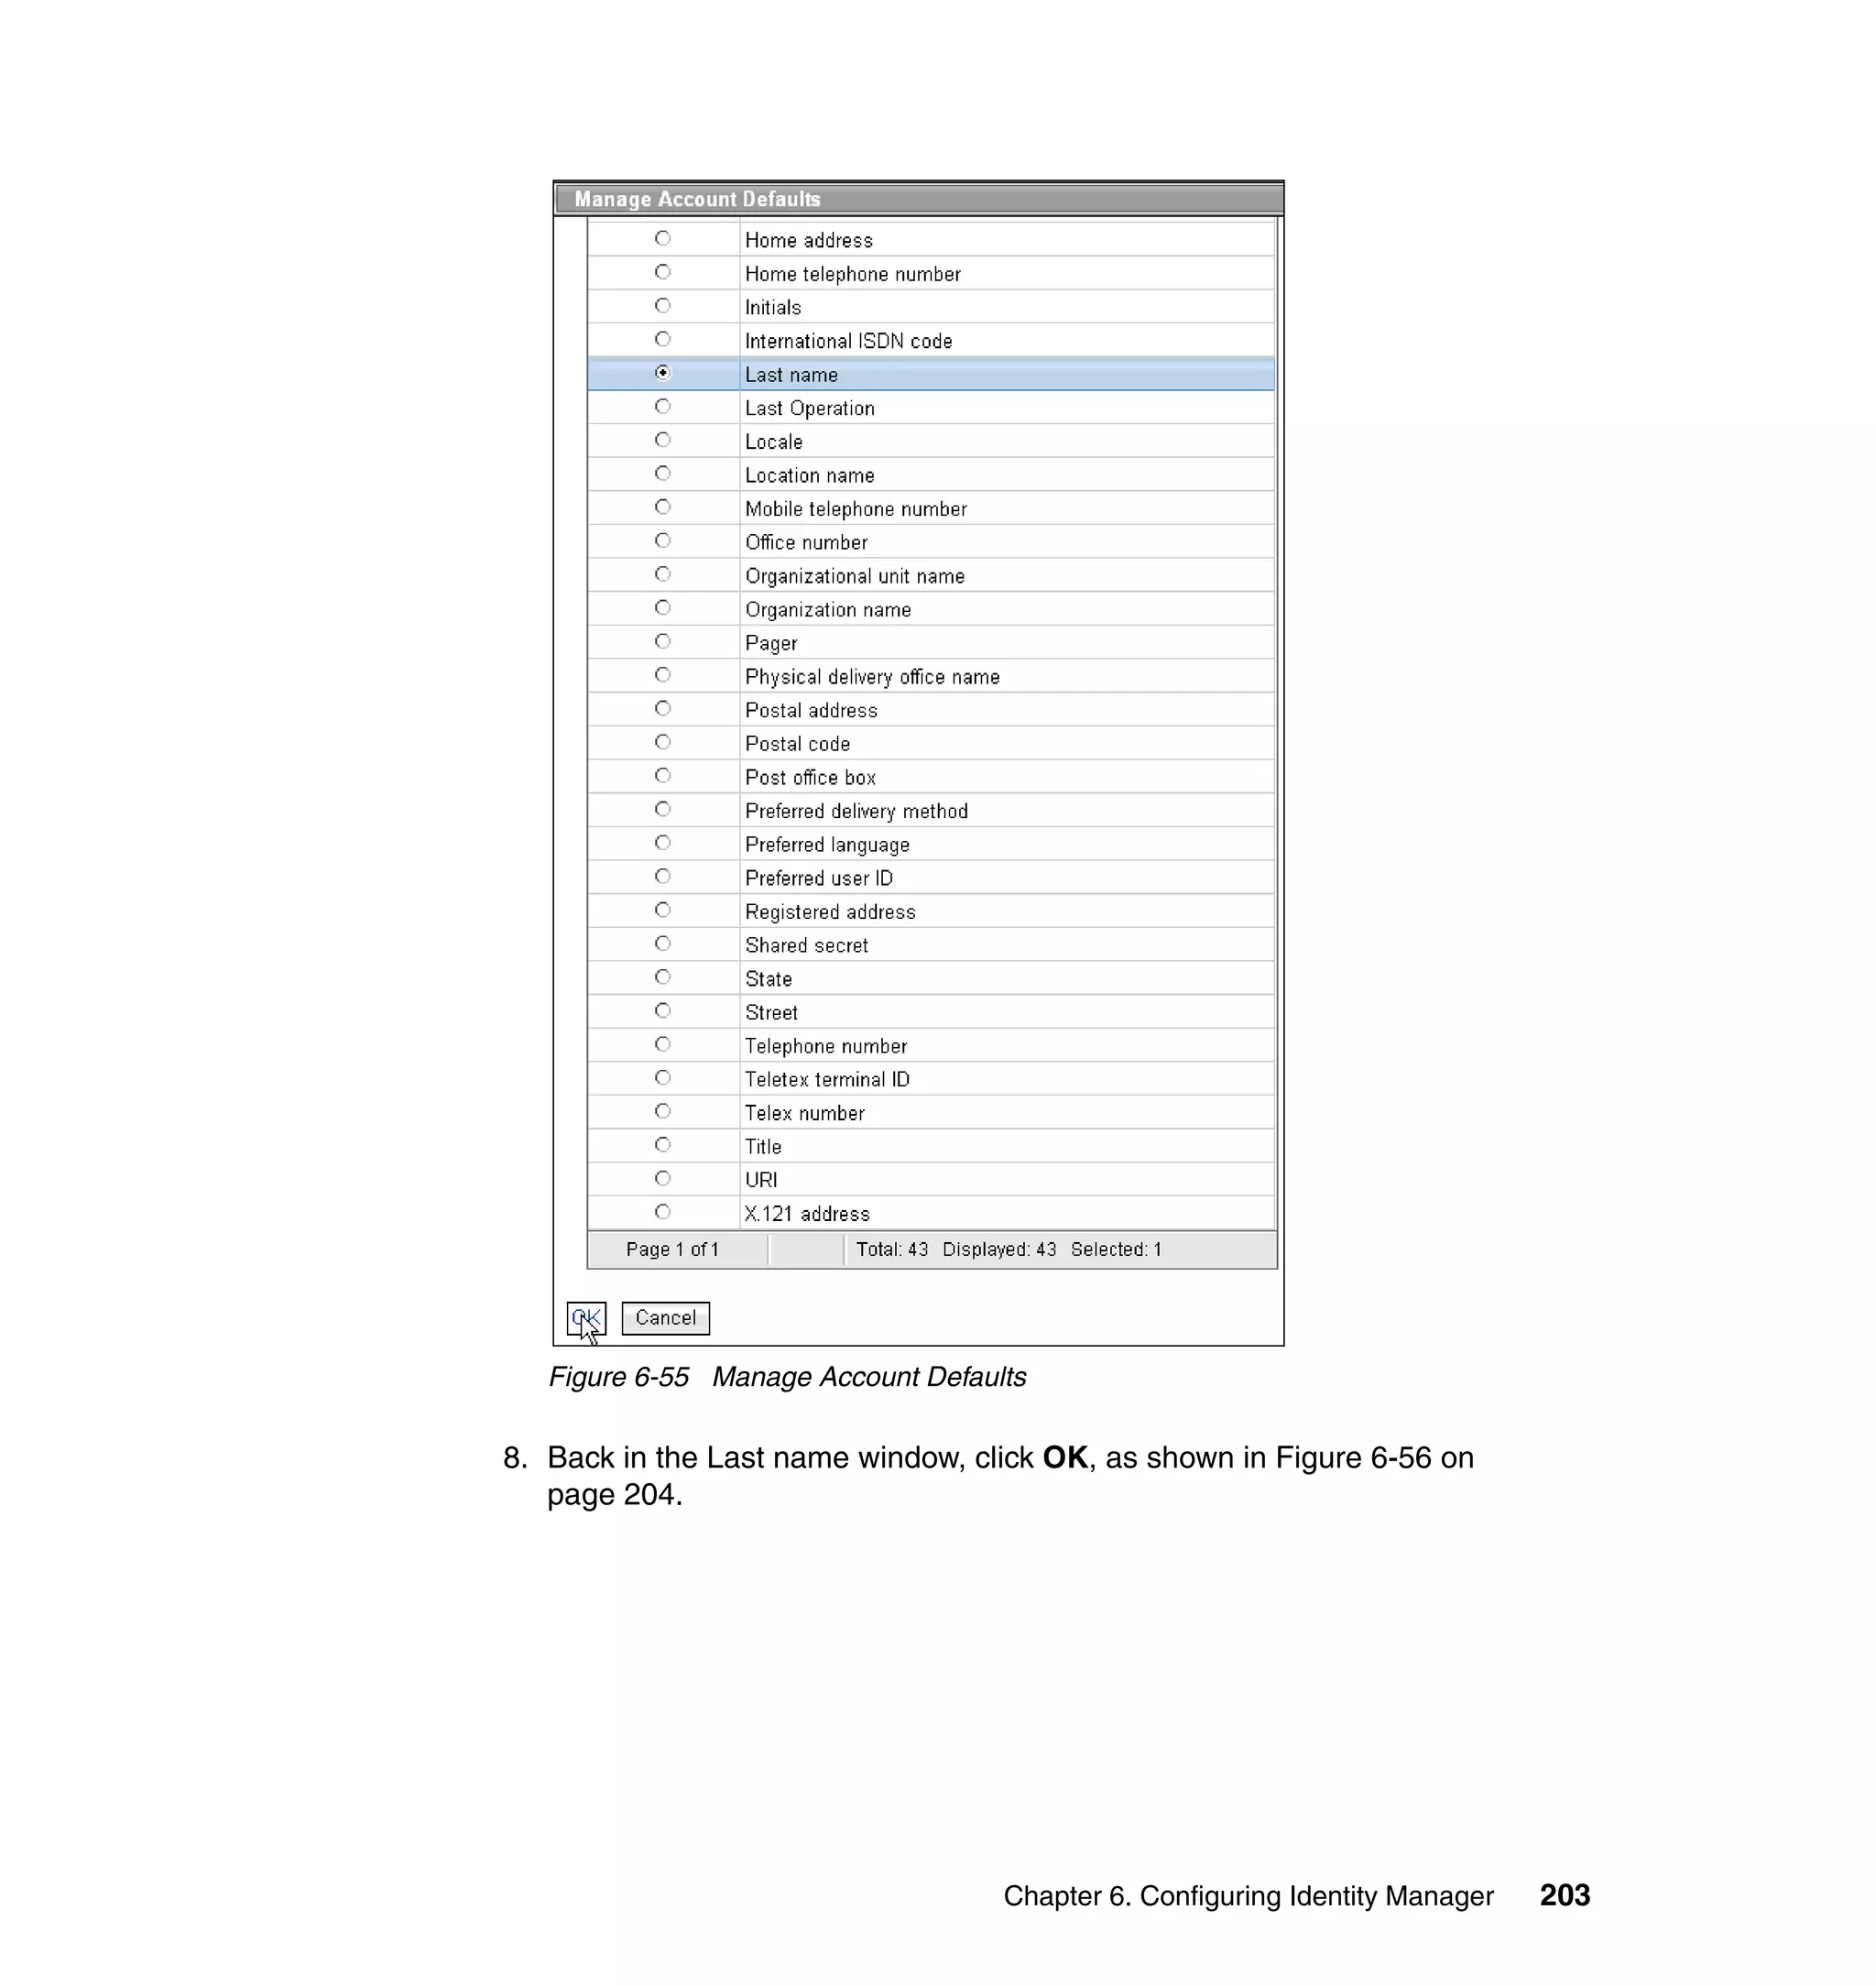
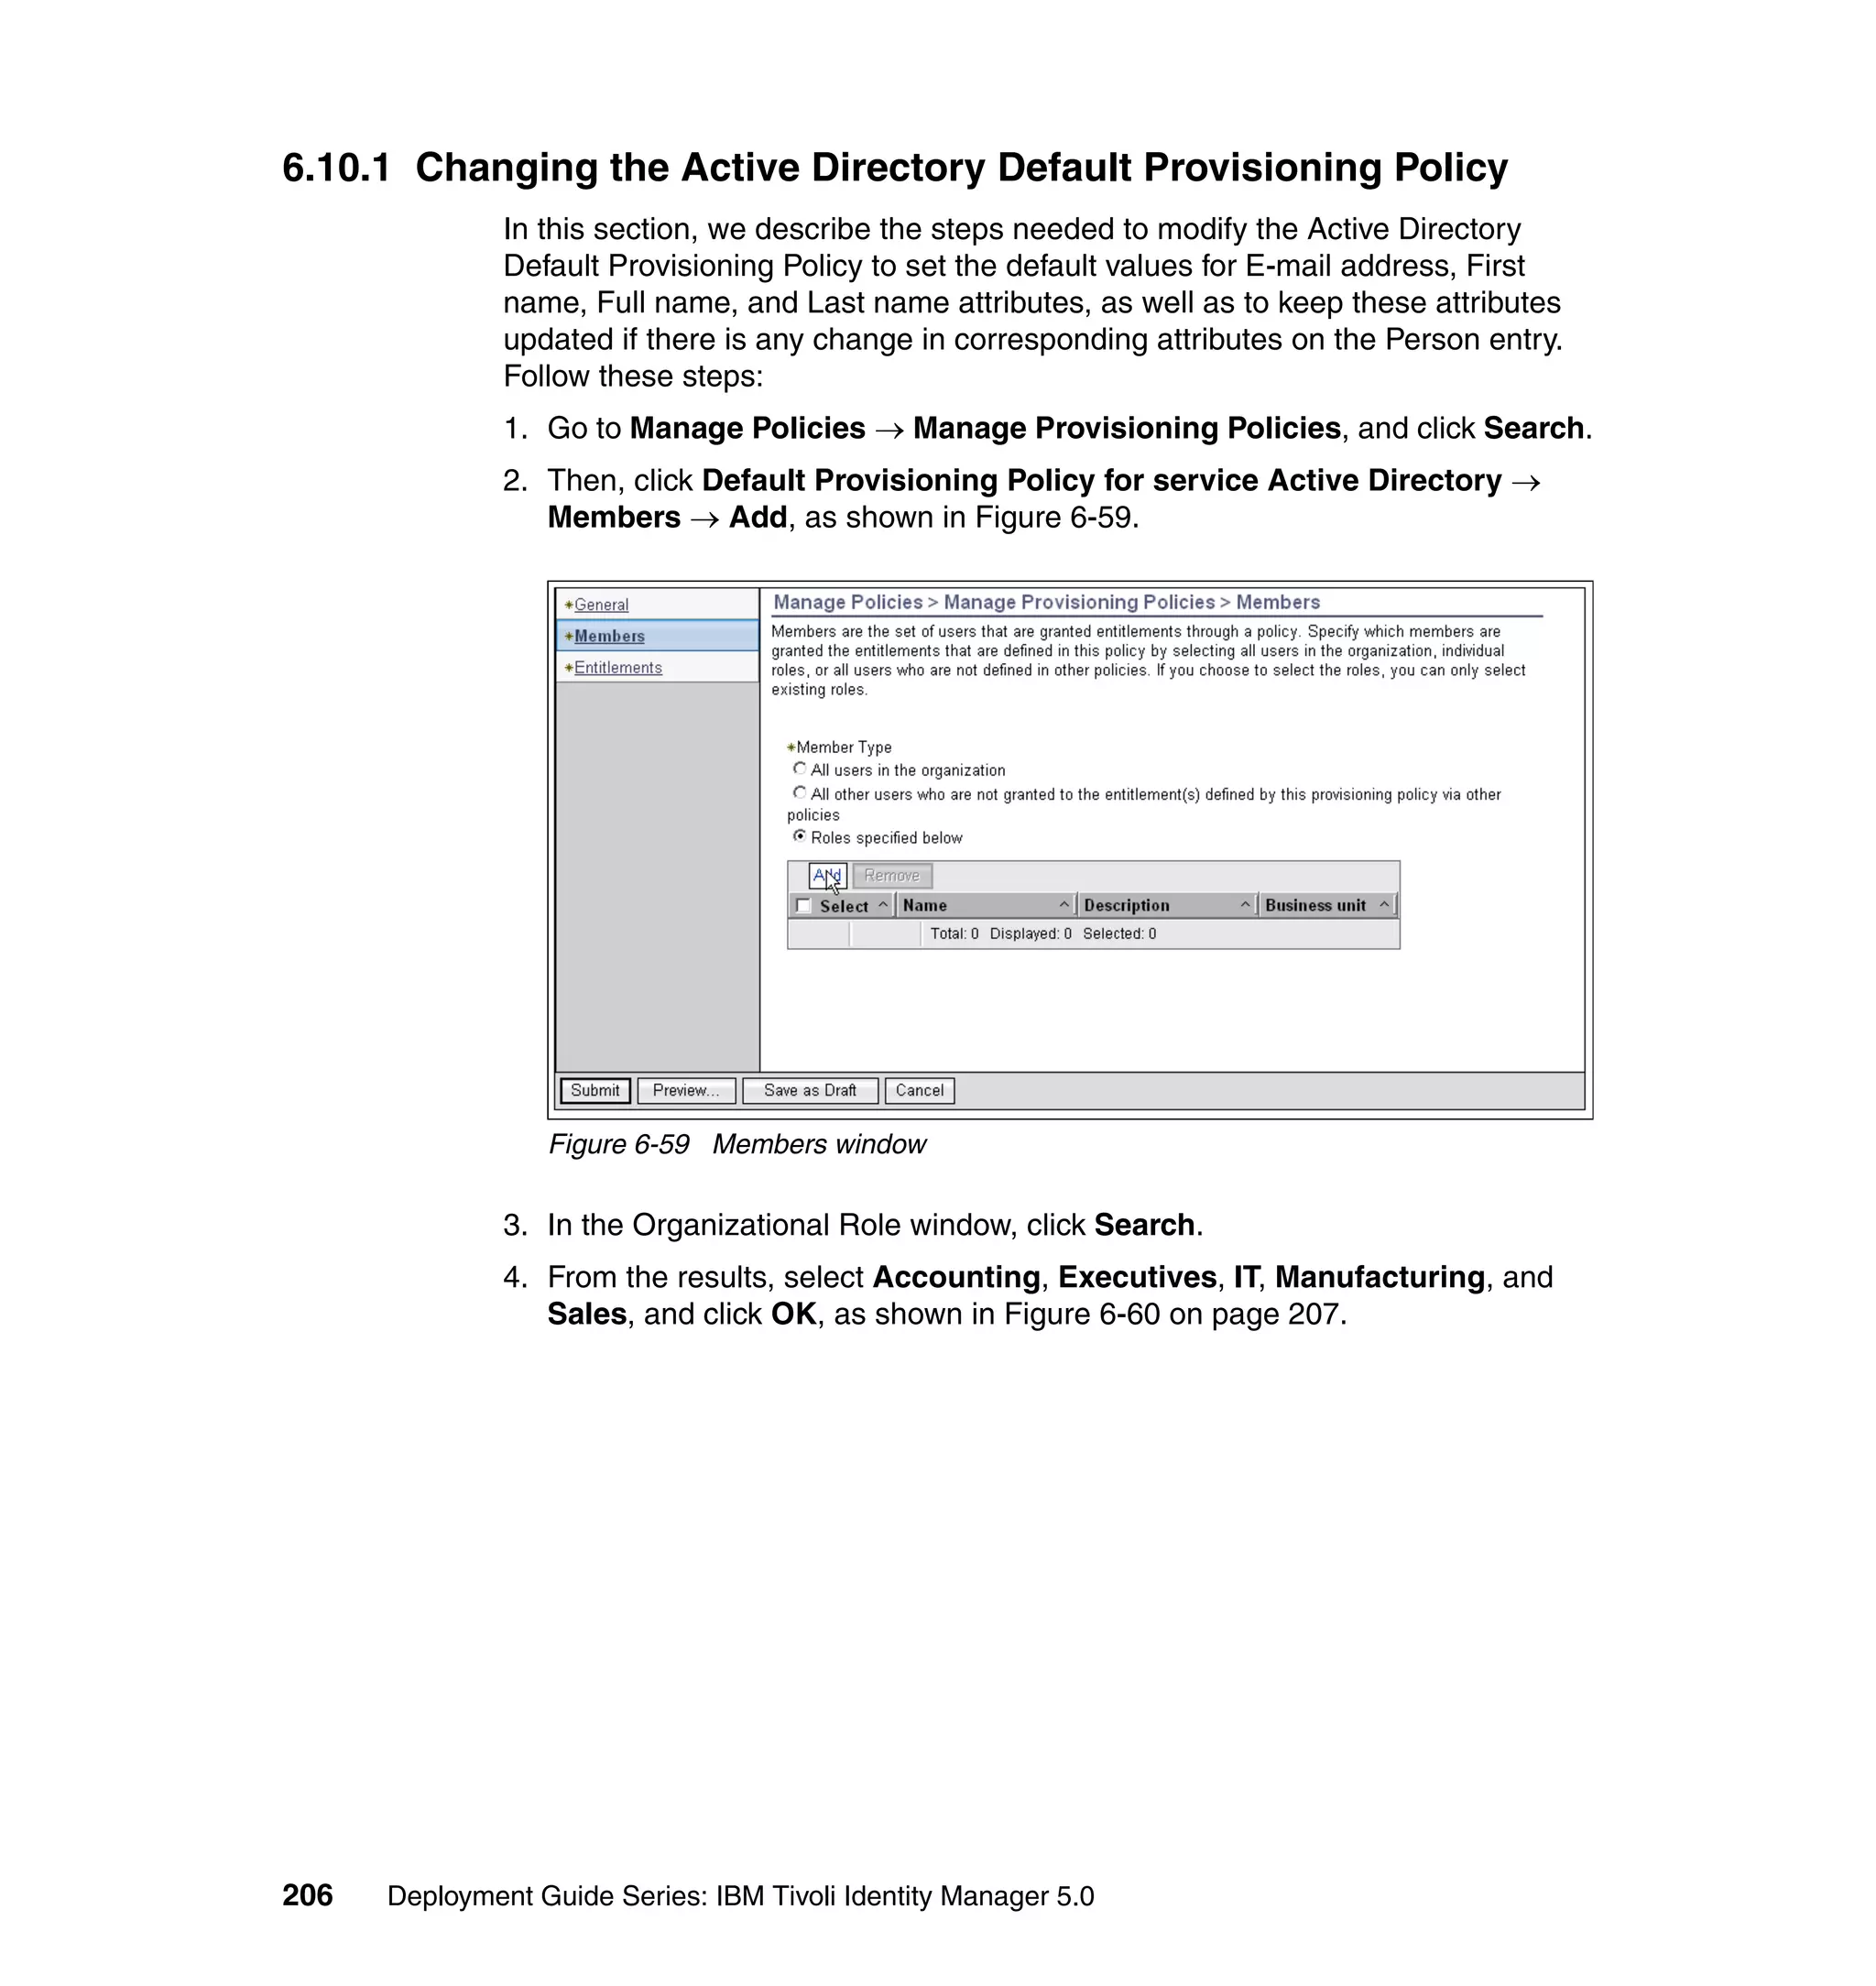
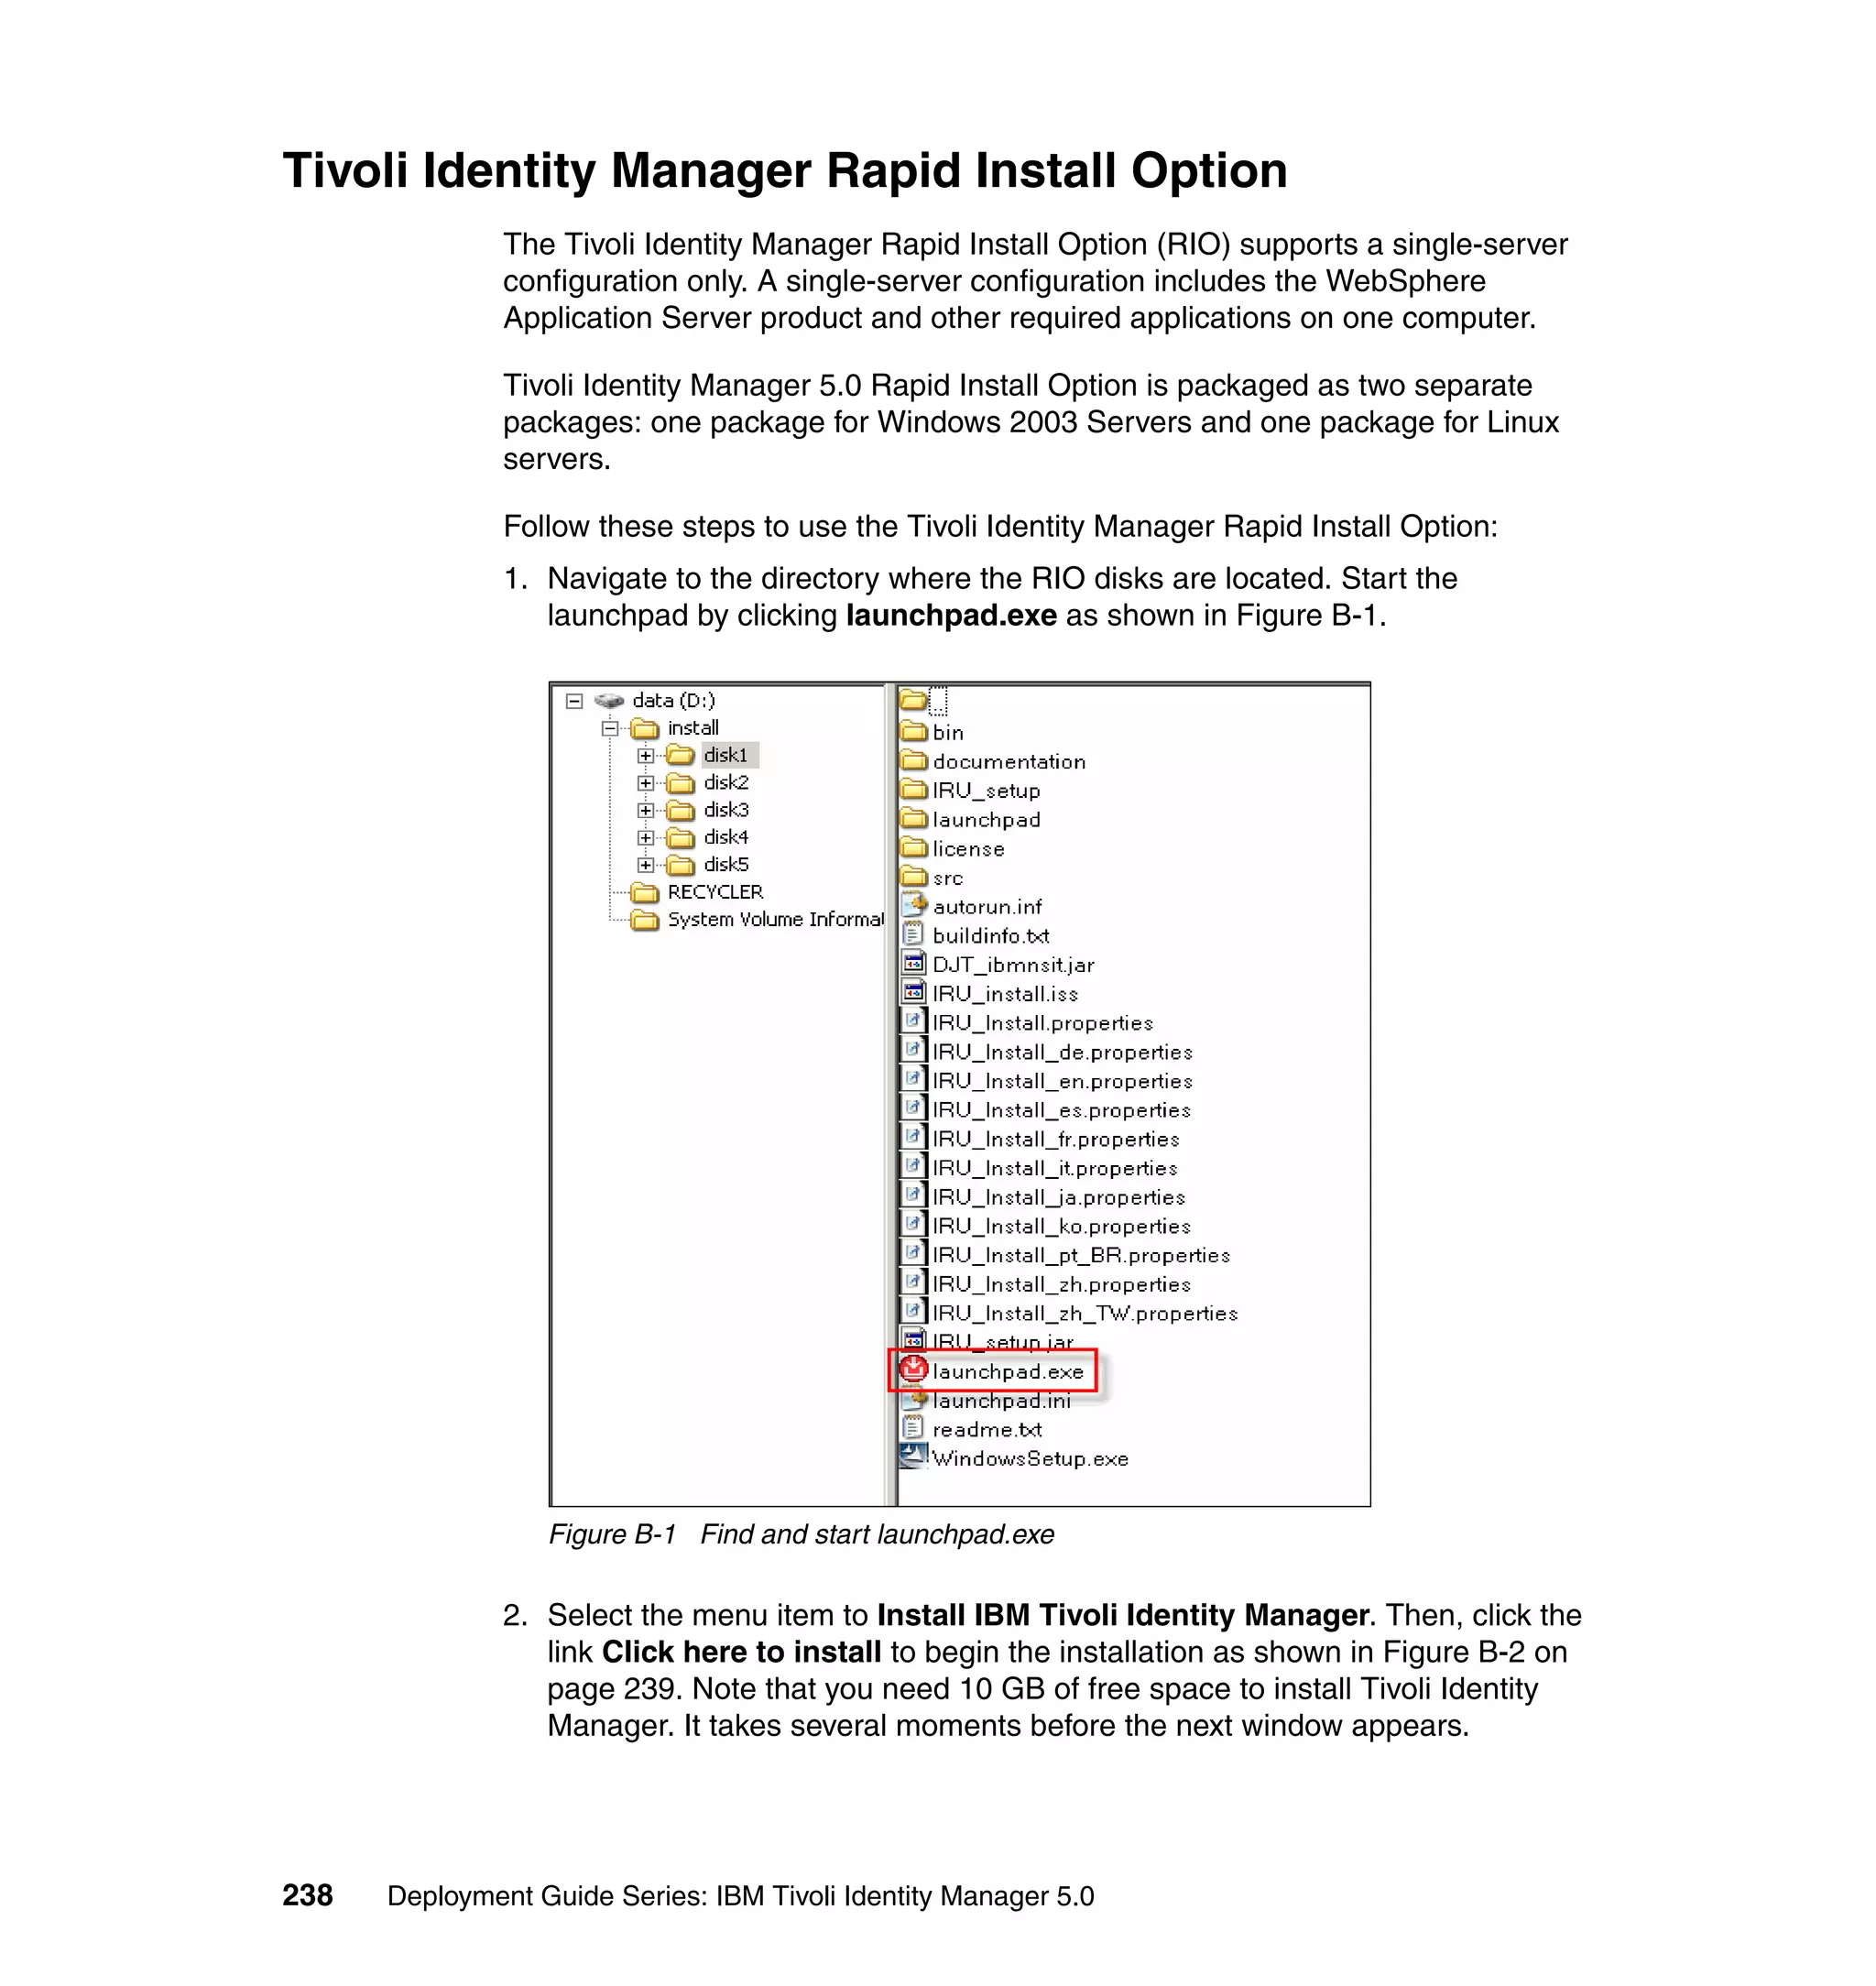
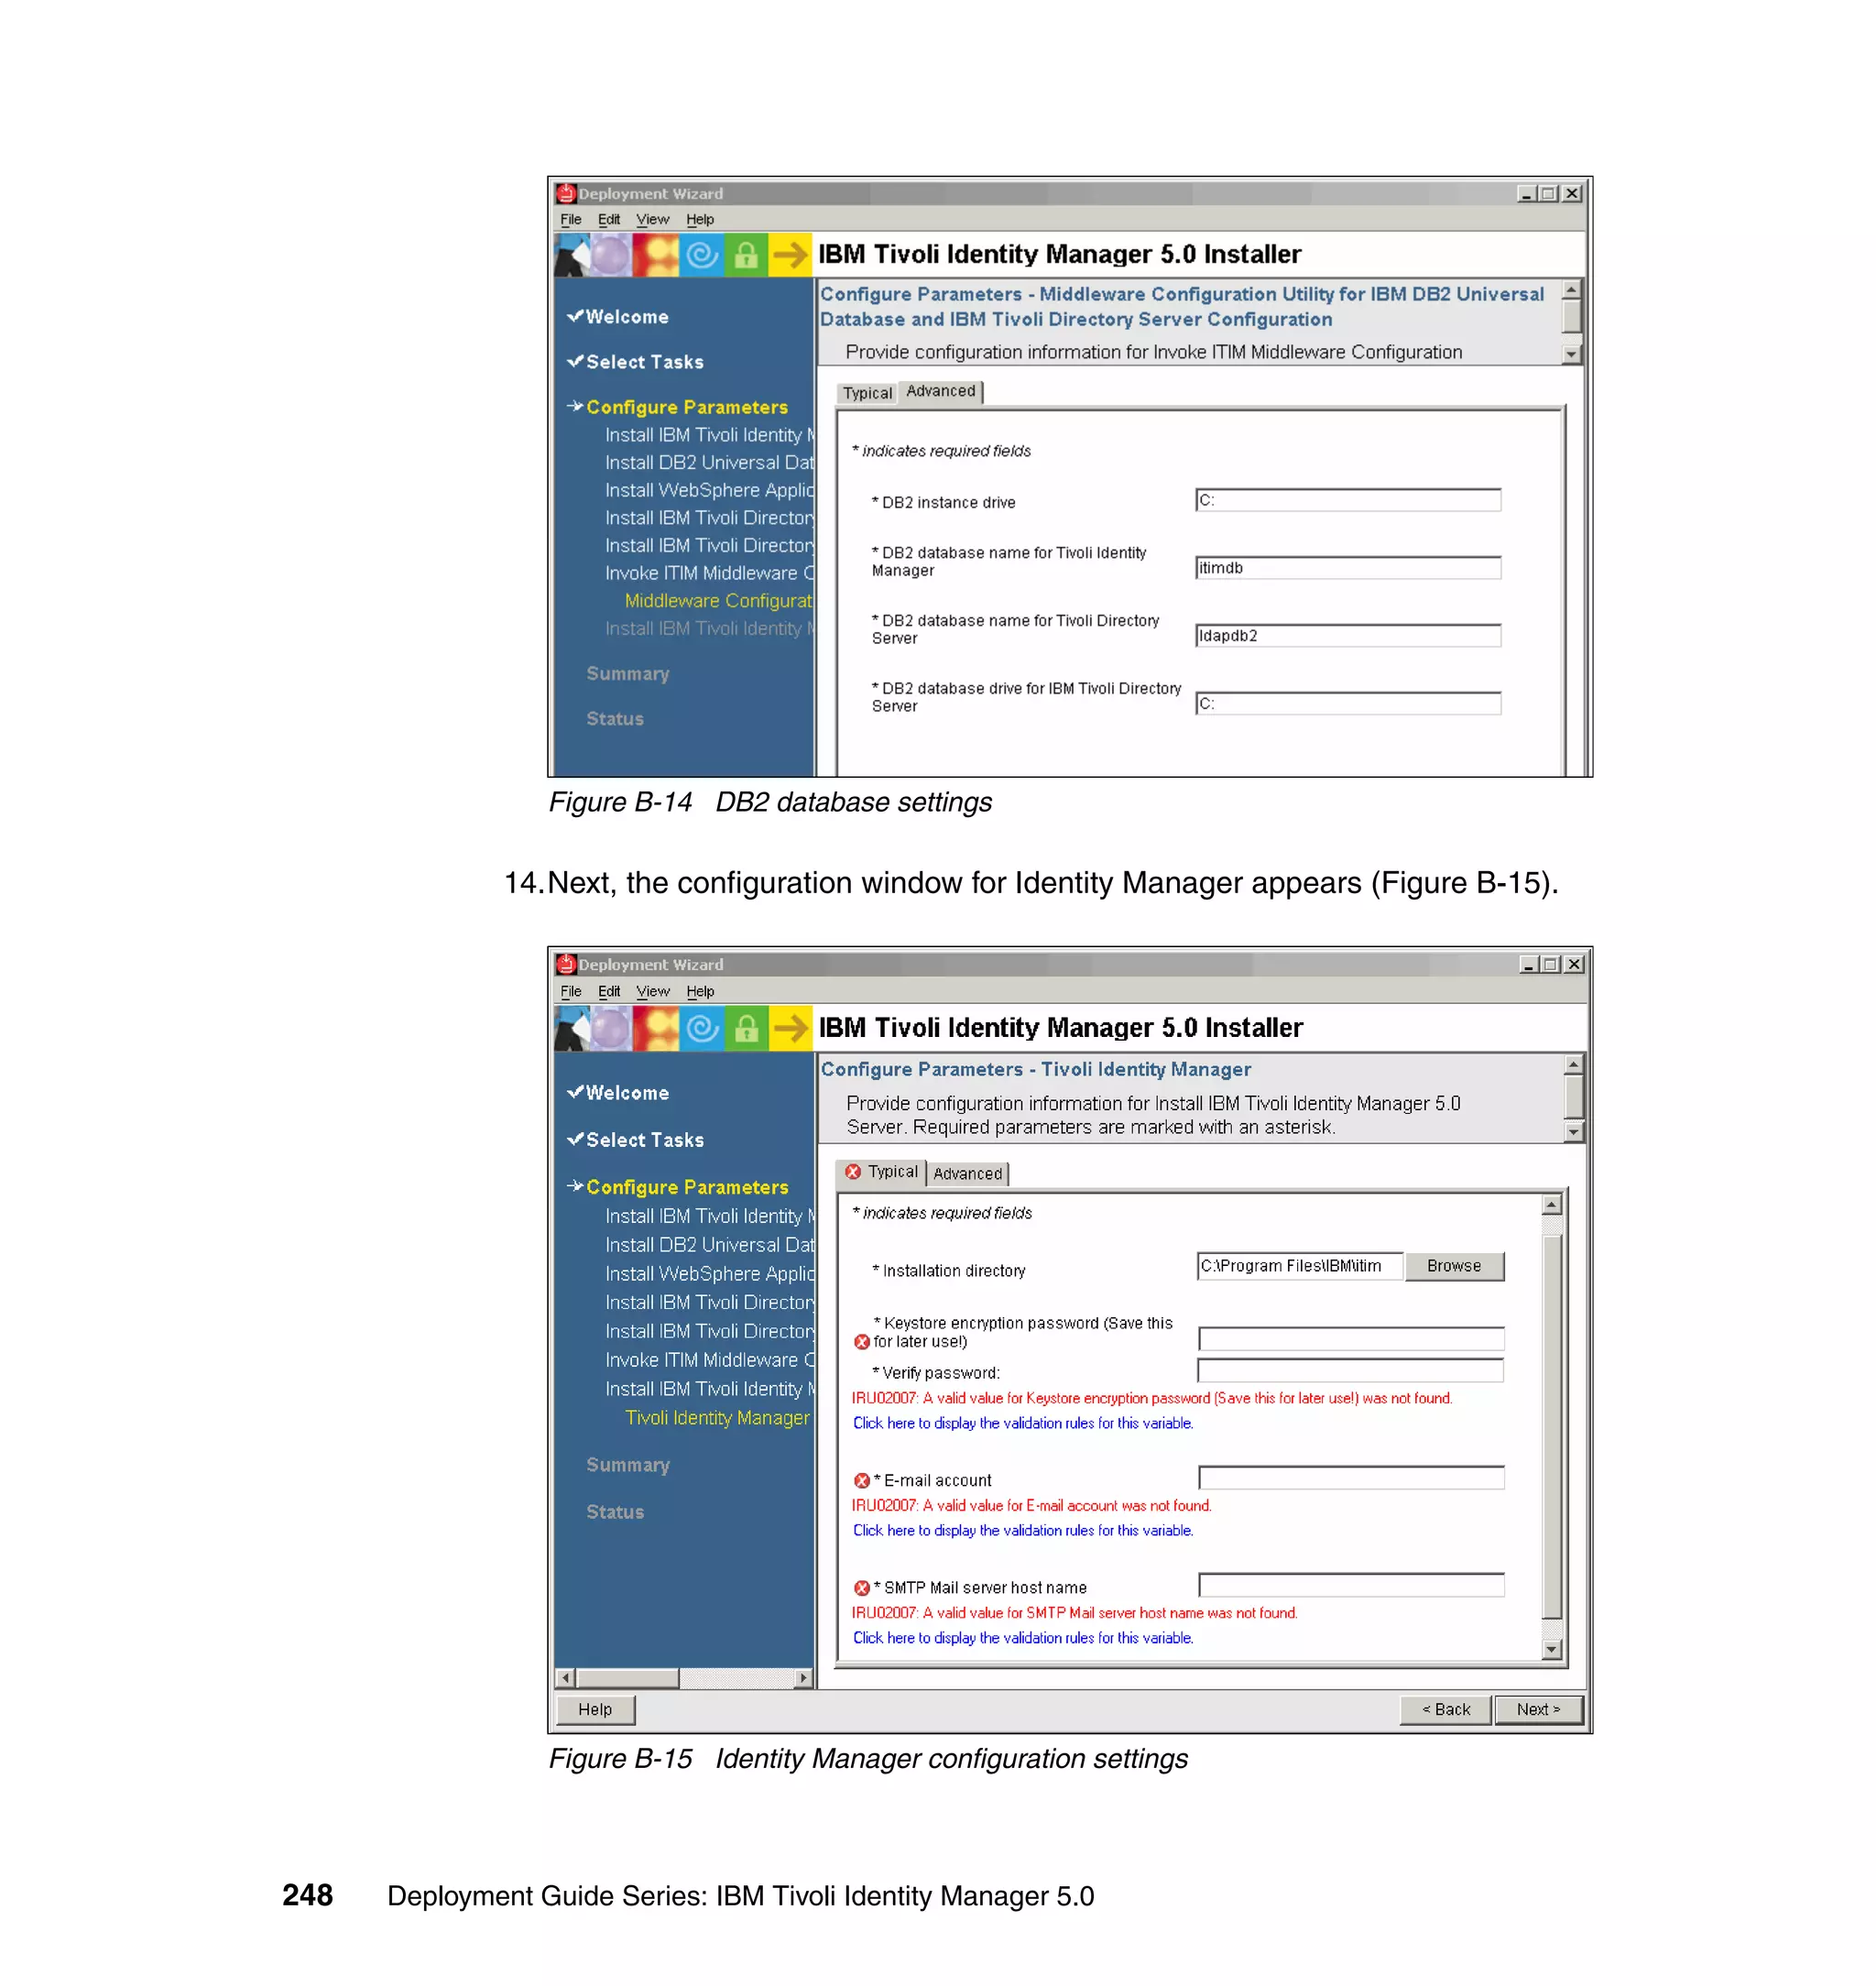
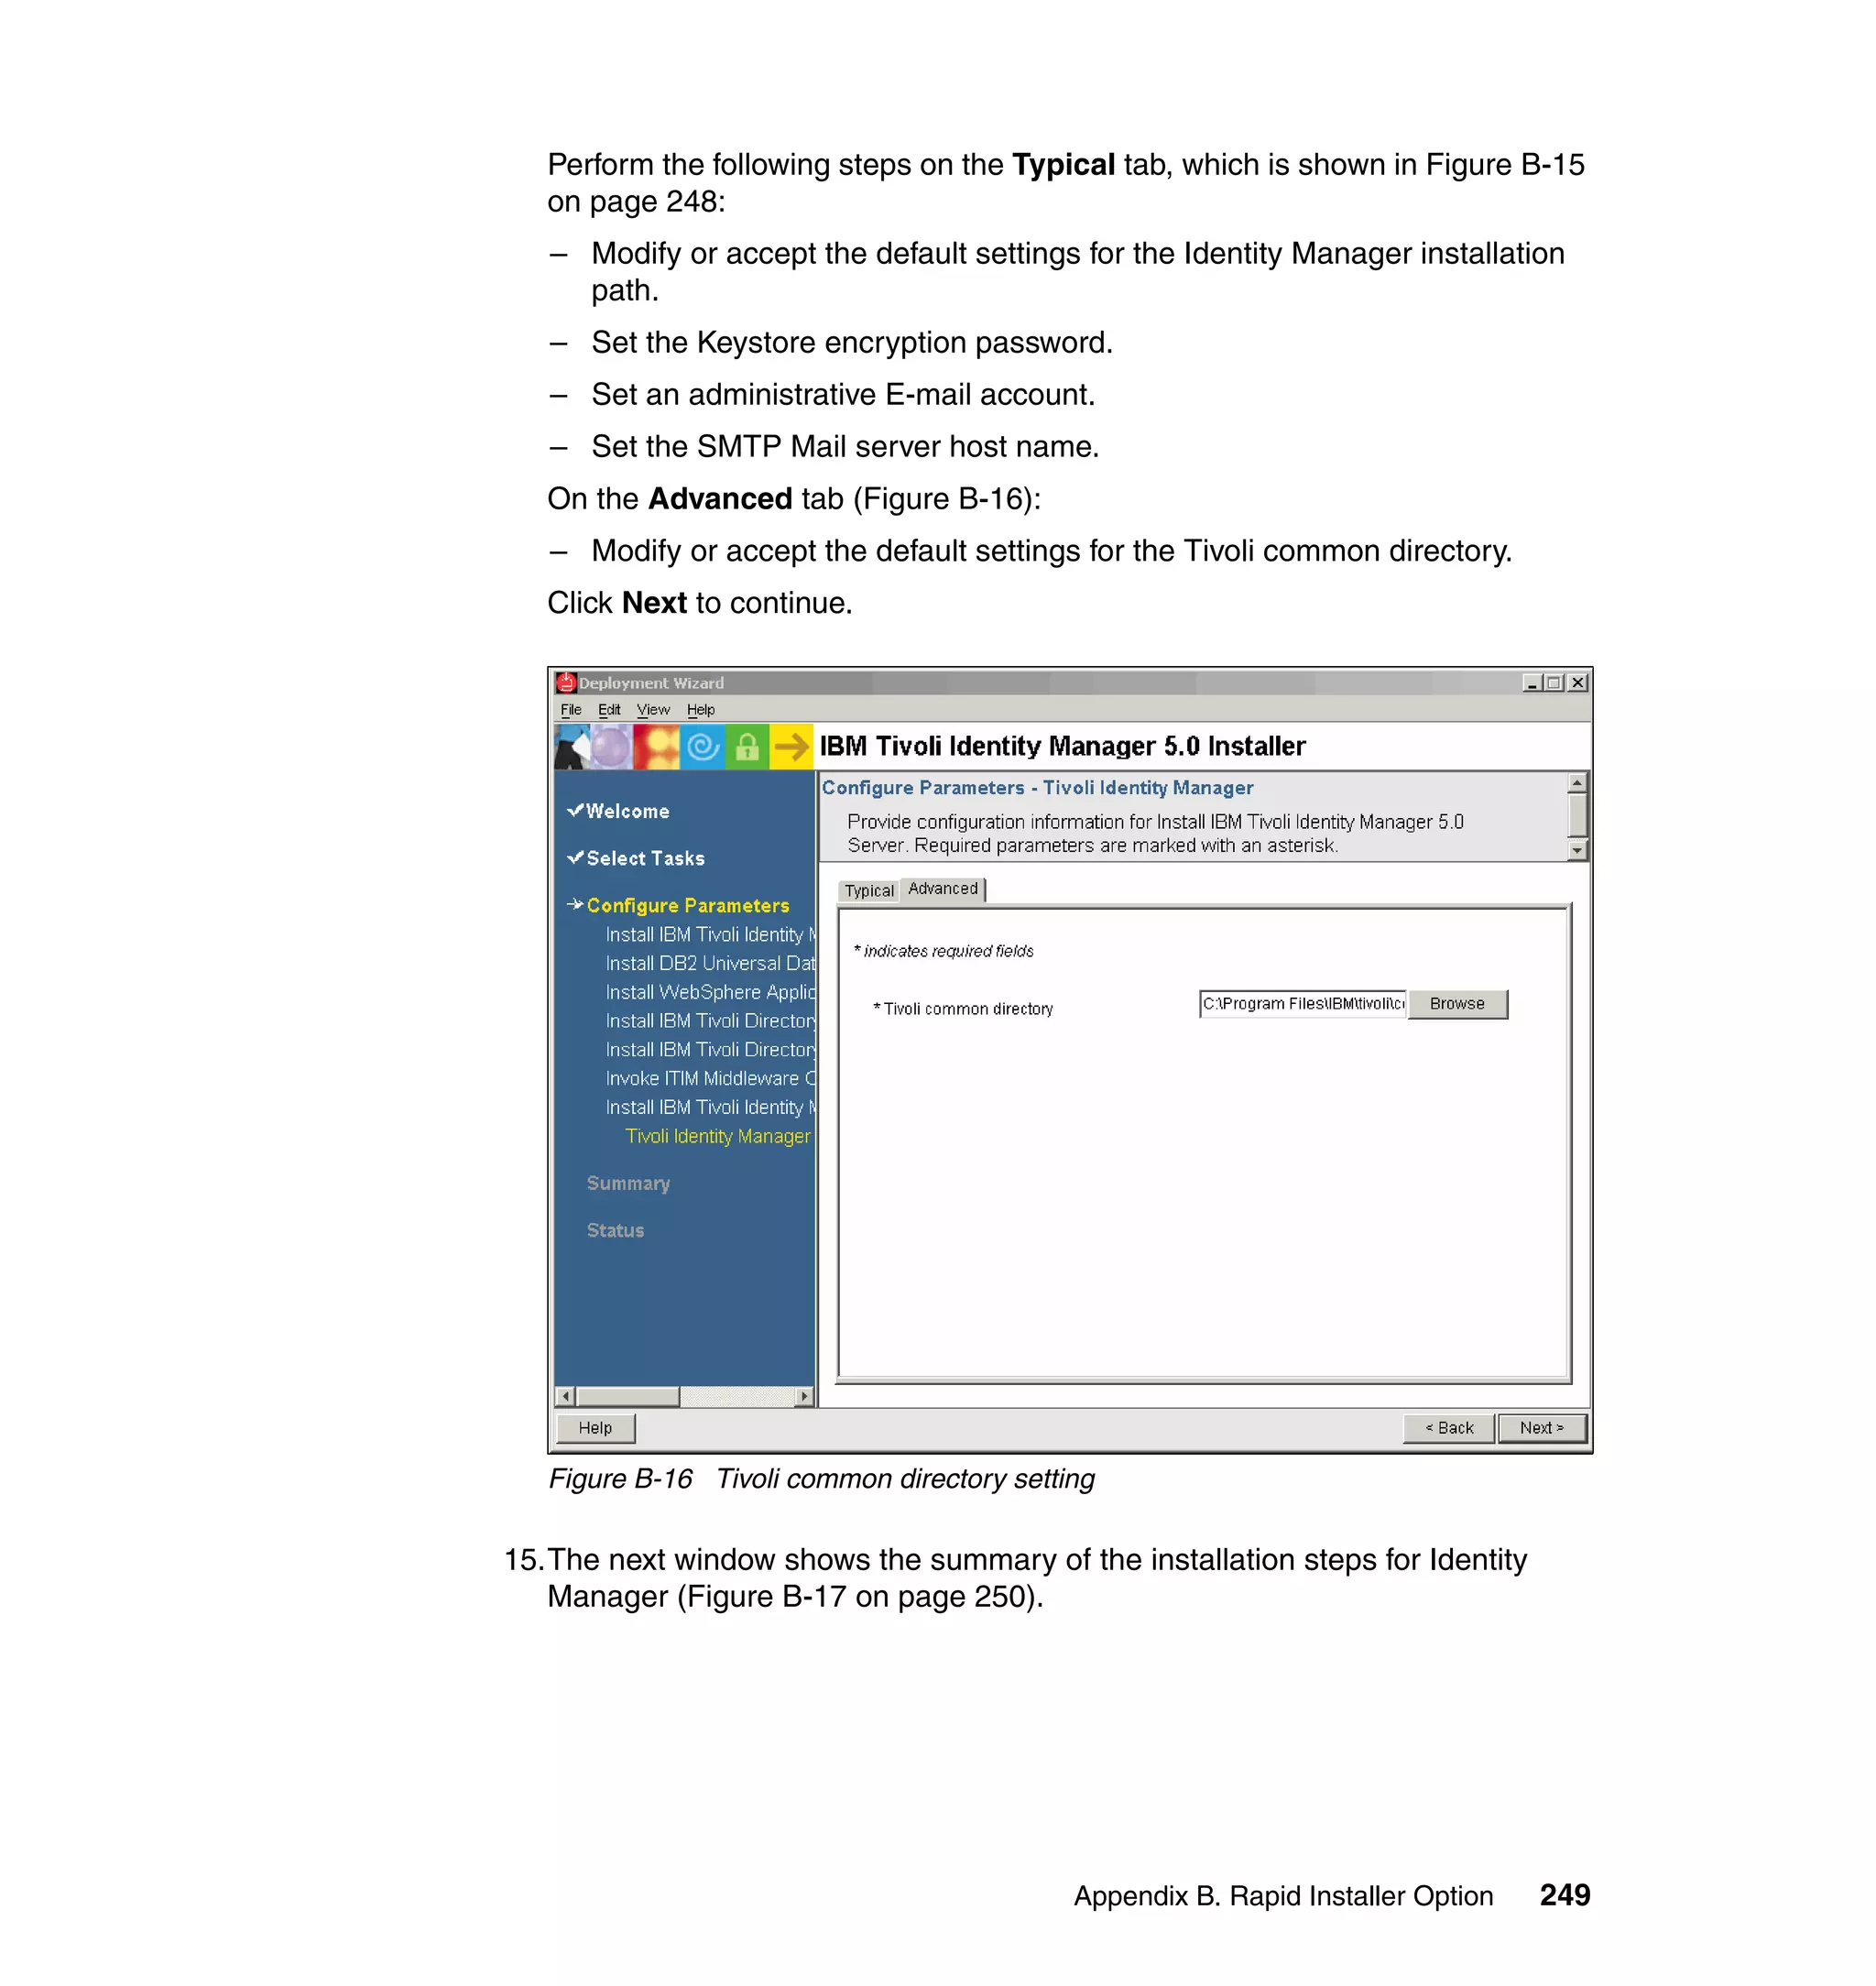
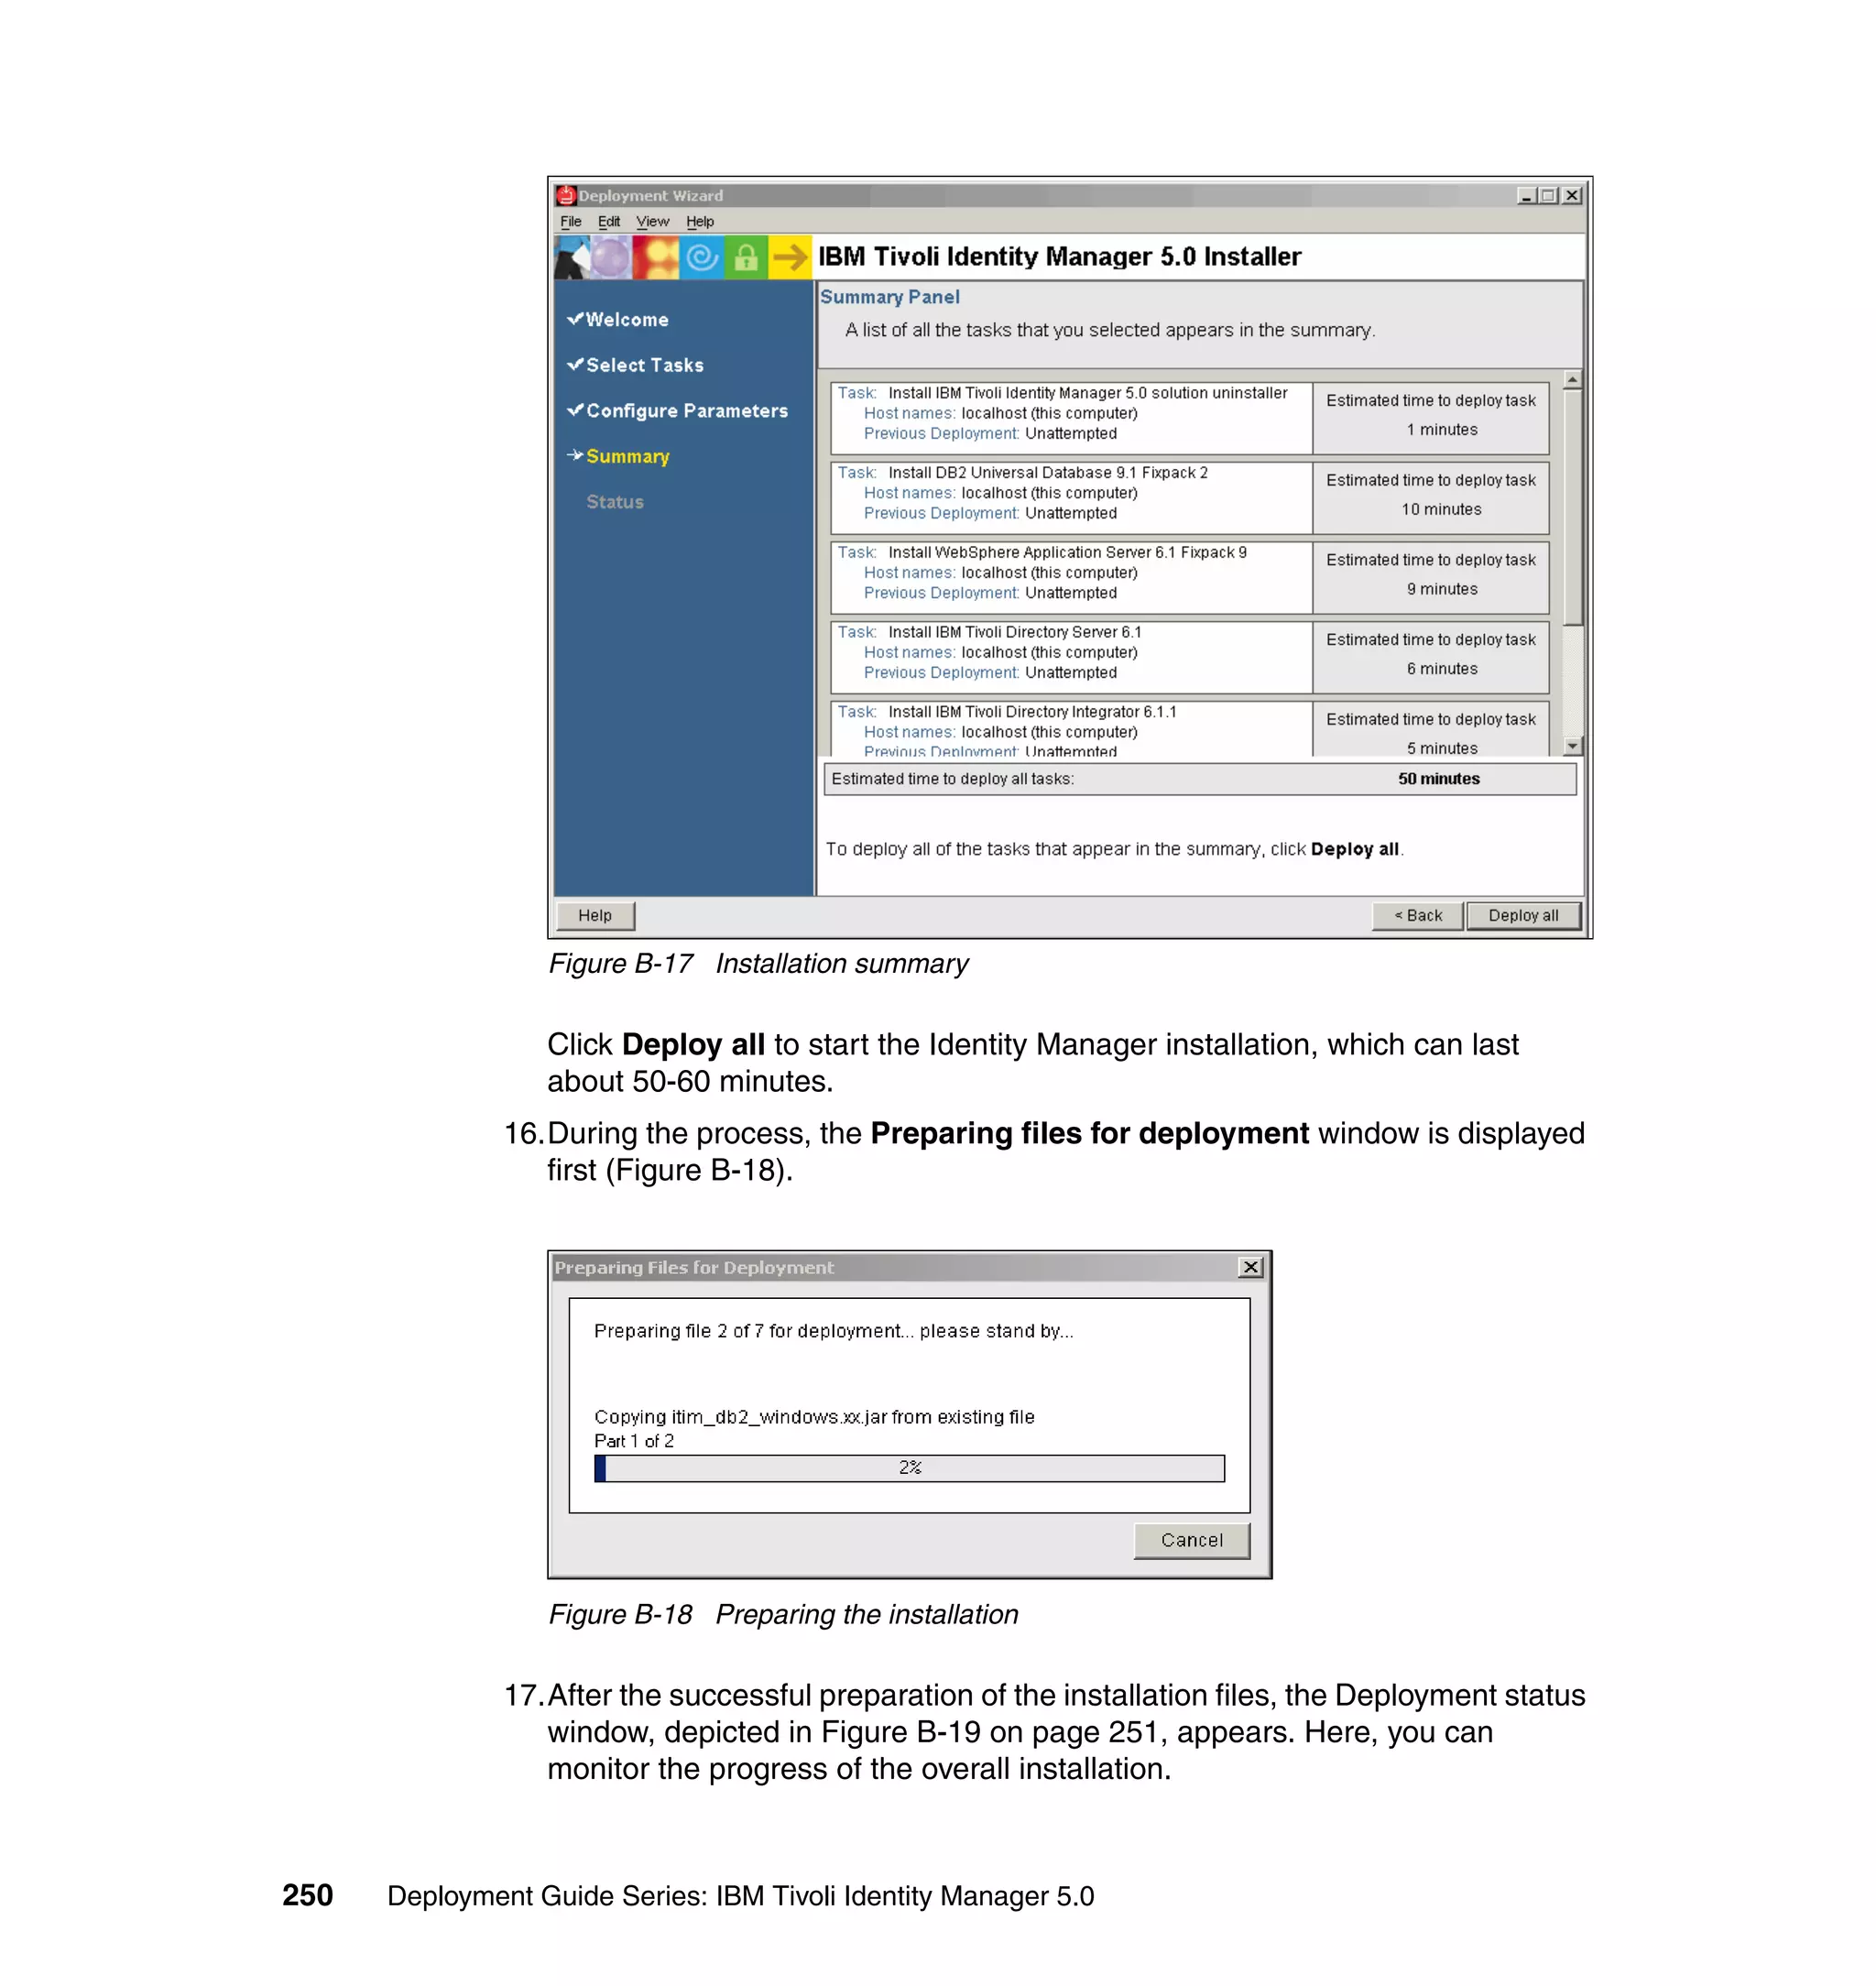
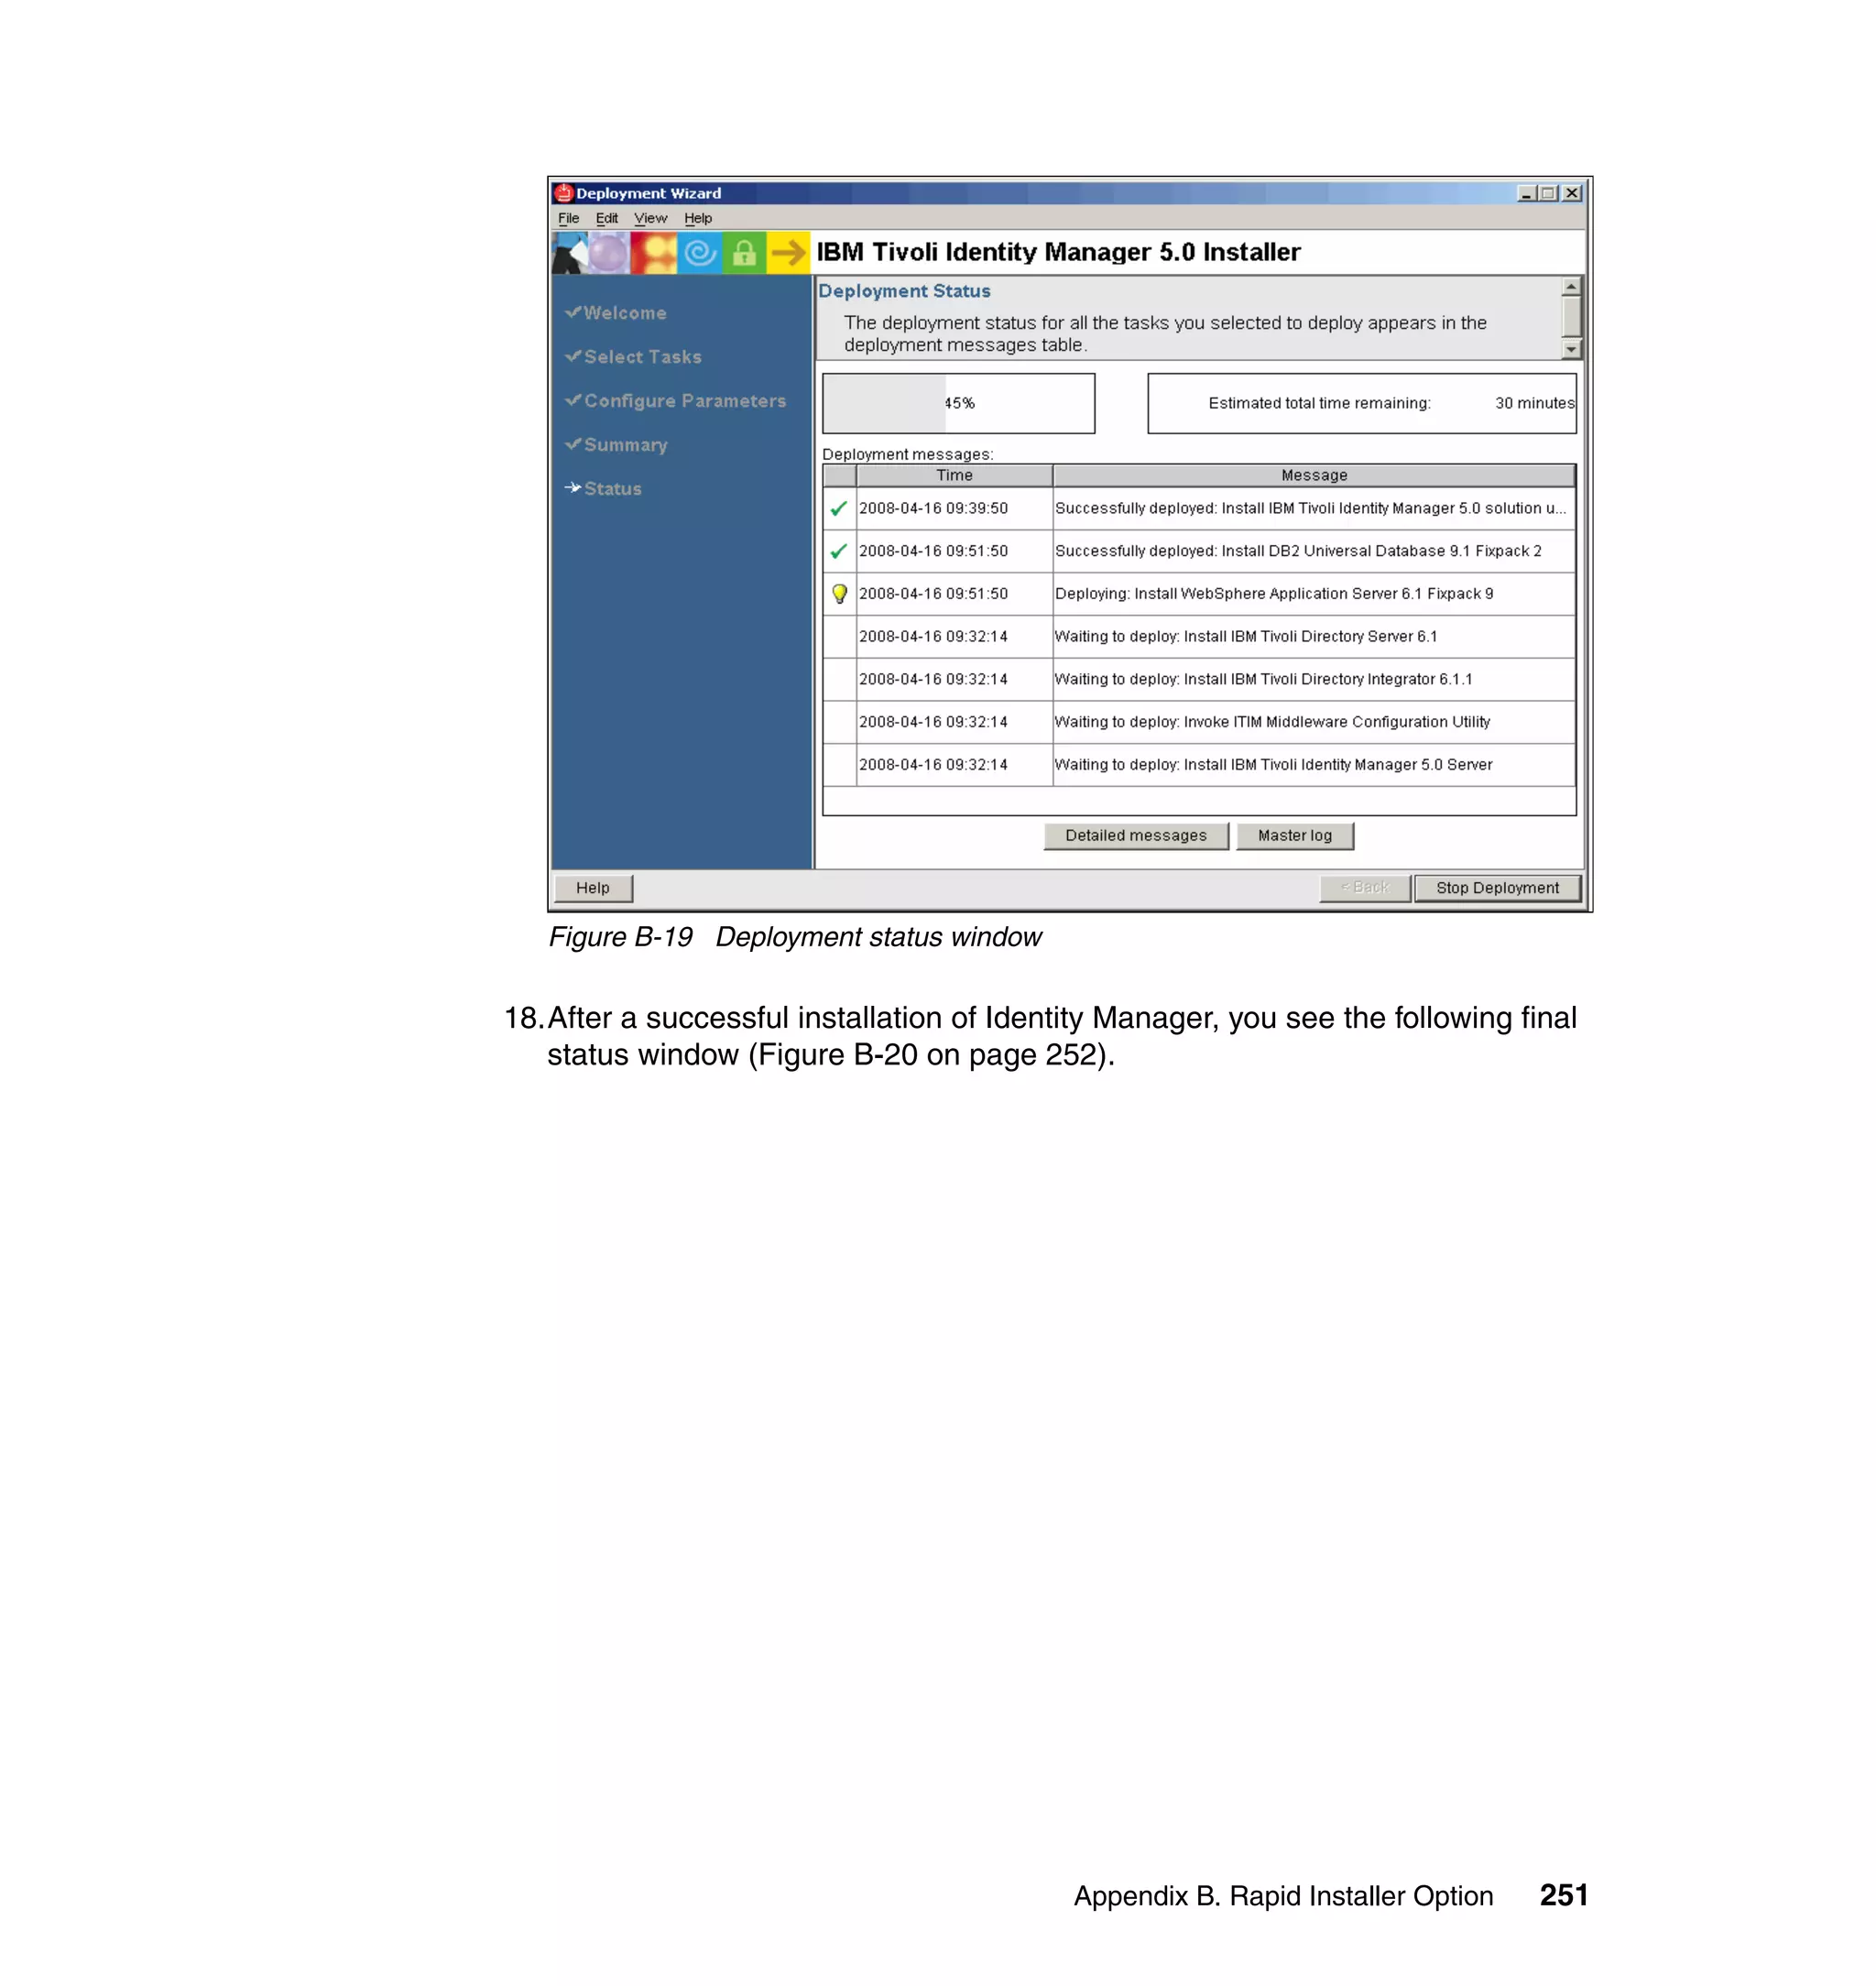
And then, in the Rule window, click OK, as shown in Figure 6-8 on page 165.
164 Deployment Guide Series: IBM Tivoli Identity Manager 5.0](https://image.slidesharecdn.com/deploymentguideseriesibmtivoliidentitymanager5-0sg246477-120523195924-phpapp02/75/Deployment-guide-series-ibm-tivoli-identity-manager-5-0-sg246477-182-2048.jpg)

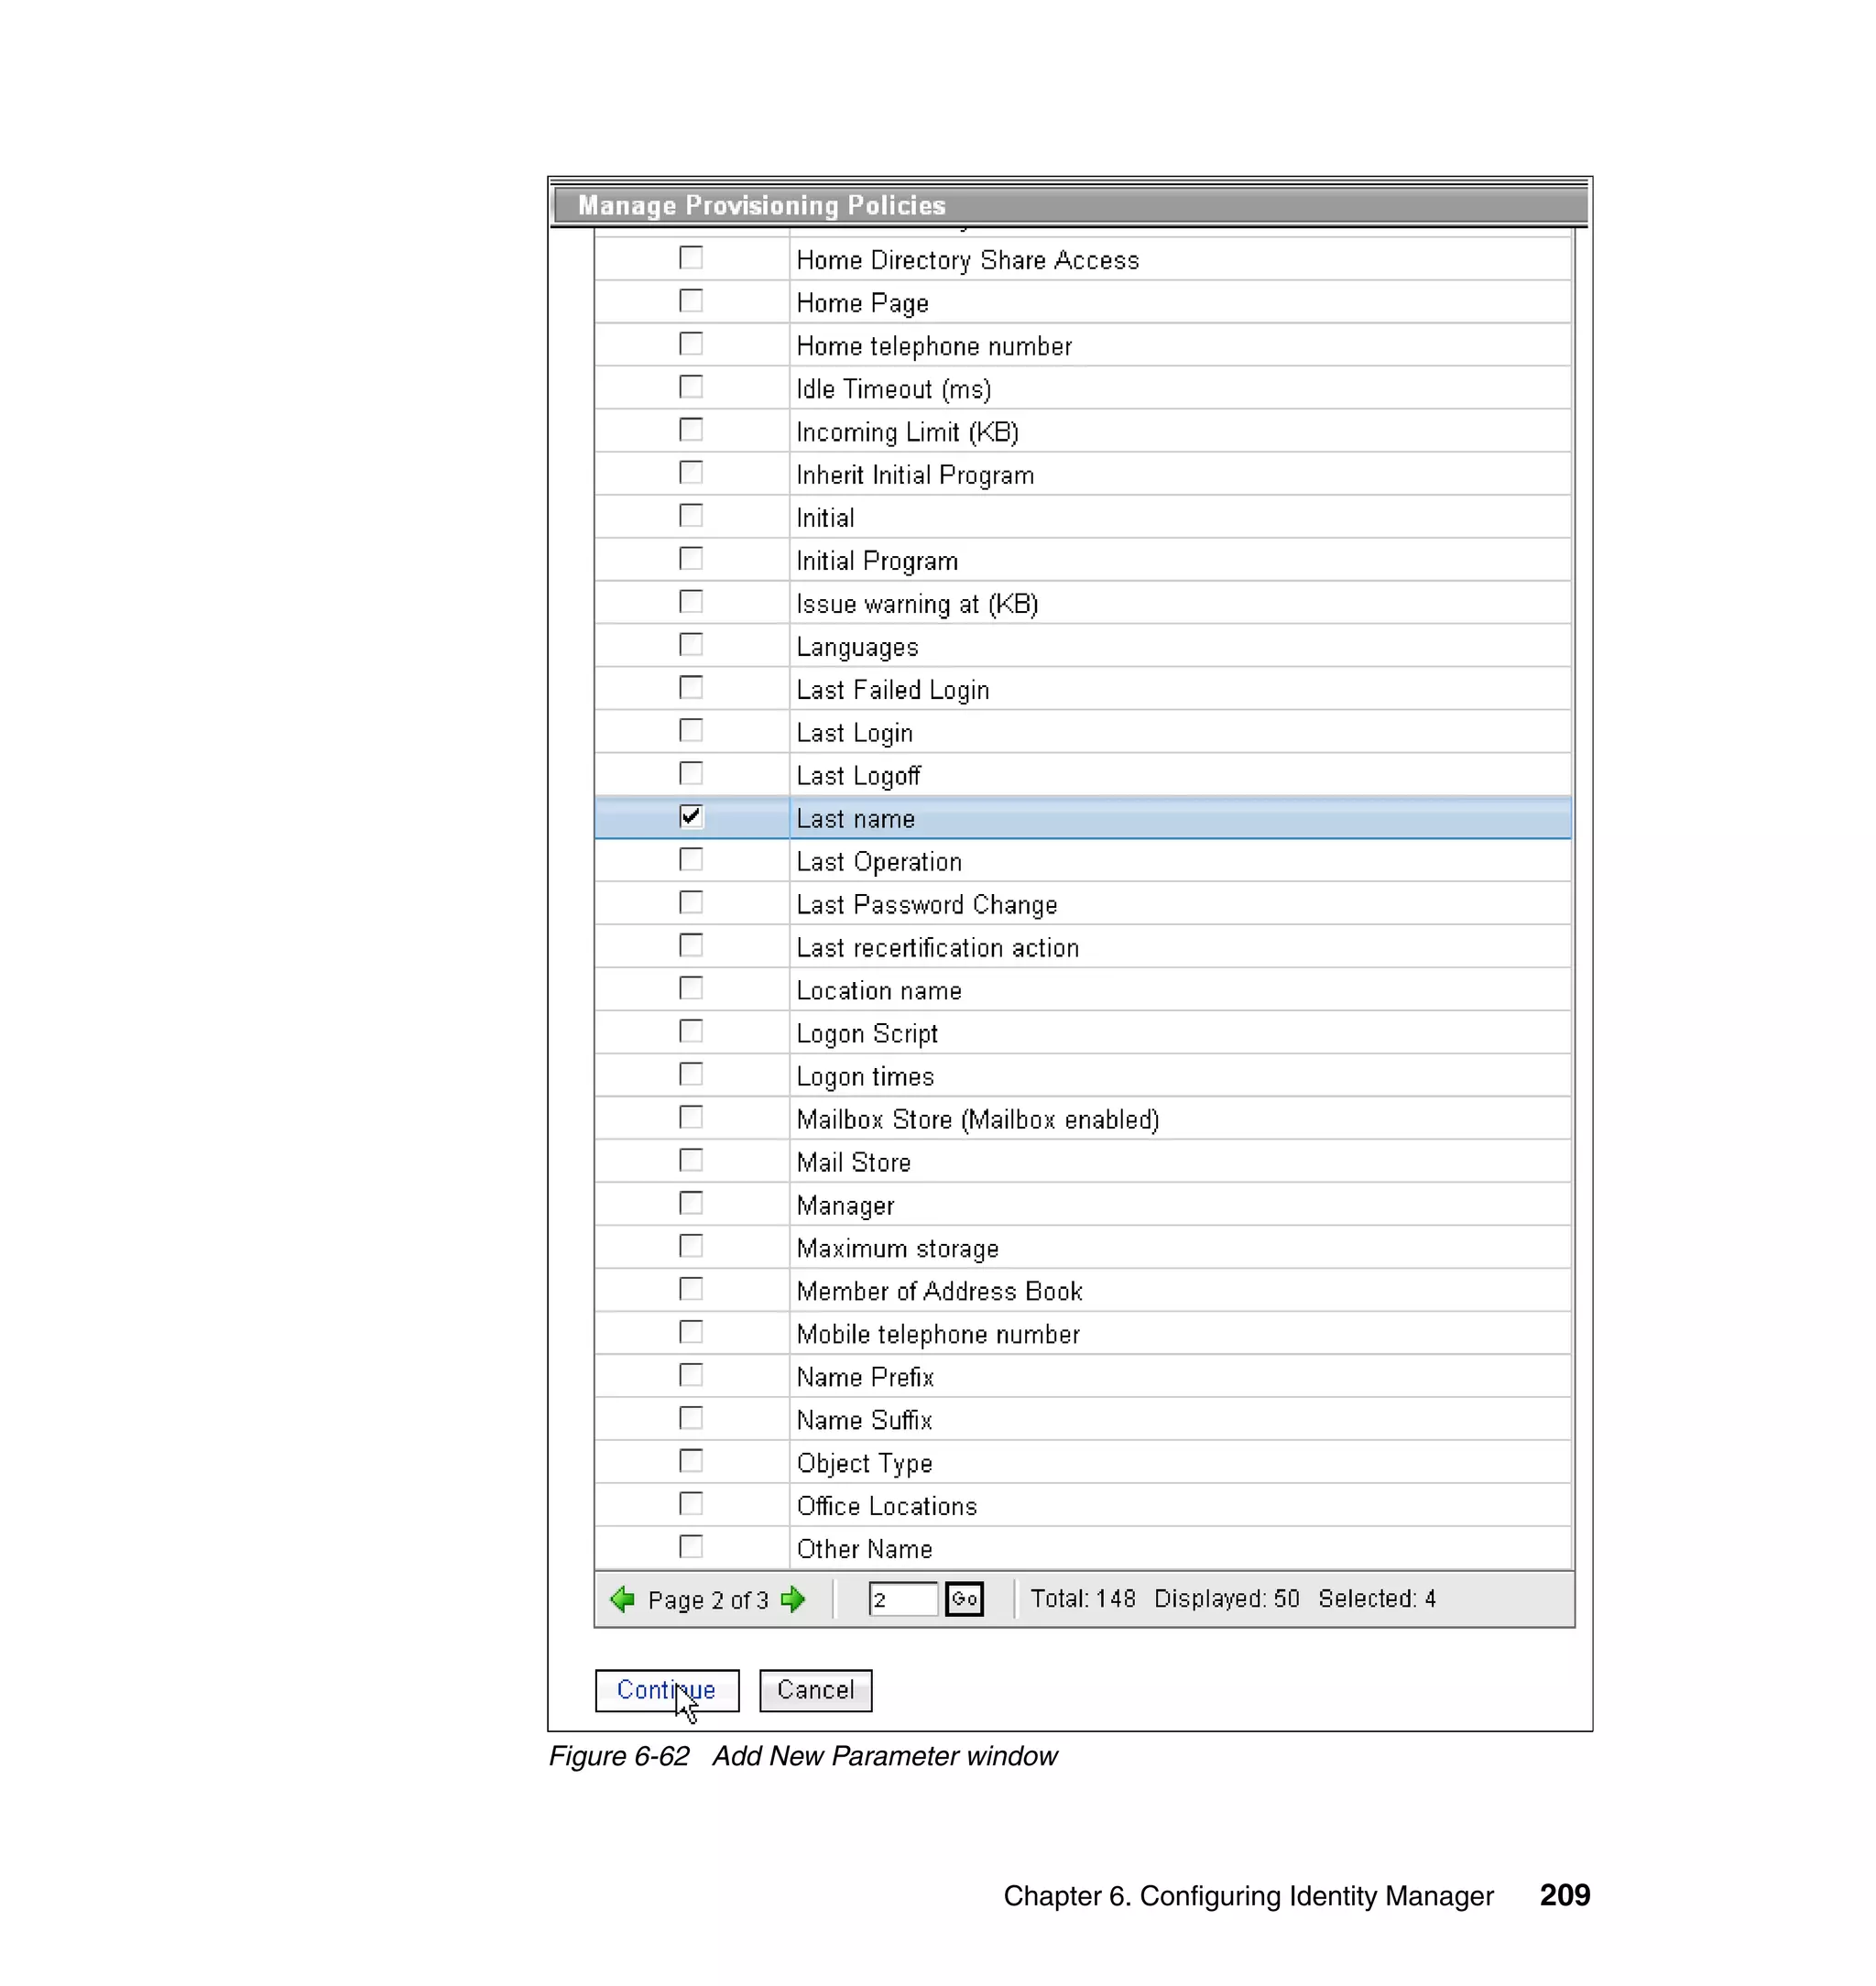
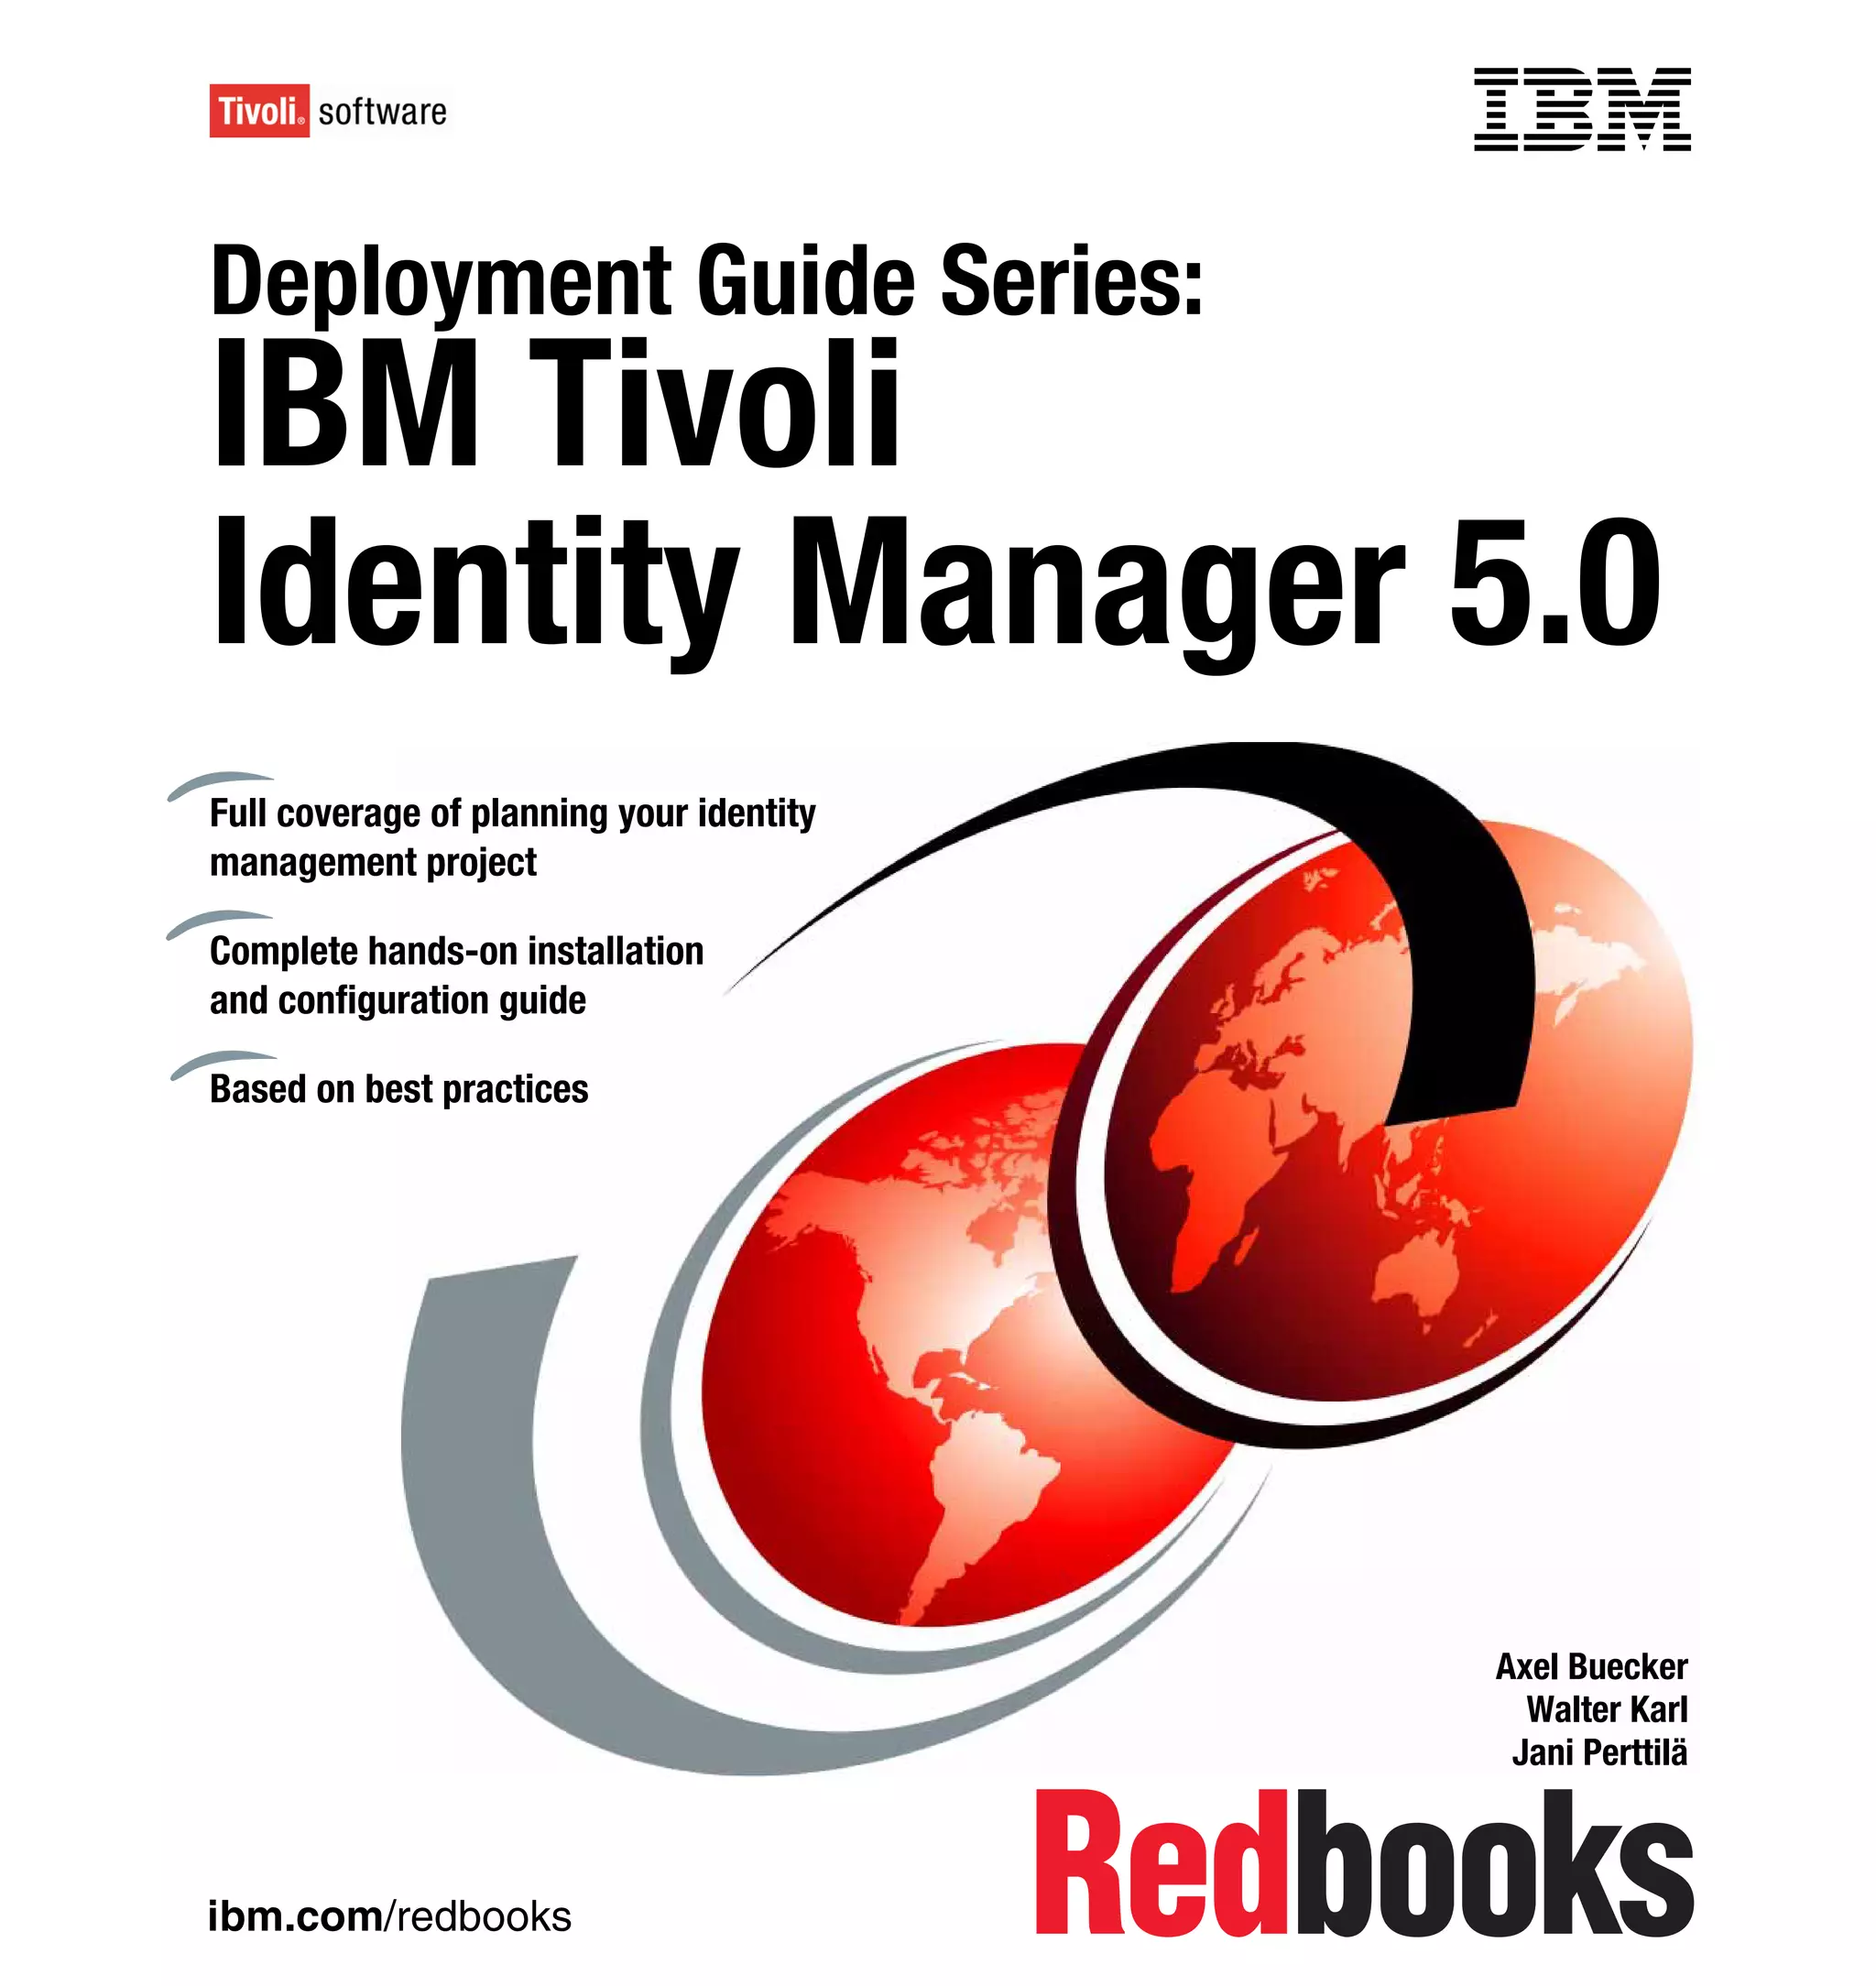
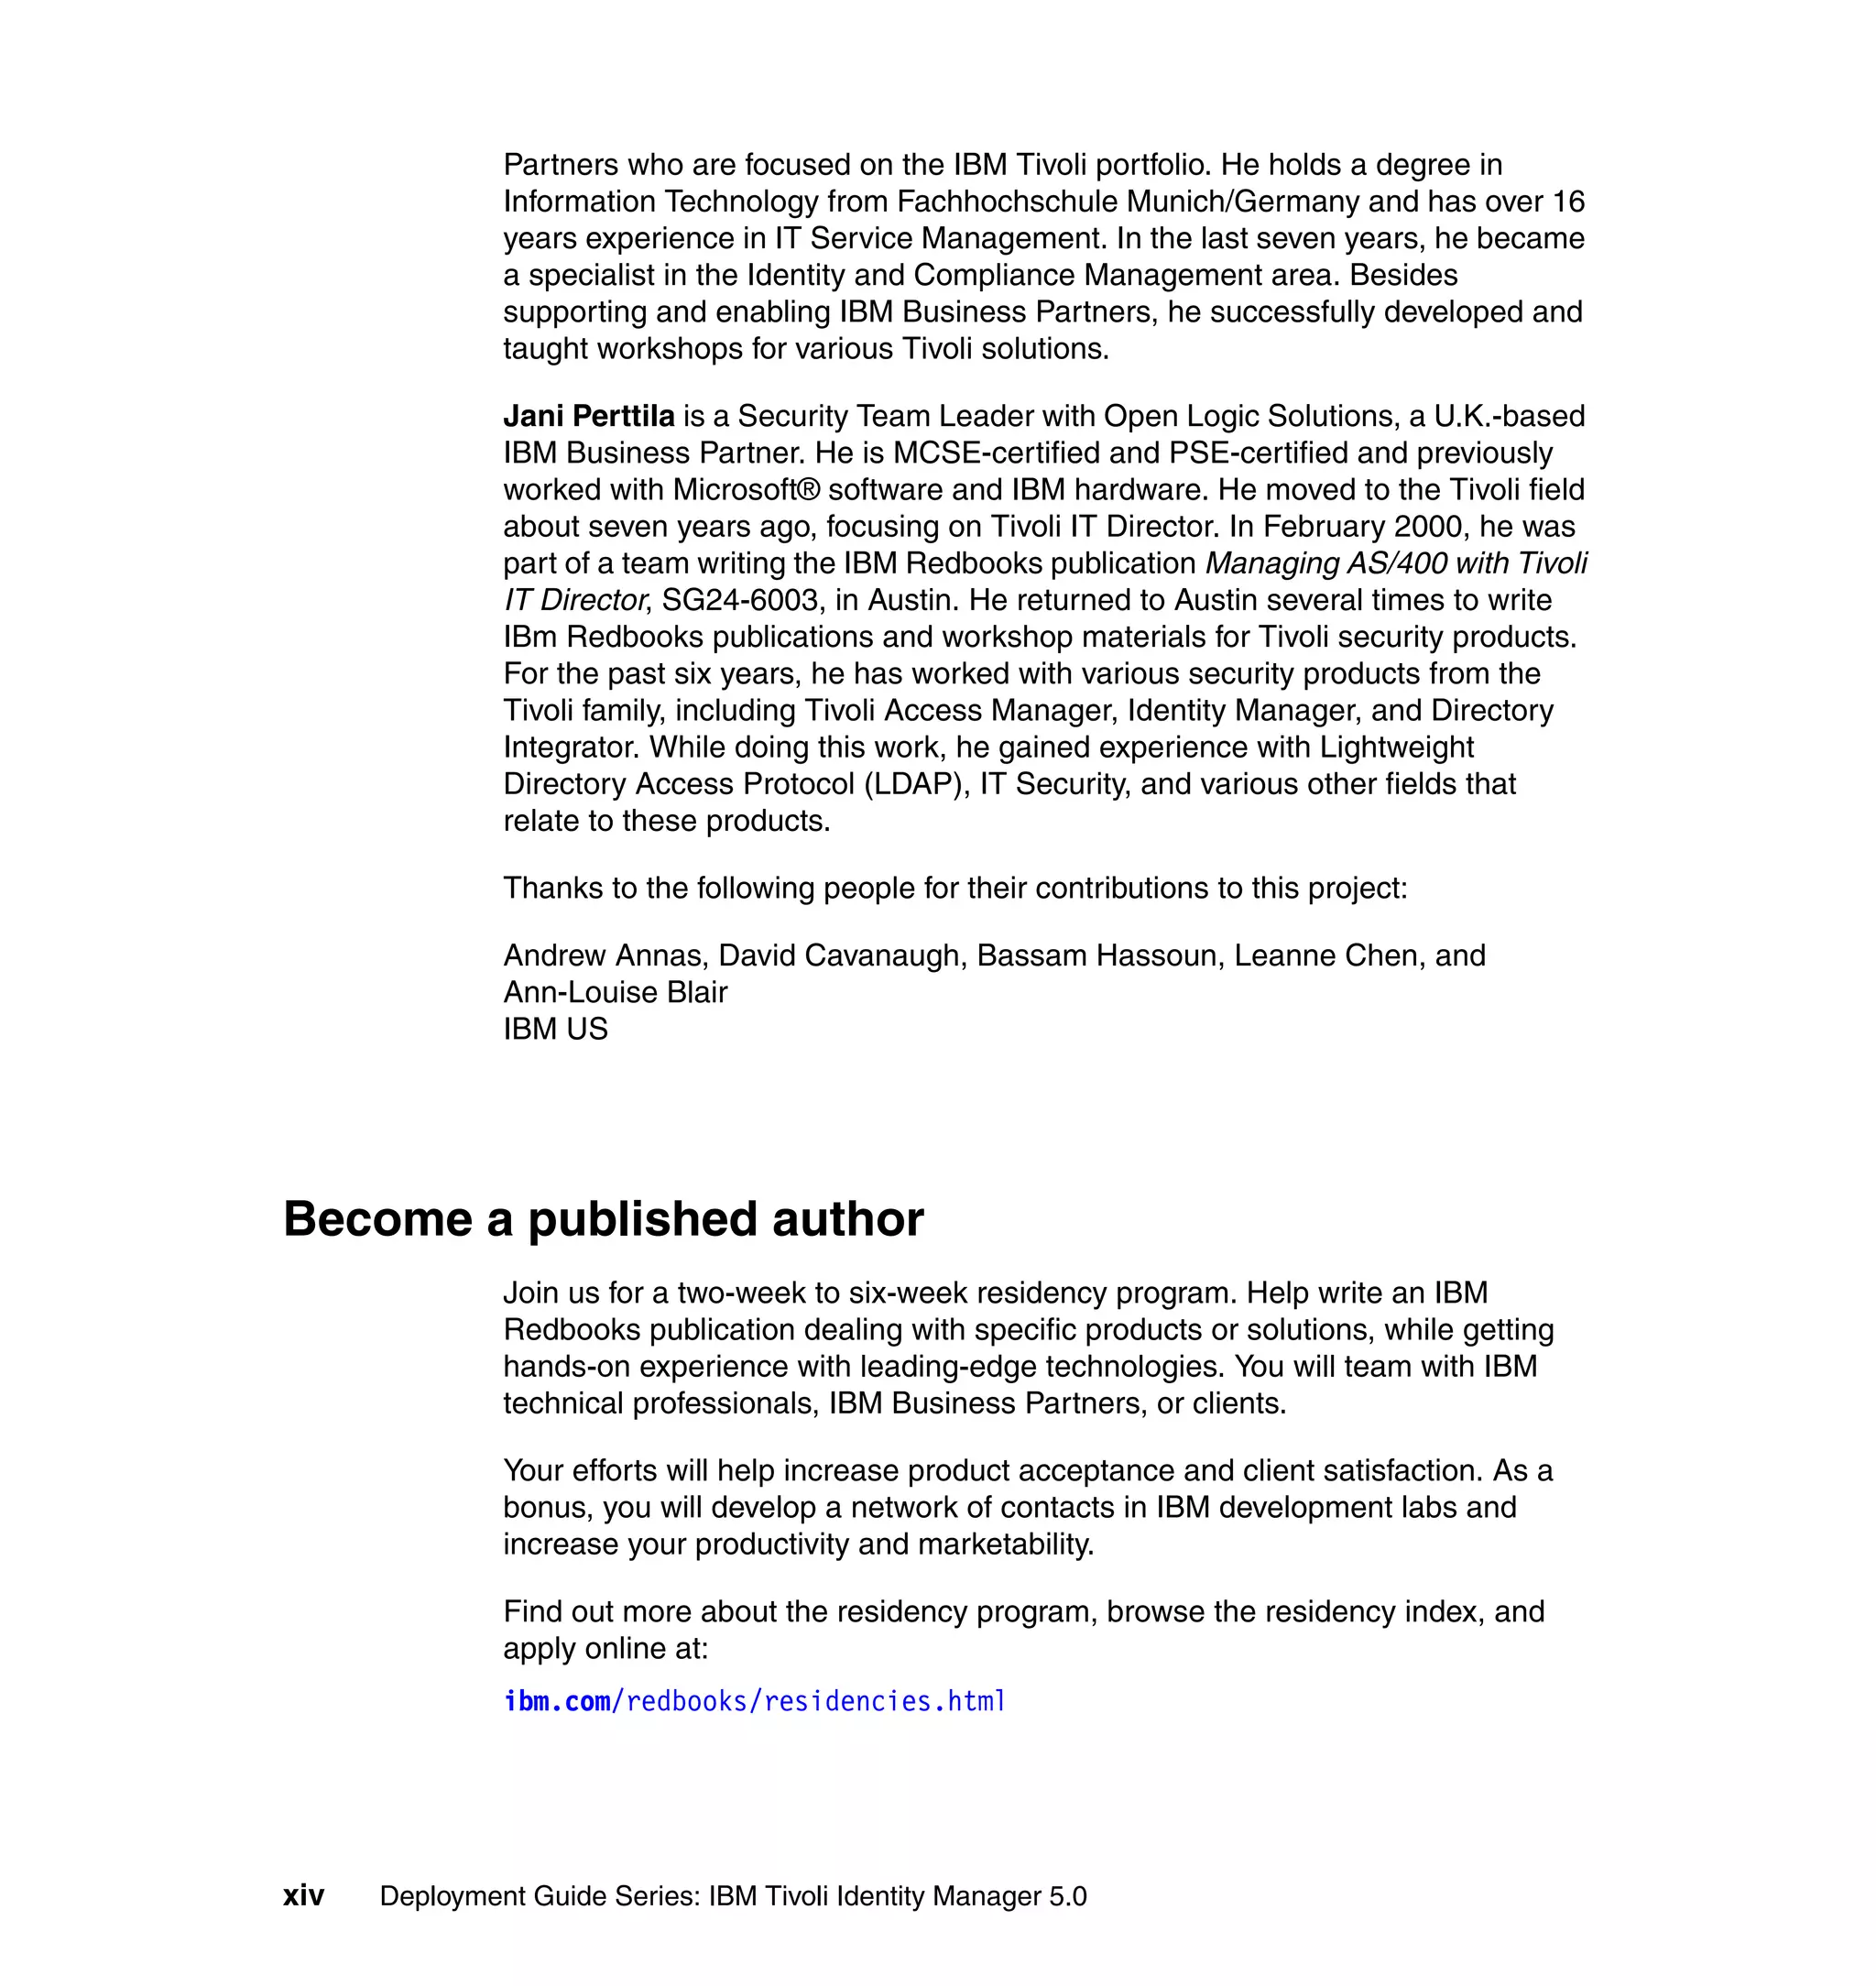
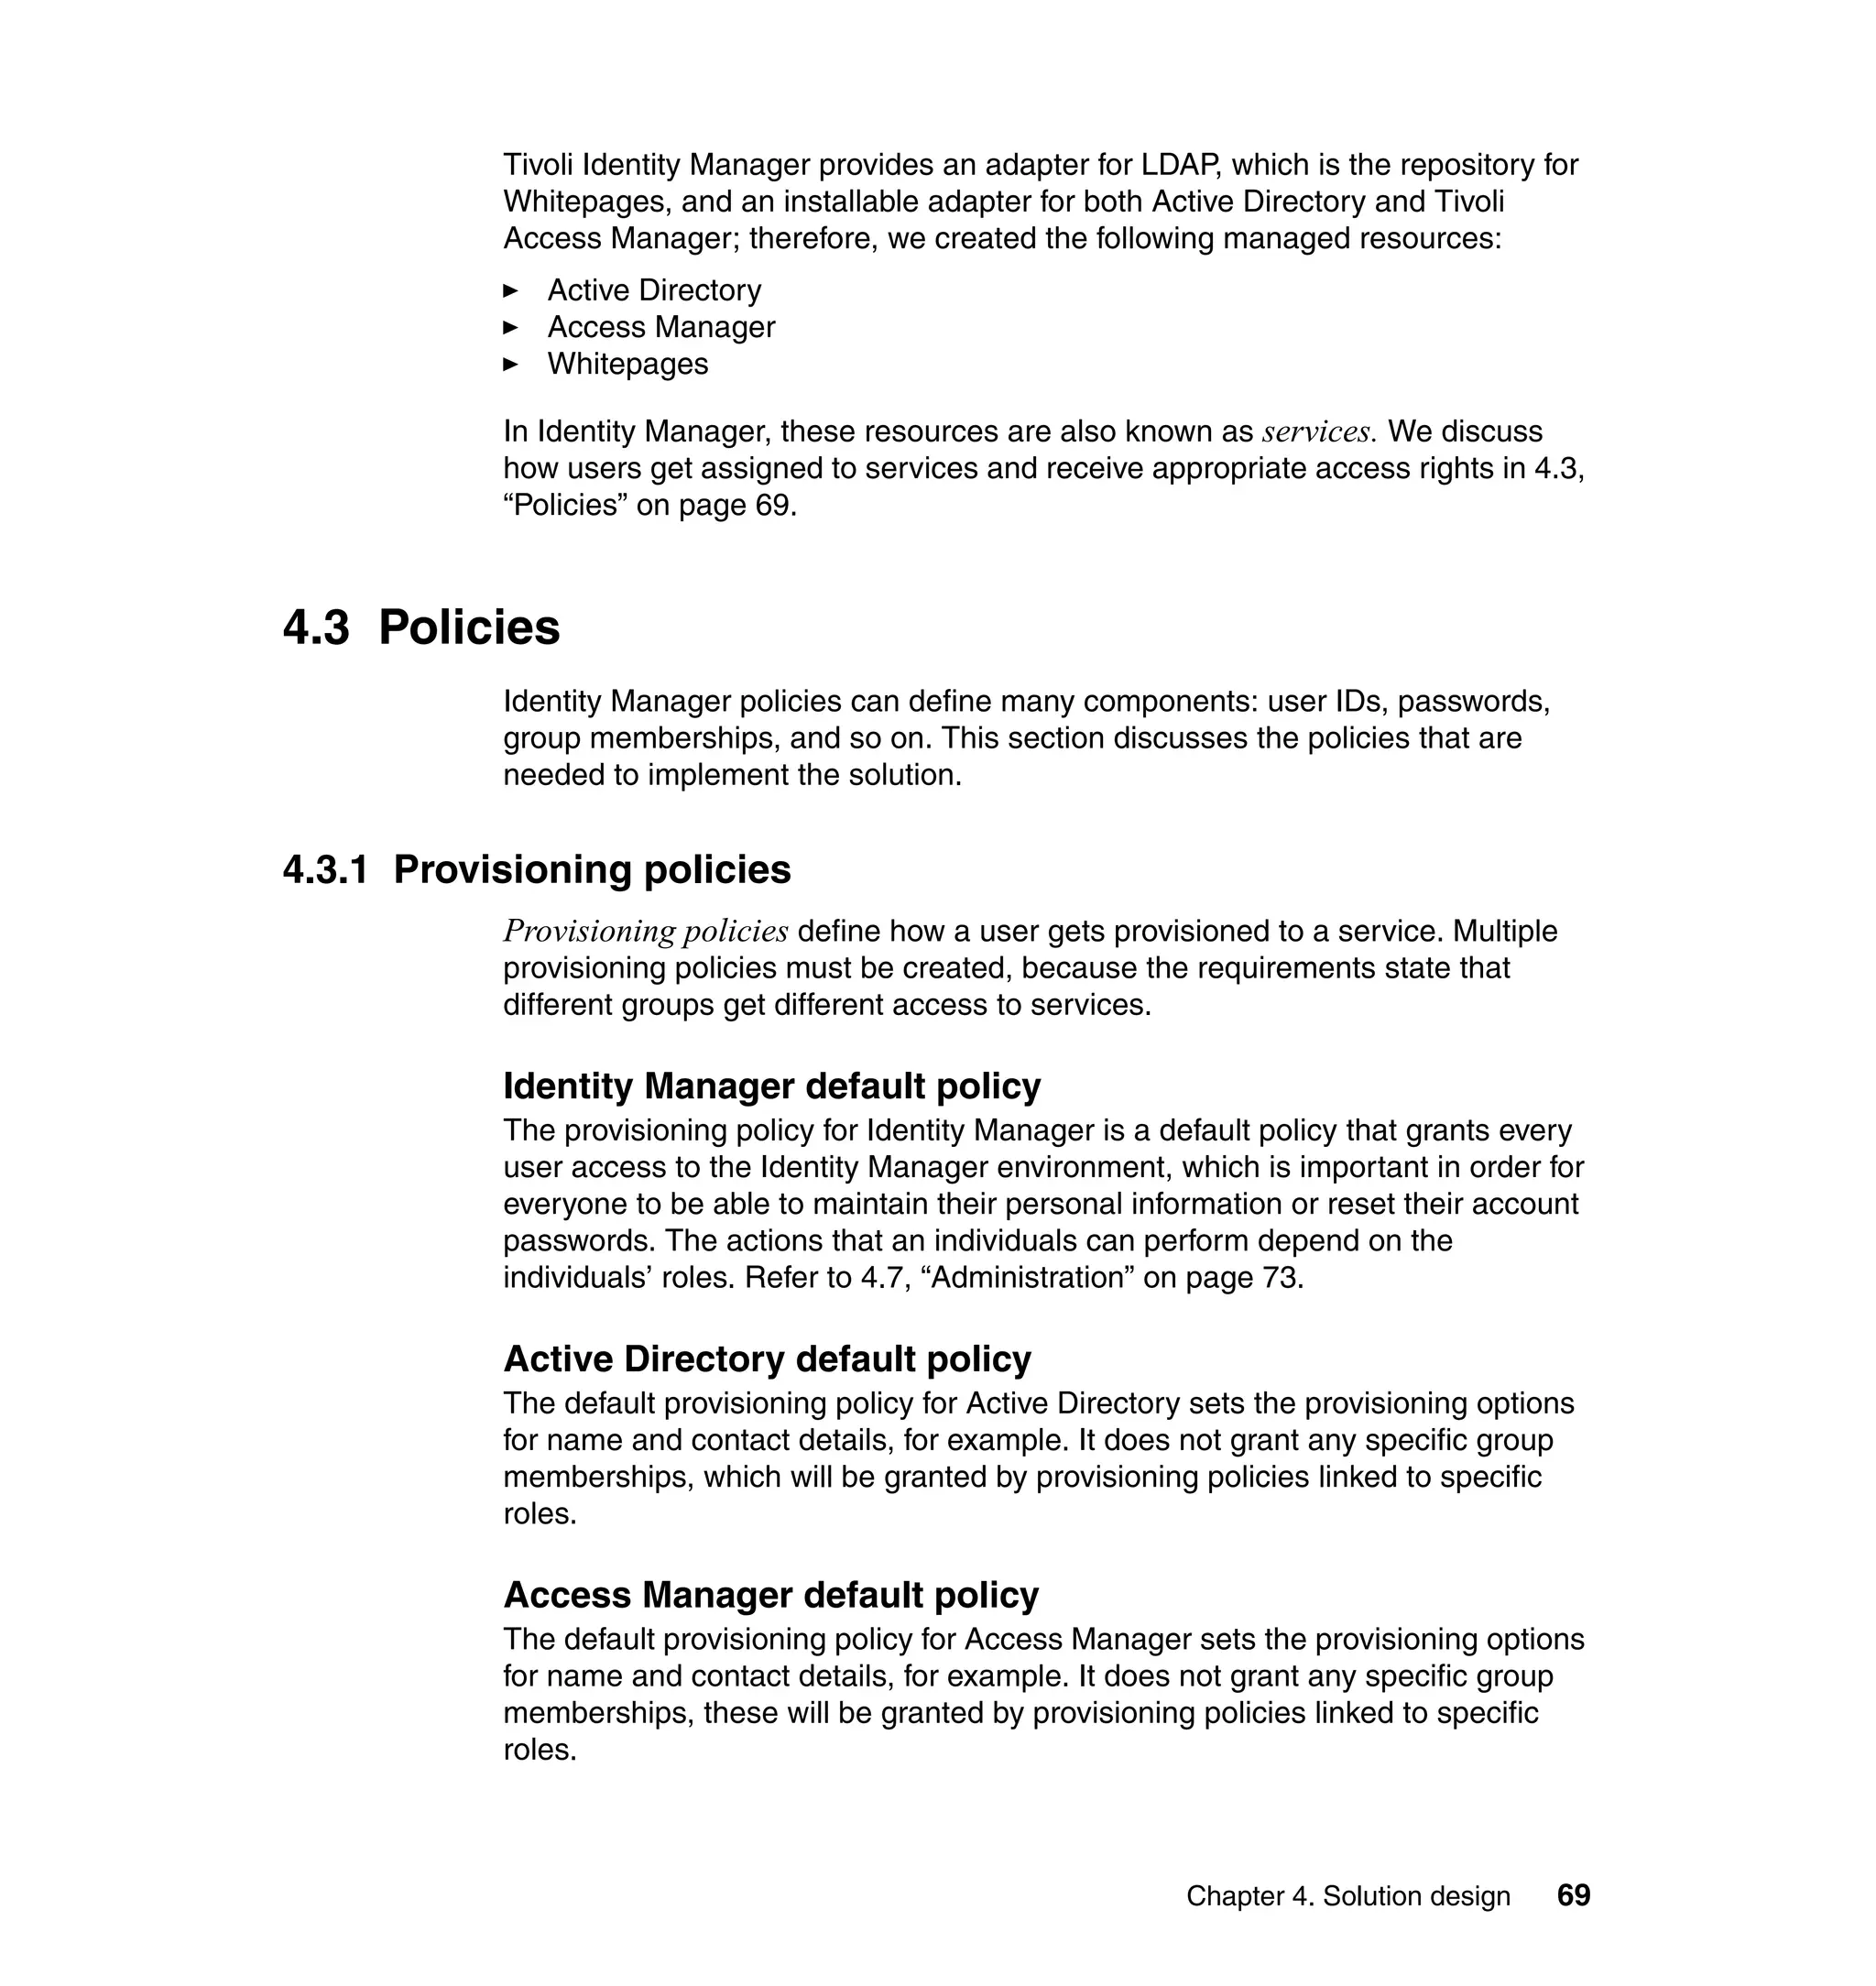
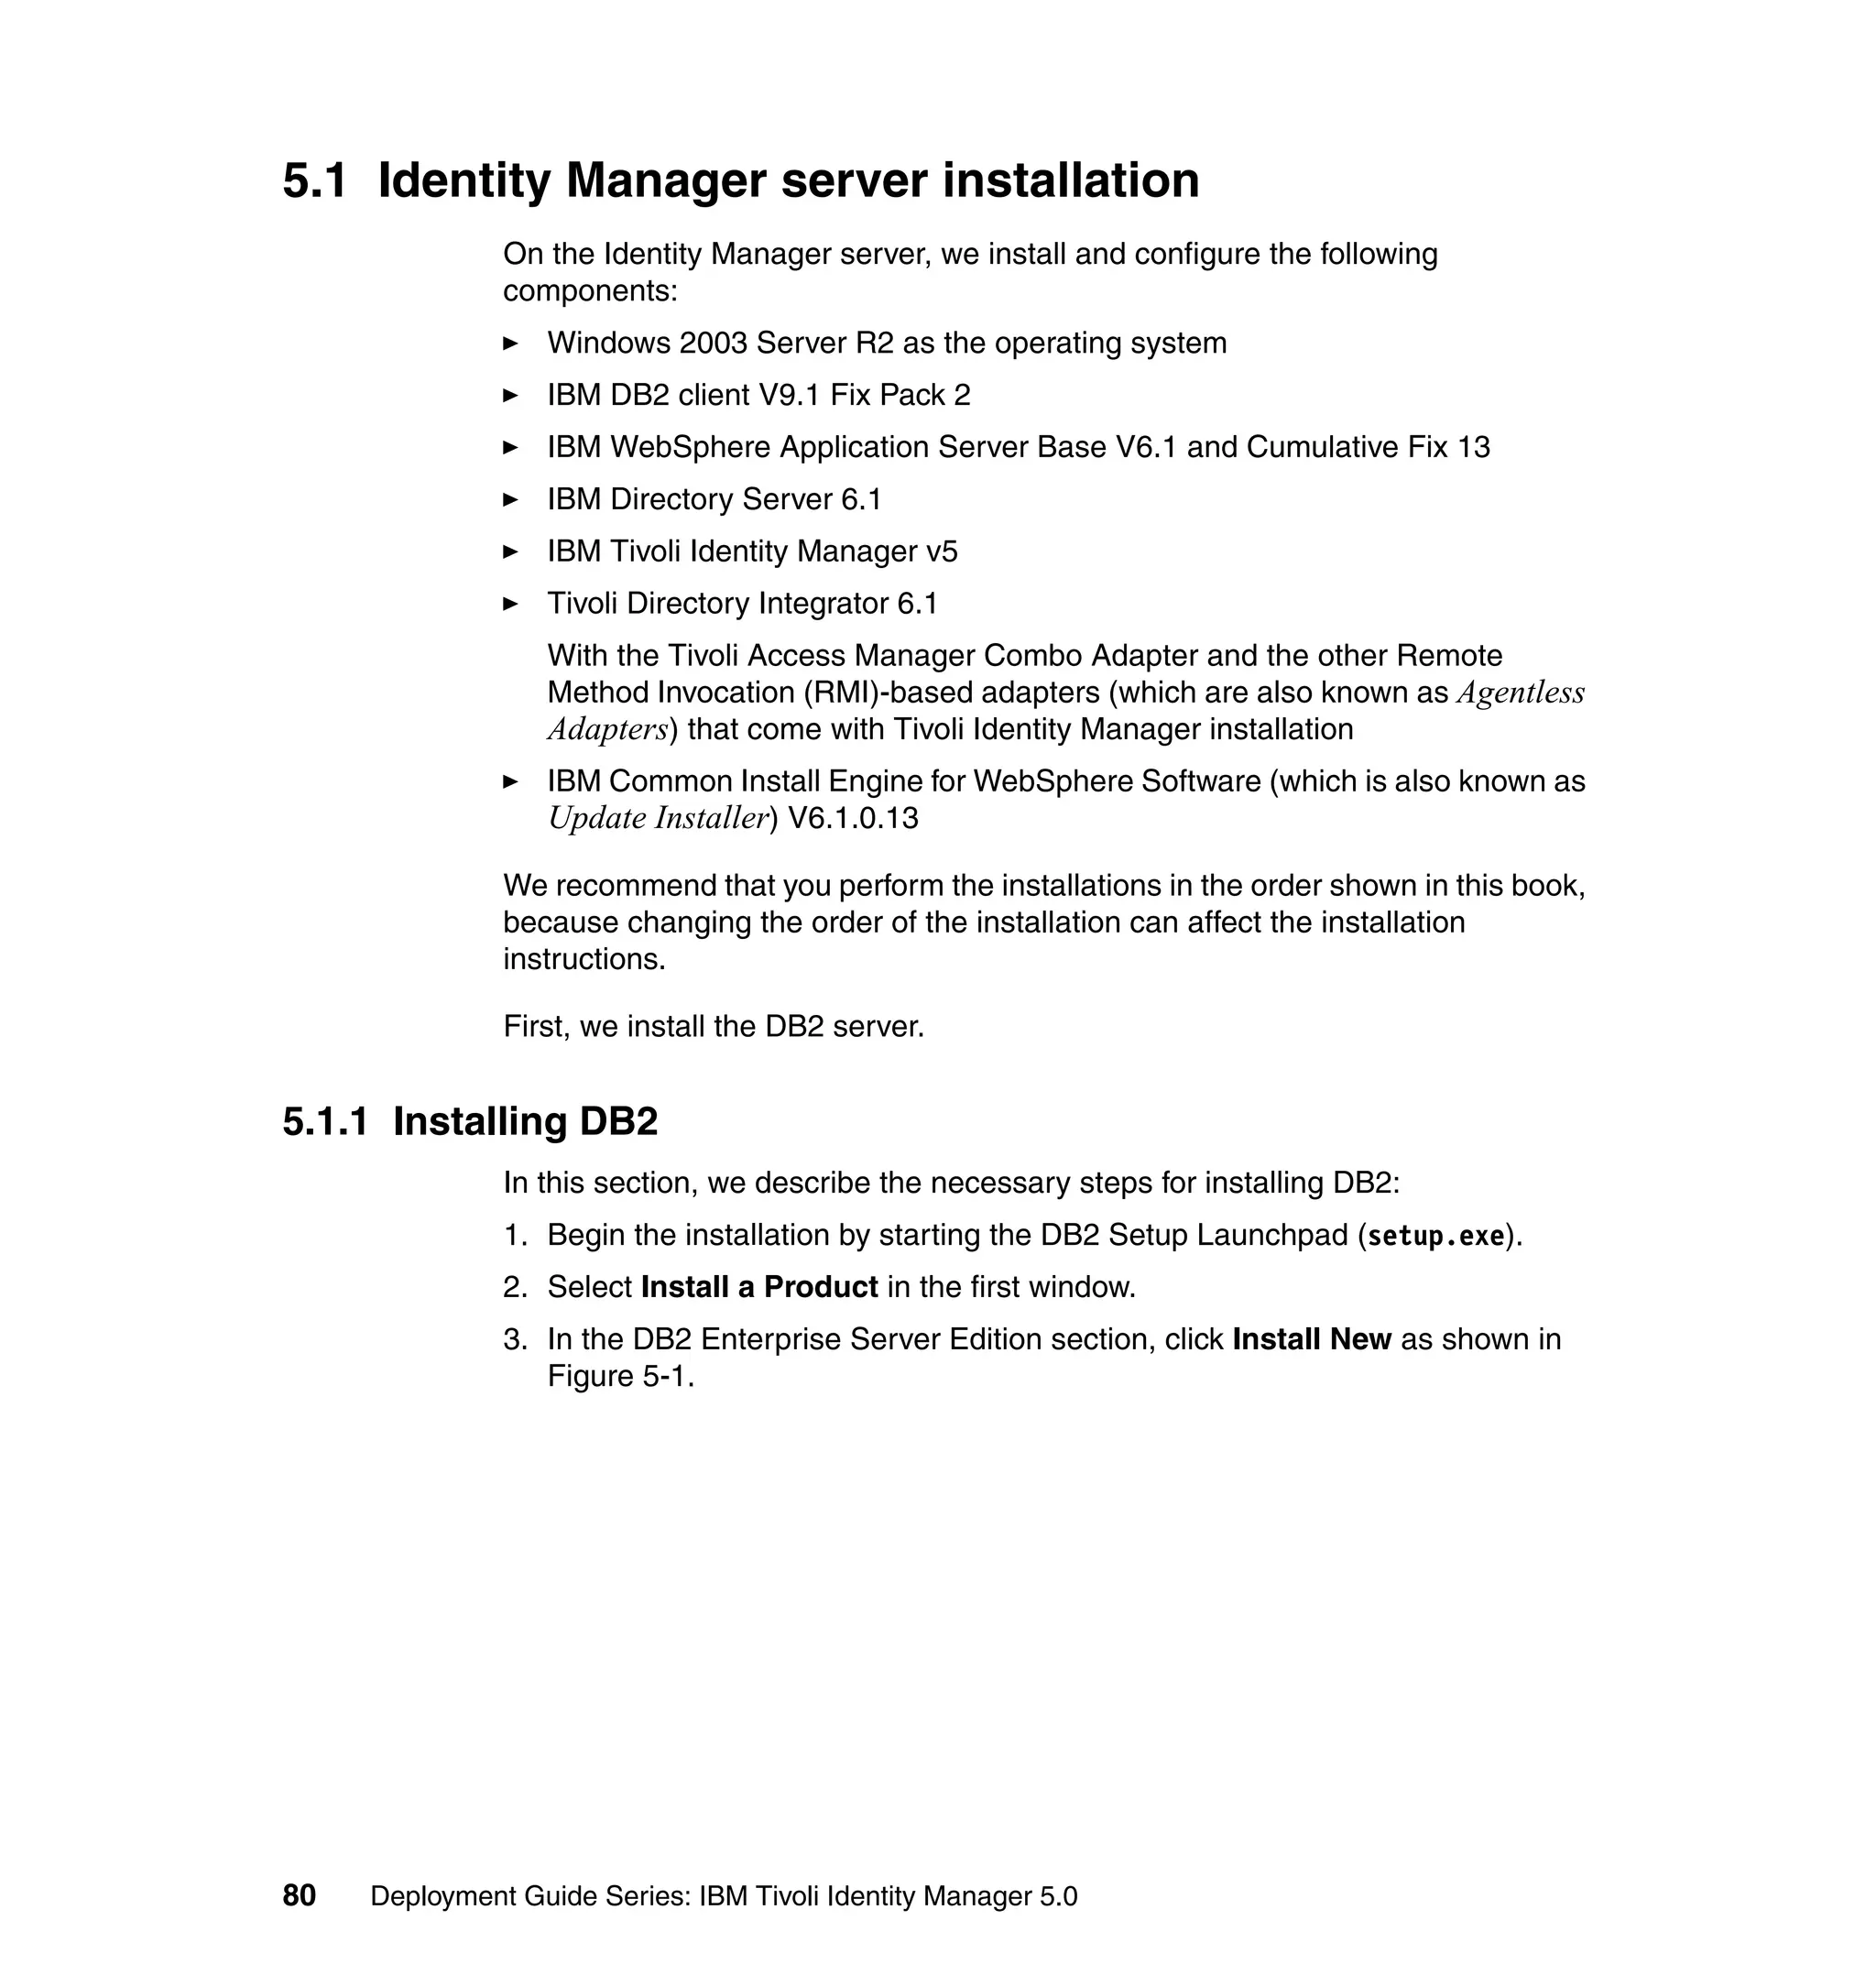
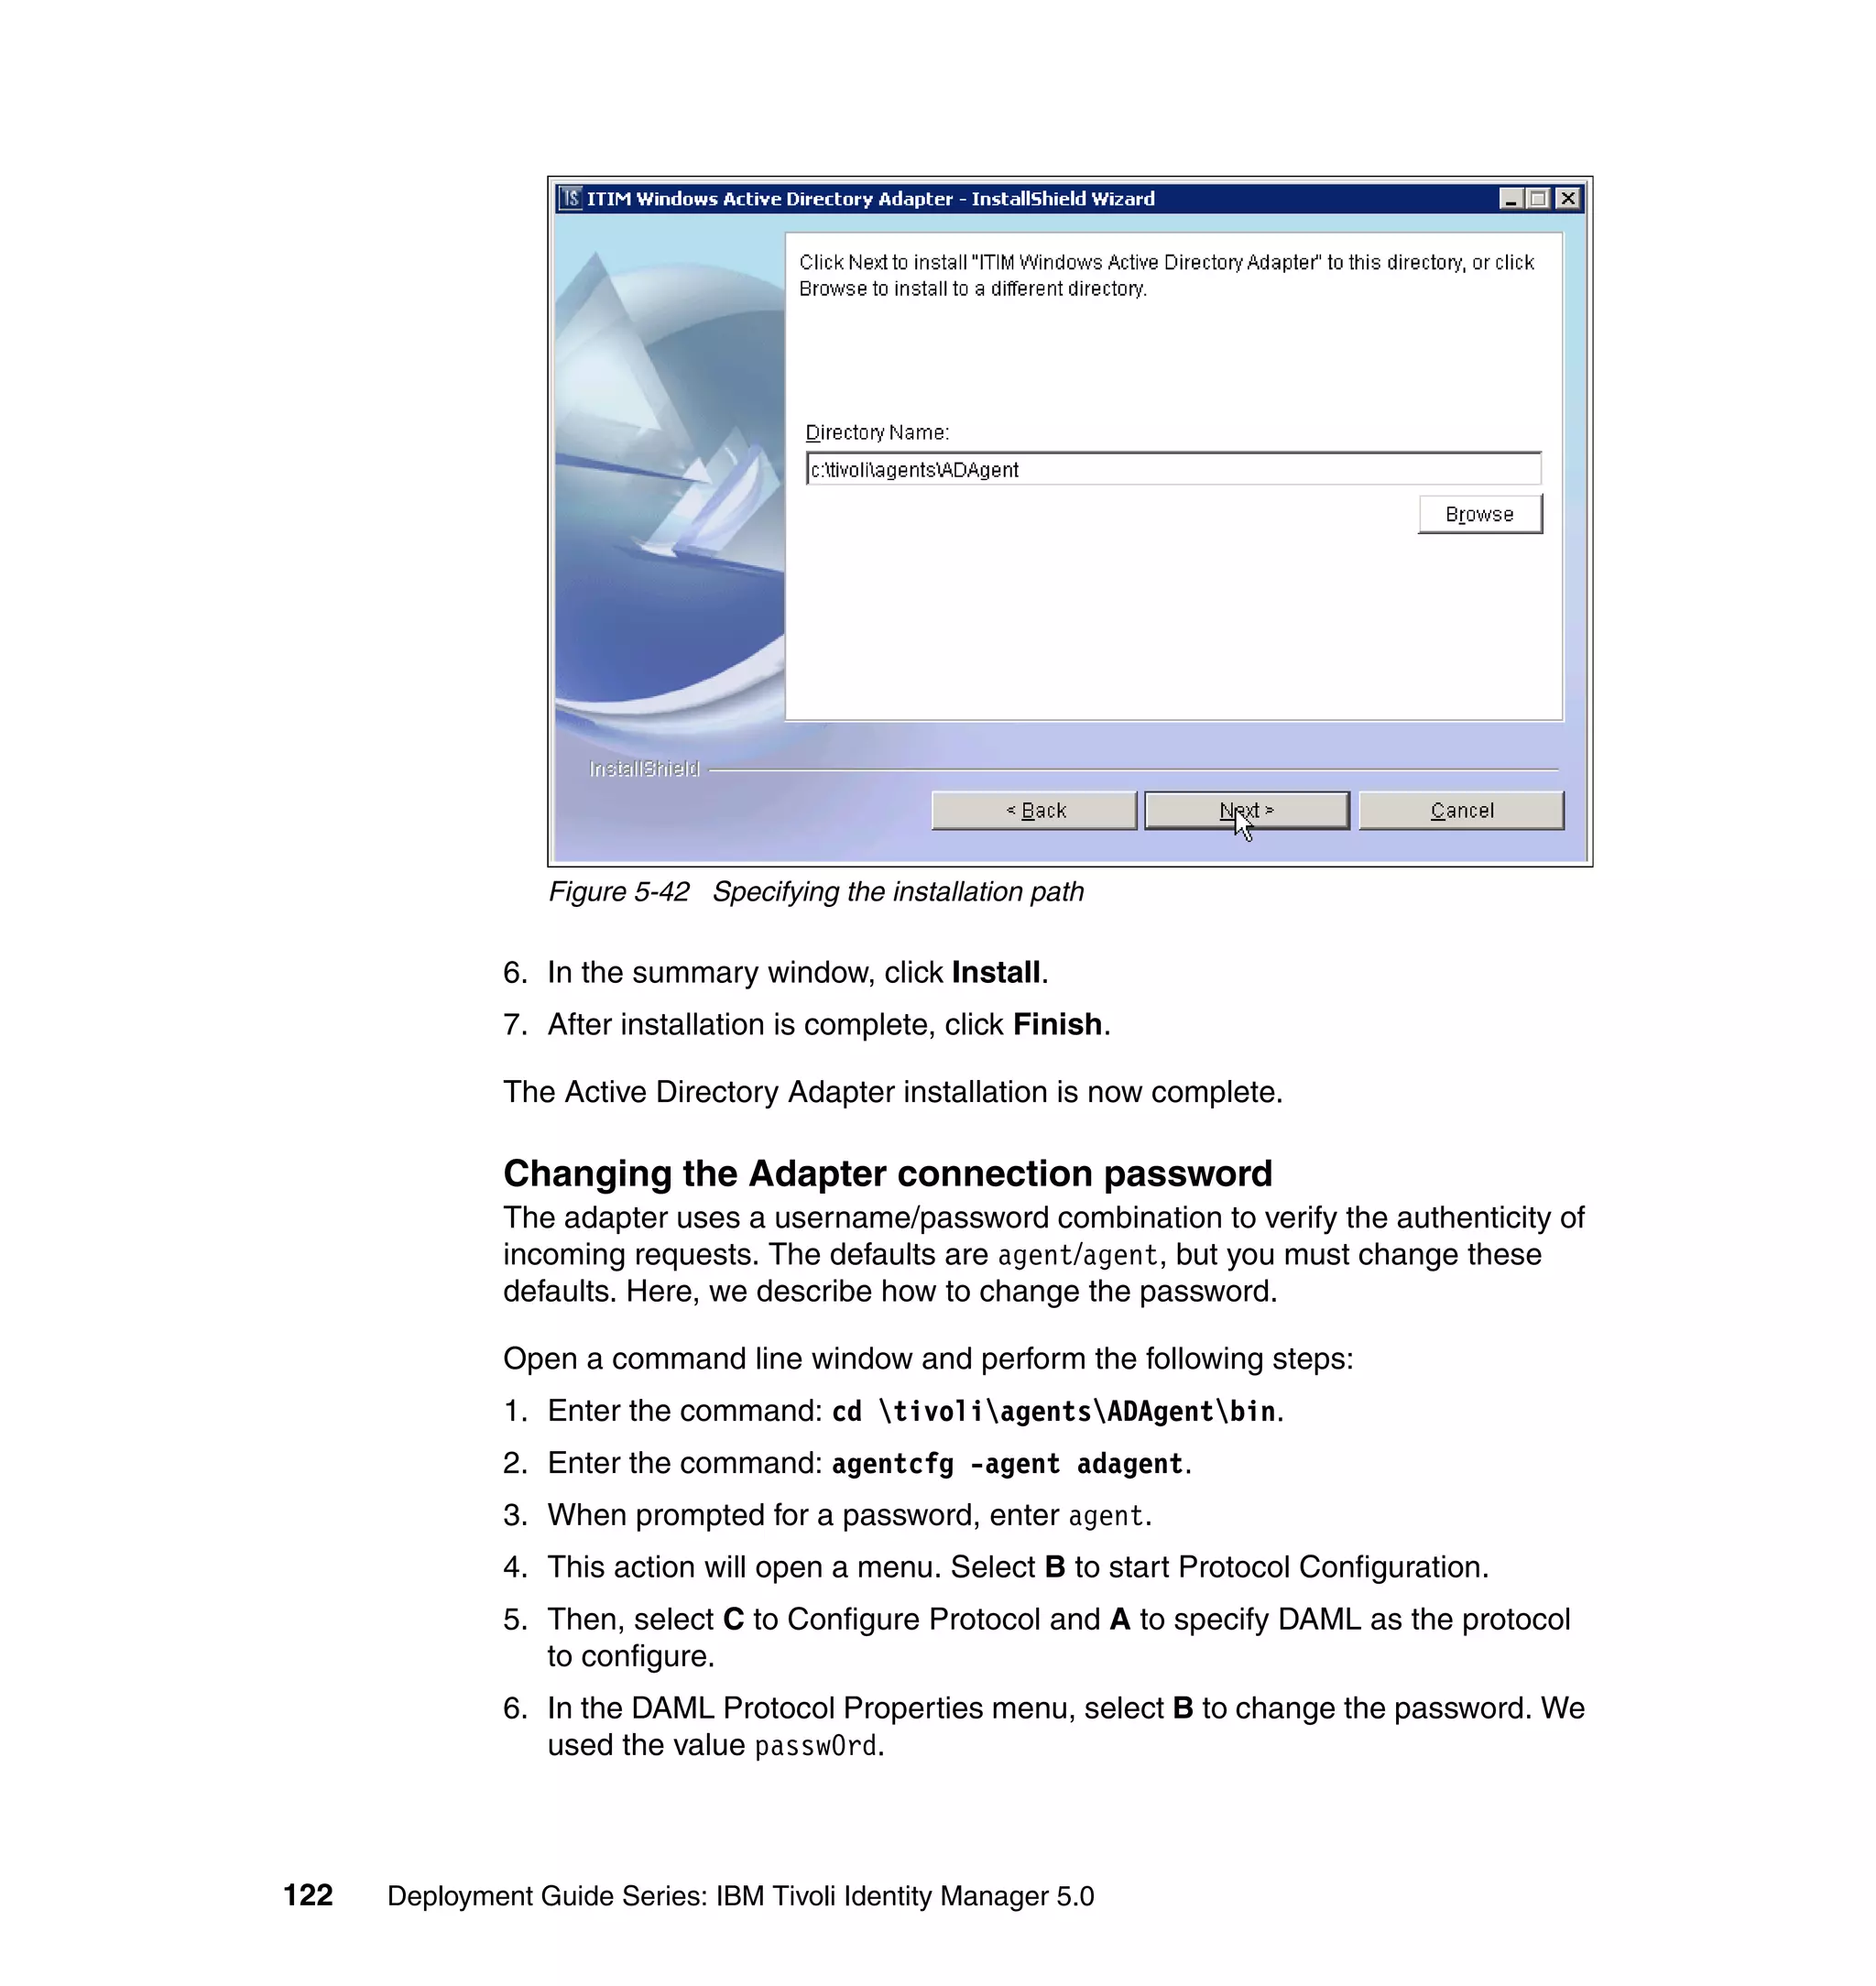
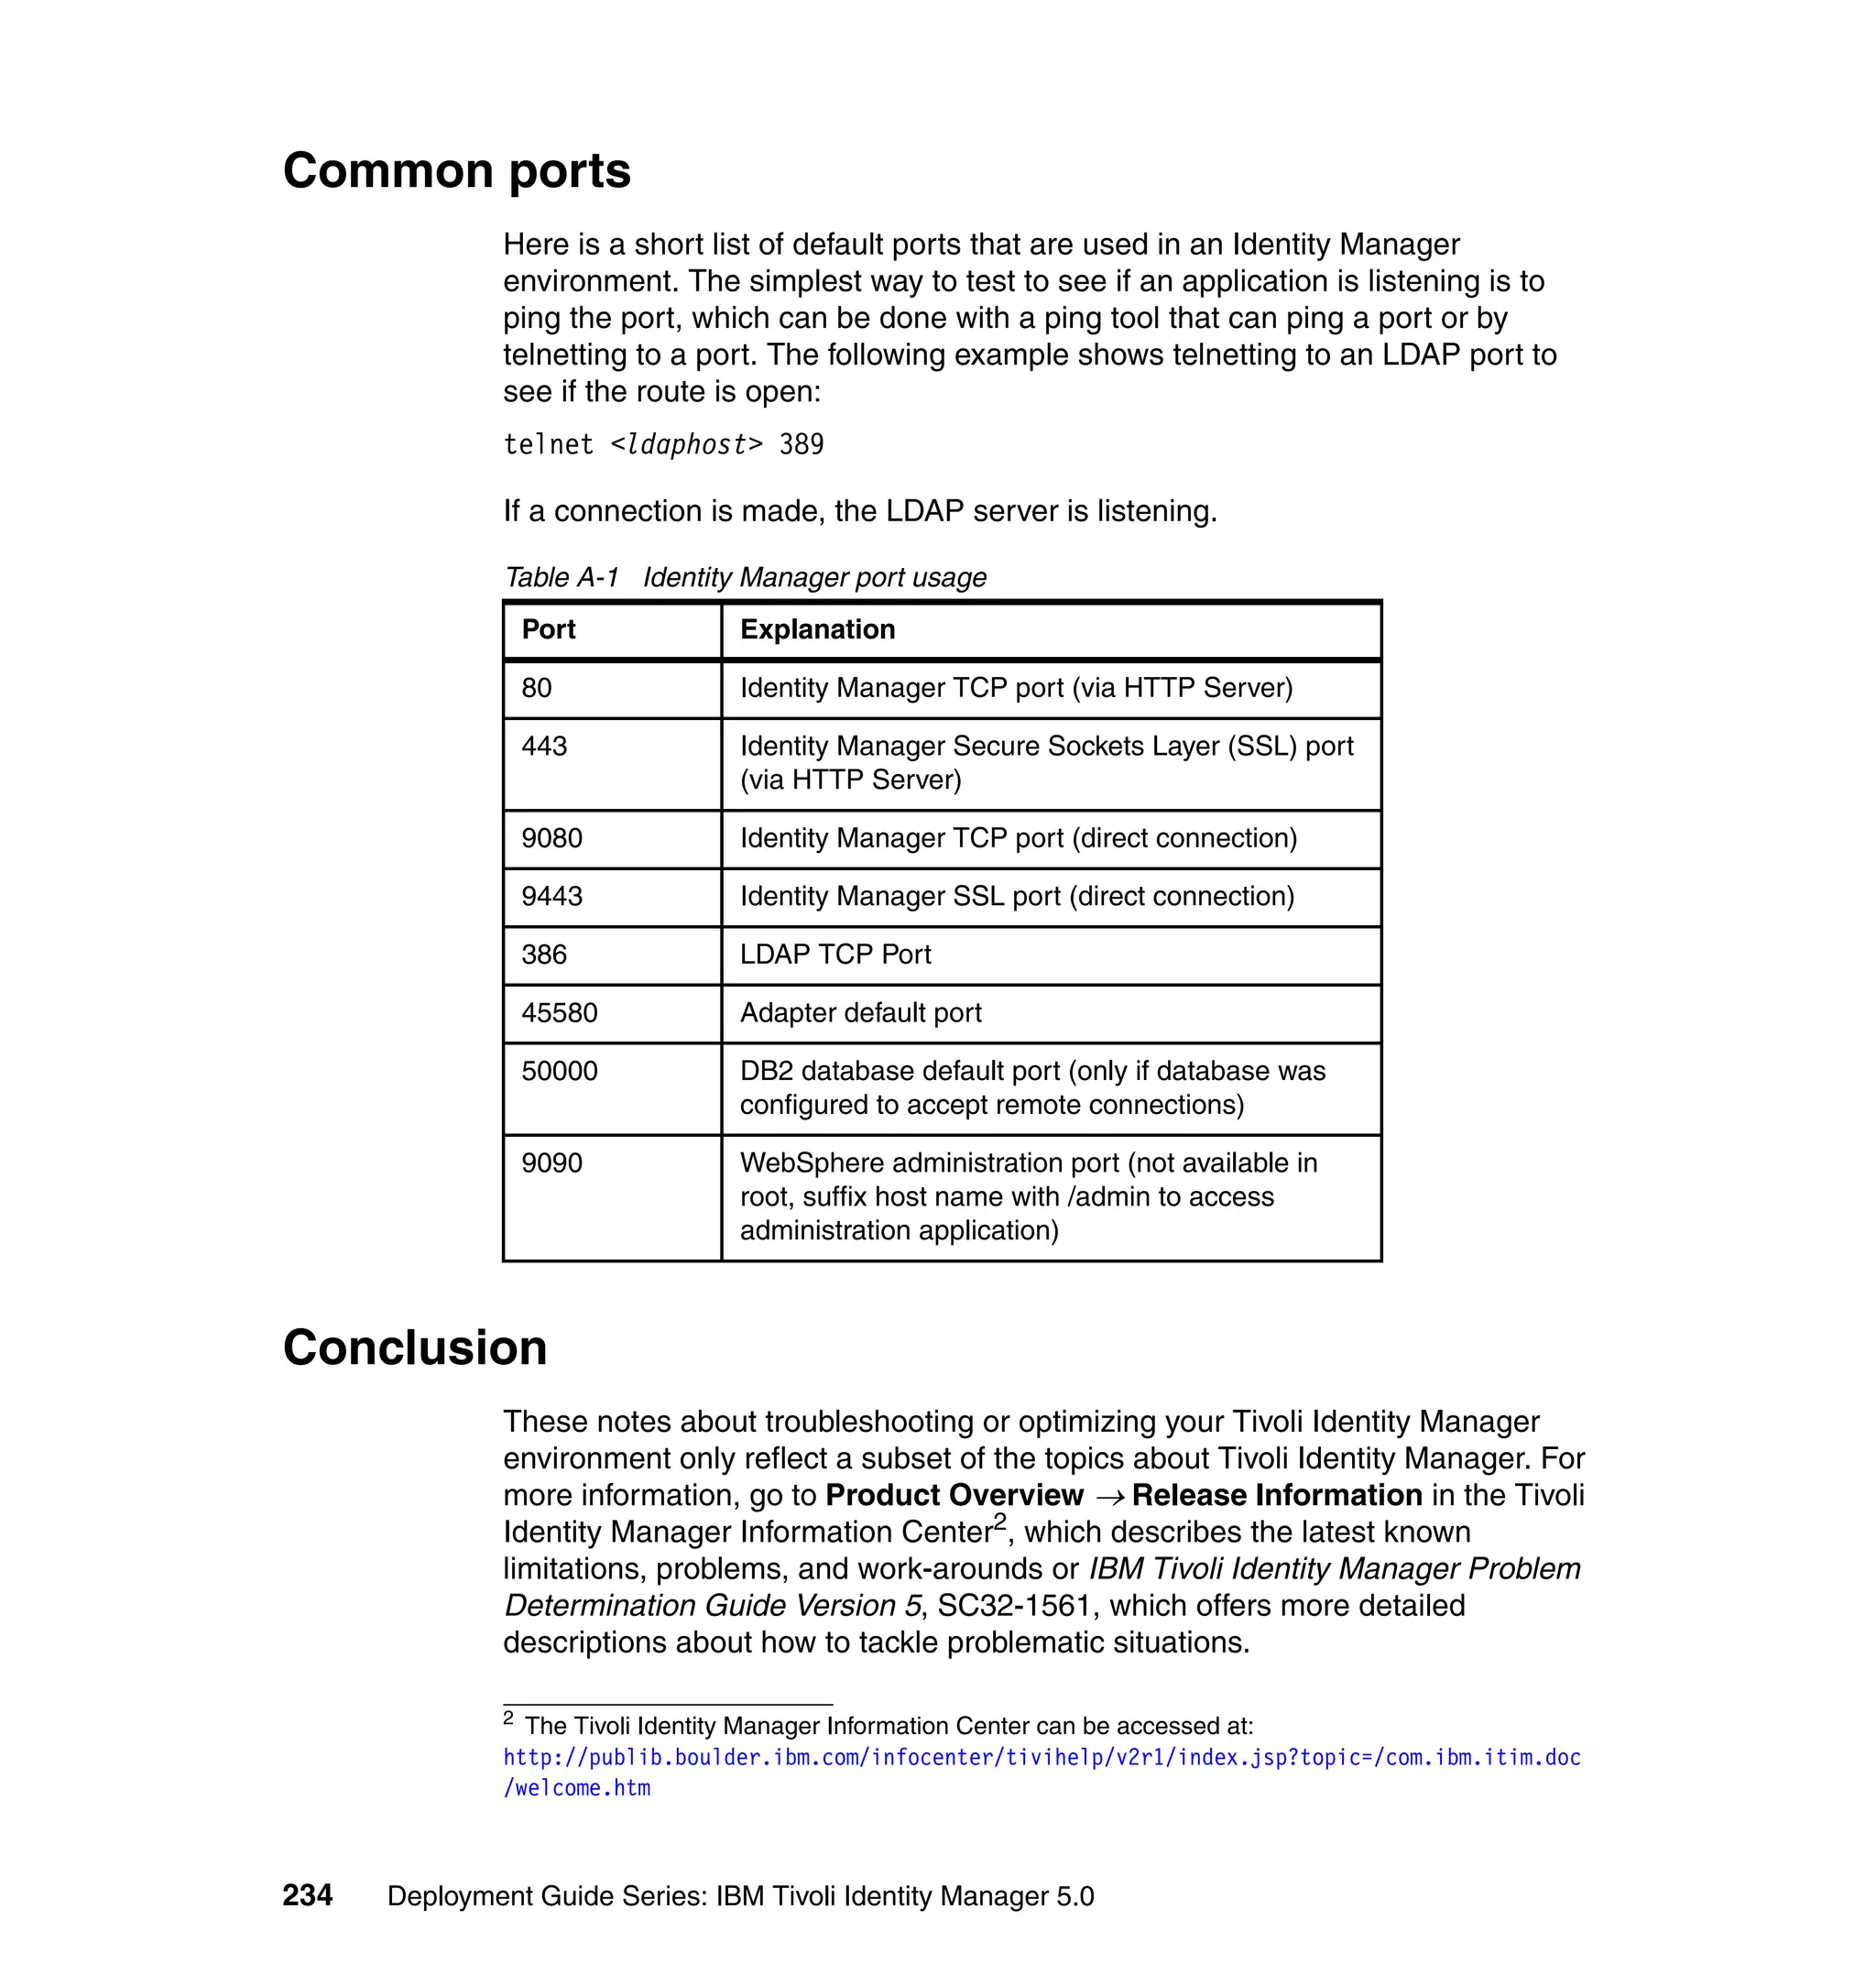
![Note: You will have to change pages to select all of these parameters. The
page change arrows are located near the bottom left area of the window.
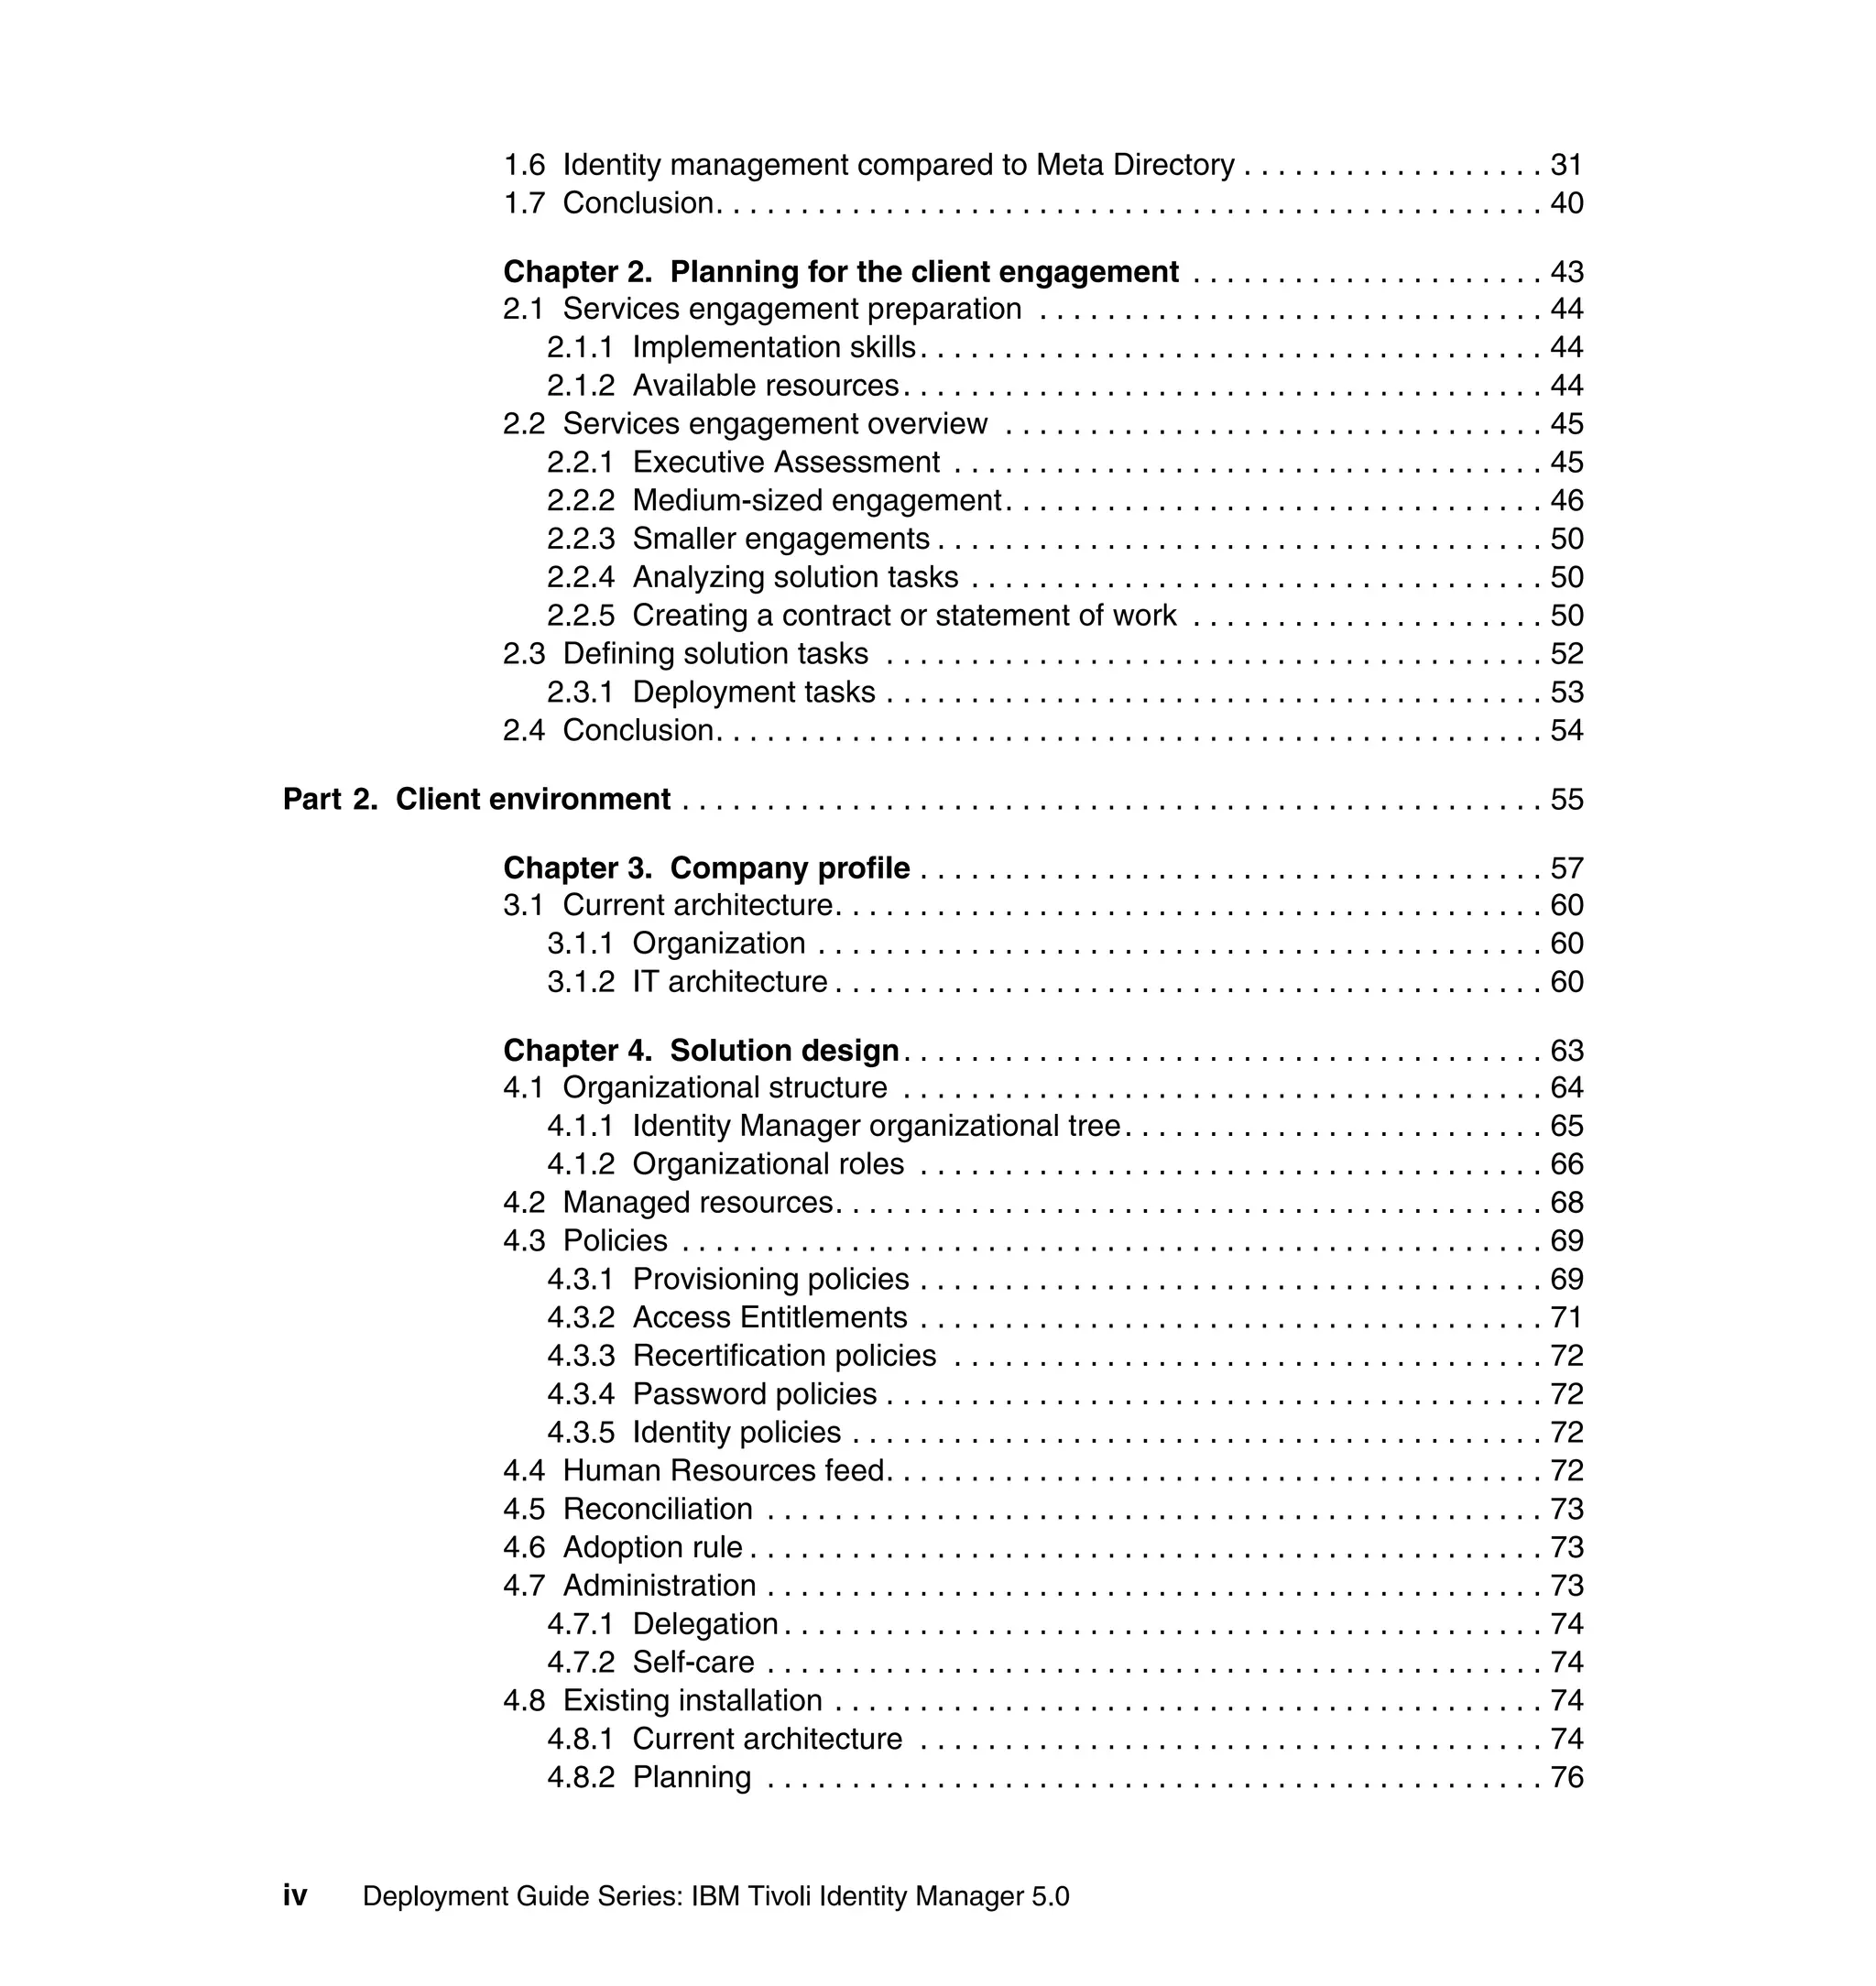
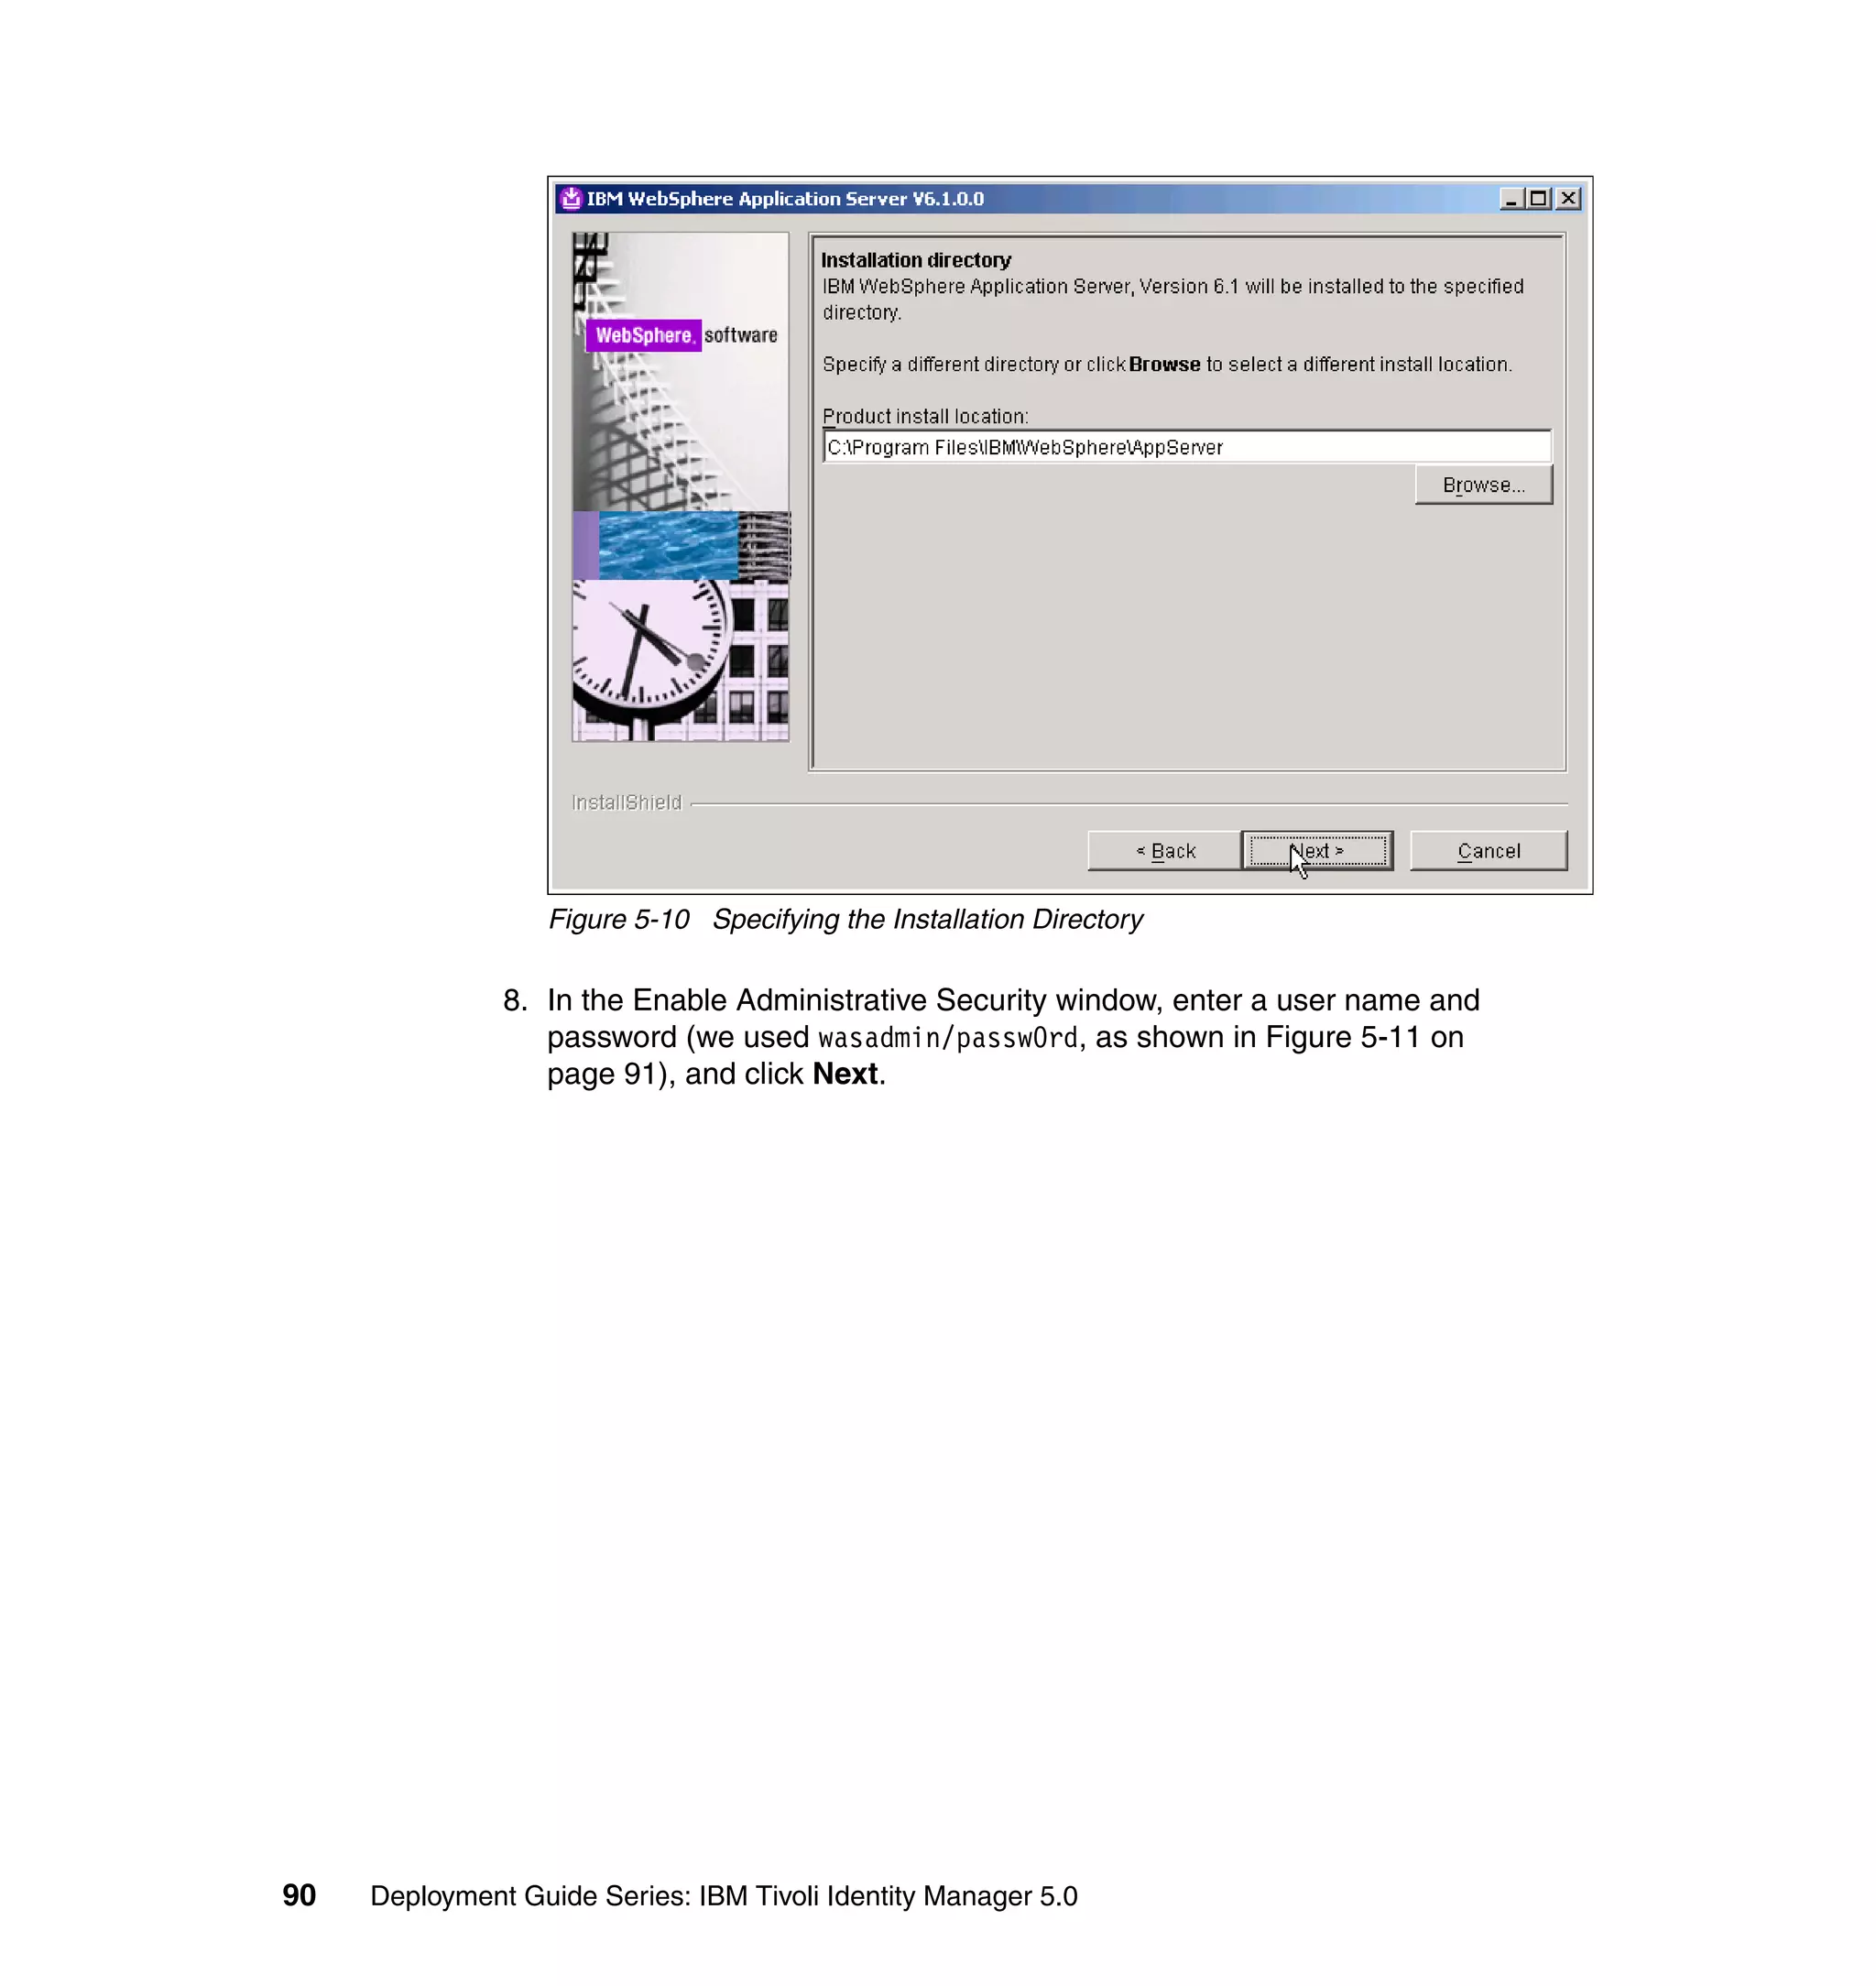
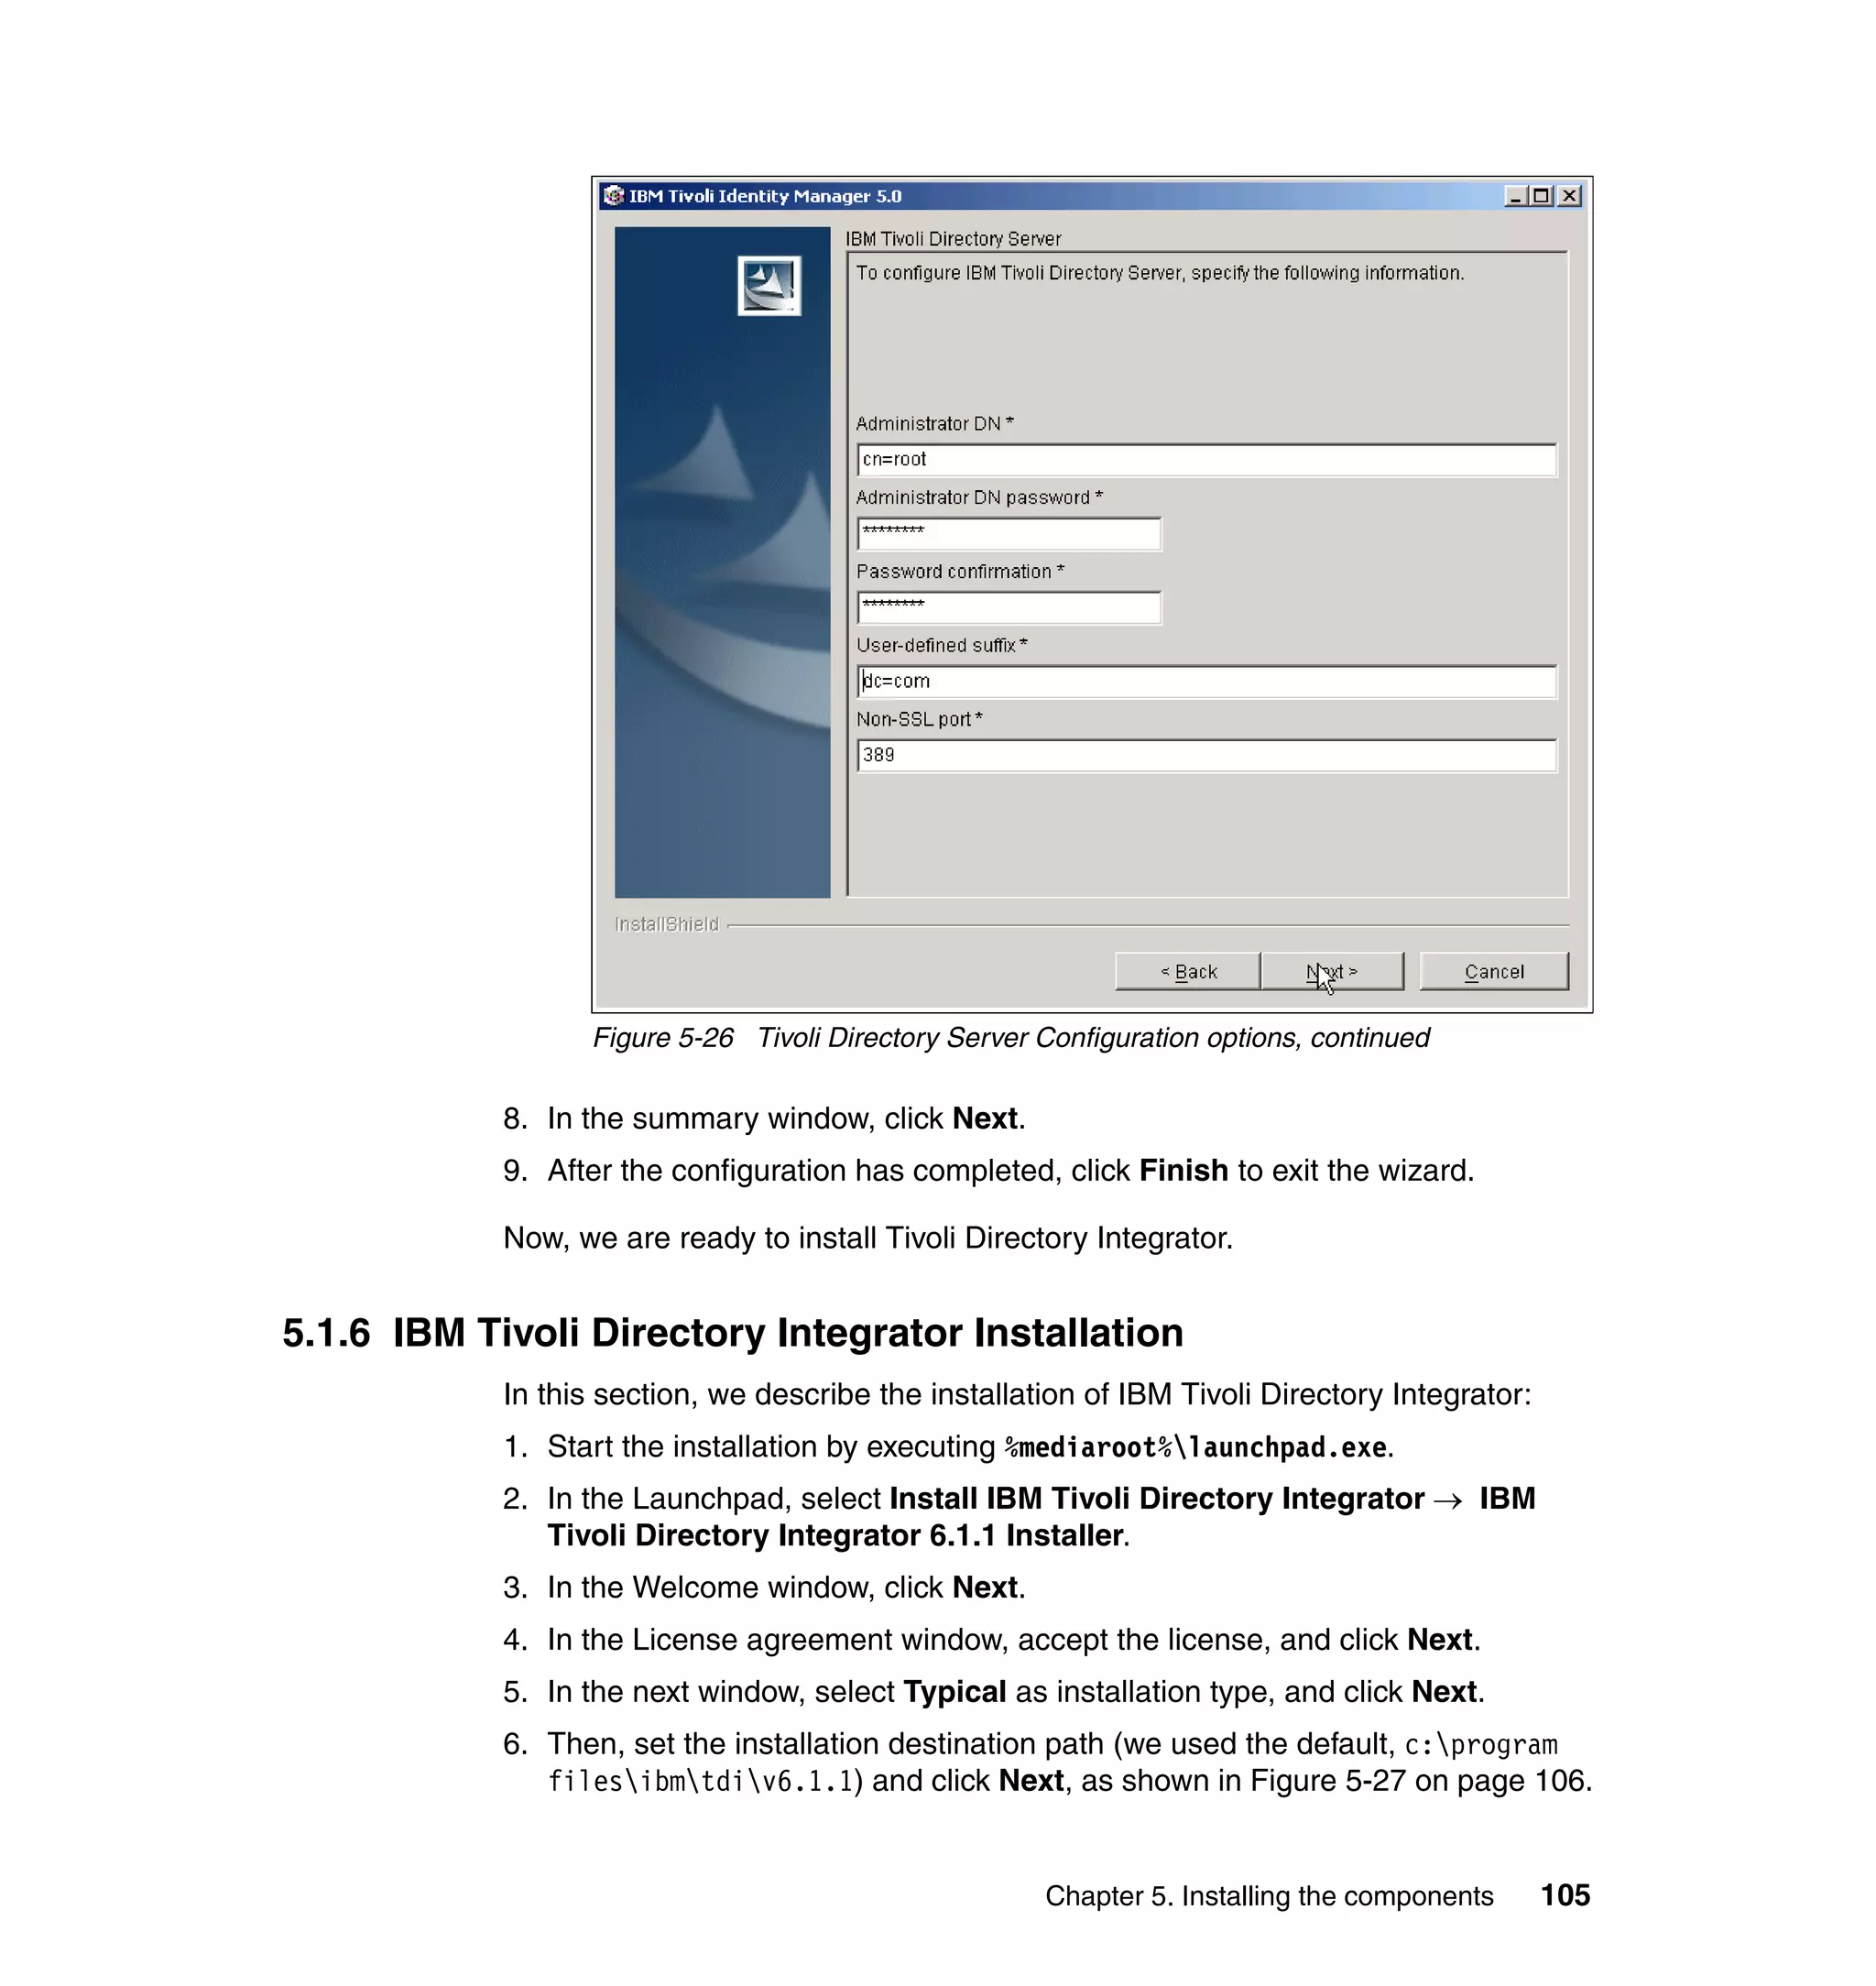
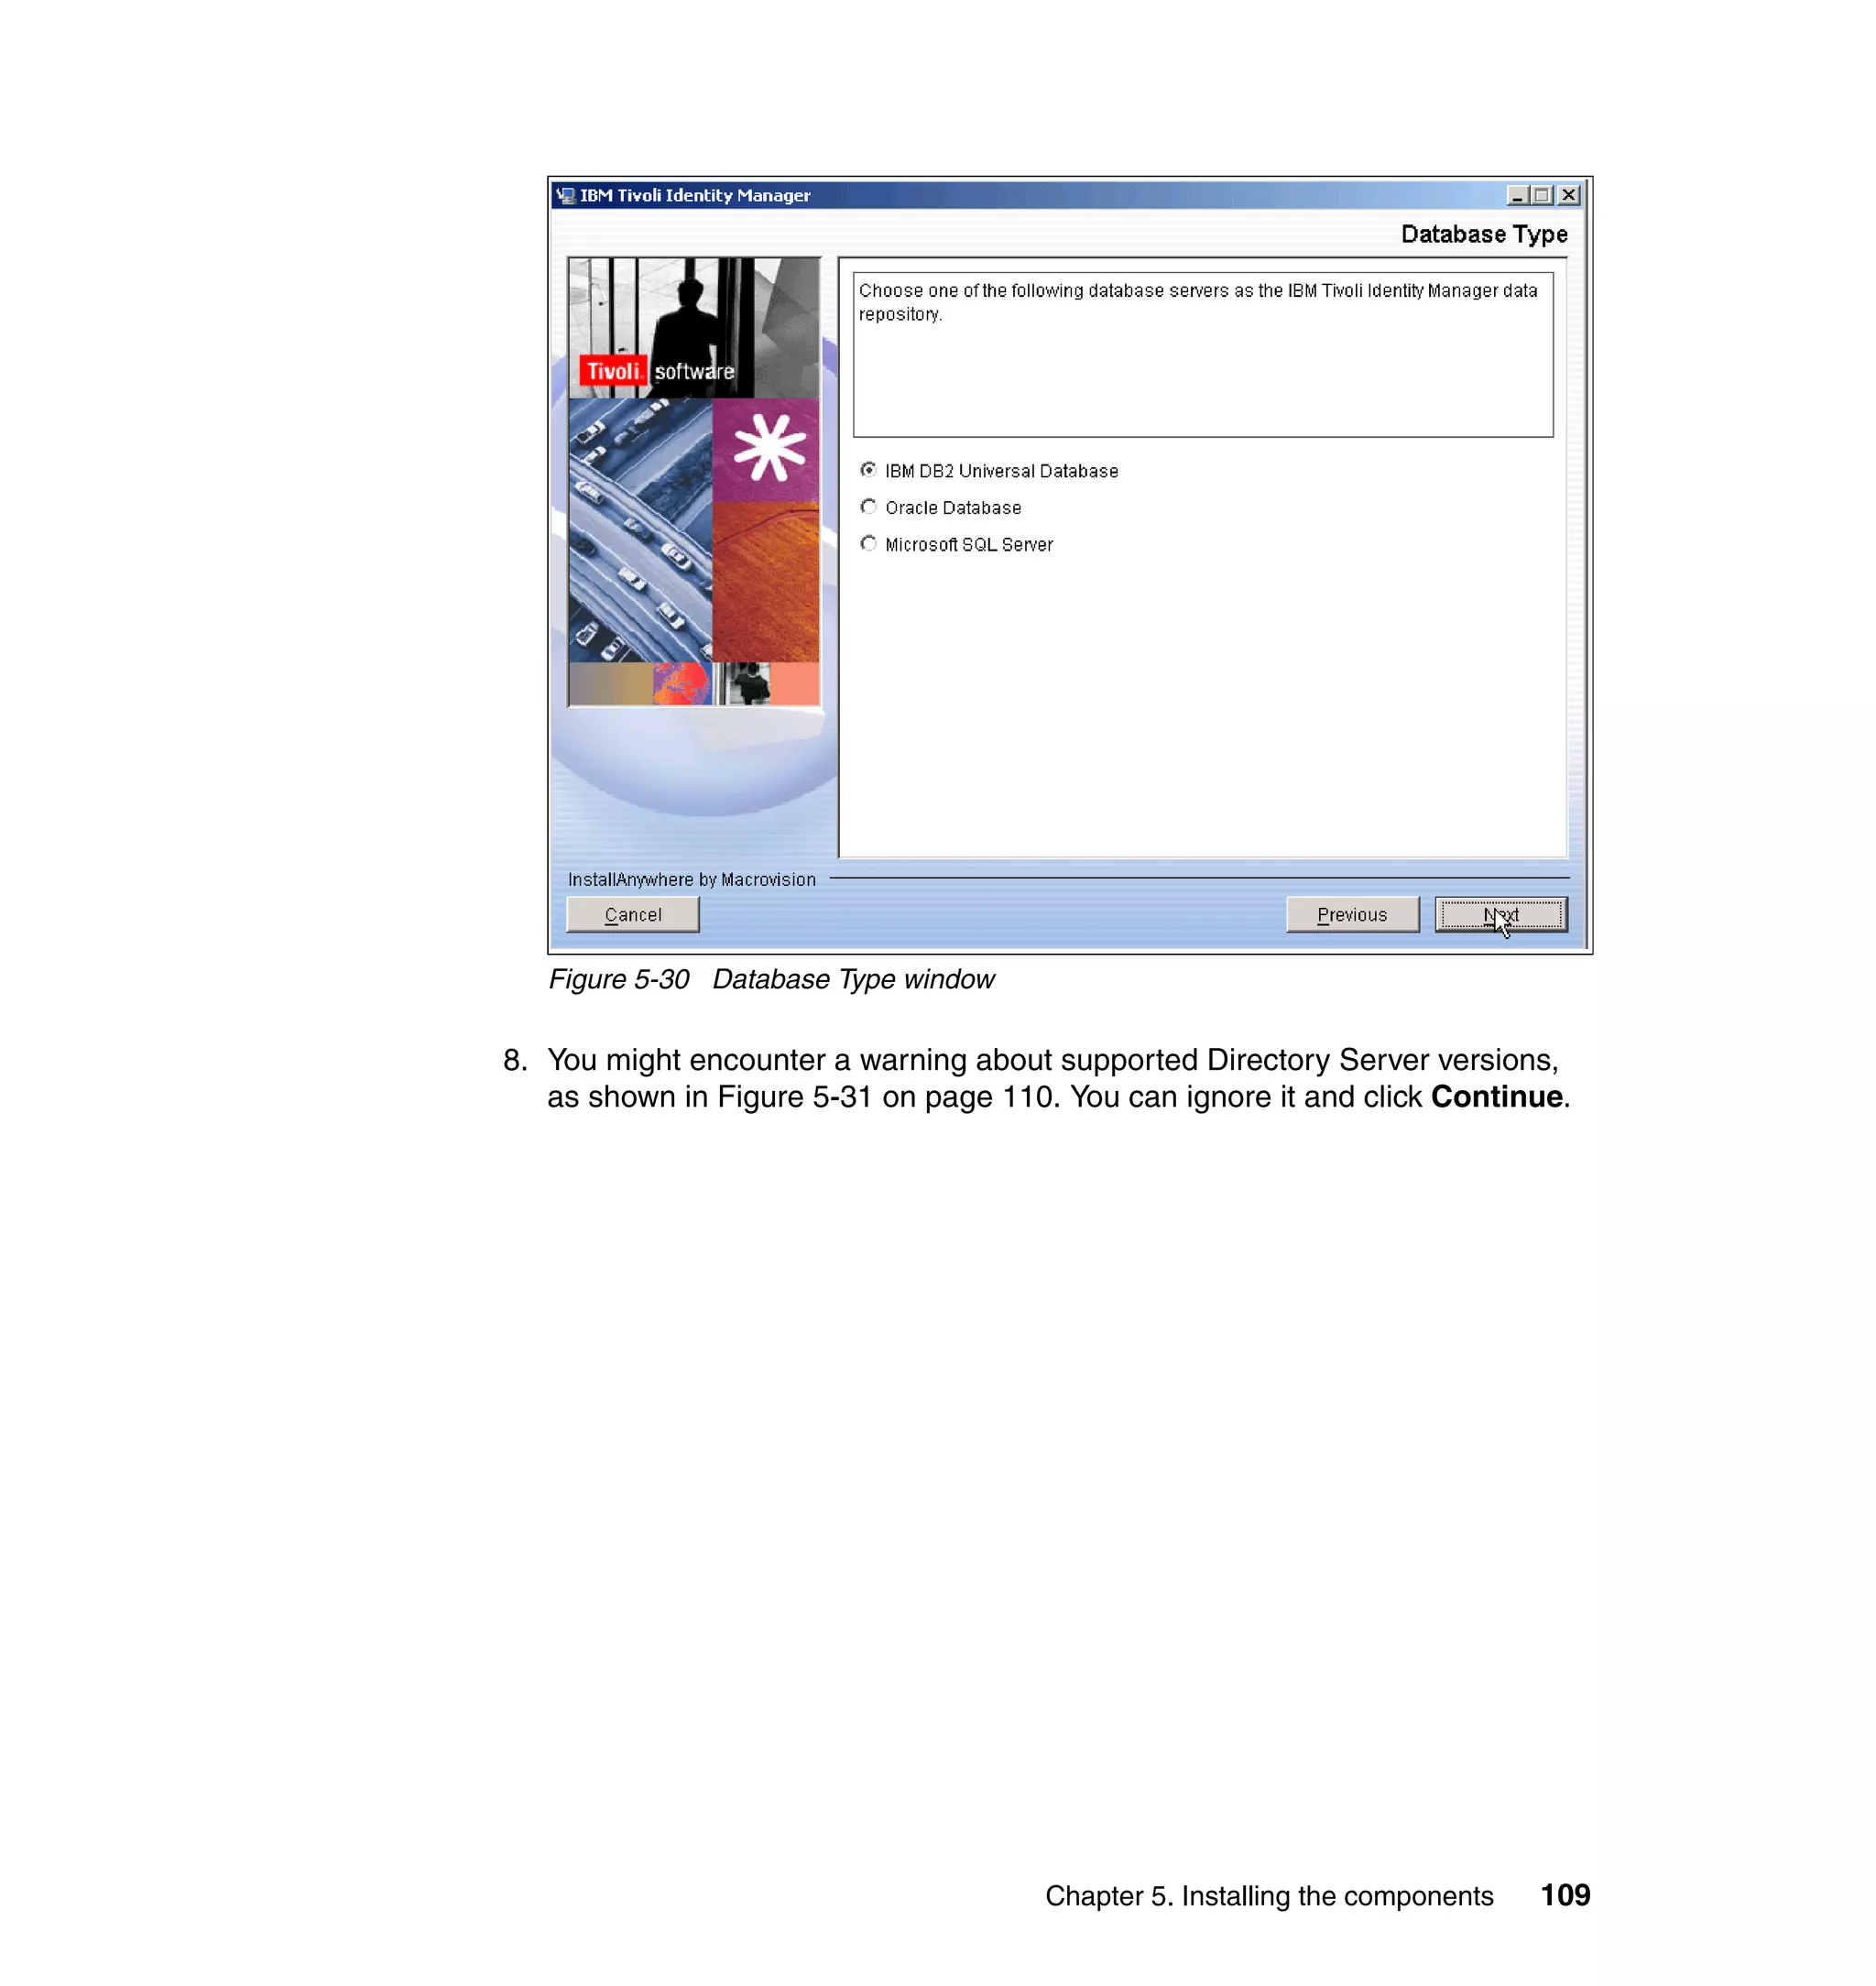
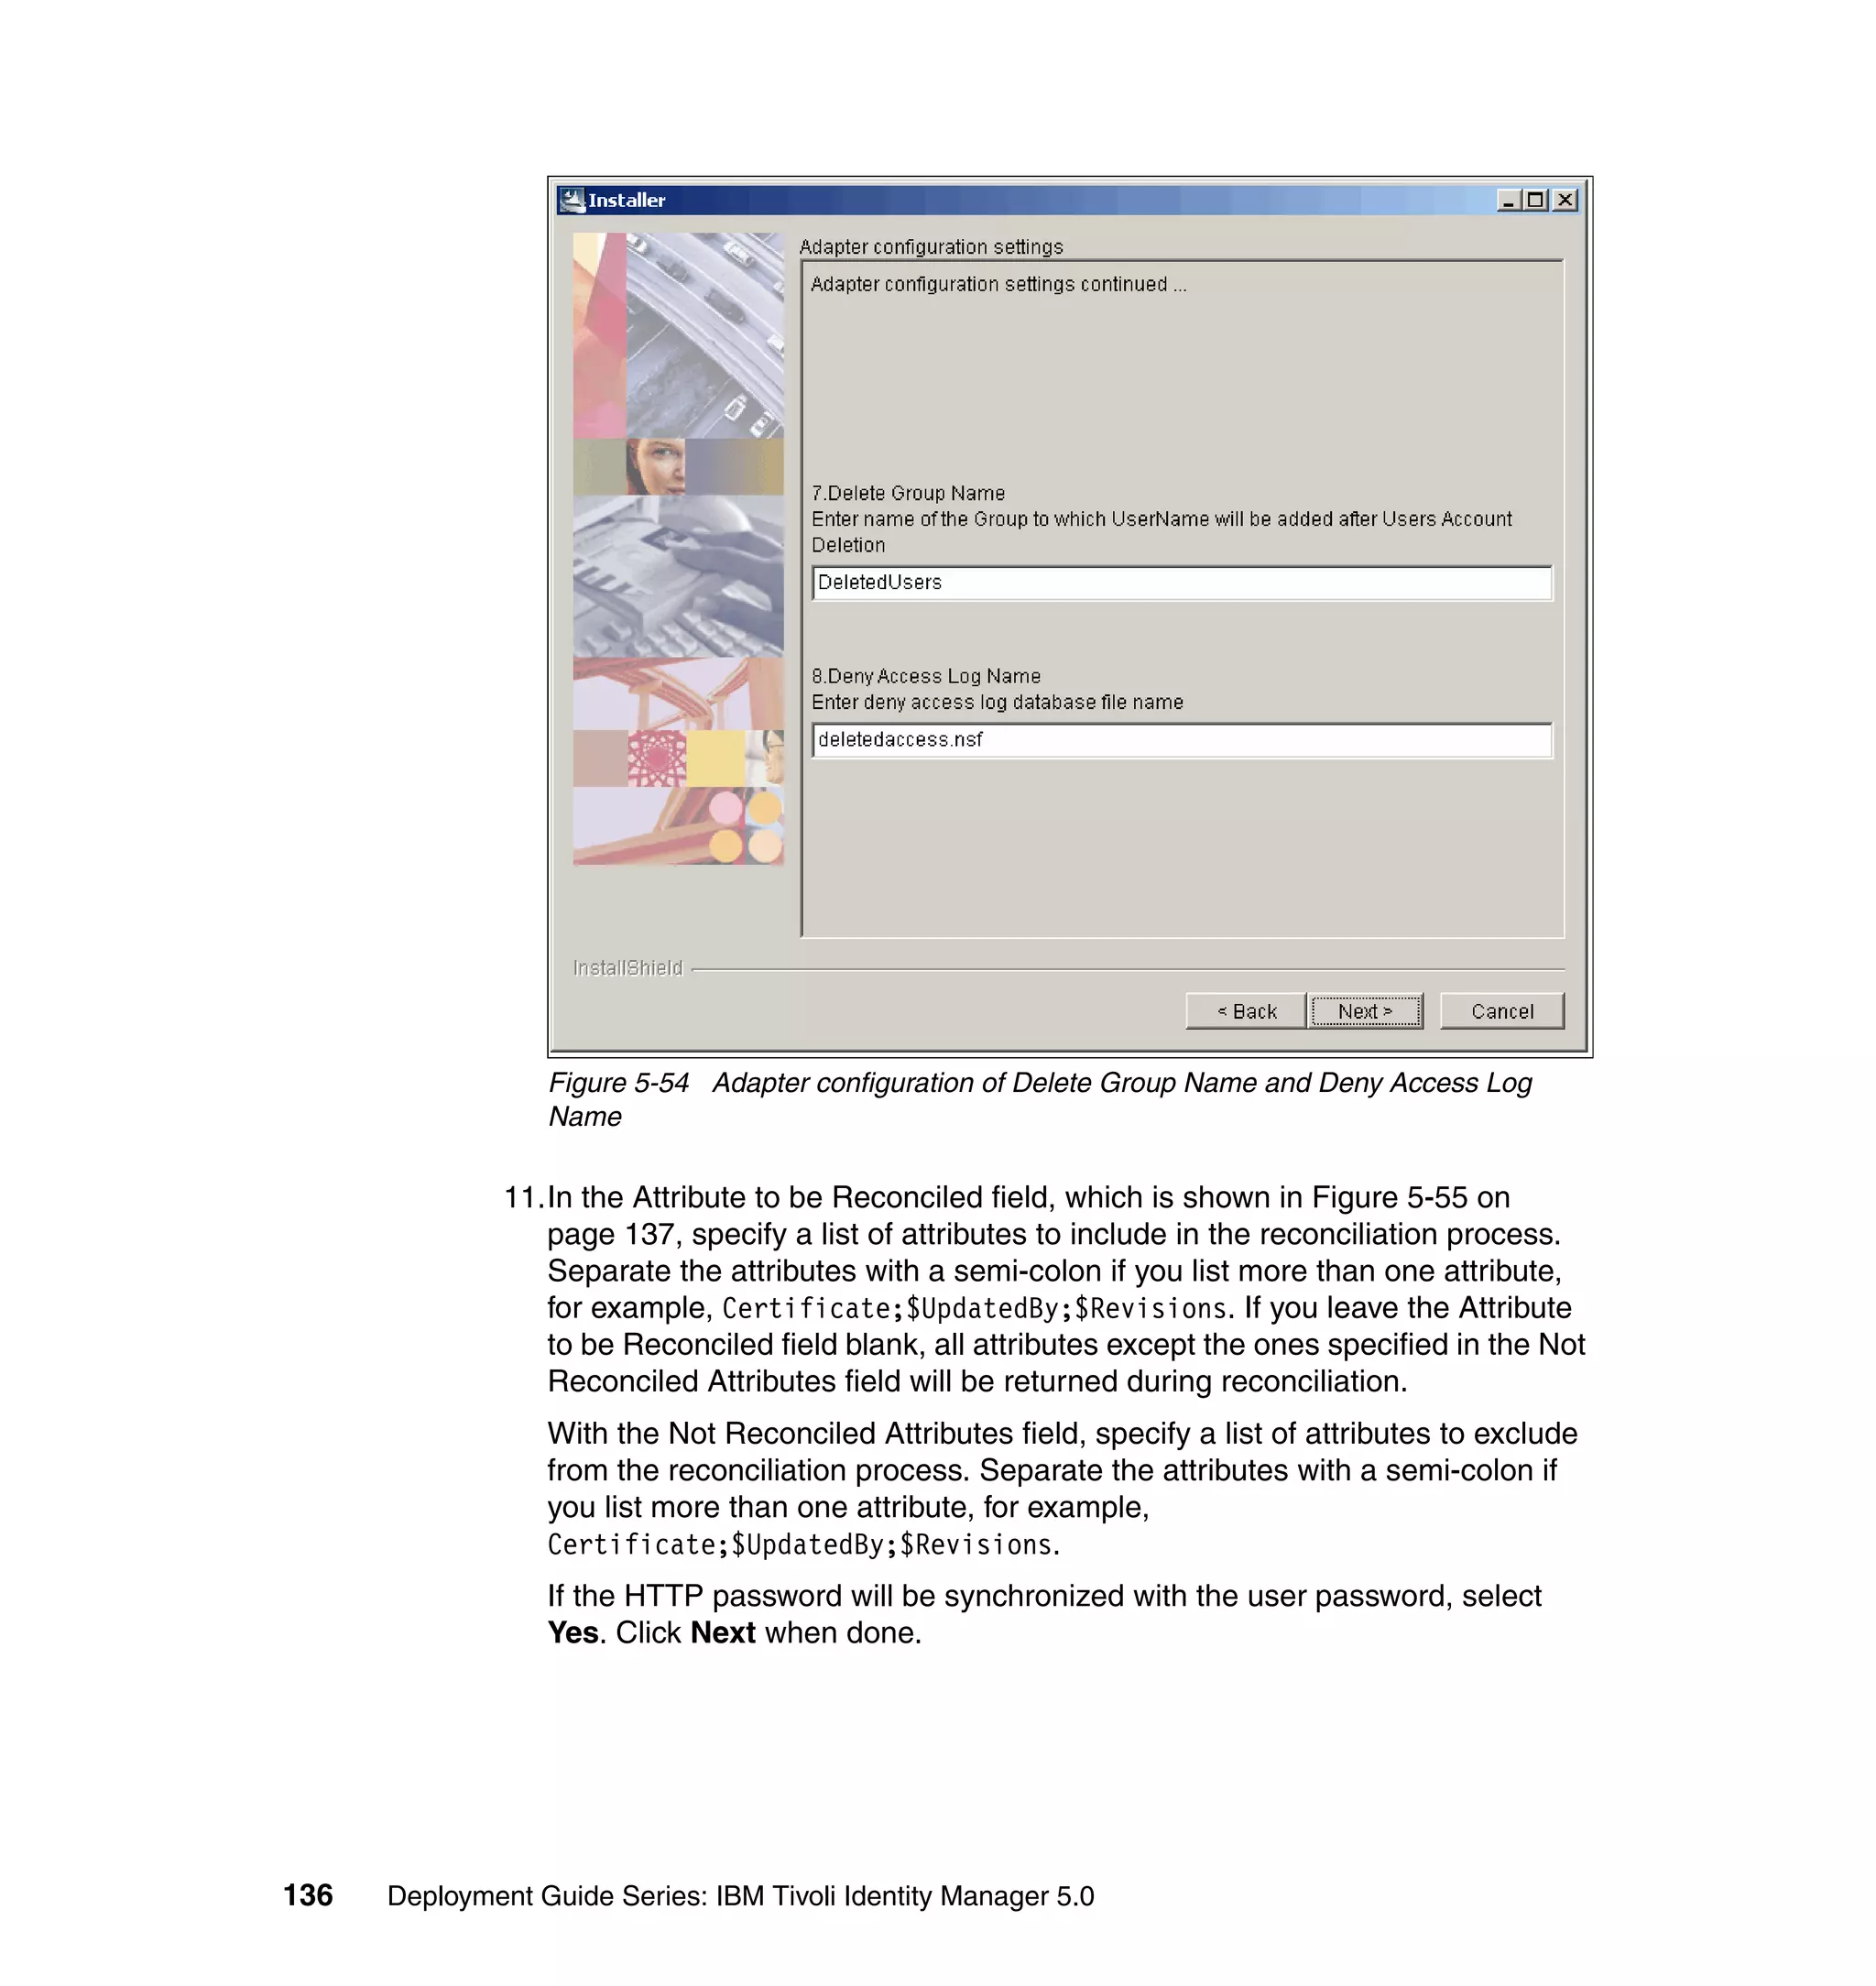
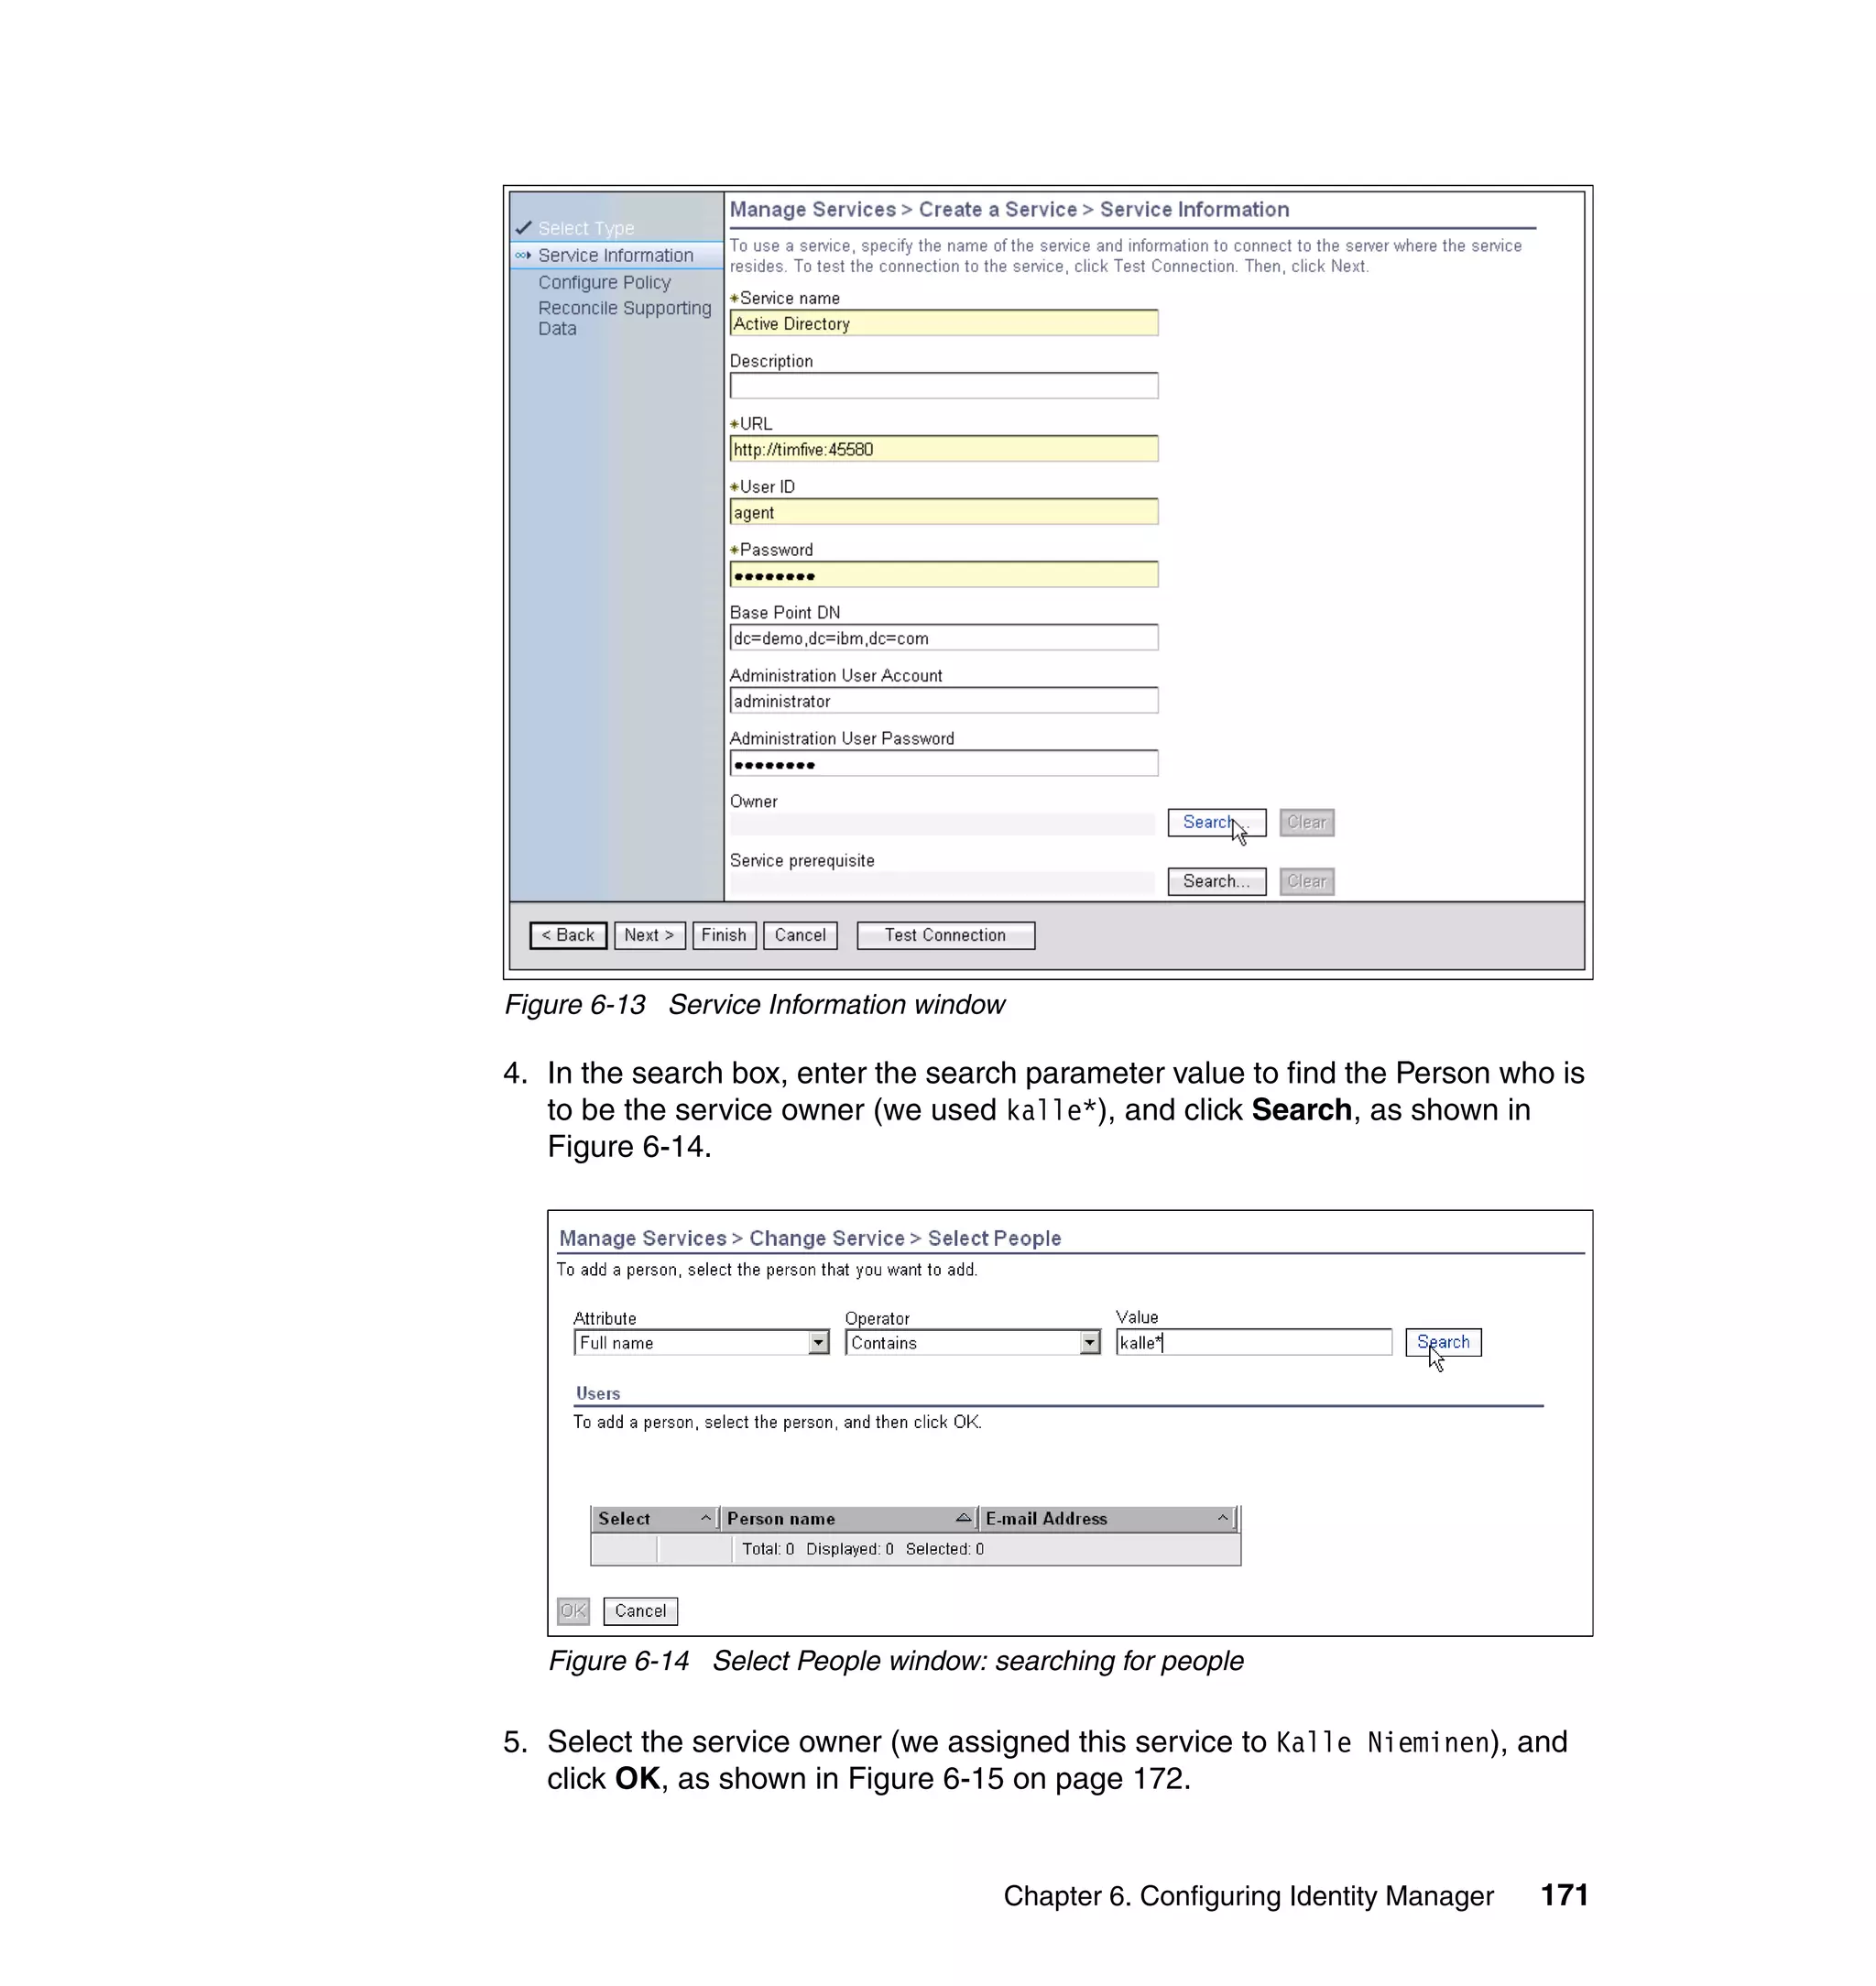
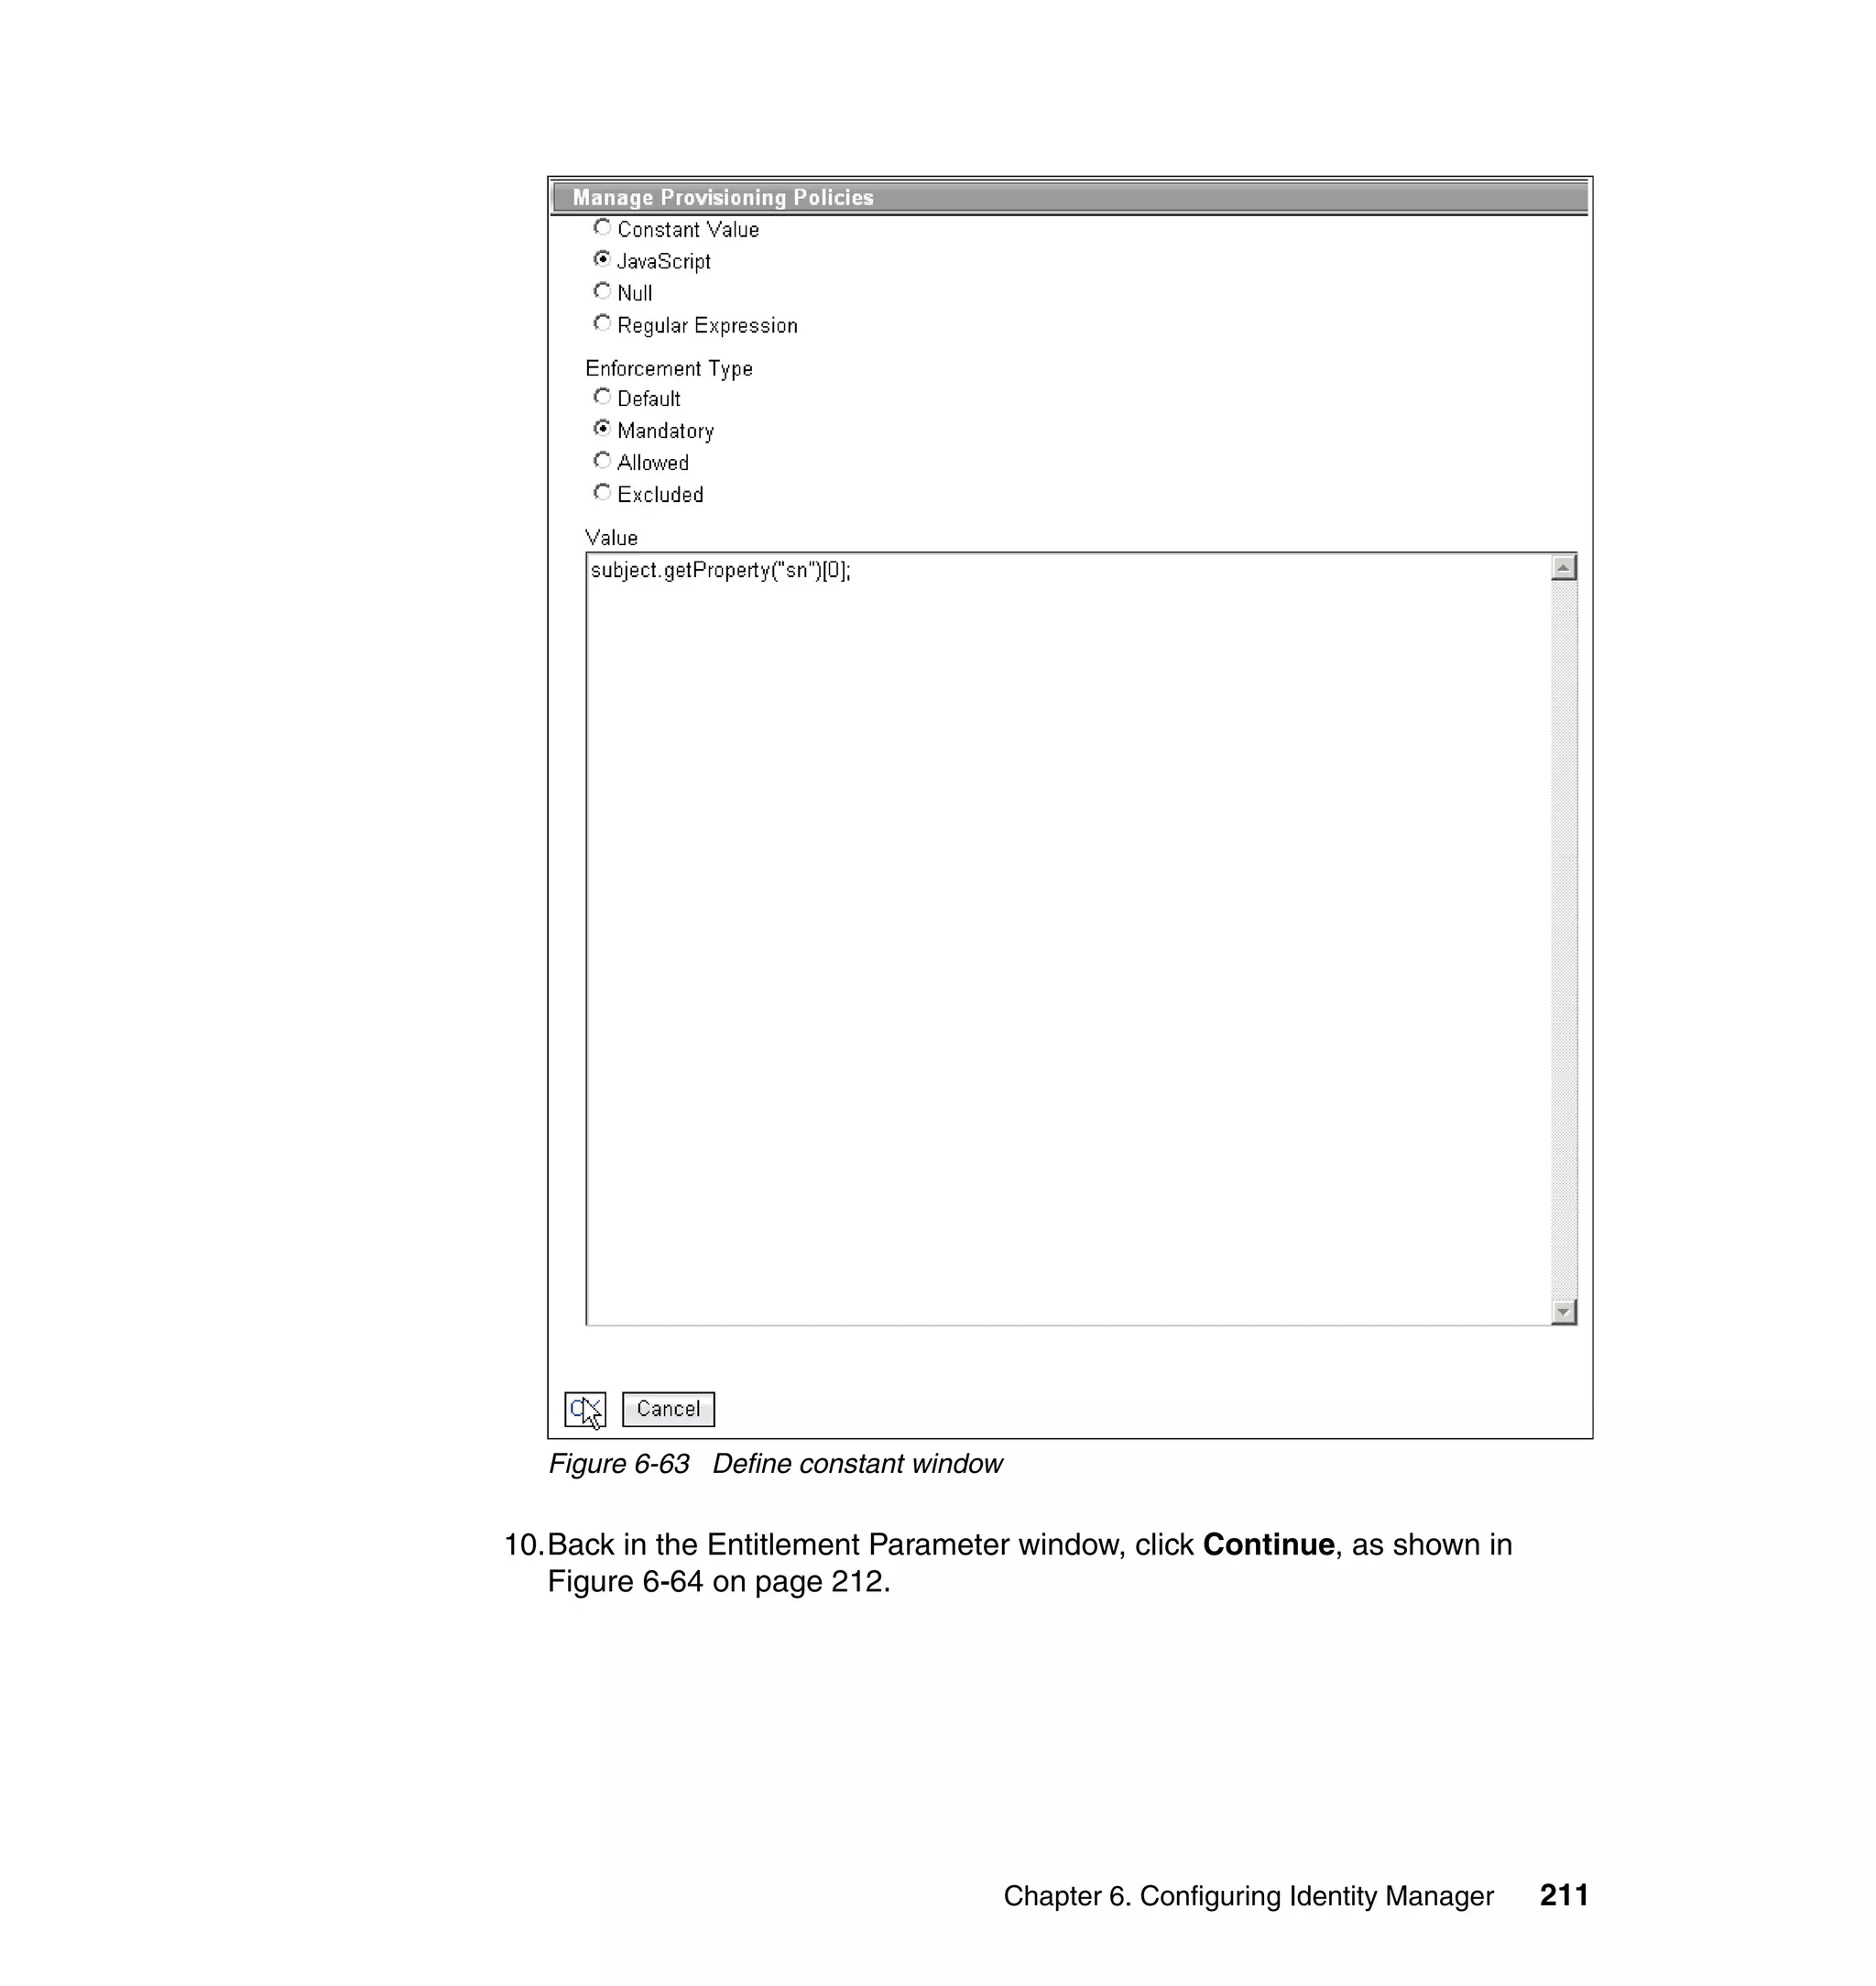
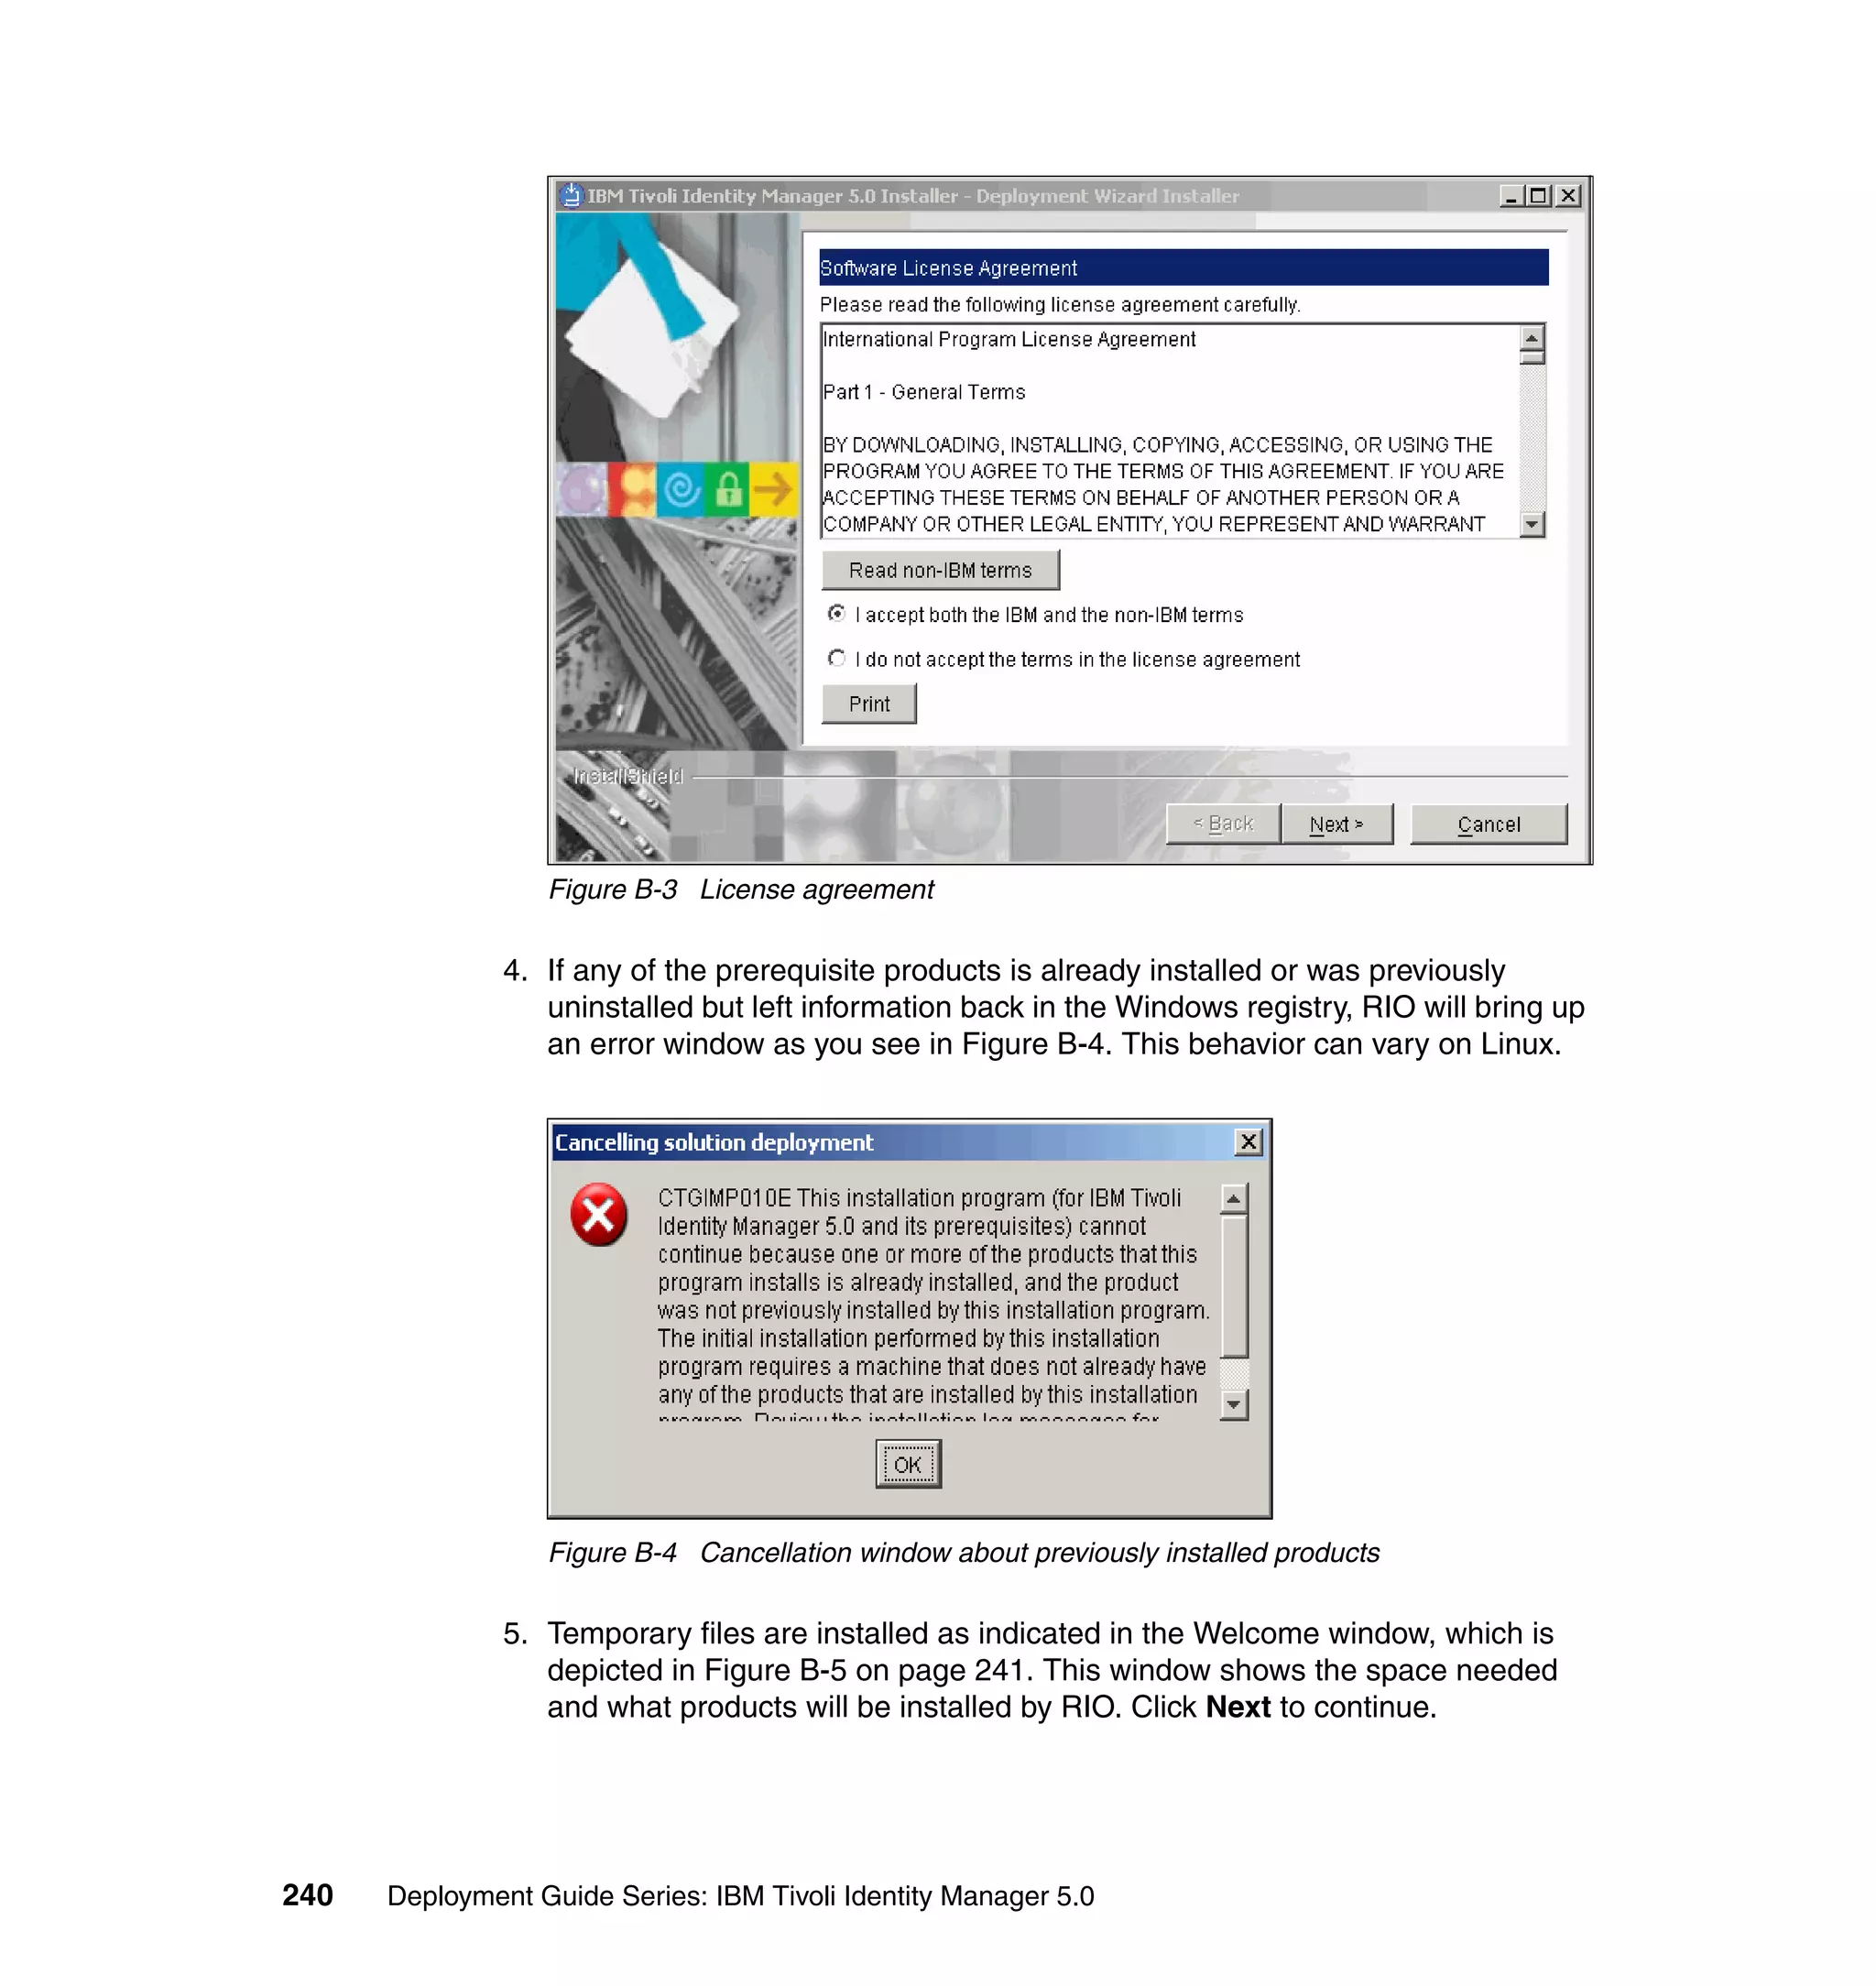
9. For each of the selected parameters, you get a Define Constant window. In
this window, the first two parameters are the same for each Attribute, with the
third parameter depending on which attribute is being defined:
– Parameter Type: Javascript
– Enforcement Type: Mandatory
– Value (for Last name): {subject.getProperty("sn")[0];}
– Value (for E-mail address): {subject.getProperty("mail")[0];}
– Value (for Full name): {subject.getProperty("cn")[0];}
– Value (for First name): {subject.getProperty("givenname")[0];}
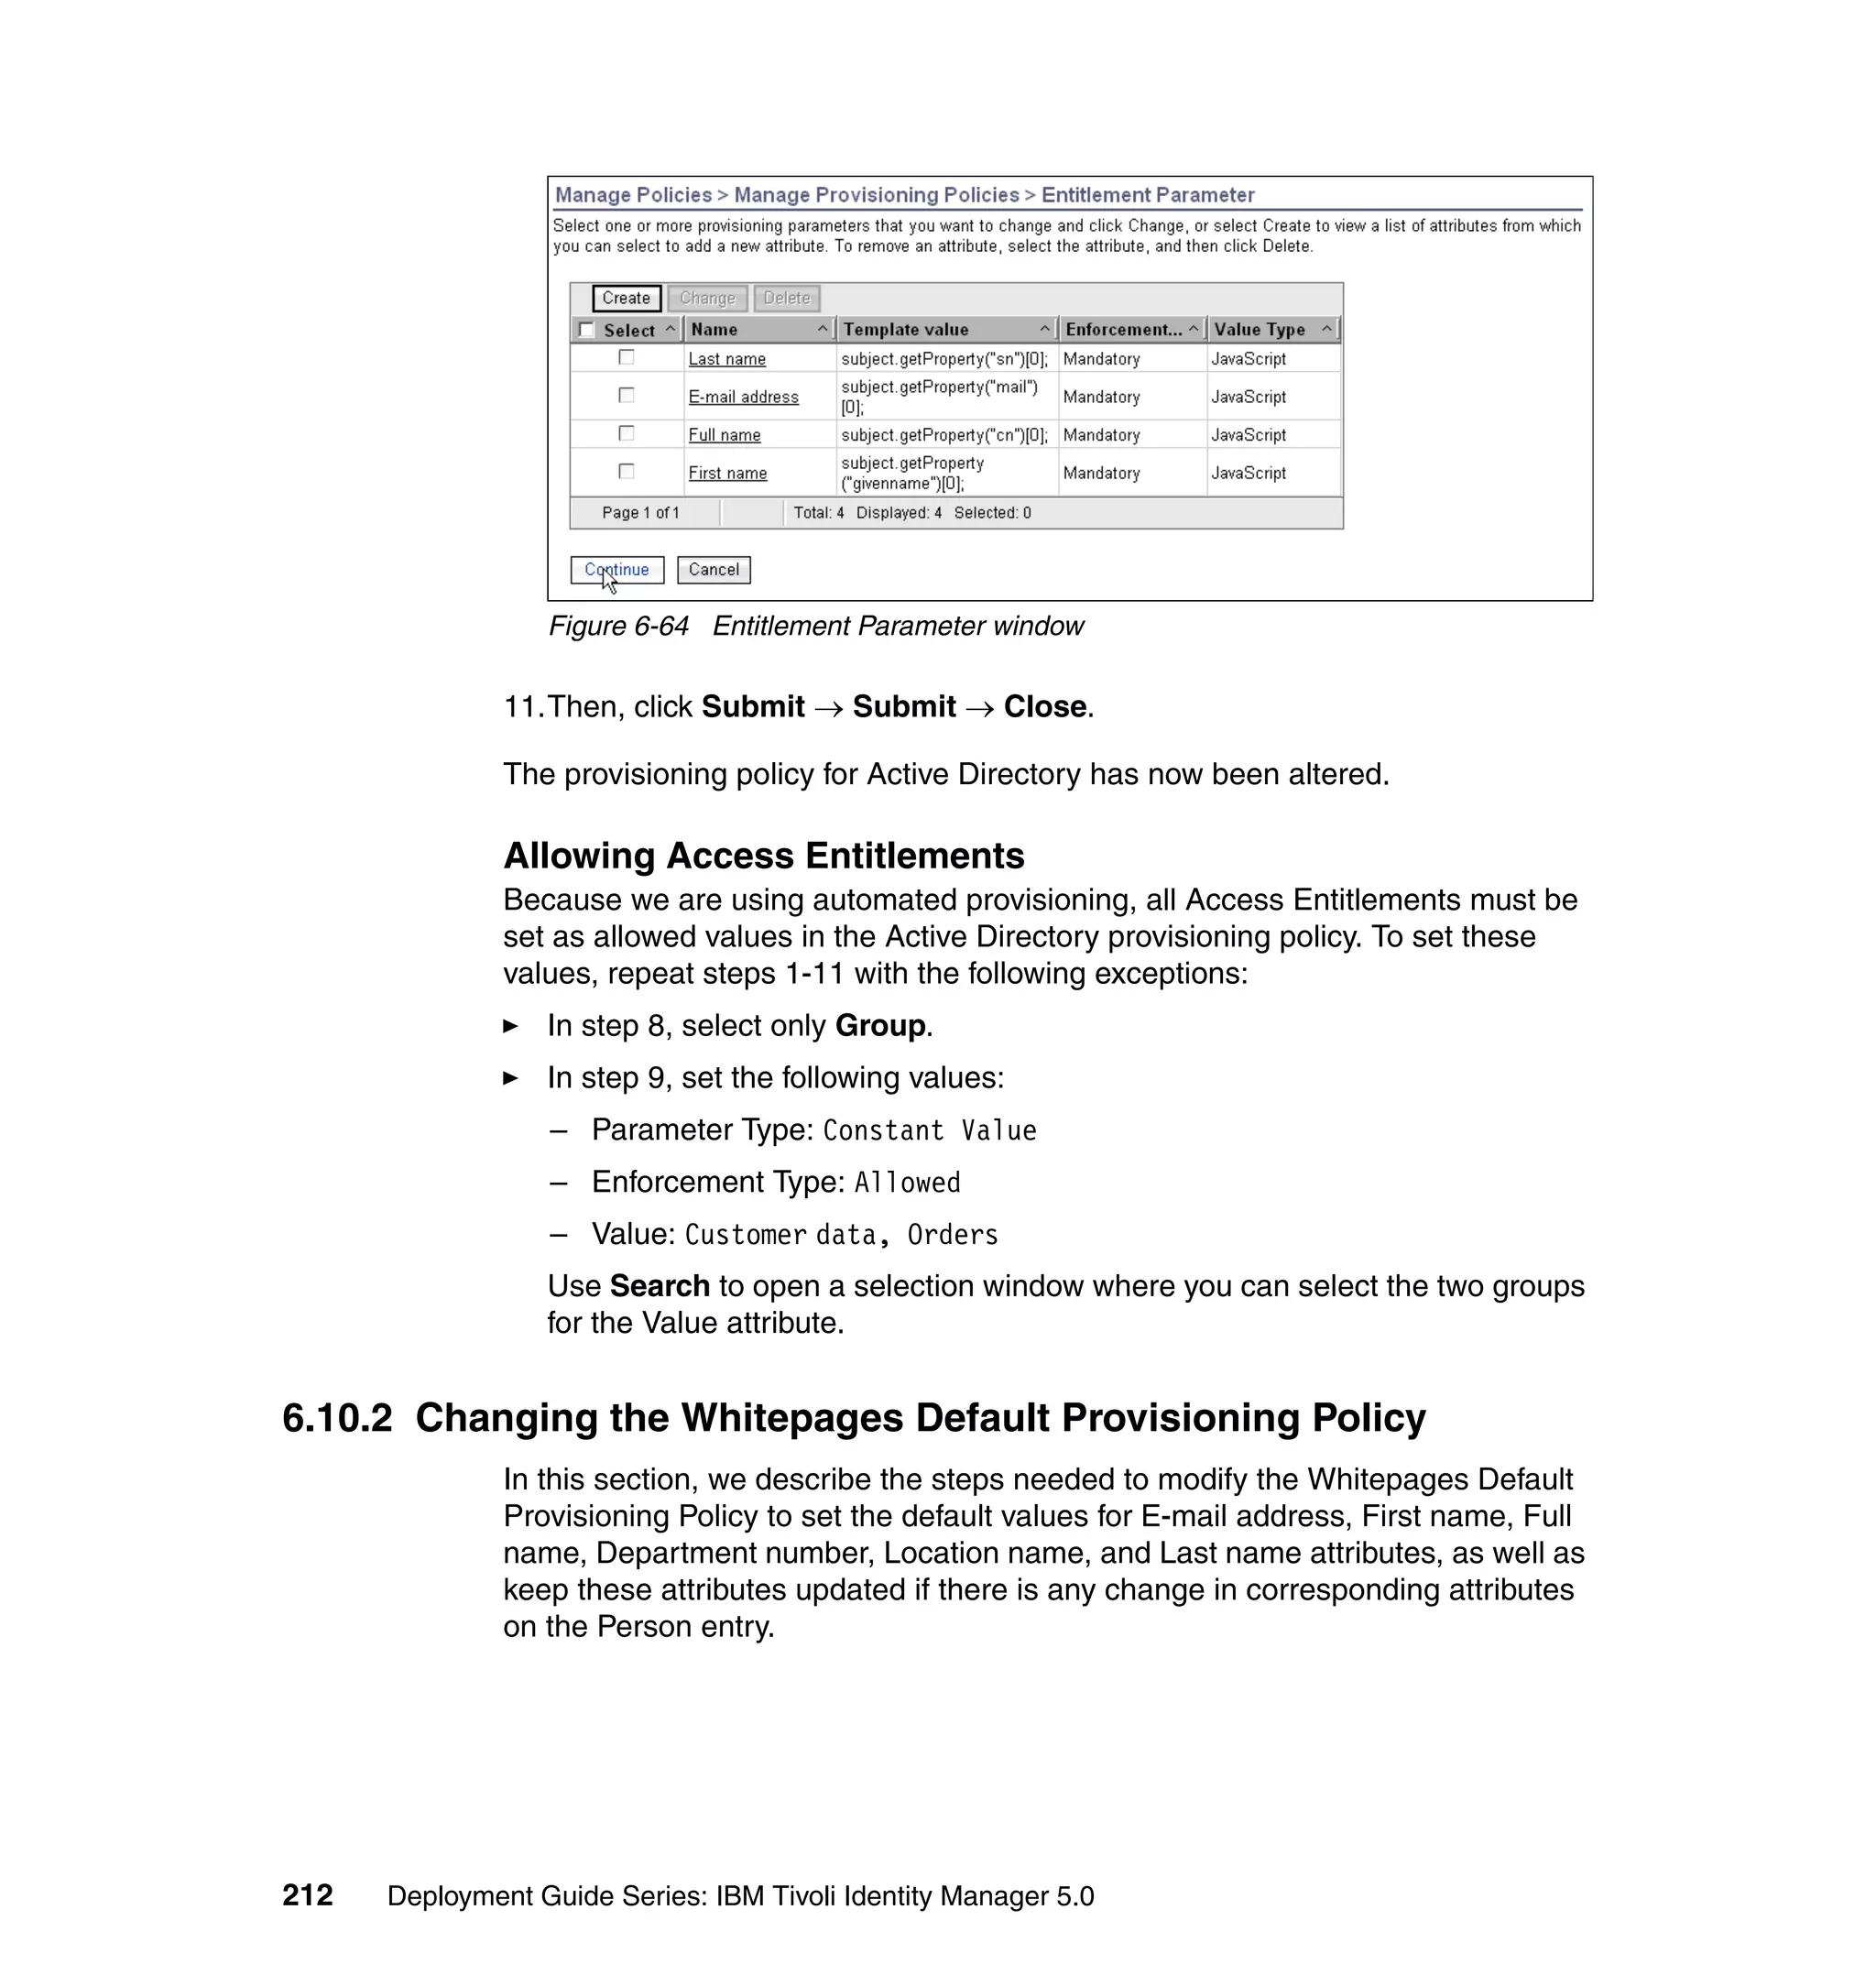
For each attribute, set the three available values, and click OK, as shown in
Figure 6-63 on page 211.
210 Deployment Guide Series: IBM Tivoli Identity Manager 5.0](https://image.slidesharecdn.com/deploymentguideseriesibmtivoliidentitymanager5-0sg246477-120523195924-phpapp02/75/Deployment-guide-series-ibm-tivoli-identity-manager-5-0-sg246477-228-2048.jpg)
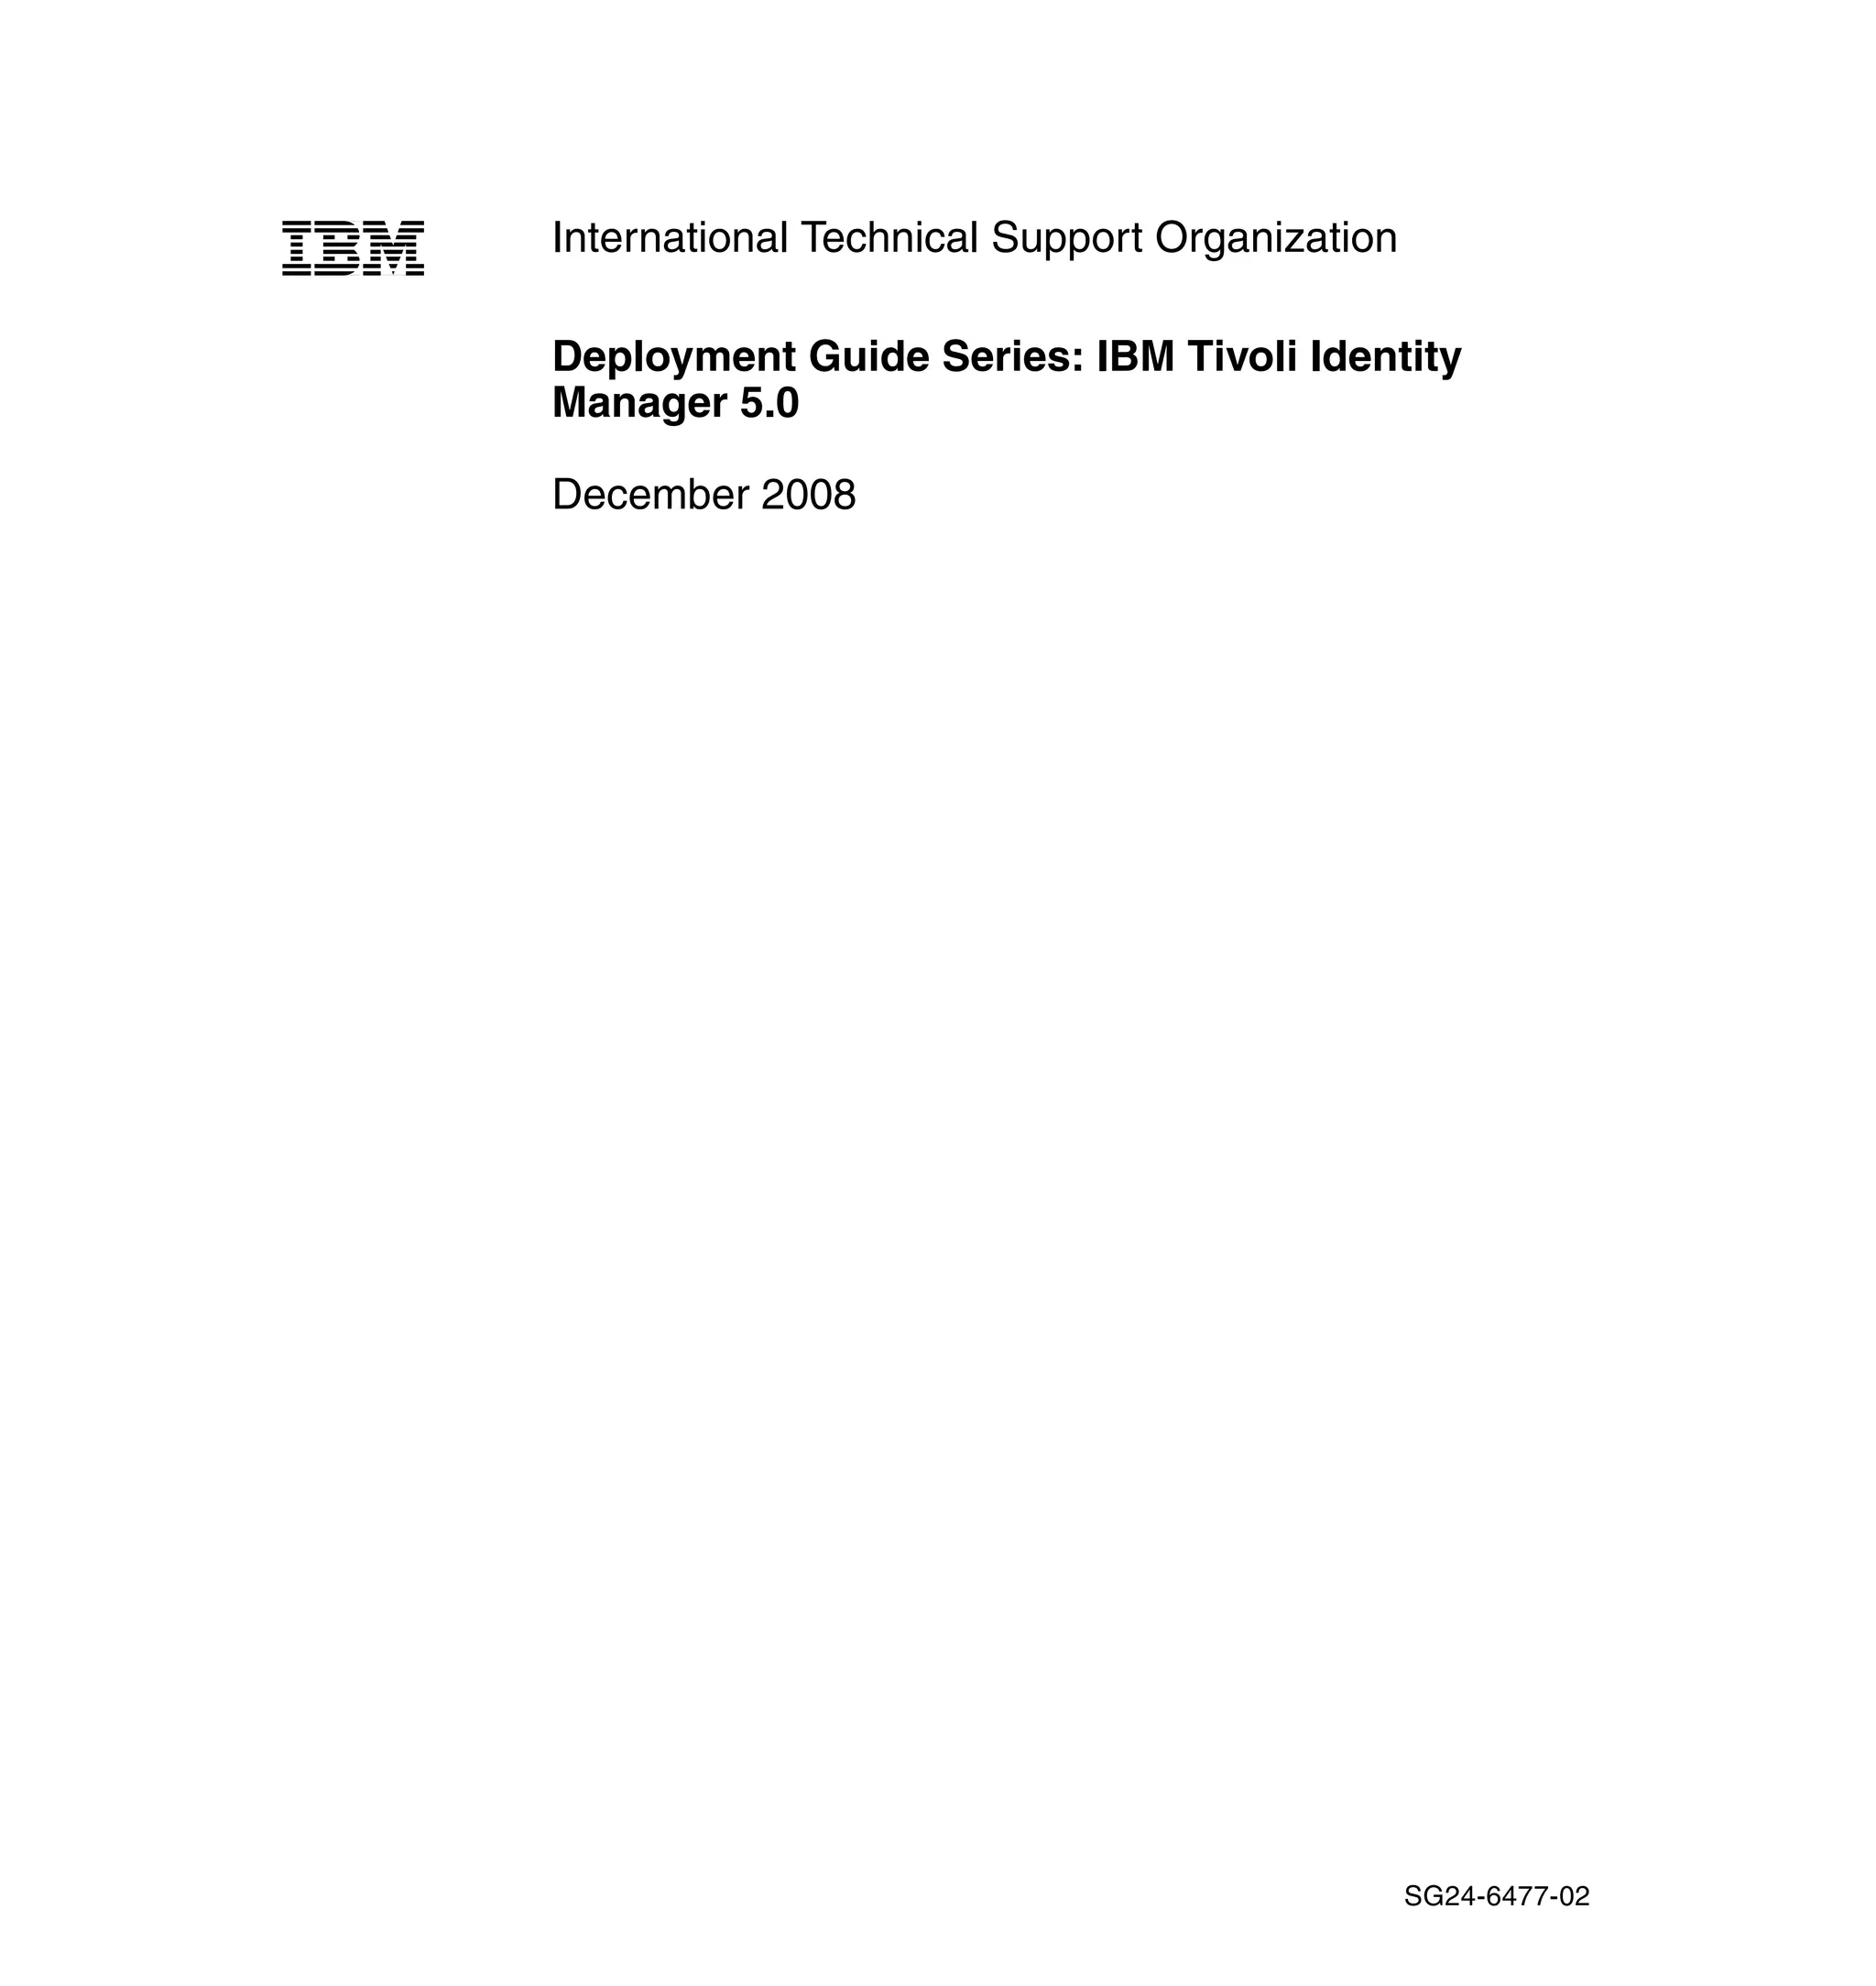
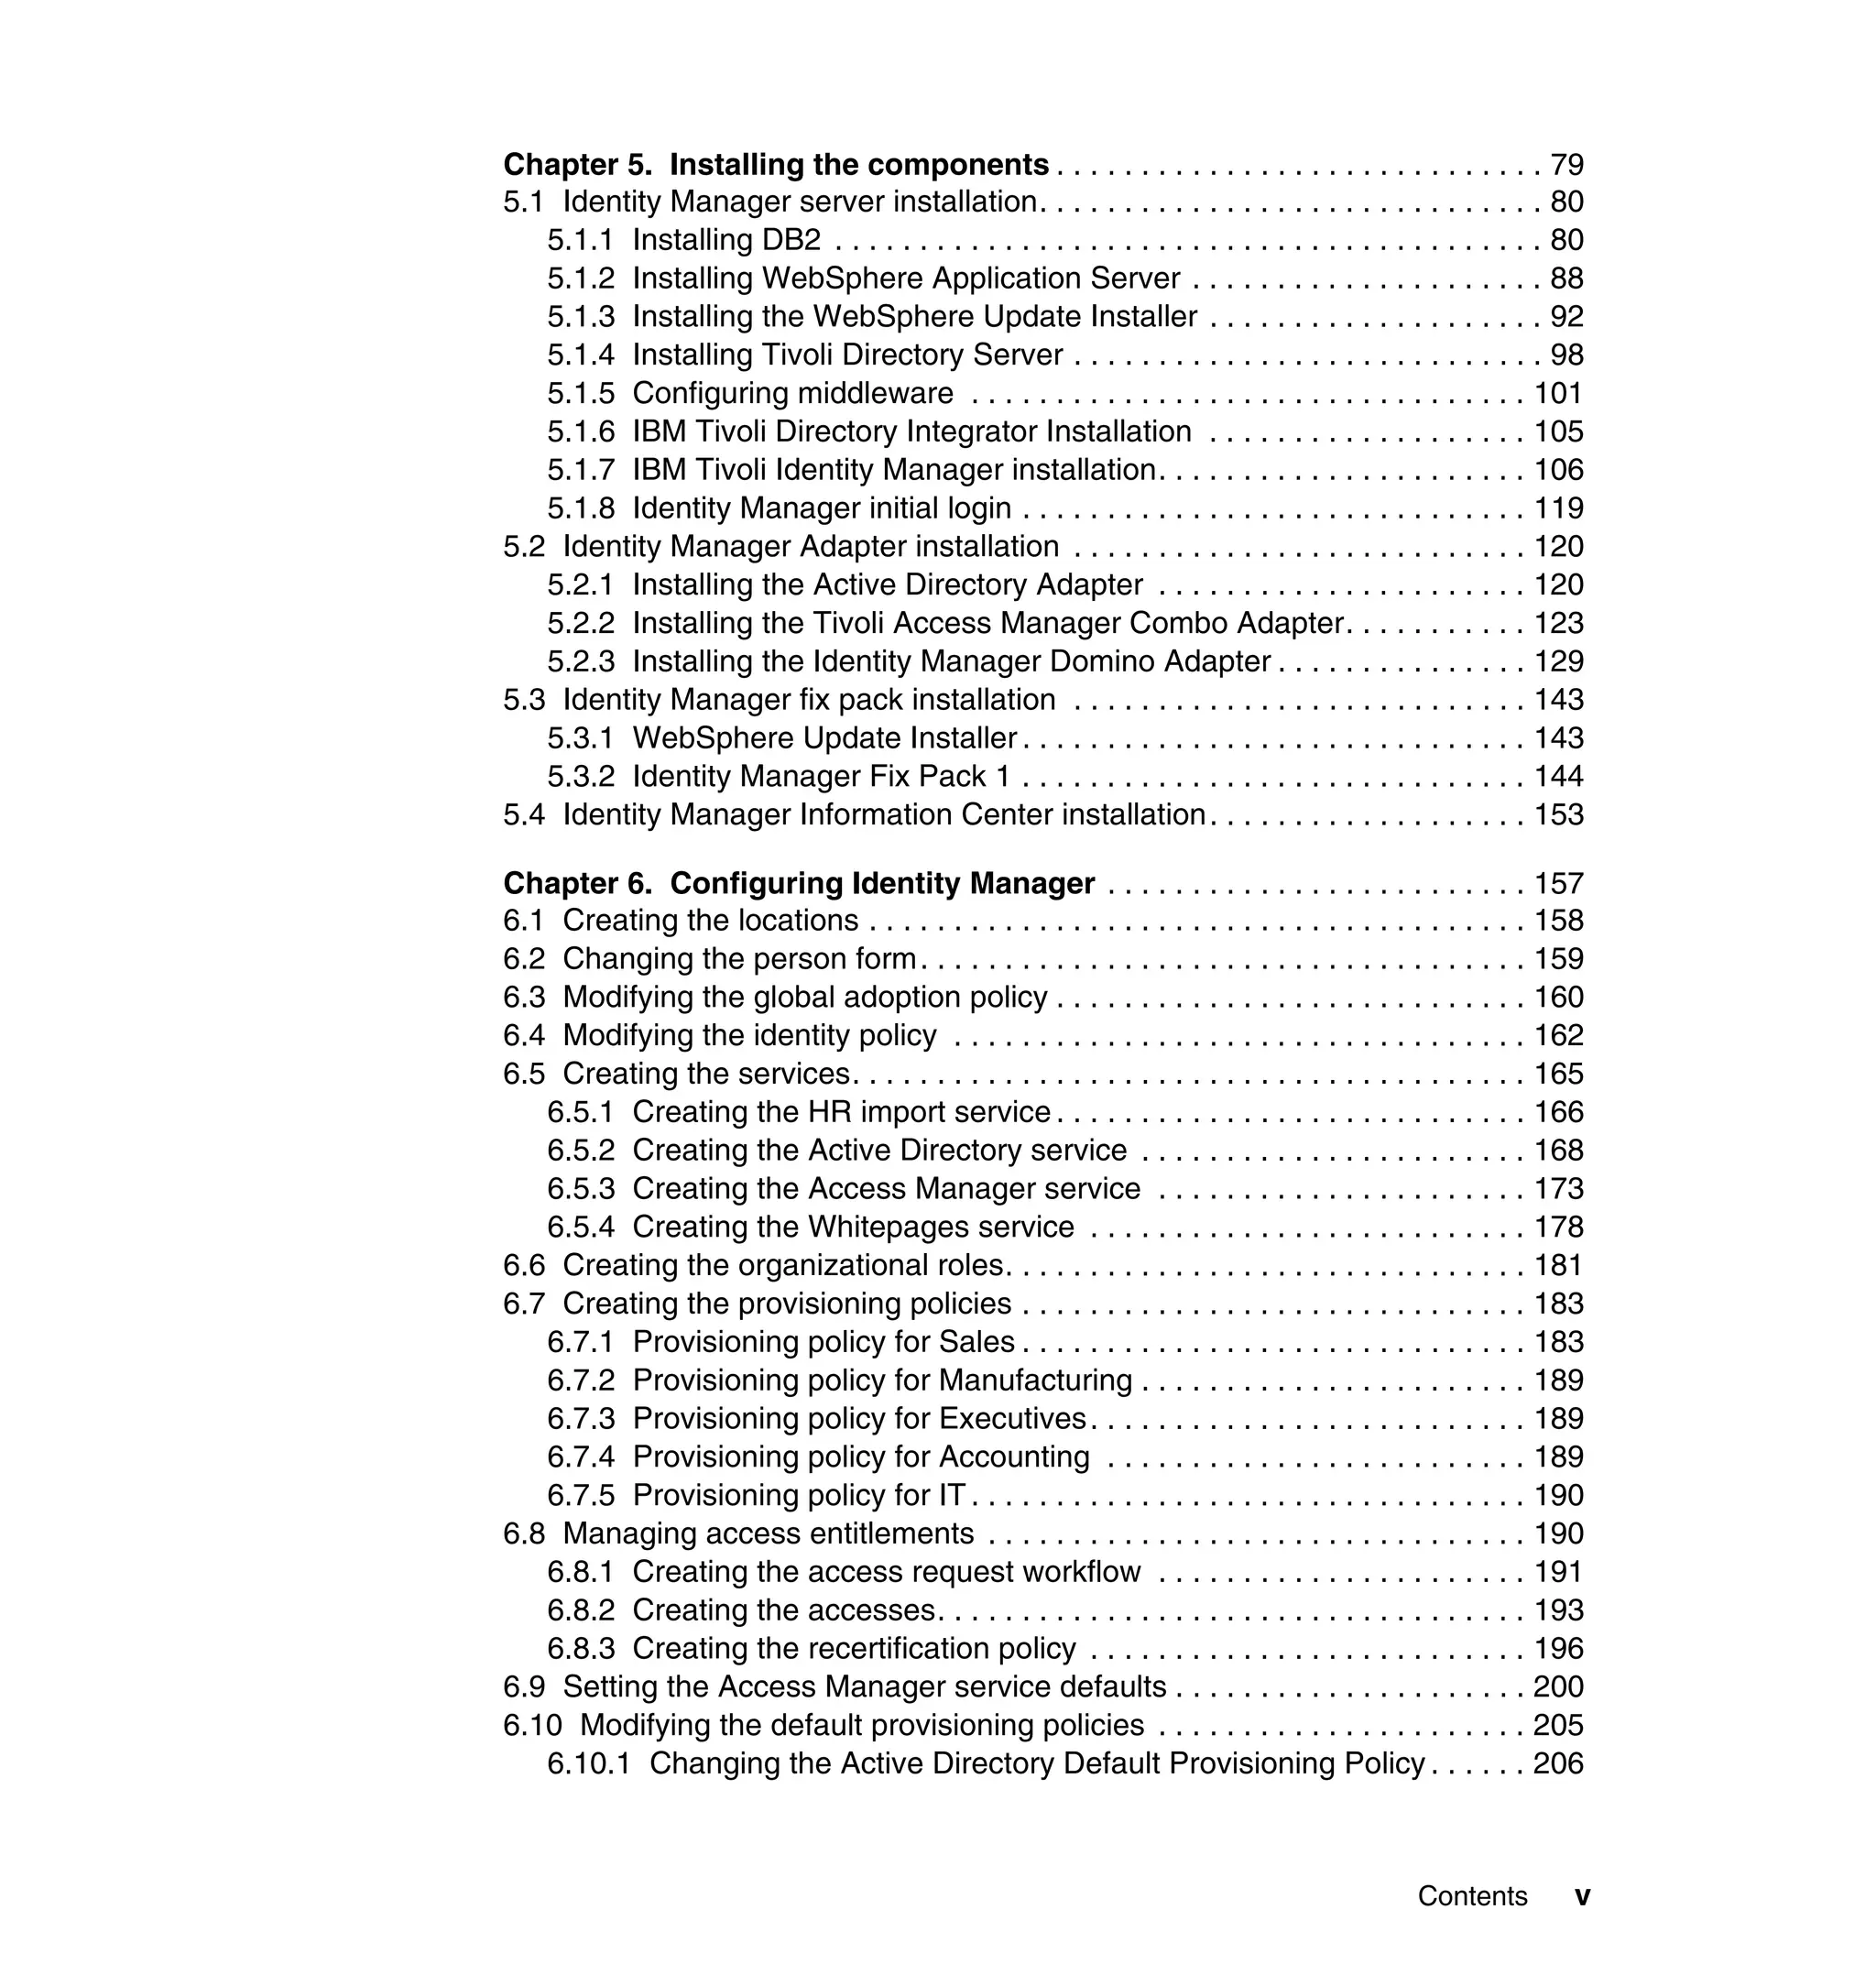
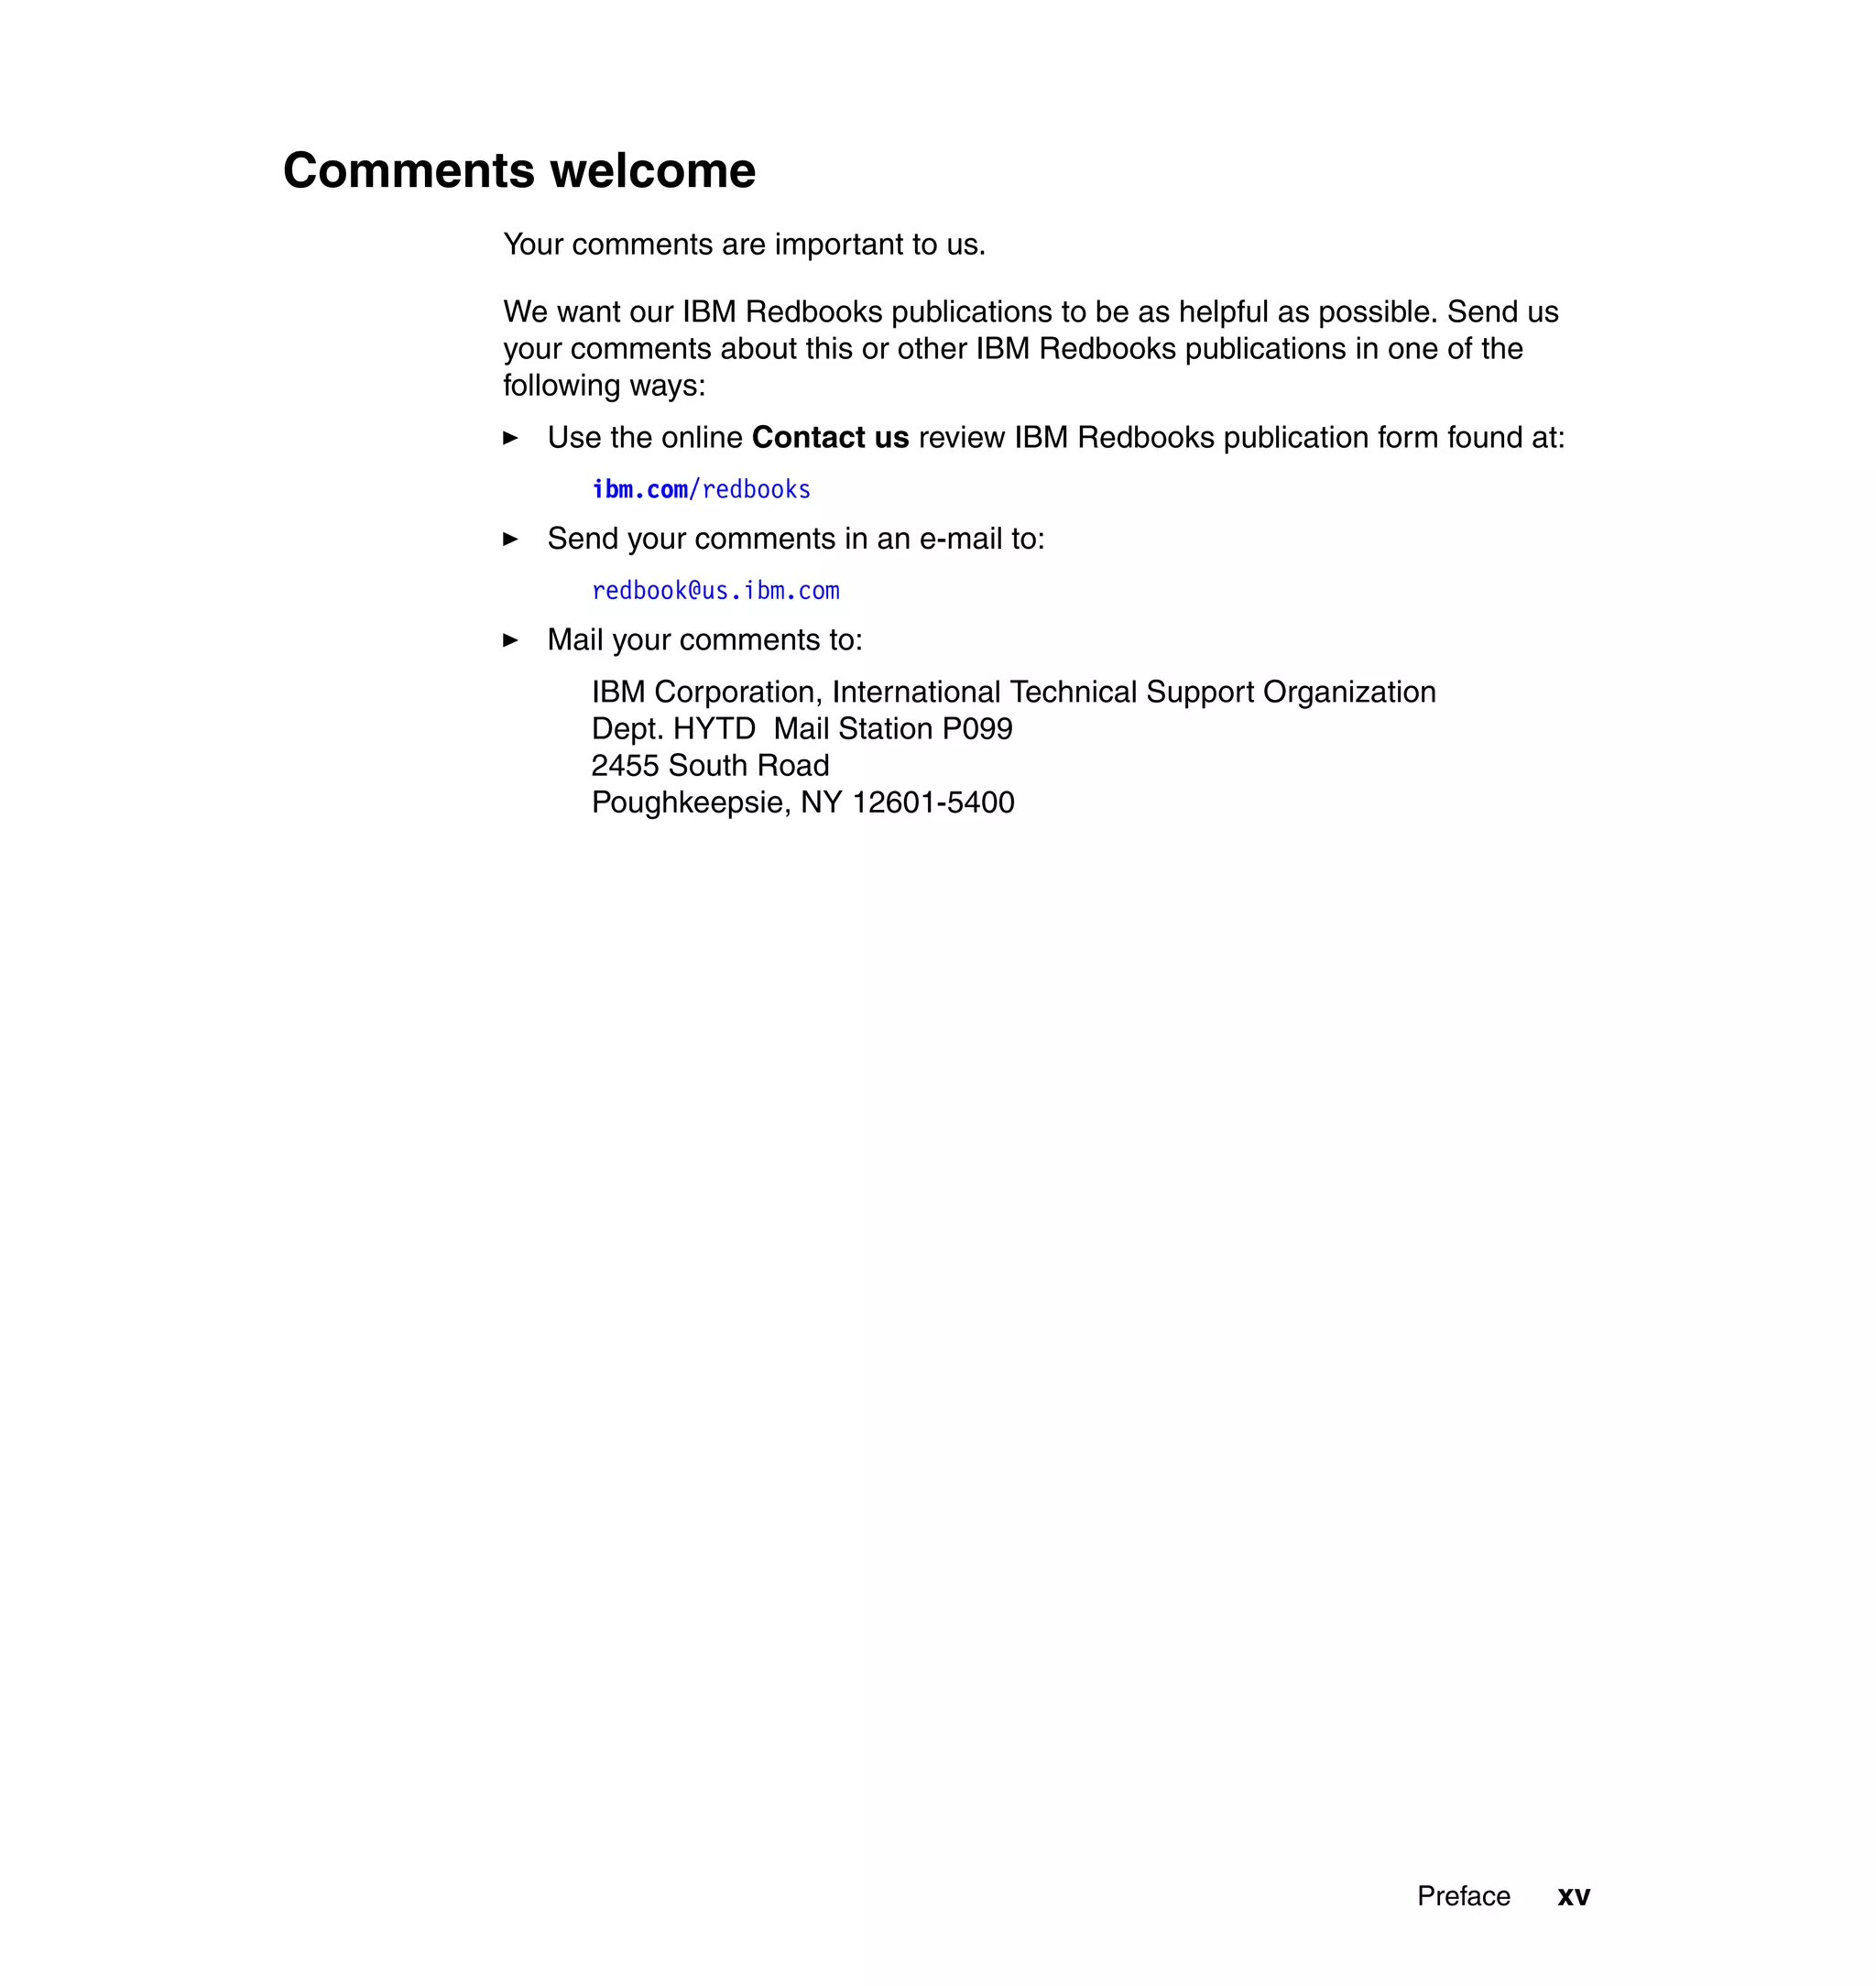
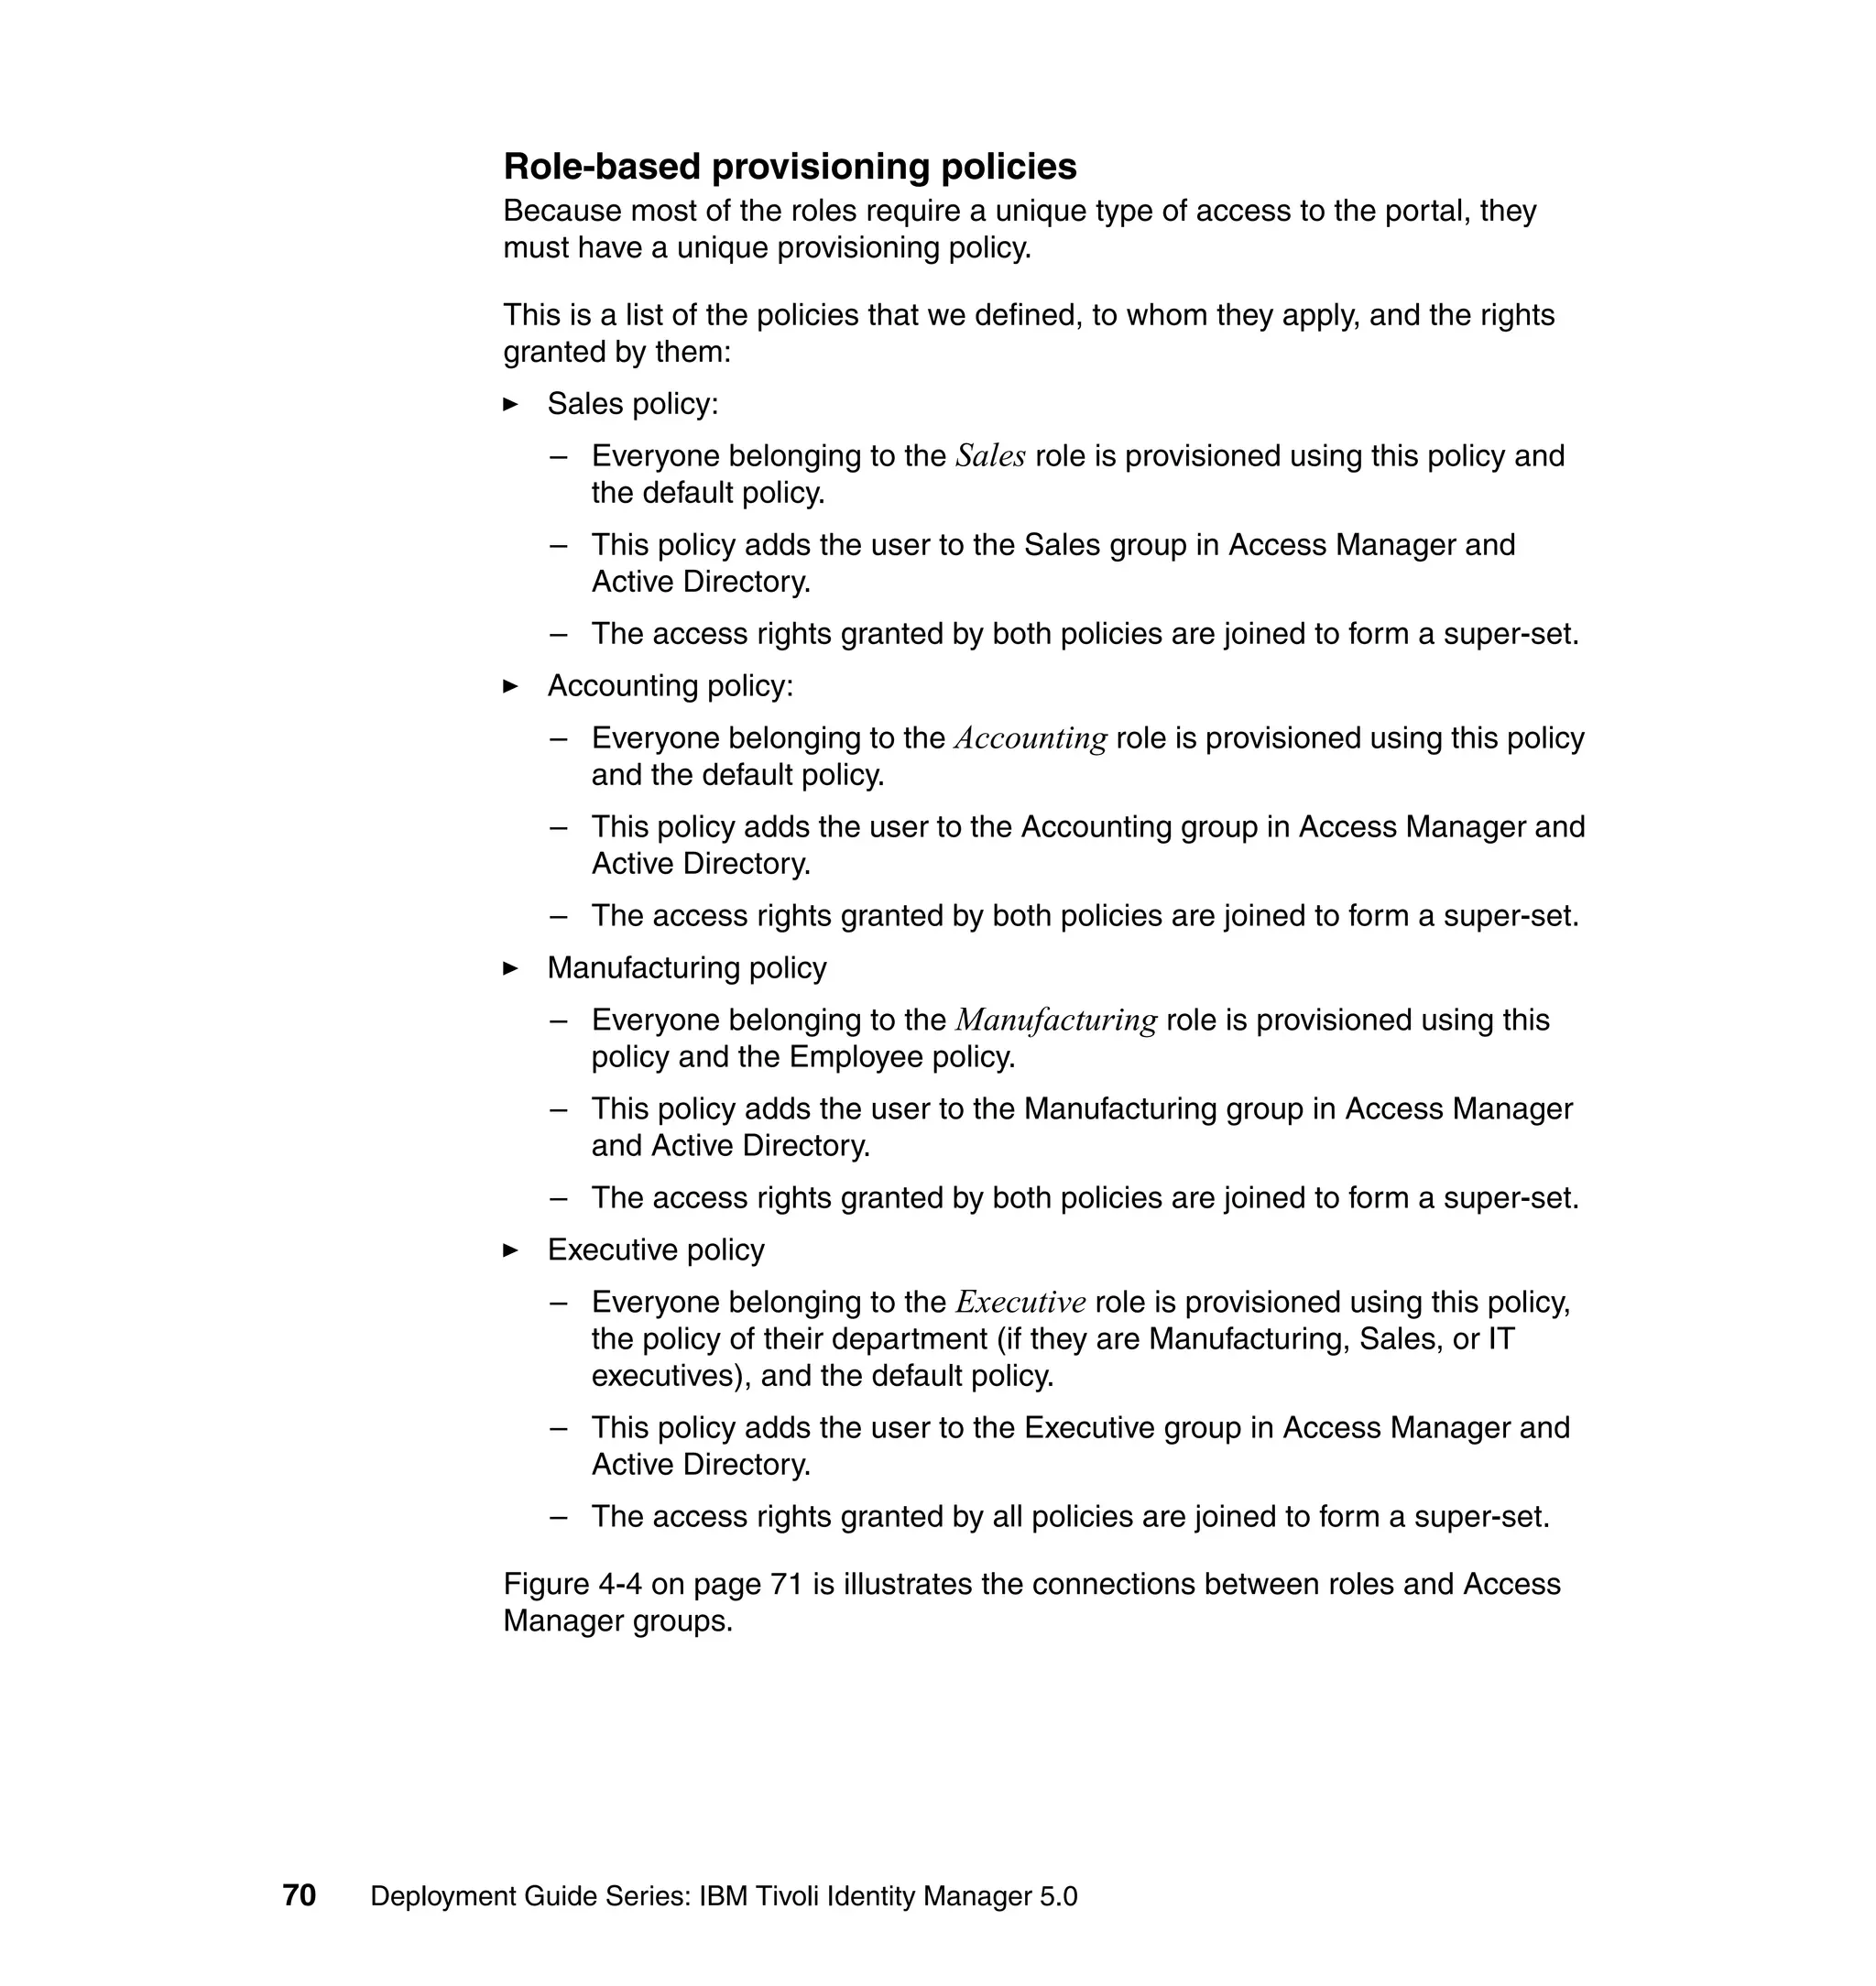
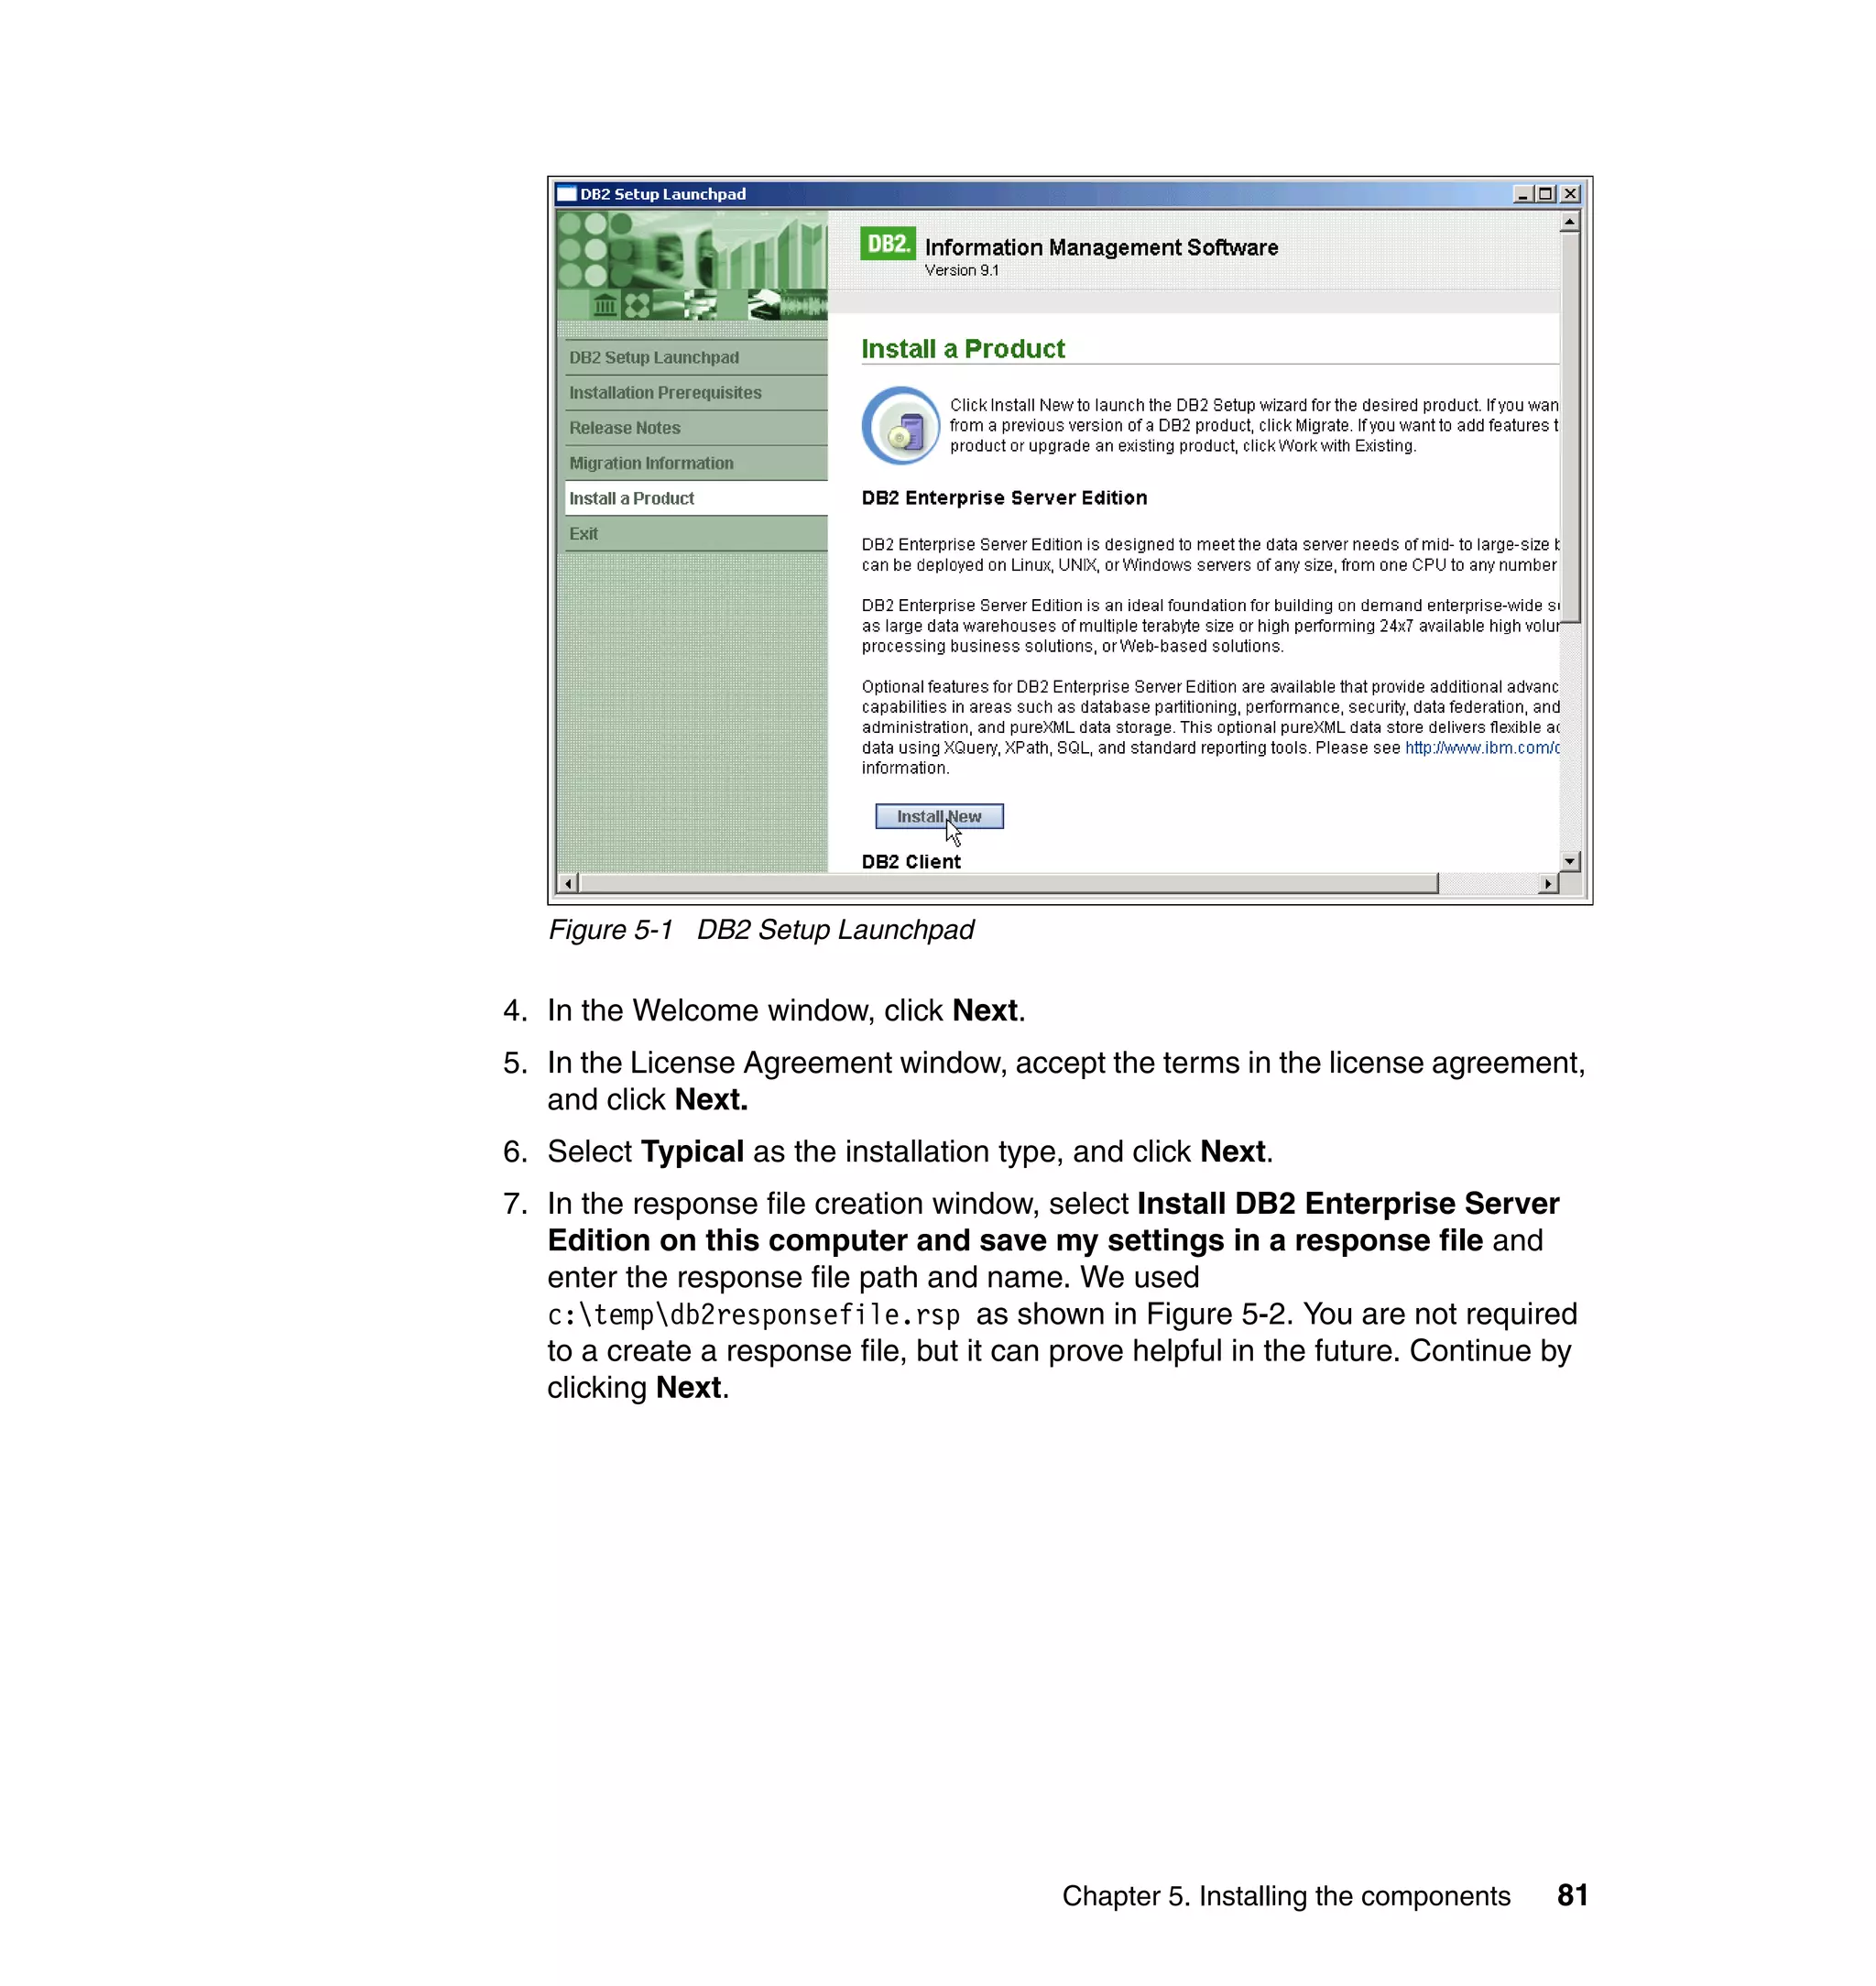
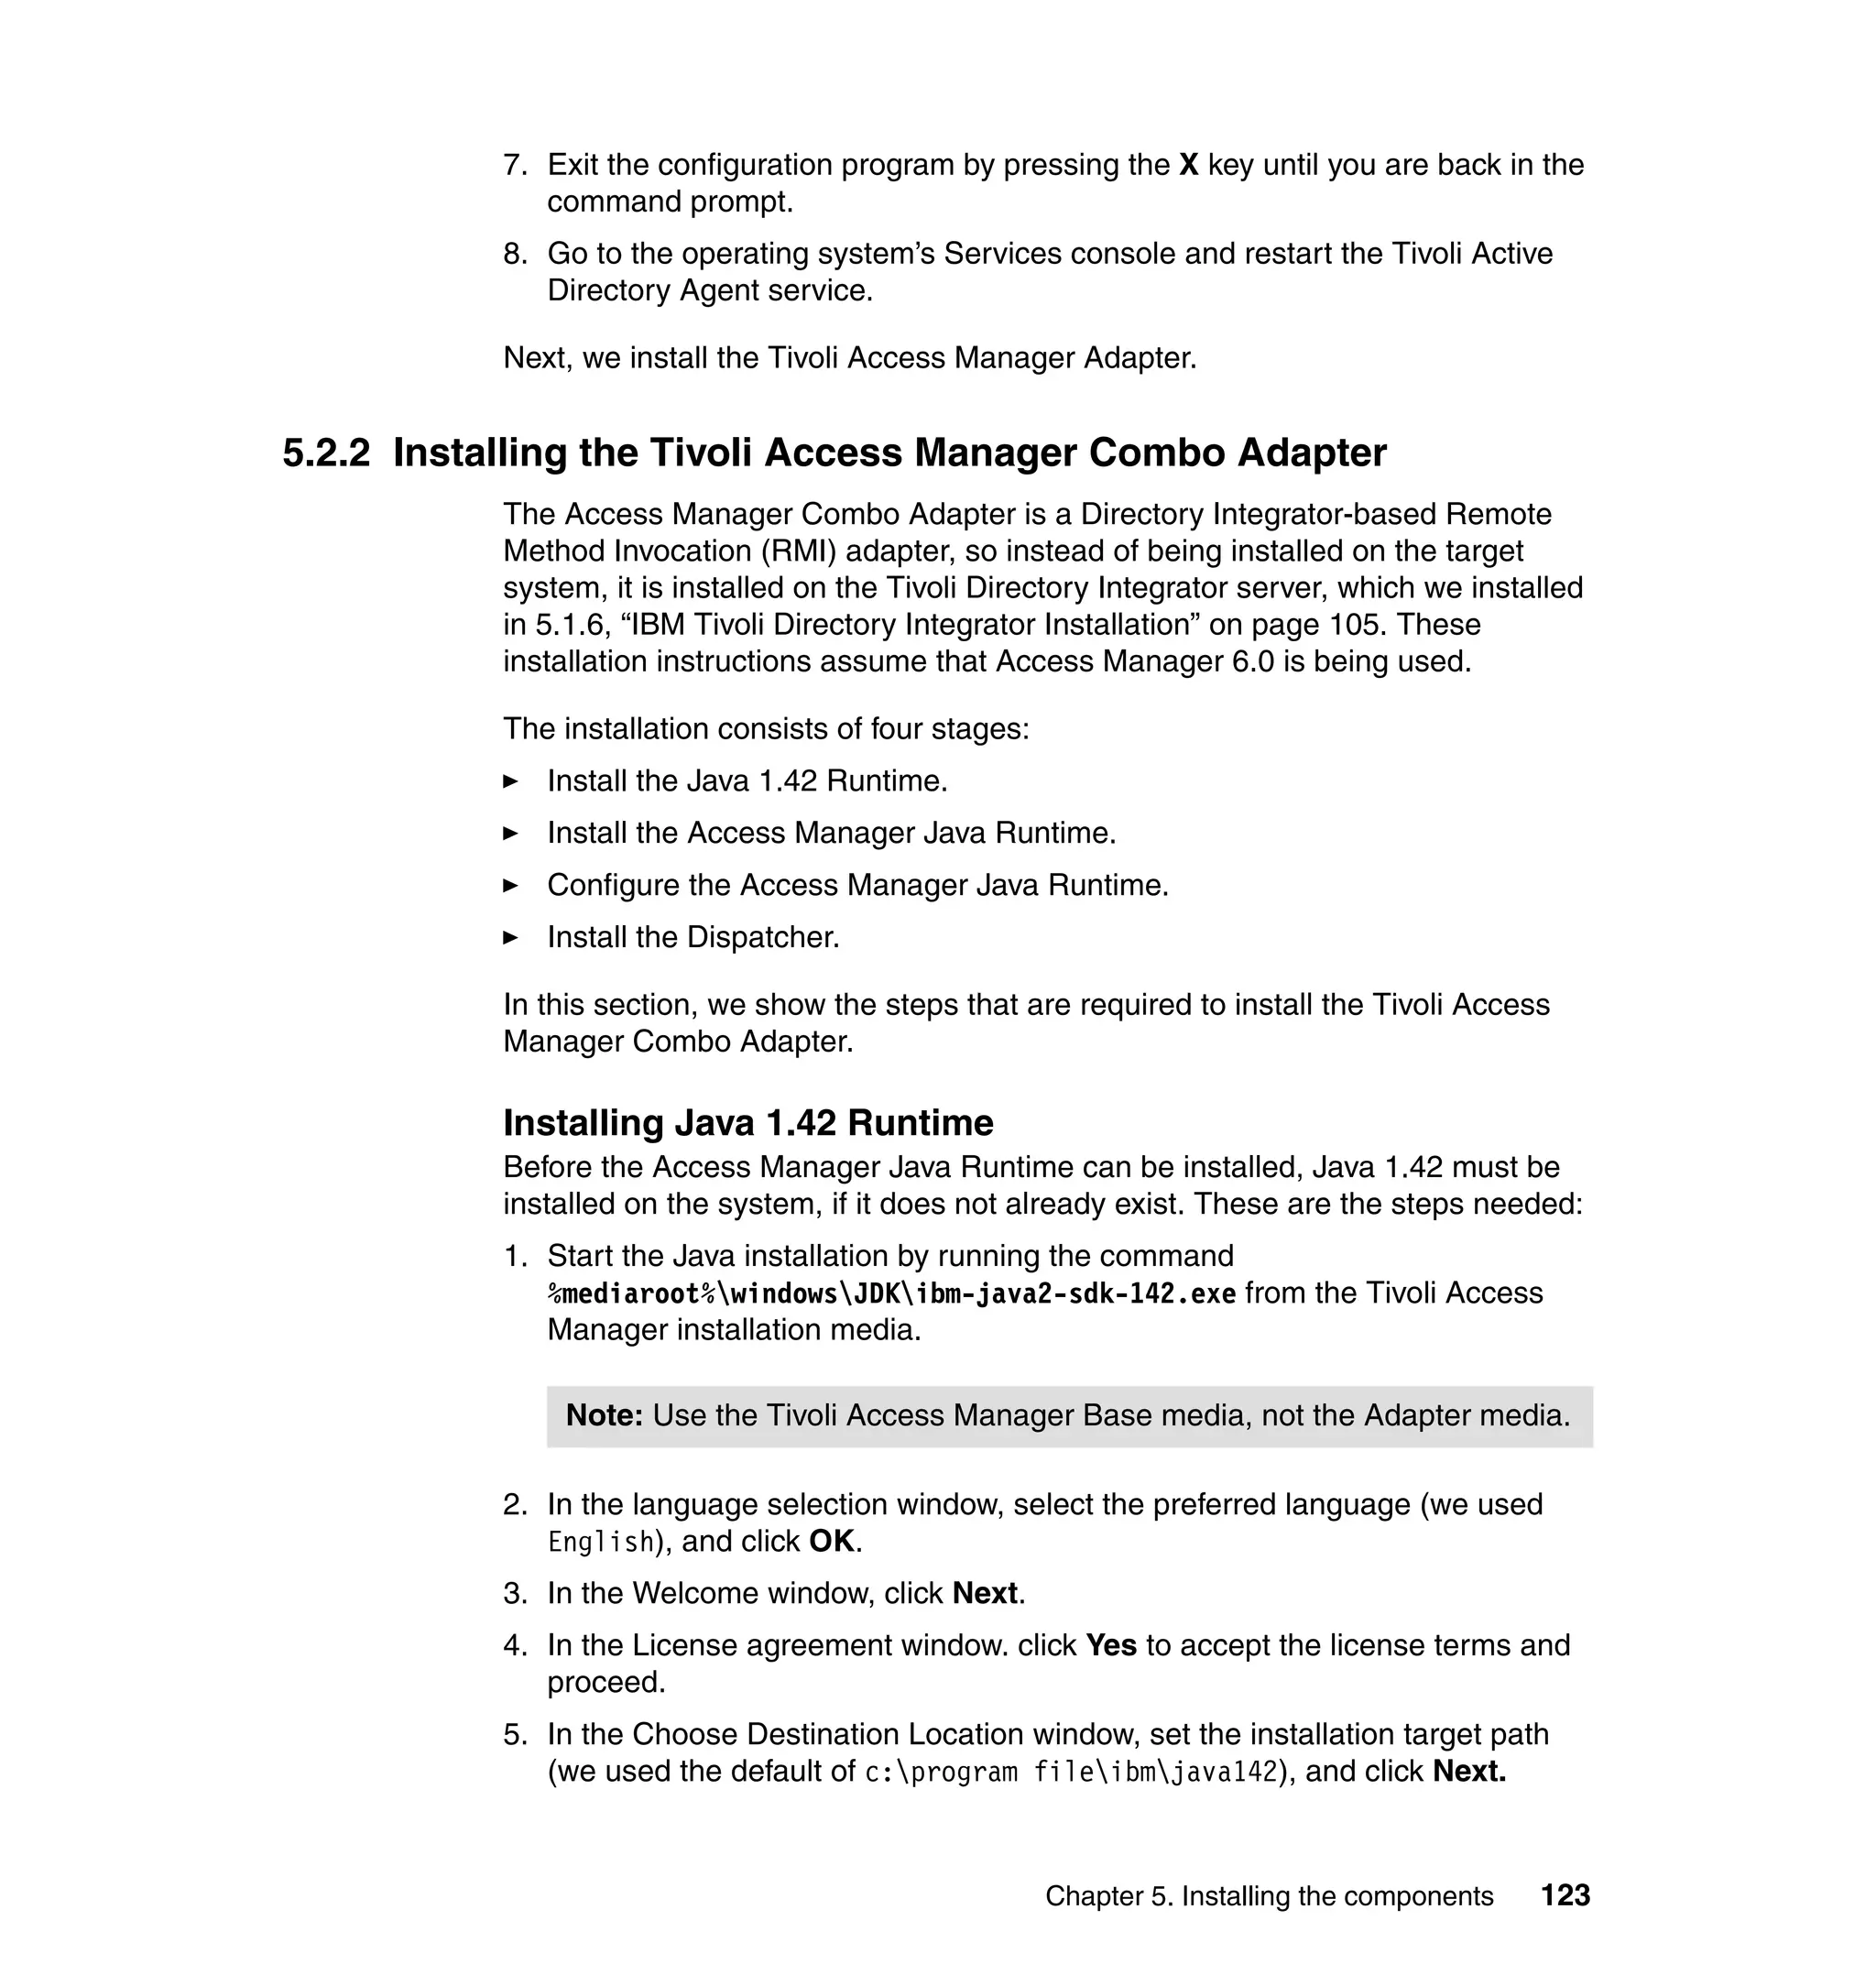
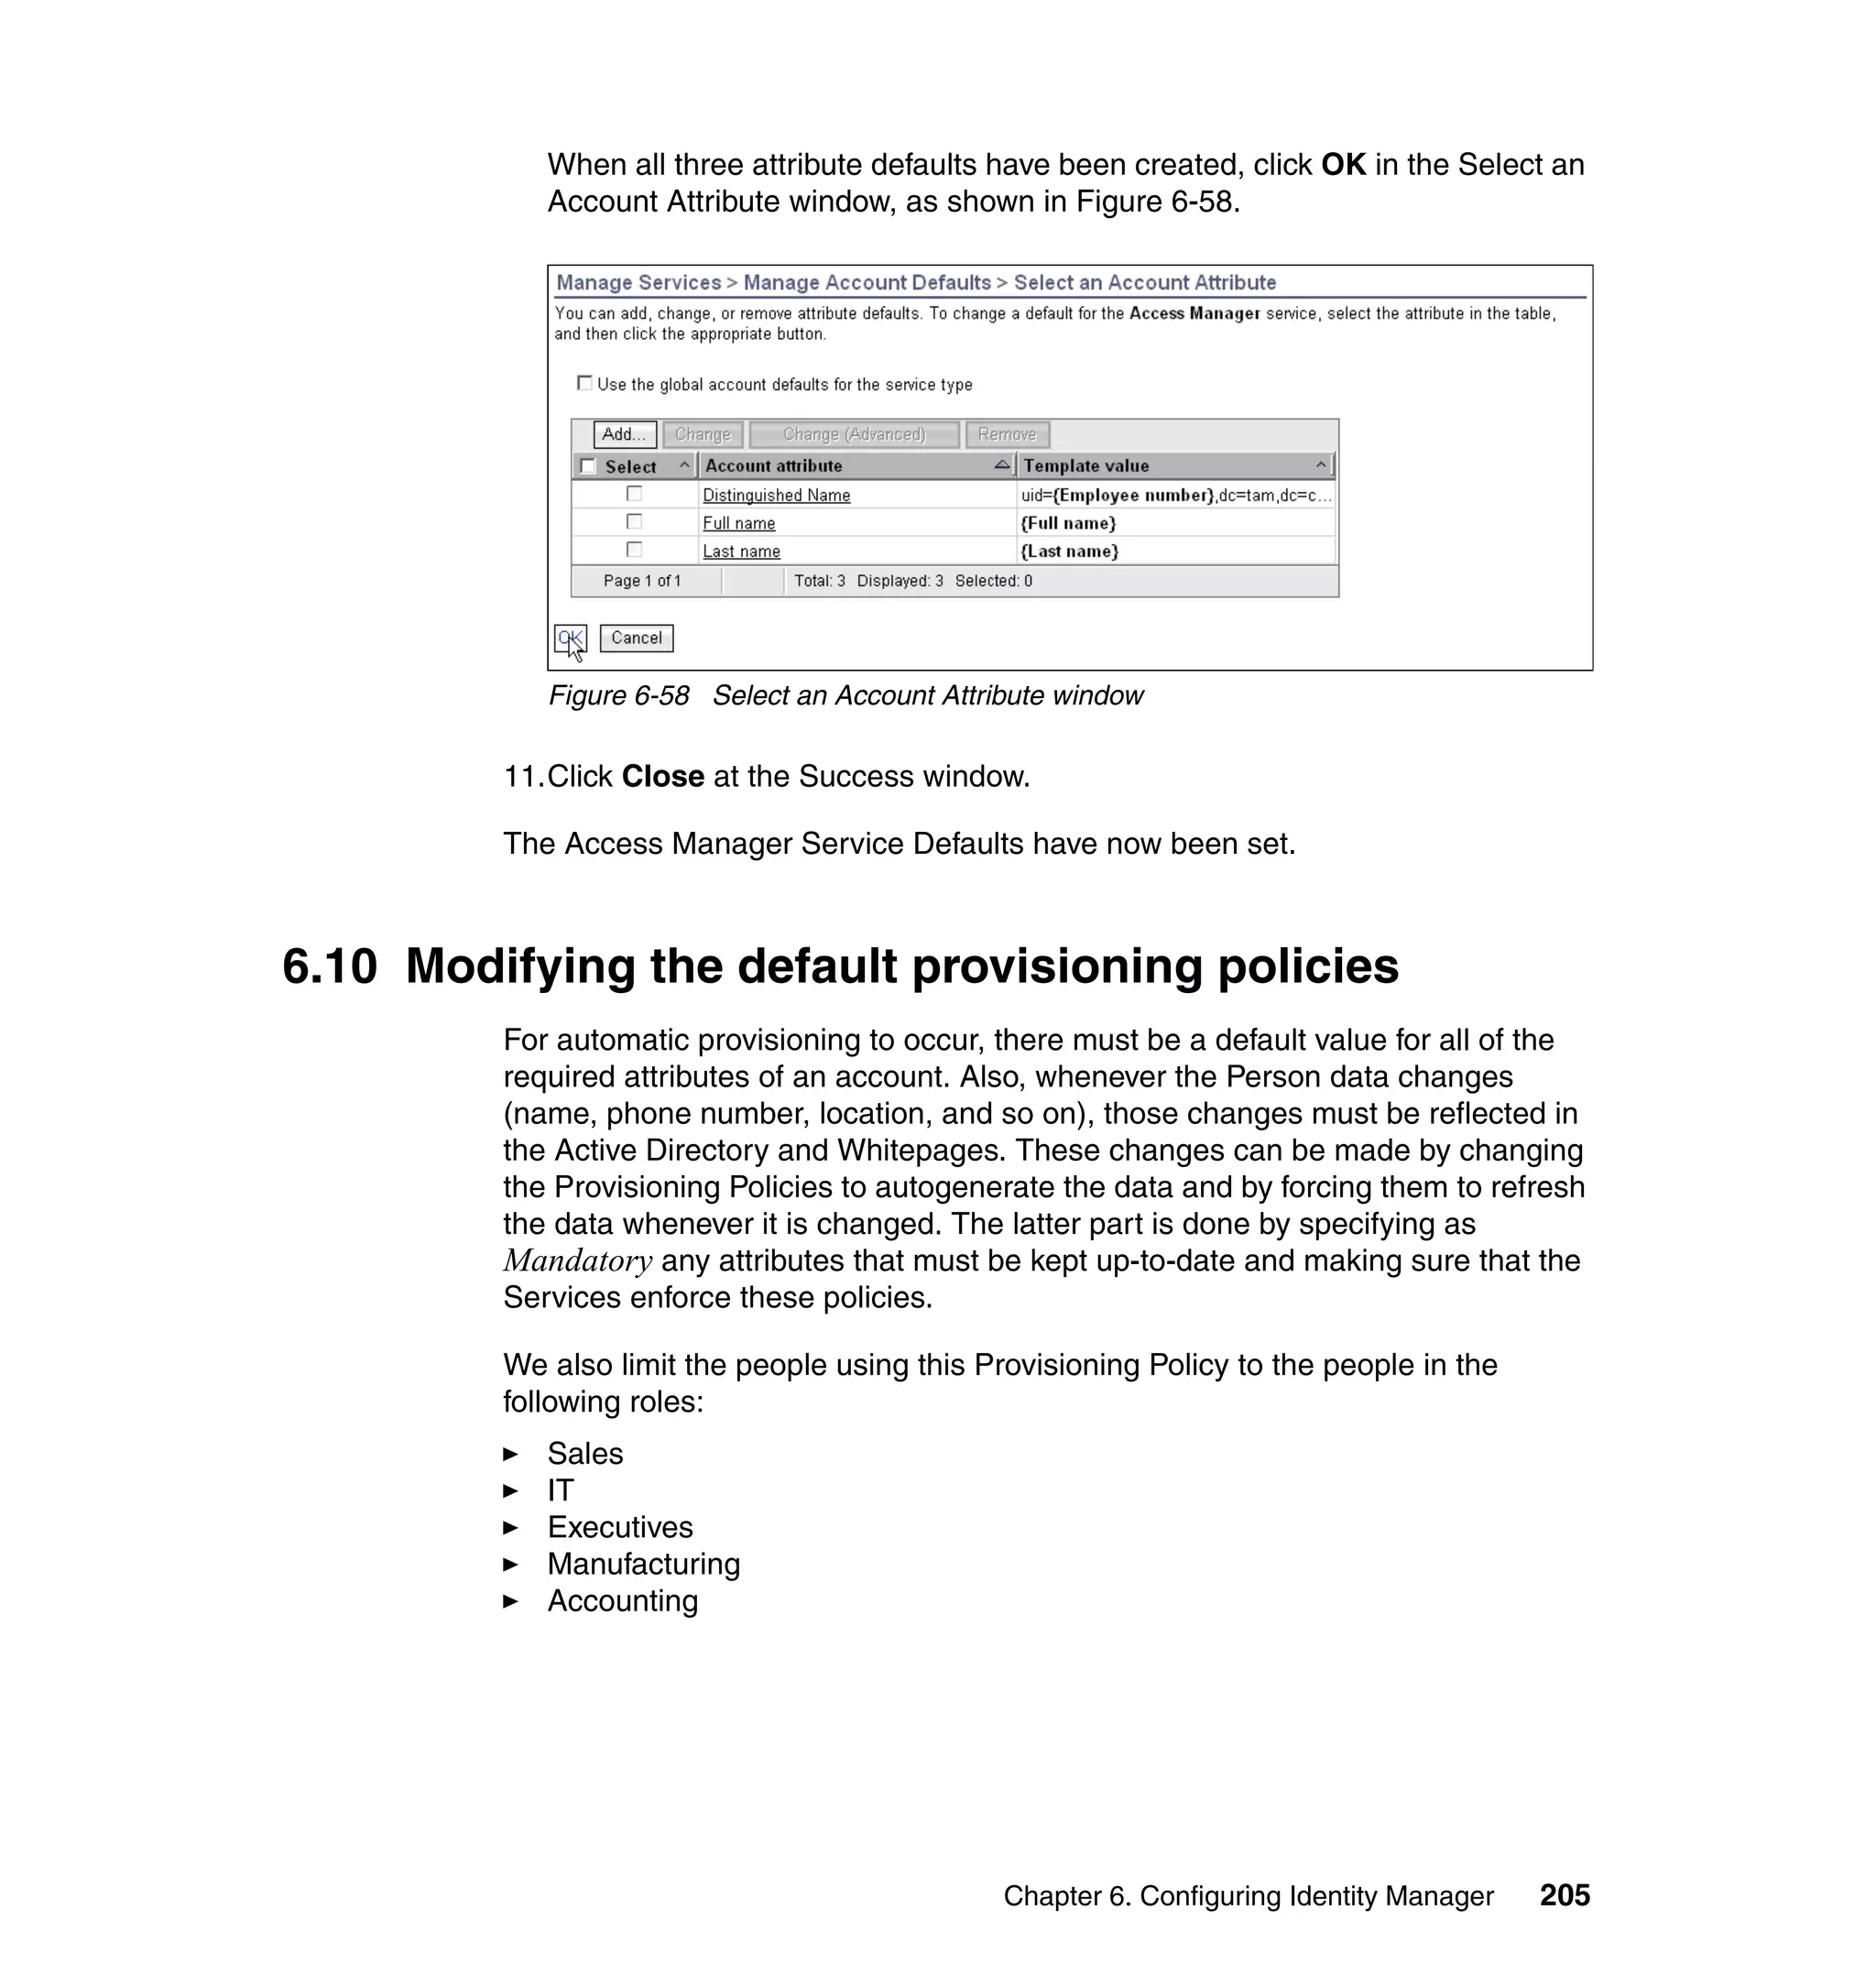
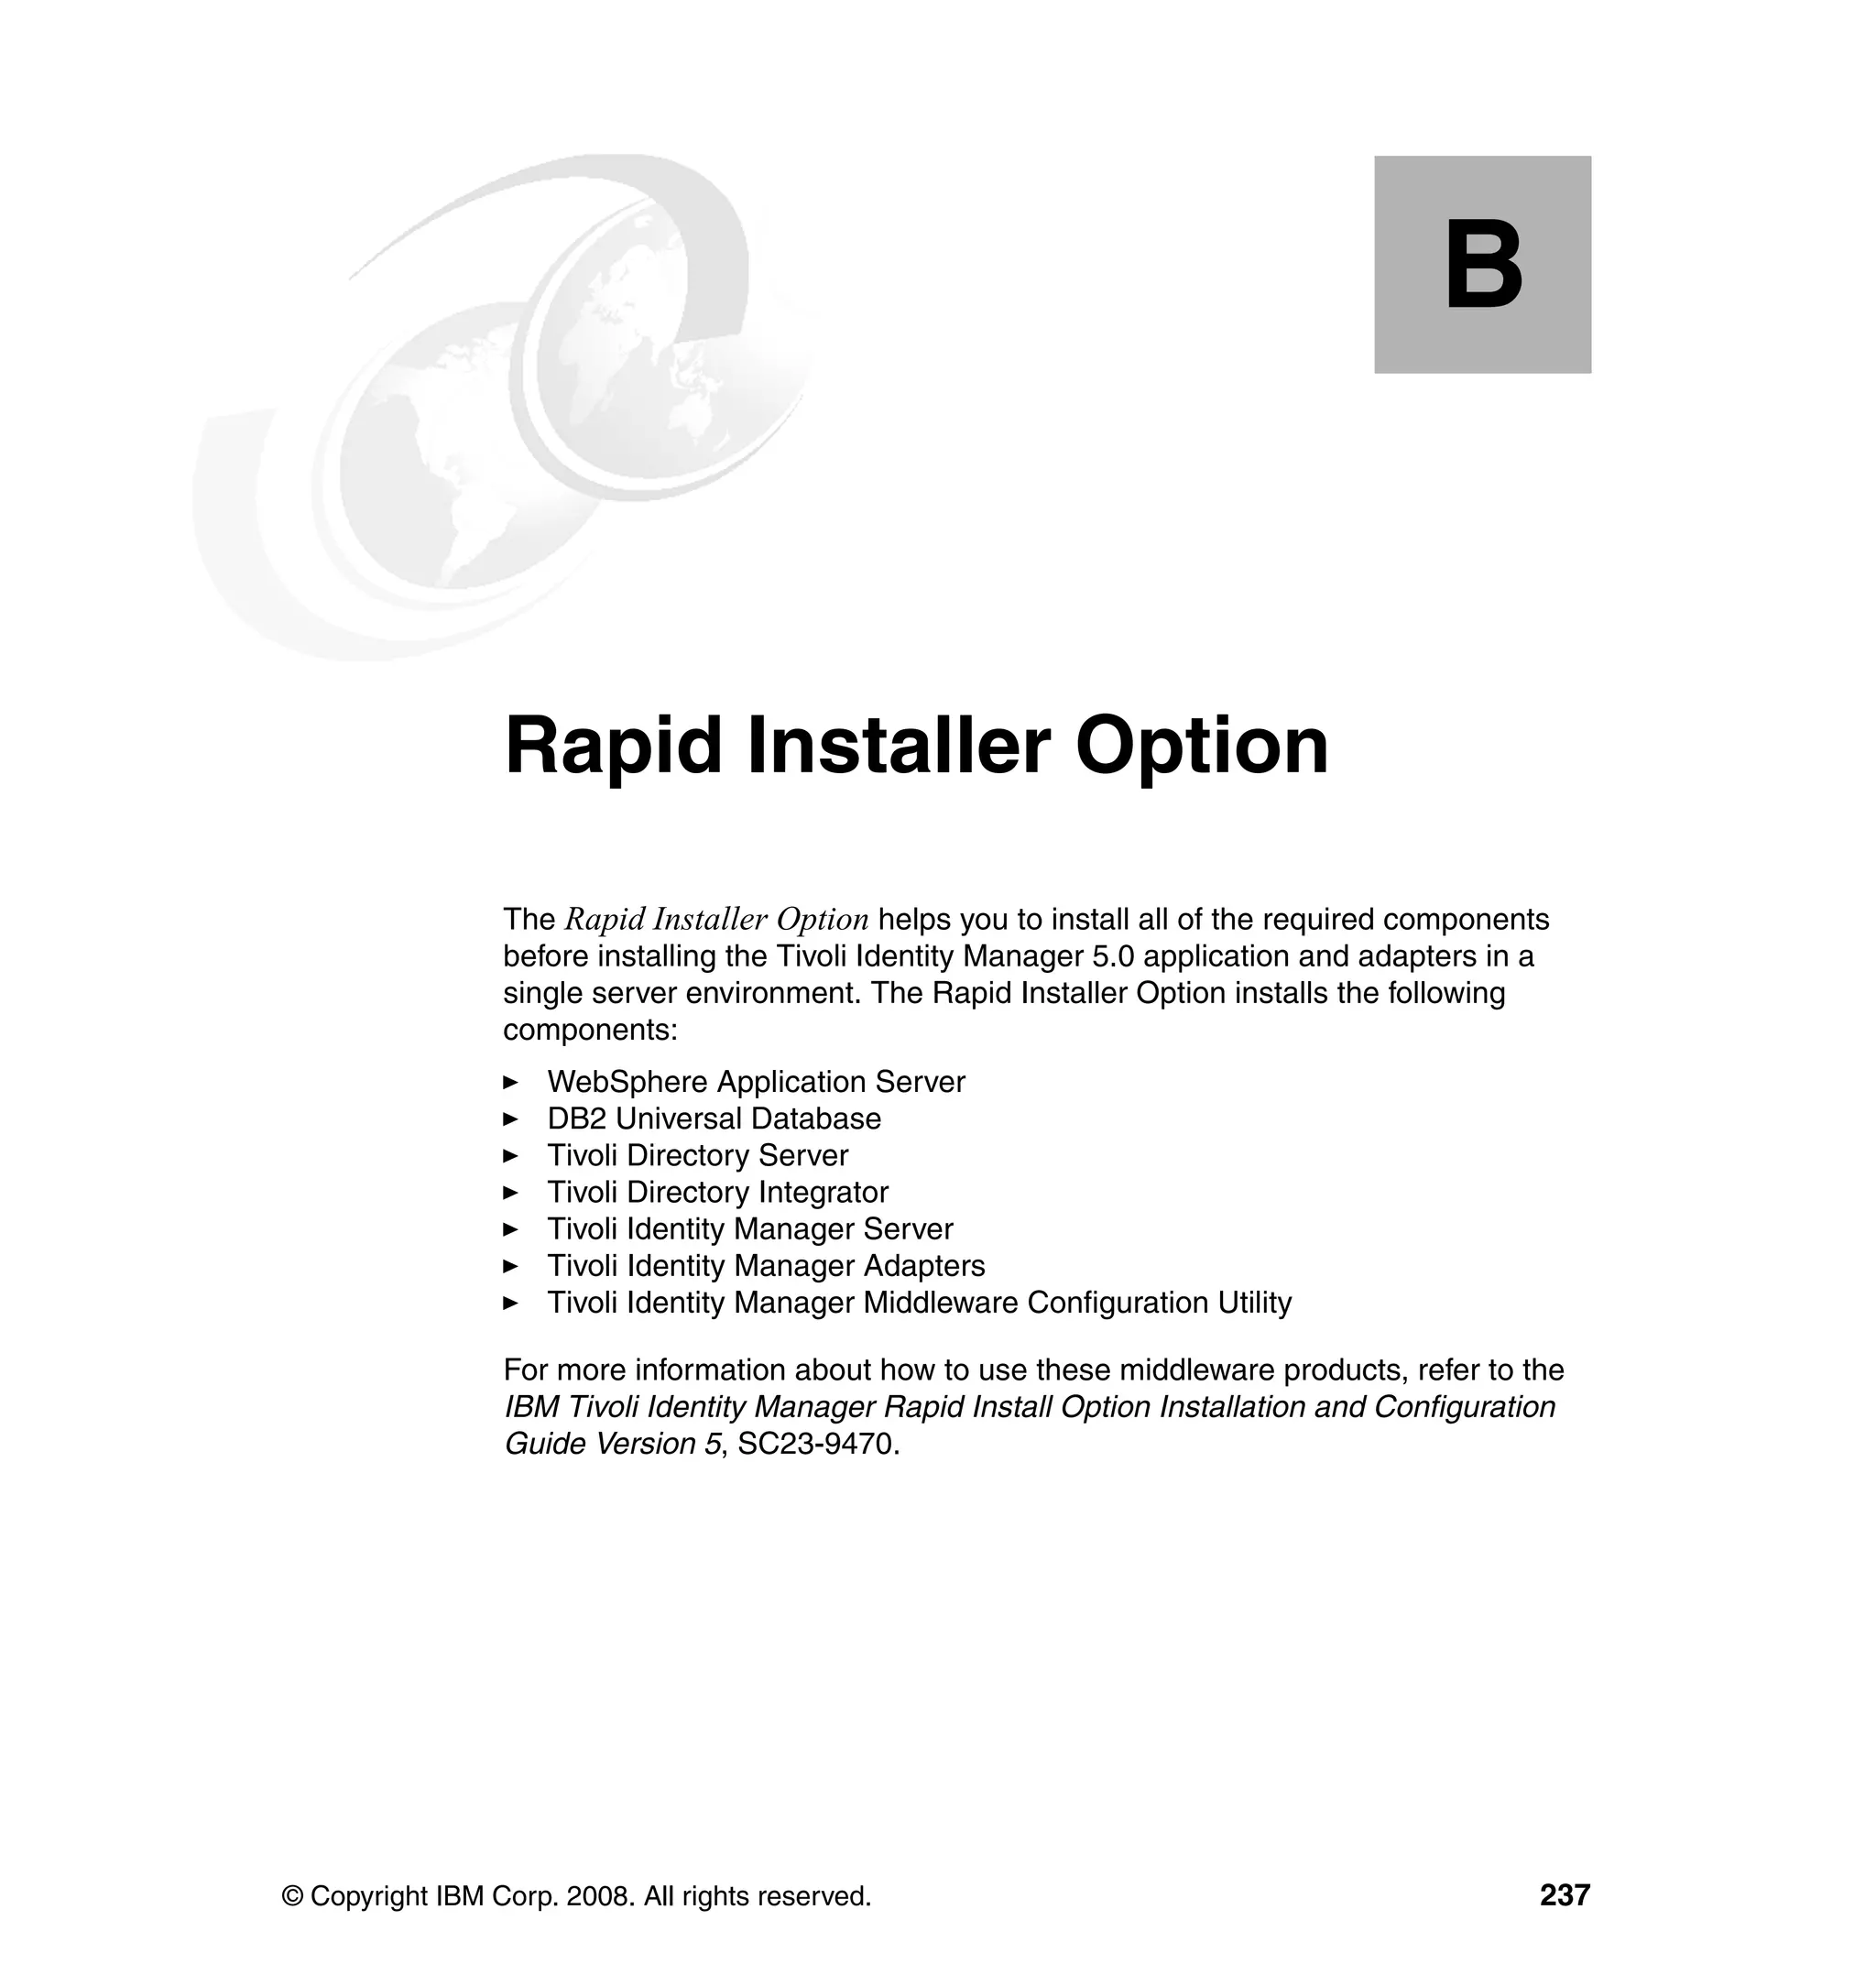
![We also limit the people using this Provisioning Policy to the people in the
following roles:
Sales
IT
Executives
Manufacturing
Accounting
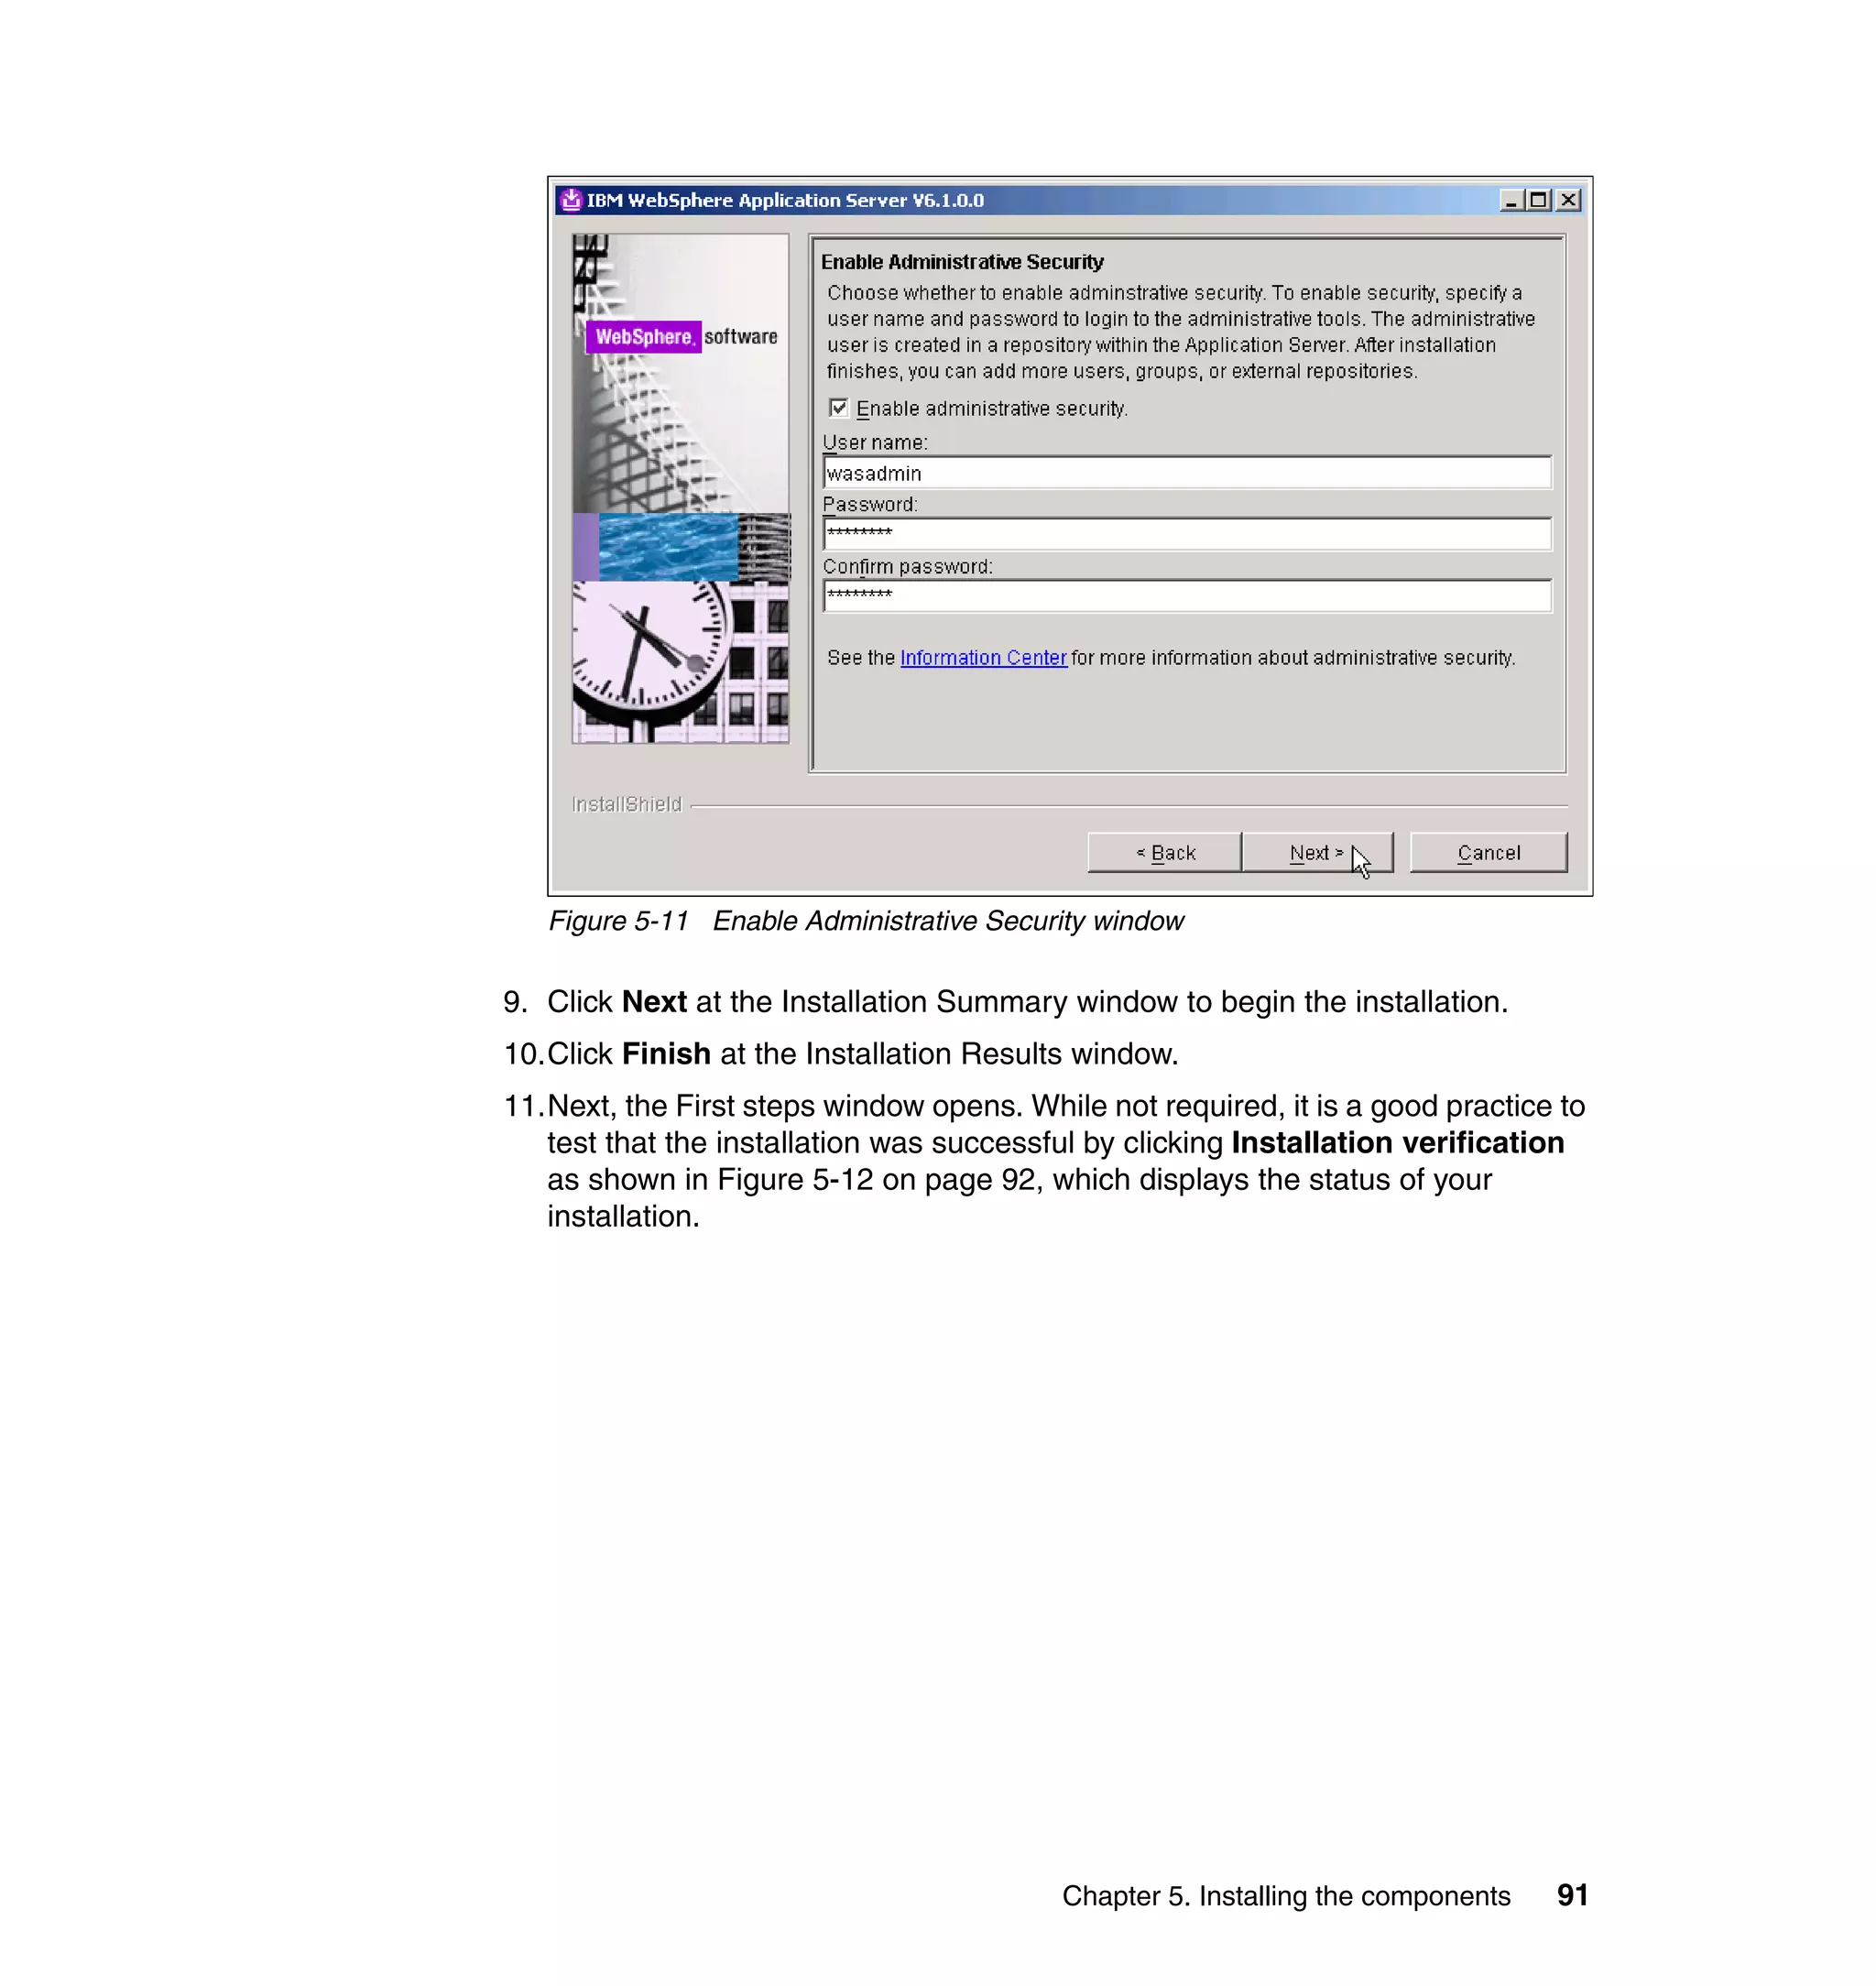
To change the Whitepages Default Provisioning Policy, follow the steps outlined
in 6.10.1, “Changing the Active Directory Default Provisioning Policy” on
page 206, with the following exceptions:
In step 2, select Default Provisioning Policy for service Active Directory.
In step 6, select Whitepages instead of Active Directory.
In step 8, select Full name, Last name, Department number, E-mail
address, First name, Location name, and Telephone number.
In step 9, set the following Javascript values for the attributes:
– Value (for Last name): {subject.getProperty("sn")[0];}
– Value (for Department number):
{subject.getProperty("departmentnumber")[0];}
– Value (for E-mail address): {subject.getProperty("mail")[0];}
– Value (for Full Name): {subject.getProperty("cn")[0];}
– Value (for First Name): {subject.getProperty("givenname")[0];}
– Value (for Location name): {subject.getProperty("erlocale")[0];}
– Value (for Telephone number):
{subject.getProperty("telephonenumber")[0];}
The Whitepages Default Provisioning Policy has now been changed.
6.10.3 Changing the Access Manager Default Provisioning Policy
In this section, we show how to limit the people using this Provisioning Policy to
the people in the following roles:
Sales
IT
Executives
Manufacturing
Accounting
Unlike Active Directory and Whitepages Provisioning Policies, we will not set any
mandatory attributes for Access Manager.
Chapter 6. Configuring Identity Manager 213](https://image.slidesharecdn.com/deploymentguideseriesibmtivoliidentitymanager5-0sg246477-120523195924-phpapp02/75/Deployment-guide-series-ibm-tivoli-identity-manager-5-0-sg246477-231-2048.jpg)


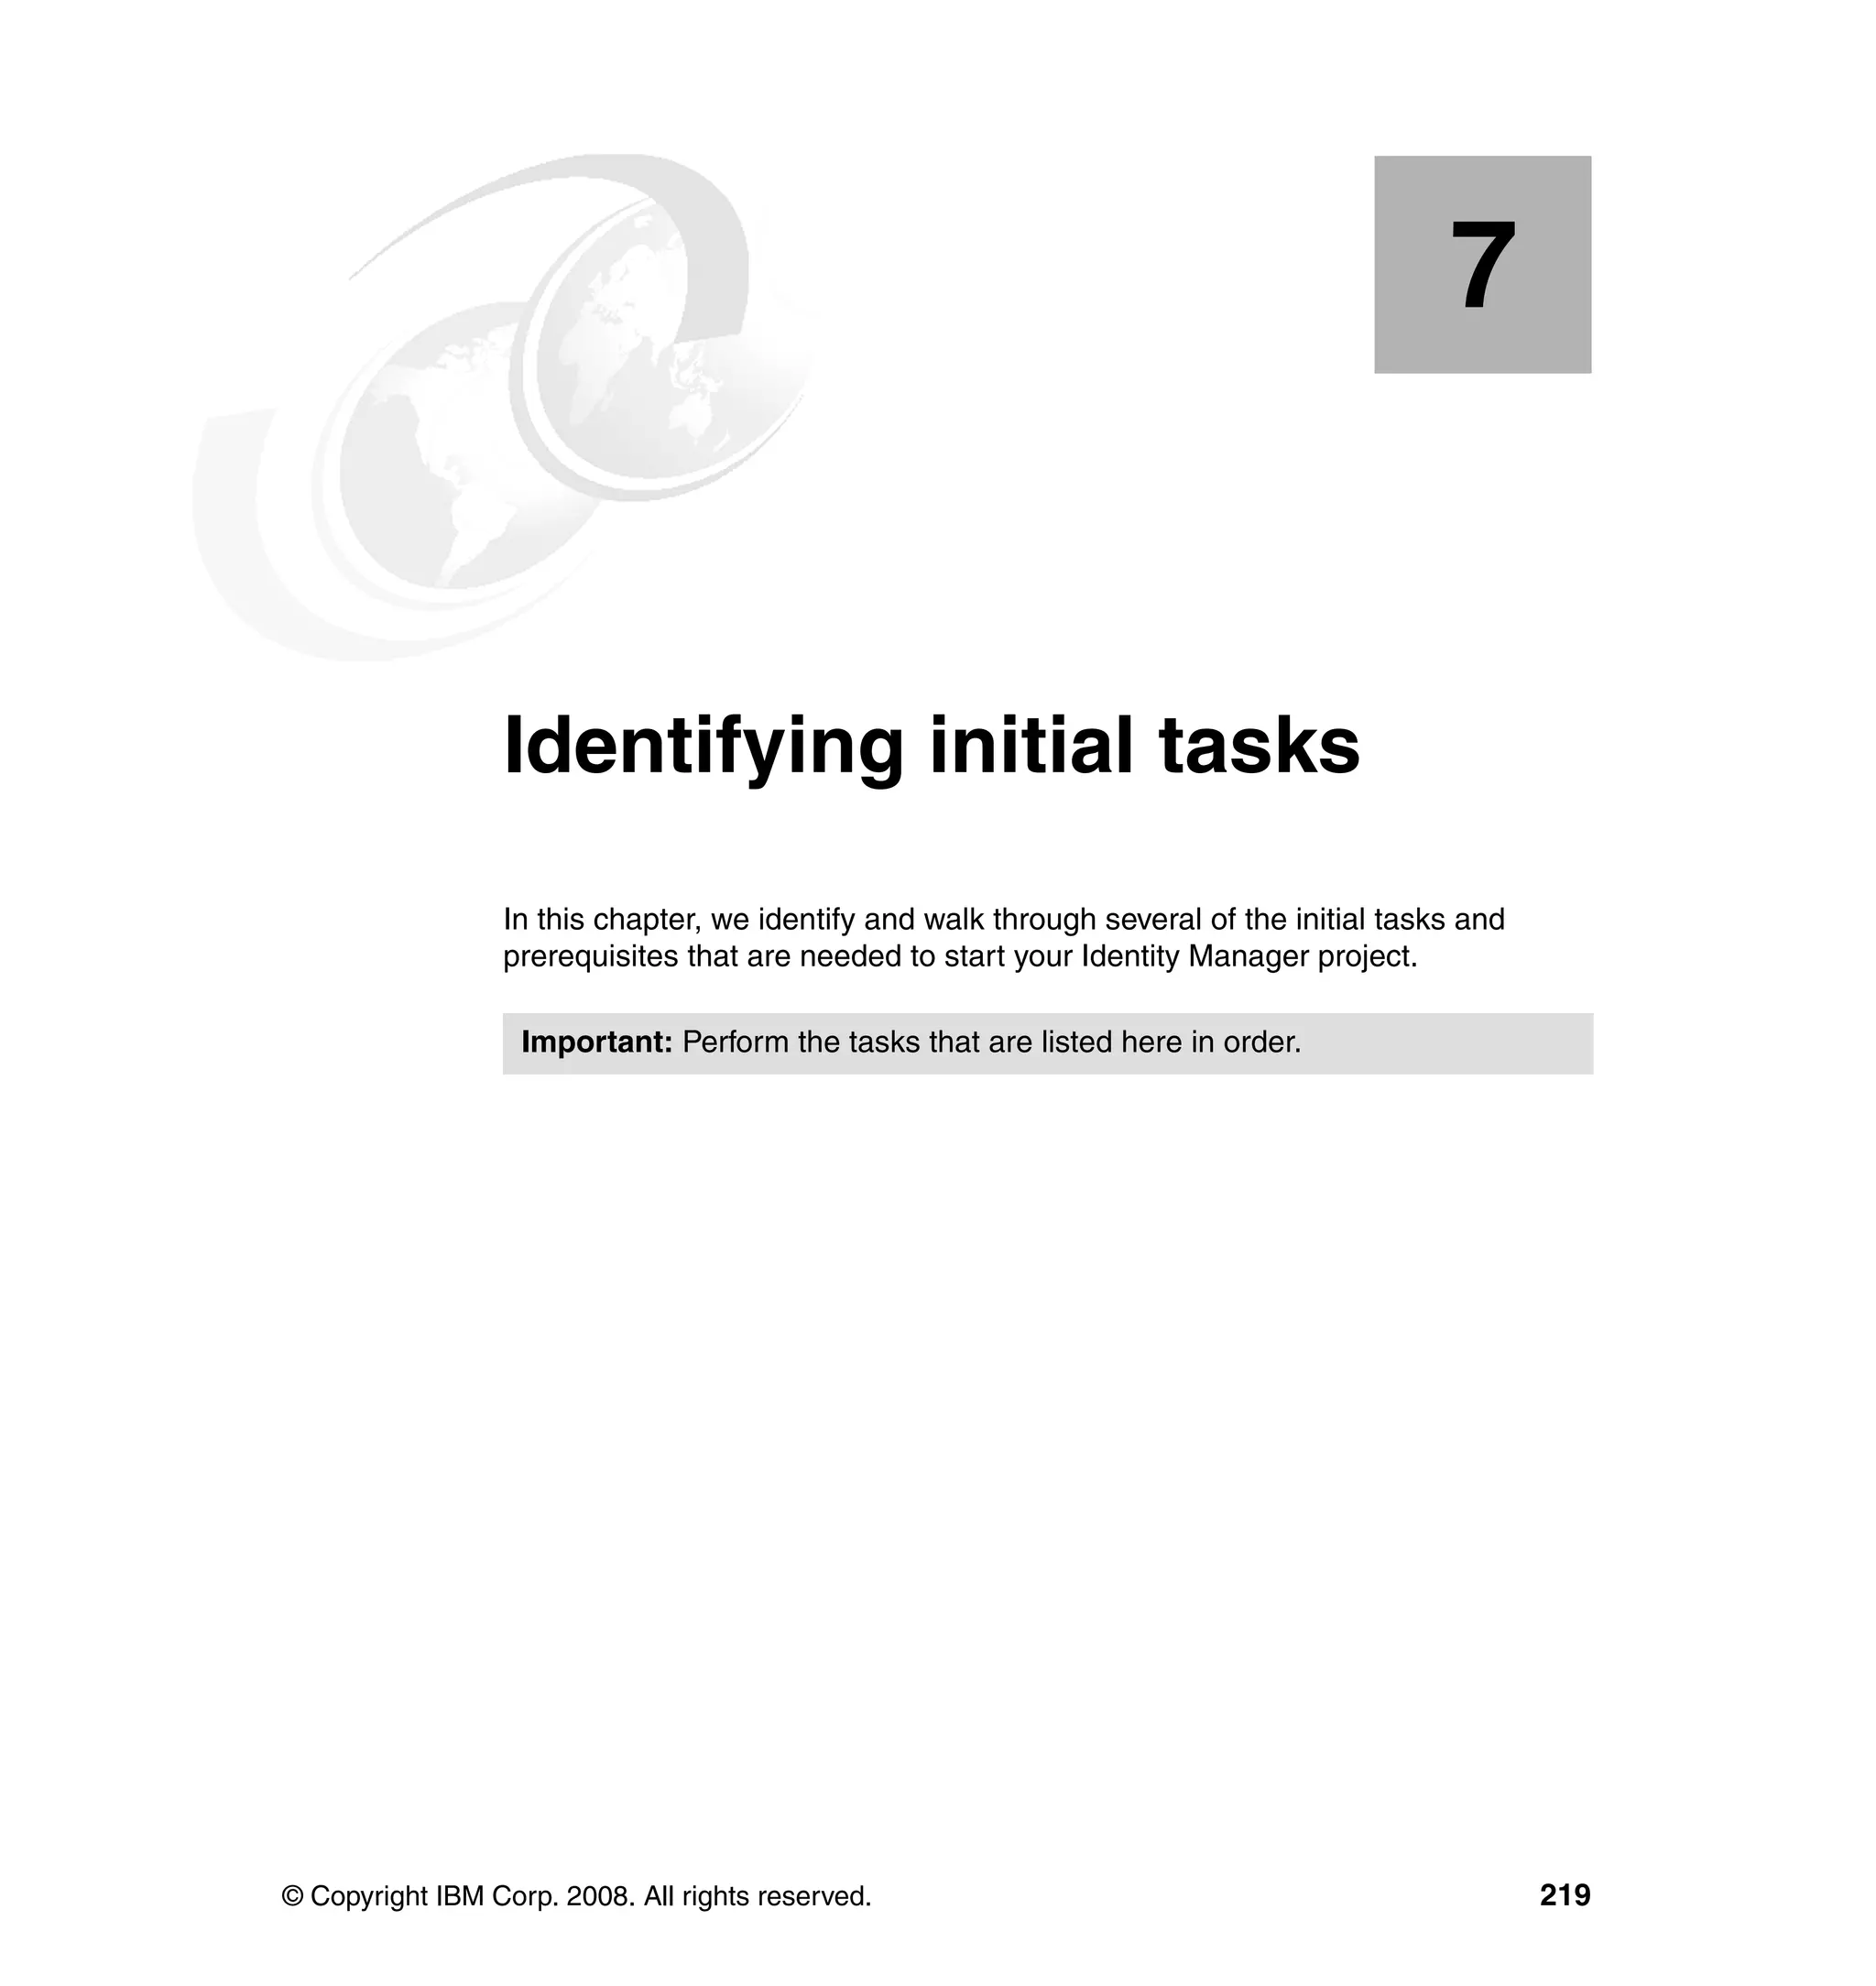
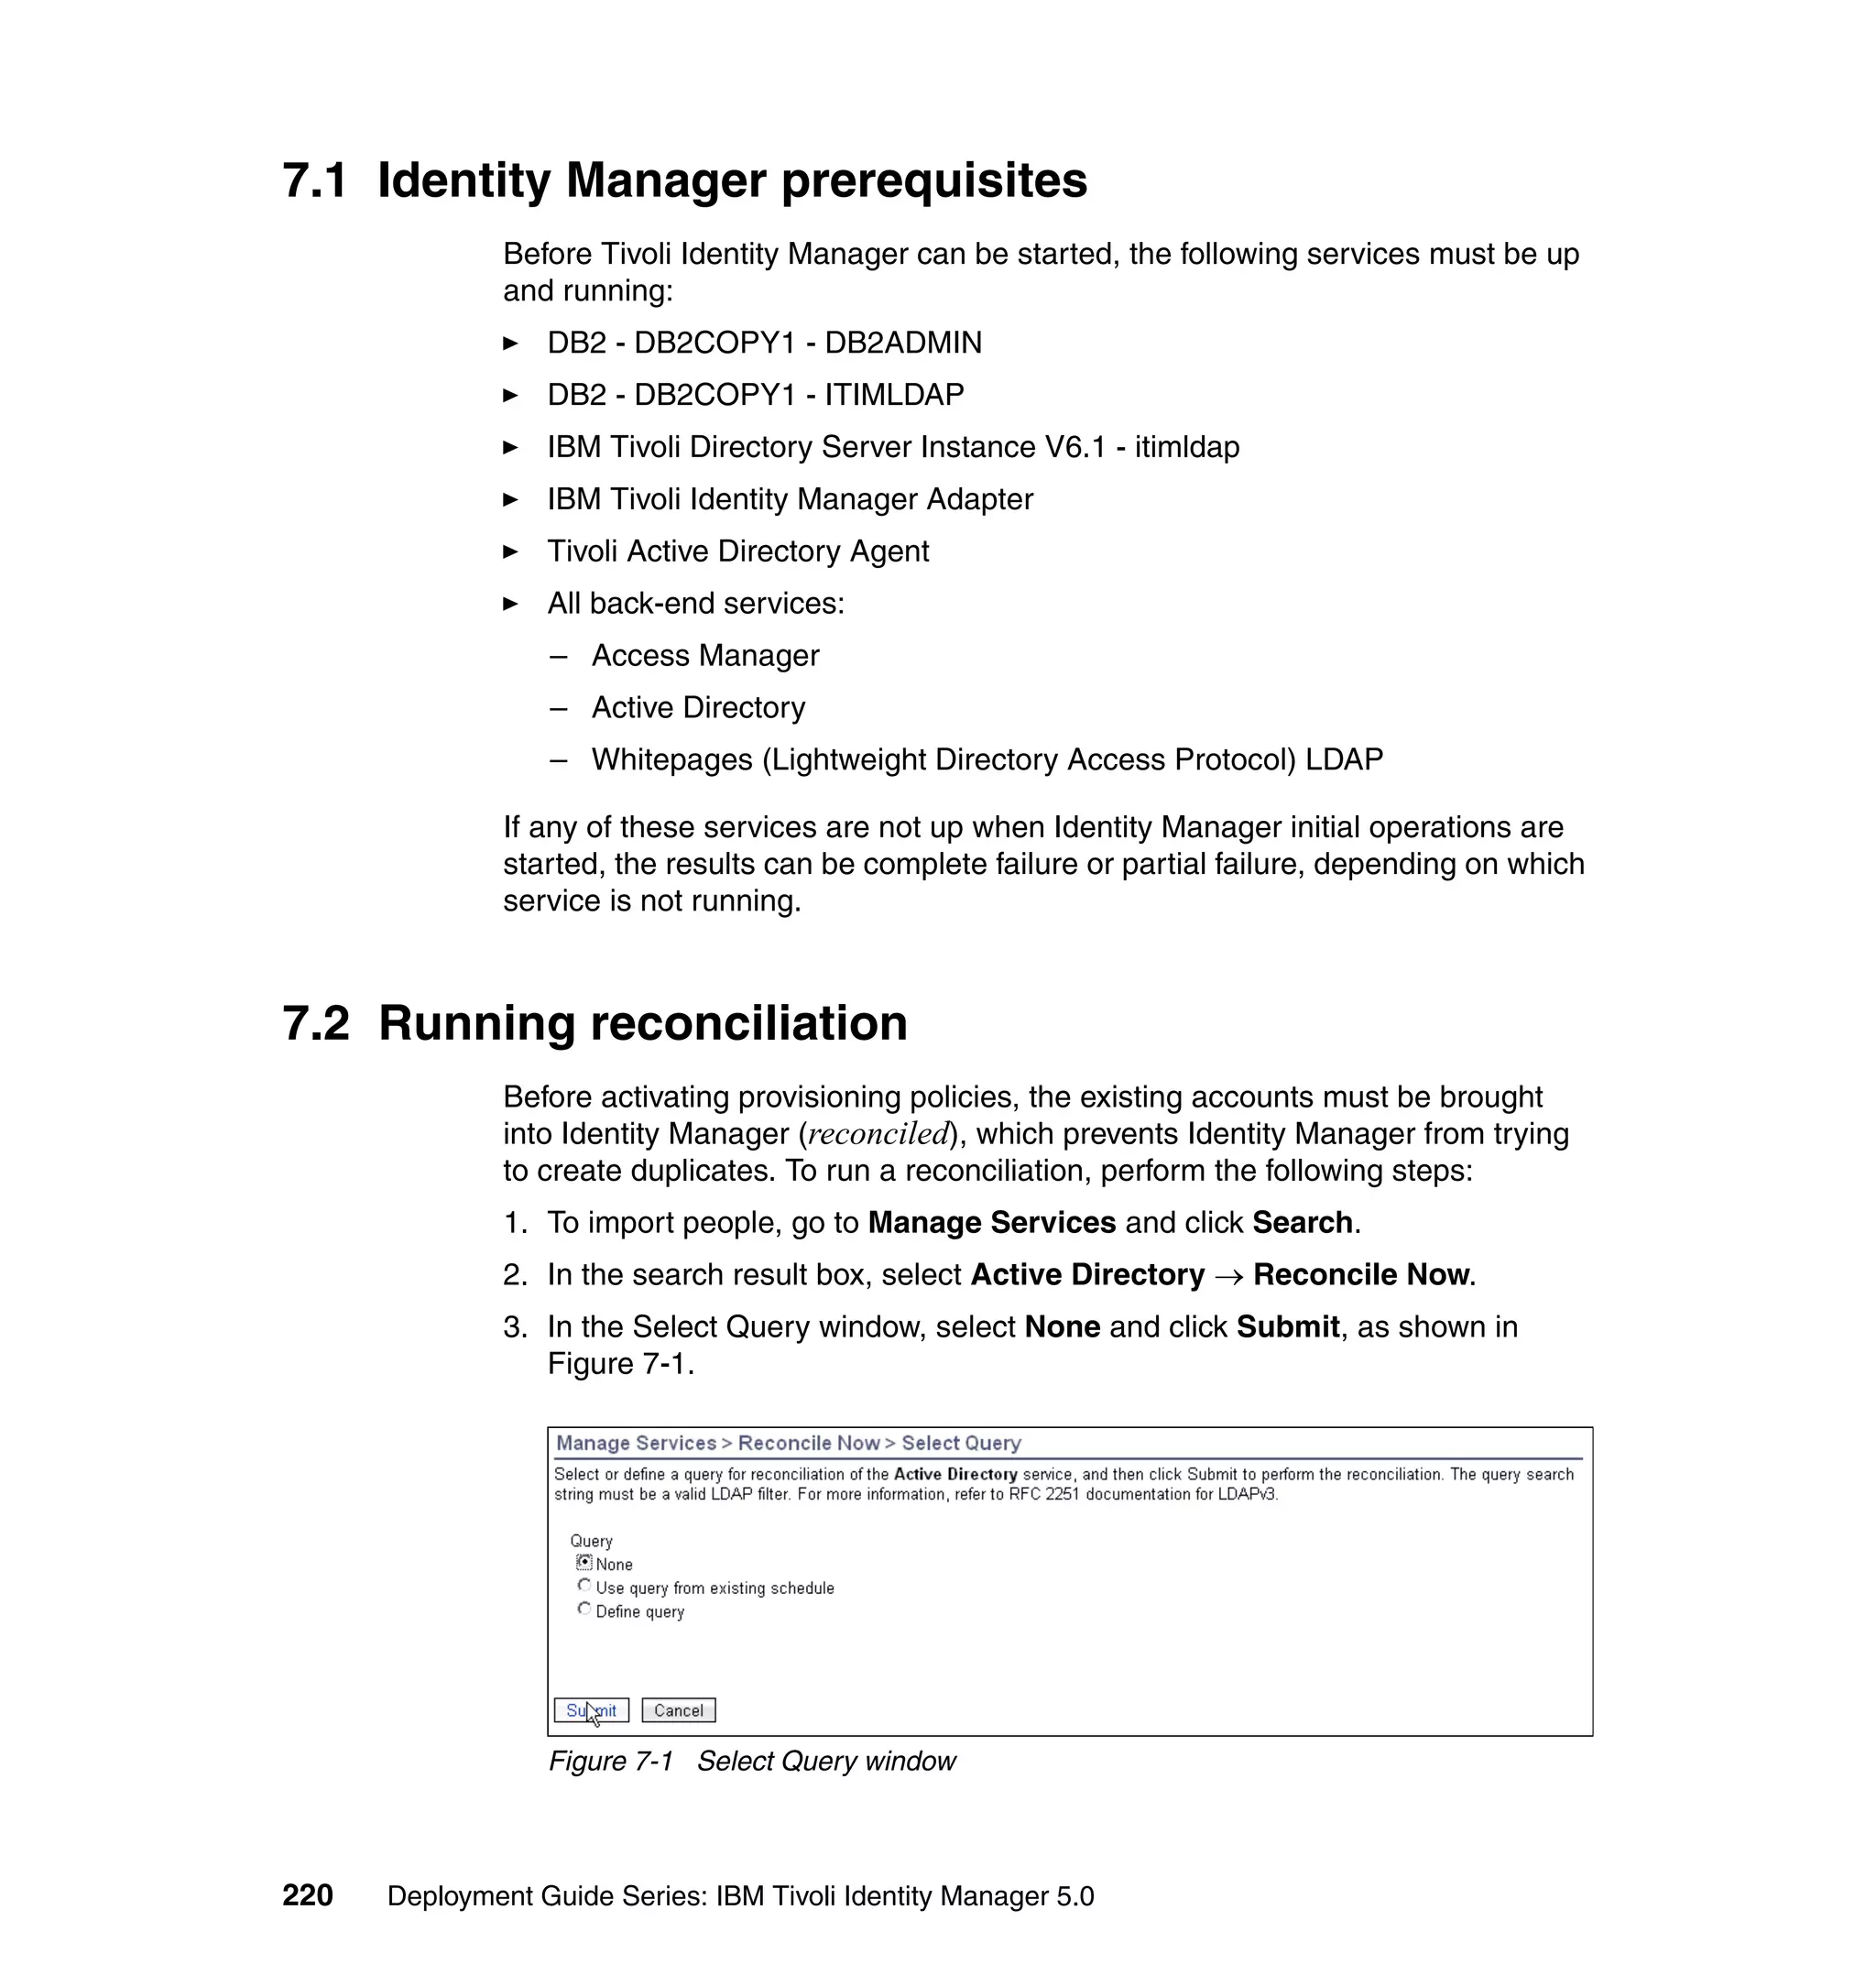
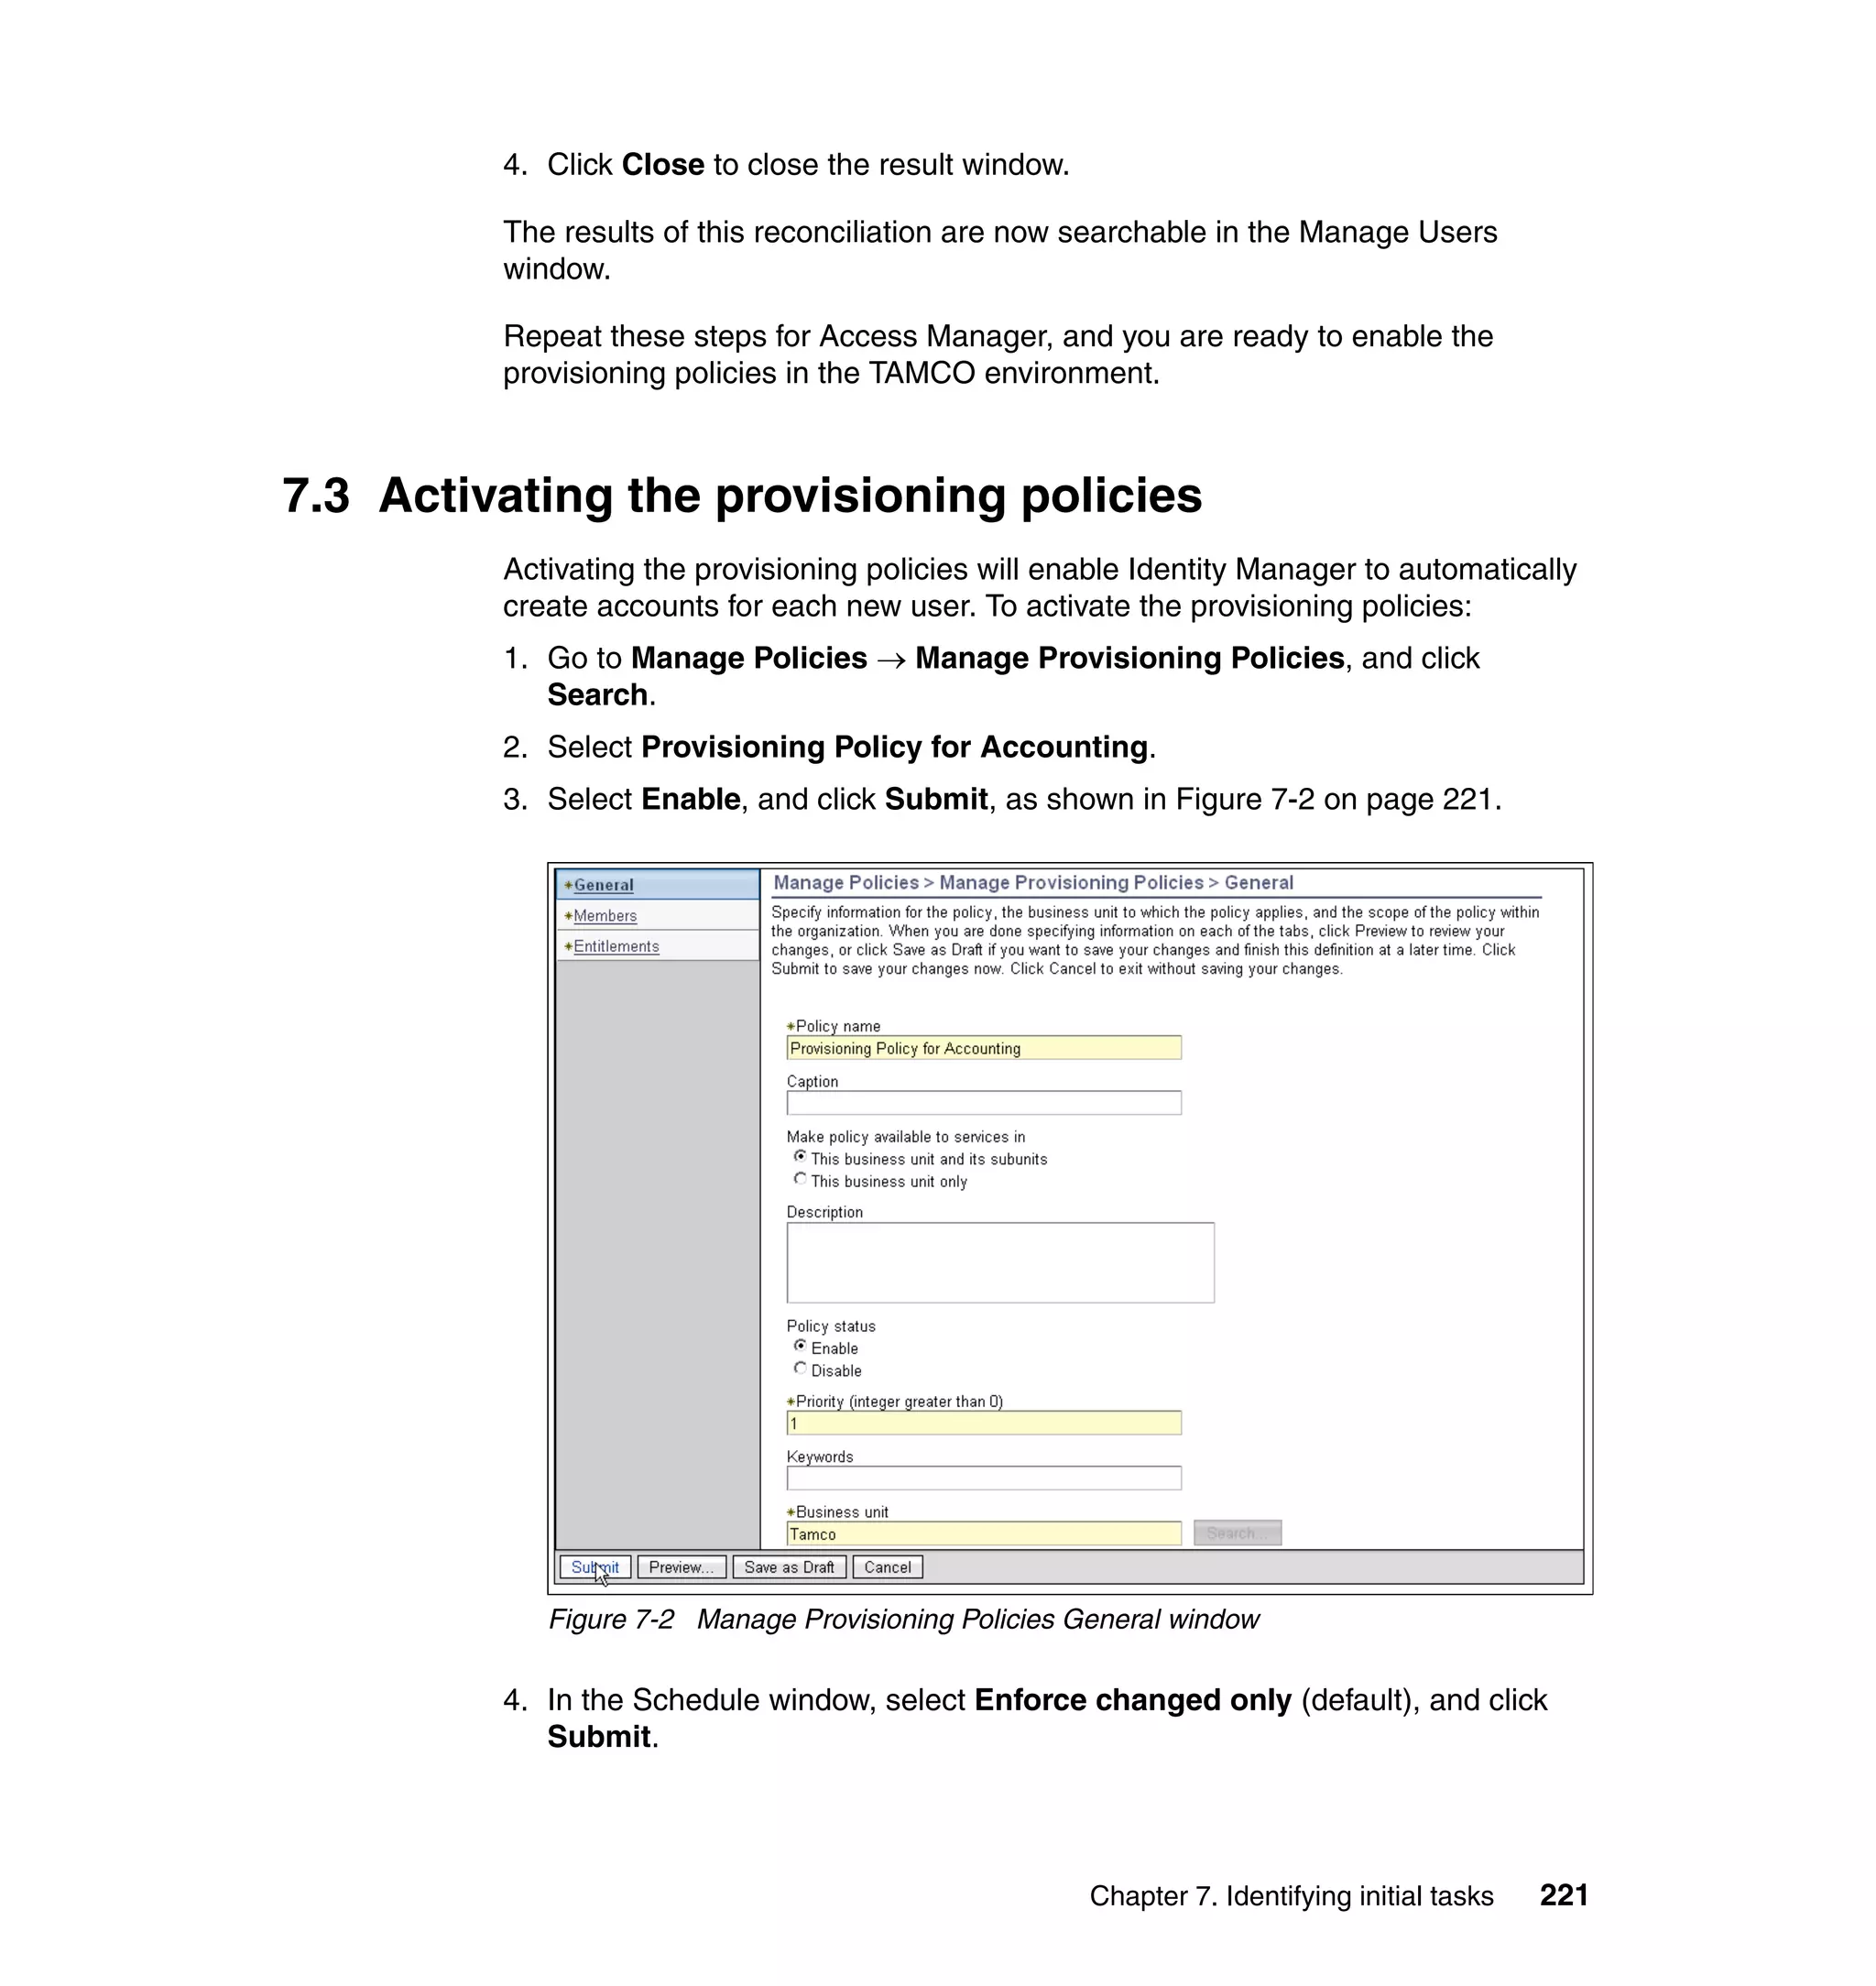
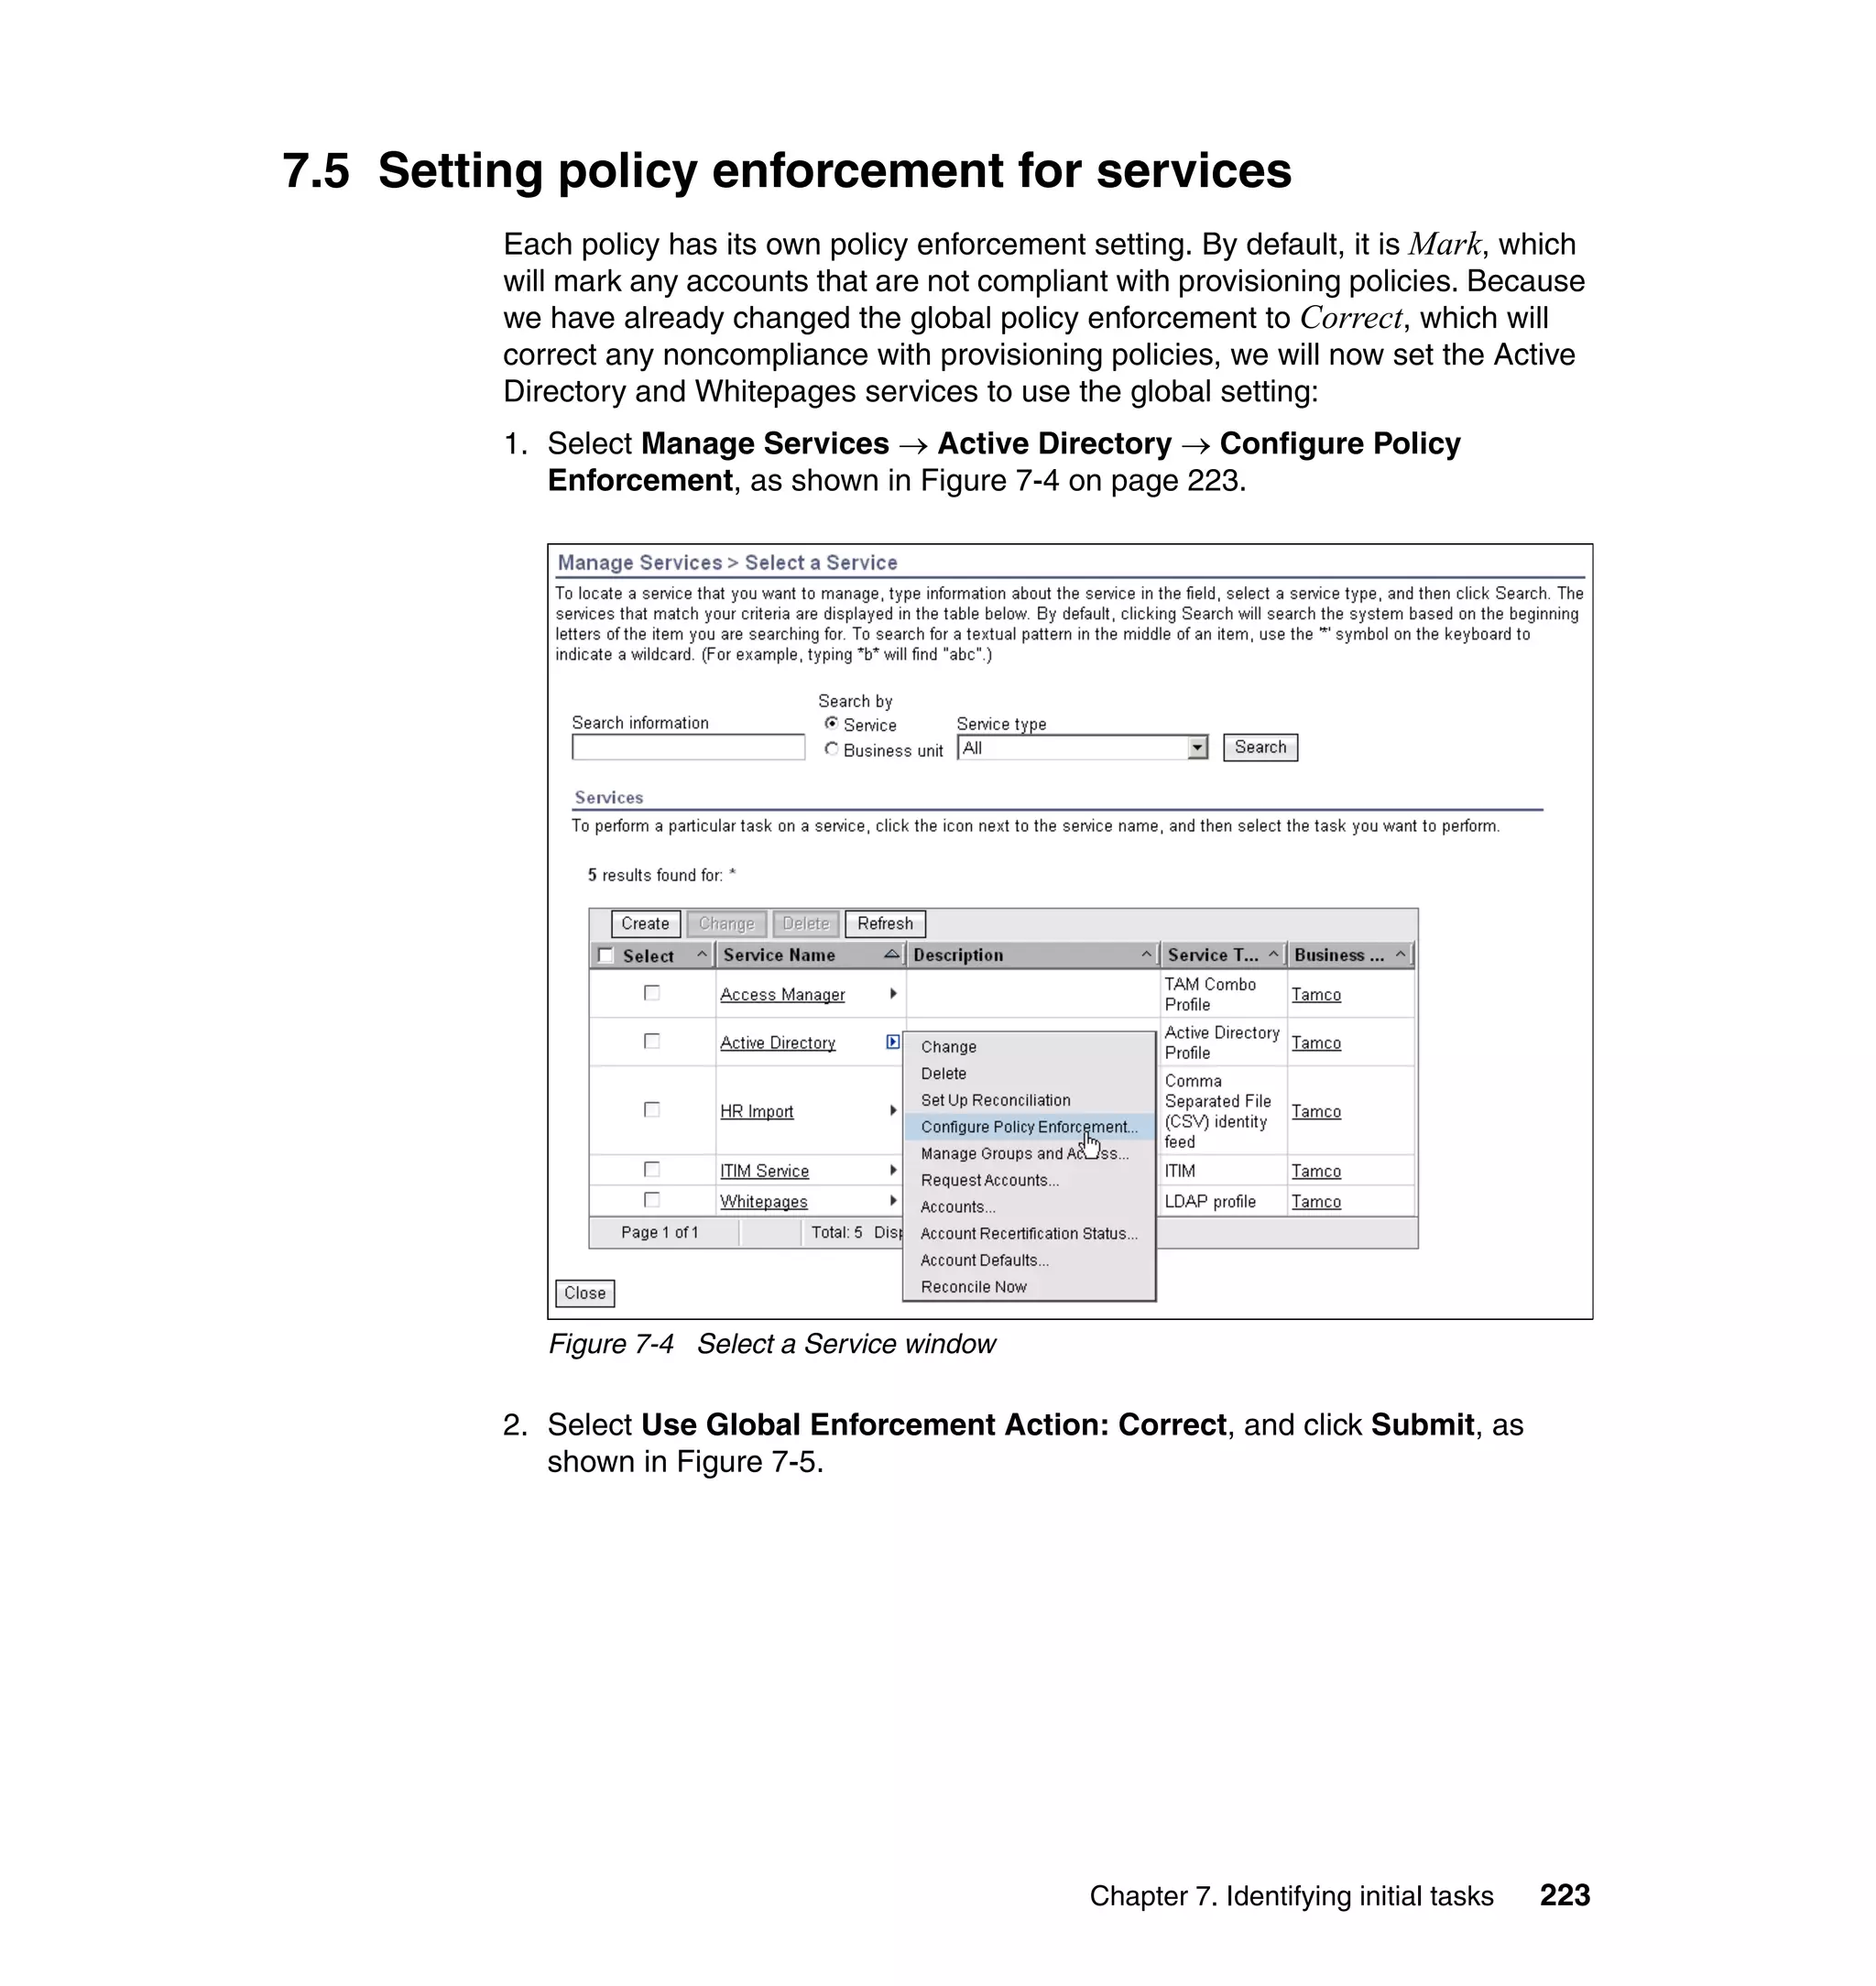
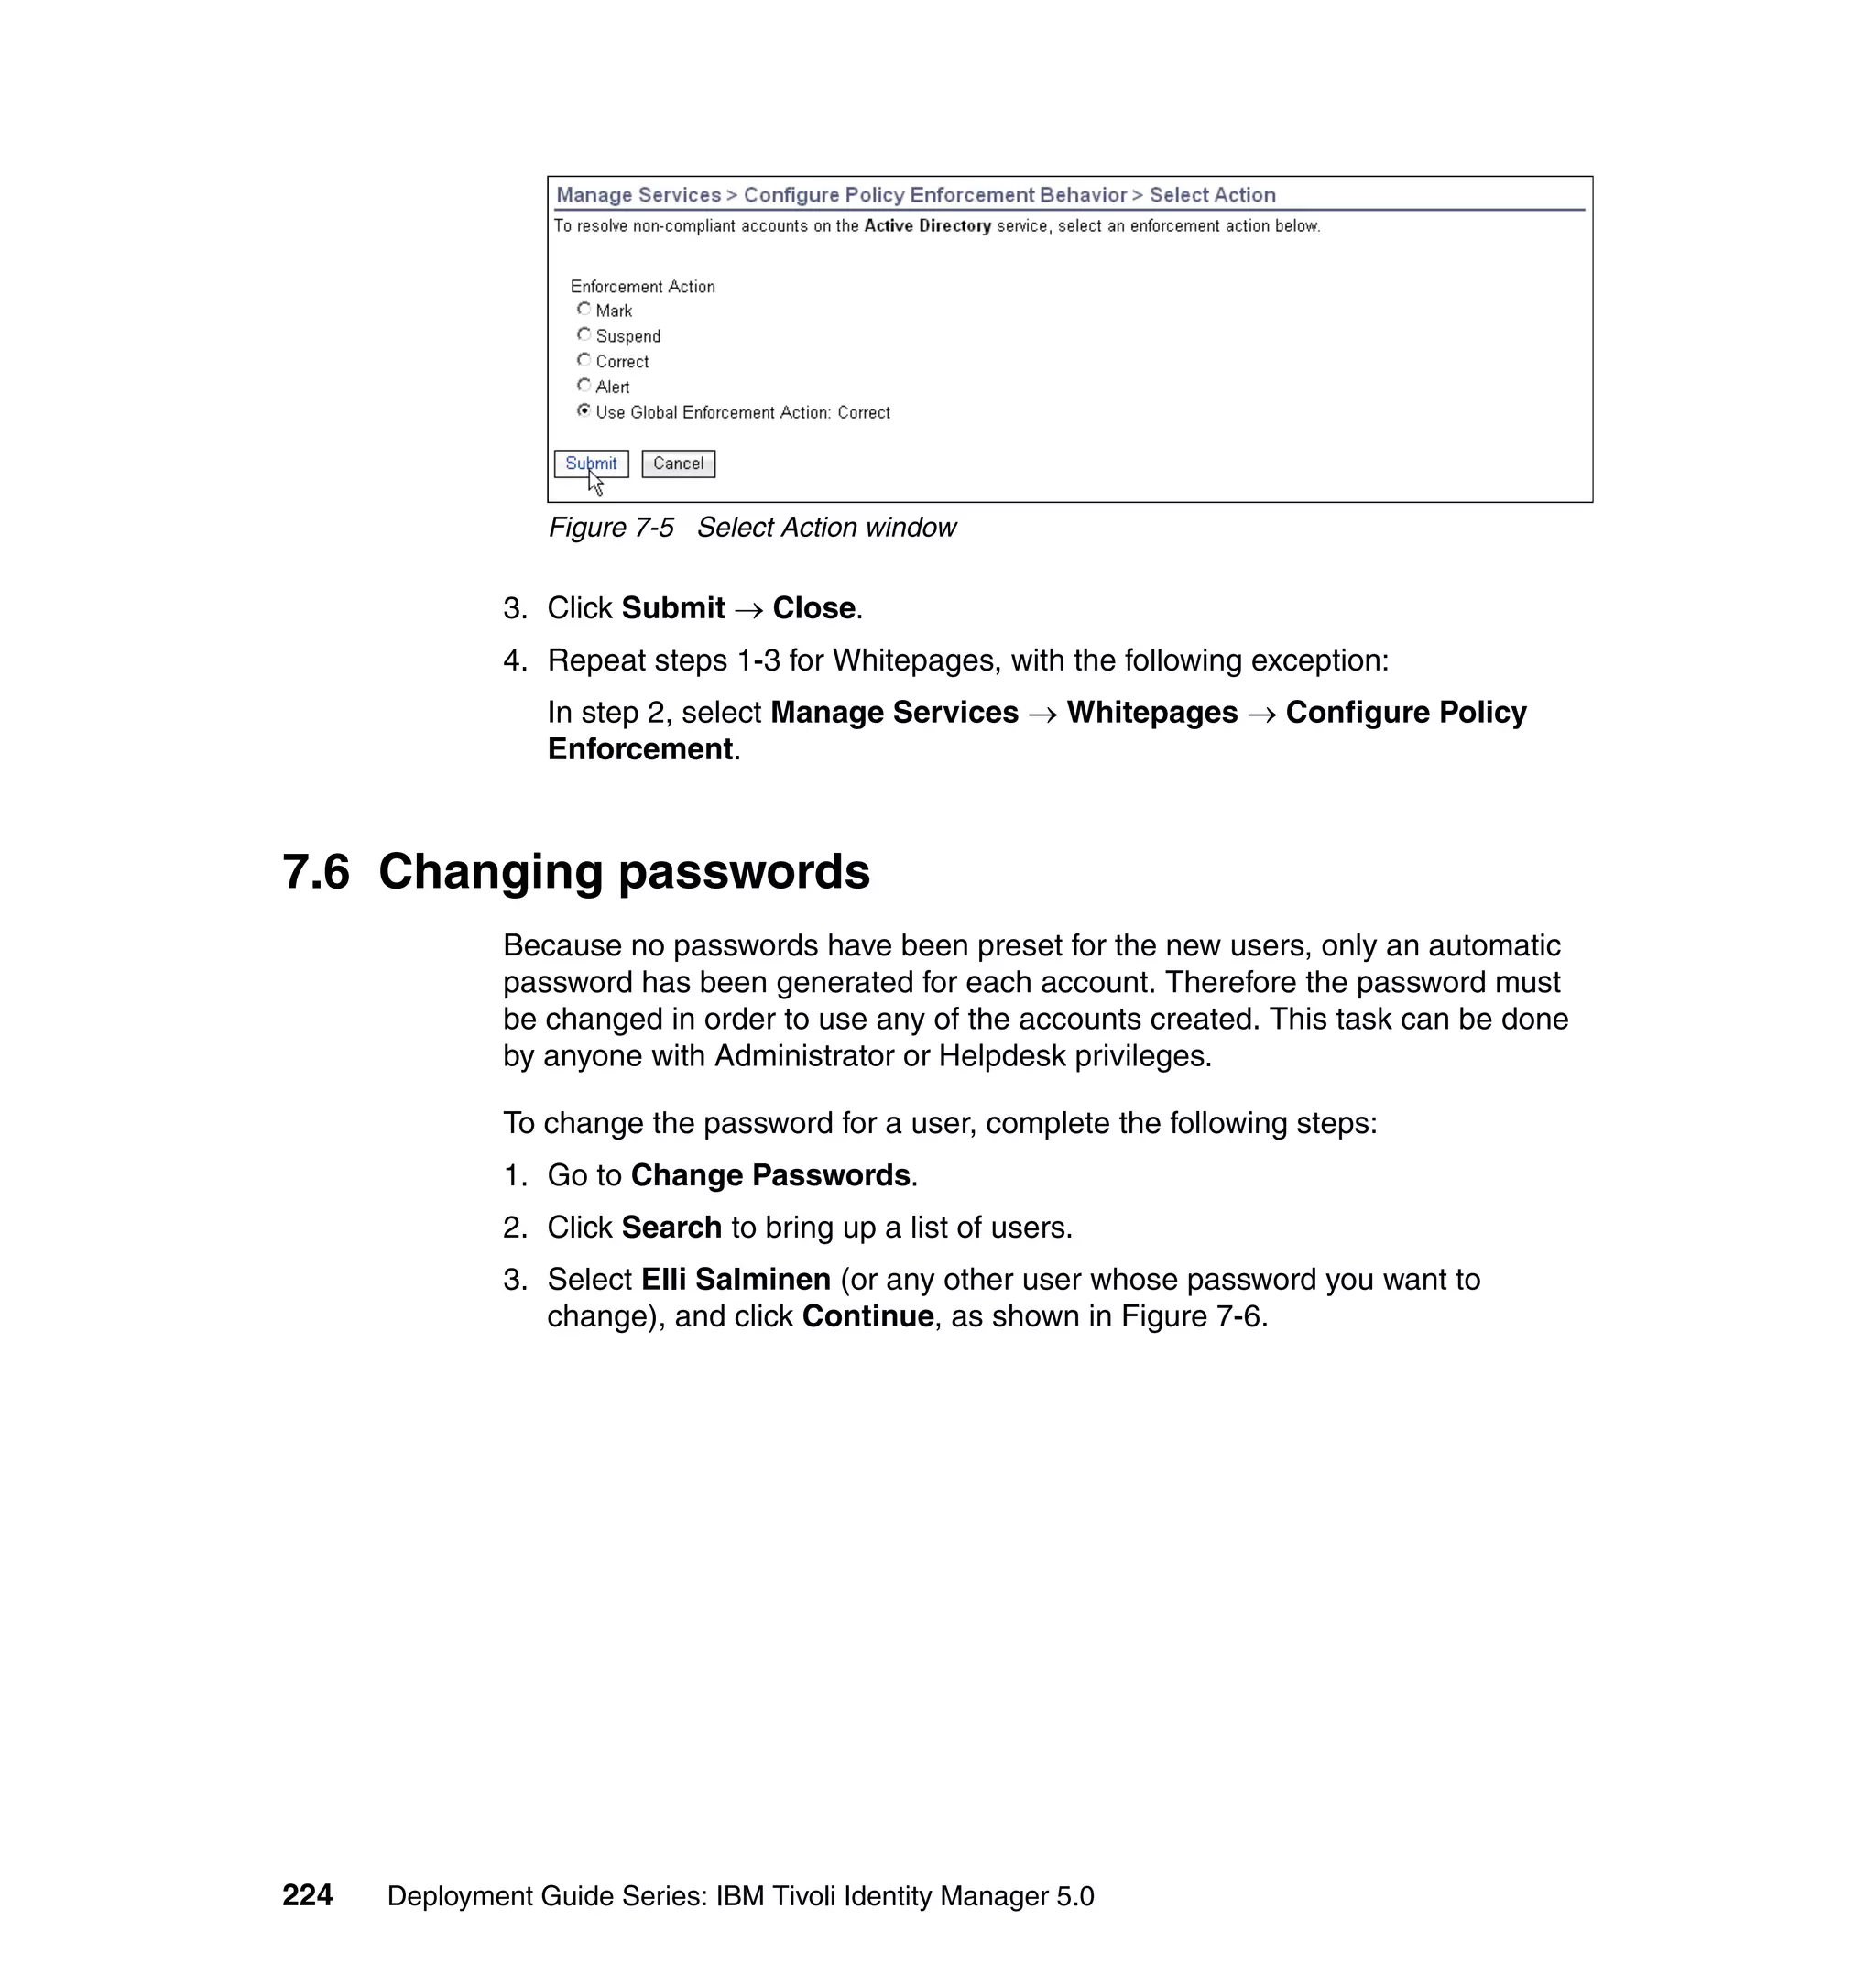
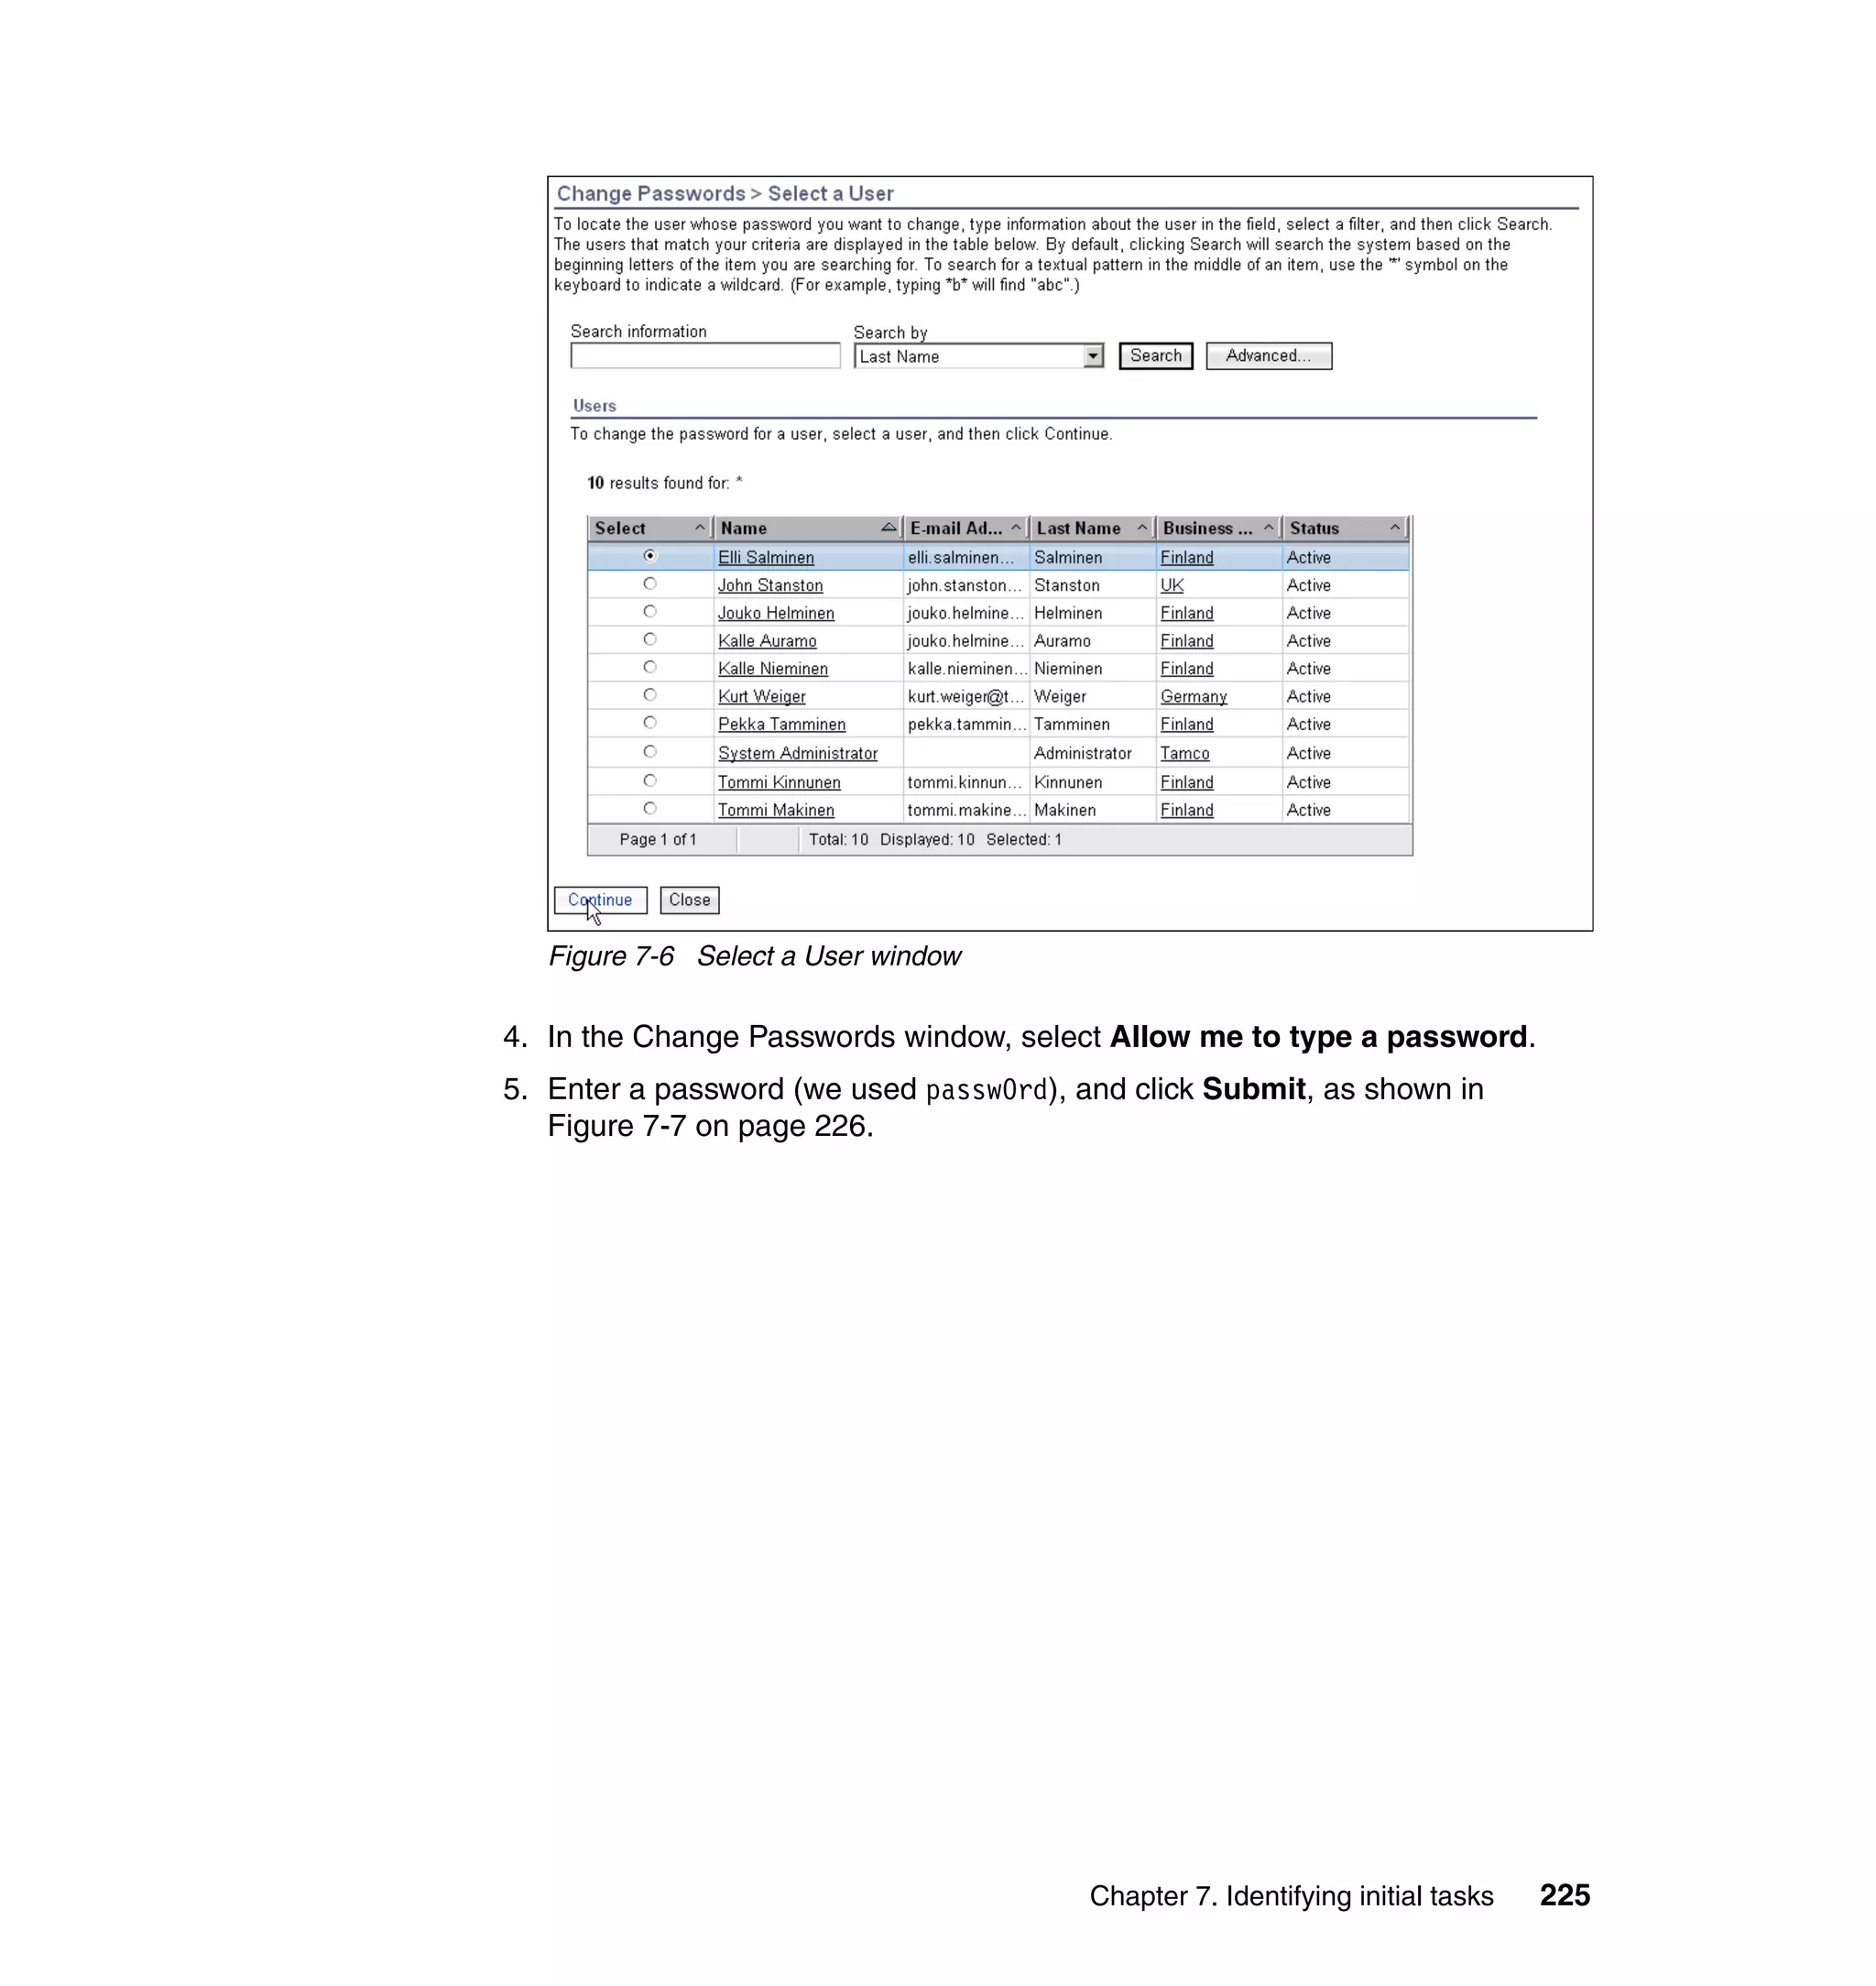


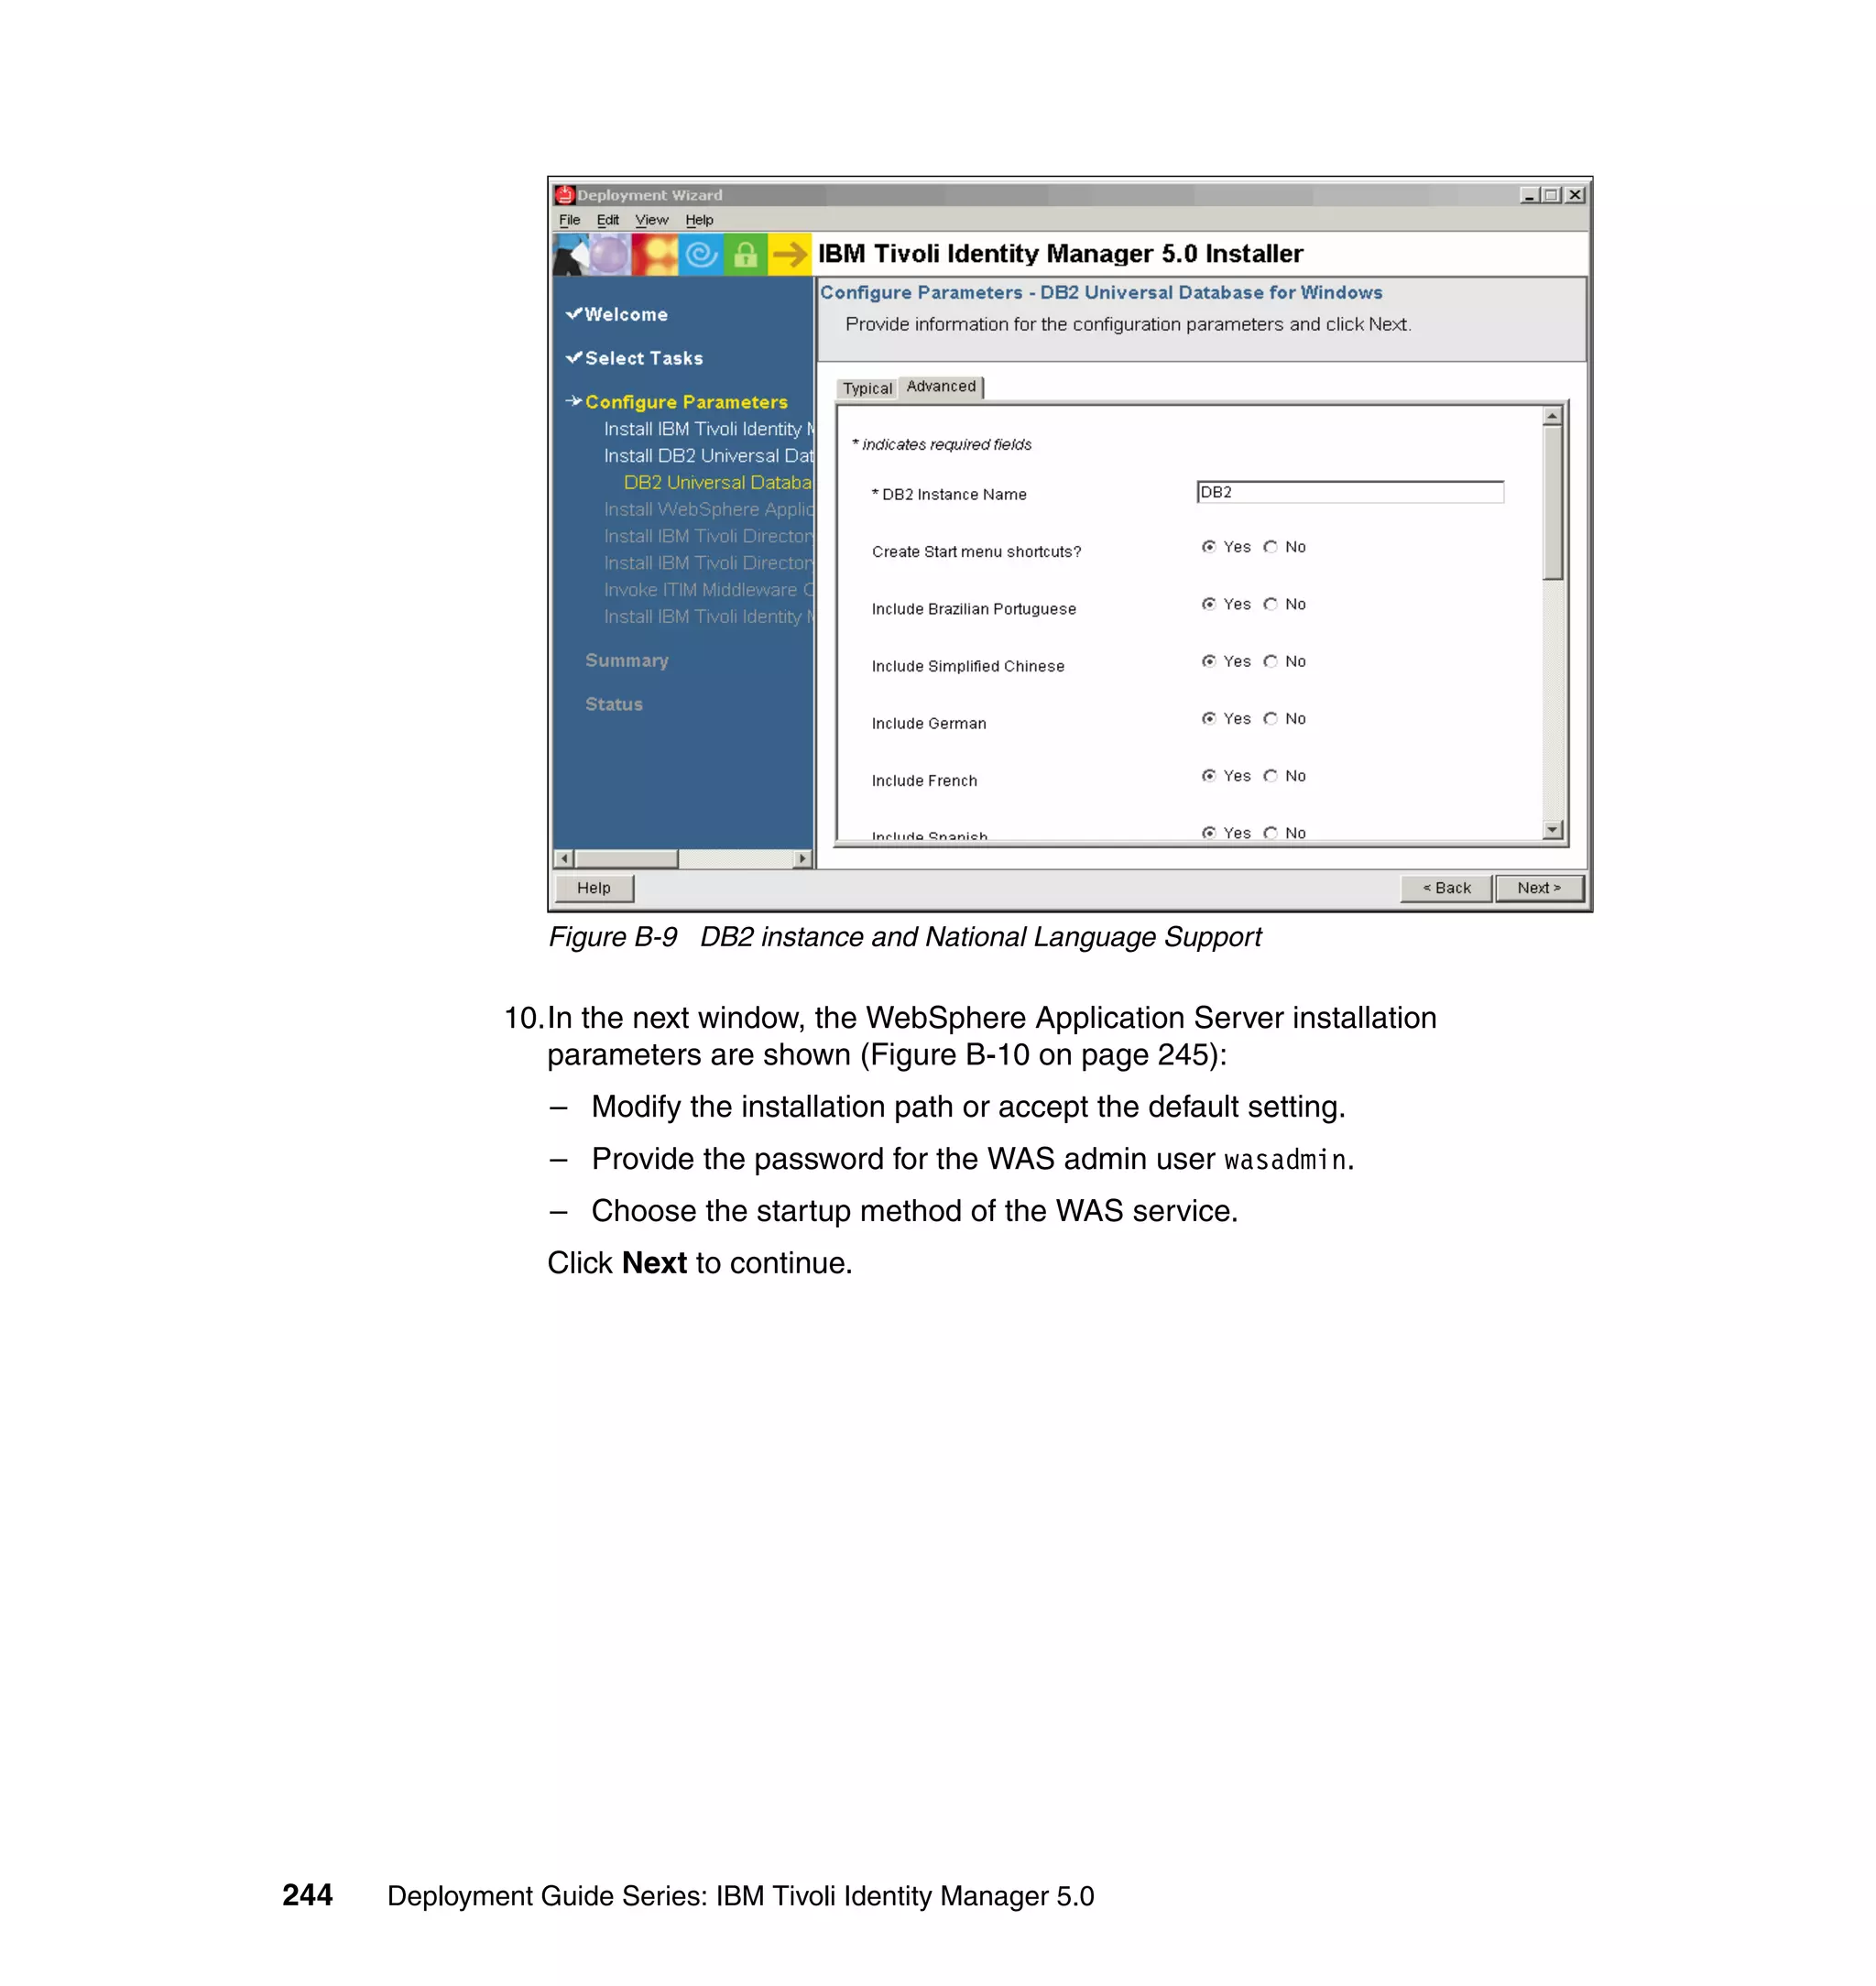
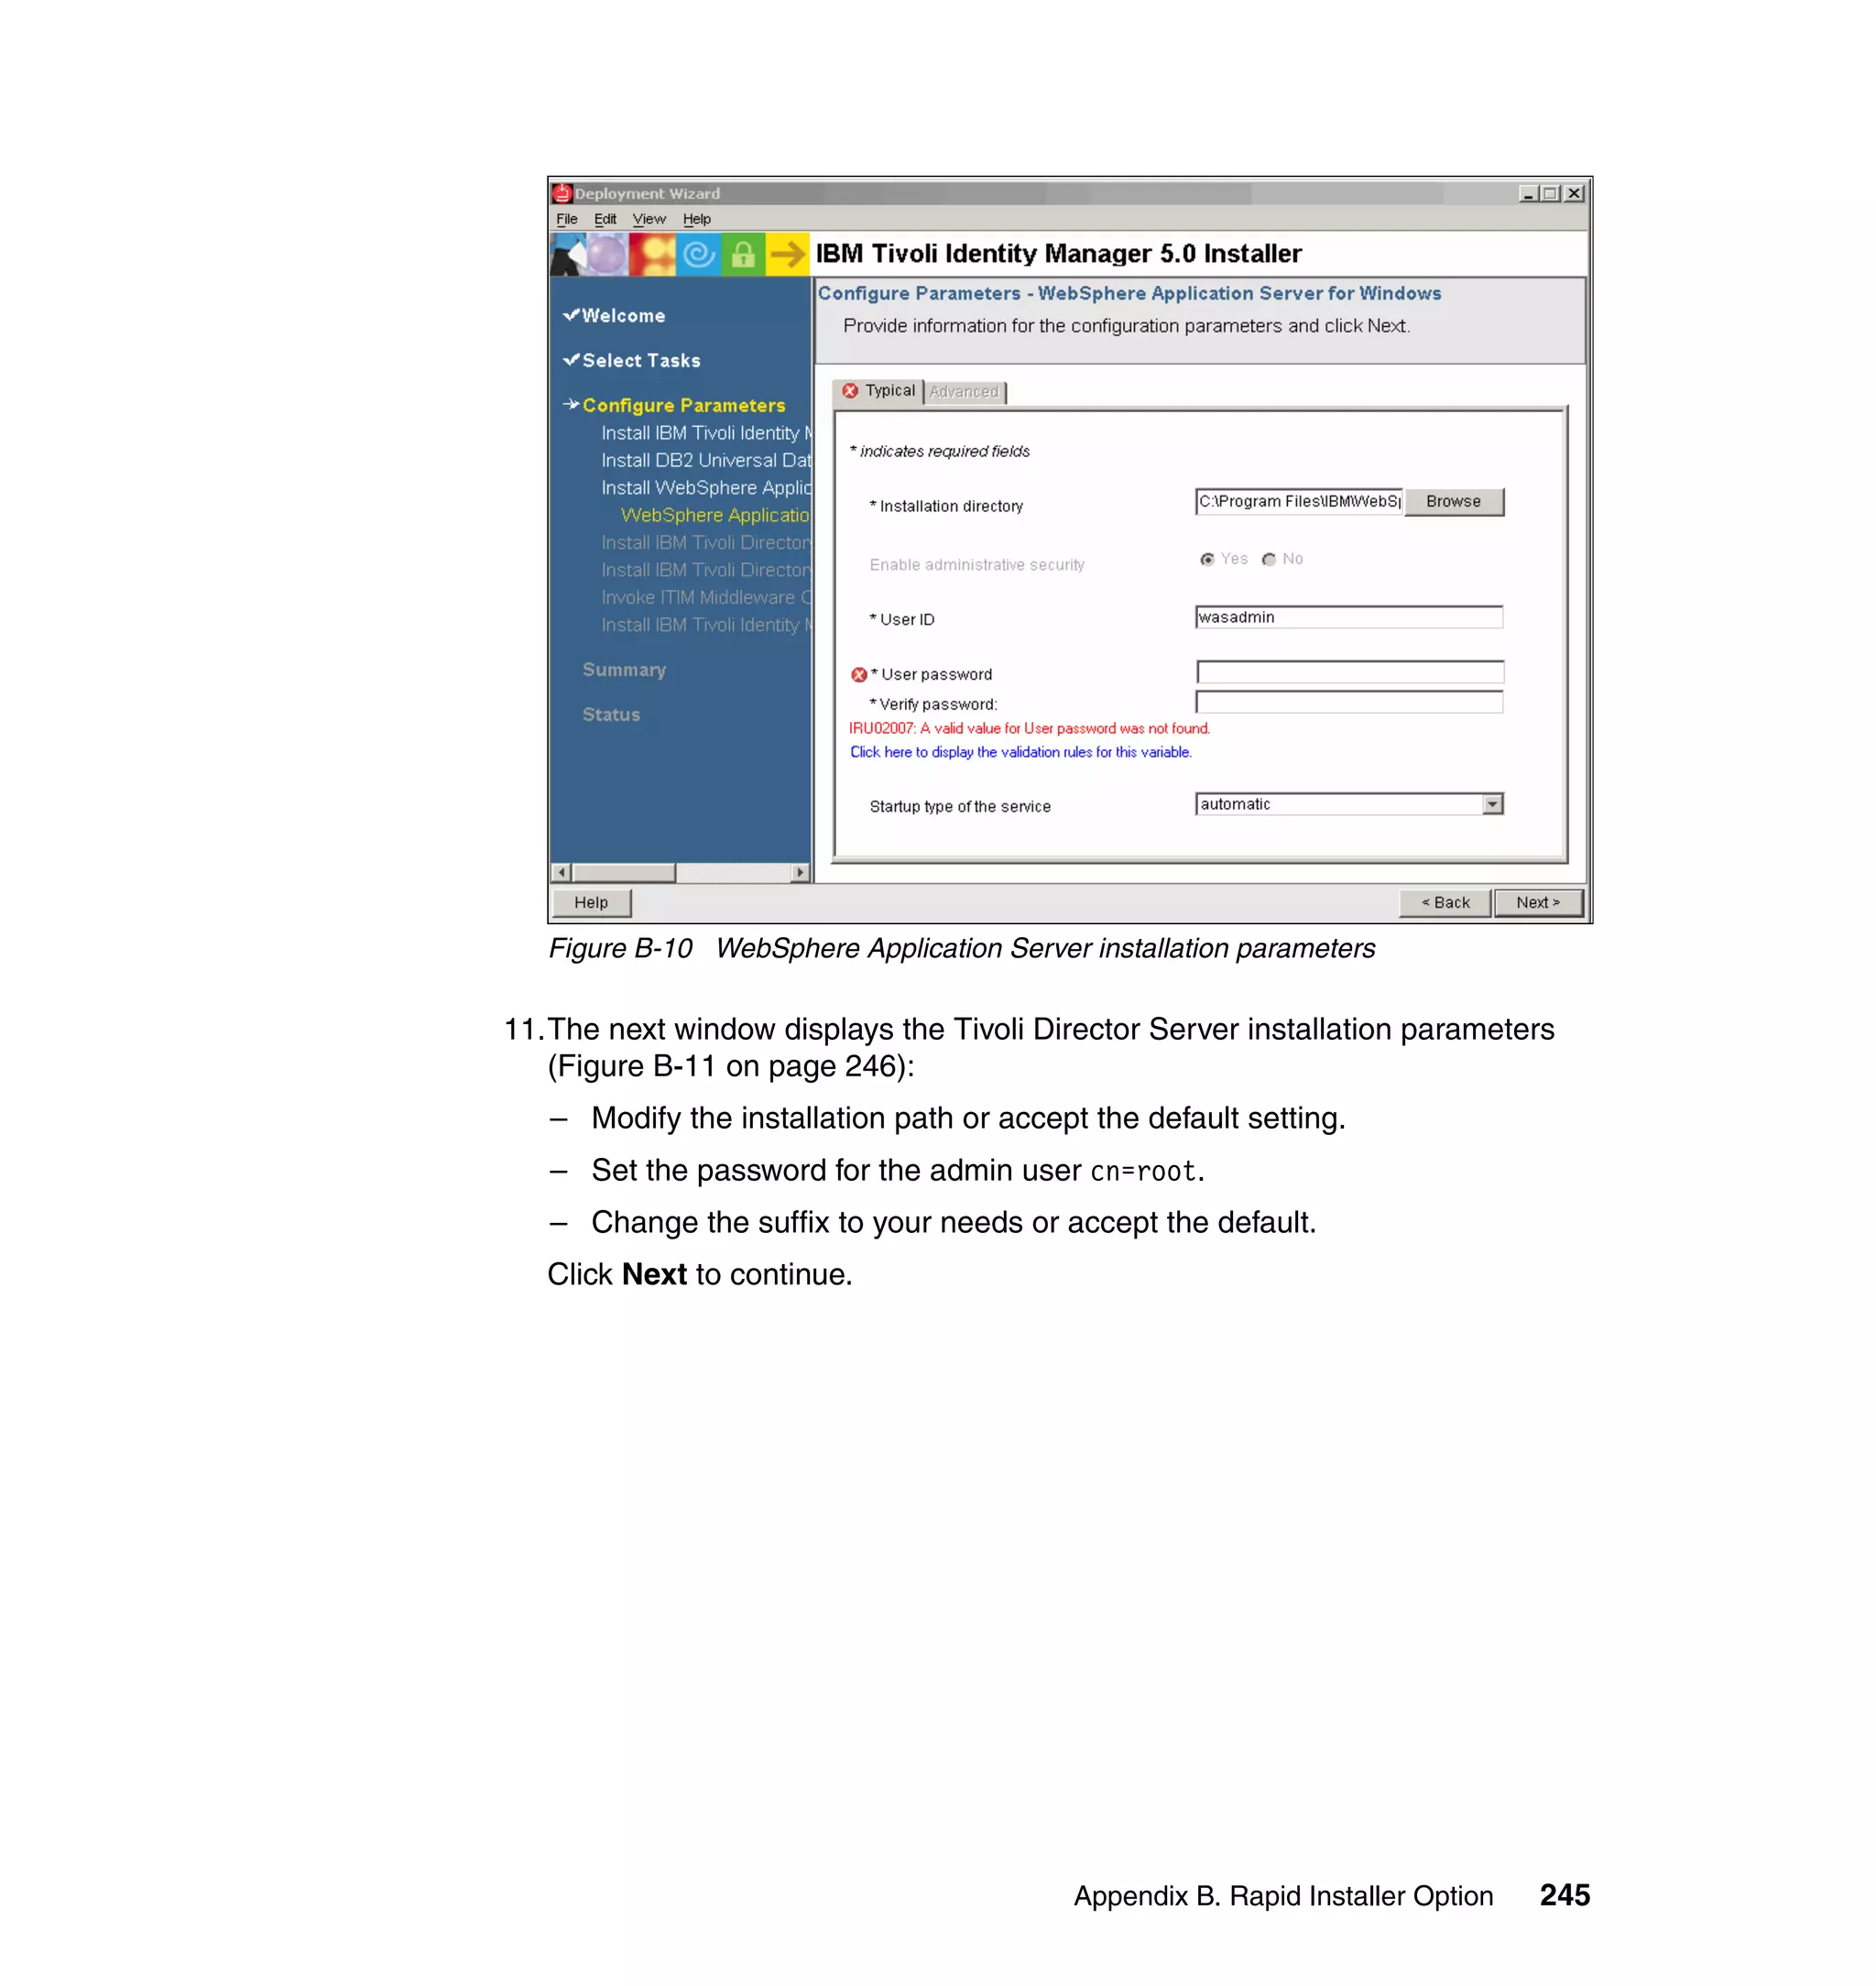
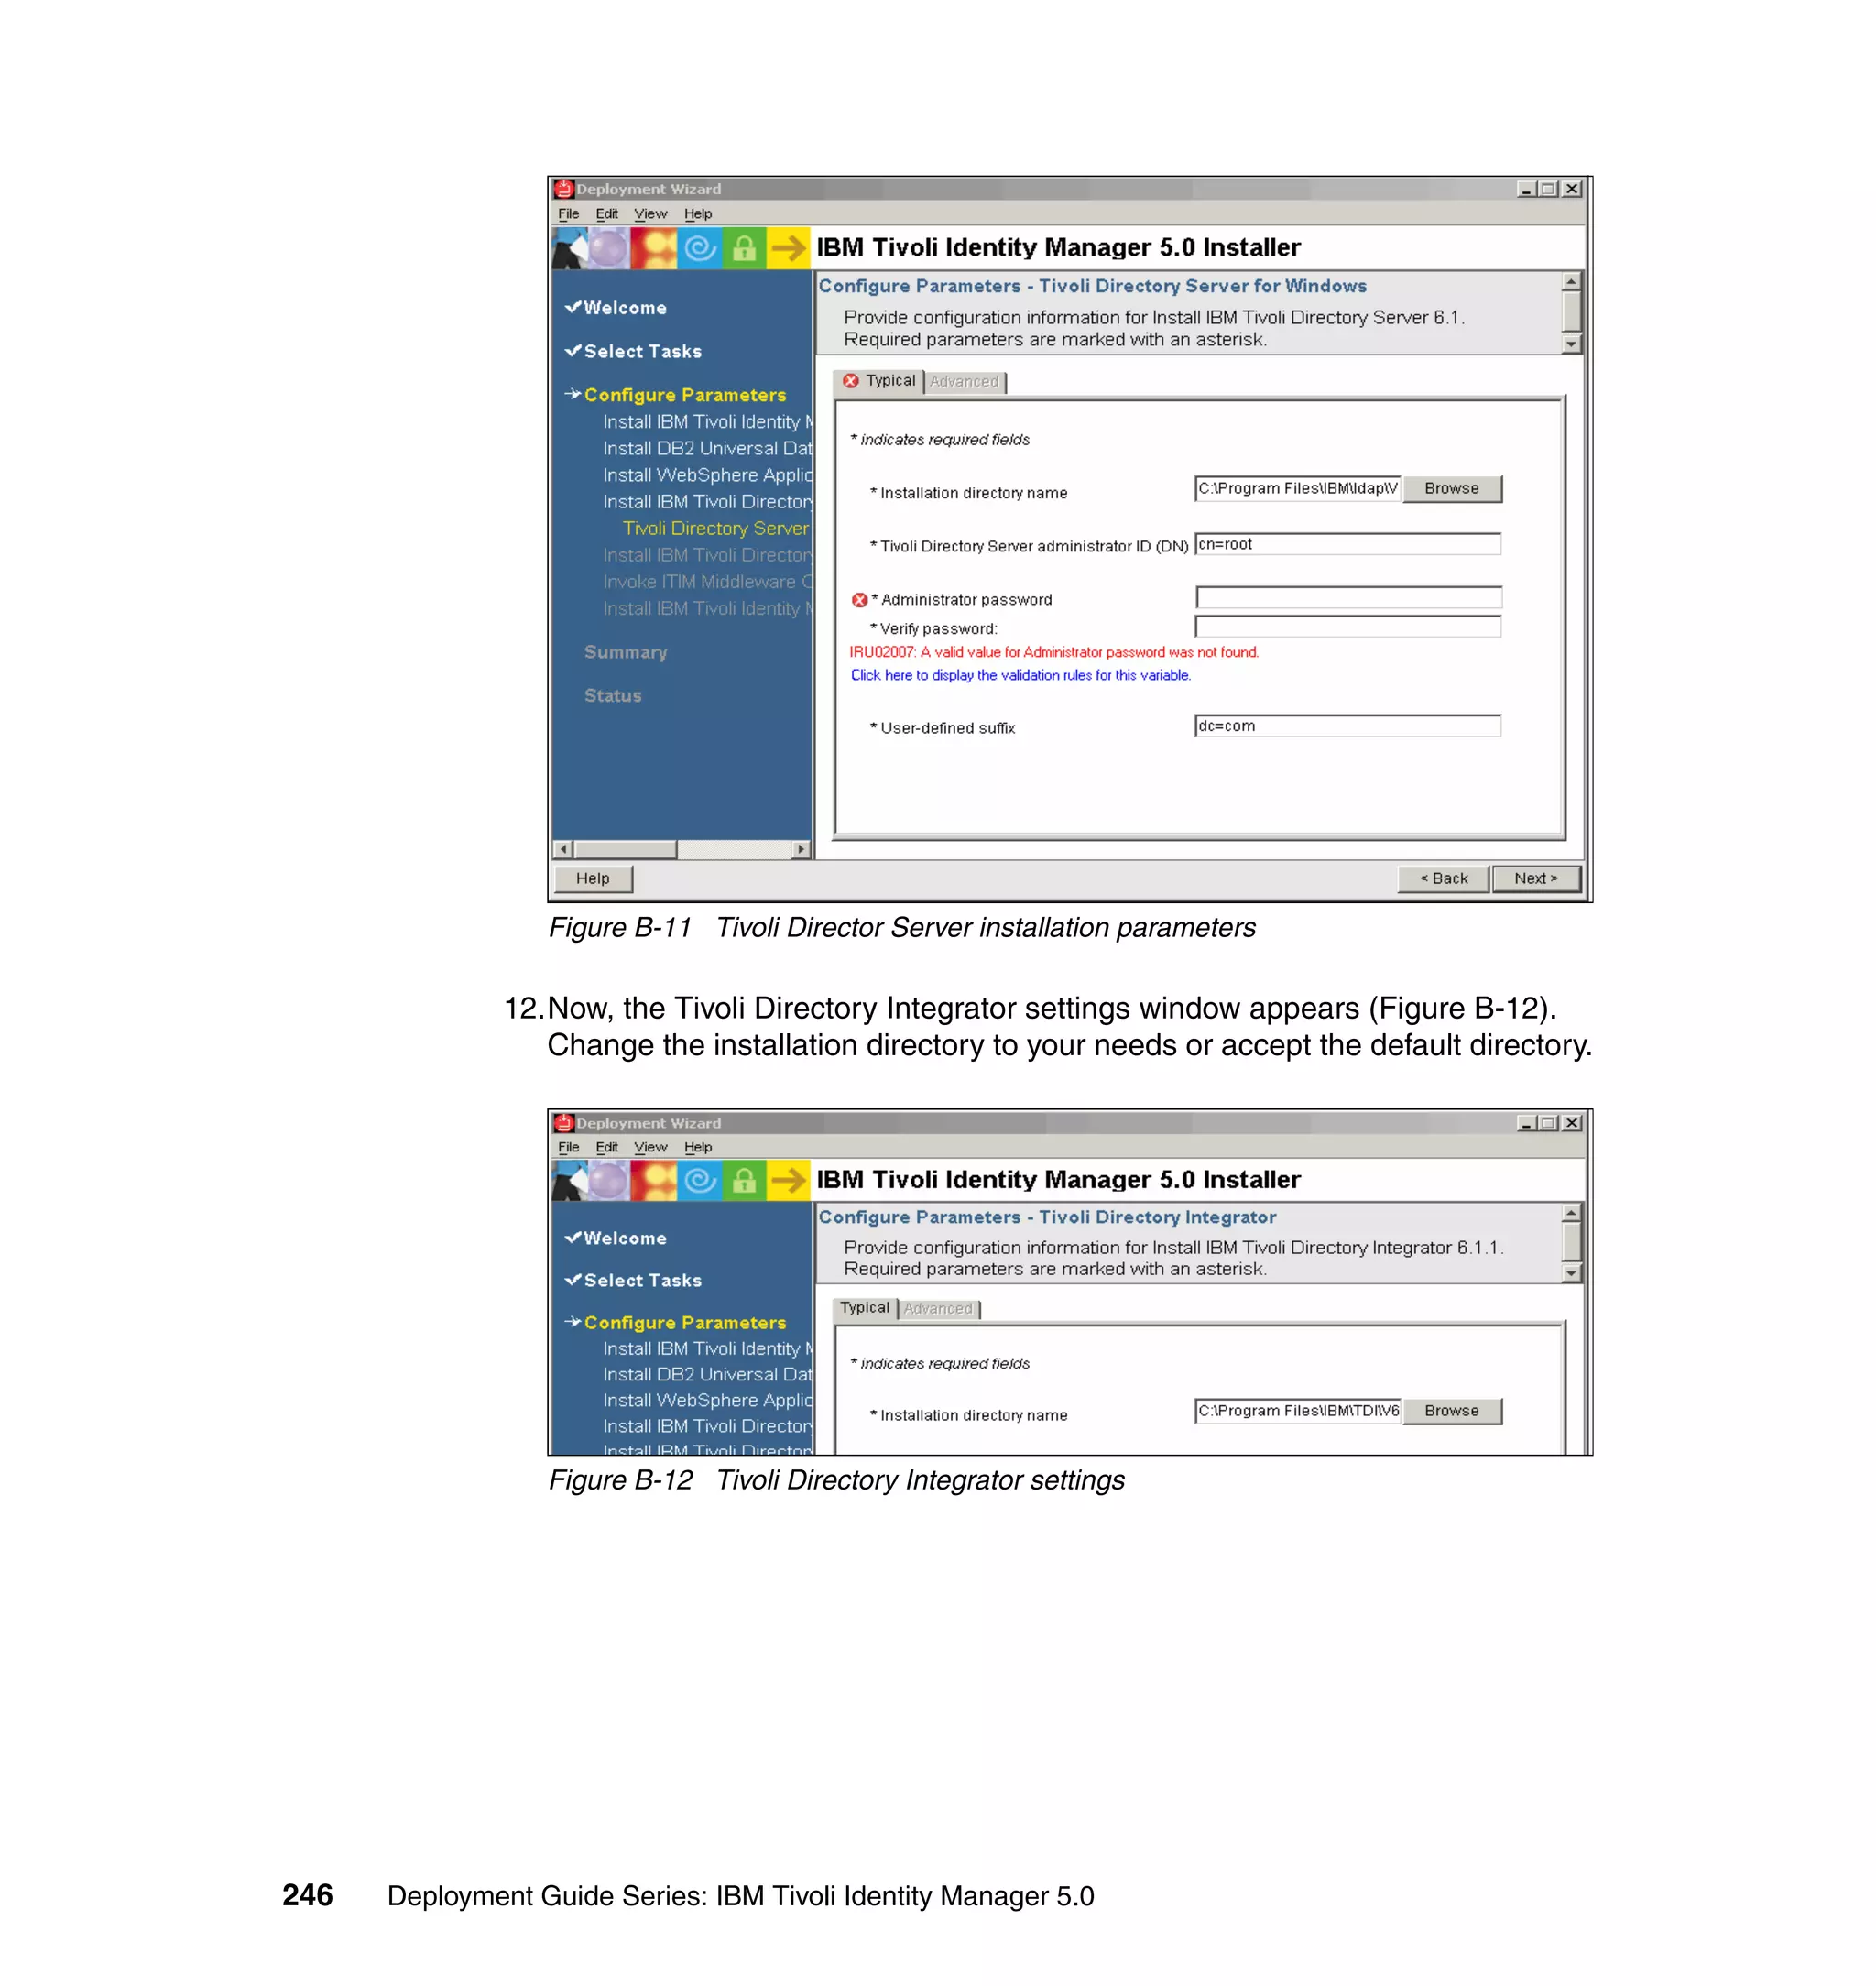
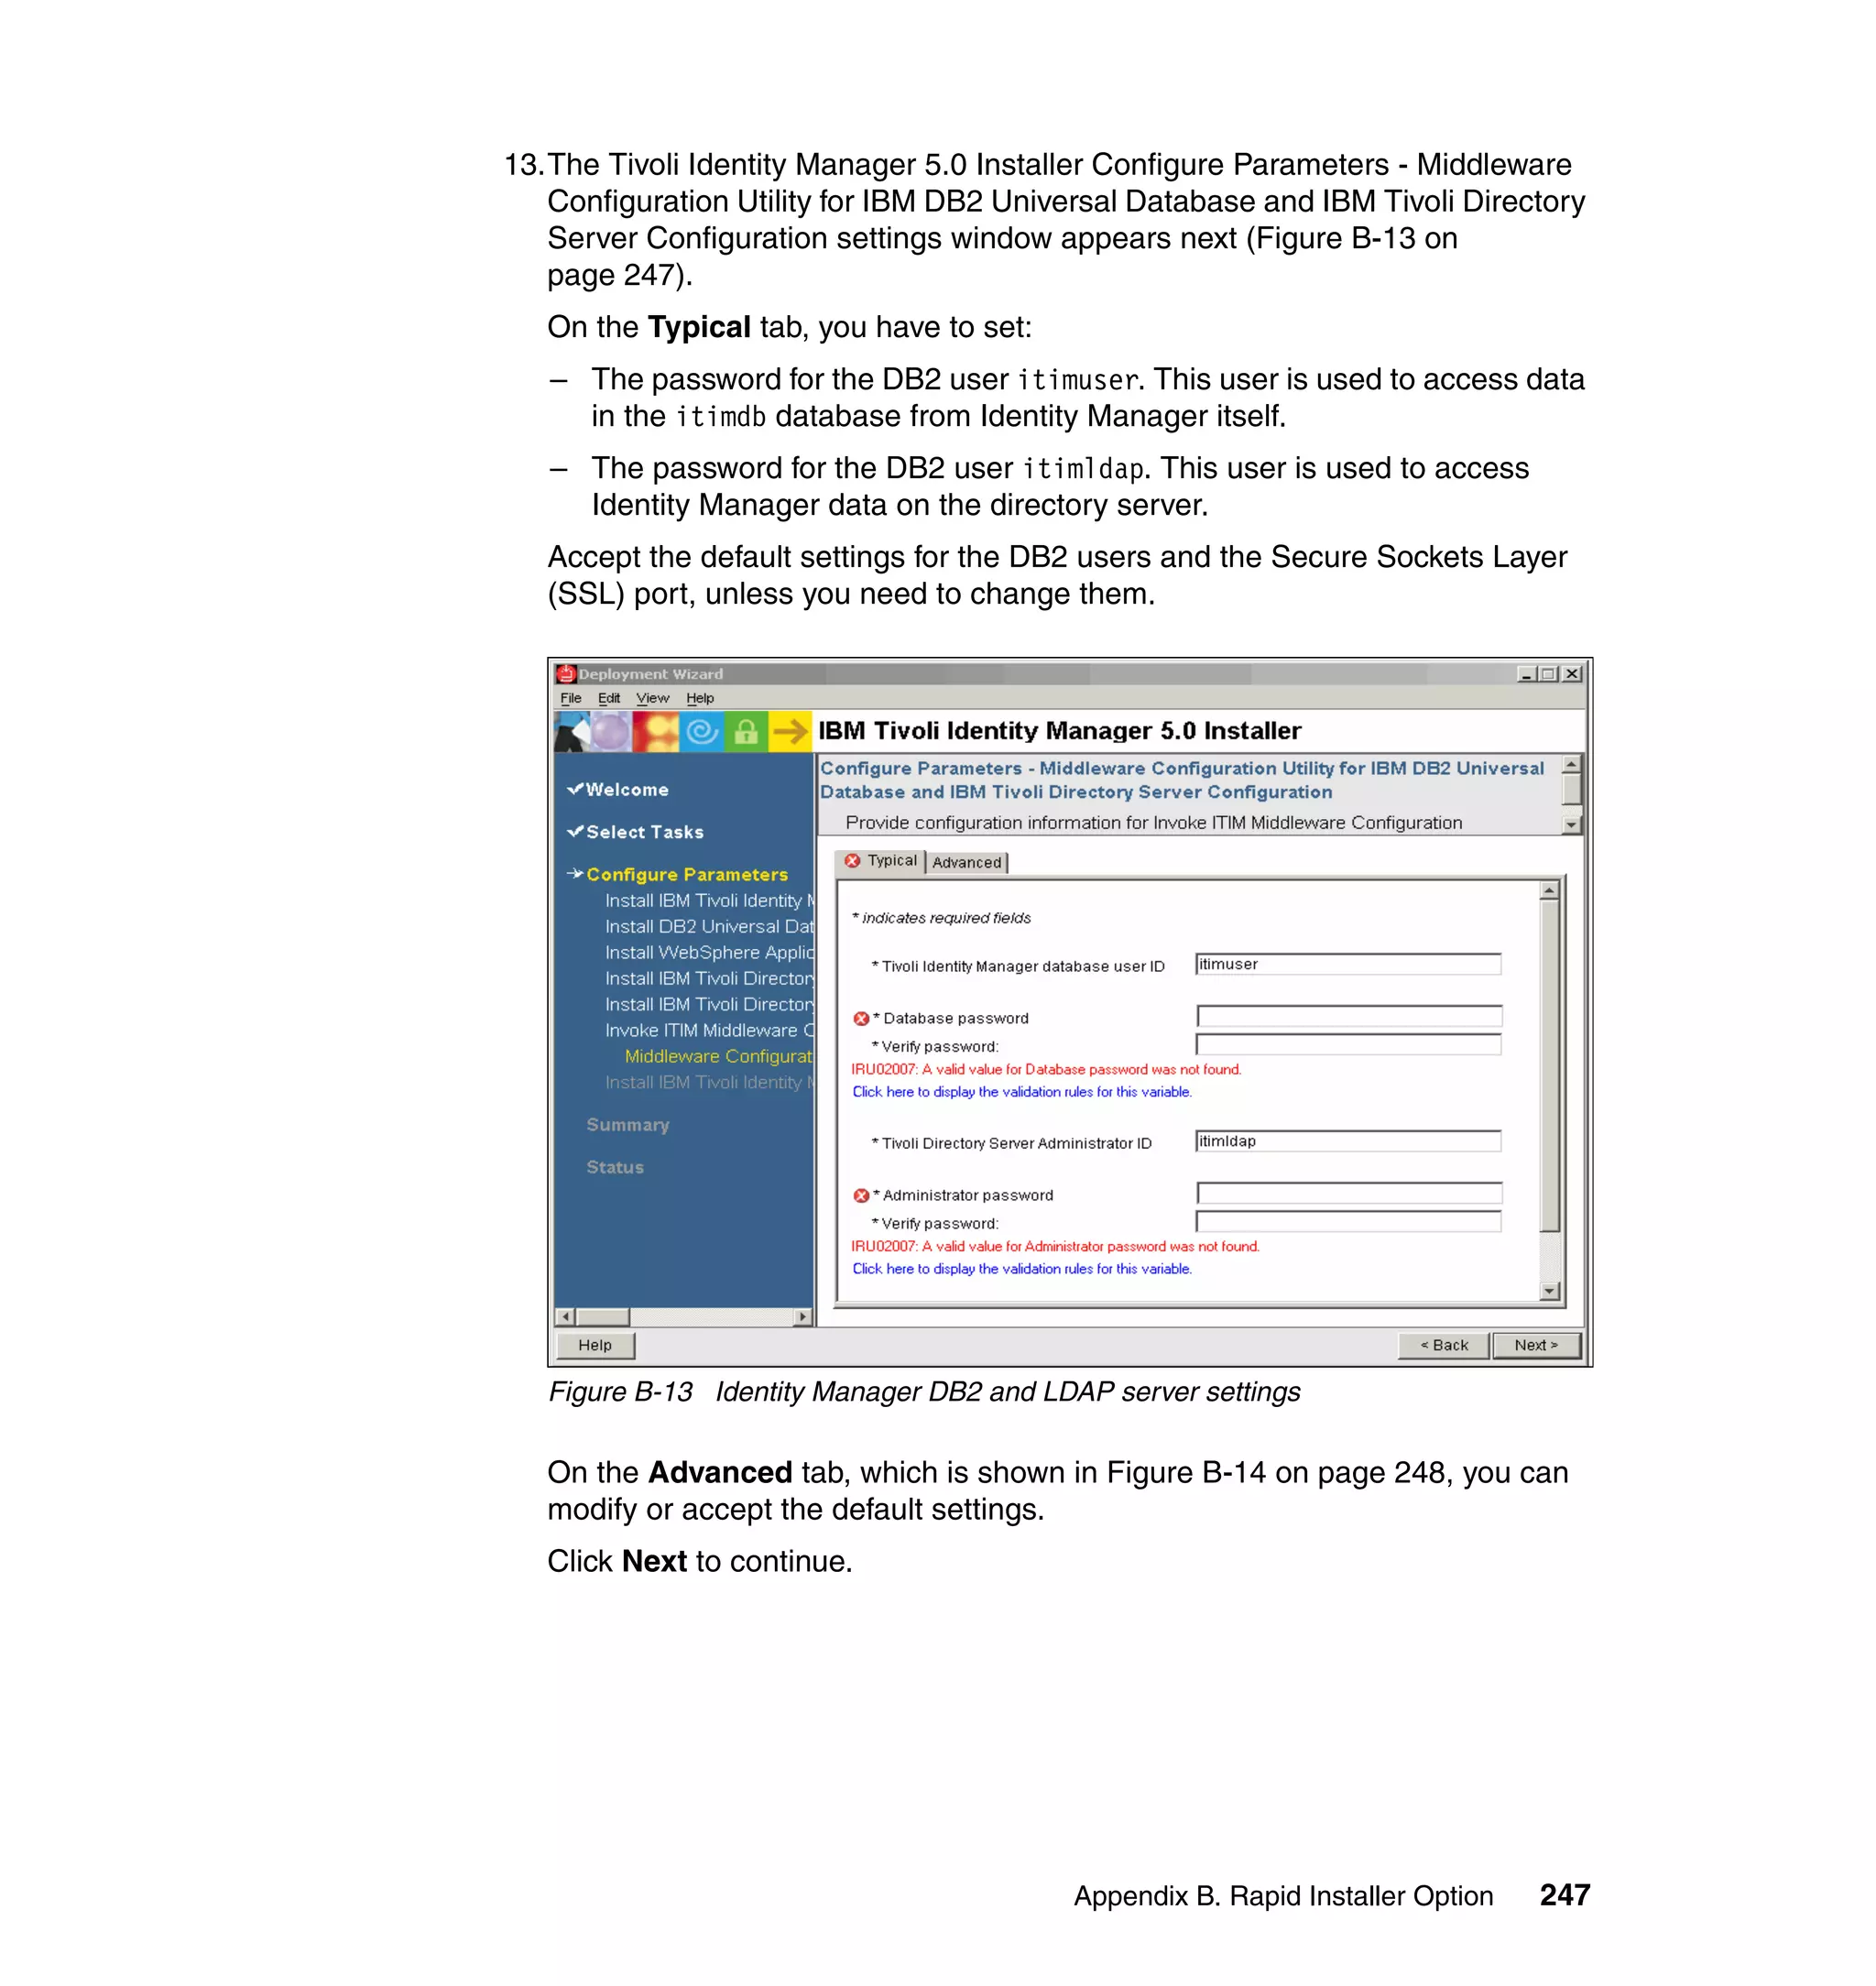
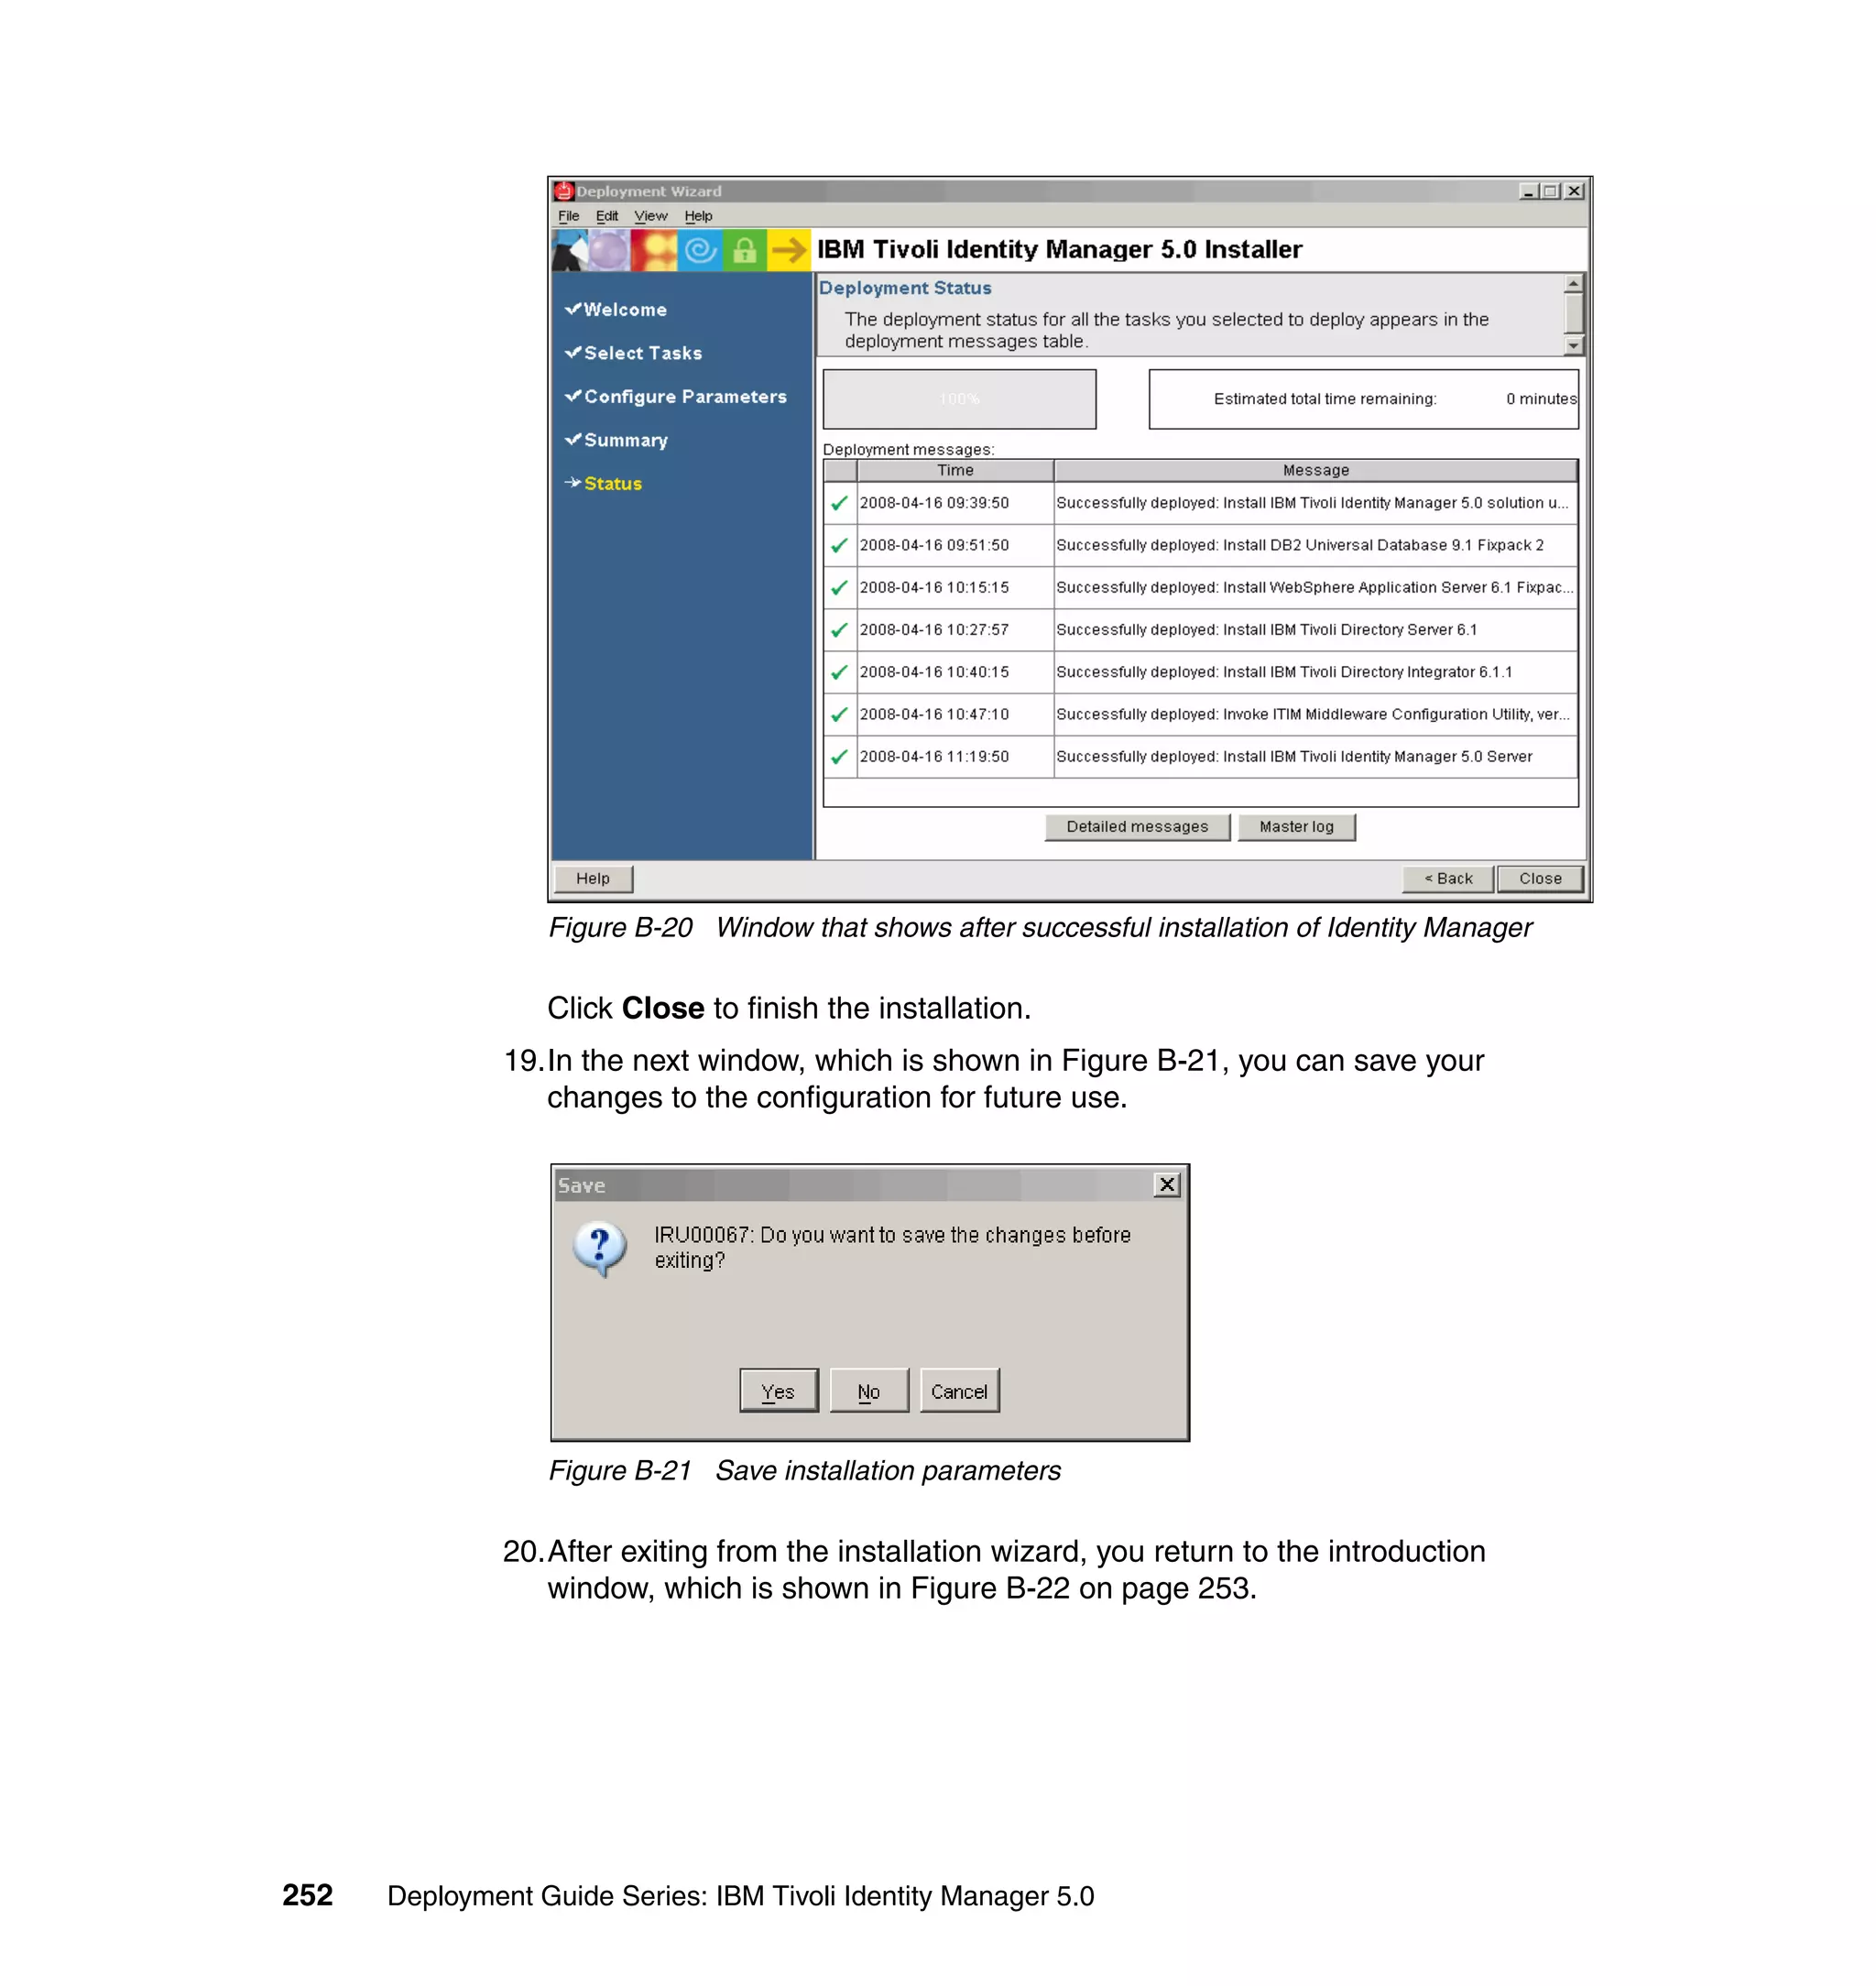
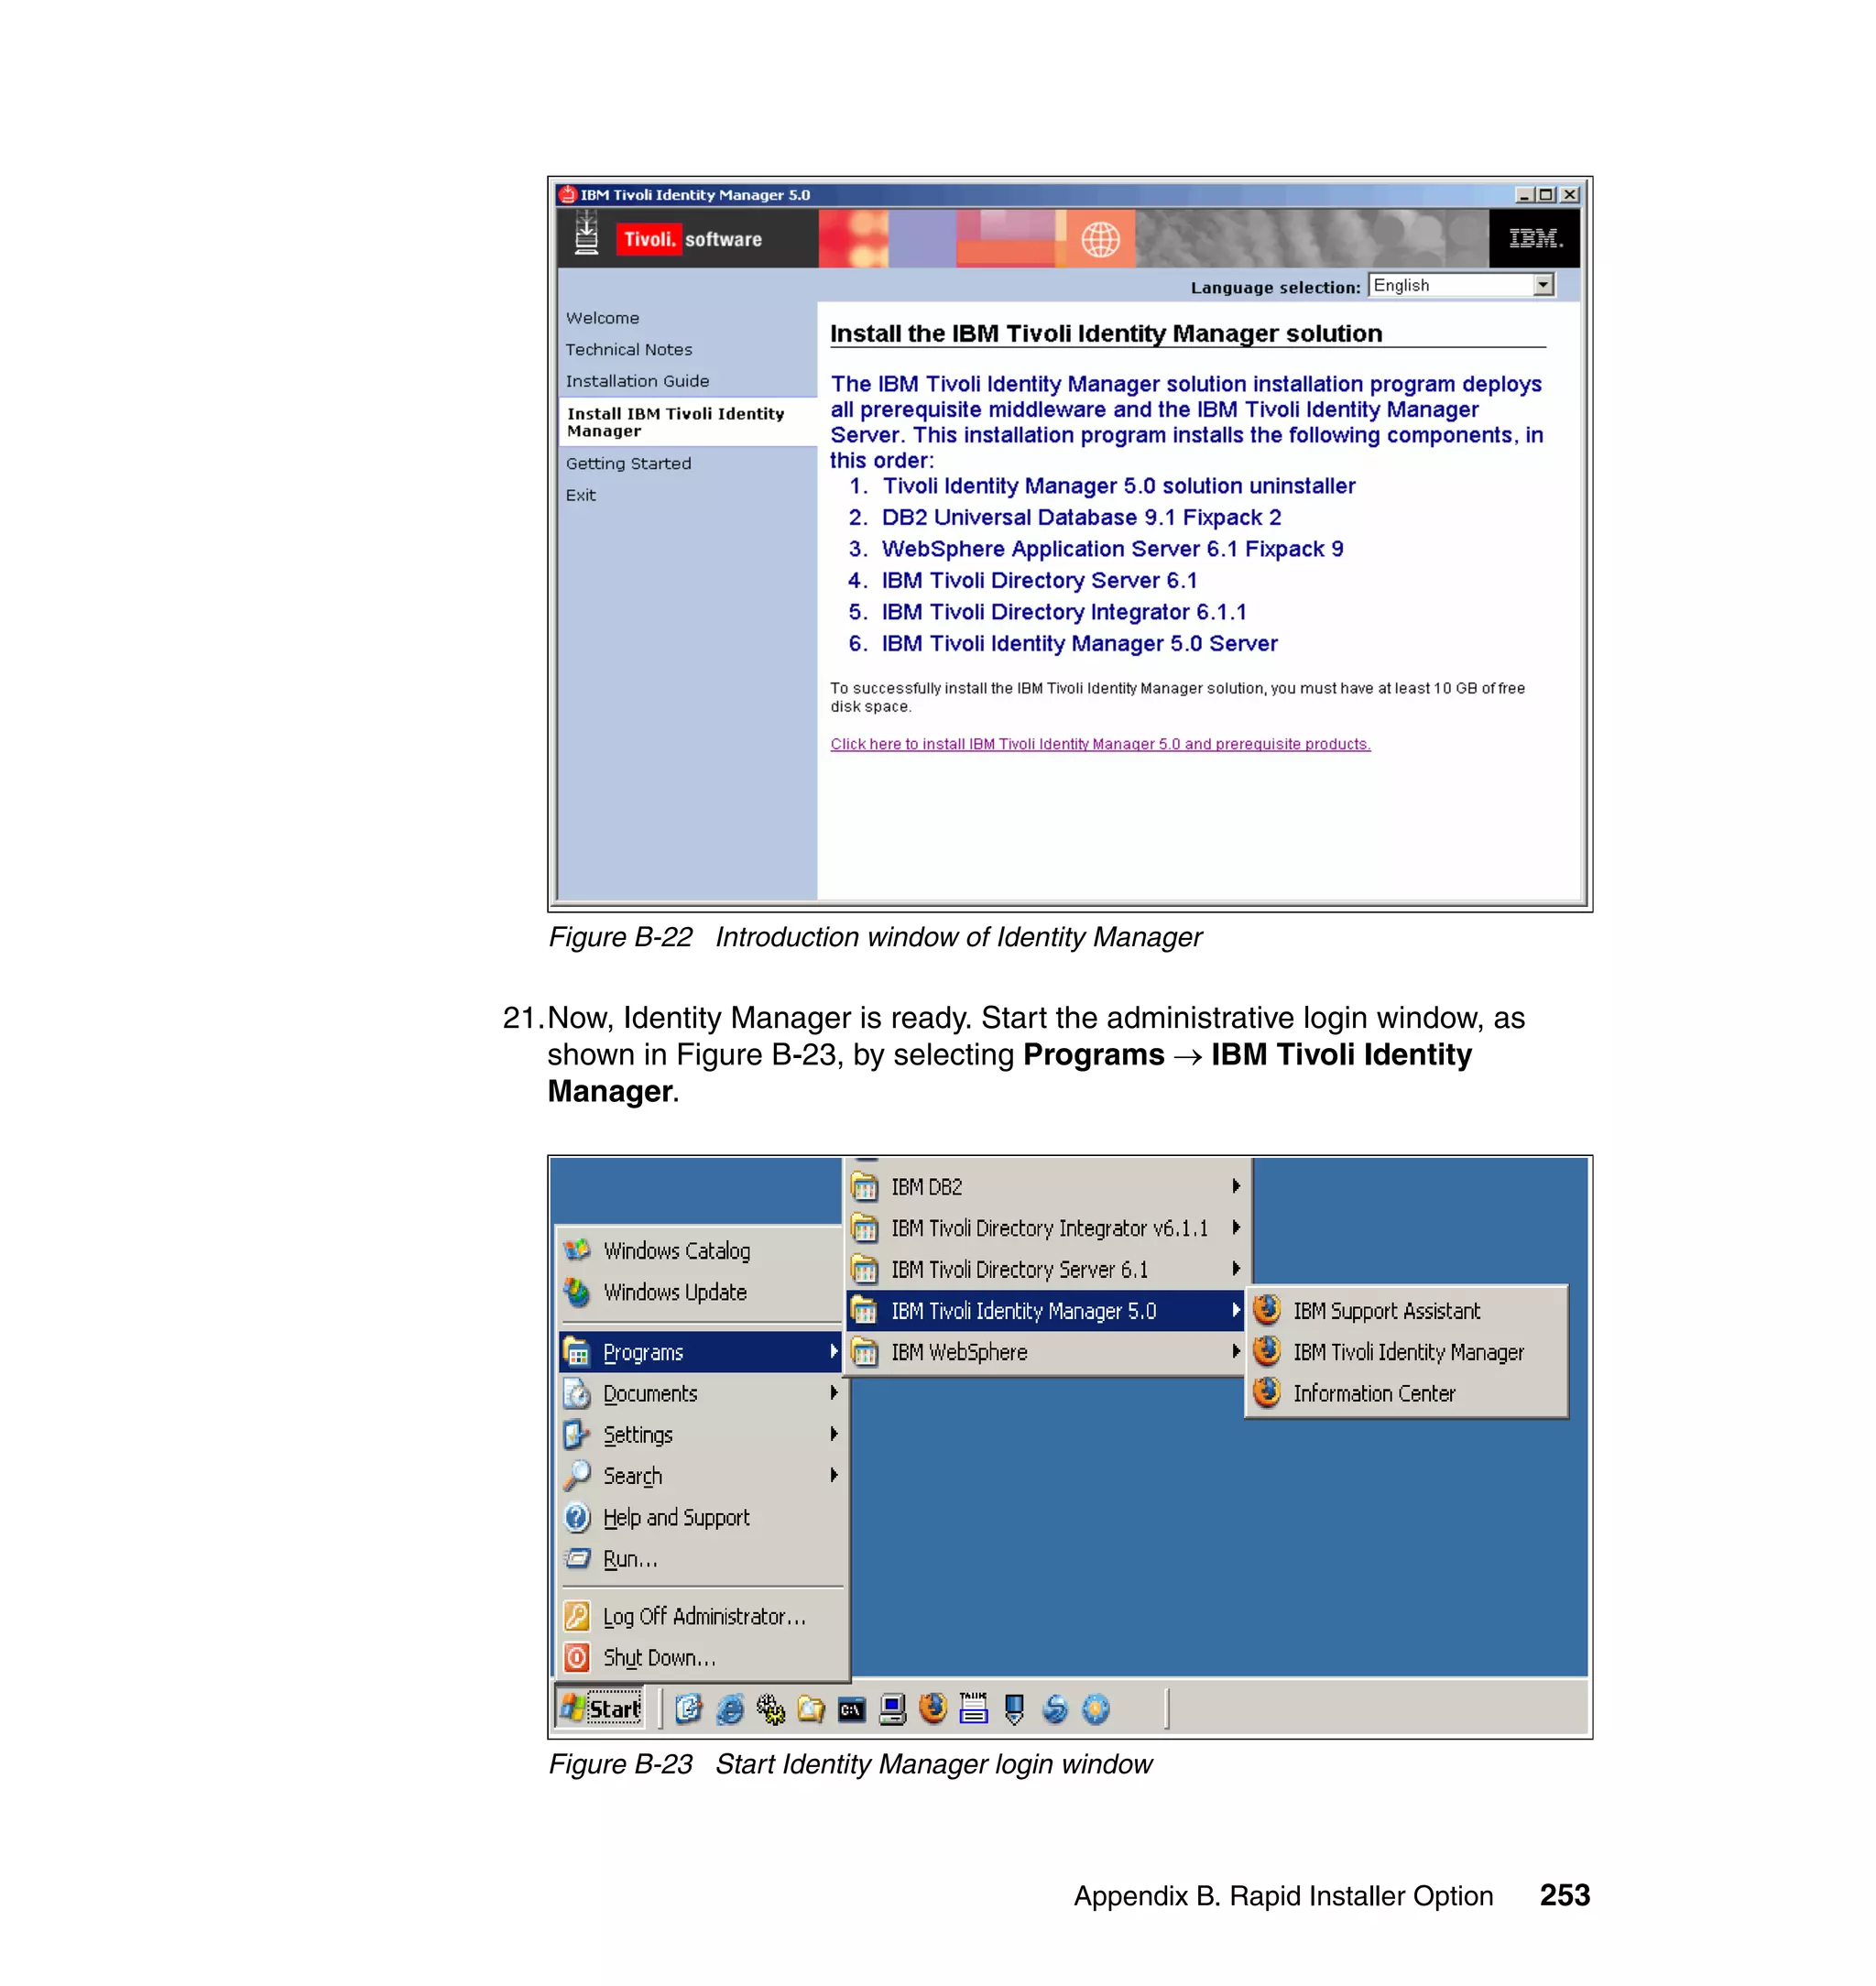
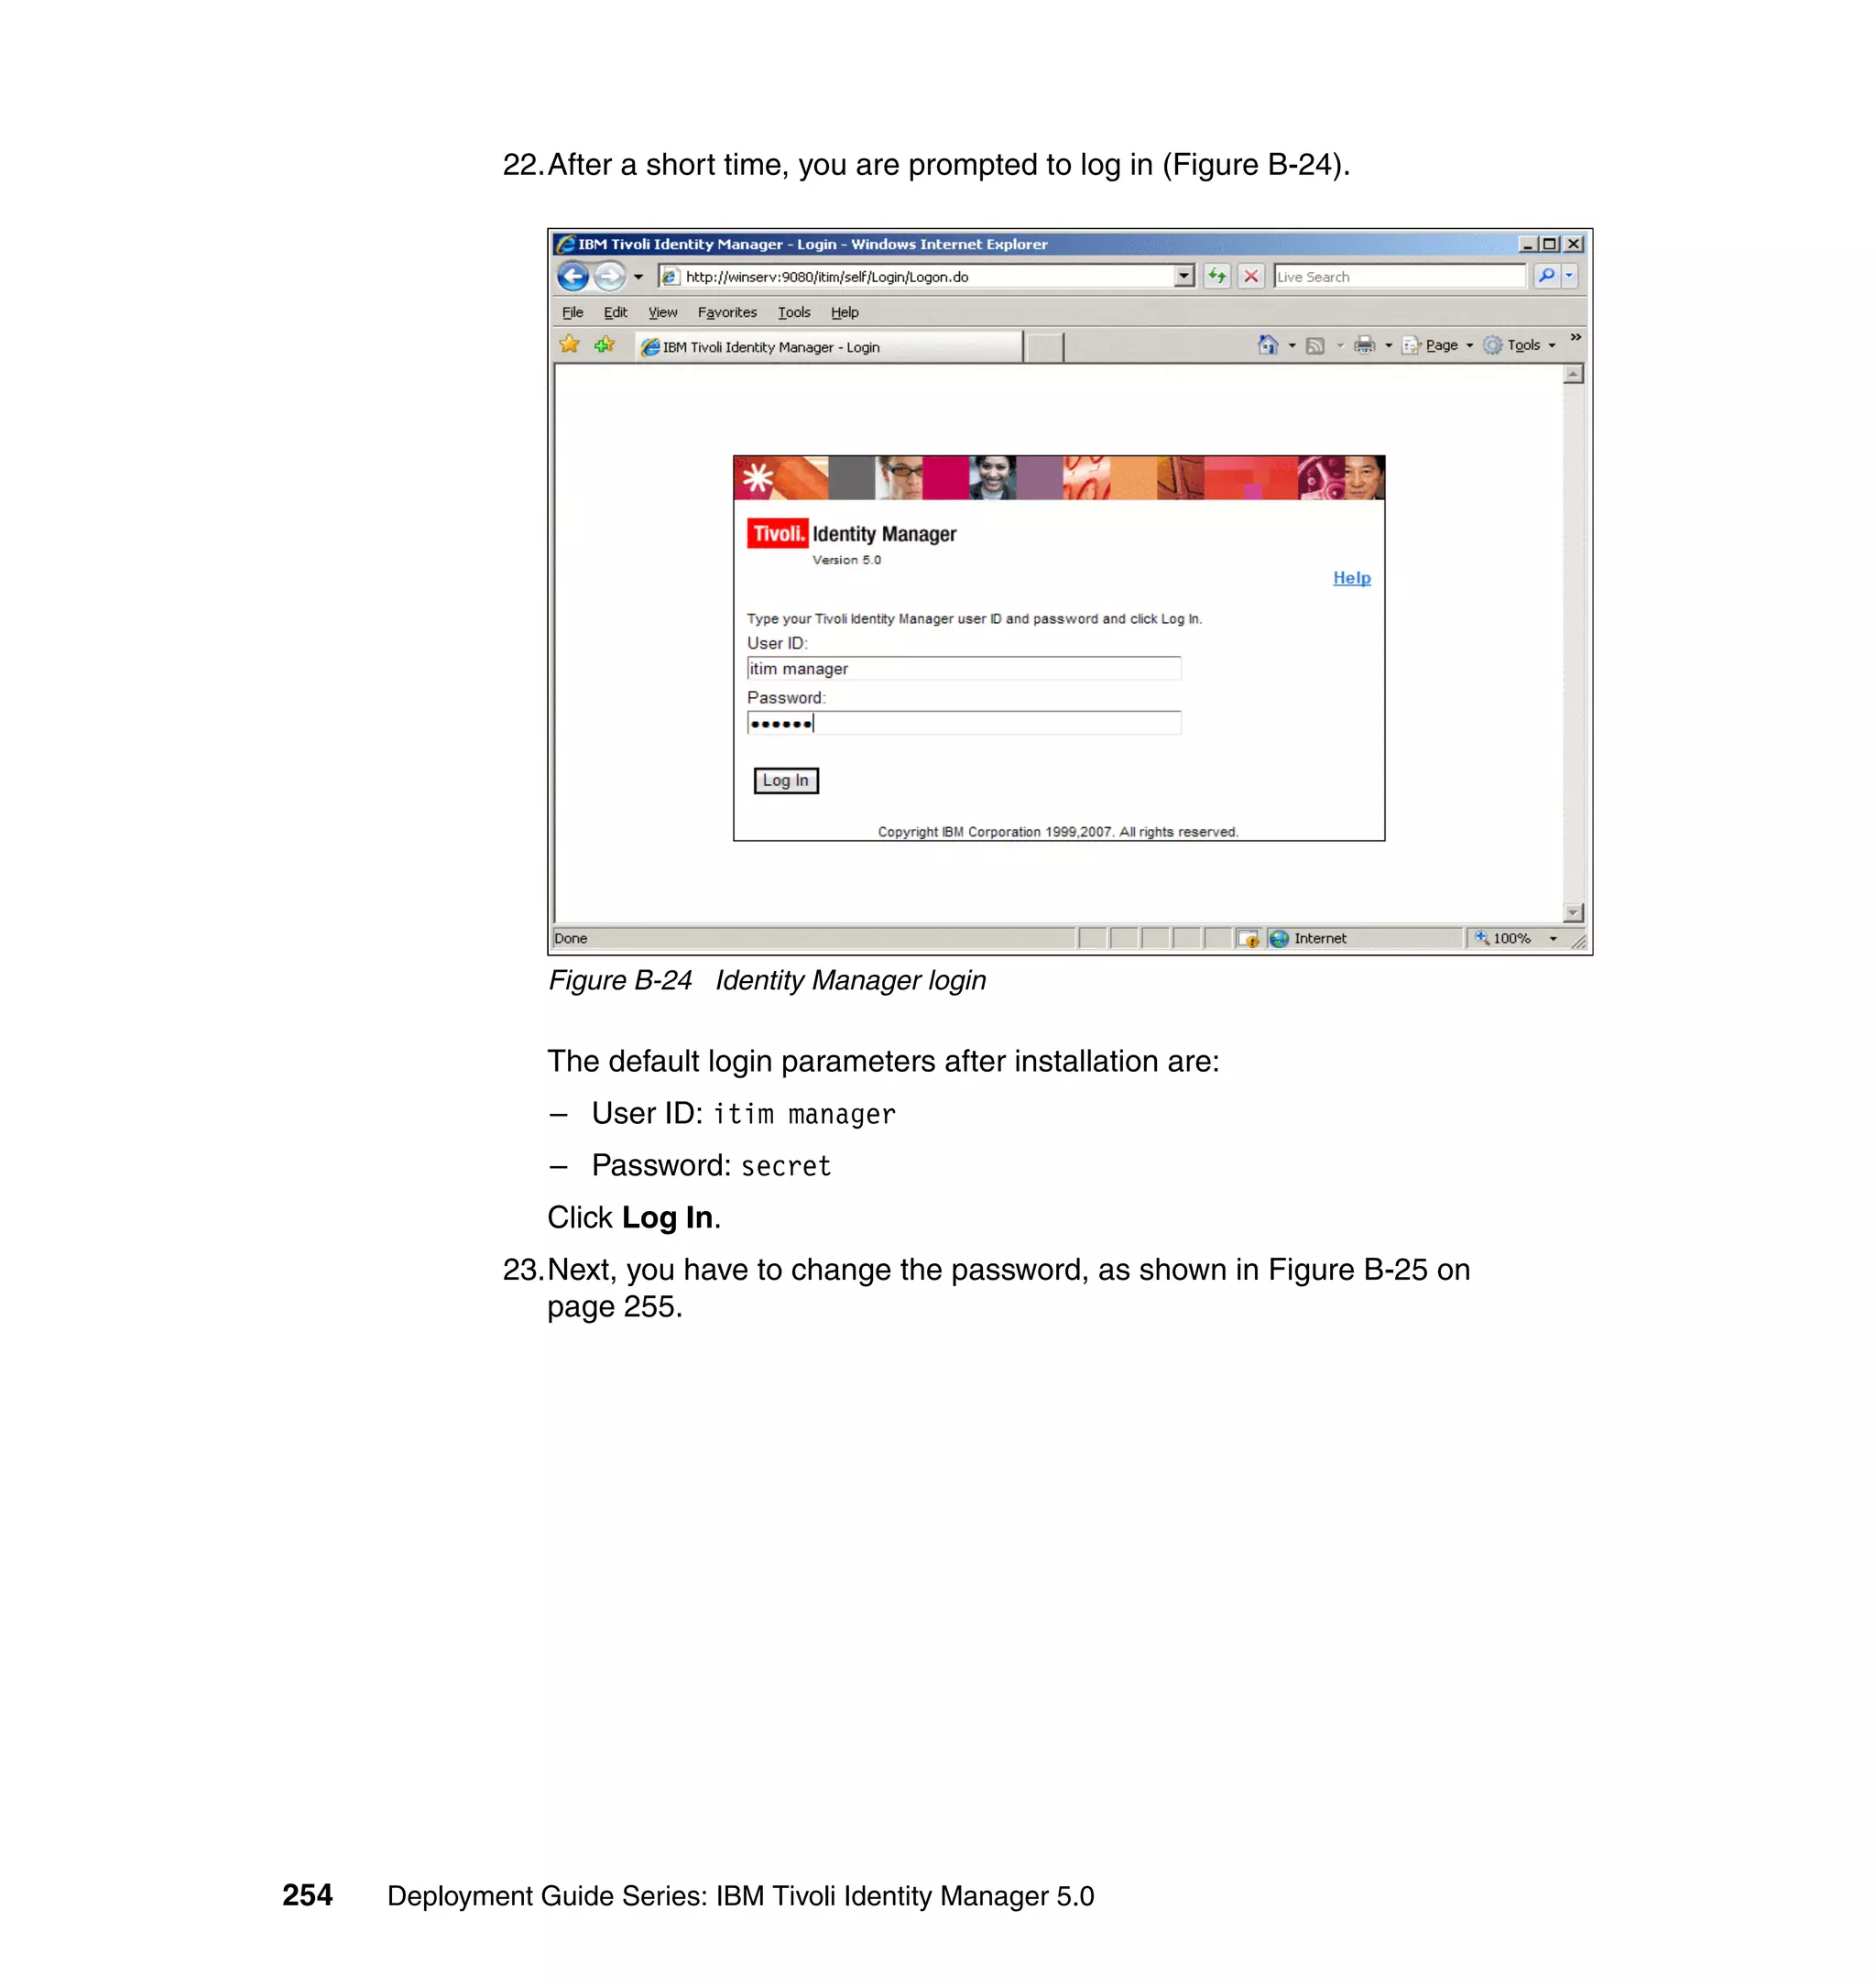
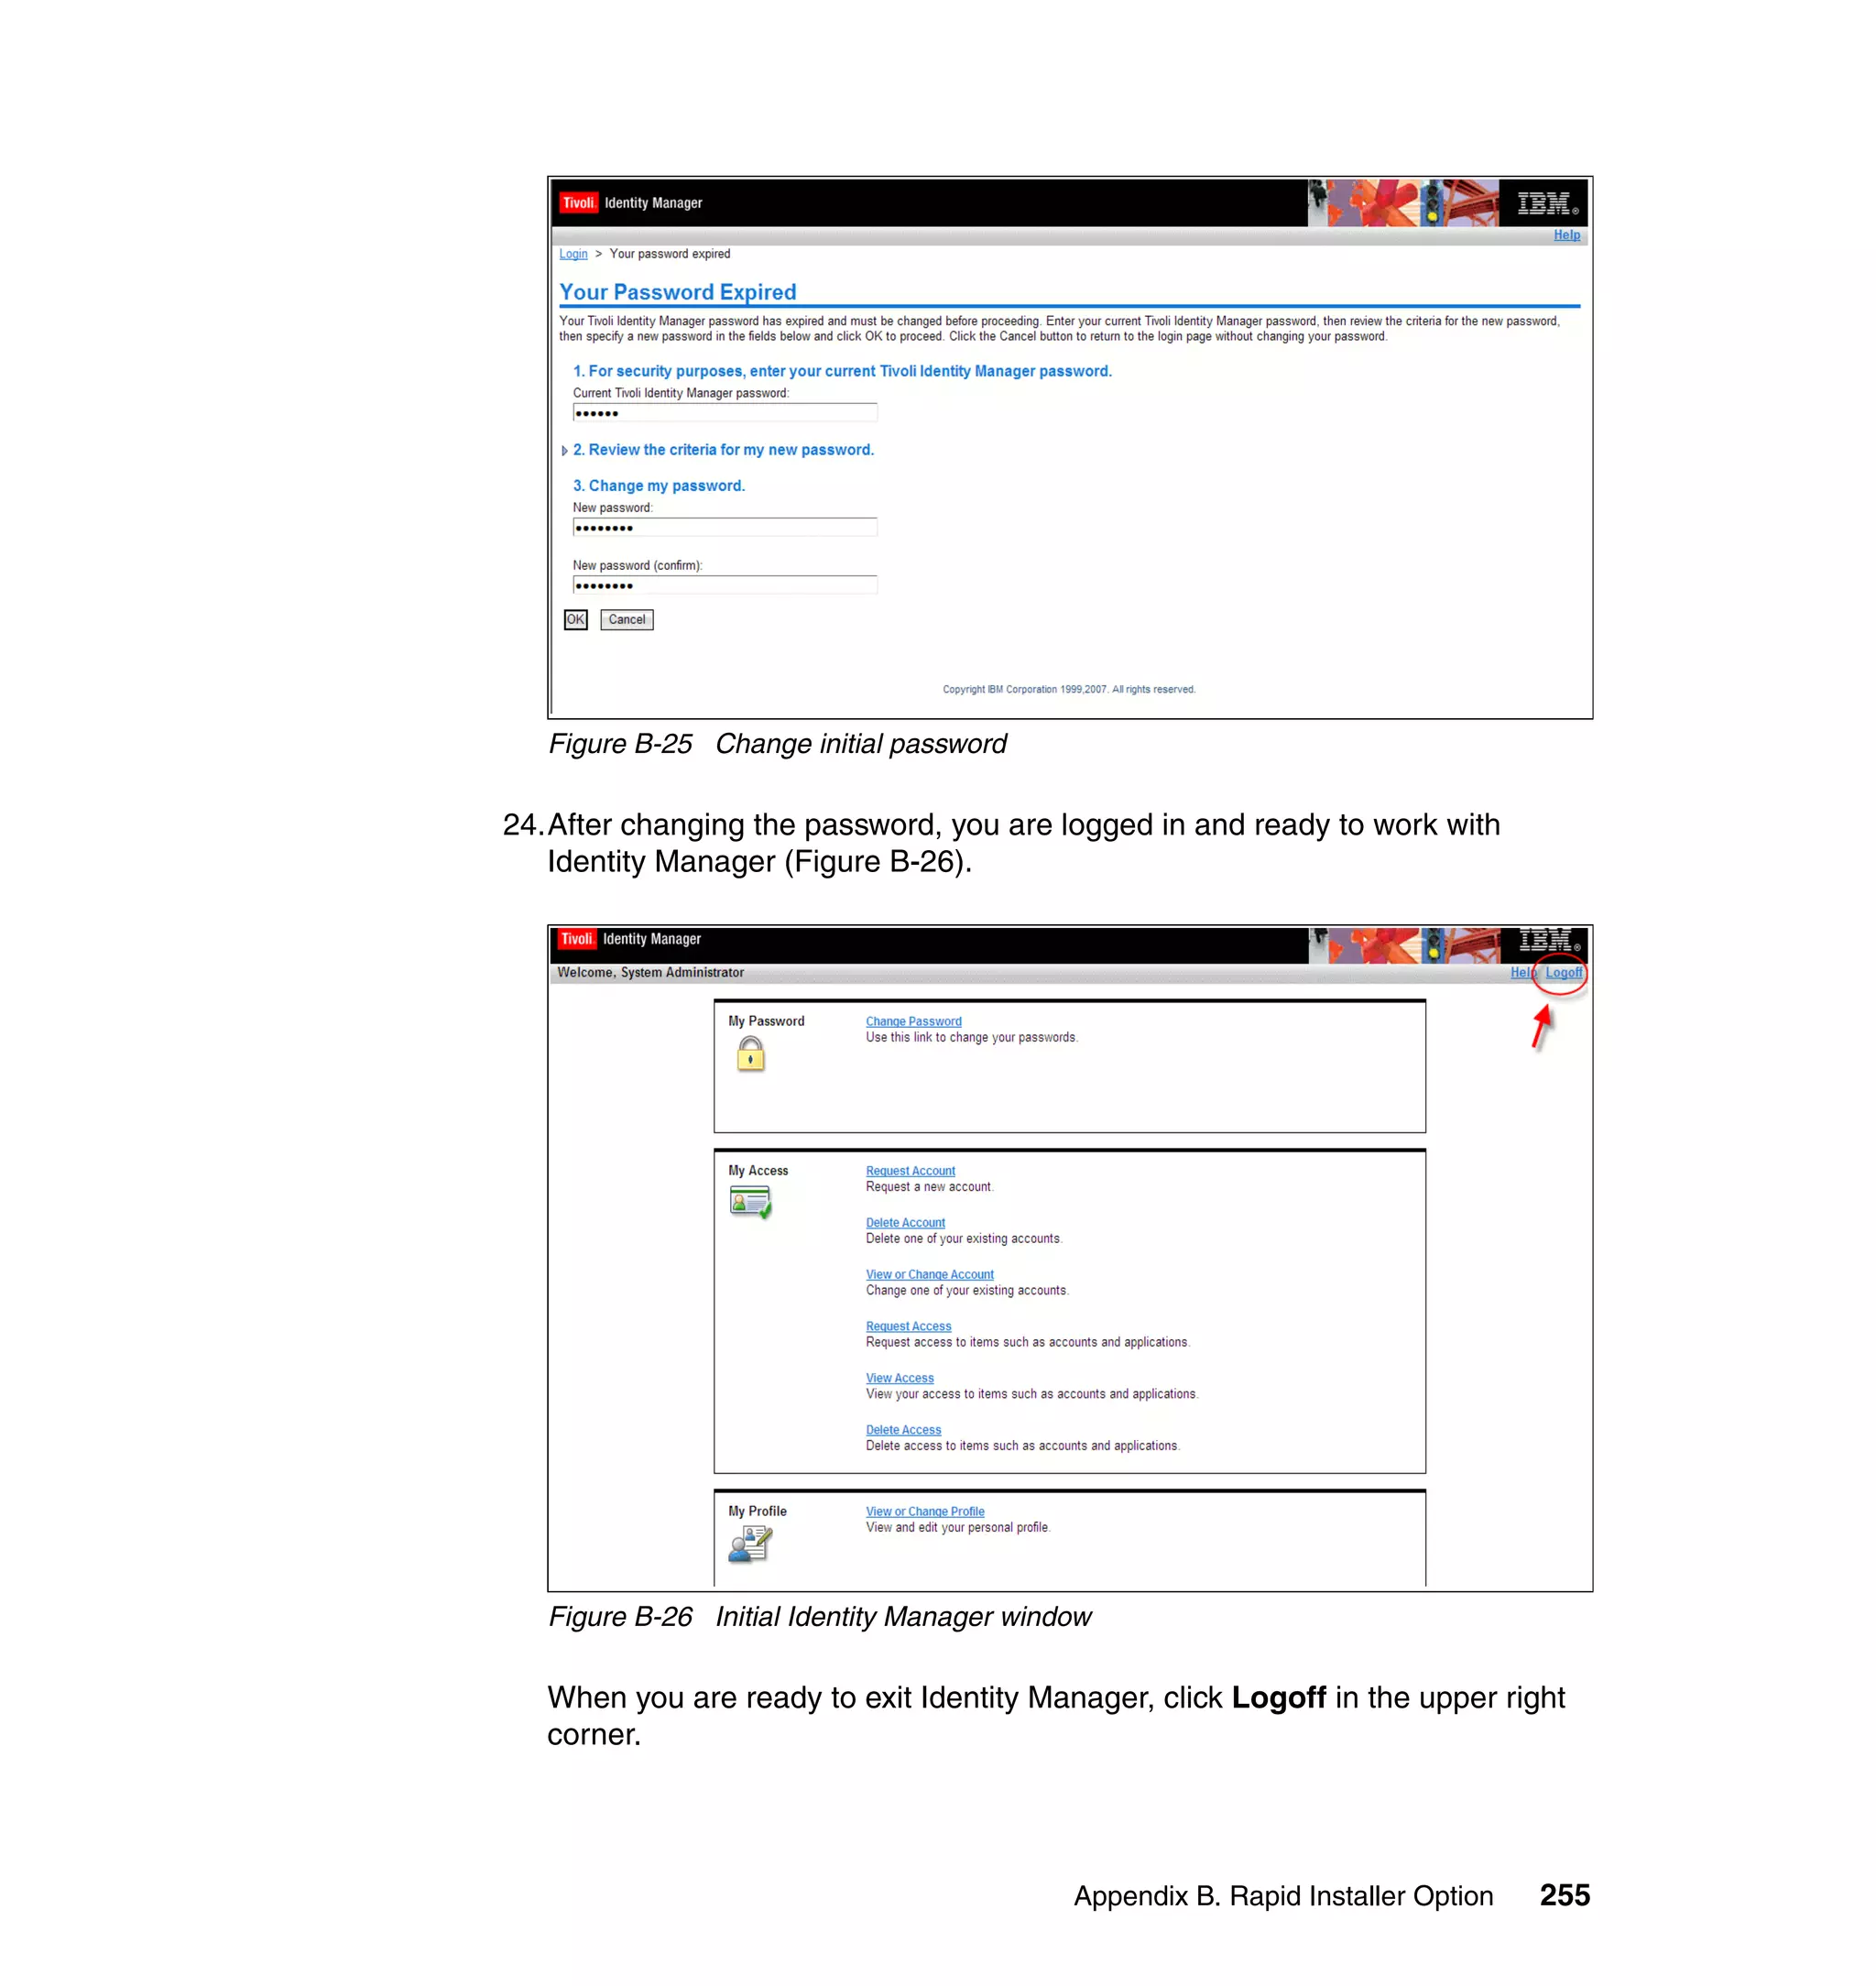

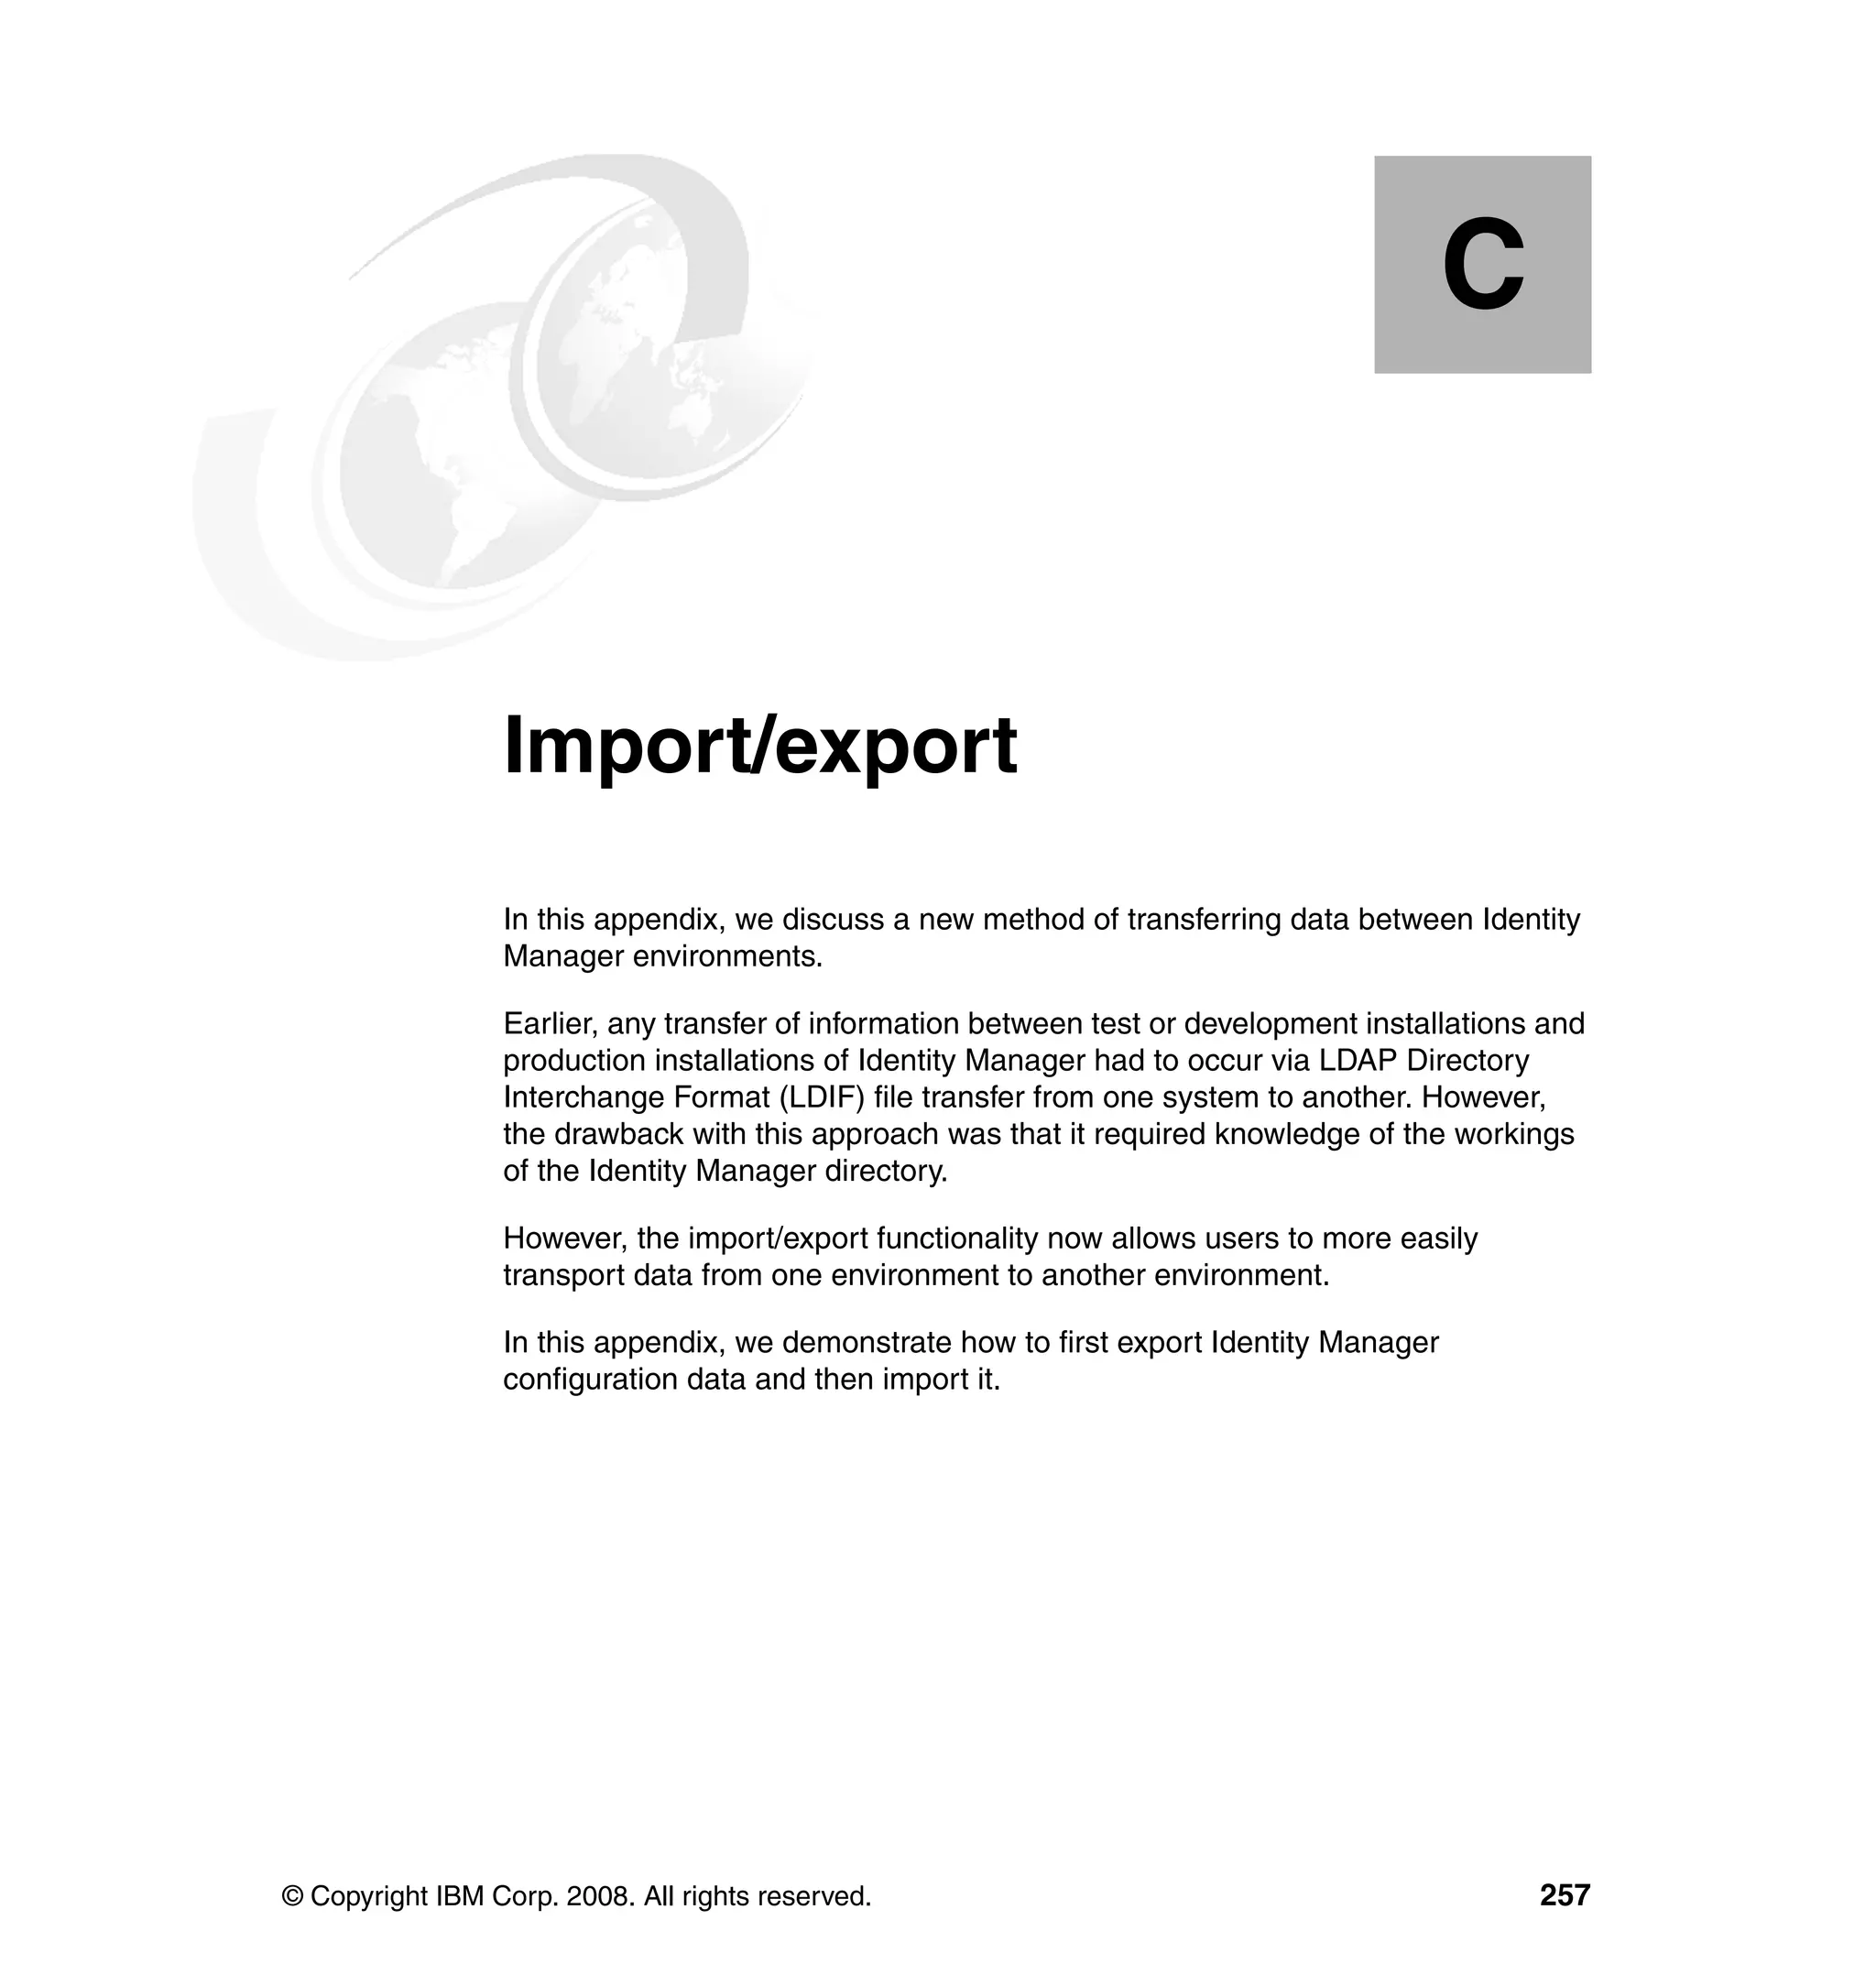


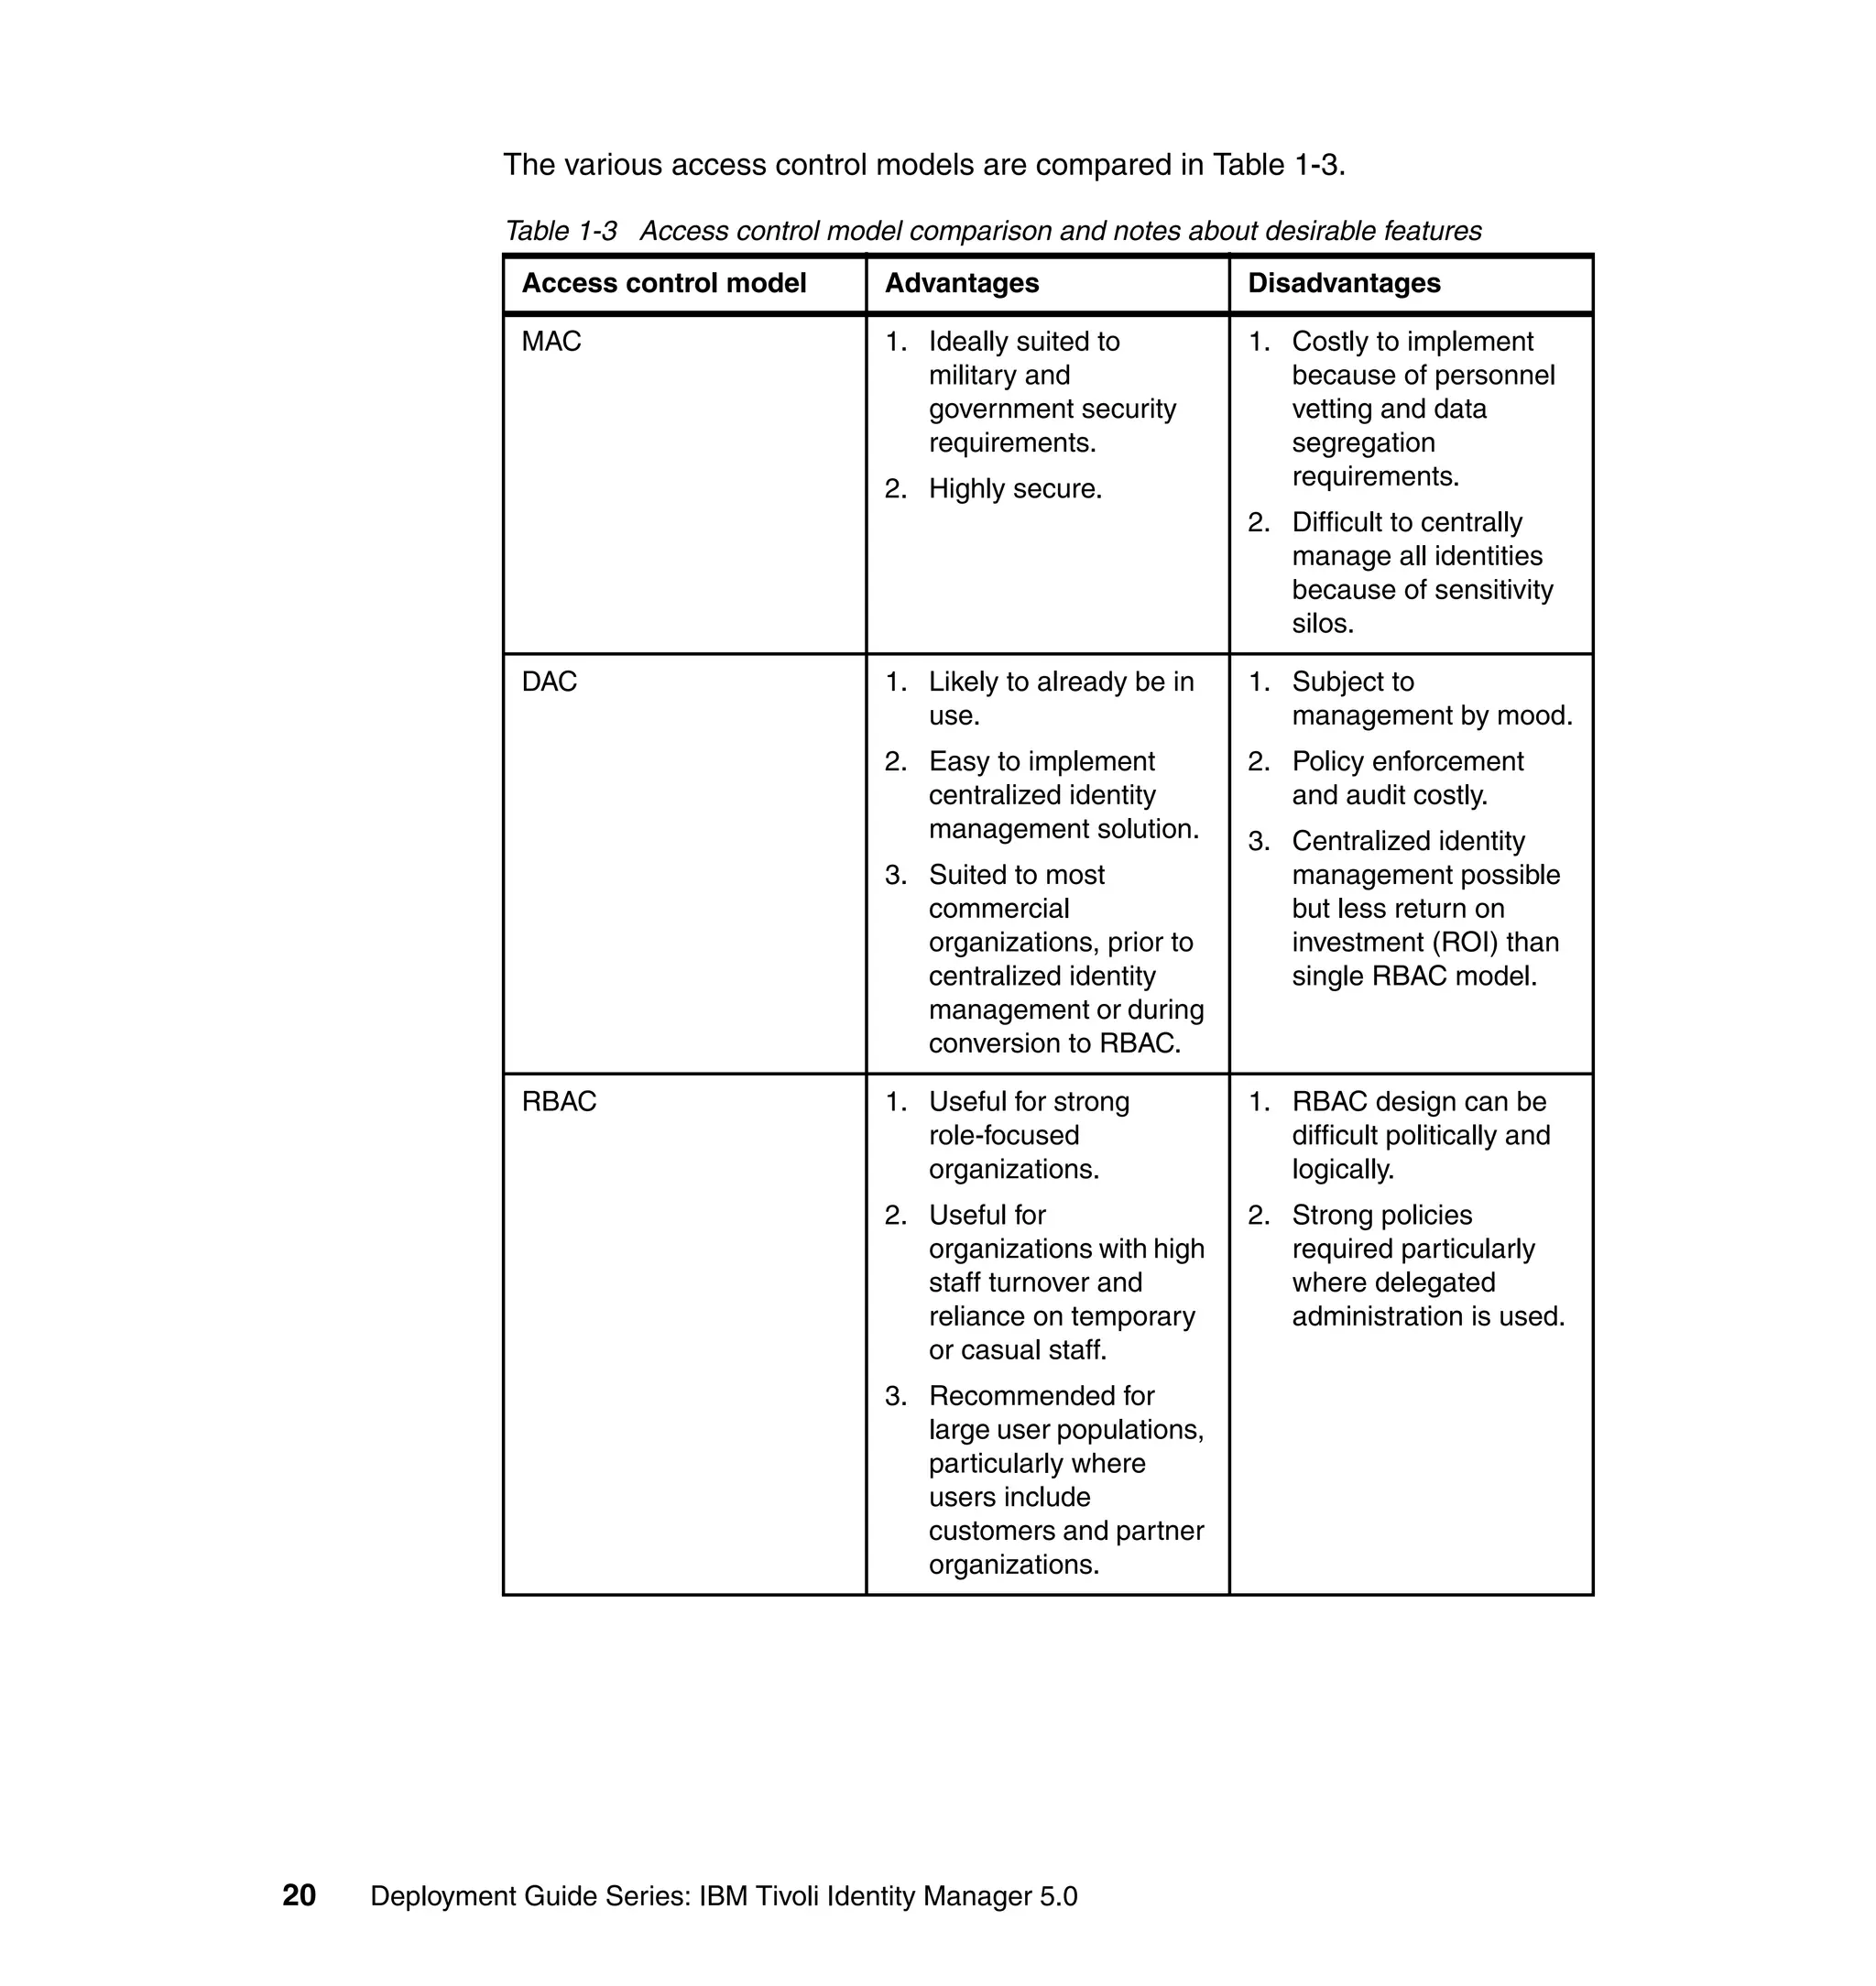
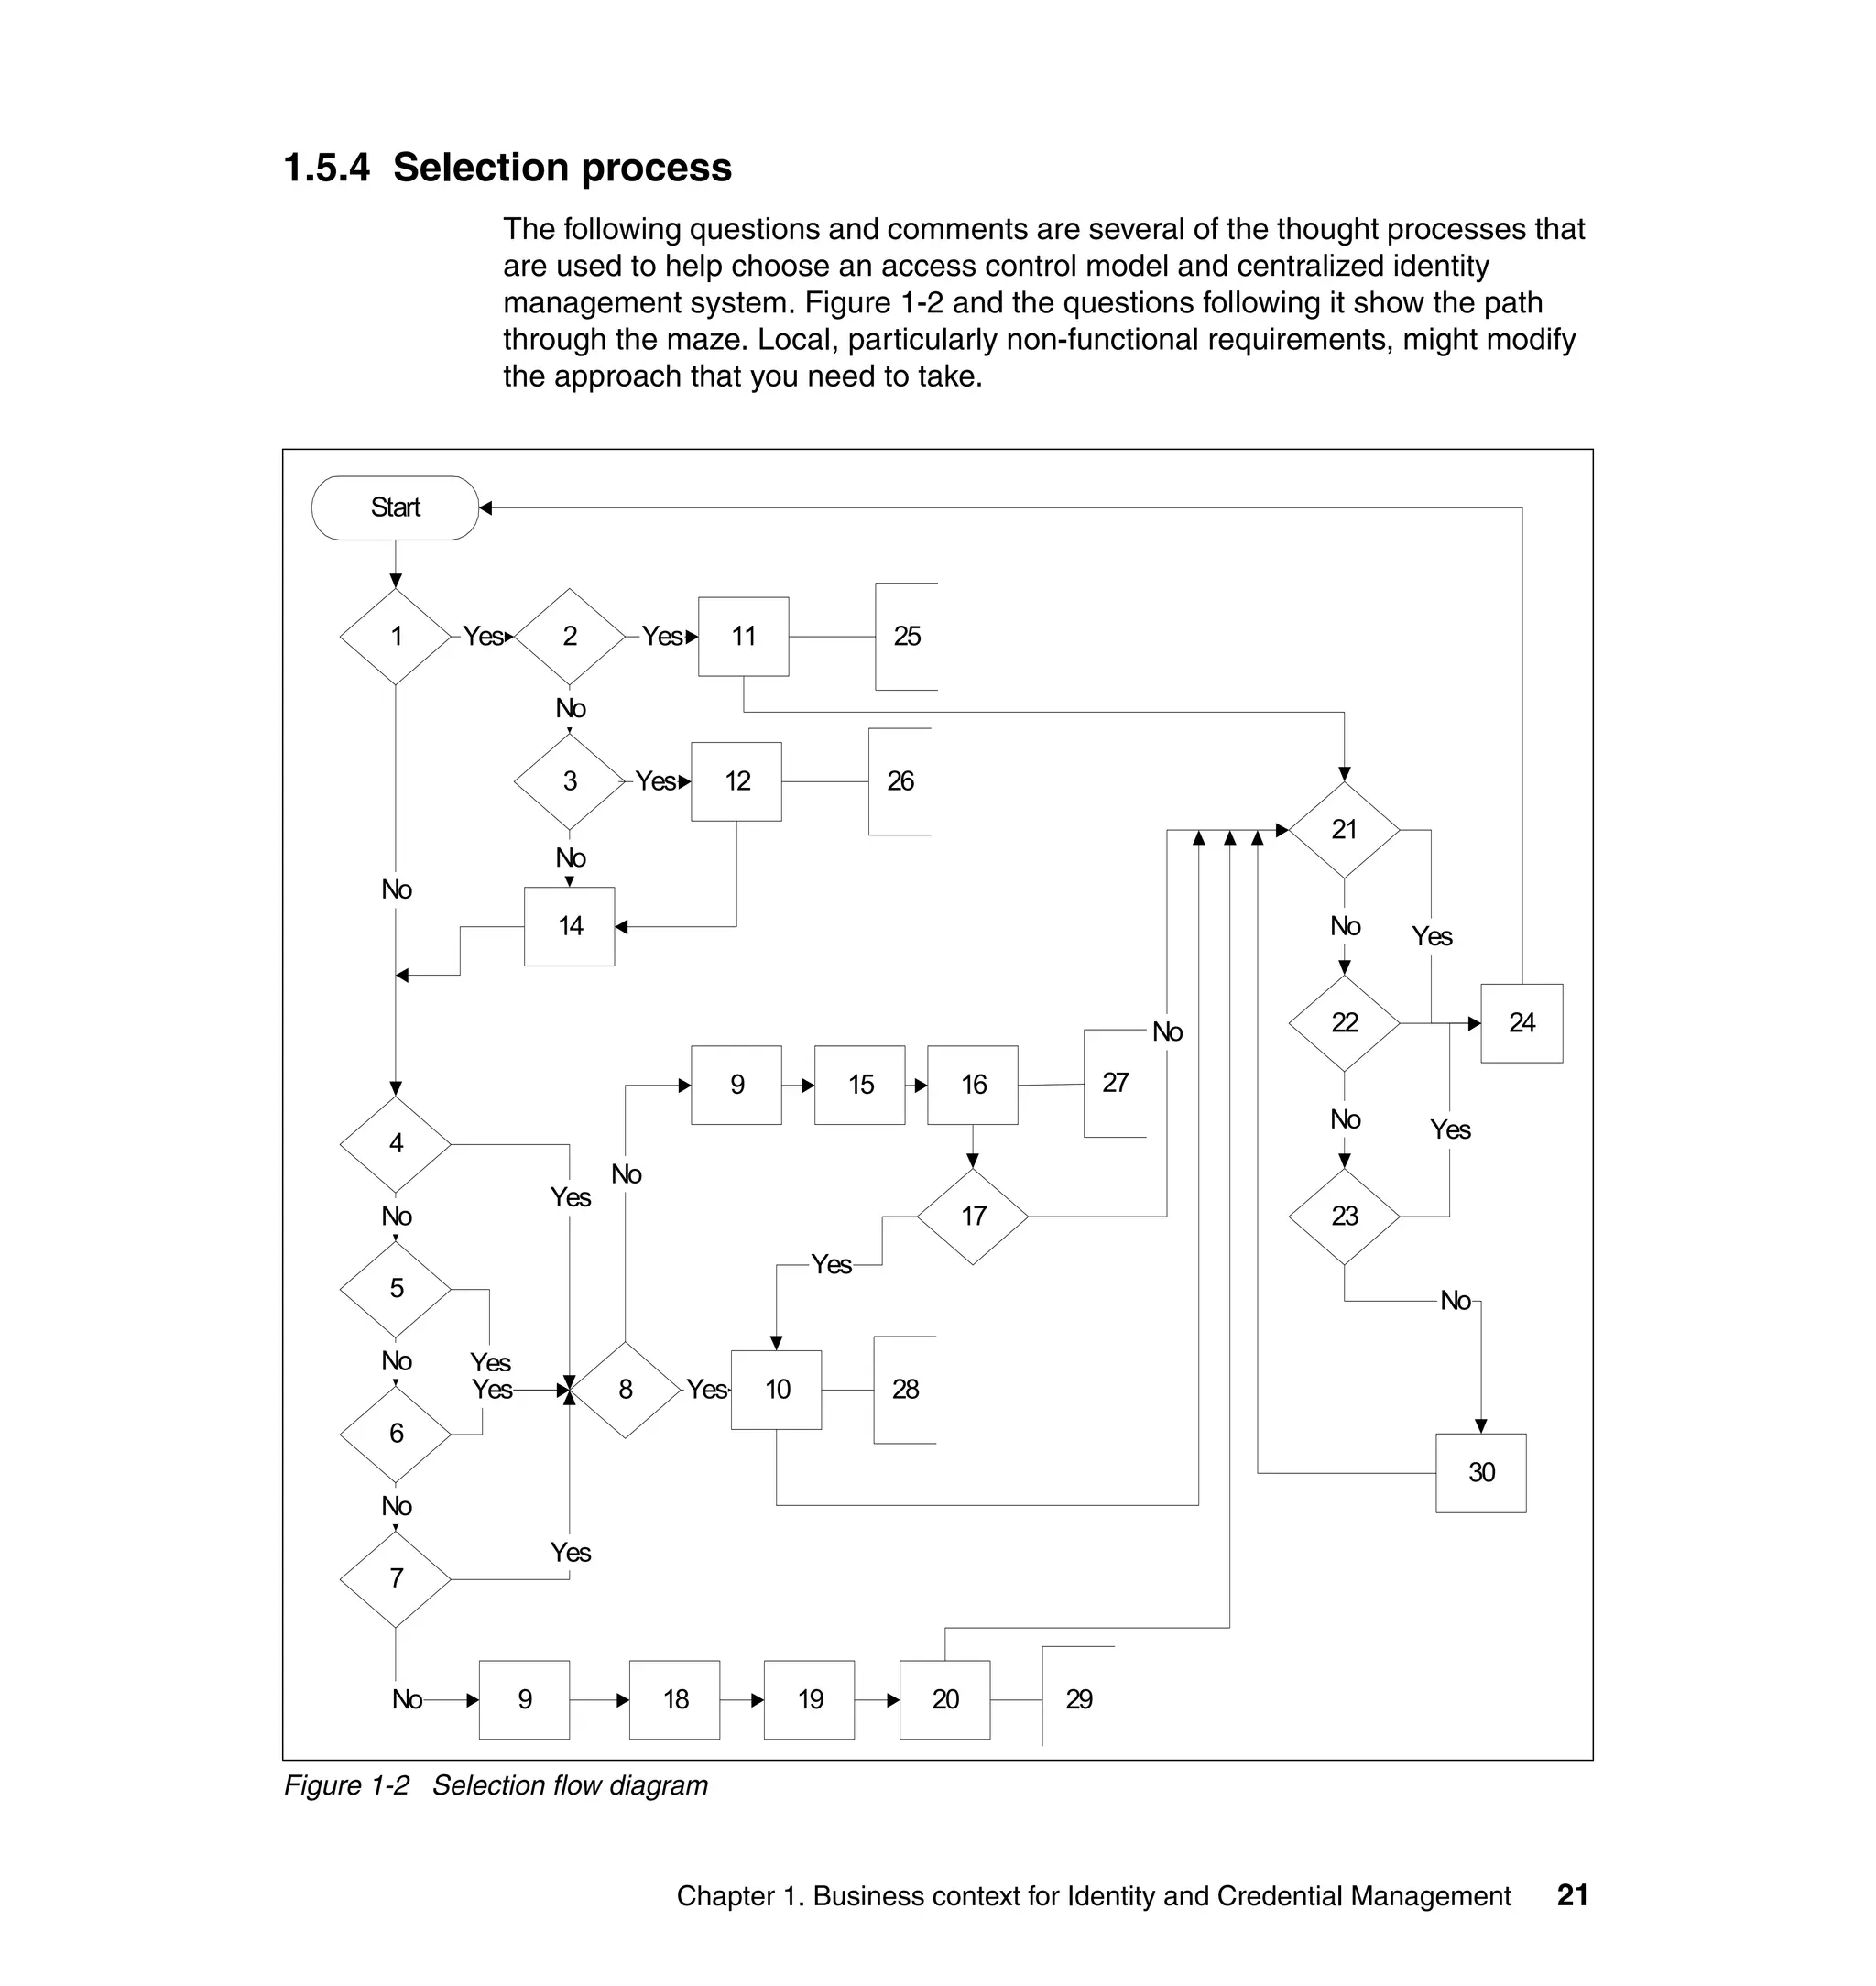
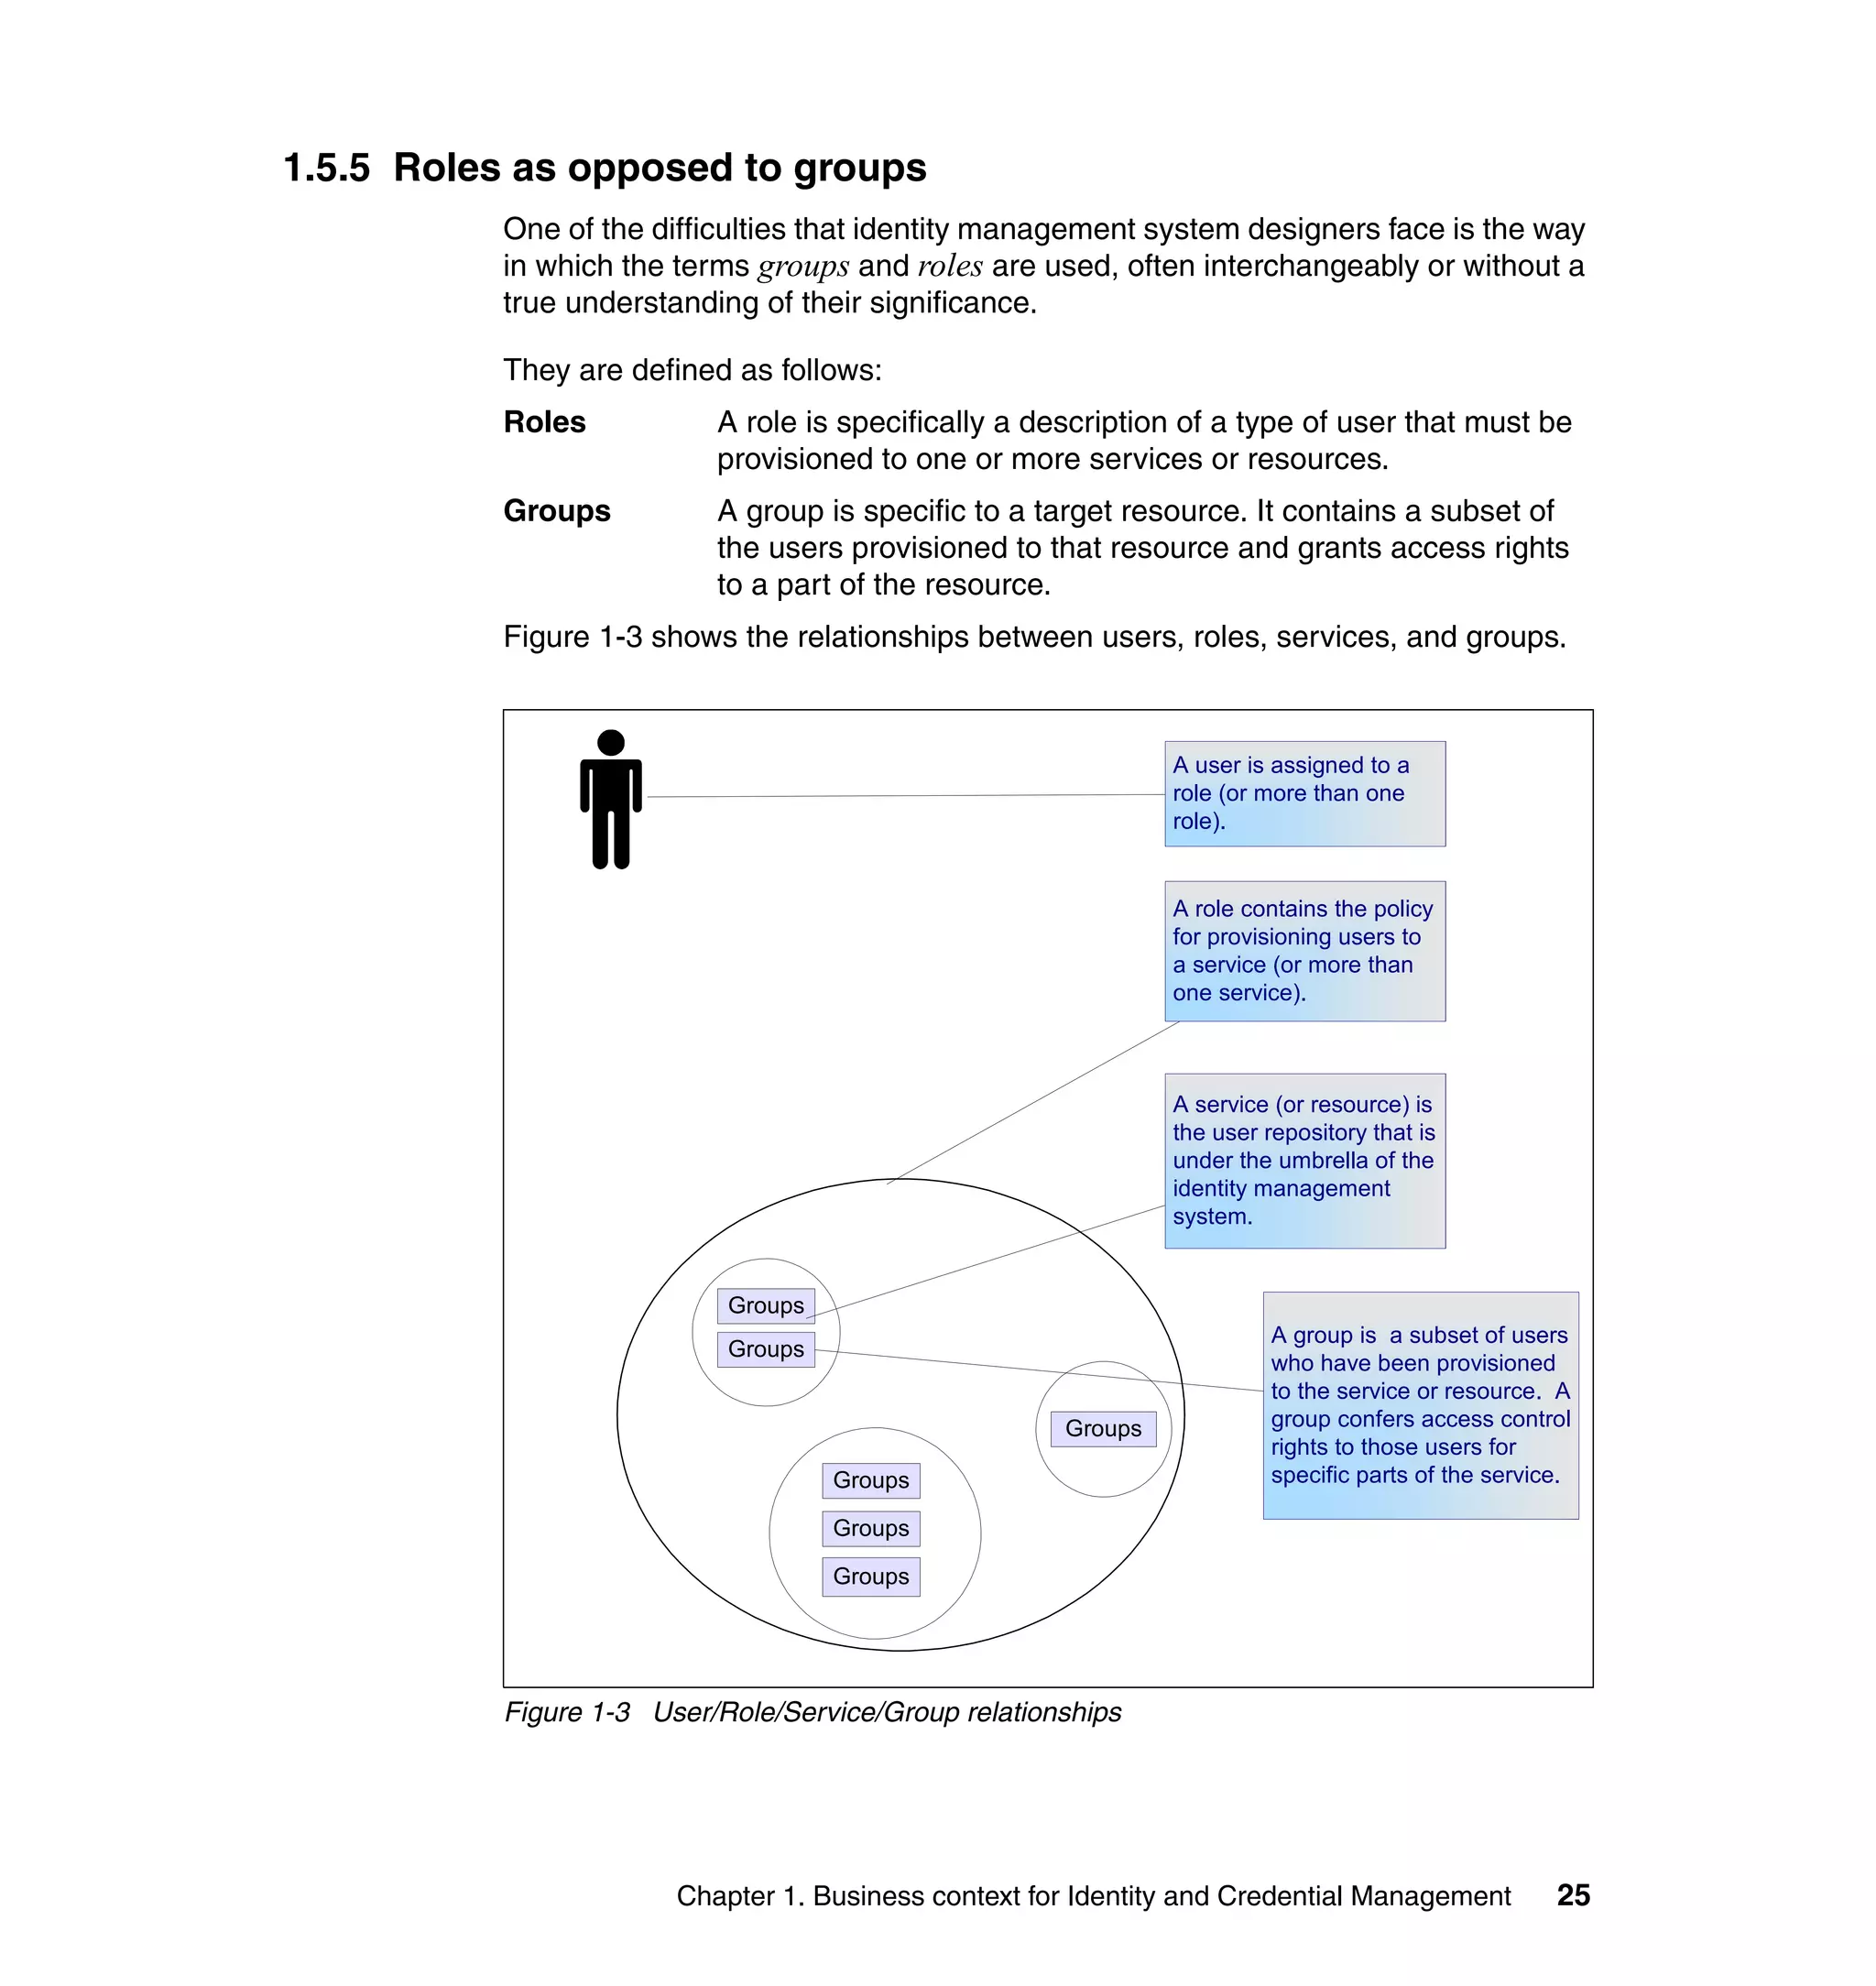
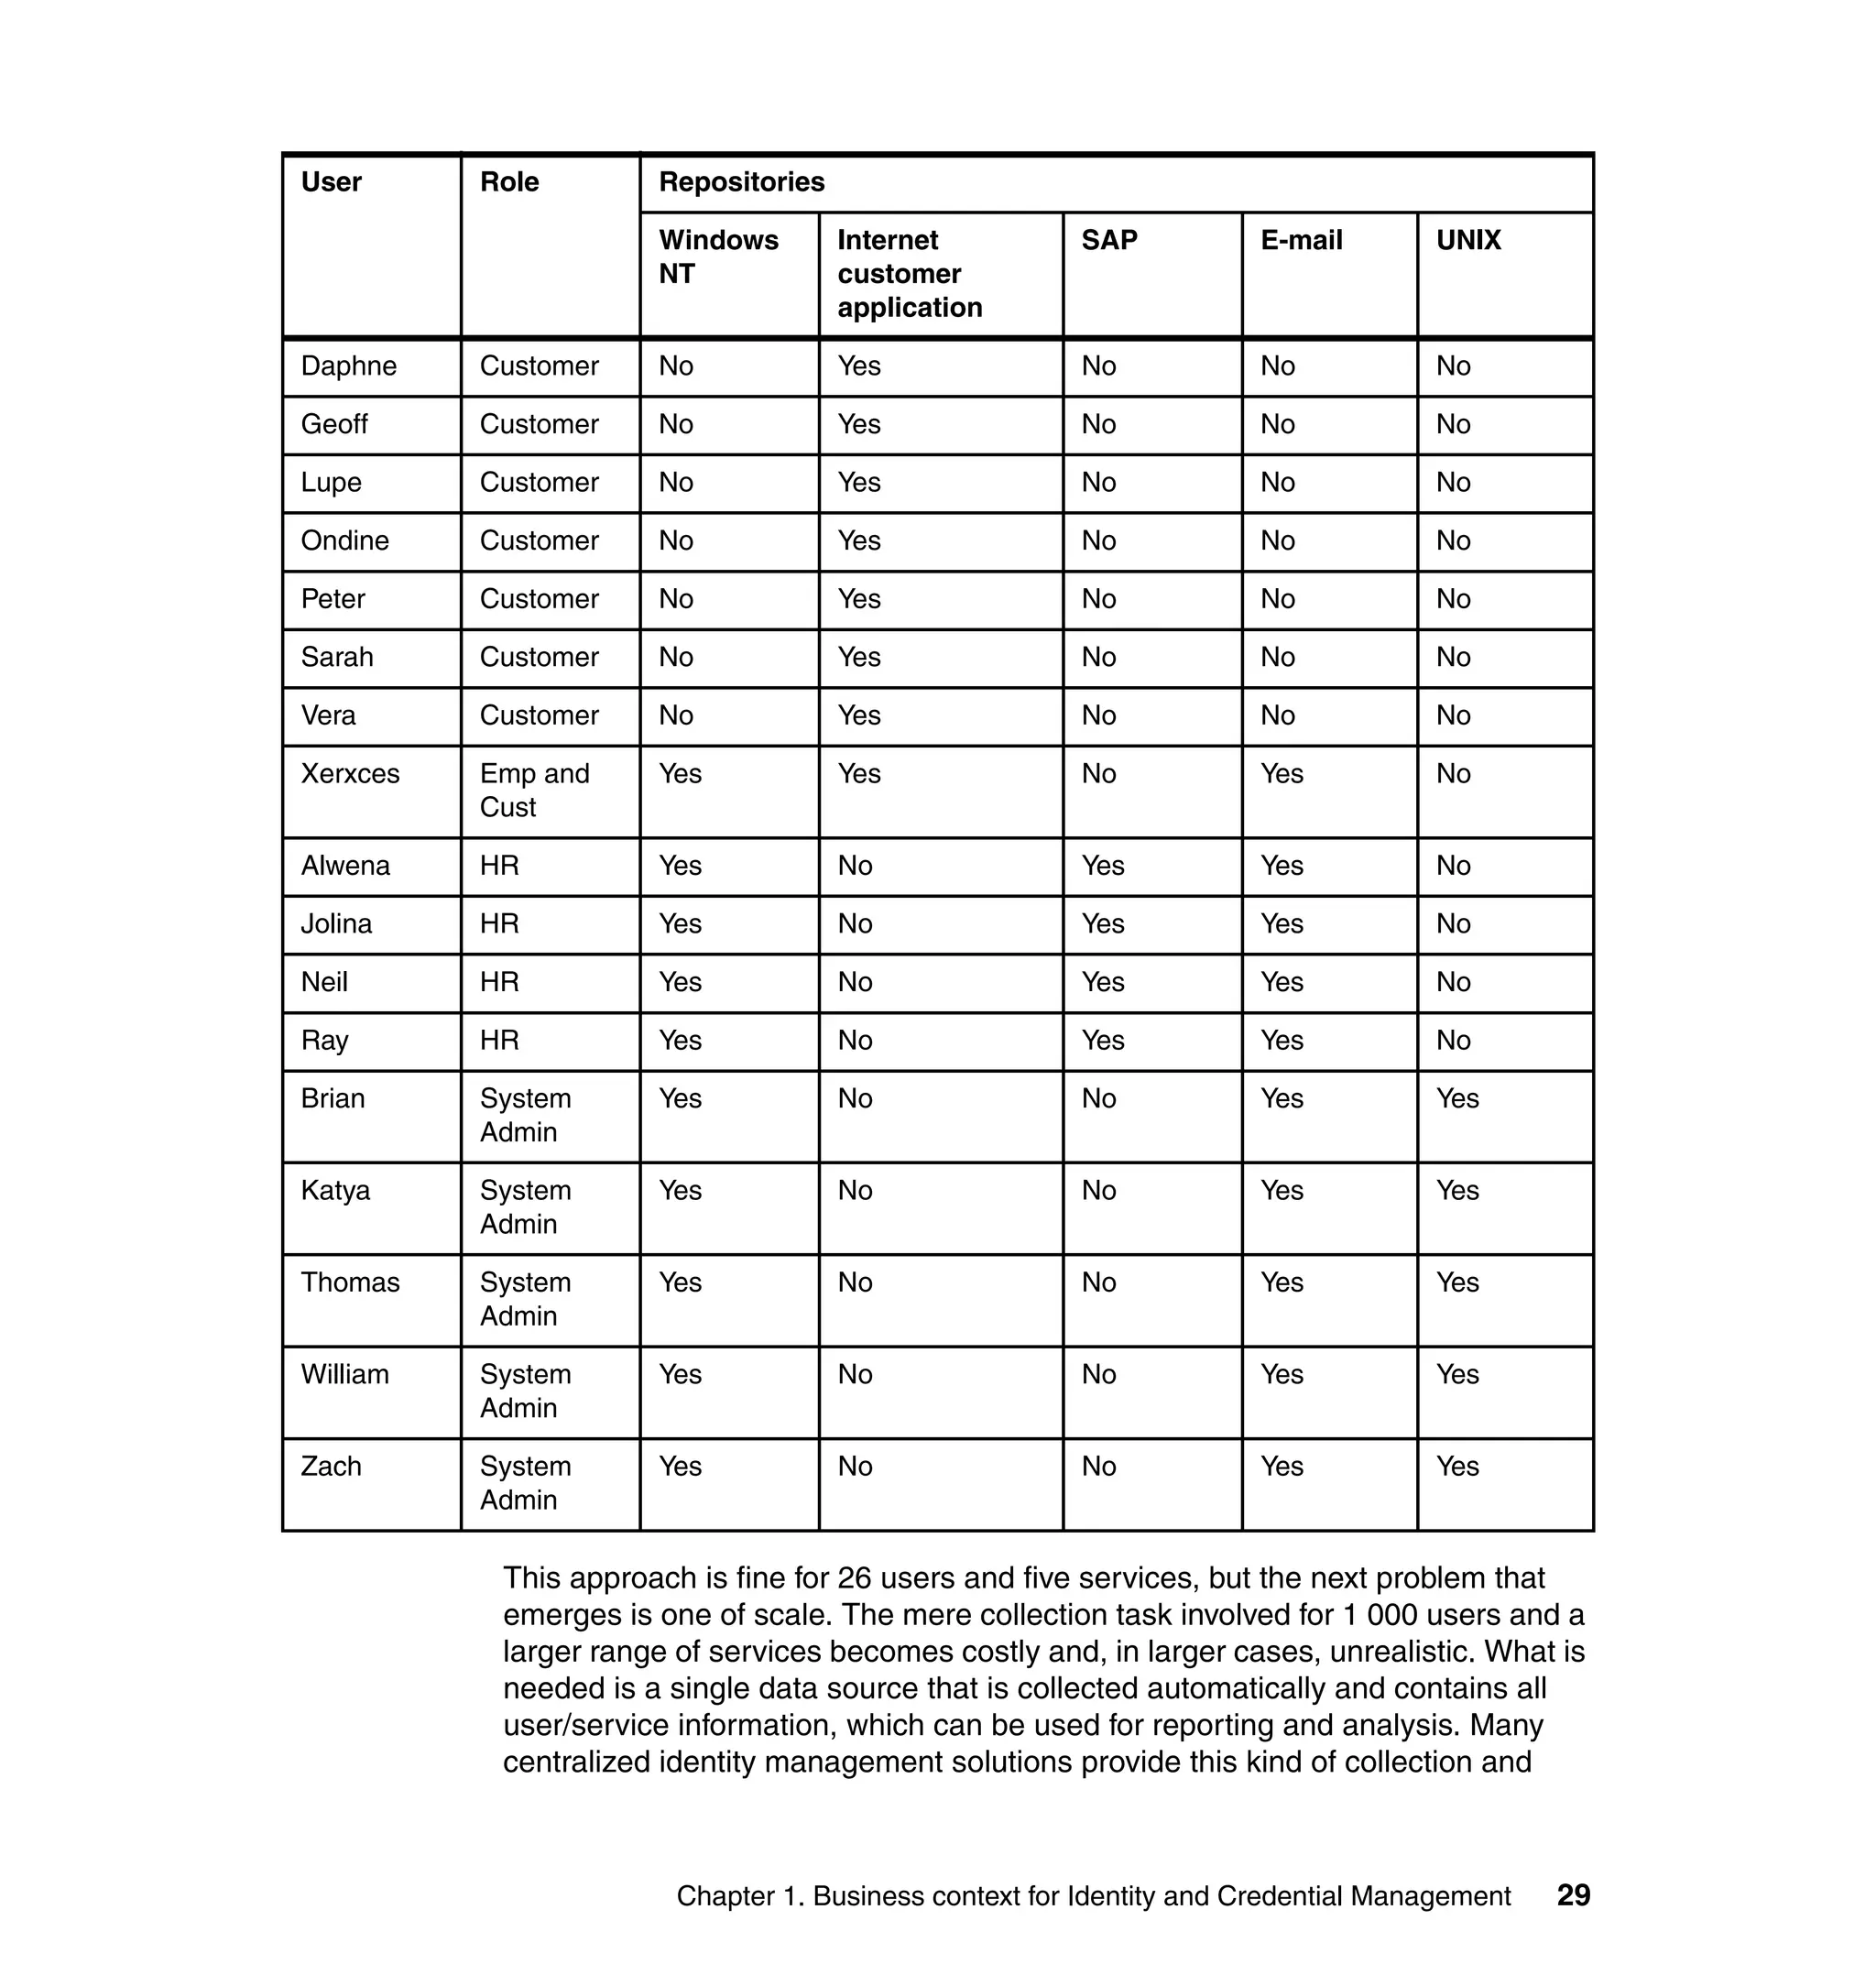
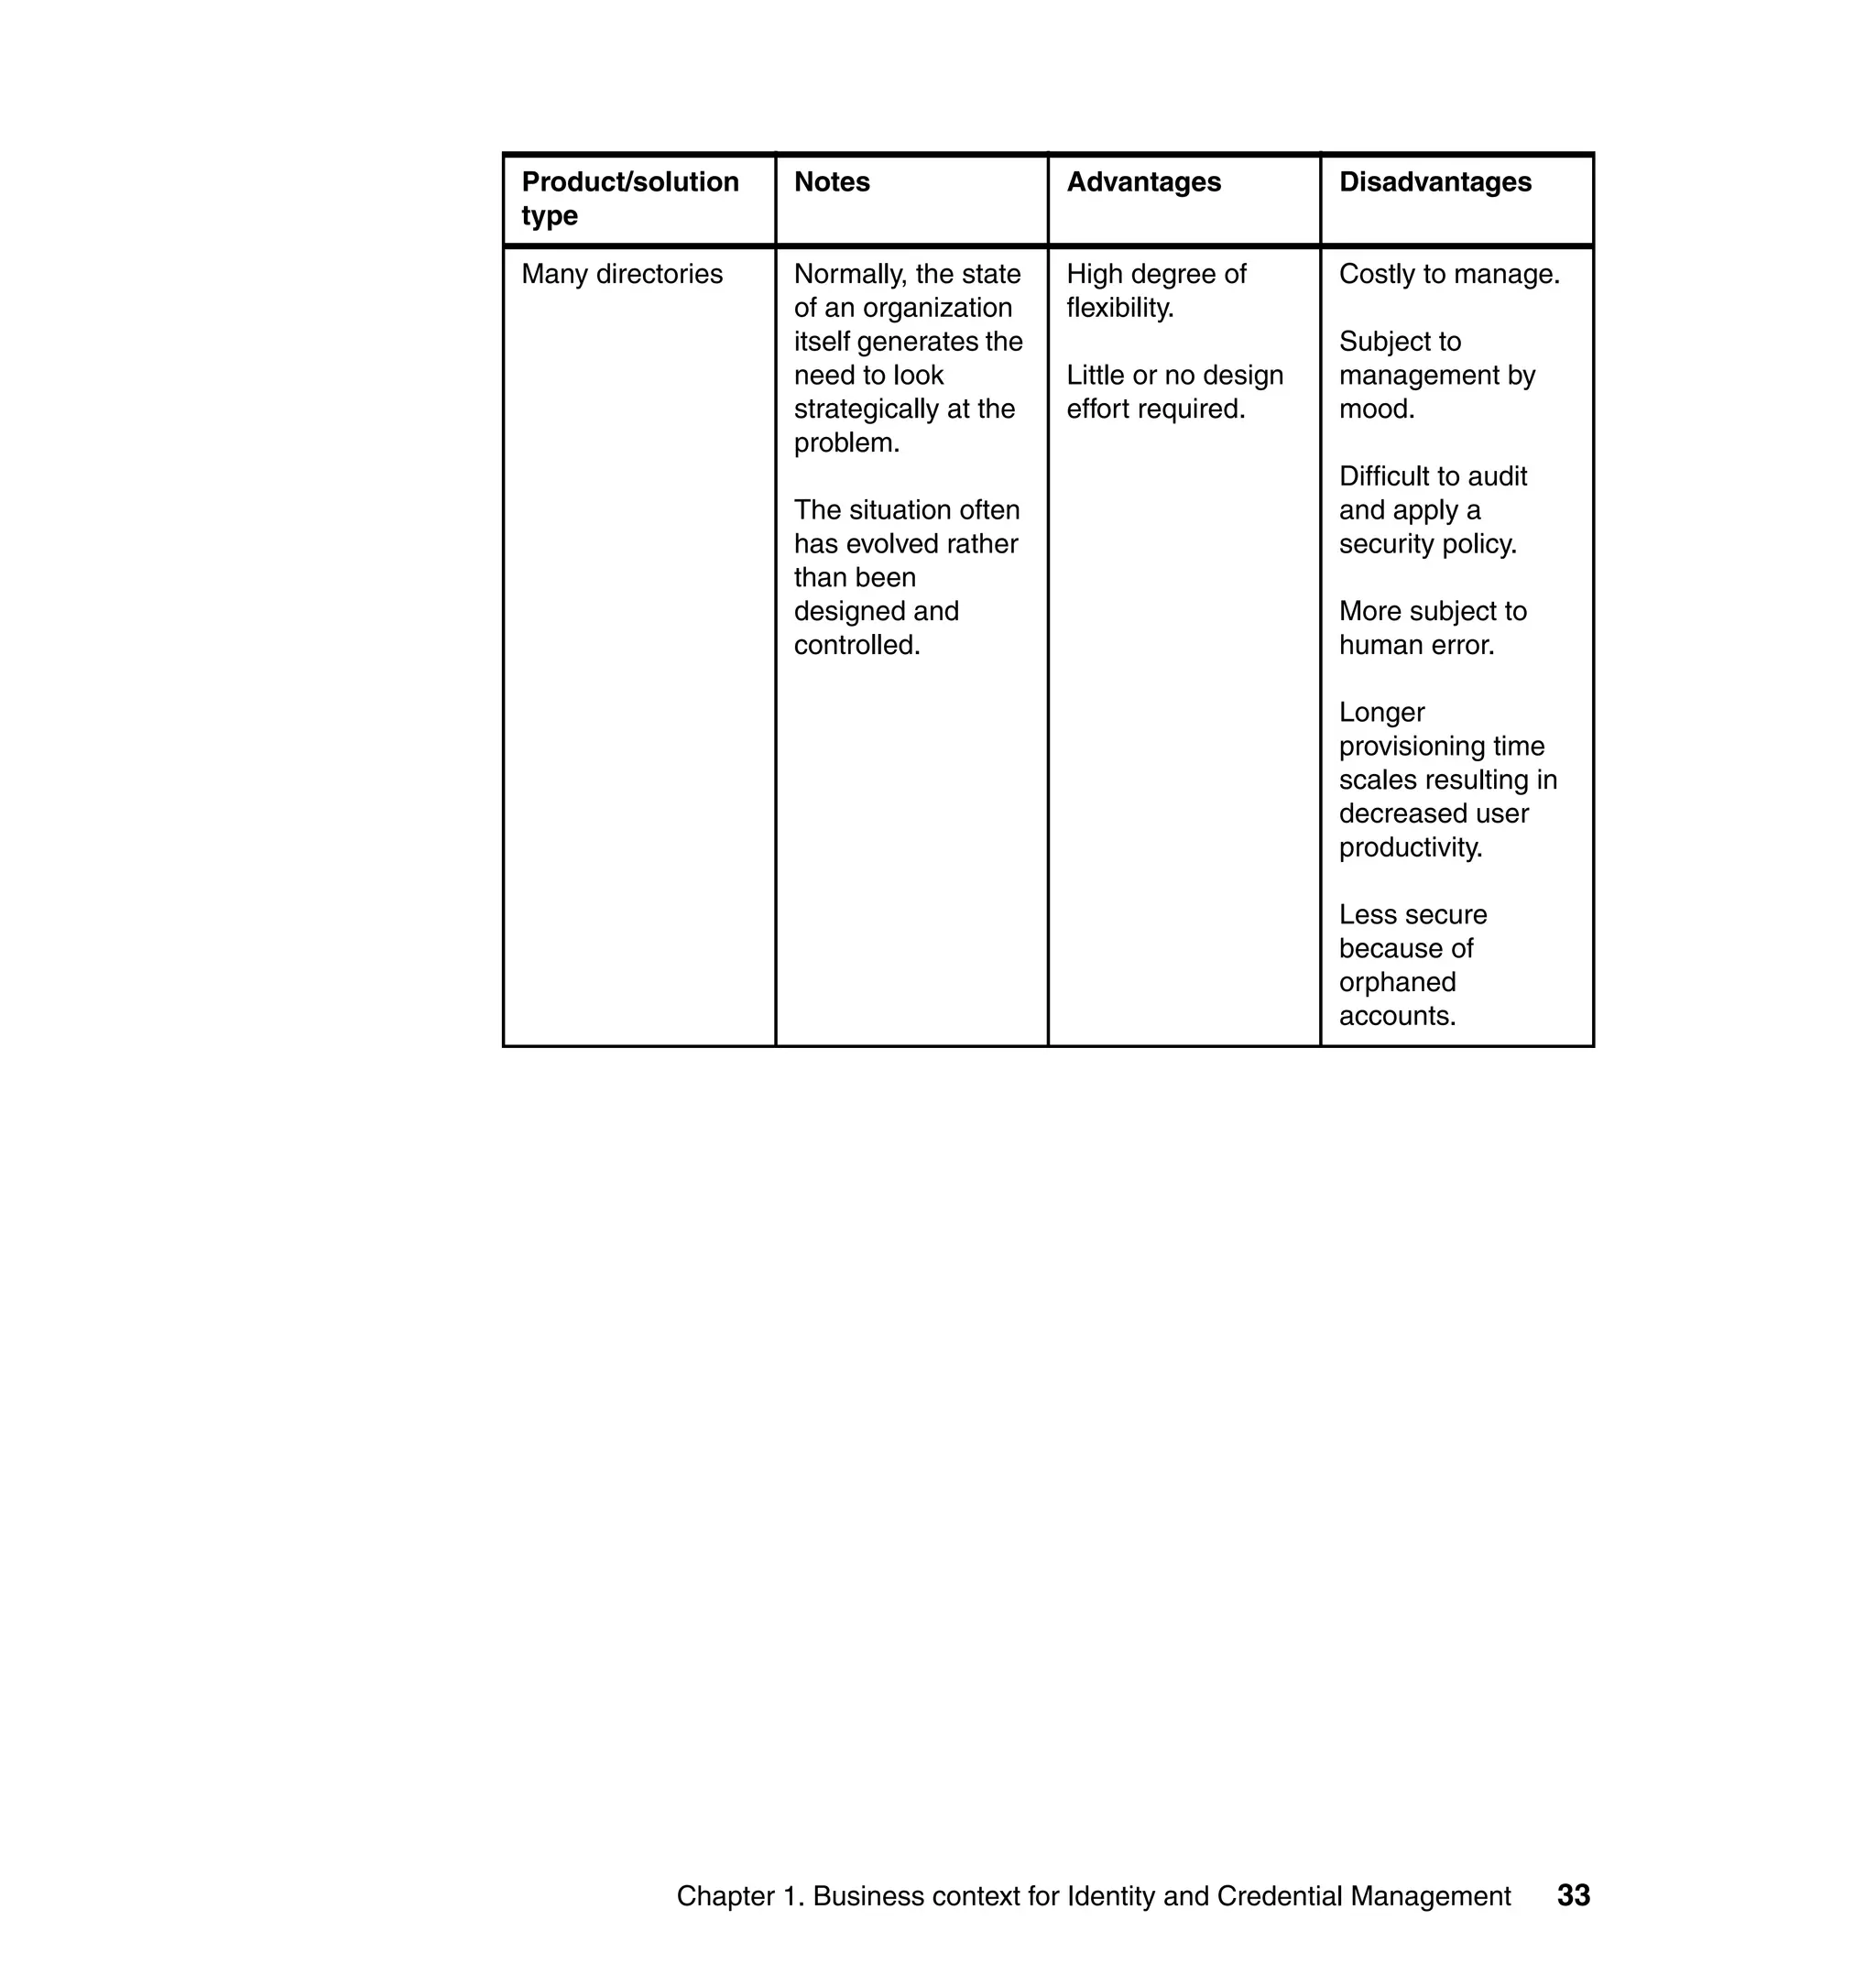
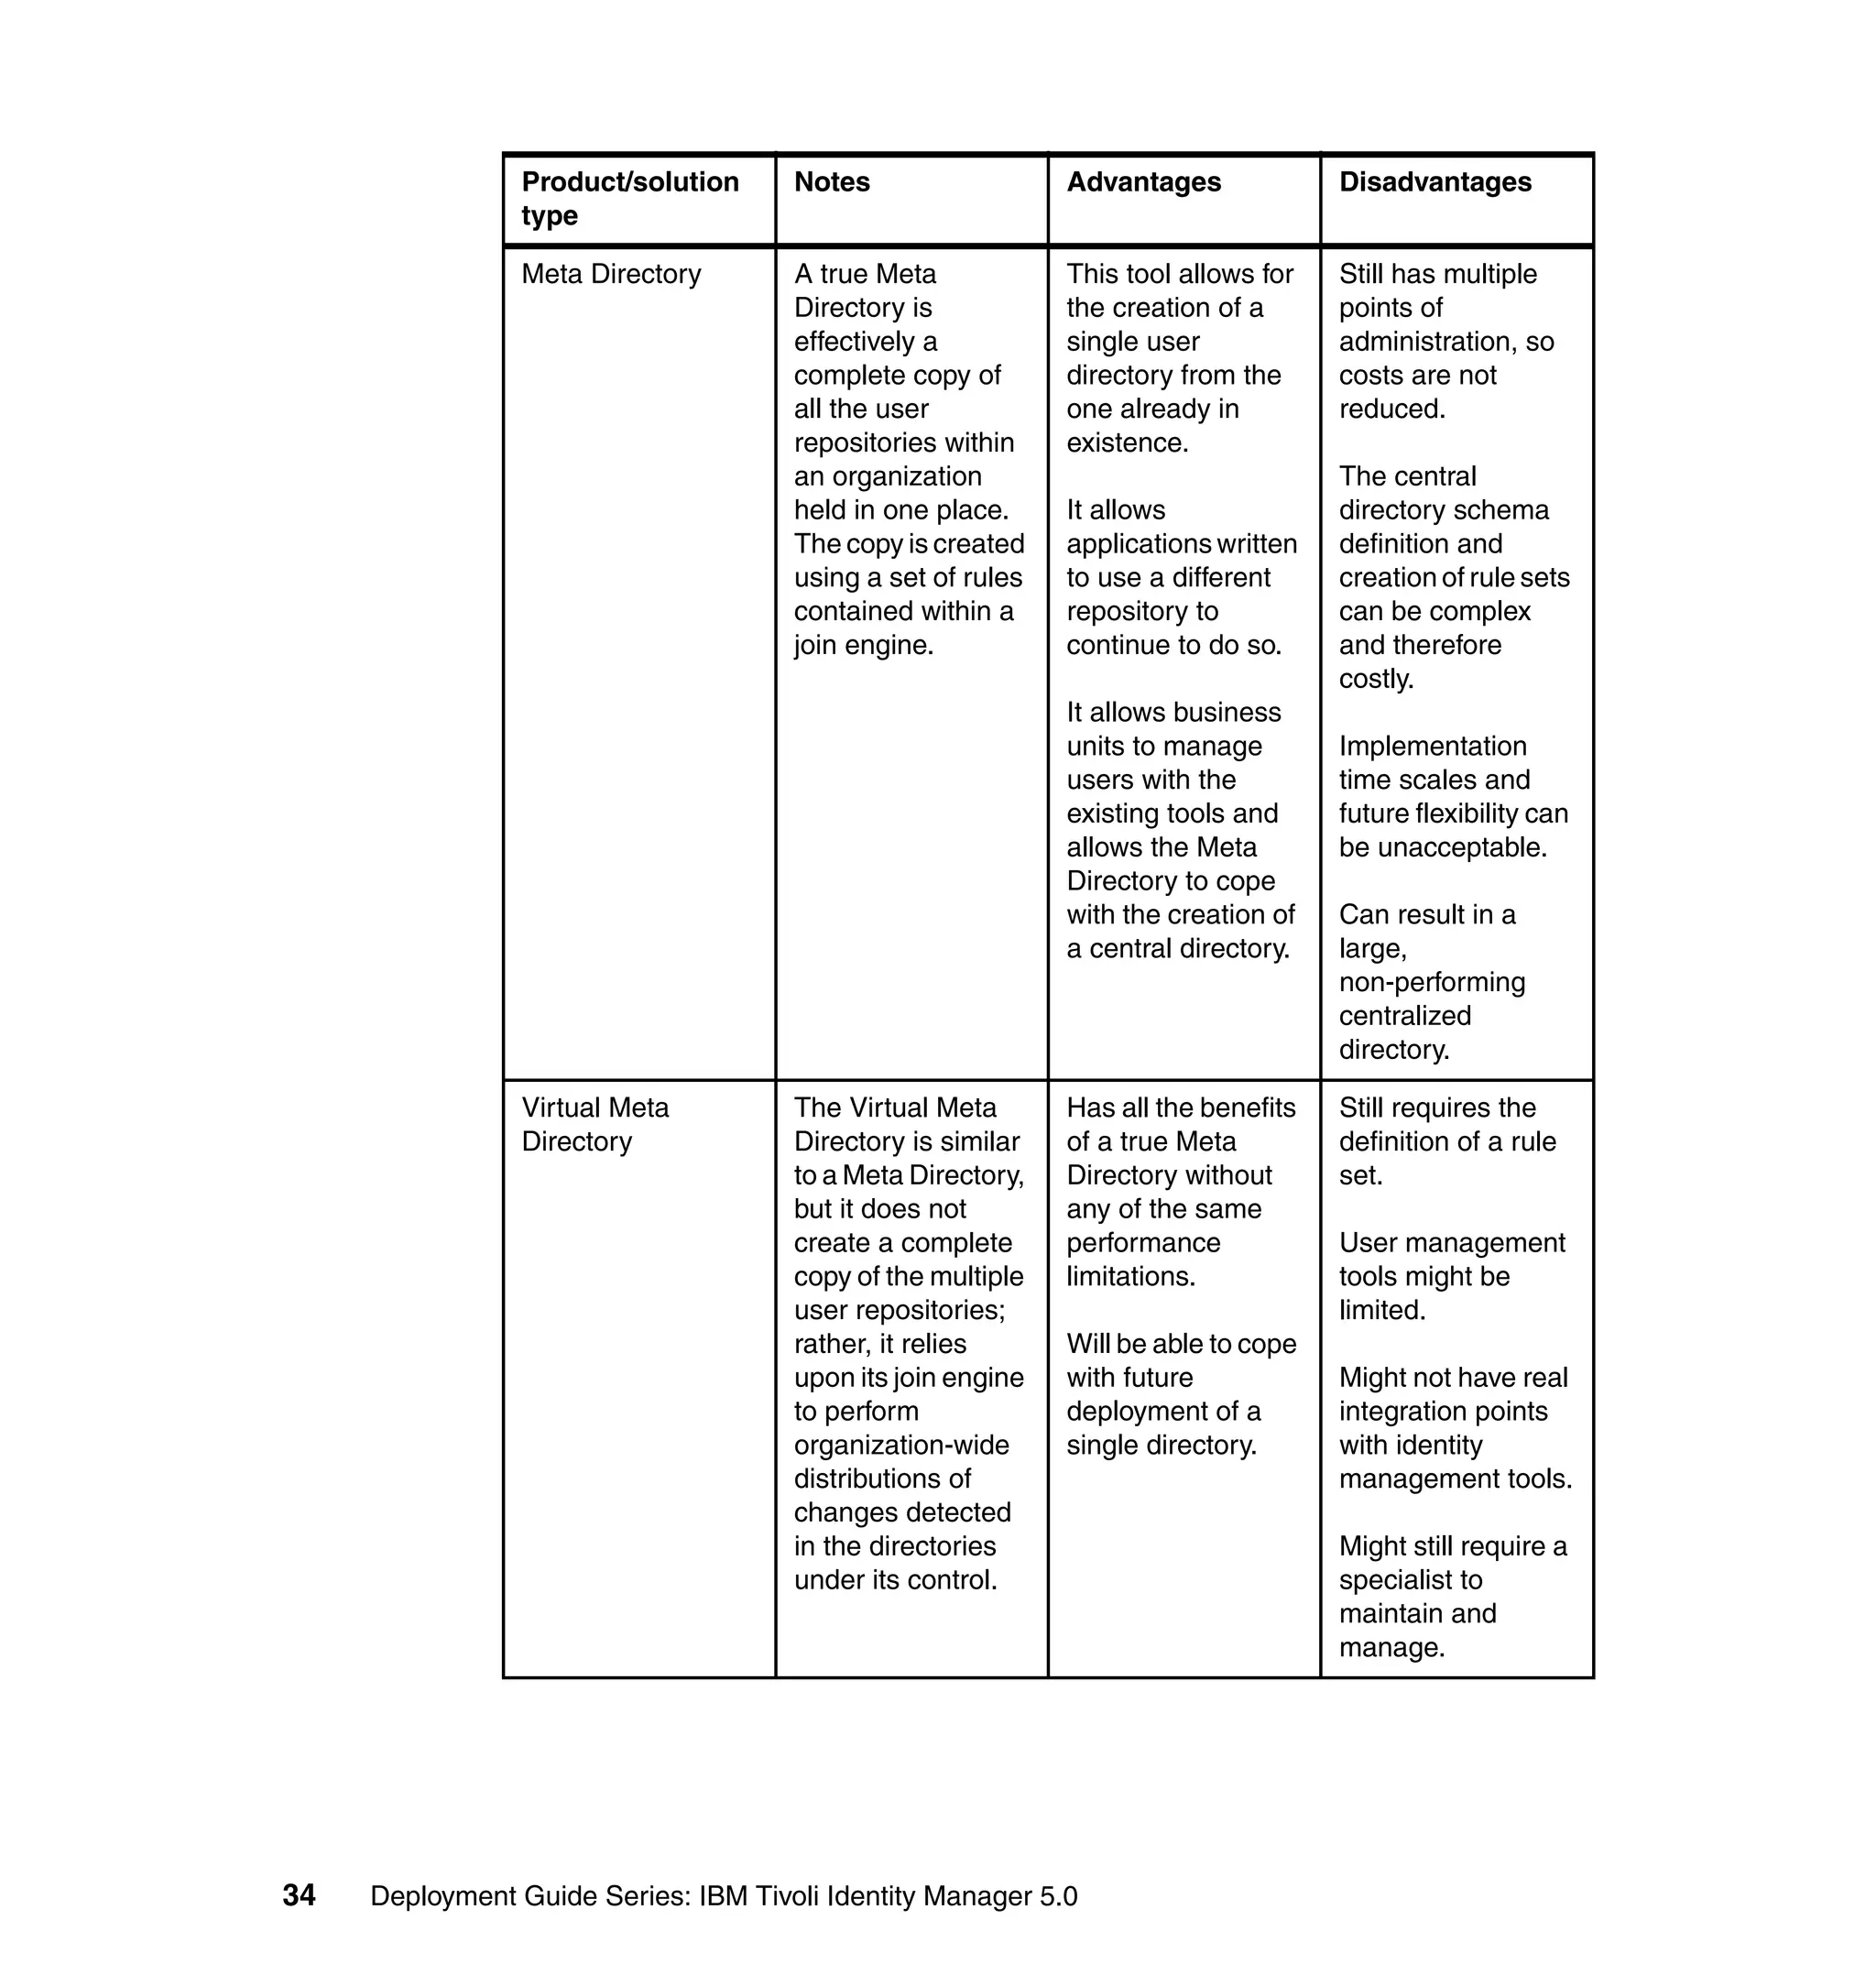
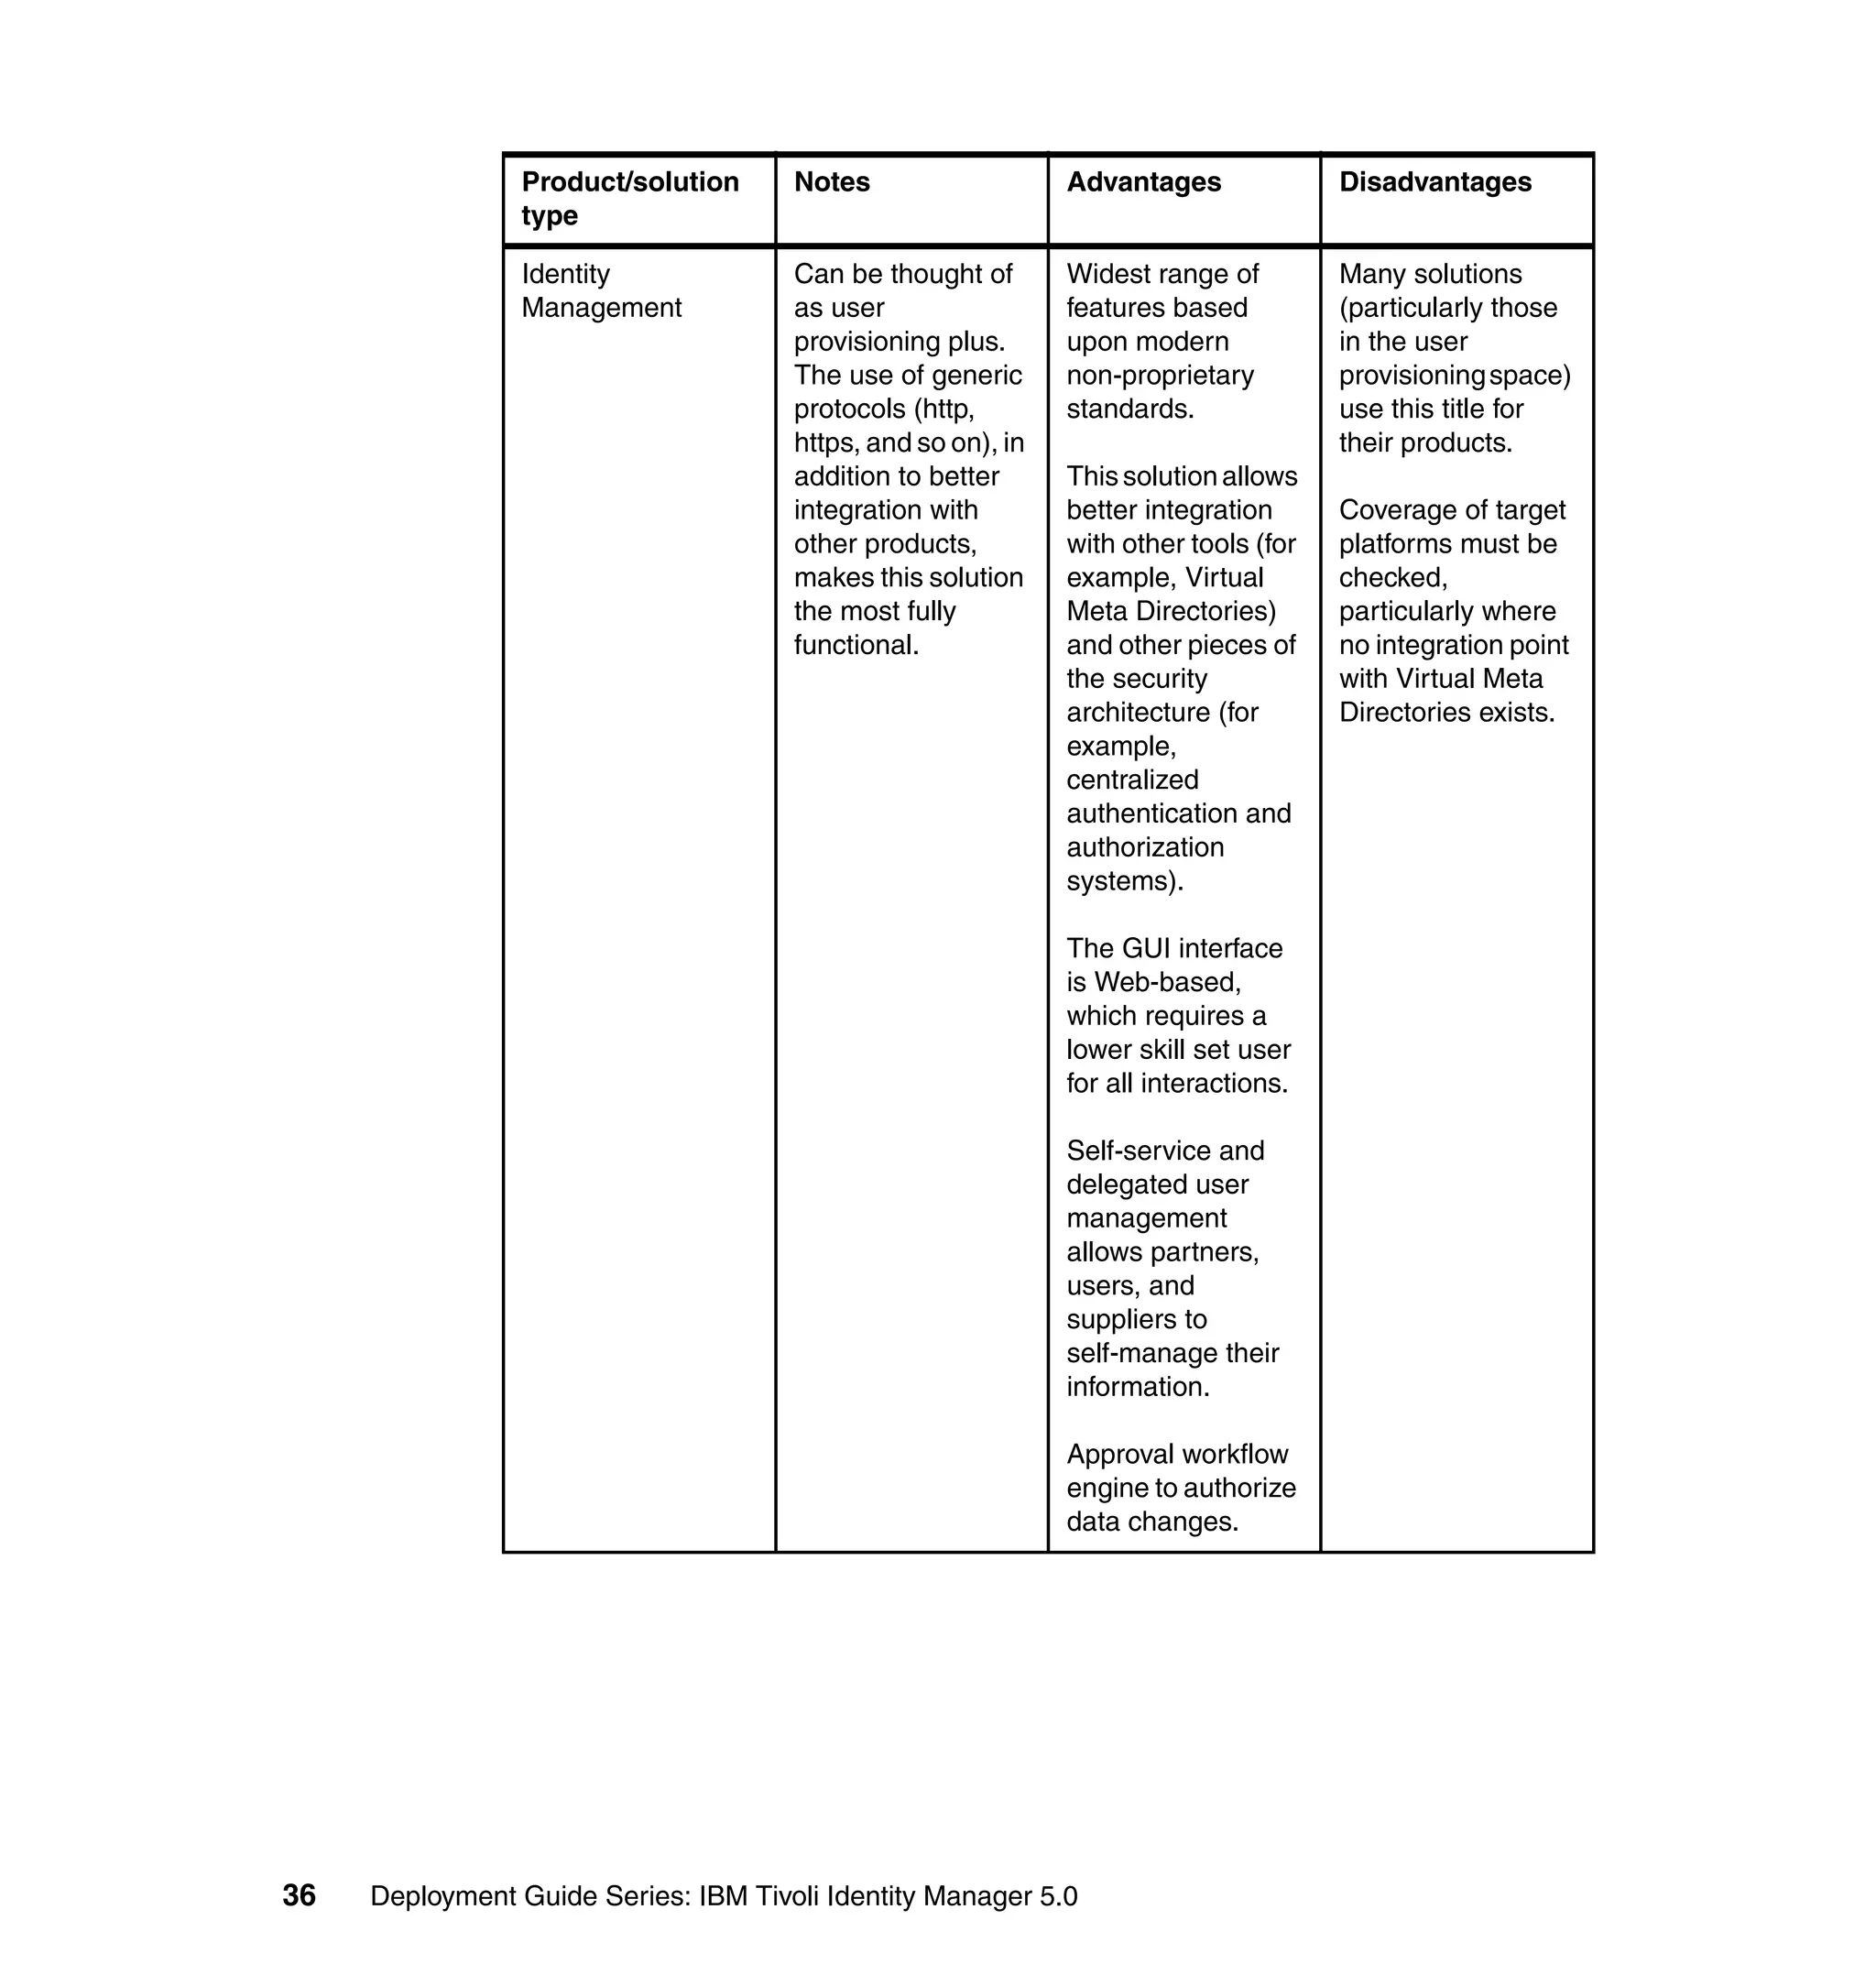
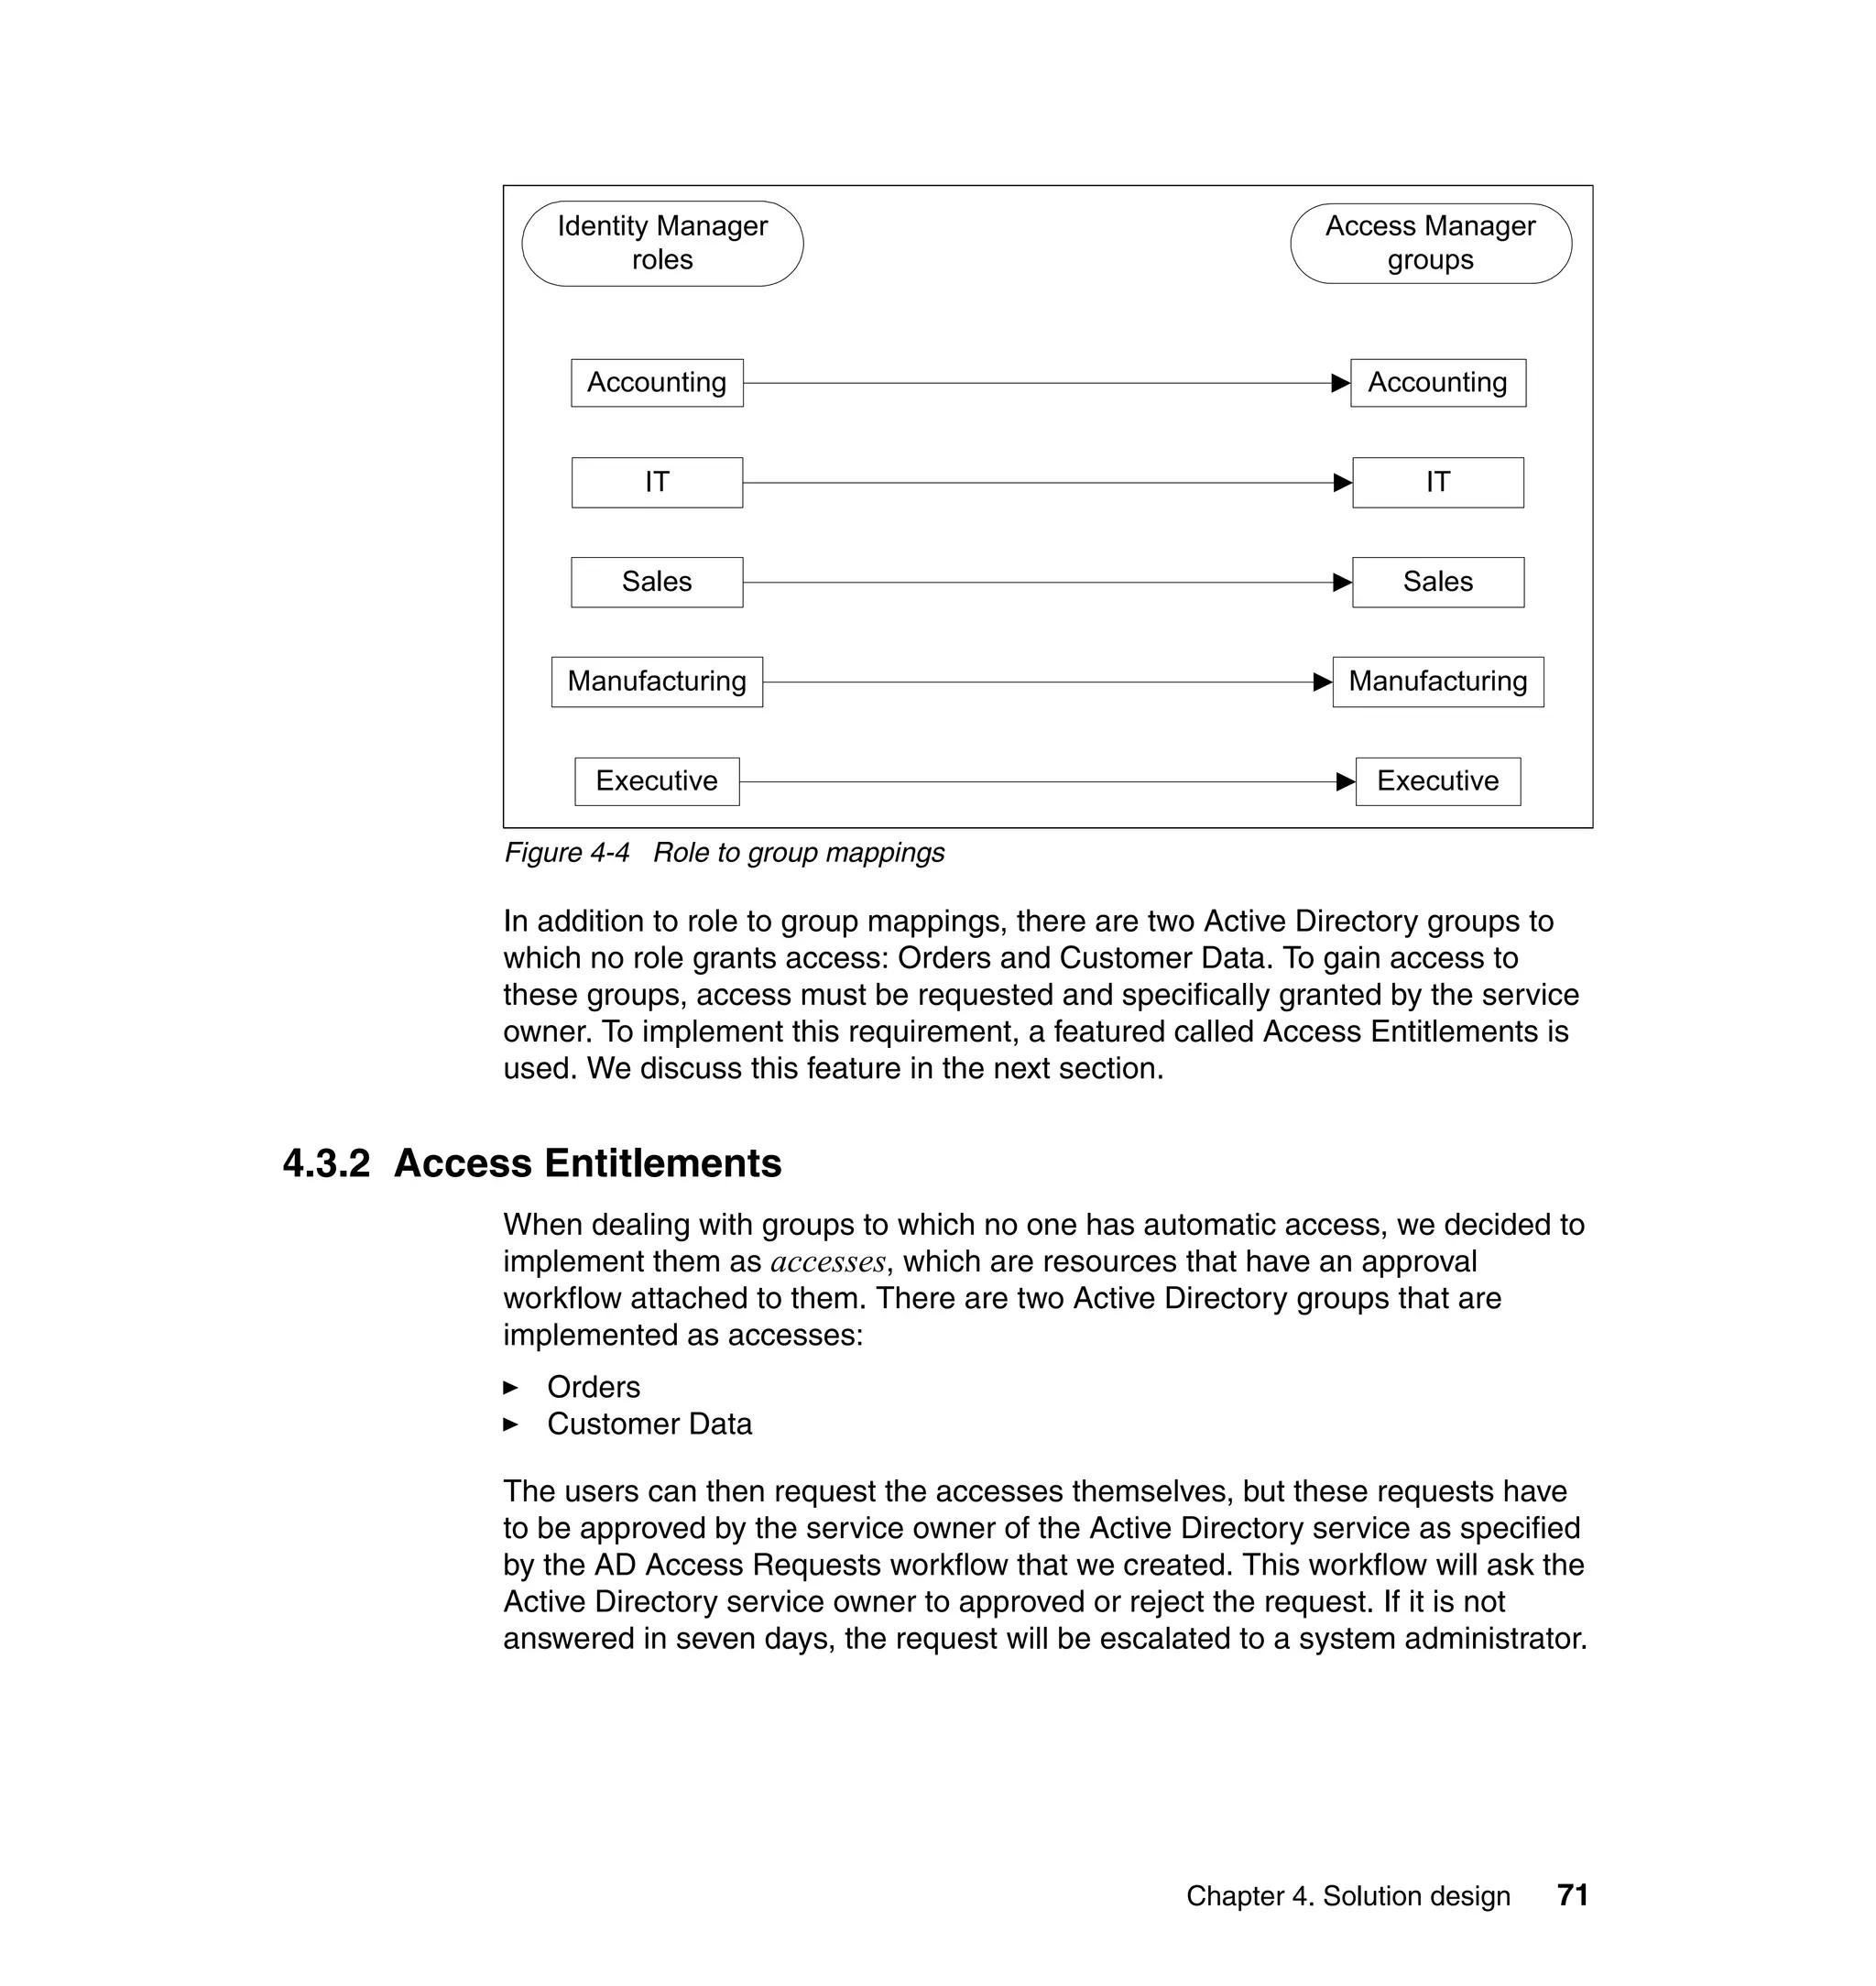
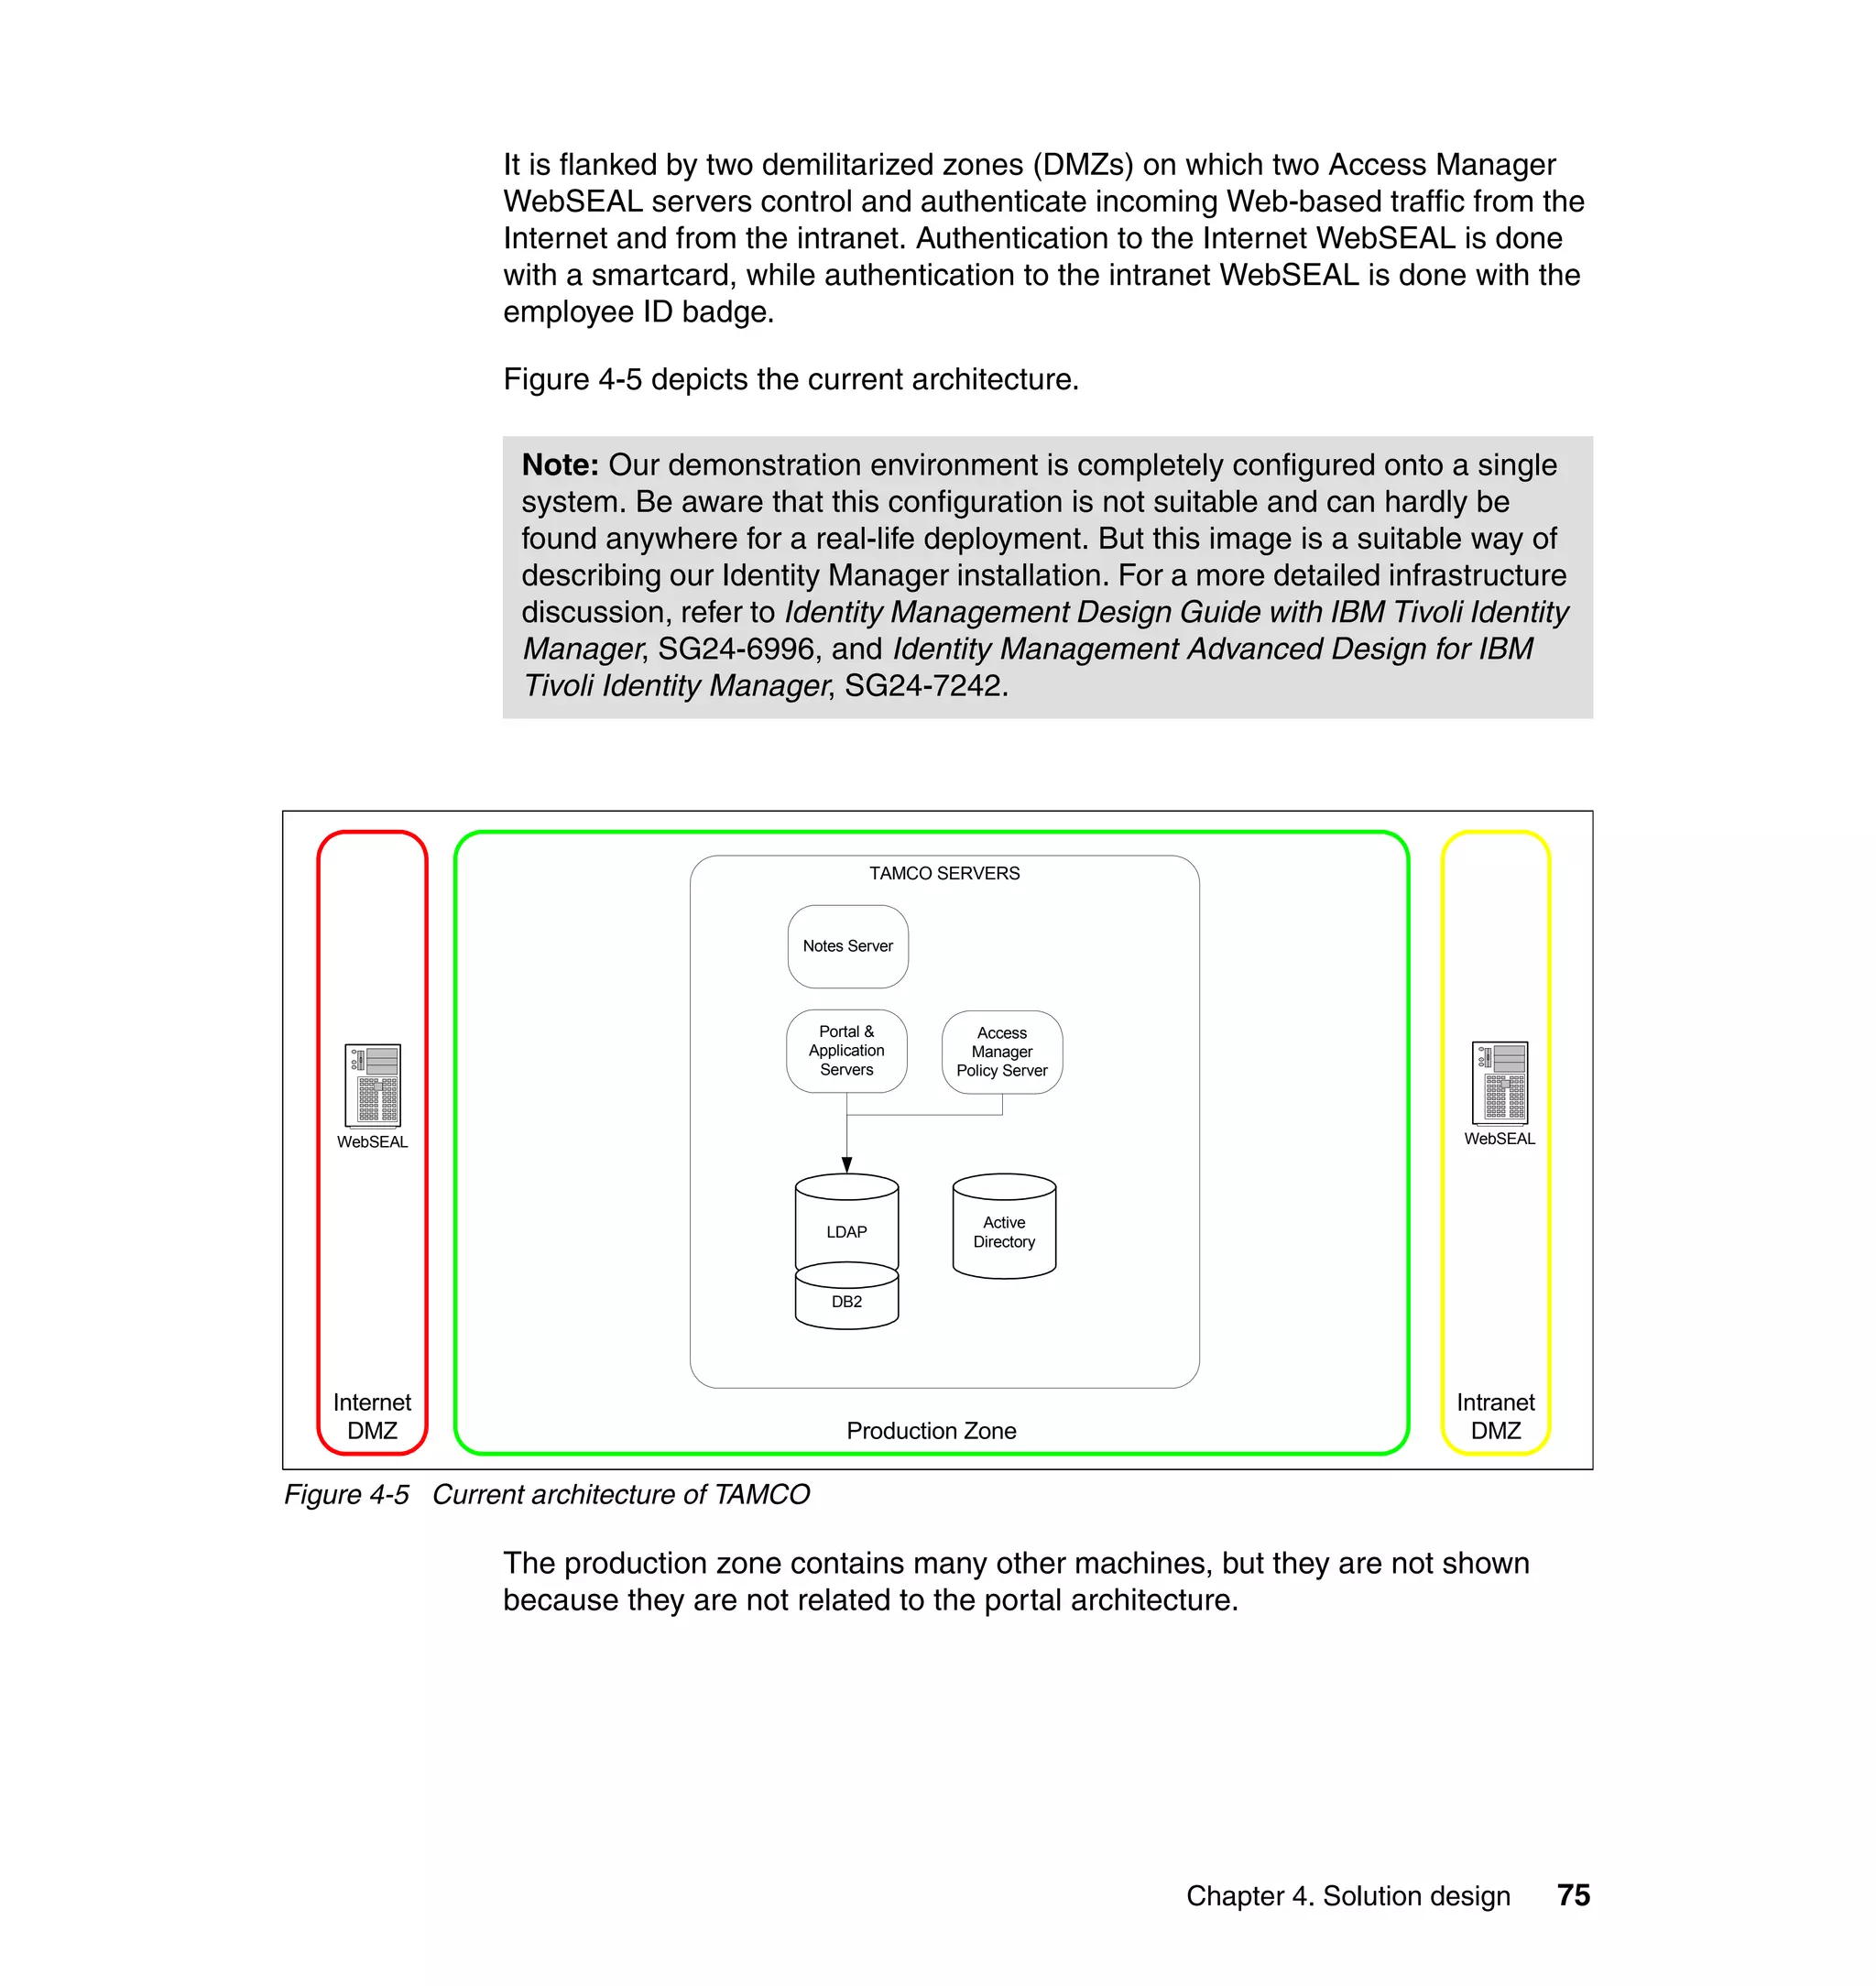
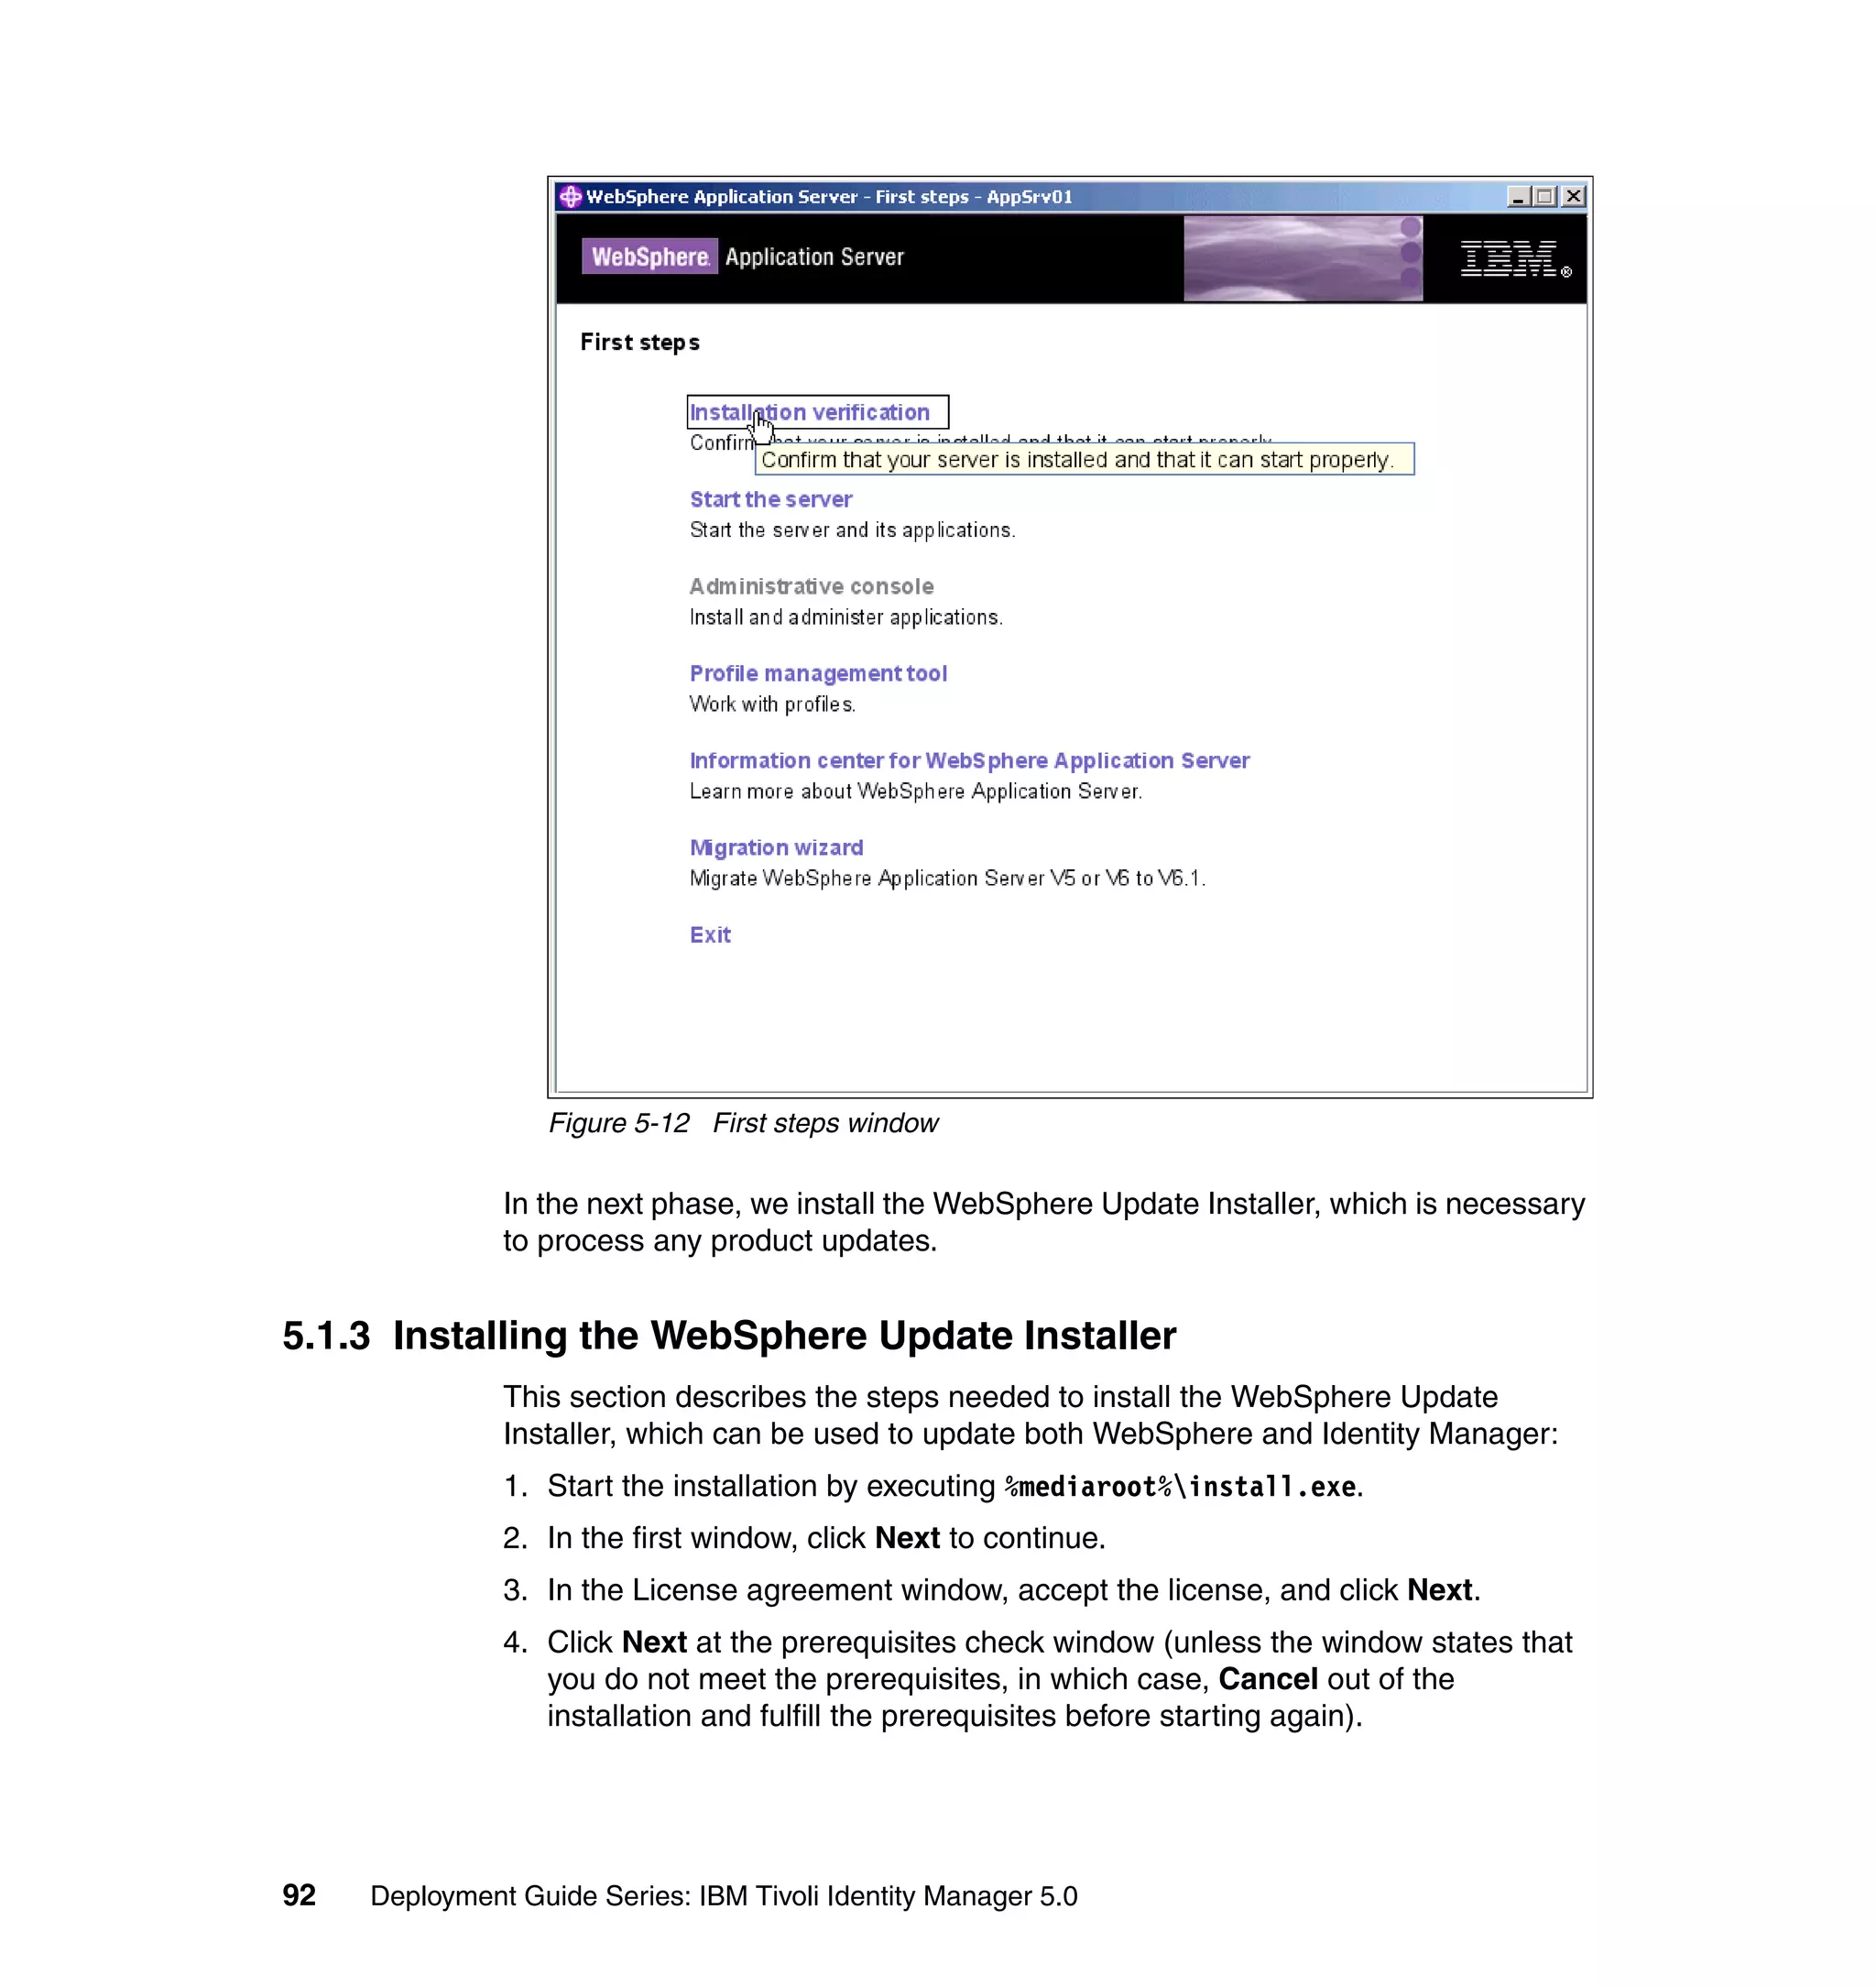
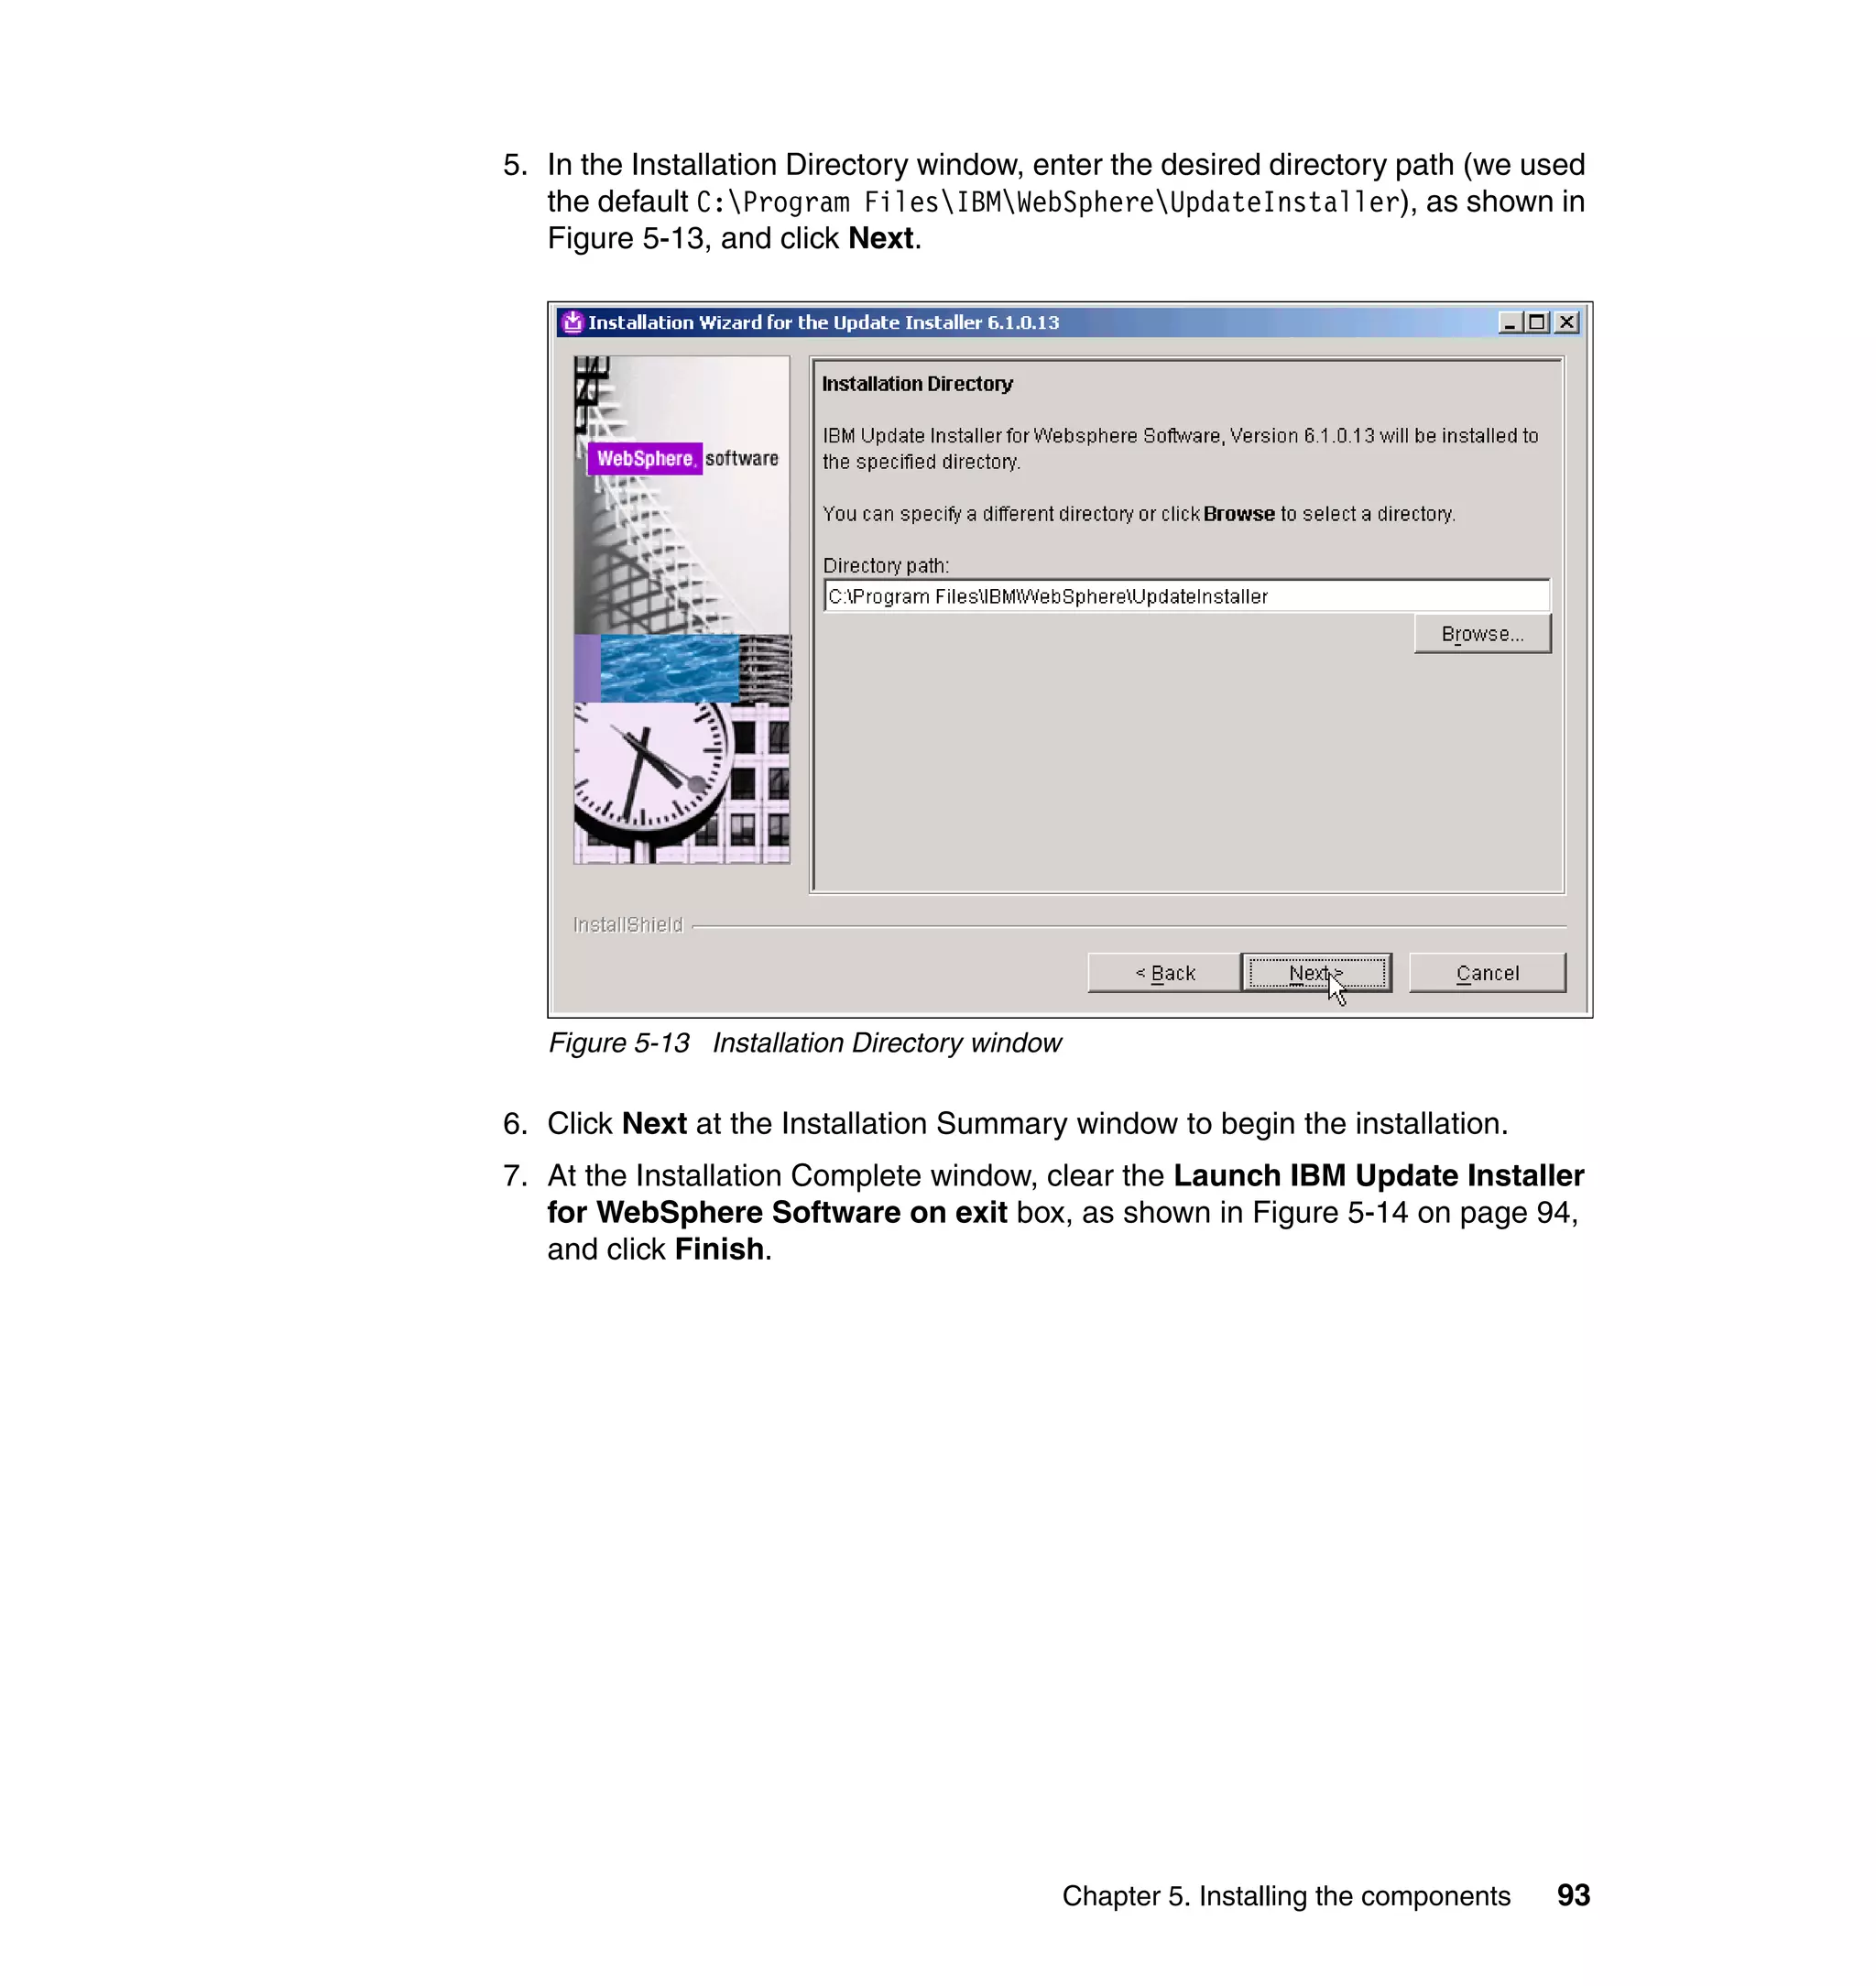
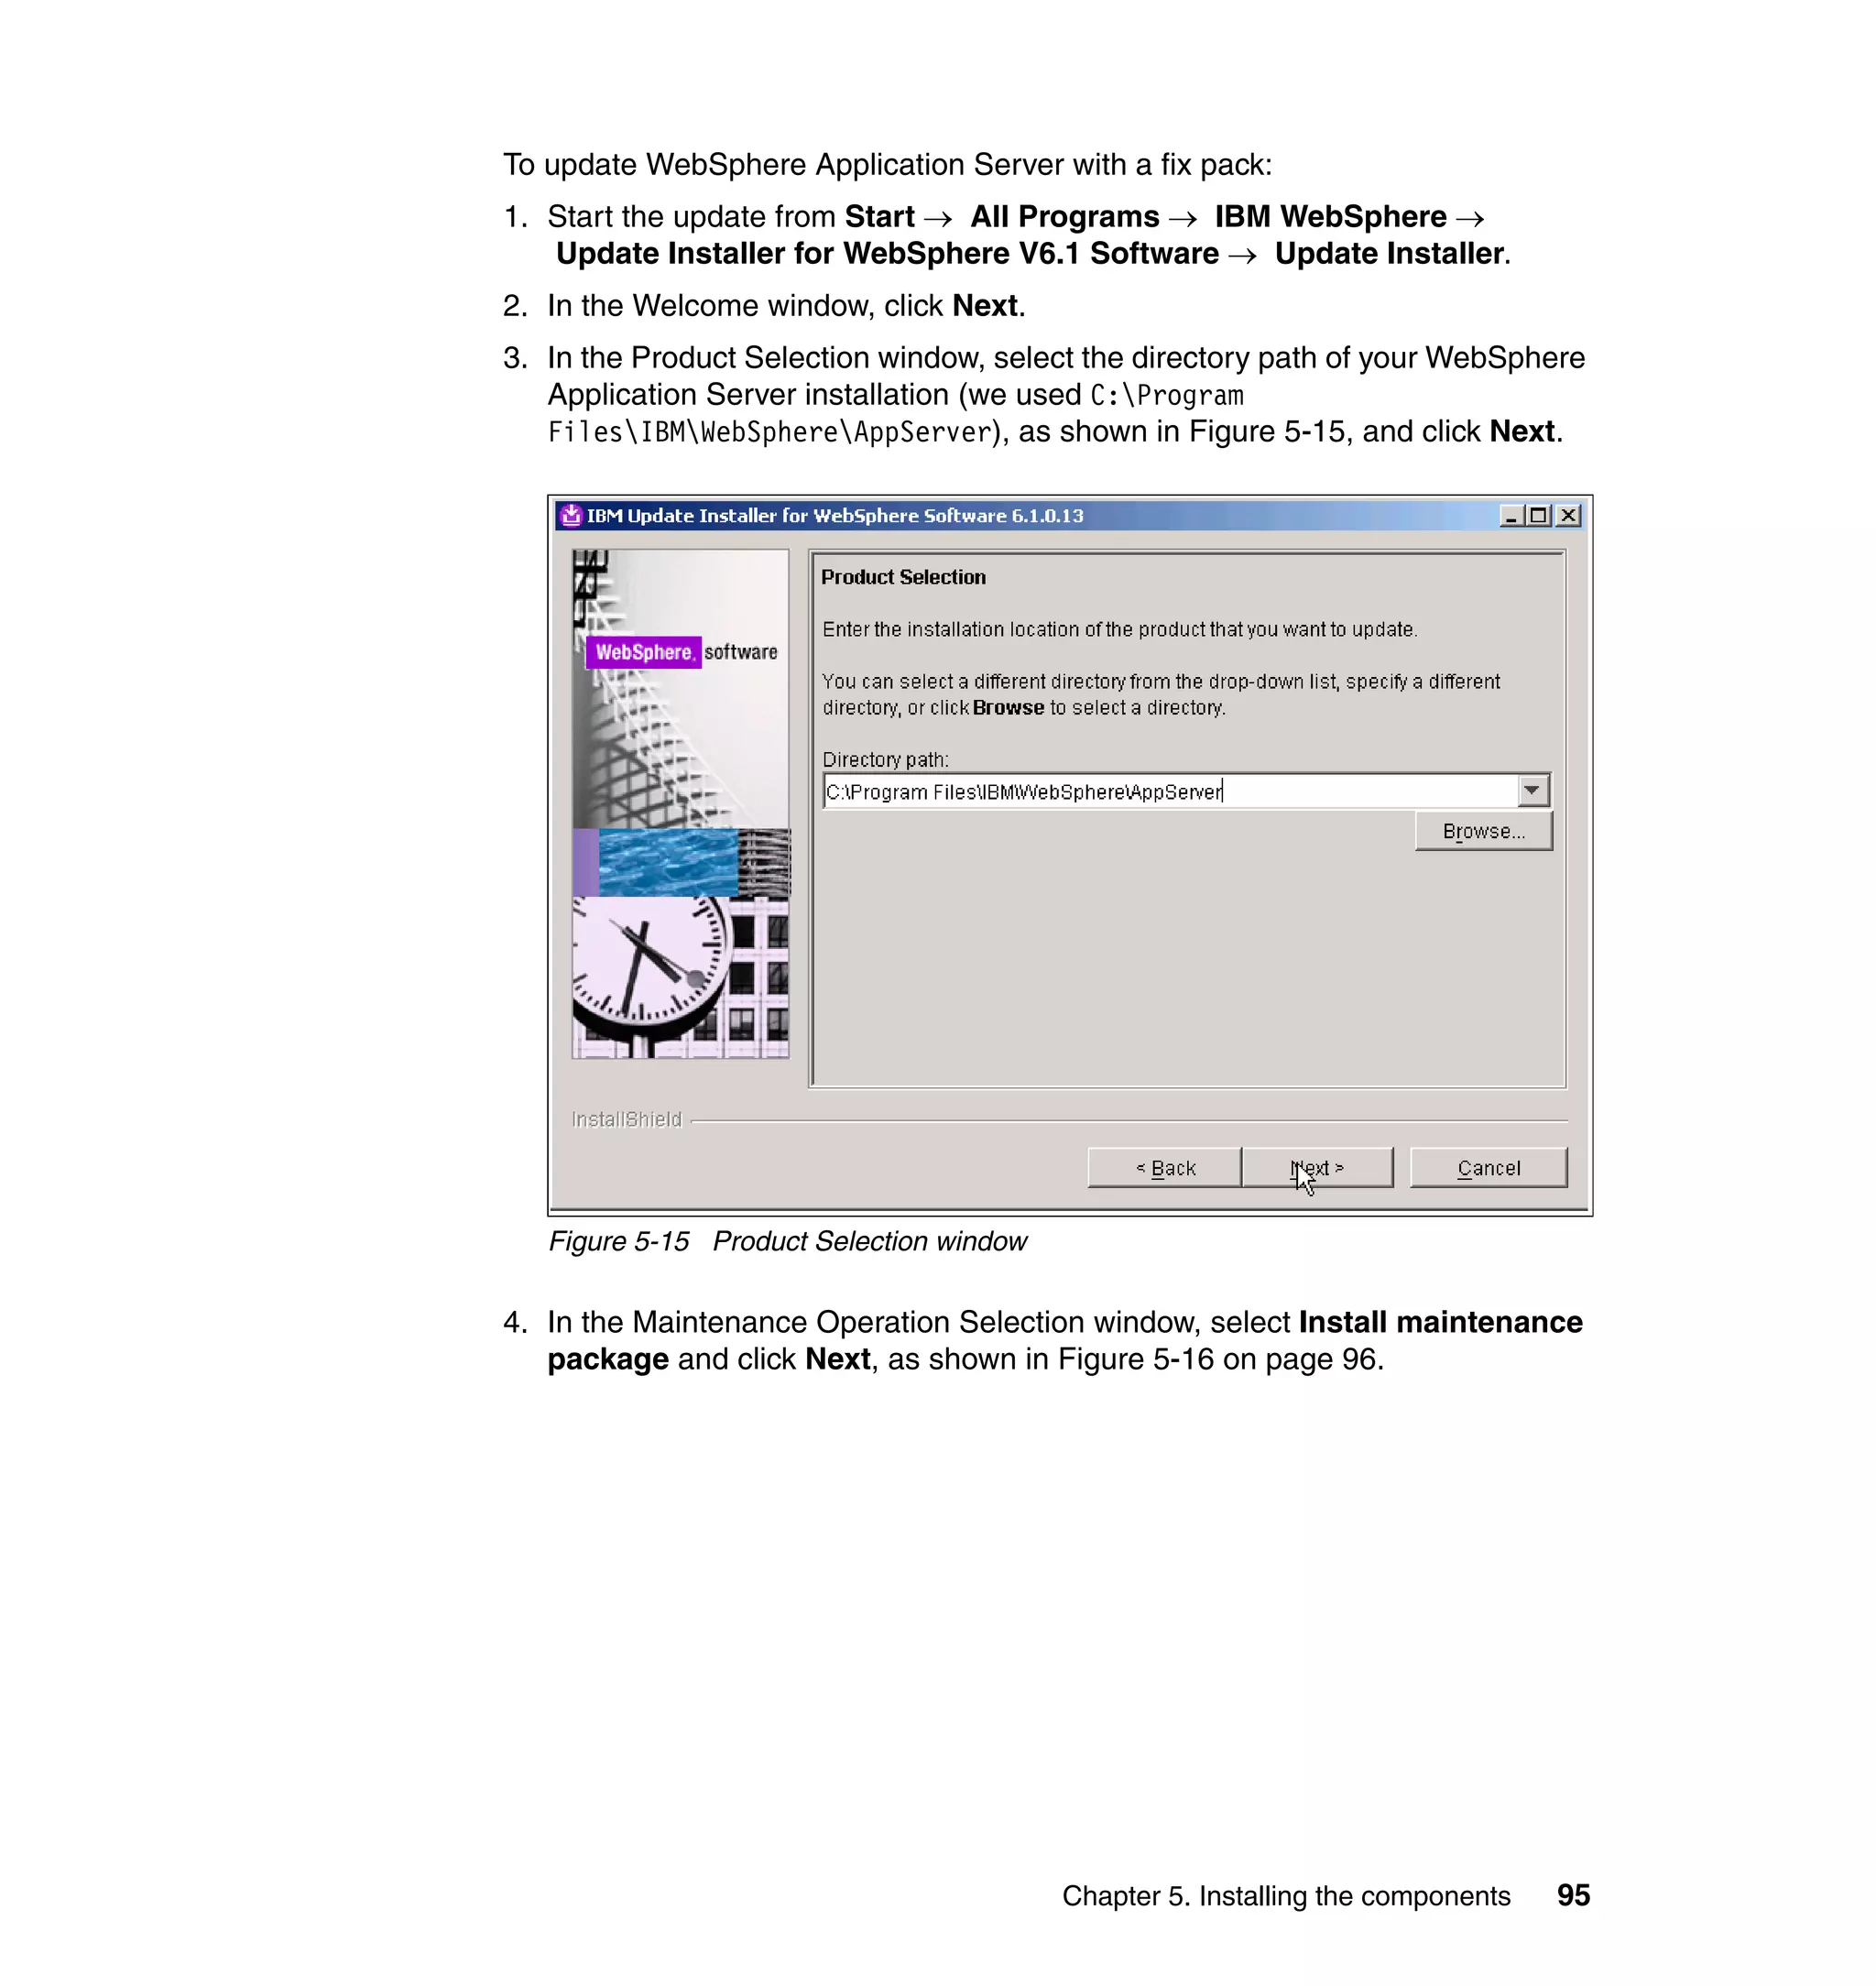
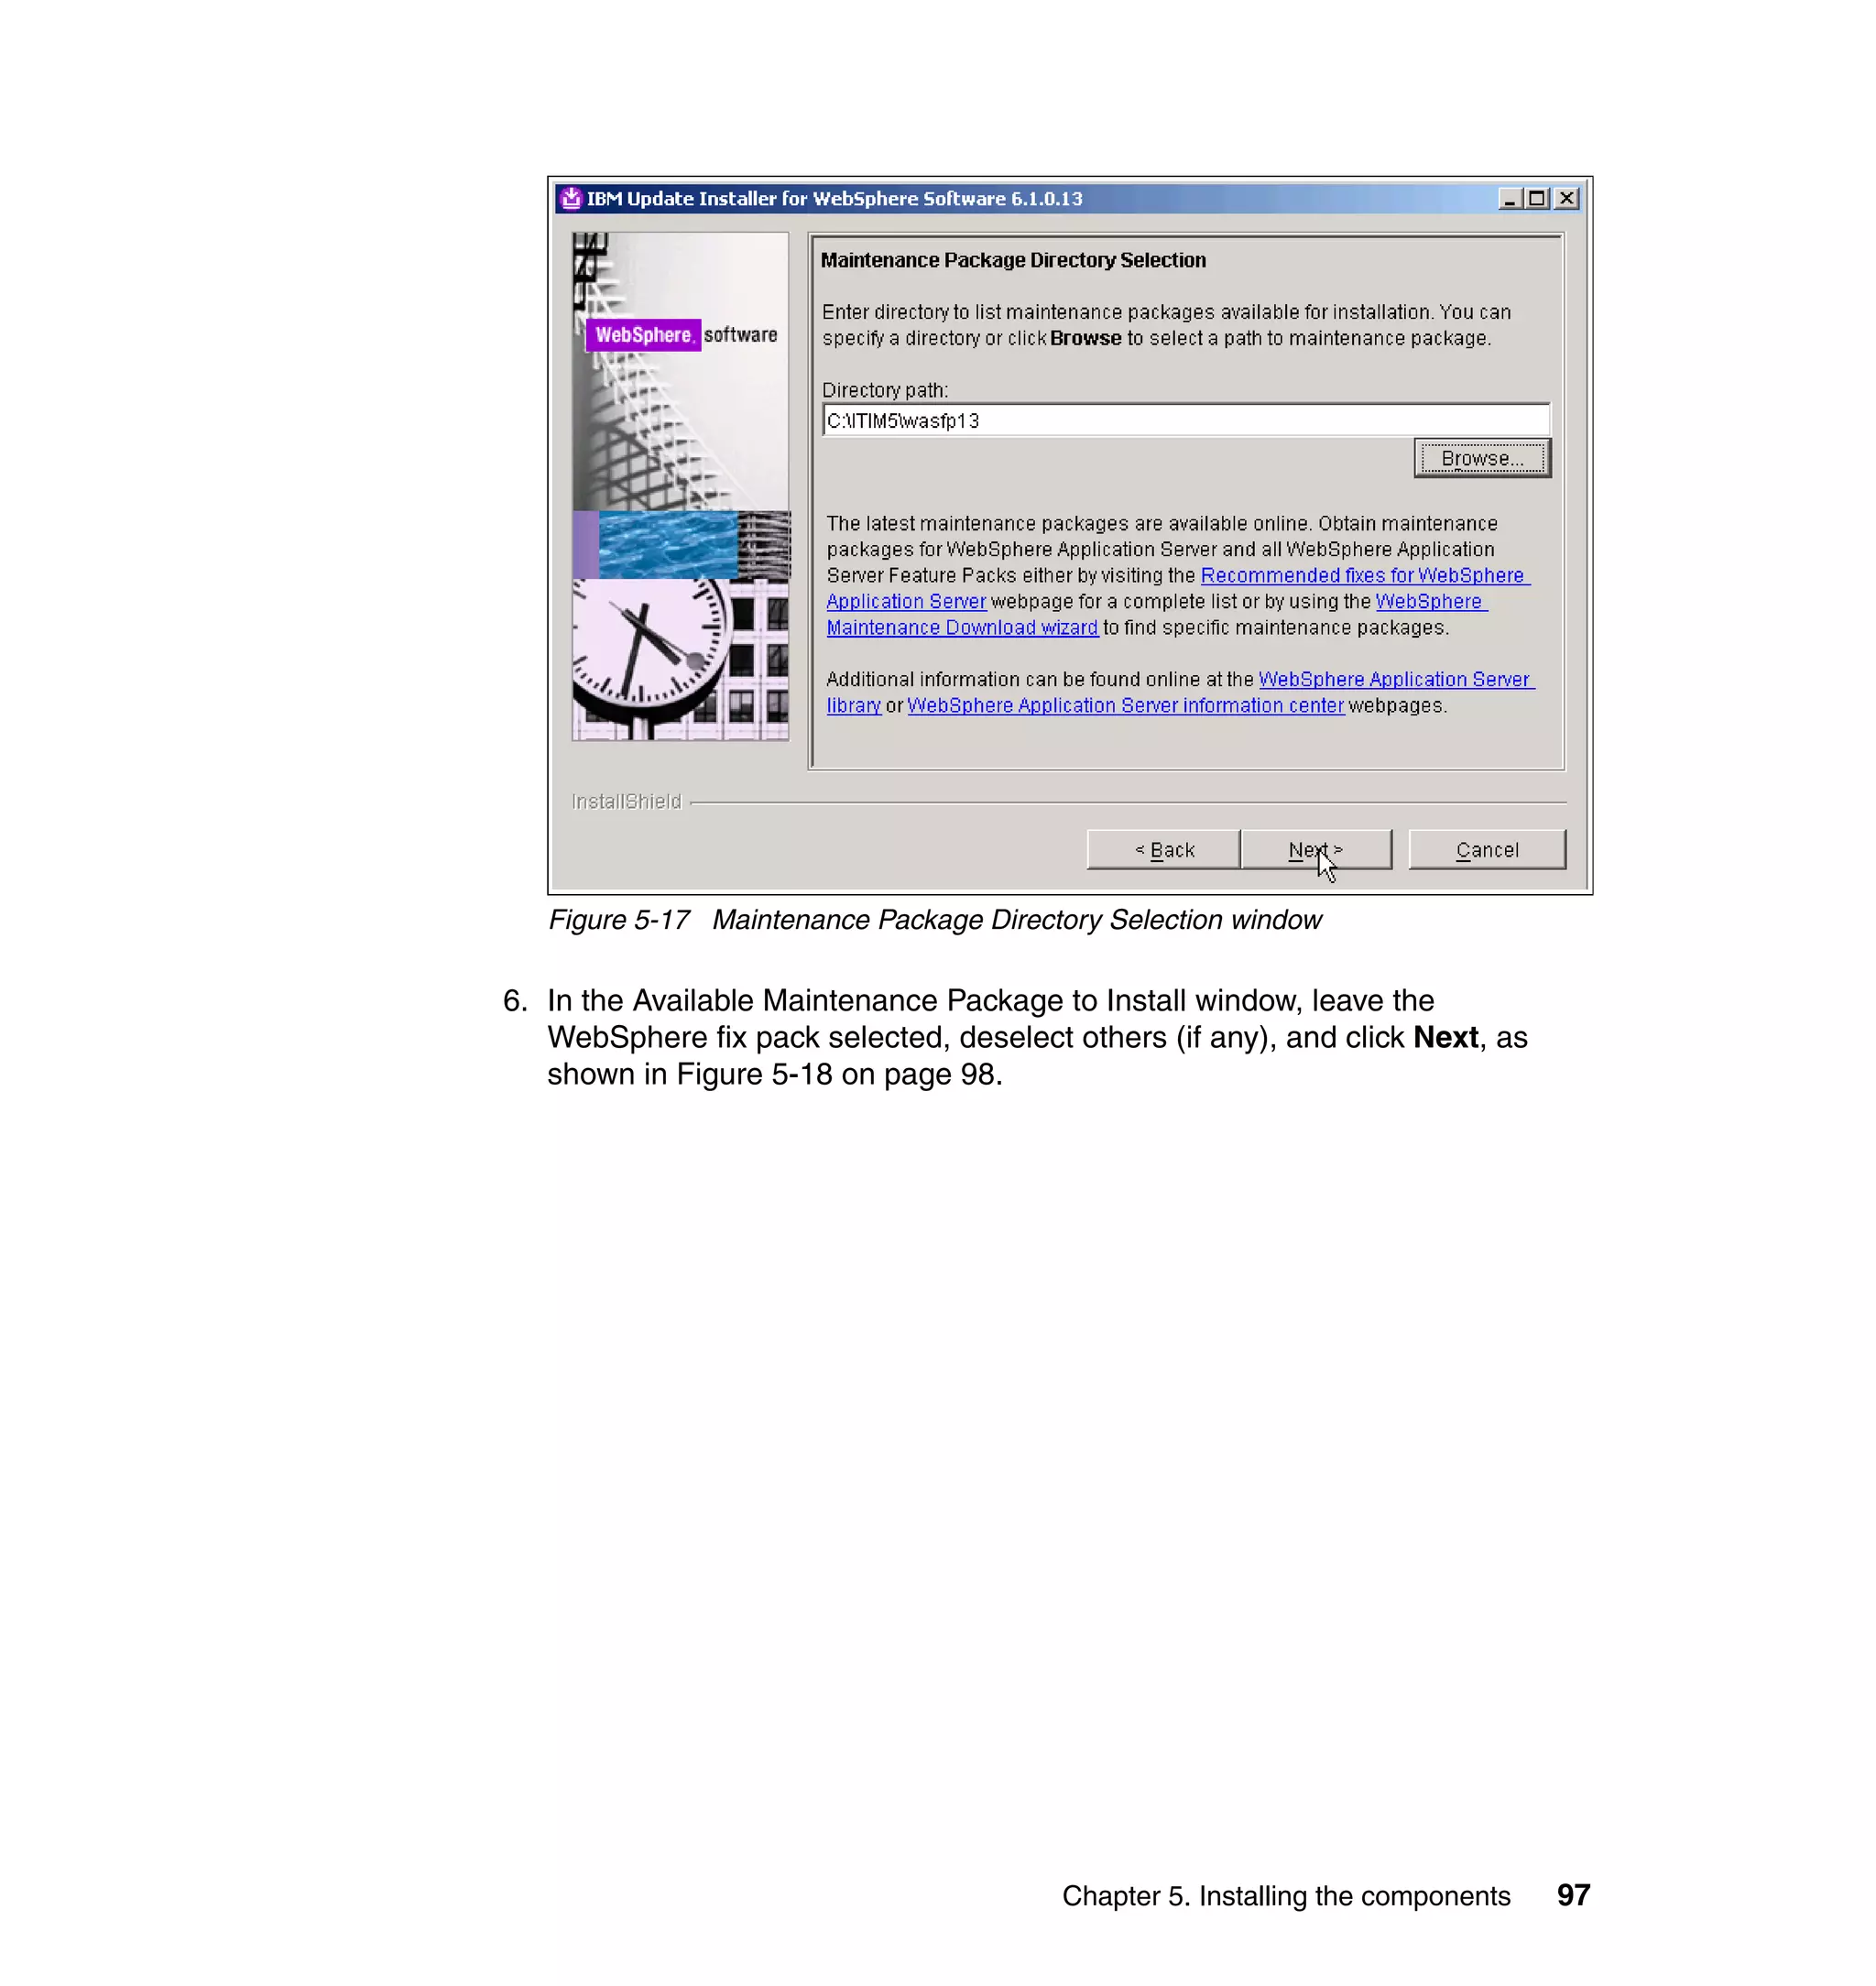
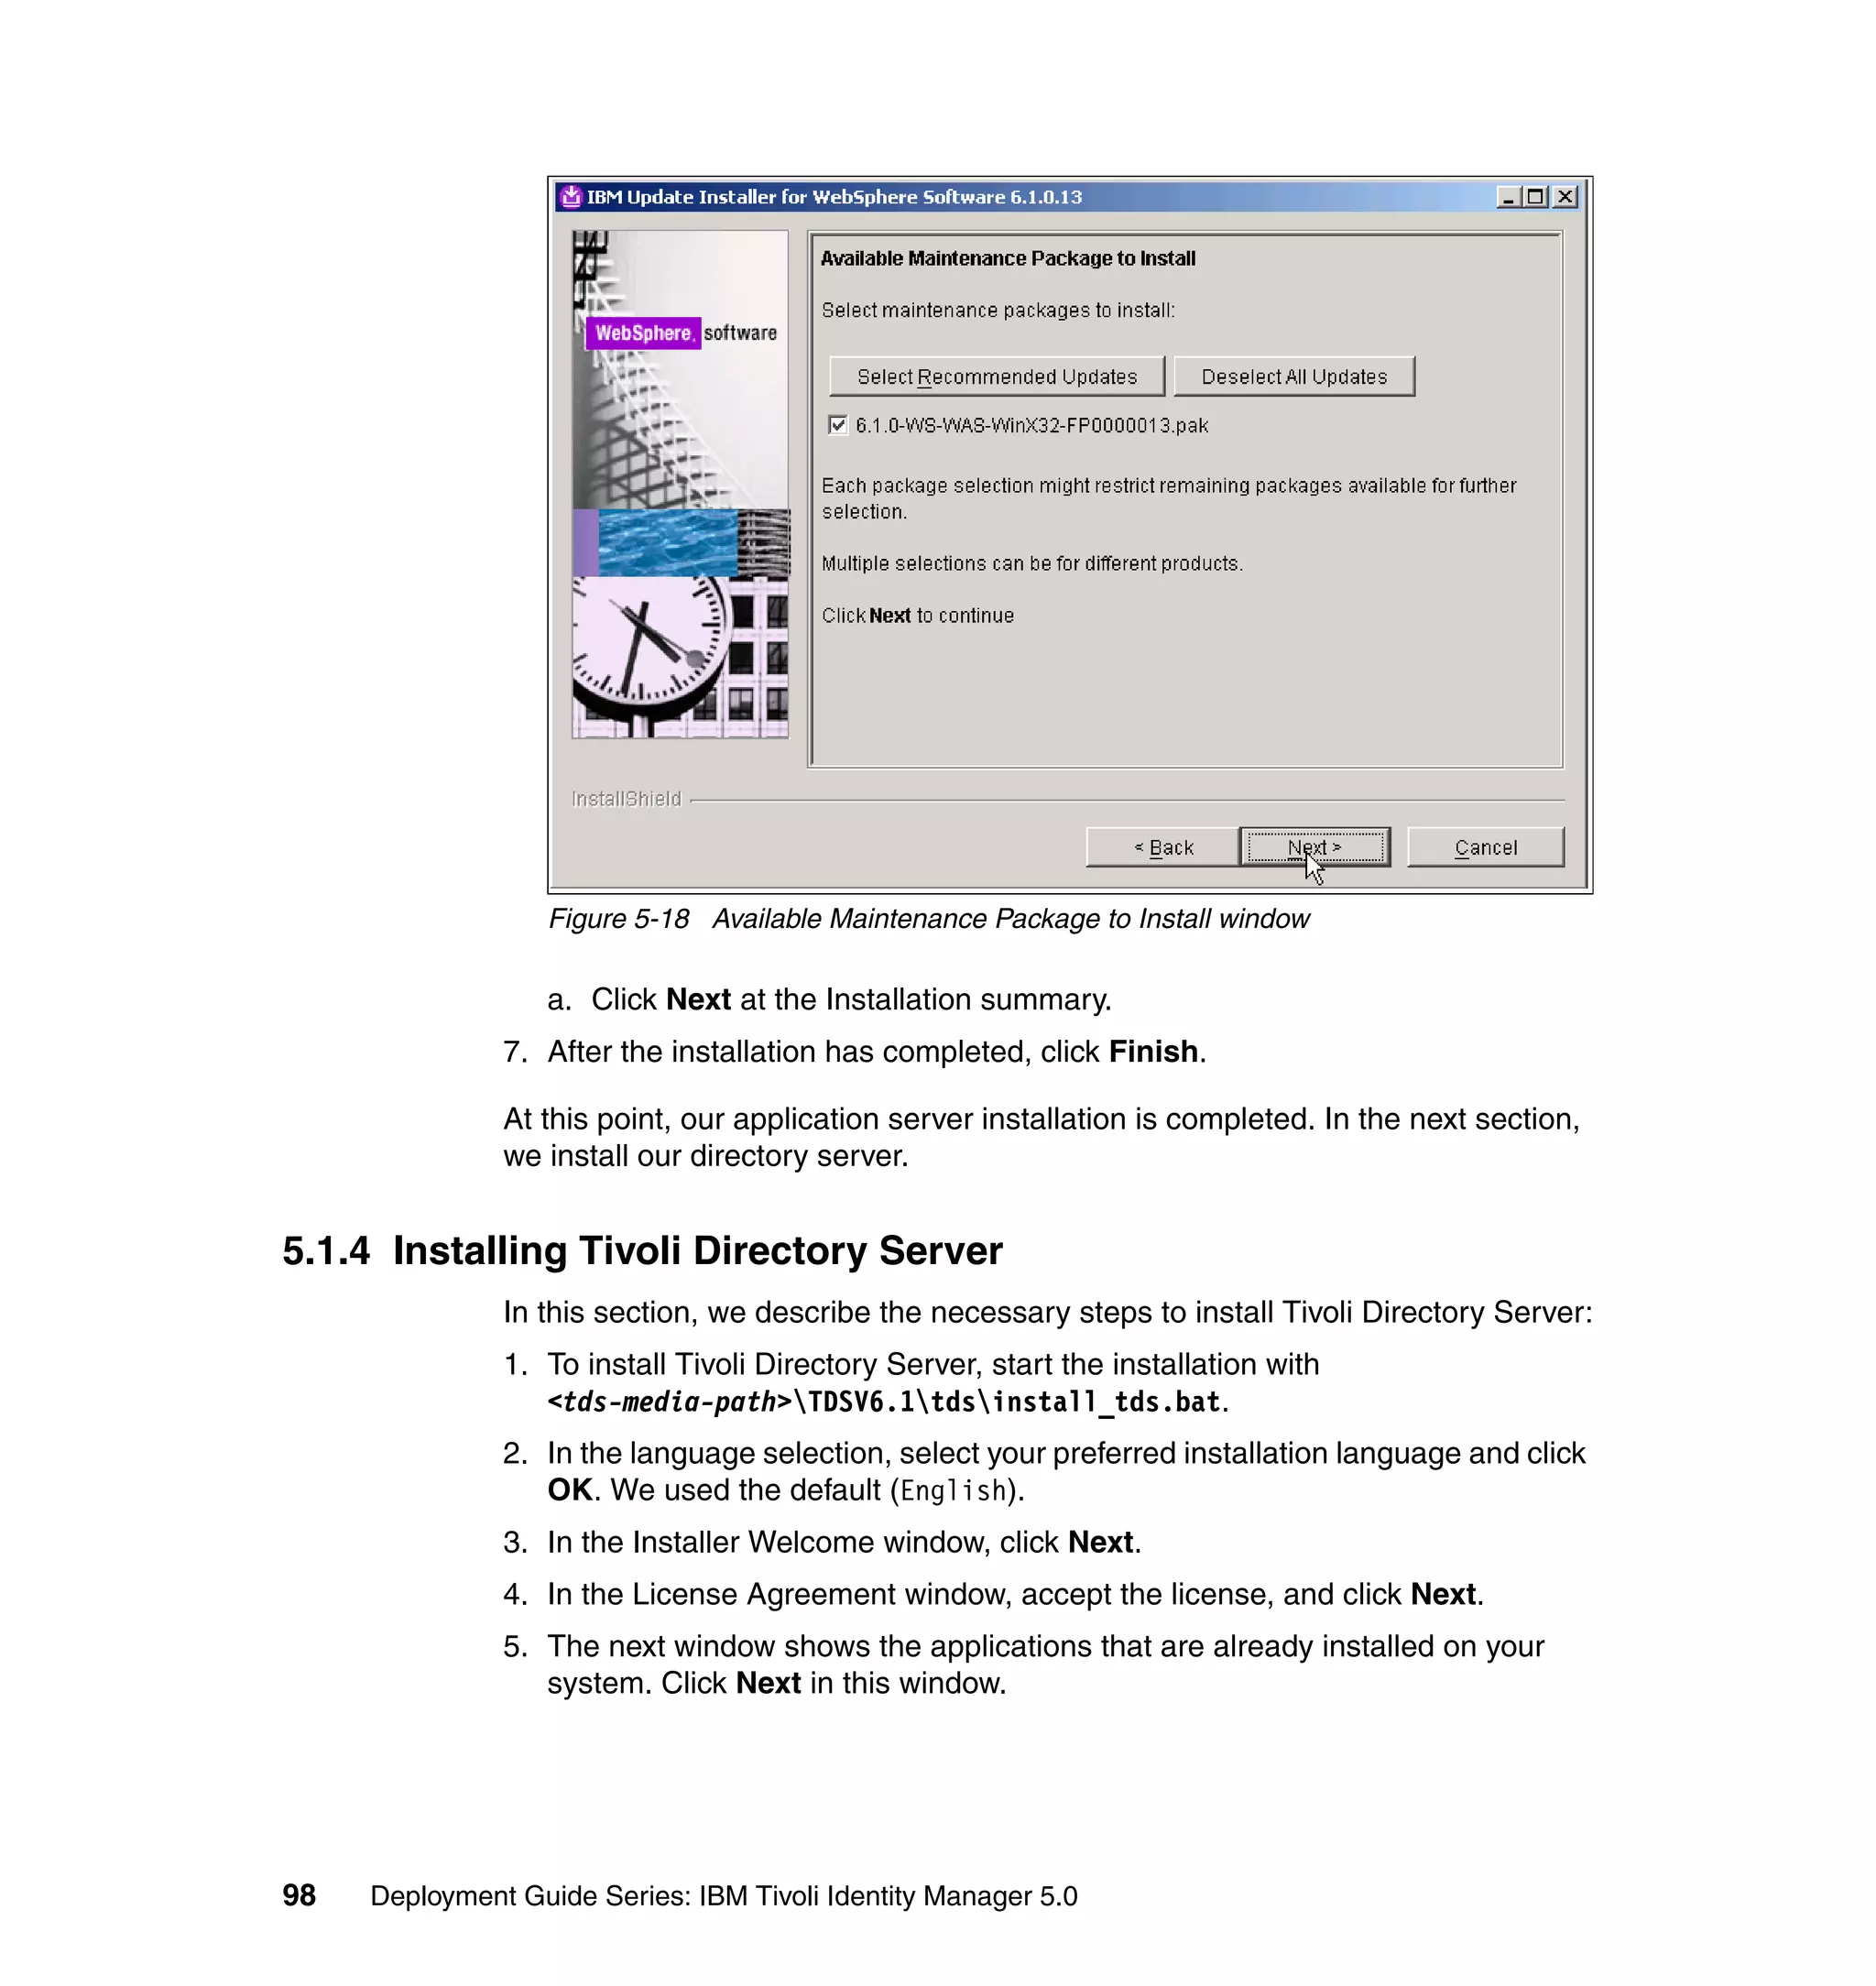
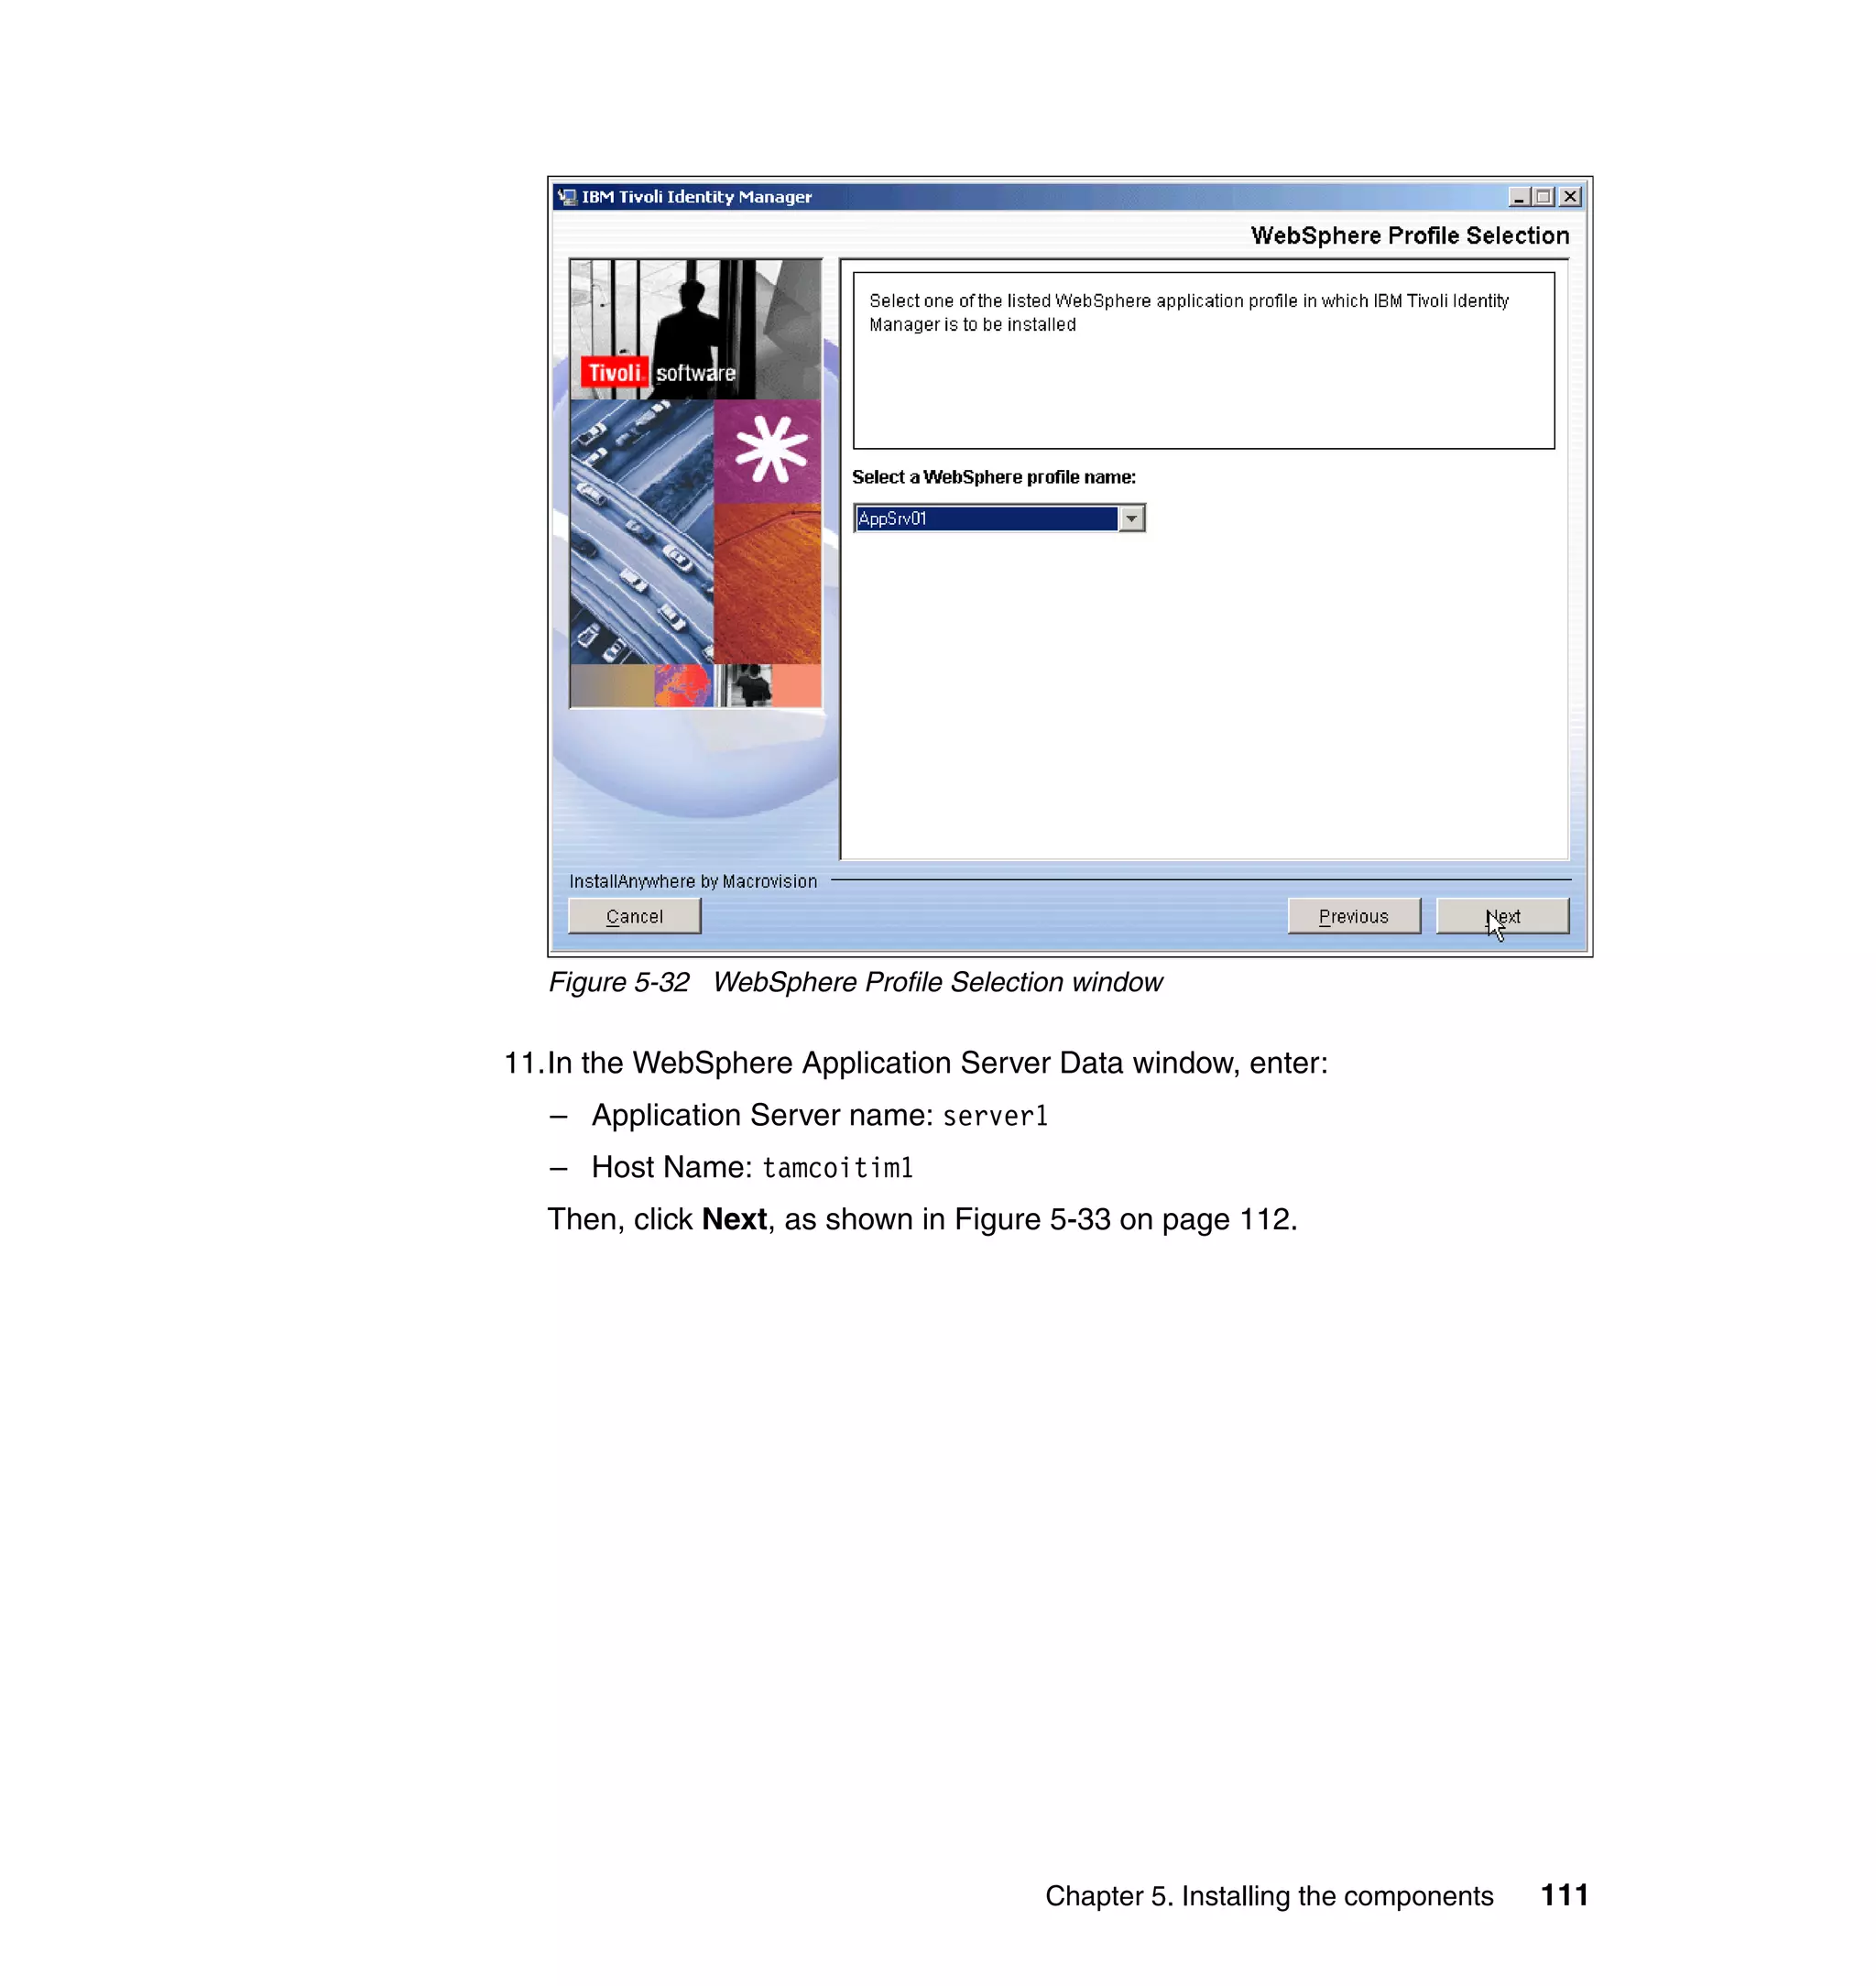
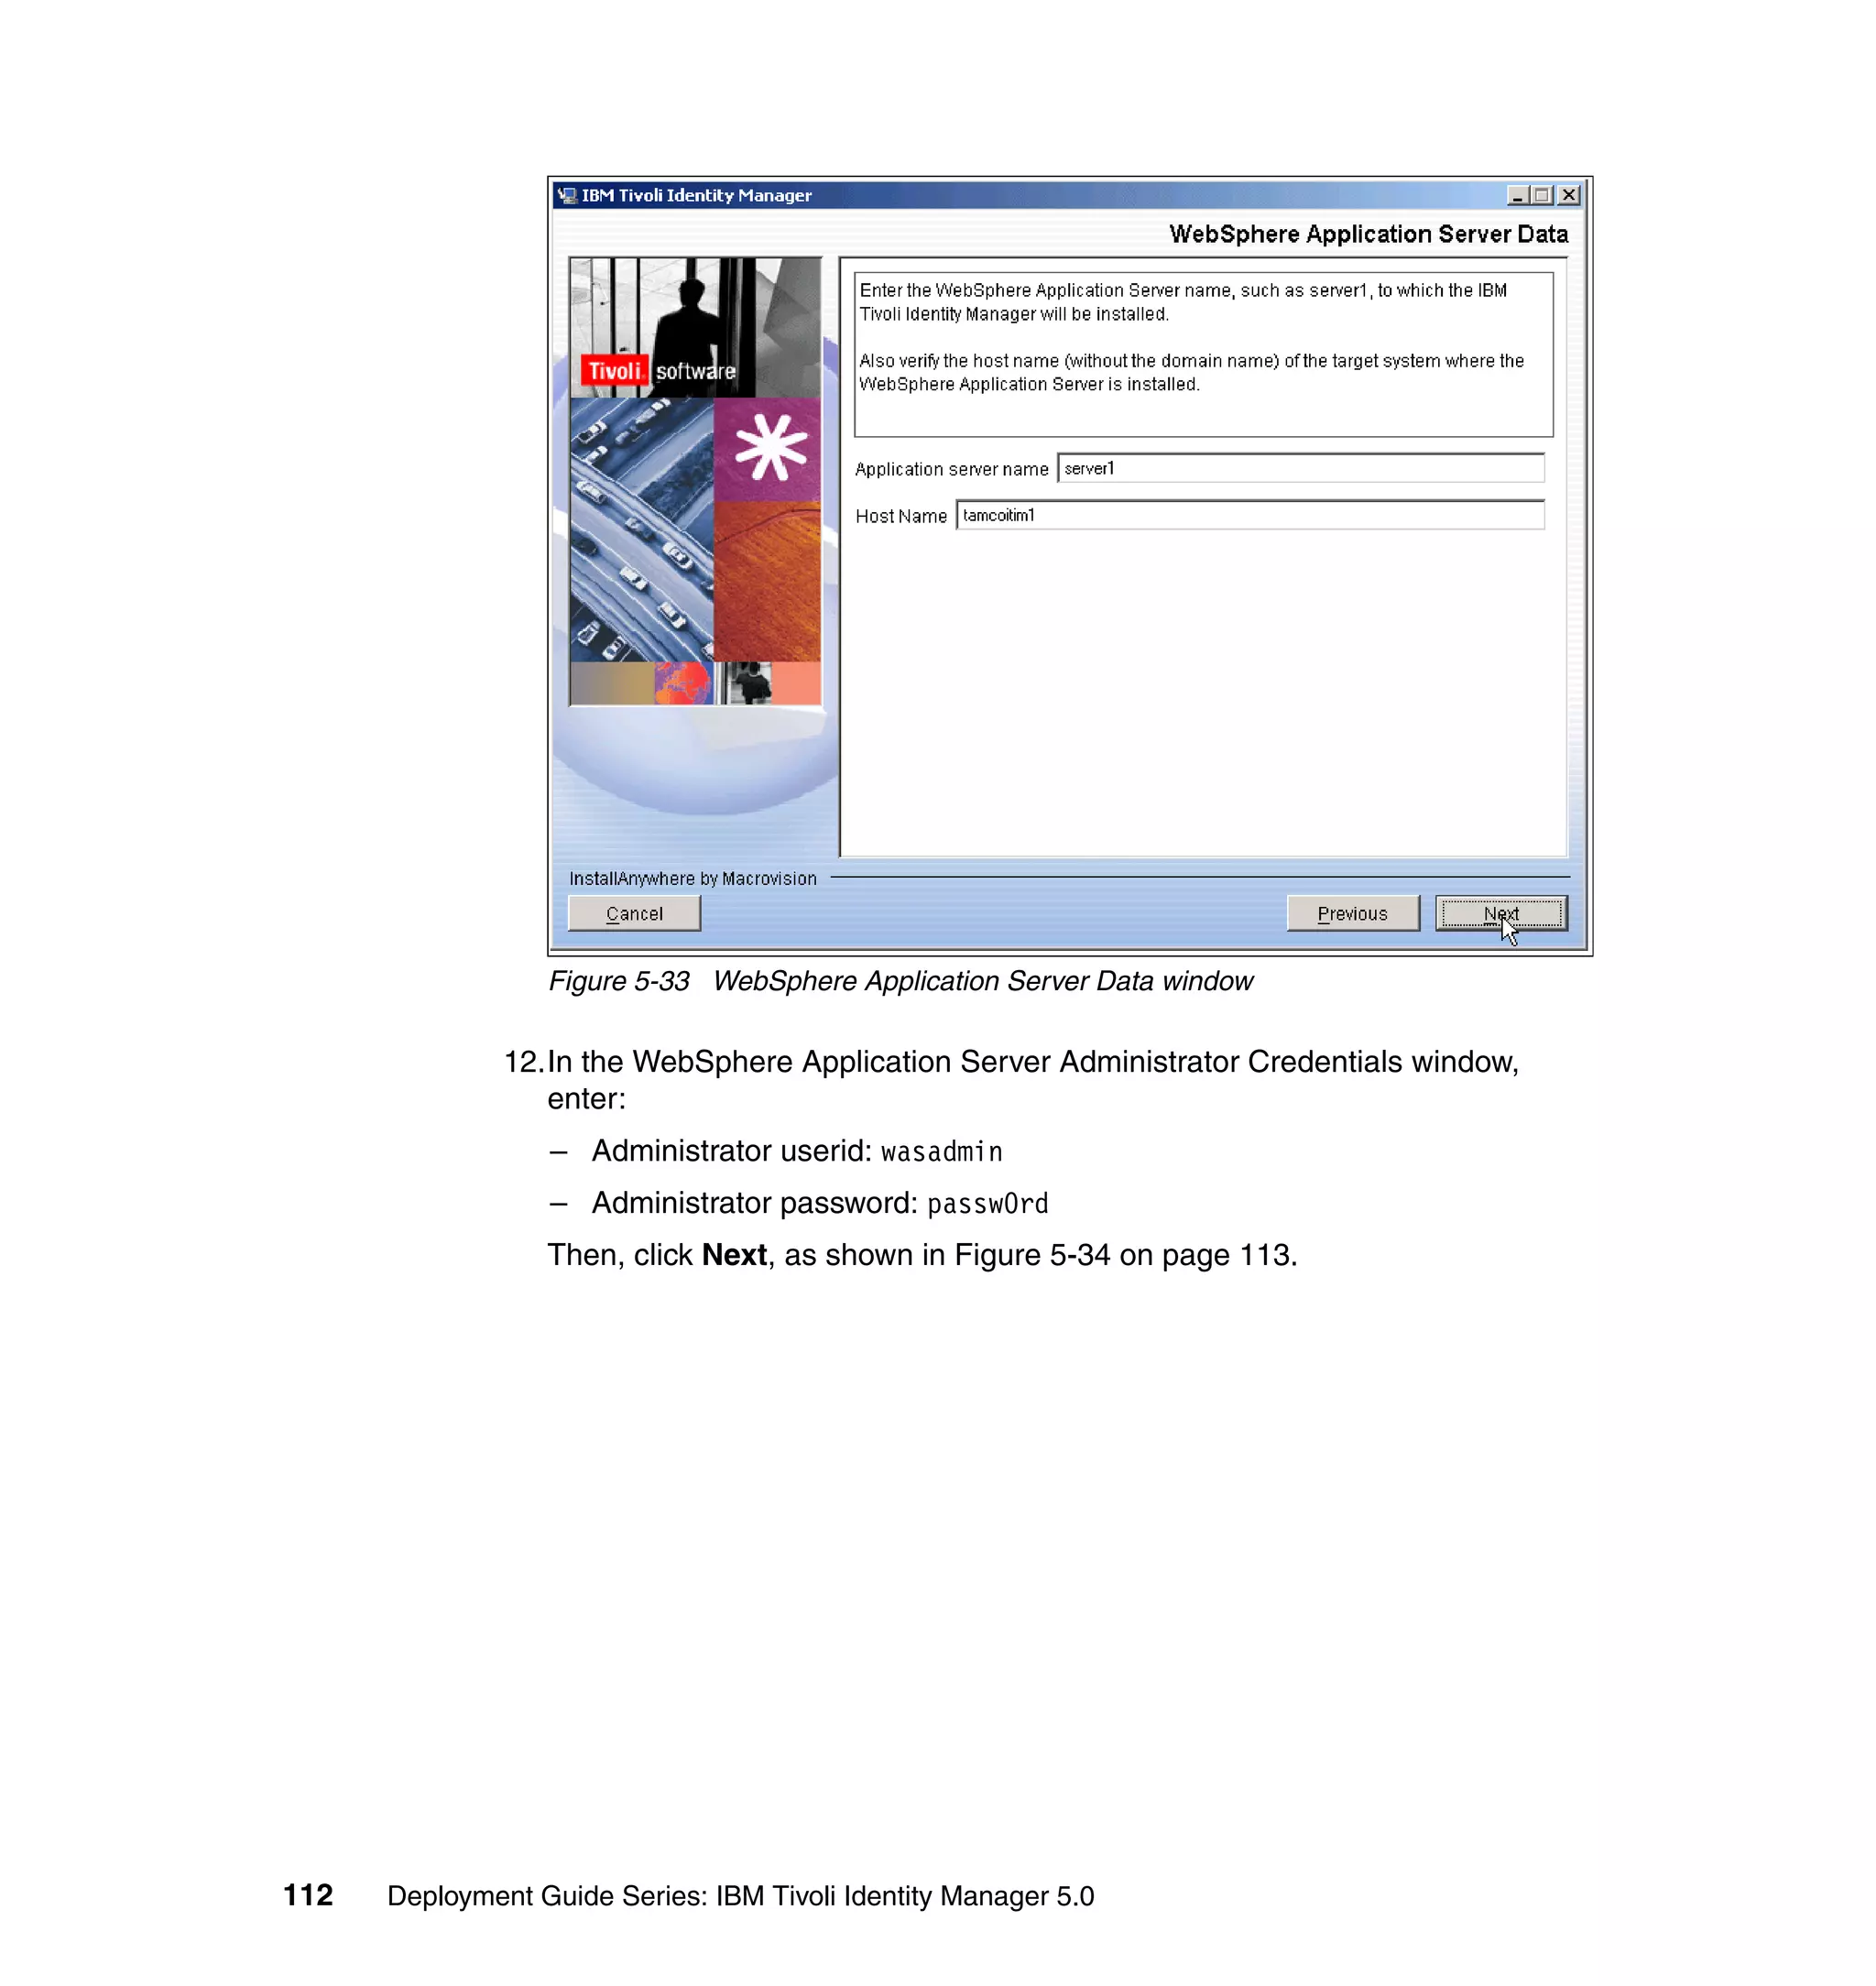
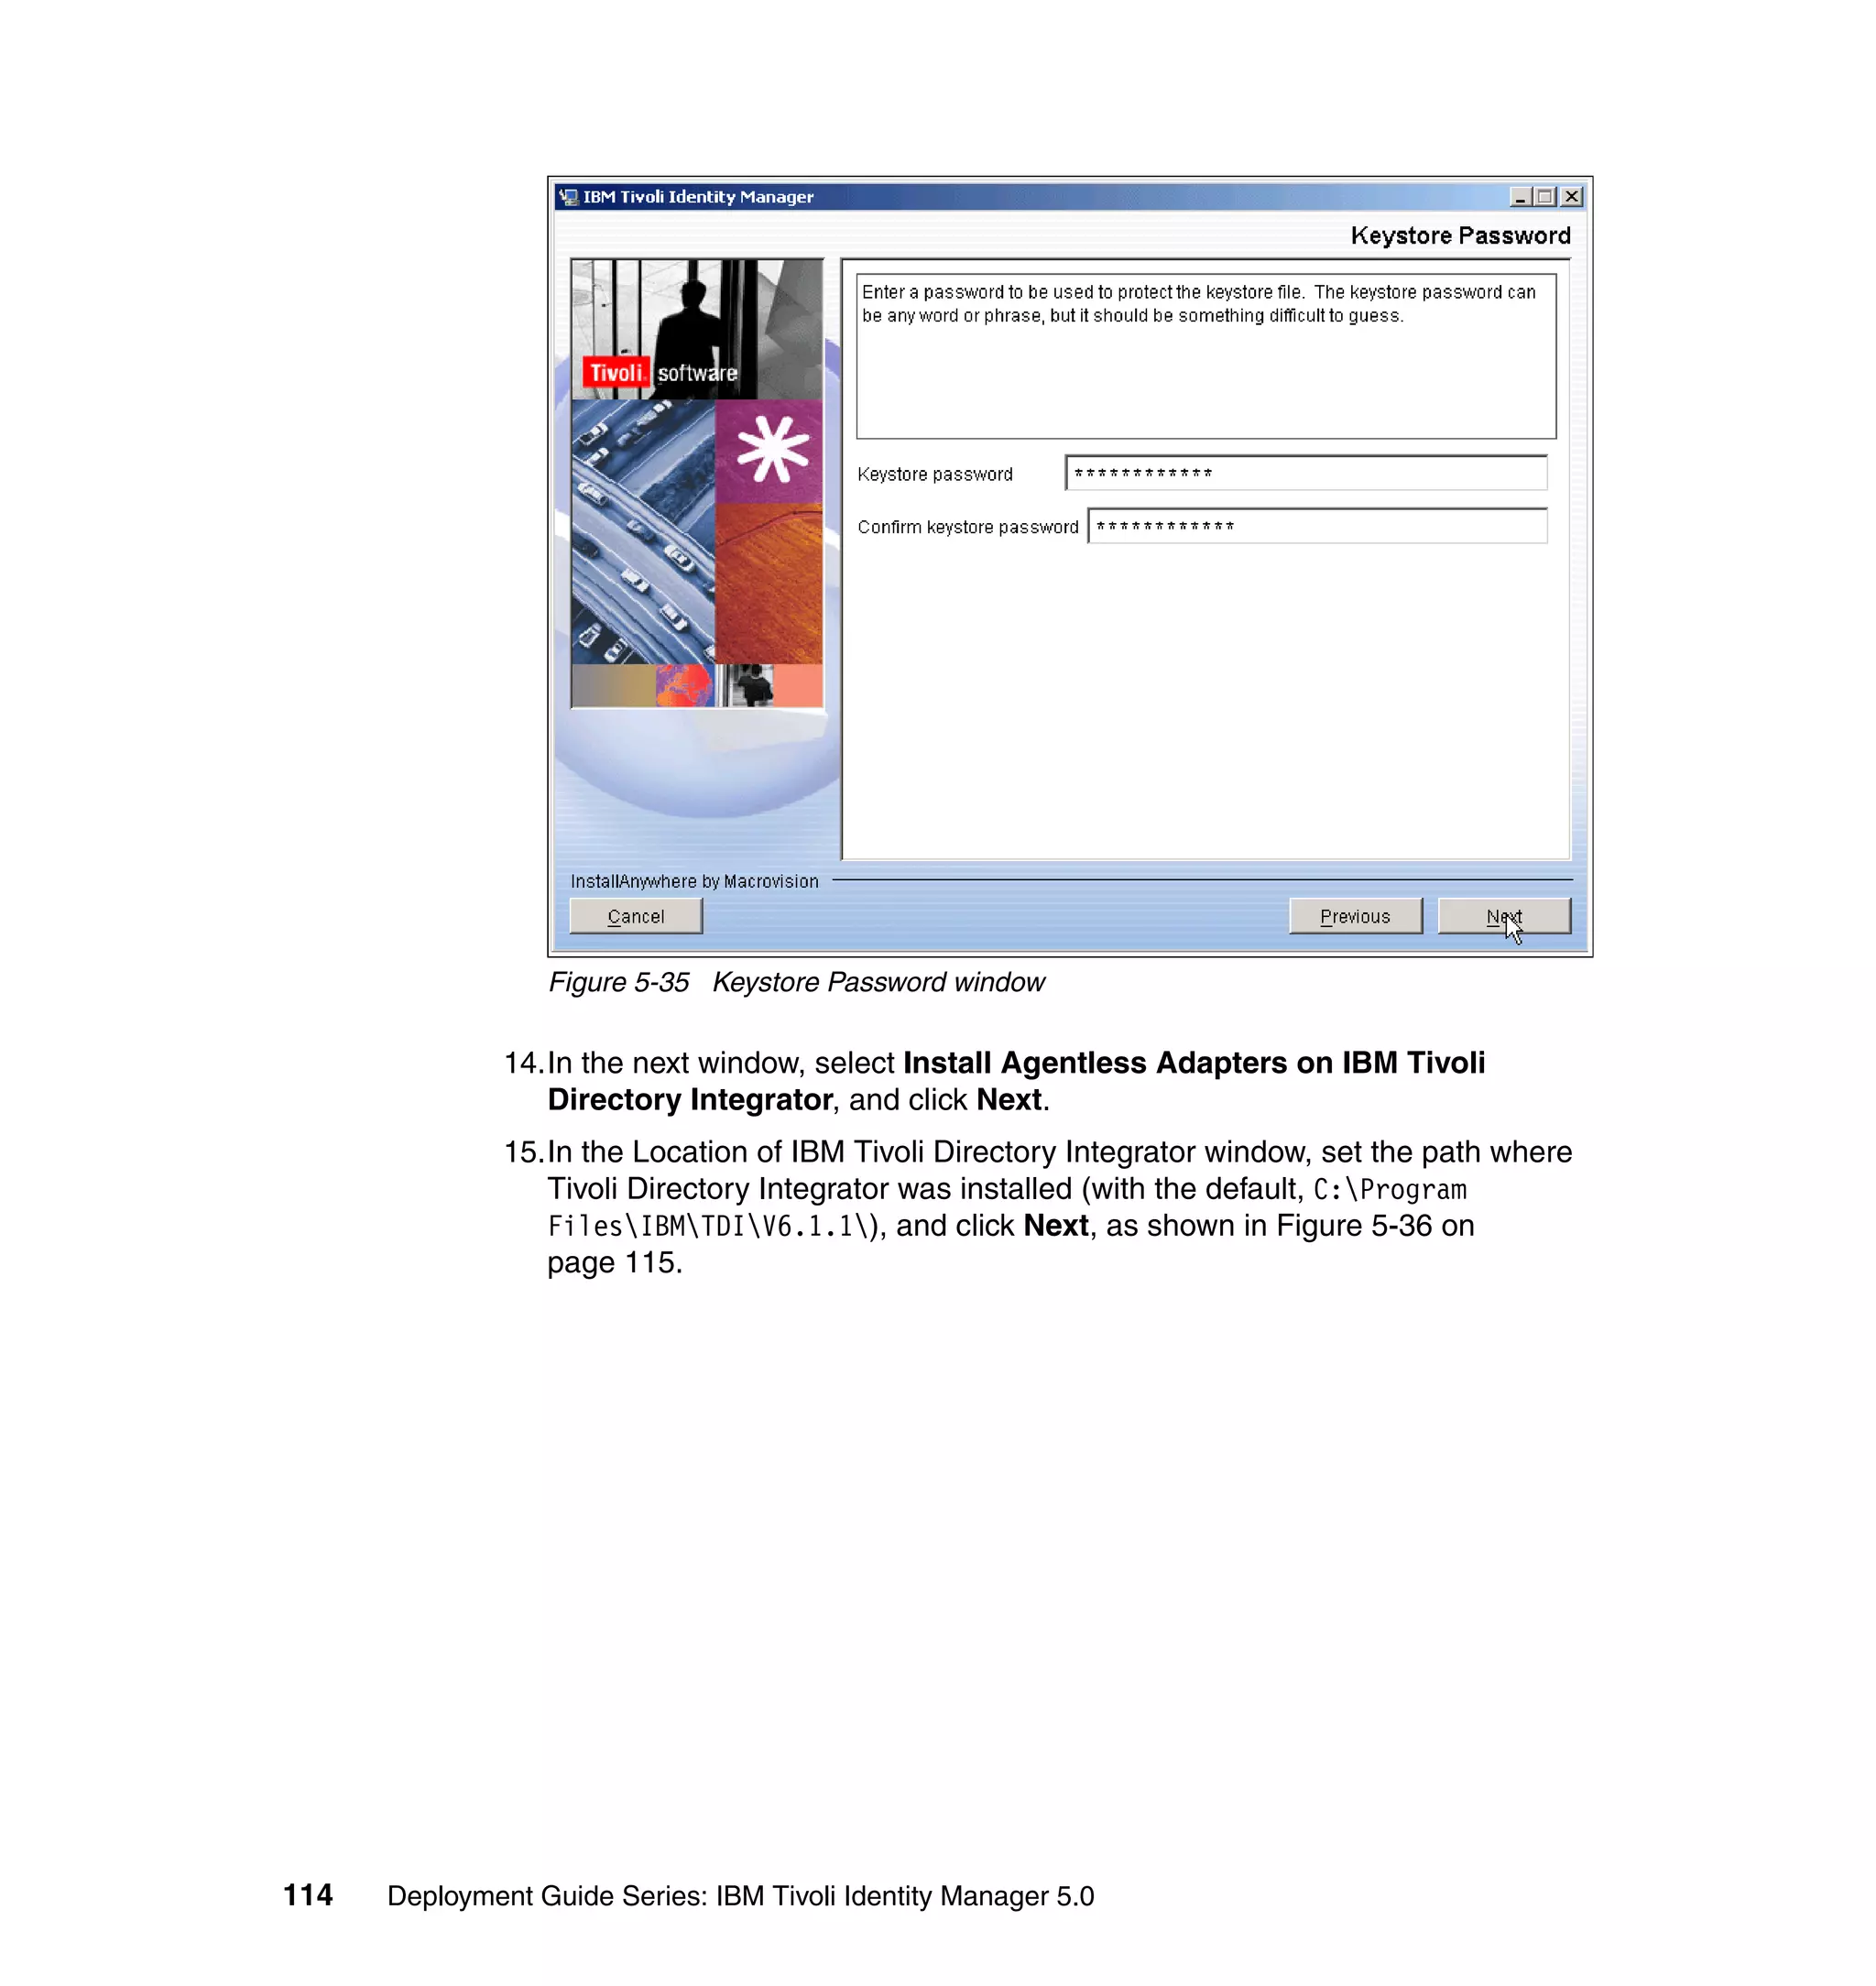
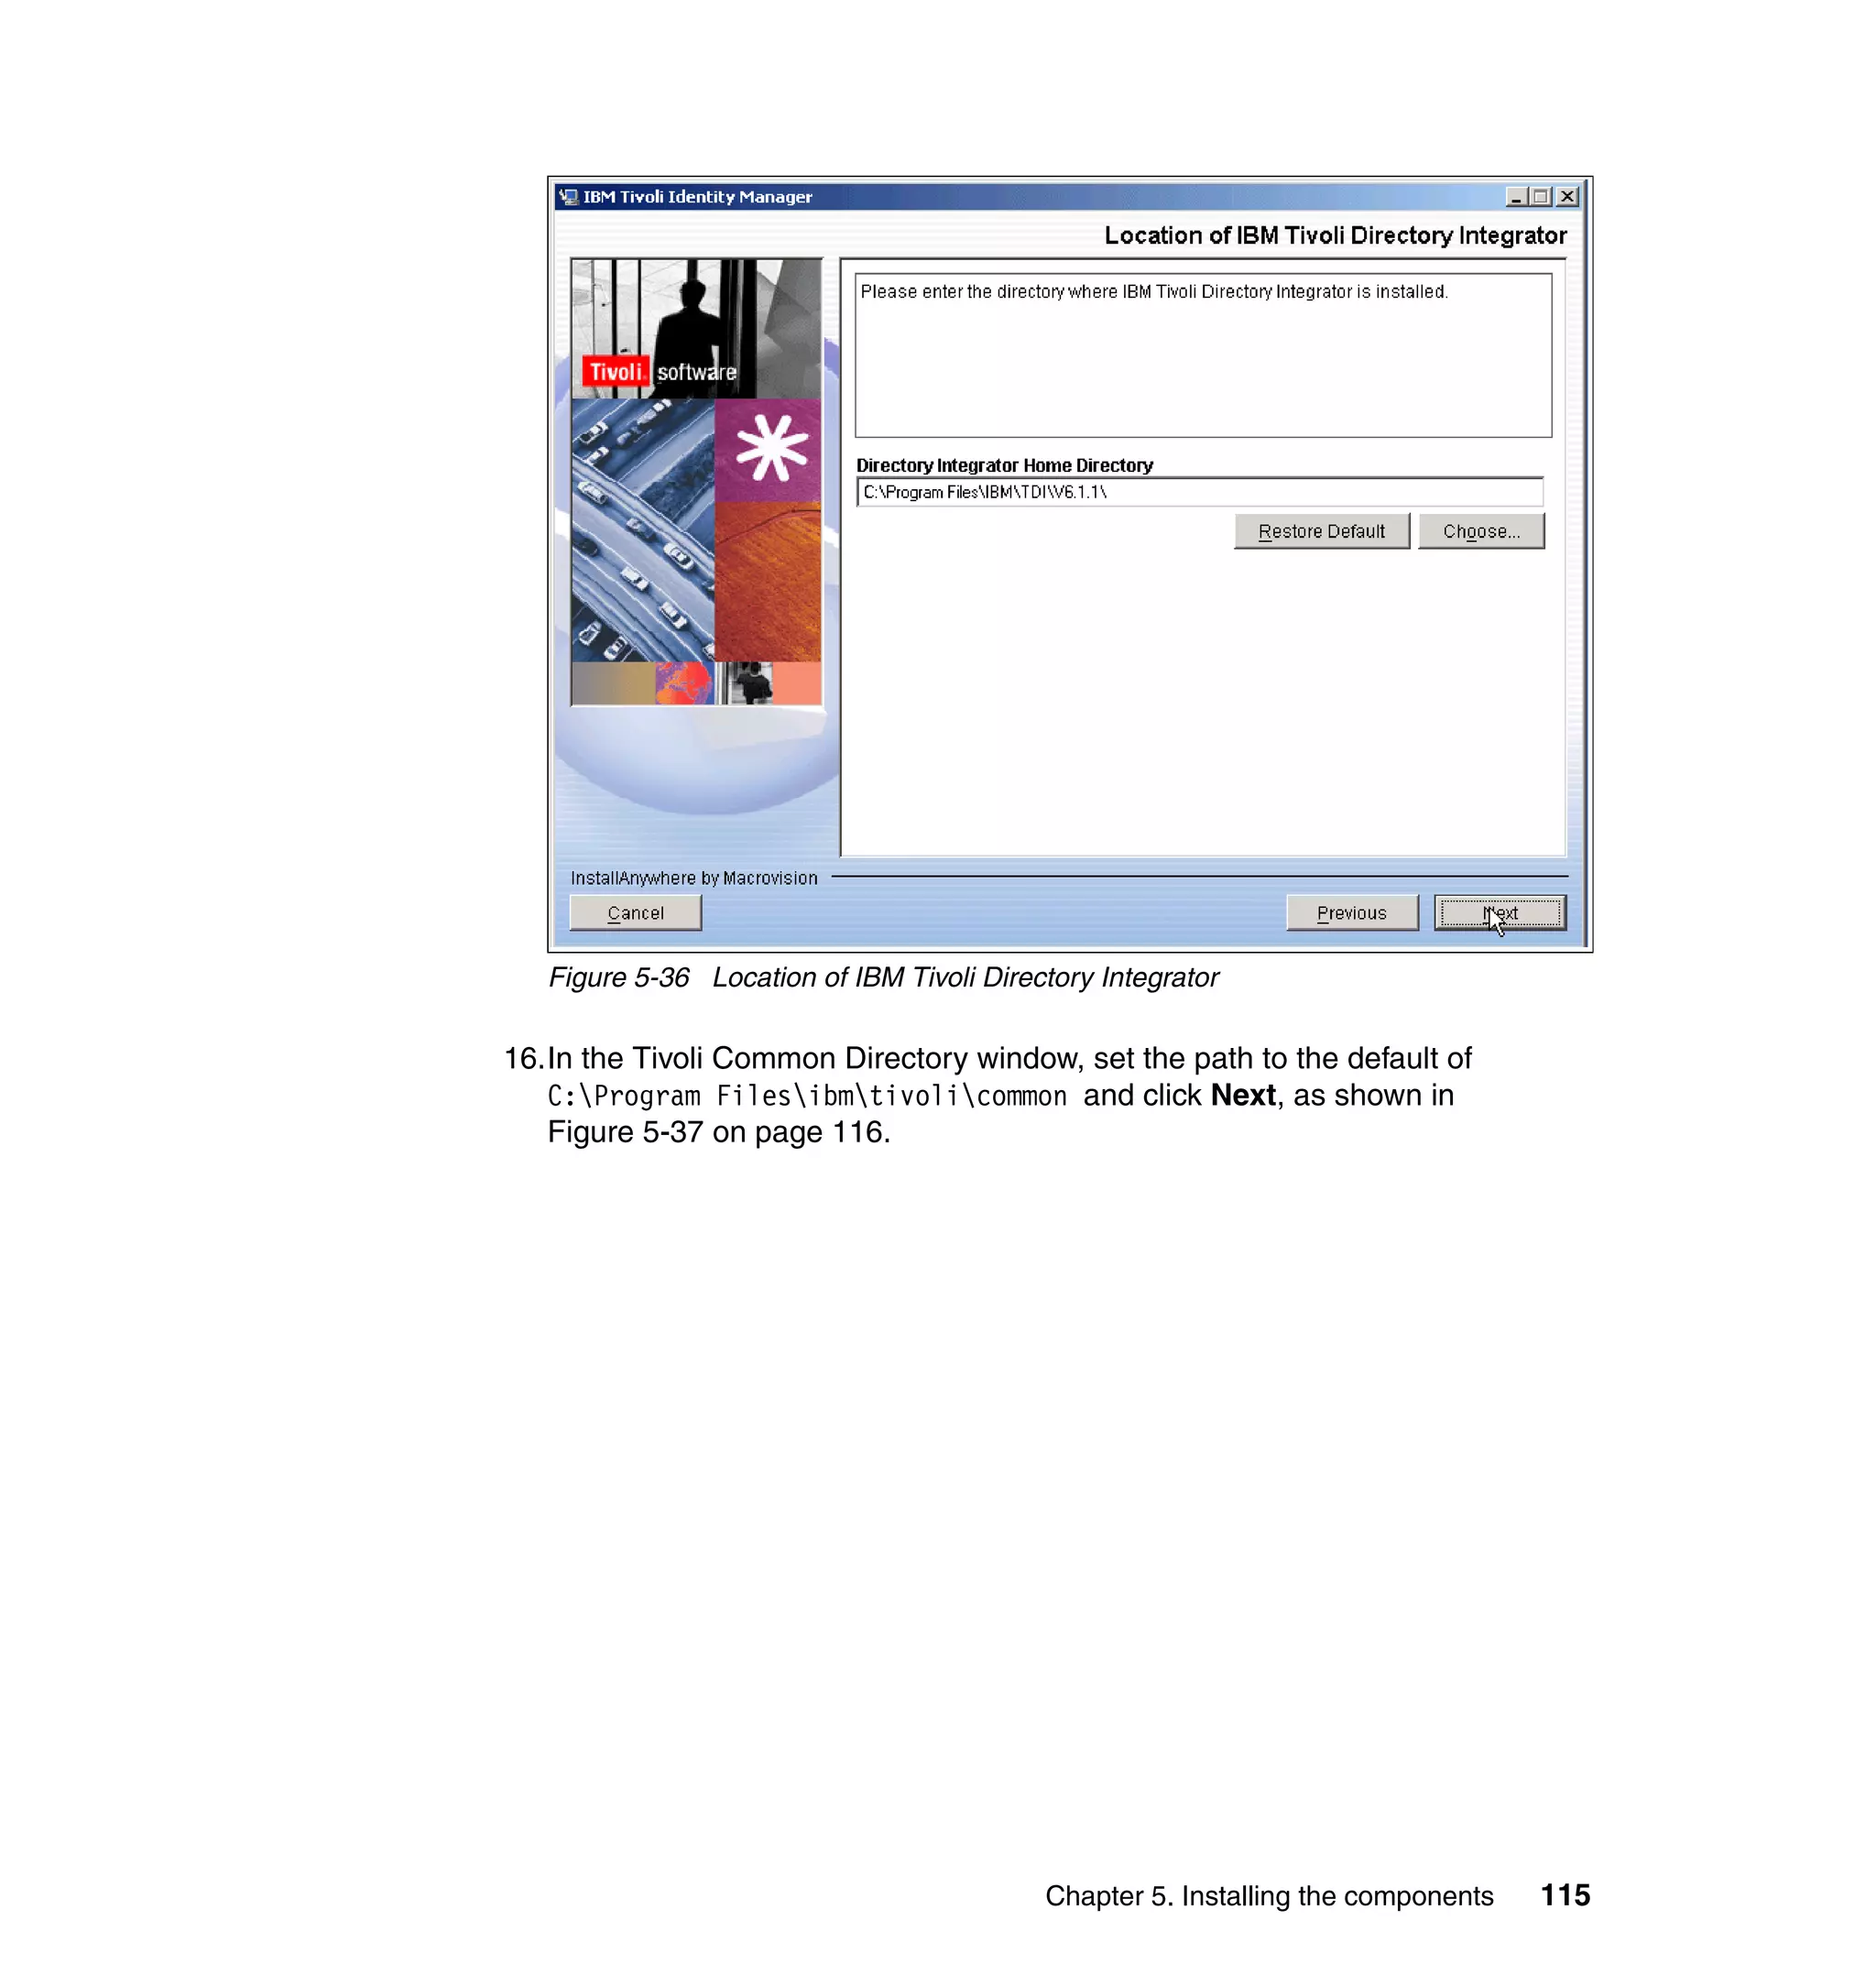
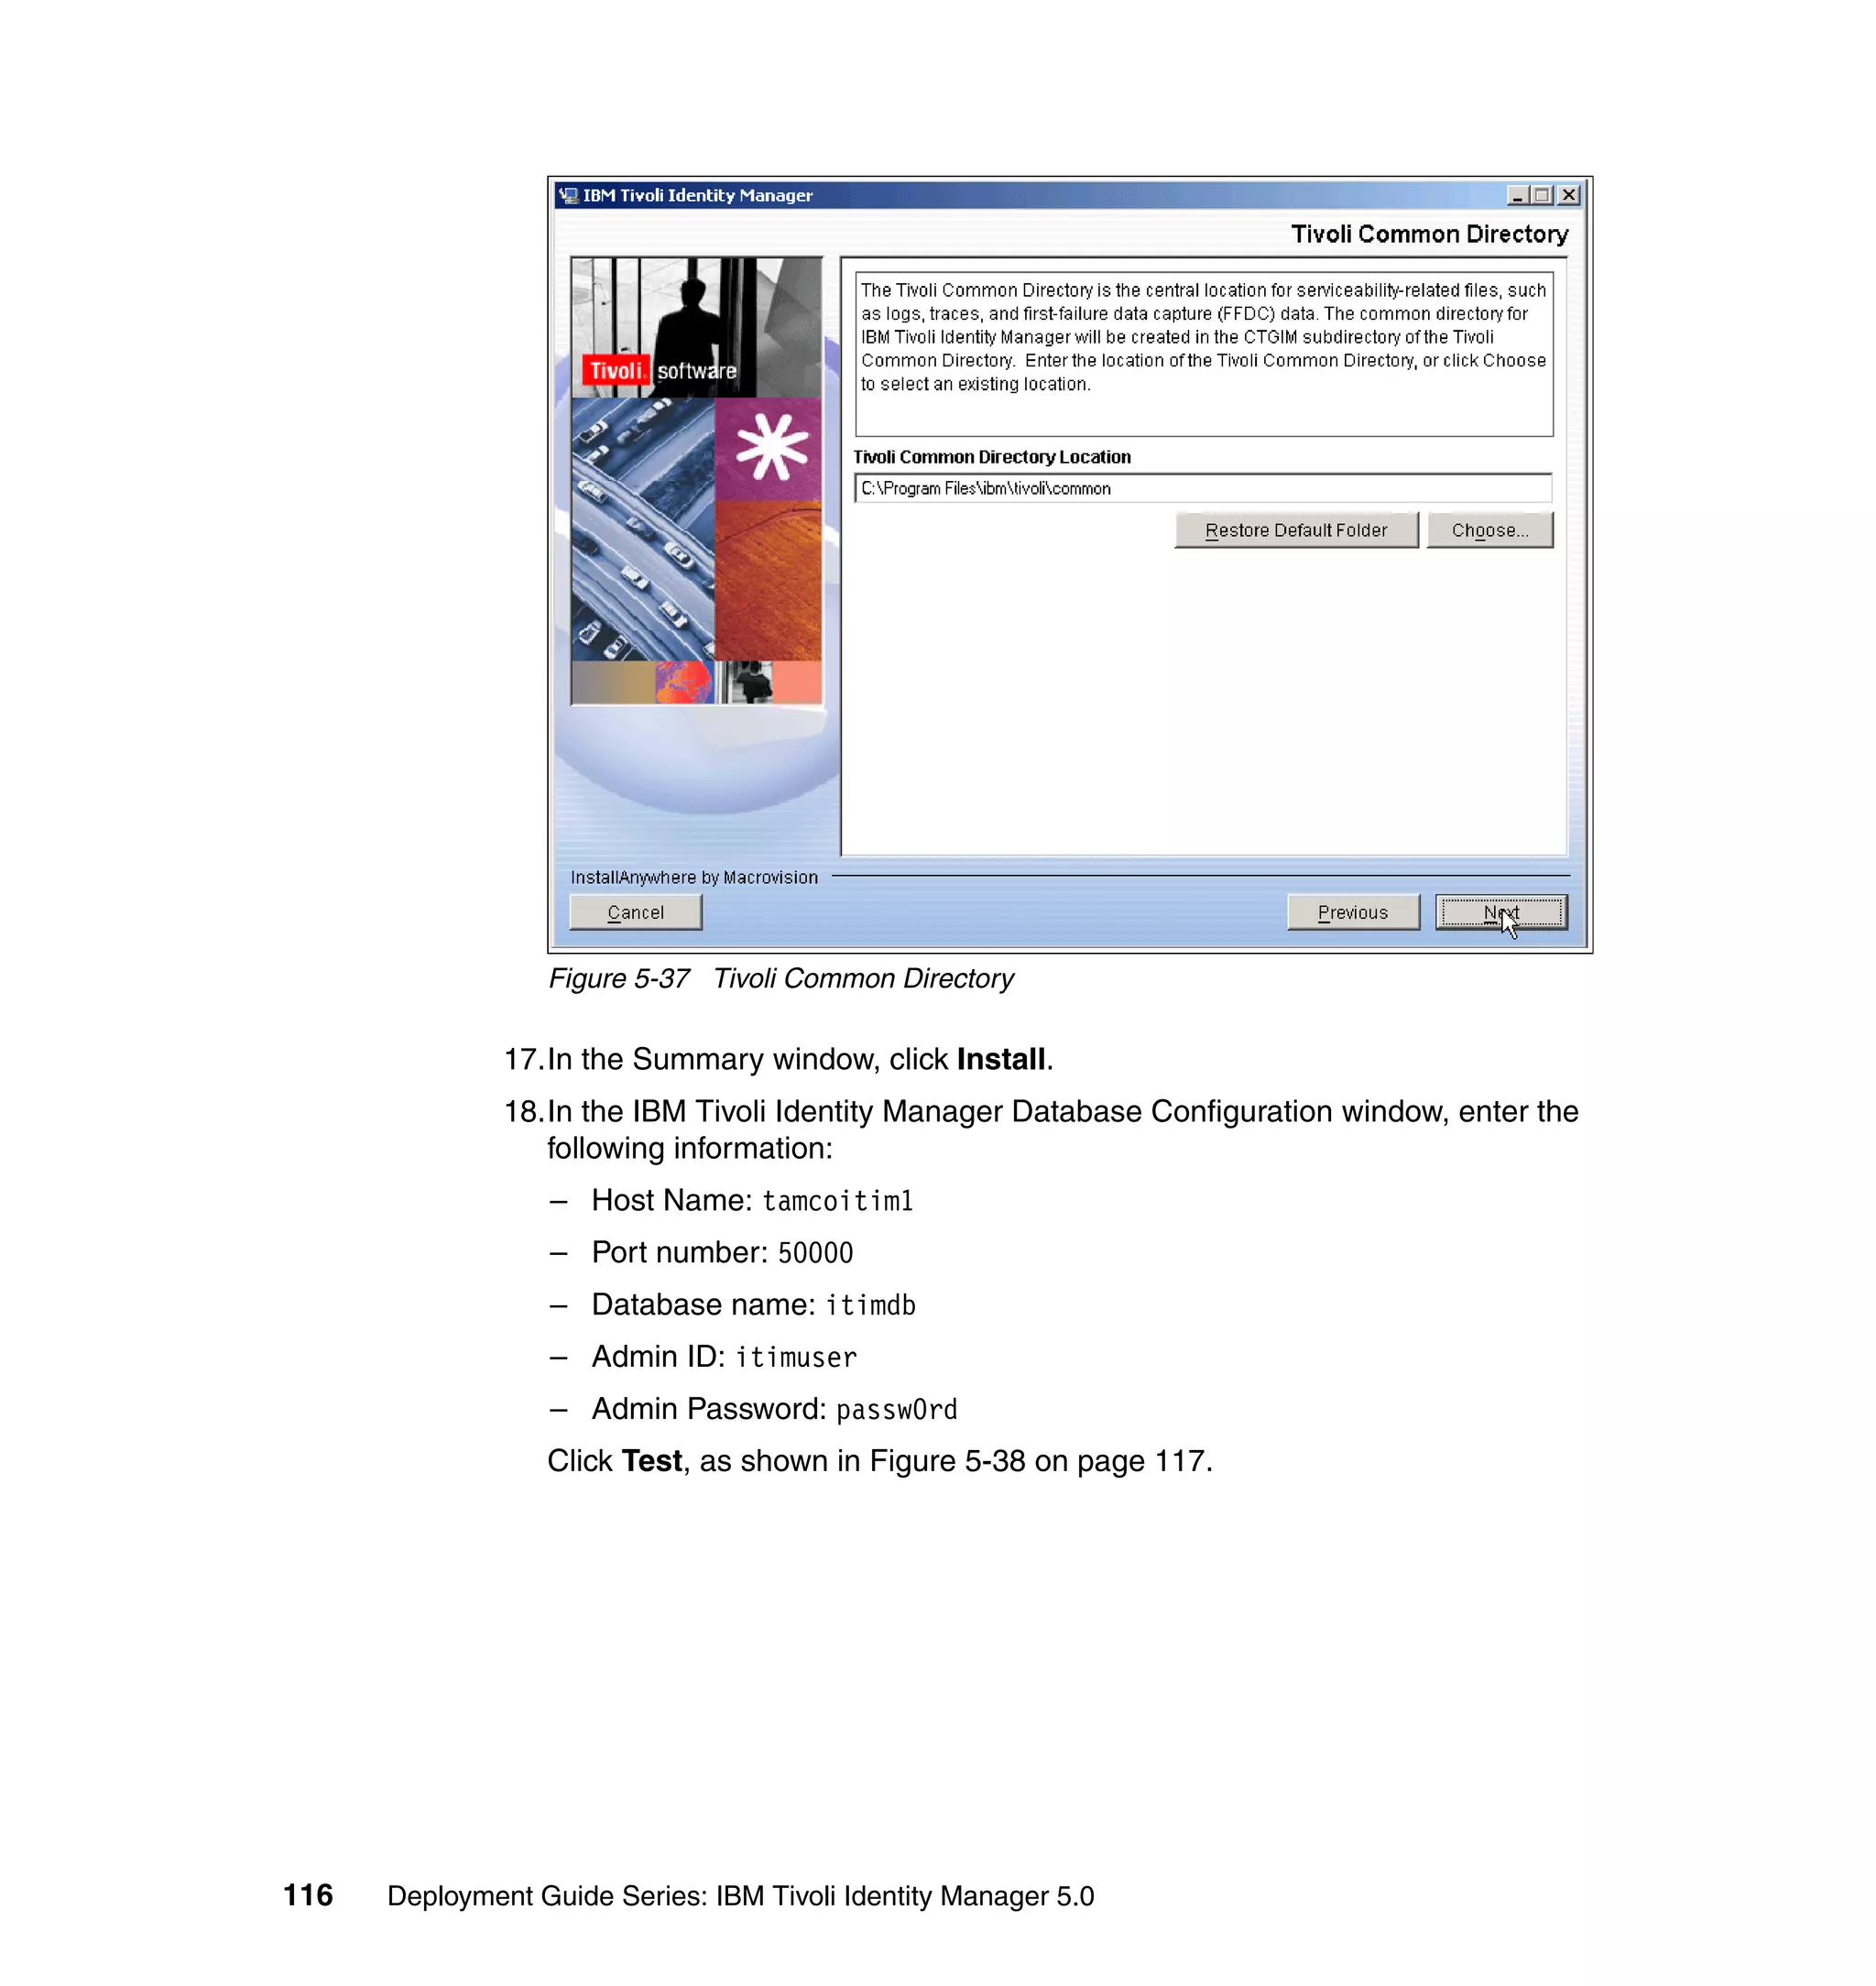
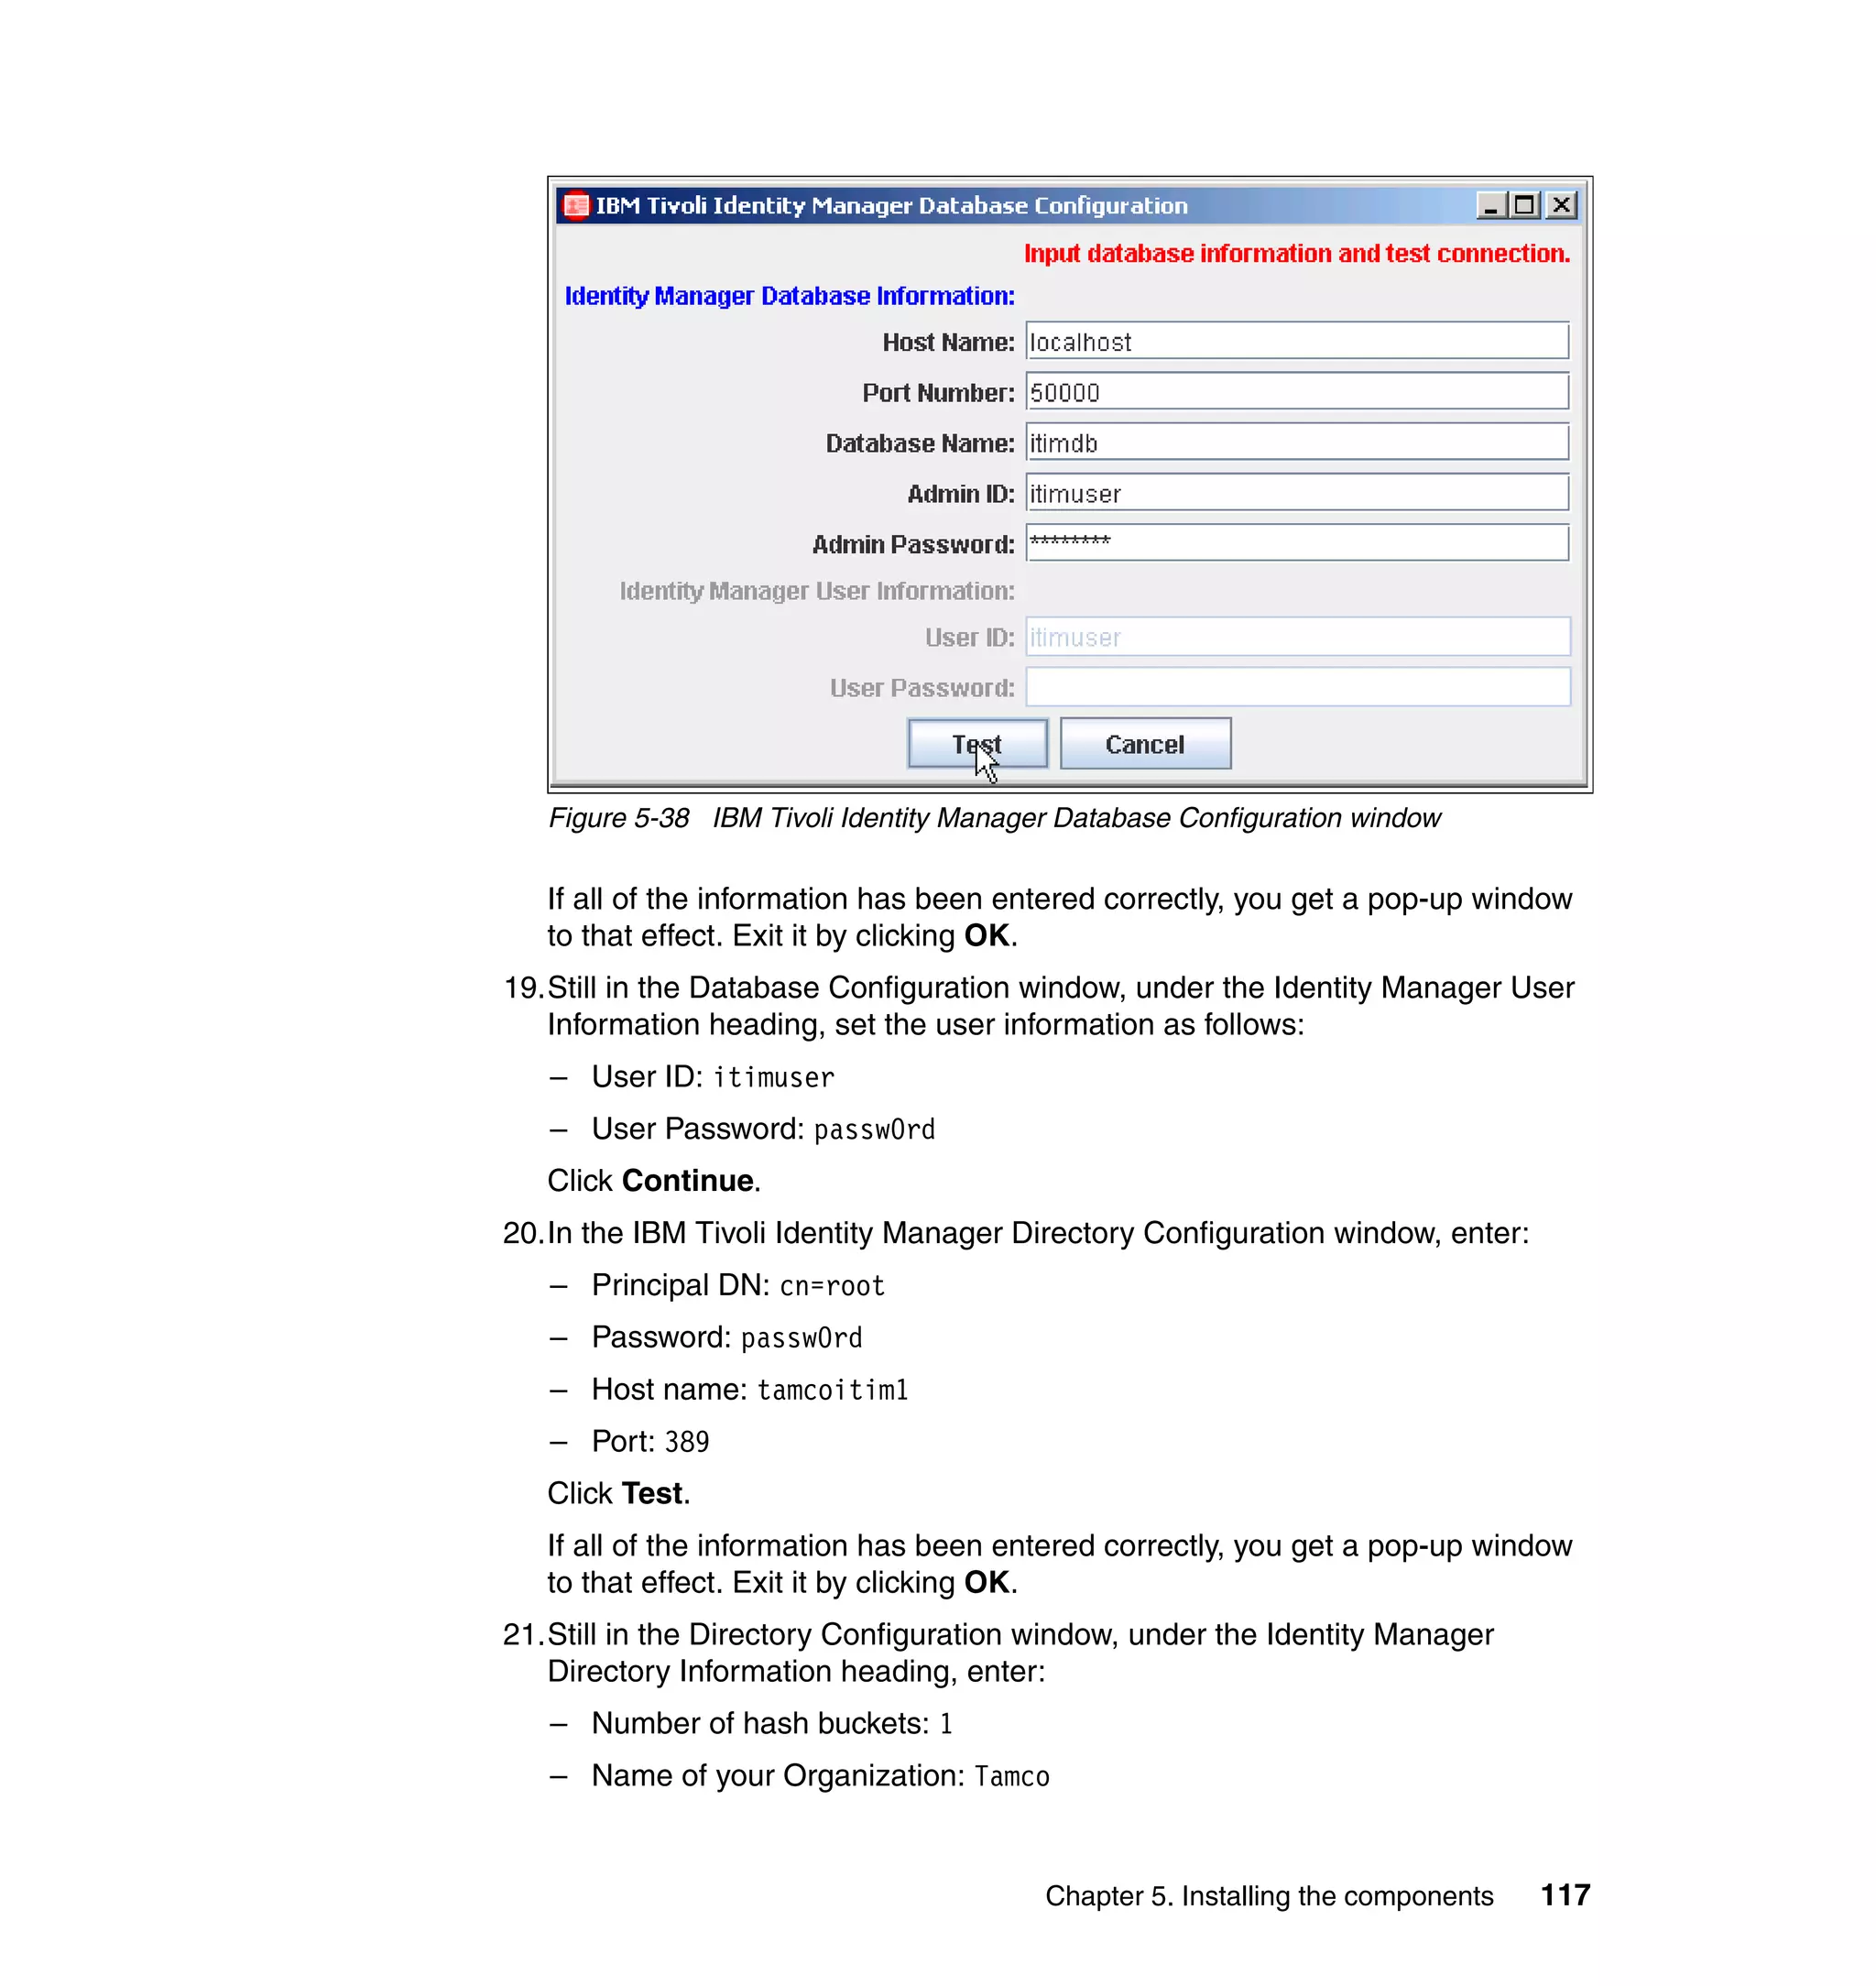
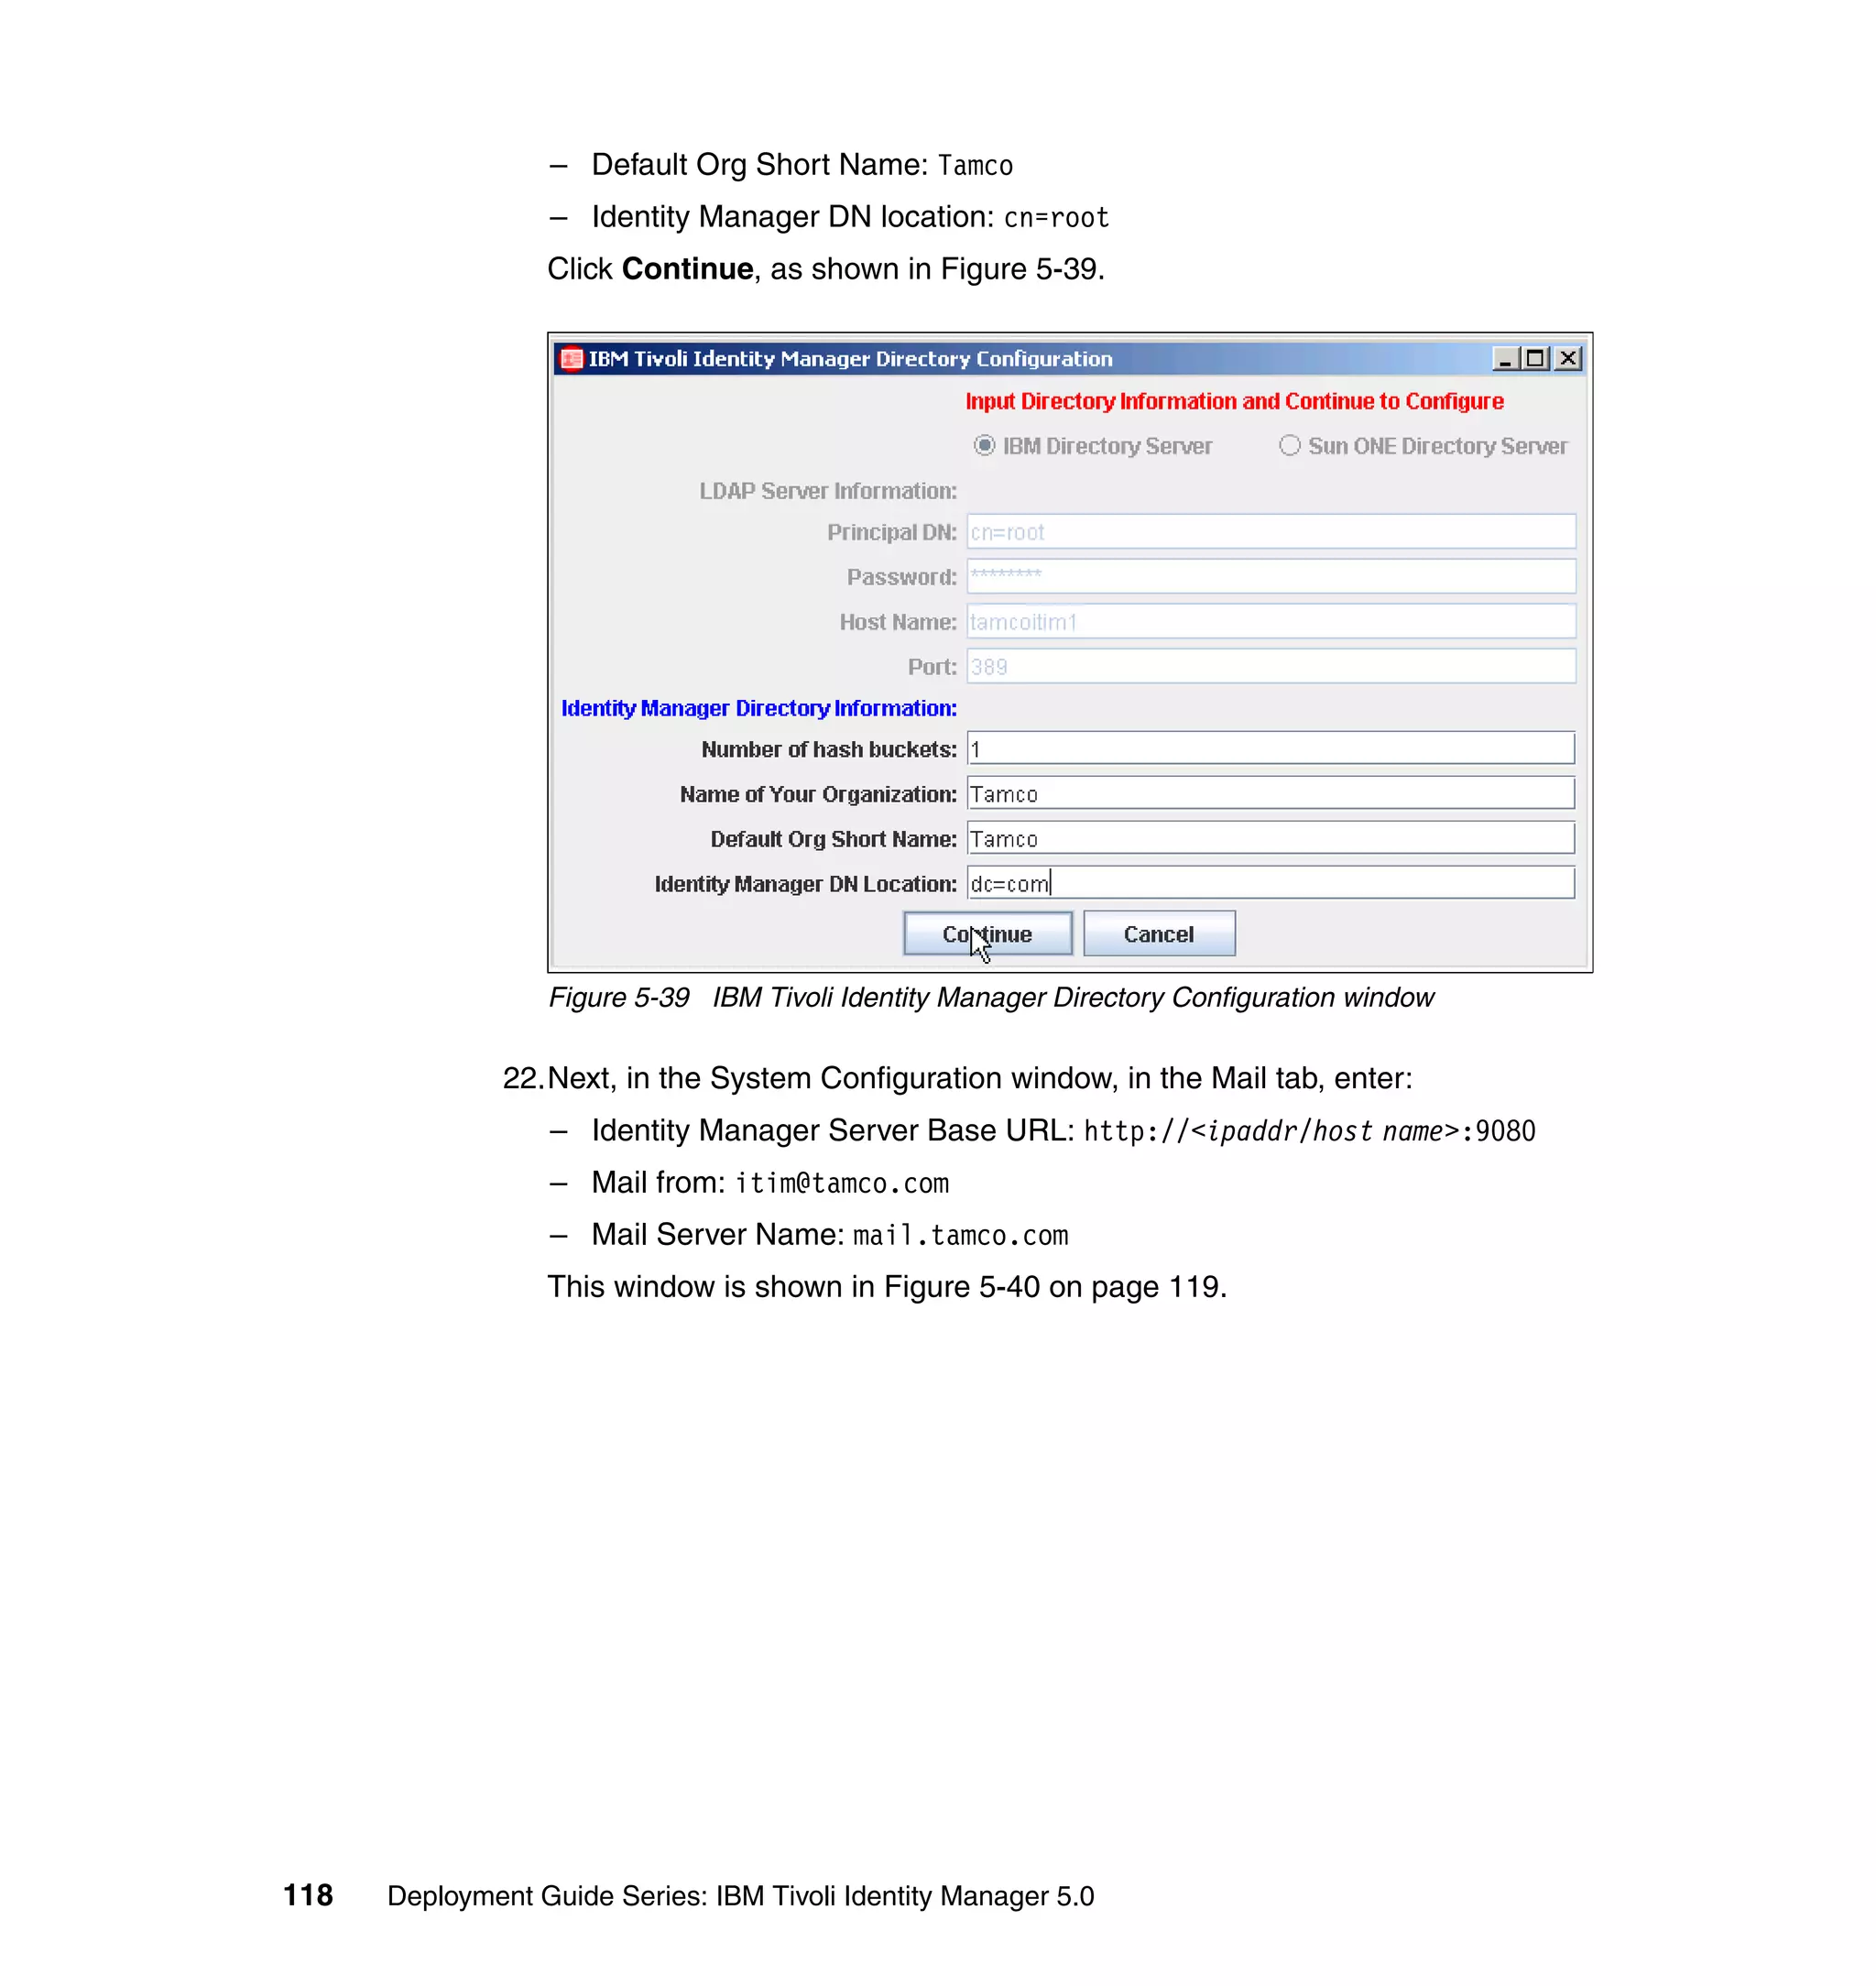
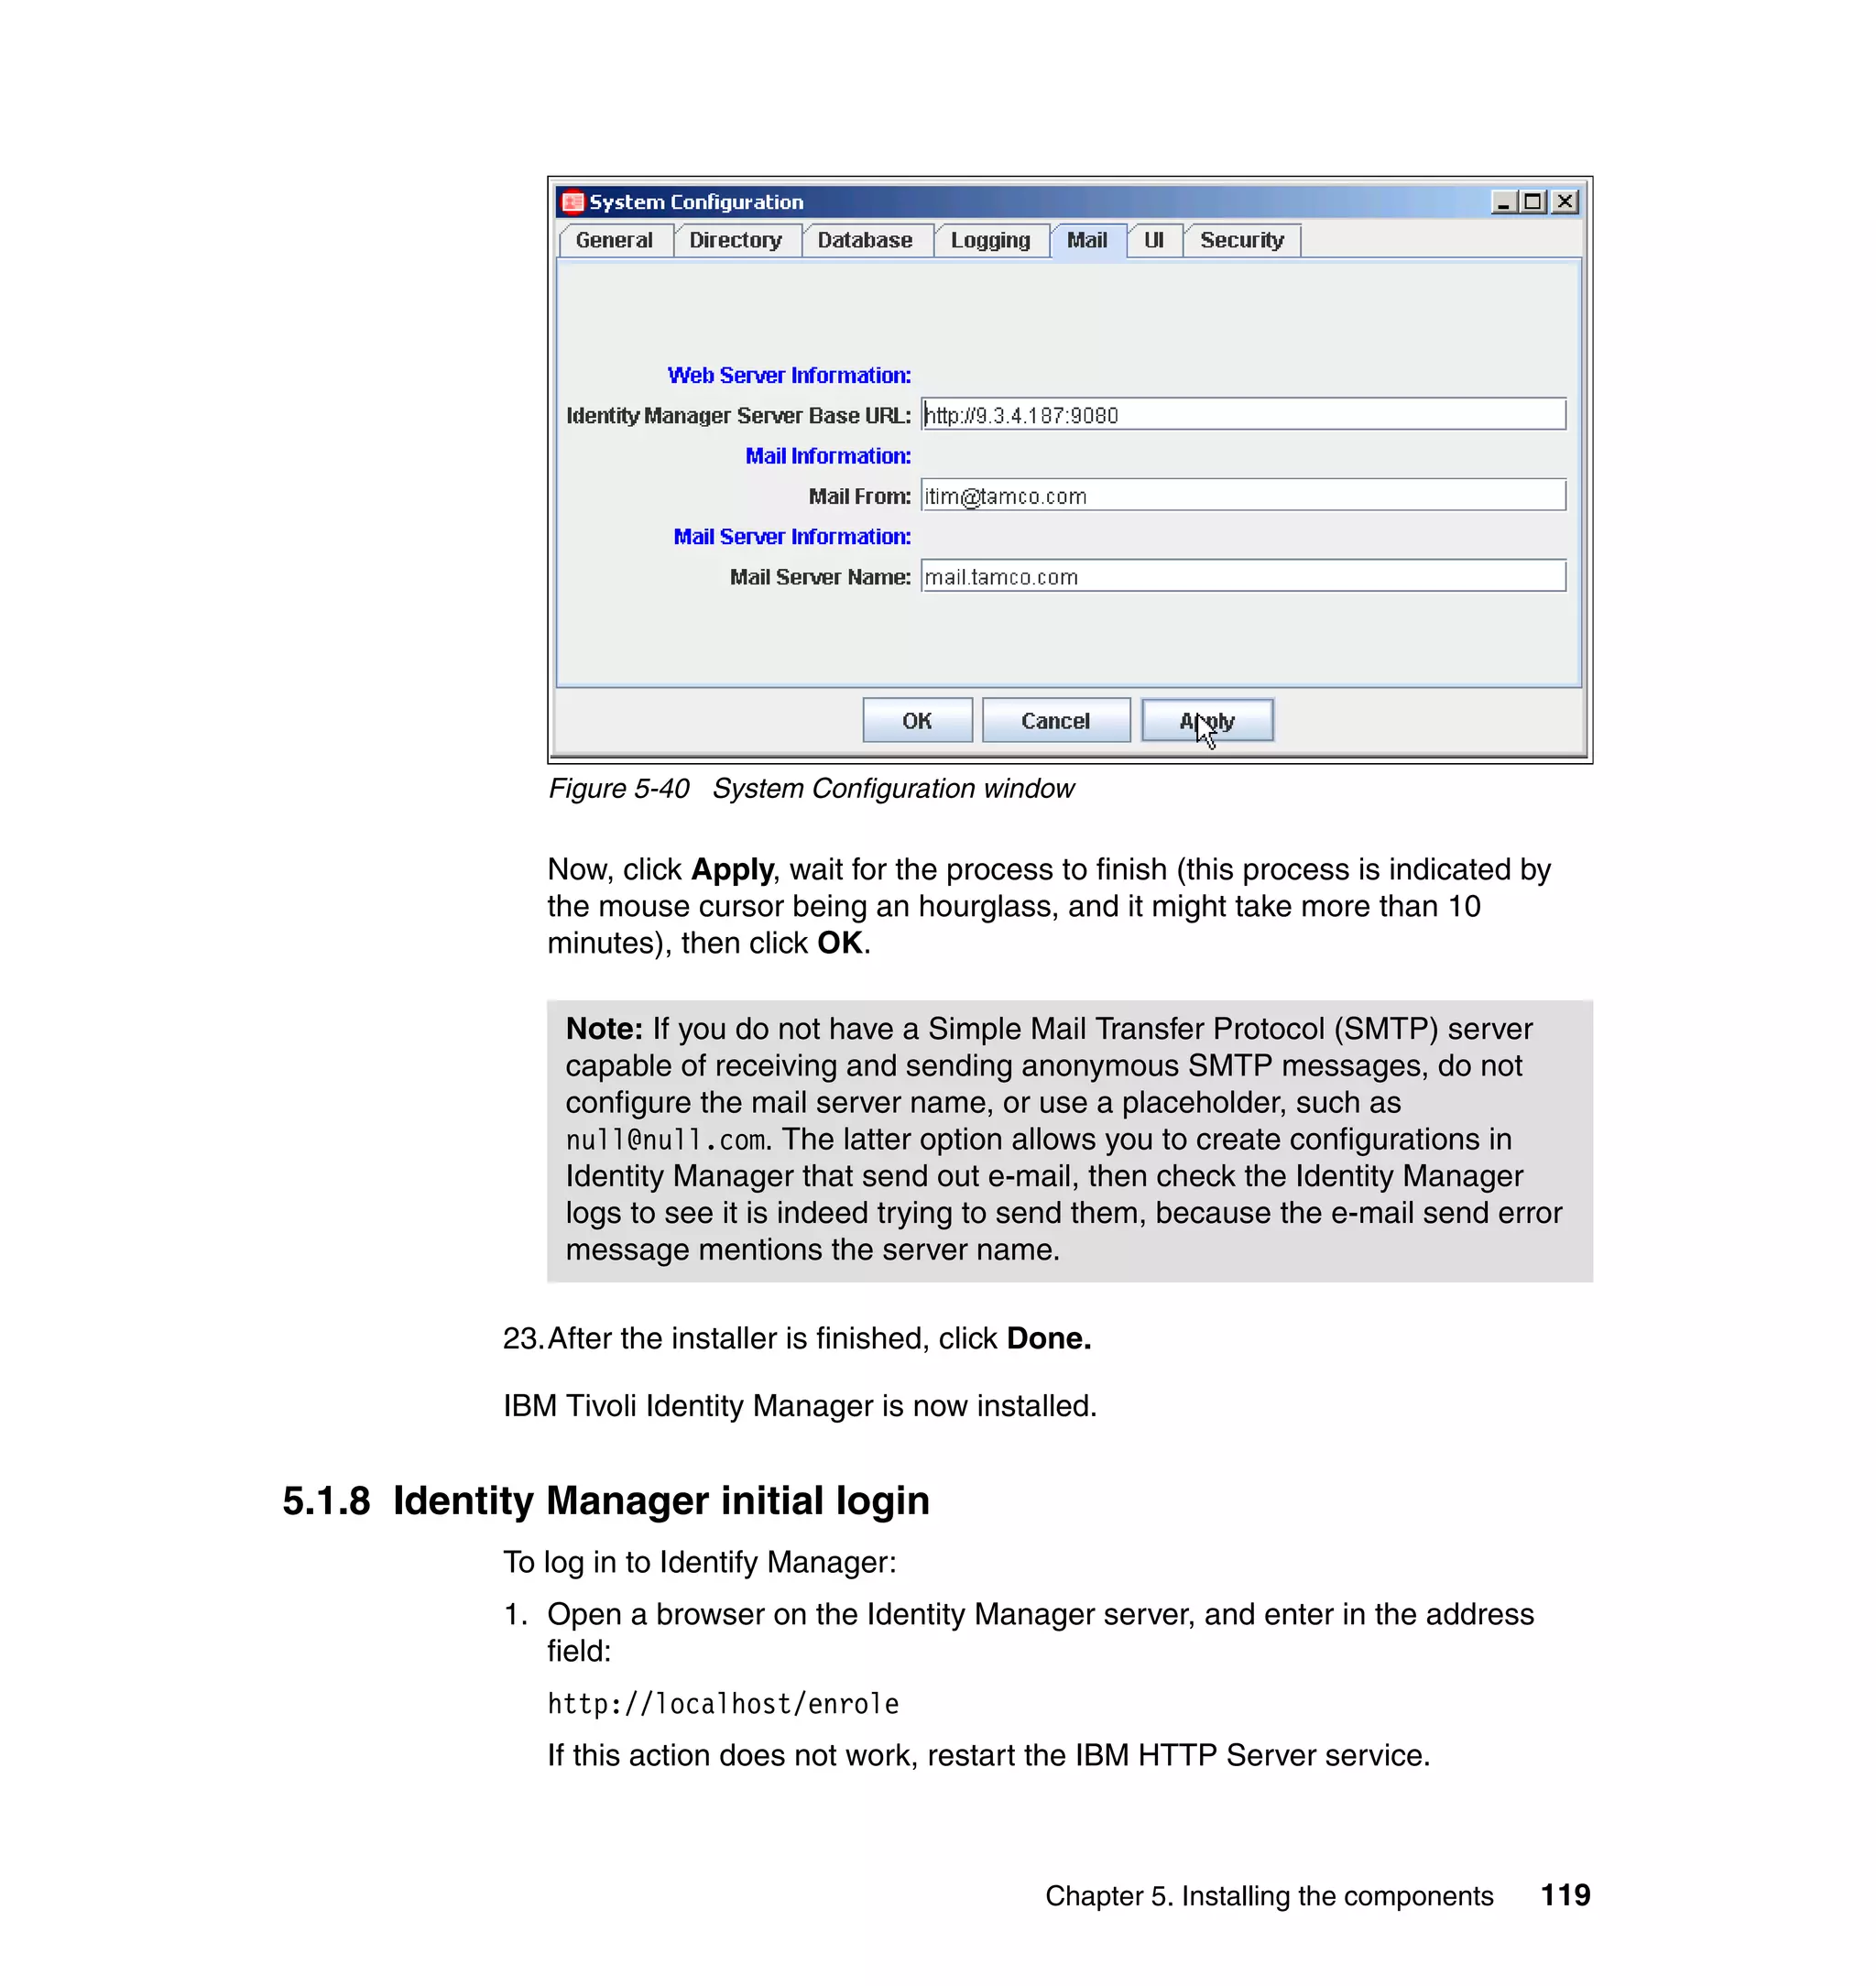
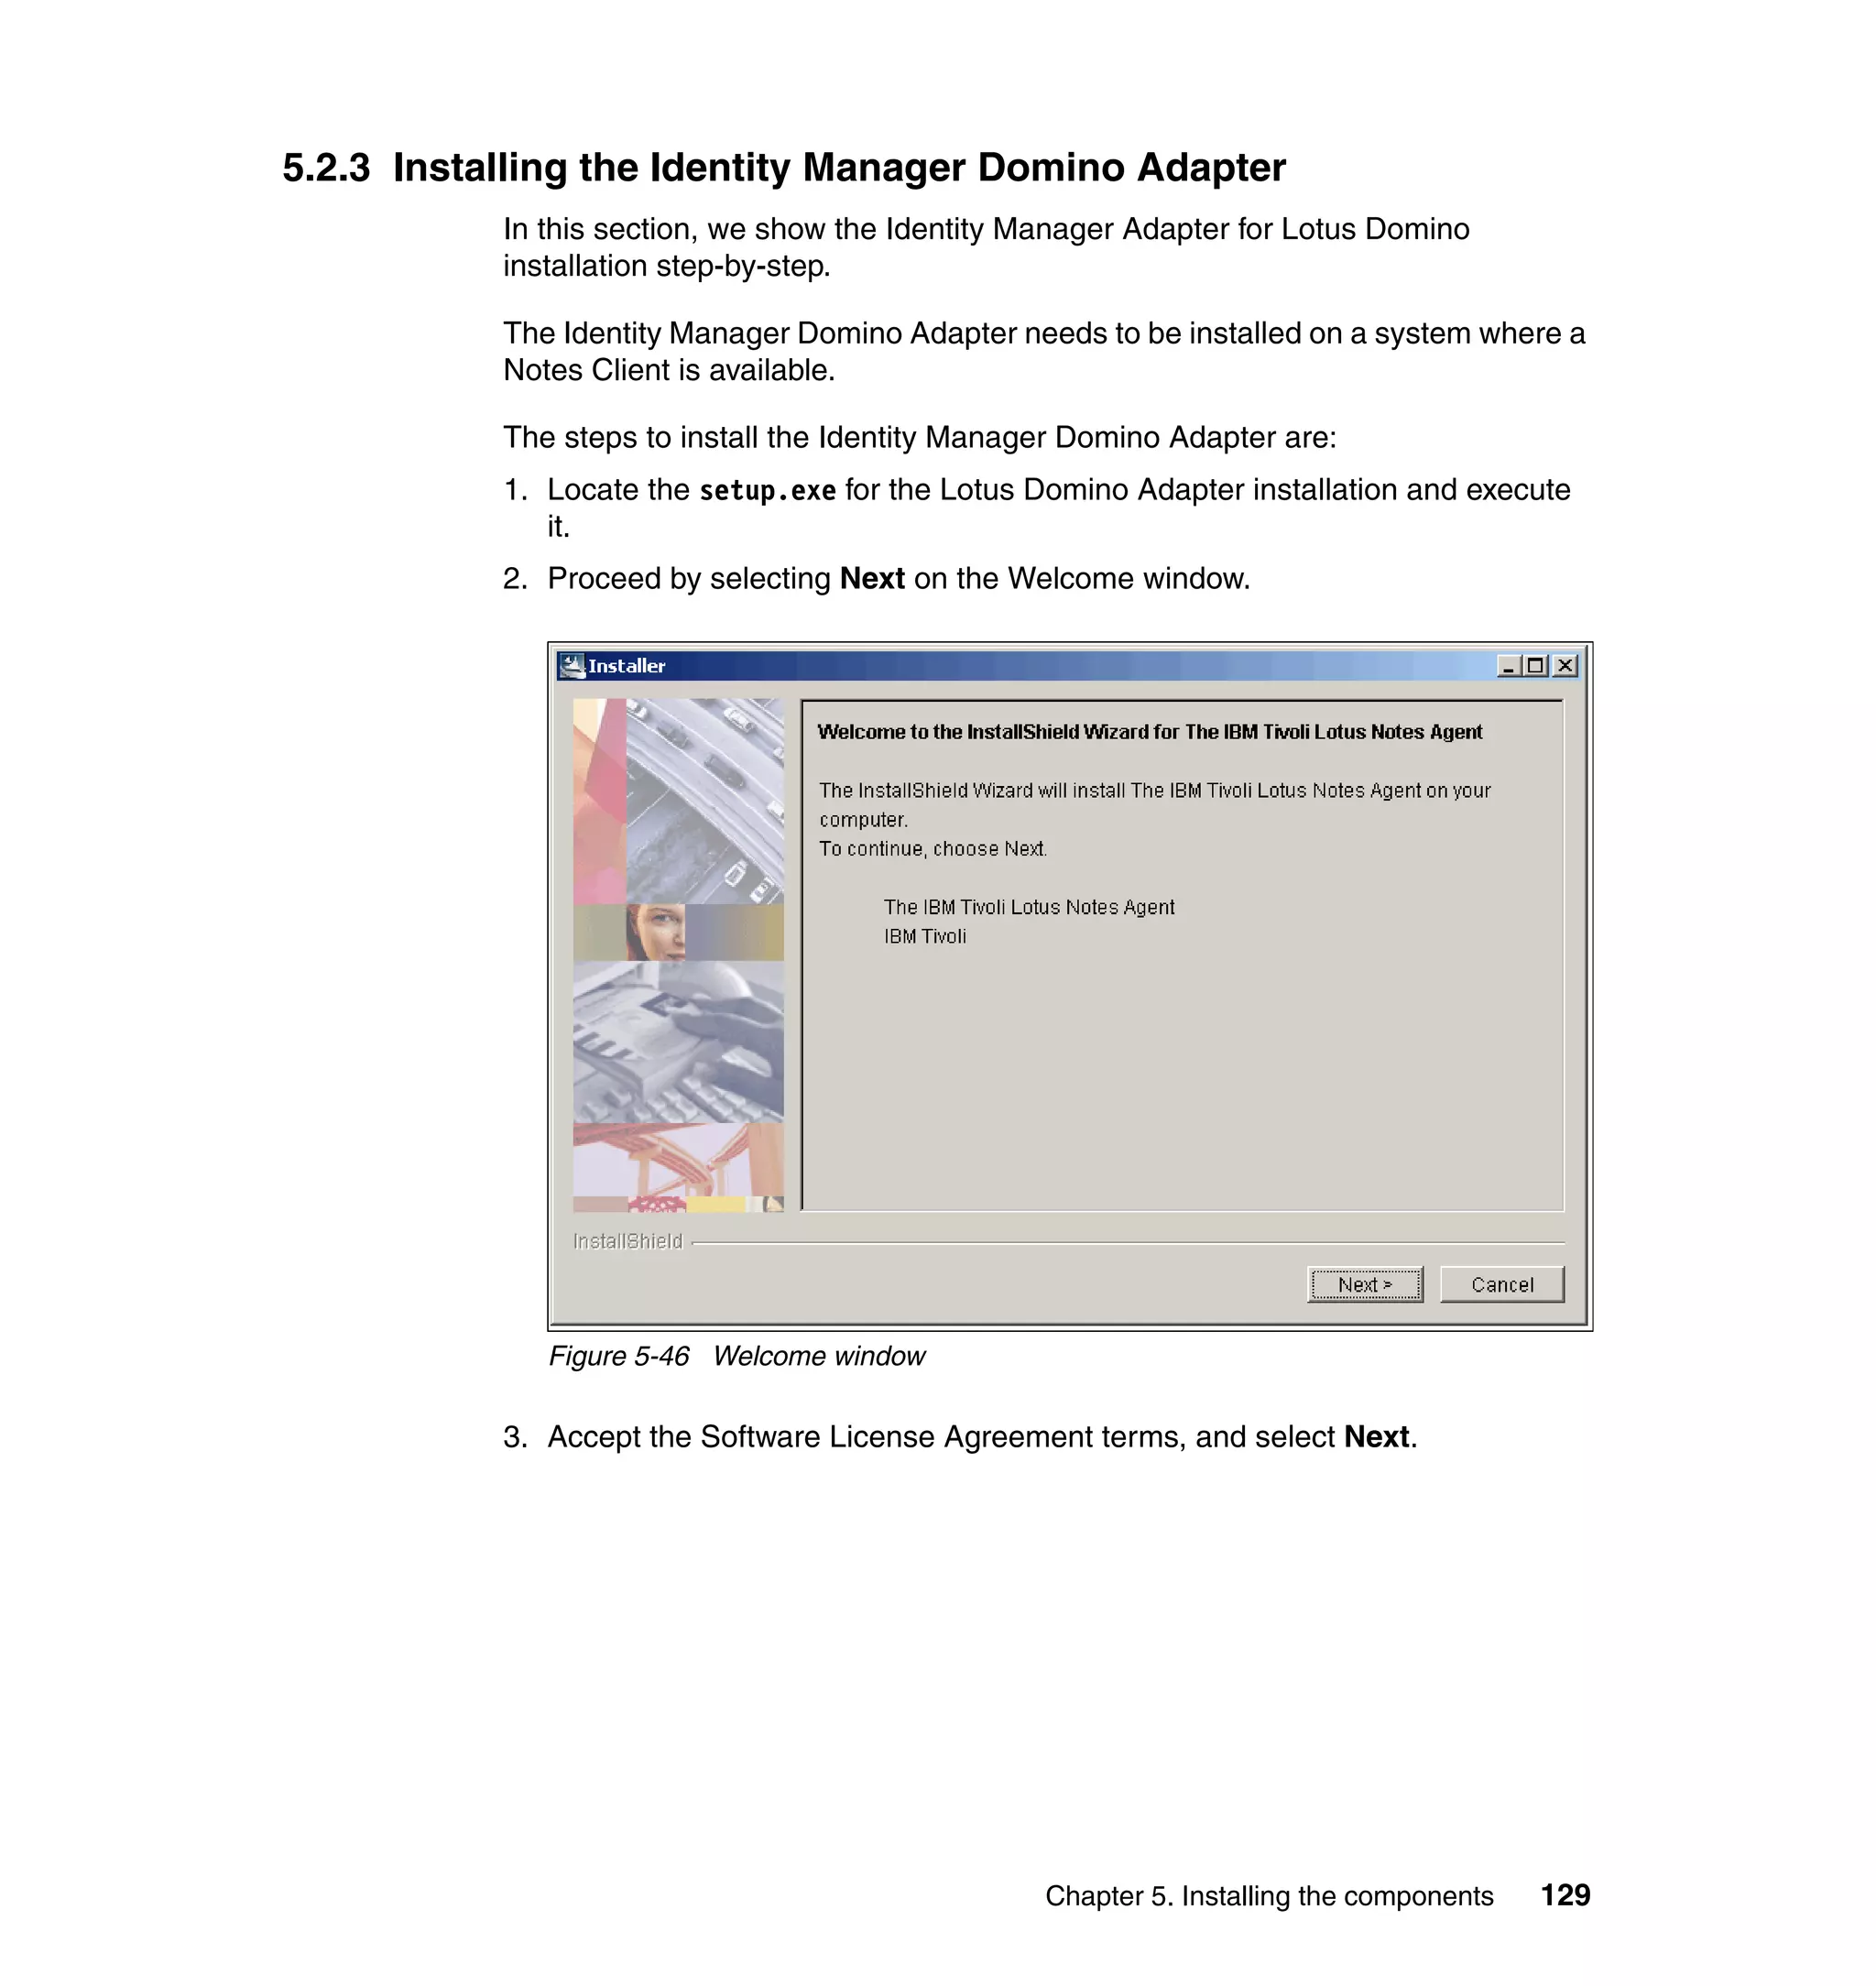
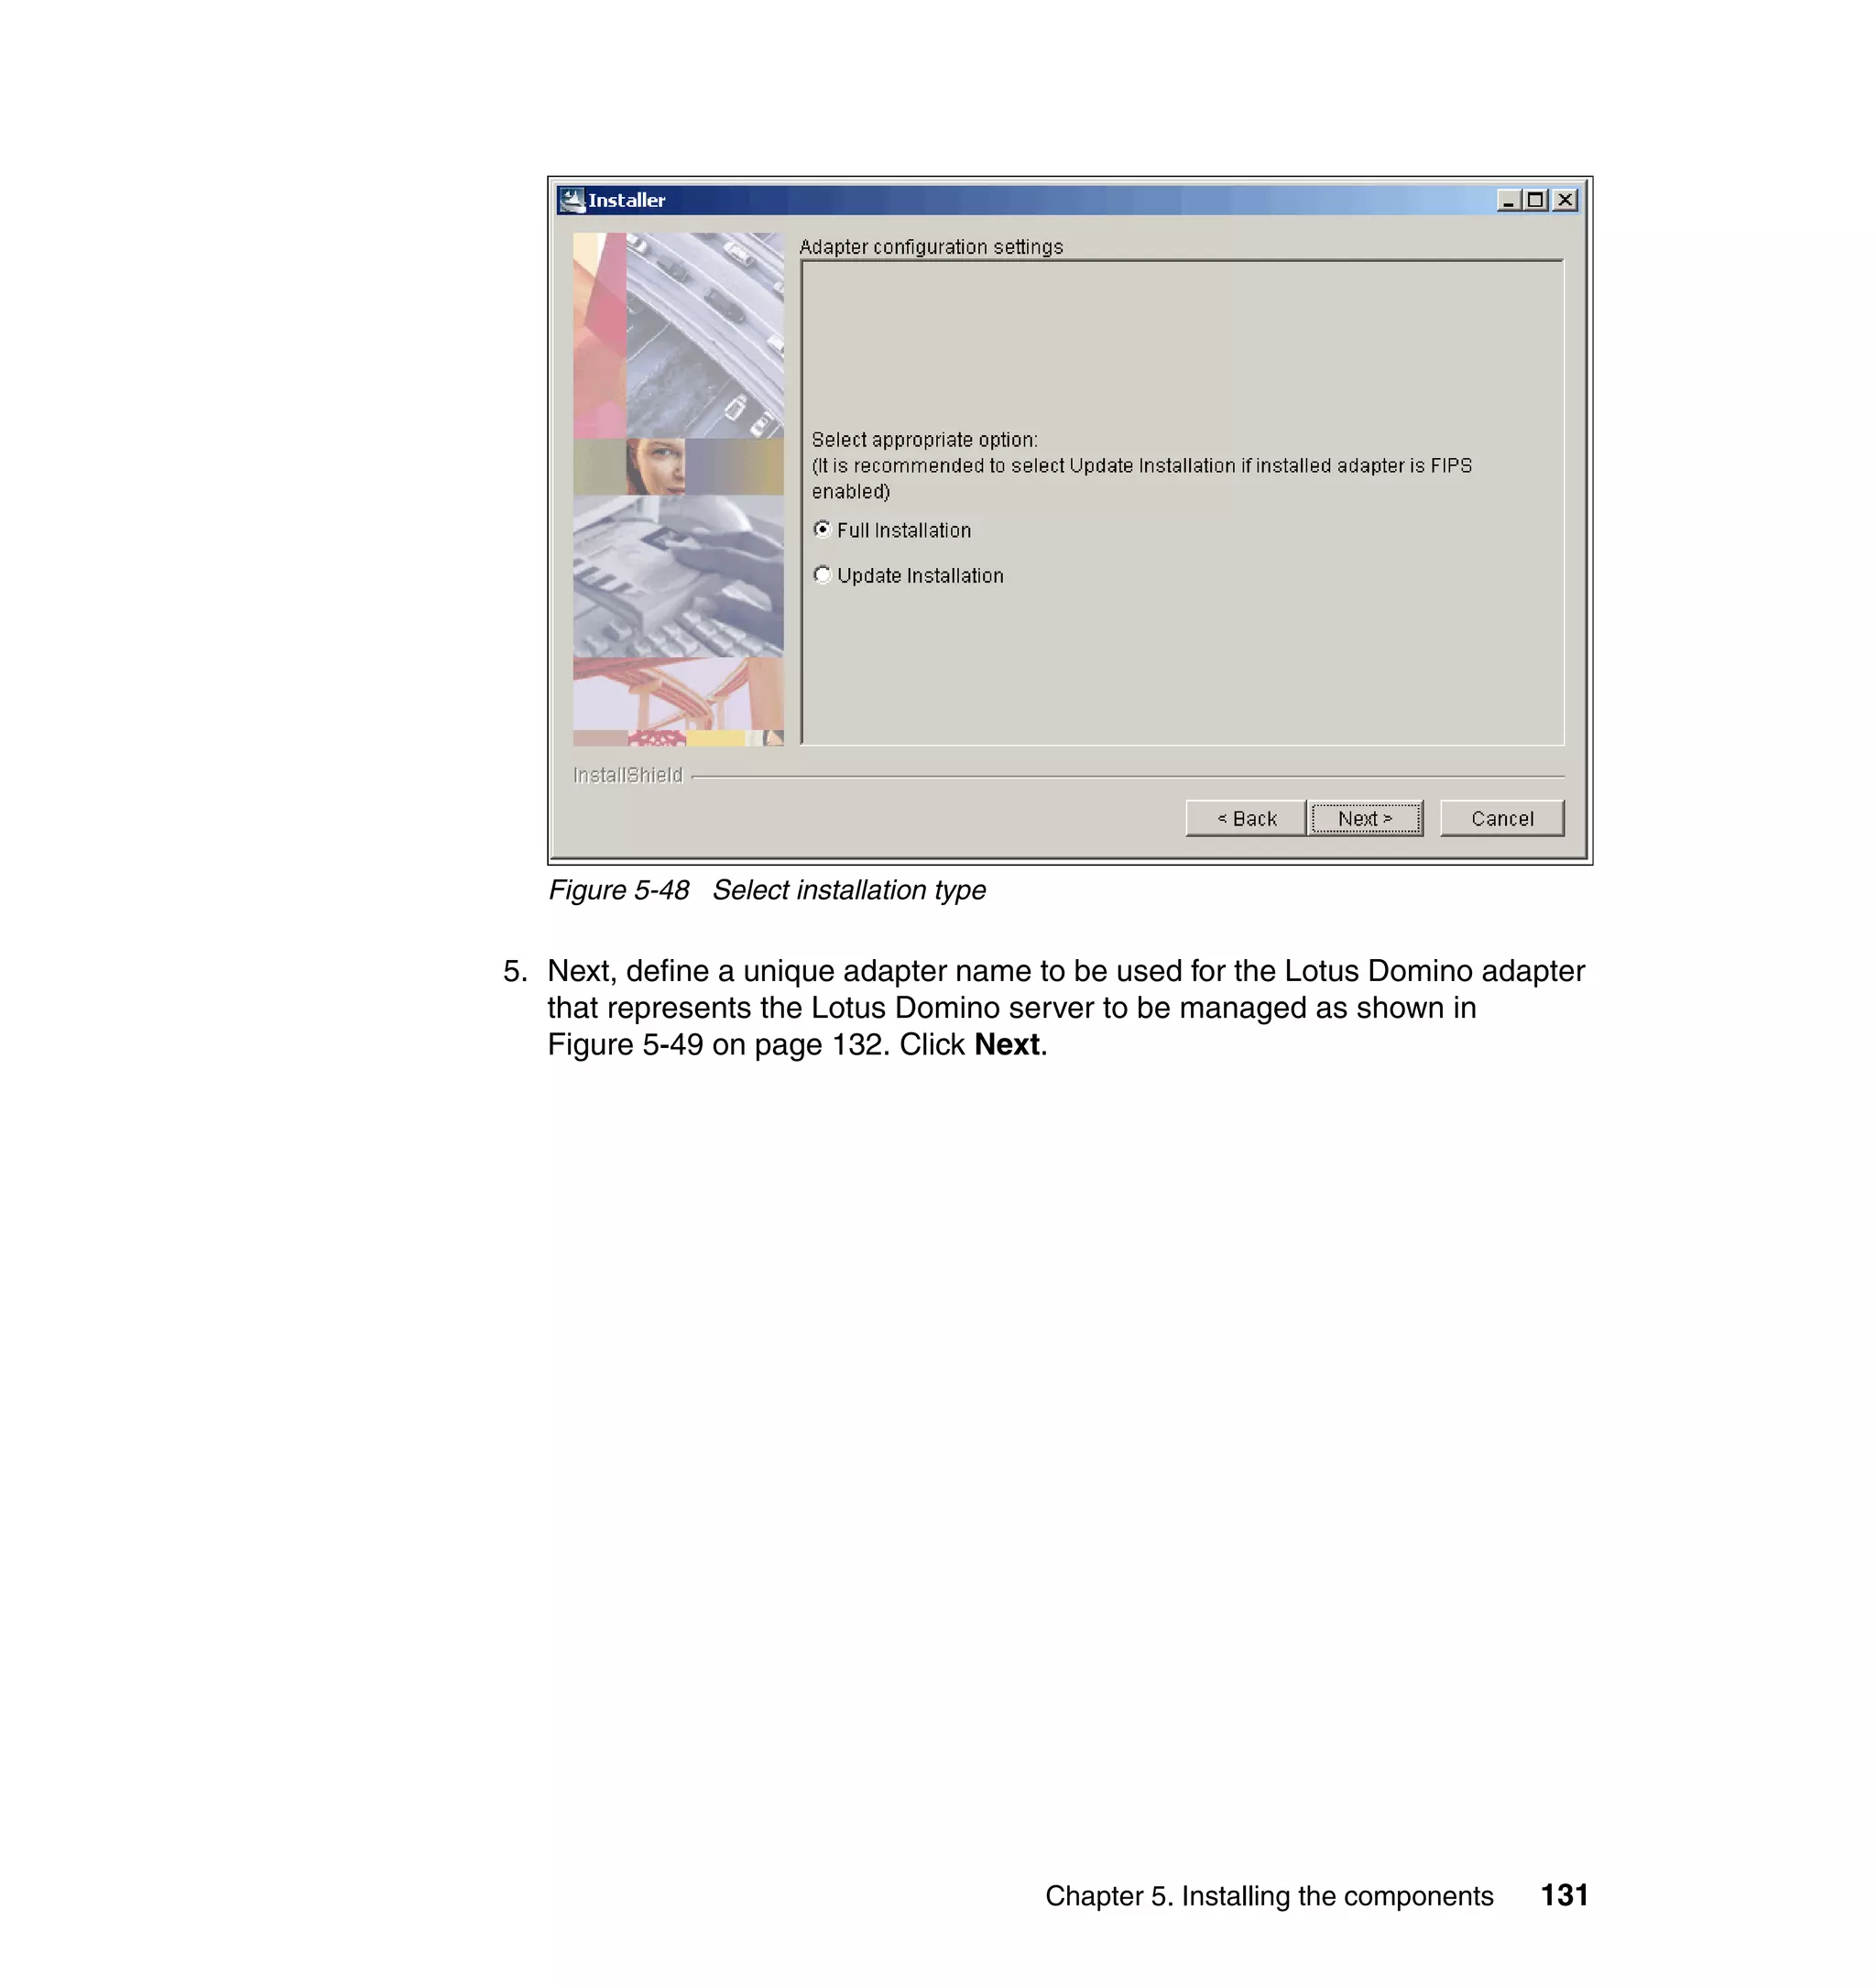
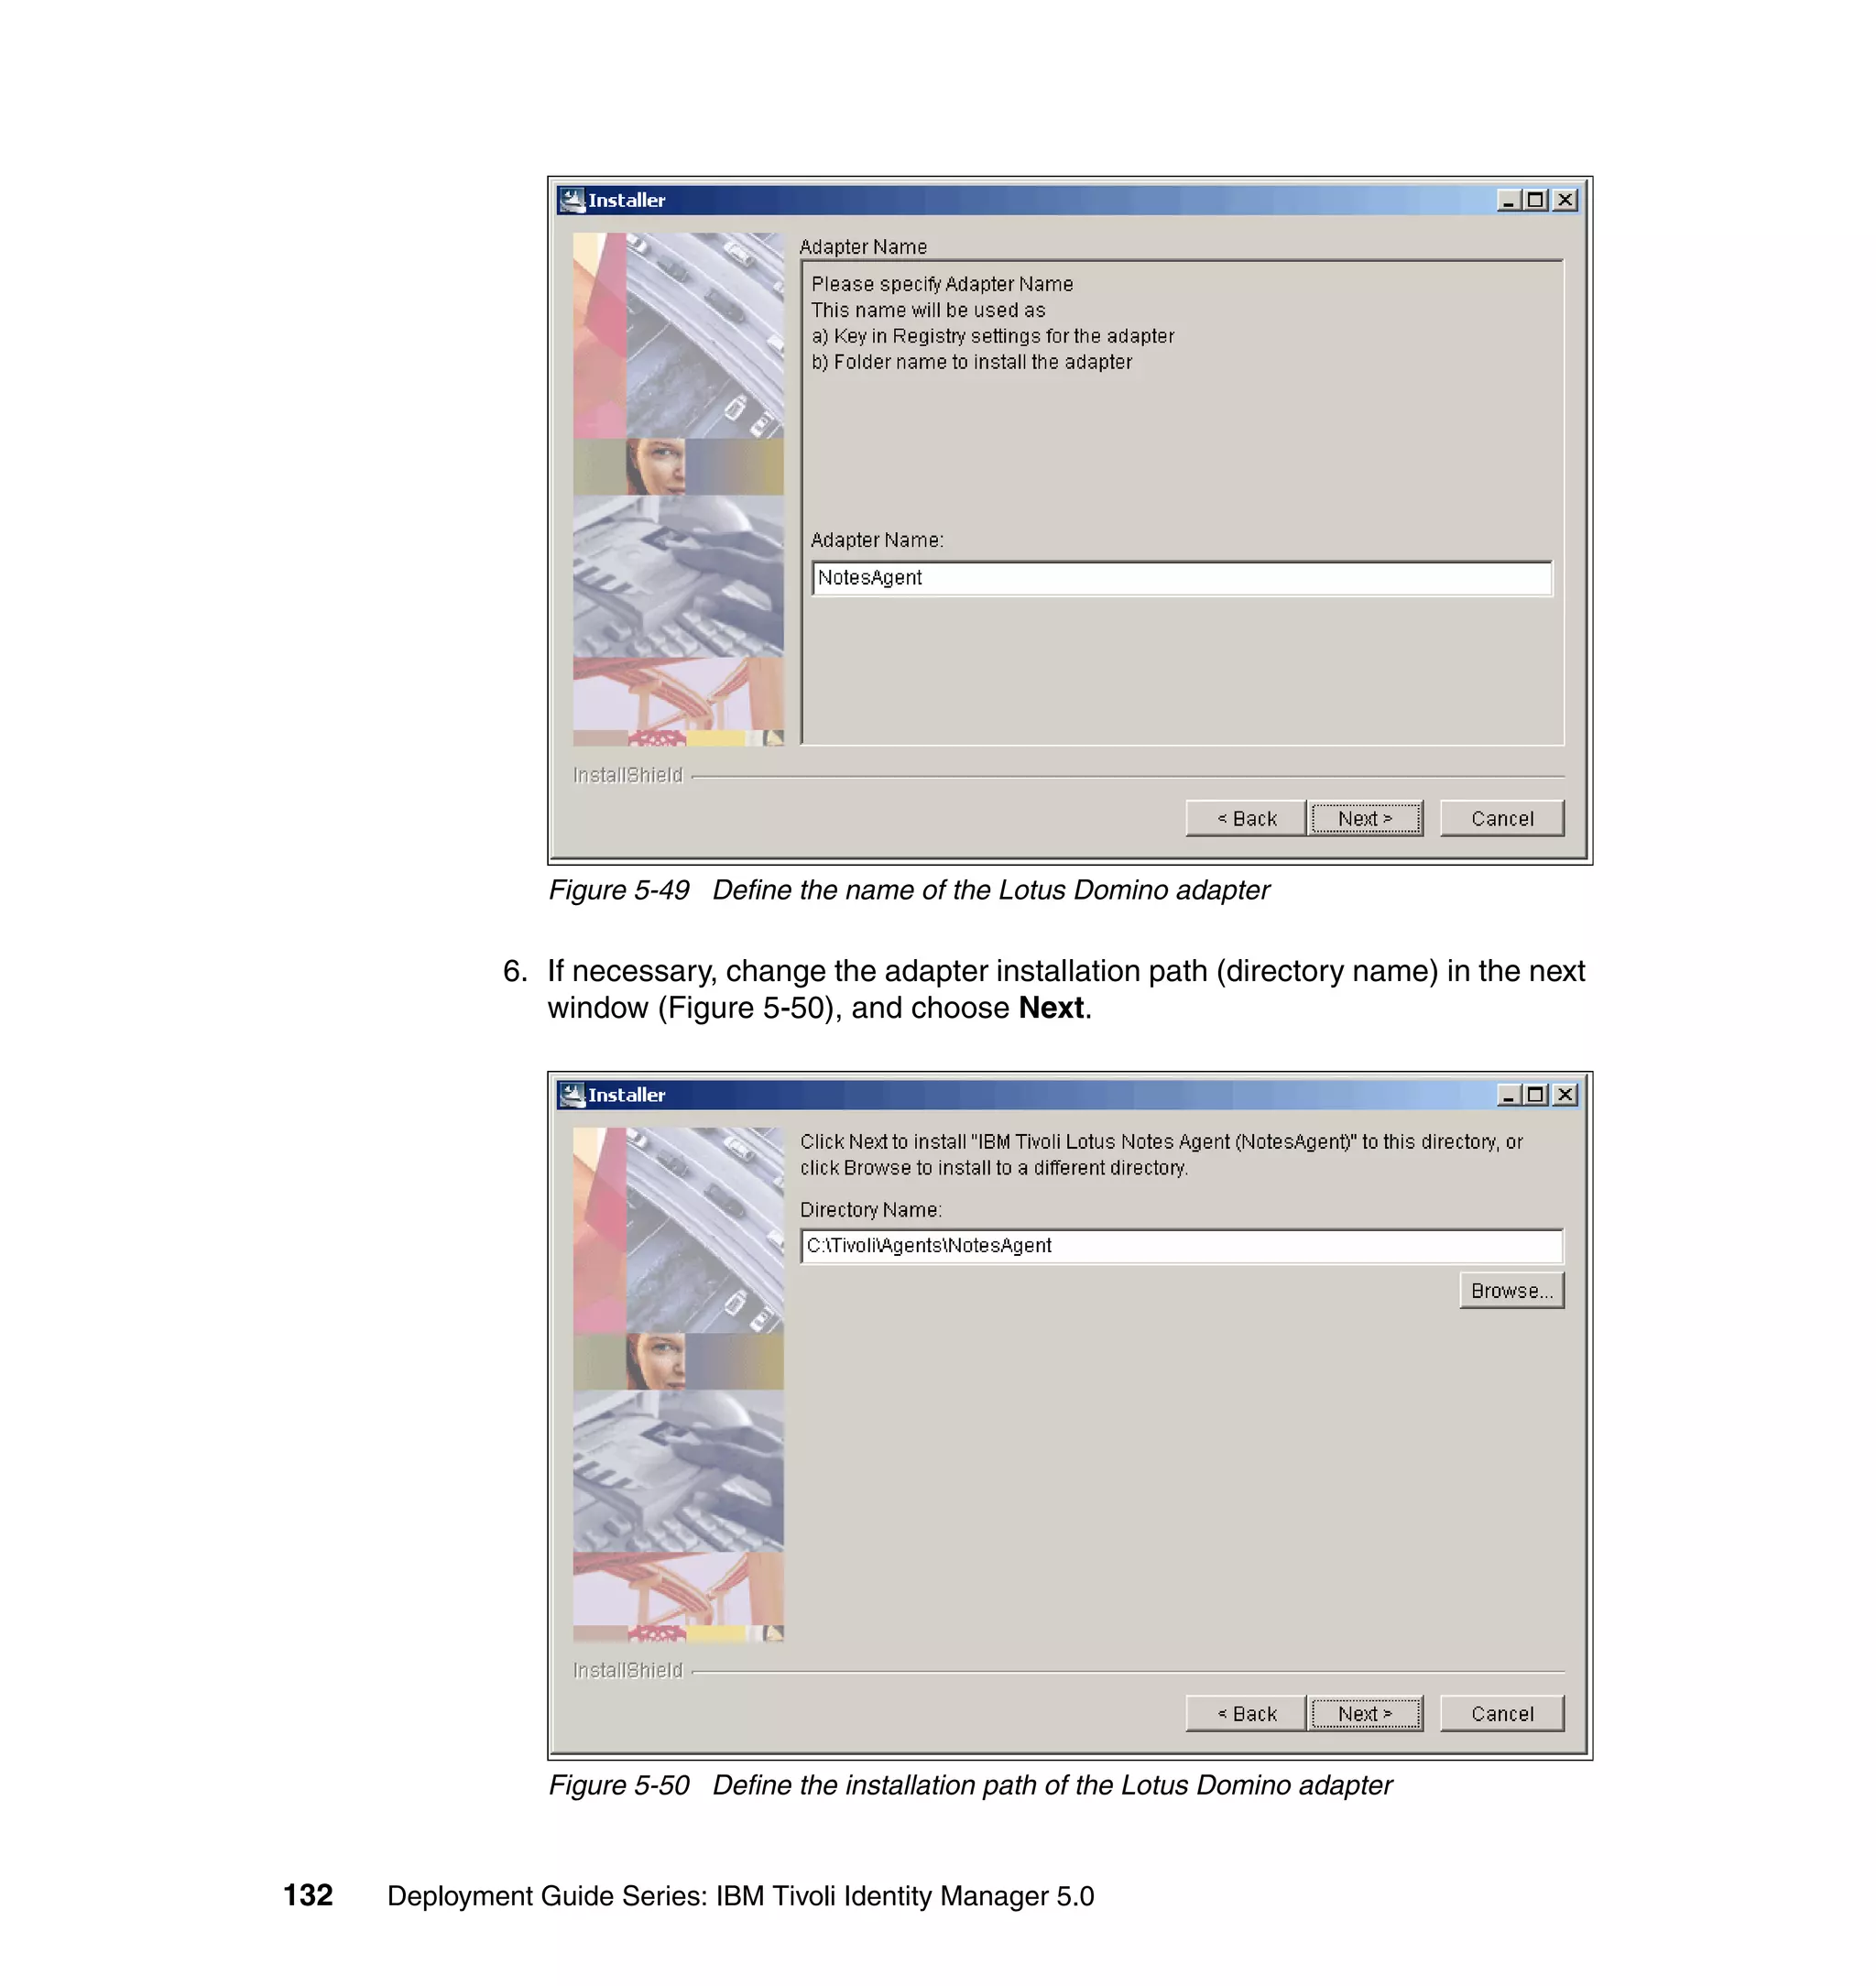
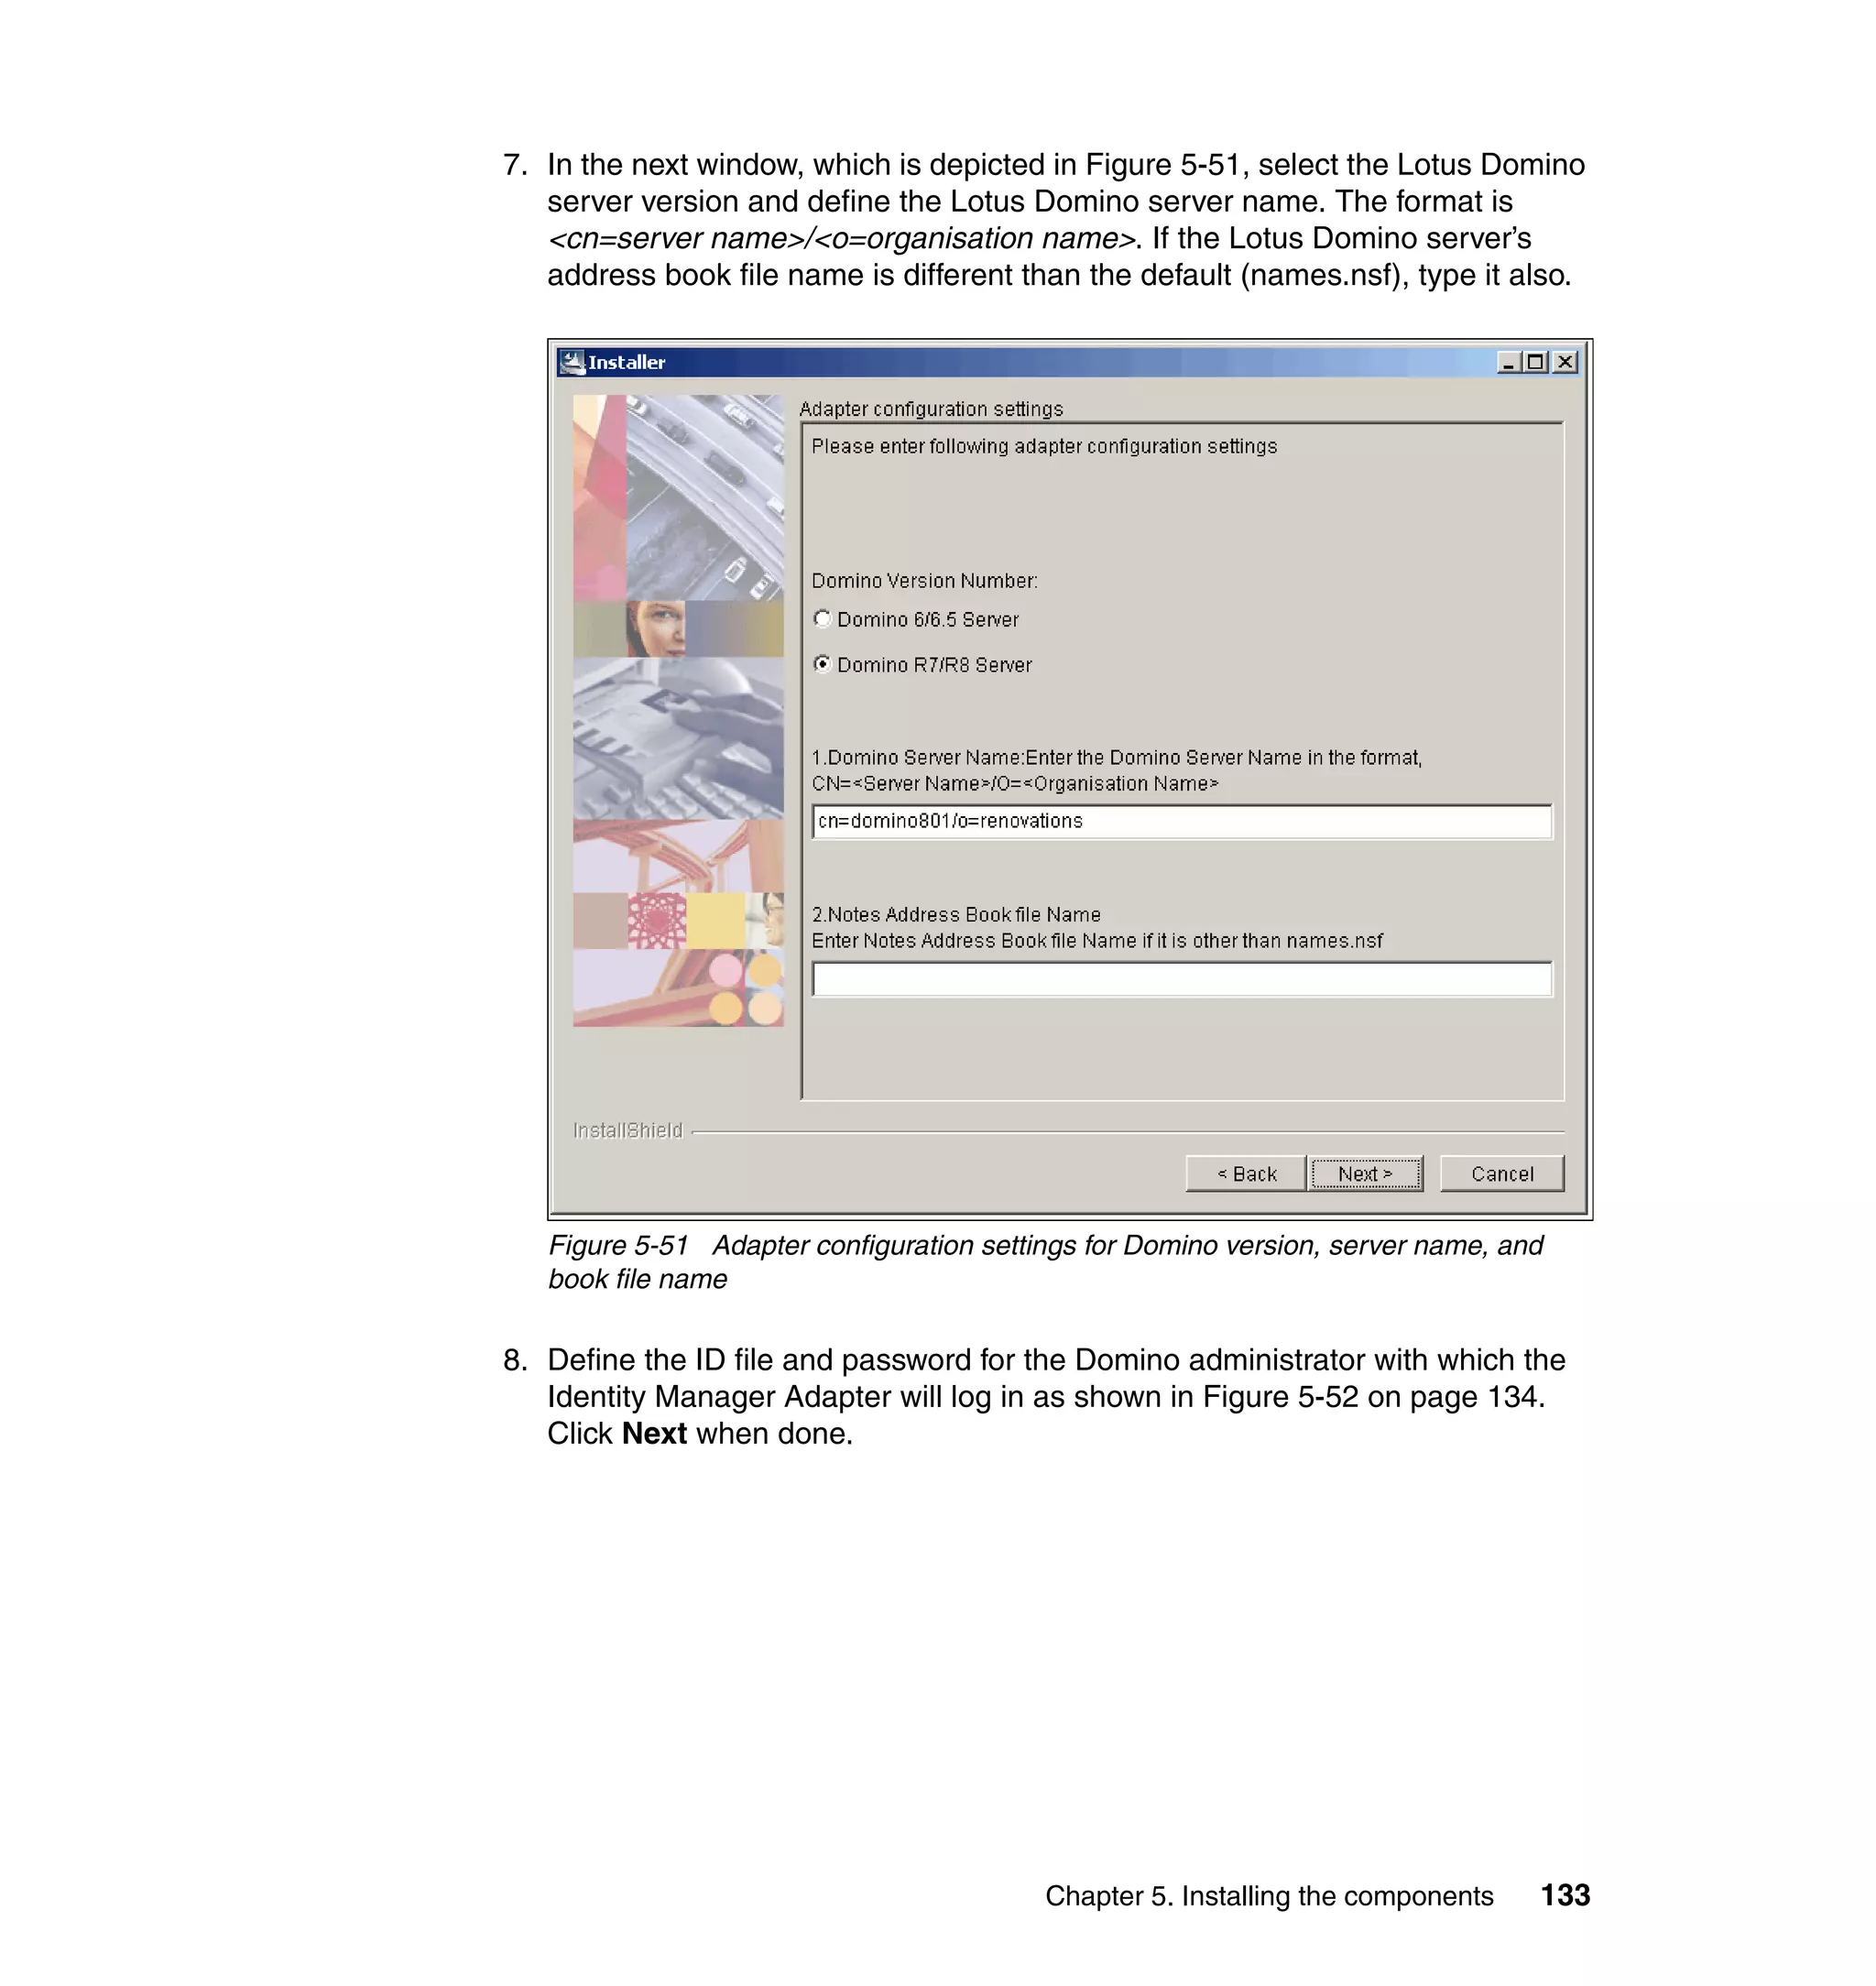
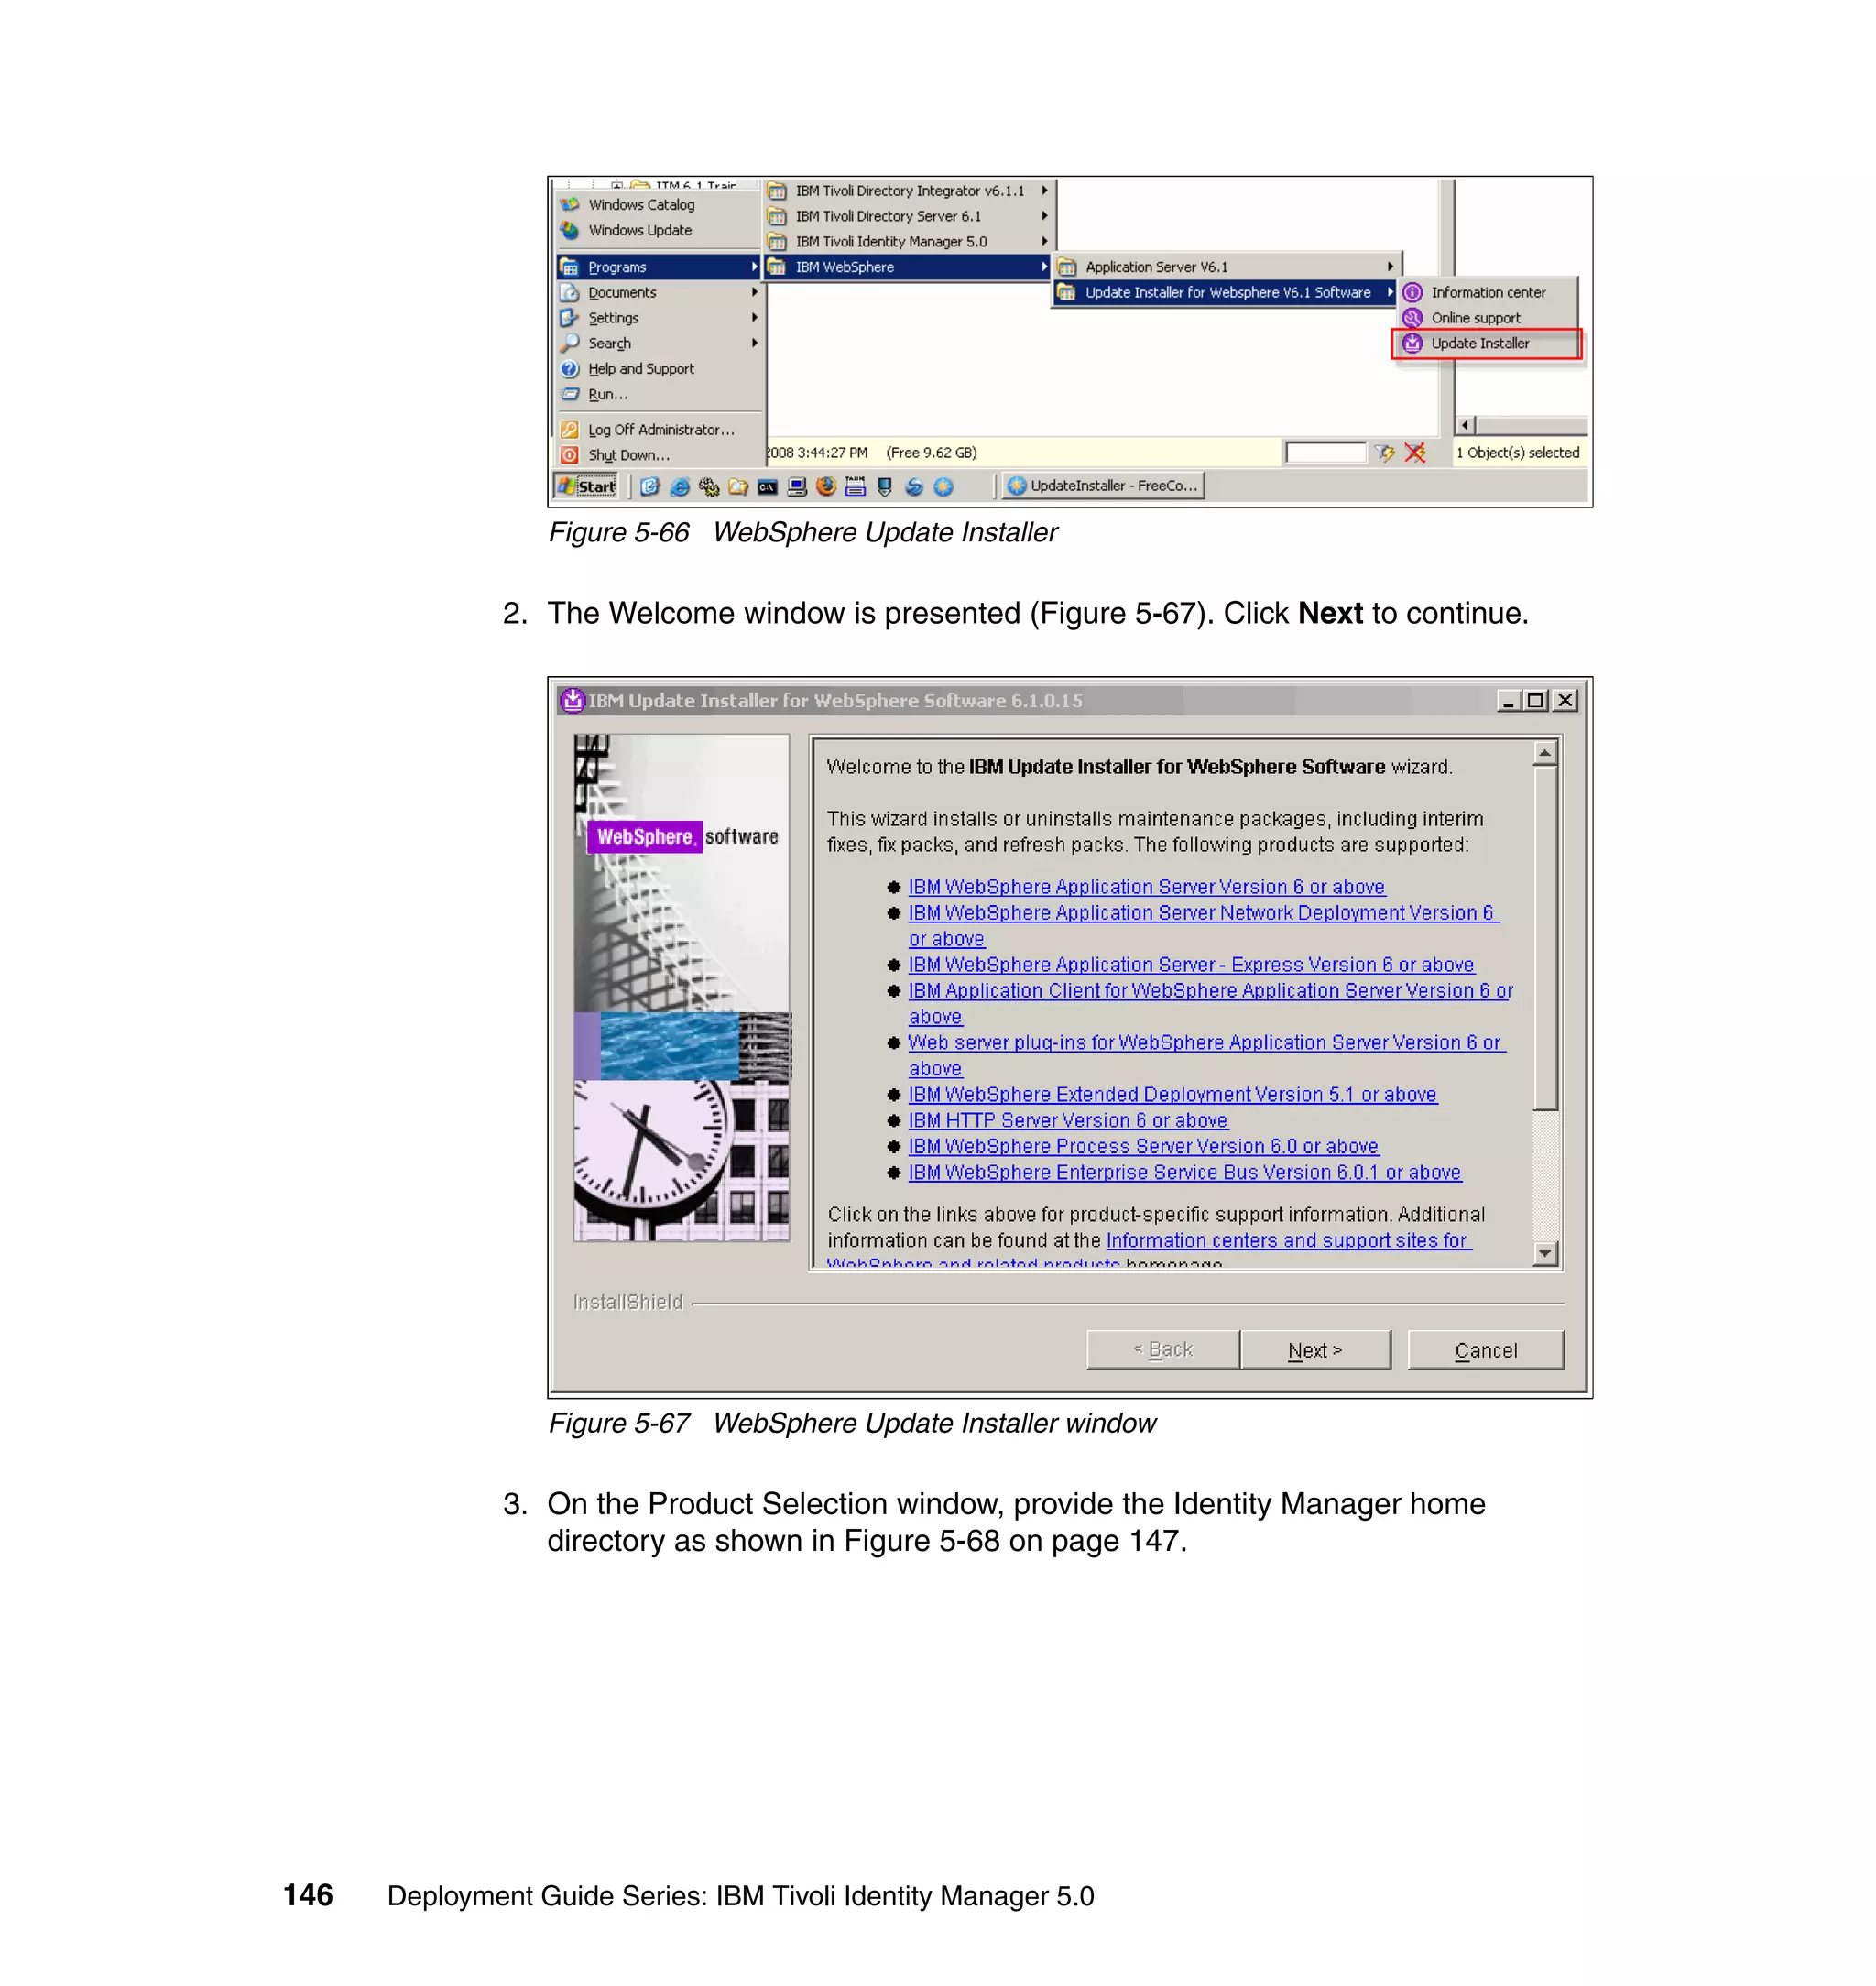
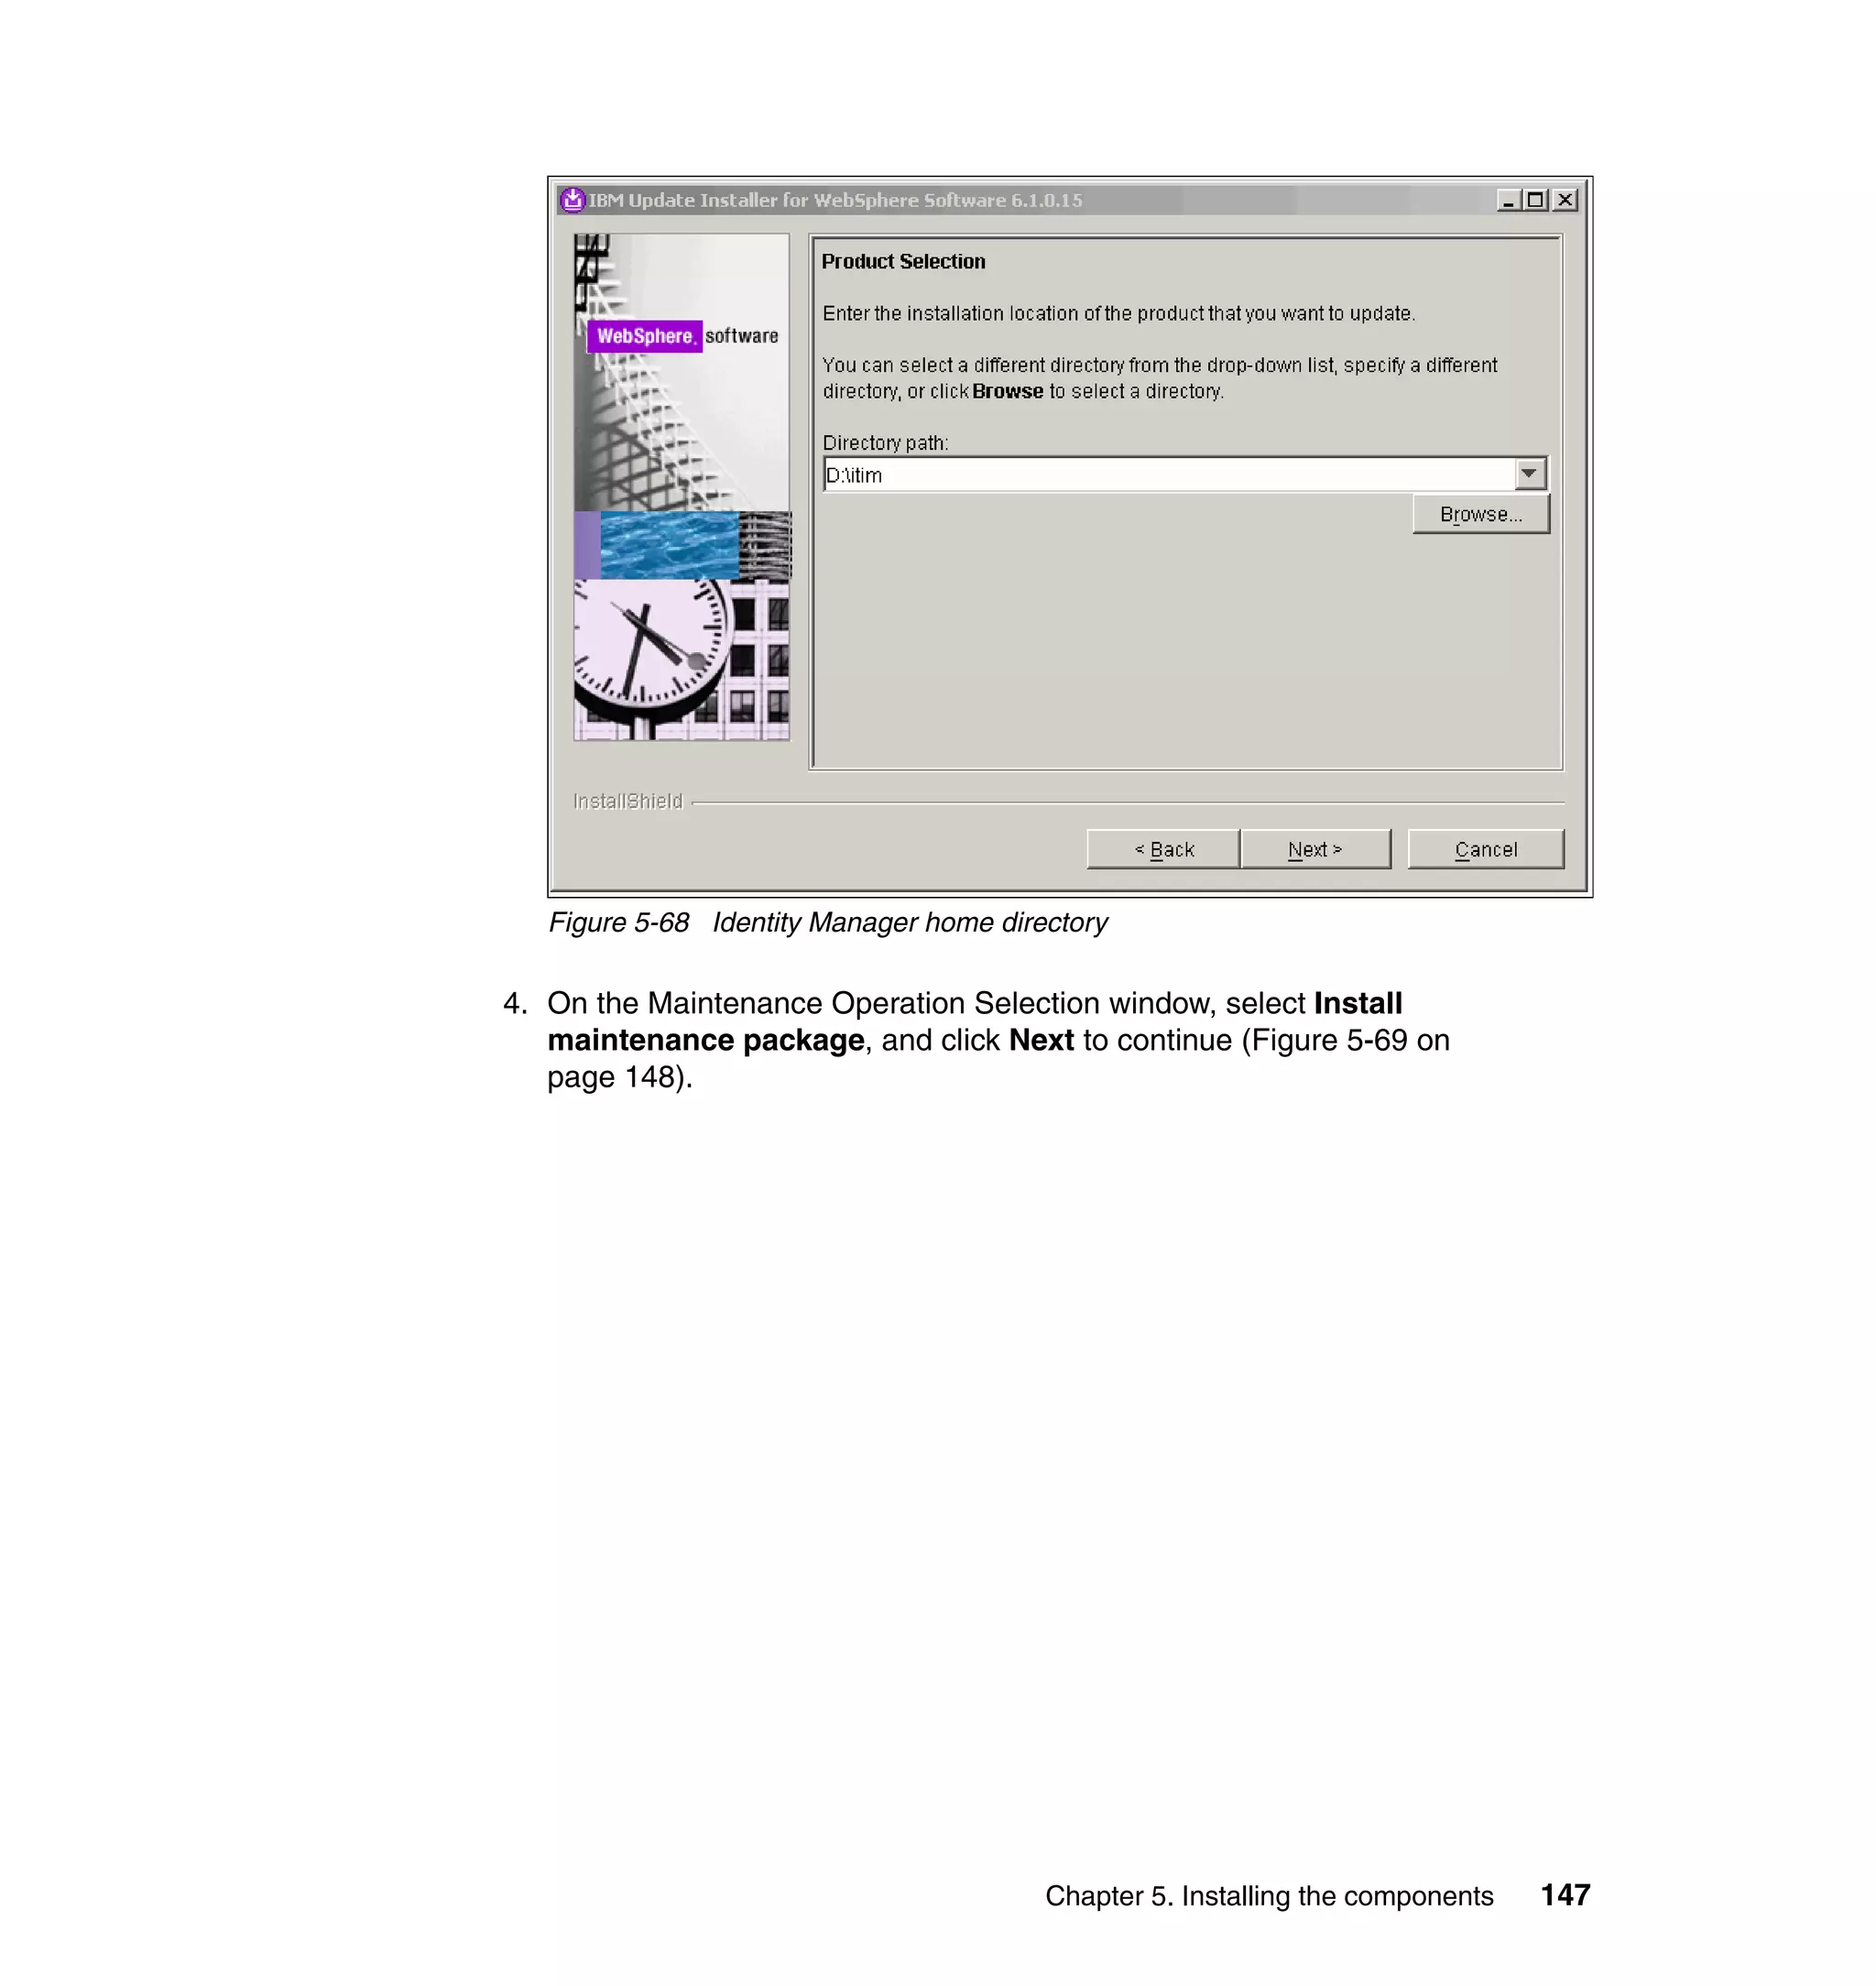
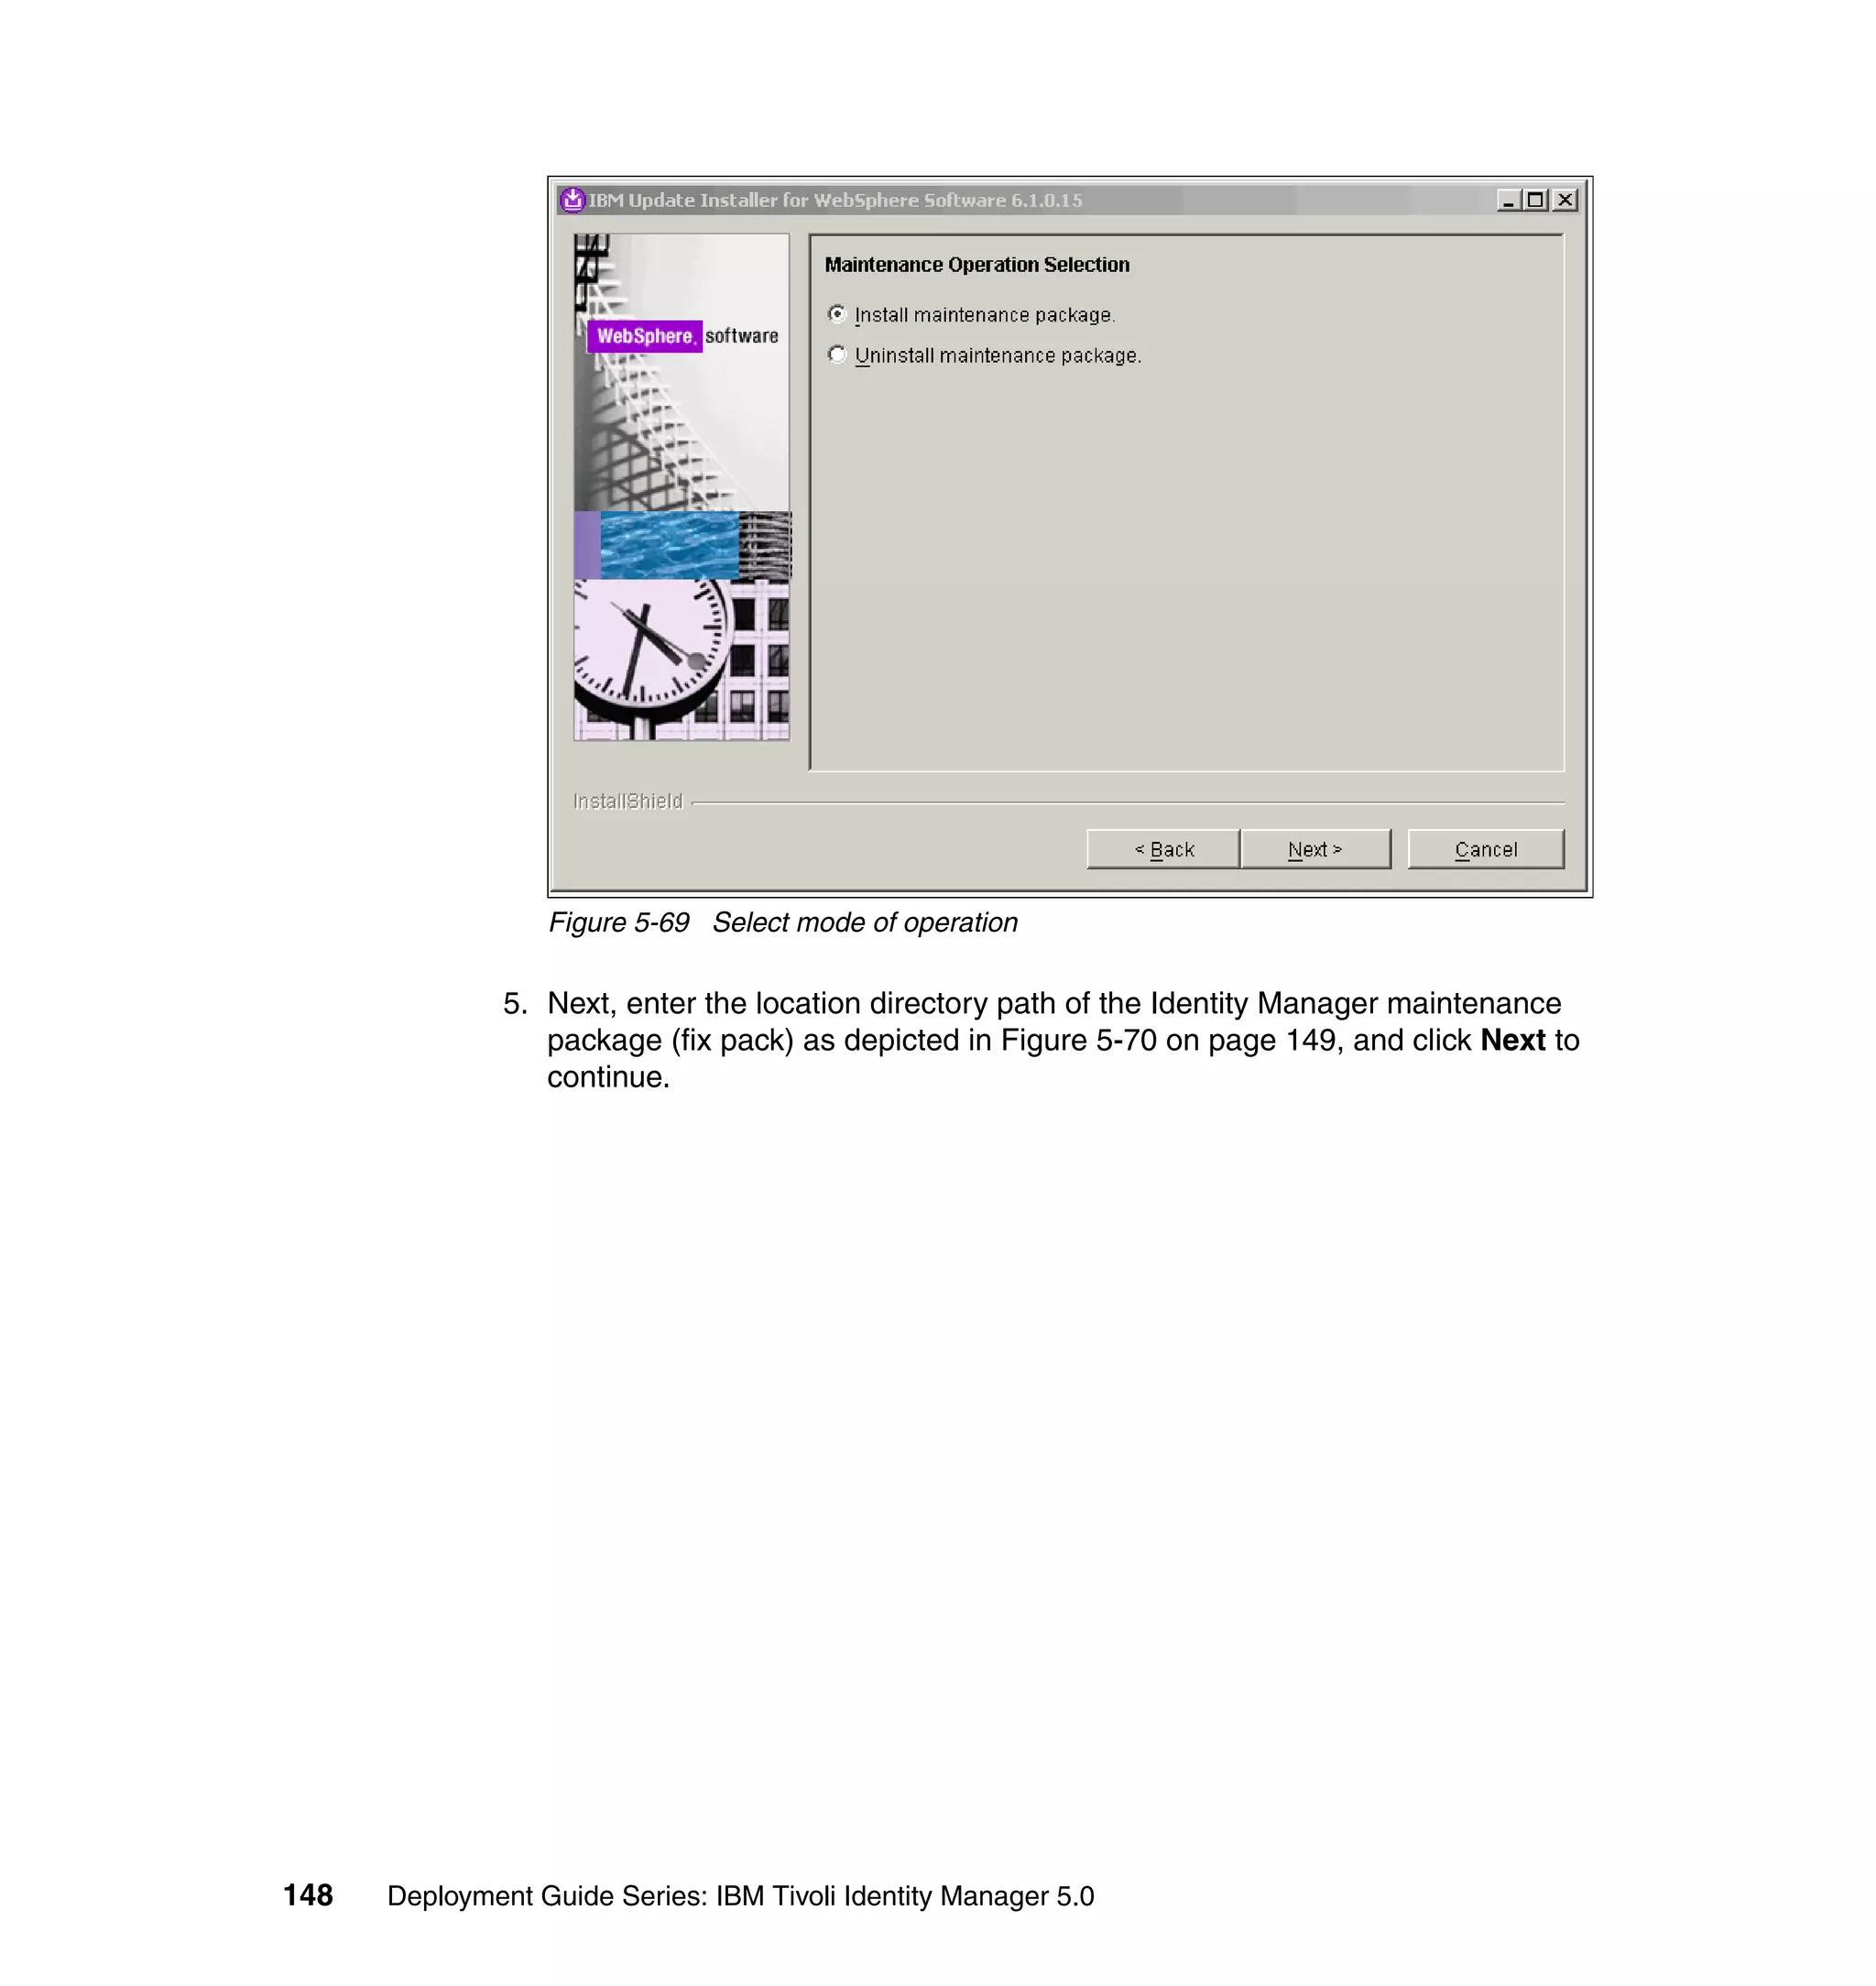
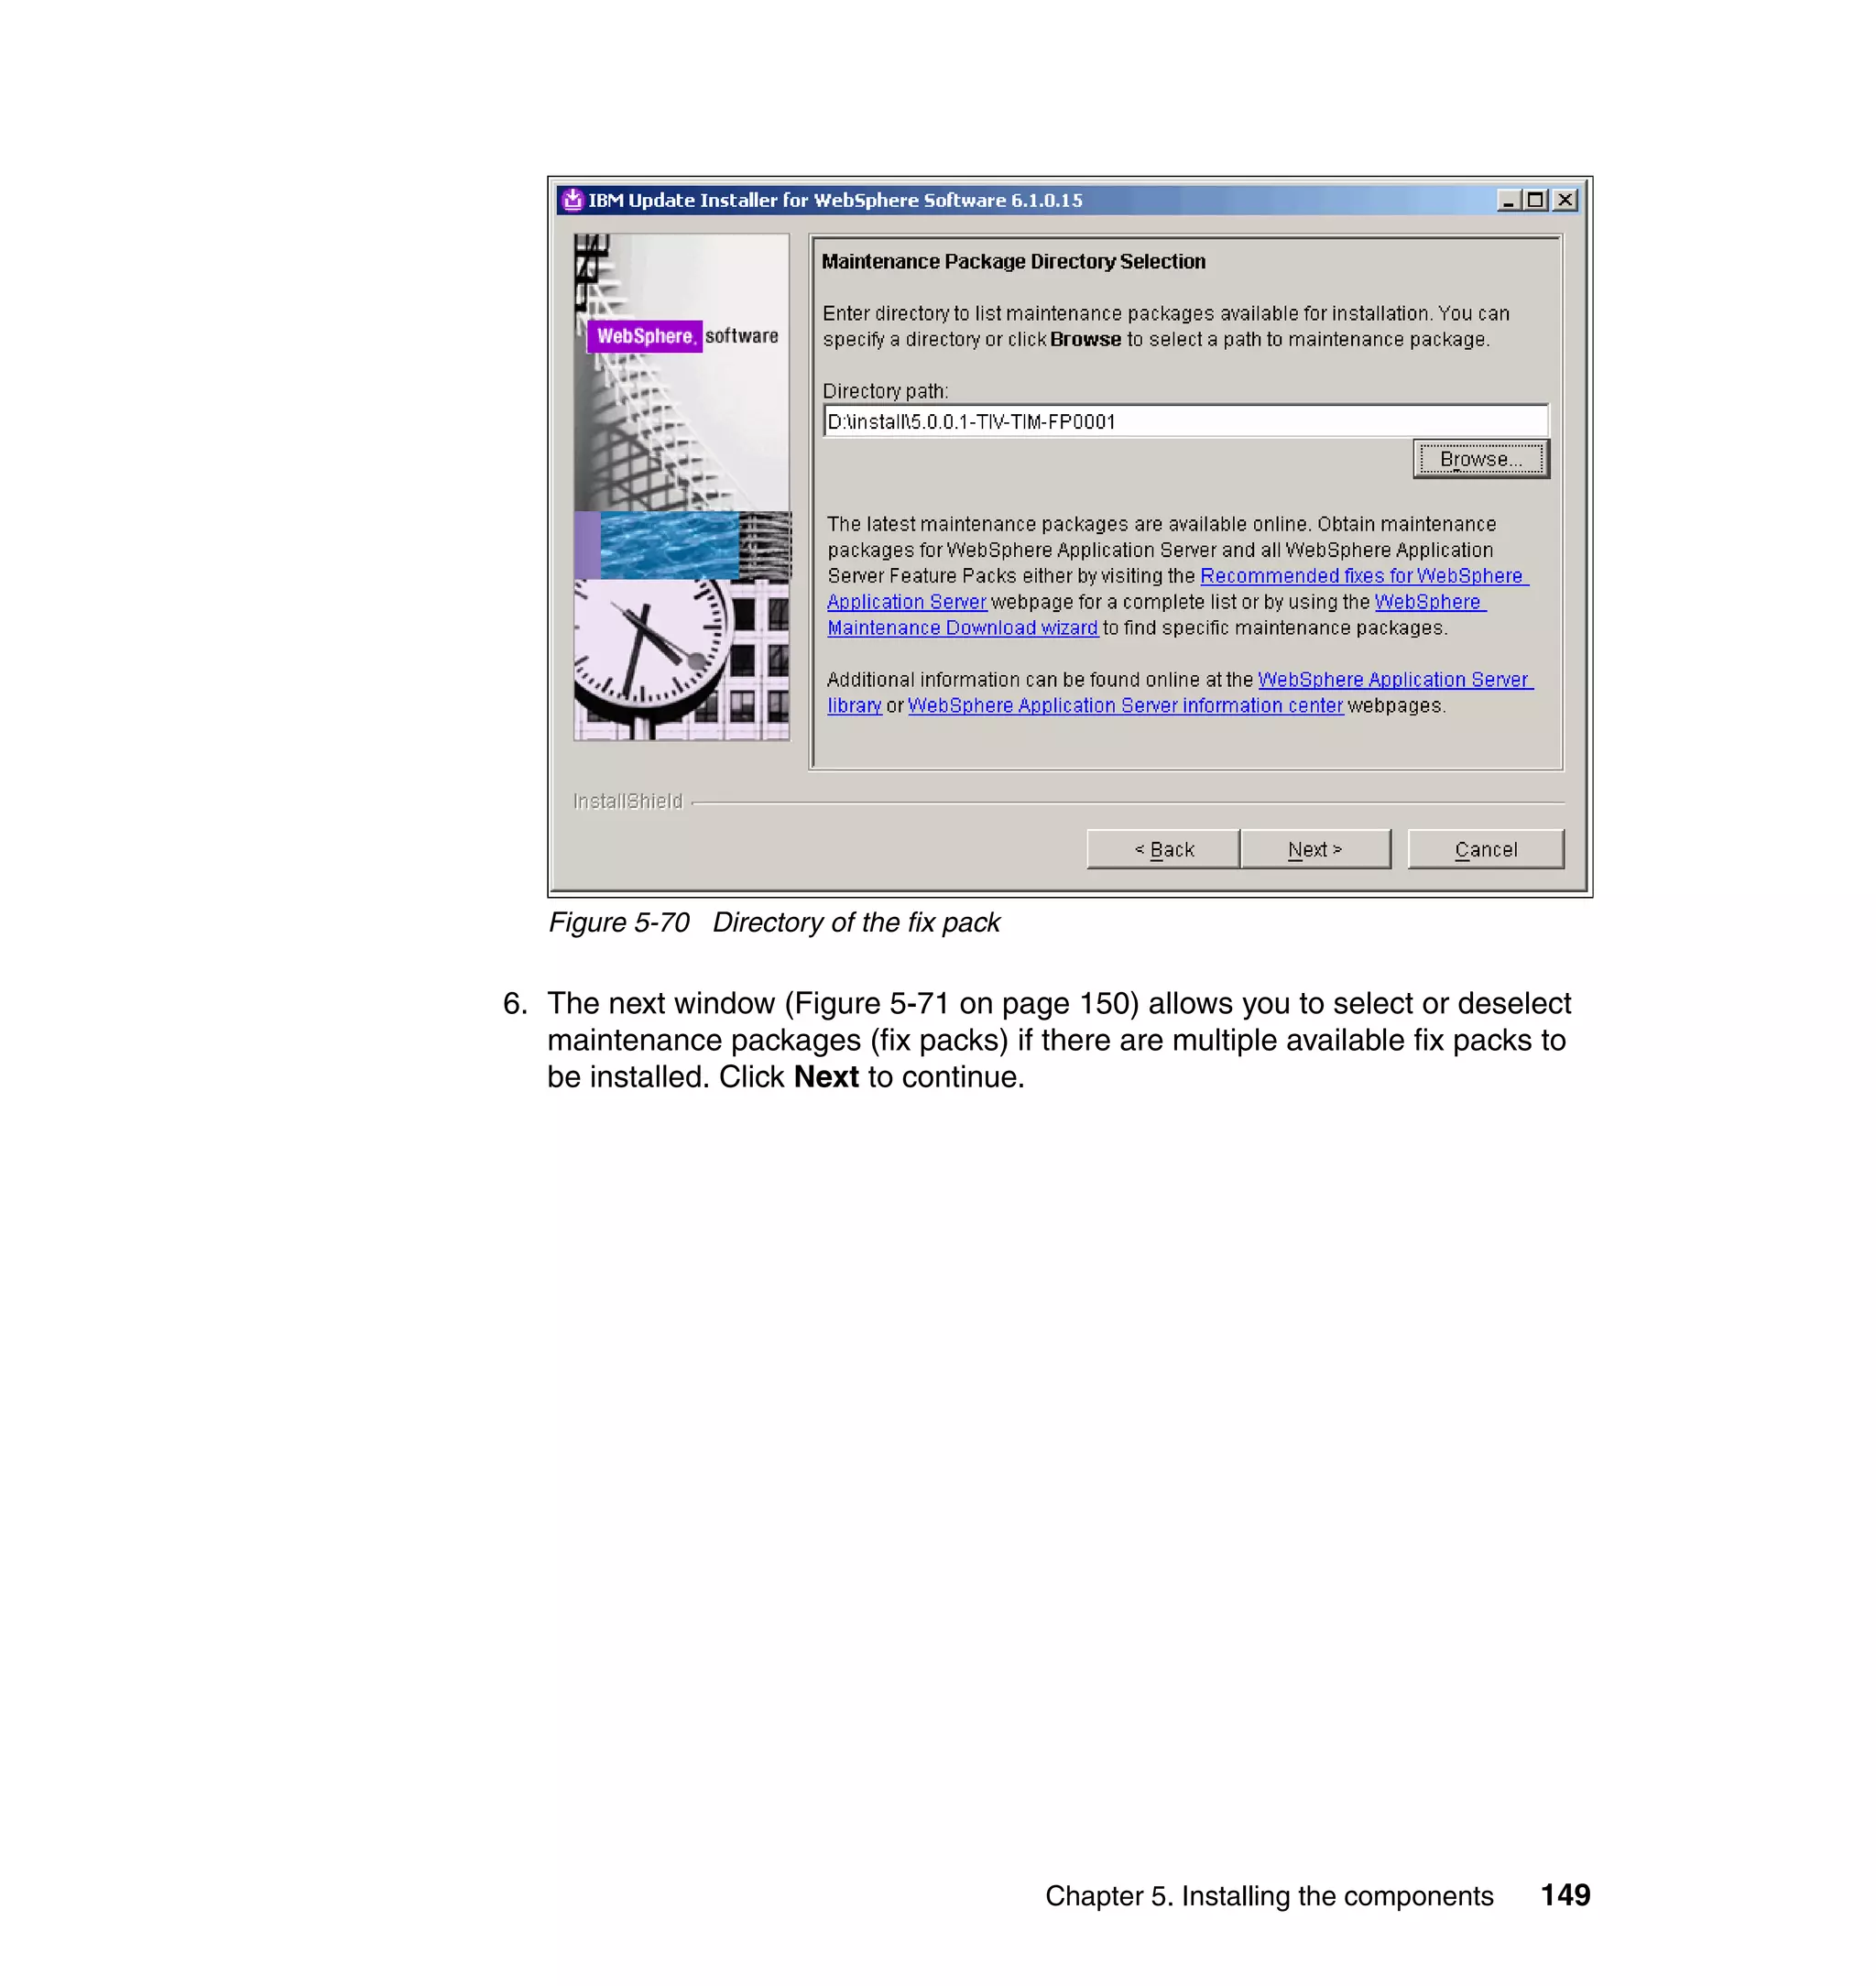
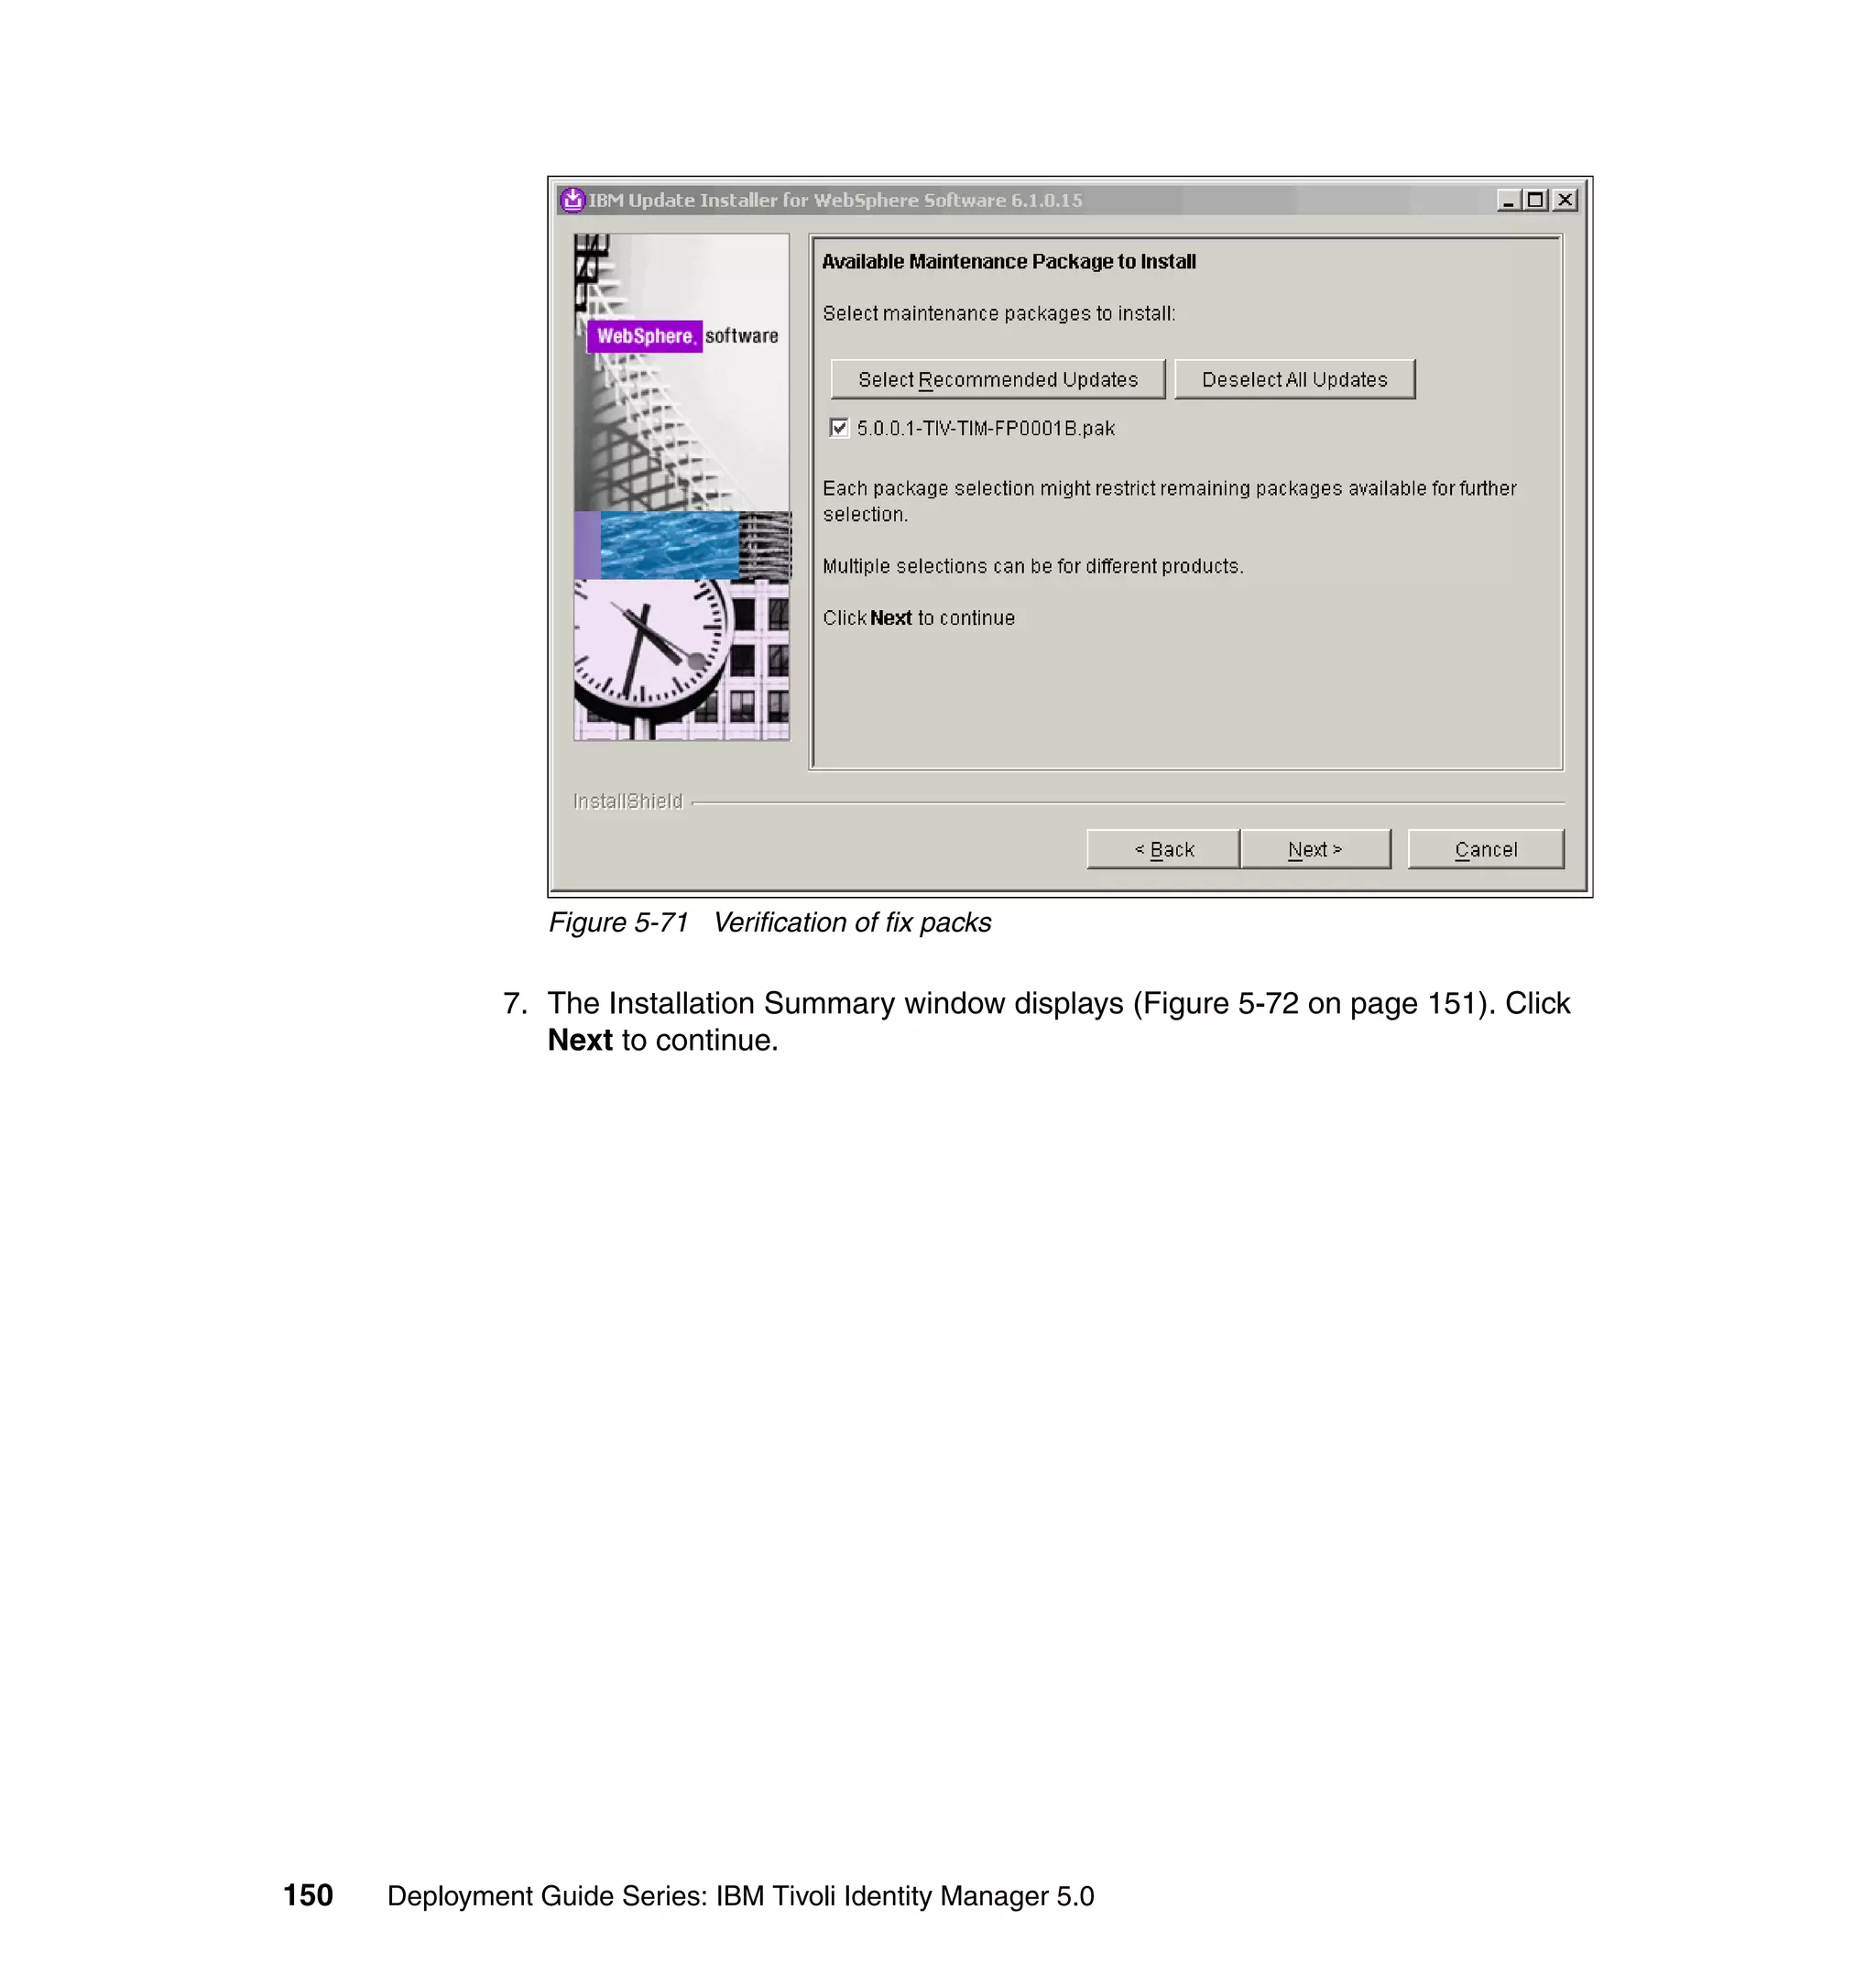
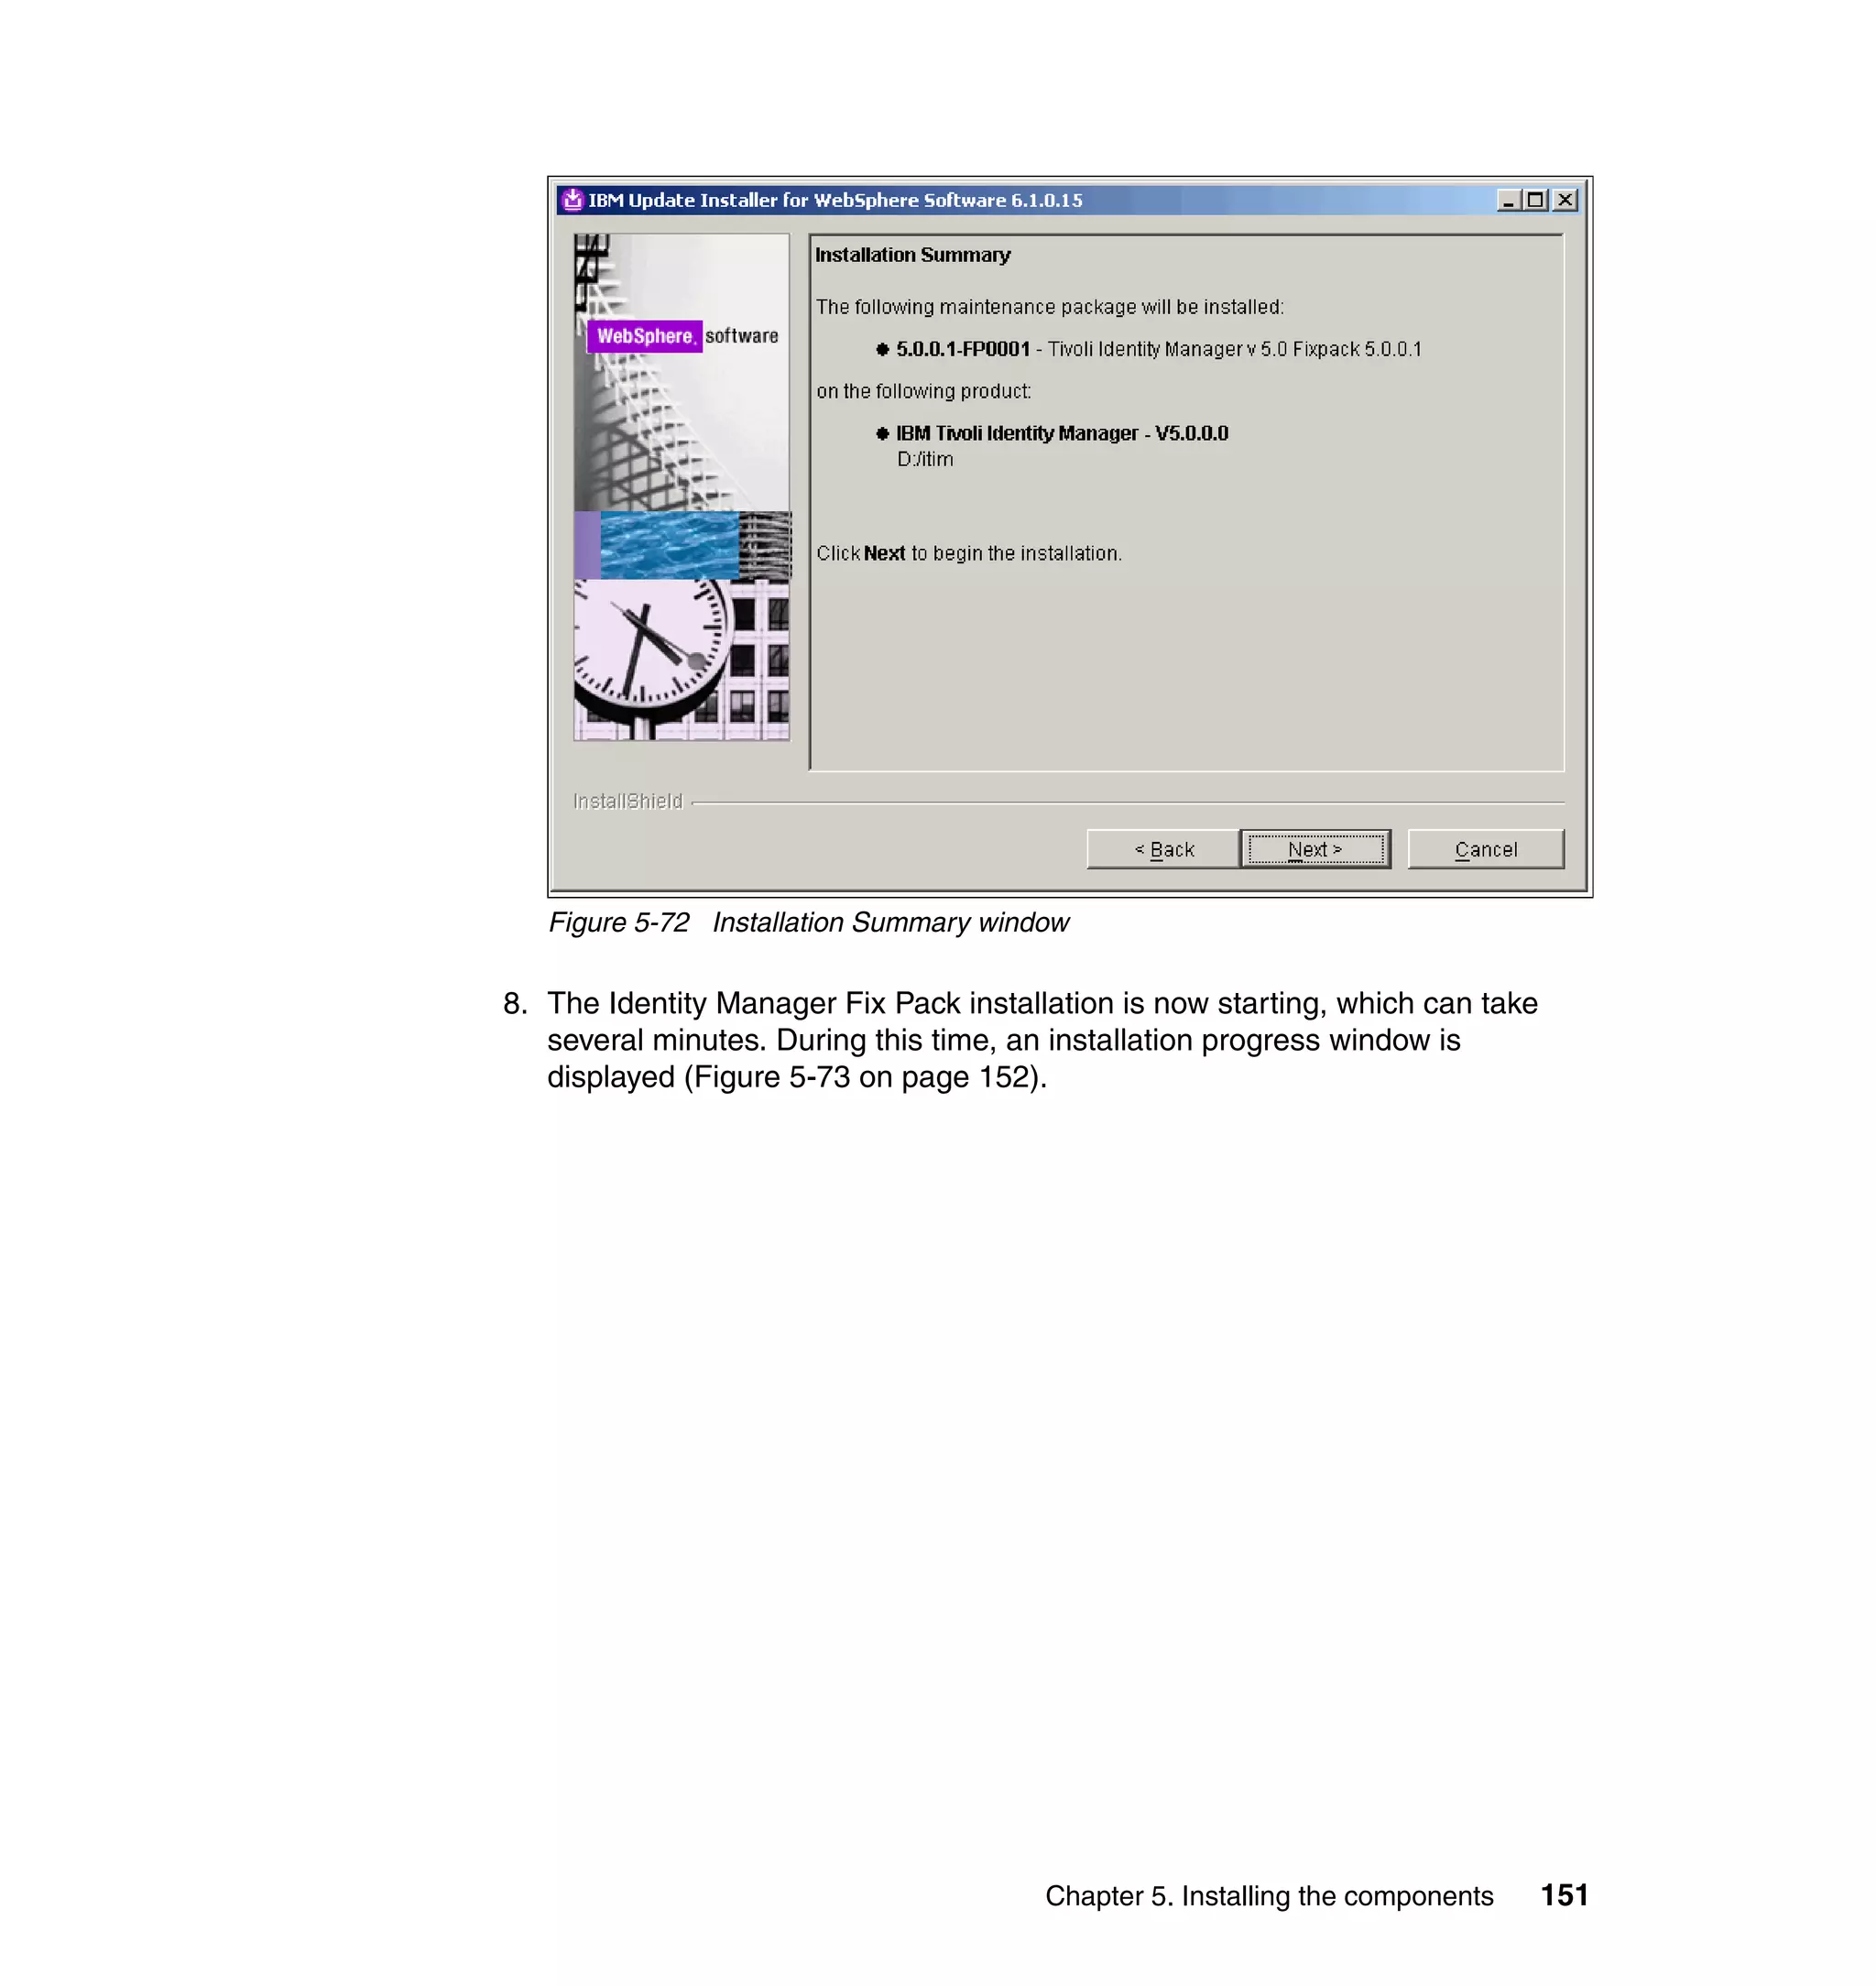
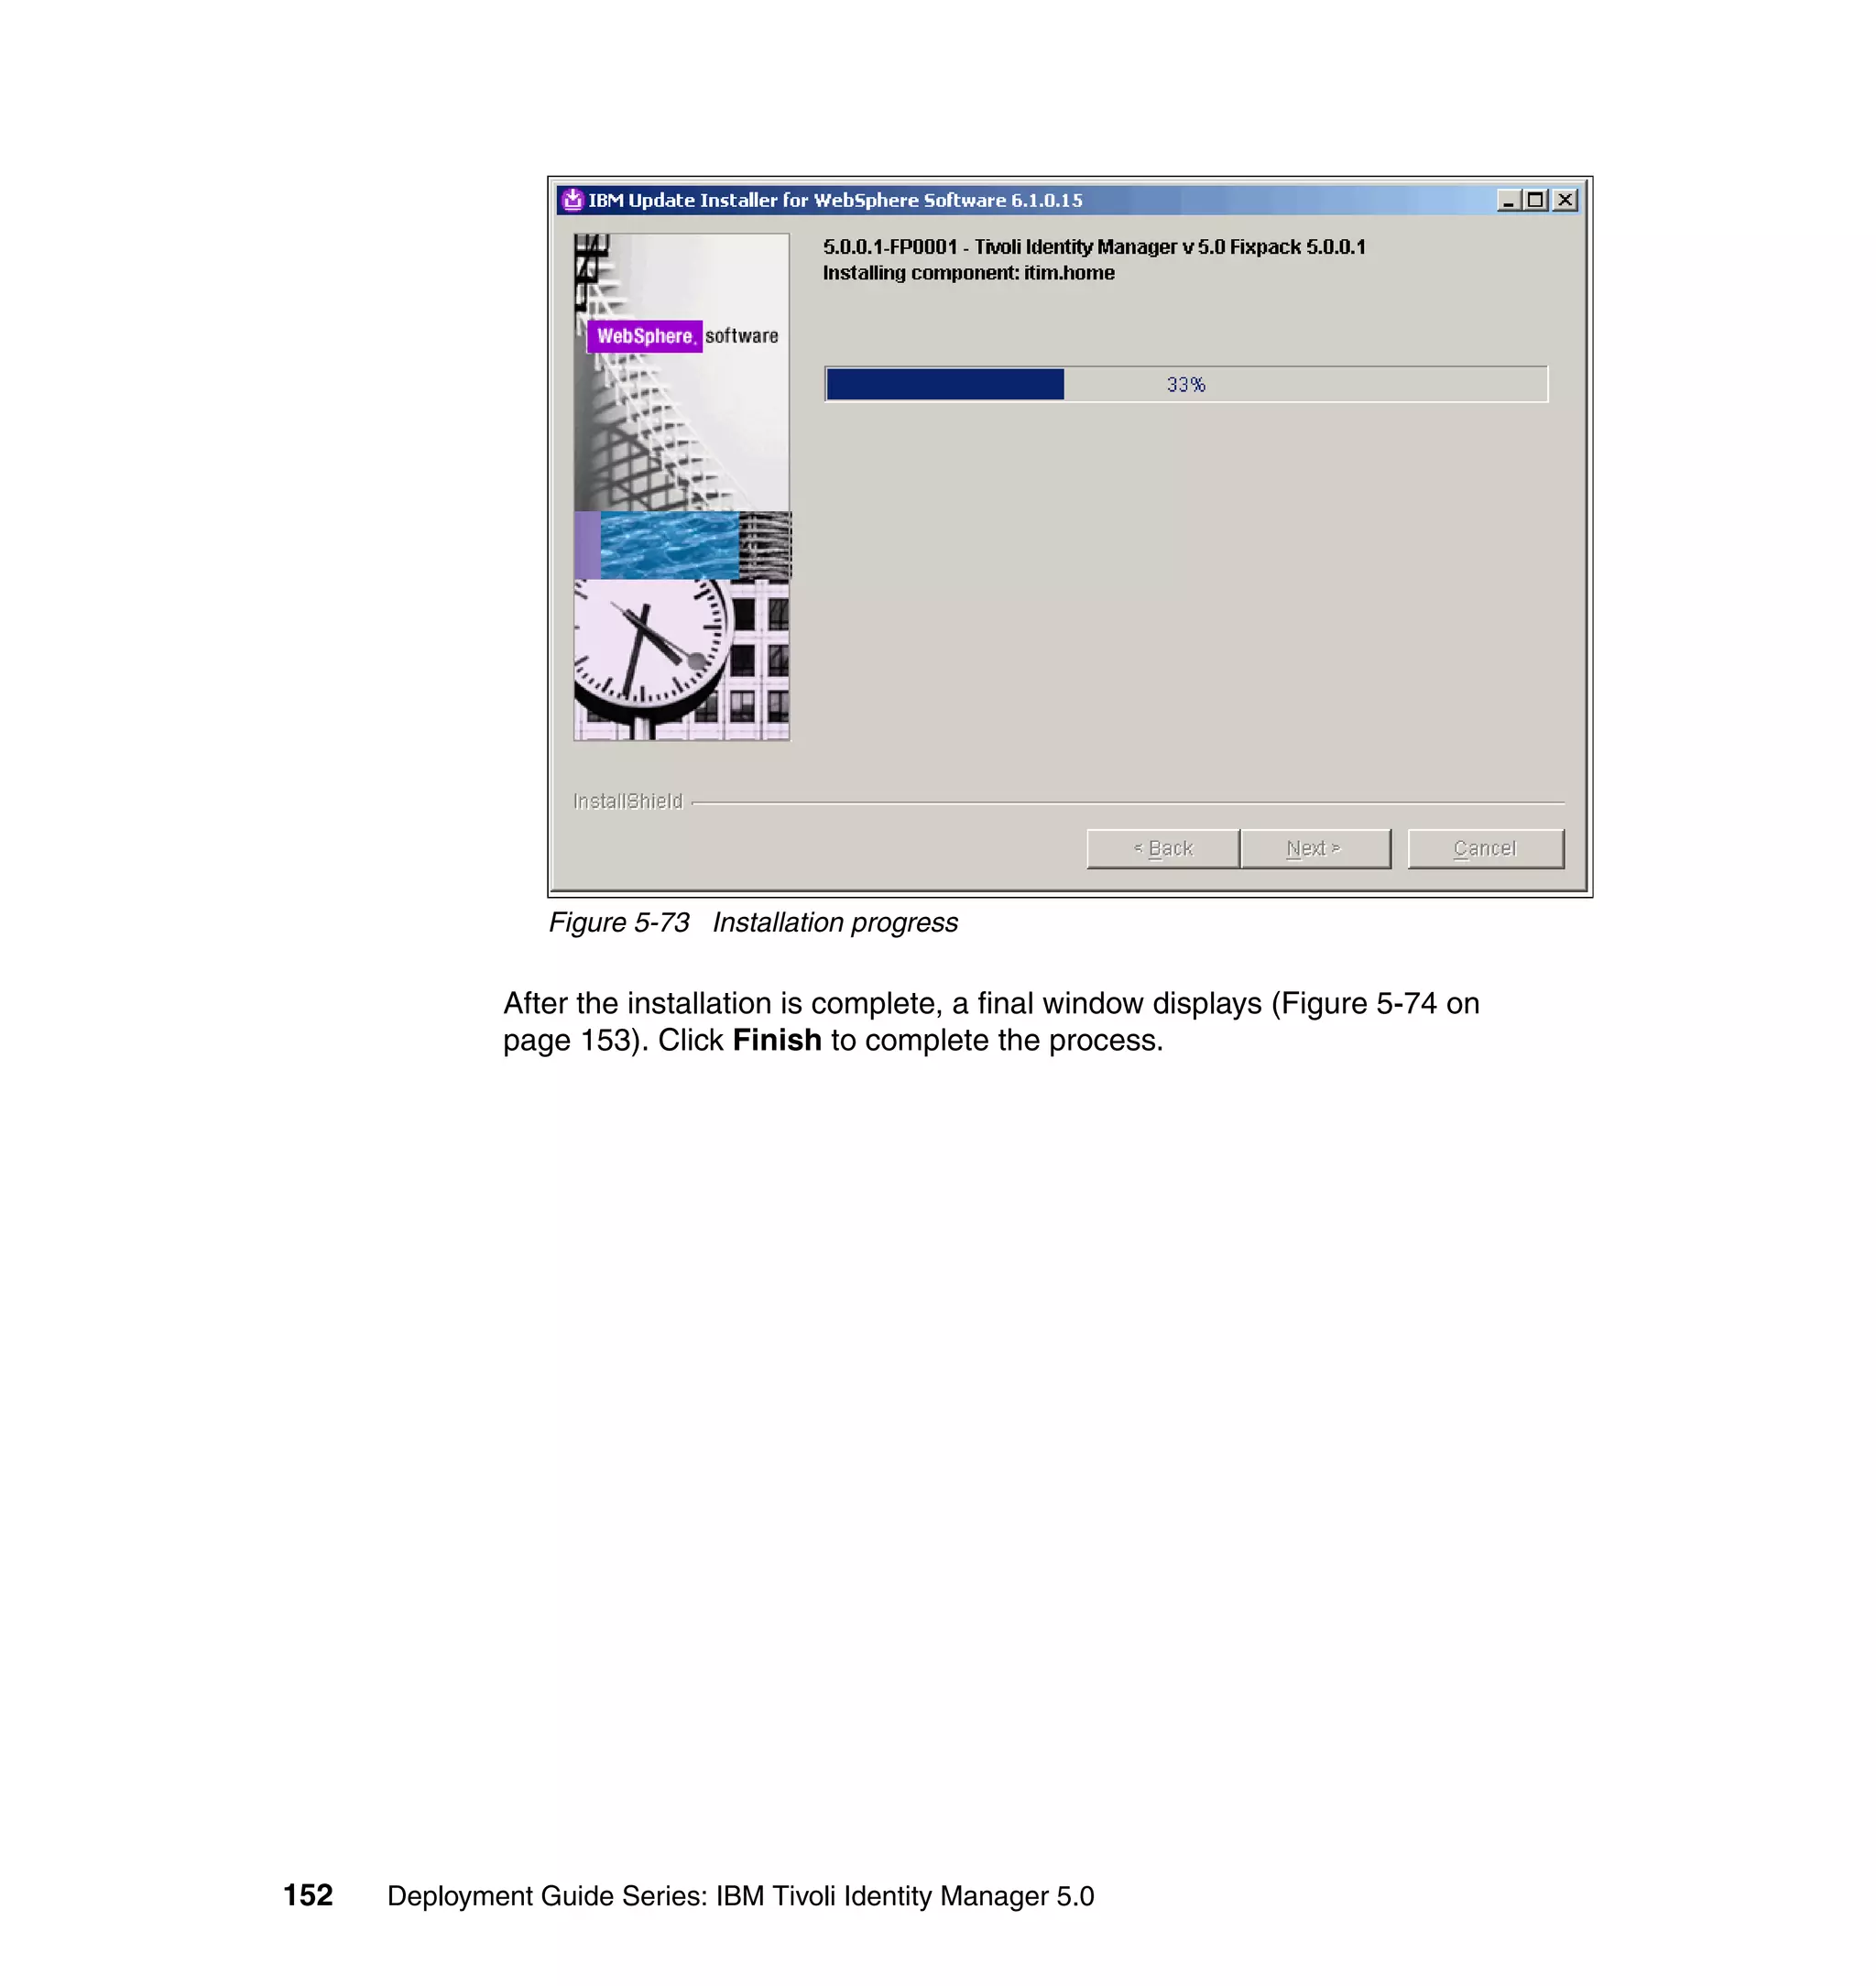
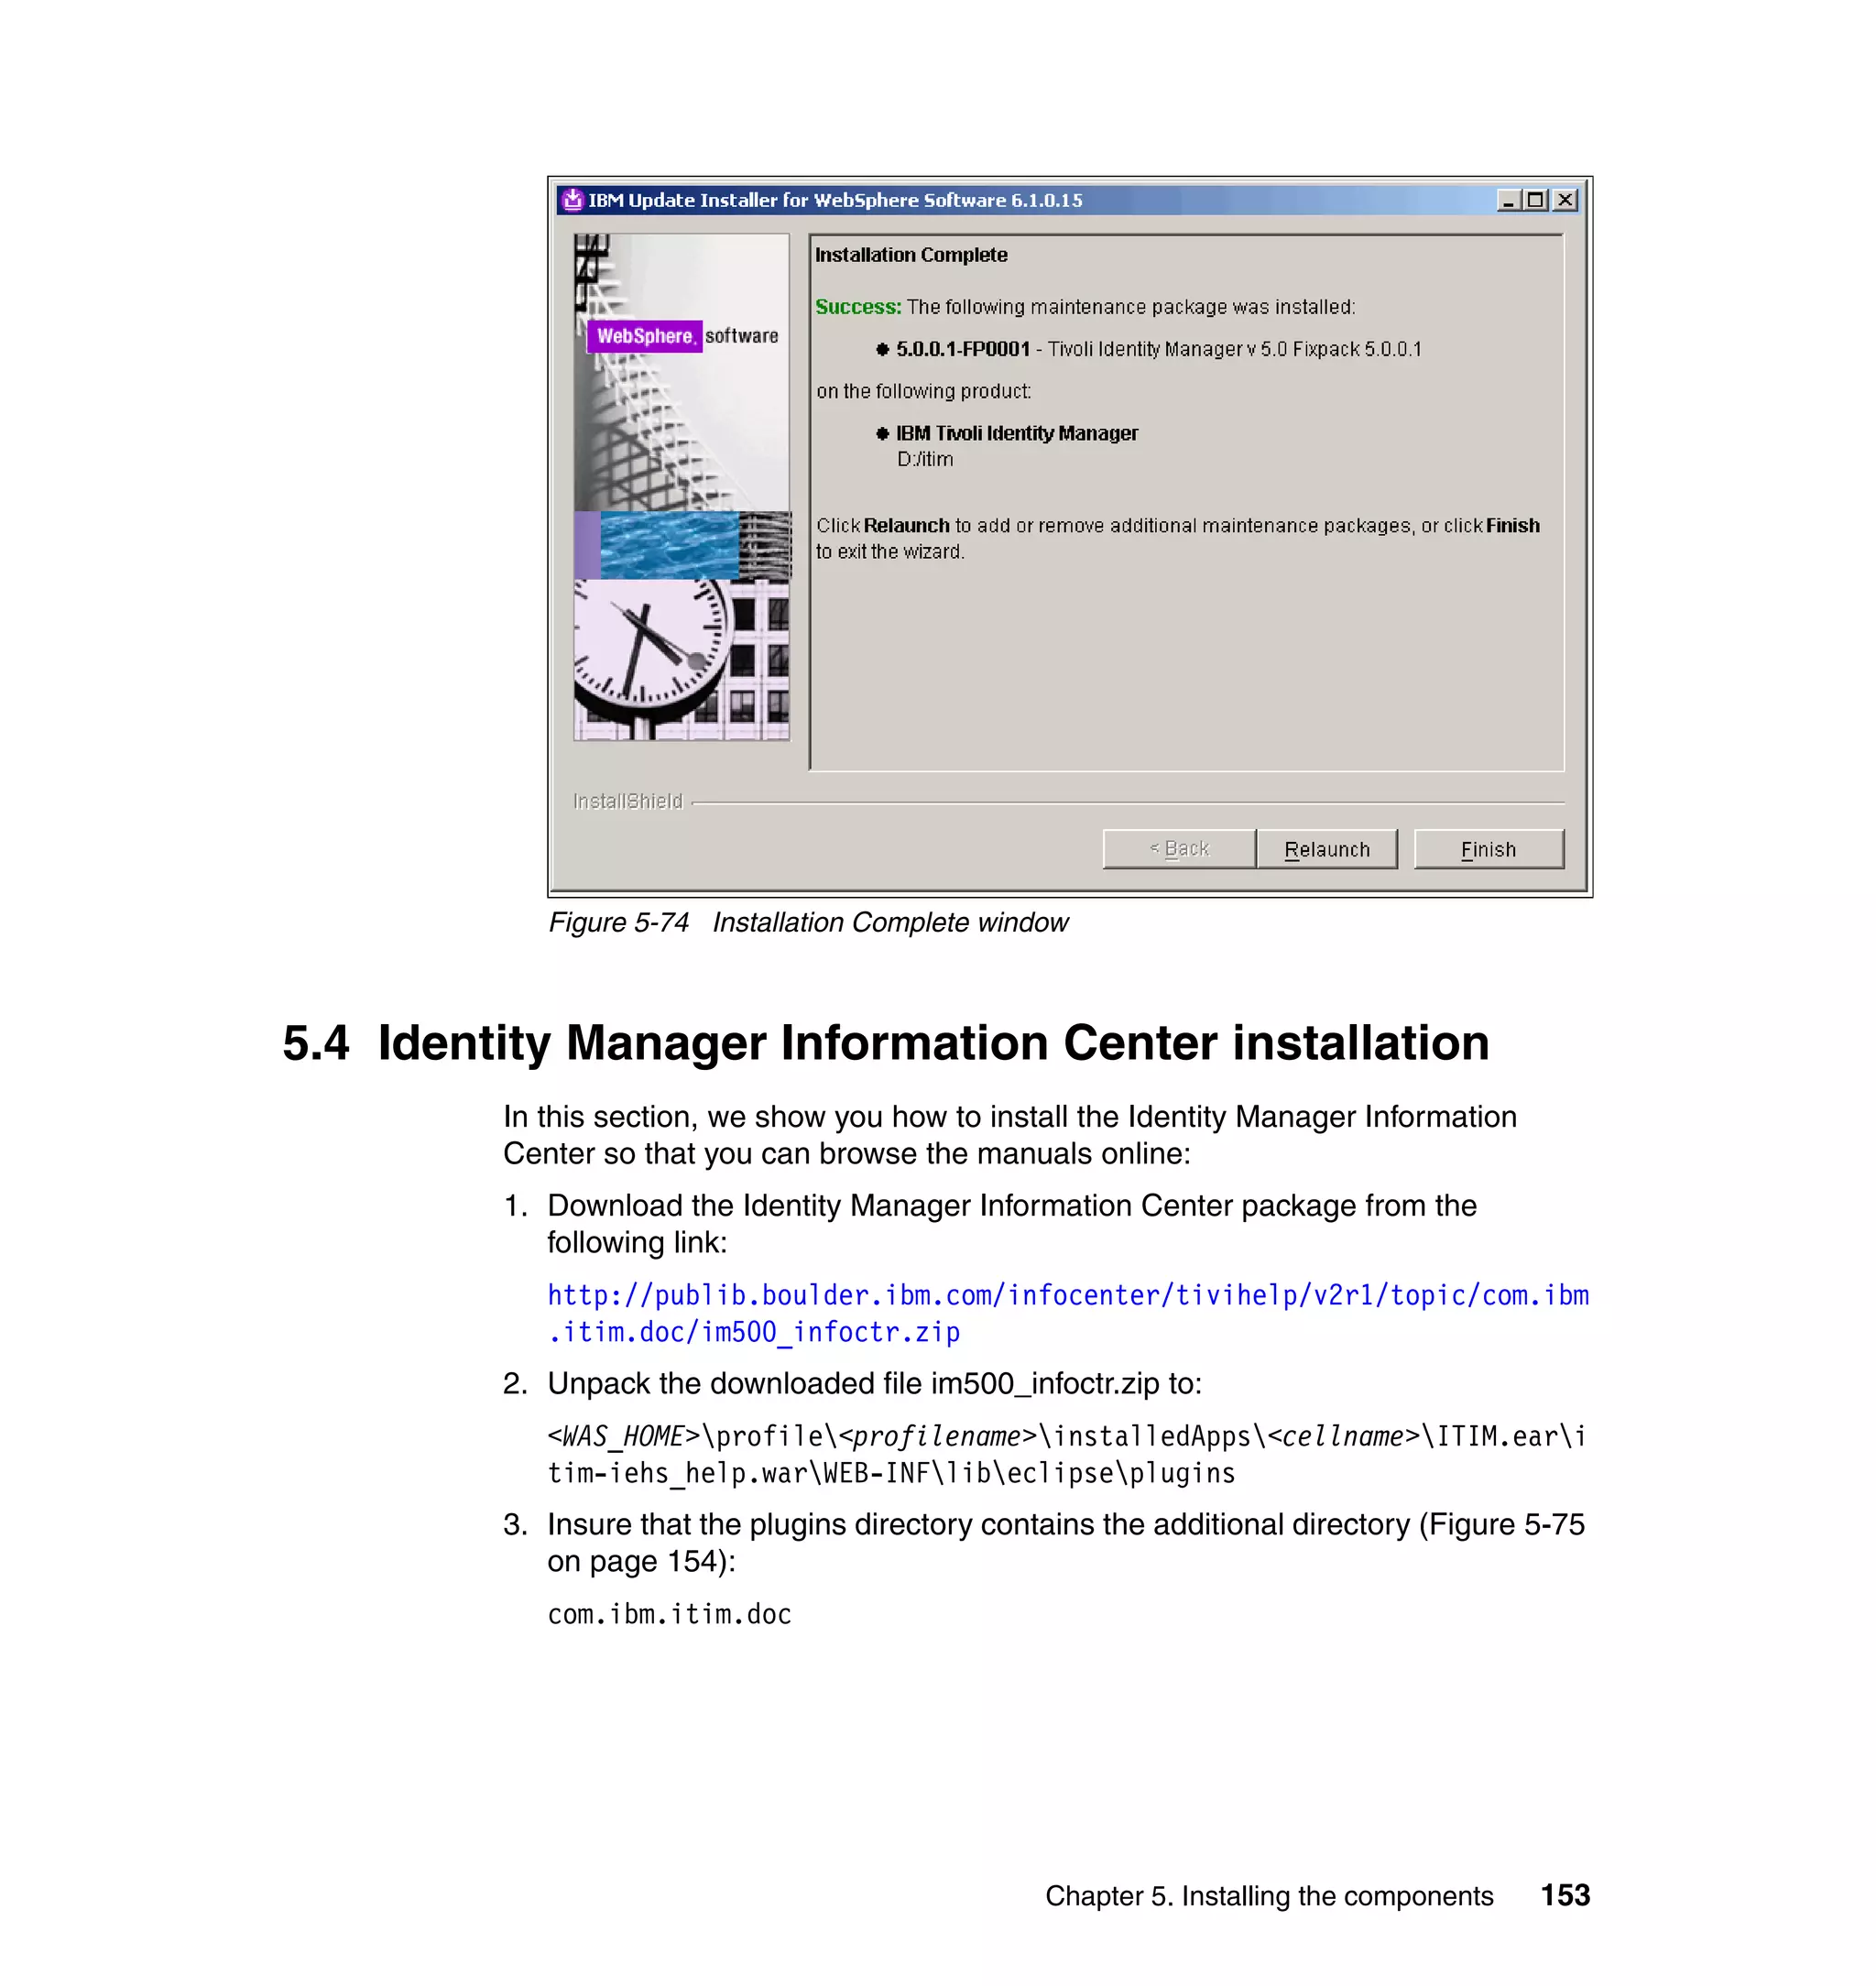
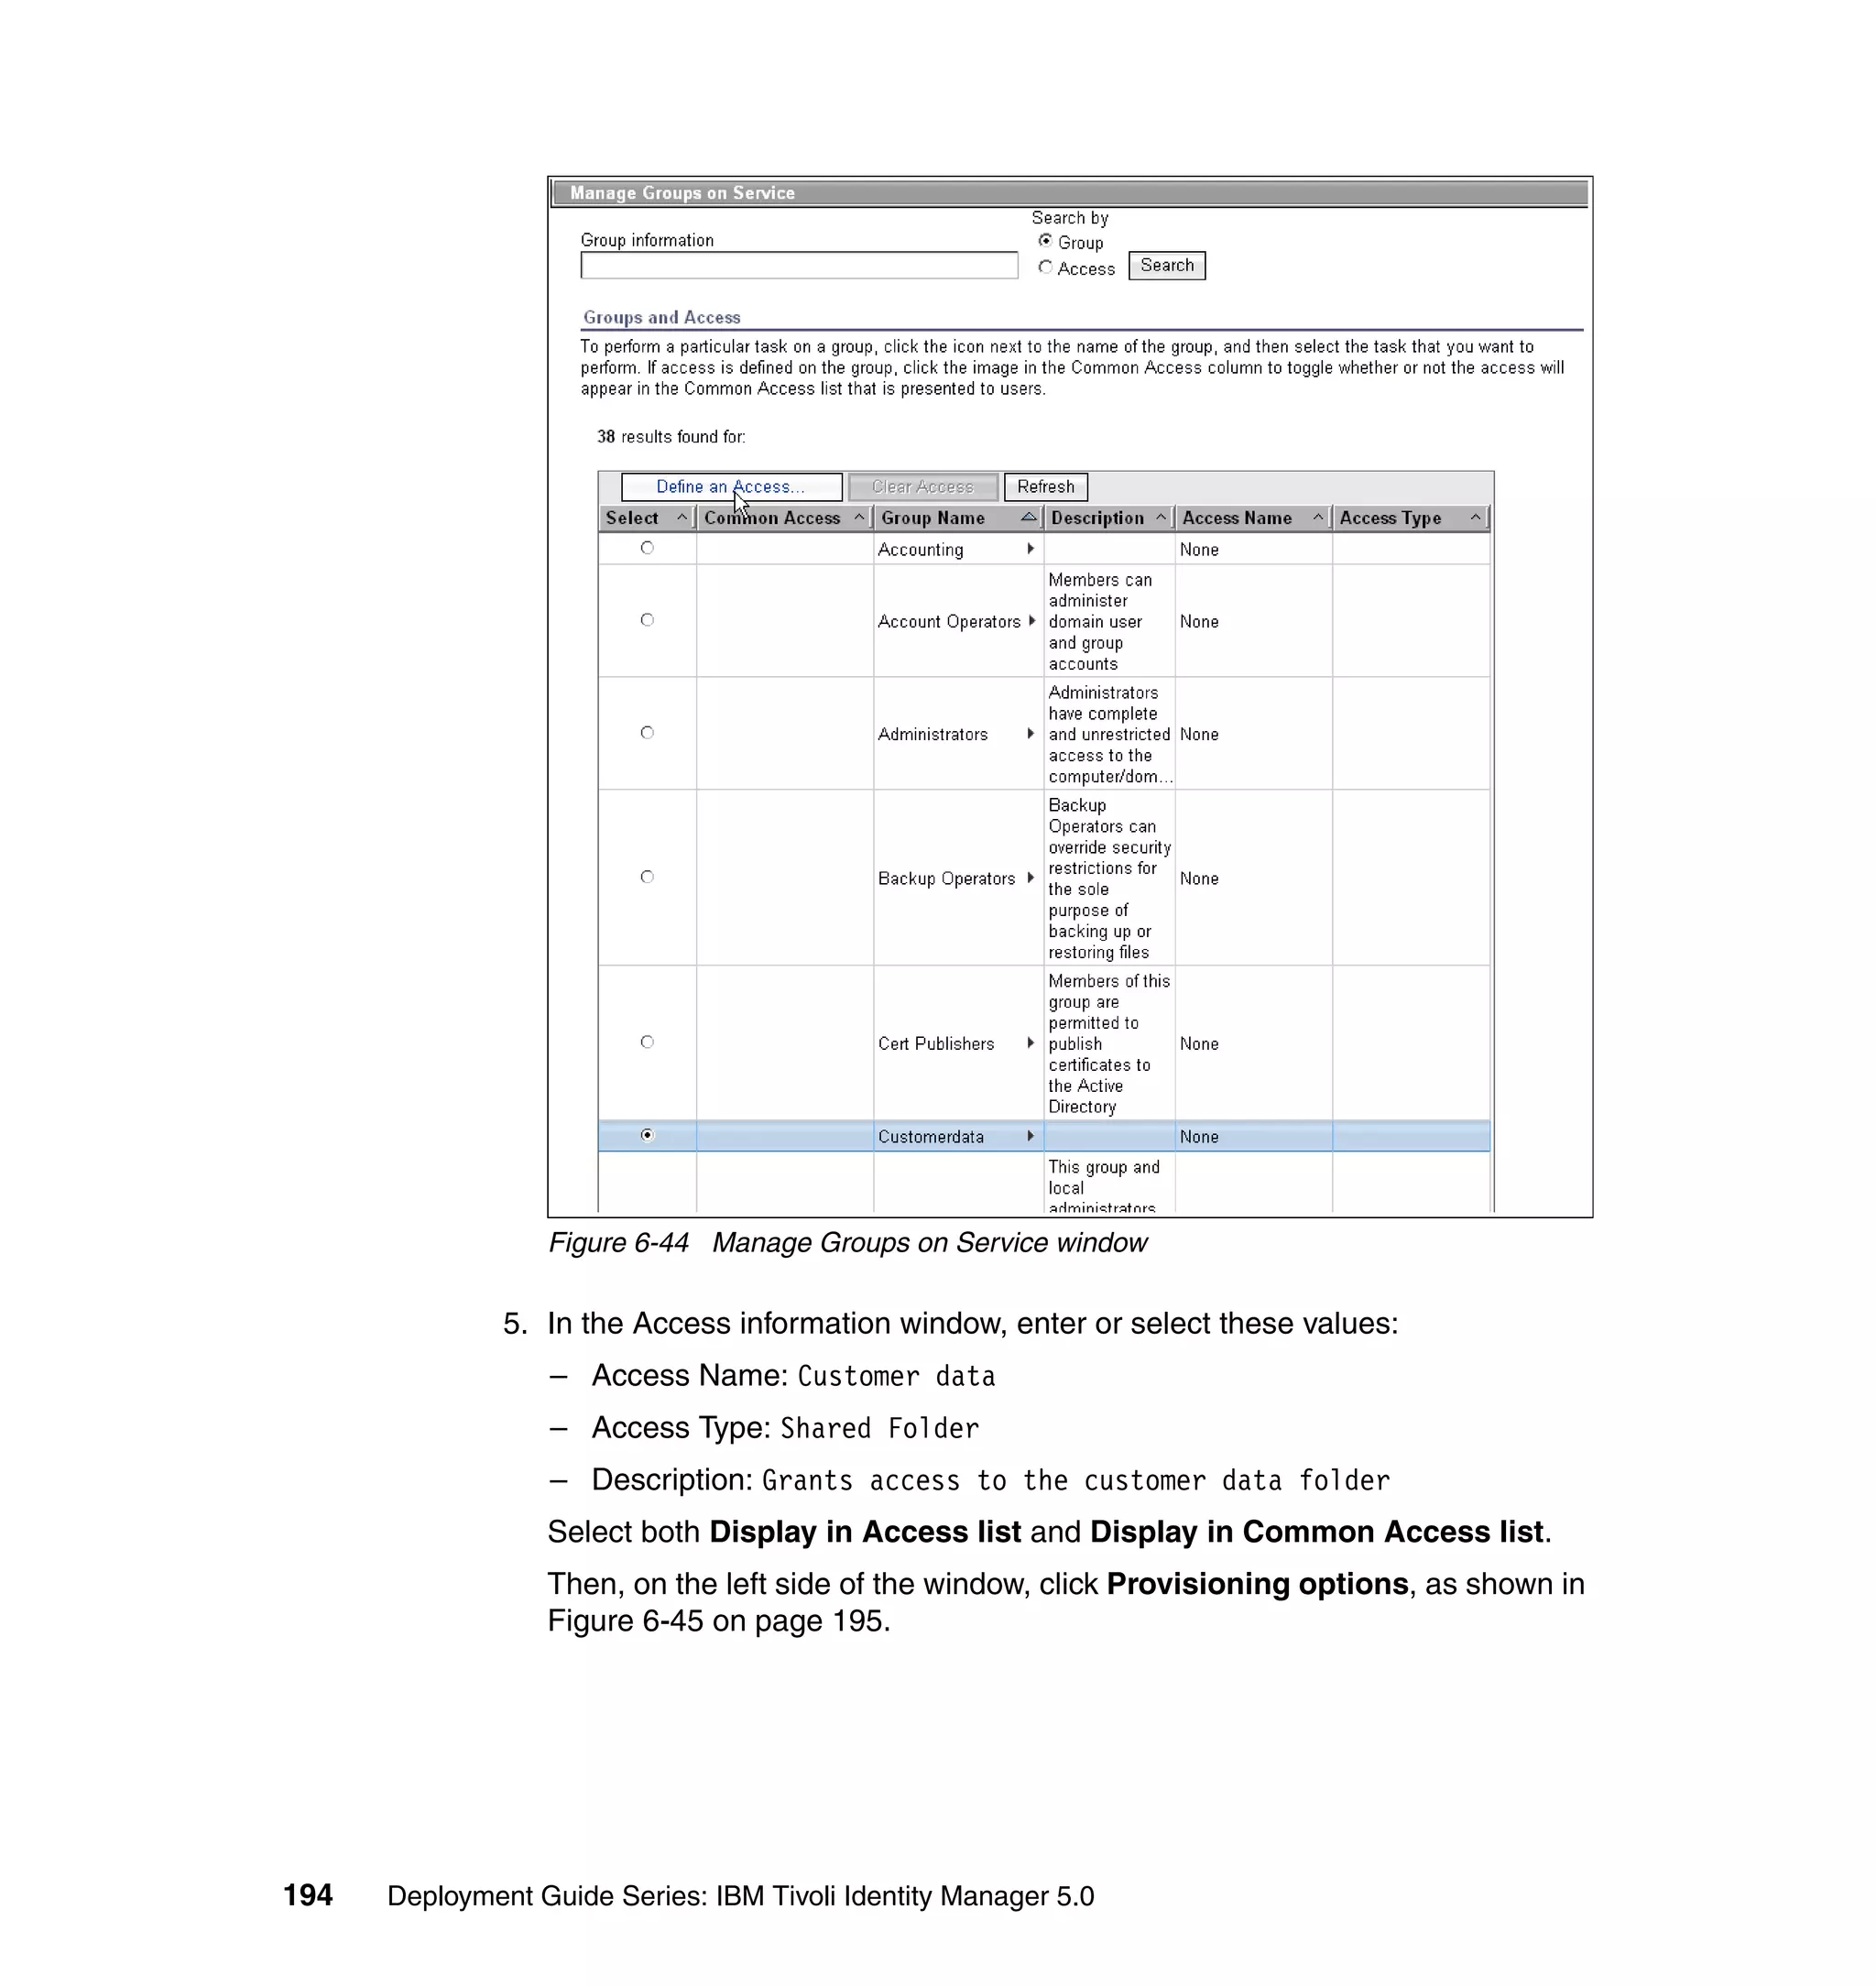
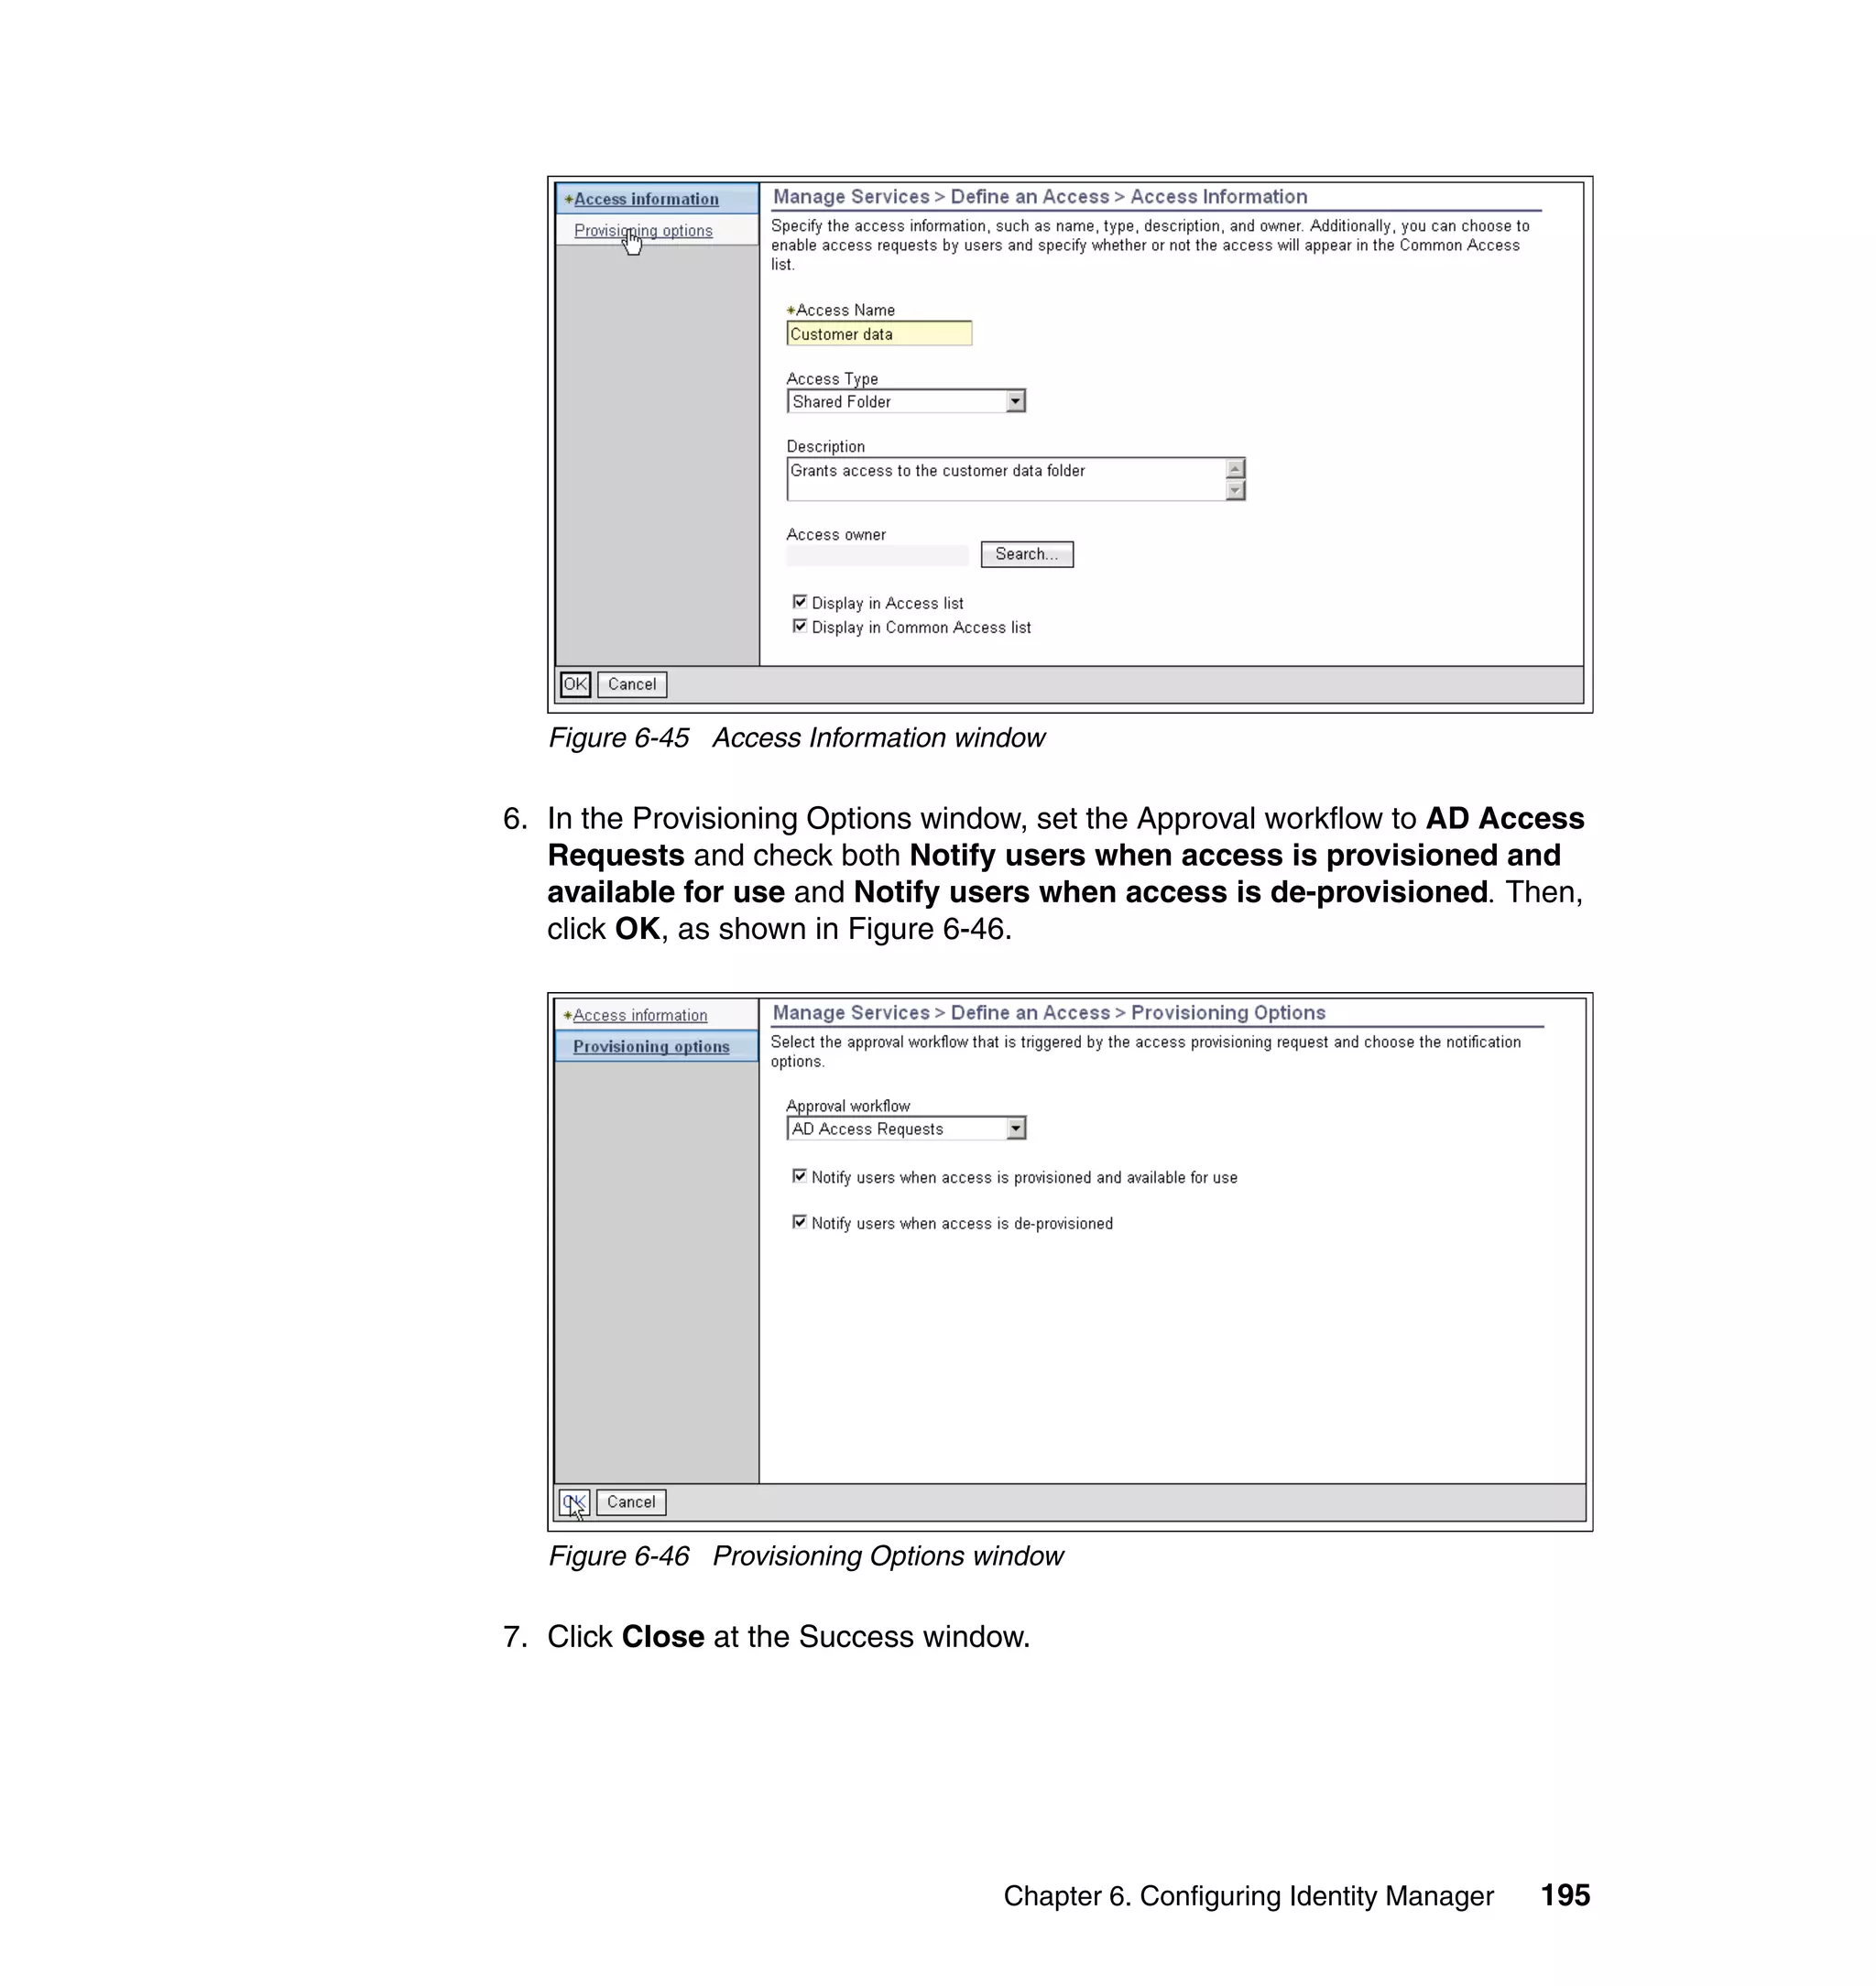
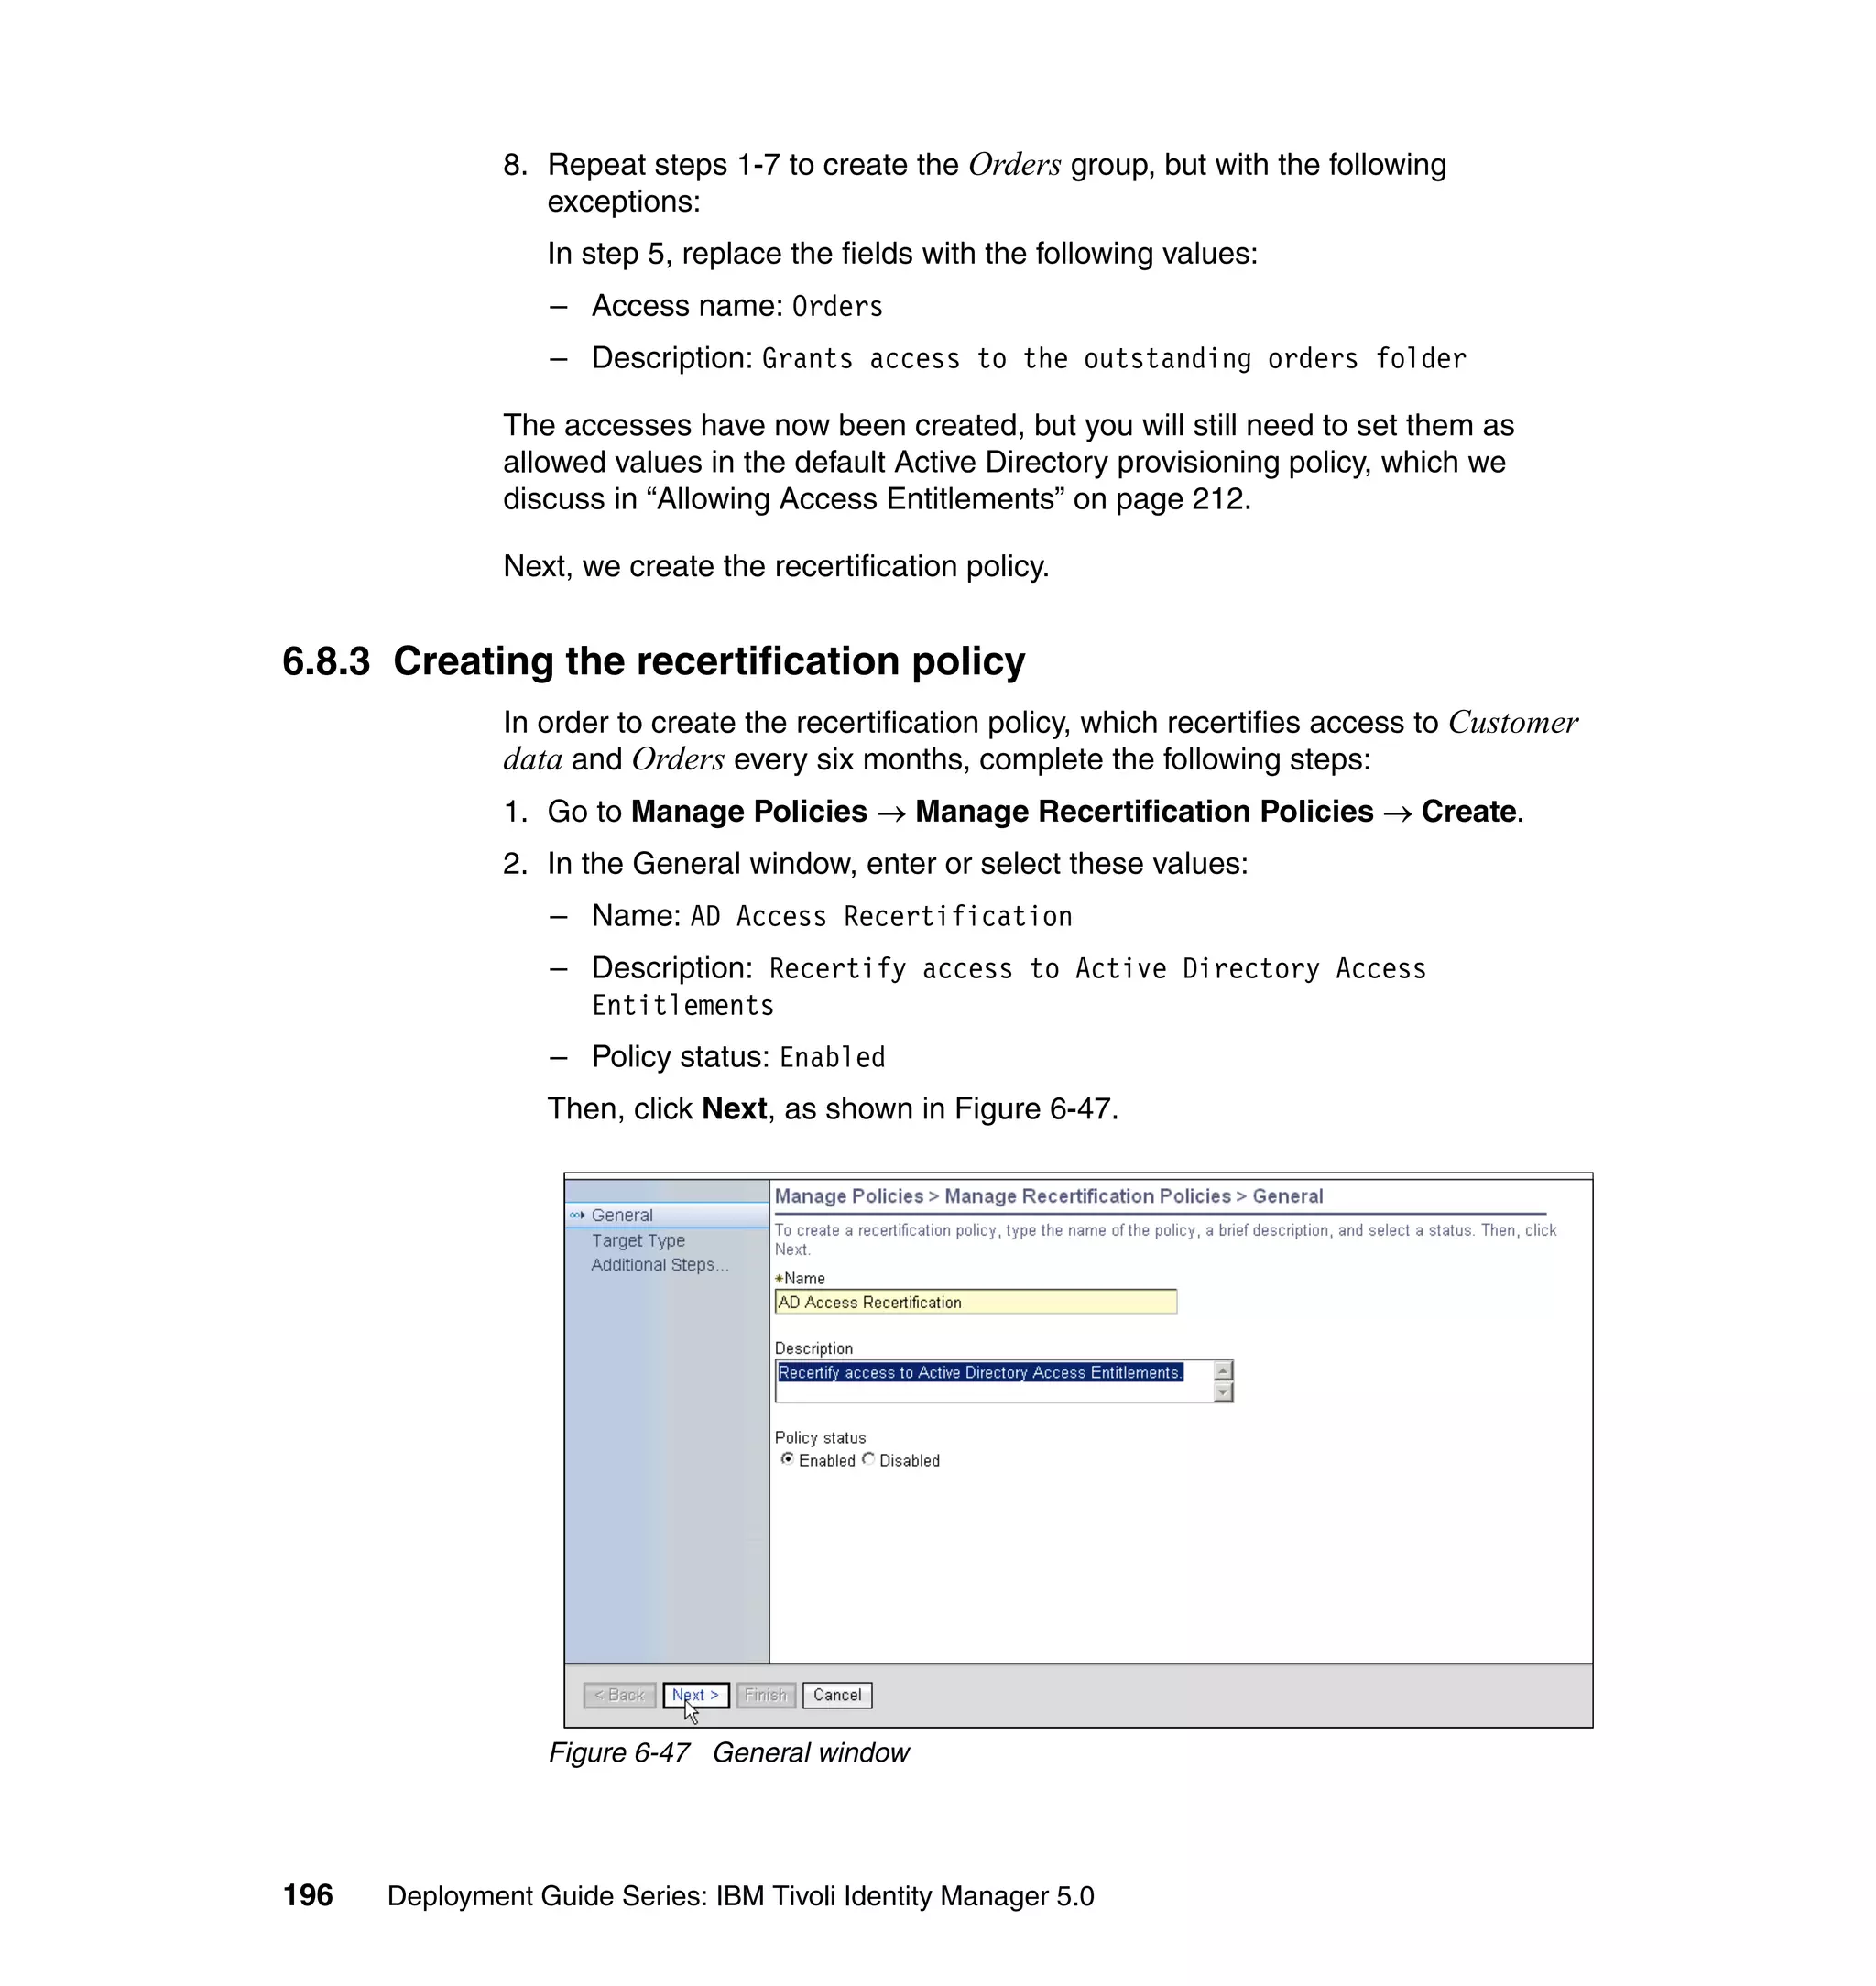
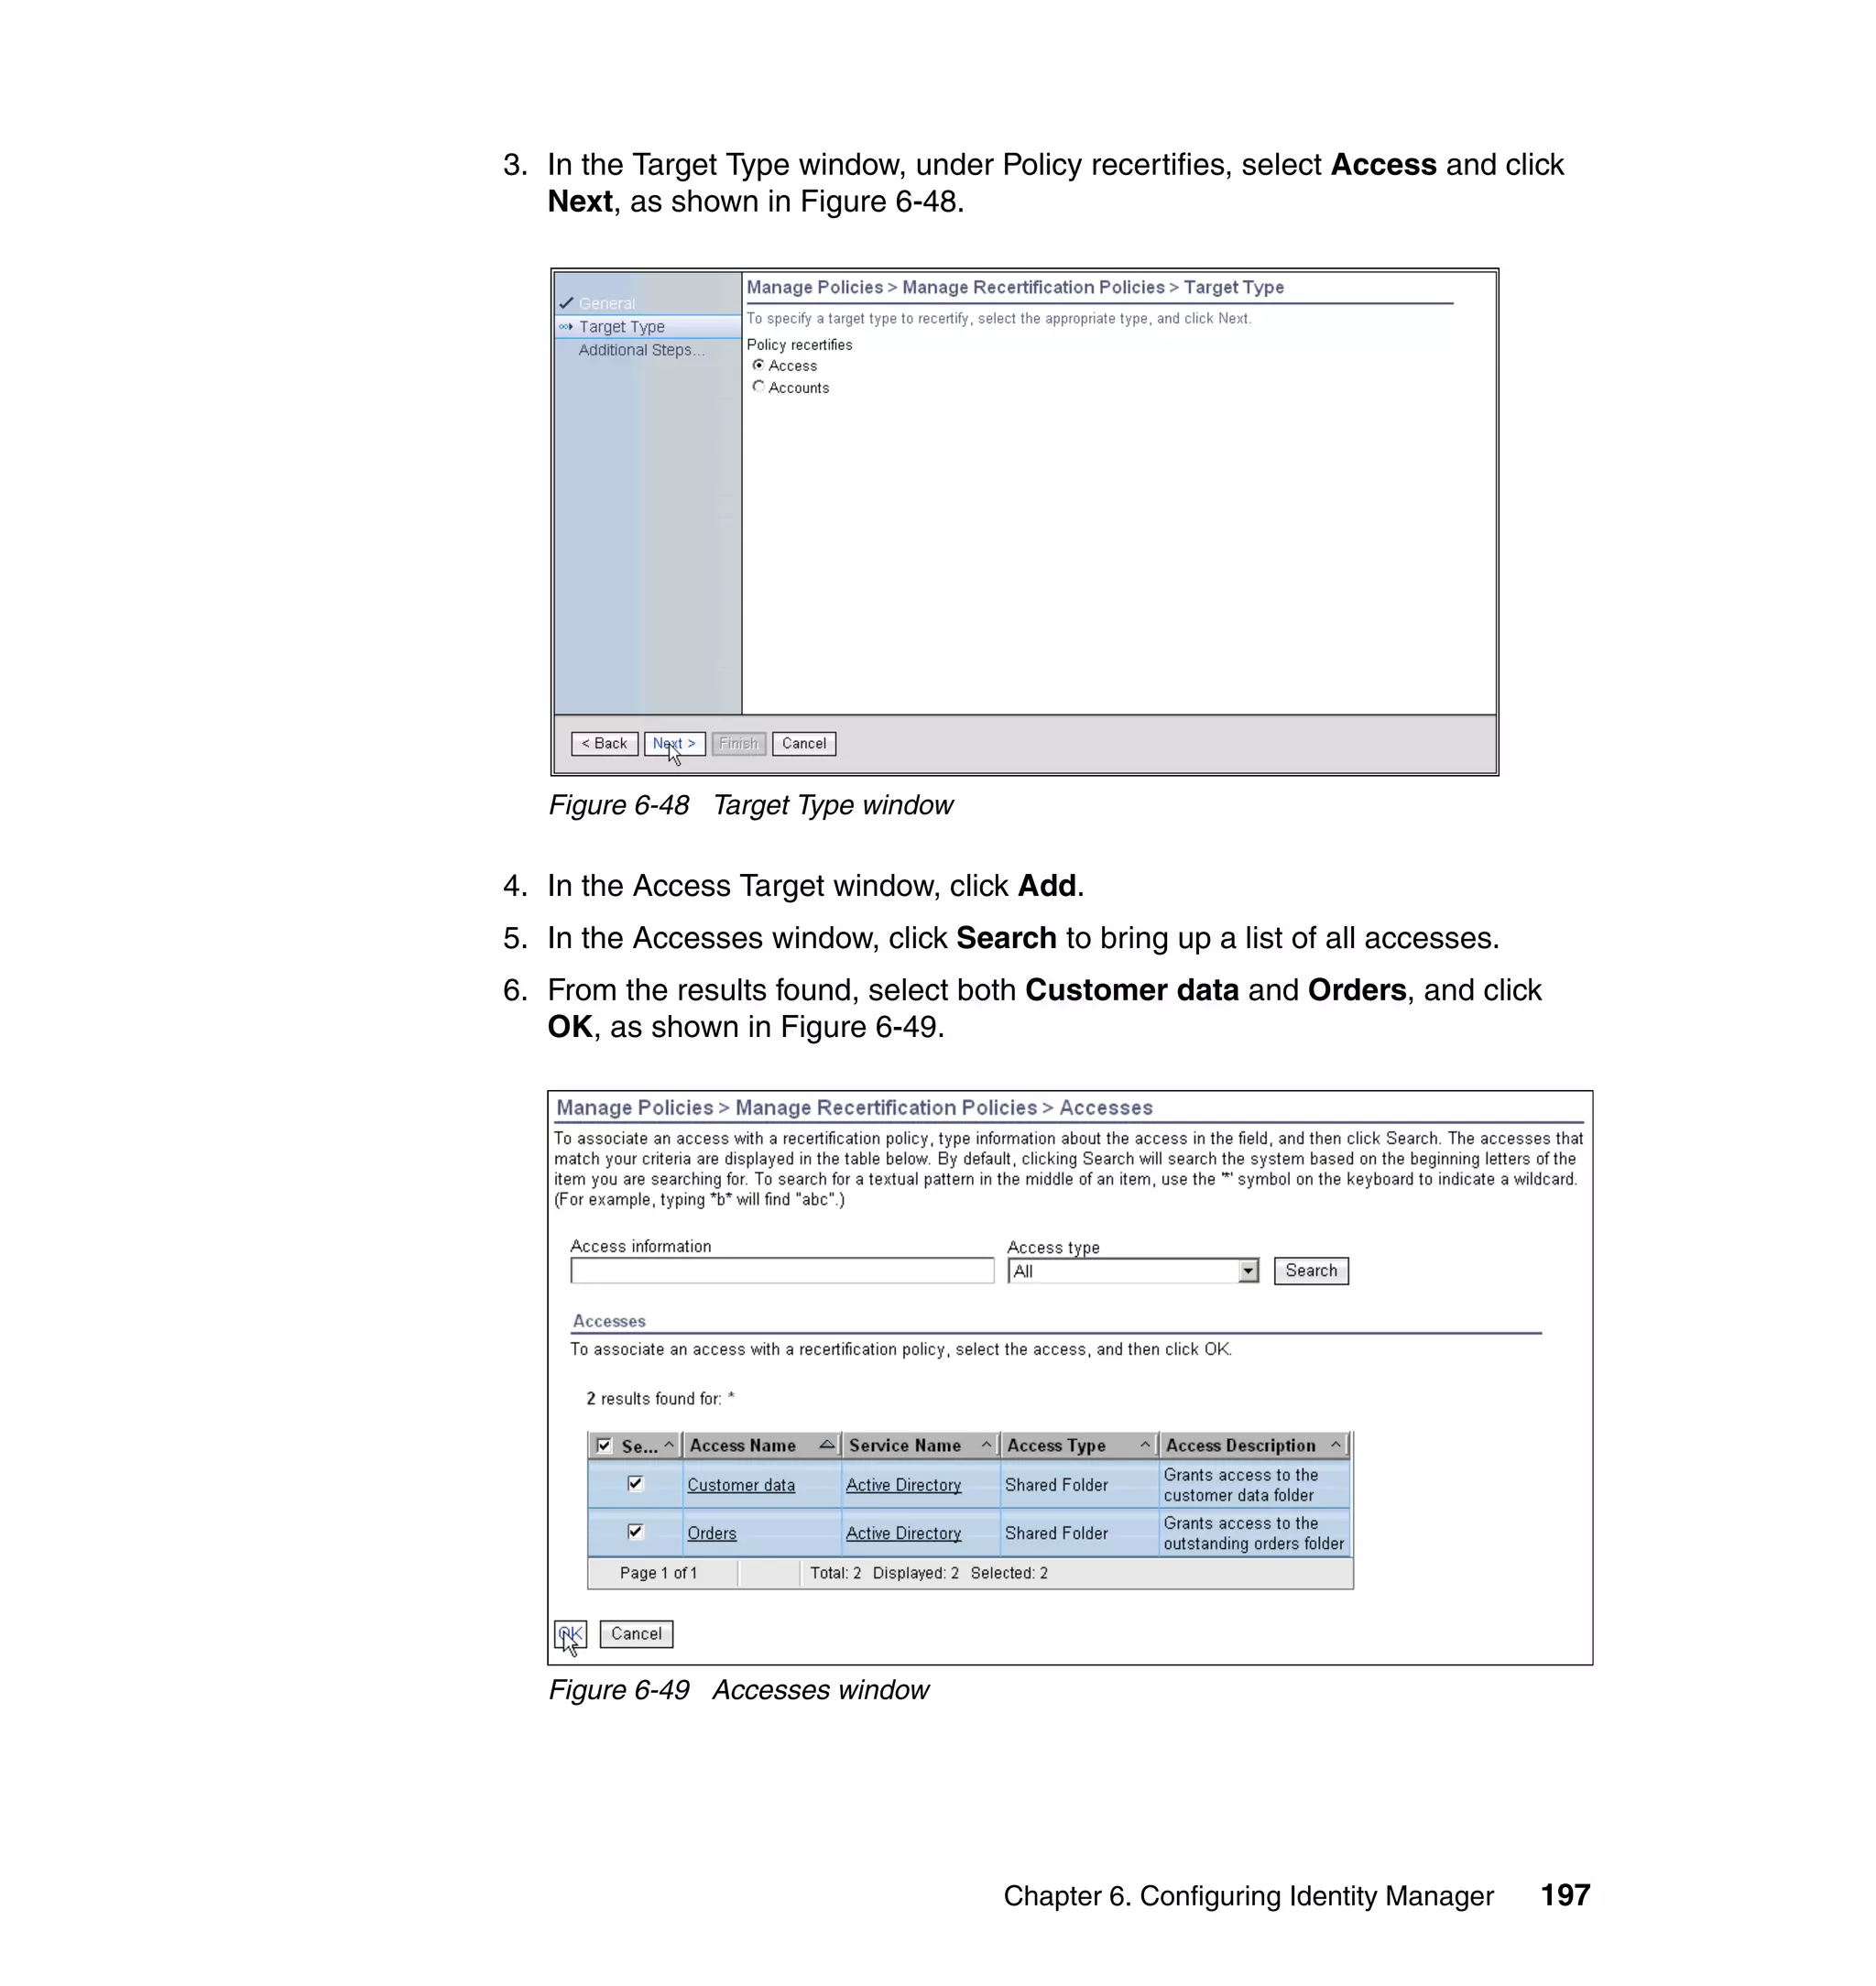
This document provides a complete guide for planning and deploying IBM Tivoli Identity Manager 5.0. It includes guidance on the business context for identity management, planning a client engagement, profiling the client environment, and designing an identity management solution. The guide covers topics such as centralized user management, access control models, organizational structure, policies, and integrating with existing systems. It is intended to help consultants and customers successfully implement an identity management project.