Delivery Date Scheduler Magento Extension - User Guide
•
1 like•269 views

Magento Delivery Date Scheduler extension helps your customers decide the order's/product's delivery dates. This can improve the delivery processes and online orders can be placed on time at particular dates. https://store.biztechconsultancy.com/magento-delivery-date-scheduler.htm

Recommended
Recommended
More Related Content
What's hot
Viewers also liked
Viewers also liked (18)
Similar to Delivery Date Scheduler Magento Extension - User Guide
Similar to Delivery Date Scheduler Magento Extension - User Guide (20)
More from Biztech Store
More from Biztech Store (19)
Recently uploaded
Recently uploaded (20)
Delivery Date Scheduler Magento Extension - User Guide
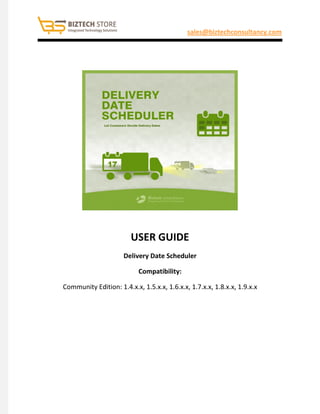
- 1. sales@biztechconsultancy.com USER GUIDE Delivery Date Scheduler Compatibility: Community Edition: 1.4.x.x, 1.5.x.x, 1.6.x.x, 1.7.x.x, 1.8.x.x, 1.9.x.x
- 2. 2 Index 1. Installation ............................................................................................................................................3 2. Installation (Custom Theme).................................................................................................................6 3. Extension Activation .............................................................................................................................7 4. Configuration ........................................................................................................................................9 5. Quick Notes .........................................................................................................................................17 6. Technical Support………………………………………………………………………………………………………………………….18
- 3. 3 1. Installation Step 1 Check Permissions Make sure the ''app'', ''js' and ''skin'' directories of your Magento and all directories inside it have full written permissions or set permissions on the each directory equal to 777 or 0777. Important! Change all permissions back after installation. Read more about permission at http://www.magentocommerce.com/wiki/magento_filesystem_permissions Step 2 Disable Compilation Log into Magento Admin Panel and go to System → Tools → Compilation and disable the compilation. After step 5 you can run the compilation process again. Step 3 Upload Files Upload all folders from the extension package to the installation directory of your Magento software using an FTP client.
- 4. 4 Step 4 Clear cache Go to System → Cache Management. Clear the store cache. Step 5 Re-login Log out and log back into Magento Admin Panel. Step 6 Use Extension Go to System → Configuration. In the left column you will see the new tab – Biztech Extensions.
- 5. 5
- 6. 6 2. Installation (Custom Theme) Please do the next steps after the Installation: Step 1 Copy layout and template folders from app/design/frontend/default/default folder to app/design/frontend/your_package/your_theme folder. Step 2 Copy css and images folders from skin/frontend/ default/default folder to skin/frontend/ your_package /your_theme folder.
- 7. 7 3. Extension Activation Step 1 Copy an activation key Copy the activation key from the Order Confirmation Email. OR Log in into your account at http://store.biztechconsultancy.com website using the e- mail and password that you provided at checkout process. Go to Downloadable Options and copy the activation key for the Delivery Date Scheduler extension. Step 2 Activate an extension Log into Magento Admin Panel and go to System → Configuration → Biztech Extensions / Delivery date Activation and enter the activation key in the ''Activation Key'' field for the Delivery Date Scheduler extension then click the “Save Config”.
- 8. 8 Step 3 Select Websites When you enter and save the key it will be verified on our server and you can select the websites where you need to use the Delivery Date Scheduler extension. Click the ''Save Config'' button after making your selections. You are now ready to use the Delivery Date Scheduler extension. Now, Delivery Date Scheduler got activated! You just have to set configurations.
- 9. 9 4. Configuration Configuration Please follow the below steps to enable Delivery Date Scheduler. Go to system->configuration. In the left column you will see the tab Biztech Extensions -> Delivery Date. Enabled: Select "Yes" to enable the Delivery Date extension. The extension is disabled by default. Enabled to Admin: Select “Yes” to let admin select the delivery date. Enabled For Checkout With Multiple Address: You can enable this feature for checkout with multiple address. Display At: On which step of shipping arrival date should be display, whether it is on shipping method page or order review page. Show delivery schedule in: Set “Calendar View” to display calendar and set “Time Slot View” to display time slots for delivery date selection.
- 10. 10 Make Delivery Date Mandatory: Set “Yes” to make delivery date as required field. Label for Delivery Date: Enter text to display as Label for delivery date in front end. Label for Delivery Date Comments: Enter text to display as Label for delivery date comment in front end. Show Additional Info: Select “Yes” to display additional information to customers. Additional info for Customers: You can add custom message to notify customers if any special instruction is there. Time Format: Define time format which will be displayed in frontend and admin panel. Date Format: Defined date format will be displayed in frontend and admin panel. Enable Time In Calendar: Select "Yes" to enable the Time in calendar. Minimum interval of days between the order and delivery date: Mention minimum number of interval days between order place date and delivery date. Do You Want Email Notification? : Select ‘Yes’ for getting email notification for shipment of an order on particular date. Email Notification Options: Define days when you want to get email notification for order shipment. Email Notification Id: An email will be send to defined email id (Note: You can define multiple email address by using comma separated E.g. test@gmail.com, dev@yahoo.com)
- 11. 11 Day off settings Day Off: Select day when you don’t provide shipment, so customer can’t select that day. Single Day Off: Set and Disable single day offs (Festivals and national holidays). You can select date, month and year from the drop down button as per required. Period, from-To: Set and Disable Dates for a given period of time. When you have holidays for a couple of days then you can disable those dates.
- 12. 12 Time slot settings Add no. of Delivery days: Provide the no. of days for which you are going to provide delivery. Minimum interval of hours between the order placing time and delivery time: You can add the time interval in hours which will be the minimum gap between order placing and delivery time i.e. customer will not be able to select the delivery time lees than the hours you have entered. Add time slot: Admin can add the time slot in sorting order by entering the fields for “Start time”, “End time” and ” Price”. You can charge extra for specific time intervals. Disable time slot of day: Here you can select the “Day” and “Timeslot” which you want to disable i.e. customer will not be able to select that day and timeslot. Disable time slot of particular day: You can select the “Date”, “Month”, “Year” and “Timeslot” which you want to disable.
- 13. 13 Please refer the following settings to see the working of Delivery Date Scheduler. Admin can select preferable delivery date and time slot while placing an order from back end.
- 14. 14 Admin’s dashboard view for Delivery date calendar where he can see no of orders scheduled for a particular date with its details.
- 15. 15 Admin can filter orders by delivery dates.
- 16. 16 Admin can view the delivery date information in the order details page.
- 17. 17 5. Quick Notes Admin can also set the delivery date for customer while placing an order from admin side. Mentioned below is the code you need to use for displaying shipping arrival date and comment while placing an order from admin panel. echo$this->getLayout()->createBlock('deliverydate/deliverydate')- >setTemplate('deliverydate/date.phtml')->toHtml(); All Set! Now, you are ready to use extension.
- 18. 18 6. Technical Support We welcome all forms of customized Magento e-commerce queries and deliver tailor-made Magento e-store solution,given your distinct business needs! We provide all technical support! Get in touch filling in our online message form to contact our support team or shoot us an email at support@biztechconsultancy.com. Your IT Partner, With You Anytime , Anywhere! You may also like
- 19. 19 About of Biztech Consultancy We simplify your business,offering unique business solution in digital web and IT landscapes. Our core expertise includes Magento Expertise We are magento e-commerce specialist! Be it Store Development Customization Integration Maintenance Upgaration You can trust our expertise!