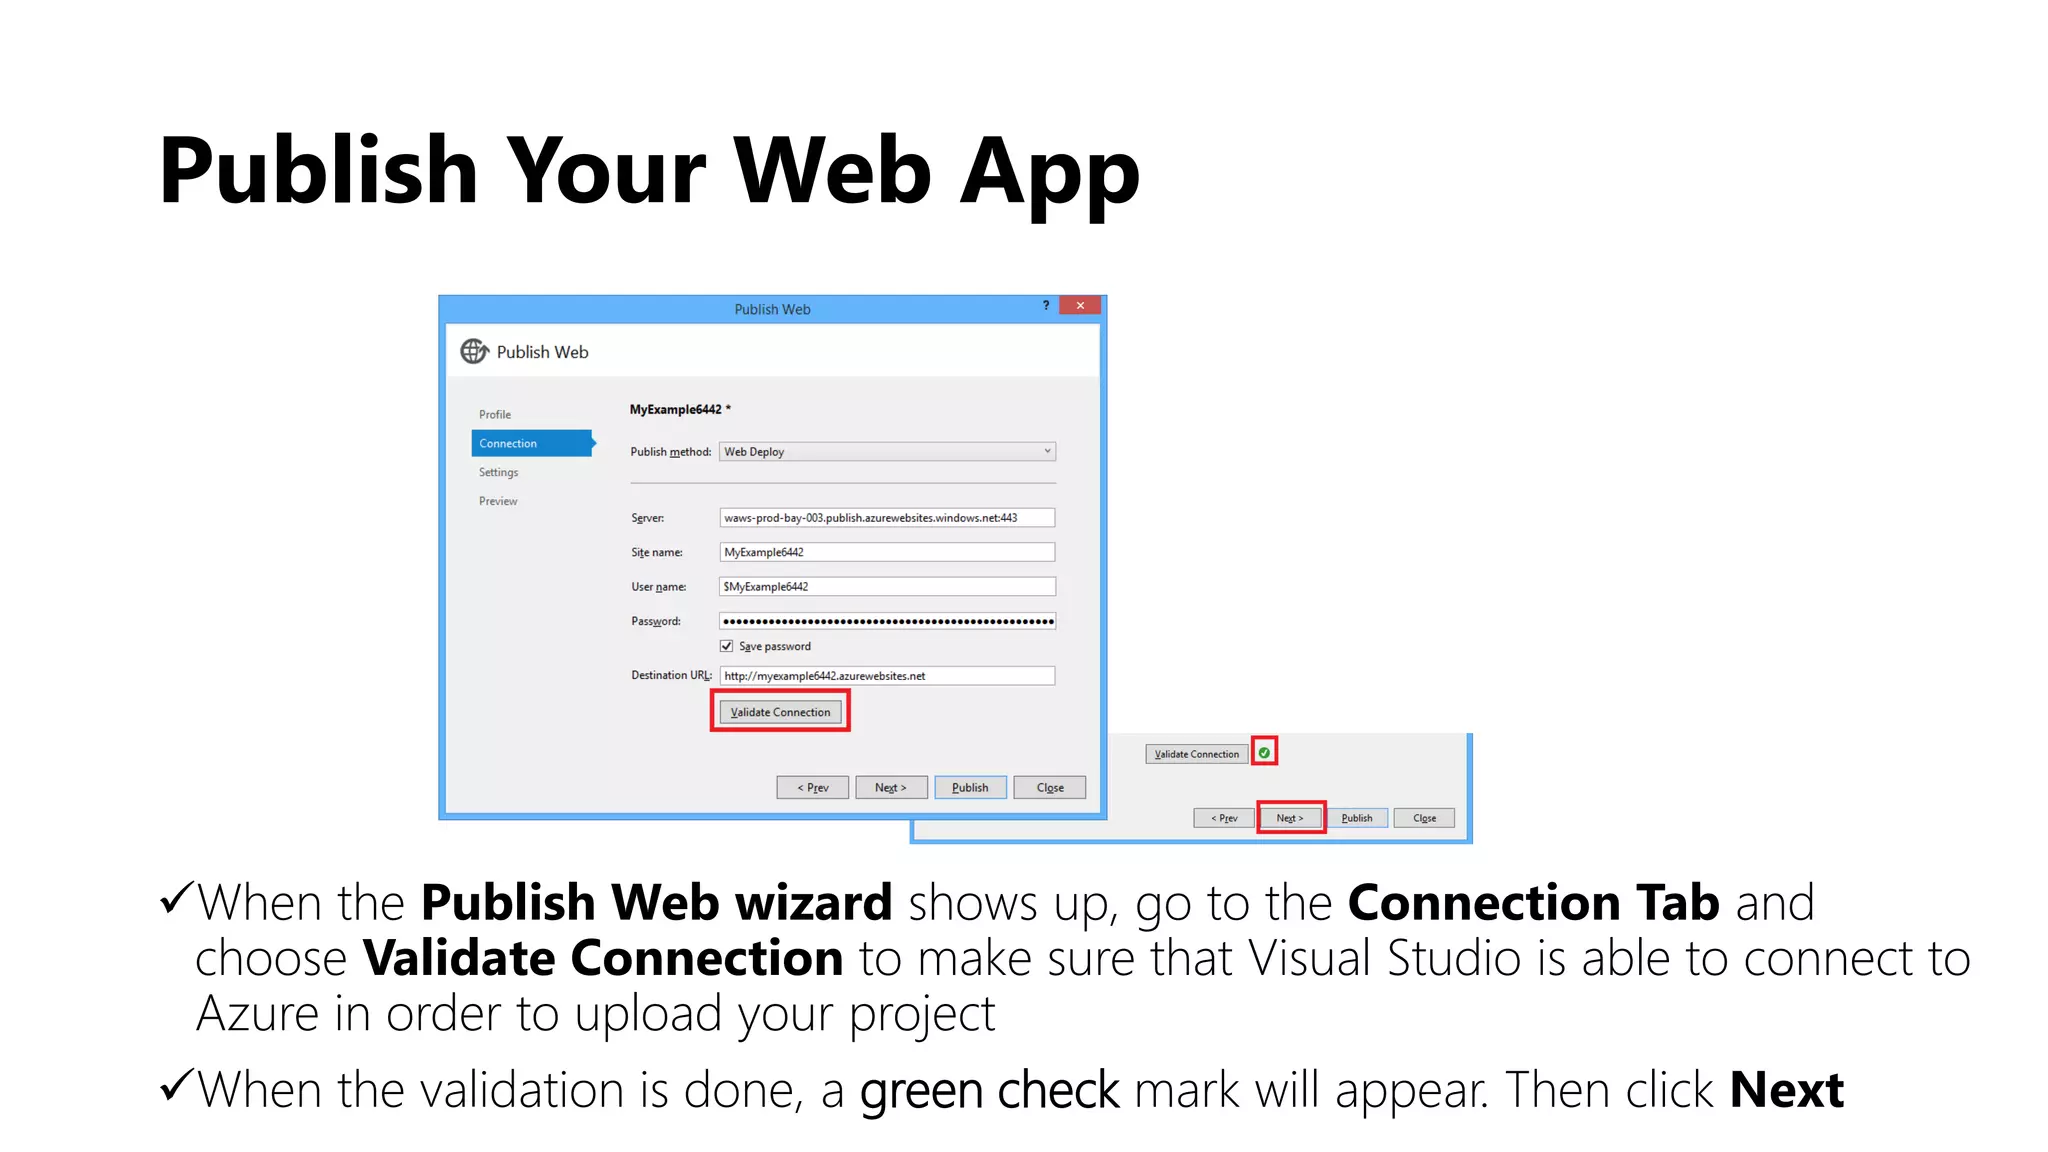
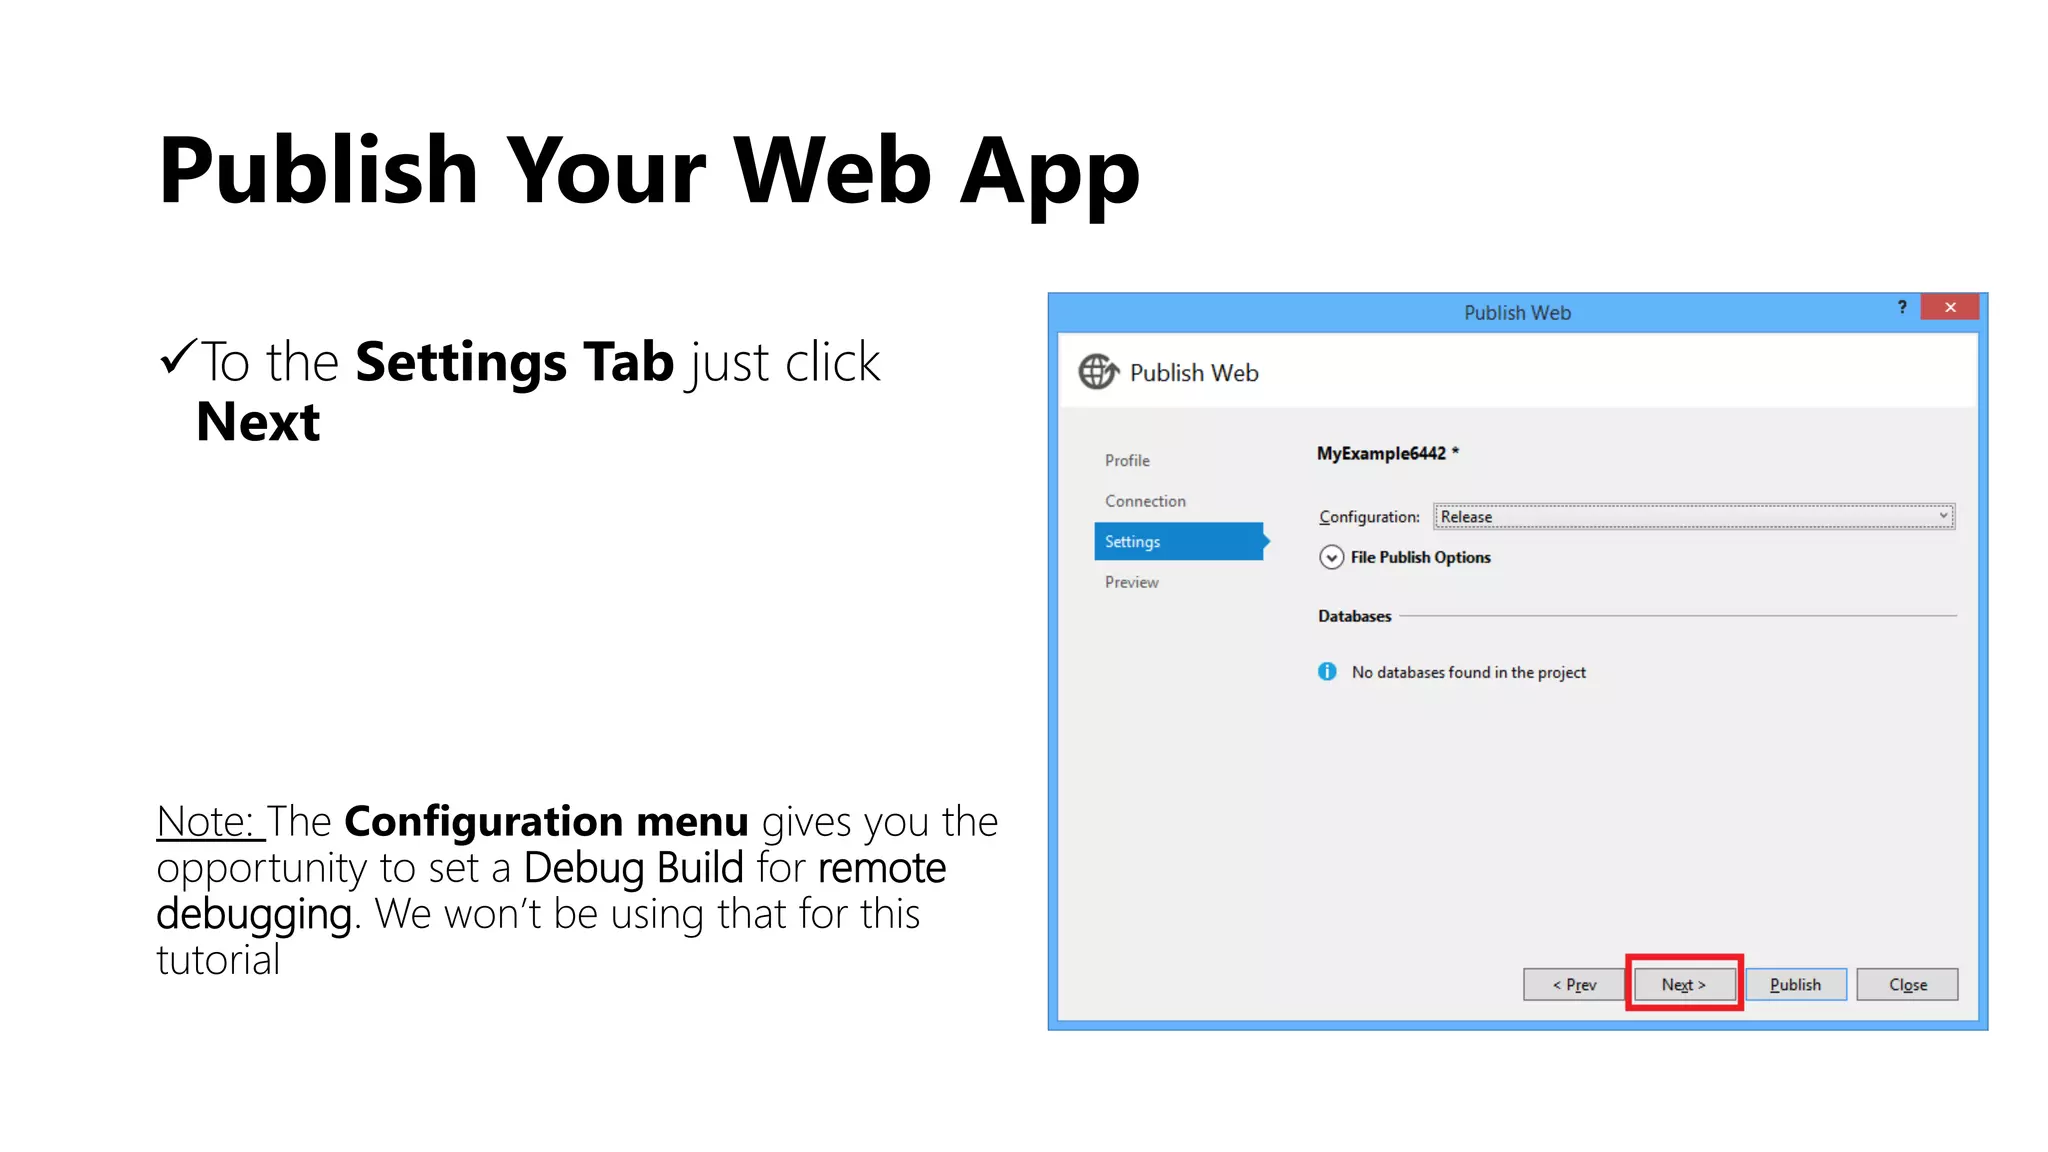
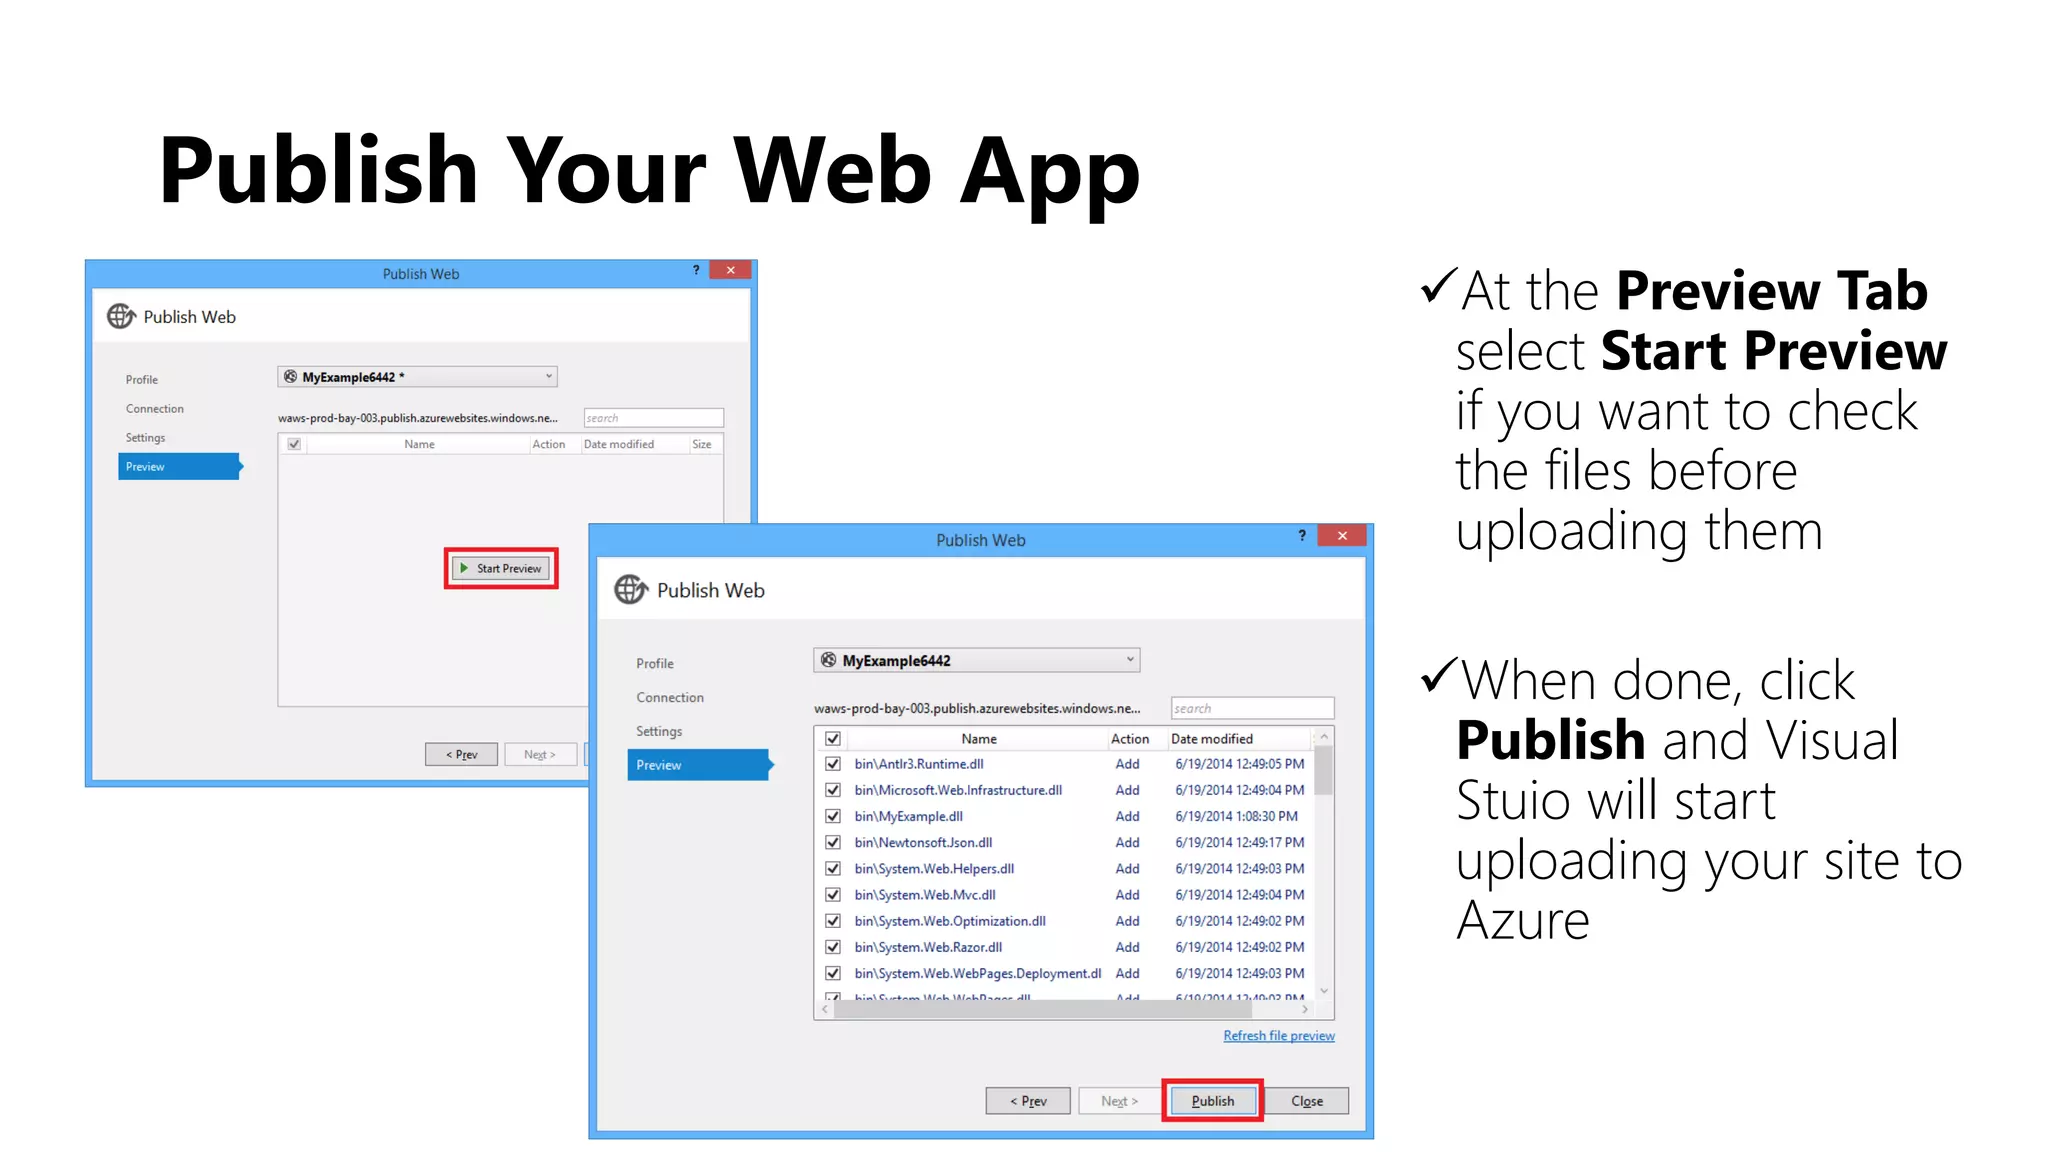
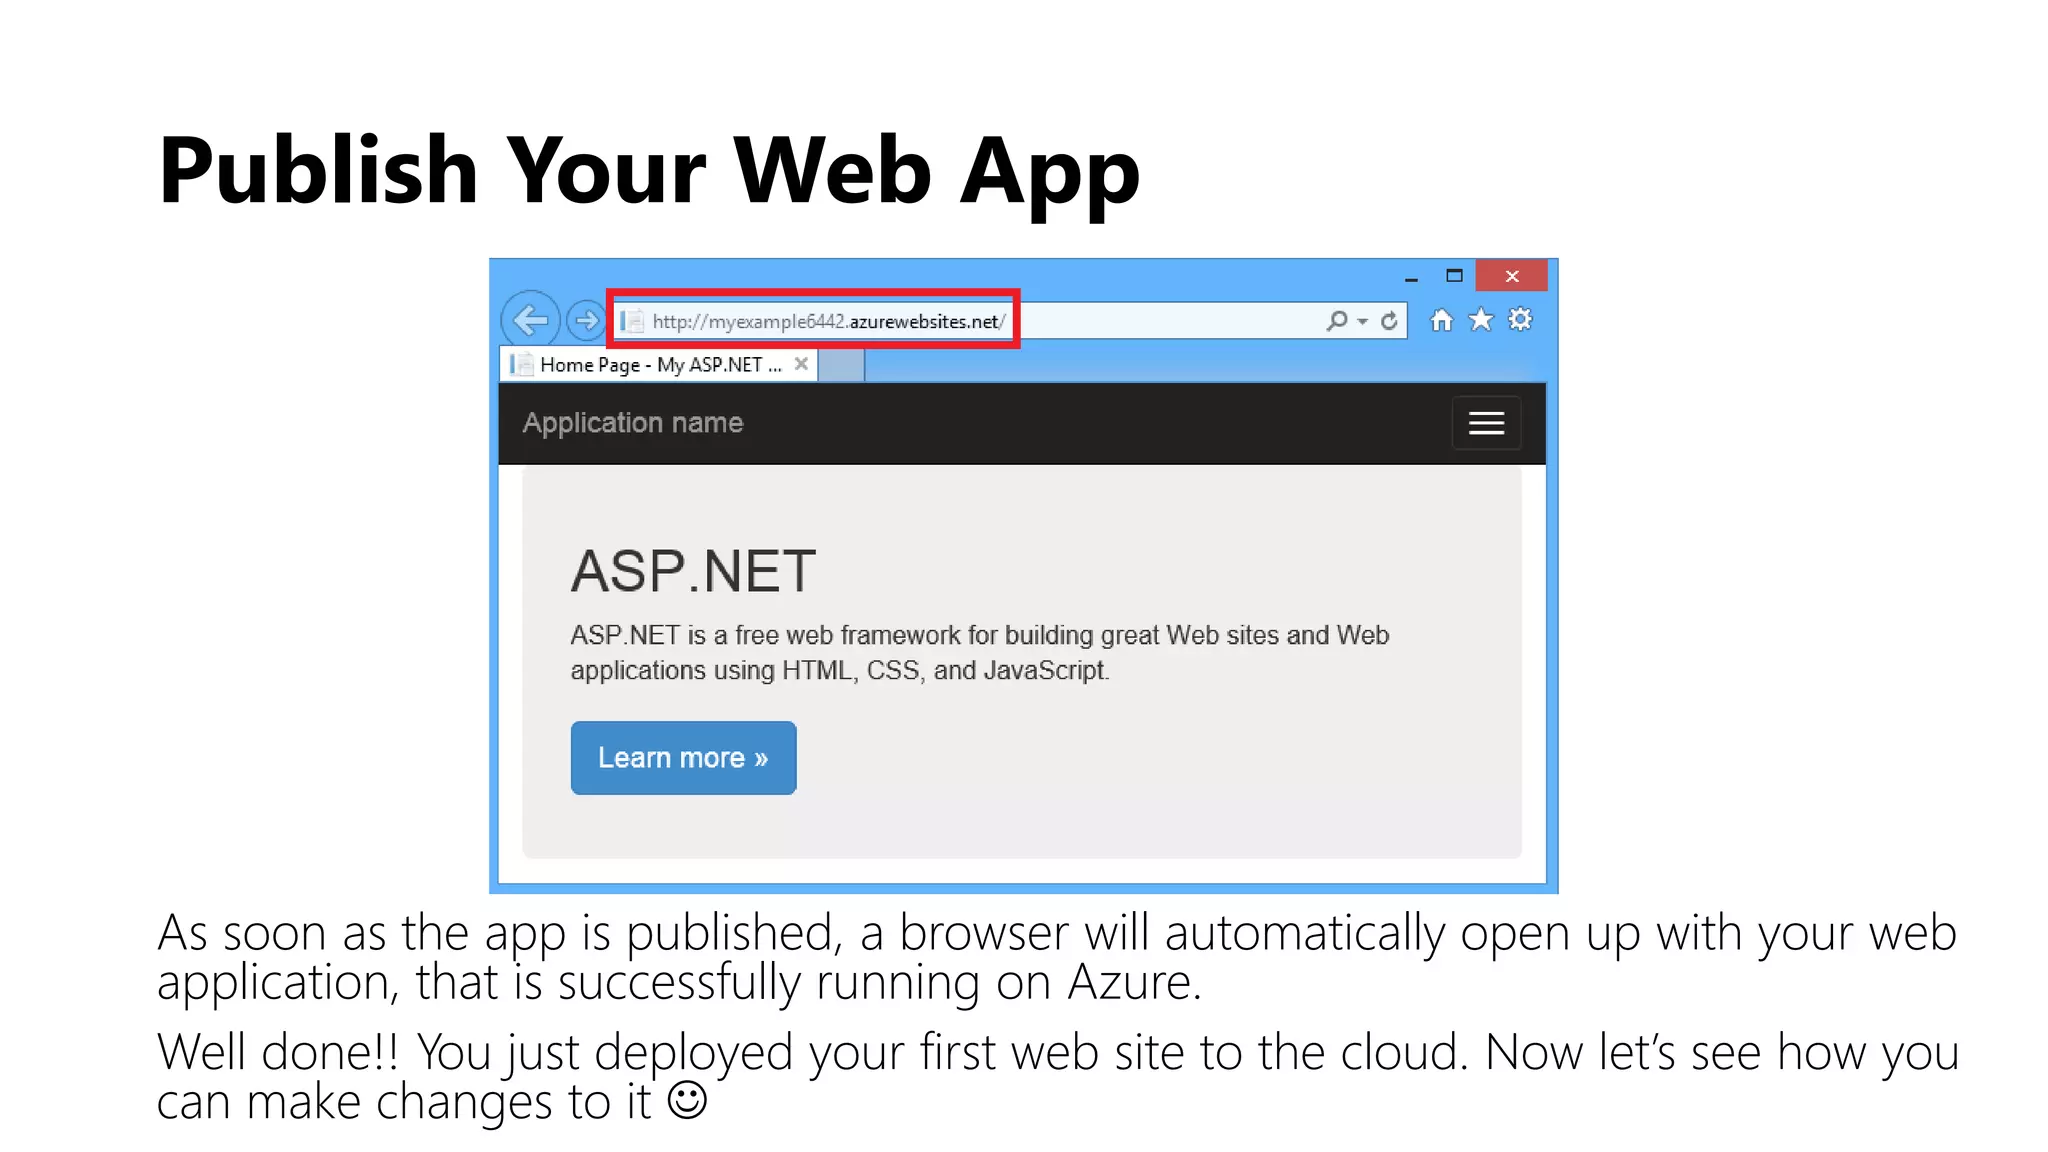
Download as PDF, PPTX


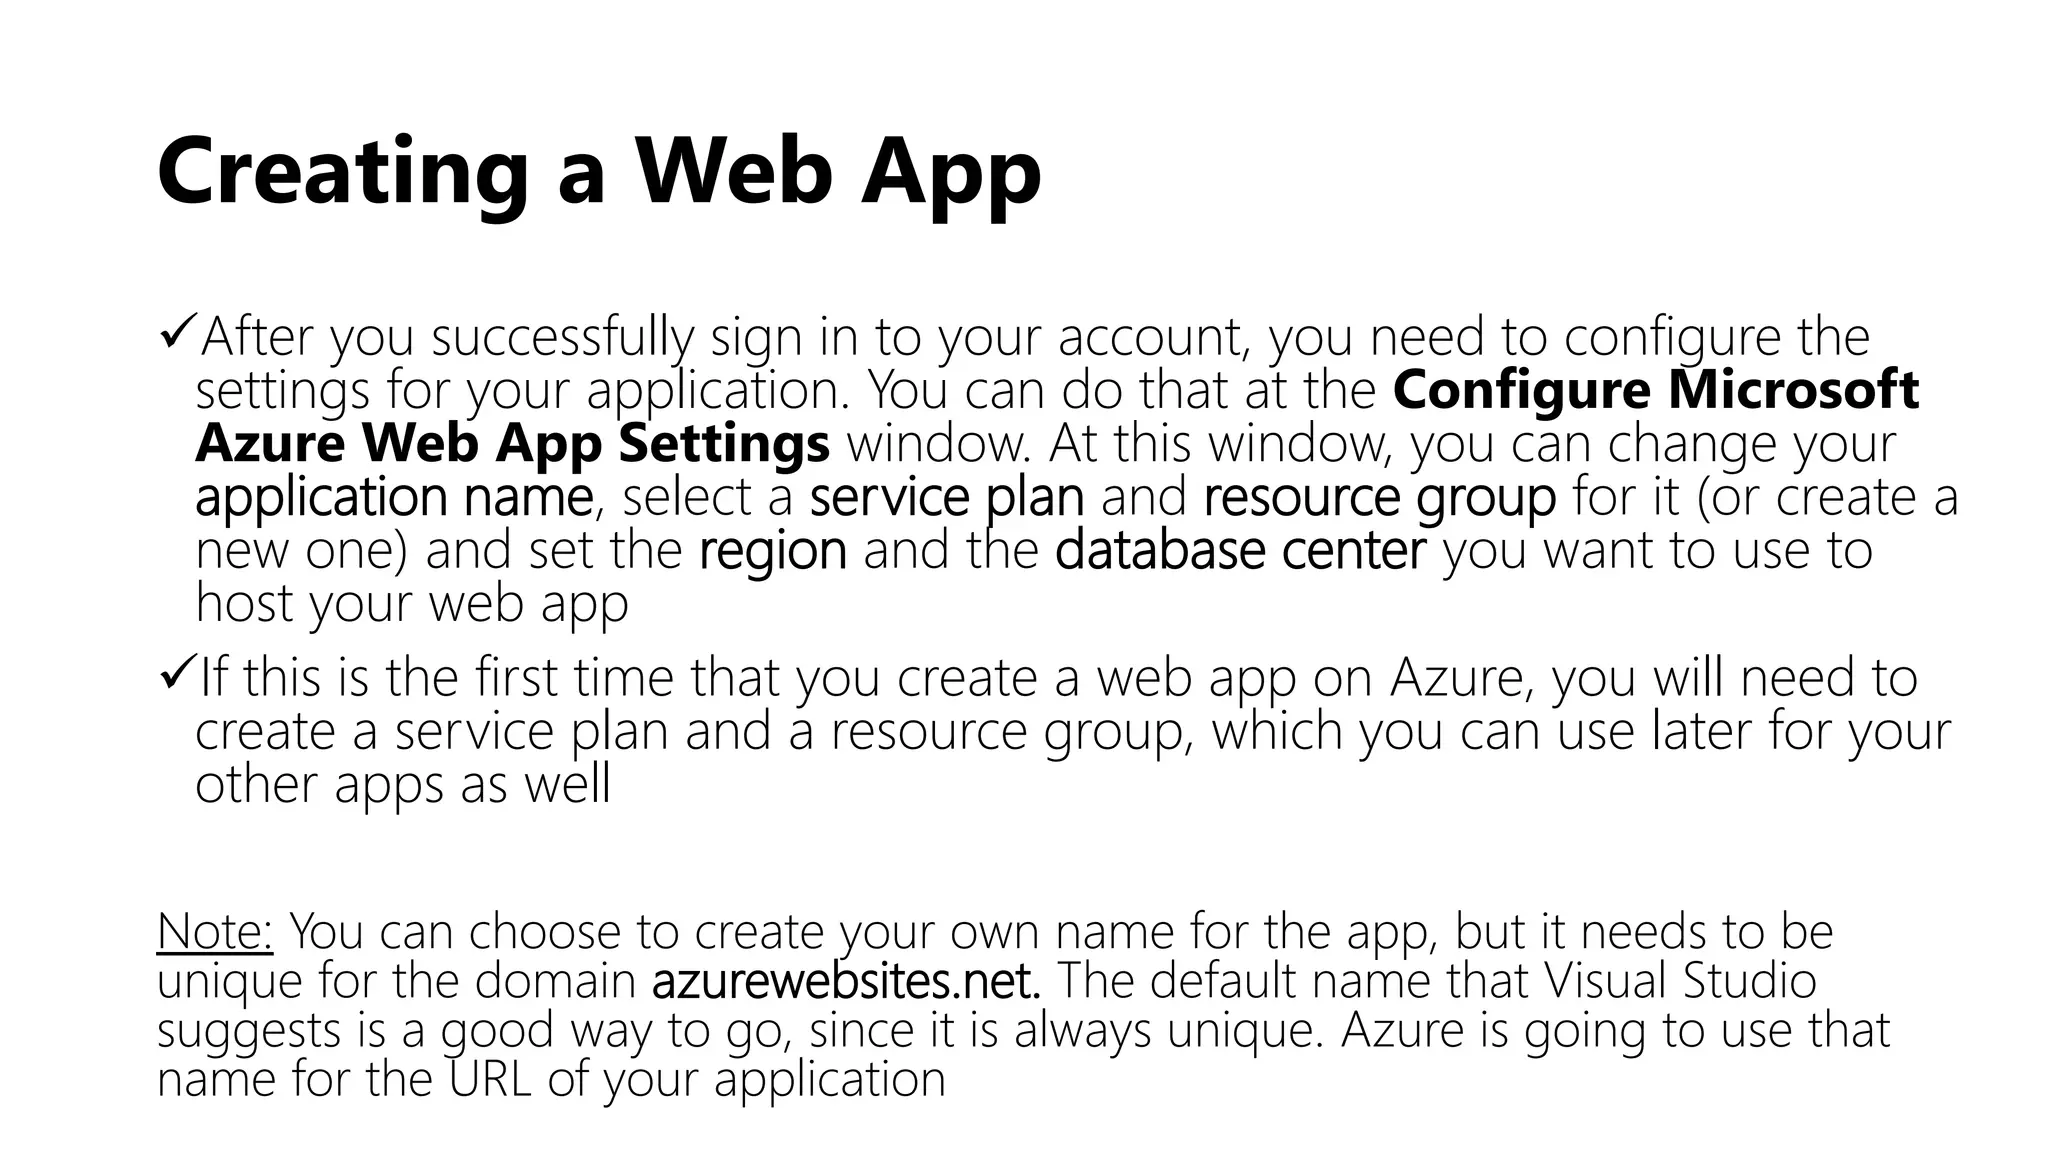
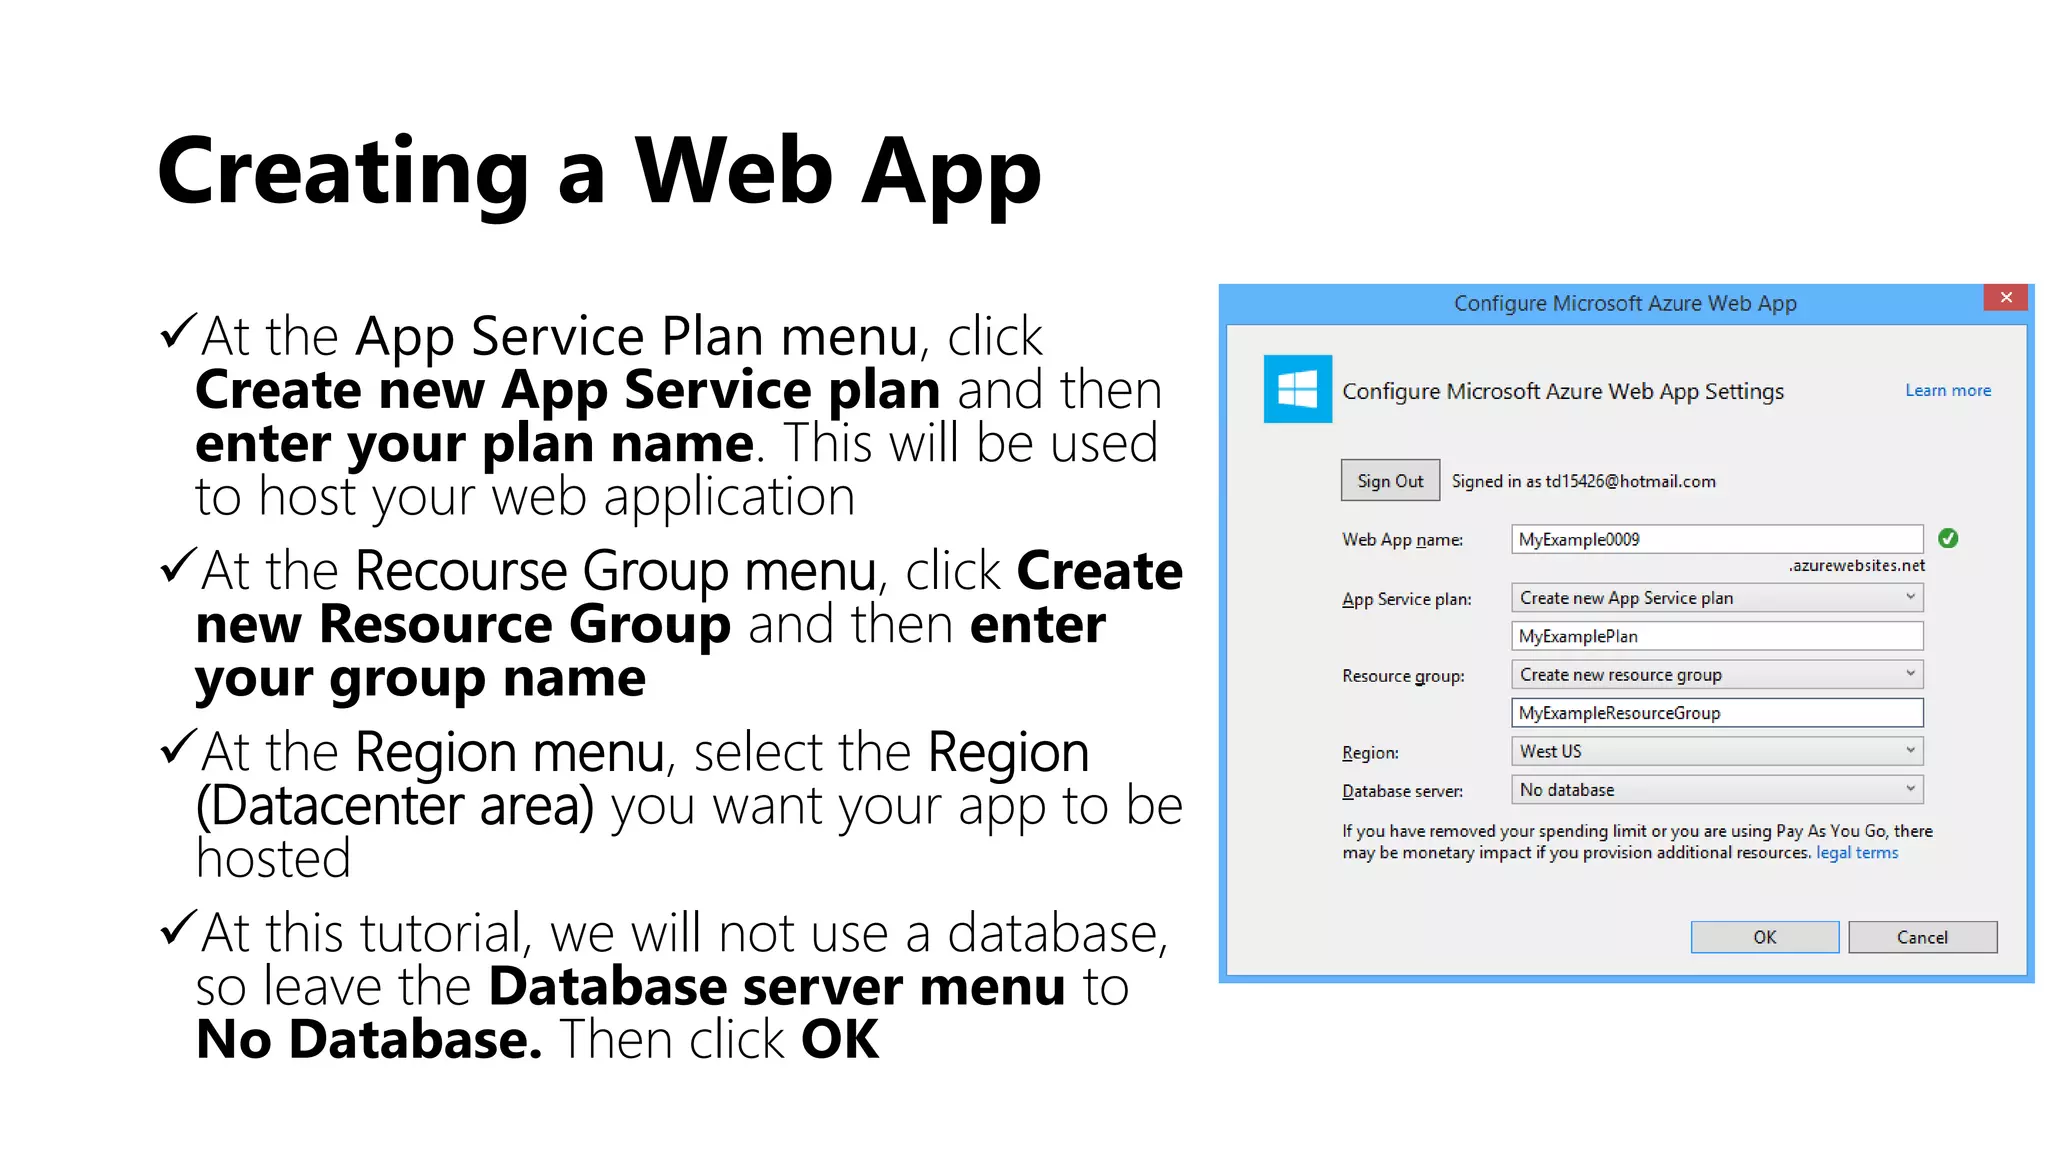
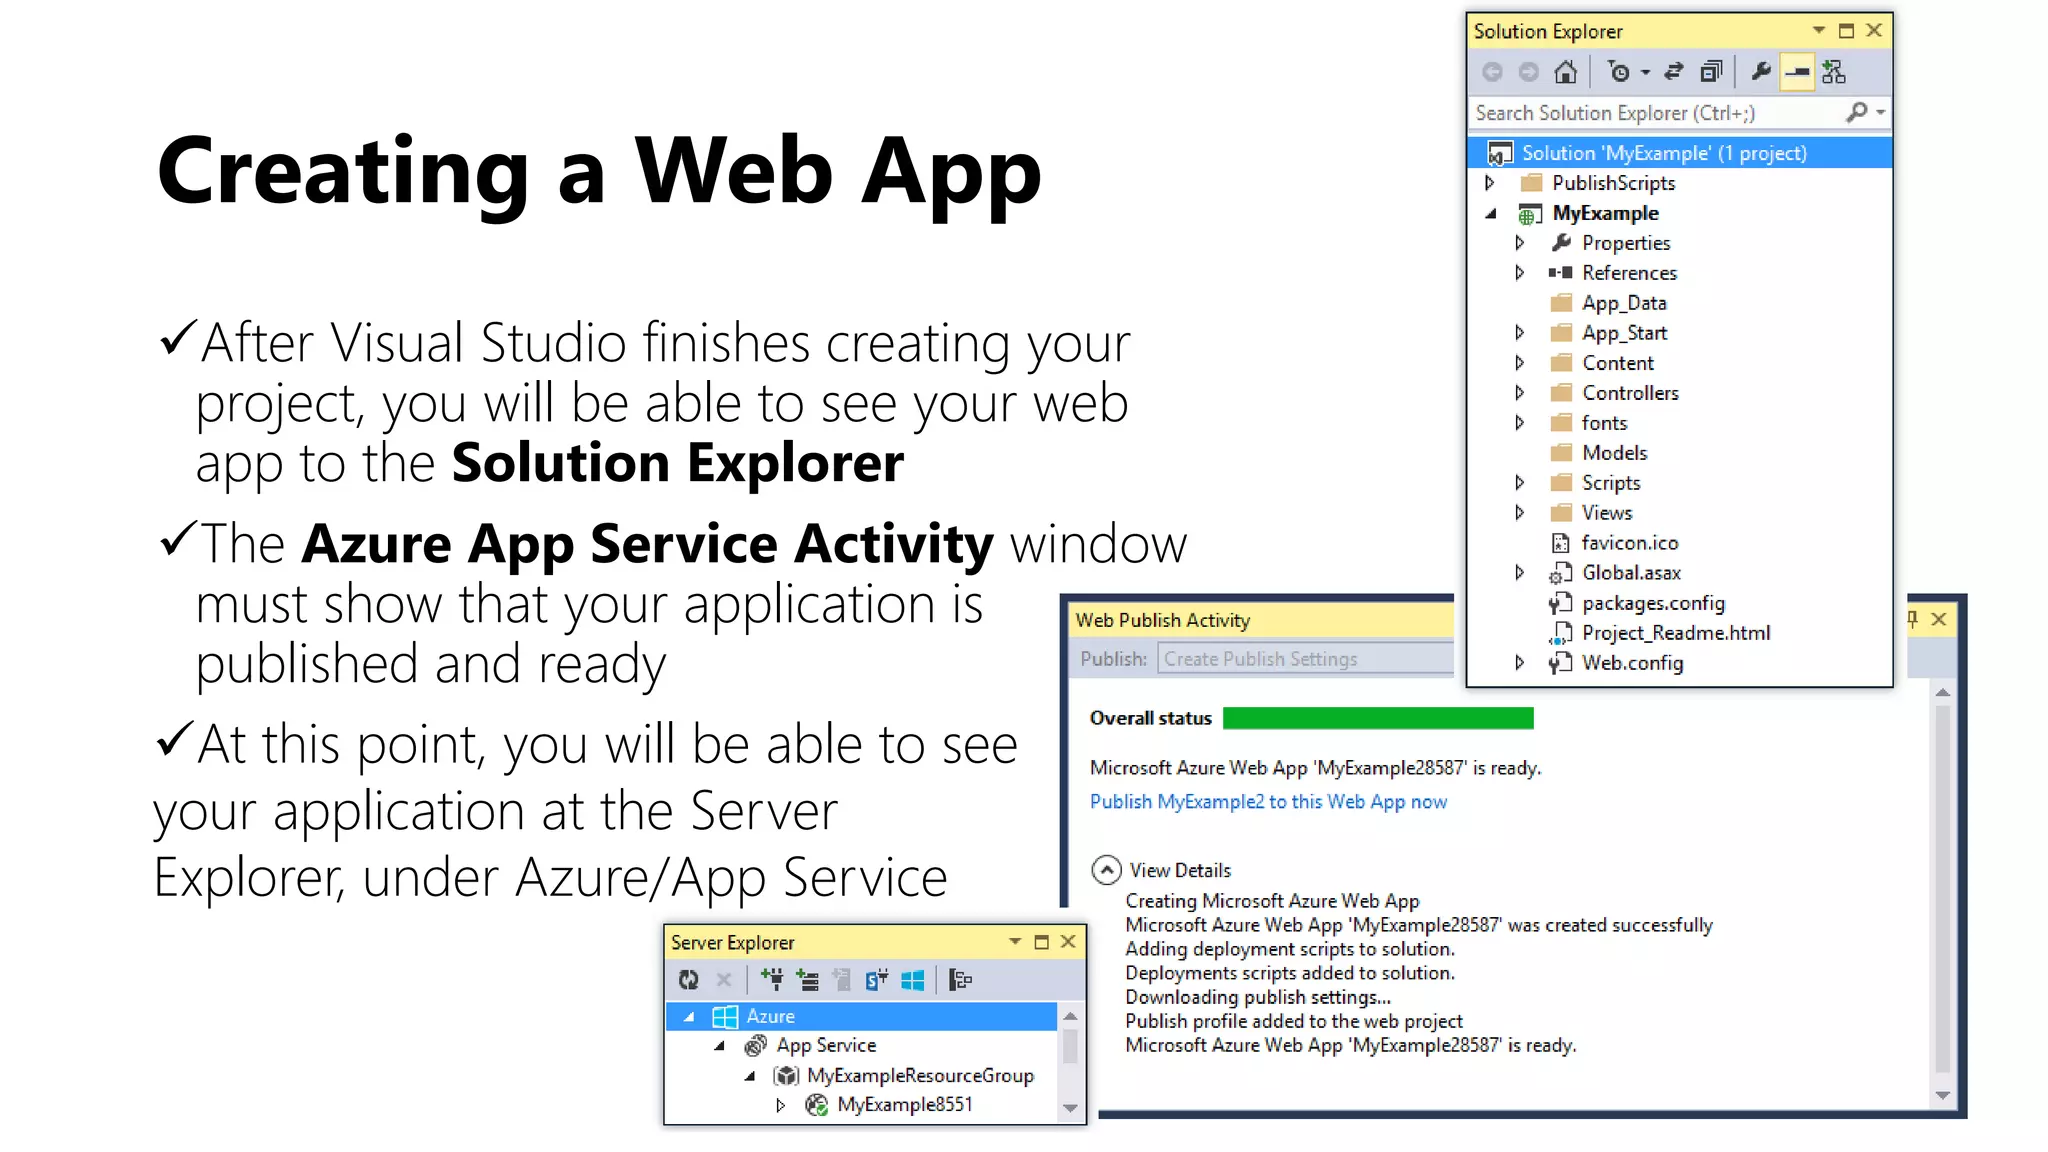
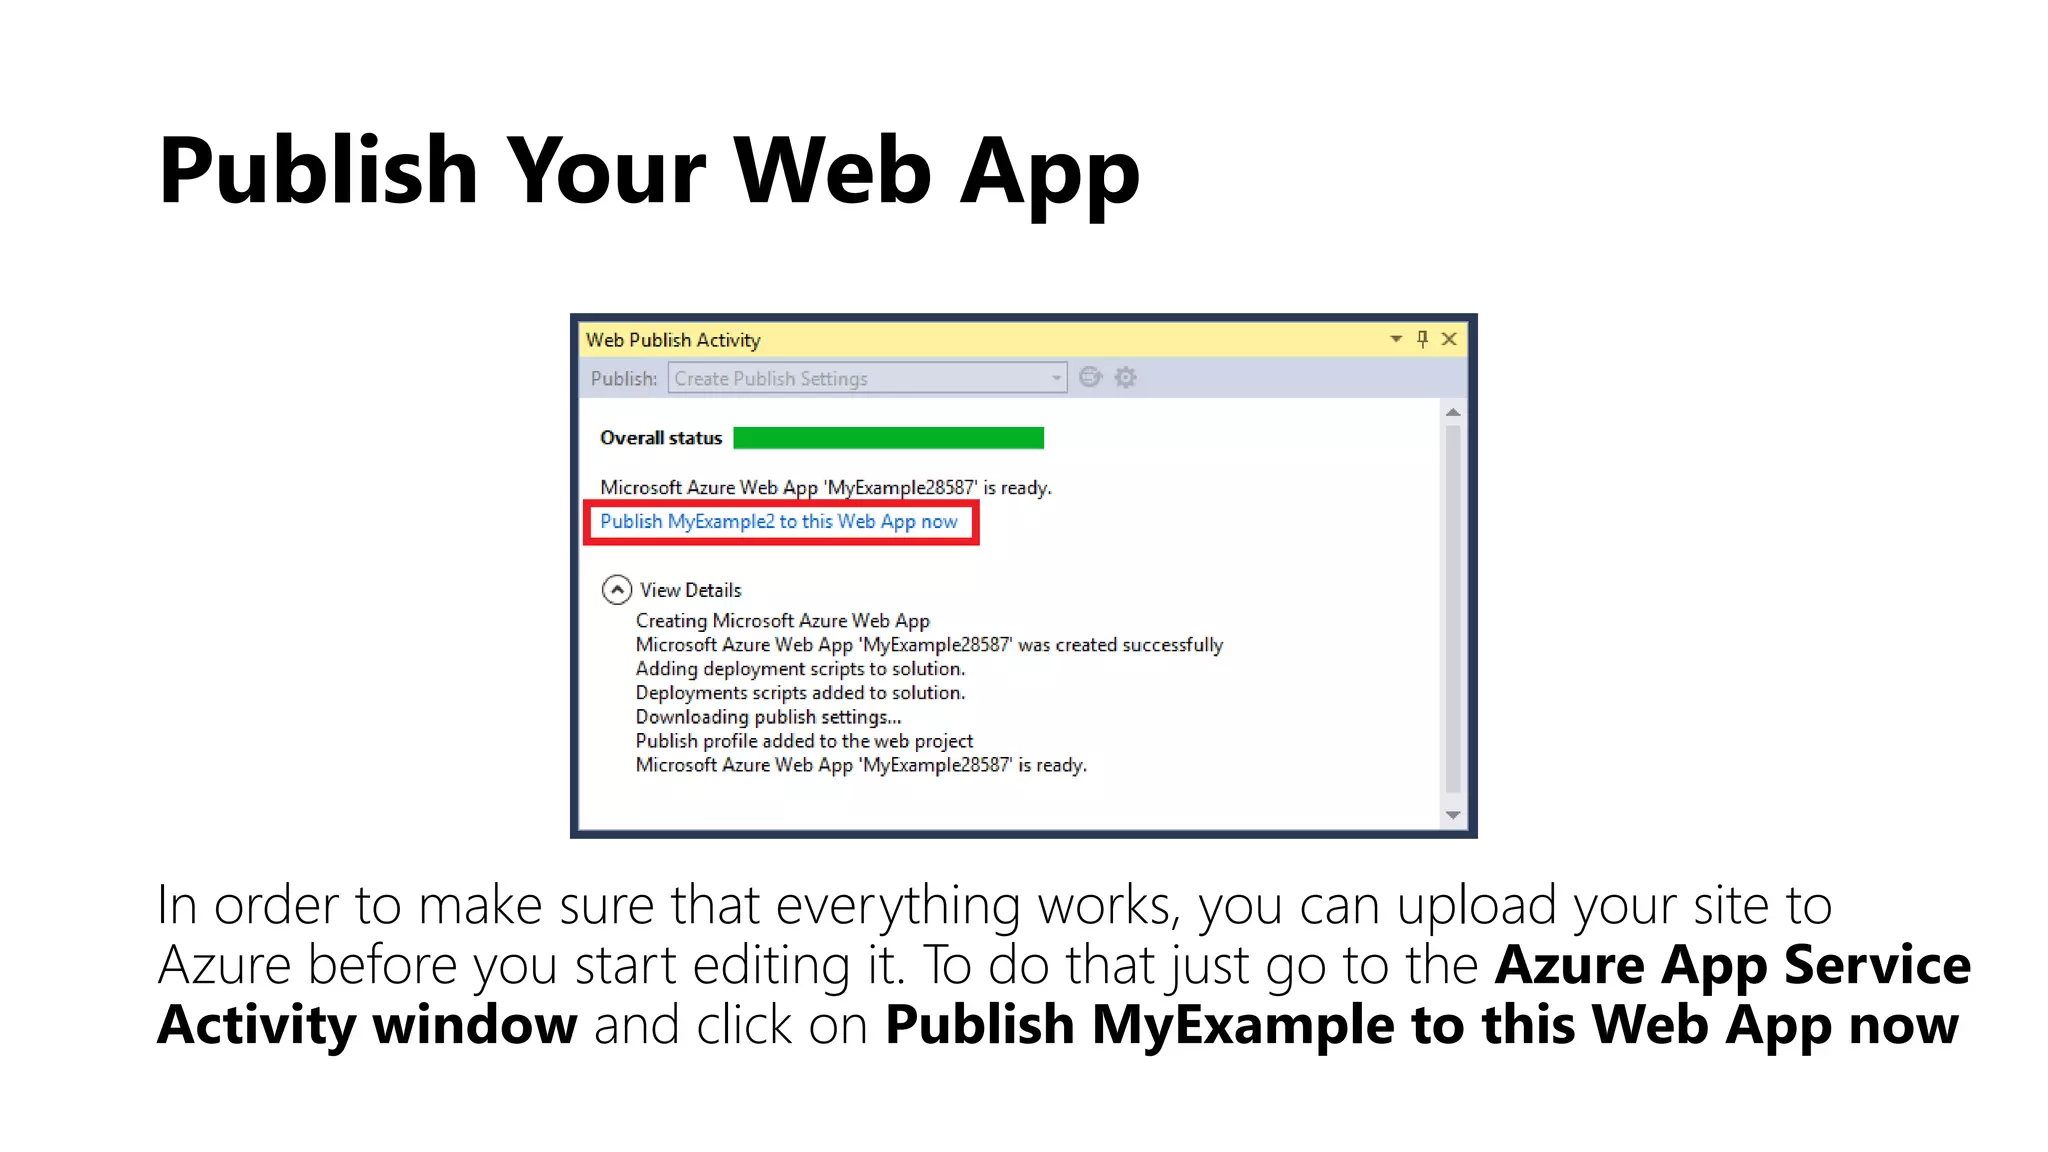
![Creating a Web App
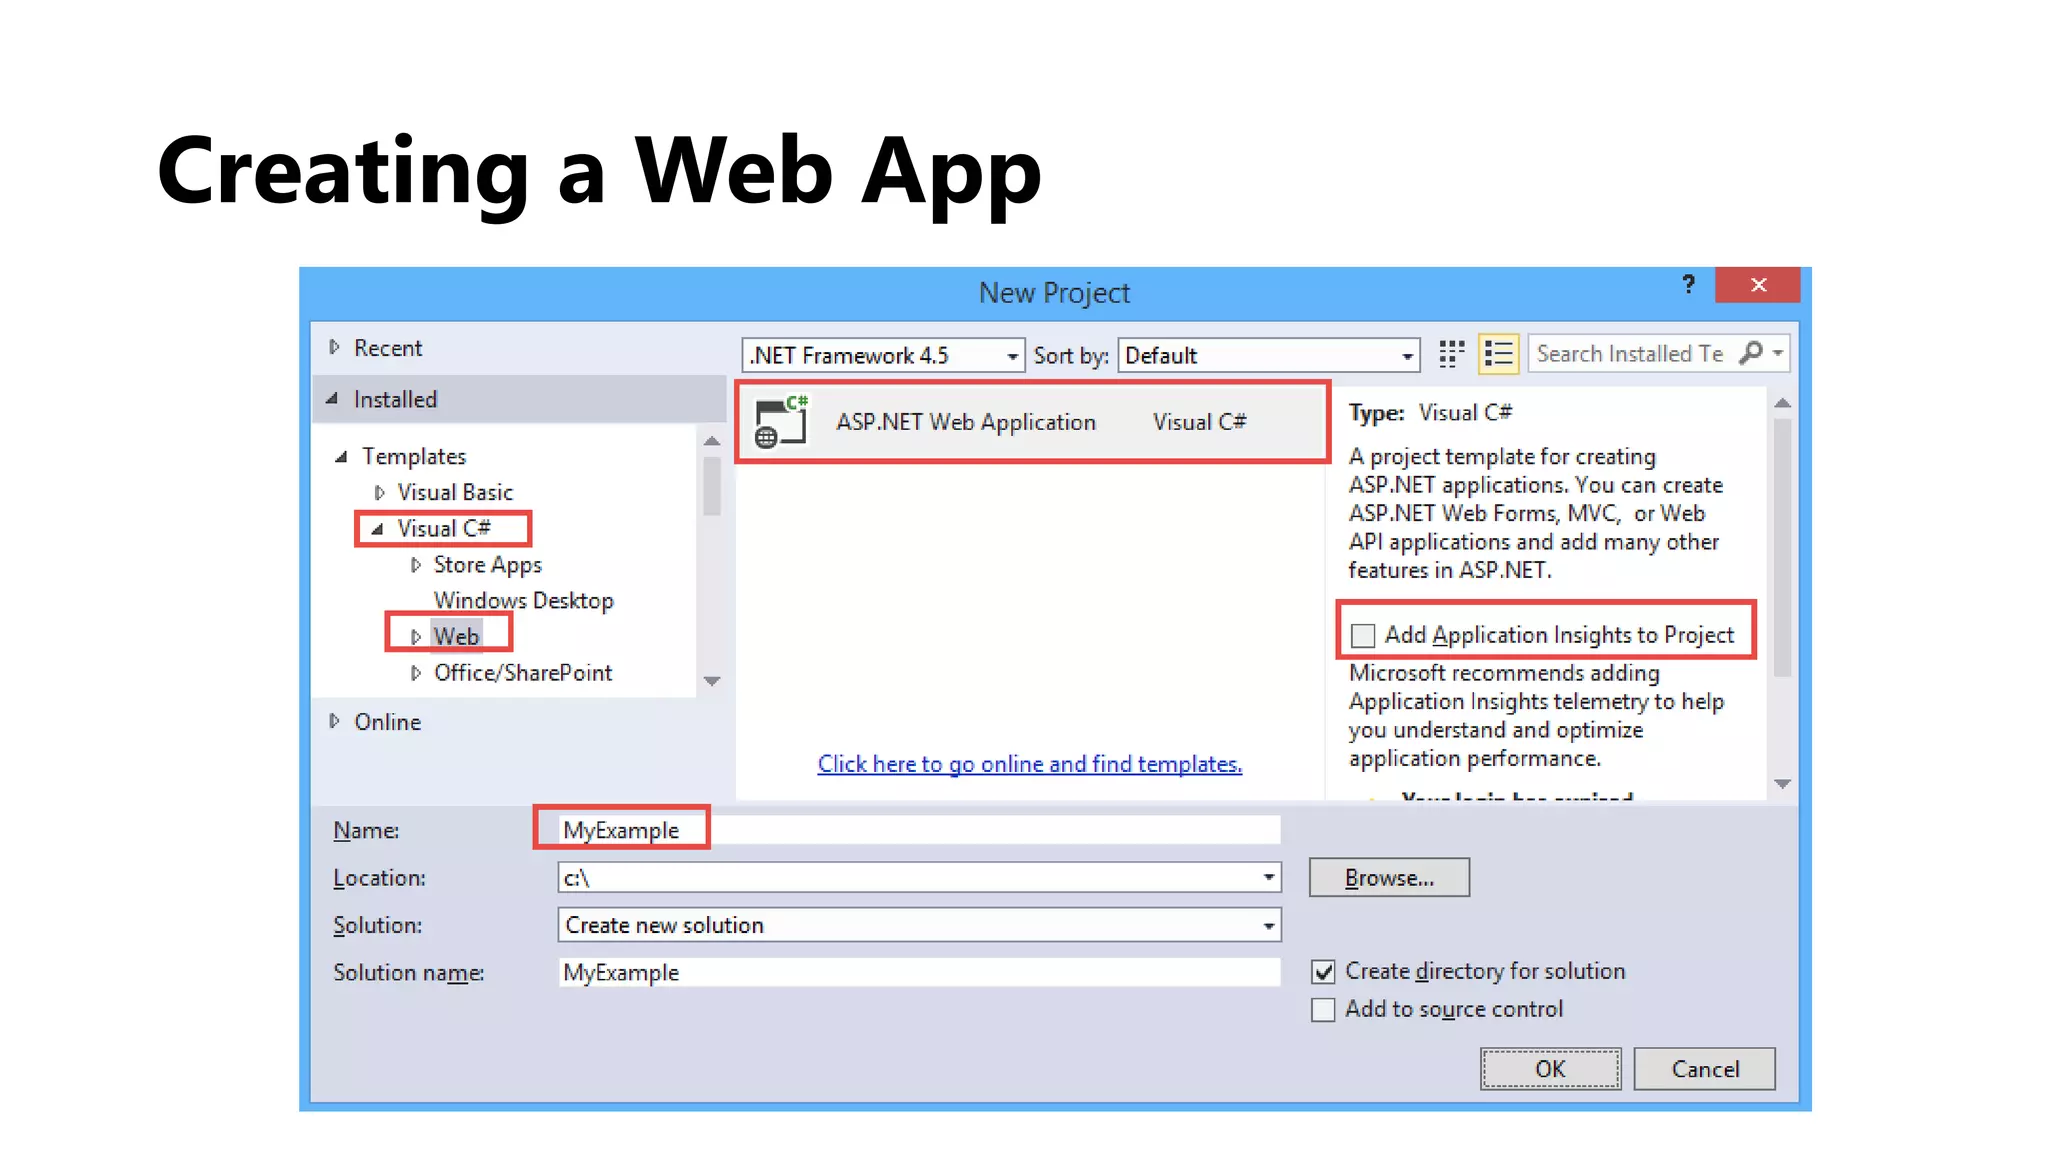
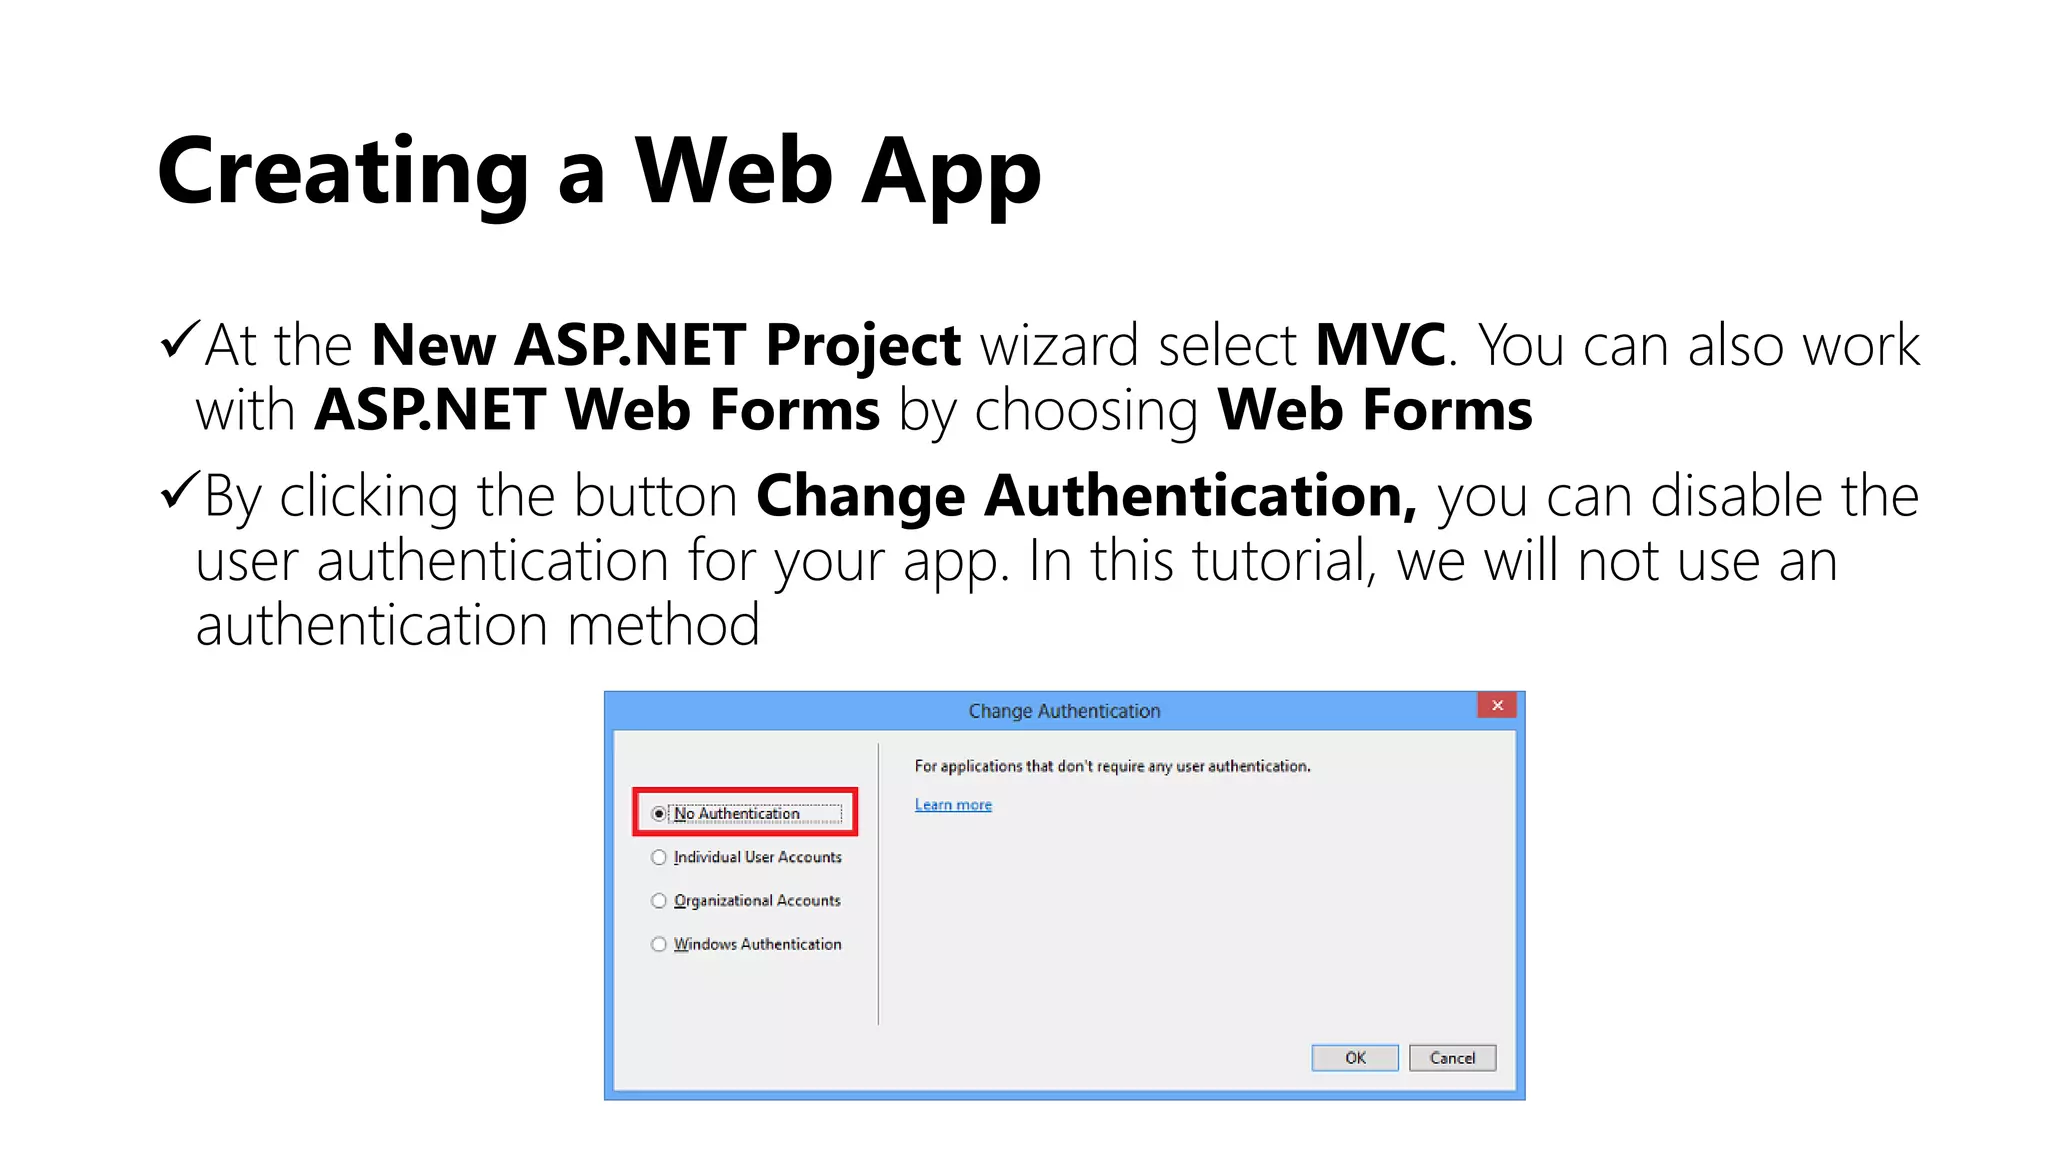
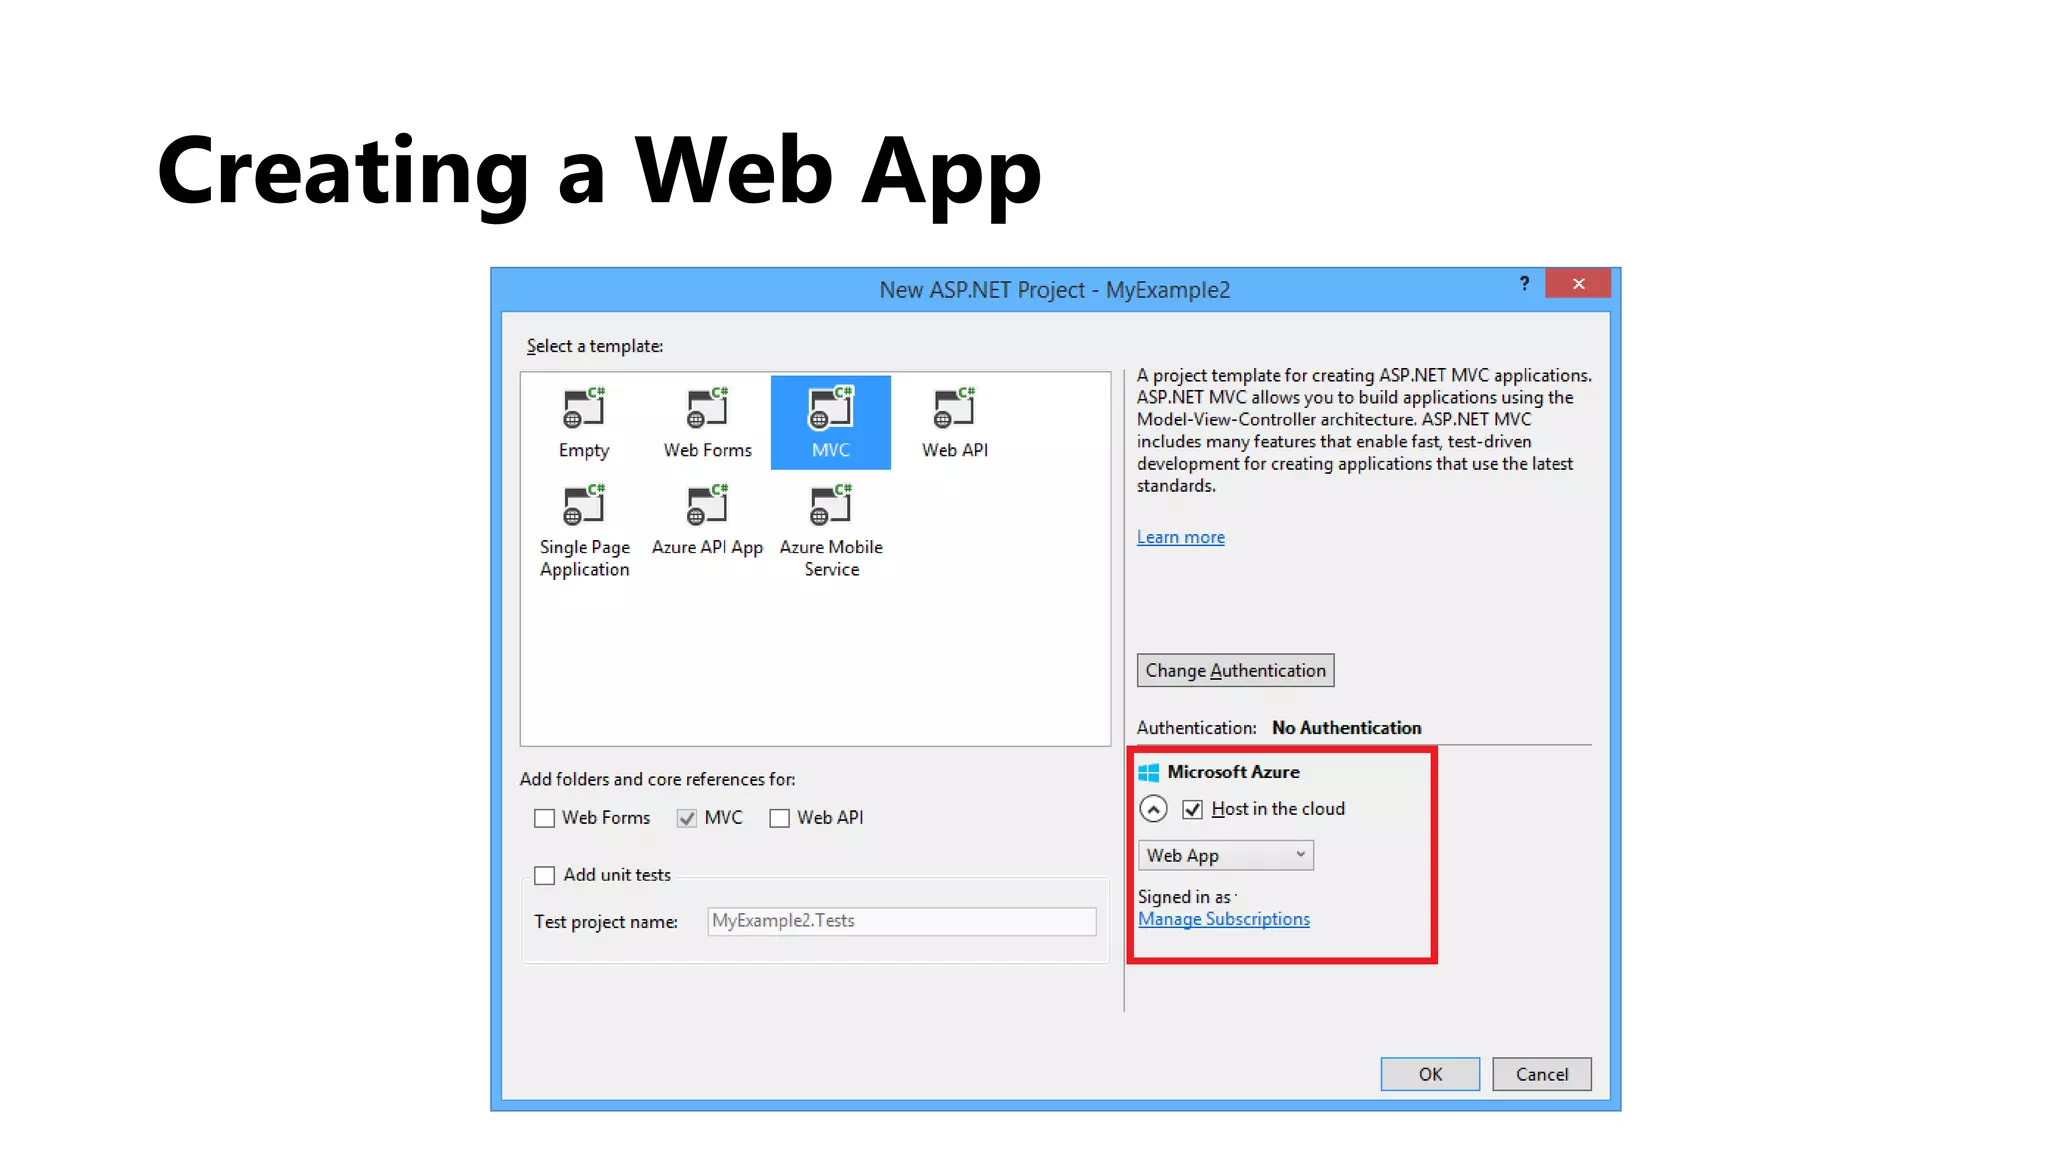
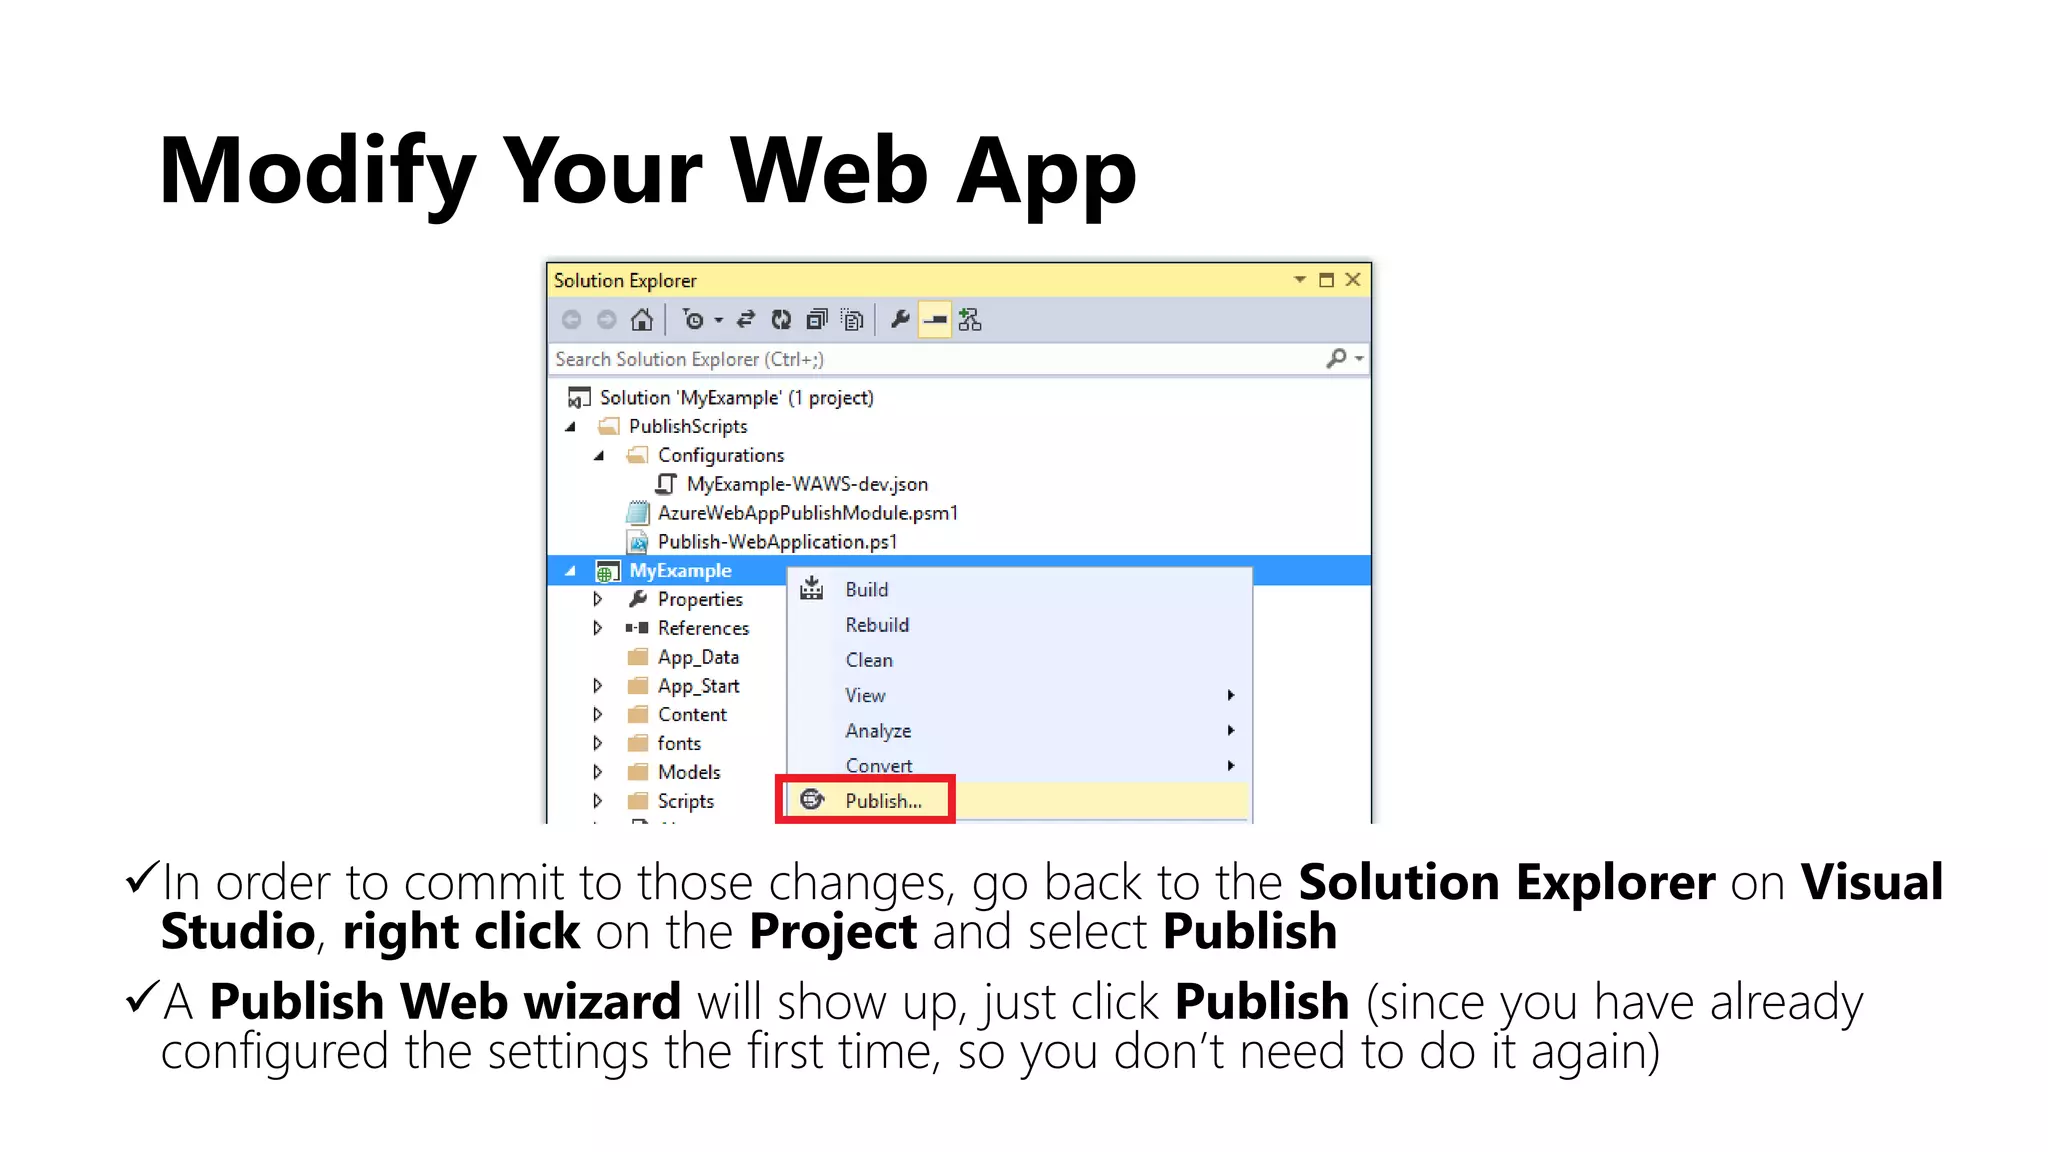
Open Visual Studio. From the menu above select: File > NewProject
At the window that pops-up, select
C# > Web > ASP.NET WebApplication. Make sure that you have
selected .ΝΕΤ Framework 4.5
Unselect the box Add Application Insights to Project (we will use a
separate tutorial for that)
Give your application a name at the field Name [MyExample] and
then click OK](https://image.slidesharecdn.com/createandmanageawebapplicationsteptosteptutorial-151126092903-lva1-app6891/75/Create-and-manage-a-web-application-on-Azure-step-to-step-tutorial-6-2048.jpg)
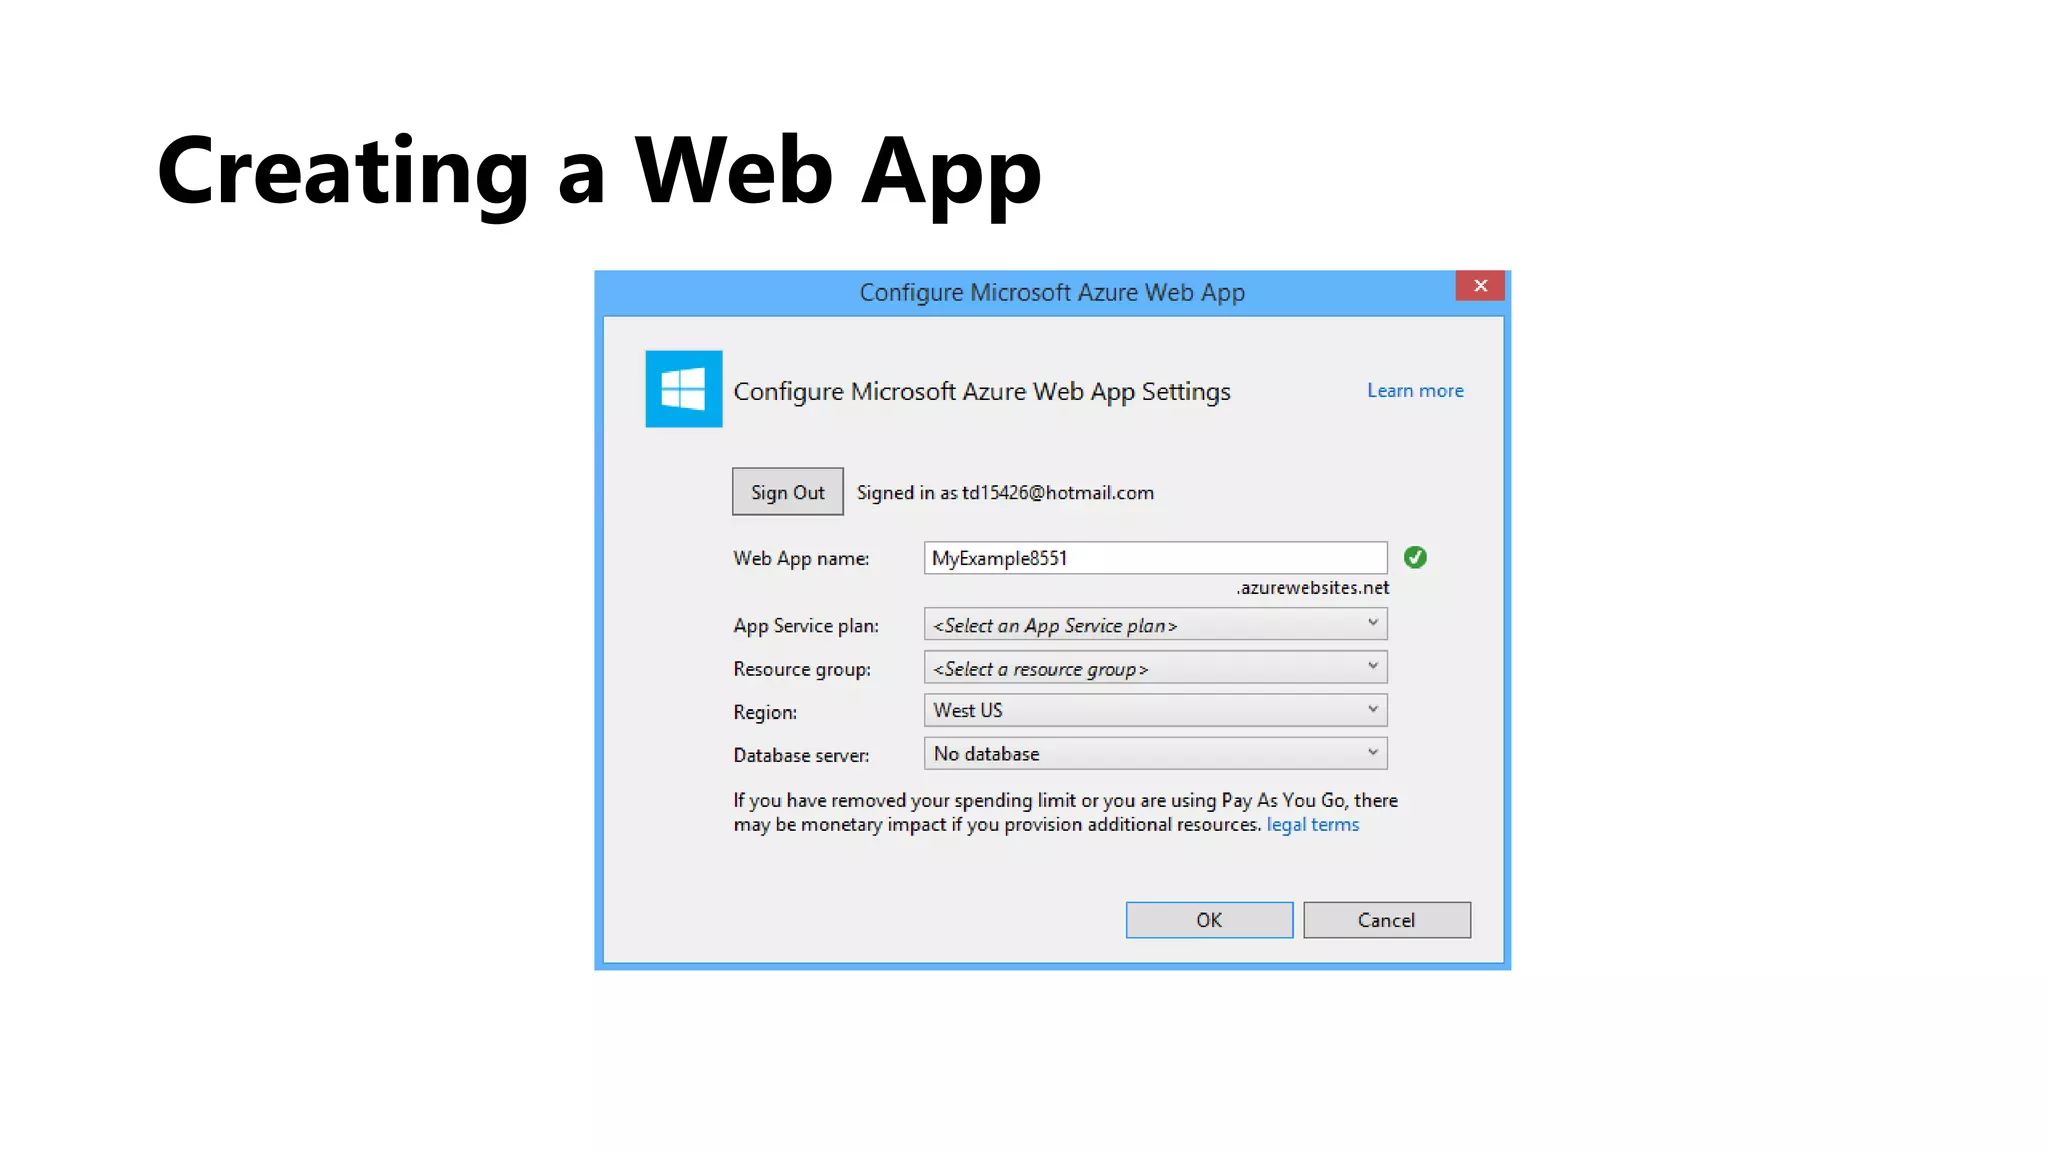


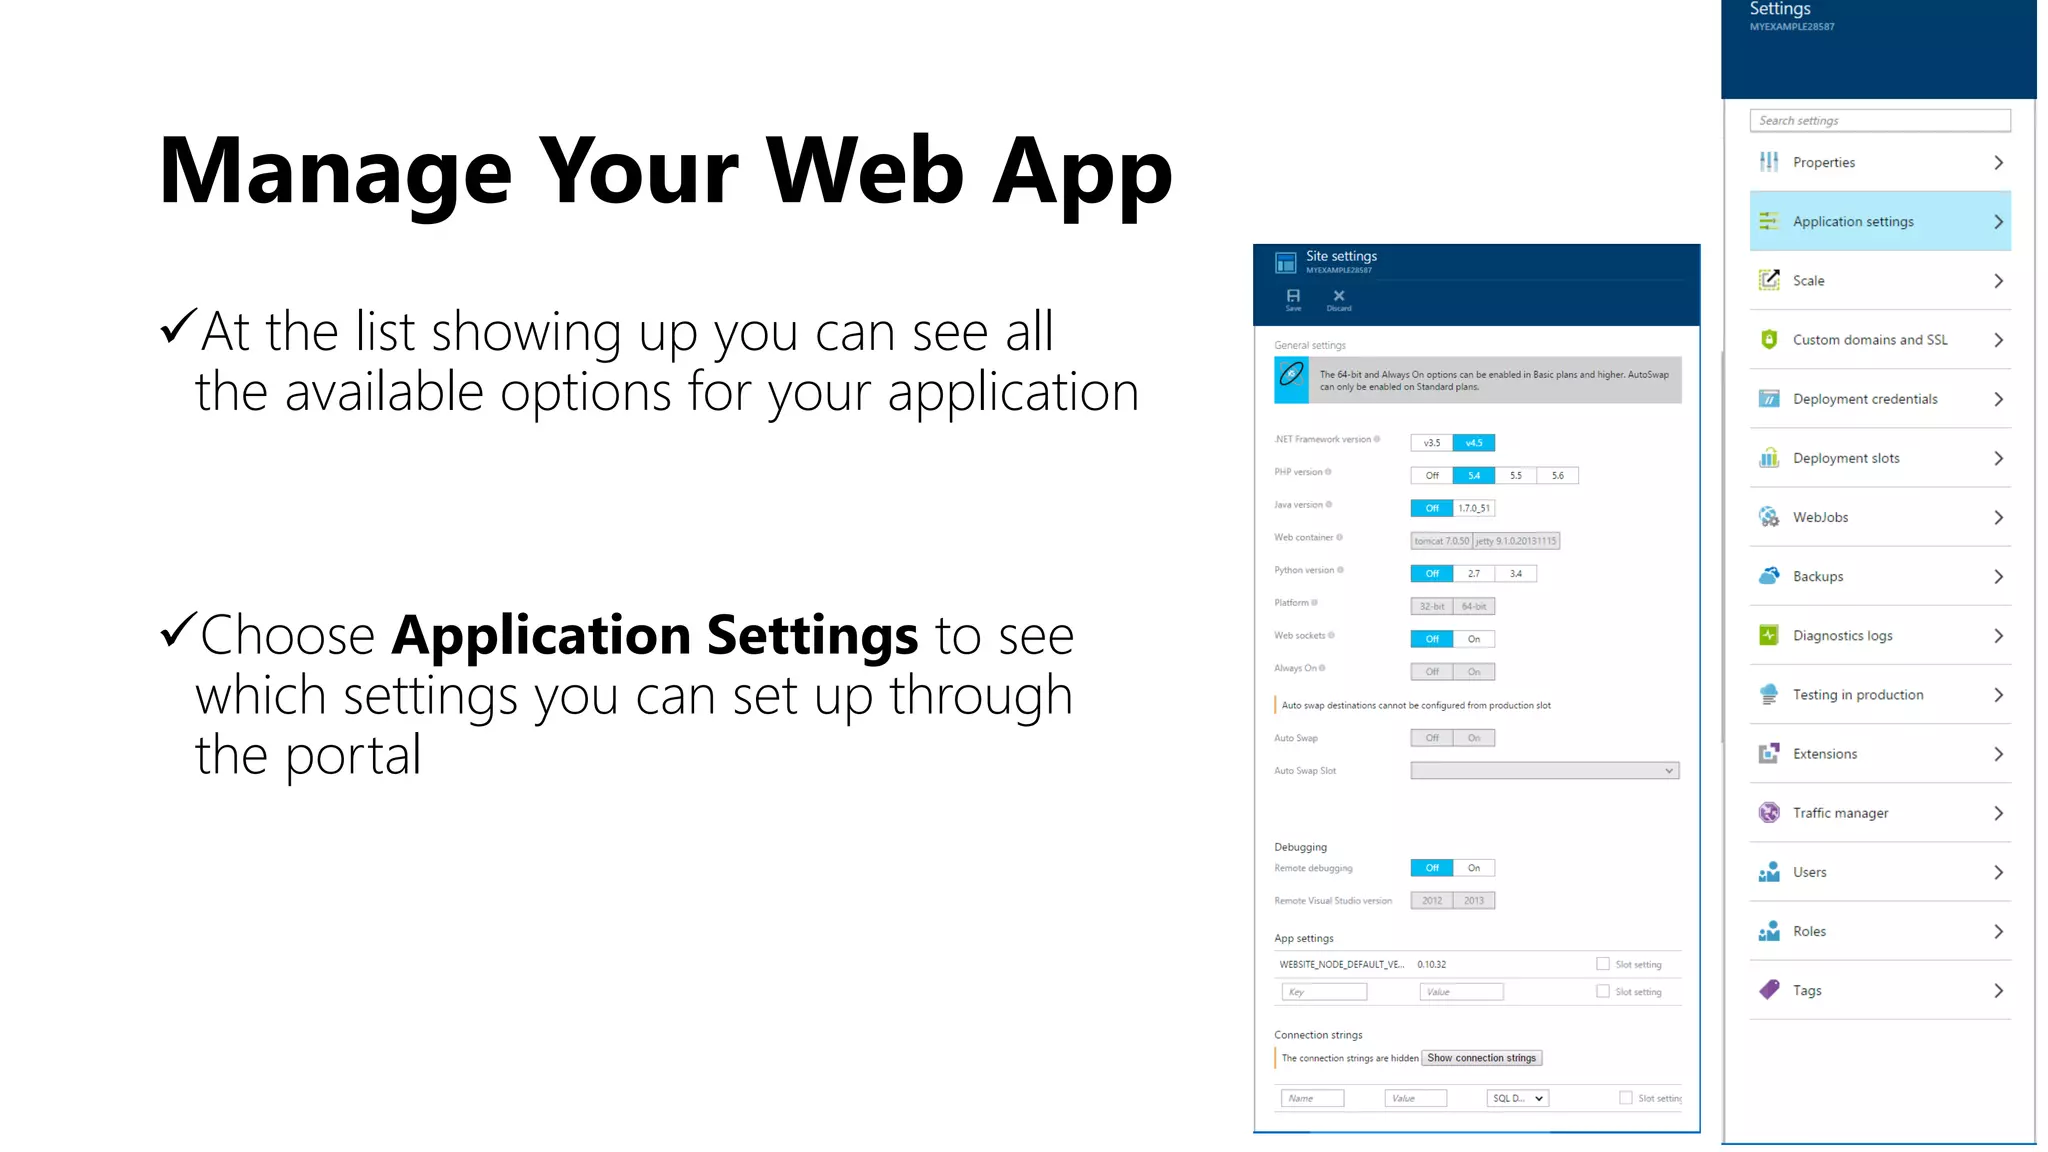
![Manage Your Web App
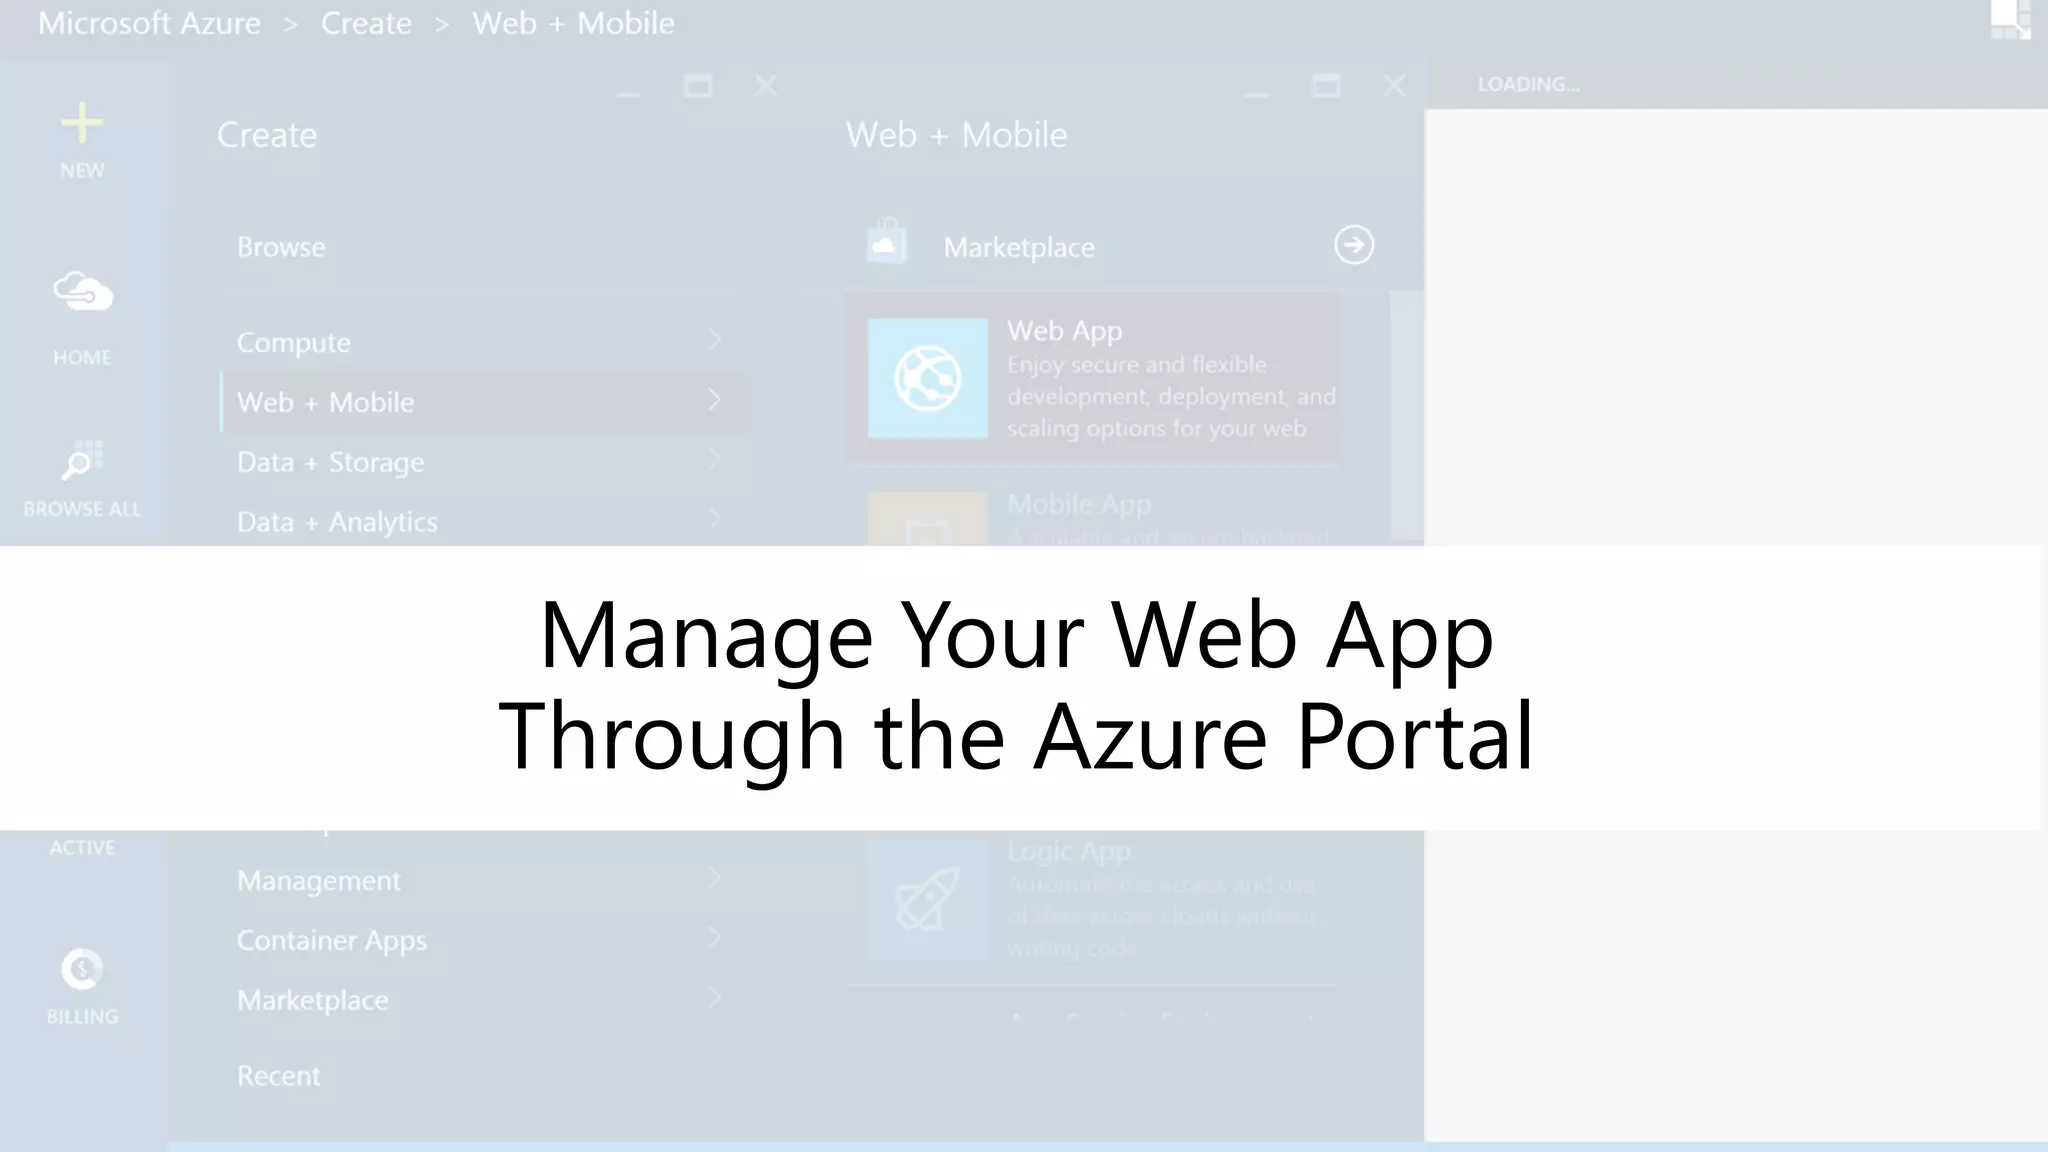
You can manage your web application through the Azure
Web Portal. In your browser, go to
https://portral.azure.com and Sign In with your Microsoft
ID and Password
Go to Browse > Web Apps > [Your Web App Name]
to see a summary with statistics for all your apps
Choose All Settings to see more details for your app](https://image.slidesharecdn.com/createandmanageawebapplicationsteptosteptutorial-151126092903-lva1-app6891/75/Create-and-manage-a-web-application-on-Azure-step-to-step-tutorial-27-2048.jpg)

This document provides a comprehensive step-by-step guide on creating and managing a web application using Microsoft Azure and Visual Studio 2013. It covers the process of setting up an ASP.NET web app, deploying it to Azure, and modifying the application post-deployment. Additionally, it includes instructions on using the Azure portal for application management and monitoring.


![[AWS Dev Day] 앱 현대화 | AWS Fargate를 사용한 서버리스 컨테이너 활용 하기 - 삼성전자 개발자 포털 사례 - 정영준...](https://cdn.slidesharecdn.com/ss_thumbnails/appmodernizationawsfargate-190930044252-thumbnail.jpg?width=640&height=640&fit=bounds)


![[1주차] 알파 유저를 위한 AWS 스터디](https://cdn.slidesharecdn.com/ss_thumbnails/awsforalphausers1-150813083228-lva1-app6892-thumbnail.jpg?width=640&height=640&fit=bounds)