Downloaded 1,441 times

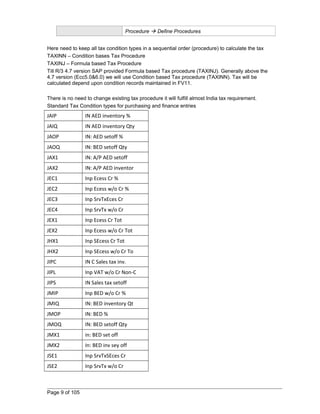
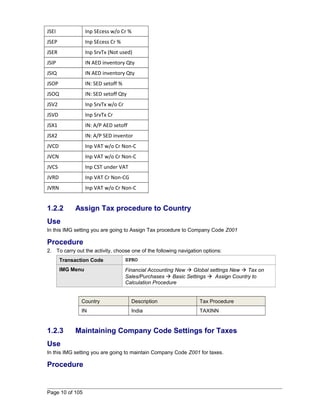
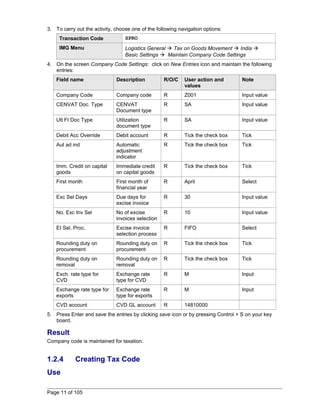
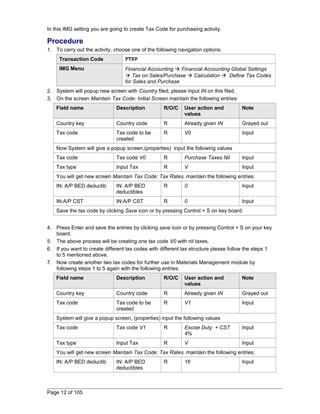

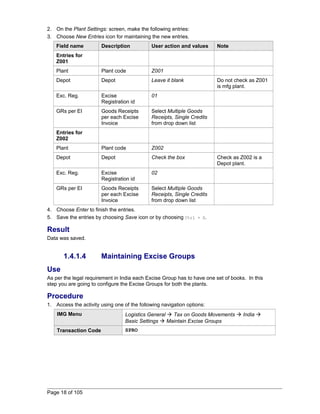
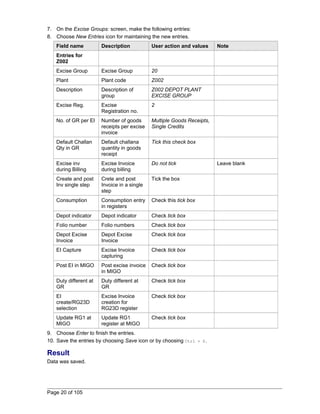

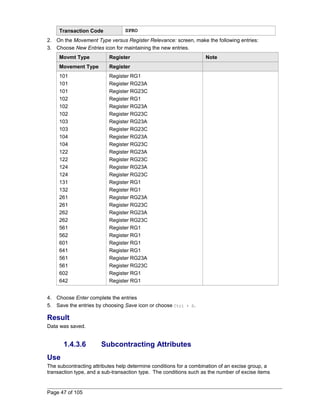


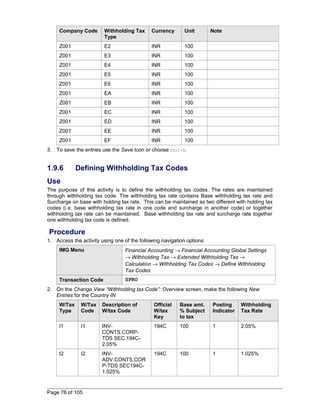
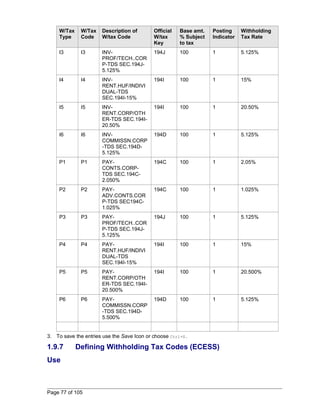


This document provides instructions for configuring taxation settings for India in SAP, including: 1) Activating business transaction events for India functions 2) Checking the assignment of SAP function modules for publish/subscribe events 3) Configuring tax procedures, tax codes, company code settings, and other basic taxation settings 4) Setting up excise duty determination, transactions for incoming and outgoing excise invoices, exports, and deemed exports 5) Configuring extended withholding tax including basic settings, calculation setup, company code assignment, and number ranges 6) Maintaining master data like chapter IDs, CIN details for vendors/customers, and excise indicators 7) Uploading opening balances for various


