Download free for 30 days
Sign in
Upload
Language (EN)
Support
Business
Mobile
Social Media
Marketing
Technology
Art & Photos
Career
Design
Education
Presentations & Public Speaking
Government & Nonprofit
Healthcare
Internet
Law
Leadership & Management
Automotive
Engineering
Software
Recruiting & HR
Retail
Sales
Services
Science
Small Business & Entrepreneurship
Food
Environment
Economy & Finance
Data & Analytics
Investor Relations
Sports
Spiritual
News & Politics
Travel
Self Improvement
Real Estate
Entertainment & Humor
Health & Medicine
Devices & Hardware
Lifestyle
Change Language
Language
English
Español
Português
Français
Deutsche
Cancel
Save
Submit search
EN
Uploaded by
SyntaxError25
PPTX, PDF
13 views
Chapter 1 - Introduction to Programming and Visual Basic.pptx
Chapter 1 - Introduction to Programming and Visual Basic.pptx
Science
◦
Read more
0
Save
Share
Embed
Embed presentation
Download
Download to read offline
1
/ 49
2
/ 49
3
/ 49
4
/ 49
5
/ 49
6
/ 49
7
/ 49
8
/ 49
9
/ 49
10
/ 49
11
/ 49
12
/ 49
13
/ 49
14
/ 49
15
/ 49
16
/ 49
17
/ 49
18
/ 49
19
/ 49
20
/ 49
21
/ 49
22
/ 49
23
/ 49
24
/ 49
25
/ 49
26
/ 49
27
/ 49
28
/ 49
29
/ 49
30
/ 49
31
/ 49
32
/ 49
33
/ 49
34
/ 49
35
/ 49
36
/ 49
37
/ 49
38
/ 49
39
/ 49
40
/ 49
41
/ 49
42
/ 49
43
/ 49
44
/ 49
45
/ 49
46
/ 49
47
/ 49
48
/ 49
49
/ 49
More Related Content
PPTX
Chapter 01
by
gsanchez1
PPTX
Chapter 01
by
gsanchez1
PPSX
Chapter 01 Introduction to Visual Basic
by
gbonilla53
PDF
Ppt on visual basics
by
younganand
PPTX
01 Database Management (re-uploaded)
by
bluejayjunior
PPTX
Object Oriented Programming I
by
raven_rainagi
PPT
Chapter 01
by
llmeade
PPTX
INTRODUCTION-TO-VB (1).pptx introduction
by
SARAHJANEMIASCO
Chapter 01
by
gsanchez1
Chapter 01
by
gsanchez1
Chapter 01 Introduction to Visual Basic
by
gbonilla53
Ppt on visual basics
by
younganand
01 Database Management (re-uploaded)
by
bluejayjunior
Object Oriented Programming I
by
raven_rainagi
Chapter 01
by
llmeade
INTRODUCTION-TO-VB (1).pptx introduction
by
SARAHJANEMIASCO
Similar to Chapter 1 - Introduction to Programming and Visual Basic.pptx
PPTX
Chapter 1 — Introduction to Visual Basic 2010 Programming
by
francopw
PPTX
INTRODUCTION-TO-VB (2)-PROJECT POWERPOINT.pptx
by
ssuserfb54c6
PPT
Vb introduction.
by
sagaroceanic11
PPT
Chapter 01 - introduction for C++
by
wahida_f6
PDF
Introduction to Computers and Programming
by
Edwin Flórez Gómez
PPT
Chapter 01: Intro to VB2010 Programming
by
patf719
PDF
Visual Basic in easy steps Covers Visual Basic 2015 Fourth Edition Mcgrath
by
hirshpirkka
PPTX
Chapter 1
by
gebrsh
PDF
Programming In Visual Basic 2008 7th Edition 7th Julia Case Bradley
by
kchvvfctep779
PPT
1 Intro to Computers SOW_C++_CSO_Chapter_01_9e.ppt
by
azizt730
PDF
ch02-IPO-Input-Process-Output-Input-Process-Output
by
ayeshazaveri4
PPTX
COM 211 PRESENTATION.pptx
by
AnasYunusa
PDF
Visual Basic In Easy Steps Covers Visual Basic 2015 Fourth Mcgrath
by
kanekshamu
PDF
Microsoft Visual Basic Programs To Accompany Programming Logic And Design 3rd...
by
teyrefededa
PPT
Visual basic 6.0
by
Aarti P
PDF
Introduction To Visual Basic 2015 Mark Maslach
by
keeverfelmor
PPT
Ms vb
by
sirjade4
PPTX
Chp 01-ntroduction to Computers and Programming.pptx
by
haseebulhasan750
PPTX
SOW_C_CSO_Chapter_01_10e_a11y.pptx c++ chapter 1
by
alzawahramarkantony
PPT
Introduction to computers and programing.pptx
by
ahmedmidhu2001
Chapter 1 — Introduction to Visual Basic 2010 Programming
by
francopw
INTRODUCTION-TO-VB (2)-PROJECT POWERPOINT.pptx
by
ssuserfb54c6
Vb introduction.
by
sagaroceanic11
Chapter 01 - introduction for C++
by
wahida_f6
Introduction to Computers and Programming
by
Edwin Flórez Gómez
Chapter 01: Intro to VB2010 Programming
by
patf719
Visual Basic in easy steps Covers Visual Basic 2015 Fourth Edition Mcgrath
by
hirshpirkka
Chapter 1
by
gebrsh
Programming In Visual Basic 2008 7th Edition 7th Julia Case Bradley
by
kchvvfctep779
1 Intro to Computers SOW_C++_CSO_Chapter_01_9e.ppt
by
azizt730
ch02-IPO-Input-Process-Output-Input-Process-Output
by
ayeshazaveri4
COM 211 PRESENTATION.pptx
by
AnasYunusa
Visual Basic In Easy Steps Covers Visual Basic 2015 Fourth Mcgrath
by
kanekshamu
Microsoft Visual Basic Programs To Accompany Programming Logic And Design 3rd...
by
teyrefededa
Visual basic 6.0
by
Aarti P
Introduction To Visual Basic 2015 Mark Maslach
by
keeverfelmor
Ms vb
by
sirjade4
Chp 01-ntroduction to Computers and Programming.pptx
by
haseebulhasan750
SOW_C_CSO_Chapter_01_10e_a11y.pptx c++ chapter 1
by
alzawahramarkantony
Introduction to computers and programing.pptx
by
ahmedmidhu2001
Recently uploaded
PDF
Consequences of Undecidability in Physics on the Theory of Everything
by
Sérgio Sacani
PDF
Rock Types and Formations: Igneous, Sedimentary, and Metamorphic
by
arabelladiorms
PPT
Electron Impact Scattering r-matrix method.ppt
by
VinayakSavarkar2
PPTX
What is Blockchain Security is managed in order to protect some vital informa...
by
cscprabh
PDF
Introduction of bioinformatics in hindi ( जैव सूचना विज्ञान का परिचय ) @irfan...
by
World of Wisdom
PPTX
Block chain Multi-chain is a process where projects deploy smart contracts.pptx
by
cscprabh
PDF
Campbell Biology 12th Edition PDF Textbook
by
wosarix923
PPT
1-2_SterilisationValidationQualification.ppt
by
UrvashiPatni1
PPTX
Typical_Menstrual_Cycle introductiom .pptx
by
sofiamansoor4
PPTX
RESTRICTION ENDONUCLEASE ,TYPES , MECHANISM , APPLICATION
by
Remya M S
PDF
Enhancing the Role of Knowledge Holders in the UN CBD: Pioneering Capacity-Bu...
by
pensoftservices
PDF
Detection of disk-jet coprecession in a tidaldisruption event
by
Sérgio Sacani
PDF
Radiation: graduate lecture slides on Cloud Physics UNR Course by Dr David Mi...
by
DDM
PDF
Complications of Blood Transfusion.pdf Karrar Hayder K. Rustum
by
karrarhayderm
PDF
MultispacecraftMeasurementsof theEvolvingGeometryof theSolarAlfvénSurface ove...
by
Sérgio Sacani
PDF
Child Development 9th Edition PDF Textbook
by
wosarix923
PPTX
Biodiversity and stability.pptx for grade 10
by
ROLANARIBATO3
PDF
Cosmic-Ray Bath in a Past Supernova Gives Birth to Earth-Like Planets
by
Sérgio Sacani
PDF
AThickVolatileAtmosphereontheUltrahotSuper-EarthTOI-561b
by
Sérgio Sacani
PPTX
Private blockchains (or Permissioned) are created and maintained by private o...
by
cscprabh
Consequences of Undecidability in Physics on the Theory of Everything
by
Sérgio Sacani
Rock Types and Formations: Igneous, Sedimentary, and Metamorphic
by
arabelladiorms
Electron Impact Scattering r-matrix method.ppt
by
VinayakSavarkar2
What is Blockchain Security is managed in order to protect some vital informa...
by
cscprabh
Introduction of bioinformatics in hindi ( जैव सूचना विज्ञान का परिचय ) @irfan...
by
World of Wisdom
Block chain Multi-chain is a process where projects deploy smart contracts.pptx
by
cscprabh
Campbell Biology 12th Edition PDF Textbook
by
wosarix923
1-2_SterilisationValidationQualification.ppt
by
UrvashiPatni1
Typical_Menstrual_Cycle introductiom .pptx
by
sofiamansoor4
RESTRICTION ENDONUCLEASE ,TYPES , MECHANISM , APPLICATION
by
Remya M S
Enhancing the Role of Knowledge Holders in the UN CBD: Pioneering Capacity-Bu...
by
pensoftservices
Detection of disk-jet coprecession in a tidaldisruption event
by
Sérgio Sacani
Radiation: graduate lecture slides on Cloud Physics UNR Course by Dr David Mi...
by
DDM
Complications of Blood Transfusion.pdf Karrar Hayder K. Rustum
by
karrarhayderm
MultispacecraftMeasurementsof theEvolvingGeometryof theSolarAlfvénSurface ove...
by
Sérgio Sacani
Child Development 9th Edition PDF Textbook
by
wosarix923
Biodiversity and stability.pptx for grade 10
by
ROLANARIBATO3
Cosmic-Ray Bath in a Past Supernova Gives Birth to Earth-Like Planets
by
Sérgio Sacani
AThickVolatileAtmosphereontheUltrahotSuper-EarthTOI-561b
by
Sérgio Sacani
Private blockchains (or Permissioned) are created and maintained by private o...
by
cscprabh
Chapter 1 - Introduction to Programming and Visual Basic.pptx
1.
Copyright © 2014
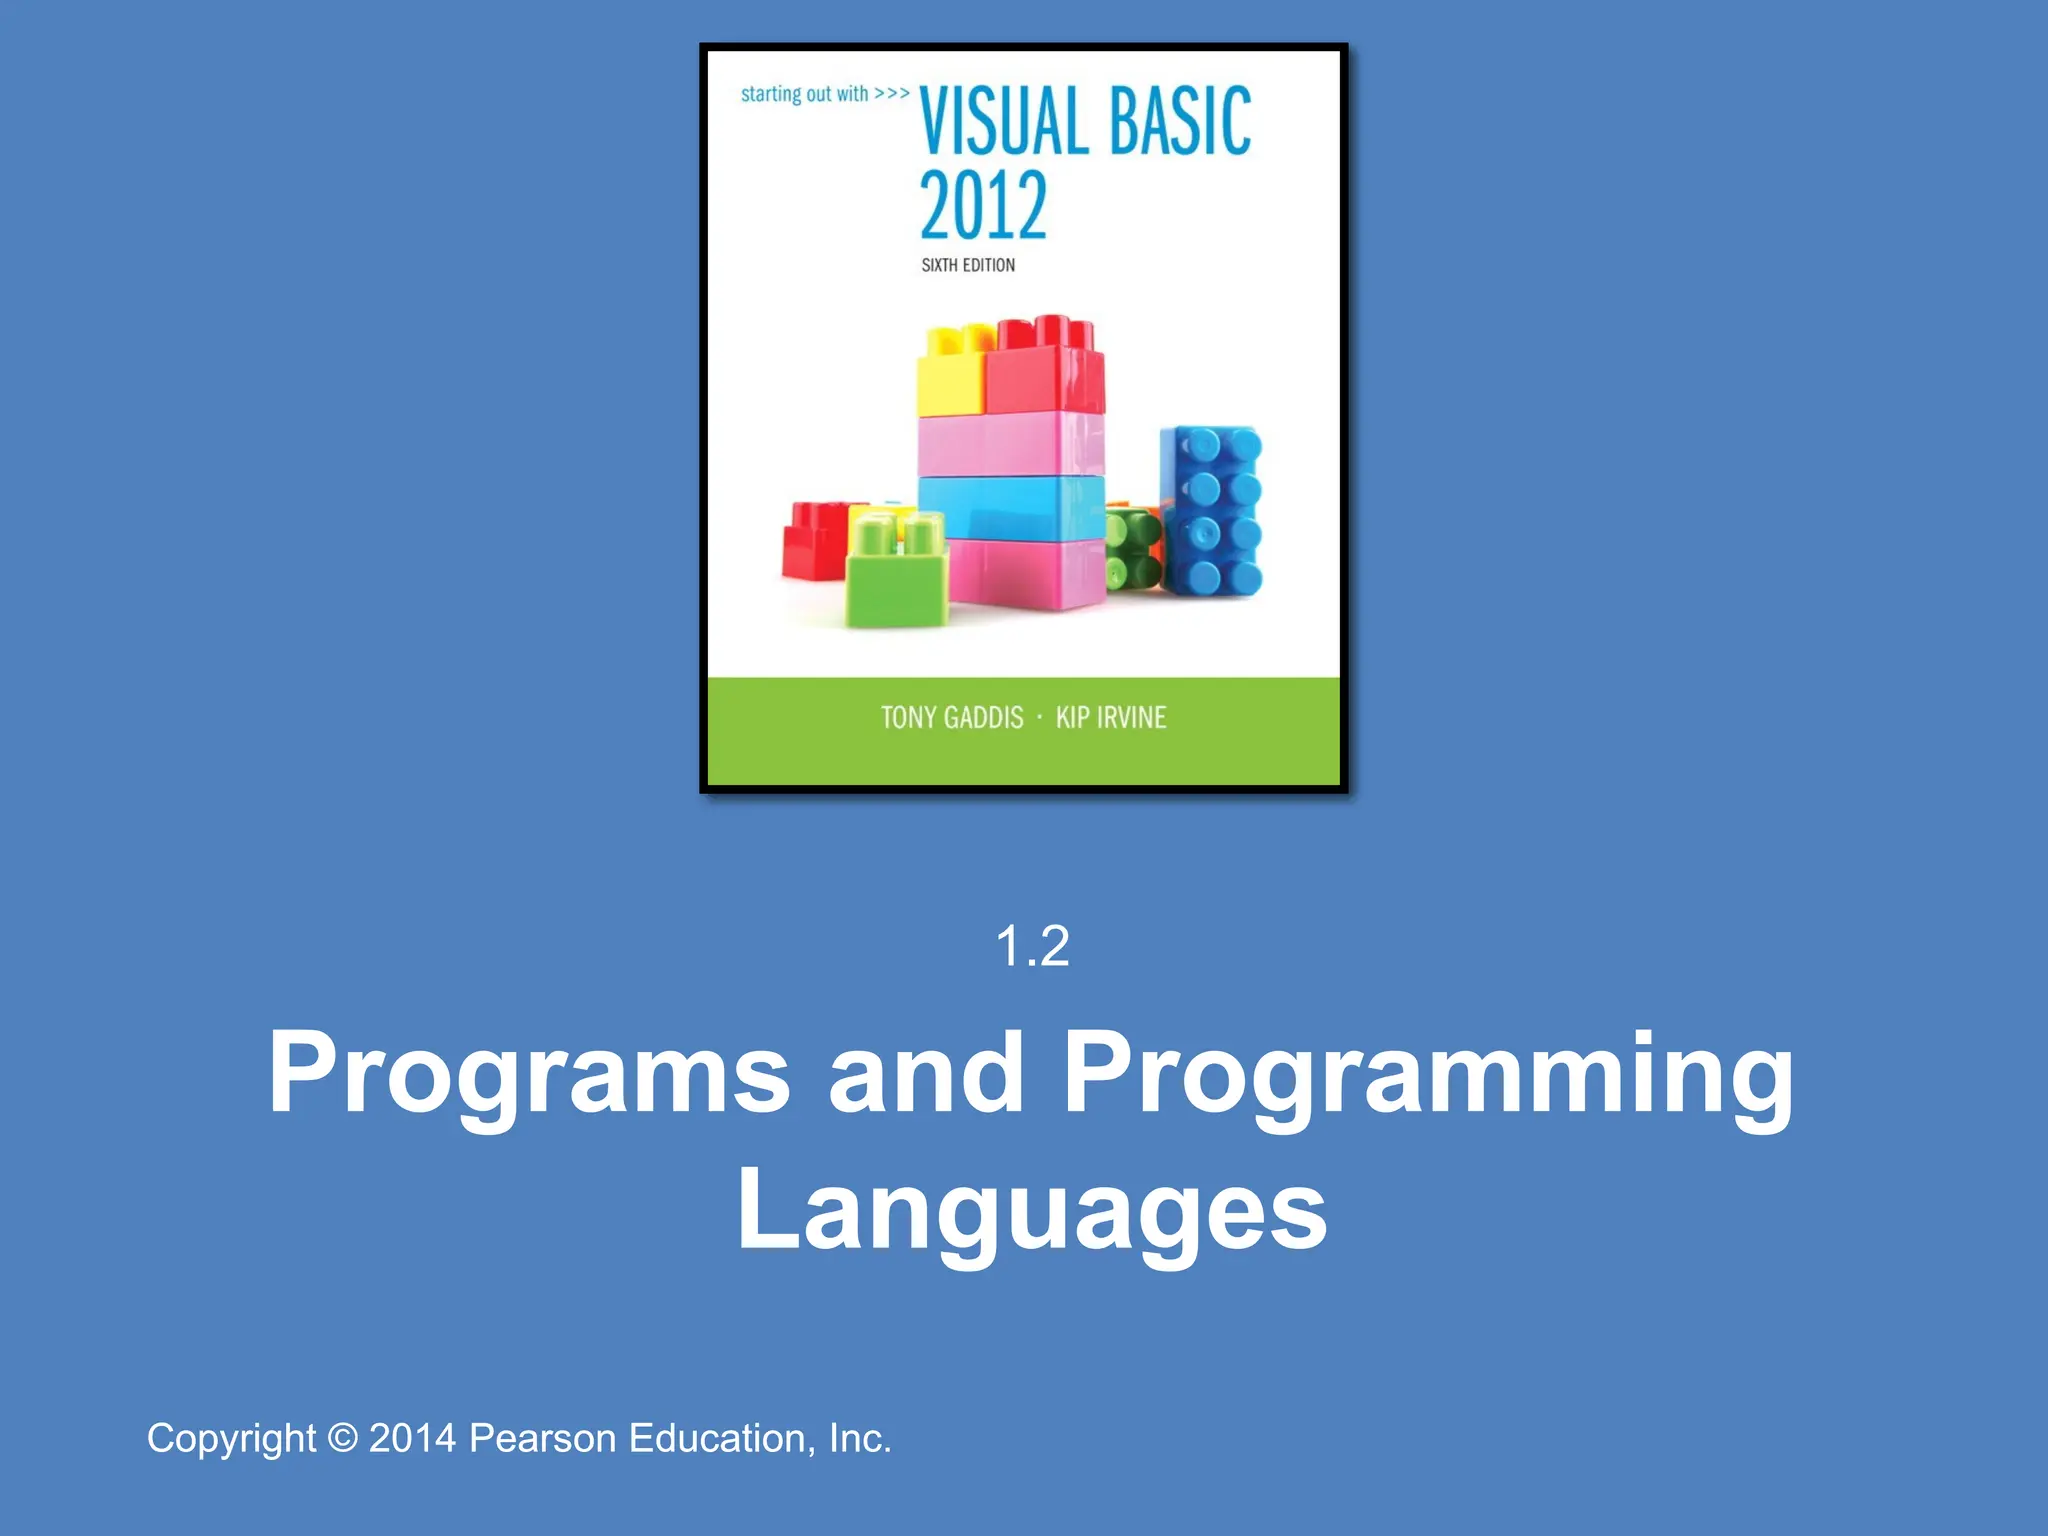
Pearson Education, Inc. Copyright © 2014 Pearson Education, Inc. Copyright © 2014 Pearson Education, Inc. Copyright © 2014 Pearson Education, Inc. Chapter 1 Introduction to Programming and Visual Basic
2.
Copyright © 2014
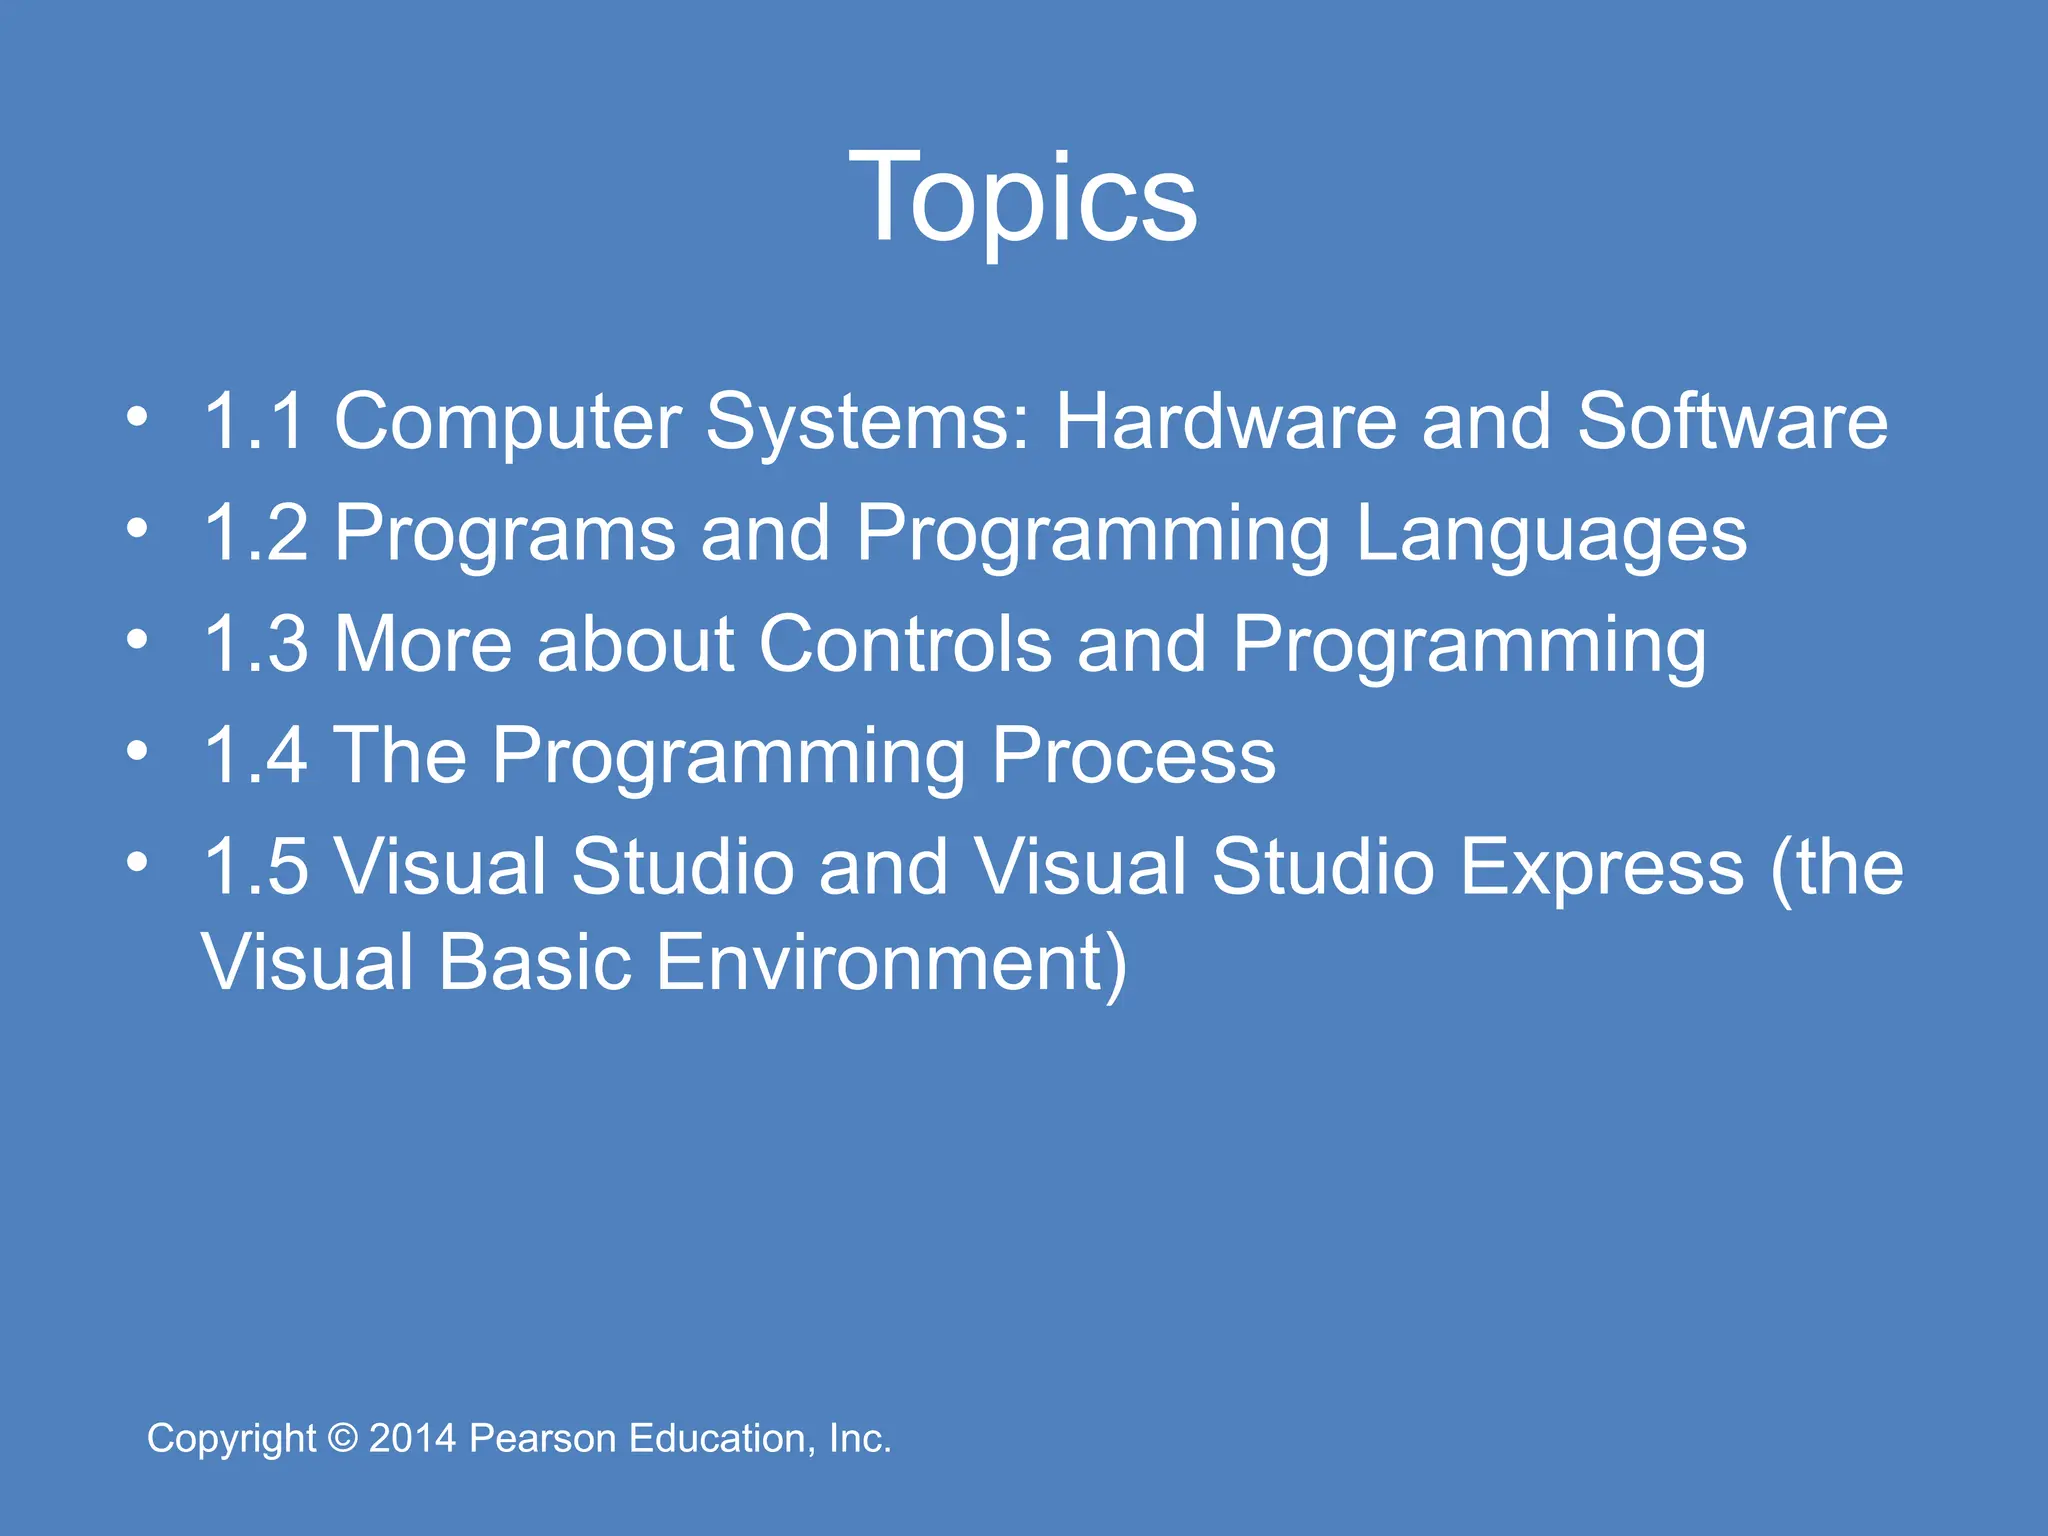
Pearson Education, Inc. Copyright © 2014 Pearson Education, Inc. Topics • 1.1 Computer Systems: Hardware and Software • 1.2 Programs and Programming Languages • 1.3 More about Controls and Programming • 1.4 The Programming Process • 1.5 Visual Studio and Visual Studio Express (the Visual Basic Environment)
3.
Copyright © 2014
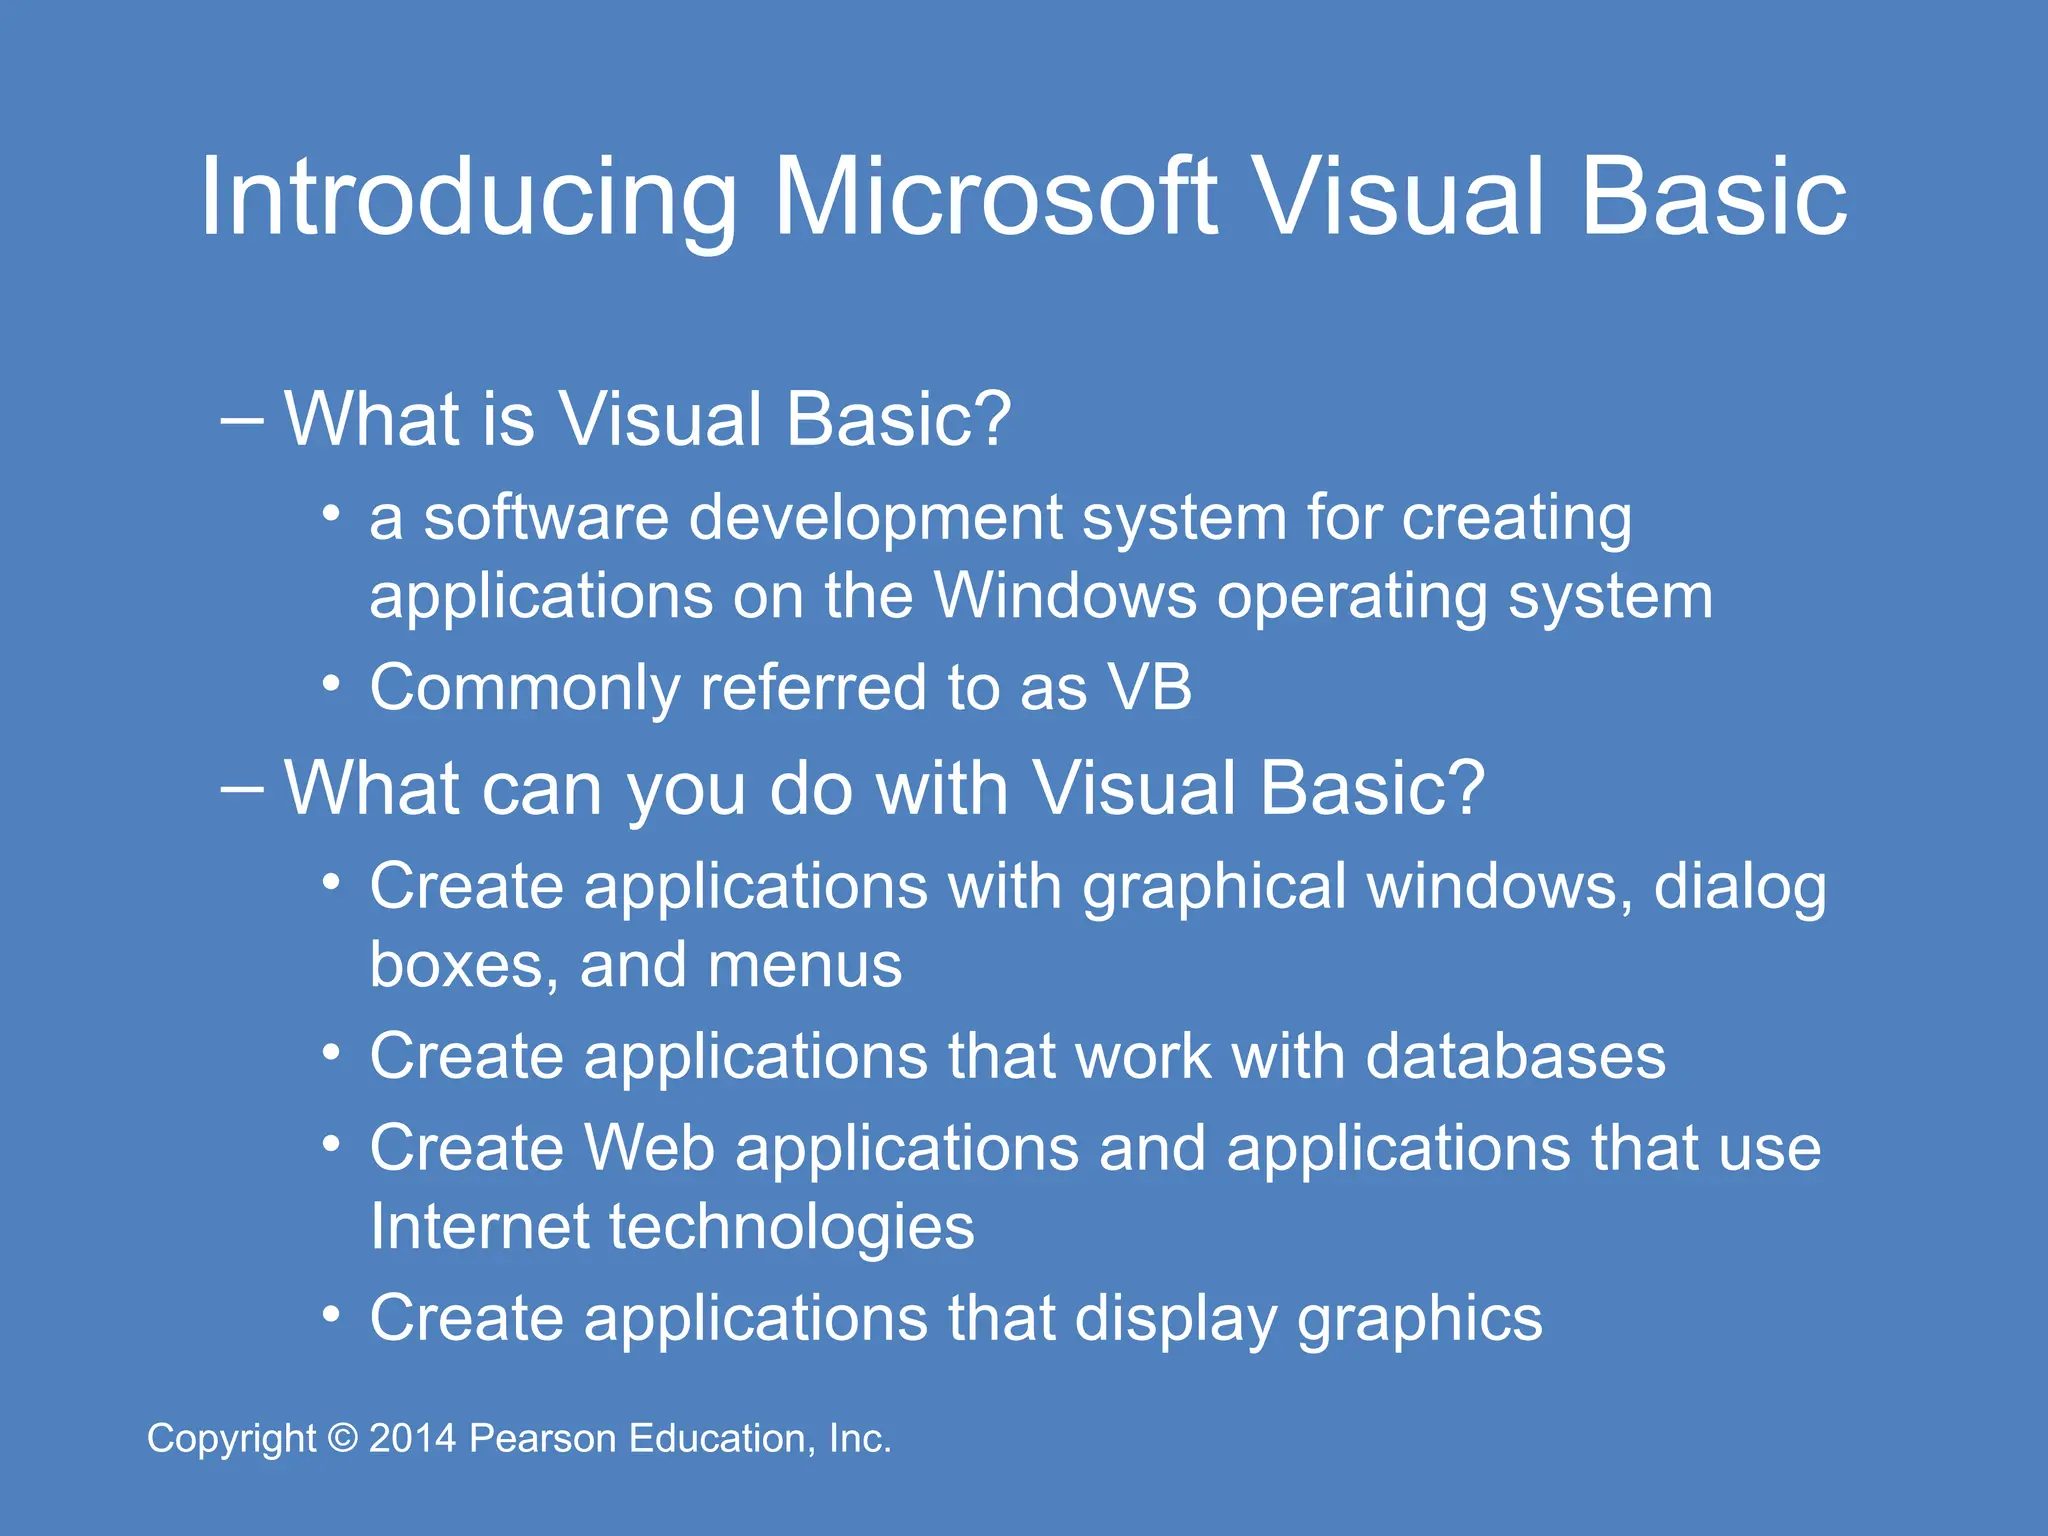
Pearson Education, Inc. Copyright © 2014 Pearson Education, Inc. Introducing Microsoft Visual Basic – What is Visual Basic? • a software development system for creating applications on the Windows operating system • Commonly referred to as VB – What can you do with Visual Basic? • Create applications with graphical windows, dialog boxes, and menus • Create applications that work with databases • Create Web applications and applications that use Internet technologies • Create applications that display graphics
4.
Copyright © 2014
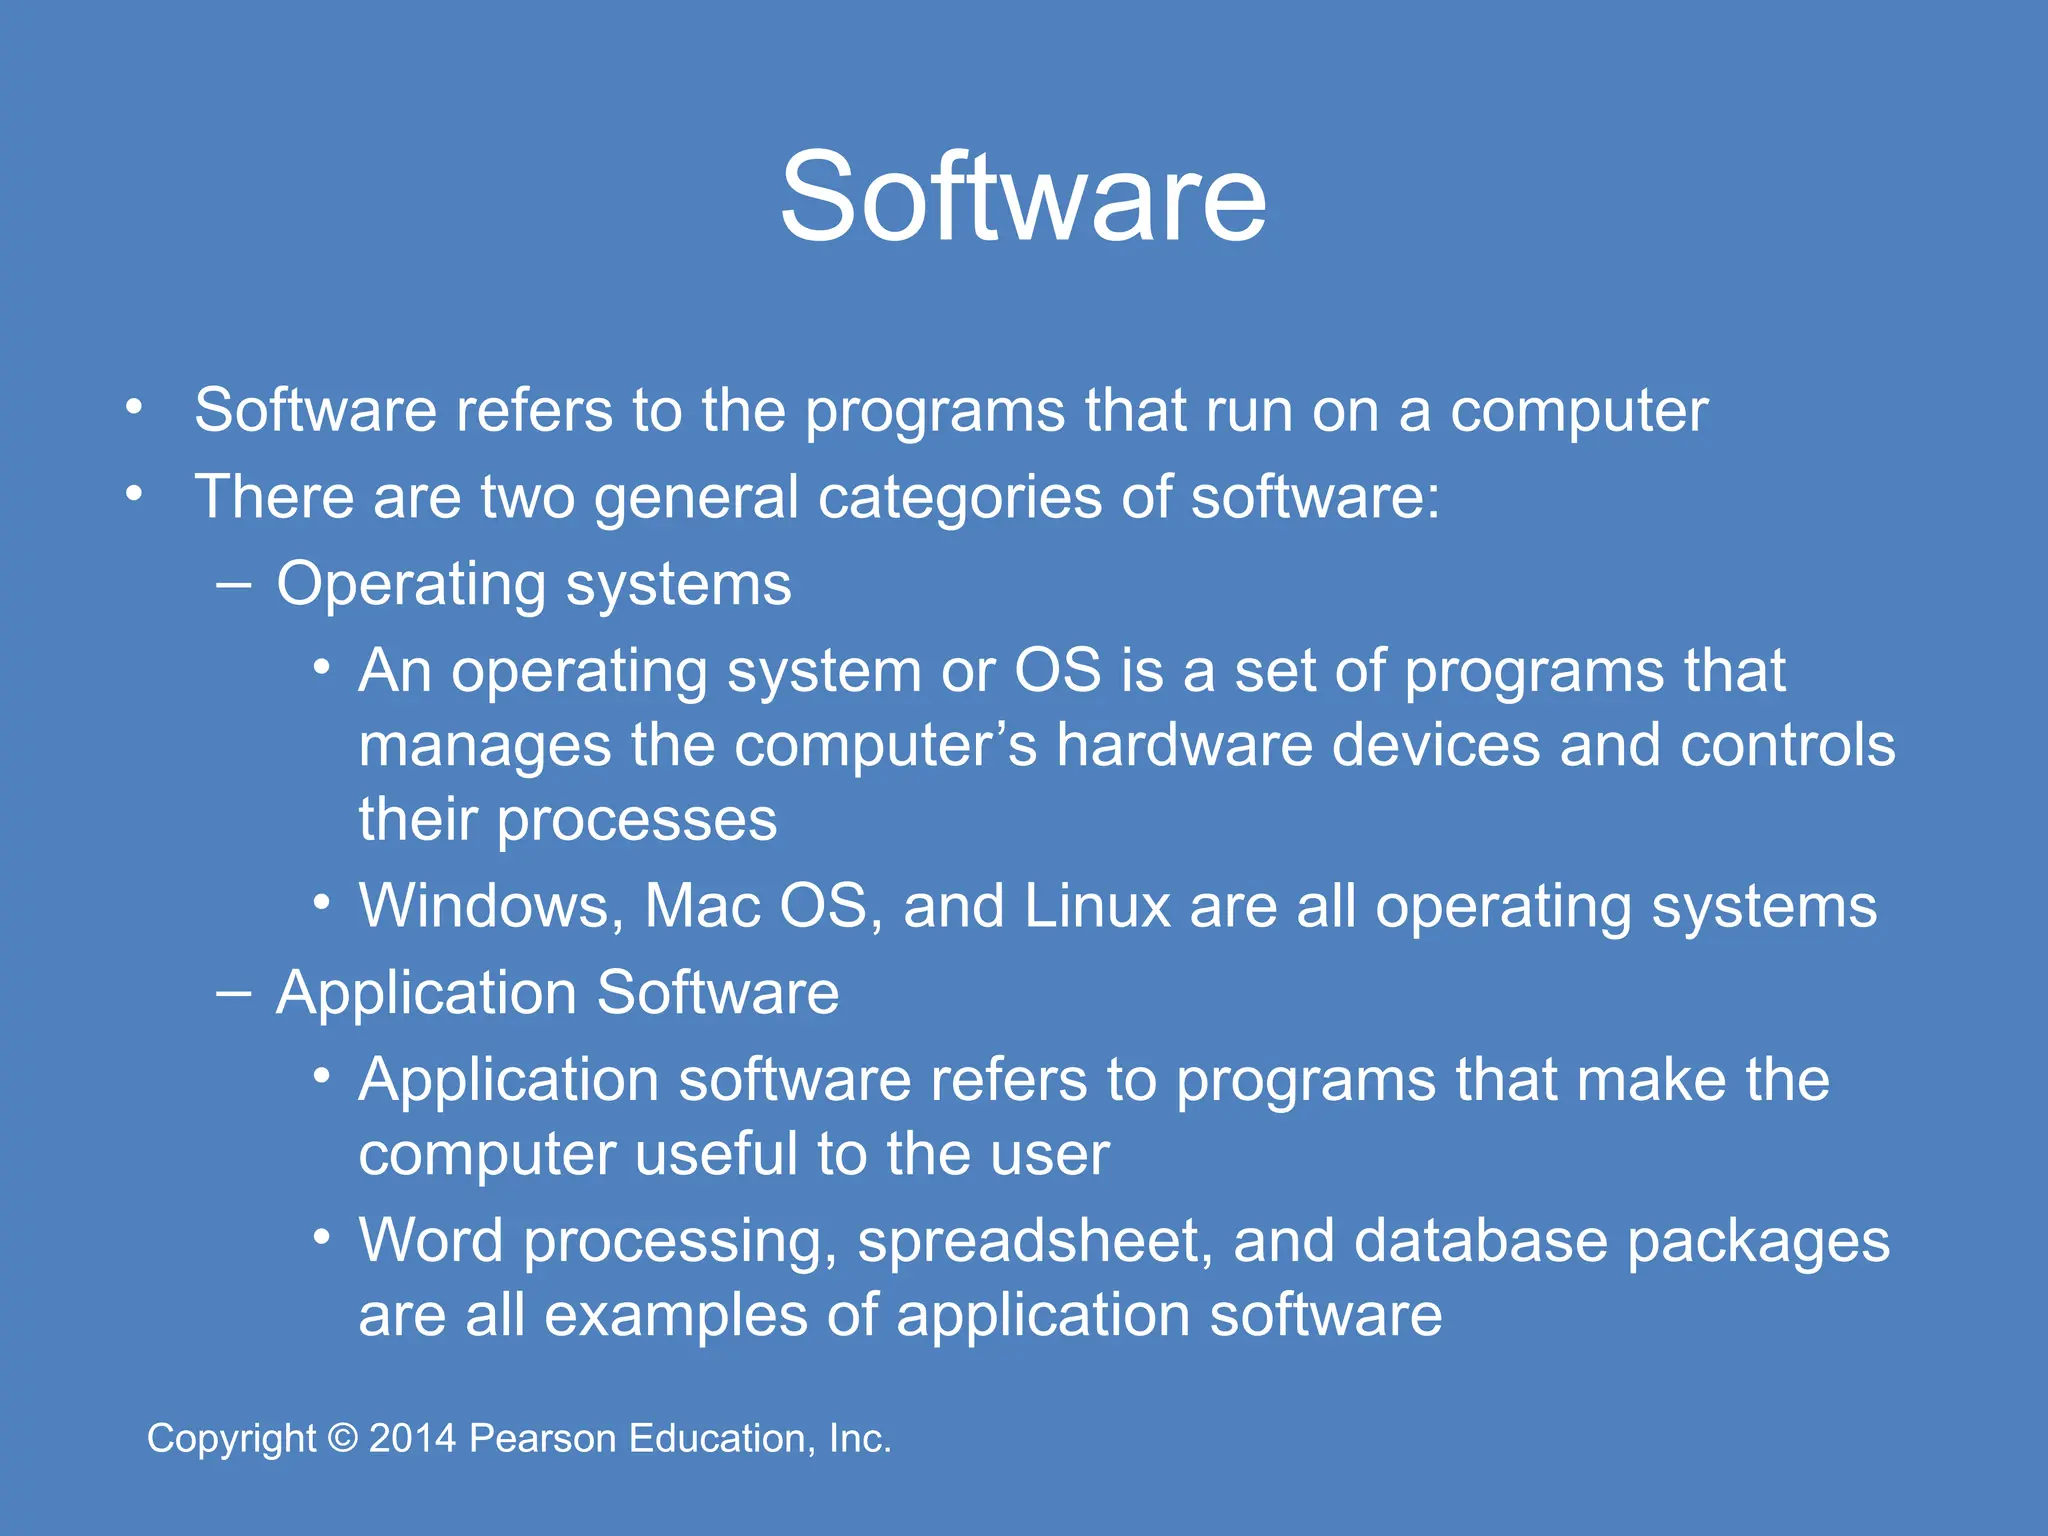
Pearson Education, Inc. Copyright © 2014 Pearson Education, Inc. Software • Software refers to the programs that run on a computer • There are two general categories of software: – Operating systems • An operating system or OS is a set of programs that manages the computer’s hardware devices and controls their processes • Windows, Mac OS, and Linux are all operating systems – Application Software • Application software refers to programs that make the computer useful to the user • Word processing, spreadsheet, and database packages are all examples of application software
5.
Copyright © 2014
Pearson Education, Inc. Copyright © 2014 Pearson Education, Inc. Programs and Programming Languages 1.2
6.
Copyright © 2014
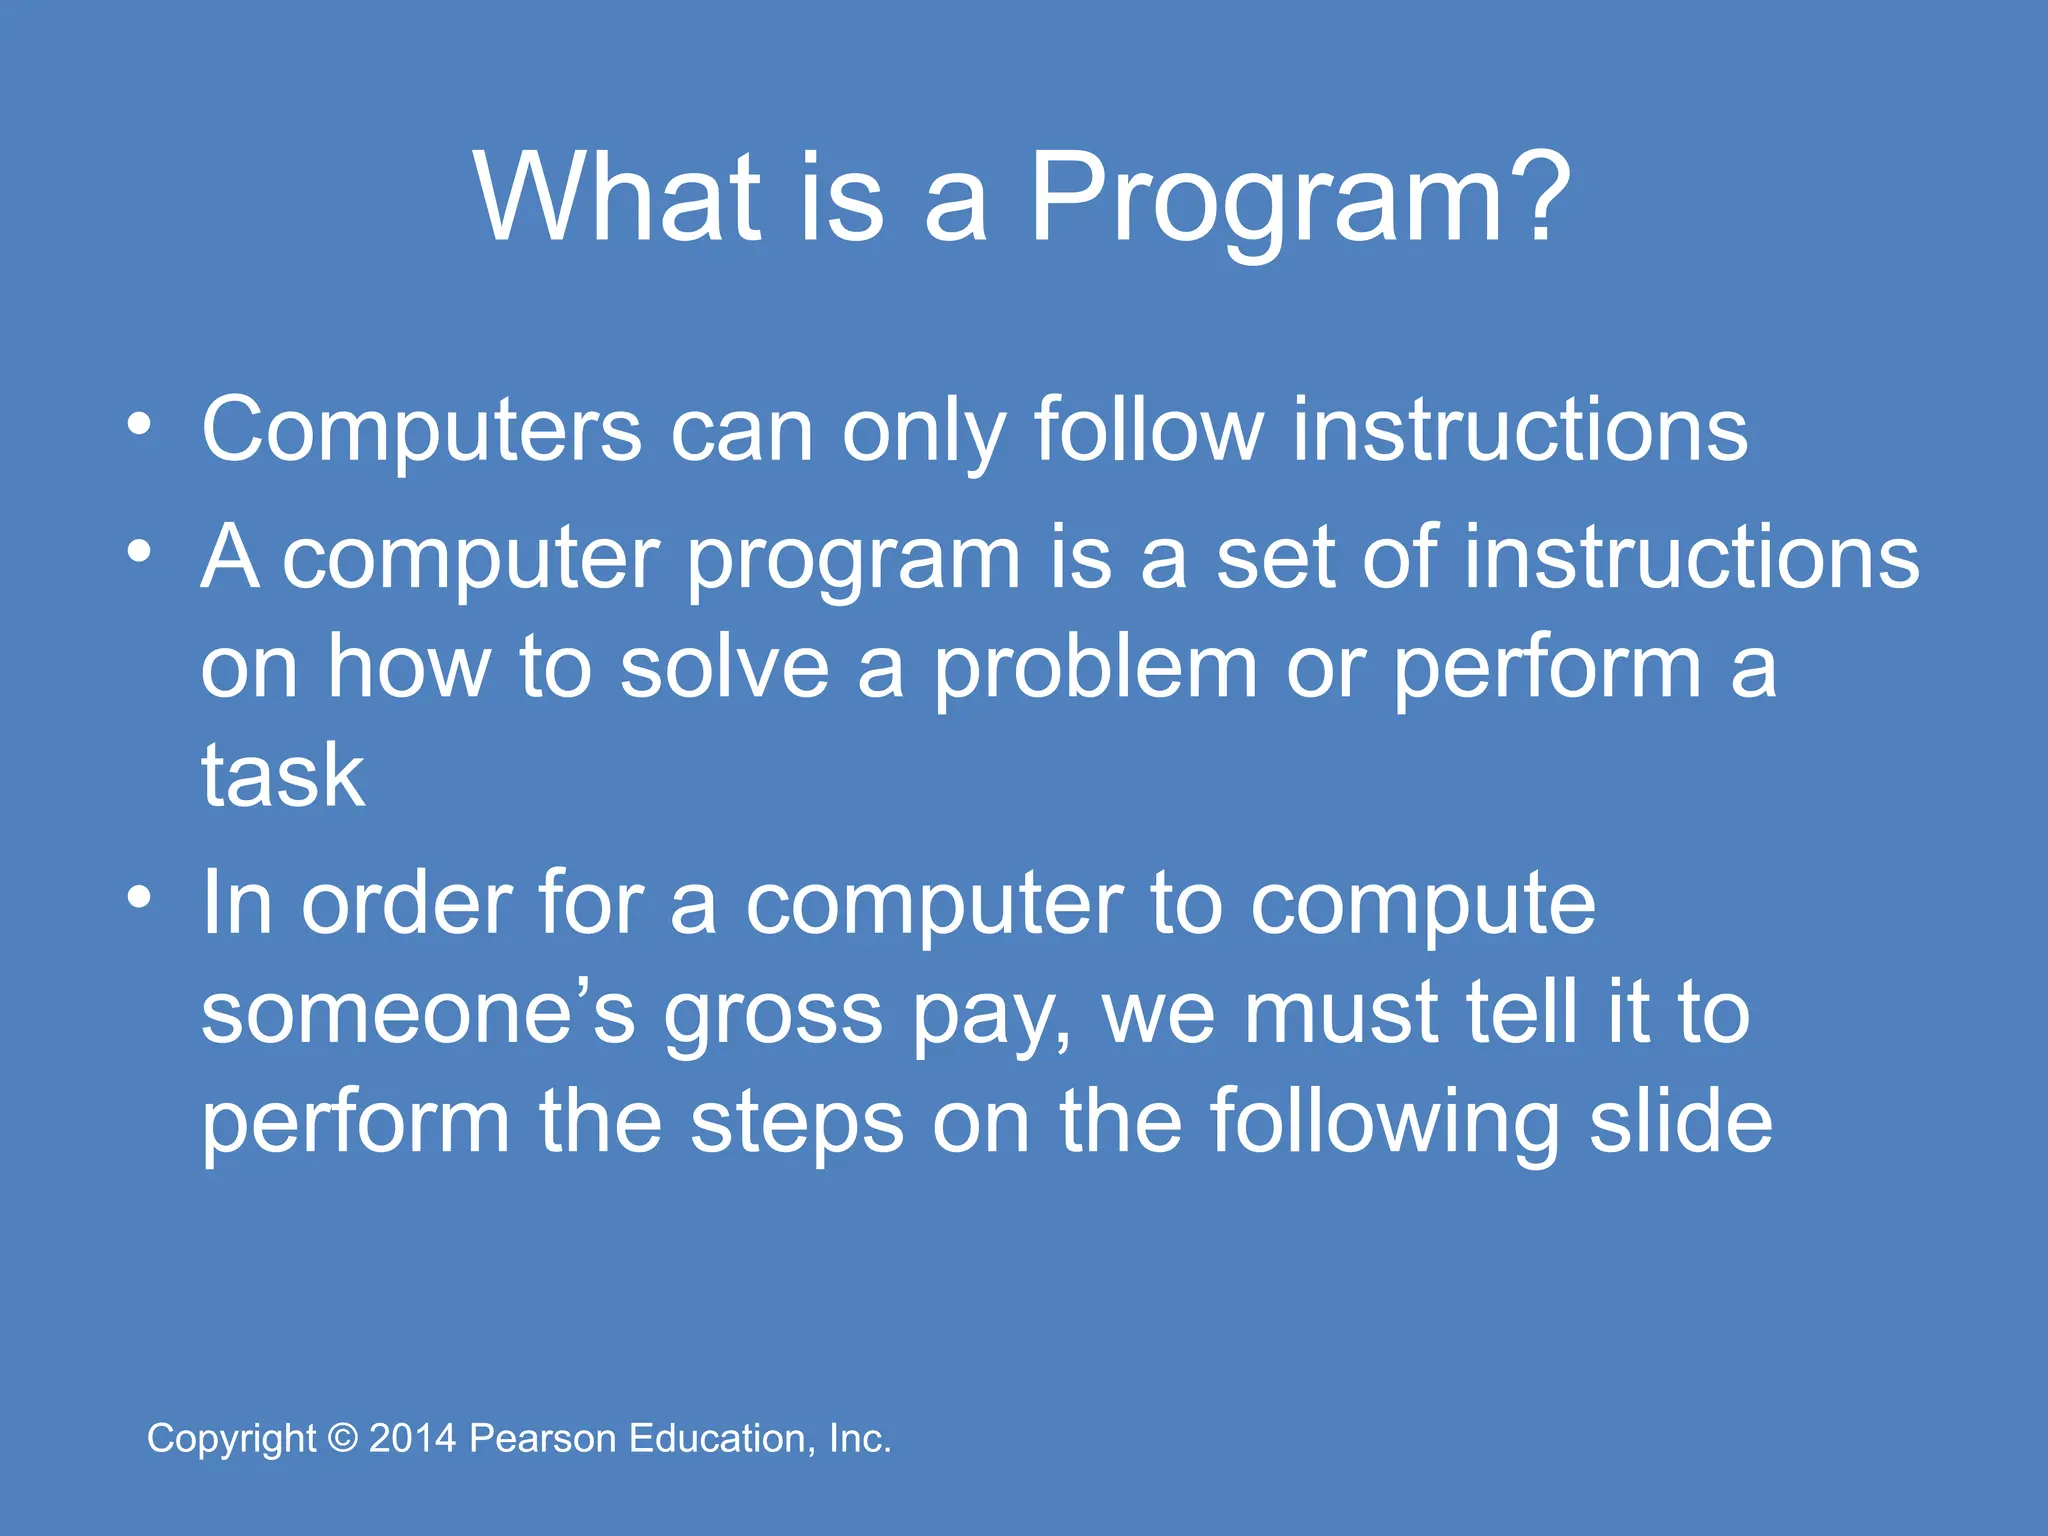
Pearson Education, Inc. Copyright © 2014 Pearson Education, Inc. What is a Program? • Computers can only follow instructions • A computer program is a set of instructions on how to solve a problem or perform a task • In order for a computer to compute someone’s gross pay, we must tell it to perform the steps on the following slide
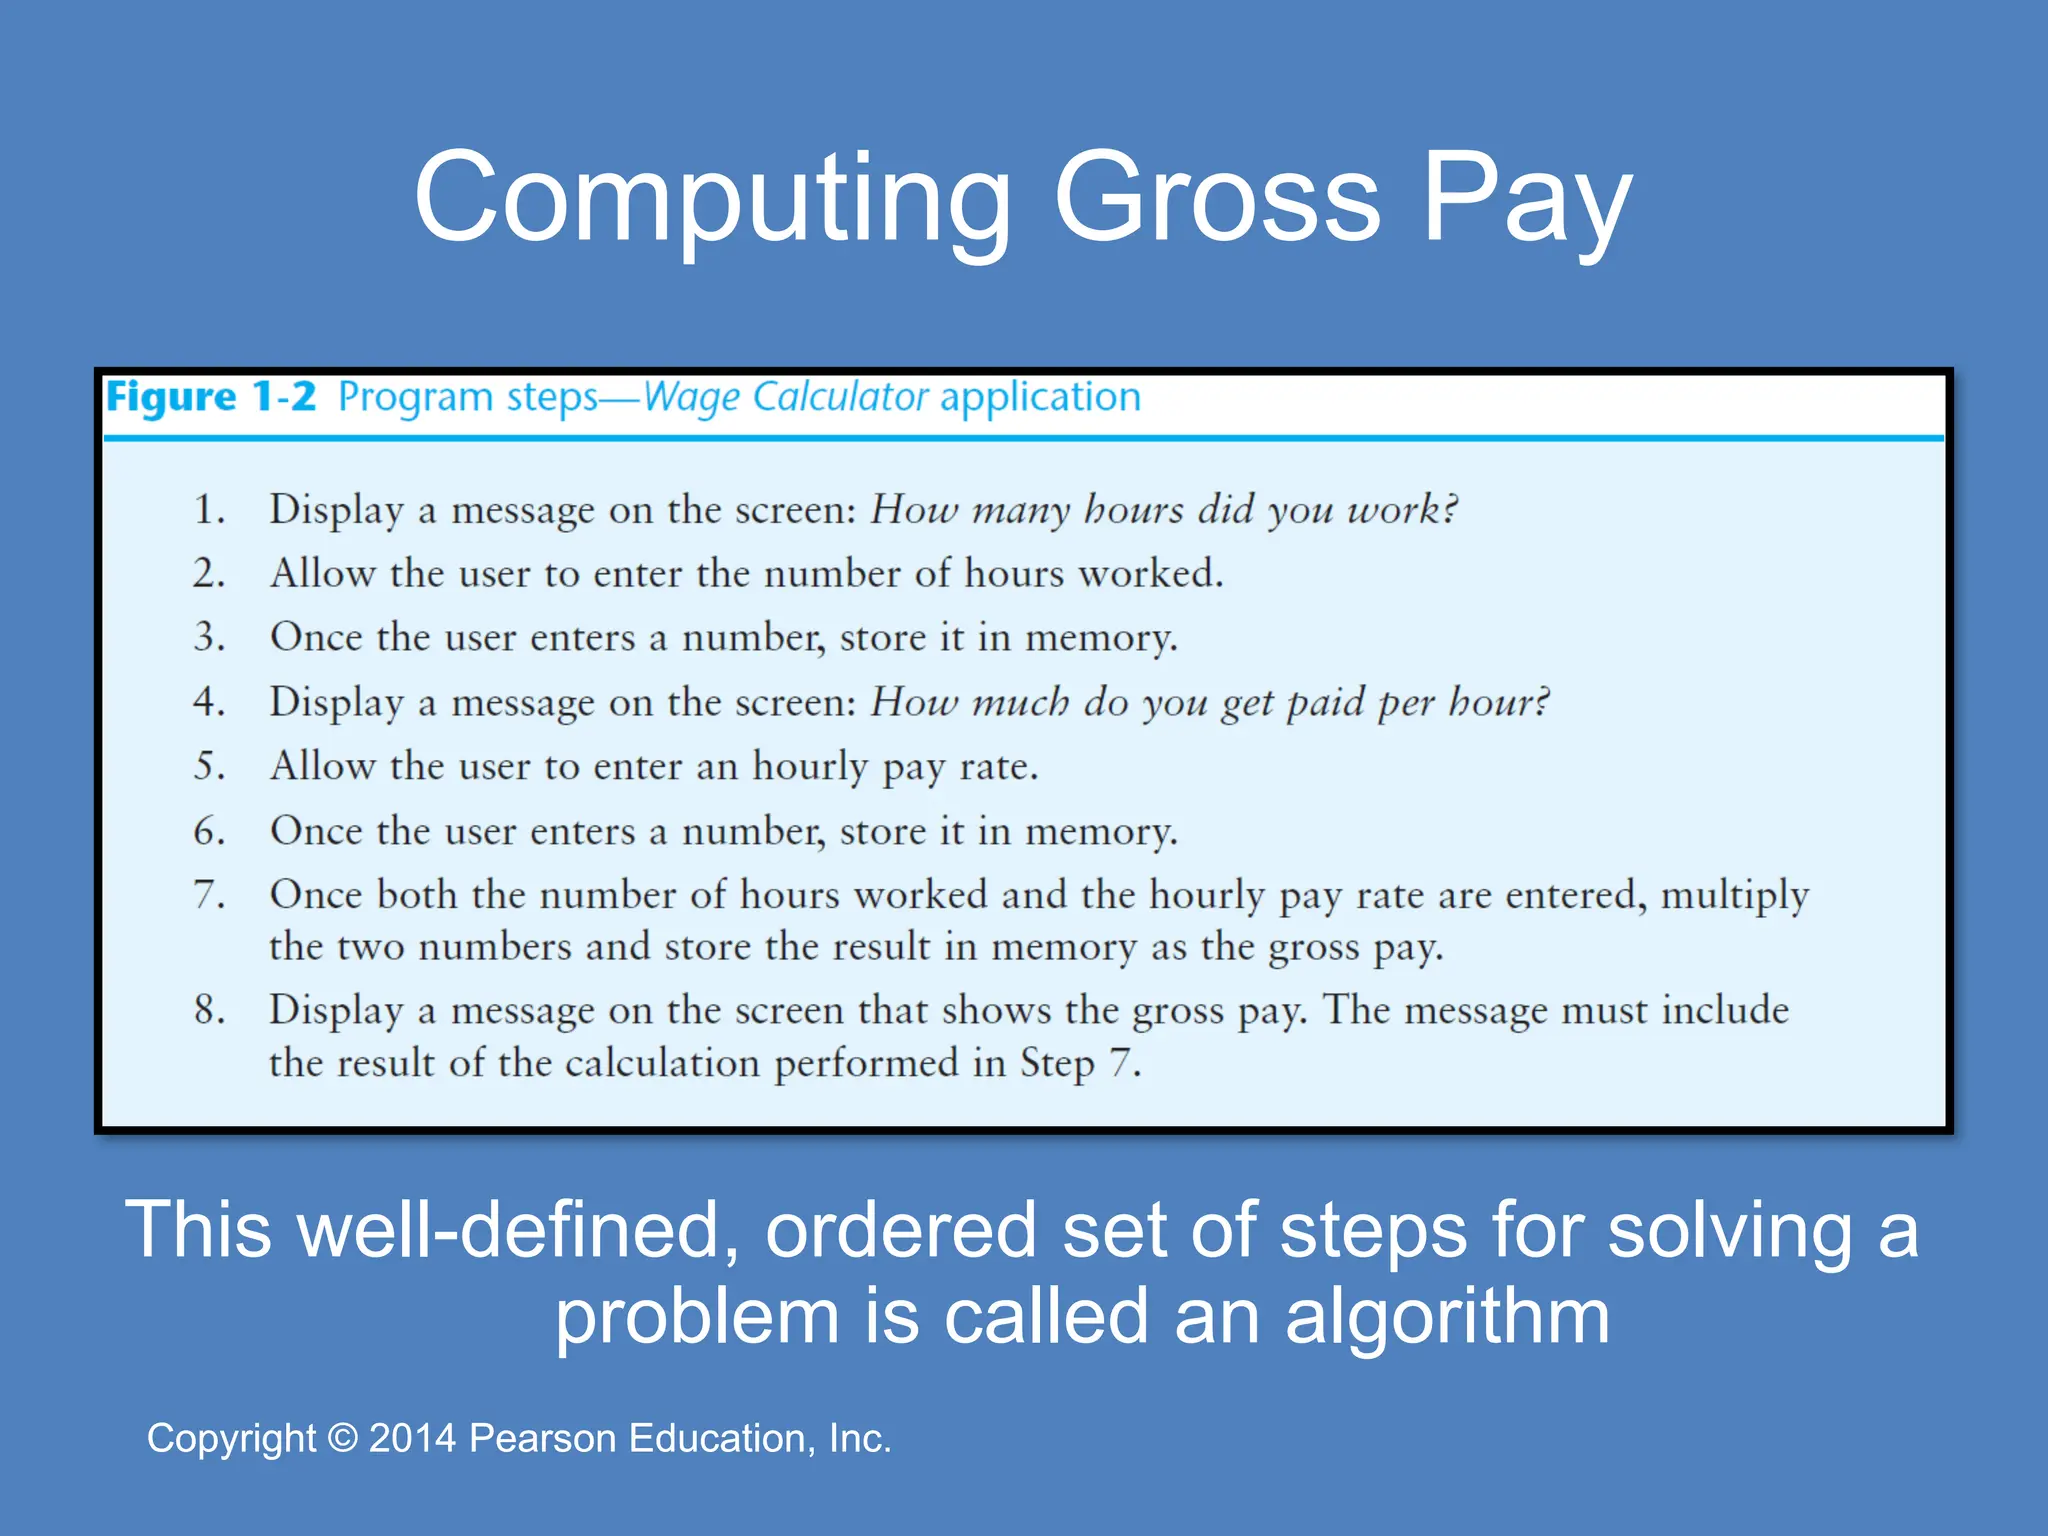
7.
Copyright © 2014
Pearson Education, Inc. Copyright © 2014 Pearson Education, Inc. Computing Gross Pay This well-defined, ordered set of steps for solving a problem is called an algorithm
8.
Copyright © 2014
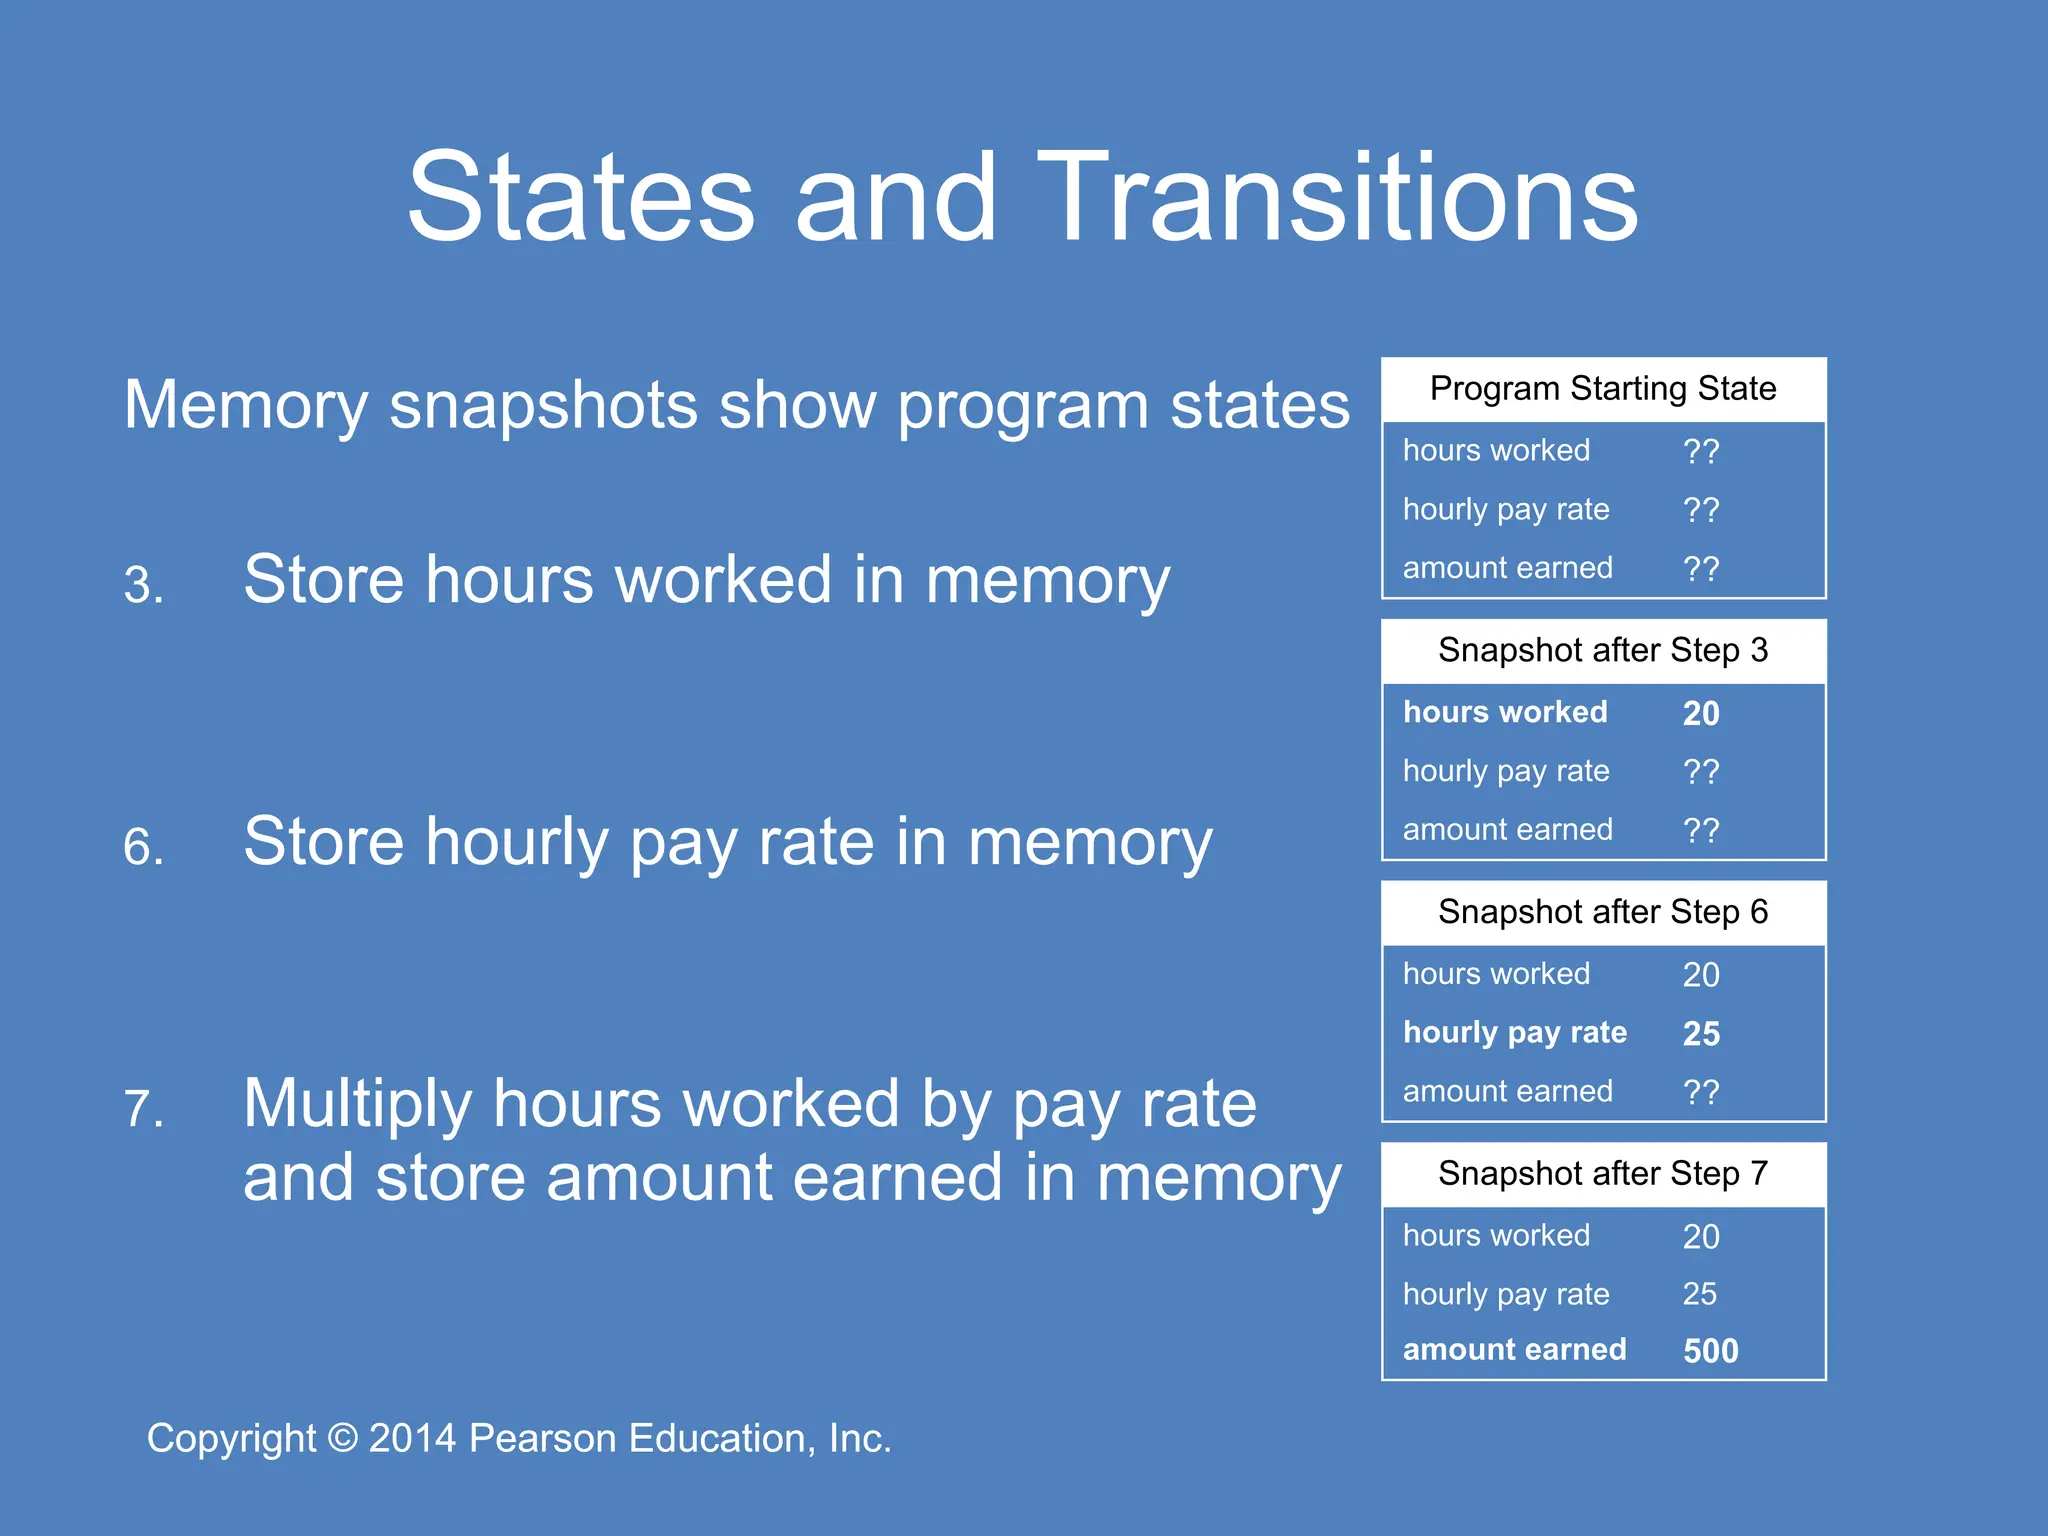
Pearson Education, Inc. Copyright © 2014 Pearson Education, Inc. States and Transitions Memory snapshots show program states 3. Store hours worked in memory 6. Store hourly pay rate in memory 7. Multiply hours worked by pay rate and store amount earned in memory Program Starting State hours worked ?? hourly pay rate ?? amount earned ?? Snapshot after Step 3 hours worked 20 hourly pay rate ?? amount earned ?? Snapshot after Step 6 hours worked 20 hourly pay rate 25 amount earned ?? Snapshot after Step 7 hours worked 20 hourly pay rate 25 amount earned 500
9.
Copyright © 2014
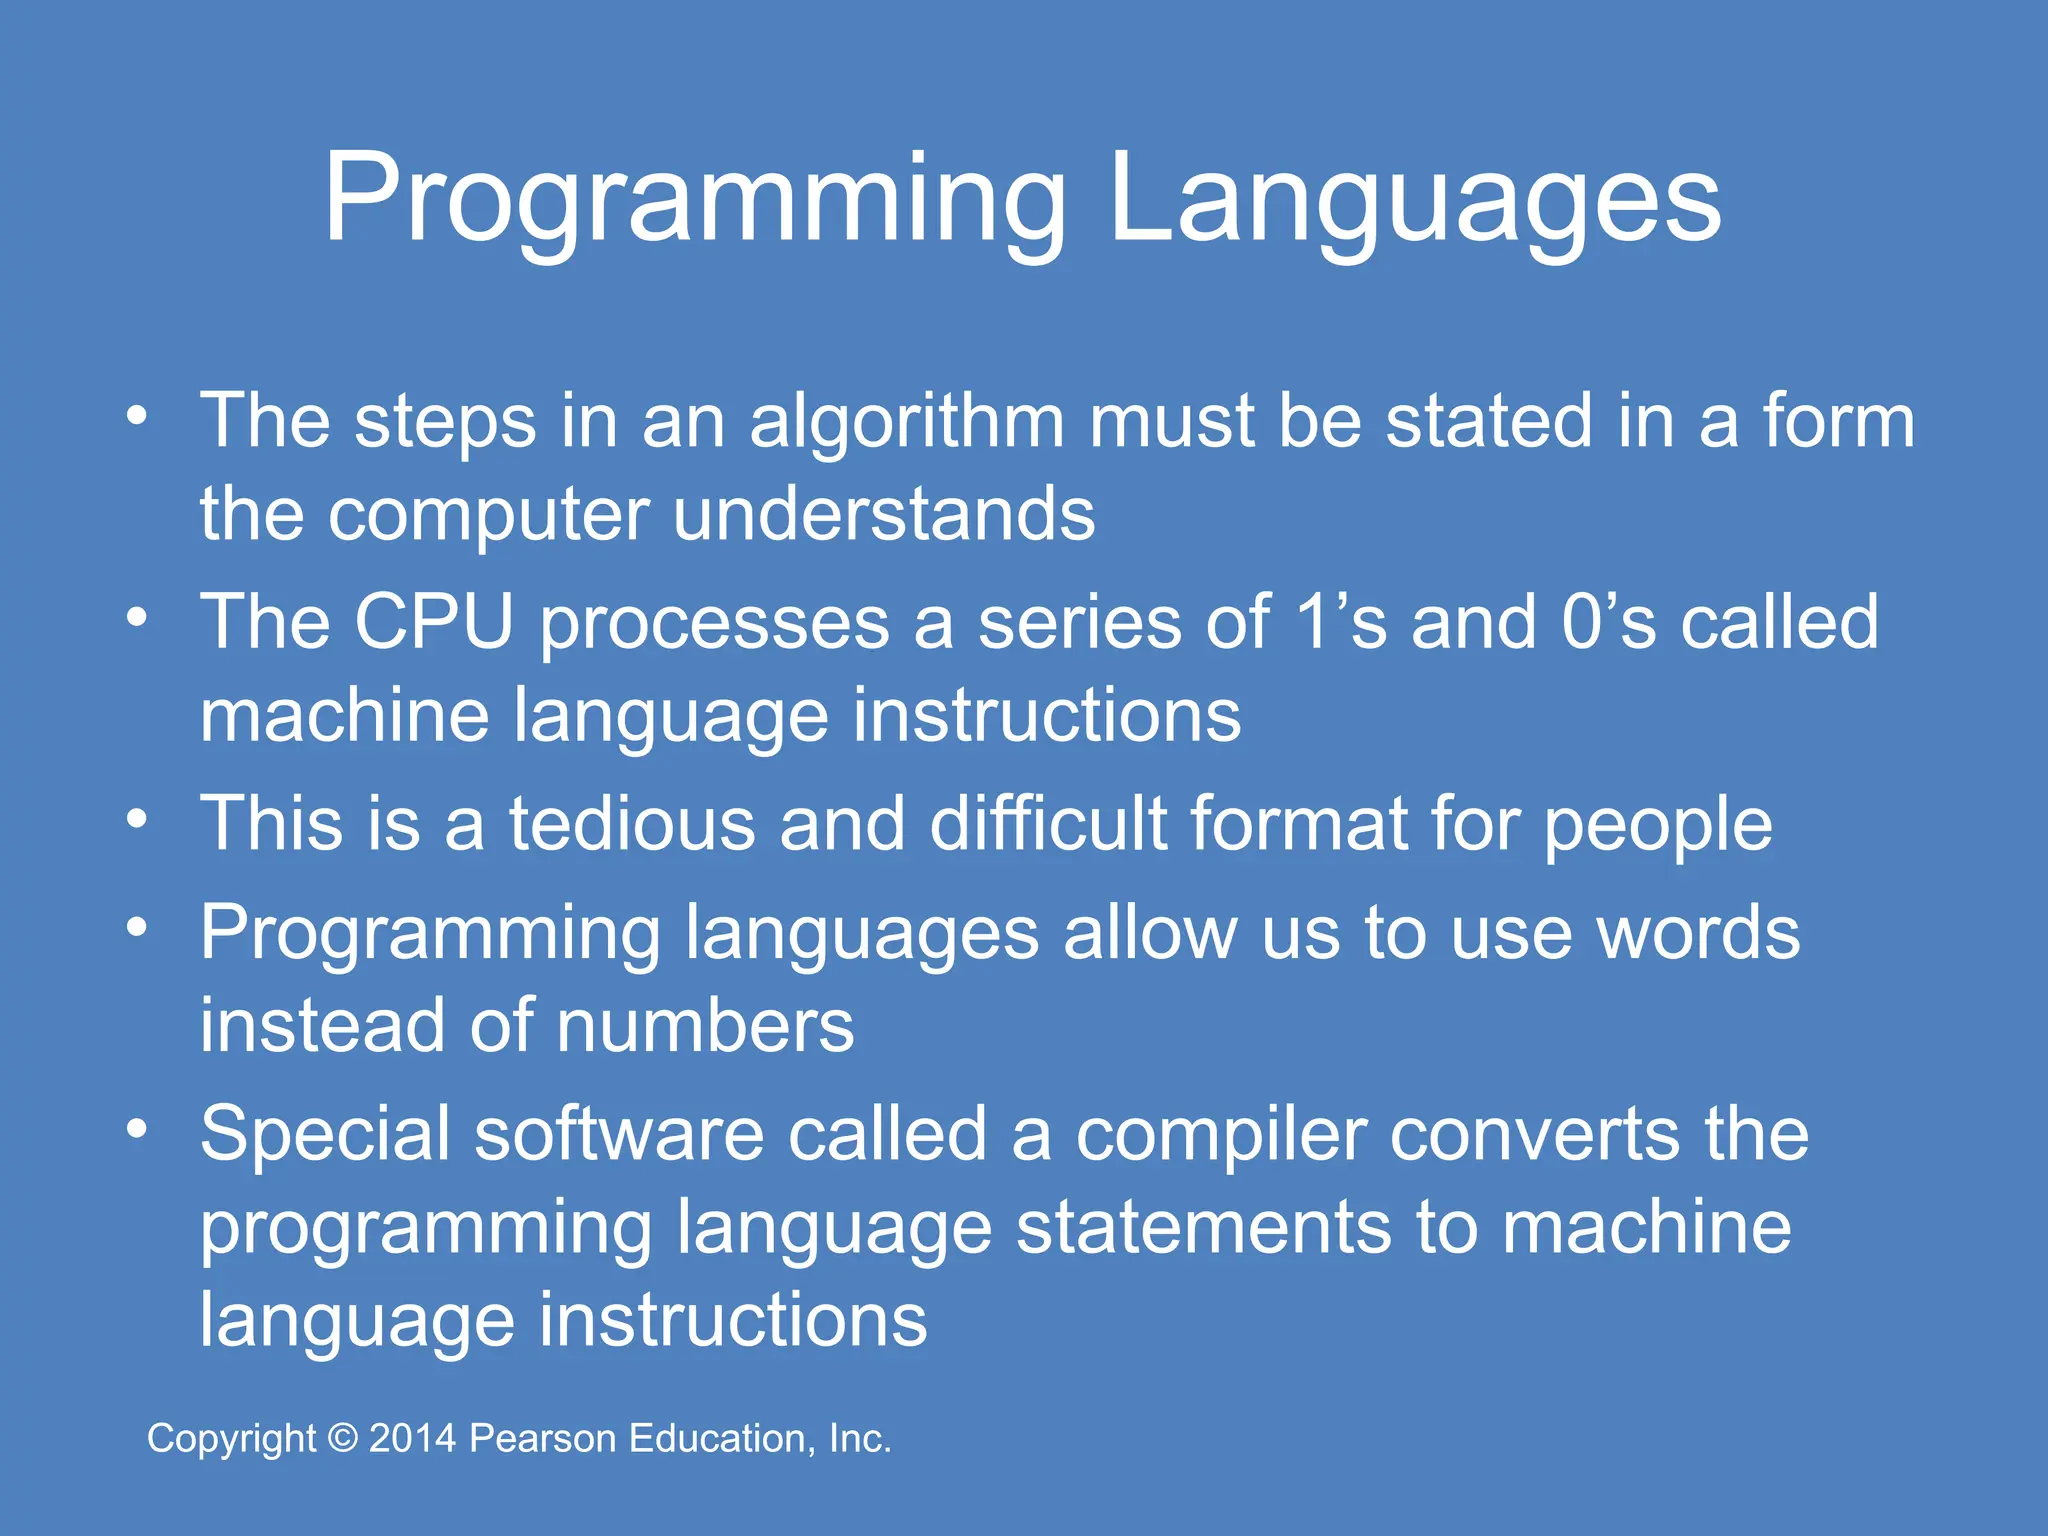
Pearson Education, Inc. Copyright © 2014 Pearson Education, Inc. Programming Languages • The steps in an algorithm must be stated in a form the computer understands • The CPU processes a series of 1’s and 0’s called machine language instructions • This is a tedious and difficult format for people • Programming languages allow us to use words instead of numbers • Special software called a compiler converts the programming language statements to machine language instructions
10.
Copyright © 2014
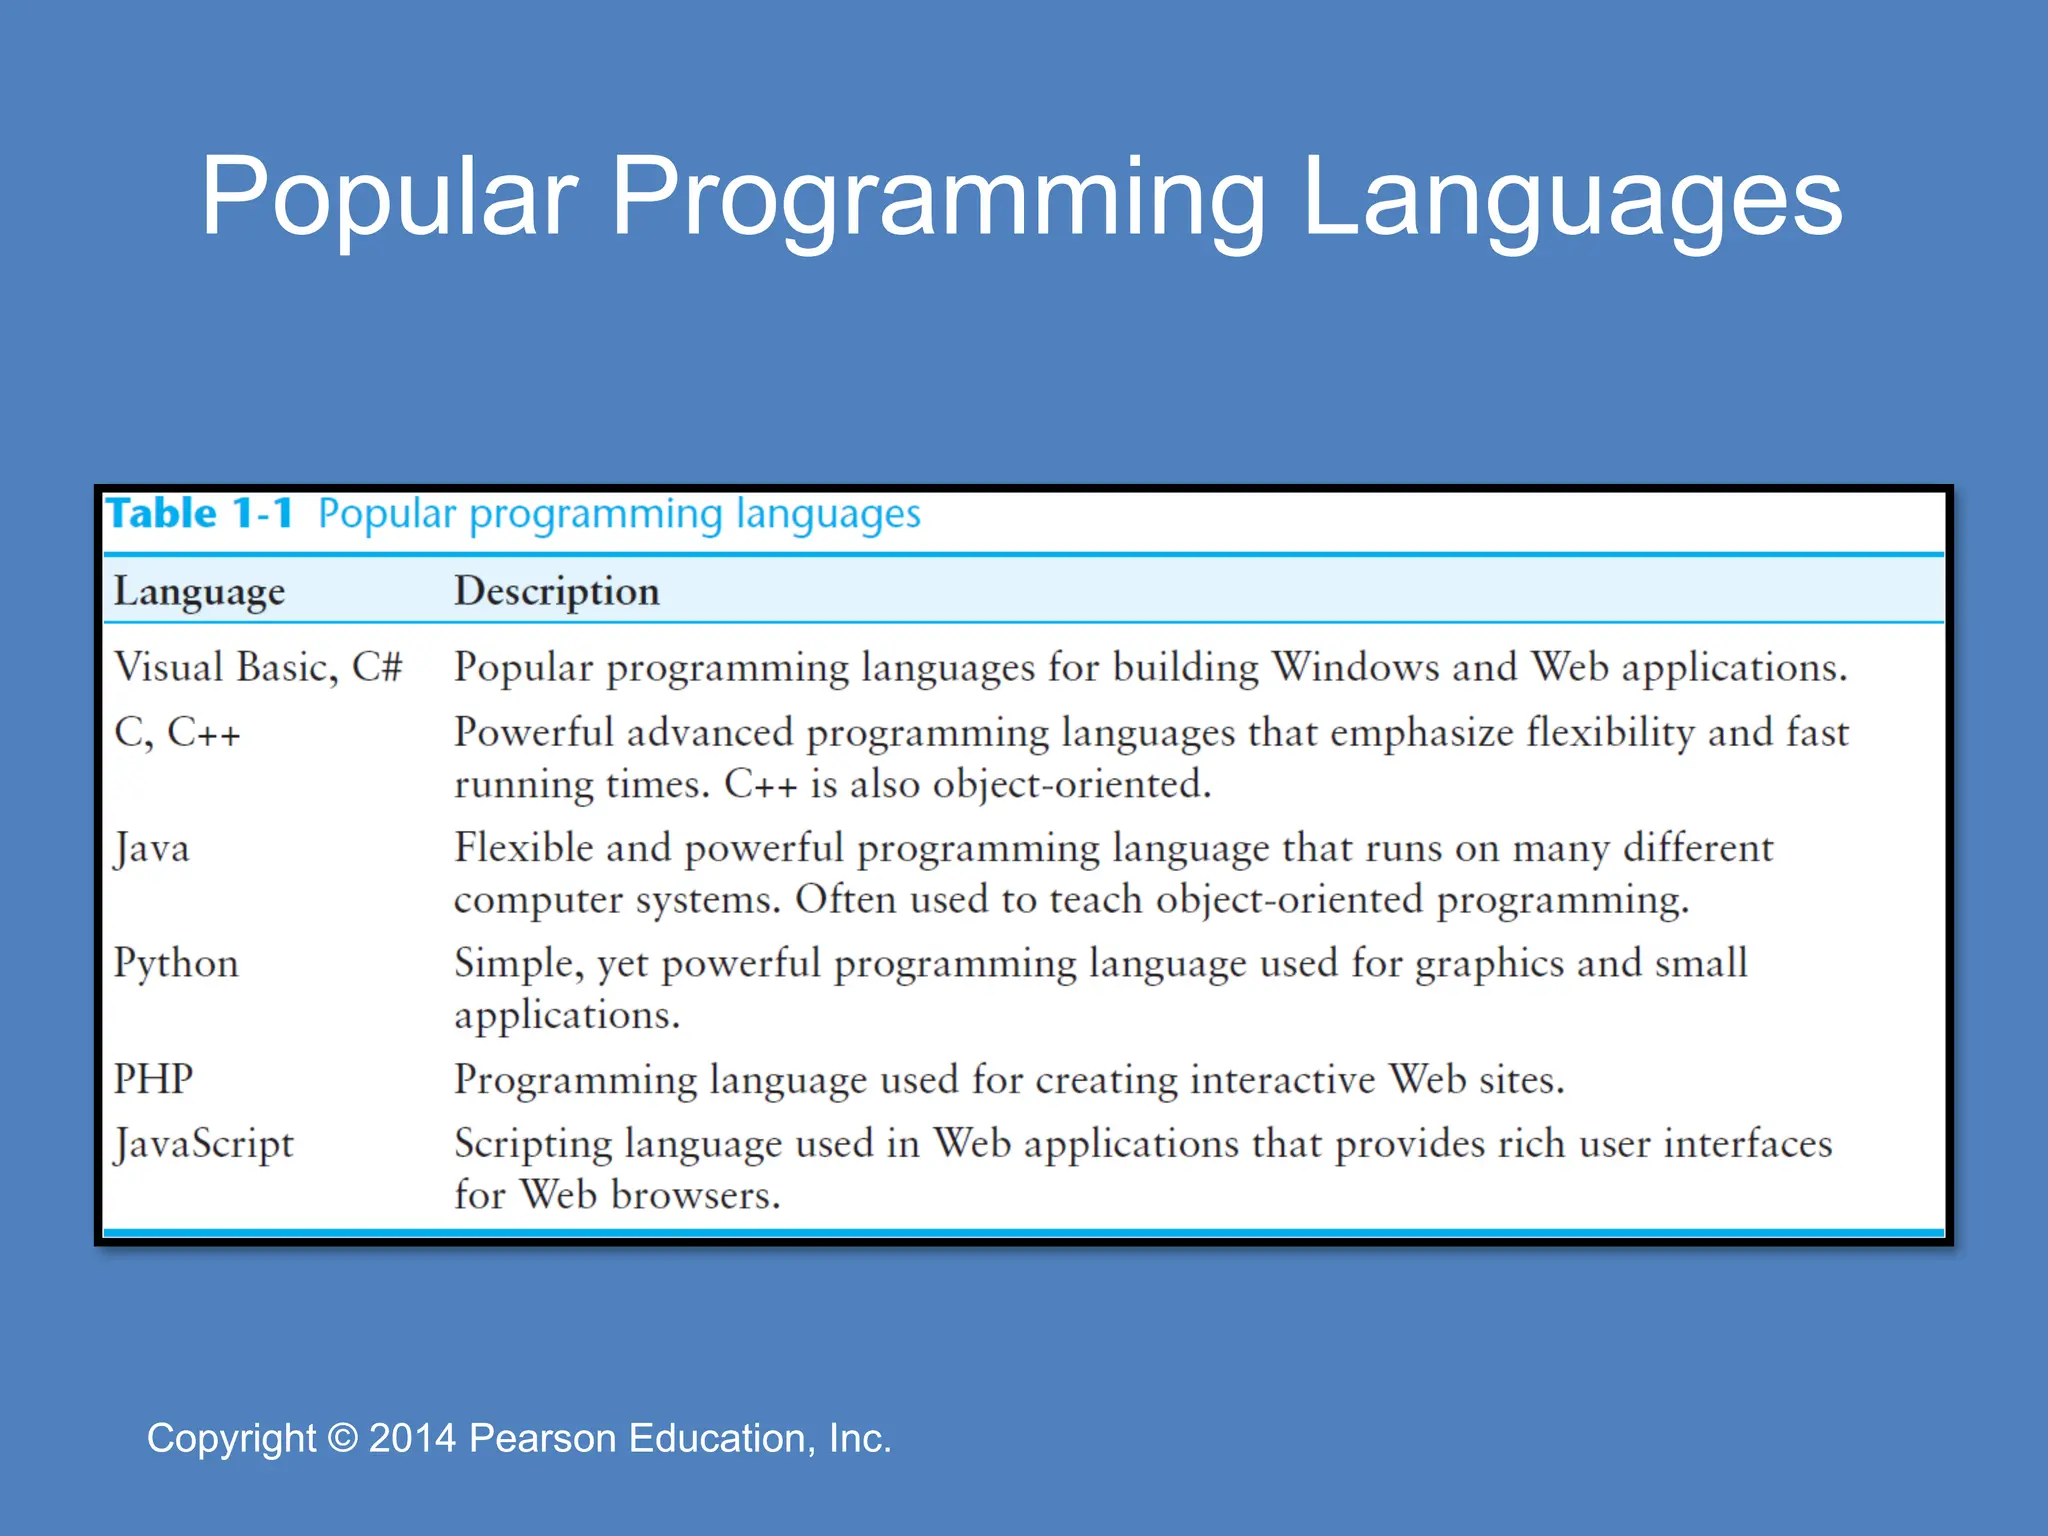
Pearson Education, Inc. Copyright © 2014 Pearson Education, Inc. Popular Programming Languages
11.
Copyright © 2014
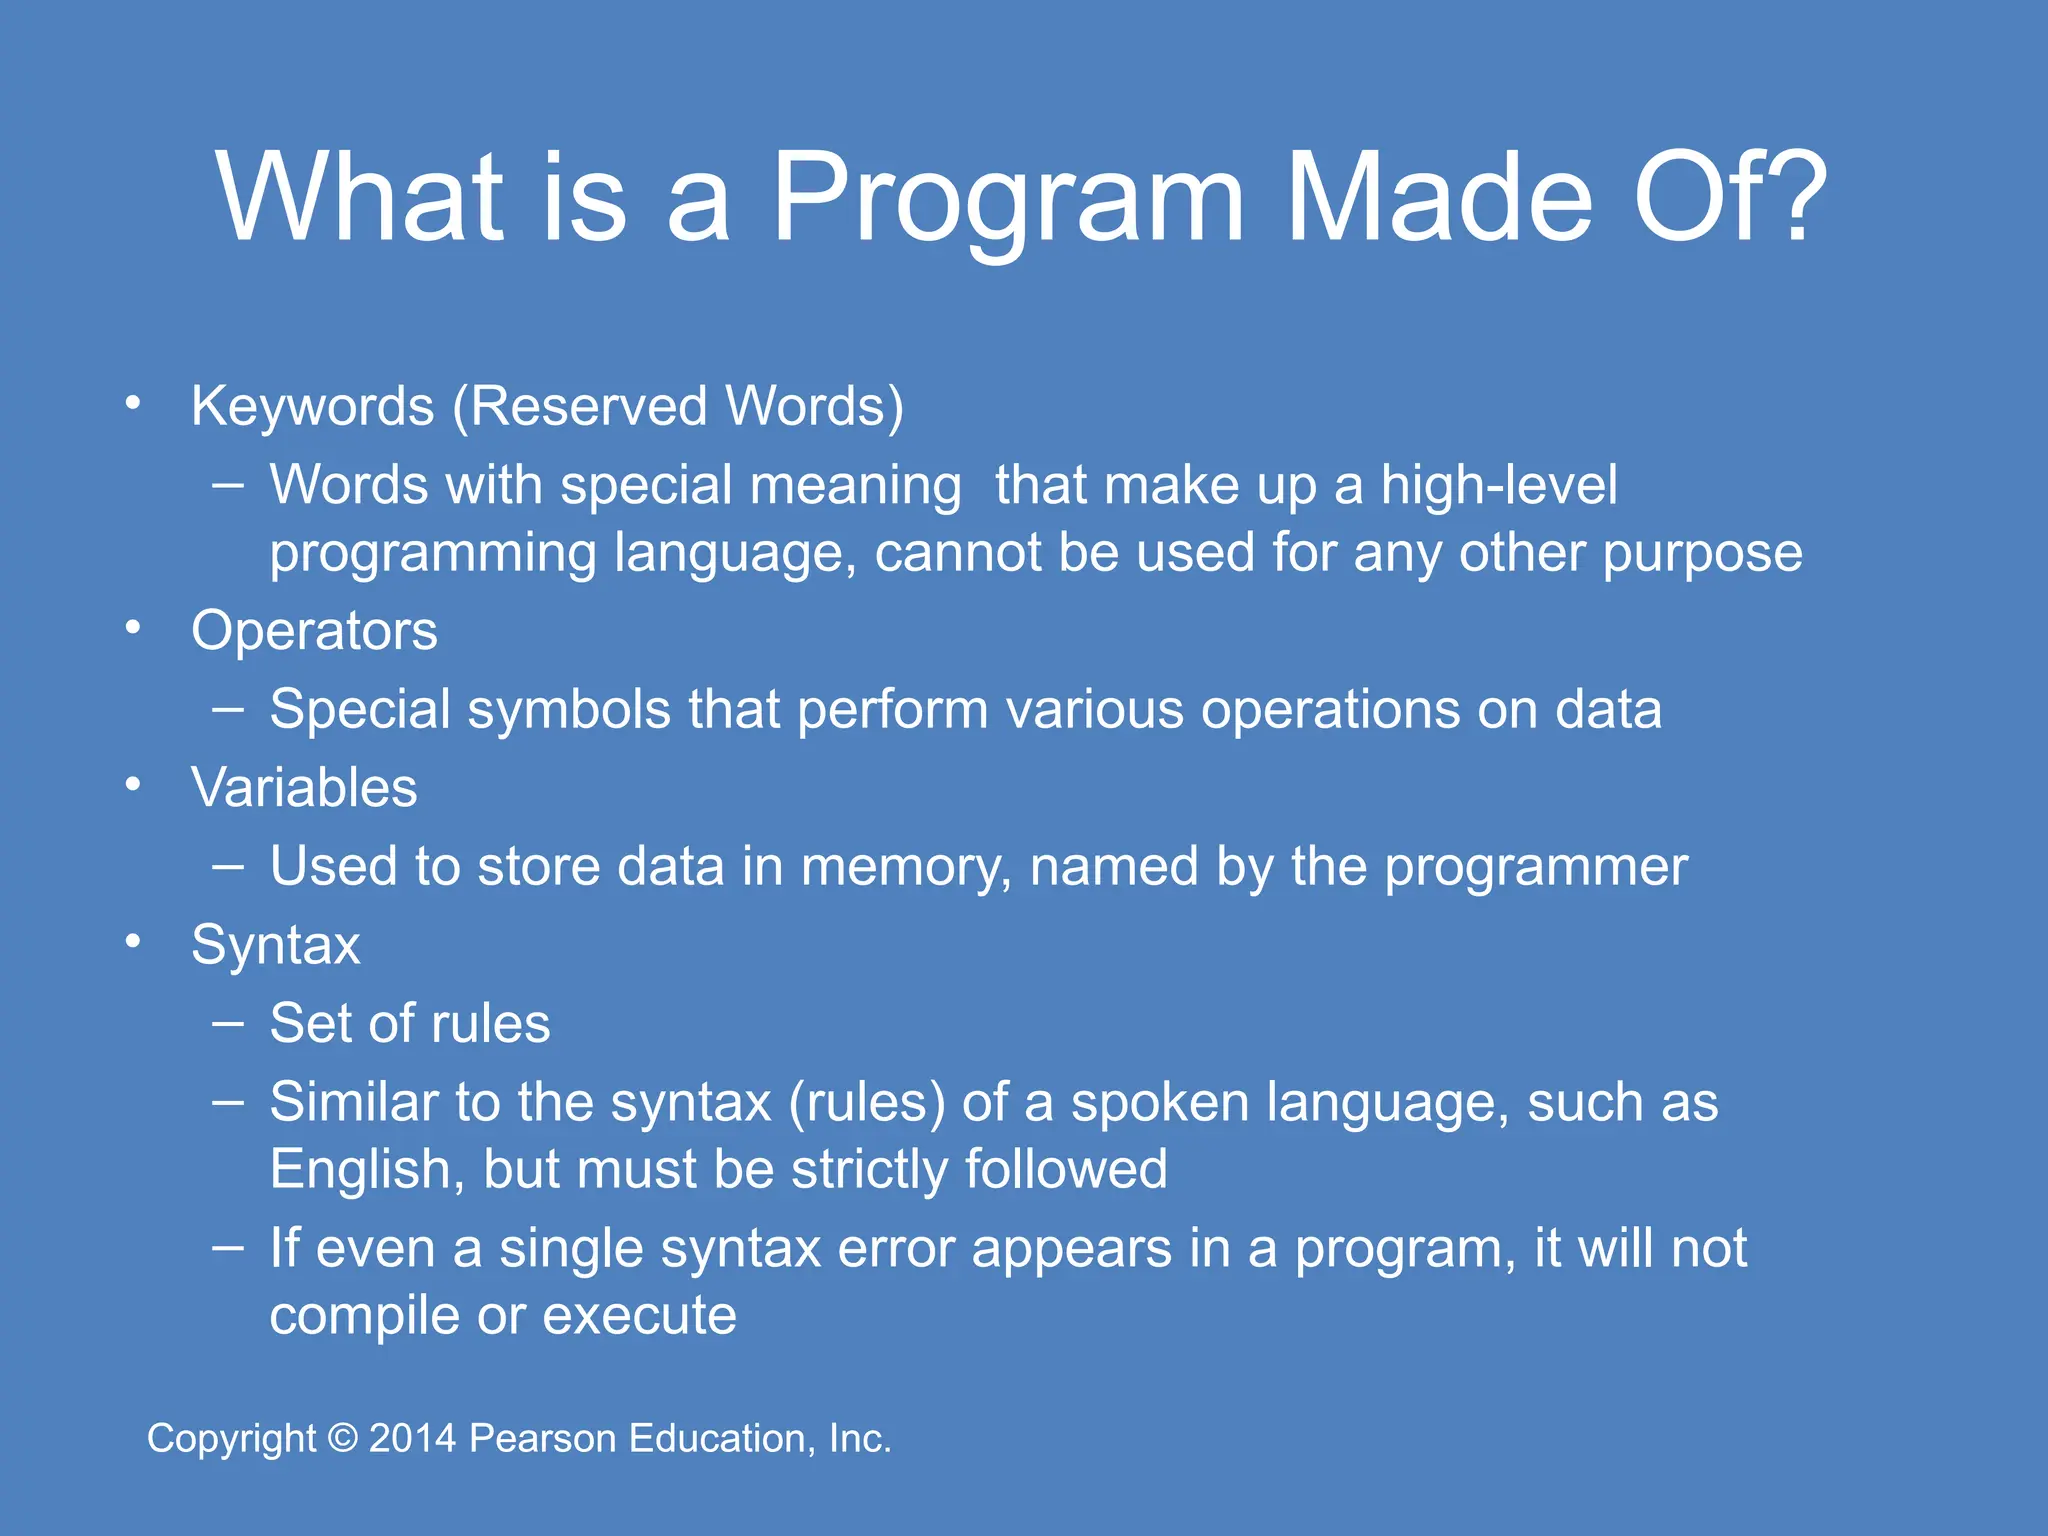
Pearson Education, Inc. Copyright © 2014 Pearson Education, Inc. What is a Program Made Of? • Keywords (Reserved Words) – Words with special meaning that make up a high-level programming language, cannot be used for any other purpose • Operators – Special symbols that perform various operations on data • Variables – Used to store data in memory, named by the programmer • Syntax – Set of rules – Similar to the syntax (rules) of a spoken language, such as English, but must be strictly followed – If even a single syntax error appears in a program, it will not compile or execute
12.
Copyright © 2014
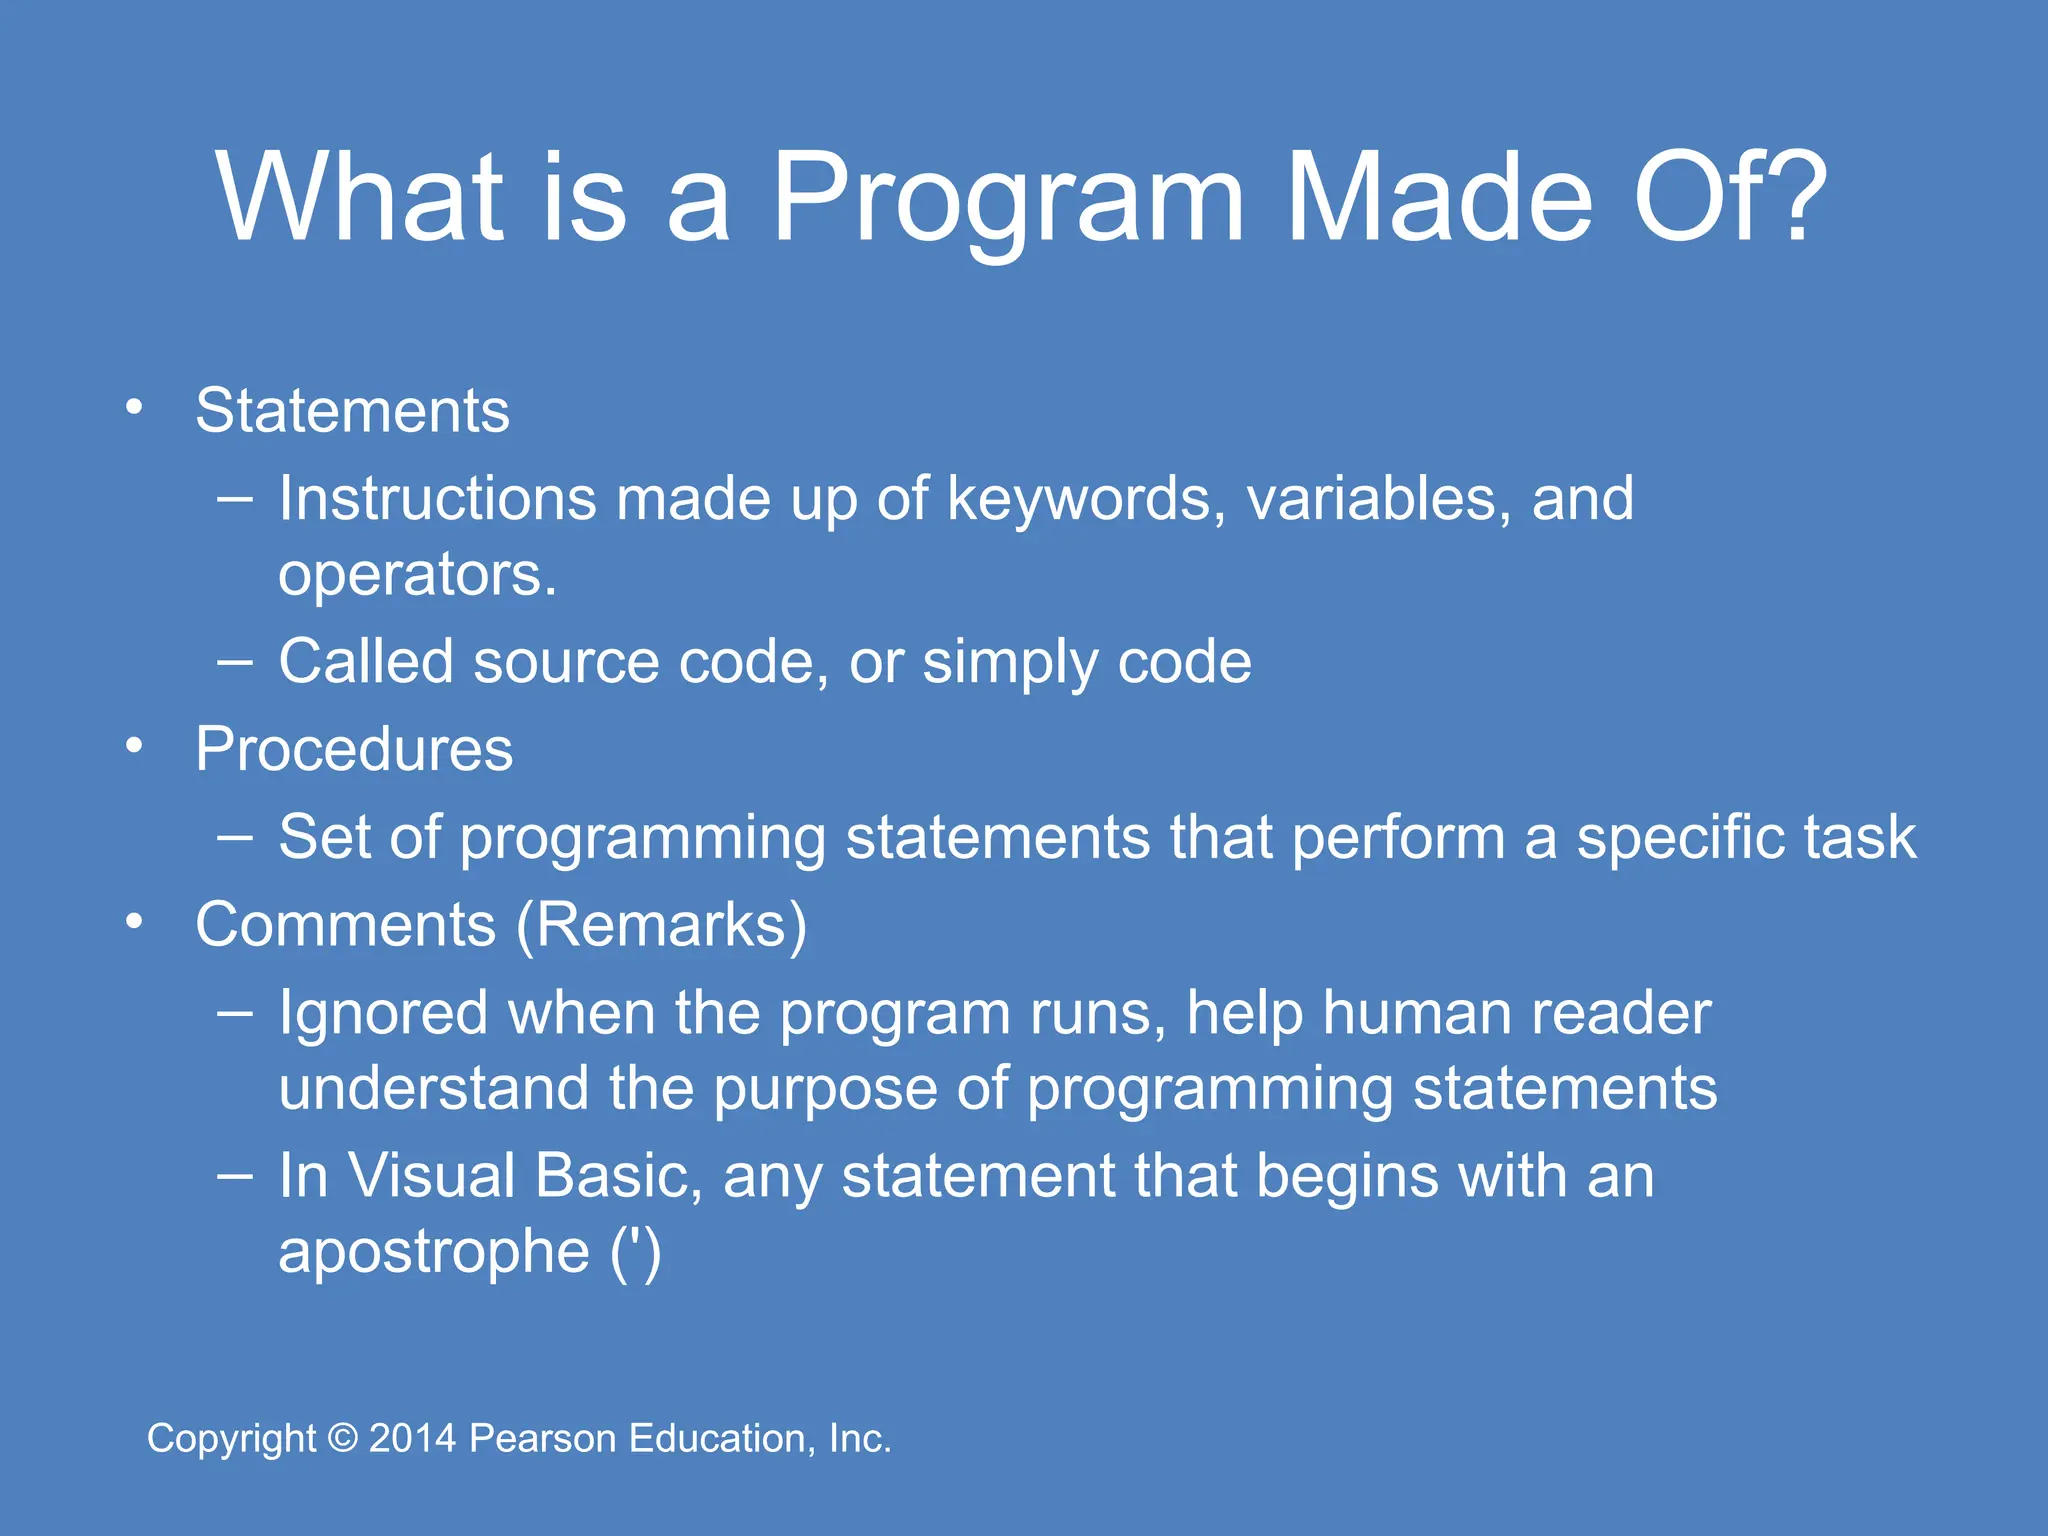
Pearson Education, Inc. Copyright © 2014 Pearson Education, Inc. What is a Program Made Of? • Statements – Instructions made up of keywords, variables, and operators. – Called source code, or simply code • Procedures – Set of programming statements that perform a specific task • Comments (Remarks) – Ignored when the program runs, help human reader understand the purpose of programming statements – In Visual Basic, any statement that begins with an apostrophe (')
13.
Copyright © 2014
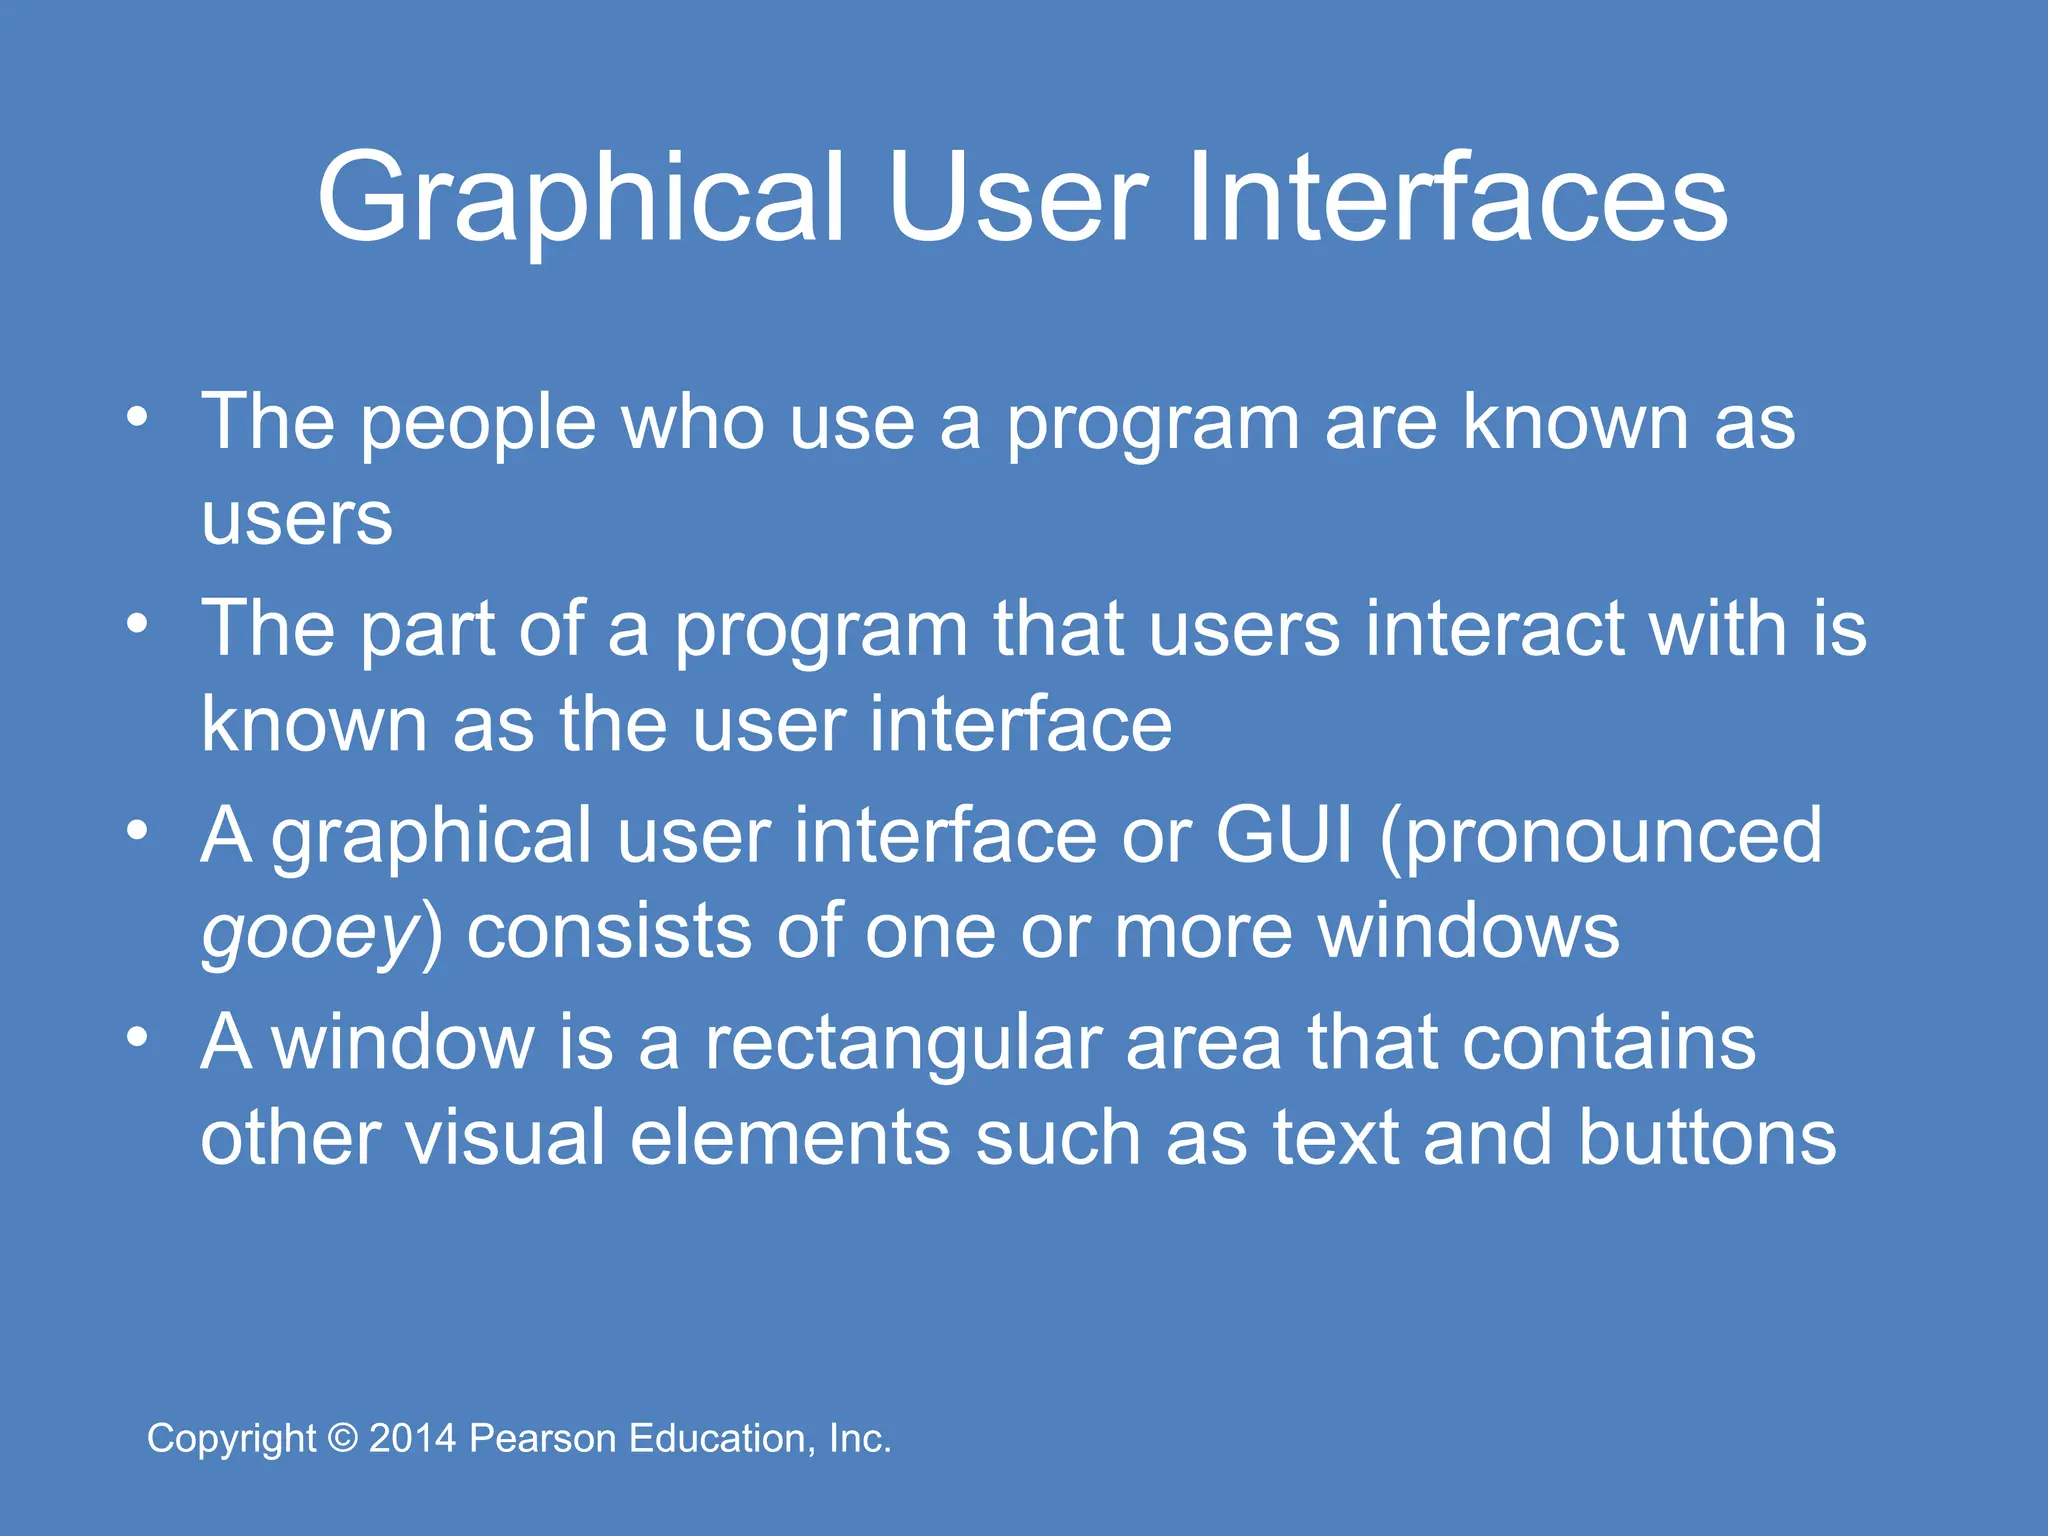
Pearson Education, Inc. Copyright © 2014 Pearson Education, Inc. Graphical User Interfaces • The people who use a program are known as users • The part of a program that users interact with is known as the user interface • A graphical user interface or GUI (pronounced gooey) consists of one or more windows • A window is a rectangular area that contains other visual elements such as text and buttons
14.
Copyright © 2014
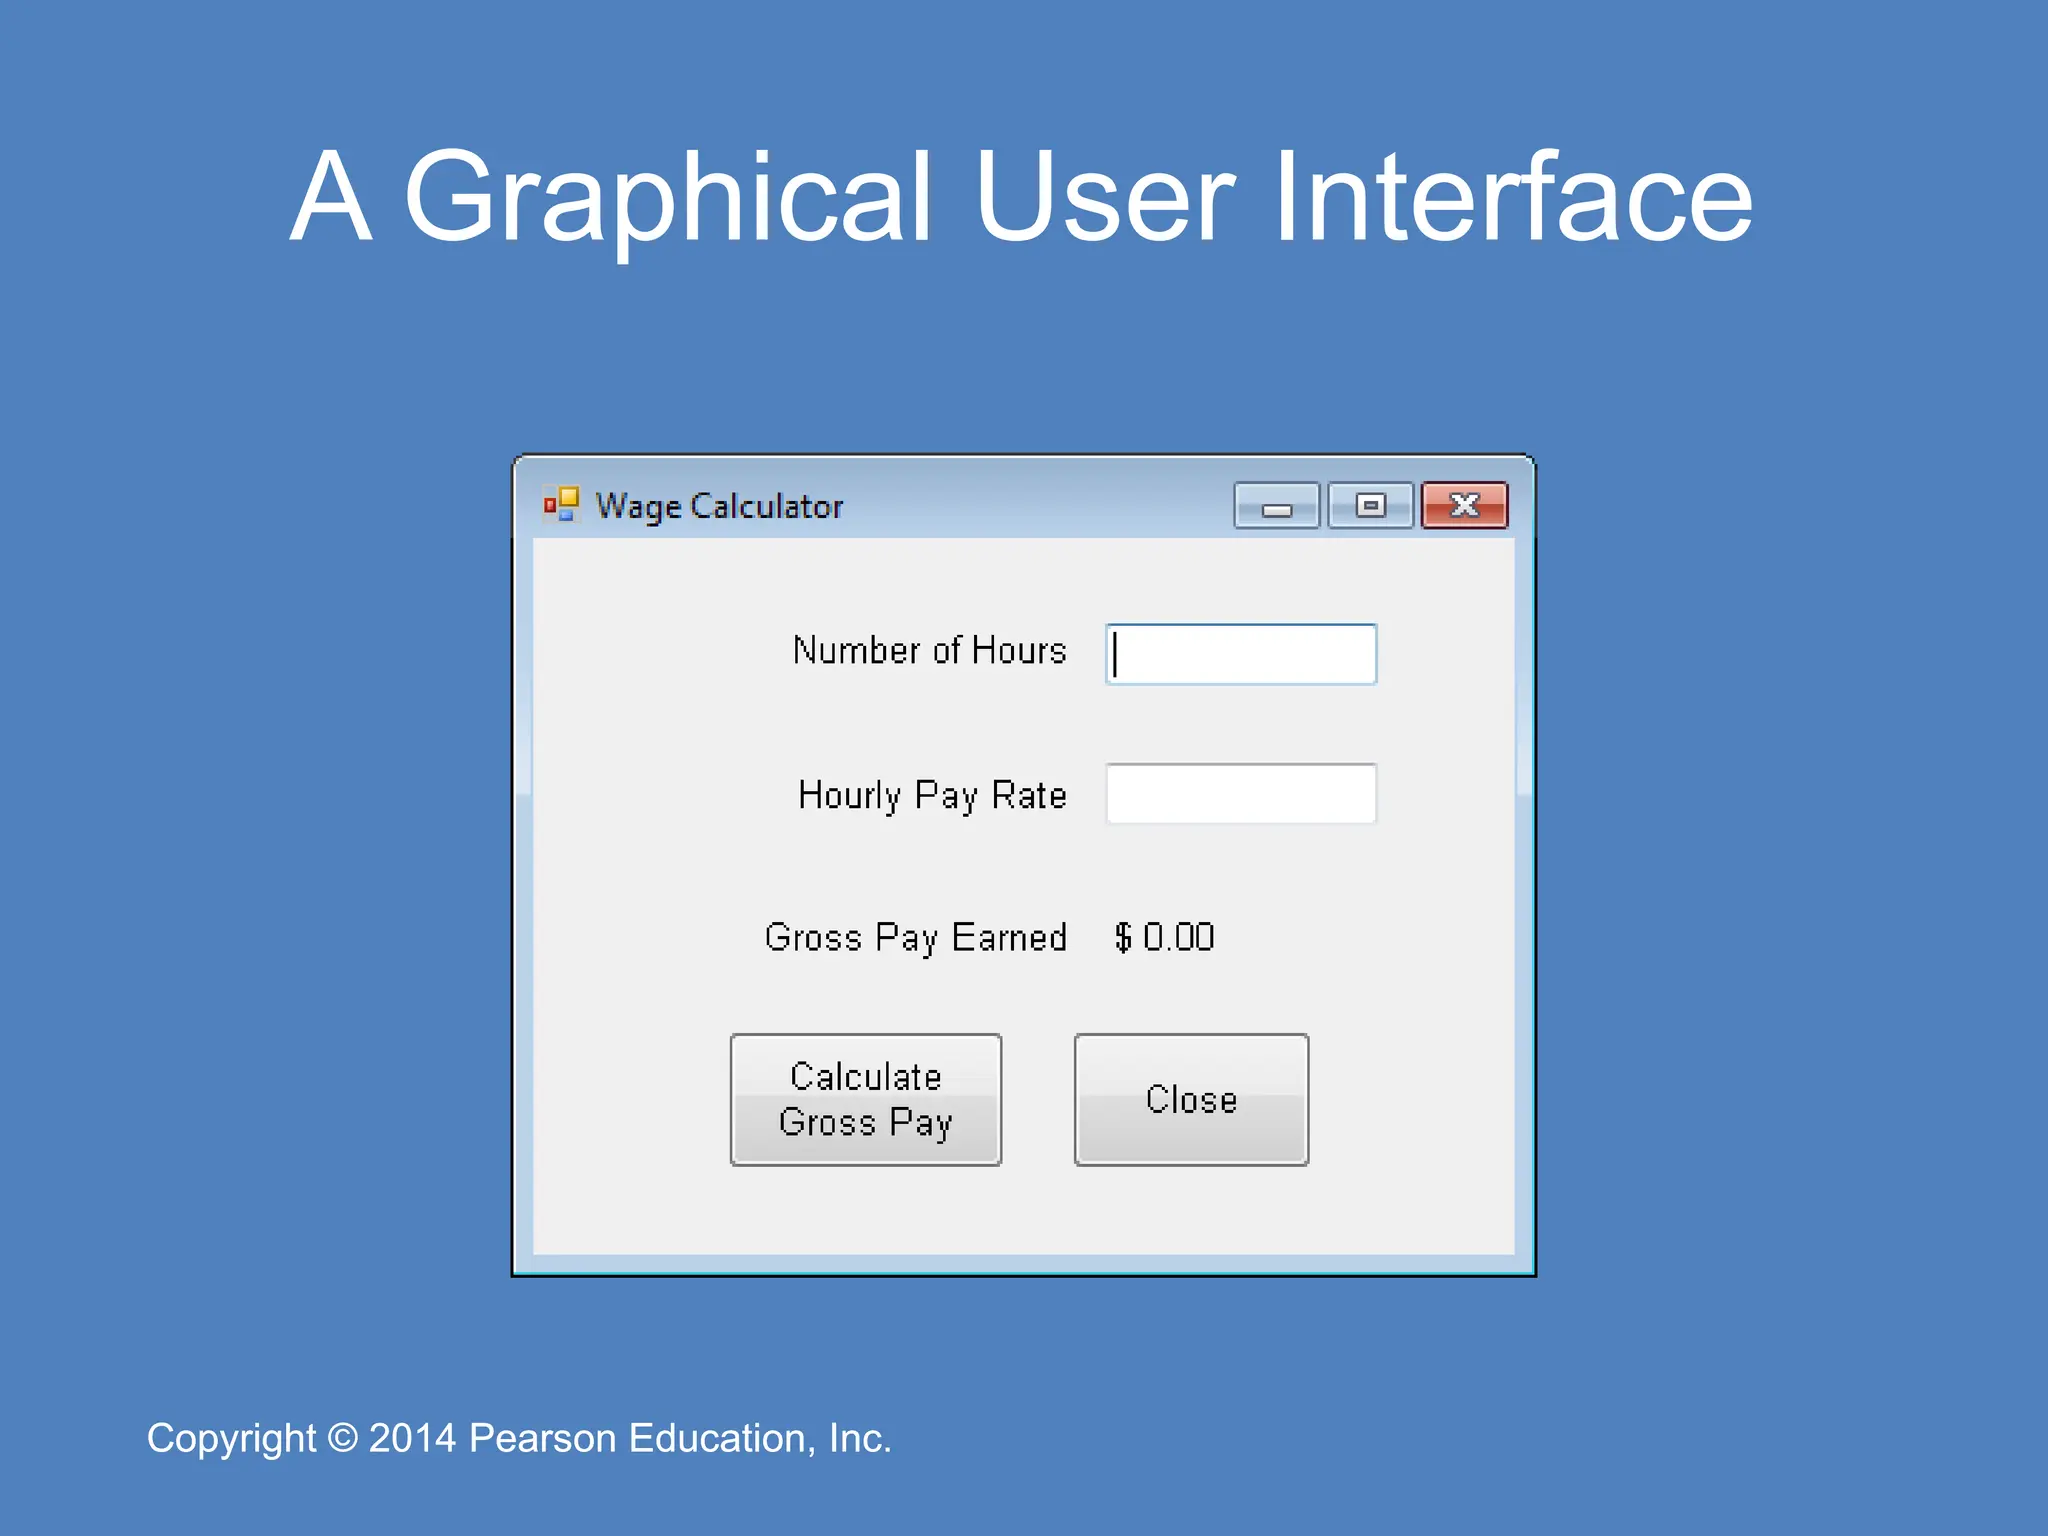
Pearson Education, Inc. Copyright © 2014 Pearson Education, Inc. A Graphical User Interface
15.
Copyright © 2014
Pearson Education, Inc. Copyright © 2014 Pearson Education, Inc. Objects and Controls • Visual Basic is an object-oriented programming (OOP) language • An object is an item in a program that contains data and has the ability to perform actions • The data an object contains is referred to as properties, or attributes • The operations that an object can perform are called methods • A method is a special type of procedure that belongs to an object
16.
Copyright © 2014
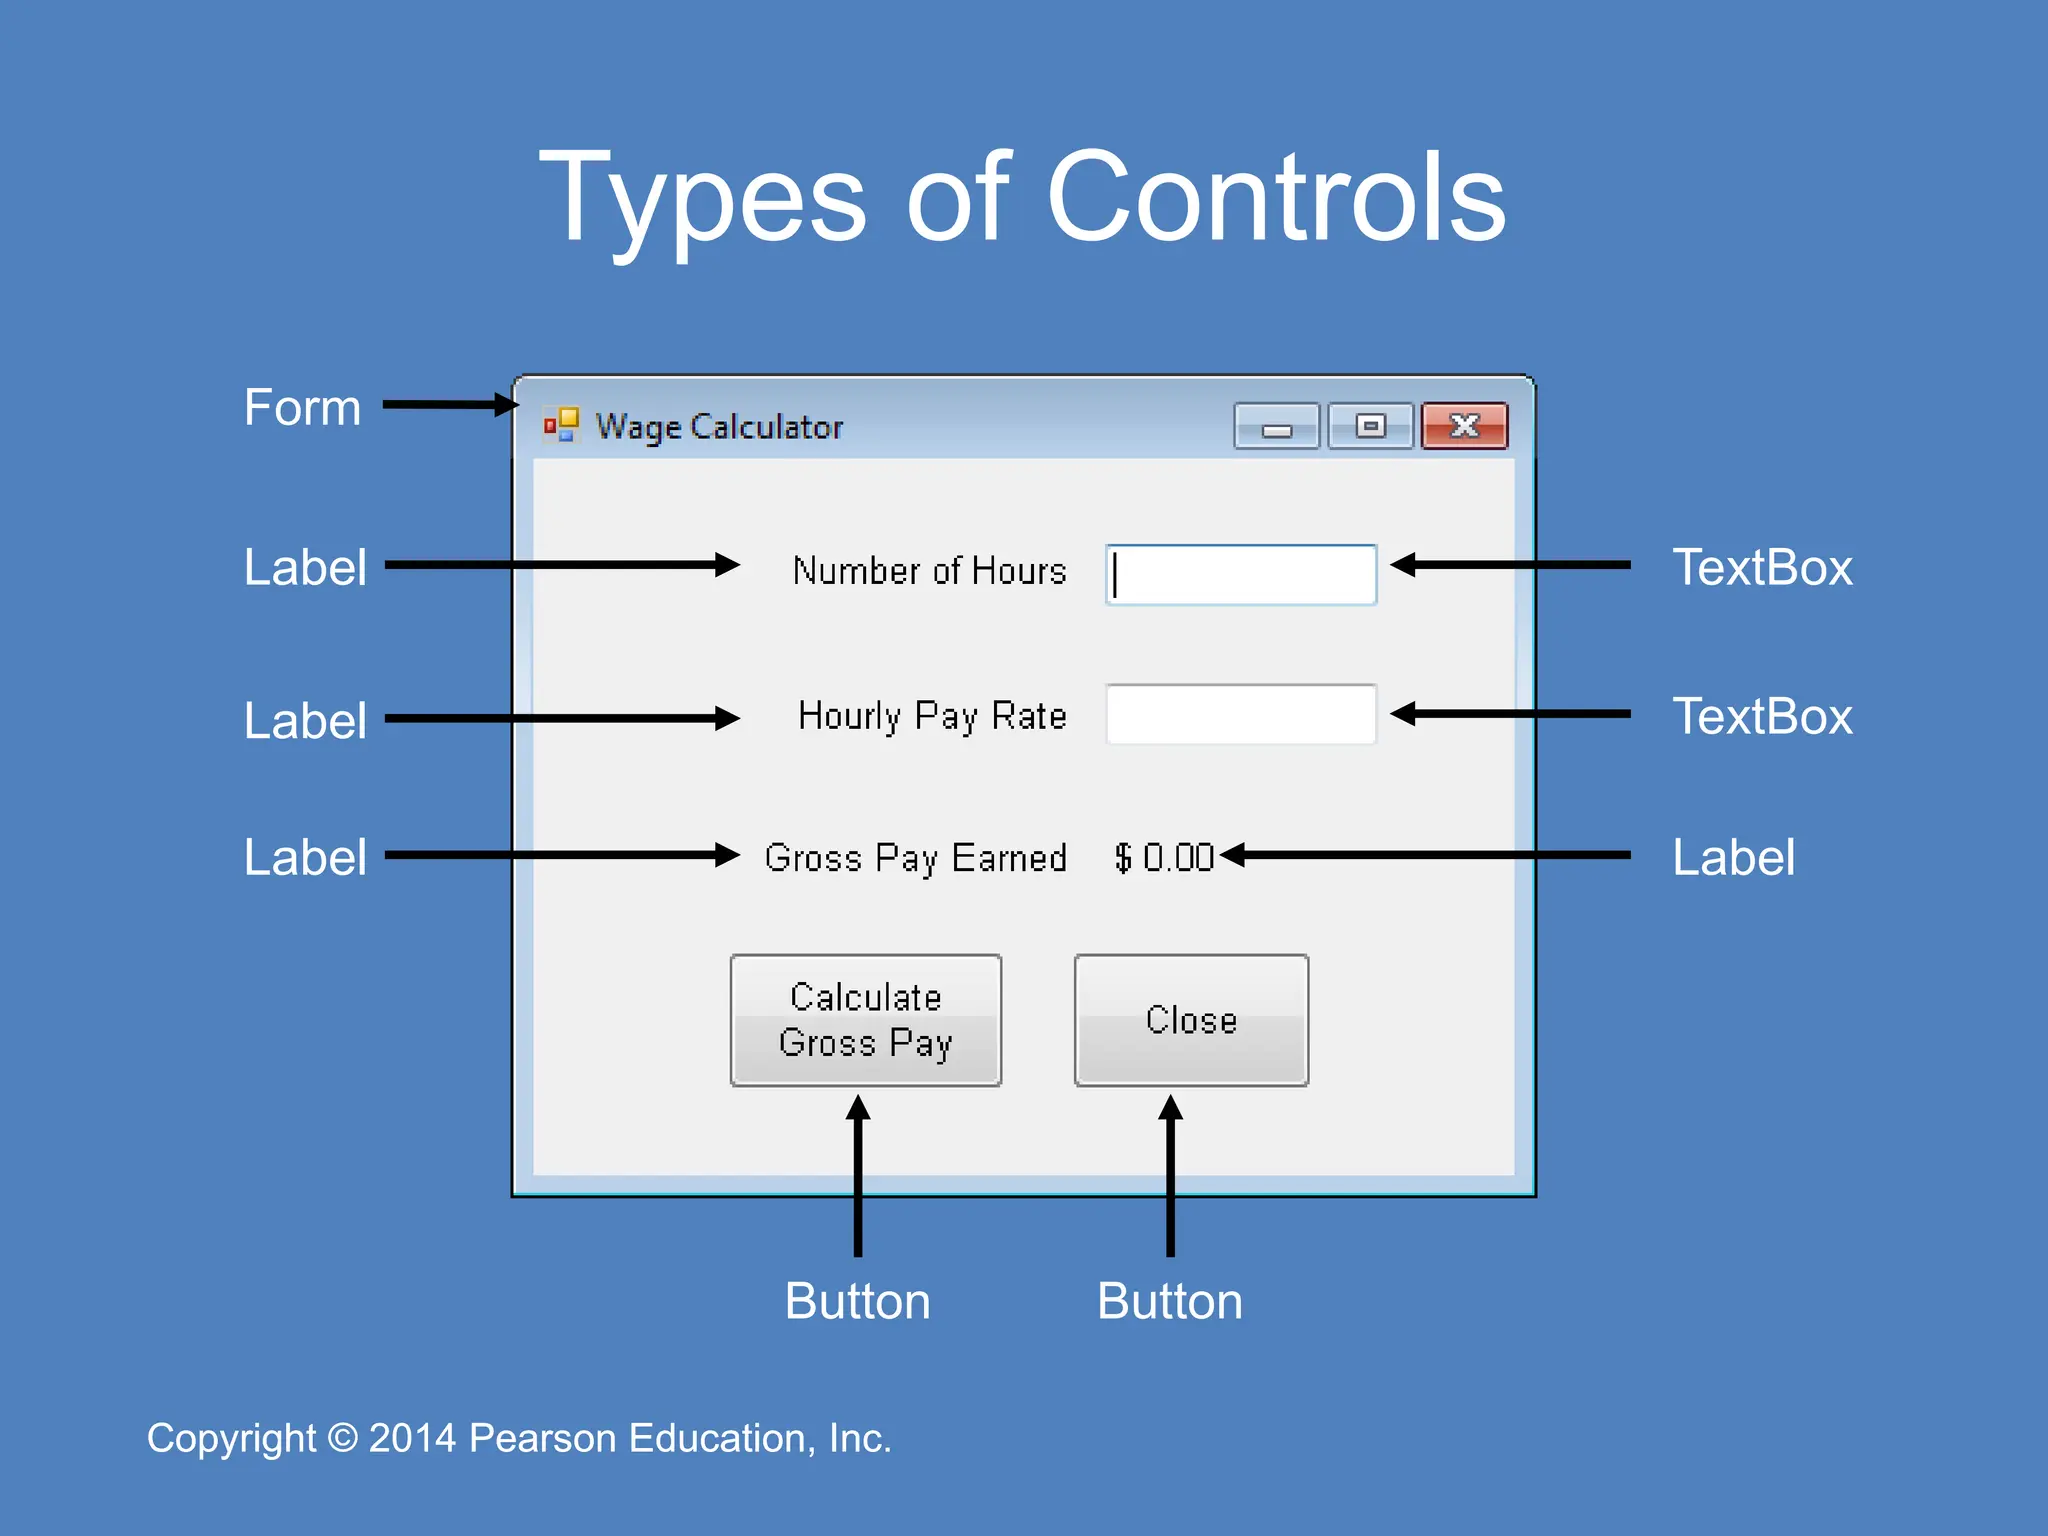
Pearson Education, Inc. Copyright © 2014 Pearson Education, Inc. Objects and Controls • A control is specific type of object that usually appears in a program’s graphical user interface – The window that contains the other elements is known as a Form control – The small boxes that accept input are known as TextBox controls – The areas that simply display text are known as Label controls – The buttons that perform operations when clicked with the mouse are known as Button controls
17.
Copyright © 2014
Pearson Education, Inc. Copyright © 2014 Pearson Education, Inc. Types of Controls Form Label Label Label Label Button Button TextBox TextBox
18.
Copyright © 2014
Pearson Education, Inc. Copyright © 2014 Pearson Education, Inc. Event-Driven Programming • The GUI environment is event-driven – An event is an action that takes place within a program – All Visual Basic controls are capable of detecting various events, such as: • Clicking a Button control • Changing the text in a TextBox control • In order for a control to respond to a specific event, you must write a special type of procedure called an event handler – Event handlers are also known as event procedures
19.
Copyright © 2014
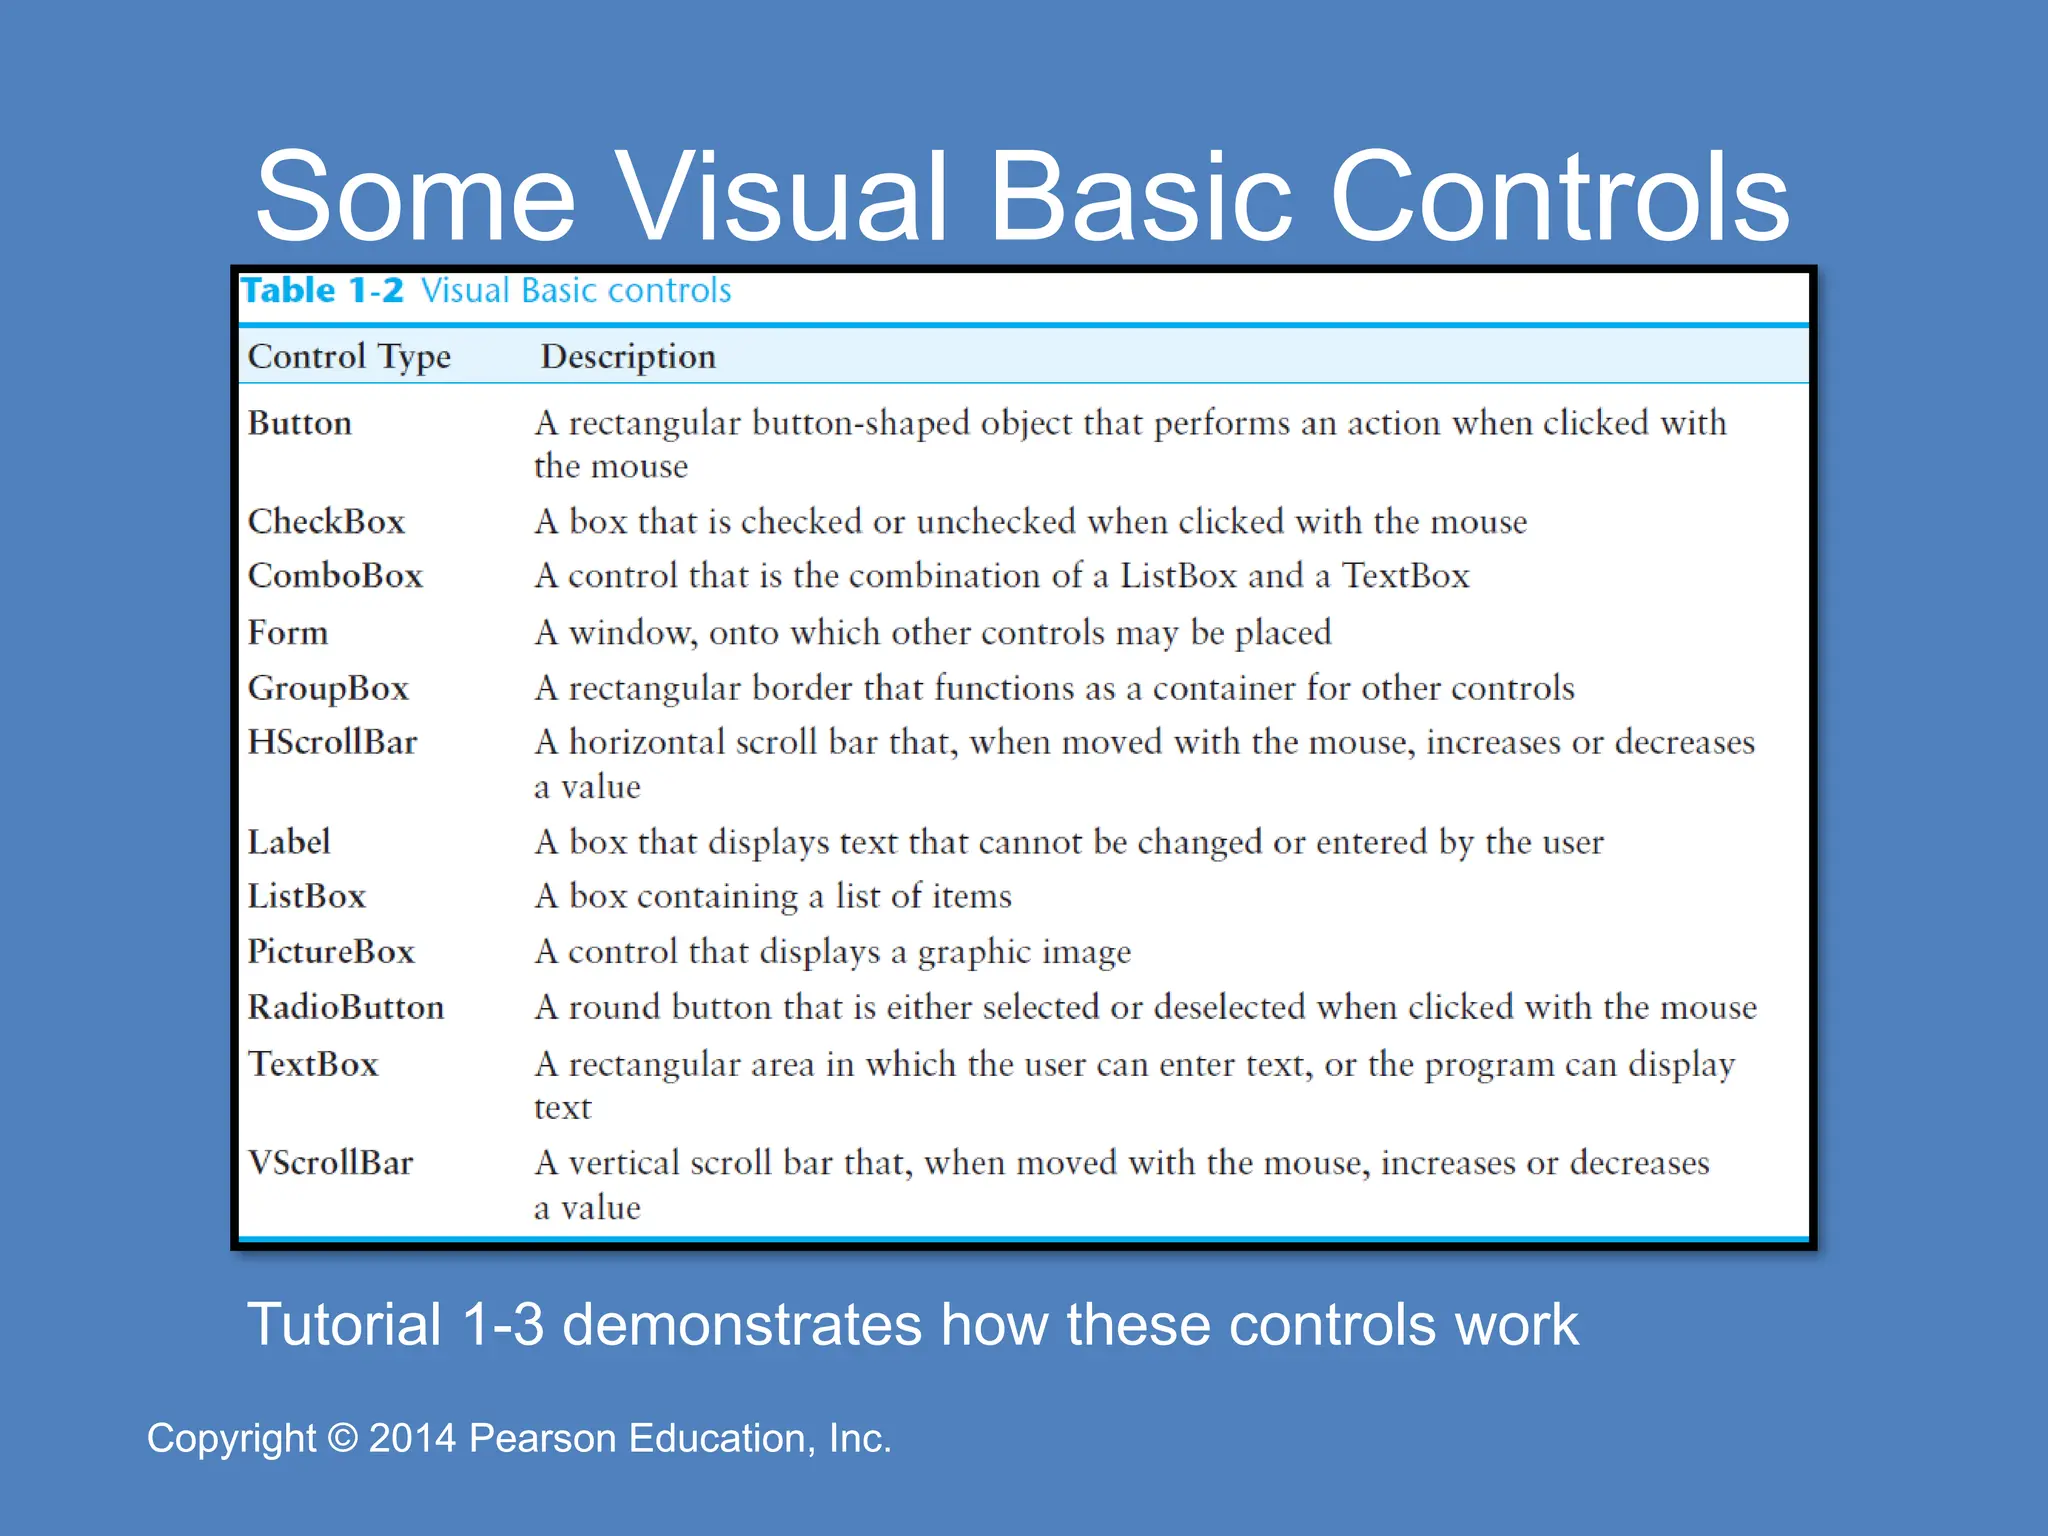
Pearson Education, Inc. Copyright © 2014 Pearson Education, Inc. Some Visual Basic Controls Tutorial 1-3 demonstrates how these controls work
20.
Copyright © 2014
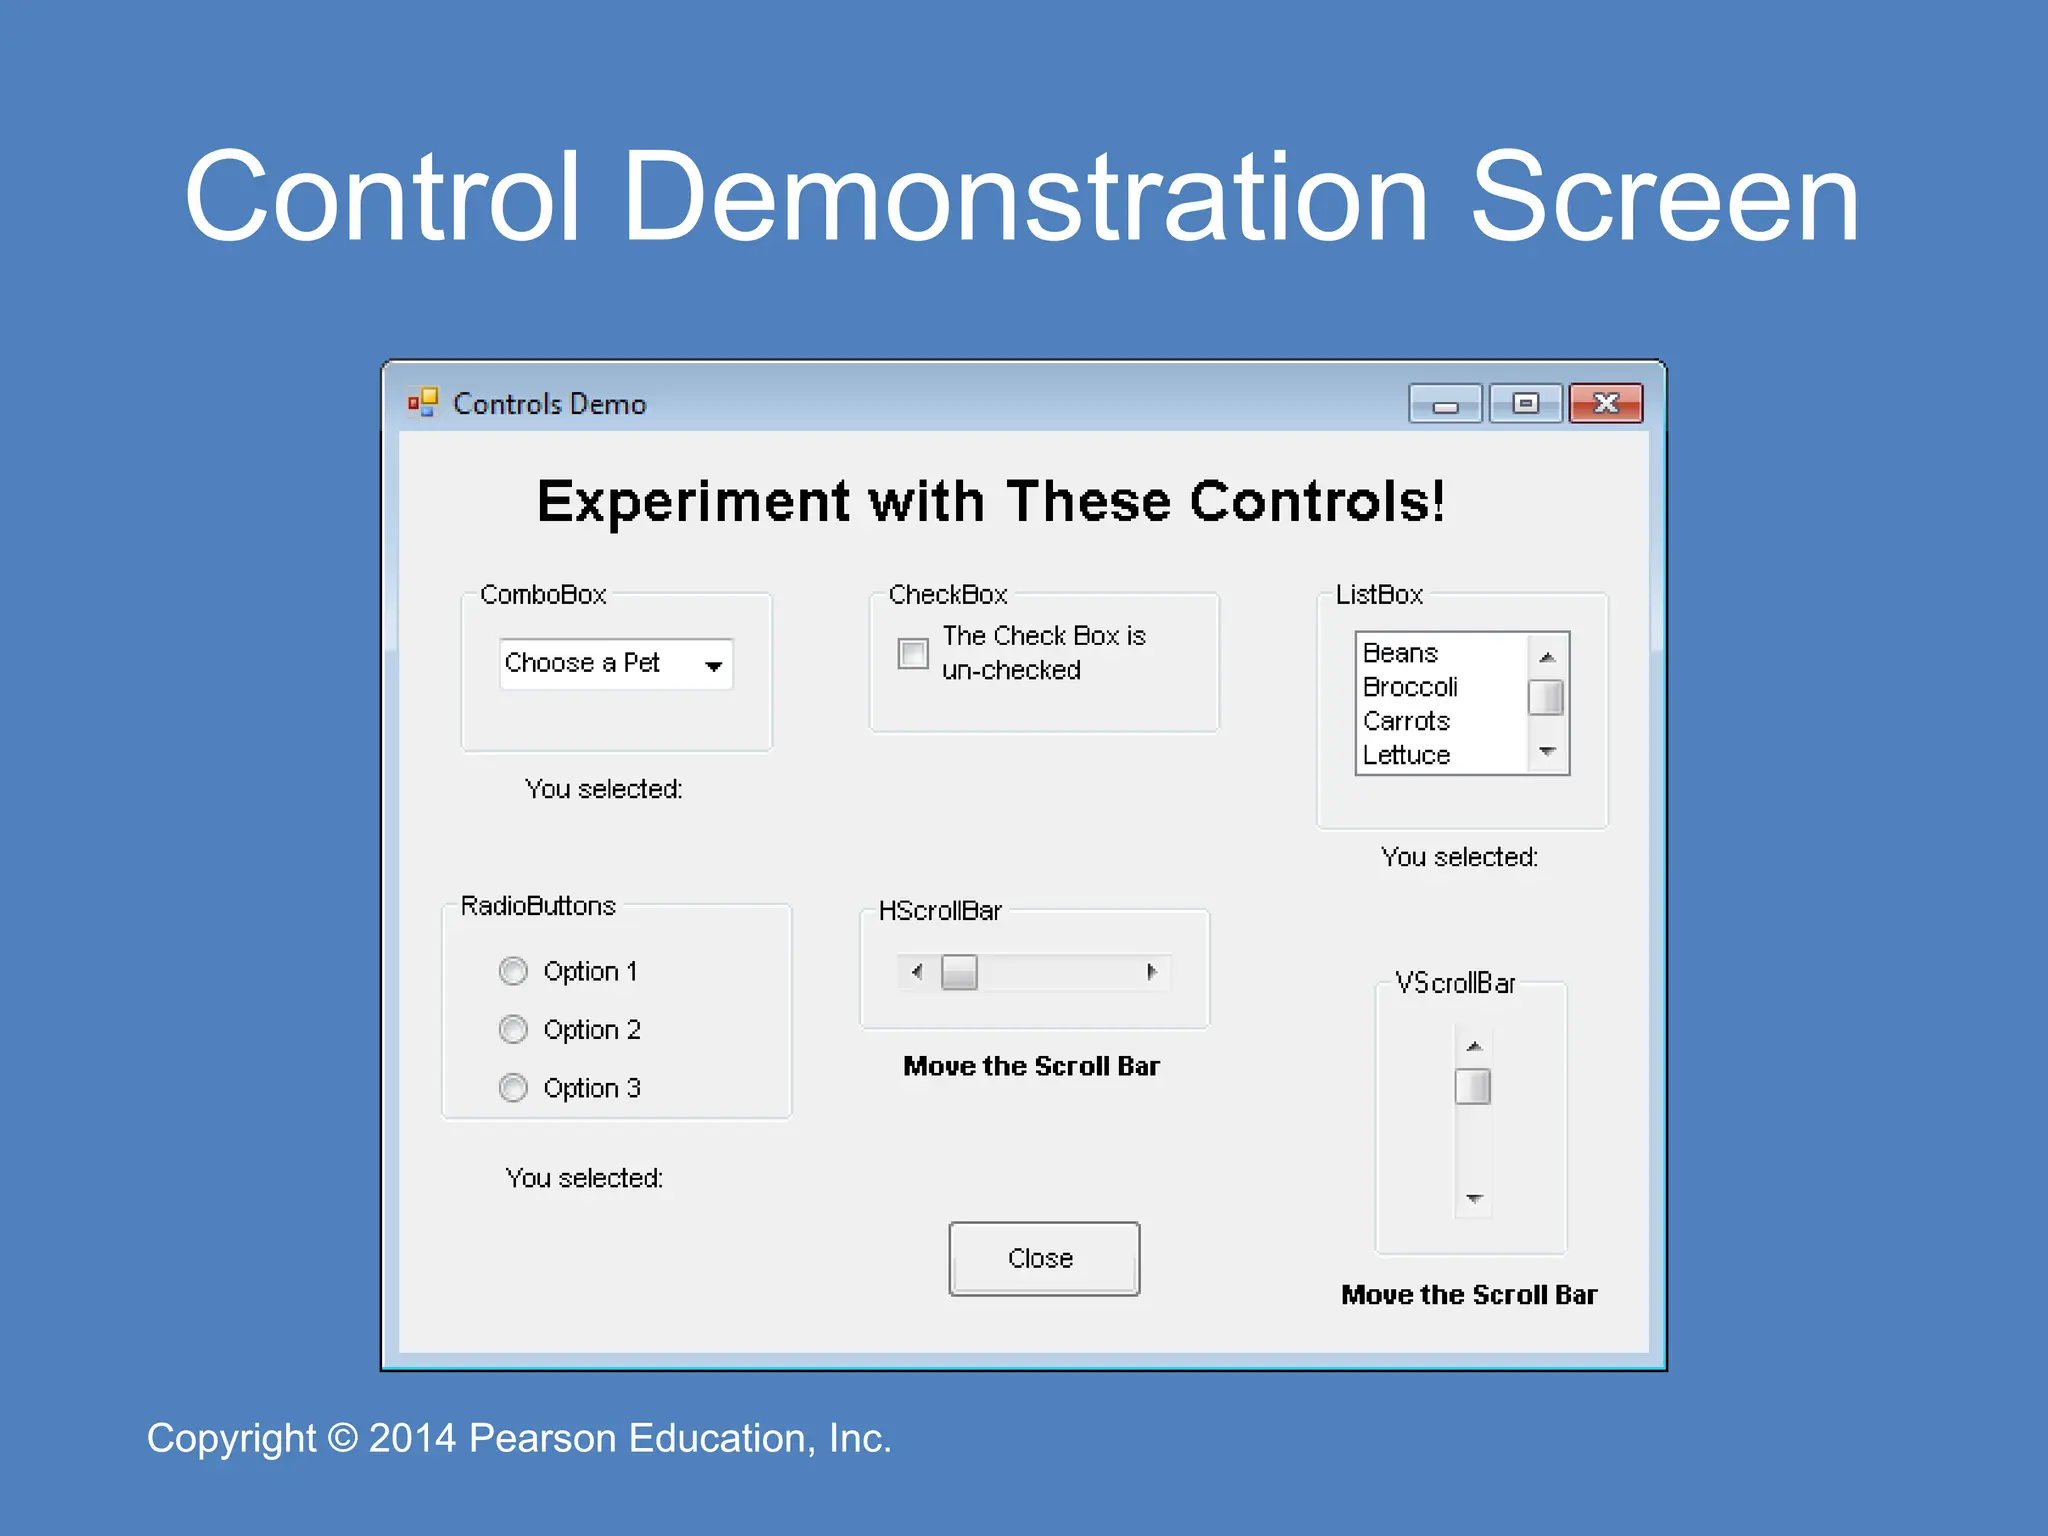
Pearson Education, Inc. Copyright © 2014 Pearson Education, Inc. Control Demonstration Screen
21.
Copyright © 2014
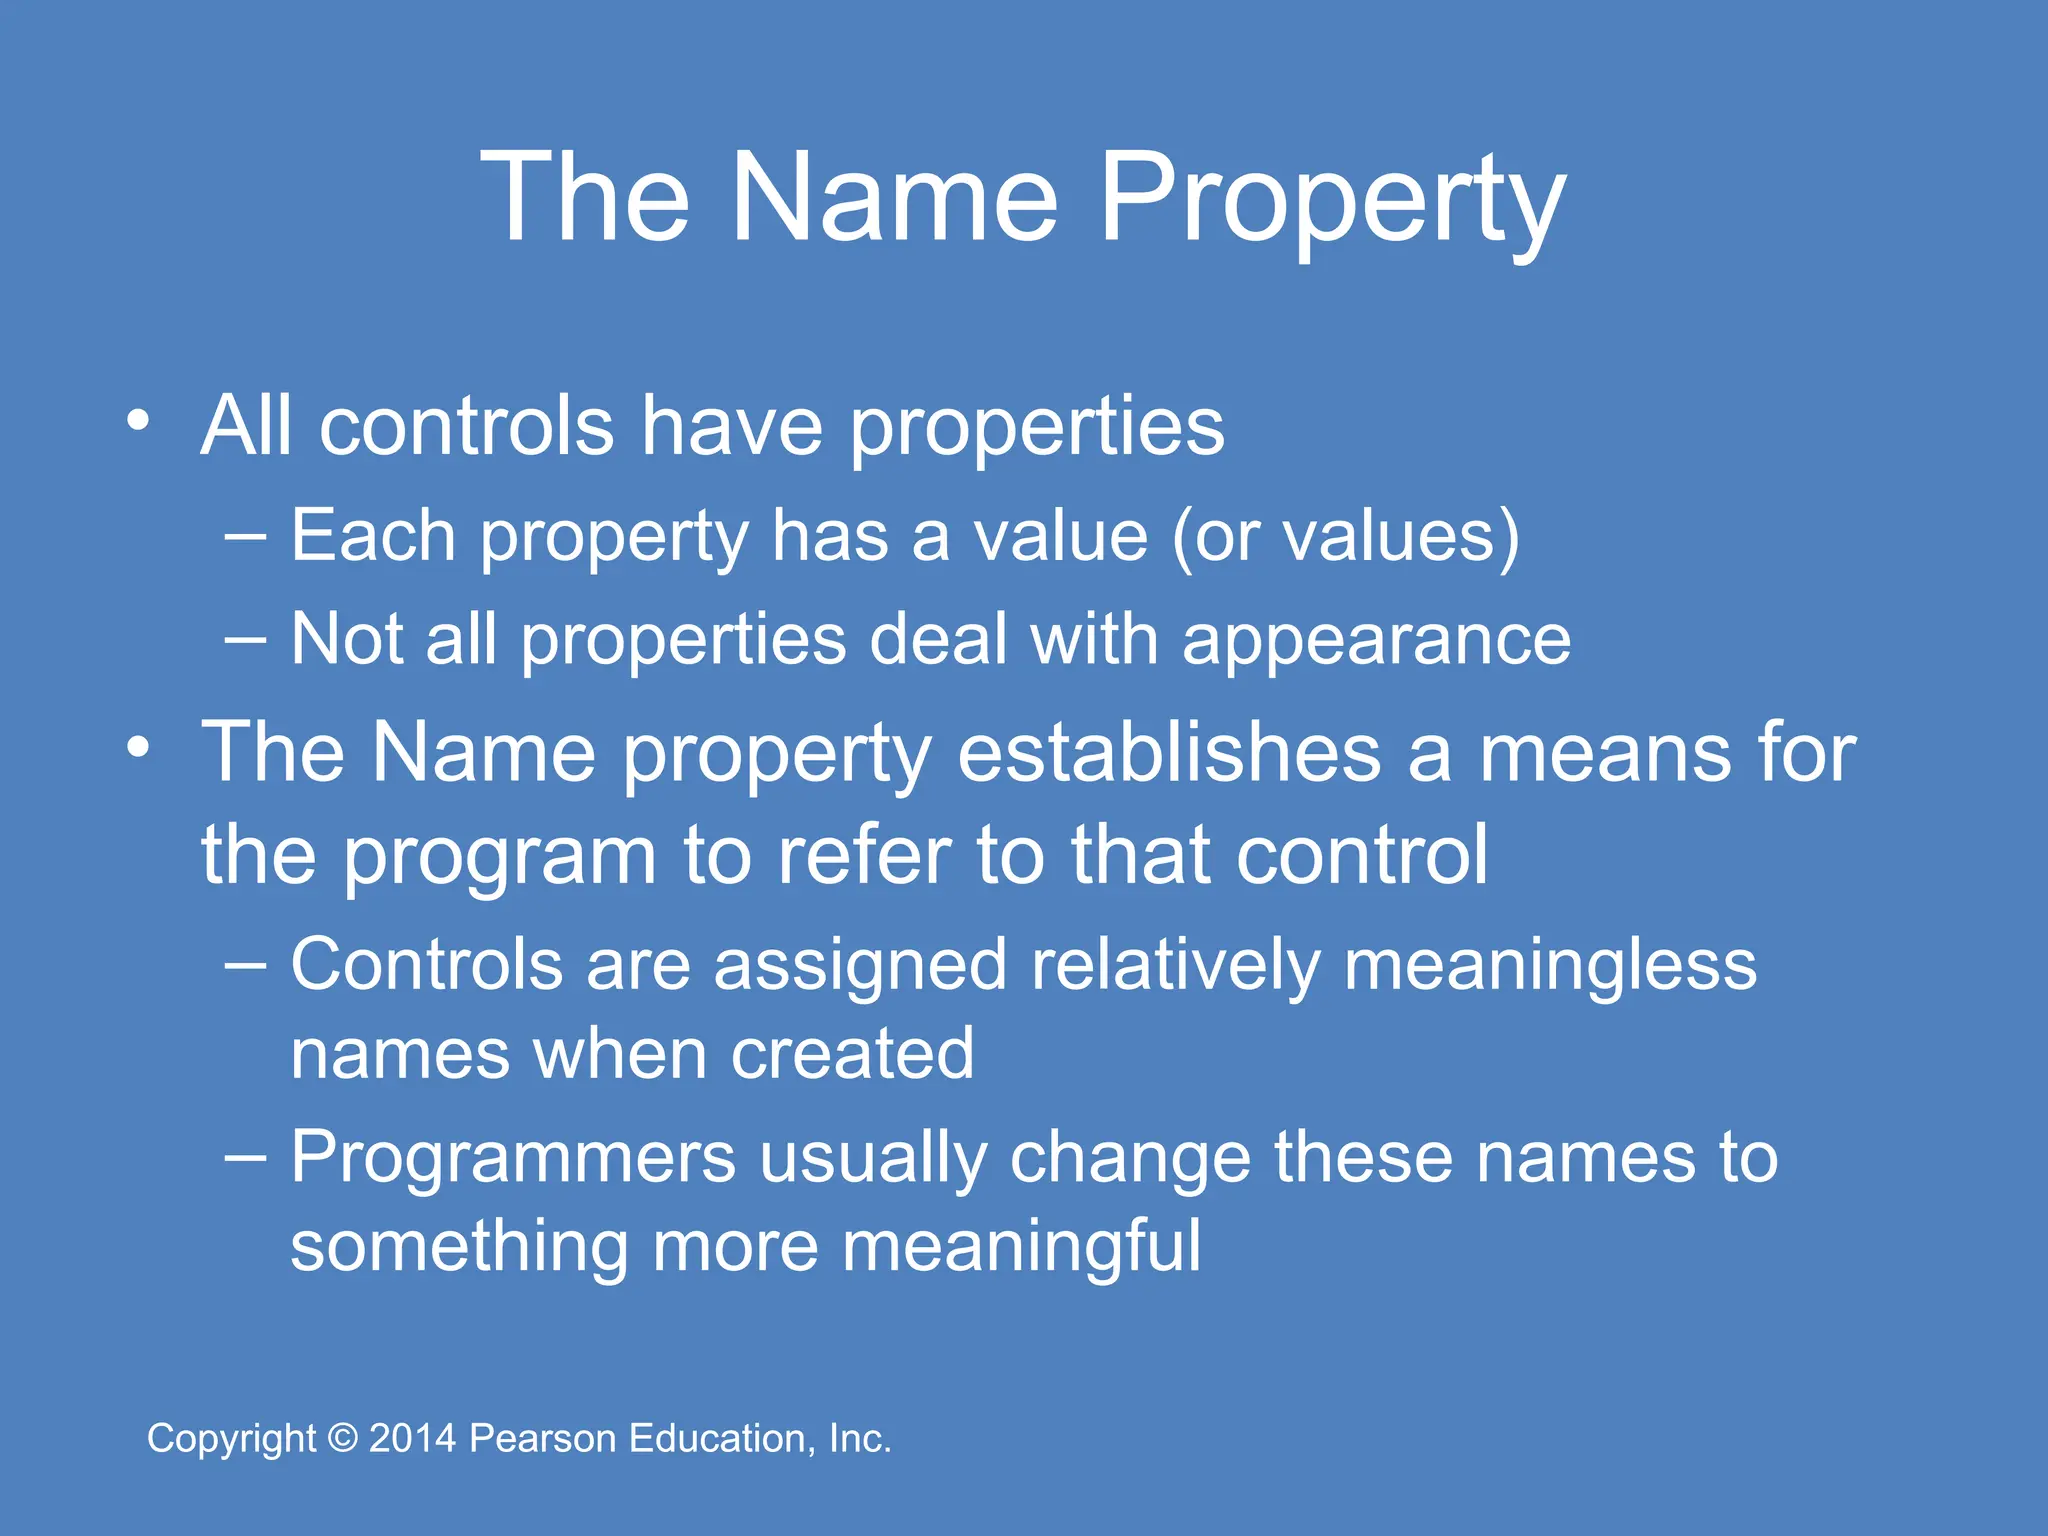
Pearson Education, Inc. Copyright © 2014 Pearson Education, Inc. The Name Property • All controls have properties – Each property has a value (or values) – Not all properties deal with appearance • The Name property establishes a means for the program to refer to that control – Controls are assigned relatively meaningless names when created – Programmers usually change these names to something more meaningful
22.
Copyright © 2014
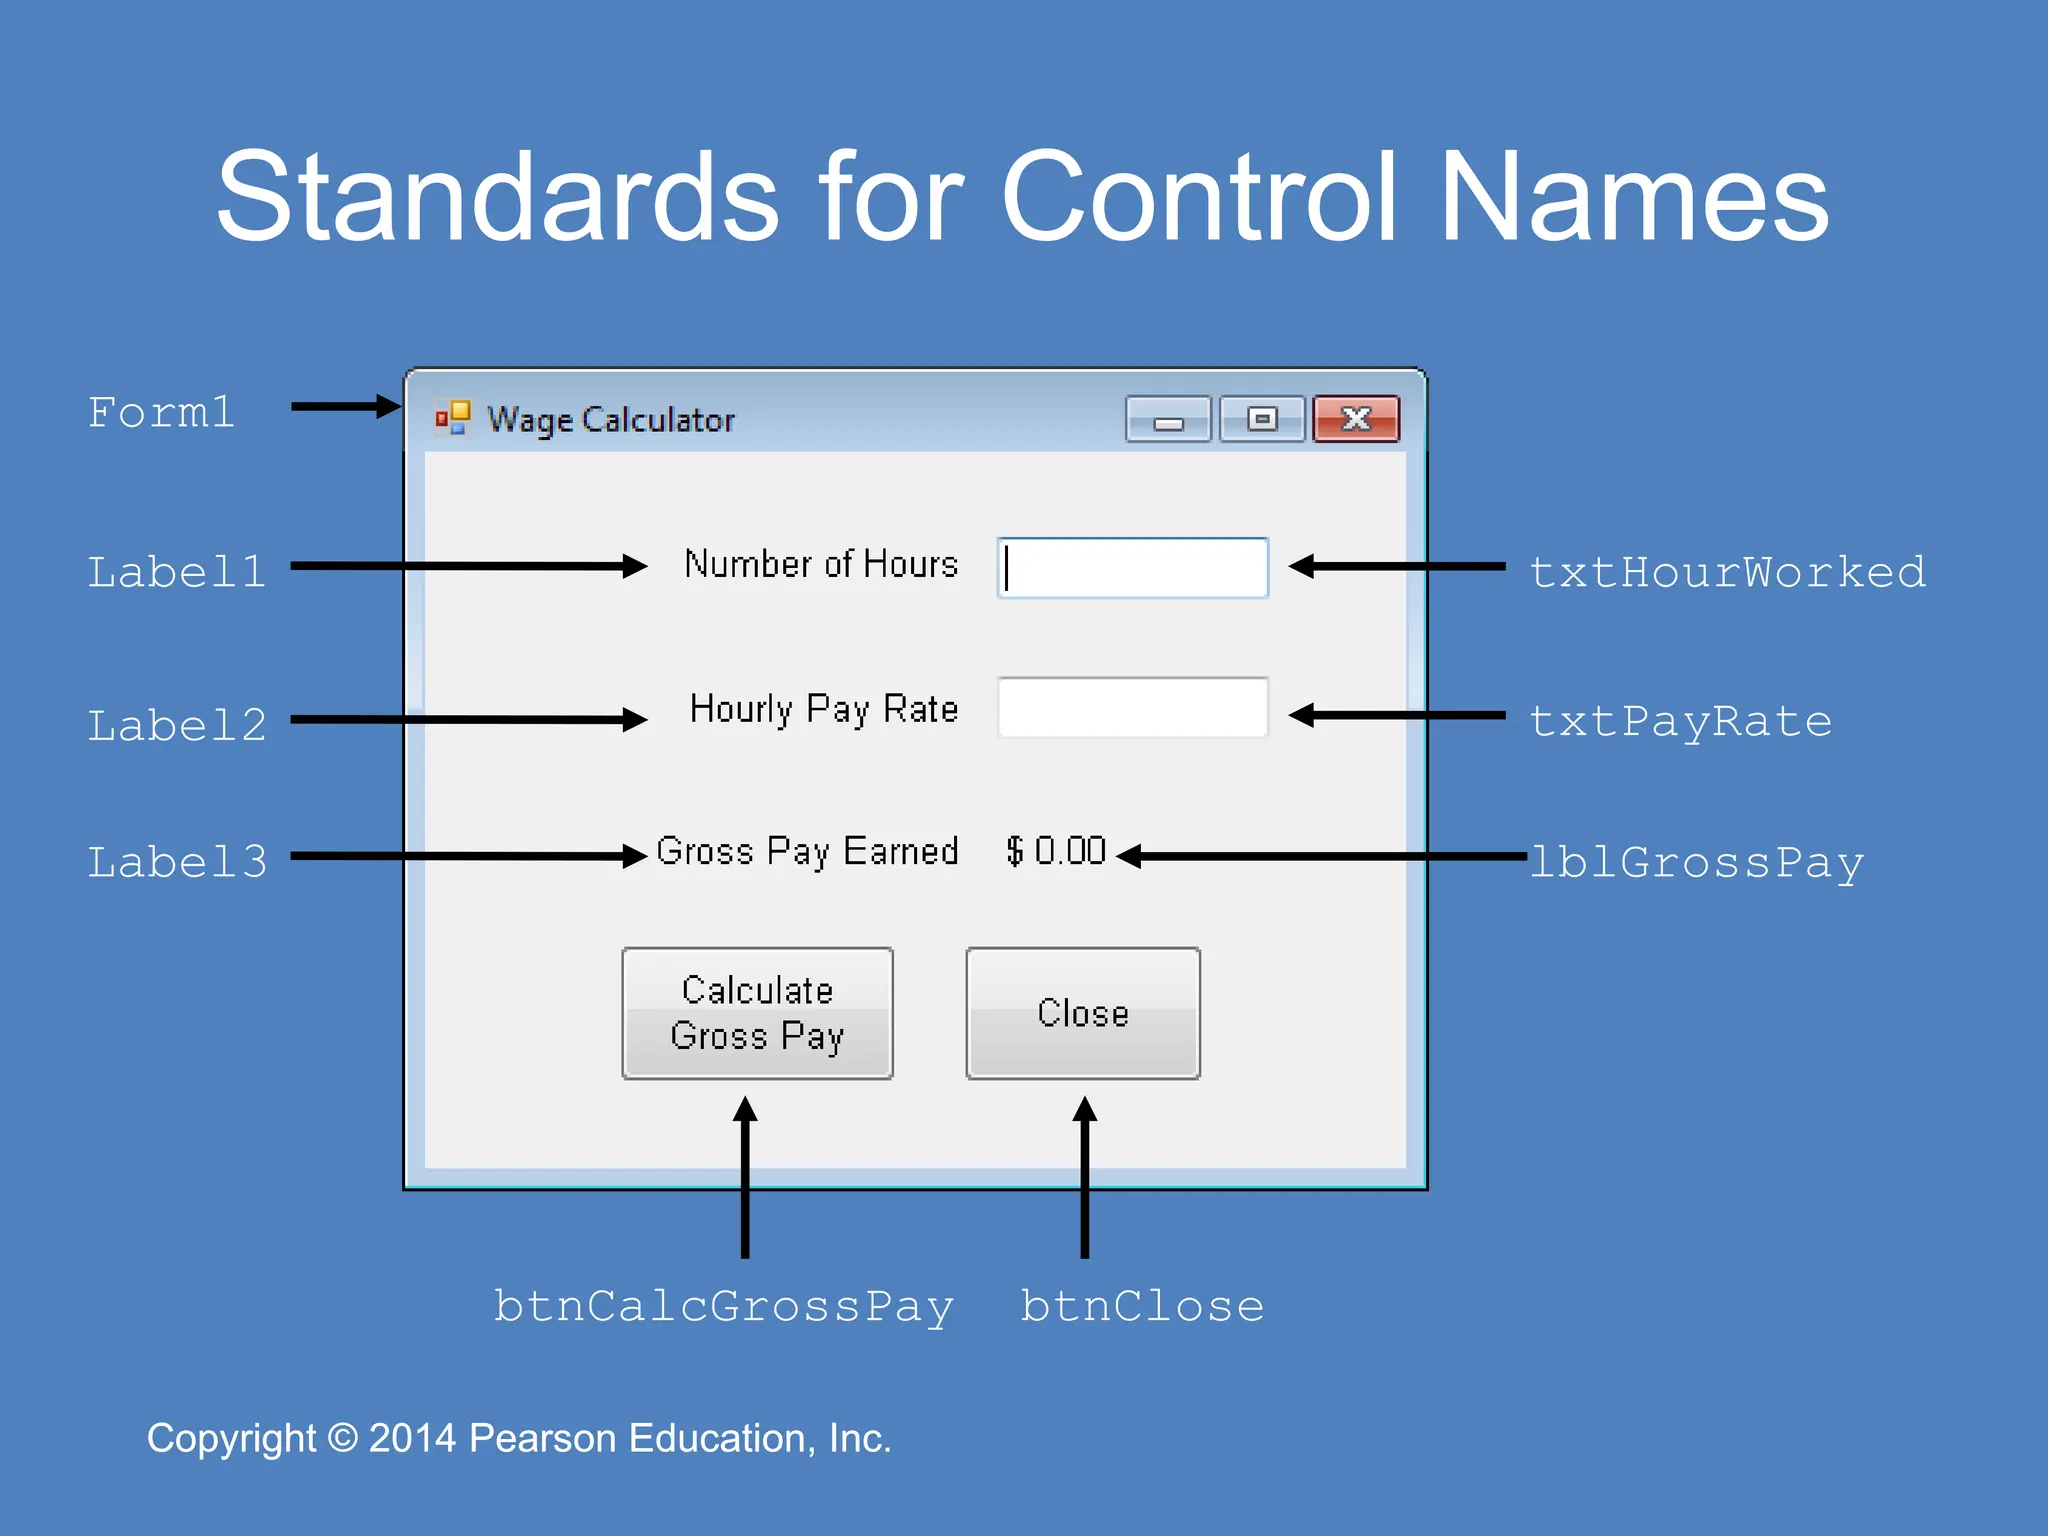
Pearson Education, Inc. Copyright © 2014 Pearson Education, Inc. Standards for Control Names Form1 Label1 Label2 Label3 lblGrossPay btnClose btnCalcGrossPay txtPayRate txtHourWorked
23.
Copyright © 2014
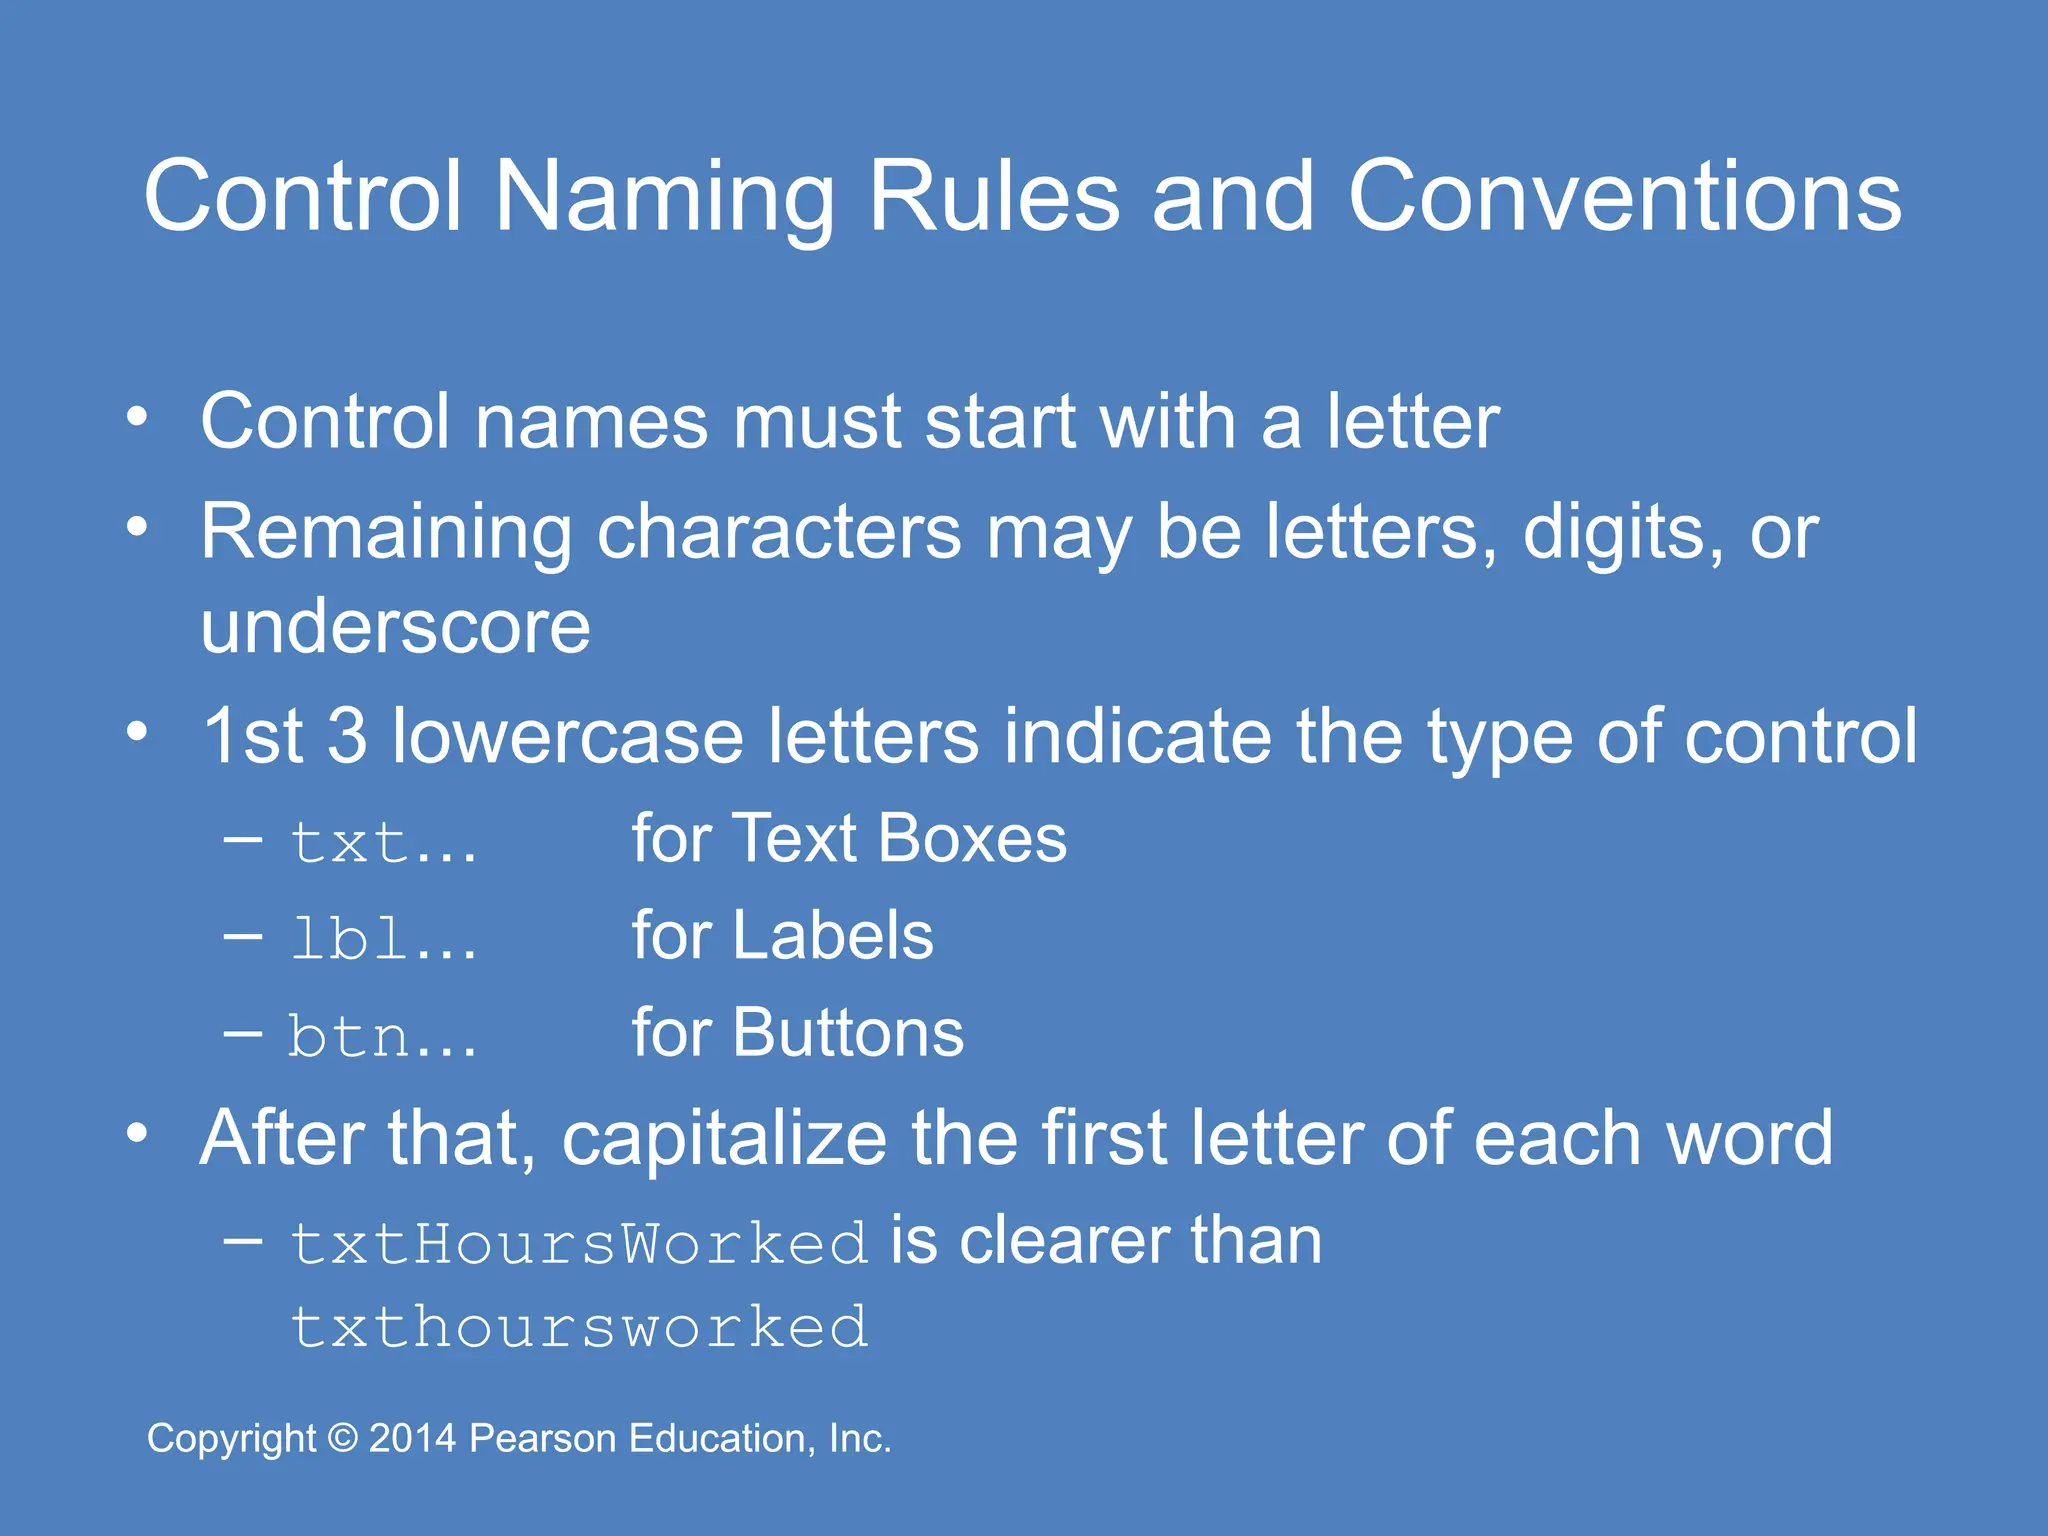
Pearson Education, Inc. Copyright © 2014 Pearson Education, Inc. Control Naming Rules and Conventions • Control names must start with a letter • Remaining characters may be letters, digits, or underscore • 1st 3 lowercase letters indicate the type of control – txt… for Text Boxes – lbl… for Labels – btn… for Buttons • After that, capitalize the first letter of each word – txtHoursWorked is clearer than txthoursworked
24.
Copyright © 2014
Pearson Education, Inc. Copyright © 2014 Pearson Education, Inc. The Programming Process 1.4
25.
Copyright © 2014
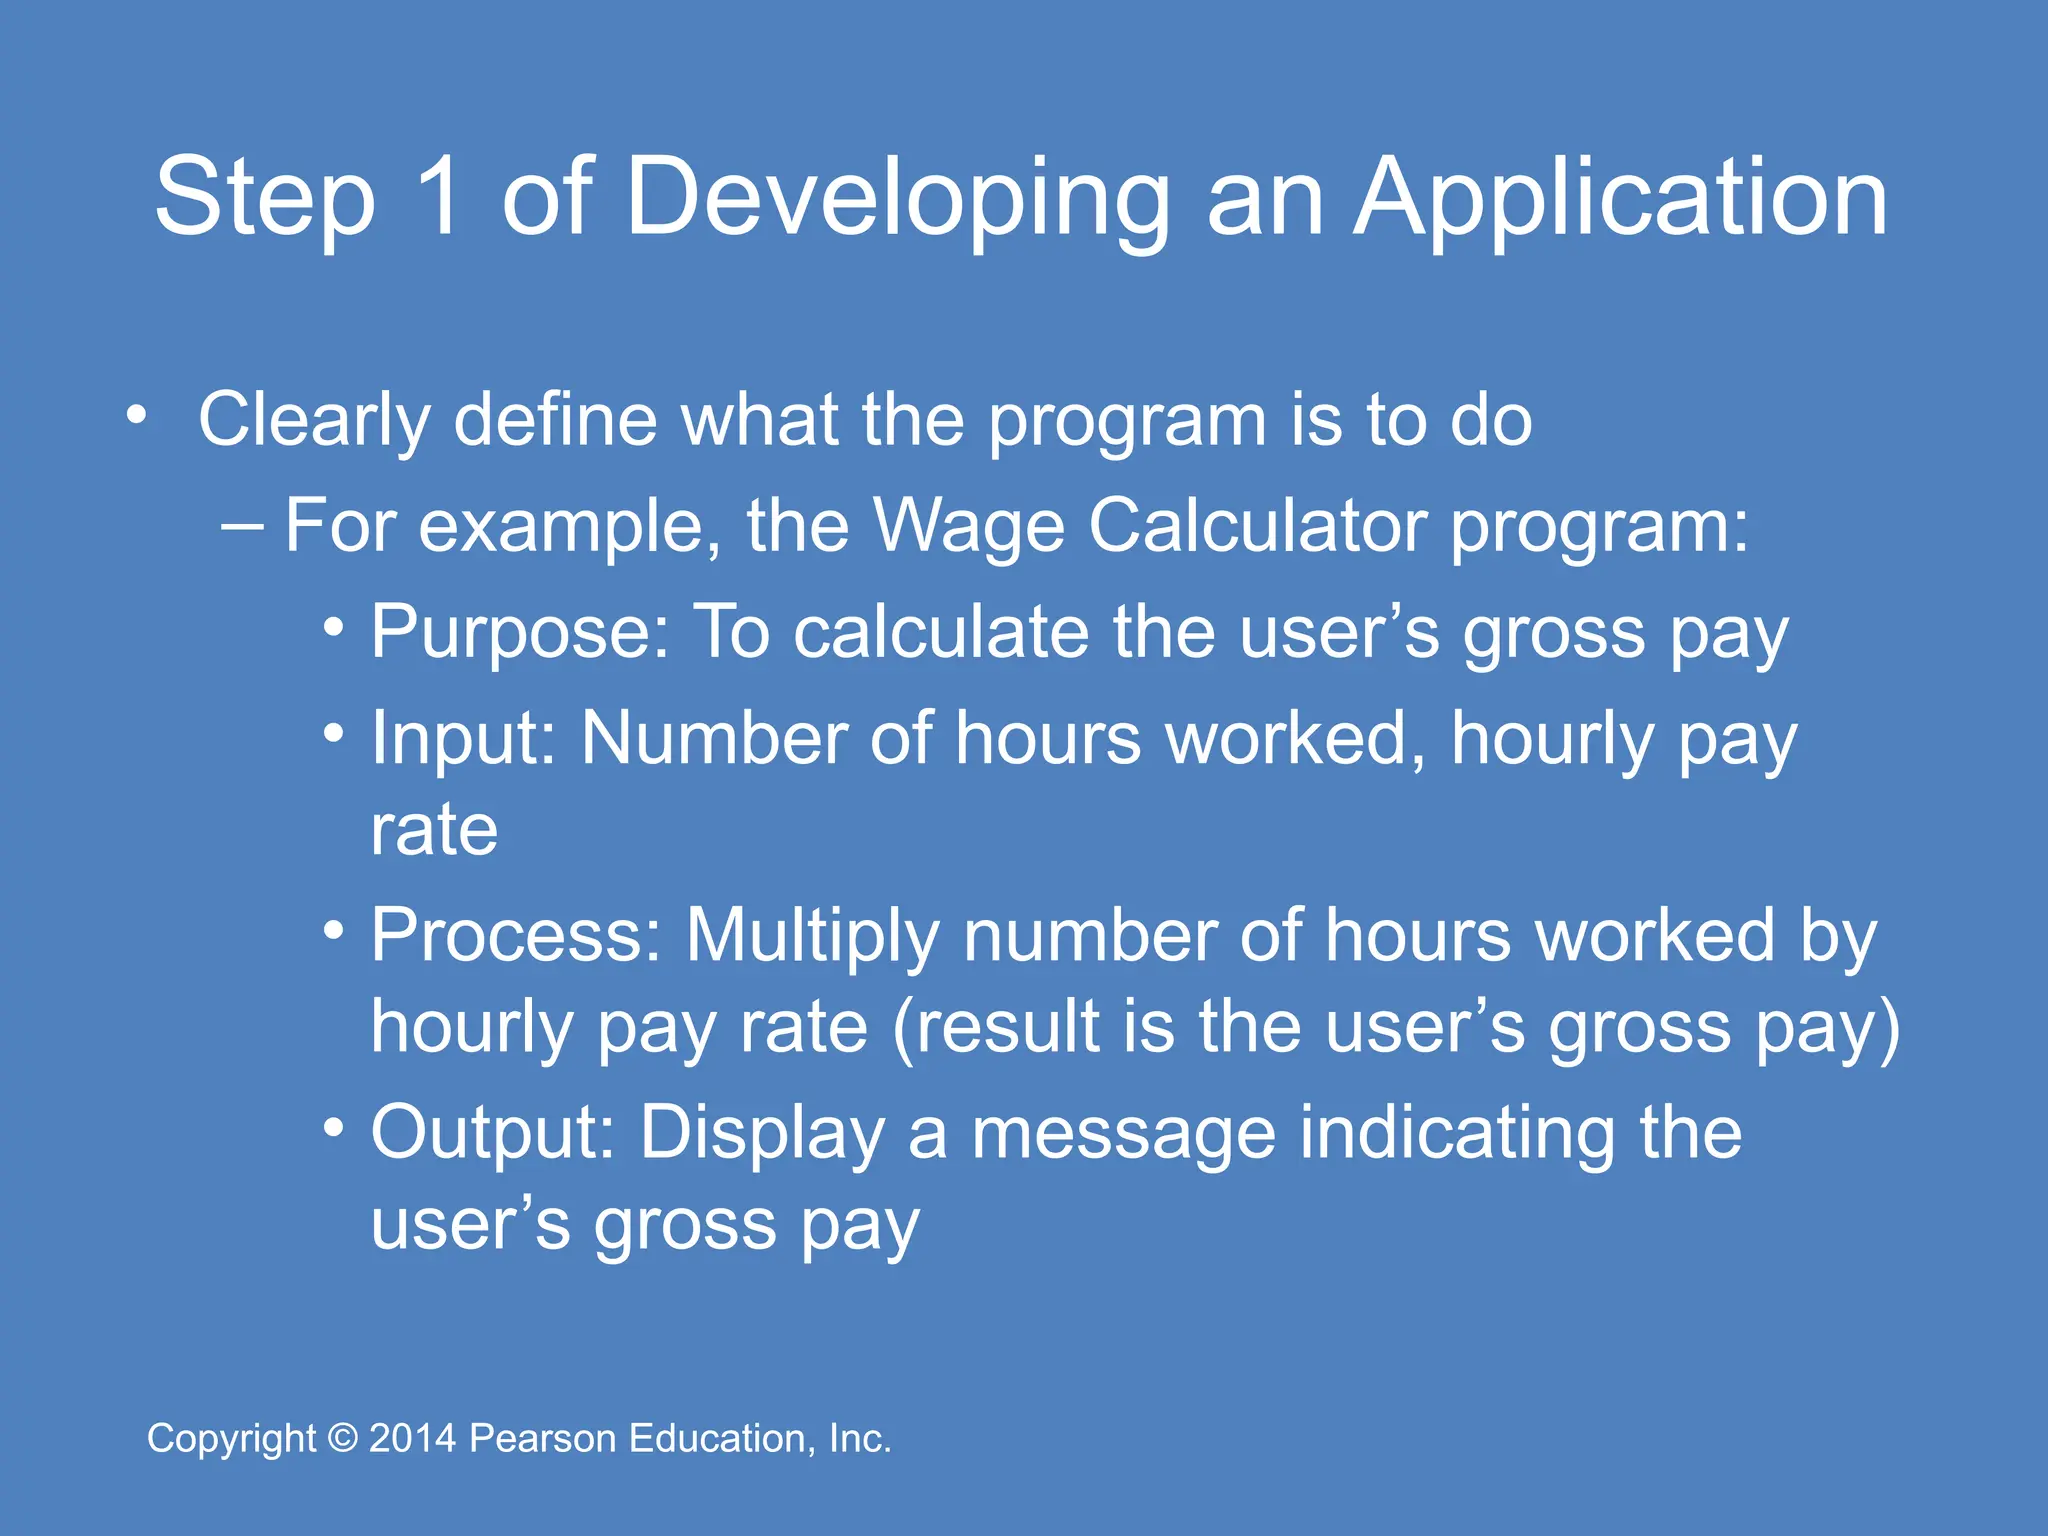
Pearson Education, Inc. Copyright © 2014 Pearson Education, Inc. Step 1 of Developing an Application • Clearly define what the program is to do – For example, the Wage Calculator program: • Purpose: To calculate the user’s gross pay • Input: Number of hours worked, hourly pay rate • Process: Multiply number of hours worked by hourly pay rate (result is the user’s gross pay) • Output: Display a message indicating the user’s gross pay
26.
Copyright © 2014
Pearson Education, Inc. Copyright © 2014 Pearson Education, Inc. Step 2 of Developing an Application • Visualize the application running on the computer and design its user interface
27.
Copyright © 2014
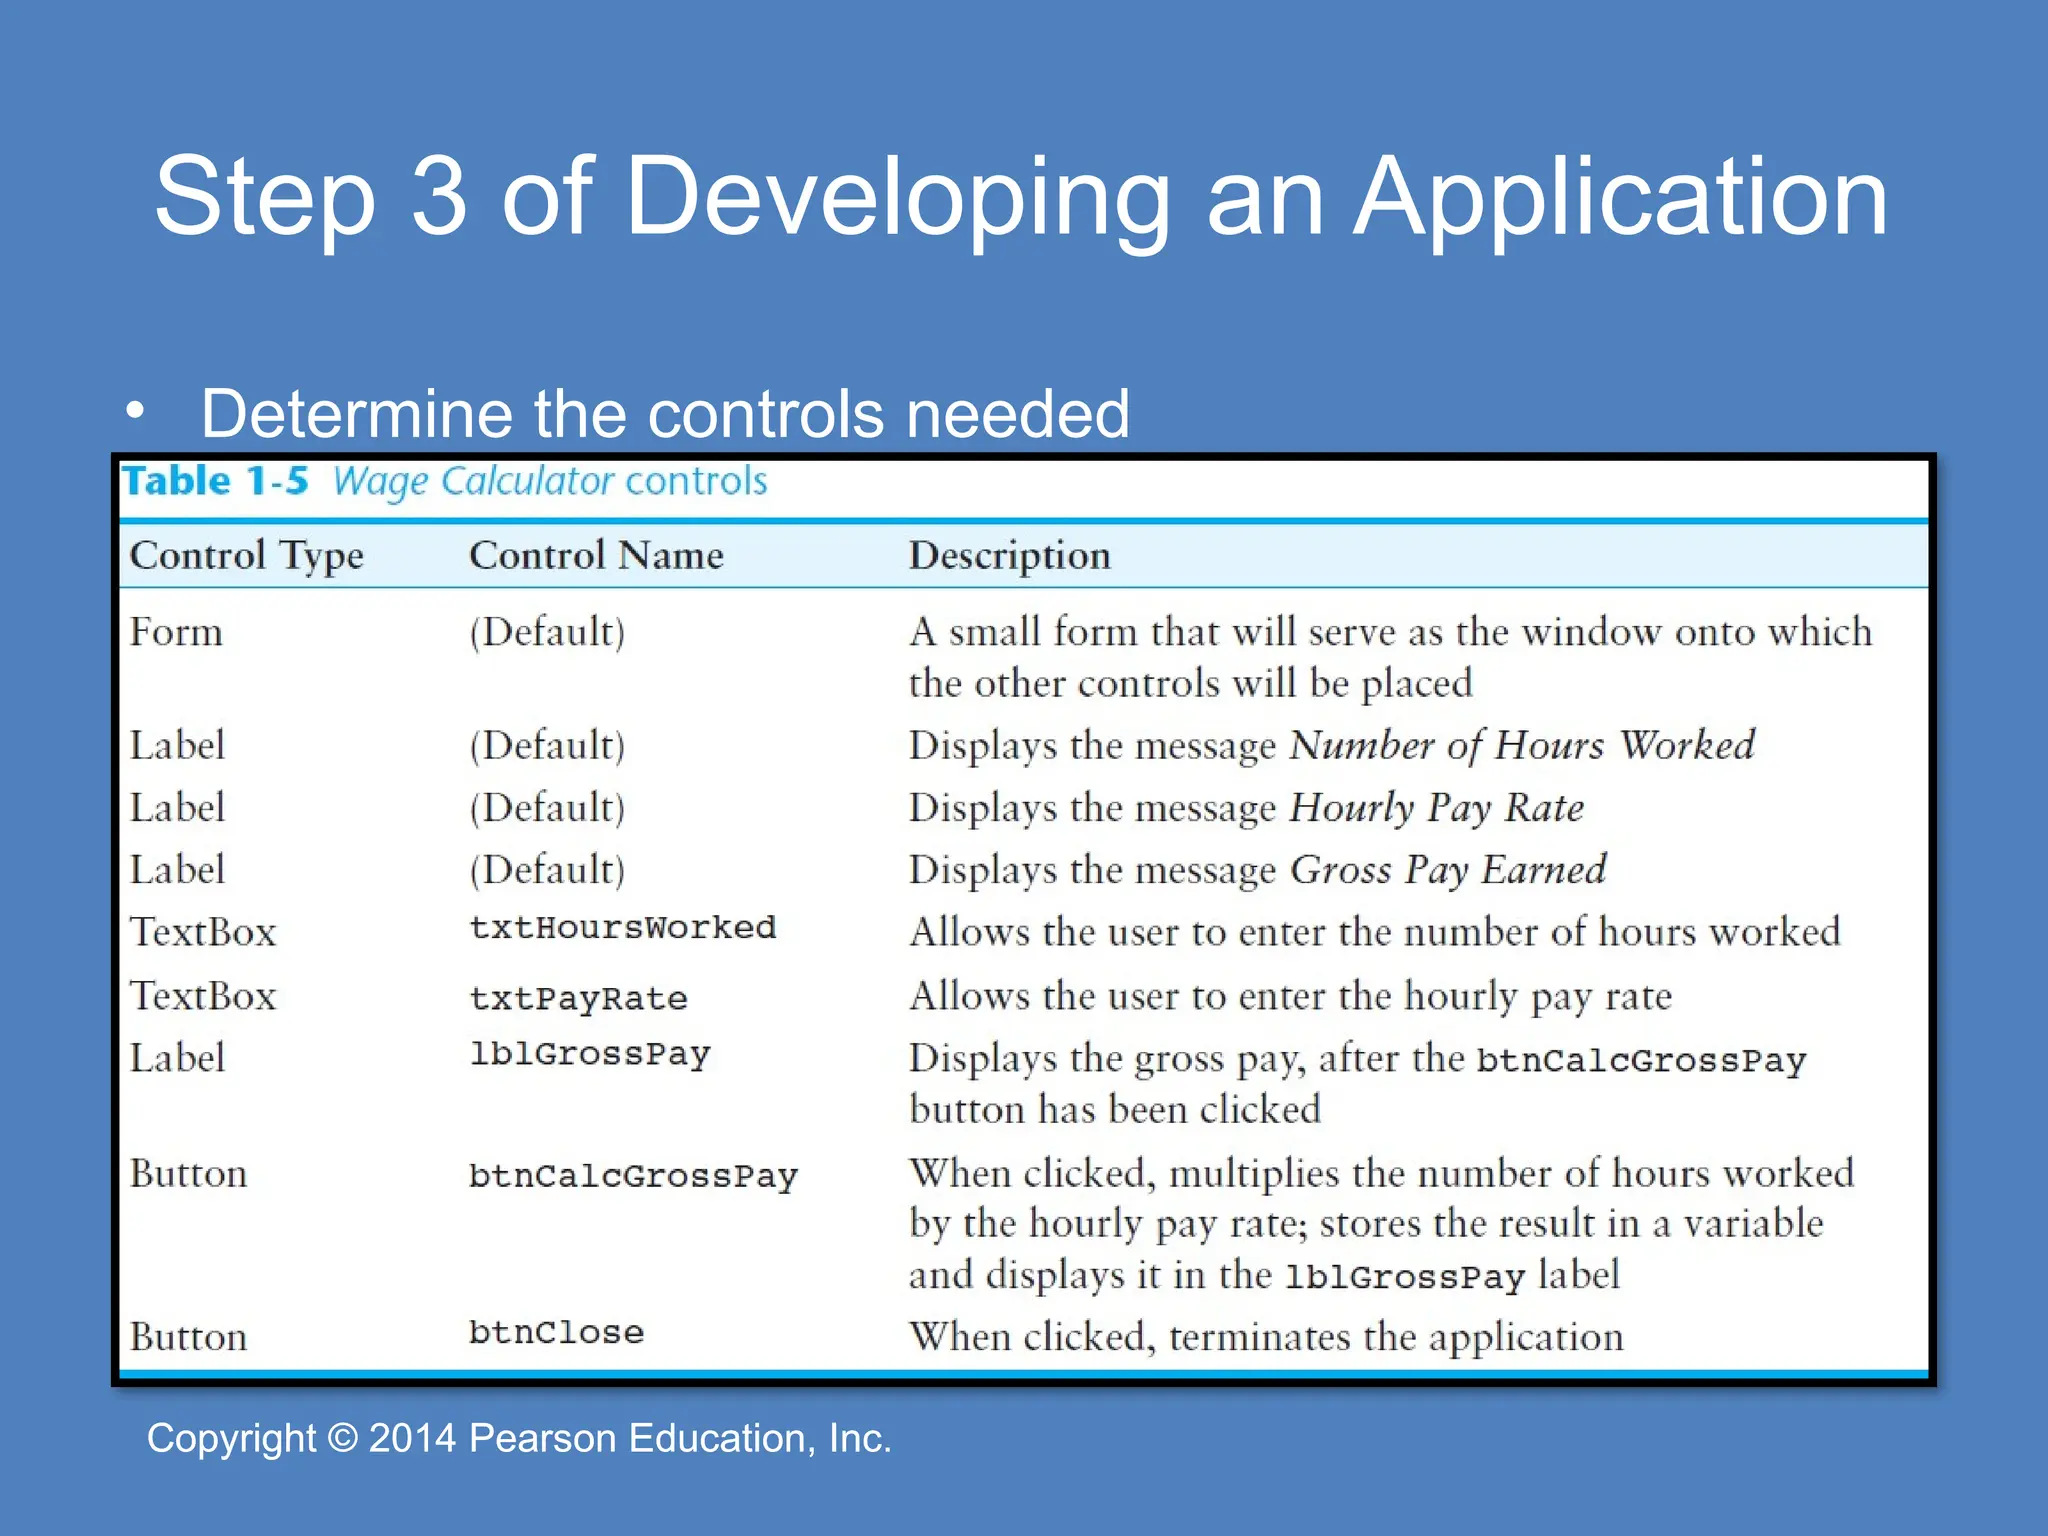
Pearson Education, Inc. Copyright © 2014 Pearson Education, Inc. Step 3 of Developing an Application • Determine the controls needed
28.
Copyright © 2014
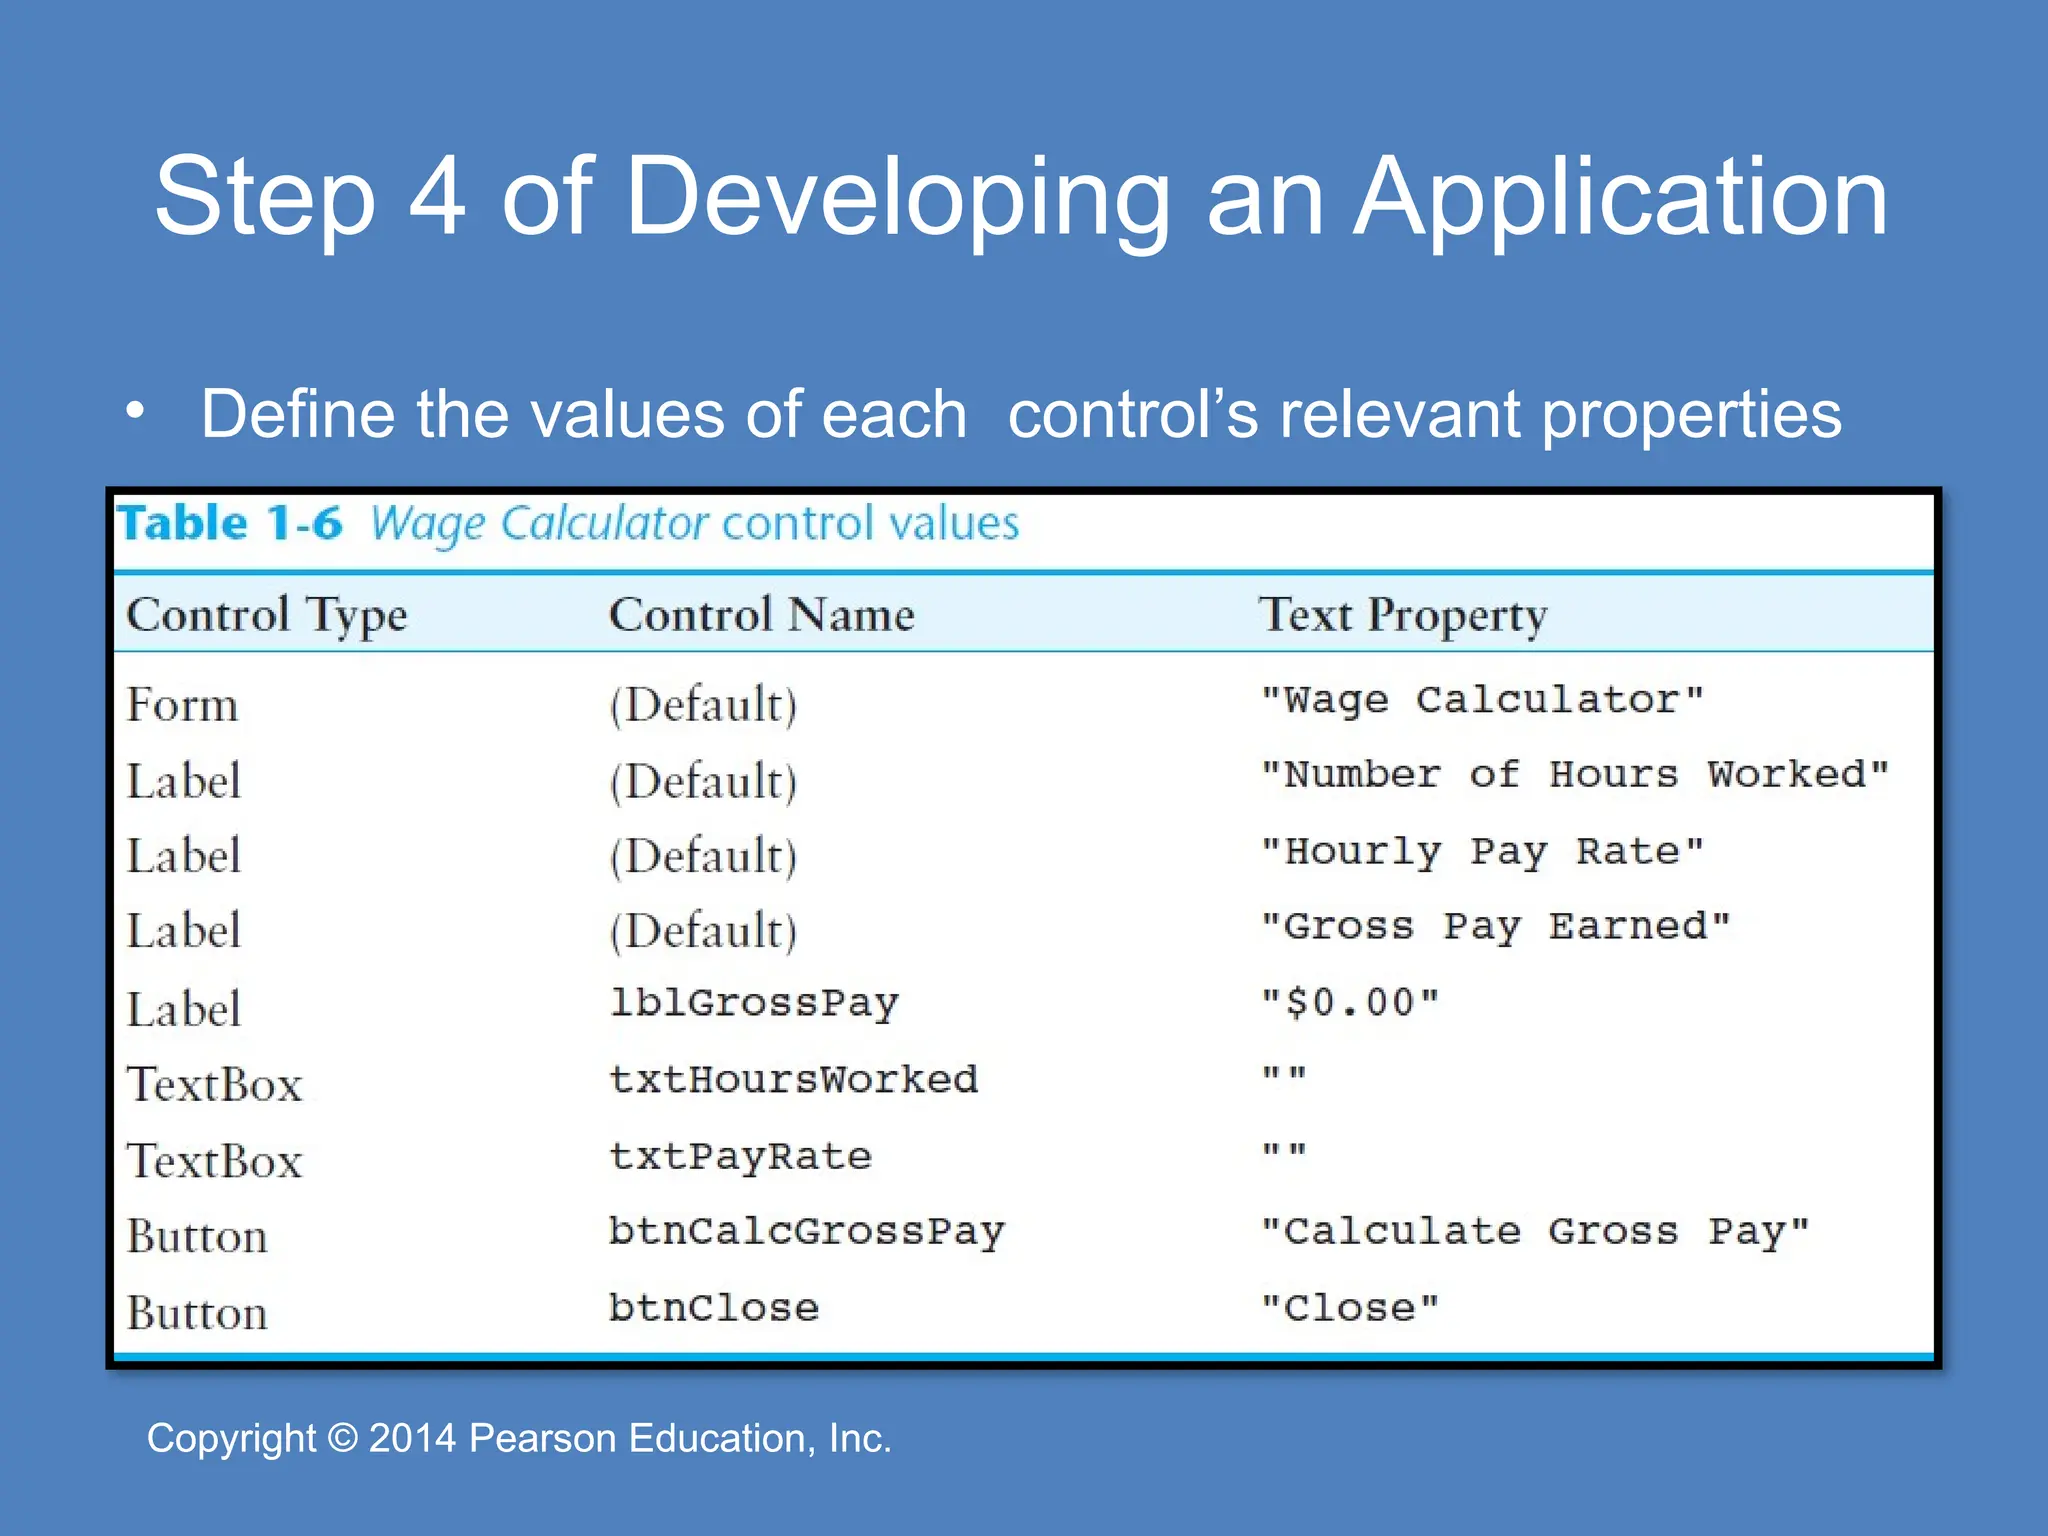
Pearson Education, Inc. Copyright © 2014 Pearson Education, Inc. Step 4 of Developing an Application • Define the values of each control’s relevant properties
29.
Copyright © 2014
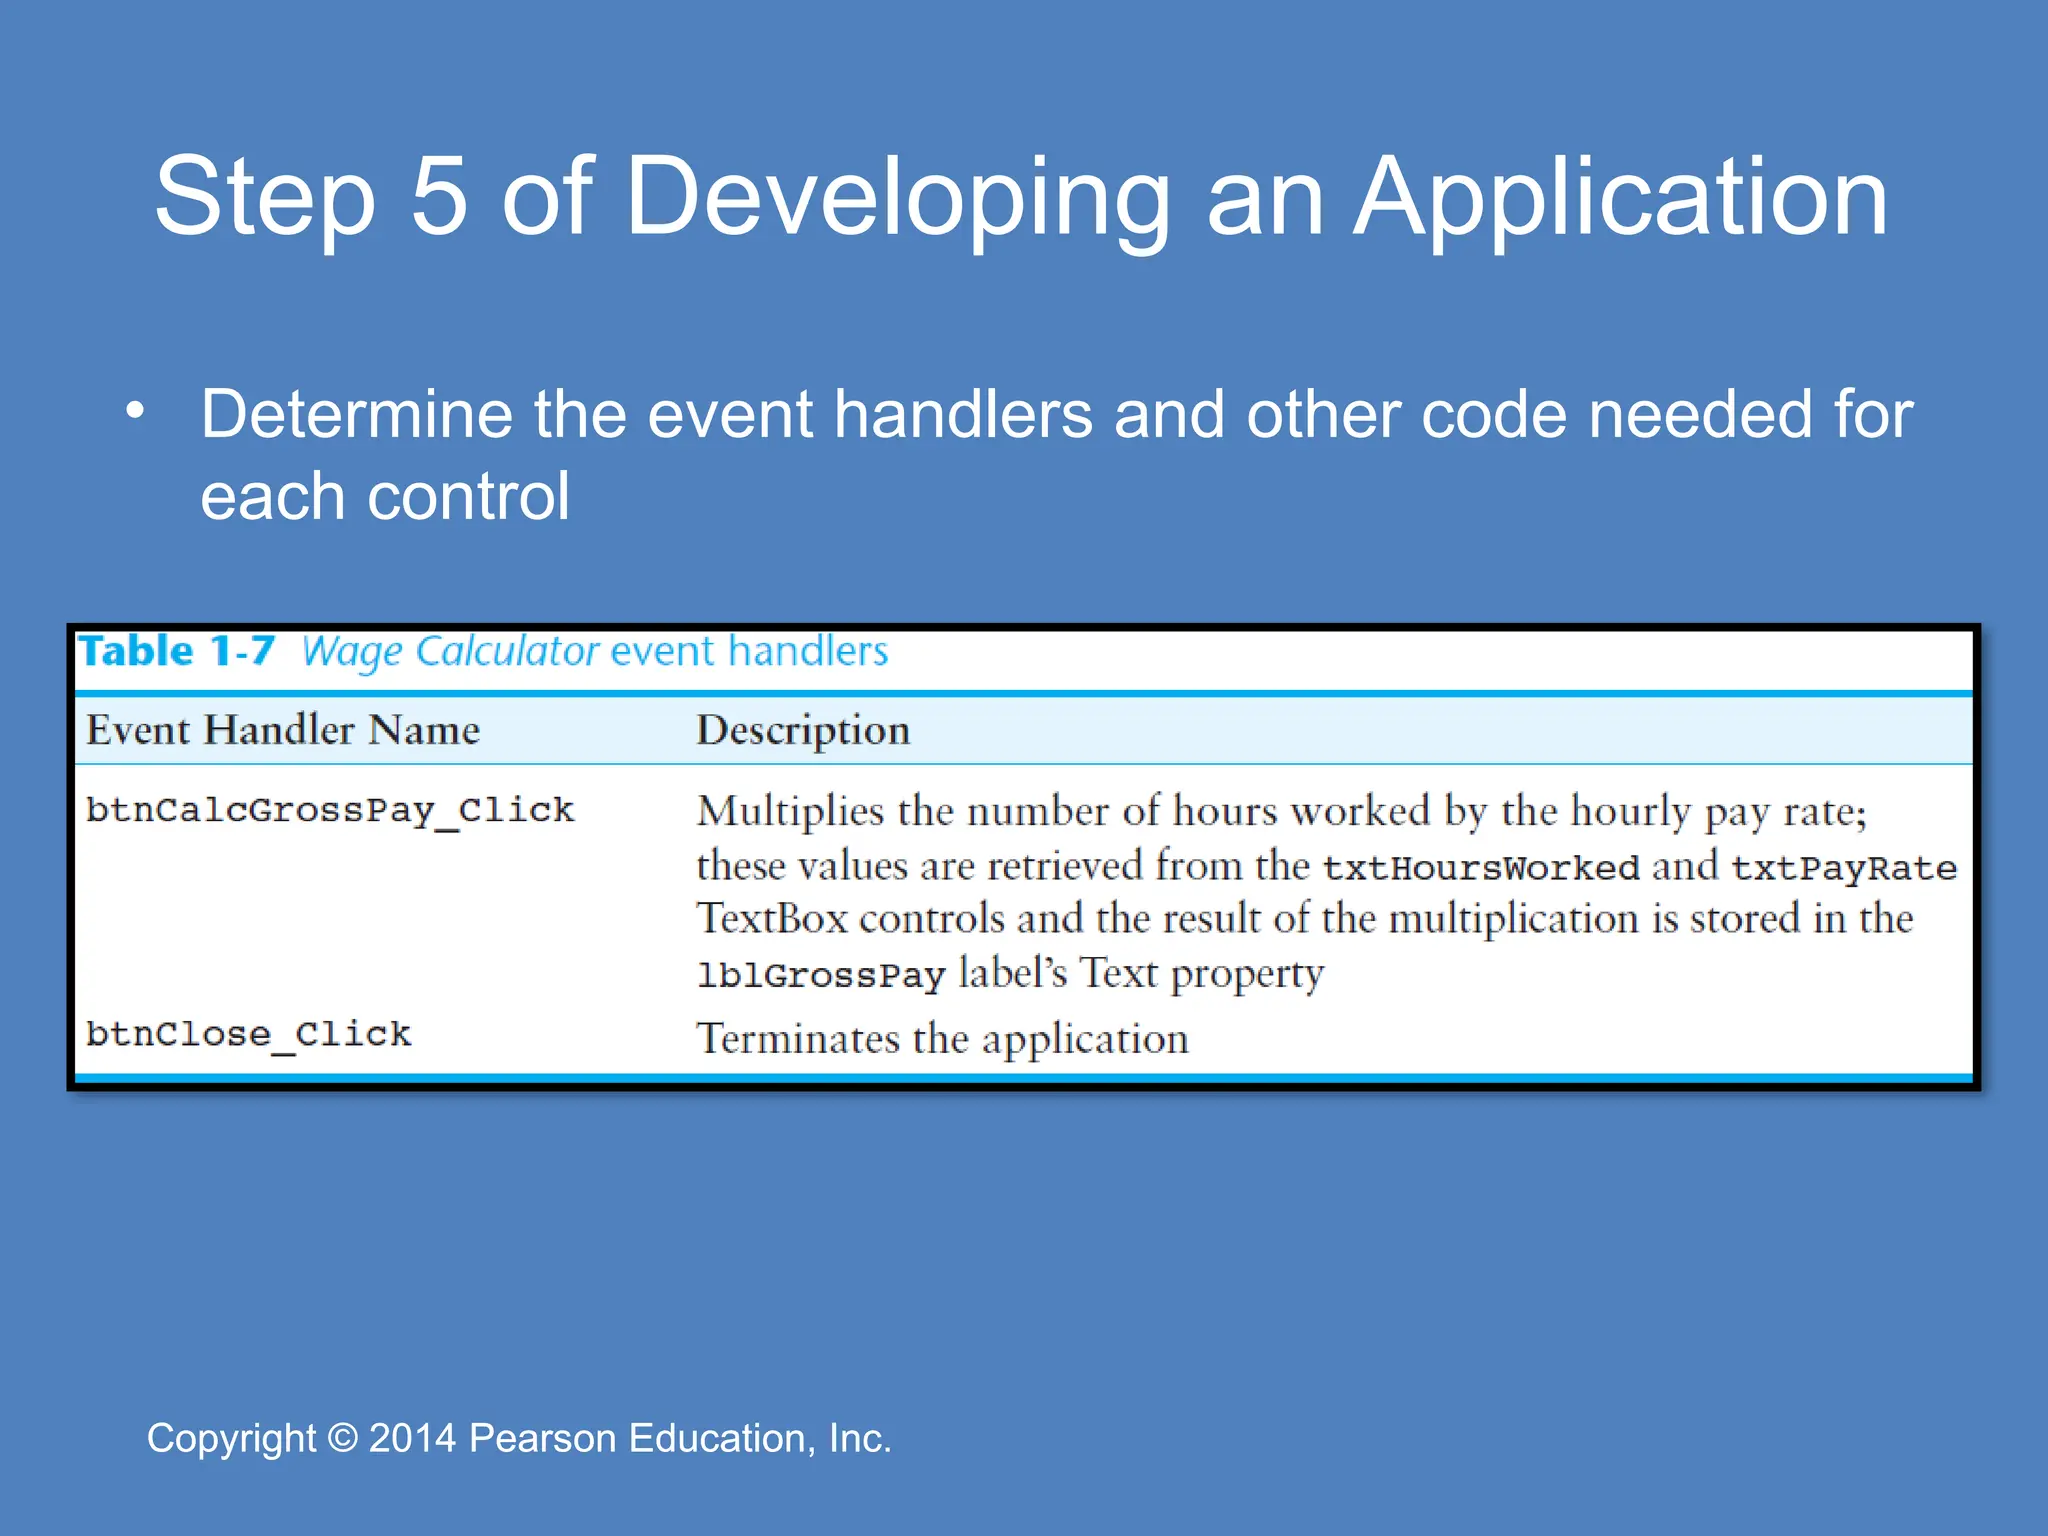
Pearson Education, Inc. Copyright © 2014 Pearson Education, Inc. Step 5 of Developing an Application • Determine the event handlers and other code needed for each control
30.
Copyright © 2014
Pearson Education, Inc. Copyright © 2014 Pearson Education, Inc. Step 6 of Developing an Application • Create a flowchart or pseudocode version of the code – A flowchart is a diagram that graphically depicts the flow of a method – Pseudocode is a cross between human language and a programming language
31.
Copyright © 2014
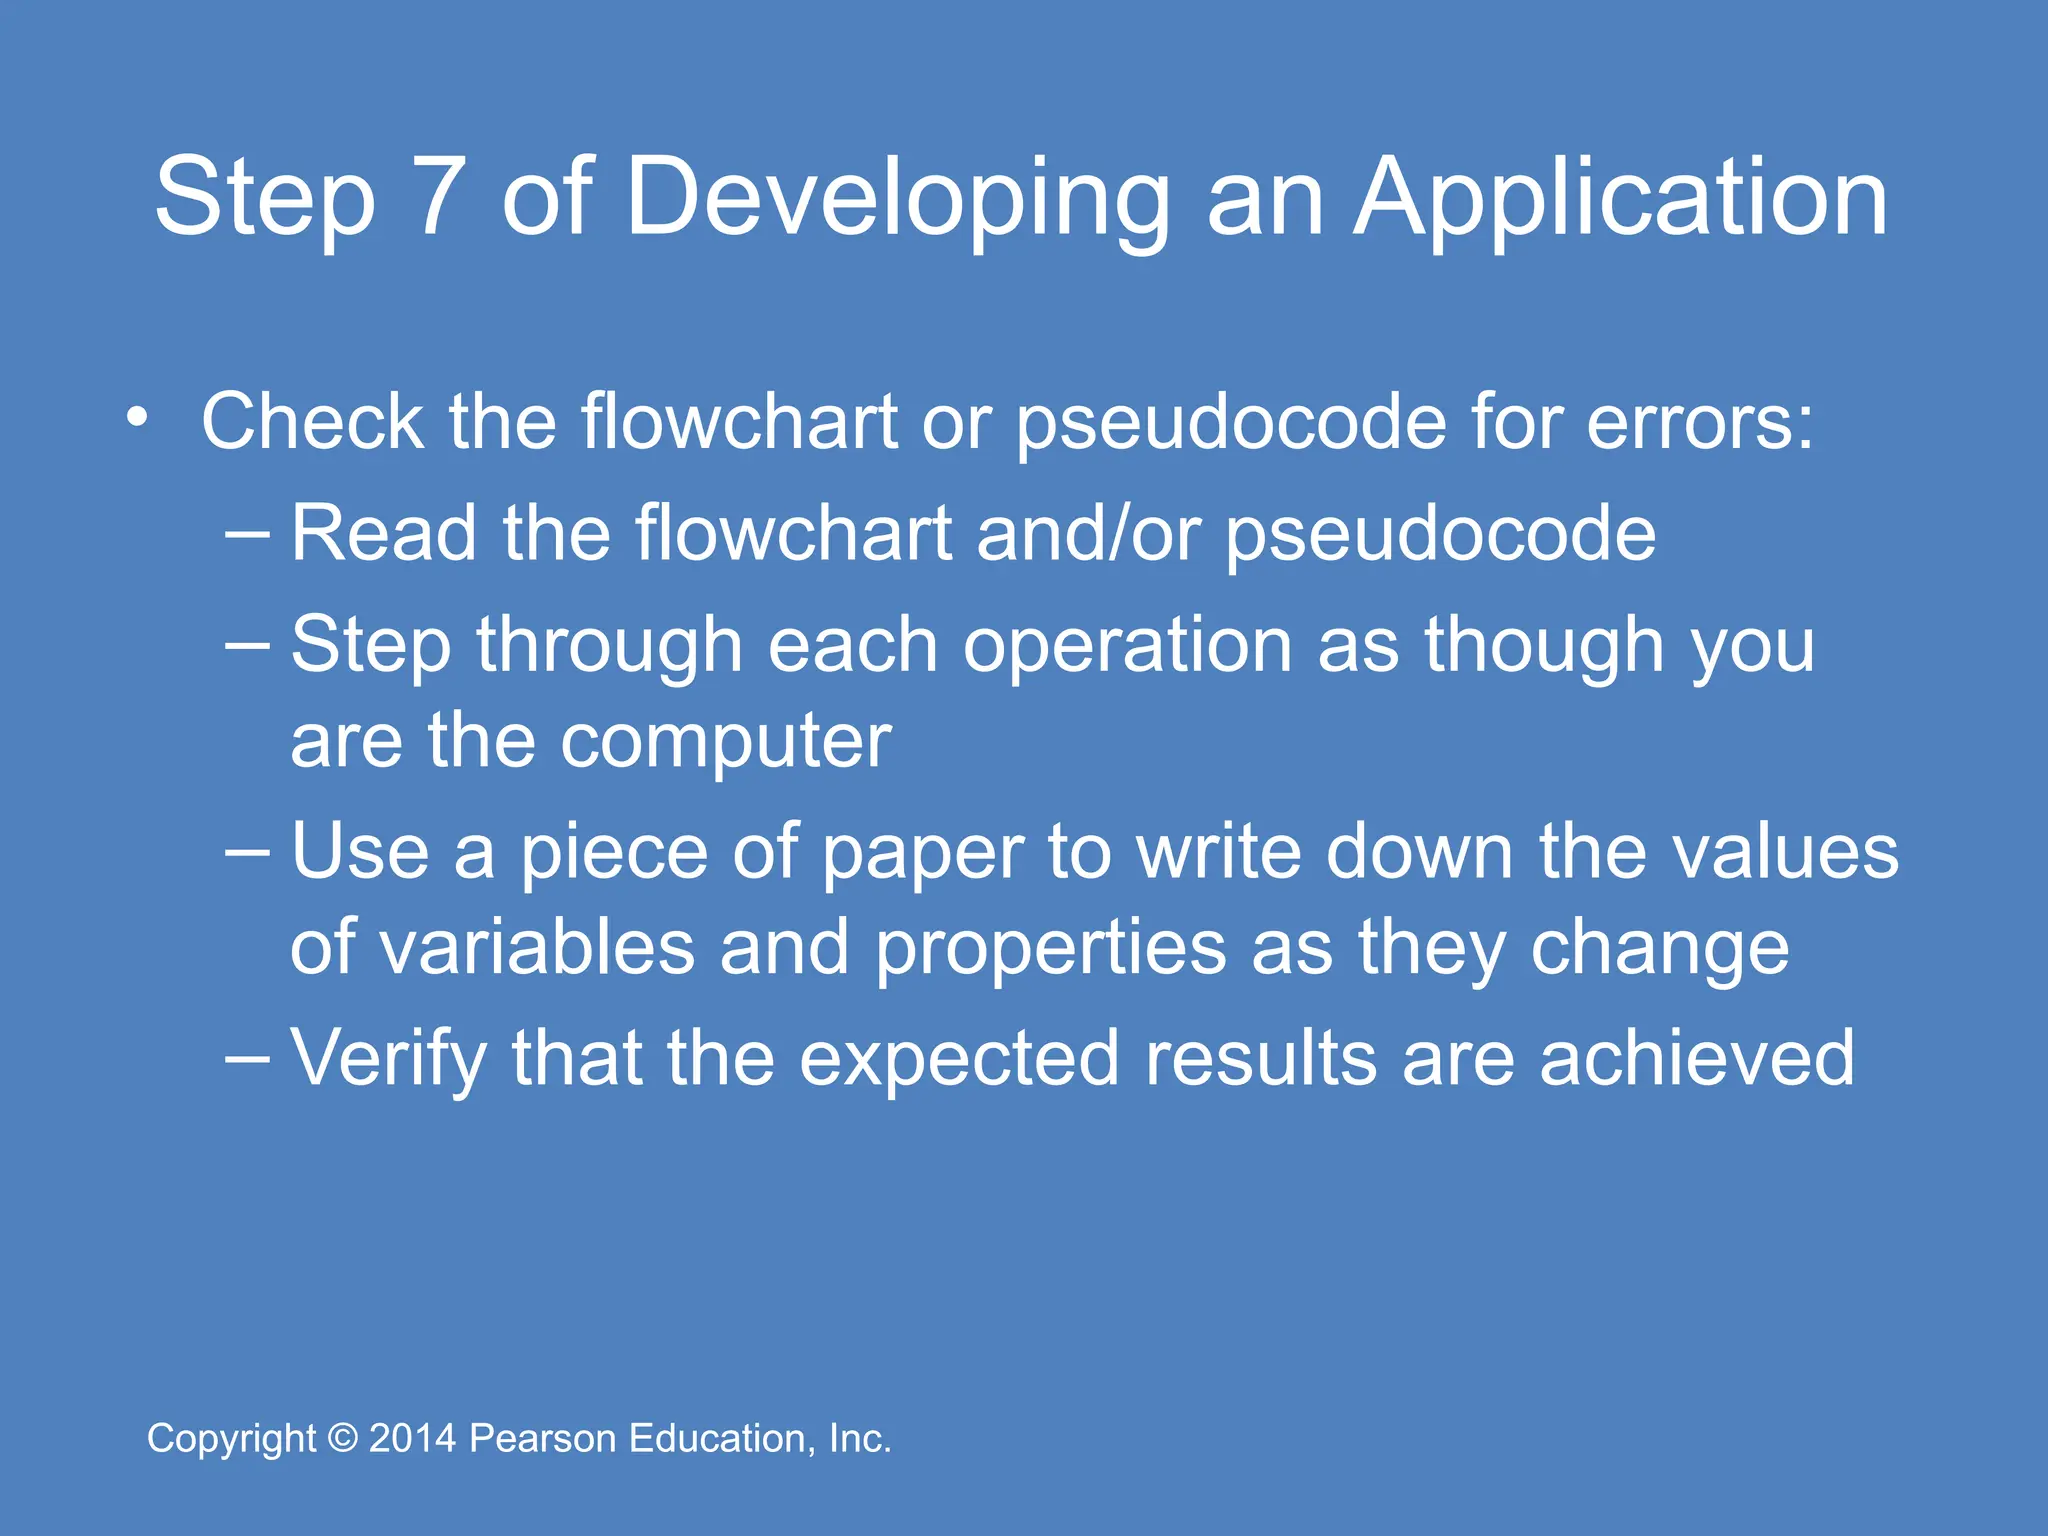
Pearson Education, Inc. Copyright © 2014 Pearson Education, Inc. Step 7 of Developing an Application • Check the flowchart or pseudocode for errors: – Read the flowchart and/or pseudocode – Step through each operation as though you are the computer – Use a piece of paper to write down the values of variables and properties as they change – Verify that the expected results are achieved
32.
Copyright © 2014
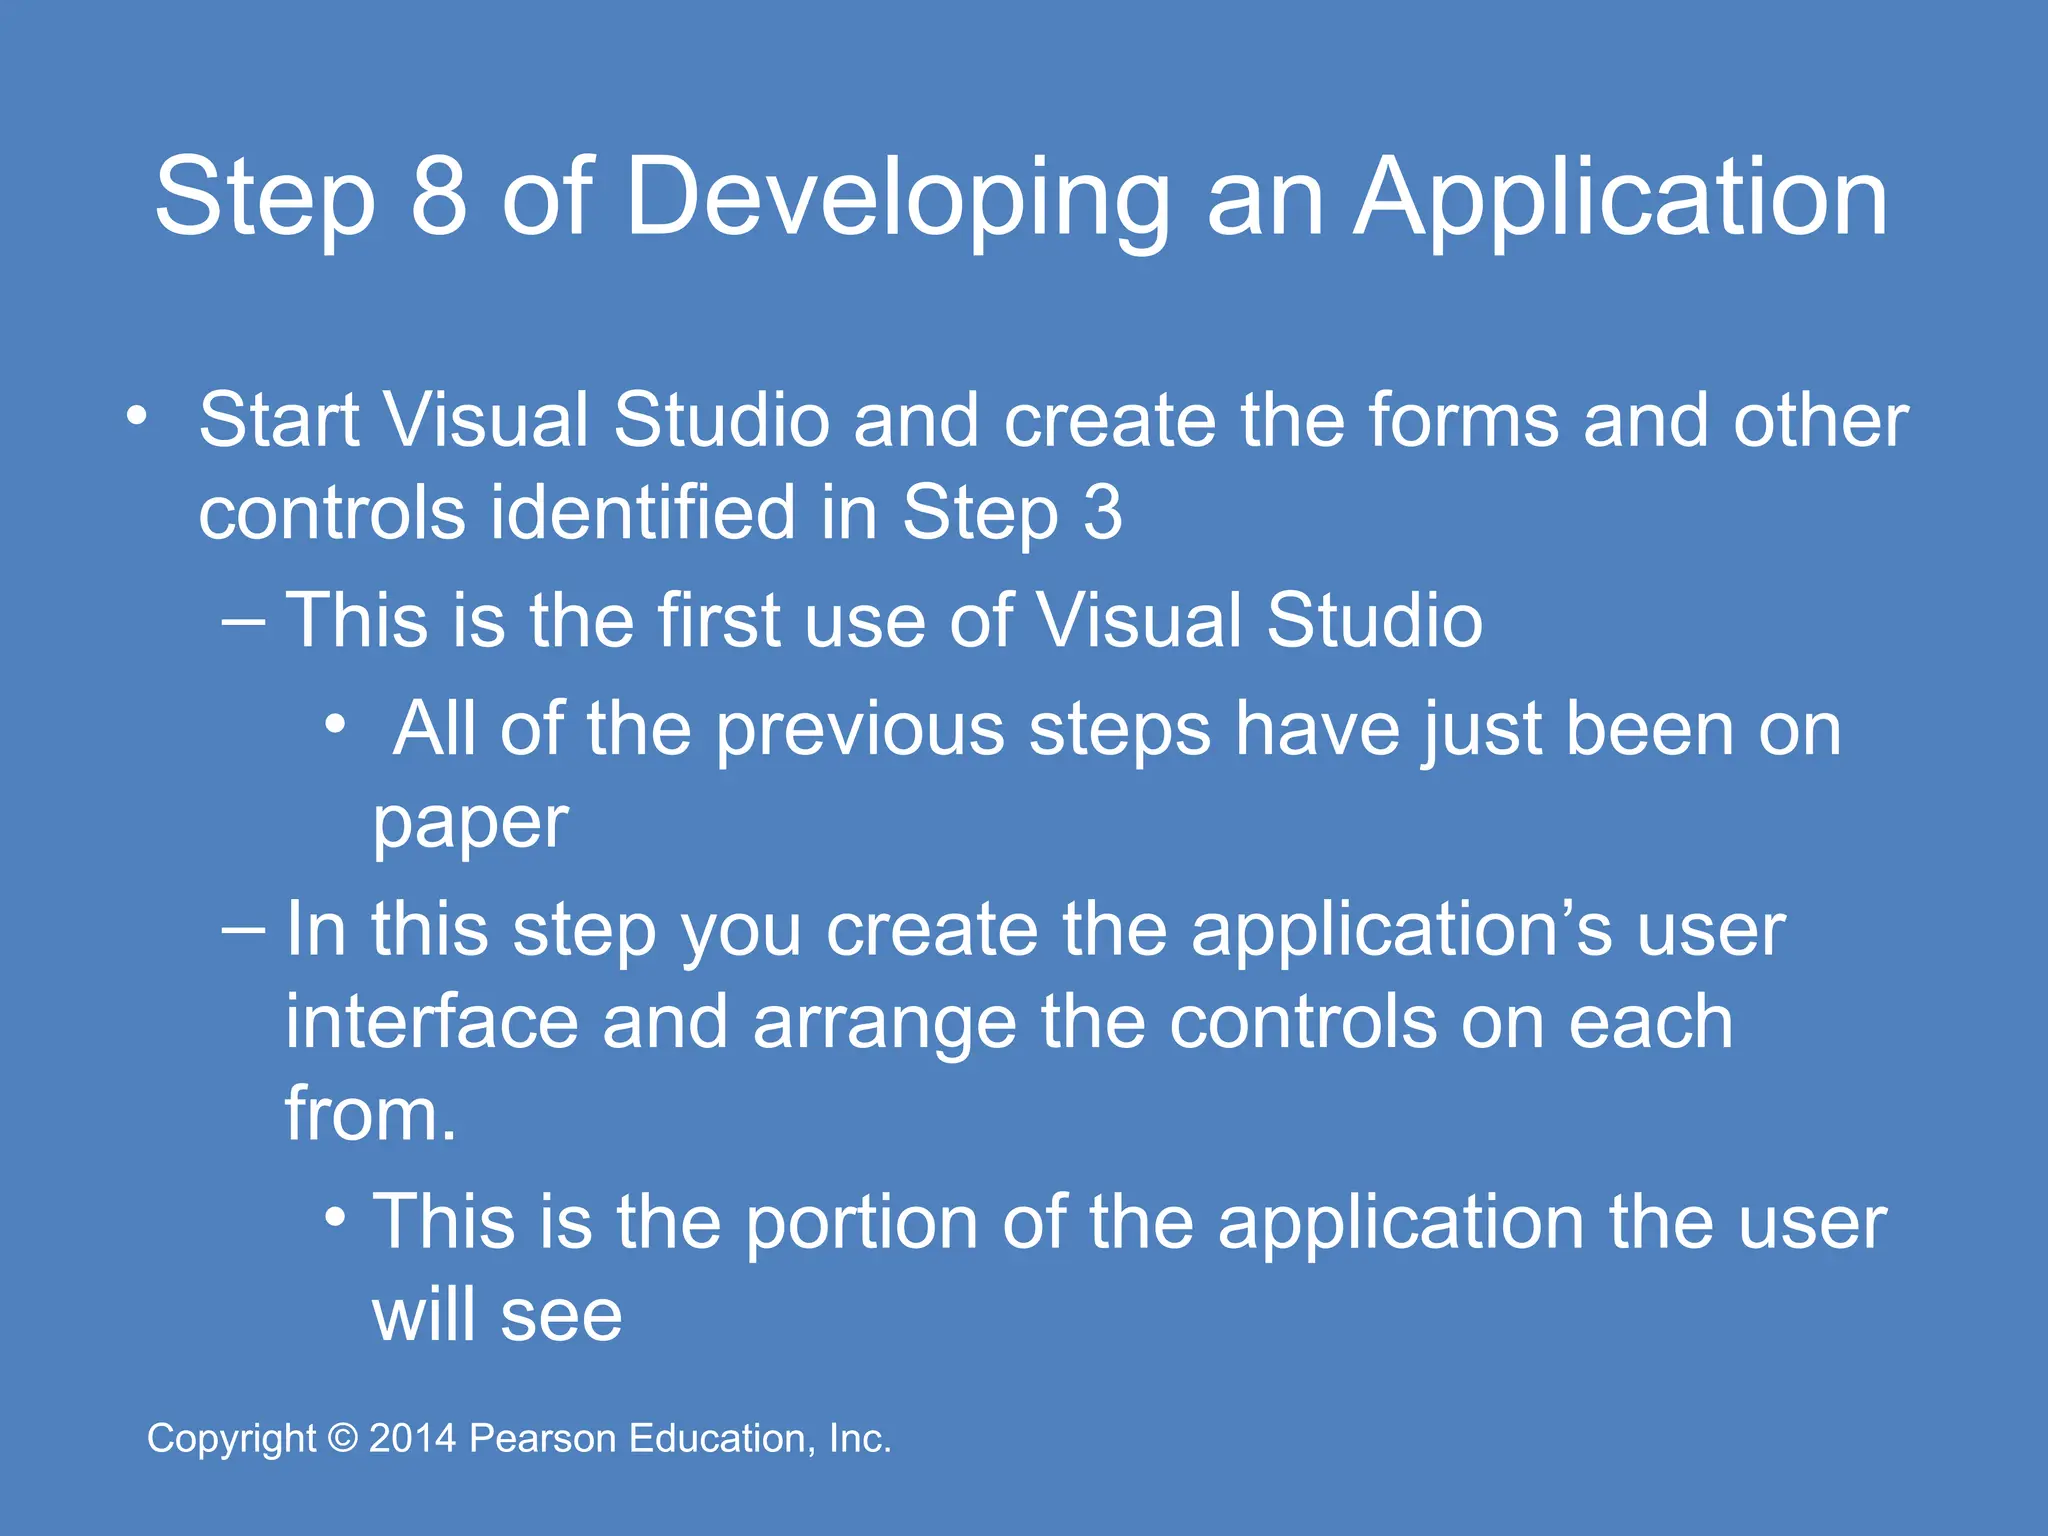
Pearson Education, Inc. Copyright © 2014 Pearson Education, Inc. Step 8 of Developing an Application • Start Visual Studio and create the forms and other controls identified in Step 3 – This is the first use of Visual Studio • All of the previous steps have just been on paper – In this step you create the application’s user interface and arrange the controls on each from. • This is the portion of the application the user will see
33.
Copyright © 2014
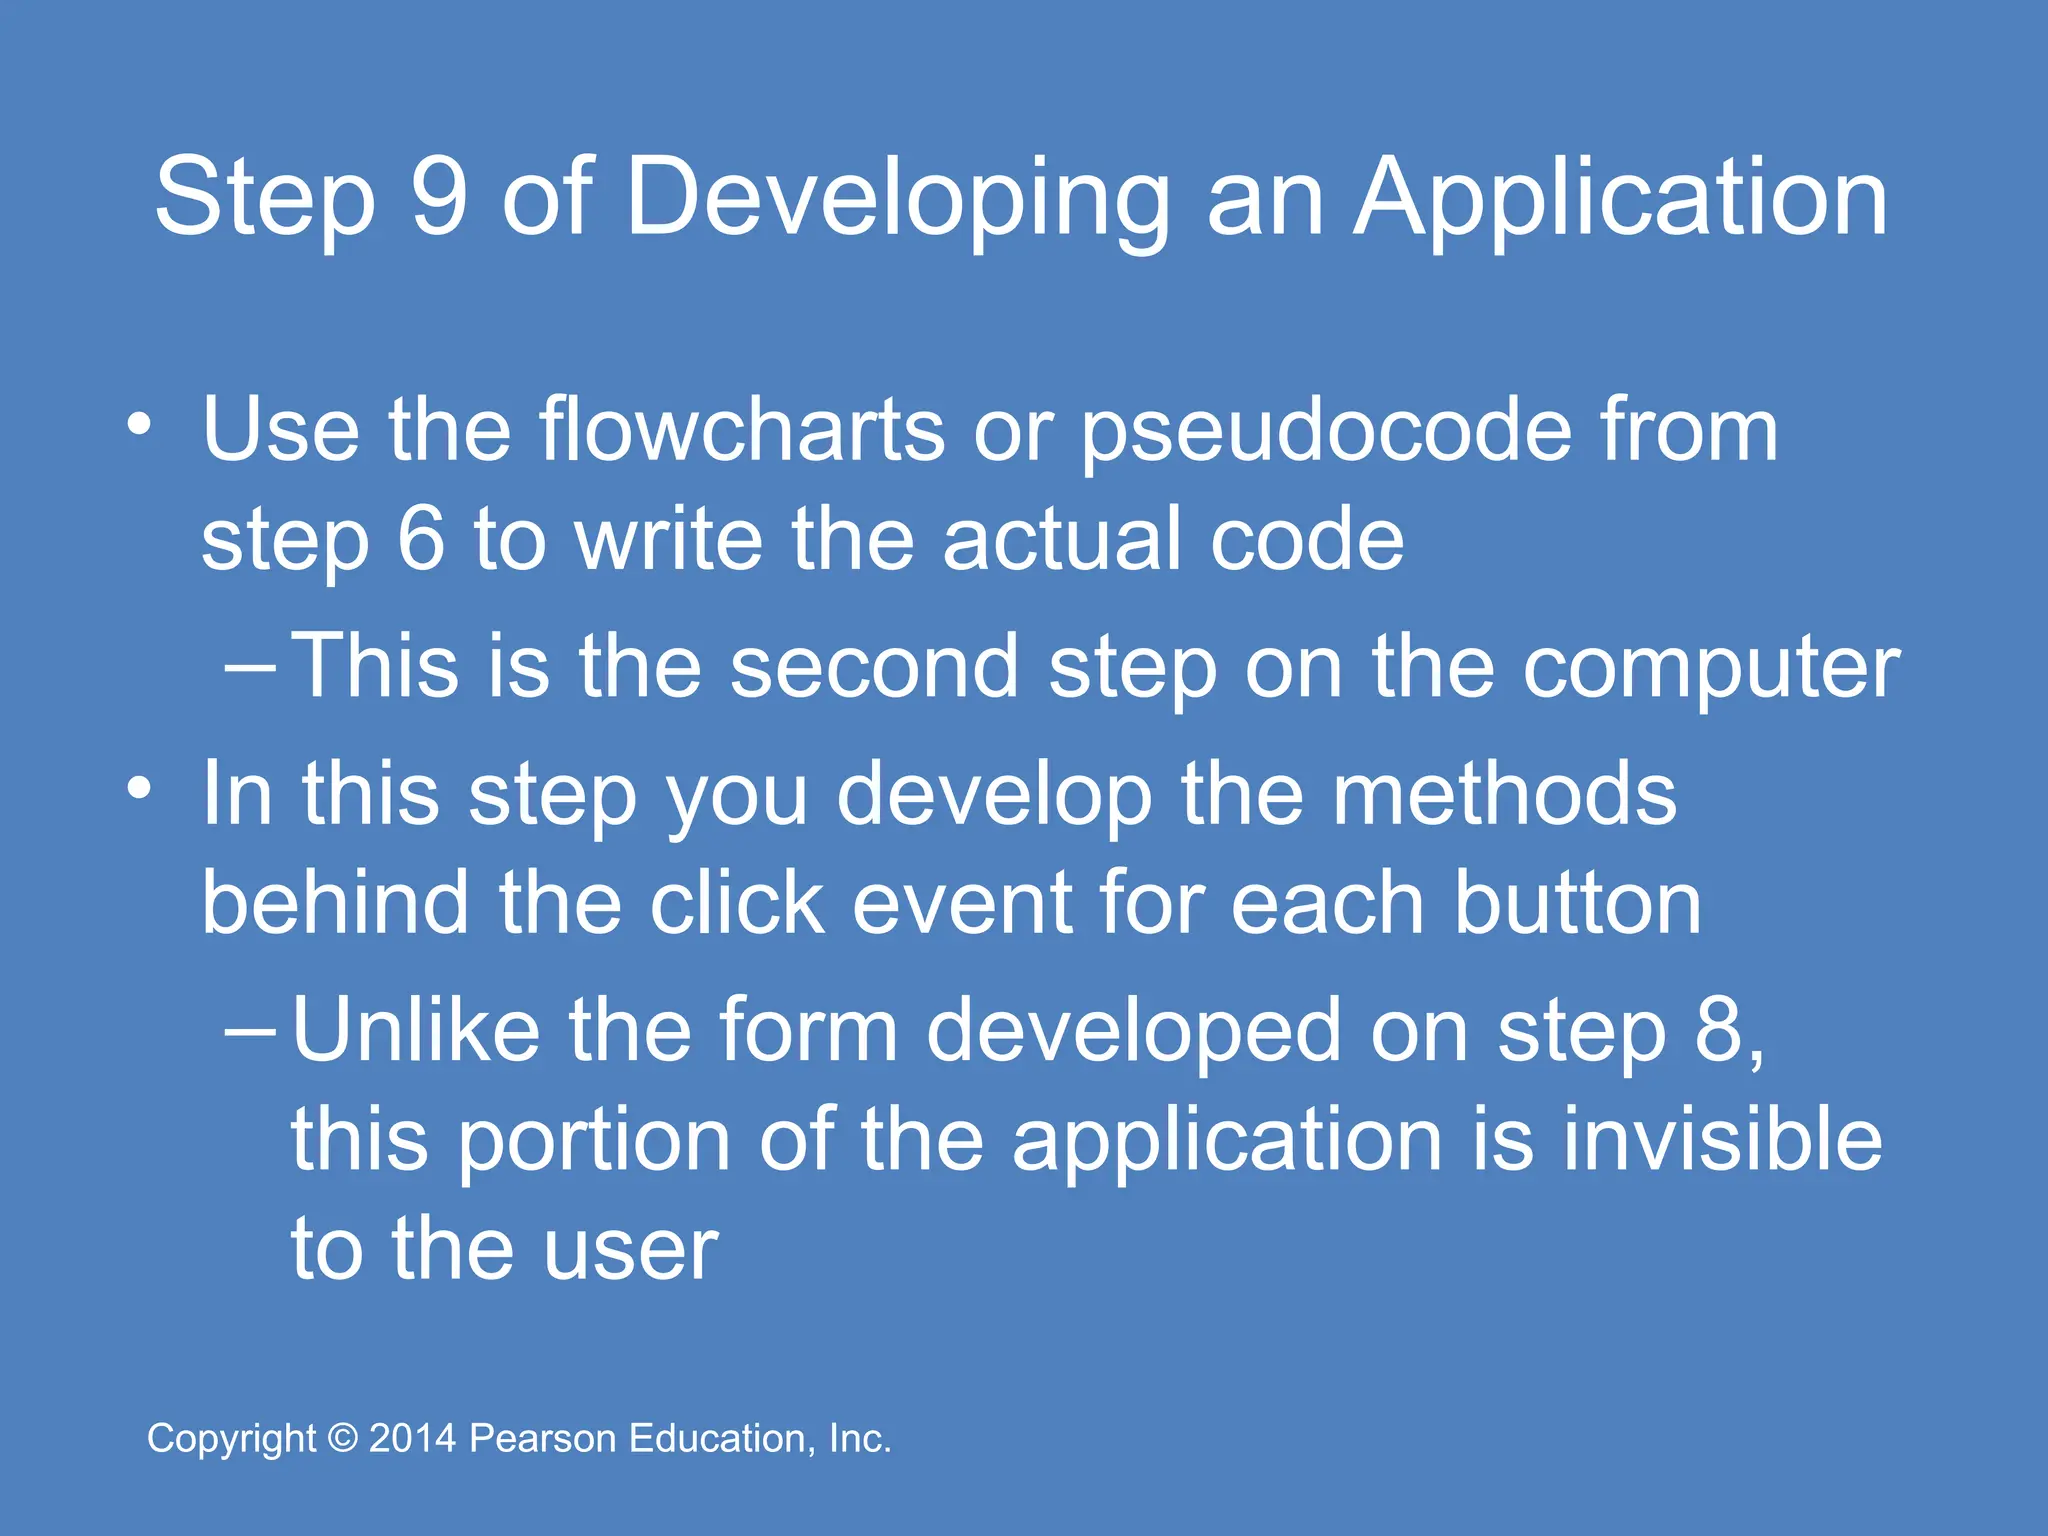
Pearson Education, Inc. Copyright © 2014 Pearson Education, Inc. Step 9 of Developing an Application • Use the flowcharts or pseudocode from step 6 to write the actual code –This is the second step on the computer • In this step you develop the methods behind the click event for each button –Unlike the form developed on step 8, this portion of the application is invisible to the user
34.
Copyright © 2014
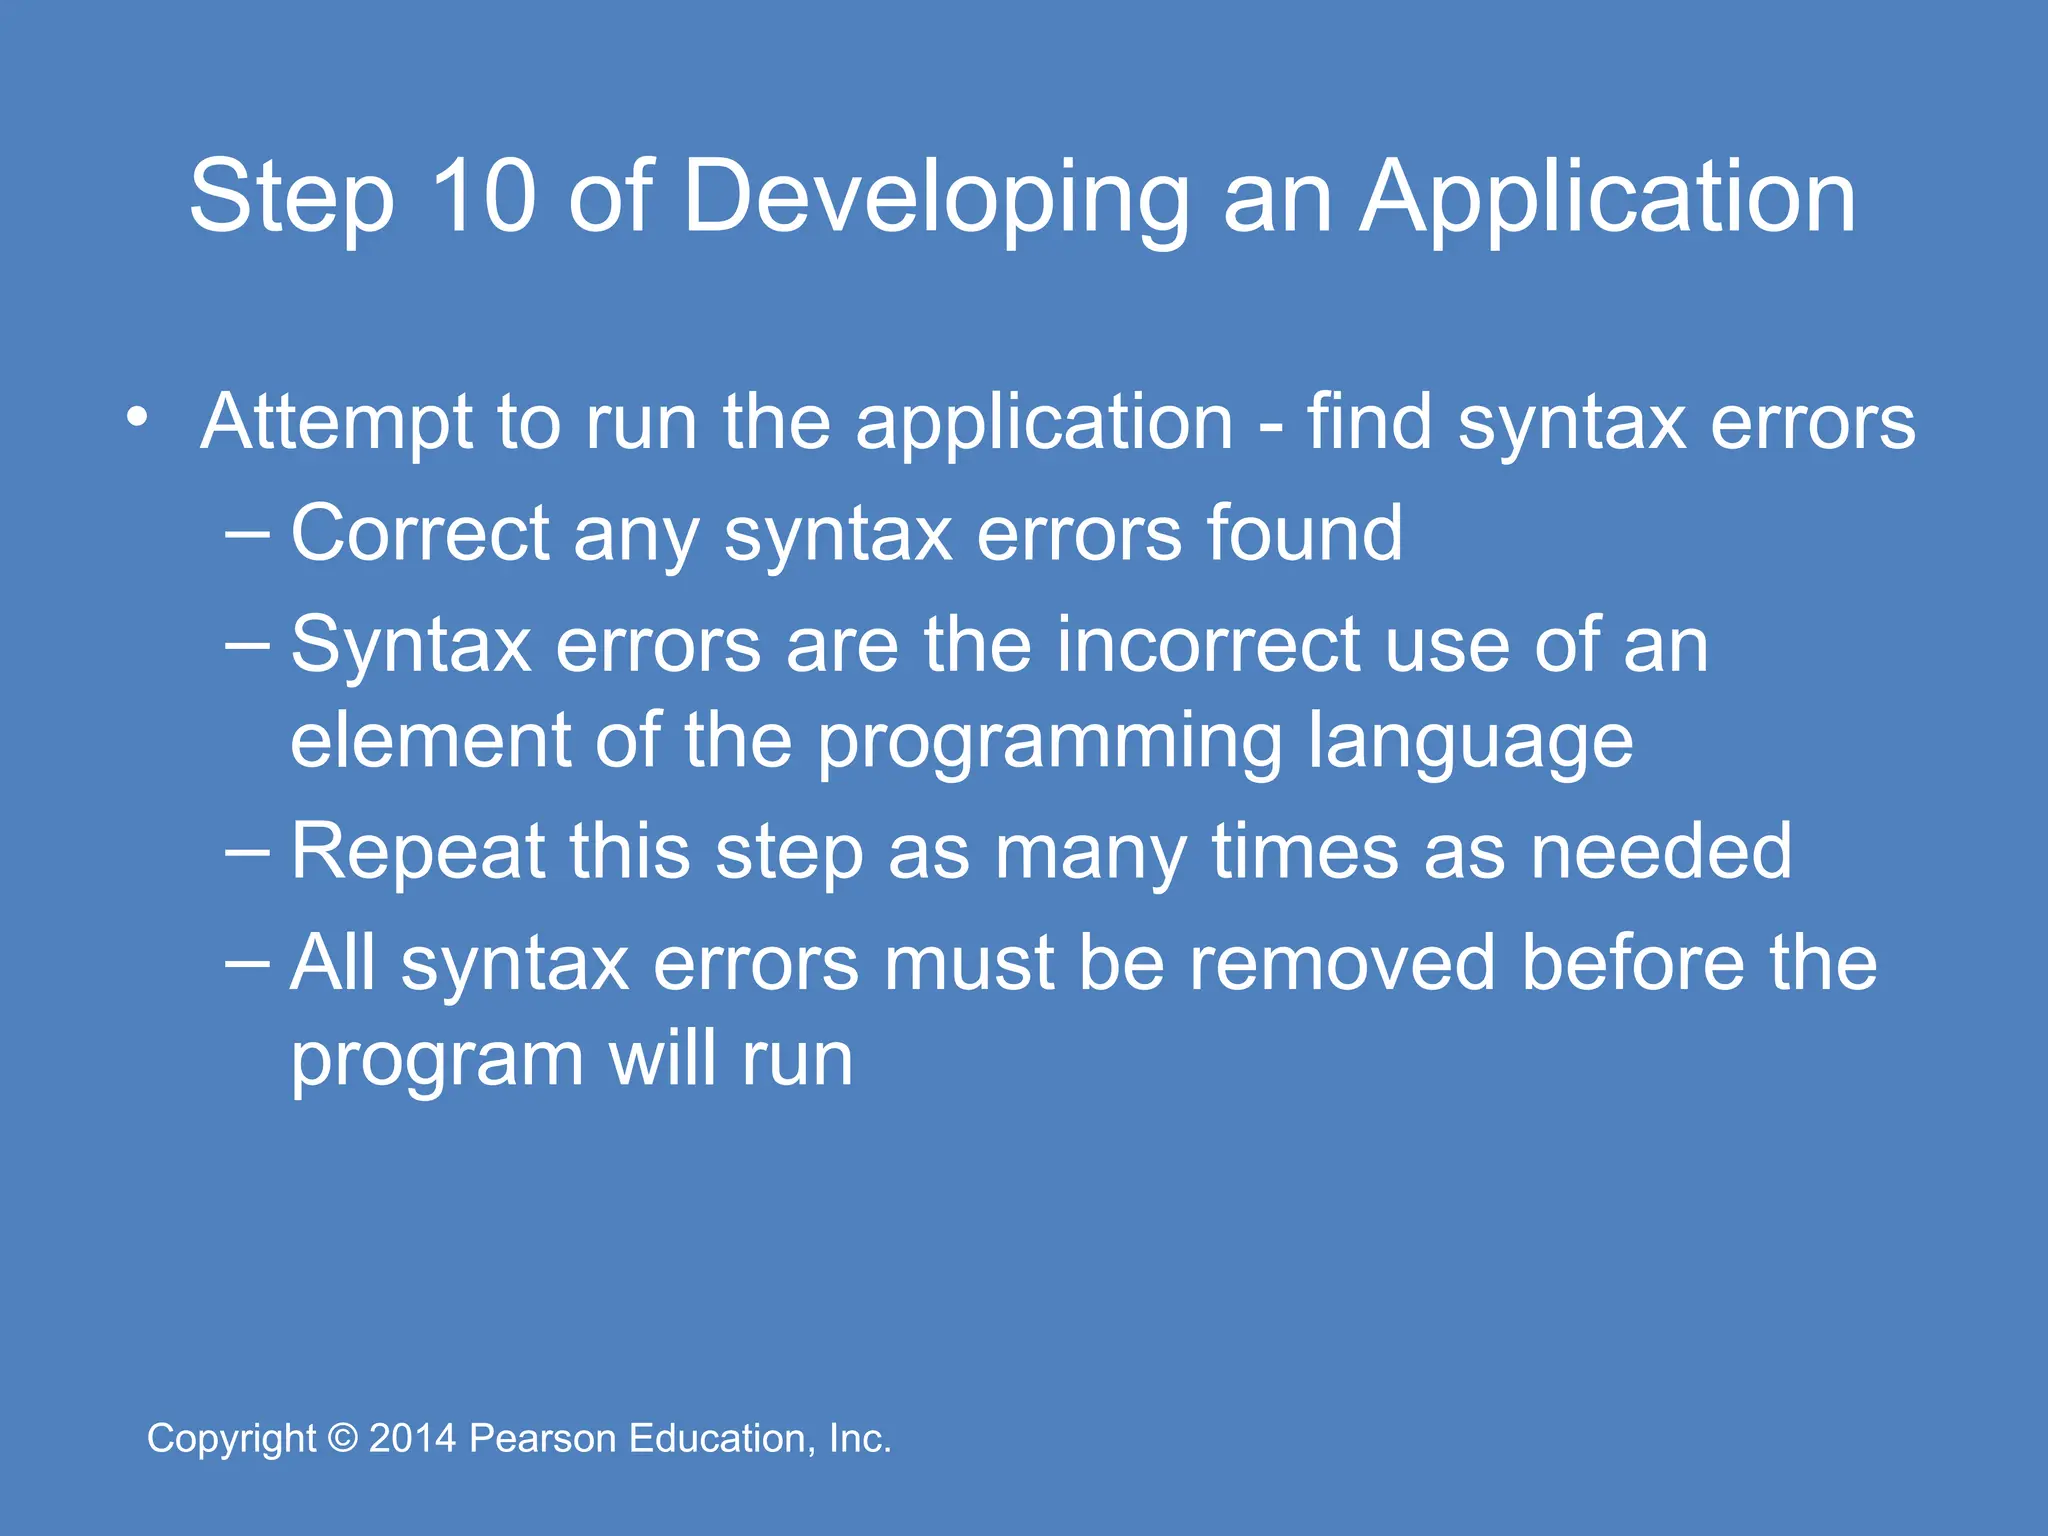
Pearson Education, Inc. Copyright © 2014 Pearson Education, Inc. Step 10 of Developing an Application • Attempt to run the application - find syntax errors – Correct any syntax errors found – Syntax errors are the incorrect use of an element of the programming language – Repeat this step as many times as needed – All syntax errors must be removed before the program will run
35.
Copyright © 2014
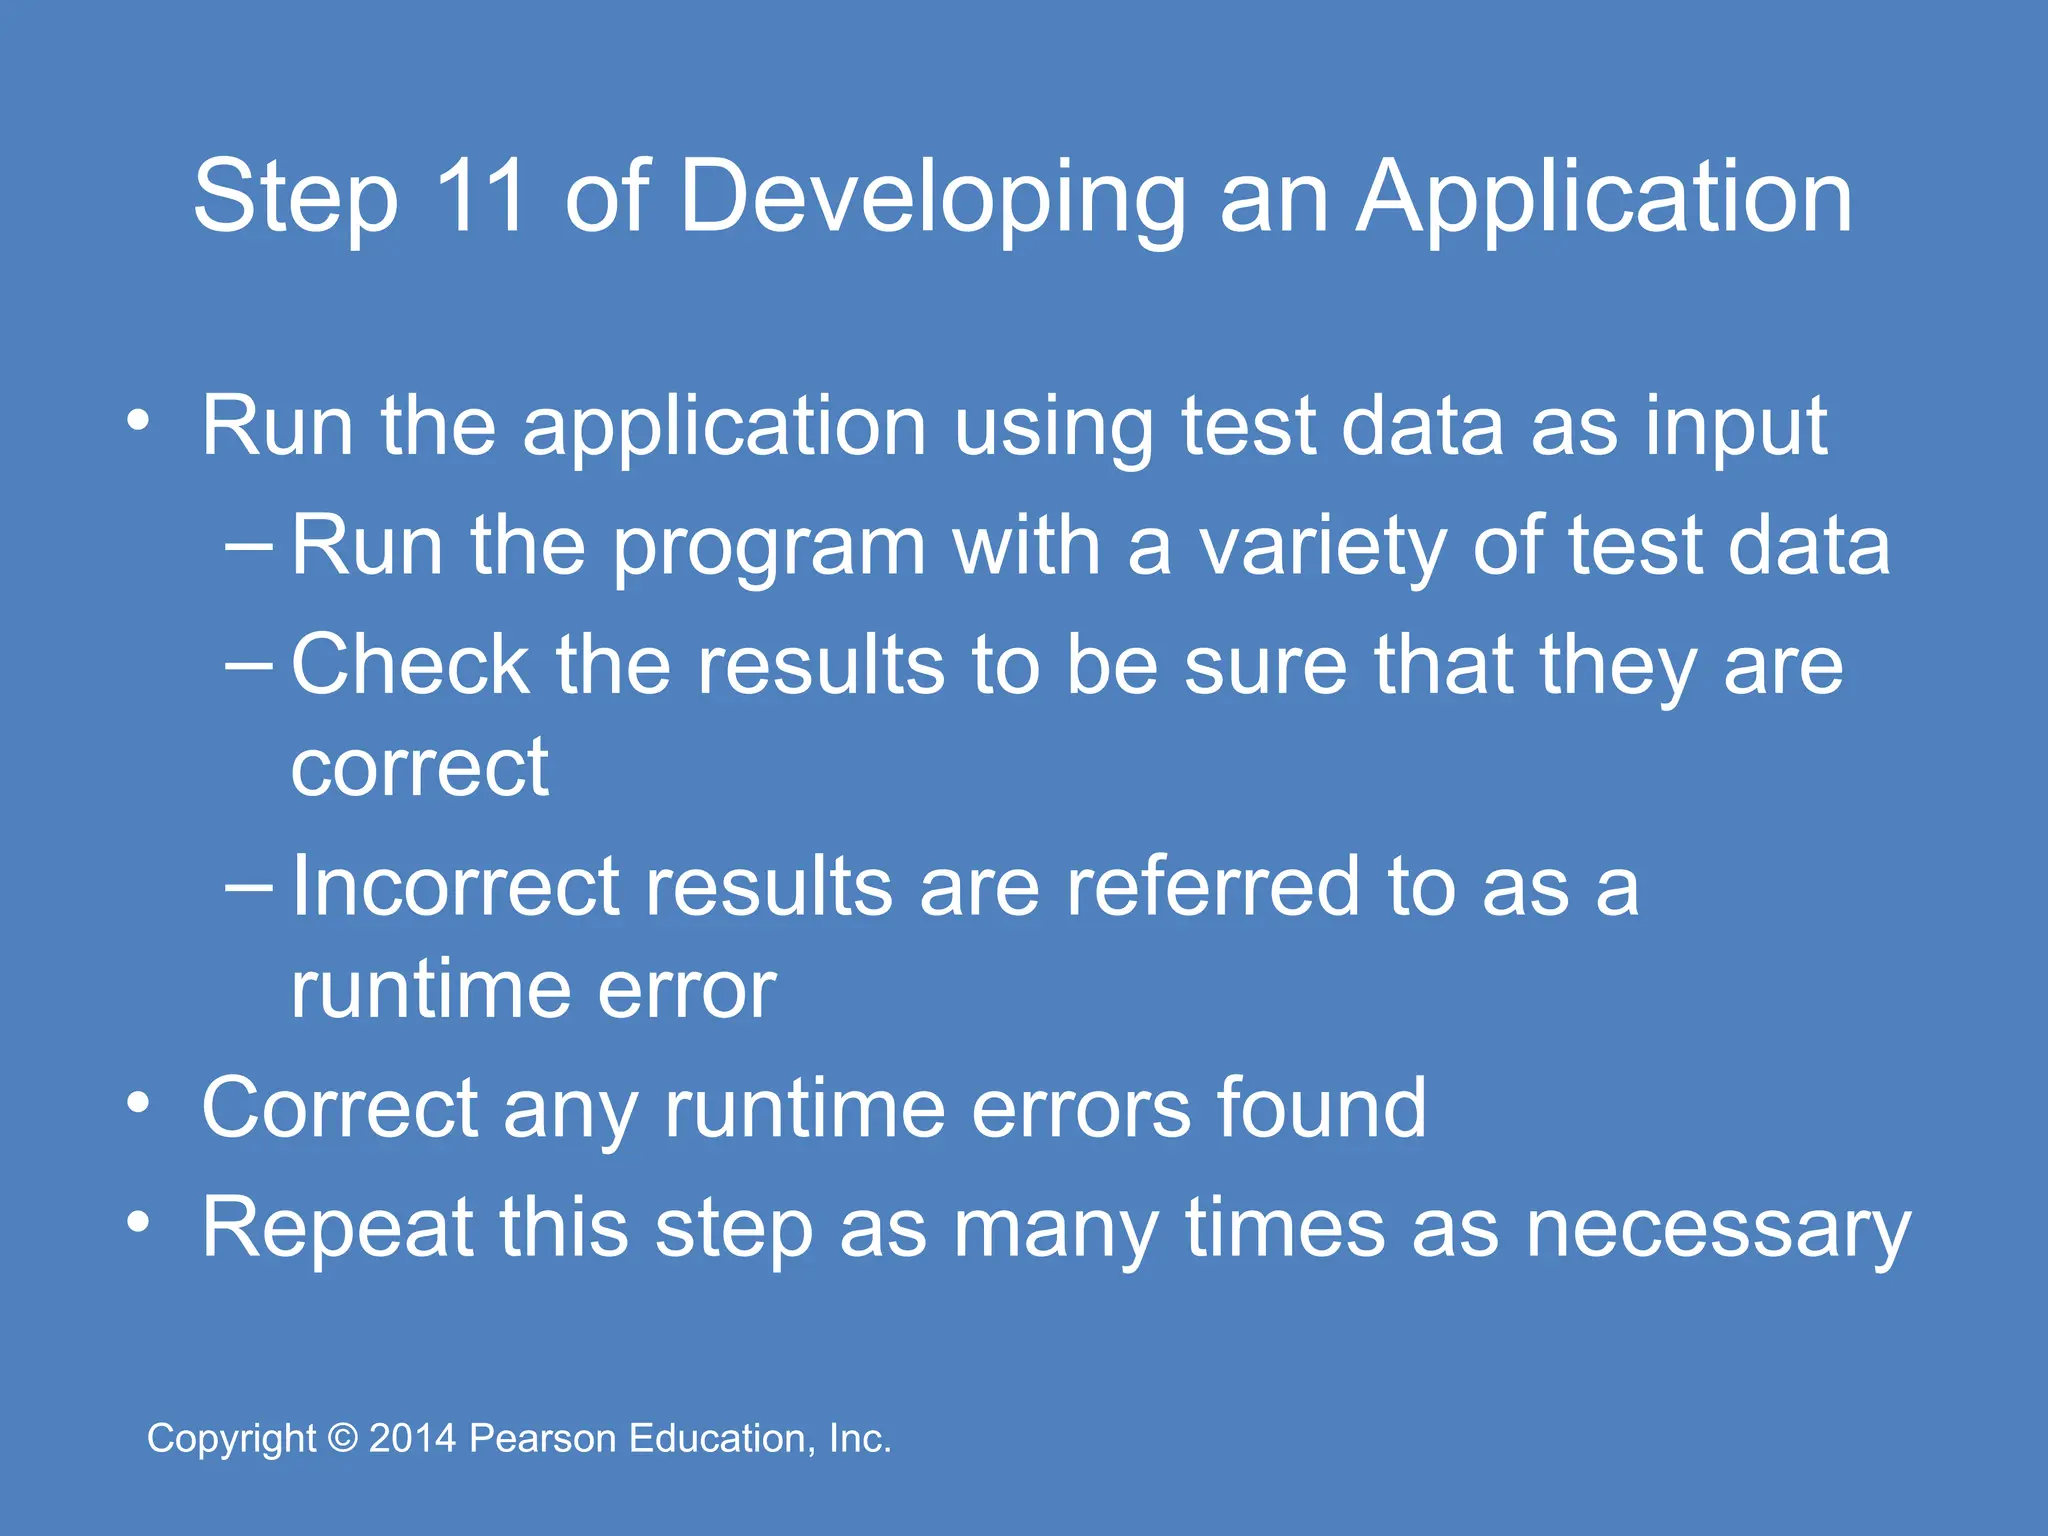
Pearson Education, Inc. Copyright © 2014 Pearson Education, Inc. Step 11 of Developing an Application • Run the application using test data as input – Run the program with a variety of test data – Check the results to be sure that they are correct – Incorrect results are referred to as a runtime error • Correct any runtime errors found • Repeat this step as many times as necessary
36.
Copyright © 2014
Pearson Education, Inc. Copyright © 2014 Pearson Education, Inc. Visual Studio and Visual Studio Express (the Visual Basic Environment) 1.5
37.
Copyright © 2014
Pearson Education, Inc. Copyright © 2014 Pearson Education, Inc. What is Visual Studio? • Visual Studio is an integrated development environment, often abbreviated as IDE – Provides everything needed to create, test, and debug software including: • The Visual Basic language • Form design tools to create the user interface • Debugging tools to help find and correct programming errors – Visual Studio can be used to create applications with other languages such as C++ and C#
38.
Copyright © 2014
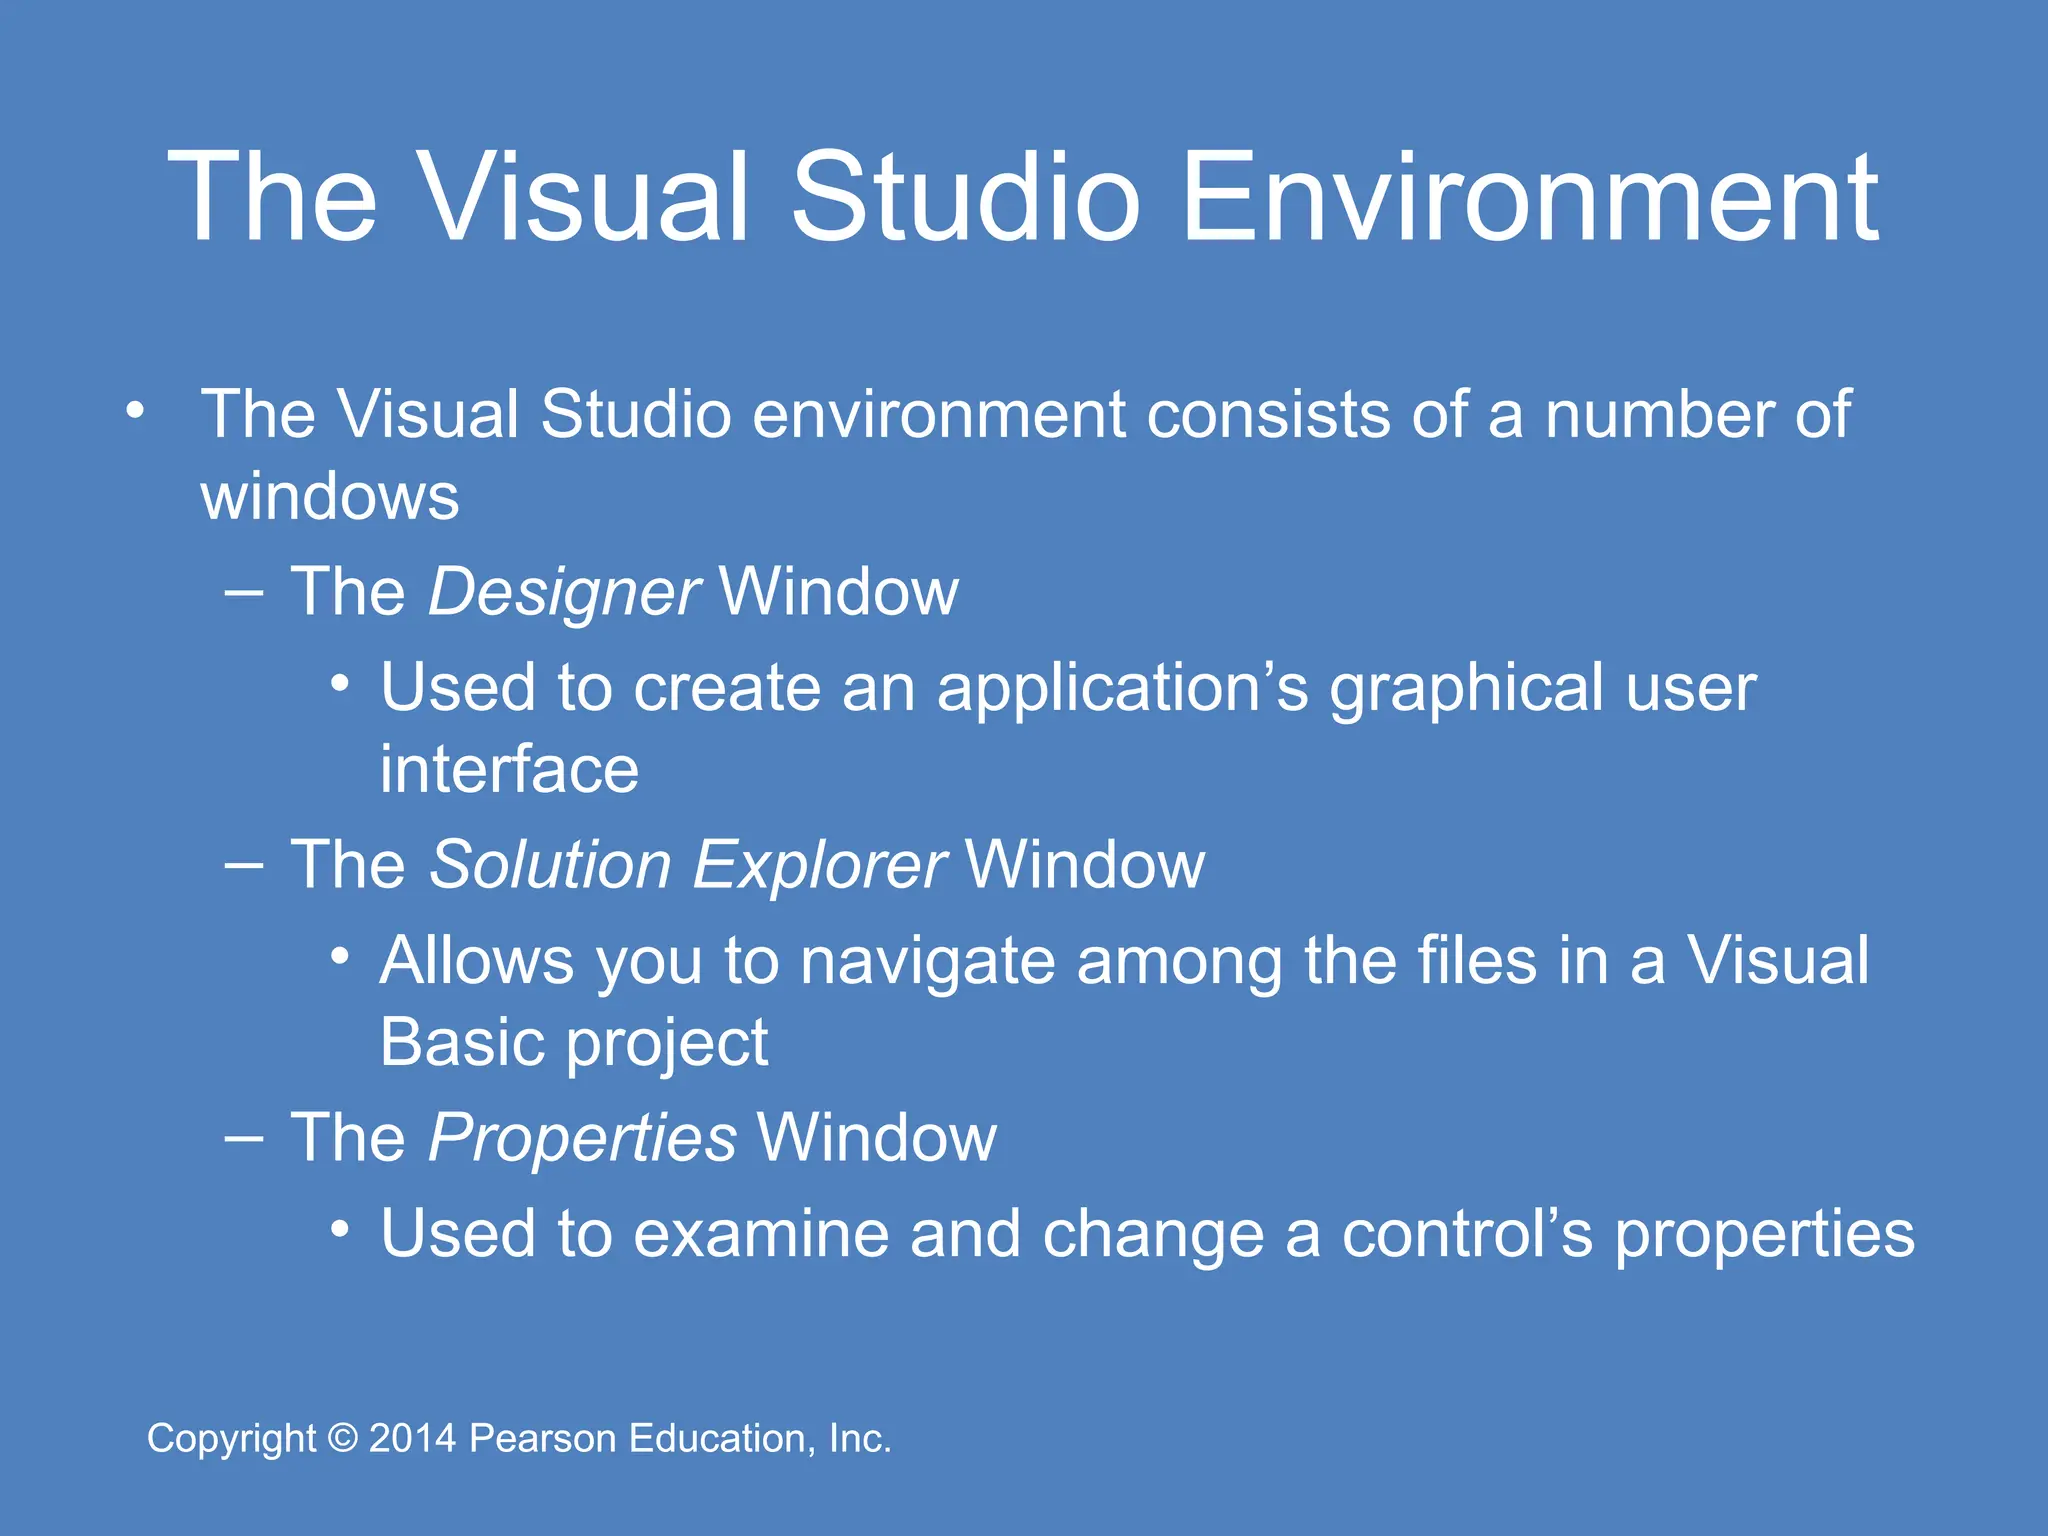
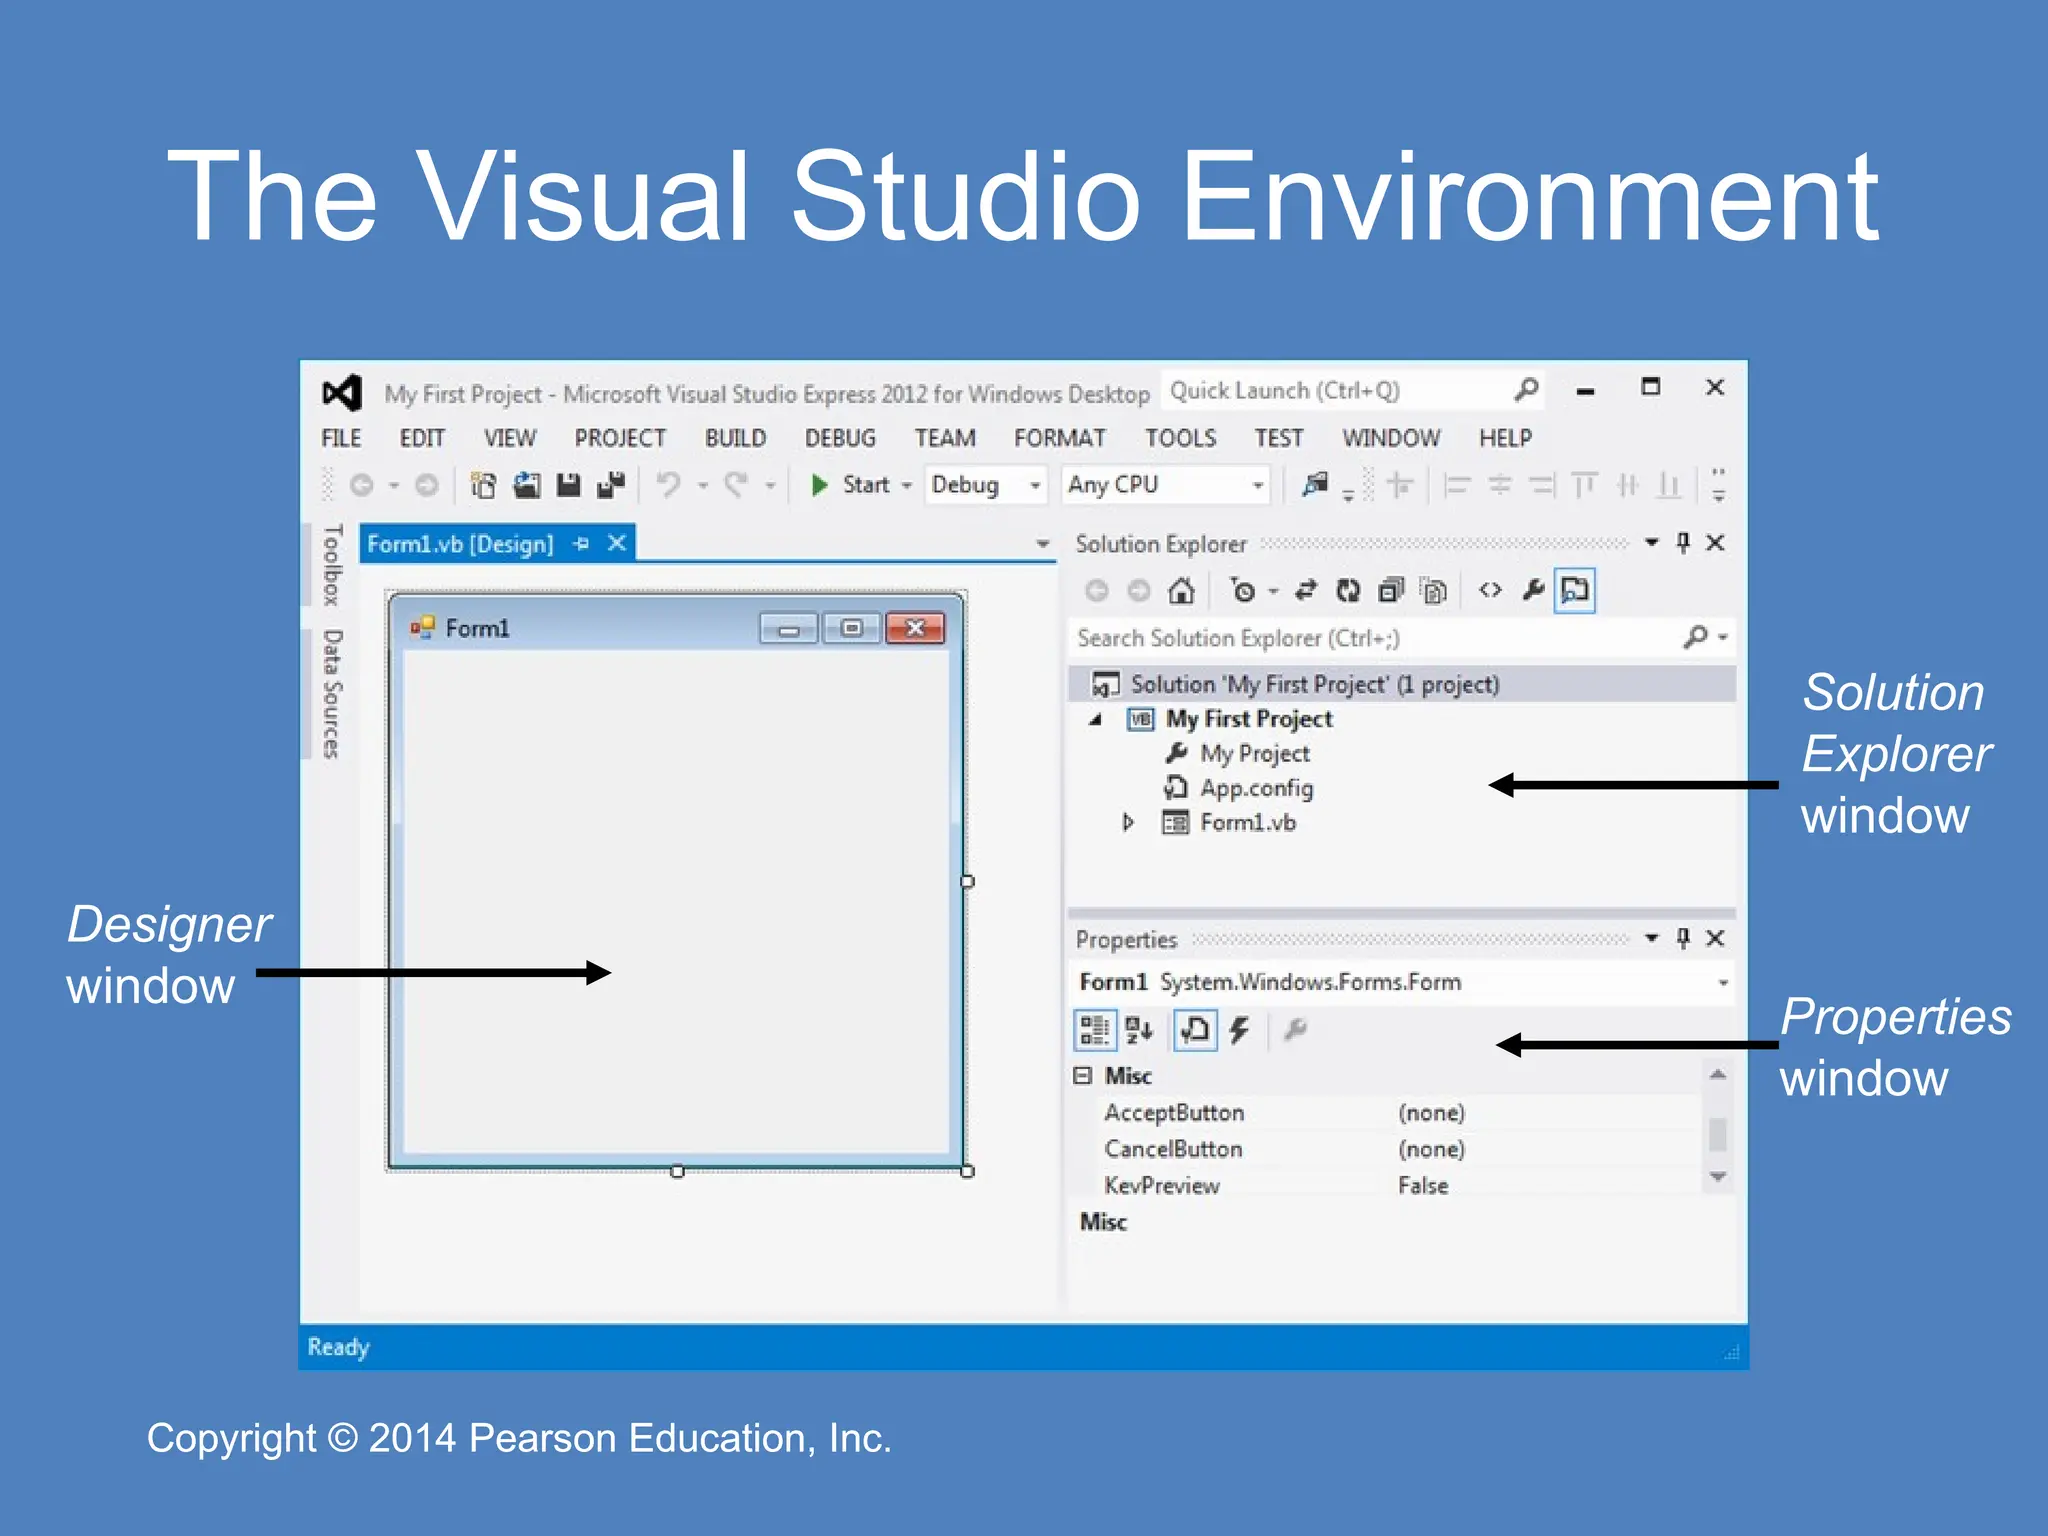
Pearson Education, Inc. Copyright © 2014 Pearson Education, Inc. The Visual Studio Environment • The Visual Studio environment consists of a number of windows – The Designer Window • Used to create an application’s graphical user interface – The Solution Explorer Window • Allows you to navigate among the files in a Visual Basic project – The Properties Window • Used to examine and change a control’s properties
39.
Copyright © 2014
Pearson Education, Inc. Copyright © 2014 Pearson Education, Inc. The Visual Studio Environment Designer window Solution Explorer window Properties window
40.
Copyright © 2014
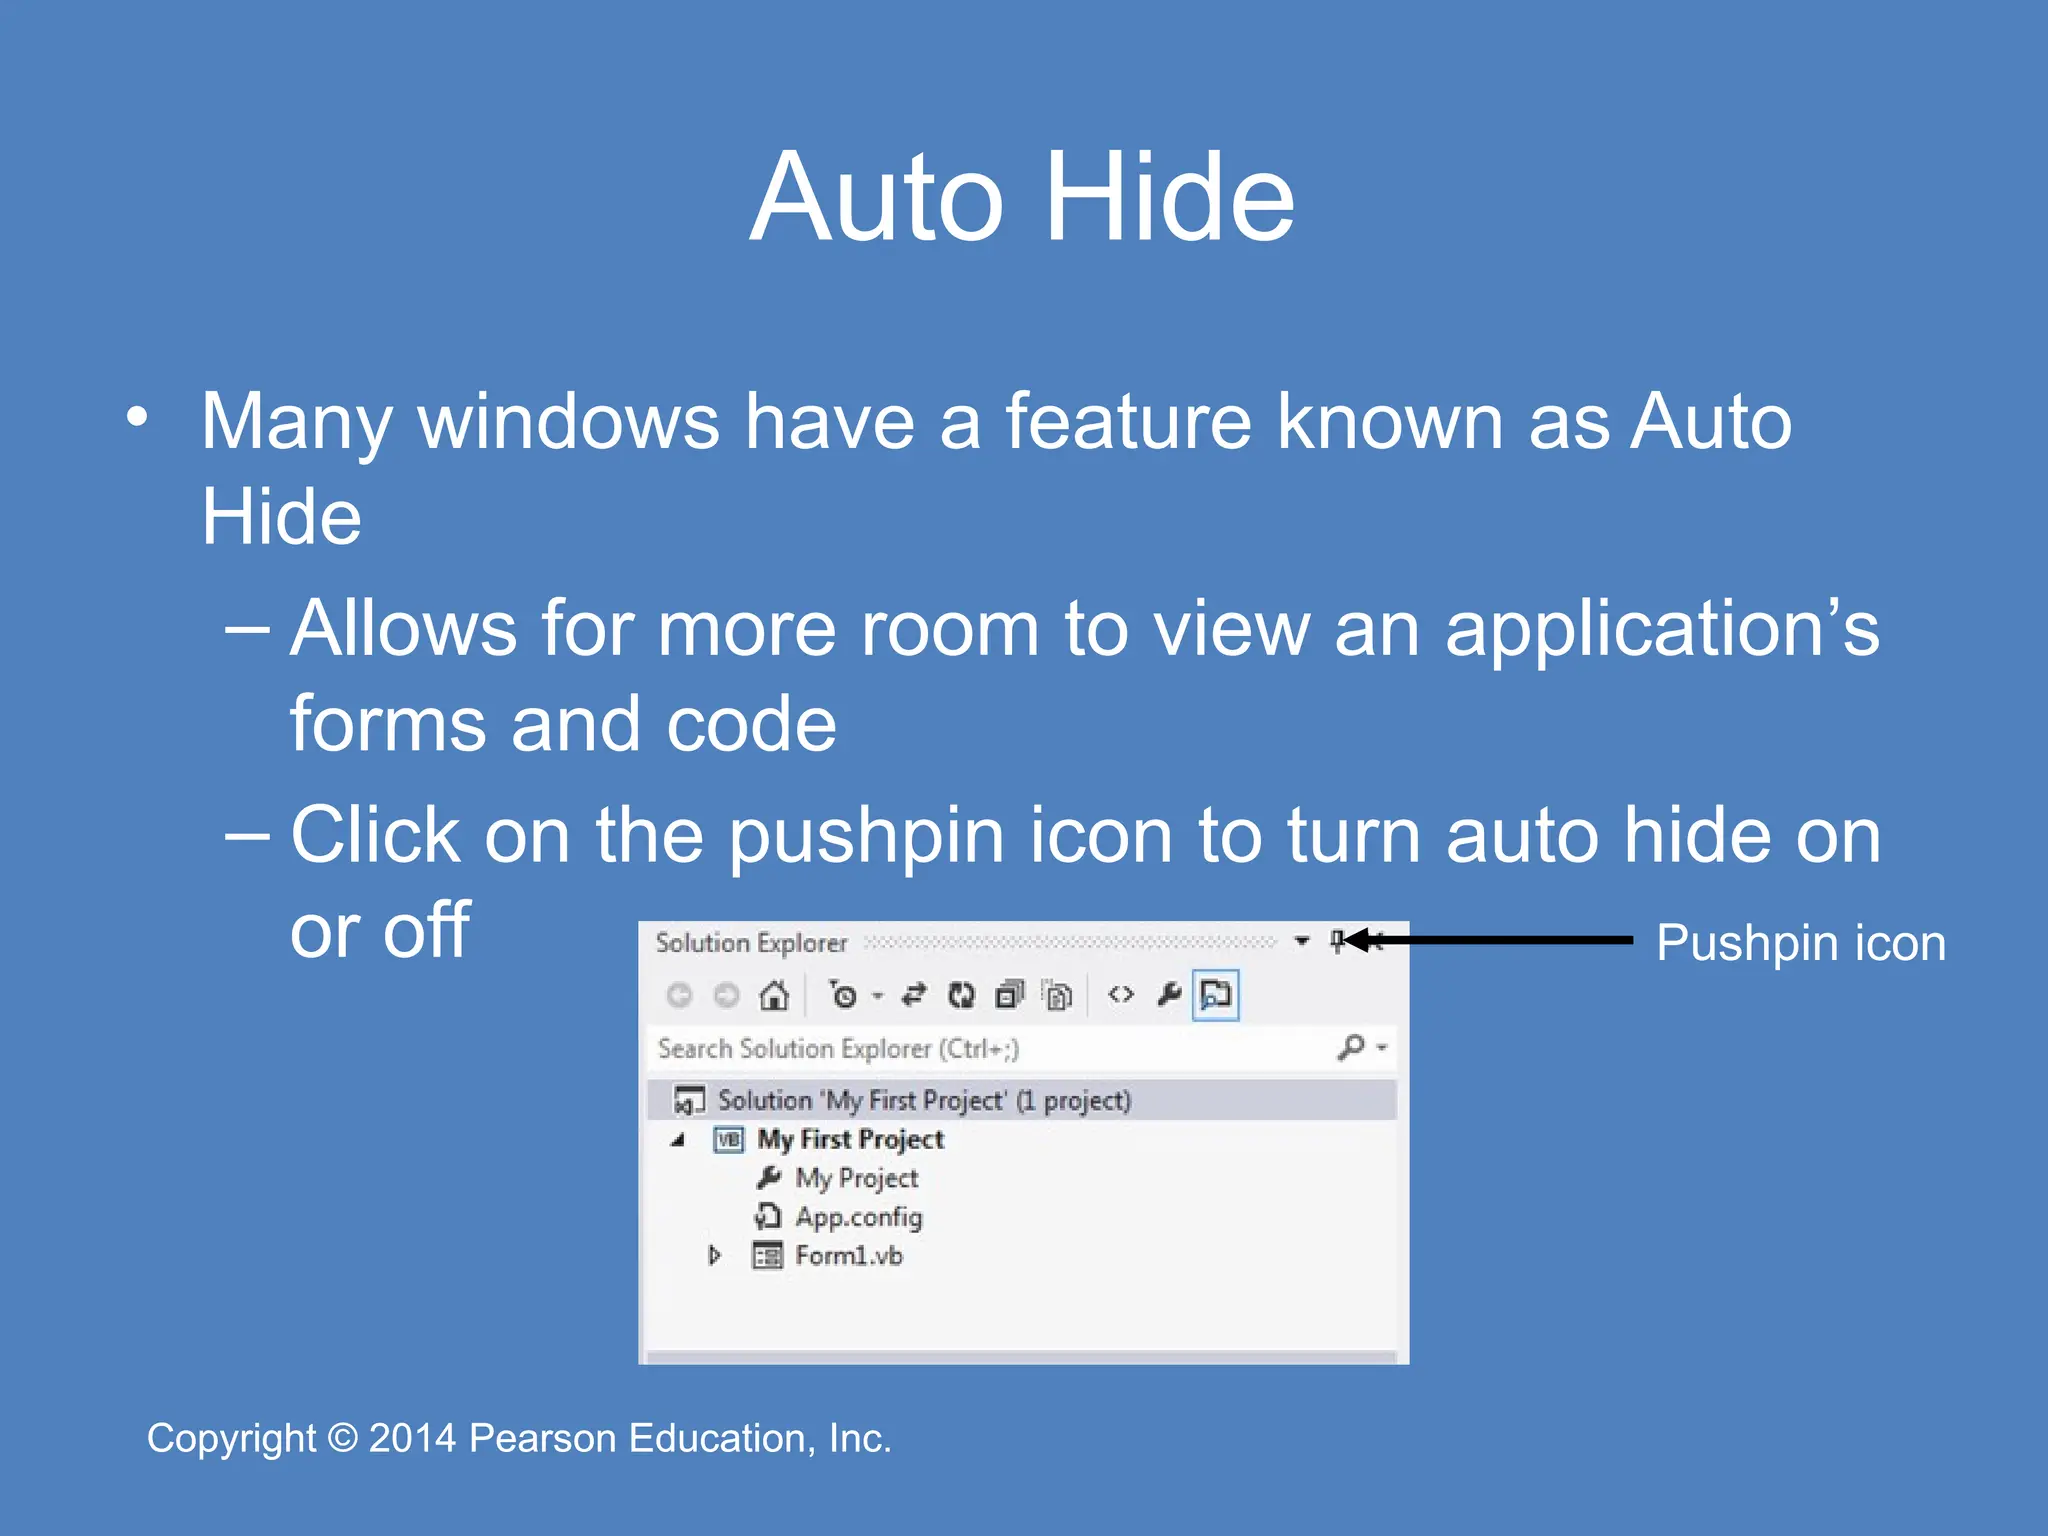
Pearson Education, Inc. Copyright © 2014 Pearson Education, Inc. Auto Hide • Many windows have a feature known as Auto Hide – Allows for more room to view an application’s forms and code – Click on the pushpin icon to turn auto hide on or off Pushpin icon
41.
Copyright © 2014
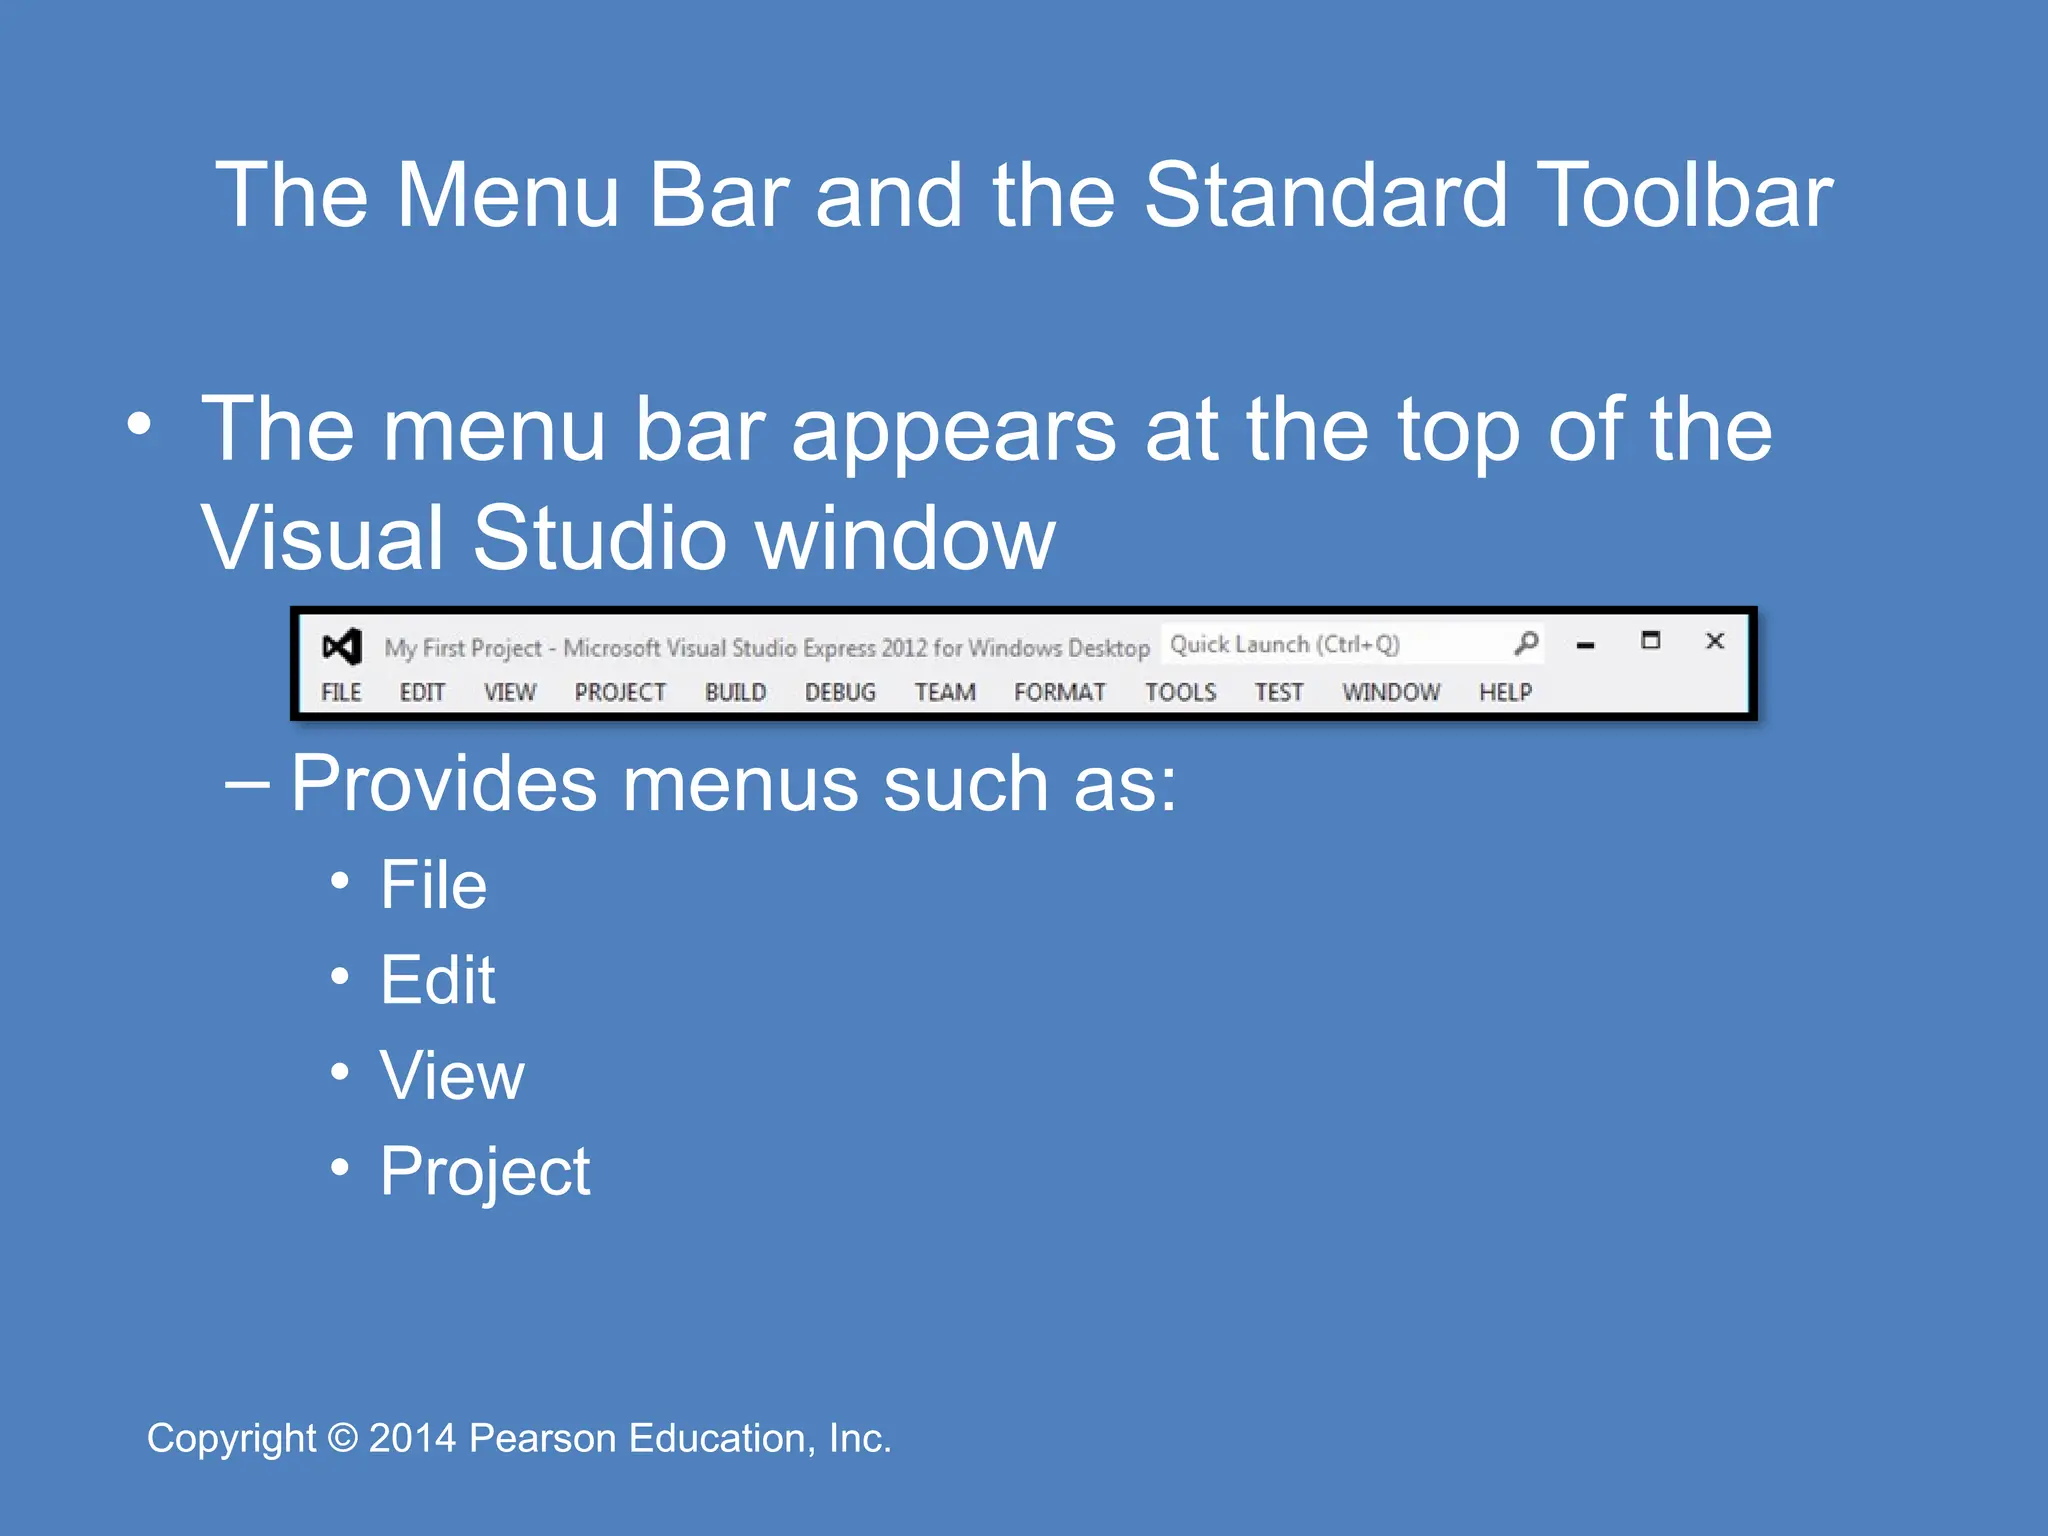
Pearson Education, Inc. Copyright © 2014 Pearson Education, Inc. The Menu Bar and the Standard Toolbar • The menu bar appears at the top of the Visual Studio window – Provides menus such as: • File • Edit • View • Project
42.
Copyright © 2014
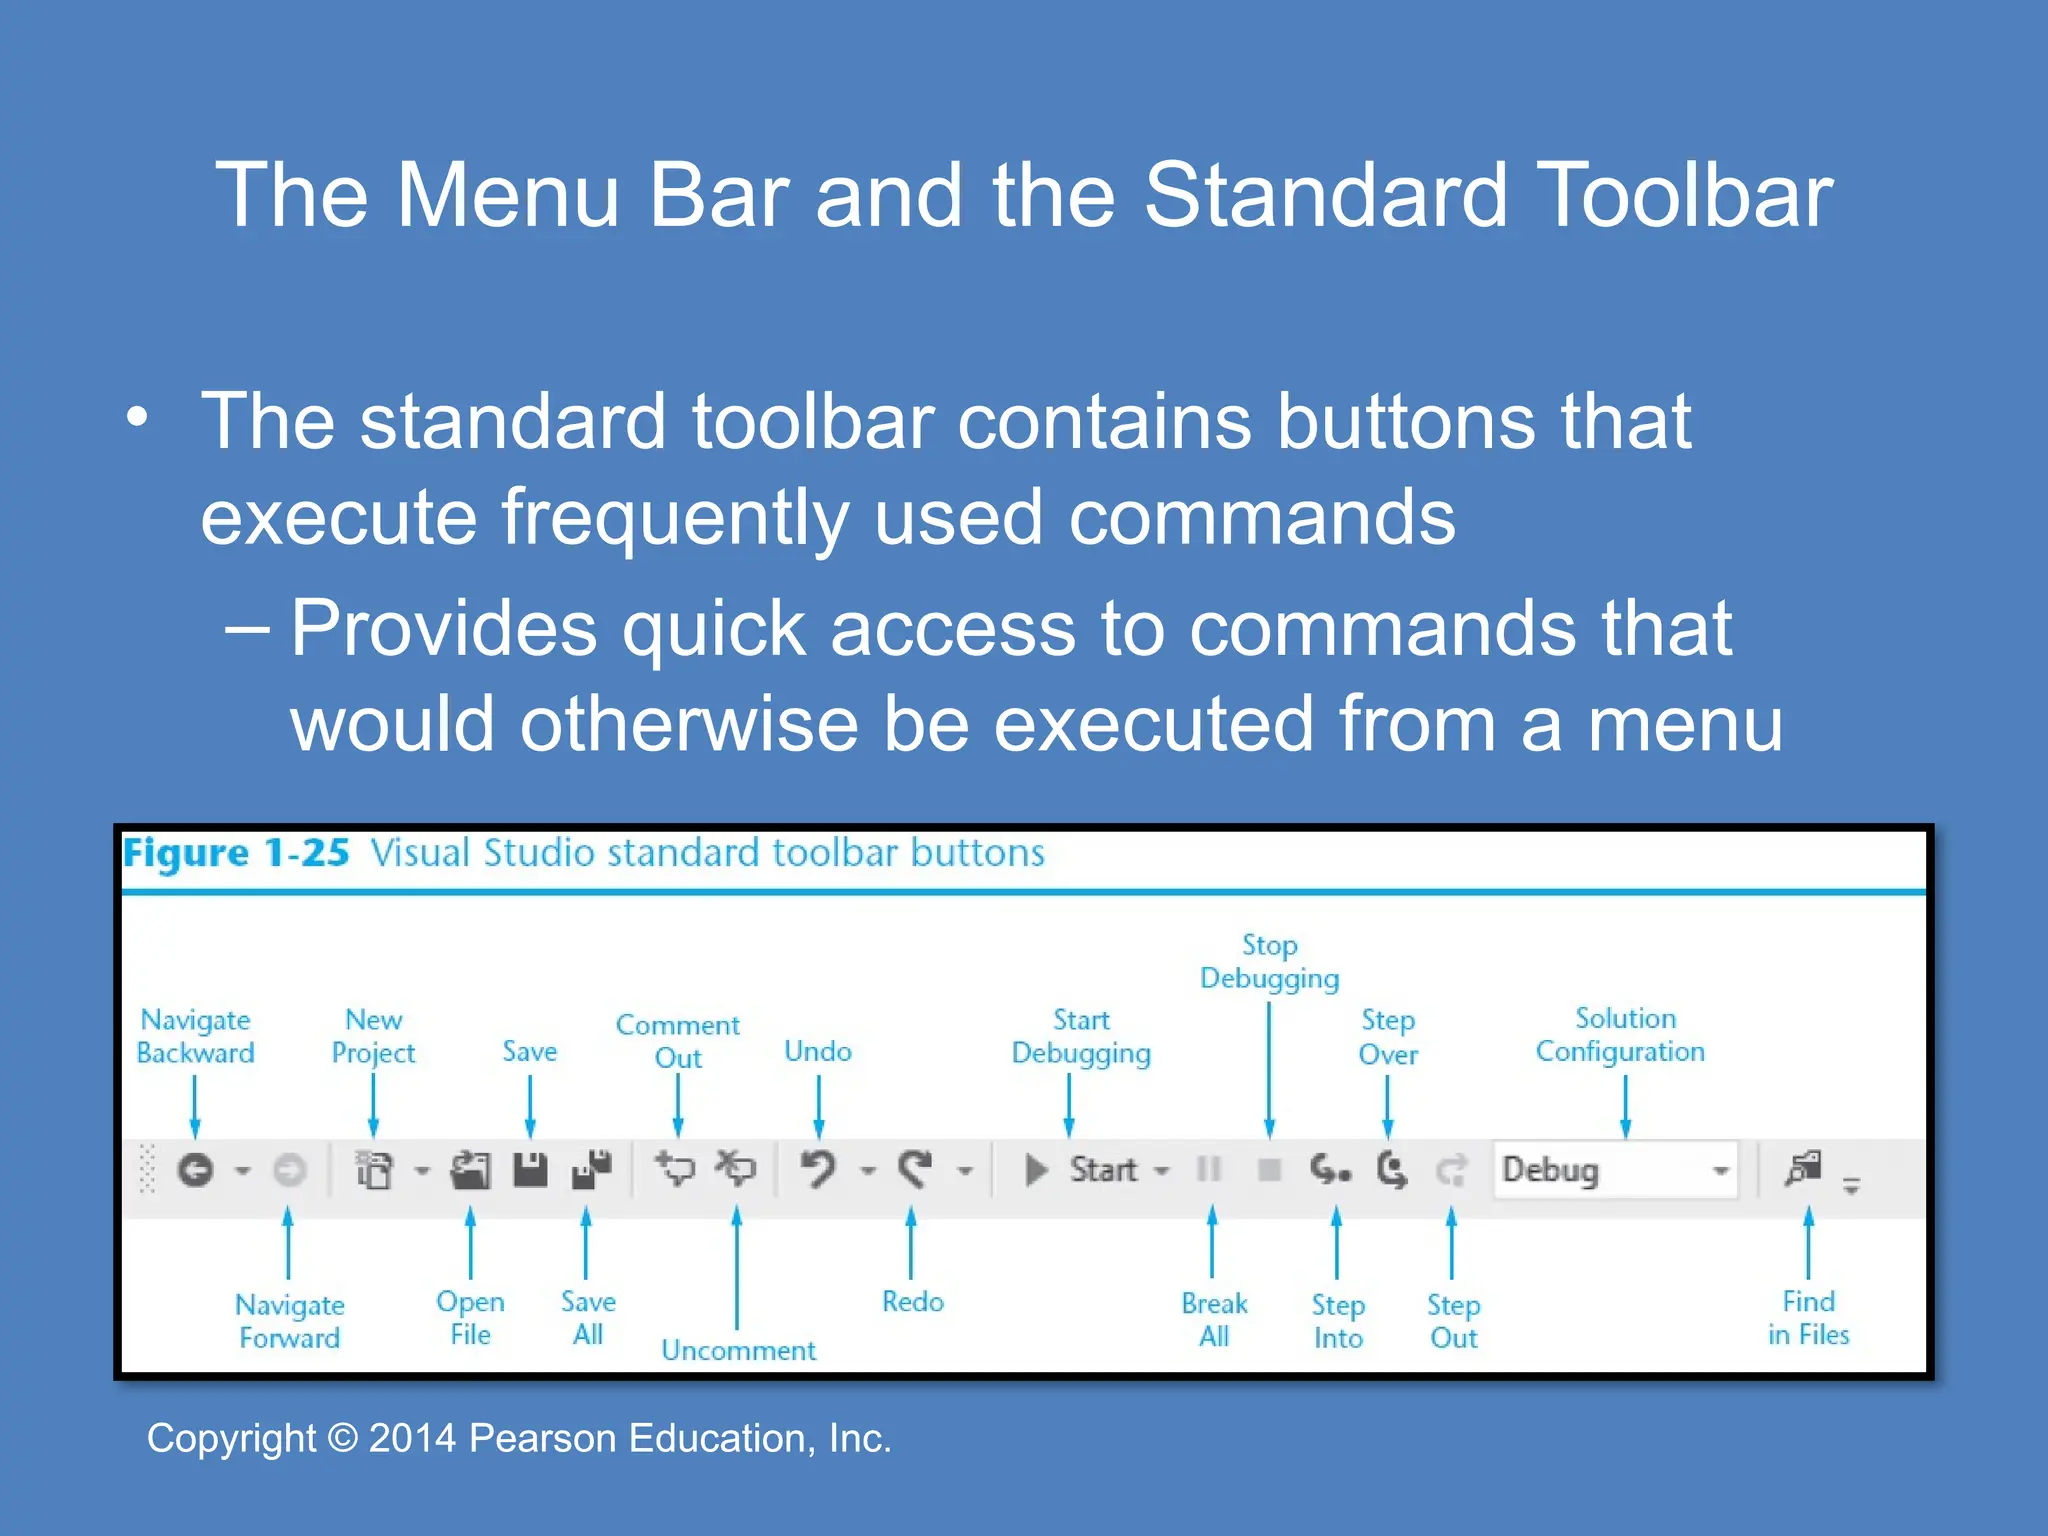
Pearson Education, Inc. Copyright © 2014 Pearson Education, Inc. The Menu Bar and the Standard Toolbar • The standard toolbar contains buttons that execute frequently used commands – Provides quick access to commands that would otherwise be executed from a menu
43.
Copyright © 2014
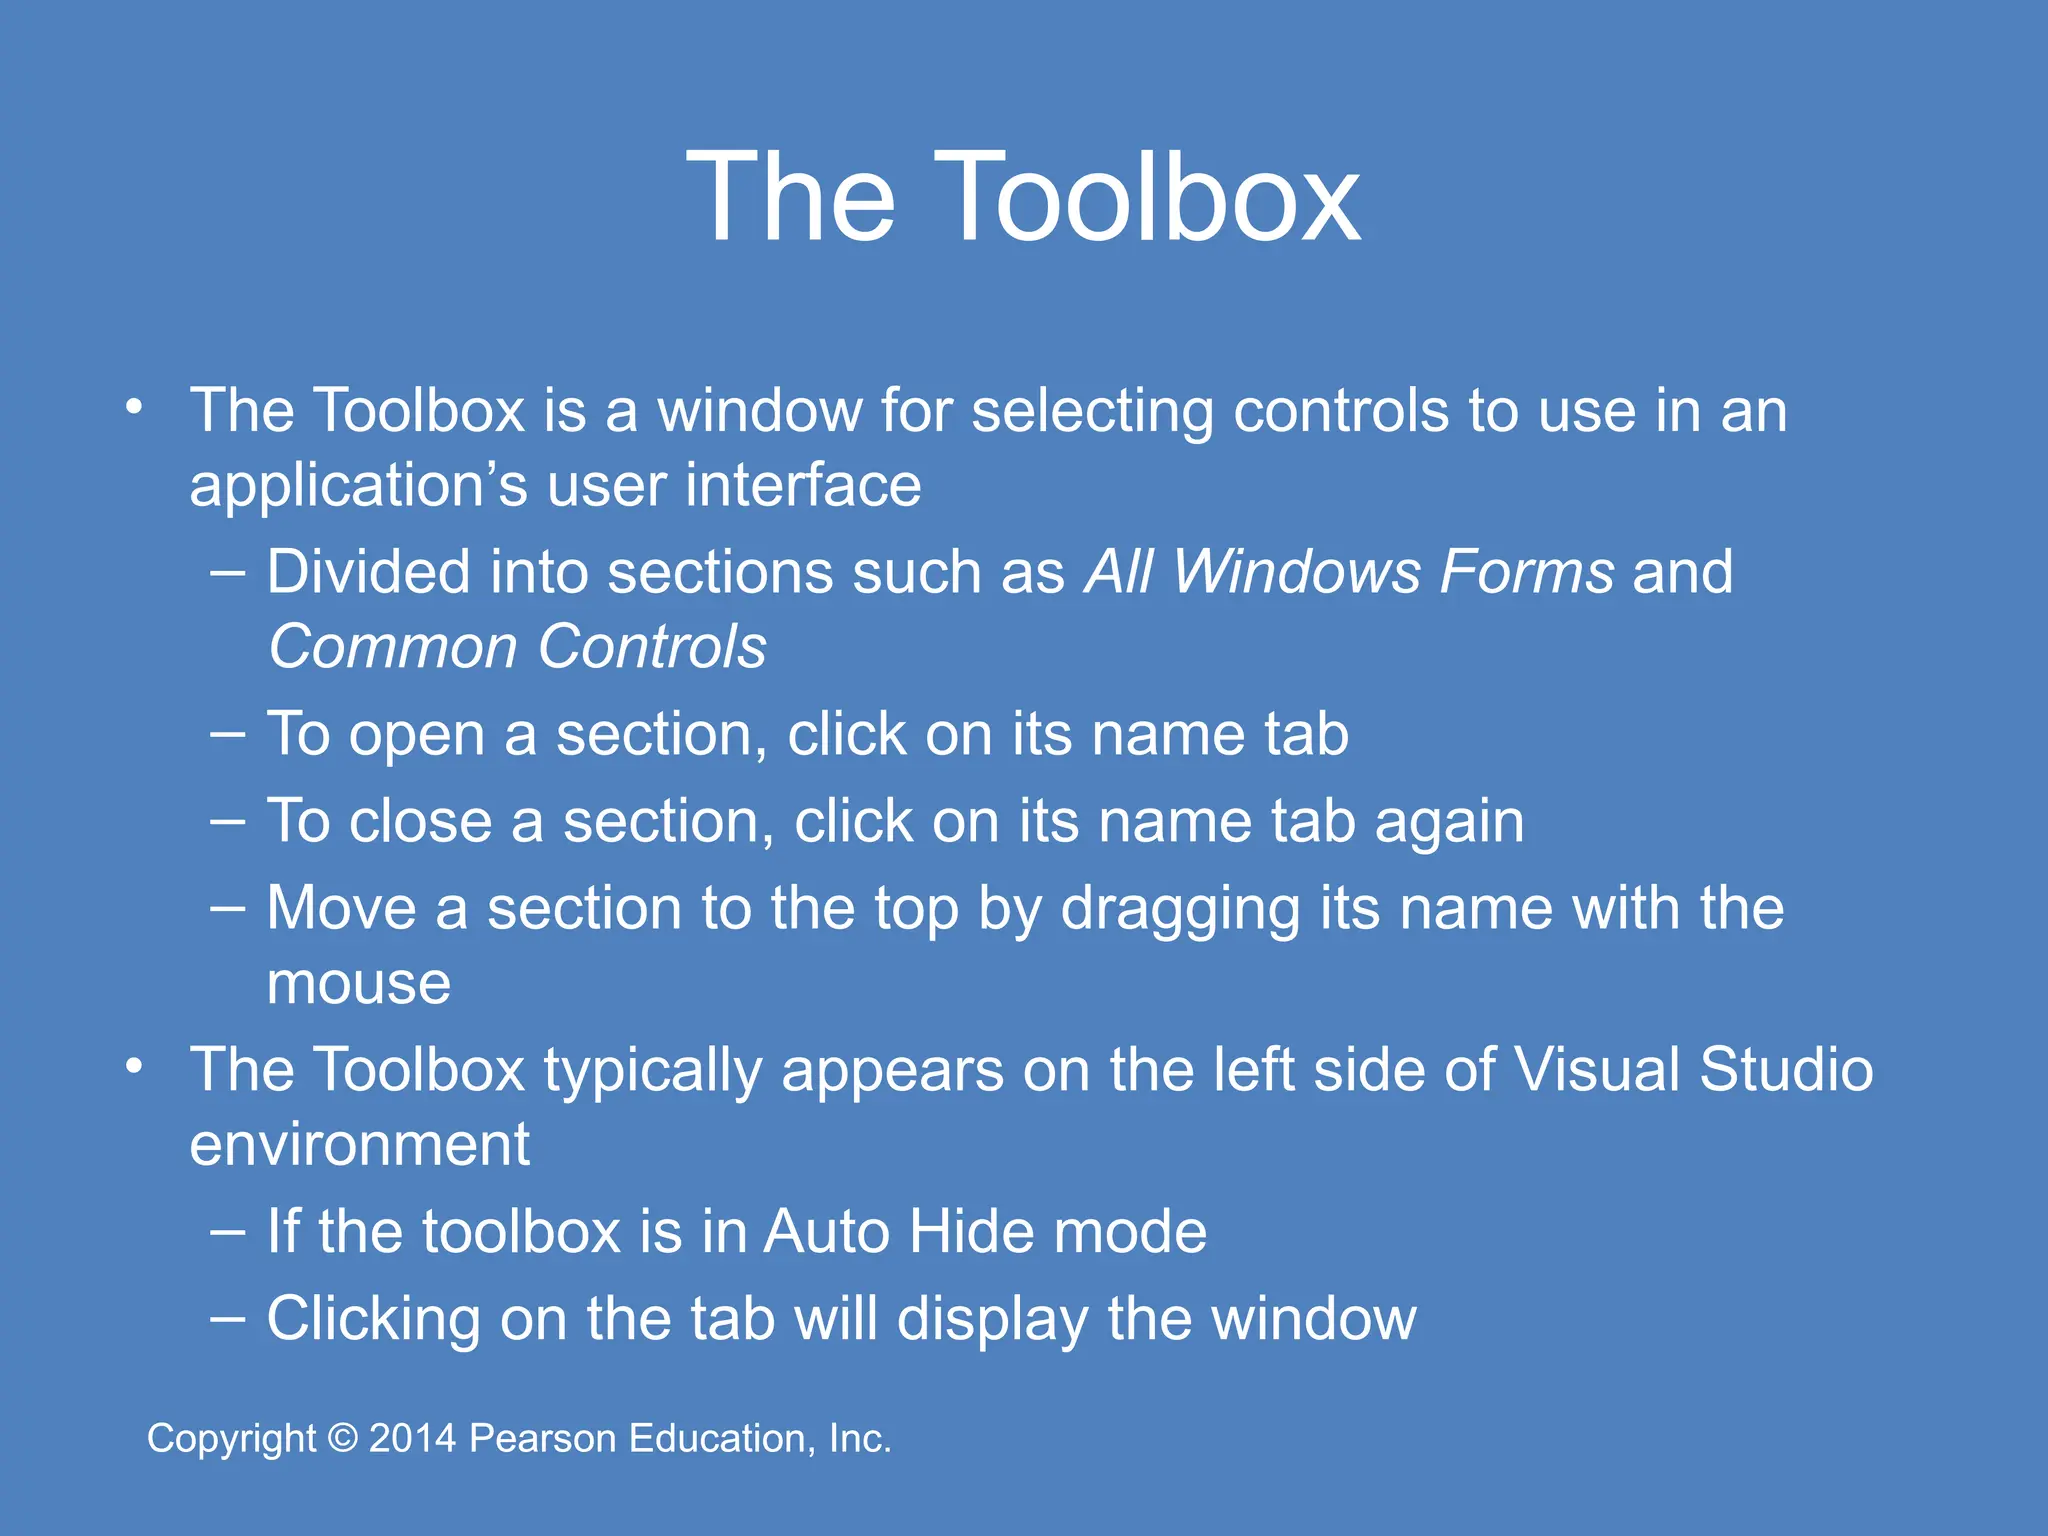
Pearson Education, Inc. Copyright © 2014 Pearson Education, Inc. The Toolbox • The Toolbox is a window for selecting controls to use in an application’s user interface – Divided into sections such as All Windows Forms and Common Controls – To open a section, click on its name tab – To close a section, click on its name tab again – Move a section to the top by dragging its name with the mouse • The Toolbox typically appears on the left side of Visual Studio environment – If the toolbox is in Auto Hide mode – Clicking on the tab will display the window
44.
Copyright © 2014
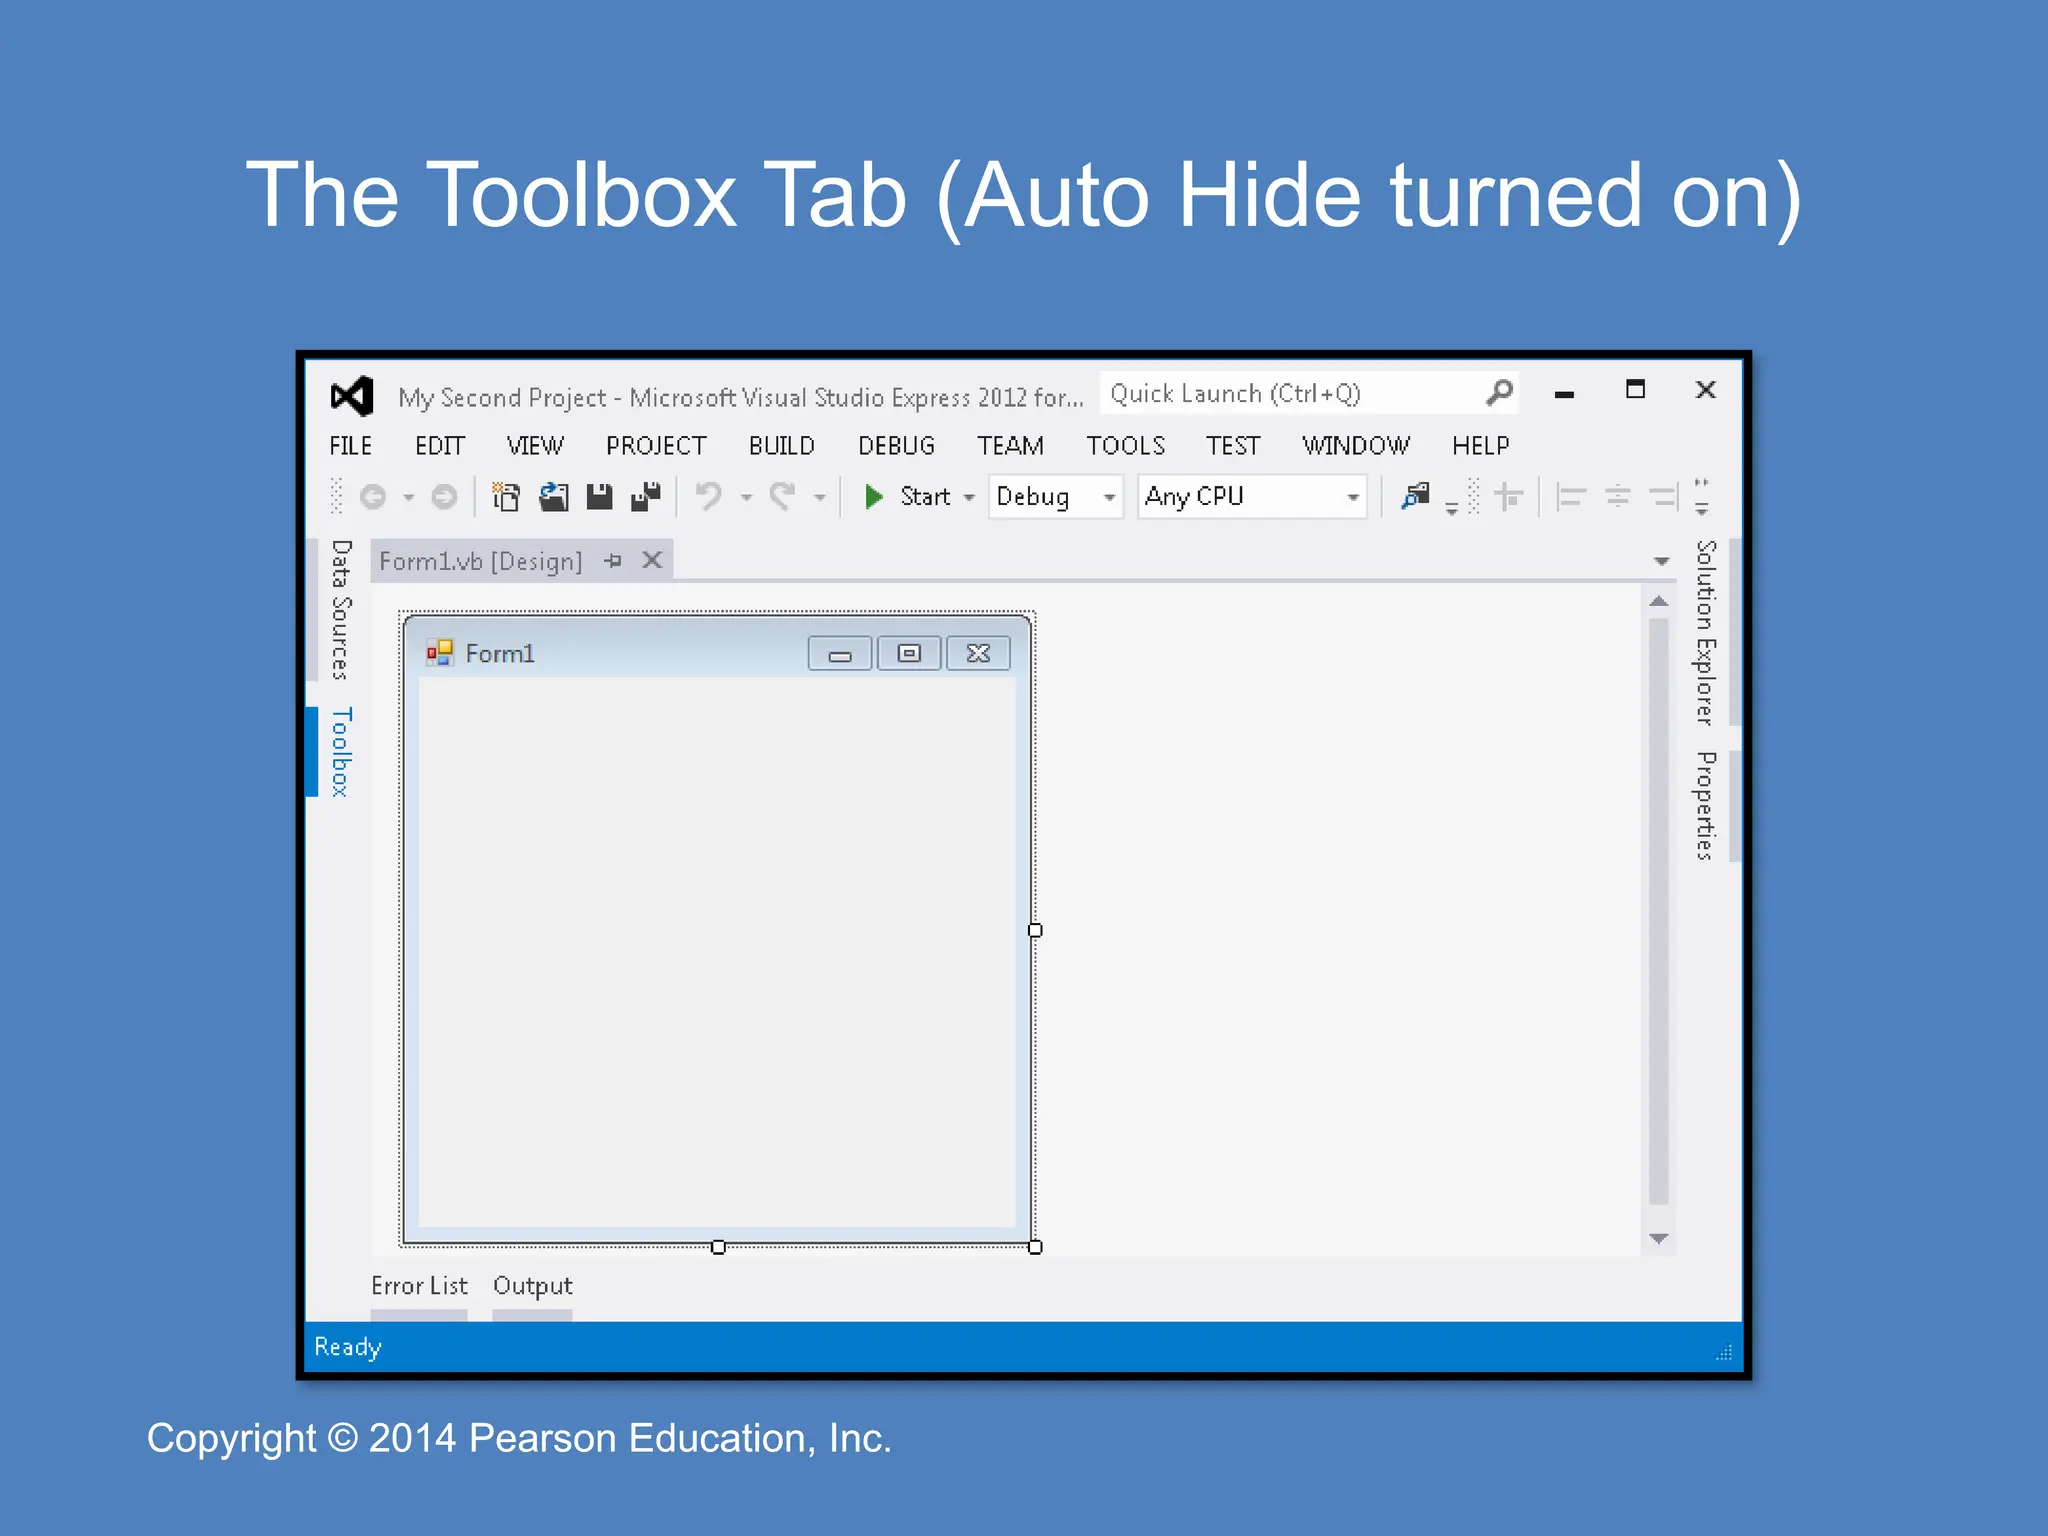
Pearson Education, Inc. Copyright © 2014 Pearson Education, Inc. The Toolbox Tab (Auto Hide turned on)
45.
Copyright © 2014
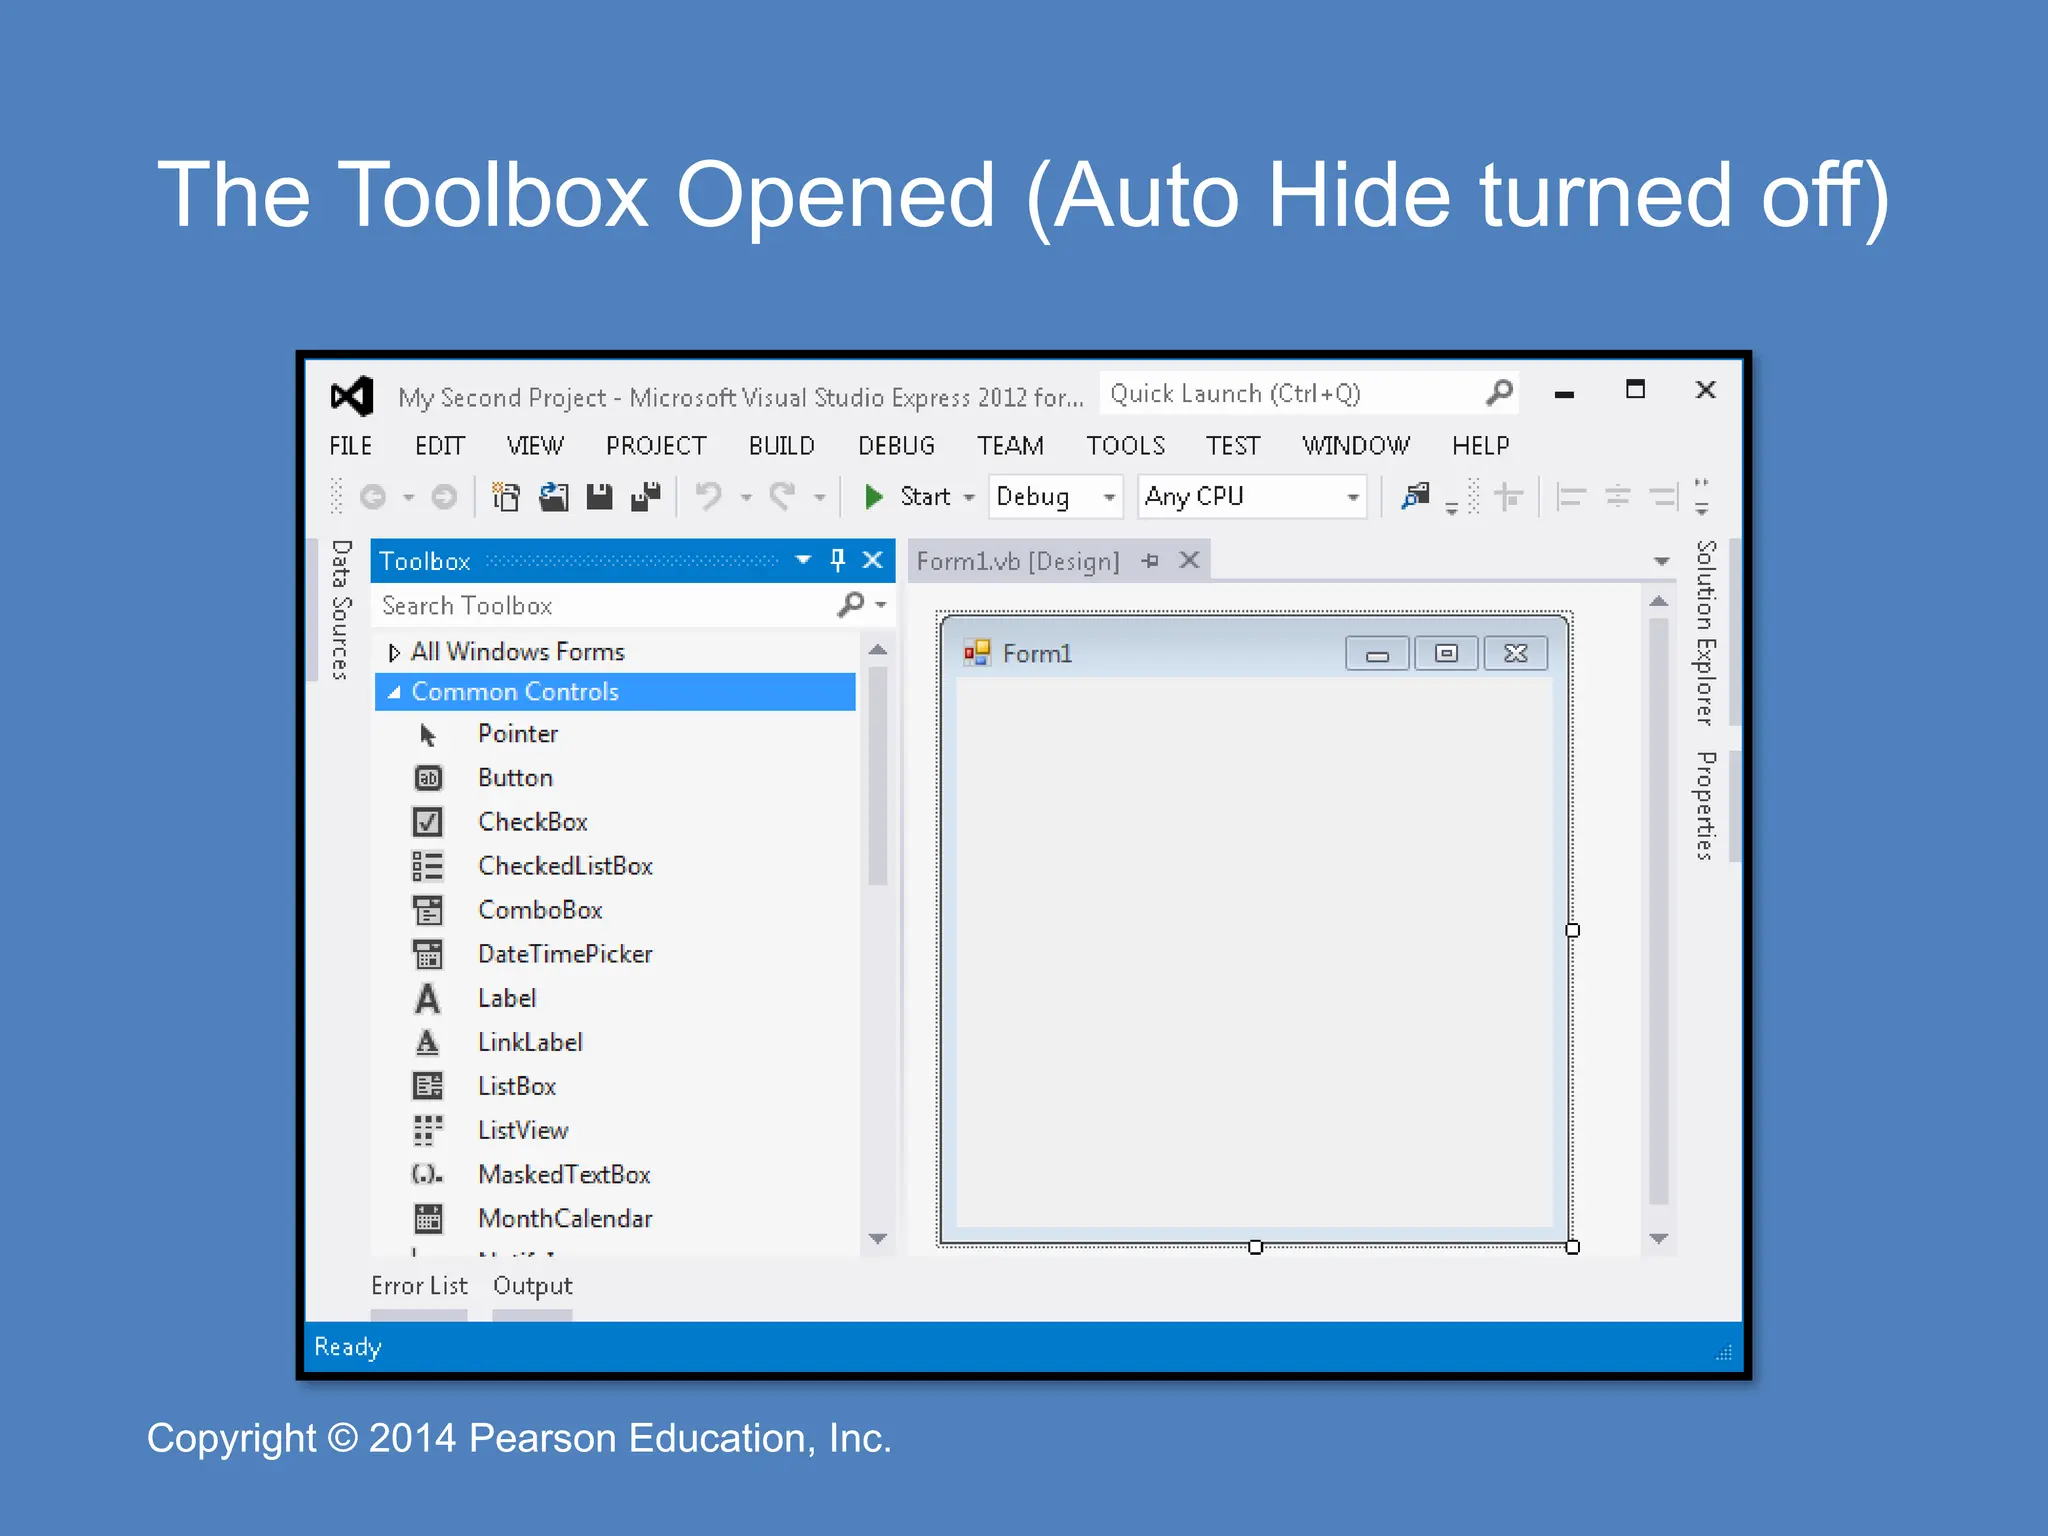
Pearson Education, Inc. Copyright © 2014 Pearson Education, Inc. The Toolbox Opened (Auto Hide turned off)
46.
Copyright © 2014
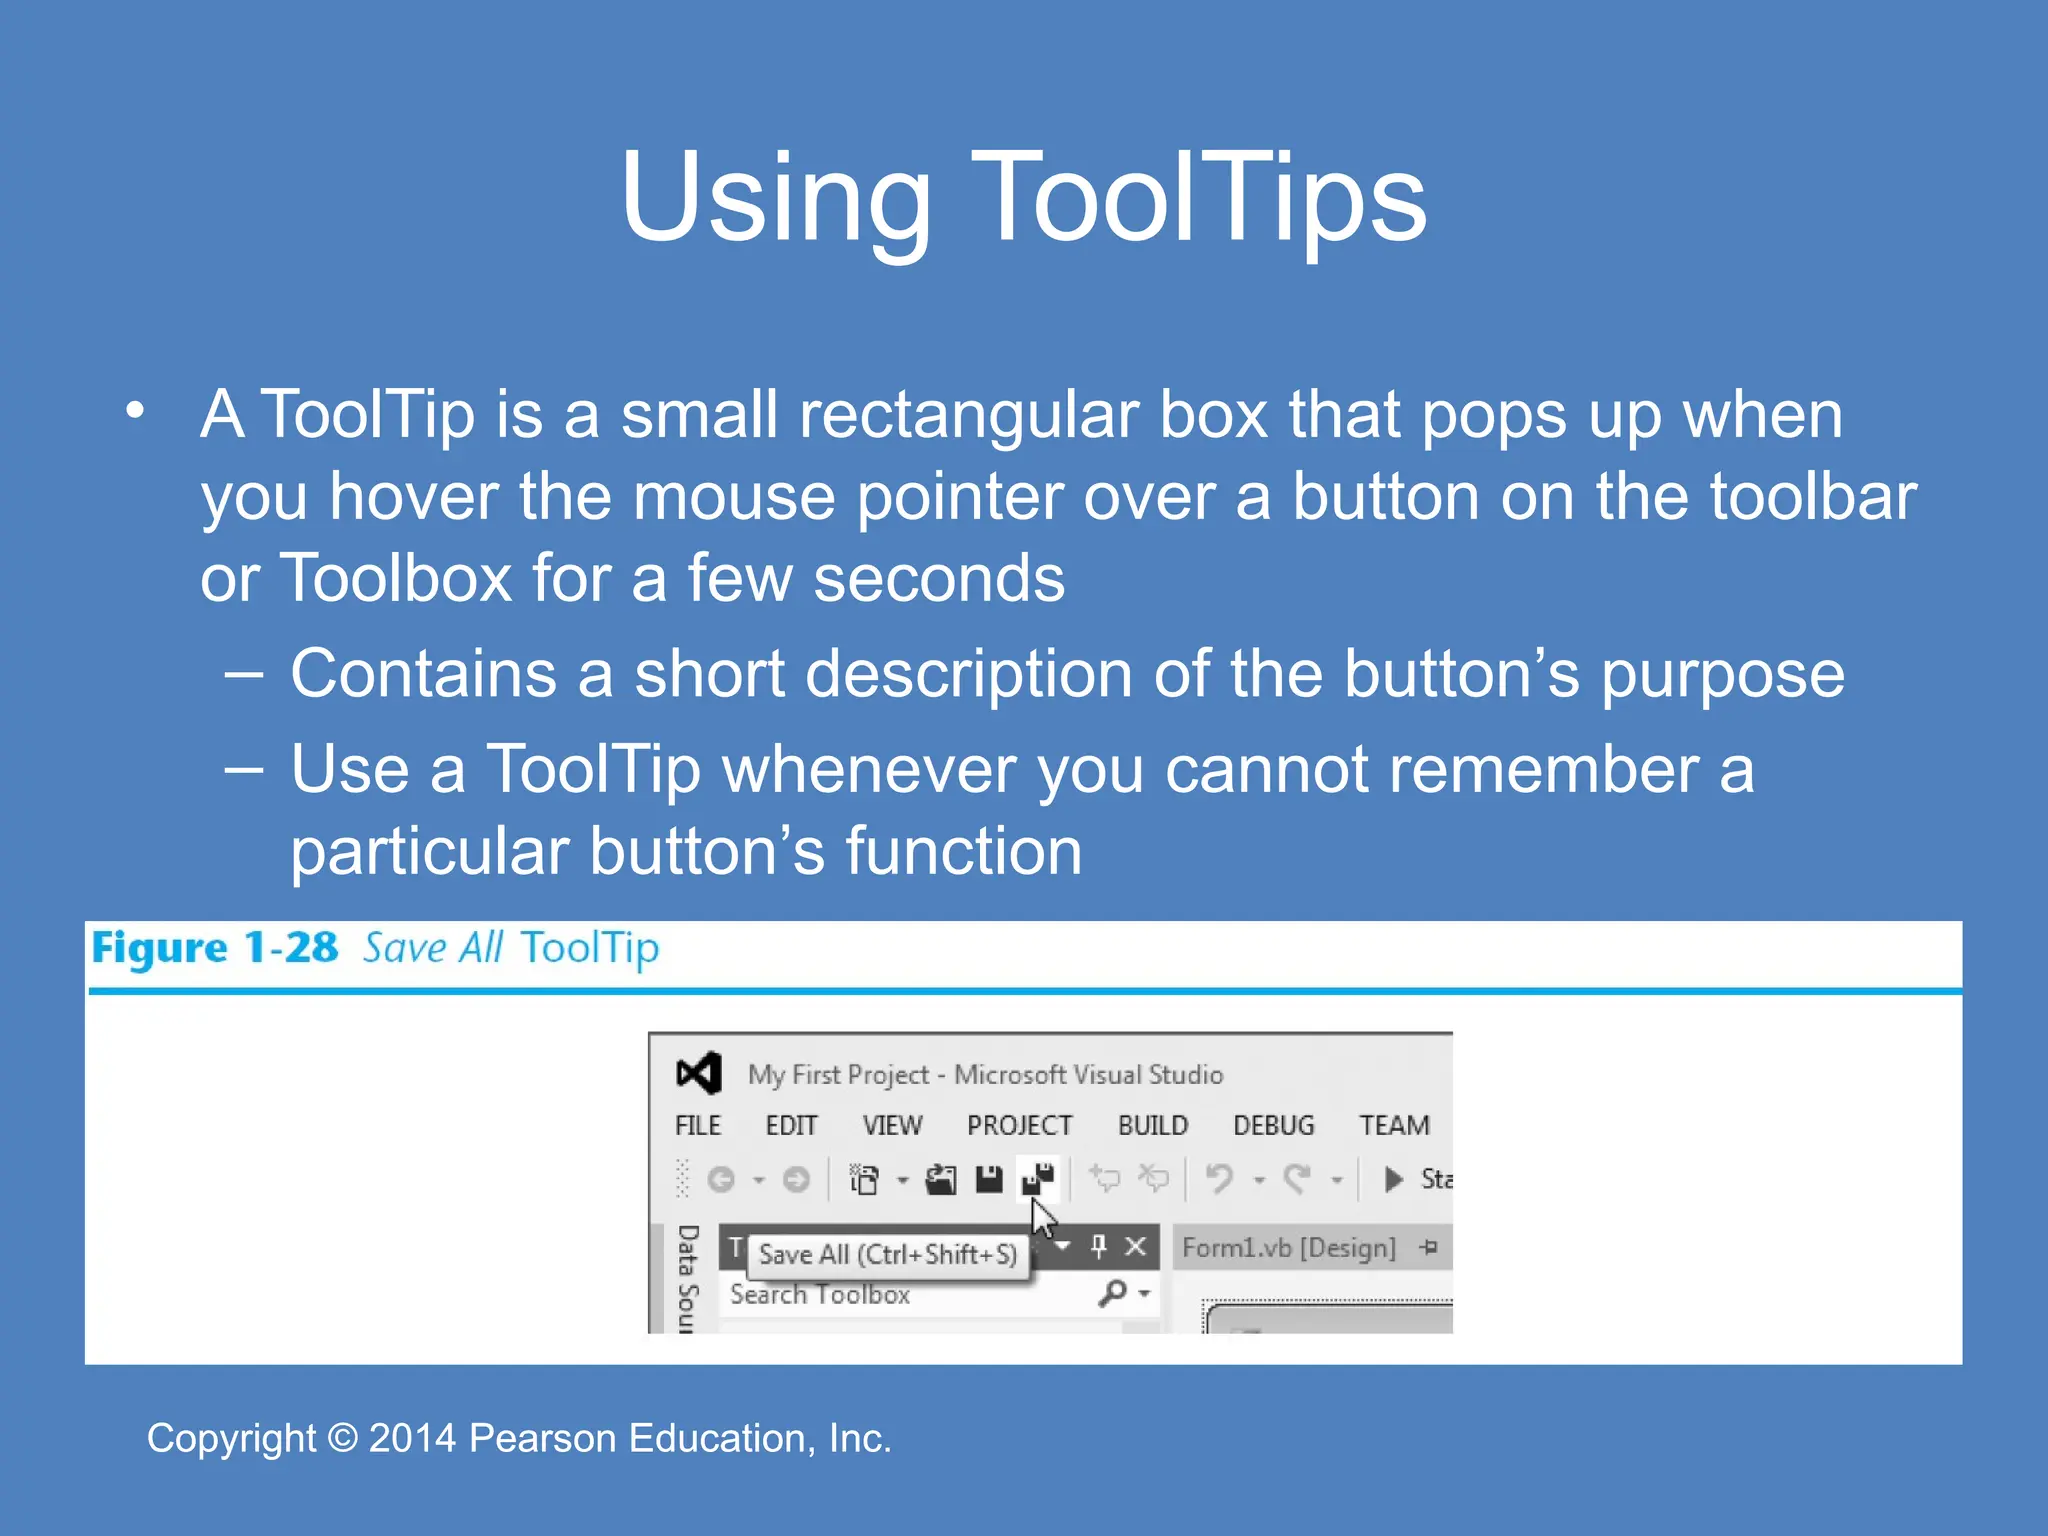
Pearson Education, Inc. Copyright © 2014 Pearson Education, Inc. Using ToolTips • A ToolTip is a small rectangular box that pops up when you hover the mouse pointer over a button on the toolbar or Toolbox for a few seconds – Contains a short description of the button’s purpose – Use a ToolTip whenever you cannot remember a particular button’s function
47.
Copyright © 2014
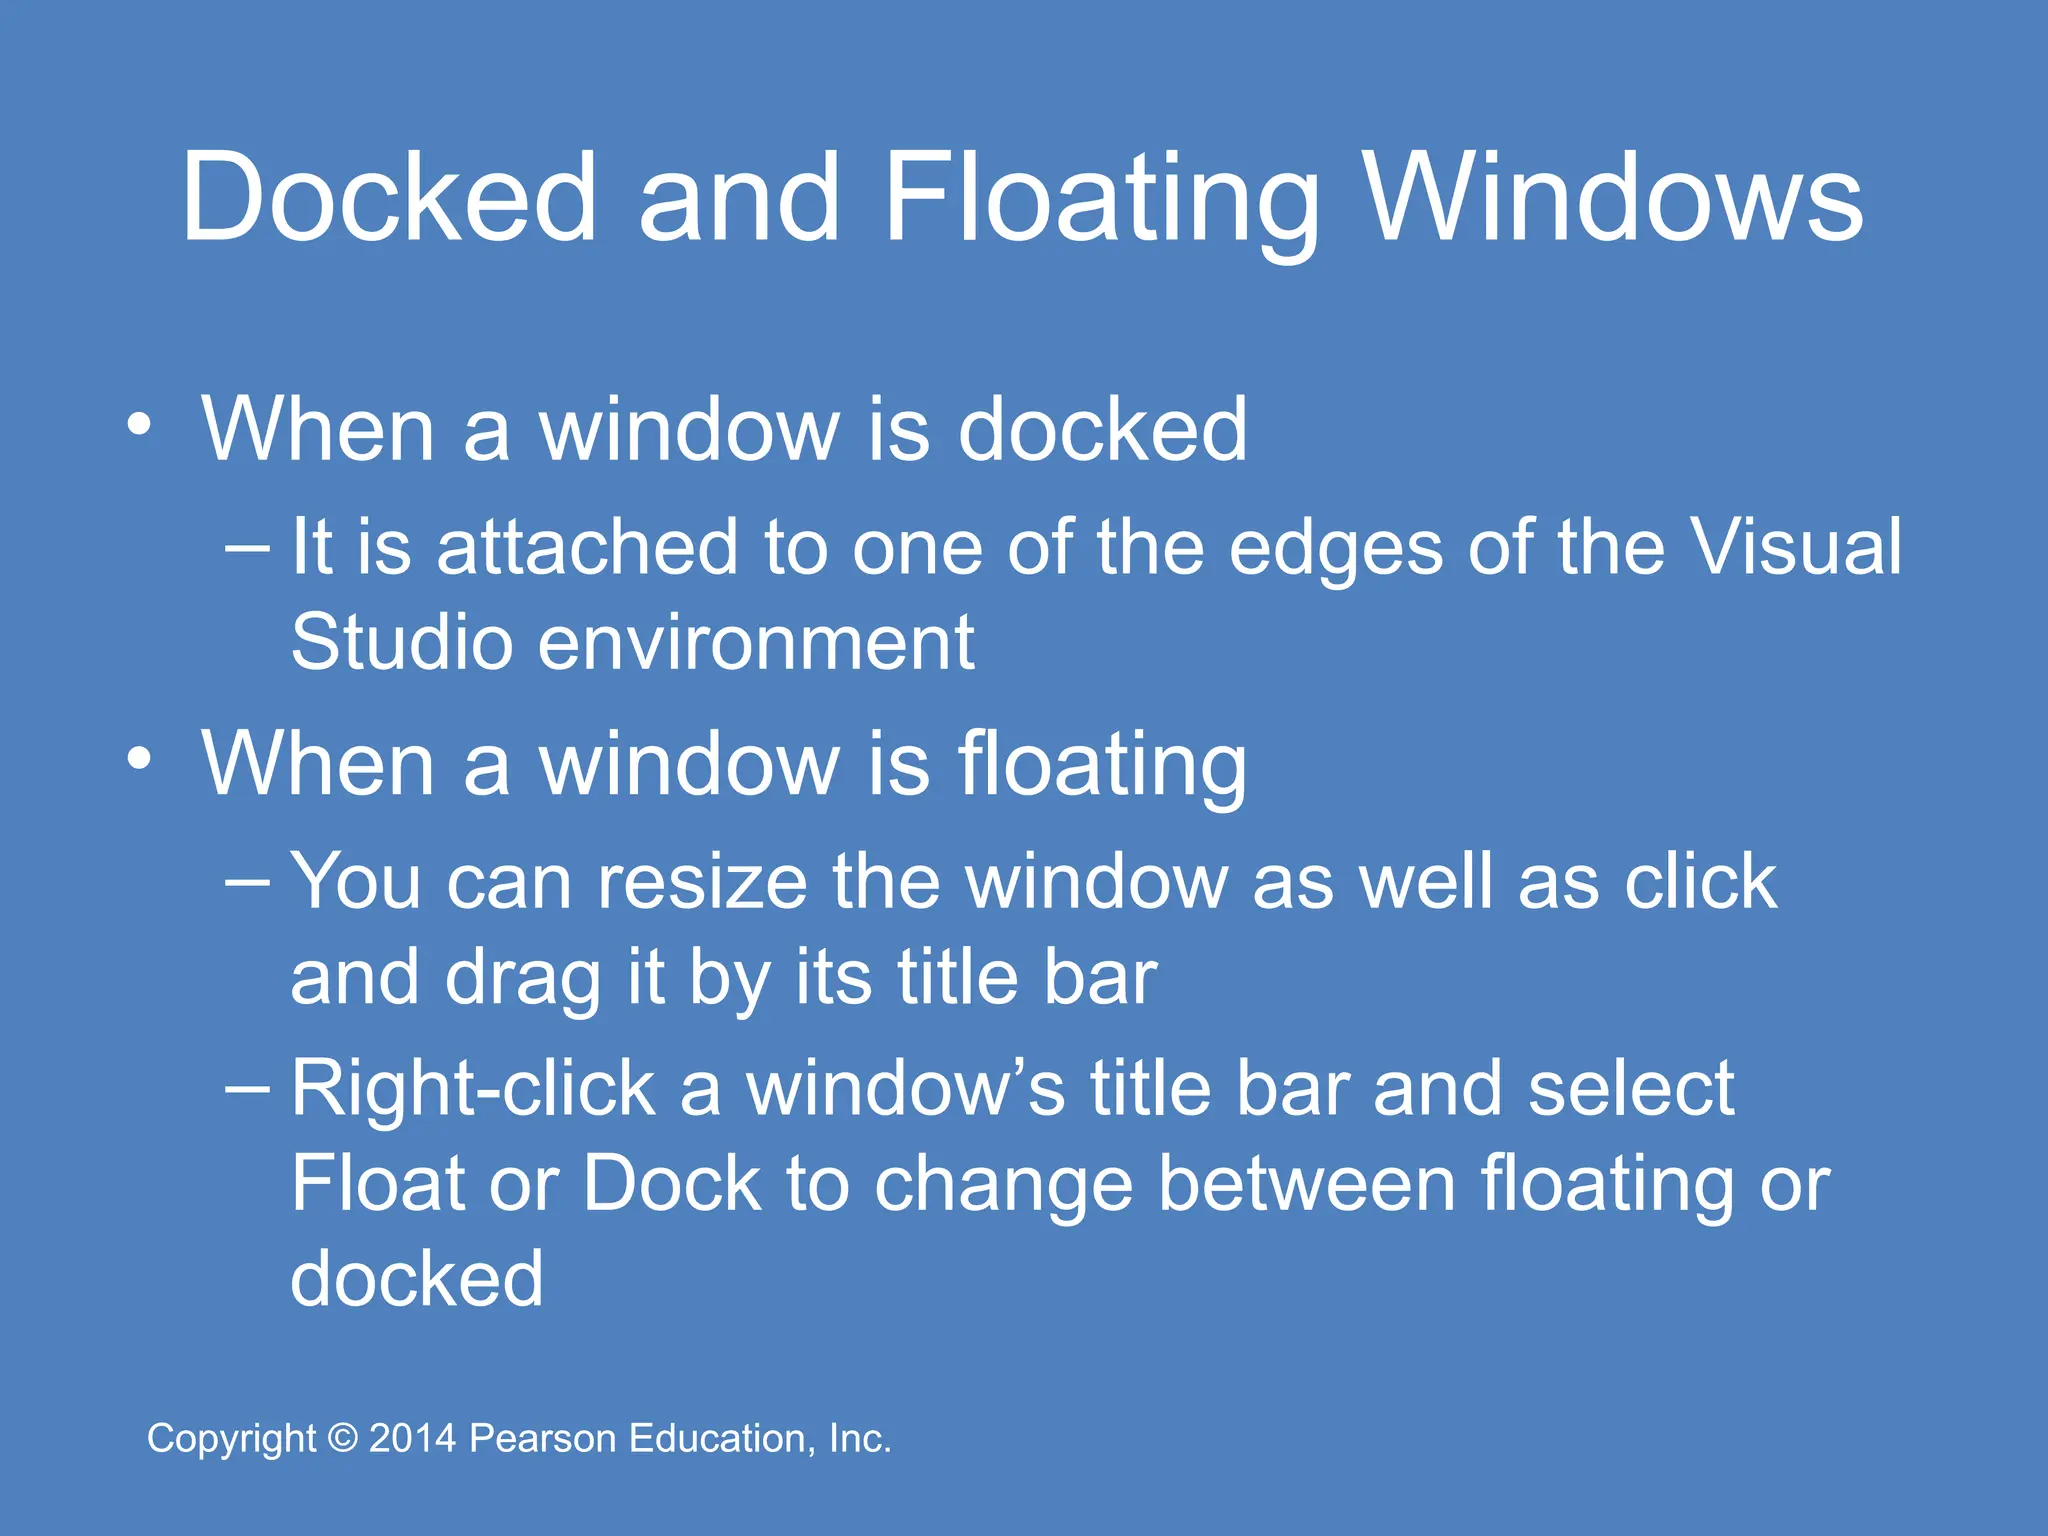
Pearson Education, Inc. Copyright © 2014 Pearson Education, Inc. Docked and Floating Windows • When a window is docked – It is attached to one of the edges of the Visual Studio environment • When a window is floating – You can resize the window as well as click and drag it by its title bar – Right-click a window’s title bar and select Float or Dock to change between floating or docked
48.
Copyright © 2014
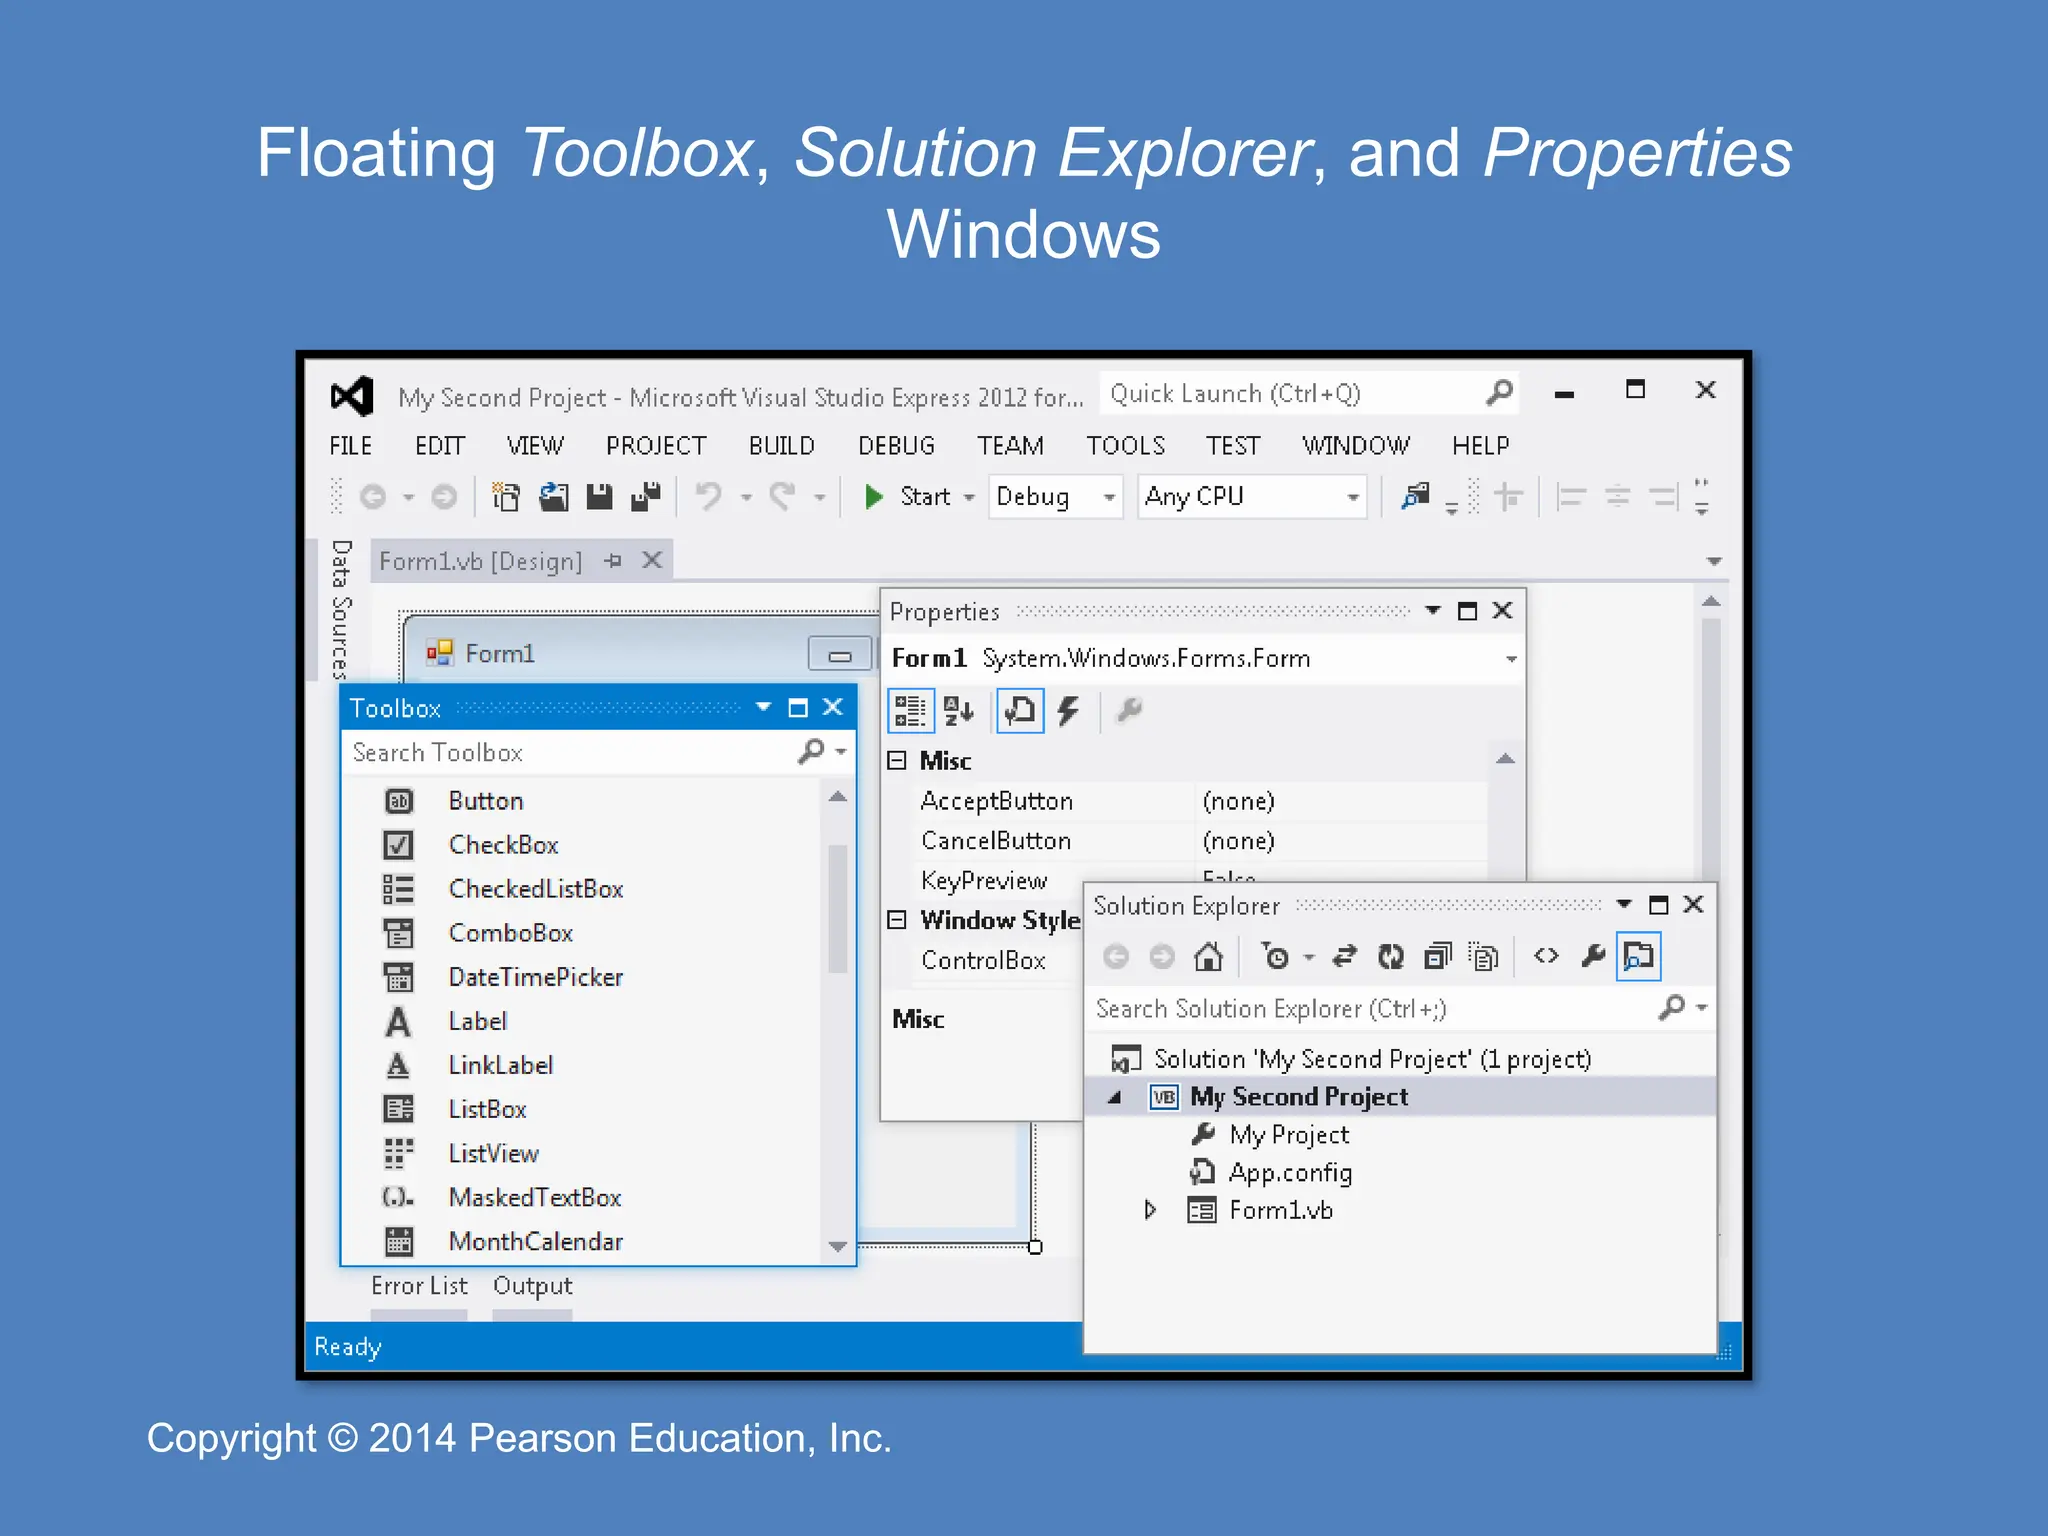
Pearson Education, Inc. Copyright © 2014 Pearson Education, Inc. Floating Toolbox, Solution Explorer, and Properties Windows
49.
Copyright © 2014
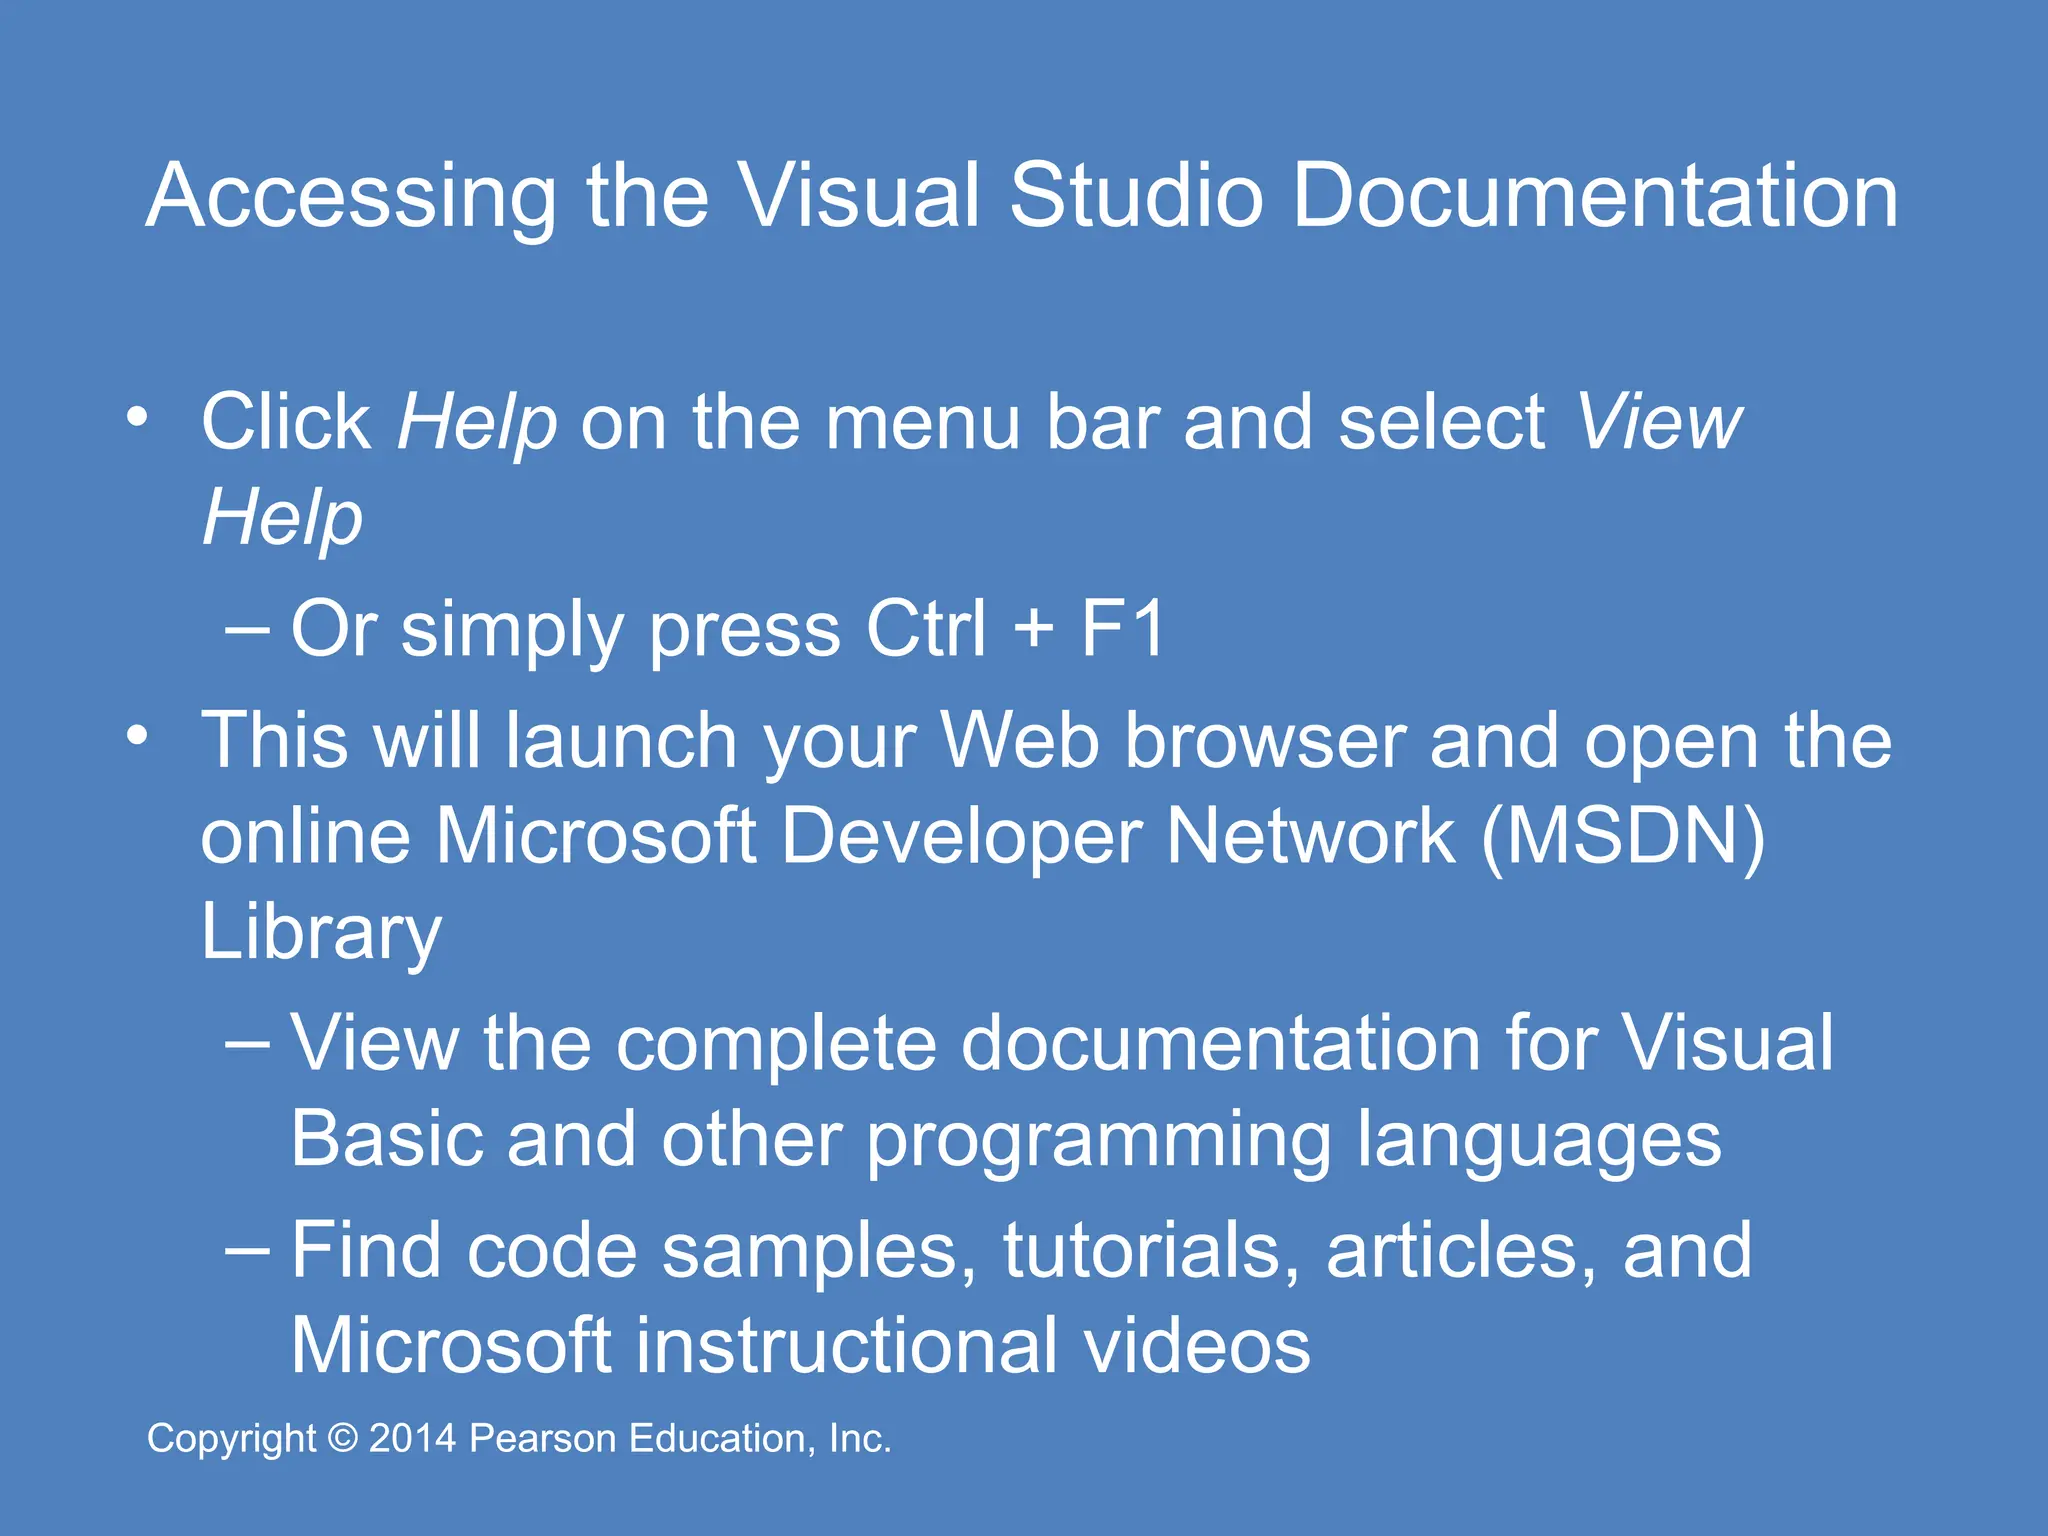
Pearson Education, Inc. Copyright © 2014 Pearson Education, Inc. Accessing the Visual Studio Documentation • Click Help on the menu bar and select View Help – Or simply press Ctrl + F1 • This will launch your Web browser and open the online Microsoft Developer Network (MSDN) Library – View the complete documentation for Visual Basic and other programming languages – Find code samples, tutorials, articles, and Microsoft instructional videos
Download