This document provides a summary of the contents of the book "Build Your Own ASP.NET 2.0 Web Site Using C# & VB". It includes 14 chapters that cover topics such as introducing ASP.NET and .NET, ASP.NET basics, VB and C# programming, constructing web pages, building web applications, validation controls, database design, SQL, ADO.NET, data lists, grid views, advanced data access, and security/authentication. Each chapter builds upon the previous chapters to teach the reader how to develop a full-featured ASP.NET website.


![Arrays
</form>
</body>
</html>
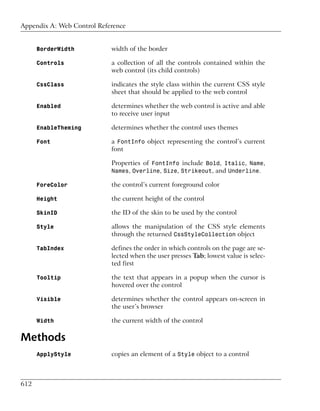
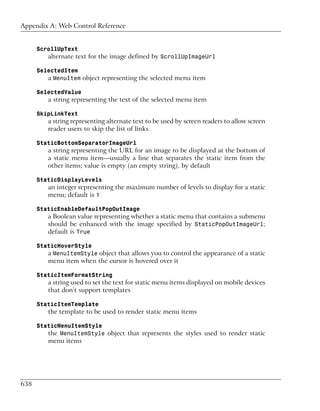
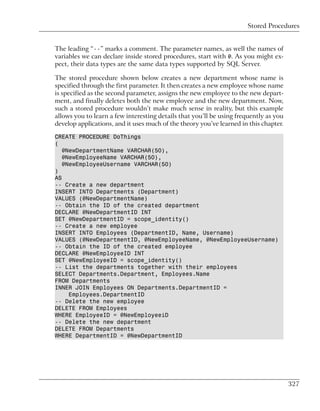
C# File: Arrays.aspx
<!DOCTYPE html PUBLIC "-//W3C//DTD XHTML 1.0 Strict//EN"
"http://www.w3.org/TR/xhtml1/DTD/xhtml1-strict.dtd">
<html>
<head>
<title>Arrays</title>
<script runat="server" language="C#">
void Page_Load()
{
// Declare an array
string[] drinkList = new string[4];
// Place some items in it
drinkList[0] = "Water";
drinkList[1] = "Juice";
drinkList[2] = "Soda";
drinkList[3] = "Milk";
// Access an item in the array by its position
drinkLabel.Text = drinkList[1];
}
</script>
</head>
<body>
<form runat="server">
<asp:Label id="drinkLabel" runat="server" />
</form>
</body>
</html>
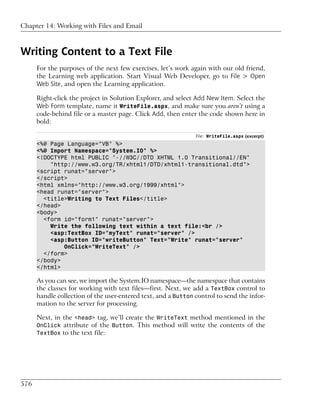
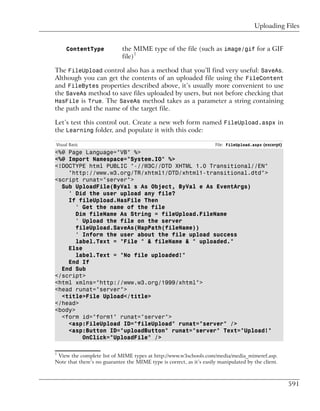
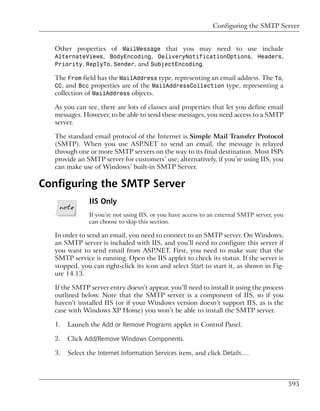
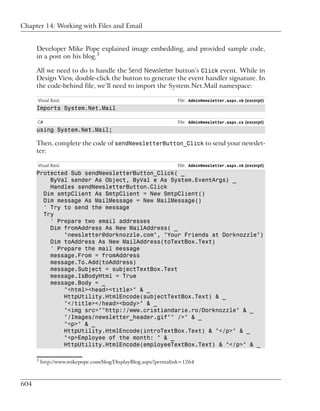
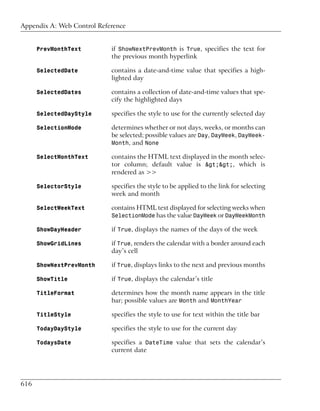
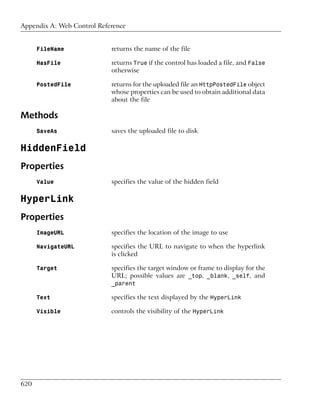
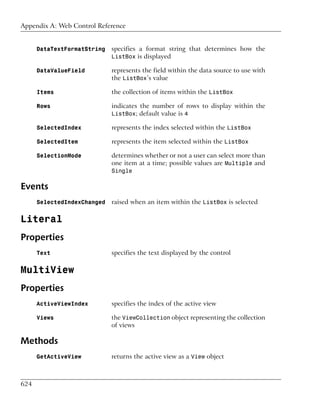
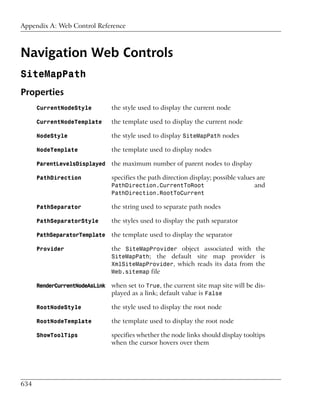
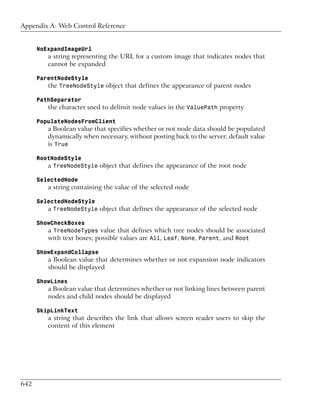
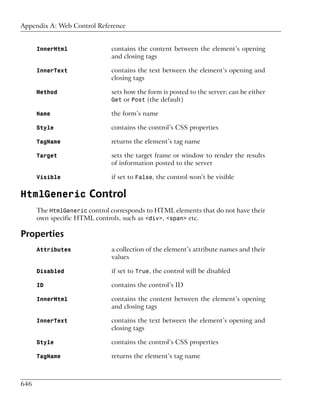
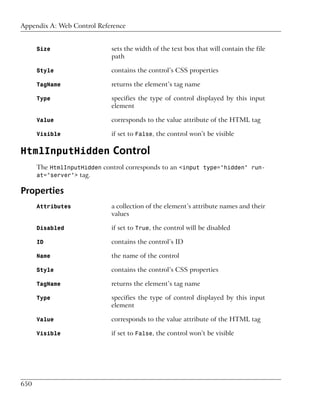
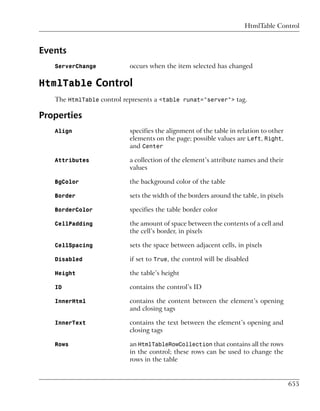
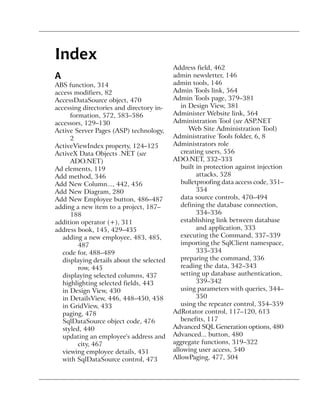
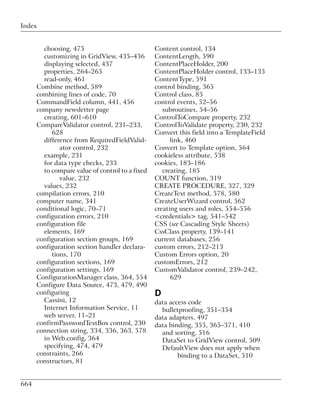
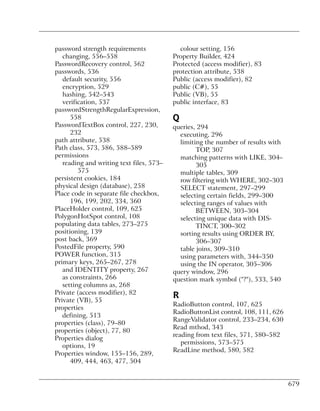
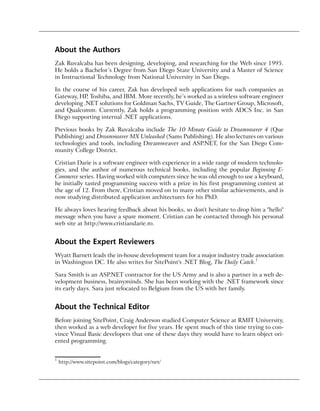
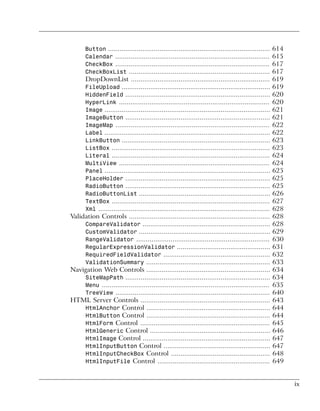
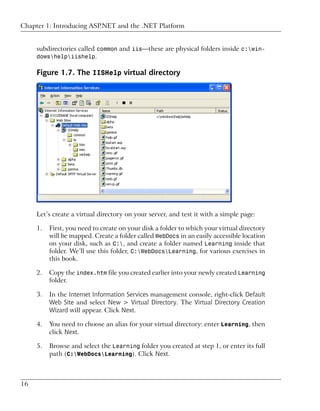
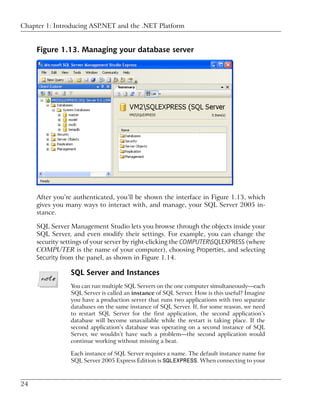
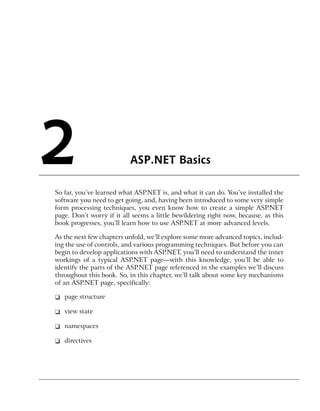
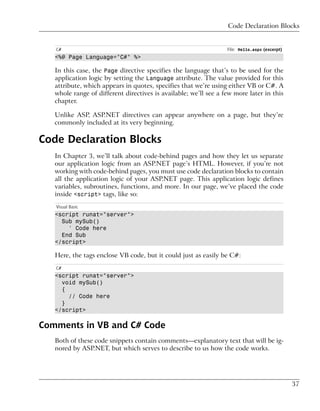
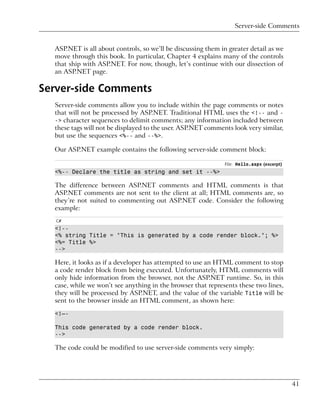
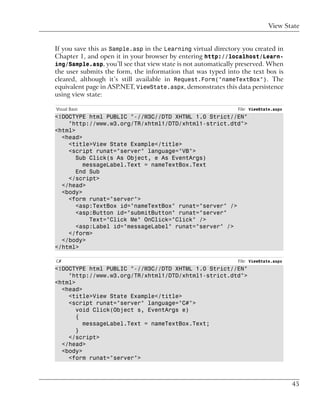
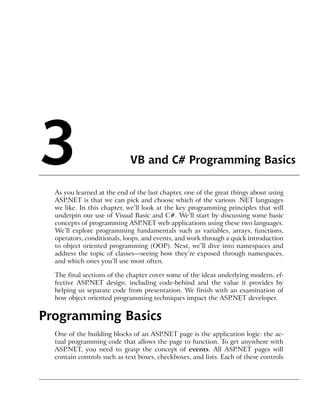
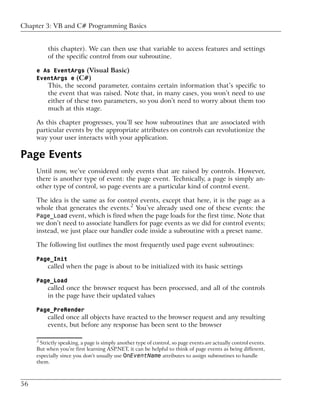
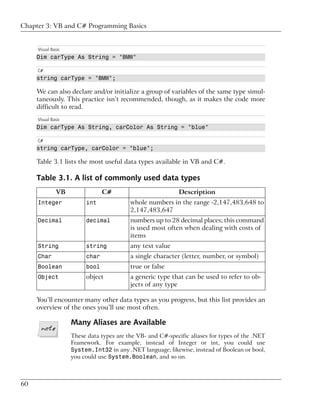
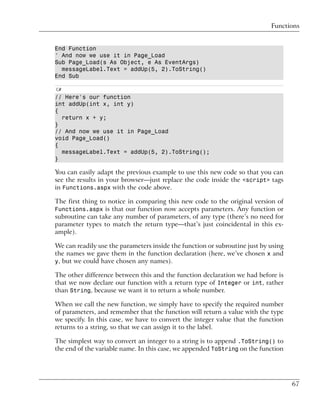
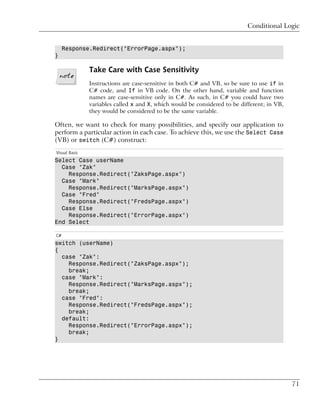
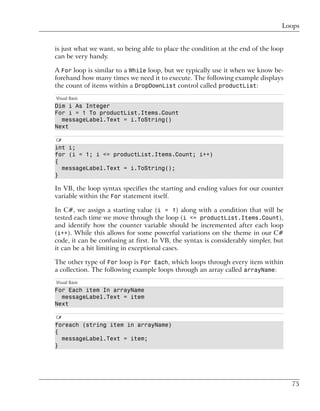
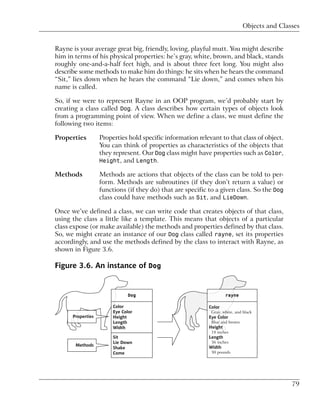
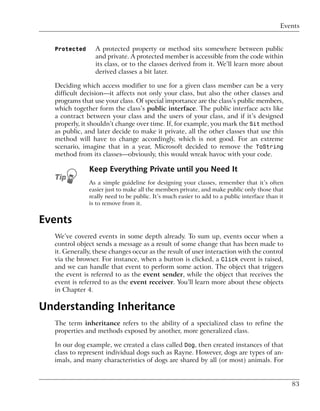
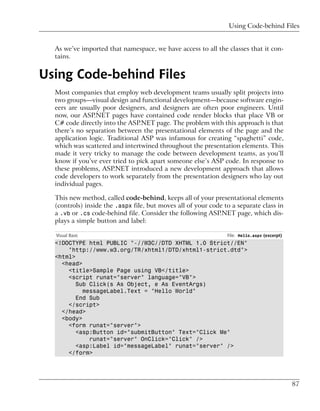
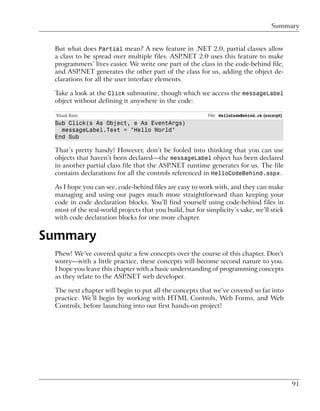
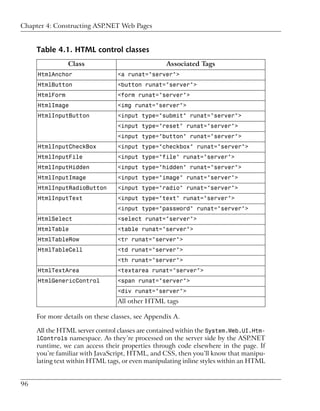
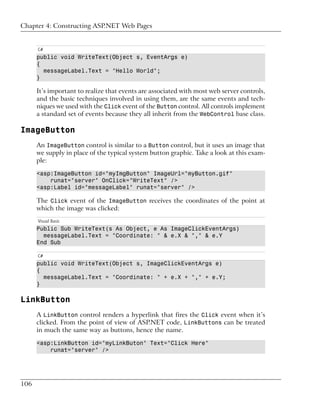
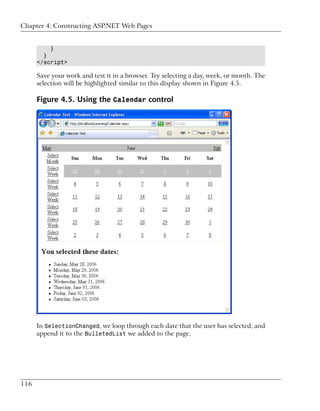
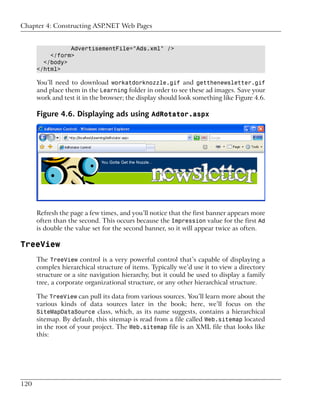
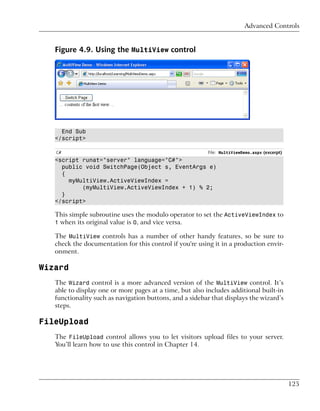
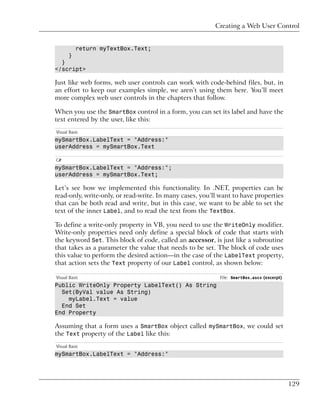
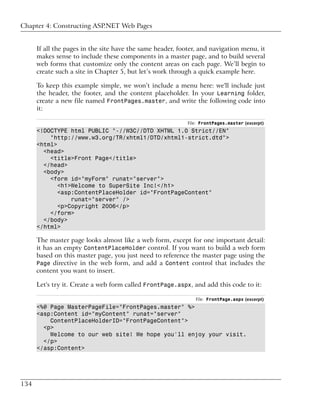
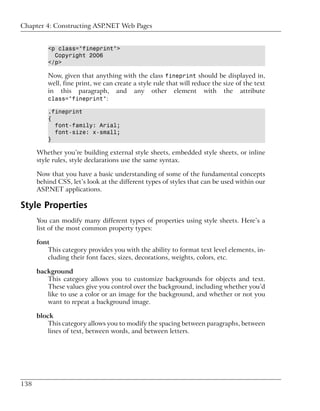
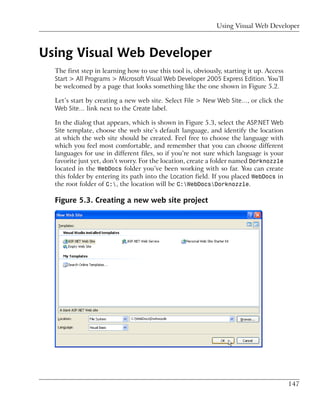
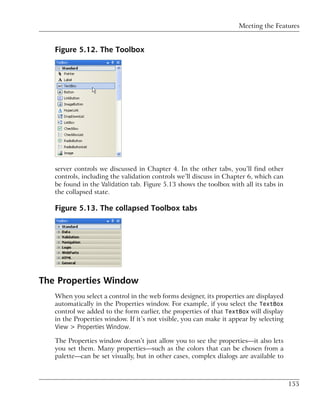
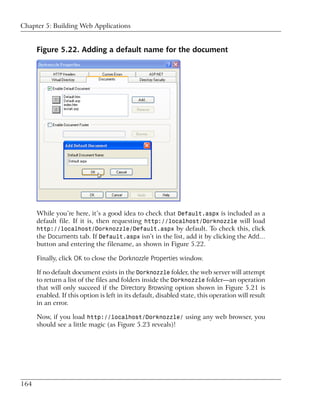
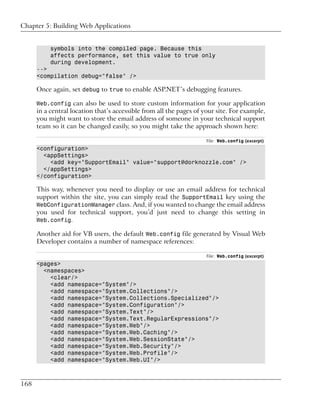
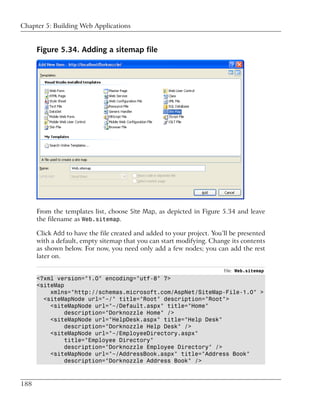
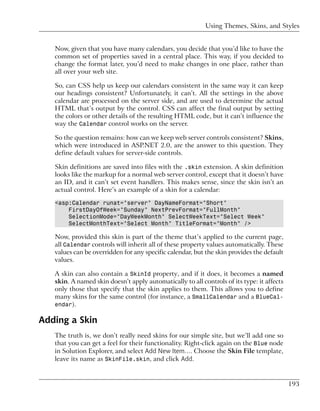
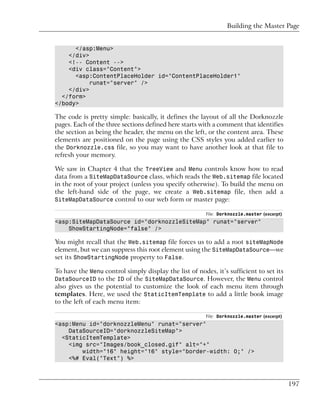
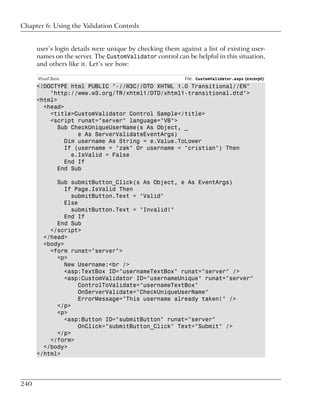
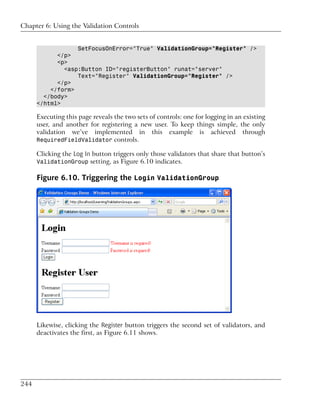
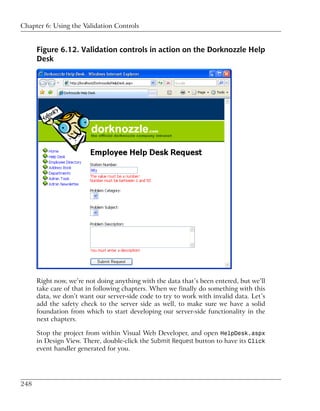
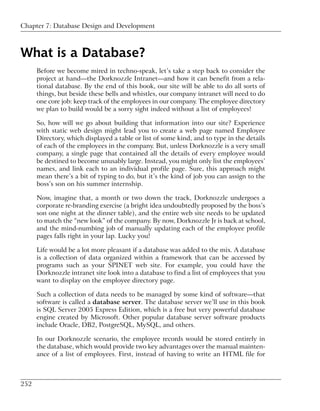
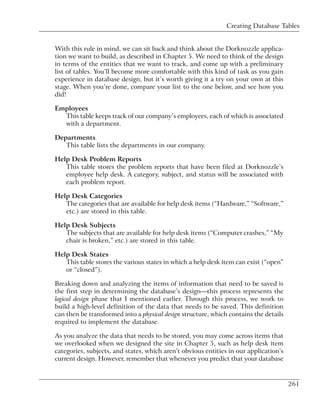
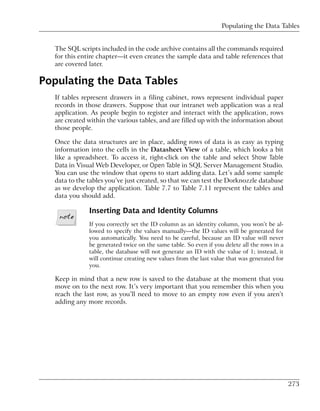
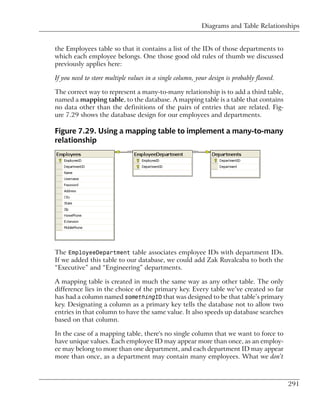
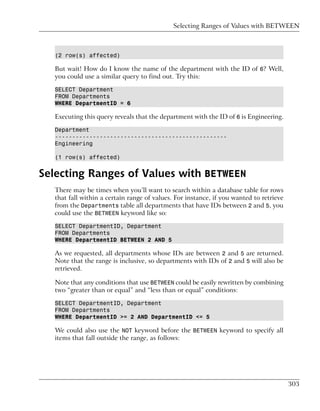
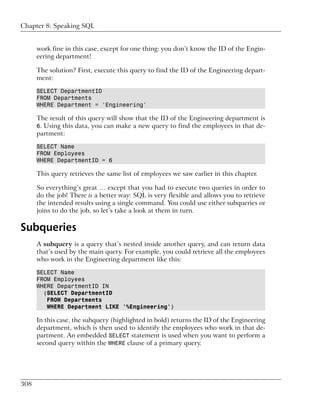
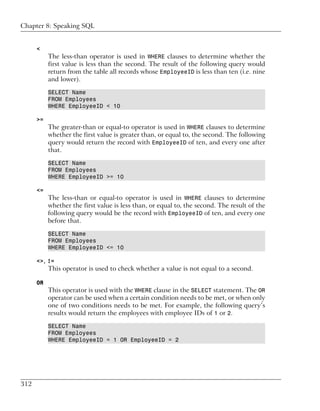
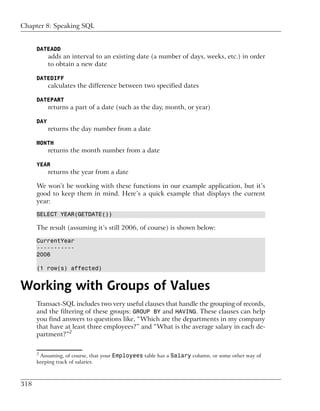
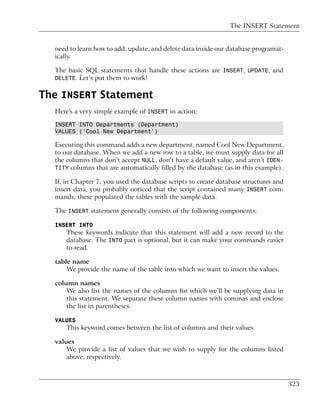
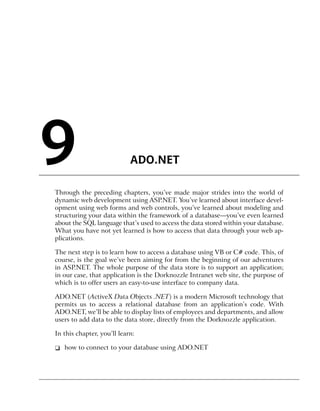
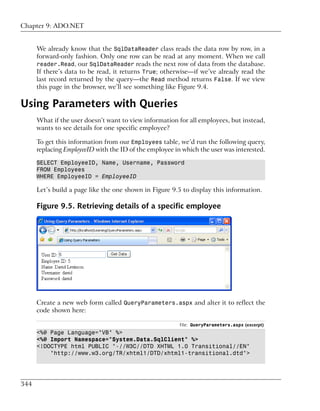
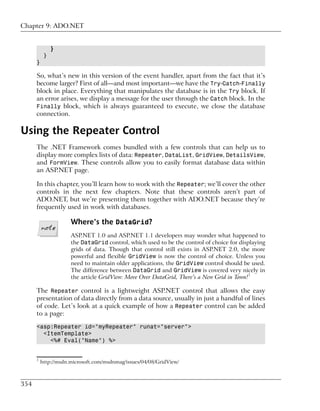
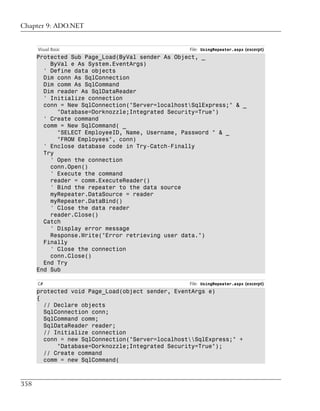
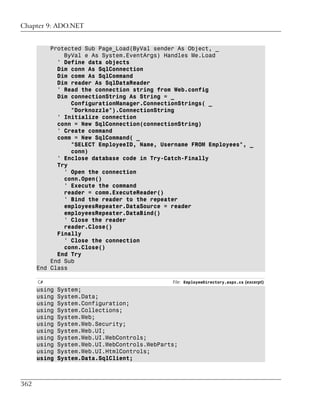
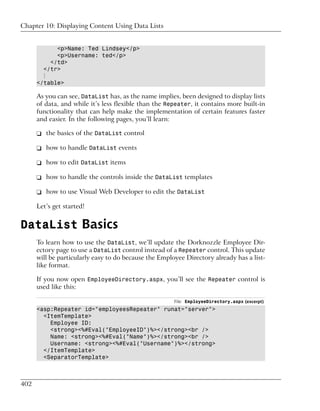
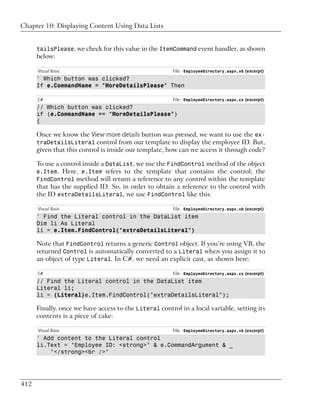
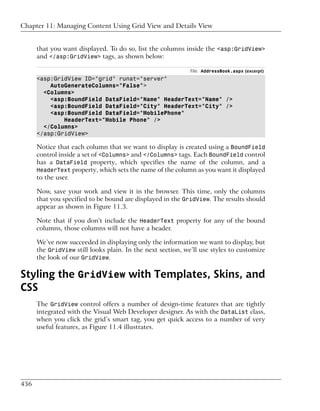
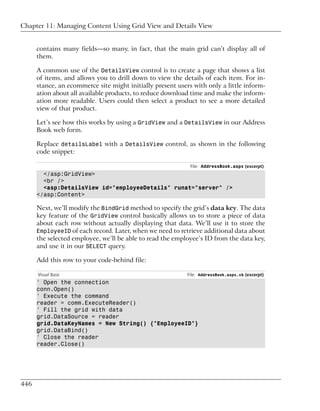
Figure 3.3. Reading an element from an array
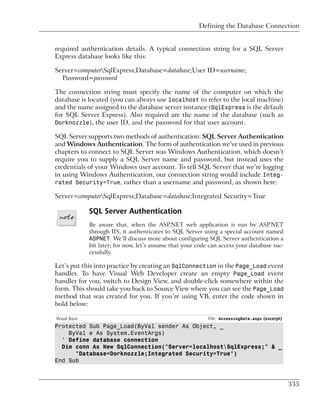
There are some important points to pick up from this code. First, notice how we
declare an array. In VB, it looks like a regular declaration for a string, except that
63](https://image.slidesharecdn.com/categories457/85/Categories-89-320.jpg)
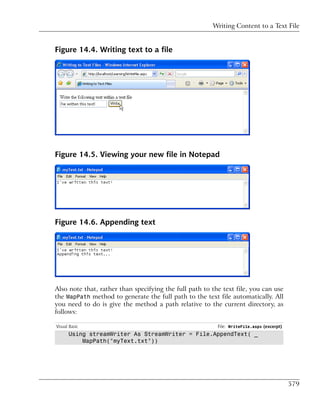
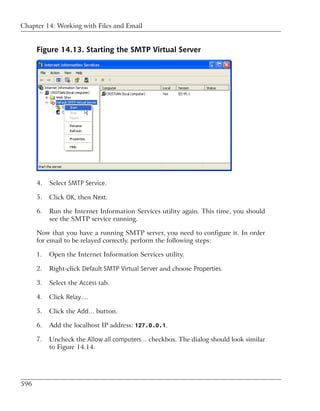
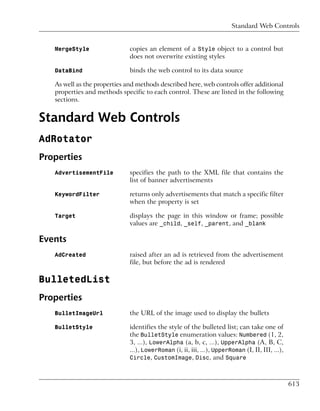
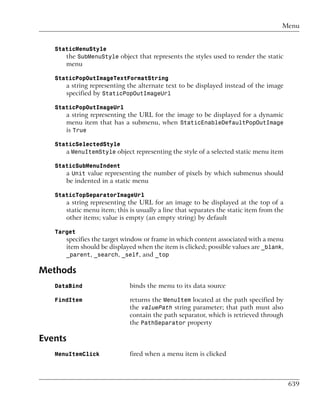
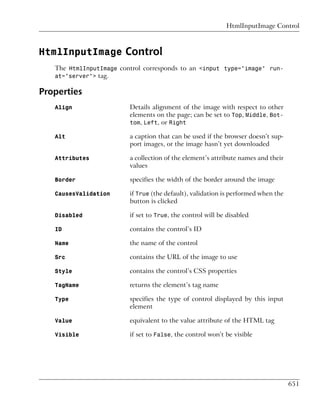
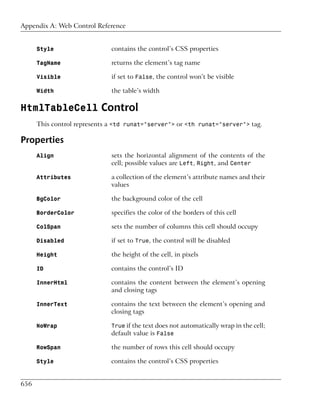
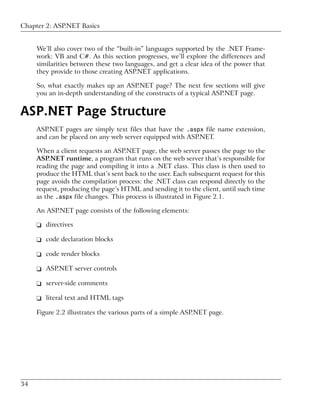
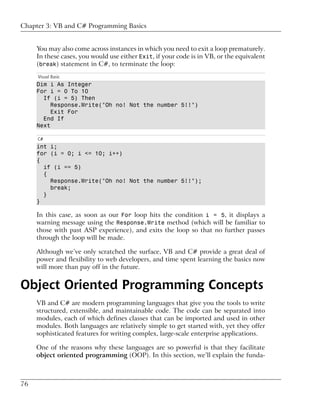
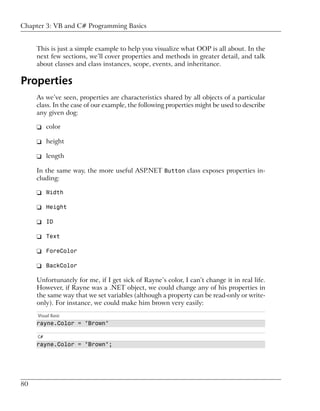
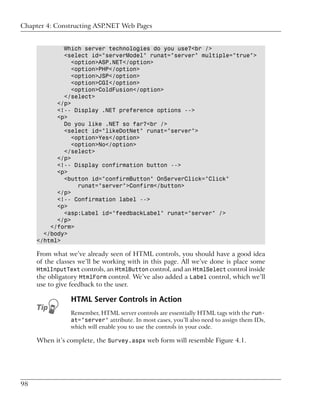
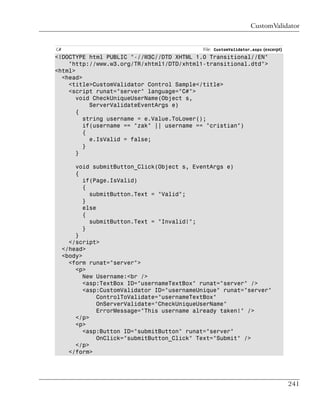
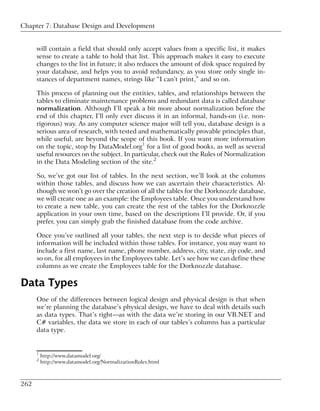
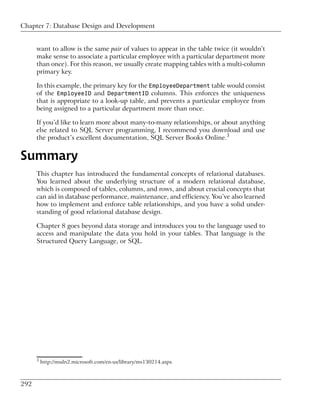
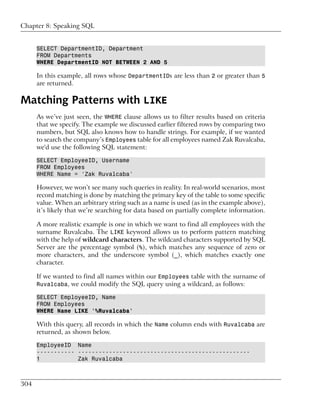
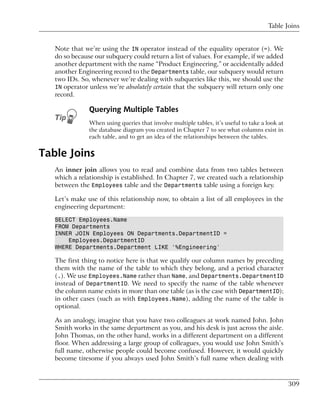
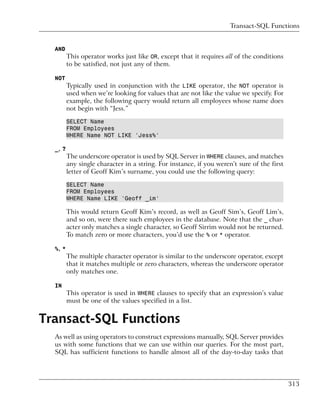
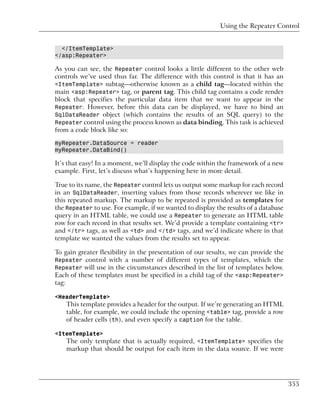
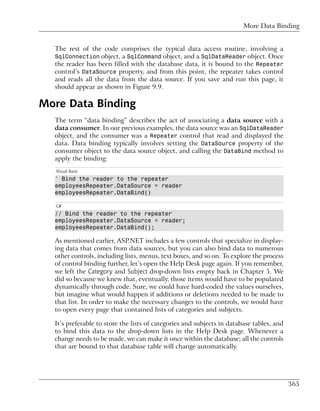
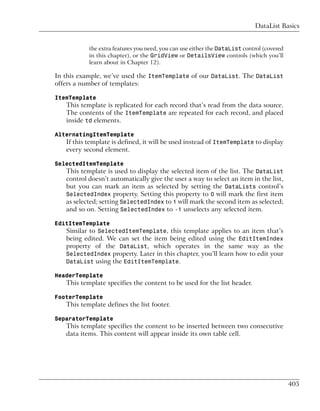
![Chapter 3: VB and C# Programming Basics
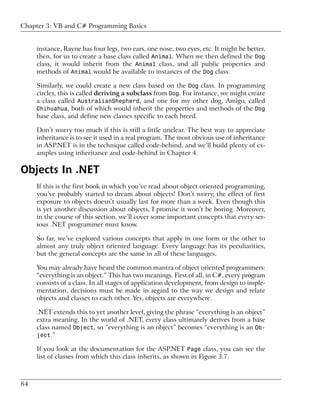
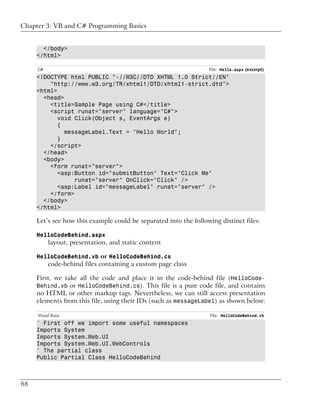
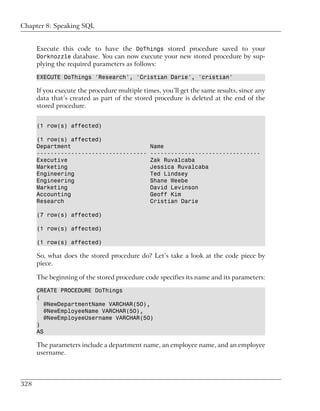
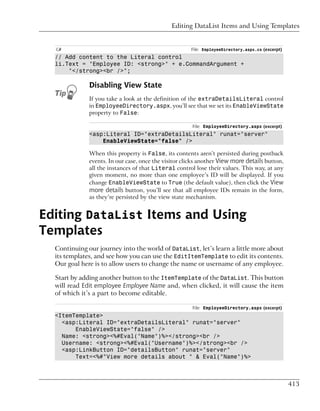
the number of items we want the array to contain is provided in parentheses after
the name:
Visual Basic File: Arrays.aspx (excerpt)
Dim drinkList(4) As String
In C#, it’s a little different. First, we declare that drinkList is an array by fol-
lowing the data type with two empty square brackets. We then specify that this
is an array of four items, using the new keyword:
C# File: Arrays.aspx (excerpt)
string[] drinkList = new string[4];
A crucial point to realize here is that, in both C# and VB, these arrays are known
as zero-based arrays. In a zero-based array, the first item has position 0, the
second has position 1, and so on through to the last item, which has a position
that’s one less than the size of the array (3, in this case). So, we specify each item
in our array like this:
Visual Basic File: Arrays.aspx (excerpt)
drinkList(0) = "Water"
drinkList(1) = "Juice"
drinkList(2) = "Soda"
drinkList(3) = "Milk"
C# File: Arrays.aspx (excerpt)
drinkList[0] = "Water";
drinkList[1] = "Juice";
drinkList[2] = "Soda";
drinkList[3] = "Milk";
Note that C# uses square brackets for arrays, while VB uses standard parentheses.
We have to remember that arrays are zero-based when we set the label text to
the second item, as shown here:
Visual Basic File: Arrays.aspx (excerpt)
drinkLabel.Text = drinkList(1)
C# File: Arrays.aspx (excerpt)
drinkLabel.Text = drinkList[1];
To help this fact sink in, you might like to try changing this code to show the
third item in the list, instead of the second. Can you work out what change you’d
need to make? That’s right—you need only to change the number in the brackets
64](https://image.slidesharecdn.com/categories457/85/Categories-90-320.jpg)


![Chapter 4: Constructing ASP.NET Web Pages
feedbackLabel.Text += "You like .NET: " & likeDotNet.Value
End Sub
</script>
C# File: Survey.aspx (excerpt)
<script runat="server" language="C#">
void Click(Object s, EventArgs e)
{
feedbackLabel.Text = "Your name is: " + name.Value + "<br />";
feedbackLabel.Text += "Your email is: " + email.Value +
"<br />";
feedbackLabel.Text += "You like to work with:<br />";
for (int i = 0; i <= serverModel.Items.Count - 1; i++)
{
if (serverModel.Items[i].Selected)
{
feedbackLabel.Text += " - " + serverModel.Items[i].Text +
"<br />";
}
}
feedbackLabel.Text += "You like .NET: " + likeDotNet.Value;
}
</script>
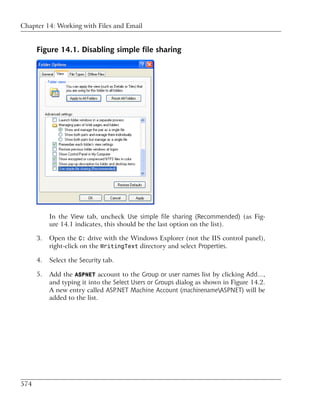
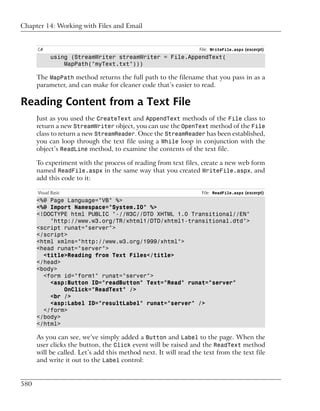
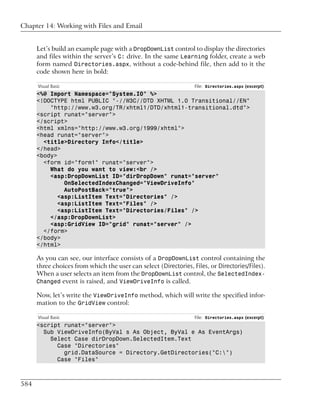
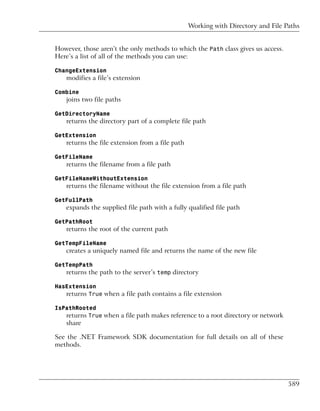
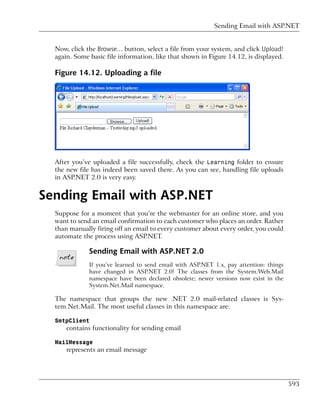
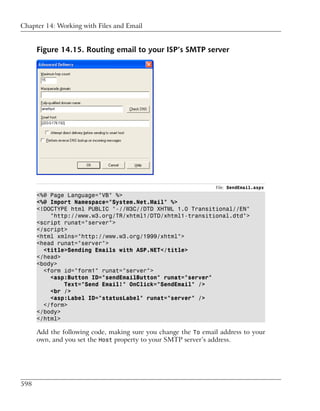
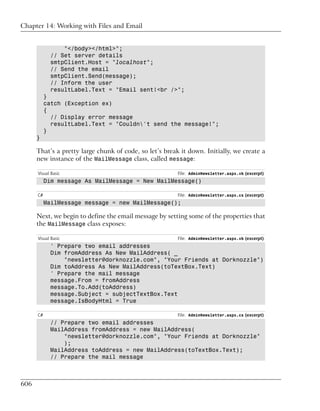
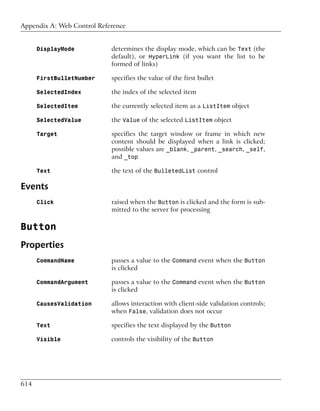
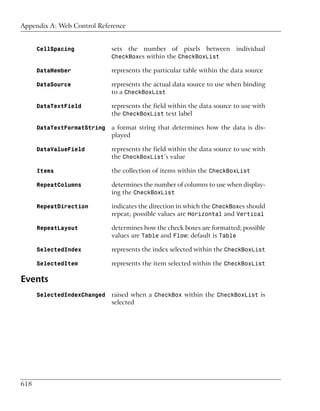
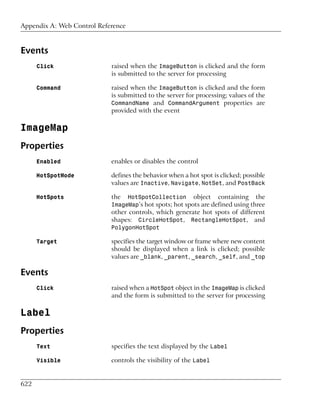
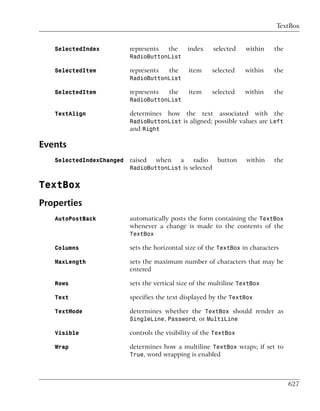
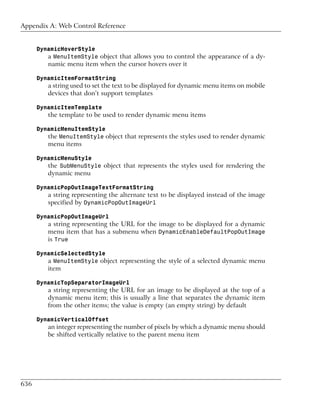
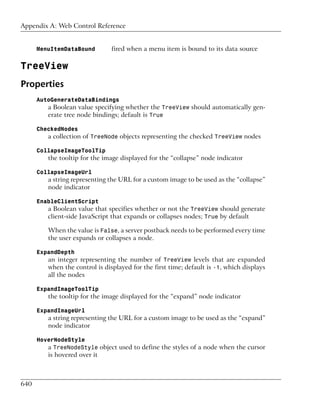
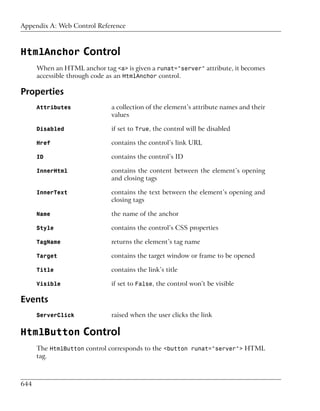
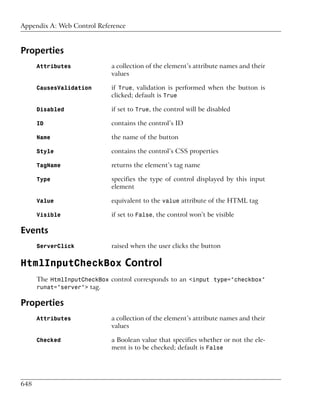
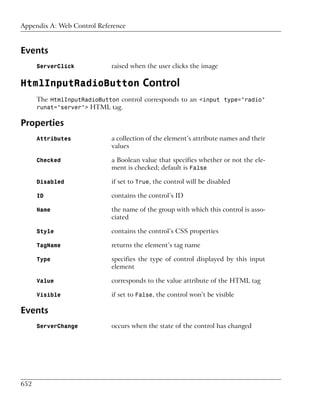
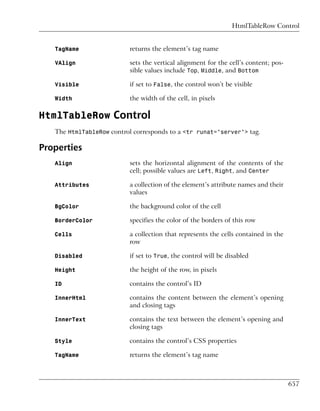
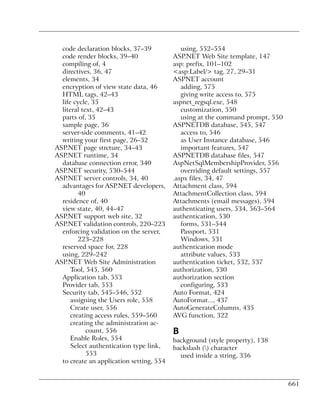
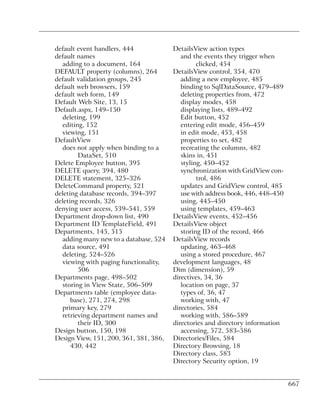
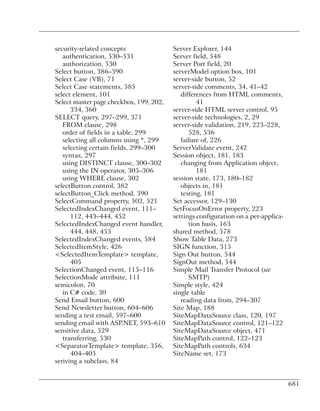
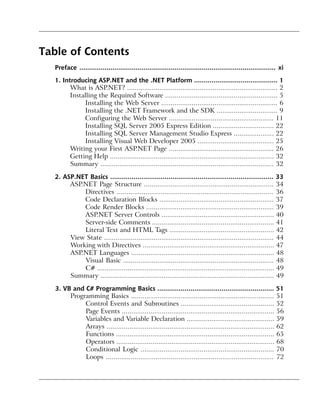
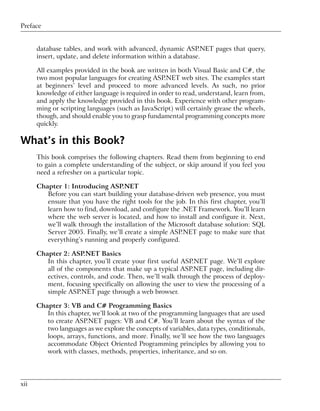
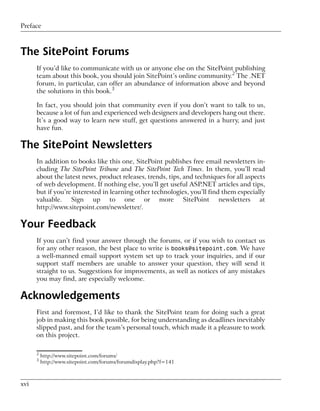
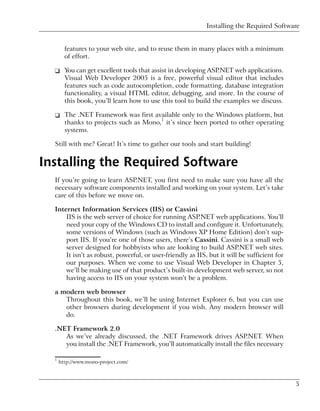
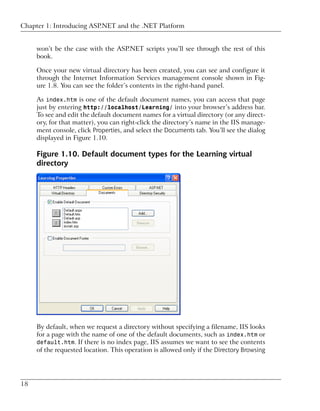
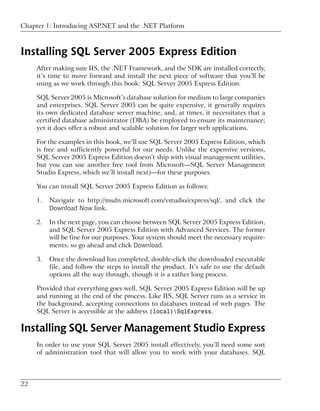
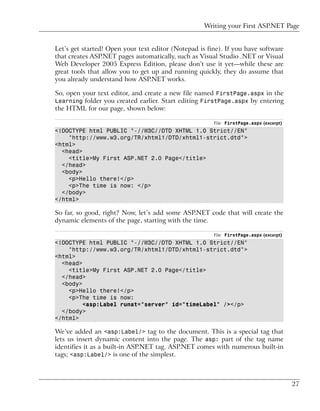
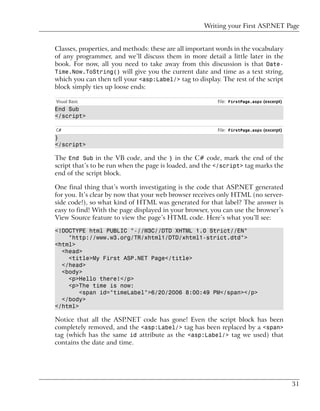
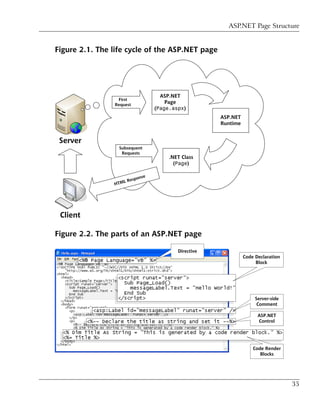
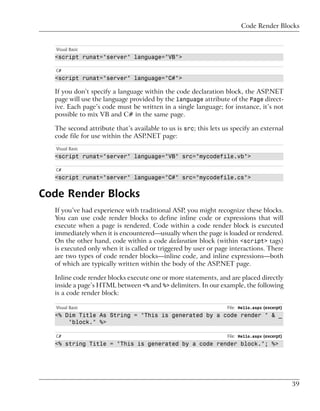
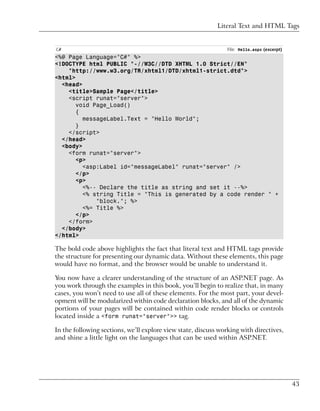
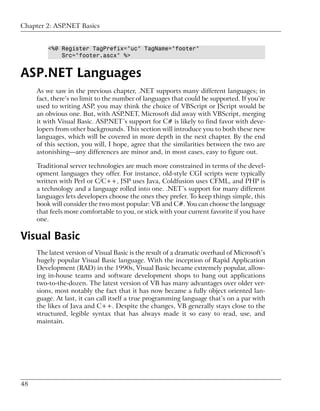
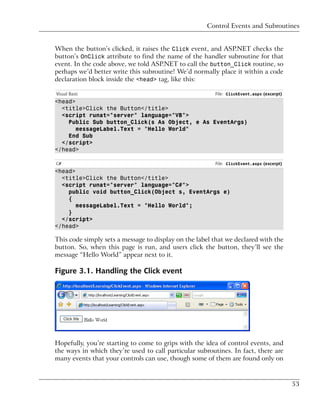
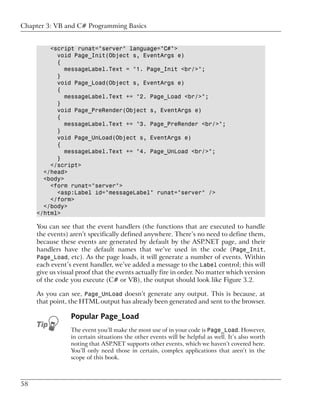
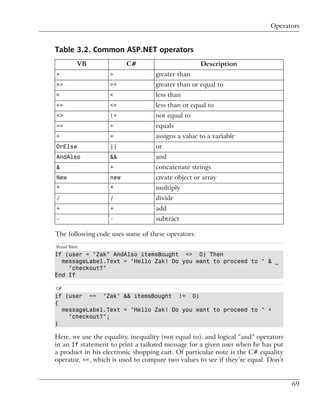
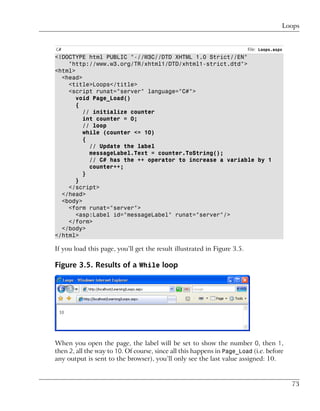
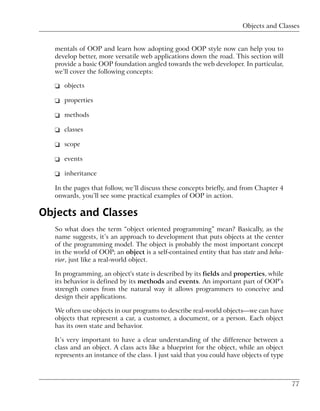
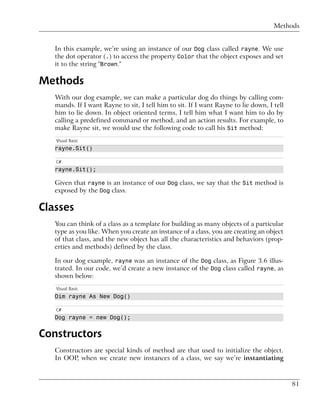
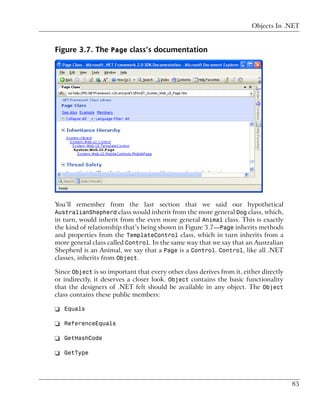
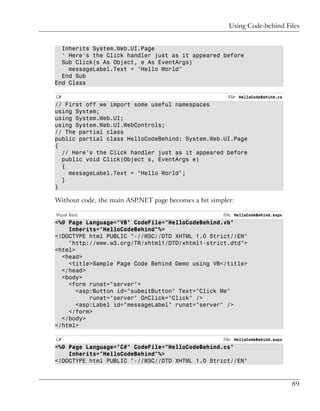
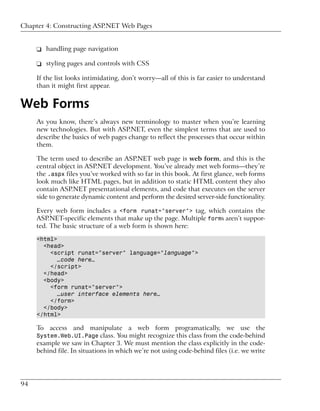
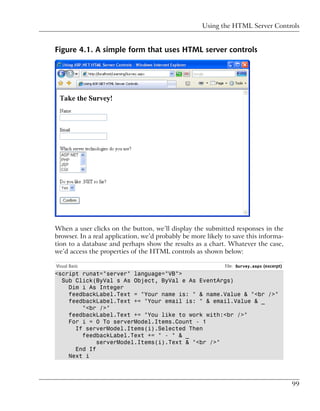
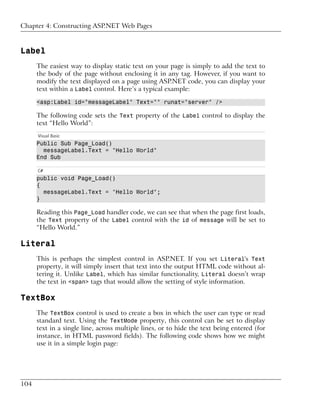
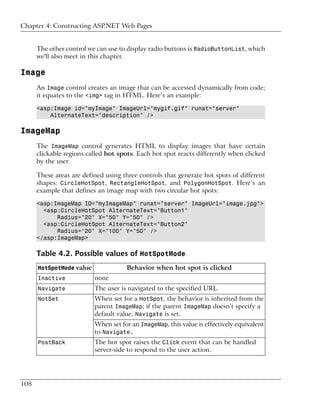
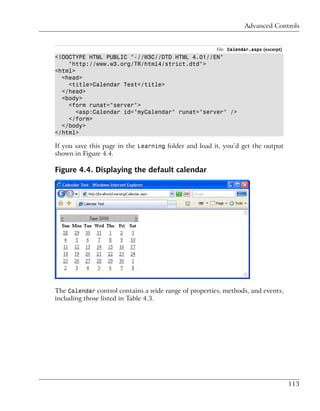
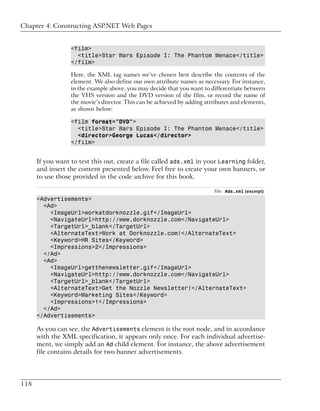
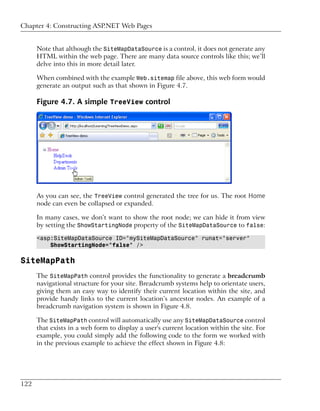
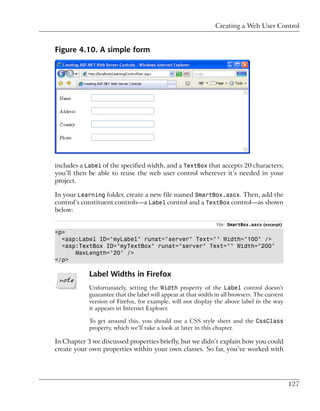
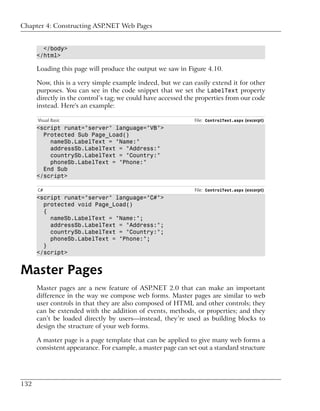
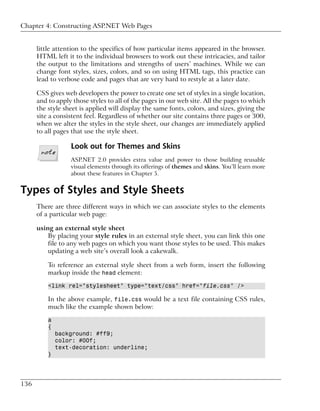
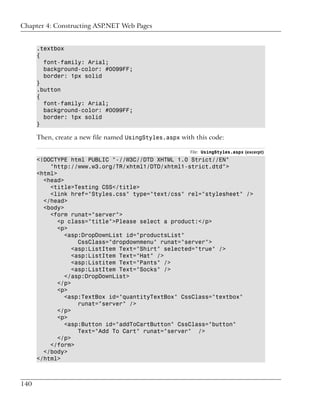
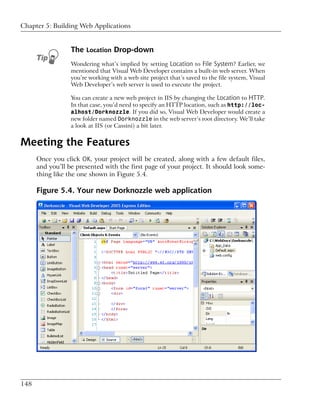
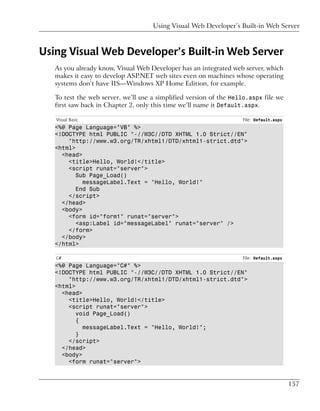
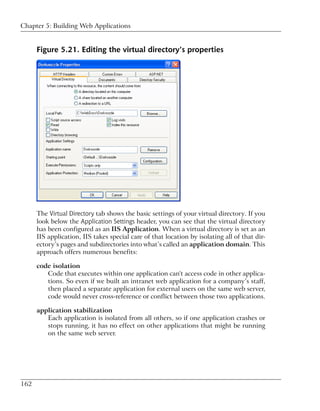
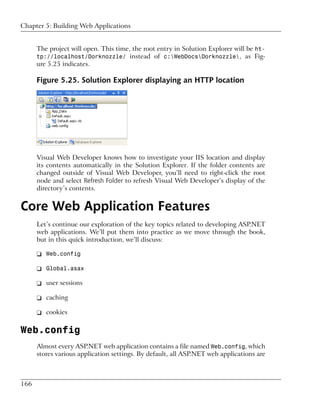
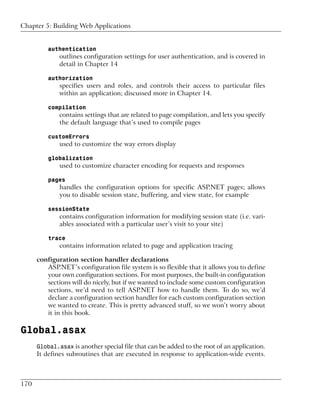
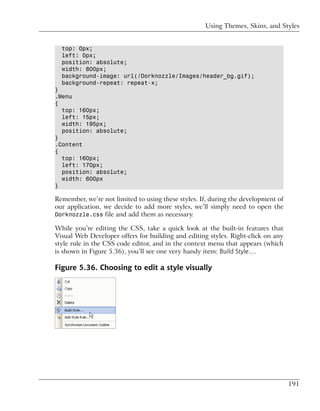
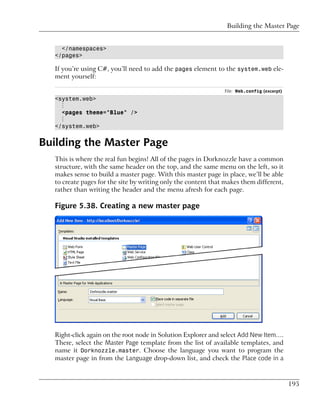
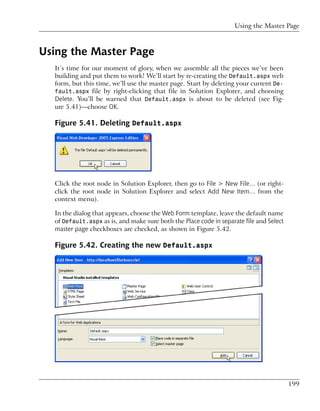
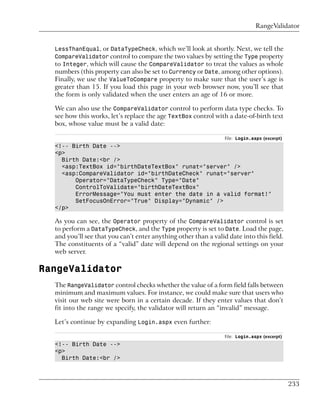
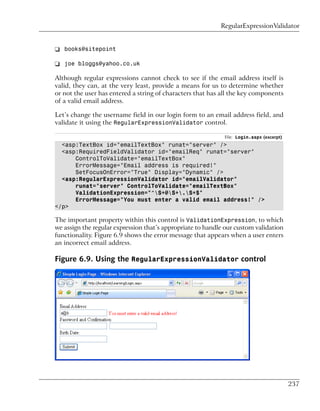
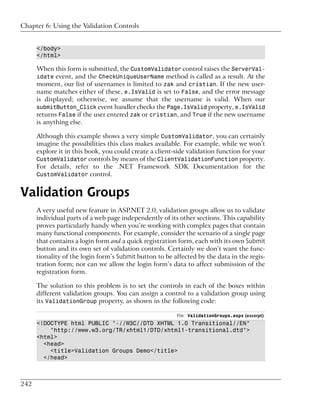
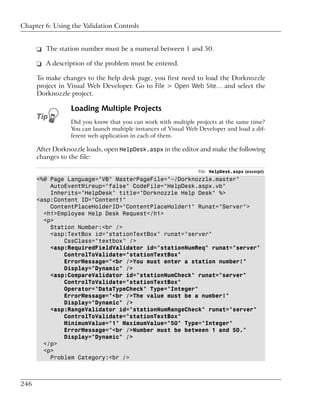
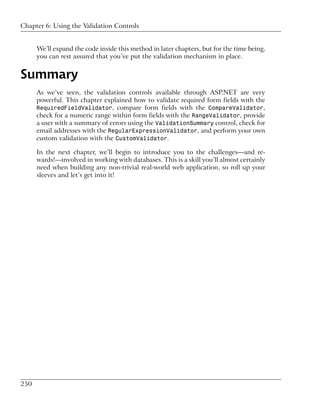
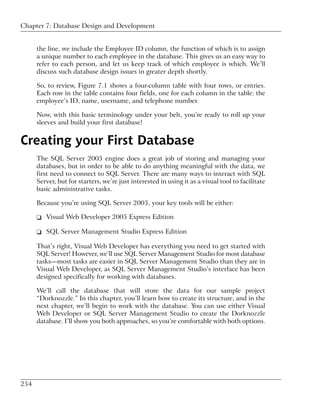
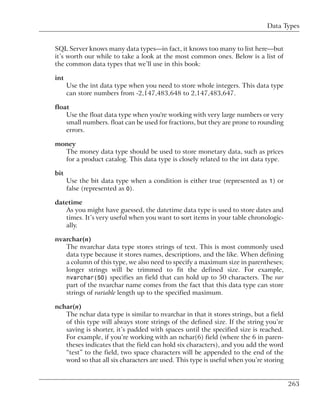
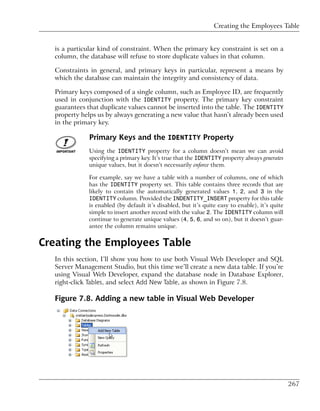
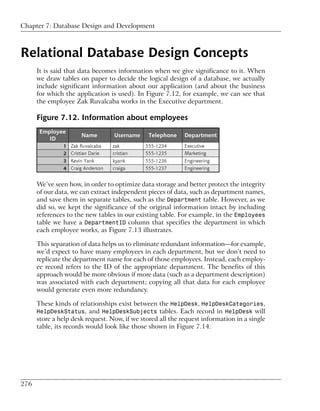
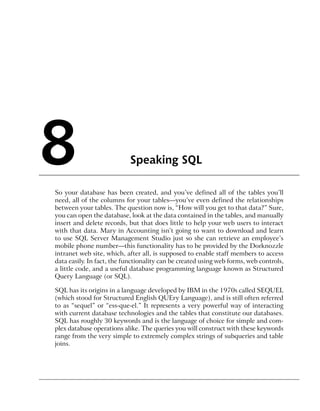
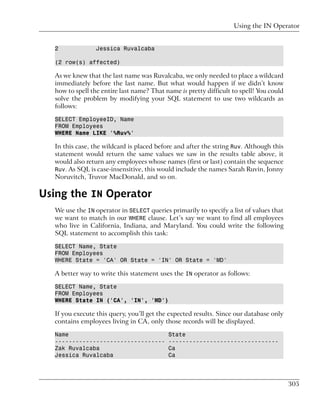
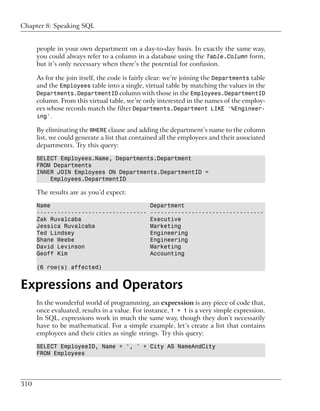
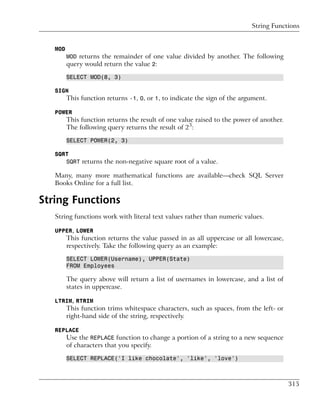
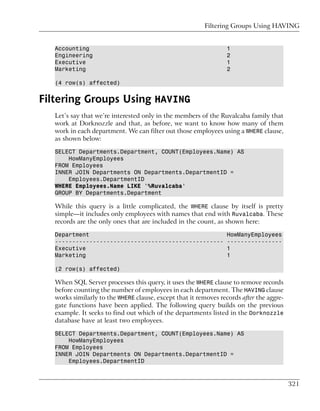
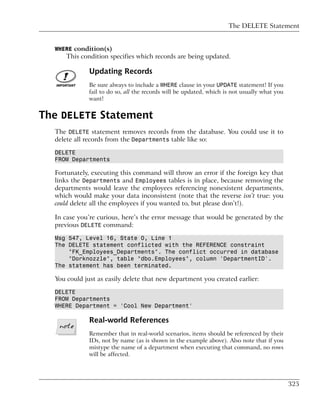
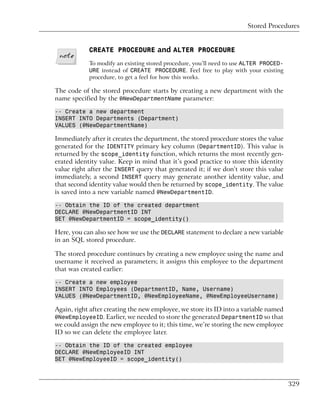
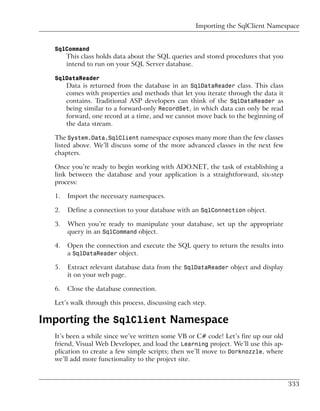
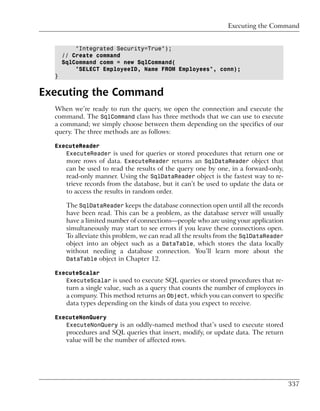
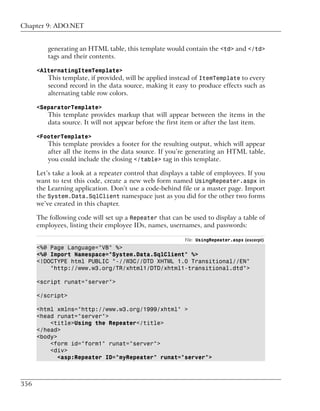
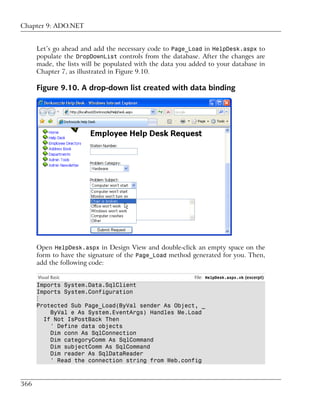
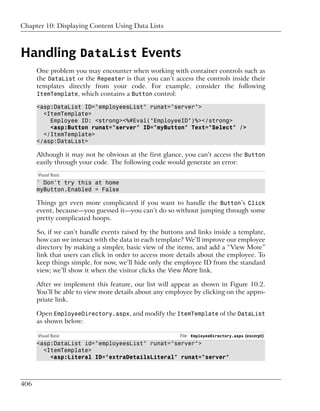
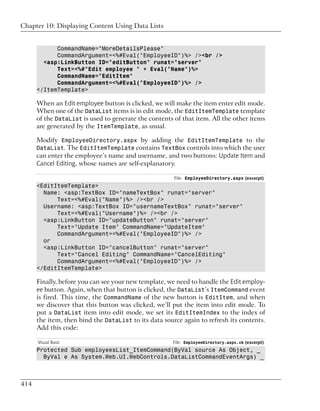
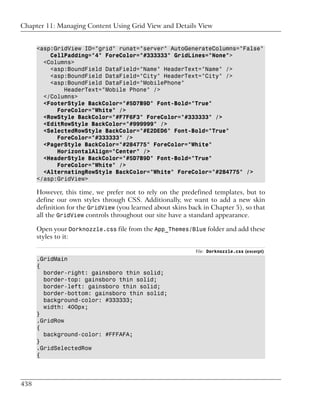
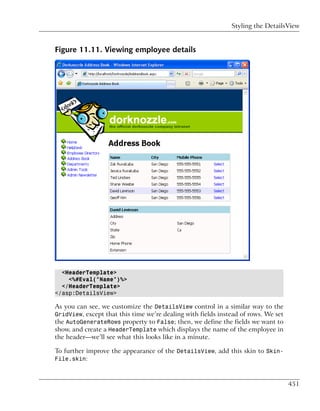
As with the examples in previous chapters, we start by placing our VB and C#
code inside a server-side script block within the <head> part of the page. Next,
we create a new Click event handler that takes the two usual parameters. Finally,
we use the Label control to display the user’s responses within the page.
Figure 4.2. Viewing the survey results
100](https://image.slidesharecdn.com/categories457/85/Categories-126-320.jpg)


![Using Application State
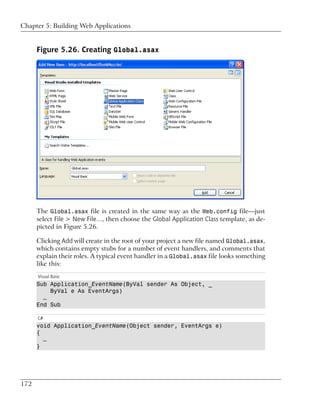
Be Careful when Changing Global.asax
Be cautious when you add and modify code within the Global.asax file.
Any additions or modifications you make within this file will cause the ap-
plication to restart, so you’ll lose any data stored in application state.
Using Application State
You can store the variables and objects you want to use throughout an entire
application in a special object called Application. The data stored in this object
is called application state. The Application object also provides you with
methods that allow you to share application state data between all the pages in
a given ASP.NET application very easily.
Application state is closely related to another concept: session state. The key
difference between the two is that session state stores variables and objects for
one particular user for the duration of that user’s current visit, whereas application
state stores objects and variables that are shared between all users of an application
at the same time. Thus, application state is ideal for storing data that’s used by
all users of the same application.
In ASP.NET, session and application state are both implemented as collections,
or sets of name-value pairs. You can set the value of an application variable named
SiteName like this:
Visual Basic
Application("SiteName") = "Dorknozzle Intranet Application"
C#
Application["SiteName"] = "Dorknozzle Intranet Application";
With SiteName set, any pages in the application can read this string:
Visual Basic
Dim appName As String = Application("SiteName")
C#
String appName = Application["SiteName"];
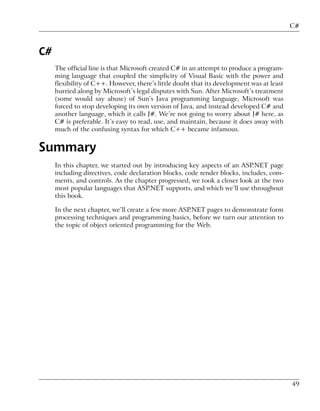
We can remove an object from application state using the Remove method, like
so:
Visual Basic
Application.Remove("SiteName")
173](https://image.slidesharecdn.com/categories457/85/Categories-199-320.jpg)
![Chapter 5: Building Web Applications
End If
' Display page counter
myLabel.Text = Application("PageCounter")
End Sub
C# File: Default.aspx.cs (excerpt)
protected void Page_Load(object sender, EventArgs e)
{
// Reset counter when it reaches 10
if (Application["PageCounter"] != null &&
(int)Application["PageCounter"] >= 10)
{
Application.Remove("PageCounter");
}
// Initialize or increment page counter each time the page loads
if (Application["PageCounter"] == null)
{
Application["PageCounter"] = 1;
}
else
{
Application["PageCounter"] =
(int)Application["PageCounter"] + 1;
}
// Display page counter
myLabel.Text = Convert.ToString(Application["PageCounter"]);
}
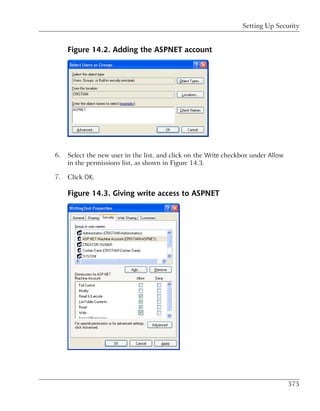
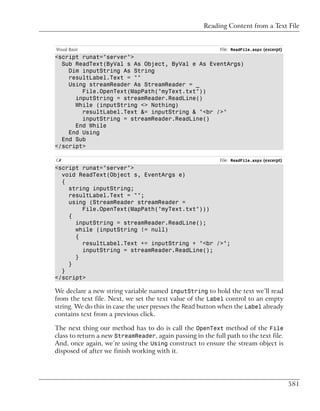
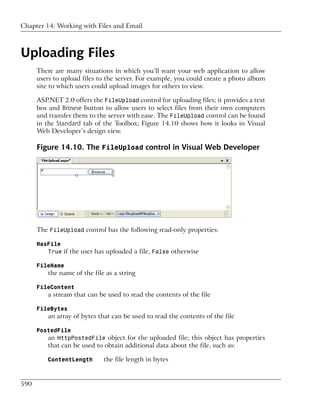
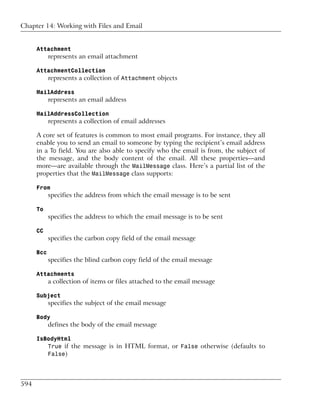
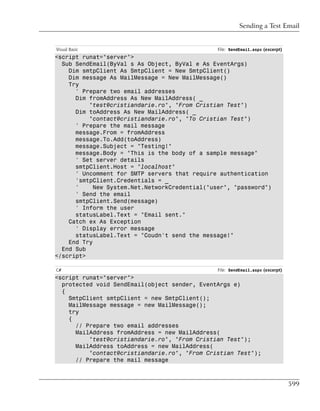
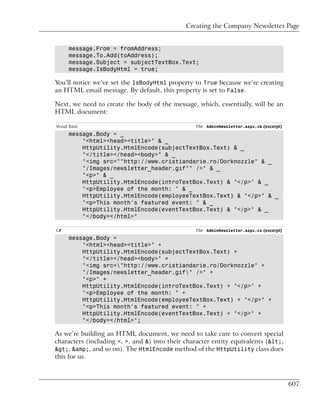
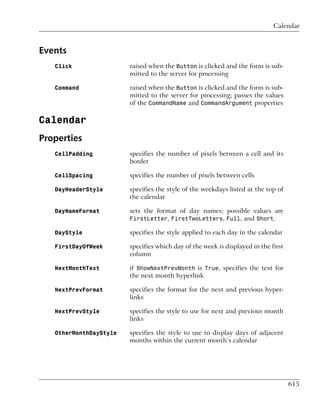
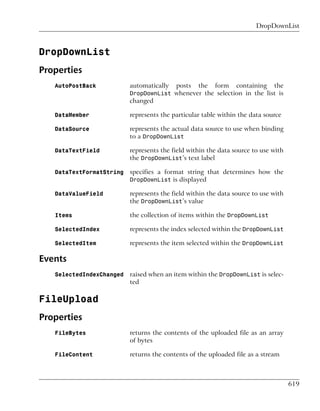
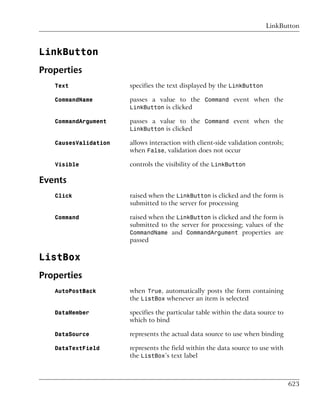
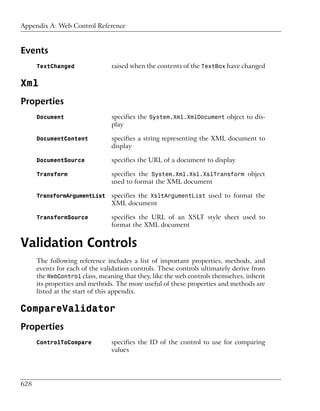
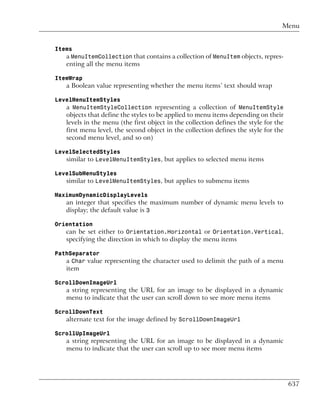
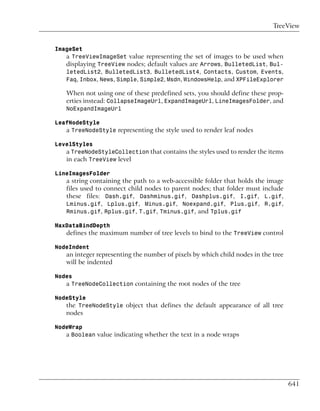
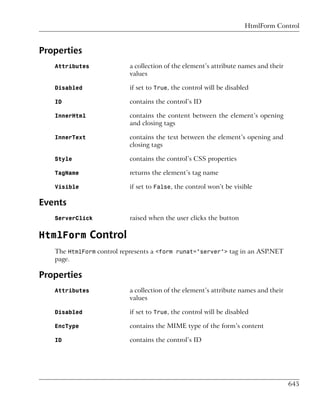
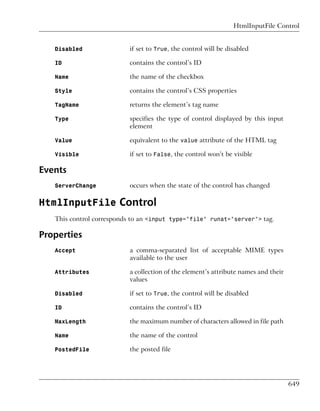
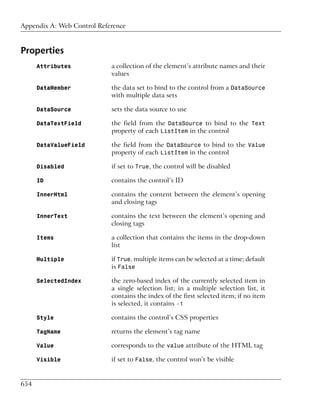
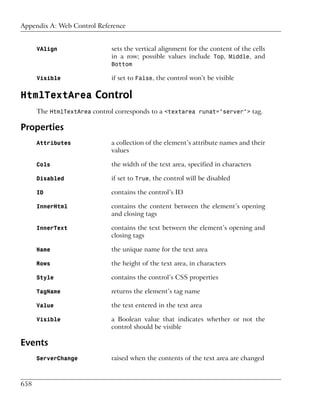
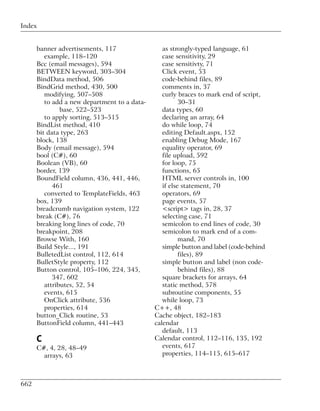
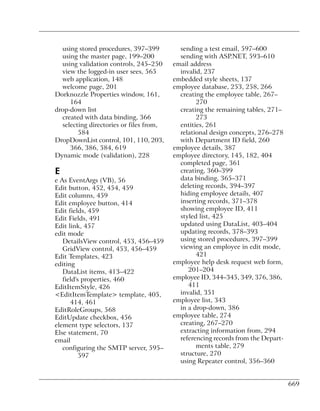
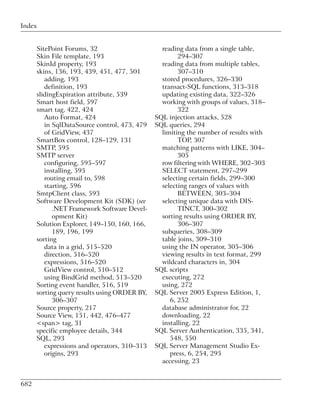
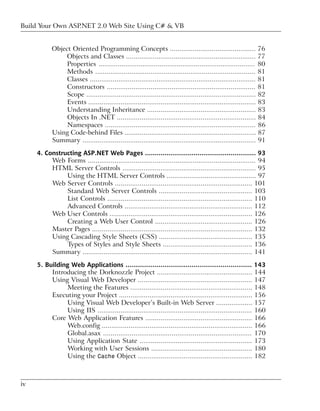
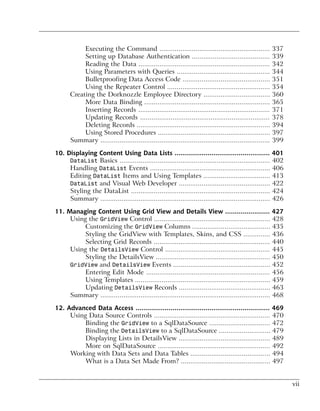
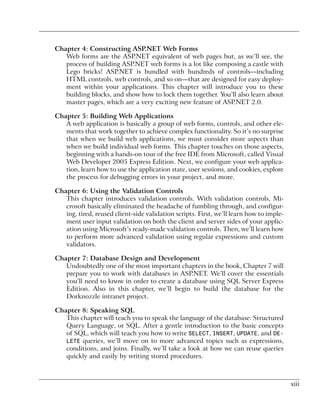
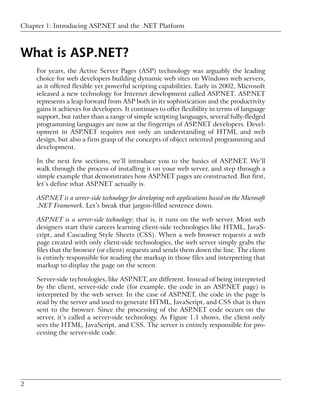
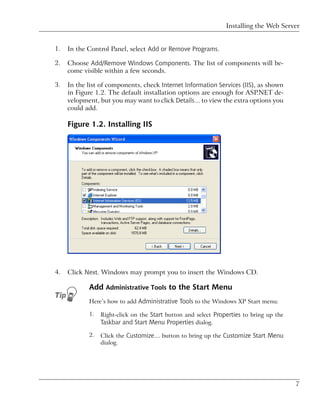
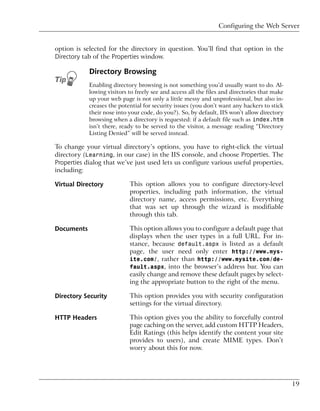
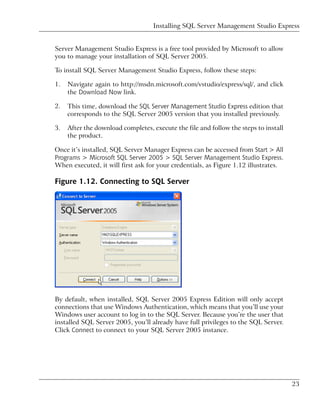
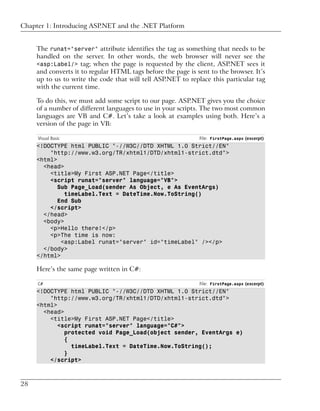
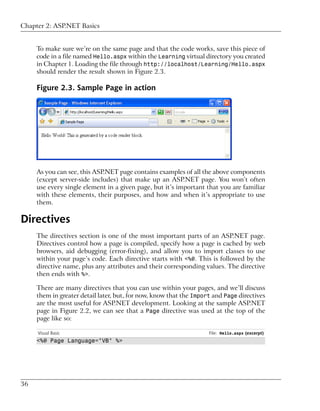
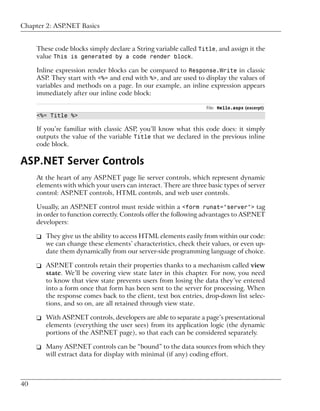
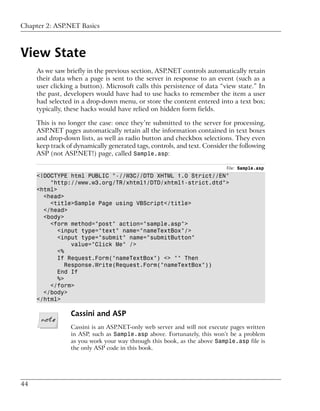
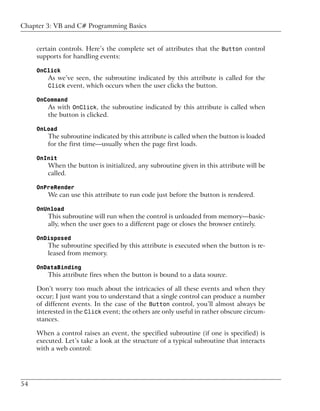
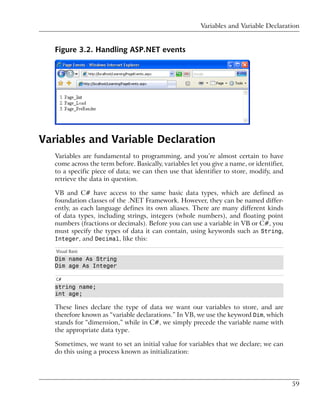
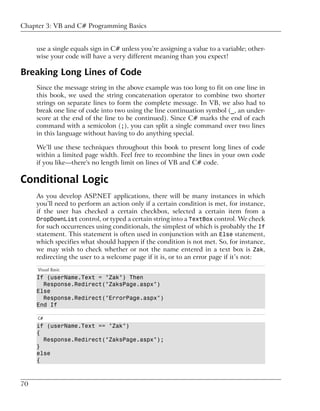
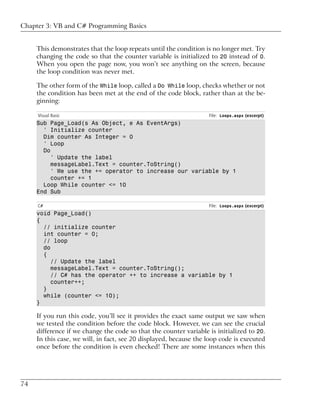
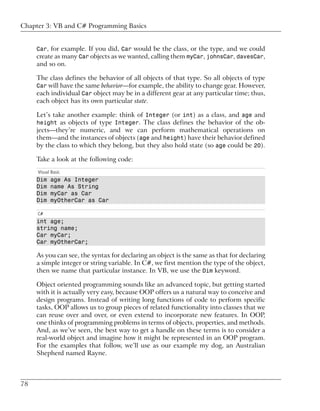
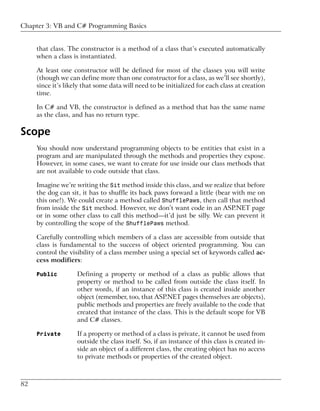
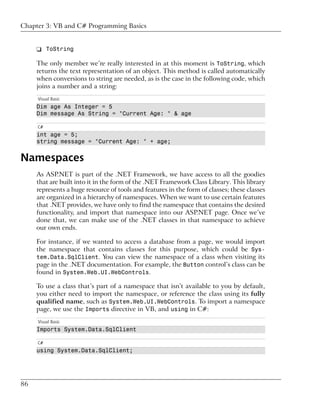
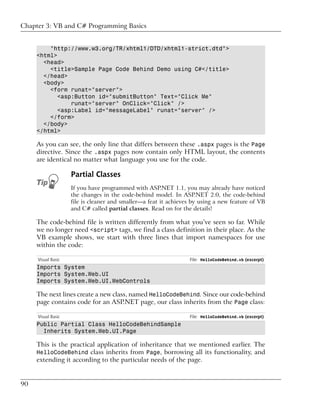
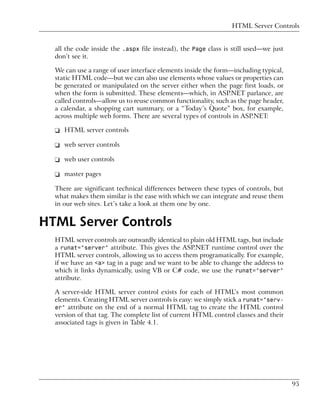
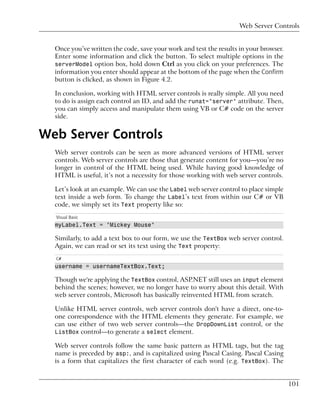
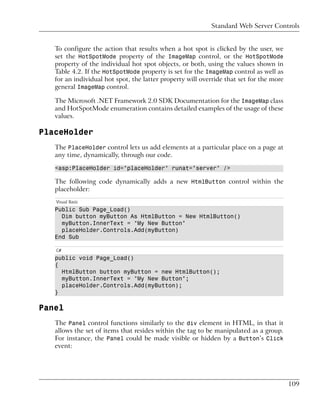
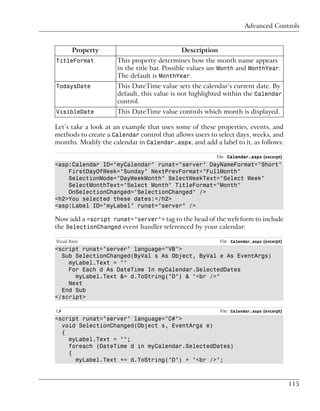
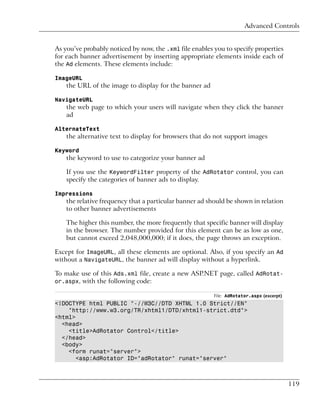
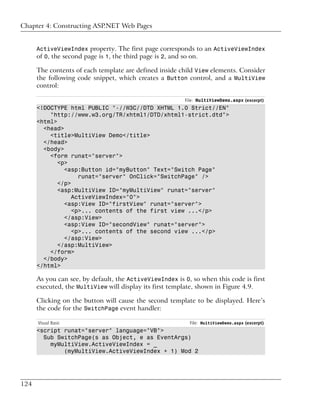
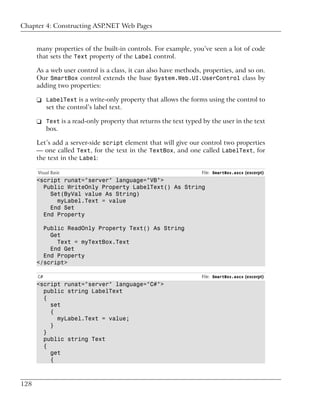
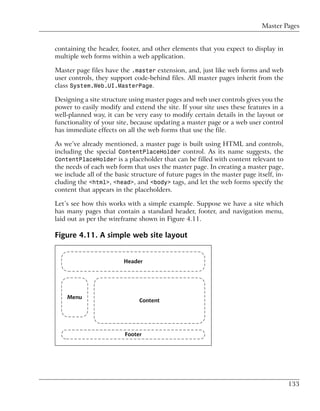
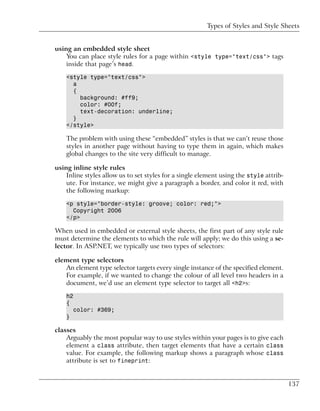
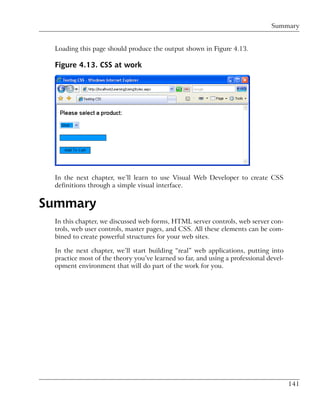
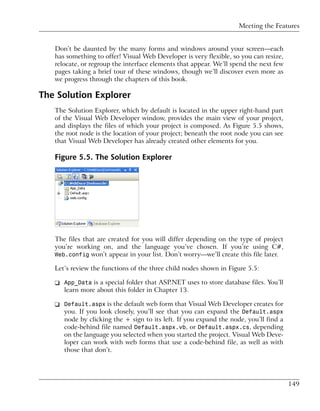
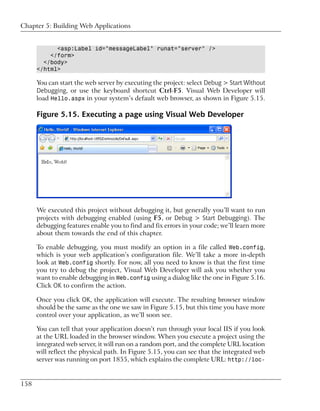
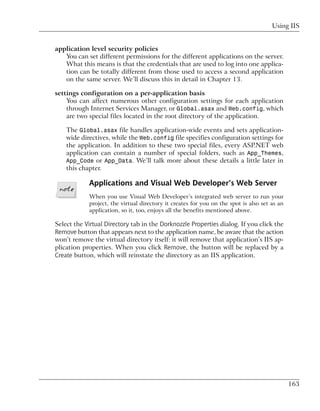
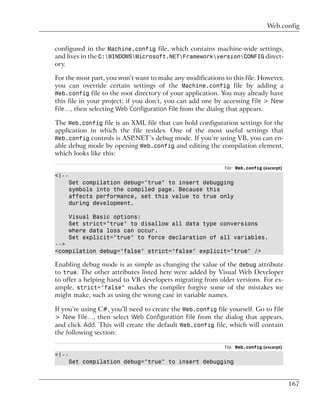
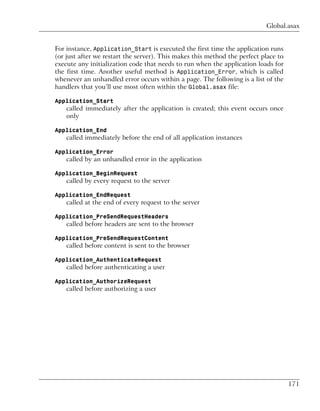
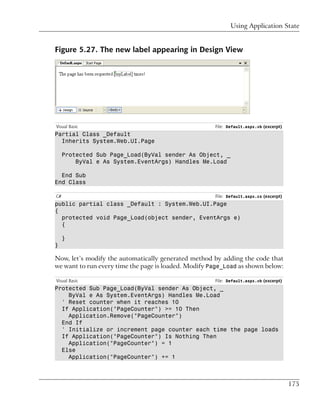
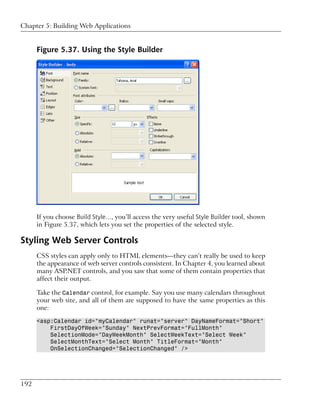
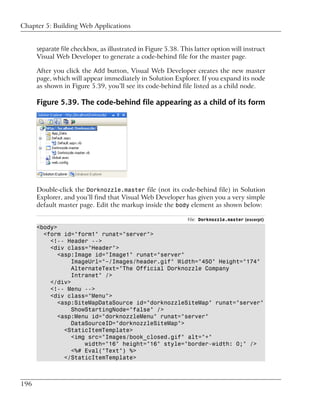
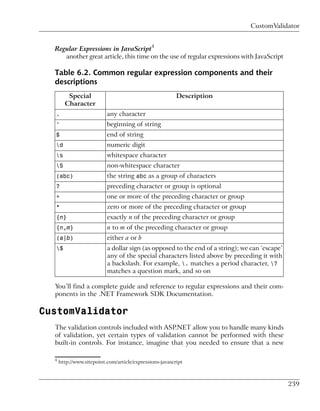
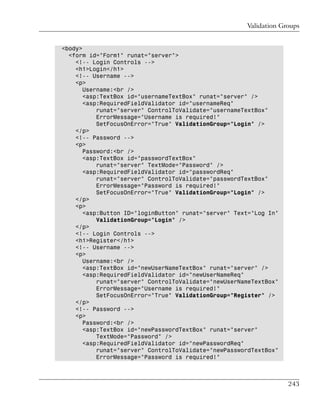
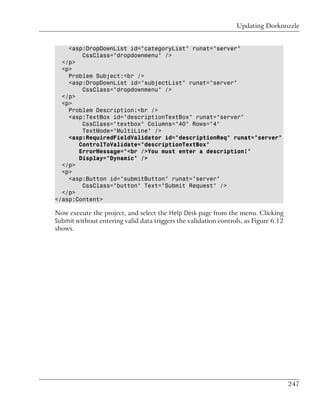
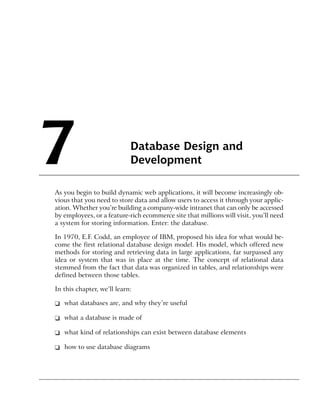
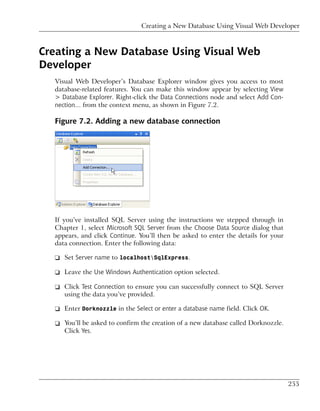
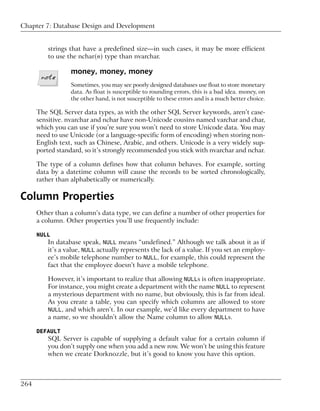
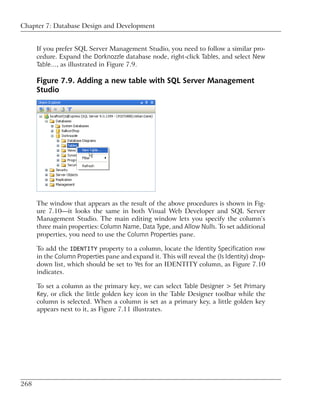
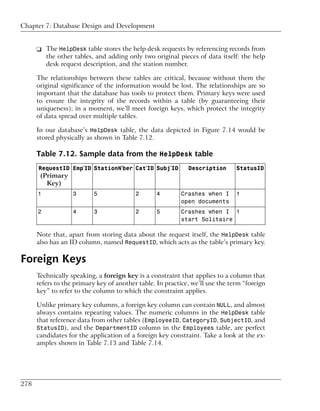
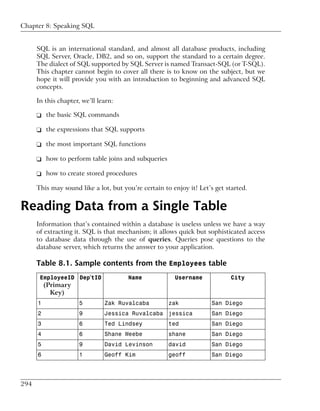
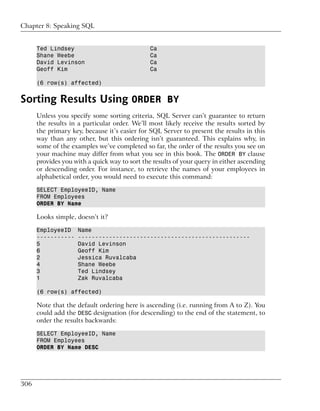
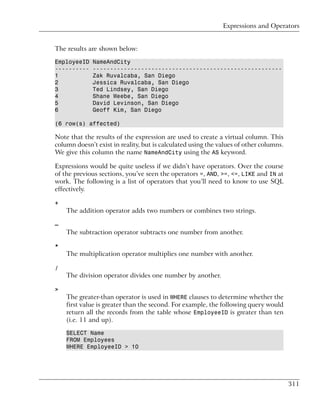
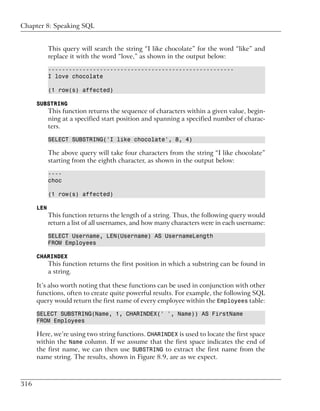
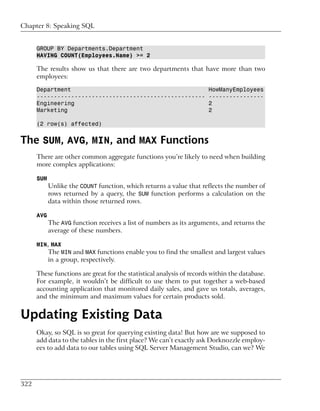
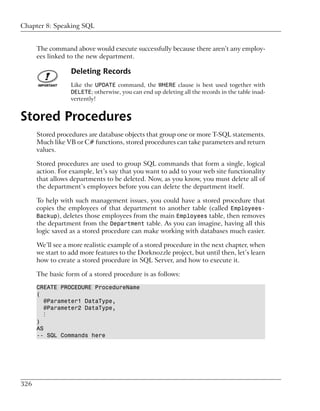
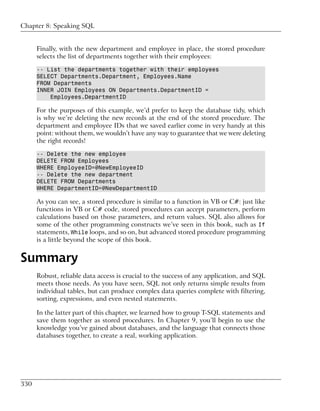
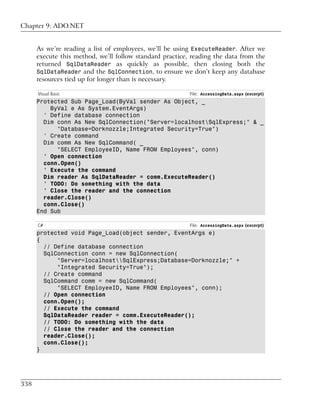
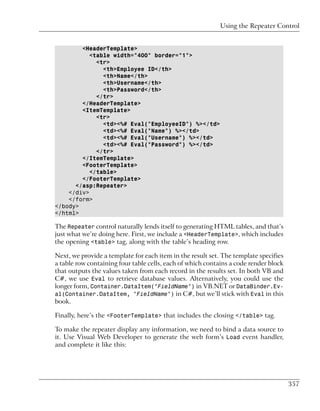
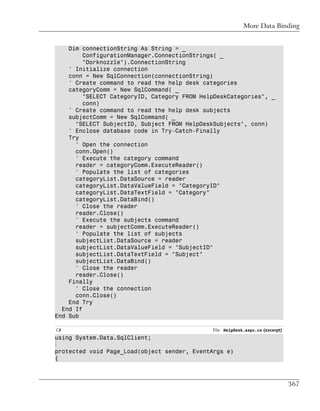
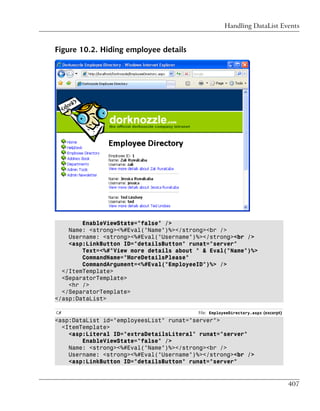
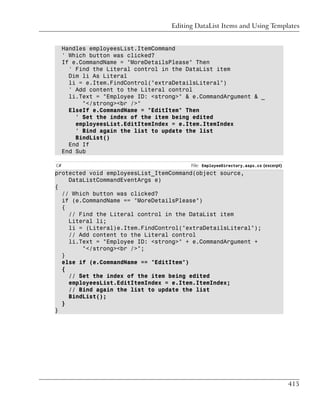
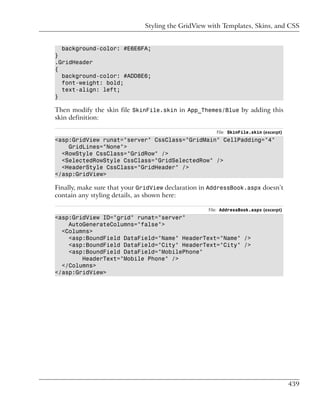
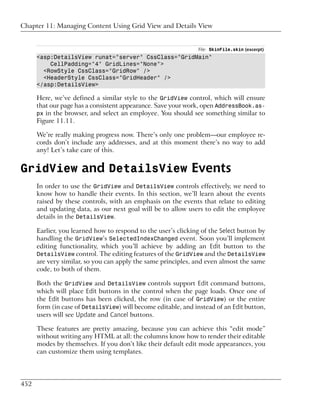
Before analyzing the code, press F5 to run the site and ensure that everything
works properly. Every time you refresh the page, the hit counter should increase
by one until it reaches ten, when it starts over. Now, shut down your browser
altogether, and open the page in another browser. We’ve stored the value within
application state, so when you restart the application, the page hit counter will
remember the value it reached in the original browser, as Figure 5.28 shows.
If you play with the page, reloading it over and over again, you’ll see that the
code increments PageCounter every time the page is loaded. First, though, the
code verifies that the counter hasn’t reached or exceeded ten requests. If it has,
the counter variable is removed from the application state:
Visual Basic File: Default.aspx.vb (excerpt)
' Reset counter when it reaches 10
If Application("PageCounter") >= 10 Then
Application.Remove("PageCounter")
End If
176](https://image.slidesharecdn.com/categories457/85/Categories-202-320.jpg)
![Using Application State
Figure 5.28. Using the Application object
C# File: Default.aspx.cs (excerpt)
// Reset counter when it reaches 10
if (Application["PageCounter"] != null &&
(int)Application["PageCounter"] >= 10)
{
Application.Remove("PageCounter");
}
Notice that the C# code has to do a little more work than the VB code. You may
remember from Chapter 3 that C# is more strict than VB when it comes to
variable types. As everything in application state is stored as an Object, C# re-
quires that we cast the value to an integer before we make use of it. This conver-
sion won’t work if PageCounter hasn’t been added to application state, so we
also need to check that it’s not equal to null.
Next, we try to increase the hit counter. First of all, we need verify that the
counter variable exists in the application state. If it doesn’t, we set it to 1, reflect-
ing that the page is being loaded. To verify that an element exists in VB, we use
Is Nothing:
Visual Basic File: Default.aspx.vb (excerpt)
' Initialize or increment page counter each time the page loads
If Application("PageCounter") Is Nothing Then
Application("PageCounter") = 1
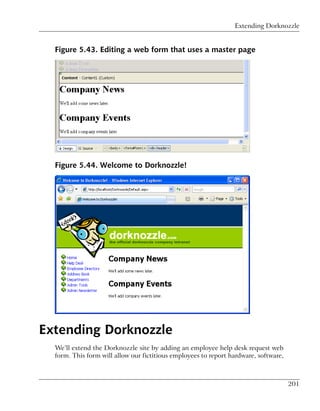
Else
Application("PageCounter") += 1
End If
As we’ve already seen, we compare the value to null in C#:
177](https://image.slidesharecdn.com/categories457/85/Categories-203-320.jpg)
![Chapter 5: Building Web Applications
C# File: Default.aspx.cs (excerpt)
// Initialize or increment page counter each time the page loads
if (Application["PageCounter"] == null)
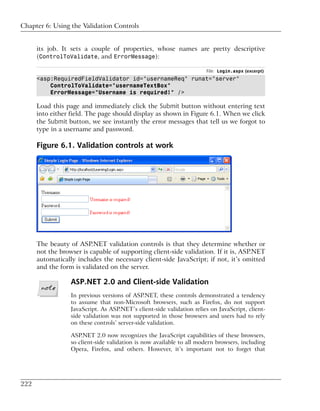
{
Application["PageCounter"] = 1;
}
else
{
Application["PageCounter"] =
(int)Application["PageCounter"] + 1;
}
The last piece of code simply displays the hit counter value in the label.
There’s one small problem with our code: if two people were to open the page
simultaneously, the value could increment only by one, rather than two. The
reason for this has to do with the code that increments the counter:
C# File: Default.aspx.cs (excerpt)
Application["PageCounter"] =
(int)Application["PageCounter"] + 1;
The expression to the right of the = operator is evaluated first; to do this, the
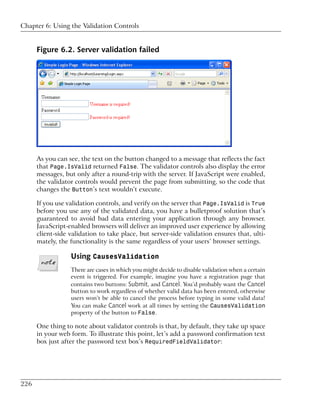
server must read the value of the PageCounter value stored in the application.
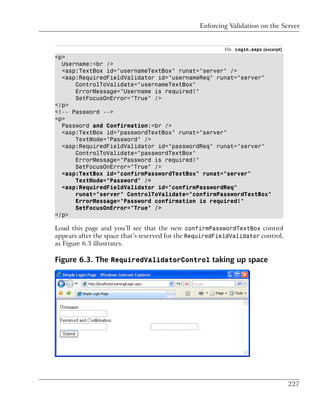
It adds one to this value, then stores the updated value in application state.
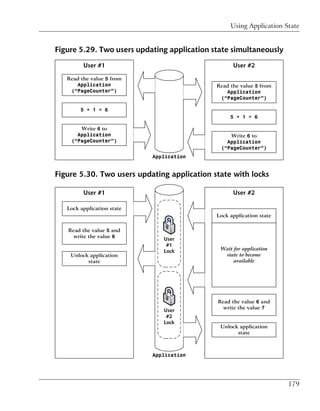
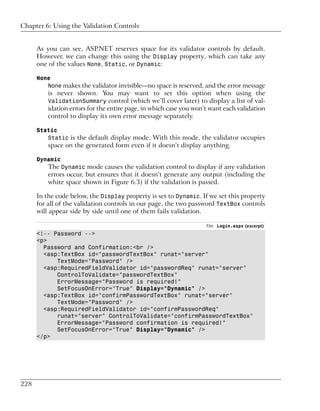
Now, let’s imagine that two users visit this page at the same time, and that the
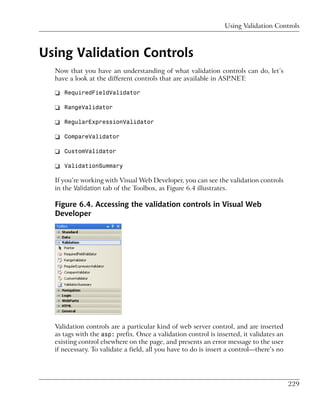
web server processes the first user’s request a fraction of a second before the
other request. The web form that’s loaded for the first user might read Page-
Counter from application state and obtain a value of 5, to which it would add 1
to obtain 6. However, before the web form had a chance to store this new value
into application state, another copy of the web form, running for the second user,
might read PageCounter and also obtain the value 6. Both copies of the page will
have read the same value, and both will store an updated value of 6! This tricky
situation is illustrated in Figure 5.29.
To avoid this kind of confusion, we should develop the application so that each
user locks application state, updates the value, and then unlocks application state
so that other users can do the same thing. This process is depicted in Figure 5.30.
178](https://image.slidesharecdn.com/categories457/85/Categories-204-320.jpg)
![Chapter 5: Building Web Applications
Let’s modify our code slightly to create these locks:
Visual Basic File: Default.aspx.vb (excerpt)
' Initialize or increment page counter
If Application("PageCounter") Is Nothing Then
Application("PageCounter") = 1
Else
' Lock the Application object
Application.Lock()
' Increment counter
Application("PageCounter") += 1
' Unlock the Application object
Application.UnLock()
End If
C# File: Default.aspx.cs (excerpt)
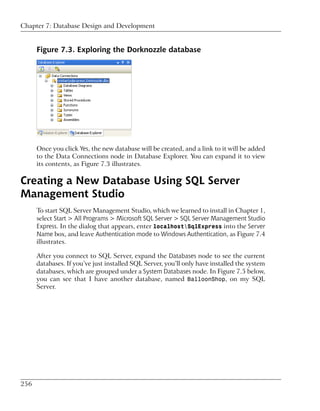
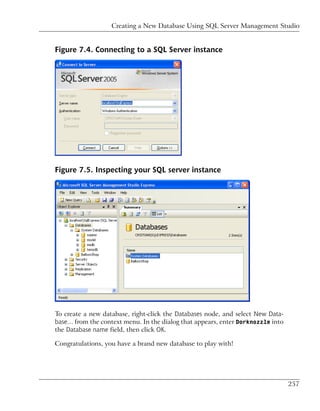
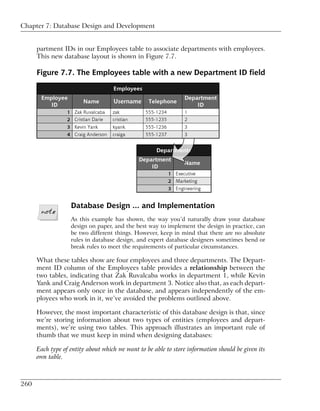
// Initialize or increment page counter each time the page loads
if (Application["PageCounter"] == null)
{
Application["PageCounter"] = 1;
}
else
{
// Lock the Application object
Application.Lock();
// Increment counter
Application["PageCounter"] =
(int)Application["PageCounter"] + 1;
// Unlock the Application object
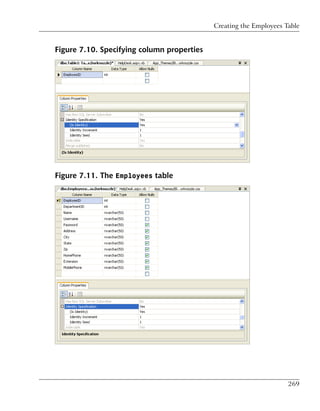
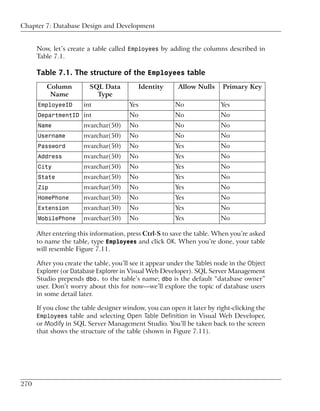
Application.UnLock();
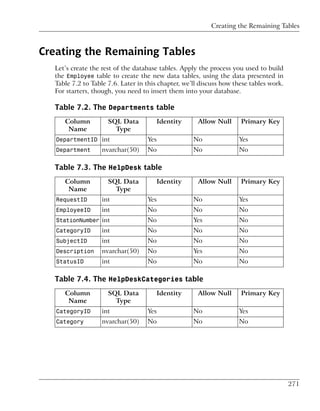
}
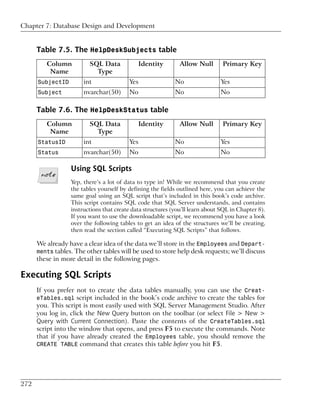
In this case, the Lock method guarantees that only one user can work with the
application variable at any time. Next, we call the UnLock method to unlock the
application variable for the next request. Our use of Lock and UnLock in this
scenario guarantees that the application variable is incremented by one for each
visit that’s made to the page.
Working with User Sessions
Like application state, session state is an important way to store temporary in-
formation across multiple page requests. However, unlike application state, which
is accessible to all users, each object stored in session state is associated with a
particular user’s visit to your site. Stored on the server, session state allocates
180](https://image.slidesharecdn.com/categories457/85/Categories-206-320.jpg)
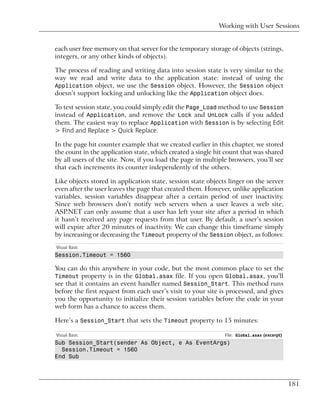
![Chapter 5: Building Web Applications
C# File: Global.asax (excerpt)
void Session_Start(Object sender, EventArgs e)
{
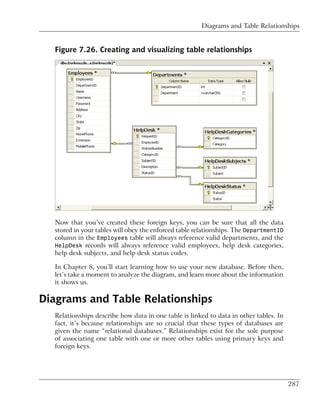
Session.Timeout = 1560;
}
Using the Cache Object
In traditional ASP, developers used application state to cache data. Although
there’s nothing to prevent you from doing the same thing here, ASP.NET provides
a new object, Cache, specifically for that purpose. Cache is also a collection, and
we access its contents similarly to the way we accessed the contents of
Application. Another similarity is that both have application-wide visibility,
being shared between all users who access a web application.
Let’s assume that there’s a list of employees that you’d normally read from the
database. To spare the database server’s resources, after you read the table from
the database the first time, you might save it into the cache using a command
like this:
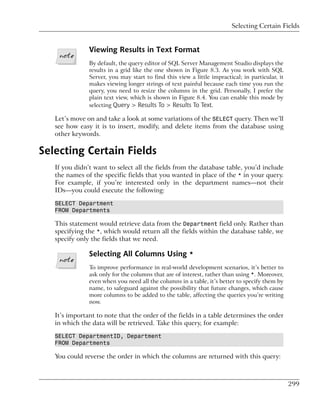
Visual Basic
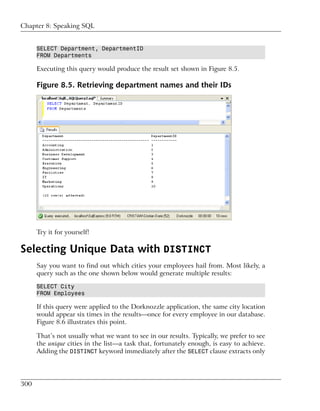
Cache("Employees") = employeesTable
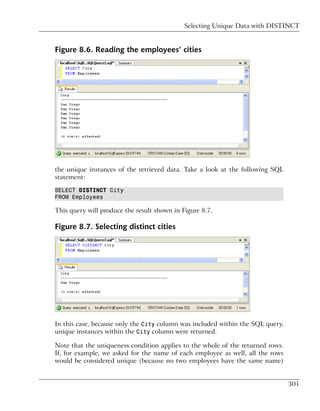
C#
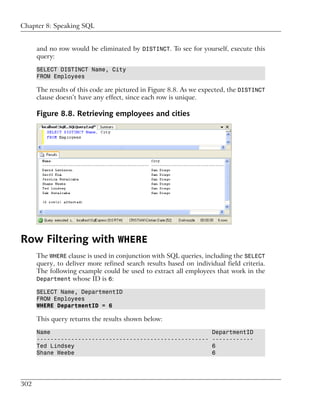
Cache["Employees"] = employeesTable;
By default, objects stay in the cache until we remove them, or server resources
become low, at which point objects begin to be removed from the cache in the
order in which they were added. The Cache object also lets us control expira-
tion—if, for example, we want to add an object to the cache for a period of ten
minutes, we can use the Insert method. Here’s an example:
Visual Basic
Cache.Insert("Employees", employeesTable, Nothing,
DateTime.MaxValue, TimeSpan.FromMinutes(10))
C#
Cache.Insert("Employees", employeesTable, null,
DateTime.MaxValue, TimeSpan.FromMinutes(10));
The third parameter, which in this case is Nothing or null, can be used to add
cache dependencies. We could use such dependencies to invalidate cached items
182](https://image.slidesharecdn.com/categories457/85/Categories-208-320.jpg)
![Using Cookies
when some external indicator changes, but that kind of task is a little beyond the
scope of this discussion.
Later in the code, we could use the cached object as follows:
Visual Basic
employeesTable = Cache("Employees")
C#
employeesTable = Cache["Employees"];
Objects in the cache can expire, so it’s good practice to verify that the object
you’re expecting does actually exist, to avoid any surprises:
Visual Basic
employeesTable = Cache("Employees")
If employeesTable Is Nothing Then
' Read the employees table from another source
Cache("Employees") = employeesTable
End If
C#
employeesTable = Cache["Employees"];
if (employeesTable == null)
{
// Read the employees table from another source
Cache["Employees"] = employeesTable;
}
This sample code checks to see if the data you’re expecting exists in the cache.
If not, it means that this is the first time the code has been executed, or that the
item has been removed from the cache. Thus, we can populate employeesTable
from the database, remembering to store the retrieved data into the cache. The
trip to the database server is made only if the cache is empty or not present.
Using Cookies
If you want to store data related to a particular user, you could use the Session
object, but this approach has an important drawback: its contents are lost when
the user closes the browser window.
To store user data for longer periods of time, you need to use cookies. Cookies
are pieces of data that your ASP.NET application can save on the user’s browser,
to be read later by your application. Cookies aren’t lost when the browser is
183](https://image.slidesharecdn.com/categories457/85/Categories-209-320.jpg)
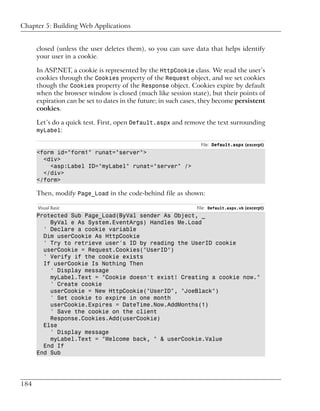
![Using Cookies
C# File: Default.aspx.cs (excerpt)
protected void Page_Load(object sender, EventArgs e)
{
// Declare a cookie variable
HttpCookie userCookie;
// Try to retrieve user's ID by reading the UserID cookie
userCookie = Request.Cookies["UserID"];
// Verify if the cookie exists
if (userCookie == null)
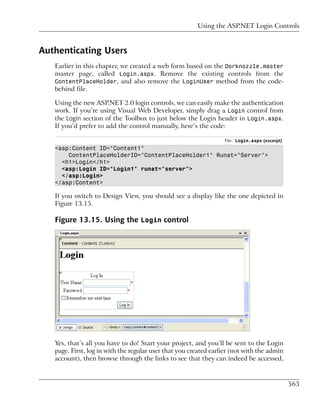
{
// Display message
myLabel.Text =
"Cookie doesn't exist! Creating a cookie now.";
// Create cookie
userCookie = new HttpCookie("UserID", "JoeBlack");
// Set cookie to expire in one month
userCookie.Expires = DateTime.Now.AddMonths(1);
// Save the cookie on the client
Response.Cookies.Add(userCookie);
}
else
{
// Display message
myLabel.Text = "Welcome back, " + userCookie.Value;
}
}
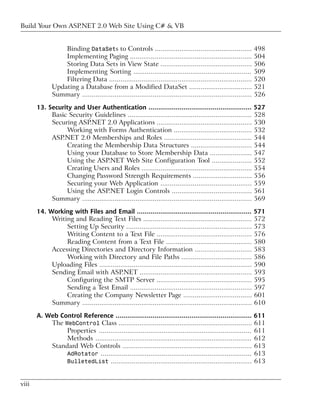
The first time you load the page, you’ll be notified that the cookie doesn’t exist,
and that a new cookie is being created, via a message like the one shown in Fig-
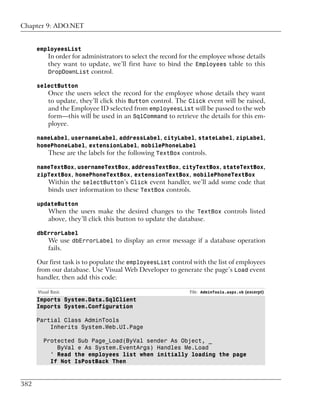
ure 5.31.
Figure 5.31. Creating a new cookie
185](https://image.slidesharecdn.com/categories457/85/Categories-211-320.jpg)

![Chapter 5: Building Web Applications
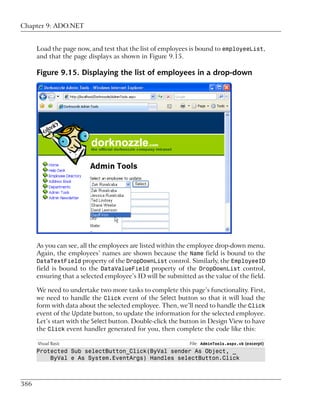
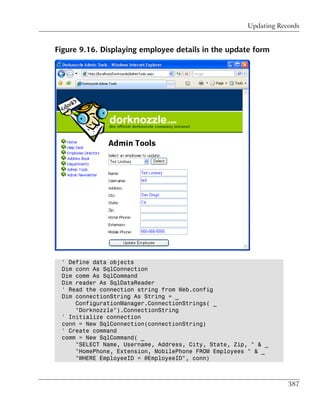
this effect could have been achieved just as easily through CSS, but in future,
when you’re working on projects that utilize more complex controls and properties,
skins might be your only choice. As such, it’s important that you know how to
use them.
Debugging and Error Handling
Your work with Dorknozzle for this chapter is over, but now that we’ve started
to create a real-world application, it’s time to consider the real-world problems
that might occur as we’re developing that application. A constant truth in the
life of any programmer is that programming mistakes do happen, and they happen
no matter how experienced the programmer is. For this reason, it’s beneficial to
know what you can do when you encounter an error, and to learn how ASP.NET
and Visual Web Developer can help you analyze and debug your code.
Debugging with Visual Web Developer
Take a look at this code:
Visual Basic File: ErrorTest.aspx.vb (excerpt)
Protected Sub Page_Load(ByVal sender As Object, _
ByVal e As System.EventArgs) Handles Me.Load
Dim a(10) As Integer
Dim i As Integer
For i = 1 To 11
a(i) = i
Next
End Sub
C# File: ErrorTest.aspx.cs (excerpt)
protected void Page_Load(object sender, EventArgs e)
{
int[] a = new int[10];
int i;
for (i = 0; i < 11; i++)
{
a[i] = i;
}
}
204](https://image.slidesharecdn.com/categories457/85/Categories-230-320.jpg)
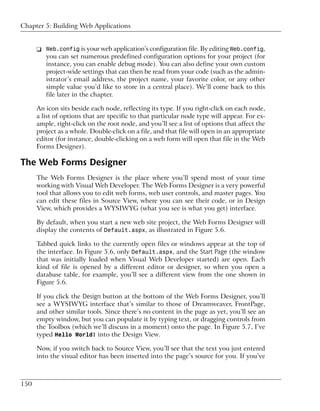
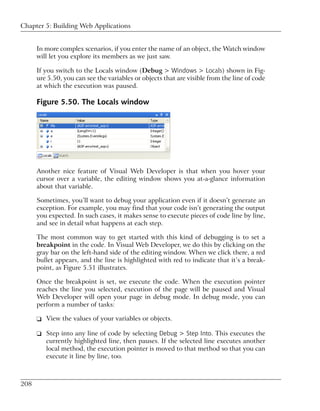
![Debugging with Visual Web Developer
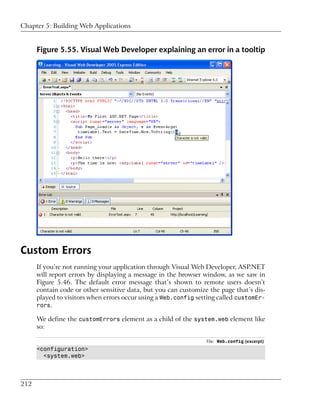
Watch window; in response, it will display their values and types. Try typing
a(5) (or a[5] if you’re using C#) in the Watch window; you should see a display
like the one in Figure 5.48.
Figure 5.48. Inspecting values using the Watch window
You could even type just a, then explore its members via the display shown in
Figure 5.49.
Figure 5.49. The Watch window showing the contents of an array
Arrays and VB
This example reveals an interesting aspect of this array. The Watch window
reports that the array’s length is 11, yet we defined it as a(10). In all .NET
languages, arrays are zero-based, which means that the first element of an
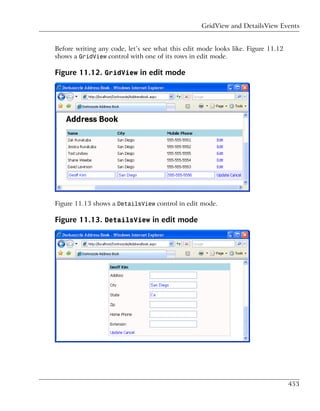
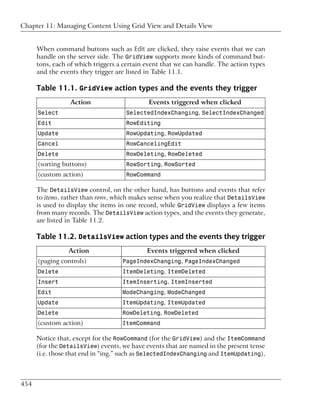
array is a(0), the second is a(1), and so on. So an array called a that had
ten elements would have as its first element a(0), and a(9) as its last.
However, VB offers extra assistance for developers who are experienced with
pre-.NET versions of the language (which had one-based arrays in which the
first element would have been a(1), and the last would have been a(10)):
it adds an element for you. In other words, if you declare an array of ten
elements in VB, you’ll get an array of 11 elements.
C# has always had zero-based arrays, so an array defined as a[10] will have
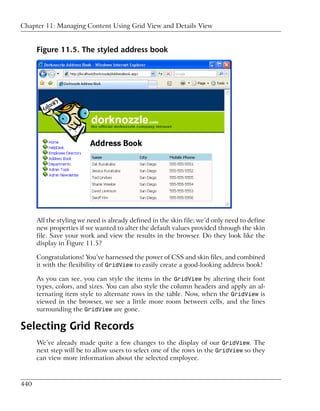
ten elements.
207](https://image.slidesharecdn.com/categories457/85/Categories-233-320.jpg)
![Chapter 5: Building Web Applications
}
catch (Exception ex)
{
// Code that is executed when an exception is generated
throw ex;
}
We could modify our array example to include Try and Catch blocks like this:
Visual Basic File: ErrorTest.aspx.vb (excerpt)
Protected Sub Page_Load(ByVal sender As Object, _
ByVal e As System.EventArgs) Handles Me.Load
Dim a(10) As Integer
Dim i As Integer
Try
For i = 1 To 11
a(i) = i
Next
Catch ex As Exception
messageLabel.Text = "Exception!<br />" & ex.Message
End Try
End Sub
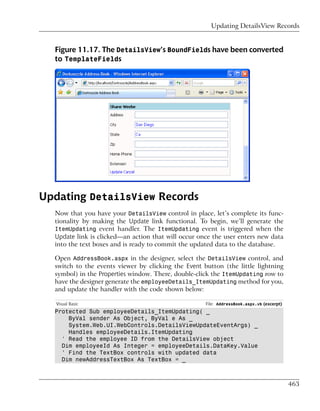
C# File: ErrorTest.aspx.cs (excerpt)
protected void Page_Load(object sender, EventArgs e)
{
int[] a = new int[10];
int i;
try
{
for (i = 0; i < 11; i++)
{
a[i] = i;
}
}
catch(Exception ex)
{
messageLabel.Text = "Exception!<br />" + ex.Message;
}
}
Provided you have a Label control named messageLabel in your web form, you’ll
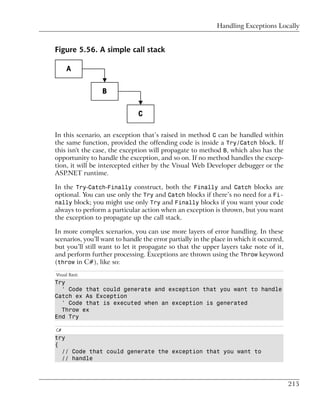
see the message shown in Figure 5.57 when you run this code.
216](https://image.slidesharecdn.com/categories457/85/Categories-242-320.jpg)


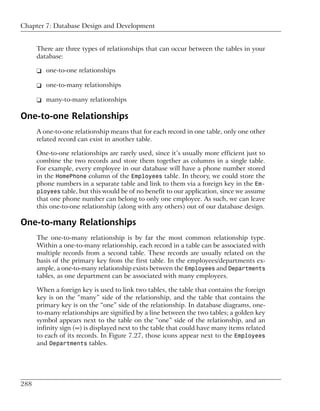


![Reading the Data
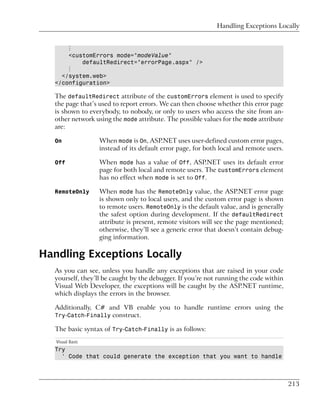
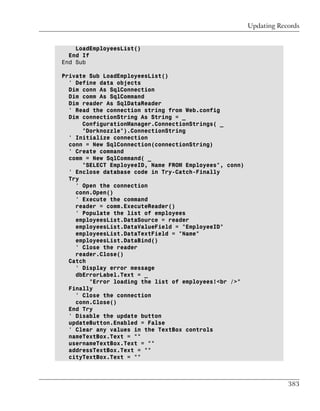
Now, let’s use the SqlDataReader’s Read method to loop through the data items
held in the reader; we’ll display them by adding their text to the employeesLabel
object as we go.
Visual Basic File: AccessingData.aspx (excerpt)
' Open connection
conn.Open()
' Execute the command
Dim reader As SqlDataReader = comm.ExecuteReader()
' Read and display the data
While reader.Read()
employeesLabel.Text &= reader.Item("Name") & "<br />"
End While
' Close the reader and the connection
reader.Close()
conn.Close()
C# File: AccessingData.aspx (excerpt)
// Open connection
conn.Open();
// Execute the command
SqlDataReader reader = comm.ExecuteReader();
// Read and display the data
while(reader.Read())
{
employeesLabel.Text += reader["Name"] + "<br />";
}
// Close the reader and the connection
reader.Close();
conn.Close();
Figure 9.4. Displaying the list of employees
343](https://image.slidesharecdn.com/categories457/85/Categories-369-320.jpg)
![Chapter 9: ADO.NET
The database would run this query without complaint, and your program would
execute as expected. However, if—as is perhaps more likely—the user entered an
employee’s name, your application would attempt to run the following query:
SELECT EmployeeID, Name, Username, Password
FROM Employees
WHERE EmployeeID = Zac Ruvalcaba
This query would cause an error in the database, which would, in turn, cause an
exception in your web form. As a safeguard against this eventuality, ADO.NET
allows you to define parameters in your query, and to give each of those para-
meters a type. Inserting parameters into your query is a pretty simple task:
comm = New SqlCommand( _
"SELECT EmployeeID, Name, Username, Password " & _
"FROM Employees WHERE EmployeeID = @EmployeeID", conn)
We’ve added a placeholder for our parameter to the query above. To do so, we
add the @ symbol, followed by an identifier for our parameter (in this case, we’ve
used EmployeeID). Next, we need to add this parameter to the SqlCommand object,
and give it a value:
Visual Basic
comm.Parameters.Add("@EmployeeID", System.Data.SqlDbType.Int)
comm.Parameters("@EmployeeID").Value = idTextBox.Text
C#
comm.Parameters.Add("@EmployeeID", System.Data.SqlDbType.Int);
comm.Parameters["@EmployeeID"].Value = idTextBox.Text
Here, we call the Add method of conn.Parameters, passing in the name of the
parameter (EmployeeID) and the parameter’s type; we’ve told ADO.NET that
we’re expecting an int to be passed to the database, but we could specify any of
the SQL Server data types here.
One of the most common SQL Server data types is nvarchar. If your query in-
volved an nvarchar parameter named @Username, for example, you could set its
value with the following code:
Visual Basic
comm.Parameters.Add("@Username", Data.SqlDbType.NVarChar, 50)
comm.Parameters("@Username").Value = username
346](https://image.slidesharecdn.com/categories457/85/Categories-372-320.jpg)
![Using Parameters with Queries
C#
comm.Parameters.Add("@Username", SqlDbType.NVarChar, 50);
comm.Parameters["@Username"].Value = username;
Notice that we’ve included an additional parameter in our call to the Add method.
This optional parameter tells the SqlCommand object the maximum allowable size
of the nvarchar field in the database. We’ve given the Username field in our Em-
ployees table a maximum size of 50 characters, so our code should reflect this.
For a list of all the types you can use when calling conn.Parameters.Add, see
the entry on System.Data.SqlDbType Enumeration in the .NET Framework’s
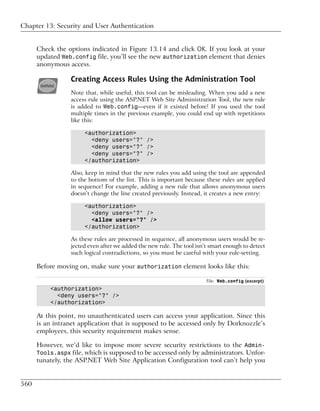
SDK Documentation.
Let’s put parameters into action in QueryParameters.aspx. First, create a Click
event handler for the Button control by double-clicking it in Design View. Next,
fill the event handler with the code shown below:
Visual Basic File: QueryParameters.aspx (excerpt)
Protected Sub submitButton_Click(ByVal sender As Object, _
ByVal e As System.EventArgs)
' Define data objects
Dim conn As SqlConnection
Dim comm As SqlCommand
Dim reader As SqlDataReader
' Initialize connection
conn = New SqlConnection("Server=localhostSqlExpress;" & _
"Database=Dorknozzle;Integrated Security=True")
' Create command
comm = New SqlCommand( _
"SELECT EmployeeID, Name, Username, Password " & _
"FROM Employees WHERE EmployeeID=@EmployeeID", conn)
' Verify if the ID entered by the visitor is numeric
Dim employeeID As Integer
If (Not Integer.TryParse(idTextBox.Text, employeeID)) Then
' If the user didn't enter numeric ID...
userLabel.Text = "Please enter a numeric ID!"
Else
' Add parameter
comm.Parameters.Add("@EmployeeID", System.Data.SqlDbType.Int)
comm.Parameters("@EmployeeID").Value = employeeID
' Open the connection
conn.Open()
' Execute the command
reader = comm.ExecuteReader()
' Display the requested data
347](https://image.slidesharecdn.com/categories457/85/Categories-373-320.jpg)
![Chapter 9: ADO.NET
If reader.Read() Then
userLabel.Text = "Employee ID: " & _
reader.Item("EmployeeID") & "<br />" & _
"Name: " & reader.Item("Name") & "<br />" & _
"Username: " & reader.Item("Username") & "<br />" & _
"Password: " & reader.Item("Password")
Else
userLabel.Text = _
"There is no user with this ID: " & employeeID
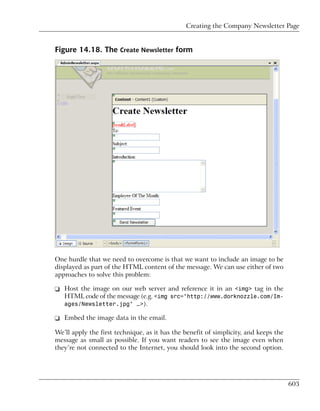
End If
' Close the reader and the connection
reader.Close()
conn.Close()
End If
End Sub
C# File: QueryParameters.aspx (excerpt)
protected void submitButton_Click(object sender, EventArgs e)
{
// Declare objects
SqlConnection conn;
SqlCommand comm;
SqlDataReader reader;
// Initialize connection
conn = new SqlConnection("Server=localhostSqlExpress;" +
"Database=Dorknozzle;Integrated Security=True");
// Create command
comm = new SqlCommand(
"SELECT EmployeeID, Name, Username, Password " +
"FROM Employees WHERE EmployeeID=@EmployeeID", conn);
// Verify if the ID entered by the visitor is numeric
int employeeID;
if (!int.TryParse(idTextBox.Text, out employeeID))
{
// If the user didn't enter numeric ID...
userLabel.Text = "Please enter a numeric ID!";
}
else
{
// Add parameter
comm.Parameters.Add("@EmployeeID", System.Data.SqlDbType.Int);
comm.Parameters["@EmployeeID"].Value = employeeID;
// Open the connection
conn.Open();
// Execute the command
reader = comm.ExecuteReader();
348](https://image.slidesharecdn.com/categories457/85/Categories-374-320.jpg)
![Using Parameters with Queries
// Display the requested data
if (reader.Read())
{
userLabel.Text = "Employee ID: " +
reader["EmployeeID"] + "<br />" +
"Name: " + reader["Name"] + "<br />" +
"Username: " + reader["Username"] + "<br />" +
"Password: " + reader["Password"];
}
else
{
userLabel.Text =
"There is no user with this ID: " + employeeID;
}
// Close the reader and the connection
reader.Close();
conn.Close();
}
}
Now, when the user clicks the button, the Click event is raised, and the event
handler is executed. In that method, we grab the Employee ID from the Text
property of the TextBox control, and check that it’s a valid integer. This check
can be done with the Integer.TryParse method in VB, or the int.TryParse
method in C#:
Visual Basic File: QueryParameters.aspx (excerpt)
' Verify if the ID entered by the visitor is numeric
Dim employeeID As Integer
If (Not Integer.TryParse(idTextBox.Text, employeeID)) Then
⋮
C# File: QueryParameters.aspx (excerpt)
// Verify if the ID entered by the visitor is numeric
int employeeID;
if (!int.TryParse(idTextBox.Text, out employeeID))
{
⋮
This method verifies whether or not the string we pass as the first parameter can
be cast to an integer, and if yes, the integer is returned through the second para-
meter. Note that in C#, this is an out parameter. Out parameters are parameters
that are used to retrieve data from a function, rather than send data to that
function. Out parameters are similar to return values, except that more than one
349](https://image.slidesharecdn.com/categories457/85/Categories-375-320.jpg)
![Chapter 9: ADO.NET
of them can exist for any method. The return value of TryParse is a Boolean
value that specifies whether or not the value could be properly converted.
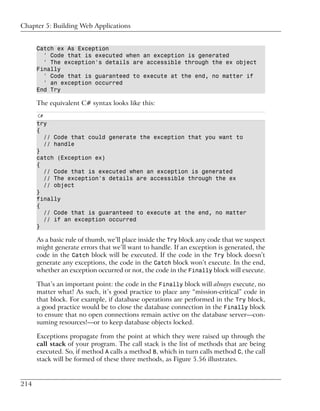
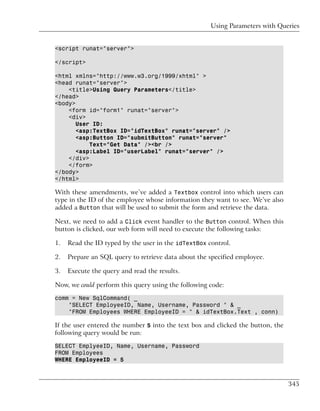
If the ID that’s entered isn’t a valid number, we notify the user, as Figure 9.6 il-
lustrates.
Figure 9.6. Invalid input data generating a warning
We also notify the user if the query doesn’t return any results. This feature is
simple to implement, because reader.Read only returns True if the query returns
a record.
Visual Basic File: QueryParameters.aspx (excerpt)
' Display the requested data
If reader.Read() Then
userLabel.Text = "Employee ID: " & reader.Item("EmployeeID") & _
⋮
C# File: QueryParameters.aspx (excerpt)
// Display the requested data
if (reader.Read())
{
userLabel.Text = "Employee ID: " + reader["EmployeeID"] +
⋮
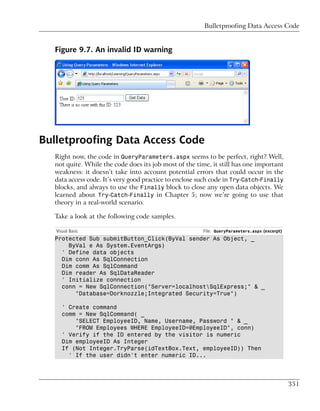
Figure 9.7 shows the message you’ll see if you enter an ID that doesn’t exist in
the database.
There are still a couple of details that we could improve in this system. For ex-
ample, if an error occurs in the code, the connection will never be closed. Let’s
look at this problem next.
350](https://image.slidesharecdn.com/categories457/85/Categories-376-320.jpg)
![Bulletproofing Data Access Code
"FROM Employees WHERE EmployeeID=@EmployeeID", conn);
// Verify if the ID entered by the visitor is numeric
int employeeID;
if (!int.TryParse(idTextBox.Text, out employeeID))
{
// If the user didn't enter numeric ID...
userLabel.Text = "Please enter a numeric ID!";
}
else
{
// Add parameter
comm.Parameters.Add("@EmployeeID", System.Data.SqlDbType.Int);
comm.Parameters["@EmployeeID"].Value = employeeID;
// Enclose database code in Try-Catch-Finally
try
{
// Open the connection
conn.Open();
// Execute the command
reader = comm.ExecuteReader();
// Display the requested data
if (reader.Read())
{
userLabel.Text = "Employee ID: " +
reader["EmployeeID"] + "<br />" +
"Name: " + reader["Name"] + "<br />" +
"Username: " + reader["Username"] + "<br />" +
"Password: " + reader["Password"];
}
else
{
userLabel.Text =
"There is no user with this ID: " + employeeID;
}
// Close the reader and the connection
reader.Close();
}
catch
{
// Display error message
userLabel.Text = "Error retrieving user data.";
}
finally
{
// Close the connection
conn.Close();
353](https://image.slidesharecdn.com/categories457/85/Categories-379-320.jpg)
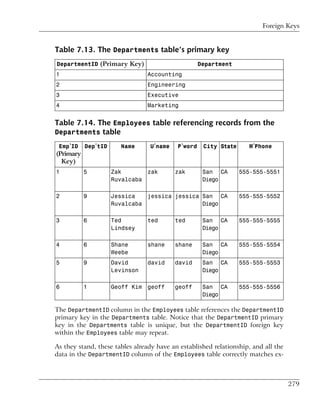
![Creating the Dorknozzle Employee Directory
public partial class EmployeeDirectory : System.Web.UI.Page
{
protected void Page_Load(object sender, EventArgs e)
{
// Define data objects
SqlConnection conn;
SqlCommand comm;
SqlDataReader reader;
// Read the connection string from Web.config
string connectionString =
ConfigurationManager.ConnectionStrings[
"Dorknozzle"].ConnectionString;
// Initialize connection
conn = new SqlConnection(connectionString);
// Create command
comm = new SqlCommand(
"SELECT EmployeeID, Name, Username FROM Employees",
conn);
// Enclose database code in Try-Catch-Finally
try
{
// Open the connection
conn.Open();
// Execute the command
reader = comm.ExecuteReader();
// Bind the reader to the repeater
employeesRepeater.DataSource = reader;
employeesRepeater.DataBind();
// Close the reader
reader.Close();
}
finally
{
// Close the connection
conn.Close();
}
}
}
Most of the code should look familiar, except for the following bit, which reads
the connection string:
Visual Basic File: EmployeeDirectory.aspx.vb (excerpt)
' Read the connection string from Web.config
Dim connectionString As String =
363](https://image.slidesharecdn.com/categories457/85/Categories-389-320.jpg)
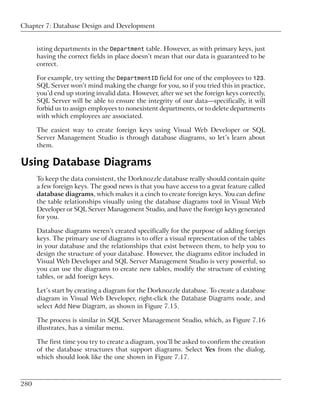
![Chapter 9: ADO.NET
ConfigurationManager.ConnectionStrings(
"Dorknozzle").ConnectionString
C# File: EmployeeDirectory.aspx.cs (excerpt)
// Read the connection string from Web.config
string connectionString = ConfigurationManager.ConnectionStrings[
"Dorknozzle"].ConnectionString;
Back in Chapter 5, you learned that you can store various configuration options
in Web.config. Anticipating that many applications will use Web.config to store
their connection strings, the designers of .NET reserved a special place in
Web.config for database connection strings. If you open Web.config now, you’ll
see an empty connectionStrings element located inside the configuration
element. Modify Web.config like this:
File: Web.config (excerpt)
<configuration>
⋮
<connectionStrings>
<add name="Dorknozzle"
connectionString="Server=localhostSqlExpress;
Database=Dorknozzle;Integrated Security=True"
providerName="System.Data.SqlClient"/>
</connectionStrings>
⋮
</configuration>
You can add more connection strings under the connectionStrings element by
inserting add elements with three attributes: connectionString contains the
actual connection string, name gives the connection string an identifier that we
can reference within our code, and providerName indicates the type of data
provider we want to use for the connection. In our case, providerName="Sys-
tem.Data.SqlClient" specifies that we’re connecting to an SQL Server database.
To retrieve configuration data from Web.config we use the
ConfigurationManager class, which is located in the System.Configuration
namespace.
Also, you may have noticed that we don’t have a Catch block in our database
handling code. When a Catch block is not present, any exceptions that are raised
are not caught, although the code in the Finally block is still executed. In other
words, we’re choosing not to handle potential errors in EmployeeDirectory.aspx,
but we still want to ensure that the database connection is properly closed if an
error arises.
364](https://image.slidesharecdn.com/categories457/85/Categories-390-320.jpg)
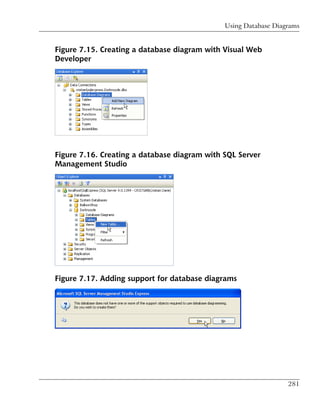
![Chapter 9: ADO.NET
if (!IsPostBack)
{
// Declare objects
SqlConnection conn;
SqlCommand categoryComm;
SqlCommand subjectComm;
SqlDataReader reader;
// Read the connection string from Web.config
string connectionString =
ConfigurationManager.ConnectionStrings[
"Dorknozzle"].ConnectionString;
// Initialize connection
conn = new SqlConnection(connectionString);
// Create command to read the help desk categories
categoryComm = new SqlCommand(
"SELECT CategoryID, Category FROM HelpDeskCategories",
conn);
// Create command to read the help desk subjects
subjectComm = new SqlCommand(
"SELECT SubjectID, Subject FROM HelpDeskSubjects", conn);
try
{
// Open the connection
conn.Open();
// Execute the category command
reader = categoryComm.ExecuteReader();
// Populate the list of categories
categoryList.DataSource = reader;
categoryList.DataValueField = "CategoryID";
categoryList.DataTextField = "Category";
categoryList.DataBind();
// Close the reader
reader.Close();
// Execute the subject command
reader = subjectComm.ExecuteReader();
// Populate the list of categories
subjectList.DataSource = reader;
subjectList.DataValueField = "SubjectID";
subjectList.DataTextField = "Subject";
subjectList.DataBind();
// Close the reader
reader.Close();
}
finally
{
// Close the connection
368](https://image.slidesharecdn.com/categories457/85/Categories-394-320.jpg)
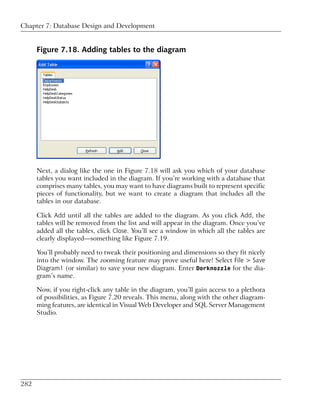
![Chapter 9: ADO.NET
Keep in mind that in C#, the syntax for accessing the parameters collection is
slightly different:
C#
comm.Parameters.Add("@Parameter1", System.Data.SqlDbType.Type1);
comm.Parameters["@Parameter1"].Value = value1;
comm.Parameters.Add("@Parameter2", System.Data.SqlDbType.Type2);
comm.Parameters["@Parameter2"].Value = value2;
To demonstrate the process of inserting records into the database, let’s finish the
help desk page.
When employees visit the help desk page, they’ll fill out the necessary information,
click Submit Request, and the information will be saved within the HelpDesk
table. The HelpDesk table acts as a queue for IT personnel to review and respond
to reported issues.
First, open HelpDesk.aspx, and add a label just below the page’s heading.
File: HelpDesk.aspx (excerpt)
<h1>Employee Help Desk Request</h1>
<asp:Label ID="dbErrorMessage" ForeColor="Red" runat="server" />
<p>
Station Number:<br />
<asp:TextBox id="stationTextBox" runat="server"
CssClass="textbox" />
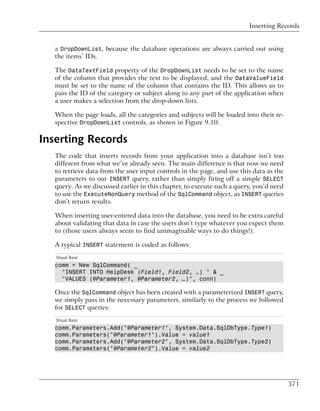
The form already contains numerous validation controls that display error mes-
sages if they find problems with the entered data. We’re adding this Label control
to display errors that arise when an exception is caught while the database query
is executing. This is necessary because, although the validation controls prevent
most of the errors that could occur, they can’t guarantee that the database query
will run flawlessly. For example, if the database server is rebooted, and we try to
run a database query, we’ll receive an error until the database is up and running
again. There could be other kinds of errors, too. An example of an error message
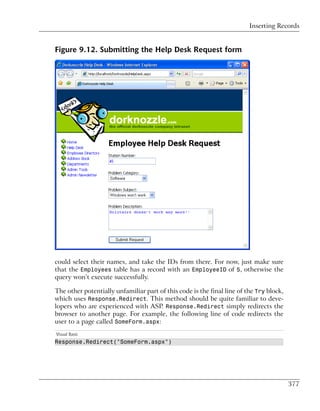
is shown in Figure 9.11.
You already have a Click event handler for the Submit Request button in Help-
Desk.aspx—we added it in Chapter 6, when we added validation controls to the
page. The event handler should look like this:
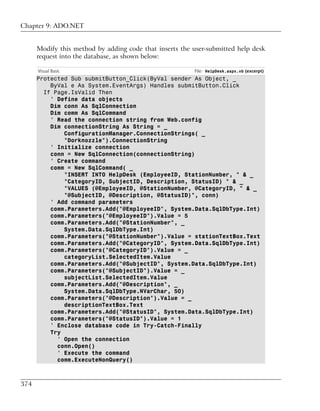
Visual Basic File: HelpDesk.aspx.vb (excerpt)
Protected Sub submitButton_Click(ByVal sender As Object, _
ByVal e As System.EventArgs) Handles submitButton.Click
372](https://image.slidesharecdn.com/categories457/85/Categories-398-320.jpg)
![Inserting Records
' Reload page if the query executed successfully
Response.Redirect("HelpDesk.aspx")
Catch
' Display error message
dbErrorMessage.Text = _
"Error submitting the help desk request! Please " & _
"try again later, and/or change the entered data!"
Finally
' Close the connection
conn.Close()
End Try
End If
End Sub
C# File: HelpDesk.aspx.cs (excerpt)
protected void submitButton_Click(object sender, EventArgs e)
{
if (Page.IsValid)
{
// Define data objects
SqlConnection conn;
SqlCommand comm;
// Read the connection string from Web.config
string connectionString =
ConfigurationManager.ConnectionStrings[
"Dorknozzle"].ConnectionString;
// Initialize connection
conn = new SqlConnection(connectionString);
// Create command
comm = new SqlCommand(
"INSERT INTO HelpDesk (EmployeeID, StationNumber, " +
"CategoryID, SubjectID, Description, StatusID) " +
"VALUES (@EmployeeID, @StationNumber, @CategoryID, " +
"@SubjectID, @Description, @StatusID)", conn);
// Add command parameters
comm.Parameters.Add("@EmployeeID", System.Data.SqlDbType.Int);
comm.Parameters["@EmployeeID"].Value = 5;
comm.Parameters.Add("@StationNumber",
System.Data.SqlDbType.Int);
comm.Parameters["@StationNumber"].Value = stationTextBox.Text;
comm.Parameters.Add("@CategoryID", System.Data.SqlDbType.Int);
comm.Parameters["@CategoryID"].Value =
categoryList.SelectedItem.Value;
comm.Parameters.Add("@SubjectID", System.Data.SqlDbType.Int);
comm.Parameters["@SubjectID"].Value =
subjectList.SelectedItem.Value;
375](https://image.slidesharecdn.com/categories457/85/Categories-401-320.jpg)
![Chapter 9: ADO.NET
comm.Parameters.Add("@Description",
System.Data.SqlDbType.NVarChar, 50);
comm.Parameters["@Description"].Value =
descriptionTextBox.Text;
comm.Parameters.Add("@StatusID", System.Data.SqlDbType.Int);
comm.Parameters["@StatusID"].Value = 1;
// Enclose database code in Try-Catch-Finally
try
{
// Open the connection
conn.Open();
// Execute the command
comm.ExecuteNonQuery();
// Reload page if the query executed successfully
Response.Redirect("HelpDesk.aspx");
}
catch
{
// Display error message
dbErrorMessage.Text =
"Error submitting the help desk request! Please " +
"try again later, and/or change the entered data!";
}
finally
{
// Close the connection
conn.Close();
}
}
}
Make Sure you’ve Set the Identity Property!
Note that when we’re inserting a new record into the HelpDesk table, we
rely on the ID column, RequestID, to be generated automatically for us by
the database. If we forget to set RequestID as an identity column, we’ll re-
ceive an exception every time we try to add a new help desk request!
Did you notice the use of the ExecuteNonQuery method? As you know, we use
this method when we’re executing any SQL query that doesn’t return a set of
results, such as INSERT, UPDATE, and DELETE queries.
You’ll remember that, in order to make the example simpler, we hard-coded the
EmployeeID (to the value of 5), and the Status (to the value of 1). To make the
application complete, you could add another drop-down list from which employees
376](https://image.slidesharecdn.com/categories457/85/Categories-402-320.jpg)
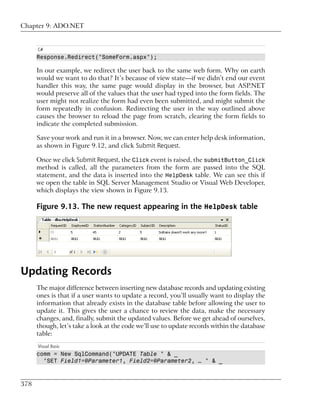
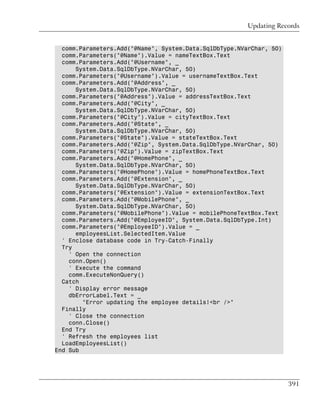
![Updating Records
"WHERE UniqueField=@UniqueFieldParameter", conn)
comm.Parameters.Add("@Parameter1", System.Data.SqlDbType.Type1)
comm.Parameters("@Parameter1").Value = value1
comm.Parameters.Add("@Parameter2", System.Data.SqlDbType.Type2)
comm.Parameters("@Parameter2").Value = value2
C#
comm = new SqlCommand ("UPDATE Table " +
"SET Field1=@Parameter1, Field2=@Parameter2, … " +
"WHERE UniqueField=@UniqueFieldParameter", conn);
comm.Parameters.Add("@Parameter1", System.Data.SqlDbType.Type1);
comm.Parameters["@Parameter1"].Value = value1;
comm.Parameters.Add("@Parameter2", System.Data.SqlDbType.Type2);
comm.Parameters["@Parameter2"].Value = value2;
Once the SqlCommand object has been created using this UPDATE statement, we
simply pass in the necessary parameters, as we did with the INSERT statement.
The important thing to remember when updating records is that you must take
care to perform the UPDATE on the correct record. To do this, you must include
a WHERE clause that specifies the correct record using a value from a suitable
unique column (usually the primary key), as shown above.
Handle Updates with Care!
When updating a table with some new data, if you don’t specify a WHERE
clause, every record in the table will be updated with the new data, and
(usually) there’s no way to undo the action!
Let’s put all this theory into practice as we build the Admin Tools page. The
database doesn’t contain a table that’s dedicated to this page; however, we’ll use
the Admin Tools page as a centralized location for a number of tables associated
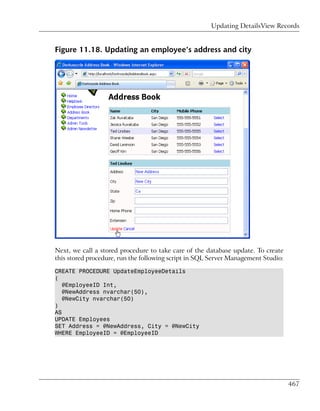
with other pages, including the Employees and Departments tables. For instance,
in this section, we’ll allow an administrator to change the details of a specific
employee.
Create a new web form named AdminTools.aspx in the same way you created
the other web forms we’ve built so far. Use the Dorknozzle.master master page
and a code-behind file. Then, add the following code to the content placeholder,
and modify the page title as shown below.
File: AdminTools.aspx (excerpt)
<%@ Page Language="VB" MasterPageFile="~/Dorknozzle.master"
AutoEventWireup="true" CodeFile="AdminTools.aspx.vb"
Inherits="AdminTools" title="Dorknozzle Admin Tools" %>
379](https://image.slidesharecdn.com/categories457/85/Categories-405-320.jpg)
![Chapter 9: ADO.NET
stateTextBox.Text = ""
zipTextBox.Text = ""
homePhoneTextBox.Text = ""
extensionTextBox.Text = ""
mobilePhoneTextBox.Text = ""
End Sub
End Class
C# File: AdminTools.aspx.cs (excerpt)
using System;
using System.Data;
using System.Configuration;
using System.Collections;
using System.Web;
using System.Web.Security;
using System.Web.UI;
using System.Web.UI.WebControls;
using System.Web.UI.WebControls.WebParts;
using System.Web.UI.HtmlControls;
using System.Data.SqlClient;
public partial class AdminTools : System.Web.UI.Page
{
protected void Page_Load(object sender, EventArgs e)
{
// Read the employees list when initially loading the page
if (!IsPostBack)
{
LoadEmployeesList();
}
}
private void LoadEmployeesList()
{
// Declare objects
SqlConnection conn;
SqlCommand comm;
SqlDataReader reader;
// Read the connection string from Web.config
string connectionString =
ConfigurationManager.ConnectionStrings[
"Dorknozzle"].ConnectionString;
// Initialize connection
conn = new SqlConnection(connectionString);
// Create command
comm = new SqlCommand(
384](https://image.slidesharecdn.com/categories457/85/Categories-410-320.jpg)
![Updating Records
ConfigurationManager.ConnectionStrings[
"Dorknozzle"].ConnectionString;
// Initialize connection
conn = new SqlConnection(connectionString);
// Create command
comm = new SqlCommand(
"SELECT Name, Username, Address, City, State, Zip, " +
"HomePhone, Extension, MobilePhone FROM Employees " +
"WHERE EmployeeID = @EmployeeID", conn);
// Add command parameters
comm.Parameters.Add("@EmployeeID", SqlDbType.Int);
comm.Parameters["@EmployeeID"].Value =
employeesList.SelectedItem.Value;
// Enclose database code in Try-Catch-Finally
try
{
// Open the connection
conn.Open();
// Execute the command
reader = comm.ExecuteReader();
// Display the data on the form
if (reader.Read())
{
nameTextBox.Text = reader["Name"].ToString();
usernameTextBox.Text = reader["Username"].ToString();
addressTextBox.Text = reader["Address"].ToString();
cityTextBox.Text = reader["City"].ToString();
stateTextBox.Text = reader["State"].ToString();
zipTextBox.Text = reader["Zip"].ToString();
homePhoneTextBox.Text = reader["HomePhone"].ToString();
extensionTextBox.Text = reader["Extension"].ToString();
mobilePhoneTextBox.Text = reader["MobilePhone"].ToString();
}
// Close the reader
reader.Close();
// Enable the Update button
updateButton.Enabled = true;
}
catch
{
// Display error message
dbErrorLabel.Text =
"Error loading the employee details!<br />";
}
finally
{
389](https://image.slidesharecdn.com/categories457/85/Categories-415-320.jpg)
![Chapter 9: ADO.NET
C# File: AdminTools.aspx.cs (excerpt)
protected void updateButton_Click(object sender, EventArgs e)
{
// Declare objects
SqlConnection conn;
SqlCommand comm;
// Read the connection string from Web.config
string connectionString =
ConfigurationManager.ConnectionStrings[
"Dorknozzle"].ConnectionString;
// Initialize connection
conn = new SqlConnection(connectionString);
// Create command
comm = new SqlCommand(
"UPDATE Employees SET Name=@Name, Username=@Username, " +
"Address=@Address, City=@City, State=@State, Zip=@Zip, " +
"HomePhone=@HomePhone, Extension=@Extension, " +
"MobilePhone=@MobilePhone " +
"WHERE EmployeeID=@EmployeeID", conn);
// Add command parameters
comm.Parameters.Add("@Name",
System.Data.SqlDbType.NVarChar,50);
comm.Parameters["@Name"].Value = nameTextBox.Text;
comm.Parameters.Add("@Username",
System.Data.SqlDbType.NVarChar, 50);
comm.Parameters["@Username"].Value = usernameTextBox.Text;
comm.Parameters.Add("@Address",
System.Data.SqlDbType.NVarChar, 50);
comm.Parameters["@Address"].Value = addressTextBox.Text;
comm.Parameters.Add("@City",
System.Data.SqlDbType.NVarChar, 50);
comm.Parameters["@City"].Value = cityTextBox.Text;
comm.Parameters.Add("@State",
System.Data.SqlDbType.NVarChar, 50);
comm.Parameters["@State"].Value = stateTextBox.Text;
comm.Parameters.Add("@Zip",
System.Data.SqlDbType.NVarChar, 50);
comm.Parameters["@Zip"].Value = zipTextBox.Text;
comm.Parameters.Add("@HomePhone",
System.Data.SqlDbType.NVarChar, 50);
comm.Parameters["@HomePhone"].Value = homePhoneTextBox.Text;
comm.Parameters.Add("@Extension",
System.Data.SqlDbType.NVarChar, 50);
comm.Parameters["@Extension"].Value = extensionTextBox.Text;
comm.Parameters.Add("@MobilePhone",
System.Data.SqlDbType.NVarChar, 50);
392](https://image.slidesharecdn.com/categories457/85/Categories-418-320.jpg)
![Updating Records
comm.Parameters["@MobilePhone"].Value = mobilePhoneTextBox.Text;
comm.Parameters.Add("@EmployeeID", System.Data.SqlDbType.Int);
comm.Parameters["@EmployeeID"].Value =
employeesList.SelectedItem.Value;
// Enclose database code in Try-Catch-Finally
try
{
// Open the connection
conn.Open();
// Execute the command
comm.ExecuteNonQuery();
}
catch
{
// Display error message
dbErrorLabel.Text =
"Error updating the employee details!<br />";
}
finally
{
// Close the connection
conn.Close();
}
// Refresh the employees list
LoadEmployeesList();
}
As you can see, the only real differences between this and the help desk page are
that we’re using an UPDATE query instead of an INSERT query, and we’ve had to
let the user choose an entry from the database to update. We use that selection
not only to populate the form fields with the existing database values, but to re-
strict our UPDATE query so that it only affects that one record.
You’ll also notice that at the very end of this method, we call LoadEmployeesList
to reload the list of employees, as the user may have changed the name of one
of the employees. LoadEmployeesList also disables the Update Employee button
and clears the contents of the page’s TextBox controls. Once LoadEmployeesList
has executed, the page is ready for the user to select another employee for updat-
ing.
As with all examples in this book, you can get this page’s completed code from
the code archive.
393](https://image.slidesharecdn.com/categories457/85/Categories-419-320.jpg)
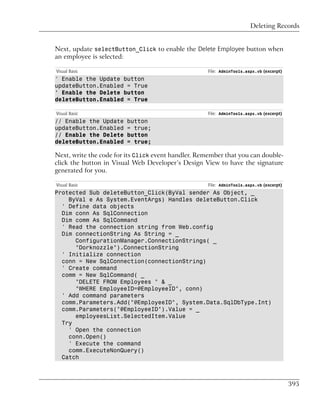
![Chapter 9: ADO.NET
Deleting Records
Just as we can insert and update records within the database, we can also delete
them. Again, most of the code for deleting records resembles that which we’ve
already seen. The only major part that changes is the SQL statement within the
command:
Visual Basic
comm = New SqlCommand("DELETE FROM Table " & _
"WHERE UniqueField=@UniqueFieldParameter", conn)
C#
comm = new SqlCommand("DELETE FROM Table " +
"WHERE UniqueField=@UniqueFieldParameter", conn)
Once we’ve created the DELETE query’s SqlCommand object, we can simply pass
in the necessary parameter:
Visual Basic
comm.Parameters.Add("@UniqueFieldParameter", _
System.Data.SqlDbType.Type)
comm.Parameters("@UniqueFieldParameter").Value = UniqueValue
C#
comm.Parameters.Add("@UniqueFieldParameter",
System.Data.SqlDbType.Type);
comm.Parameters["@UniqueFieldParameter"].Value = UniqueValue;
To demonstrate the process of deleting an item from a database table, we’ll expand
on the Admin Tools page. Since we’re allowing administrators to update inform-
ation within the Employees table, let’s also give them the ability to delete an
employee’s record from the database. To do this, we’ll place a new Button control
for deleting the selected record next to our Update Employee button.
Start by adding the new control at the end of AdminTools.aspx:
File: AdminTools.aspx (excerpt)
<p>
<asp:Button ID="updateButton" Text="Update Employee"
Enabled="False" runat="server" />
<asp:Button ID="deleteButton" Text="Delete Employee"
Enabled="False" runat="server" />
</p>
394](https://image.slidesharecdn.com/categories457/85/Categories-420-320.jpg)
![Chapter 9: ADO.NET
' Display error message
dbErrorLabel.Text = "Error deleting employee!<br />"
Finally
' Close the connection
conn.Close()
End Try
' Refresh the employees list
LoadEmployeesList()
End Sub
C# File: AdminTools.aspx.cs (excerpt)
protected void deleteButton_Click(object sender, EventArgs e)
{
// Define data objects
SqlConnection conn;
SqlCommand comm;
// Read the connection string from Web.config
string connectionString =
ConfigurationManager.ConnectionStrings[
"Dorknozzle"].ConnectionString;
// Initialize connection
conn = new SqlConnection(connectionString);
// Create command
comm = new SqlCommand("DELETE FROM Employees " +
"WHERE EmployeeID = @EmployeeID", conn);
// Add command parameters
comm.Parameters.Add("@EmployeeID", System.Data.SqlDbType.Int);
comm.Parameters["@EmployeeID"].Value =
employeesList.SelectedItem.Value;
try
{
// Open the connection
conn.Open();
// Execute the command
comm.ExecuteNonQuery();
}
catch
{
// Display error message
dbErrorLabel.Text = "Error deleting employee!<br />";
}
finally
{
// Close the connection
conn.Close();
}
396](https://image.slidesharecdn.com/categories457/85/Categories-422-320.jpg)
![Chapter 9: ADO.NET
Dim connectionString As String = _
ConfigurationManager.ConnectionStrings( _
"Dorknozzle").ConnectionString
' Initialize connection
conn = New SqlConnection(connectionString)
' Create command
comm = New SqlCommand("InsertHelpDesk", conn)
' Specify we're calling a stored procedure
comm.CommandType = System.Data.CommandType.StoredProcedure
' Add command parameters
comm.Parameters.Add("@EmployeeID", System.Data.SqlDbType.Int)
comm.Parameters("@EmployeeID").Value = 5
comm.Parameters.Add("@StationNumber", System.Data.SqlDbType.Int)
comm.Parameters("@StationNumber").Value = stationTextBox.Text
comm.Parameters.Add("@CategoryID", System.Data.SqlDbType.Int)
comm.Parameters("@CategoryID").Value = _
categoryList.SelectedItem.Value
comm.Parameters.Add("@SubjectID", System.Data.SqlDbType.Int)
comm.Parameters("@SubjectID").Value = _
subjectList.SelectedItem.Value
comm.Parameters.Add("@Description", _
System.Data.SqlDbType.NVarChar, 50)
comm.Parameters("@Description").Value = descriptionTextBox.Text
comm.Parameters.Add("@StatusID", System.Data.SqlDbType.Int)
comm.Parameters("@StatusID").Value = 1
C# File: HelpDesk.aspx.cs (excerpt)
// Define data objects
SqlConnection conn;
SqlCommand comm;
// Read the connection string from Web.config
string connectionString = ConfigurationManager.ConnectionStrings[
"Dorknozzle"].ConnectionString;
// Initialize connection
conn = new SqlConnection(connectionString);
// Create command
comm = new SqlCommand("InsertHelpDesk", conn);
// Specify we're calling a stored procedure
comm.CommandType = System.Data.CommandType.StoredProcedure;
// Add command parameters
comm.Parameters.Add("@EmployeeID", System.Data.SqlDbType.Int);
comm.Parameters["@EmployeeID"].Value = 5;
comm.Parameters.Add("@StationNumber", System.Data.SqlDbType.Int);
comm.Parameters["@StationNumber"].Value = stationTextBox.Text;
comm.Parameters.Add("@CategoryID", System.Data.SqlDbType.Int);
comm.Parameters["@CategoryID"].Value =
398](https://image.slidesharecdn.com/categories457/85/Categories-424-320.jpg)
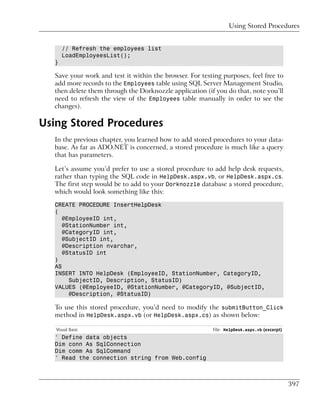
![Summary
categoryList.SelectedItem.Value;
comm.Parameters.Add("@SubjectID", System.Data.SqlDbType.Int);
comm.Parameters["@SubjectID"].Value =
subjectList.SelectedItem.Value;
comm.Parameters.Add("@Description",
System.Data.SqlDbType.NVarChar, 50);
comm.Parameters["@Description"].Value = descriptionTextBox.Text;
comm.Parameters.Add("@StatusID", System.Data.SqlDbType.Int);
comm.Parameters["@StatusID"].Value = 1;
If you now load the Help Desk page, you’ll see that it works just as it used to,
but behind the scenes, it’s making use of a stored procedure. You can verify that
this approach works by adding a new help desk request through the web form,
then opening the HelpDesk table and checking for your new help desk request.
As you can see, using stored procedures is very easy. Apart for specifying the
procedure’s name, you also need to set the CommandType of the SqlCommand object
to StoredProcedure. That’s it! Everything else is the same as when working with
a parameterized query.
Summary
In this chapter, you learned how to create simple web applications that interact
with databases. First, you learned about the various classes included with
ADO.NET, such as SqlConnection, SqlCommand, and SqlDataReader. Then,
you learned how to use these classes to create simple applications that query the
database, insert records into a database, update records within a database, and
delete records from a database. You also learned important techniques for
querying database data, including using parameters and control binding. Later
in the chapter, you learned how to improve application performance through the
use of stored procedures.
The next chapter will expand on what we learned here, and introduce a new
control that’s often used to display data from a database: the DataList.
399](https://image.slidesharecdn.com/categories457/85/Categories-425-320.jpg)


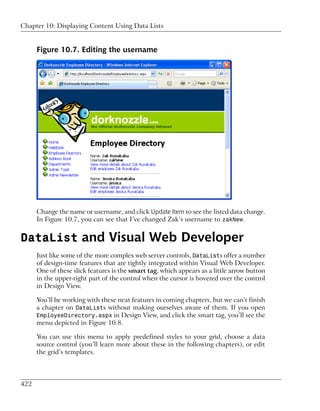
![Chapter 10: Displaying Content Using Data Lists
Finally
' Close the connection
conn.Close()
End Try
End Sub
C# File: EmployeeDirectory.aspx.cs (excerpt)
protected void UpdateItem(int employeeId, string newName,
string newUsername)
{
// Declare data objects
SqlConnection conn;
SqlCommand comm;
// Read the connection string from Web.config
string connectionString =
ConfigurationManager.ConnectionStrings[
"Dorknozzle"].ConnectionString;
// Initialize connection
conn = new SqlConnection(connectionString);
// Create command
comm = new SqlCommand("UpdateEmployee", conn);
// Specify we're calling a stored procedure
comm.CommandType = System.Data.CommandType.StoredProcedure;
// Add command parameters
comm.Parameters.Add("@EmployeeID", SqlDbType.Int);
comm.Parameters["@EmployeeID"].Value = employeeId;
comm.Parameters.Add("@NewName", SqlDbType.NVarChar, 50);
comm.Parameters["@NewName"].Value = newName;
comm.Parameters.Add("@NewUsername", SqlDbType.NVarChar, 50);
comm.Parameters["@NewUsername"].Value = newUsername;
// Enclose database code in Try-Catch-Finally
try
{
// Open the connection
conn.Open();
// Execute the command
comm.ExecuteNonQuery();
}
finally
{
// Close the connection
conn.Close();
}
}
420](https://image.slidesharecdn.com/categories457/85/Categories-446-320.jpg)
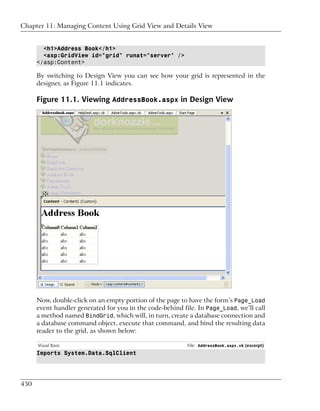
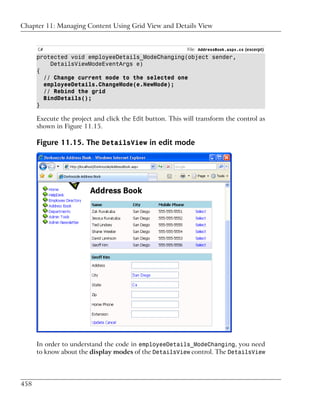
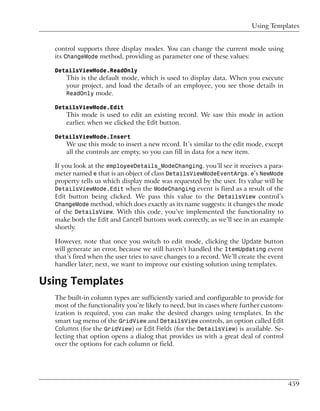
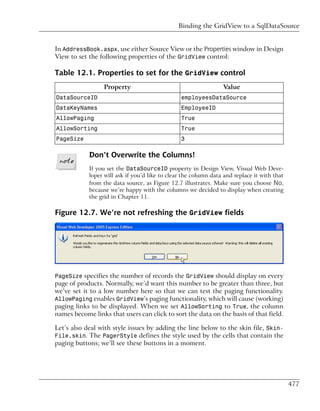
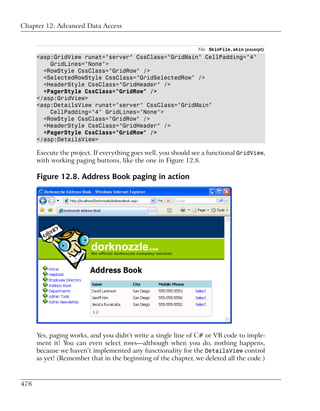
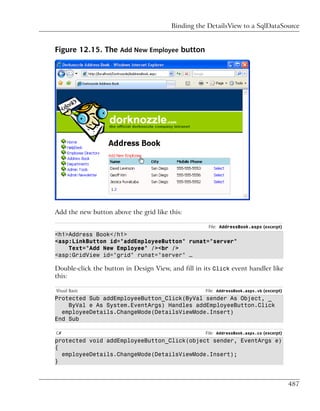
![Chapter 11: Managing Content Using Grid View and Details View
C# File: AddressBook.aspx.cs (excerpt)
using System;
using System.Data;
using System.Configuration;
using System.Collections;
using System.Web;
using System.Web.Security;
using System.Web.UI;
using System.Web.UI.WebControls;
using System.Web.UI.WebControls.WebParts;
using System.Web.UI.HtmlControls;
using System.Data.SqlClient;
public partial class AddressBook : System.Web.UI.Page
{
protected void Page_Load(object sender, EventArgs e)
{
if (!IsPostBack)
{
BindGrid();
}
}
private void BindGrid()
{
// Define data objects
SqlConnection conn;
SqlCommand comm;
SqlDataReader reader;
// Read the connection string from Web.config
string connectionString =
ConfigurationManager.ConnectionStrings[
"Dorknozzle"].ConnectionString;
// Initialize connection
conn = new SqlConnection(connectionString);
// Create command
comm = new SqlCommand(
"SELECT EmployeeID, Name, City, State, MobilePhone " +
"FROM Employees", conn);
// Enclose database code in Try-Catch-Finally
try
{
// Open the connection
conn.Open();
// Execute the command
reader = comm.ExecuteReader();
// Fill the grid with data
432](https://image.slidesharecdn.com/categories457/85/Categories-458-320.jpg)


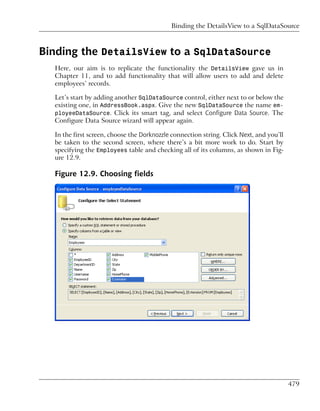
![Using the DetailsView Control
// Read the name from the grid
GridViewRow row = grid.Rows[selectedRowIndex];
string name = row.Cells[0].Text;
// Update the details label
detailsLabel.Text = "You selected " + name + ".";
}
Execute the project, and select one of the records. You should see a display like
the one in Figure 11.9.
Figure 11.9. Displaying details about the selected row
It was easy to add this new feature, wasn’t it?
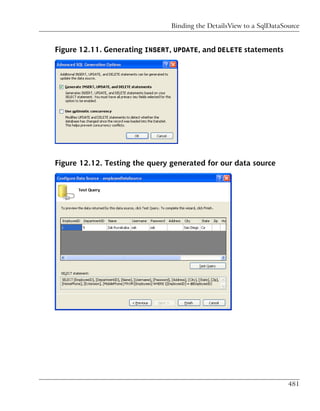
Using the DetailsView Control
ASP.NET 2.0 introduced the DetailsView control, which can come in very handy
when you want to display more details about one record in a grid. You’ll find
this control very useful when you need to display details about a record that
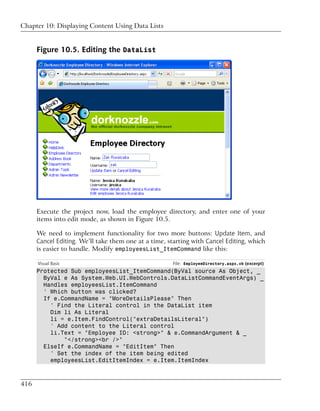
445](https://image.slidesharecdn.com/categories457/85/Categories-471-320.jpg)
![Using the DetailsView Control
Figure 11.10. The DetailsView control in action
C# File: AddressBook.aspx.cs (excerpt)
// Open the connection
conn.Open();
// Execute the command
reader = comm.ExecuteReader();
// Fill the grid with data
grid.DataSource = reader;
grid.DataKeyNames = new string[] { "EmployeeID" };
grid.DataBind();
// Close the reader
reader.Close();
As you can see, we tell the GridView which keys to store by setting the
DataKeyNames property. This property needs to be populated with an array of
447](https://image.slidesharecdn.com/categories457/85/Categories-473-320.jpg)
![Using the DetailsView Control
Try
' Open the connection
conn.Open()
' Execute the command
reader = comm.ExecuteReader()
' Fill the grid with data
employeeDetails.DataSource = reader
employeeDetails.DataKeyNames = New String() {"EmployeeID"}
employeeDetails.DataBind()
' Close the reader
reader.Close()
Finally
' Close the connection
conn.Close()
End Try
End Sub
C# File: AddressBook.aspx.cs (excerpt)
protected void grid_SelectedIndexChanged(object sender,
EventArgs e)
{
BindDetails();
}
private void BindDetails()
{
// Obtain the index of the selected row
int selectedRowIndex = grid.SelectedIndex;
// Read the employee ID
int employeeId = (int) grid.DataKeys[selectedRowIndex].Value;
// Define data objects
SqlConnection conn;
SqlCommand comm;
SqlDataReader reader;
// Read the connection string from Web.config
string connectionString =
ConfigurationManager.ConnectionStrings[
"Dorknozzle"].ConnectionString;
// Initialize connection
conn = new SqlConnection(connectionString);
// Create command
comm = new SqlCommand(
"SELECT EmployeeID, Name, Address, City, State, Zip, " +
"HomePhone, Extension FROM Employees " +
"WHERE EmployeeID=@EmployeeID", conn);
// Add the EmployeeID parameter
comm.Parameters.Add("EmployeeID", SqlDbType.Int);
449](https://image.slidesharecdn.com/categories457/85/Categories-475-320.jpg)
![Chapter 11: Managing Content Using Grid View and Details View
comm.Parameters["EmployeeID"].Value = employeeId;
// Enclose database code in Try-Catch-Finally
try
{
// Open the connection
conn.Open();
// Execute the command
reader = comm.ExecuteReader();
// Fill the grid with data
employeeDetails.DataSource = reader;
employeeDetails.DataKeyNames = new string[] {"EmployeeID"};
employeeDetails.DataBind();
// Close the reader
reader.Close();
}
finally
{
// Close the connection
conn.Close();
}
}
Now, if you execute the project and select one of the employees, you should see
a page like the one shown in Figure 11.10.
Styling the DetailsView
Displaying the data in the DetailsView control is easy enough, but you’ll probably
want to make it look a bit prettier. We’ll start by changing the row headings in
the left-hand column. Open AddressBook.aspx and modify the DetailsView
control like this:
File: AddressBook.aspx (excerpt)
<asp:DetailsView id="employeeDetails" runat="server"
AutoGenerateRows="False">
<Fields>
<asp:BoundField DataField="Address" HeaderText="Address" />
<asp:BoundField DataField="City" HeaderText="City" />
<asp:BoundField DataField="State" HeaderText="State" />
<asp:BoundField DataField="Zip" HeaderText="Zip" />
<asp:BoundField DataField="HomePhone"
HeaderText="Home Phone" />
<asp:BoundField DataField="Extension"
HeaderText="Extension" />
</Fields>
450](https://image.slidesharecdn.com/categories457/85/Categories-476-320.jpg)
![GridView and DetailsView Events
and events that are named in the past tense (i.e. those that end in “ed,” such as
SelectIndexChanged and ItemUpdated). The events that end in “ing” are fired
just before their past tense counterparts, and should be handled only if you want
to implement some logic to determine whether the action in question should be
performed.
The “ed” events, on the other hand, should perform the actual task of the button.
We saw such an event handler when we handled the SelectIndexChanged event
of our GridView control. In this handler, we queried the database to get the details
of the selected employee, then displayed the result in a DetailsView control.
If we wanted to disallow the selection of a particular employee (say, the employee
with the ID 1), we could do so by setting e.Cancel to False in the SelectIndex-
Changing event handler, as shown below:
Visual Basic
Protected Sub grid_SelectedIndexChanging(ByVal sender As Object, _
ByVal e As GridViewSelectEventArgs) _
Handles grid.SelectedIndexChanging
' Obtain the index of the selected row
Dim selectedRowIndex As Integer = grid.SelectedIndex
' Read the employee ID
Dim employeeId As Integer = _
grid.DataKeys(selectedRowIndex).Value
' Cancel the selection if Employee #1 was selected
If employeeId = 1 Then
e.Cancel = False
End If
End Sub
C#
protected void grid_SelectedIndexChanging(object sender,
GridViewSelectEventArgs e)
{
// Obtain the index of the selected row
int selectedRowIndex = grid.SelectedIndex;
// Read the employee ID
int employeeId = (int)grid.DataKeys[selectedRowIndex].Value;
// Cancel the selection if Employee #1 was selected
if (employeeId == 1)
{
e.Cancel = false;
}
}
455](https://image.slidesharecdn.com/categories457/85/Categories-481-320.jpg)
![Updating DetailsView Records
{
// Read the employee from the DetailsView object
int employeeId = (int)employeeDetails.DataKey.Value;
// Find the TextBox controls with updated data
TextBox newAddressTextBox =
(TextBox)employeeDetails.FindControl("editAddressTextBox");
TextBox newCityTextBox =
(TextBox)employeeDetails.FindControl("editCityTextBox");
// Extract the updated data from the TextBoxes
string newAddress = newAddressTextBox.Text;
string newCity = newCityTextBox.Text;
// Define data objects
SqlConnection conn;
SqlCommand comm;
// Initialize connection
string connectionString =
ConfigurationManager.ConnectionStrings[
"Dorknozzle"].ConnectionString;
// Initialize connection
conn = new SqlConnection(connectionString);
// Create command
comm = new SqlCommand("UpdateEmployeeDetails", conn);
comm.CommandType = CommandType.StoredProcedure;
// Add command parameters
comm.Parameters.Add("EmployeeID", SqlDbType.Int);
comm.Parameters["EmployeeID"].Value = employeeId;
comm.Parameters.Add("NewAddress", SqlDbType.NVarChar, 50);
comm.Parameters["NewAddress"].Value = newAddress;
comm.Parameters.Add("NewCity", SqlDbType.NVarChar, 50);
comm.Parameters["NewCity"].Value = newCity;
// Enclose database code in Try-Catch-Finally
try
{
// Open the connection
conn.Open();
// Execute the command
comm.ExecuteNonQuery();
}
finally
{
// Close the connection
conn.Close();
}
// Exit edit mode
employeeDetails.ChangeMode(DetailsViewMode.ReadOnly);
// Reload the employees grid
465](https://image.slidesharecdn.com/categories457/85/Categories-491-320.jpg)

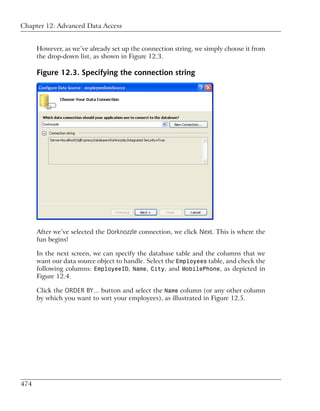
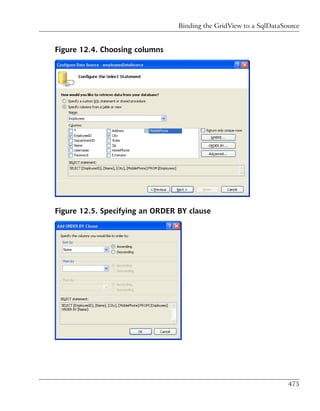
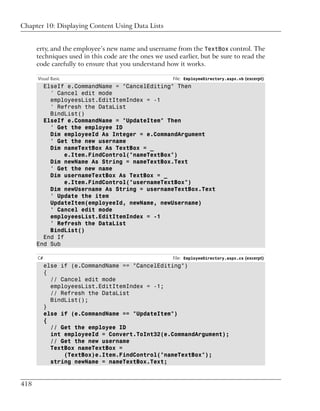
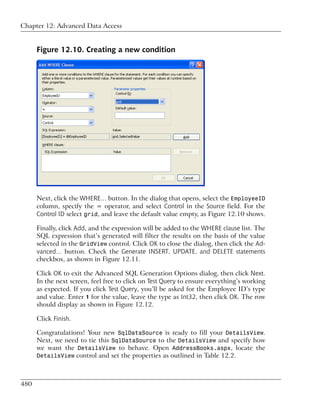
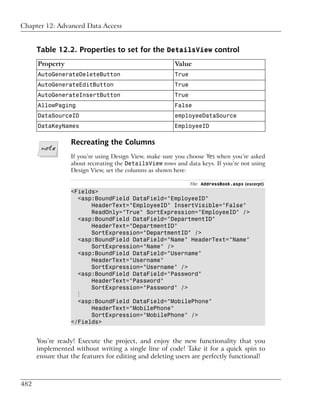
![Chapter 12: Advanced Data Access
Figure 12.6. Testing the data source
Click OK, then Next. In the dialog that appears, press the Test Query button to
test that the query will work with this data source. If everything worked well,
you should be shown a list of employees similar to the one depicted in Figure 12.6.
Finally, click Finish.
Before we move on, let’s take a look at the new code we’ve added to Address-
Book.aspx. If you switch to Source View, you’ll see that quite a bit of code has
been created for you. Let’s look at the SqlDataSource object first:
File: AddressBook.aspx (excerpt)
<asp:SqlDataSource id="employeesDataSource" runat="server"
ConnectionString="<%$ ConnectionStrings:Dorknozzle %>"
SelectCommand="SELECT [EmployeeID], [Name], [City],
[MobilePhone] FROM [Employees] ORDER BY [Name]">
</asp:SqlDataSource>
This object is amazing in its simplicity, yet the GridView can connect to it and
display the required data with very little additional effort. Let’s use this
SqlDataSource object to populate the GridView.
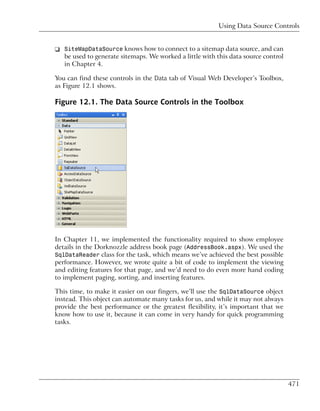
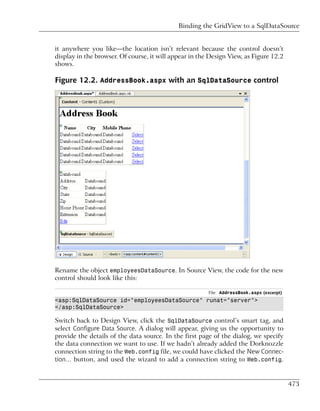
476](https://image.slidesharecdn.com/categories457/85/Categories-502-320.jpg)


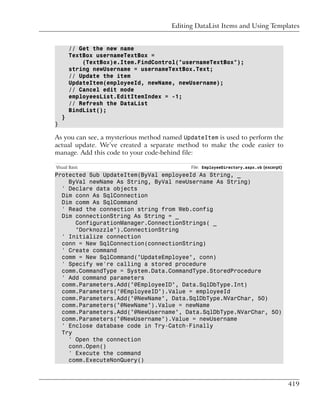
![Chapter 12: Advanced Data Access
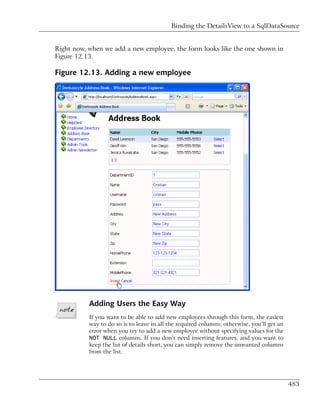
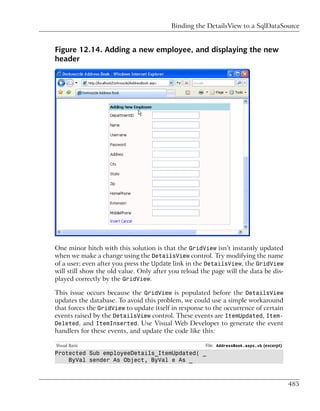
Our new button (shown in Figure 12.15) will cause the DetailsView to display
in insert mode when clicked.
Your Address Book is now fully featured, and ready for production!
What’s really interesting about the code that was generated for us in this section
is the definition of the employeeDataSource. Since this data source needs to
store the details of selecting, deleting, updating, and inserting rows, it looks sig-
nificantly bigger than the employeesDataSource:
File: AddressBook.aspx (excerpt)
<asp:SqlDataSource ID="employeeDataSource" runat="server"
ConnectionString="<%$ ConnectionStrings:Dorknozzle %>"
DeleteCommand="DELETE FROM [Employees]
WHERE [EmployeeID] = @EmployeeID"
InsertCommand="INSERT INTO [Employees] ([DepartmentID],
[Name], [Username], [Password], [Address], [City],
[State], [Zip], [HomePhone], [Extension], [MobilePhone])
VALUES (@DepartmentID, @Name, @Username, @Password,
@Address, @City, @State, @Zip, @HomePhone, @Extension,
@MobilePhone)"
SelectCommand="SELECT [EmployeeID], [DepartmentID], [Name],
[Username], [Password], [Address], [City], [State], [Zip],
[HomePhone], [Extension], [MobilePhone]
FROM [Employees]
WHERE ([EmployeeID] = @EmployeeID)"
UpdateCommand="UPDATE [Employees]
SET [DepartmentID] = @DepartmentID, [Name] = @Name,
[Username] = @Username, [Password] = @Password,
[Address] = @Address, [City] = @City, [State] = @State,
[Zip] = @Zip, [HomePhone] = @HomePhone,
[Extension] = @Extension, [MobilePhone] = @MobilePhone
WHERE [EmployeeID] = @EmployeeID">
<DeleteParameters>
<asp:Parameter Name="EmployeeID" Type="Int32" />
</DeleteParameters>
<UpdateParameters>
<asp:Parameter Name="DepartmentID" Type="Int32" />
<asp:Parameter Name="Name" Type="String" />
<asp:Parameter Name="Username" Type="String" />
<asp:Parameter Name="Password" Type="String" />
<asp:Parameter Name="Address" Type="String" />
<asp:Parameter Name="City" Type="String" />
<asp:Parameter Name="State" Type="String" />
<asp:Parameter Name="Zip" Type="String" />
488](https://image.slidesharecdn.com/categories457/85/Categories-514-320.jpg)
![Displaying Lists in DetailsView
<asp:Parameter Name="HomePhone" Type="String" />
<asp:Parameter Name="Extension" Type="String" />
<asp:Parameter Name="MobilePhone" Type="String" />
<asp:Parameter Name="EmployeeID" Type="Int32" />
</UpdateParameters>
<SelectParameters>
<asp:ControlParameter ControlID="grid" Name="EmployeeID"
PropertyName="SelectedValue" Type="Int32" />
</SelectParameters>
<InsertParameters>
<asp:Parameter Name="DepartmentID" Type="Int32" />
<asp:Parameter Name="Name" Type="String" />
<asp:Parameter Name="Username" Type="String" />
<asp:Parameter Name="Password" Type="String" />
<asp:Parameter Name="Address" Type="String" />
<asp:Parameter Name="City" Type="String" />
<asp:Parameter Name="State" Type="String" />
<asp:Parameter Name="Zip" Type="String" />
<asp:Parameter Name="HomePhone" Type="String" />
<asp:Parameter Name="Extension" Type="String" />
<asp:Parameter Name="MobilePhone" Type="String" />
</InsertParameters>
</asp:SqlDataSource>
As you can see, the SqlDataSource contains the UPDATE, DELETE, and INSERT
queries it needs to execute when the user performs these actions on the
DetailsView. These are parameterized queries, and a data type is specified for
each of the parameters, which, as you already know, is good programming practice.
You might also notice that the names of the fields and tables are surrounded by
square brackets ([ and ]). These square brackets allow us to include spaces and
other special characters in table names. Since none of our field or table names
contain spaces, we haven’t had to worry about this issue so far, but facilitating
the inclusion of spaces is a good idea.
The SqlDataSource is the perfect tool when you need to create fully featured
forms such as the address book quickly and easily for smaller projects like the
Dorknozzle intranet. As the DetailsView and GridView controls are tightly
integrated with the data source controls, they allow us to implement a lot of
functionality without writing any code.
Displaying Lists in DetailsView
We want to improve on our DetailsView by making it show a list of departments
instead of department IDs. This makes sense, as it’s much easier for users to select
489](https://image.slidesharecdn.com/categories457/85/Categories-515-320.jpg)

![Displaying Lists in DetailsView
Figure 12.17. Specifying the Departments data source
SelectCommand="SELECT [DepartmentID], [Department]
FROM [Departments]" />
Now, with AddressBook.aspx open in Design View, click the DetailsView
control’s smart tag, select Edit Fields, and transform the Department ID Bound-
Field into a TemplateField—you learned how to do this back in Chapter 11.
Now, switch to Source View, and locate the Department ID TemplateField that
you just generated. It should look something like this:
File: AddressBook.aspx (excerpt)
<asp:TemplateField HeaderText="DepartmentID"
SortExpression="DepartmentID">
<EditItemTemplate>
<asp:TextBox ID="TextBox1" runat="server"
Text='<%# Bind("DepartmentID") %>'></asp:TextBox>
</EditItemTemplate>
<InsertItemTemplate>
<asp:TextBox ID="TextBox1" runat="server"
Text='<%# Bind("DepartmentID") %>'></asp:TextBox>
</InsertItemTemplate>
<ItemTemplate>
<asp:Label ID="Label1" runat="server"
491](https://image.slidesharecdn.com/categories457/85/Categories-517-320.jpg)
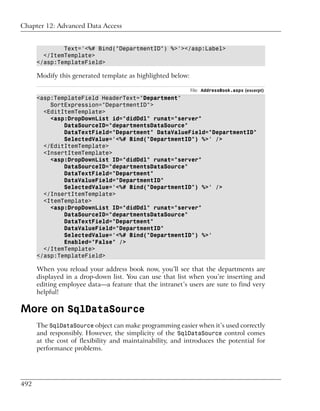
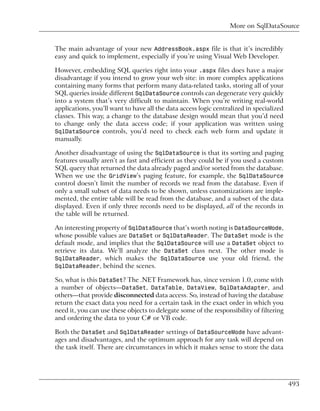
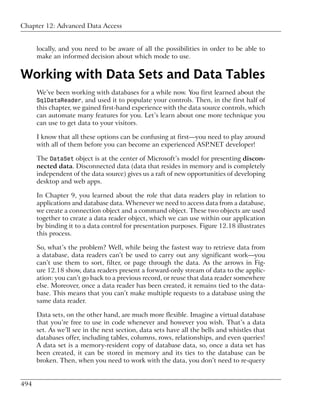
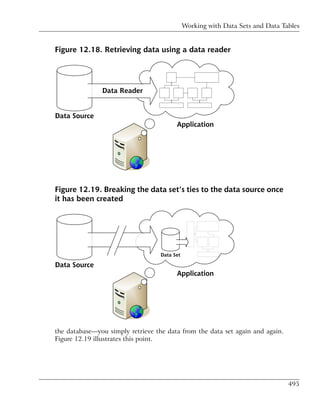
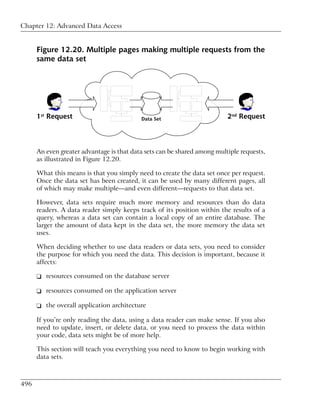
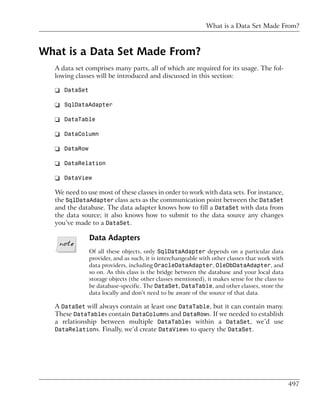
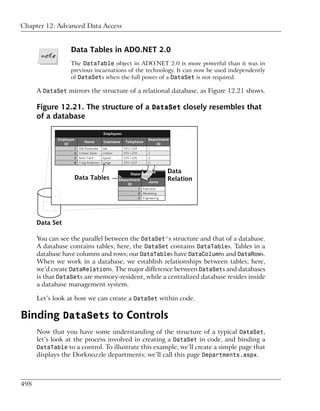

![Binding DataSets to Controls
' Bind the grid to the DataSet
departmentsGrid.DataSource = dataSet
departmentsGrid.DataBind()
End Sub
C# File: Departments.aspx.cs (excerpt)
protected void Page_Load(object sender, EventArgs e)
{
if (!IsPostBack)
{
BindGrid();
}
}
private void BindGrid()
{
// Define data objects
SqlConnection conn;
DataSet dataSet = new DataSet();
SqlDataAdapter adapter;
// Read the connection string from Web.config
string connectionString =
ConfigurationManager.ConnectionStrings[
"Dorknozzle"].ConnectionString;
// Initialize connection
conn = new SqlConnection(connectionString);
// Create adapter
adapter = new SqlDataAdapter(
"SELECT DepartmentID, Department FROM Departments",
conn);
// Fill the DataSet
adapter.Fill(dataSet, "Departments");
// Bind the grid to the DataSet
departmentsGrid.DataSource = dataSet;
departmentsGrid.DataBind();
}
Execute the project, and browse to your departments page, as shown in Fig-
ure 12.22.
The grid is already styled, because we have a GridView skin in place. At this
point, we’ve achieved a level of functionality that you might otherwise have
reached using SqlCommand and SqlDataReader, or the SqlDataSource; the differ-
ence is that, this time, we’ve used an SqlDataAdapter and a DataSet.
501](https://image.slidesharecdn.com/categories457/85/Categories-527-320.jpg)
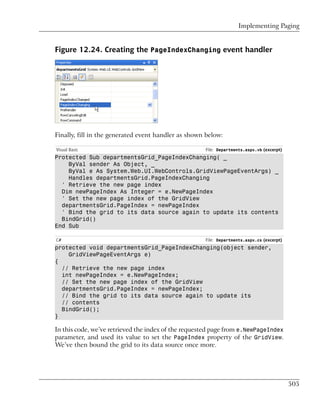
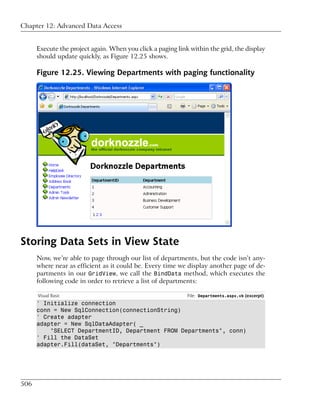
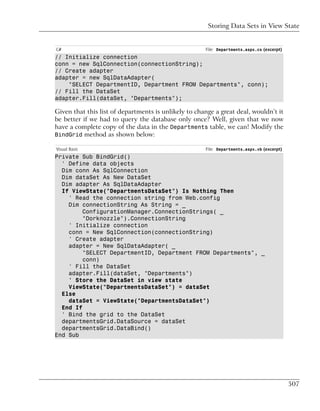
![Chapter 12: Advanced Data Access
C# File: Departments.aspx.cs (excerpt)
private void BindGrid()
{
// Define data objects
SqlConnection conn;
DataSet dataSet = new DataSet();
SqlDataAdapter adapter;
if(ViewState["DepartmentsDataSet"] == null)
{
// Read the connection string from Web.config
string connectionString =
ConfigurationManager.ConnectionStrings[
"Dorknozzle"].ConnectionString;
// Initialize connection
conn = new SqlConnection(connectionString);
// Create adapter
adapter = new SqlDataAdapter(
"SELECT DepartmentID, Department FROM Departments",
conn);
// Fill the DataSet
adapter.Fill(dataSet, "Departments");
// Store the DataSet in view state
ViewState["DepartmentsDataSet"] = dataSet;
}
else
{
dataSet = (DataSet)ViewState["DepartmentsDataSet"];
}
// Bind the grid to the DataSet
departmentsGrid.DataSource = dataSet;
departmentsGrid.DataBind();
}
Here, we’re using the ViewState collection to store our DataSet. The ViewState
collection works a lot like the Session collection, except that instead of storing
data for access by the entire application, ViewState stores data for just this one
page while the user is interacting with it. If the users navigate away from this
page, the data in ViewState will be lost—even if they return to the page within
the same session.
In this revised version of BindGrid, we start by checking the ViewState collection
for an item named DepartmentsDataSet. If no such item exists, we create a new
DataSet, fill it with data from the database, as before, and store it in ViewState.
If an item named DepartmentsDataSet does exist in ViewState, we simply save
508](https://image.slidesharecdn.com/categories457/85/Categories-534-320.jpg)
![Implementing Sorting
that item into our local variable, dataSet. Regardless of how the DataSet is
loaded, we bind it to our GridView as we did before.
If you save your work and load the Departments page in your browser, you should
see that the page runs exactly as it did previously, except that now the database
is accessed only once, the first time the page loads.
Implementing Sorting
To implement sorting functionality, we need to understand a few details of the
inner workings of data binding.
Technically, you can’t bind a DataSet to a GridView control, because a DataSet
can contain many tables, whereas the GridView control can only handle one set
of rows and columns. However, by virtue of the fact that your DataSet has only
contained a single DataTable, the GridView control has been smart enough to
figure out that what you probably meant was the following:
Visual Basic
' Bind the grid to the DataSet
departmentsGrid.DataSource = dataSet.Tables("Departments")
departmentsGrid.DataBind()
C#
// Bind the grid to the DataSet
departmentsGrid.DataSource = dataSet.Tables["Departments"];
departmentsGrid.DataBind();
However, this isn’t technically correct in the strictest sense, either. All of the
GridView’s data binding is actually done through DataView objects. Thankfully,
each DataTable has a DefaultView property, which the GridView will automat-
ically use whenever you bind it to a DataTable. So, the following code listings
have the same functionality as those we saw above:
Visual Basic
' Bind the grid to the DataView
departmentsGrid.DataSource = _
dataSet.Tables("Departments").DefaultView
departmentsGrid.DataBind()
C#
// Bind the grid to the DataView
departmentsGrid.DataSource =
509](https://image.slidesharecdn.com/categories457/85/Categories-535-320.jpg)
![Chapter 12: Advanced Data Access
dataSet.Tables["Departments"].DefaultView;
departmentsGrid.DataBind();
DefaultView does not Apply when Binding to a DataSet
It’s interesting to note that if you bind directly to a DataSet that contains
only one table, that table’s DefaultView will not be used; the GridView
will generate a separate DataView itself.
DataViews represent a customized view of a DataSet for sorting, filtering,
searching, editing, and navigation. When binding a GridView directly to a
DataTable, the DefaultView property, which is a DataView object, is accessed
automatically for us. However, if we want to enable sorting, we need to access
the DataView and set its sorting parameters.
The first step to enabling sorting is to set the AllowSorting property to True.
When we do that, the grid’s column headings become hyperlinks. Before we make
those hyperlinks work, we need to handle the grid’s Sorting event, where we
teach the grid what to do when those links are clicked.
Set the AllowSorting property of the GridView control in Departments.aspx
to True, then use the designer to generate the handler for the GridView’s Sorting
event. Then, complete the code as shown:
Visual Basic File: Departments.aspx.vb (excerpt)
Protected Sub departmentsGrid_Sorting(ByVal sender As Object, _
ByVal e As System.Web.UI.WebControls.GridViewSortEventArgs) _
Handles departmentsGrid.Sorting
' Retrieve the name of the clicked column (sort expression)
Dim sortExpression As String = e.SortExpression
' Decide and save the new sort direction
If (sortExpression = gridSortExpression) Then
If gridSortDirection = SortDirection.Ascending Then
gridSortDirection = SortDirection.Descending
Else
gridSortDirection = SortDirection.Ascending
End If
Else
gridSortDirection = WebControls.SortDirection.Ascending
End If
' Save the new sort expression
gridSortExpression = sortExpression
' Rebind the grid to its data source
BindGrid()
End Sub
510](https://image.slidesharecdn.com/categories457/85/Categories-536-320.jpg)
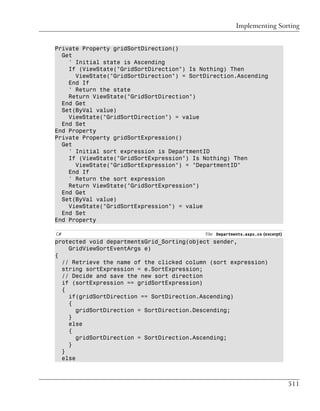
![Chapter 12: Advanced Data Access
{
gridSortDirection = SortDirection.Ascending;
}
// Save the new sort expression
gridSortExpression = sortExpression;
// Rebind the grid to its data source
BindGrid();
}
private SortDirection gridSortDirection
{
get
{
// Initial state is Ascending
if (ViewState["GridSortDirection"] == null)
{
ViewState["GridSortDirection"] = SortDirection.Ascending;
}
// Return the state
return (SortDirection) ViewState["GridSortDirection"];
}
set
{
ViewState["GridSortDirection"] = value;
}
}
private string gridSortExpression
{
get
{
// Initial sort expression is DepartmentID
if (ViewState["GridSortExpression"] == null)
{
ViewState["GridSortExpression"] = "DepartmentID";
}
// Return the sort expression
return (string) ViewState["GridSortExpression"];
}
set
{
ViewState["GridSortExpression"] = value;
}
}
512](https://image.slidesharecdn.com/categories457/85/Categories-538-320.jpg)
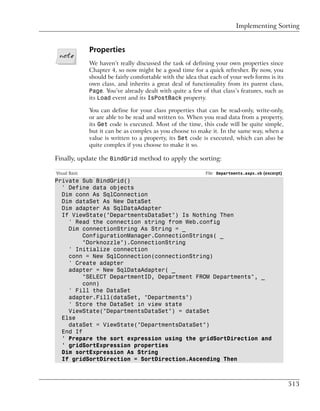
![Chapter 12: Advanced Data Access
sortExpression = gridSortExpression & " ASC"
Else
sortExpression = gridSortExpression & " DESC"
End If
' Sort the data
dataSet.Tables("Departments").DefaultView.Sort = sortExpression
' Bind the grid to the DataSet
departmentsGrid.DataSource = _
dataSet.Tables("Departments").DefaultView
departmentsGrid.DataBind()
End Sub
C# File: Departments.aspx.cs (excerpt)
private void BindGrid()
{
// Define data objects
SqlConnection conn;
DataSet dataSet = new DataSet();
SqlDataAdapter adapter;
if(ViewState["DepartmentsDataSet"] == null)
{
// Read the connection string from Web.config
string connectionString =
ConfigurationManager.ConnectionStrings[
"Dorknozzle"].ConnectionString;
// Initialize connection
conn = new SqlConnection(connectionString);
// Create adapter
adapter = new SqlDataAdapter(
"SELECT DepartmentID, Department FROM Departments",
conn);
// Fill the DataSet
adapter.Fill(dataSet, "Departments");
// Store the DataSet in view state
ViewState["DepartmentsDataSet"] = dataSet;
}
else
{
dataSet = (DataSet)ViewState["DepartmentsDataSet"];
}
// Prepare the sort expression using the gridSortDirection and
// gridSortExpression properties
string sortExpression;
if(gridSortDirection == SortDirection.Ascending)
{
sortExpression = gridSortExpression + " ASC";
514](https://image.slidesharecdn.com/categories457/85/Categories-540-320.jpg)
![Implementing Sorting
}
else
{
sortExpression = gridSortExpression + " DESC";
}
// Sort the data
dataSet.Tables["Departments"].DefaultView.Sort = sortExpression;
// Bind the grid to the DataSet
departmentsGrid.DataSource =
dataSet.Tables["Departments"].DefaultView;
departmentsGrid.DataBind();
}
Execute the project again, and test that sorting by column works as shown in
Figure 12.26.
Figure 12.26. Sorting Dorknozzle’s departments
We’ve written a lot of code here! Let’s take a look at how it works.
In order to sort the data in the grid, all we need to do is set the Sort property of
the view we’re displaying to ColumnNameSortOrder, where ColumnName is, of
course, the name of the column we’re sorting, and SortOrder is either ASC (for
515](https://image.slidesharecdn.com/categories457/85/Categories-541-320.jpg)
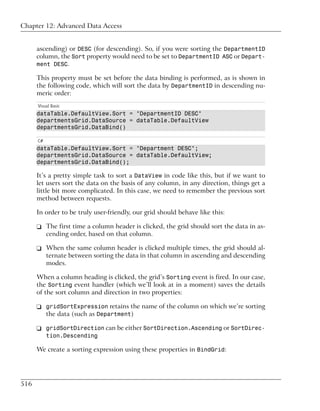

![Chapter 12: Advanced Data Access
If (ViewState("GridSortExpression") Is Nothing) Then
ViewState("GridSortExpression") = "DepartmentID"
End If
' Return the sort expression
Return ViewState("GridSortExpression")
End Get
Set(ByVal value)
ViewState("GridSortExpression") = value
End Set
End Property
C# File: Departments.aspx.cs (excerpt)
private SortDirection gridSortDirection
{
get
{
// Initial state is Ascending
if (ViewState["GridSortDirection"] == null)
{
ViewState["GridSortDirection"] = SortDirection.Ascending;
}
// Return the state
return (SortDirection) ViewState["GridSortDirection"];
}
set
{
ViewState["GridSortDirection"] = value;
}
}
private string gridSortExpression
{
get
{
// Initial sort expression is DepartmentID
if (ViewState["GridSortExpression"] == null)
{
ViewState["GridSortExpression"] = "DepartmentID";
}
// Return the sort expression
return (string) ViewState["GridSortExpression"];
}
set
{
ViewState["GridSortExpression"] = value;
}
}
518](https://image.slidesharecdn.com/categories457/85/Categories-544-320.jpg)
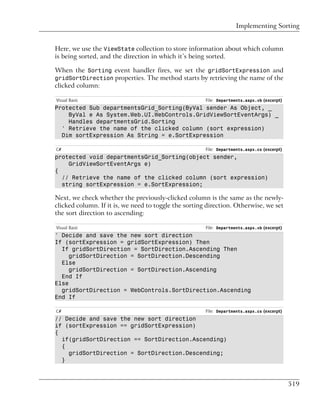
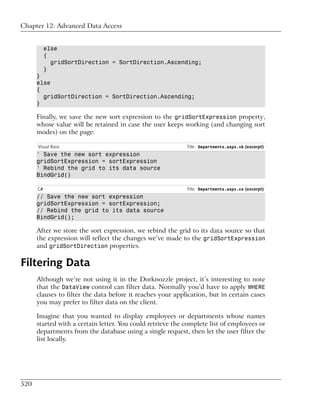
![Updating a Database from a Modified DataSet
SqlConnection conn;
DataSet dataSet = new DataSet();
SqlDataAdapter adapter;
DataRow dataRow ;
SqlCommandBuilder commandBuilder;
// Read the connection string from Web.config
string connectionString =
ConfigurationManager.ConnectionStrings[
"Dorknozzle"].ConnectionString;
// Initialize connection
conn = new SqlConnection(connectionString);
// Create adapter
adapter = new SqlDataAdapter(
"SELECT DepartmentID, Department FROM Departments",
conn);
// Fill the DataSet
adapter.Fill(dataSet, "Departments");
// Make changes to the table
dataRow = dataSet.Tables["Departments"].NewRow();
dataRow["Department"] = "New Department";
dataSet.Tables["Departments"].Rows.Add(dataRow);
// Submit the changes
commandBuilder = new SqlCommandBuilder(adapter);
adapter.Update(dataSet.Tables["Departments"]);
departmentsGrid.DataSource = dataSet.Tables["Departments"];
departmentsGrid.DataBind();
}
If you run this code a few times, you’ll have lots of “New Department” depart-
ments added to the database, as shown in Figure 12.27.
As you can see, adding a new record is a trivial task. The work that’s required to
submit the changes to the database requires us to write just two rows of code.
The rest of the new code creates the new row that was inserted.
We create an SqlCommandBuilder object, passing in our SqlDataAdapter. The
SqlCommandBuilder class is responsible for detecting modifications to the DataSet
and deciding what needs to be inserted, updated, or deleted to apply those changes
to the database. Having done this, SqlCommandBuilder generates the necessary
SQL queries and stores them in the SqlDataAdapter for the Update method to
use. It should be no surprise, then, that our next action is to call the Update
method of the SqlDataAdapter object, passing in the DataTable that needs up-
dating.
523](https://image.slidesharecdn.com/categories457/85/Categories-549-320.jpg)
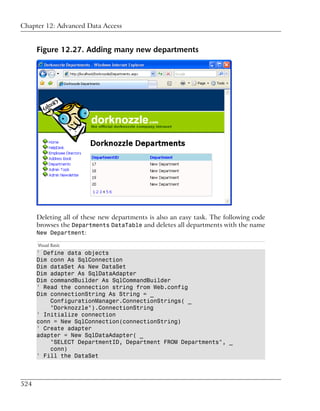
![Updating a Database from a Modified DataSet
adapter.Fill(dataSet, "Departments")
' Make changes to the table
For Each dataRow As DataRow In dataSet.Tables("Departments").Rows
If dataRow("Department") = "New Department" Then
dataRow.Delete()
End If
Next
' Submit the changes
commandBuilder = New SqlCommandBuilder(adapter)
adapter.Update(dataSet.Tables("Departments"))
' Bind the grid to the DataSet
departmentsGrid.DataSource = _
dataSet.Tables("Departments").DefaultView
departmentsGrid.DataBind()
Note that in the C# version the conversion to string needs to be performed ex-
plicitly:
C#
// Define data objects
SqlConnection conn;
DataSet dataSet = new DataSet();
SqlDataAdapter adapter;
SqlCommandBuilder commandBuilder;
// Read the connection string from Web.config
string connectionString =
ConfigurationManager.ConnectionStrings[
"Dorknozzle"].ConnectionString;
// Initialize connection
conn = new SqlConnection(connectionString);
// Create adapter
adapter = new SqlDataAdapter(
"SELECT DepartmentID, Department FROM Departments", conn);
// Fill the DataSet
adapter.Fill(dataSet, "Departments");
// Make changes to the table
foreach (DataRow dataRow in dataSet.Tables["Departments"].Rows)
{
if(dataRow["Department"].ToString() == "New Department")
{
dataRow.Delete();
}
}
// Submit the changes
commandBuilder = new SqlCommandBuilder(adapter);
adapter.Update(dataSet.Tables["Departments"]);
525](https://image.slidesharecdn.com/categories457/85/Categories-551-320.jpg)
![Chapter 12: Advanced Data Access
departmentsGrid.DataSource = dataSet.Tables["Departments"];
departmentsGrid.DataBind();
Execute this command, and all departments called New Department will be re-
moved.
Summary
This chapter has given us the chance to explore some more important concepts
of ADO.NET. First, you learned about the data source controls, and how they
can be used to build code-free data binding. With just a few mouse clicks, you
were able to build editable grids of data!
We also investigated the DataSet class, and learned how to use it in our intranet
application. We then moved on to learn about the constructs of DataSets, includ-
ing DataTables and DataViews. We also learned how to populate DataSets using
SqlDataAdapters. Finally, we looked at sorting, paging, and filtering data using
DataViews, and updated a data source from a modified DataSet using the
SqlCommandBuilder.
In the next chapter, we’ll be looking at ASP.NET’s security features. Using
ASP.NET’s form-based security capabilities, we’ll learn how to restrict each user’s
access to the specific web forms we want them to be able to use, while still allowing
public access to other parts of the site. We’ll also take a look at some controls
that make building login and logout mechanisms a snap.
526](https://image.slidesharecdn.com/categories457/85/Categories-552-320.jpg)

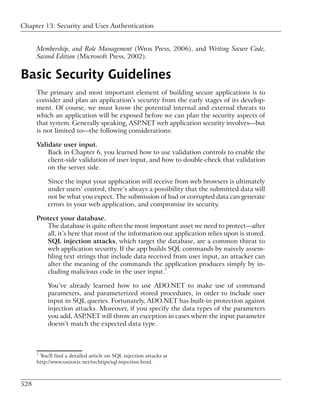

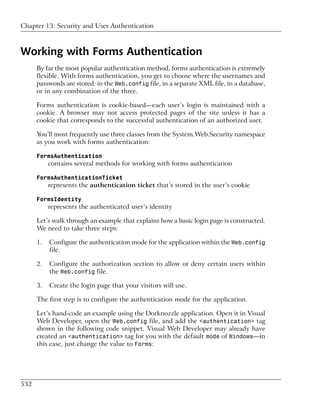
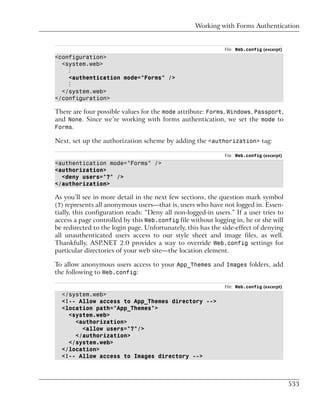
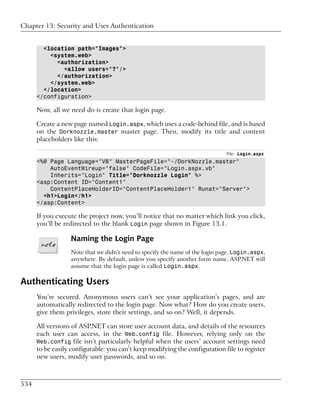
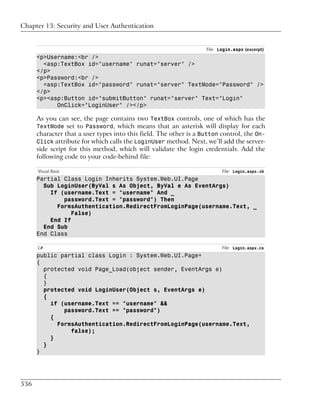
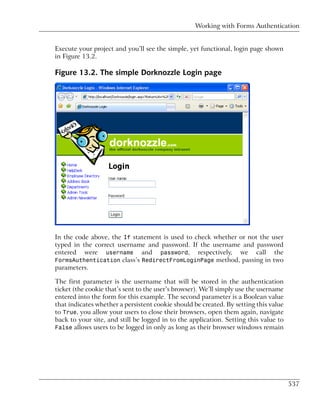

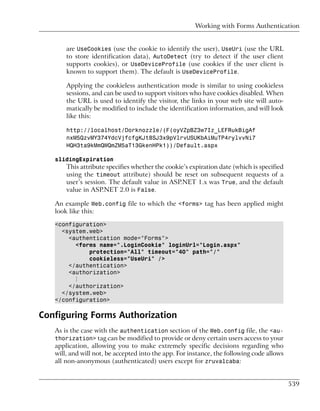
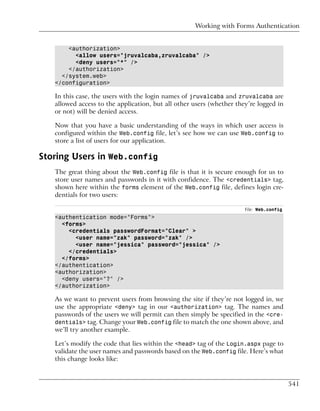

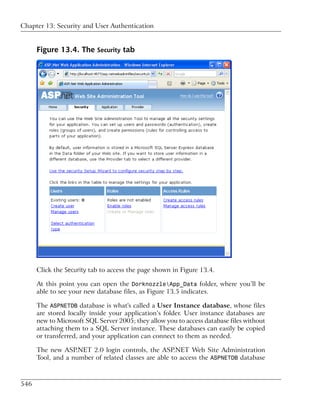
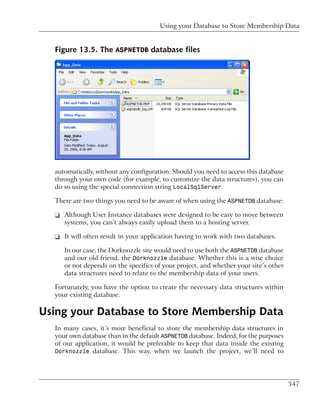

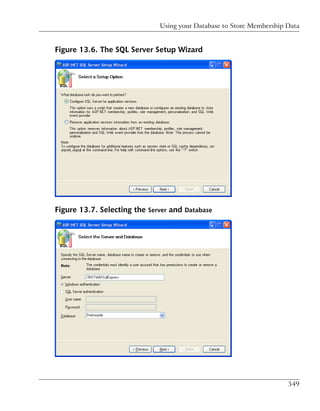
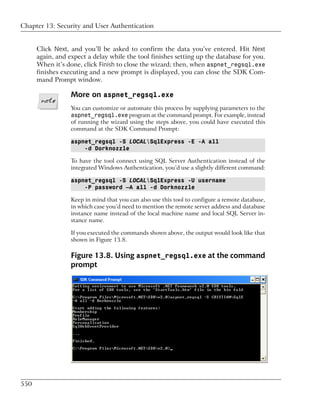
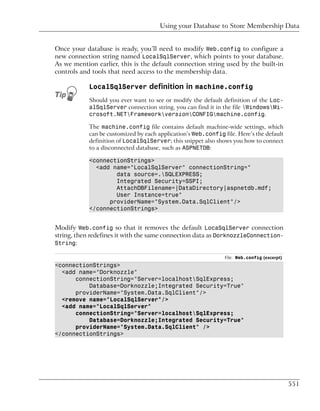
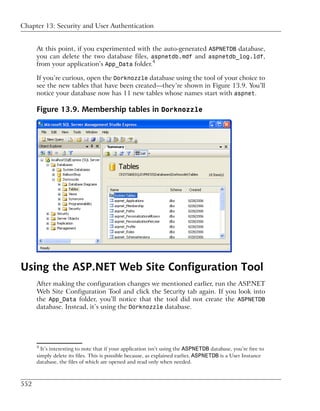
![Chapter 13: Security and User Authentication
Figure 13.10. Creating an application setting
⋮
<appSettings>
<add key="AdminEmail" value="admin@dorknozzle.com" />
</appSettings>
⋮
To access this data, you need to use the ConfigurationManager class, which is
located in the System.Configuration namespace, like this:
Visual Basic
adminEmail = ConfigurationManager.AppSettings("AdminEmail")
C#
adminEmail = ConfigurationManager.AppSettings["AdminEmail"];
Creating Users and Roles
Open the ASP.NET web site, click the Security tab, and click Enable Roles under
the Roles section. This will add the following line to your Web.config file:
554](https://image.slidesharecdn.com/categories457/85/Categories-580-320.jpg)