cast and die preparation in fixed prosthodontics
•
2 likes•1,431 views

how to make a cast with removable dies for fixed restorations

Recommended
Recommended
More Related Content
What's hot
What's hot (20)
Similar to cast and die preparation in fixed prosthodontics
Similar to cast and die preparation in fixed prosthodontics (20)
Recently uploaded
Recently uploaded (20)
cast and die preparation in fixed prosthodontics
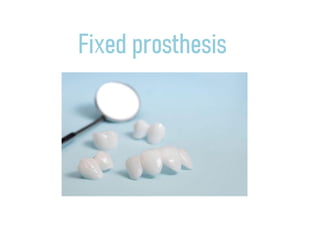
- 2. What is fixed prosthesis ? is the area of prosthodontics focused on permanently attached (fixed) dental prostheses. Such dental restorations, also referred to as indirect restorations, include crowns, bridges (fixed dentur es), inlays, onlays, and veneers.
- 3. HOW WE PREPARE THE WORKING CAST WITH REMOVABLE DIES?
- 4. Thedentistfinishes preparing thetoothand takes impressionwith silicone material. Note: the dentist takes the impression with silicone because the silicone is an accurate and stabile material that fixed need it. Then the dentist sends the impression to the laboratory to start working on it. Note: it is very important to sterilized the impression to avoid any infection.
- 5. vacuum mixer is used to minimize the amount of air incorporated into the mix. * The vibrator used to get all bubbles out put a specified amount of die stone and distilled water in the *vacuum mixer. Once the die stone mixed we ready to pour the impression . Put the impression on the edge of The*vibrator and apply the die stone from one side and let it flow to the other side .
- 6. A device with a large abrasive wheel for reducing and shaping the stone models. A wet trimmer uses a water wash away the trimmings. A dry trimmer uses a vacuum to collect the dust particles from trimming. Separate the stone cast when set and trim it to horse shoe. The base must be absolutely big and irregular in shape, the height of the base must be10-15 mm from free gingival margin.
- 7. This is the cast properly trim and the horseshoe outline with the 10 mm from the gingival margin
- 8. Draw a line from the prepared tooth to the edge of the cast Draw a point on the base from the opposite side of the cast (this point make easy to identify the areas we are going to be placing our dowel pin )
- 9. PINDEX • Bypindexmachinemakeaholeonthecastto put the pins. • Checkthat all pinscanenteron theholebefore fixingit. • Usealittle bit of superglueto stick thepins onthe cast.
- 10. PINDEX -Isolatethecast. -Makethebaseofthecast by mixstonethenputthe cast overthe stone base. -Trytoseparatethecast fromthe basebyuse hammerafter settingthe stone base. (do not apply a high force , the cast maybe break)
- 11. SAWING With a saw frame and a thin saw blade , cut between the prepared tooth and the adjacent tooth . • (it is important to pay attention not to damage any adjacent teeth) • The saw cut should start in the interdental papilla area and extend downward on a very slight taper. • The occlusal saw cut should extend three quarters of the way through the stone base . • Use your finger to press the pin from the bottom to come out of the cast.
- 12. -Mark the finish line with red pencil and be careful notto destroy the finish line. -Prepare the die with tungeston and rose head burs and sand paper.
- 13. COMPLETING THE DIE After cast and die preparation there is three steps before starting wax up : Die hardener : material applied on the surface of die to increase the surface hardness . Die spacer : apply on layer of die spacer to compensates for cement thickness. You can added more than one layer as requested by the dentist ( this should finish 1mm above the margin to ensure a tight marginal fit) Isolator: apply isolator on the die , adjacent and opposing teeth , by using a brush then, remove the excess using a paper tissue.
- 14. Now you can start waxing Show us what you can do *Organized by : - Dt. Sarah Omari *Done by : - khawla mousa - Ameera masoud