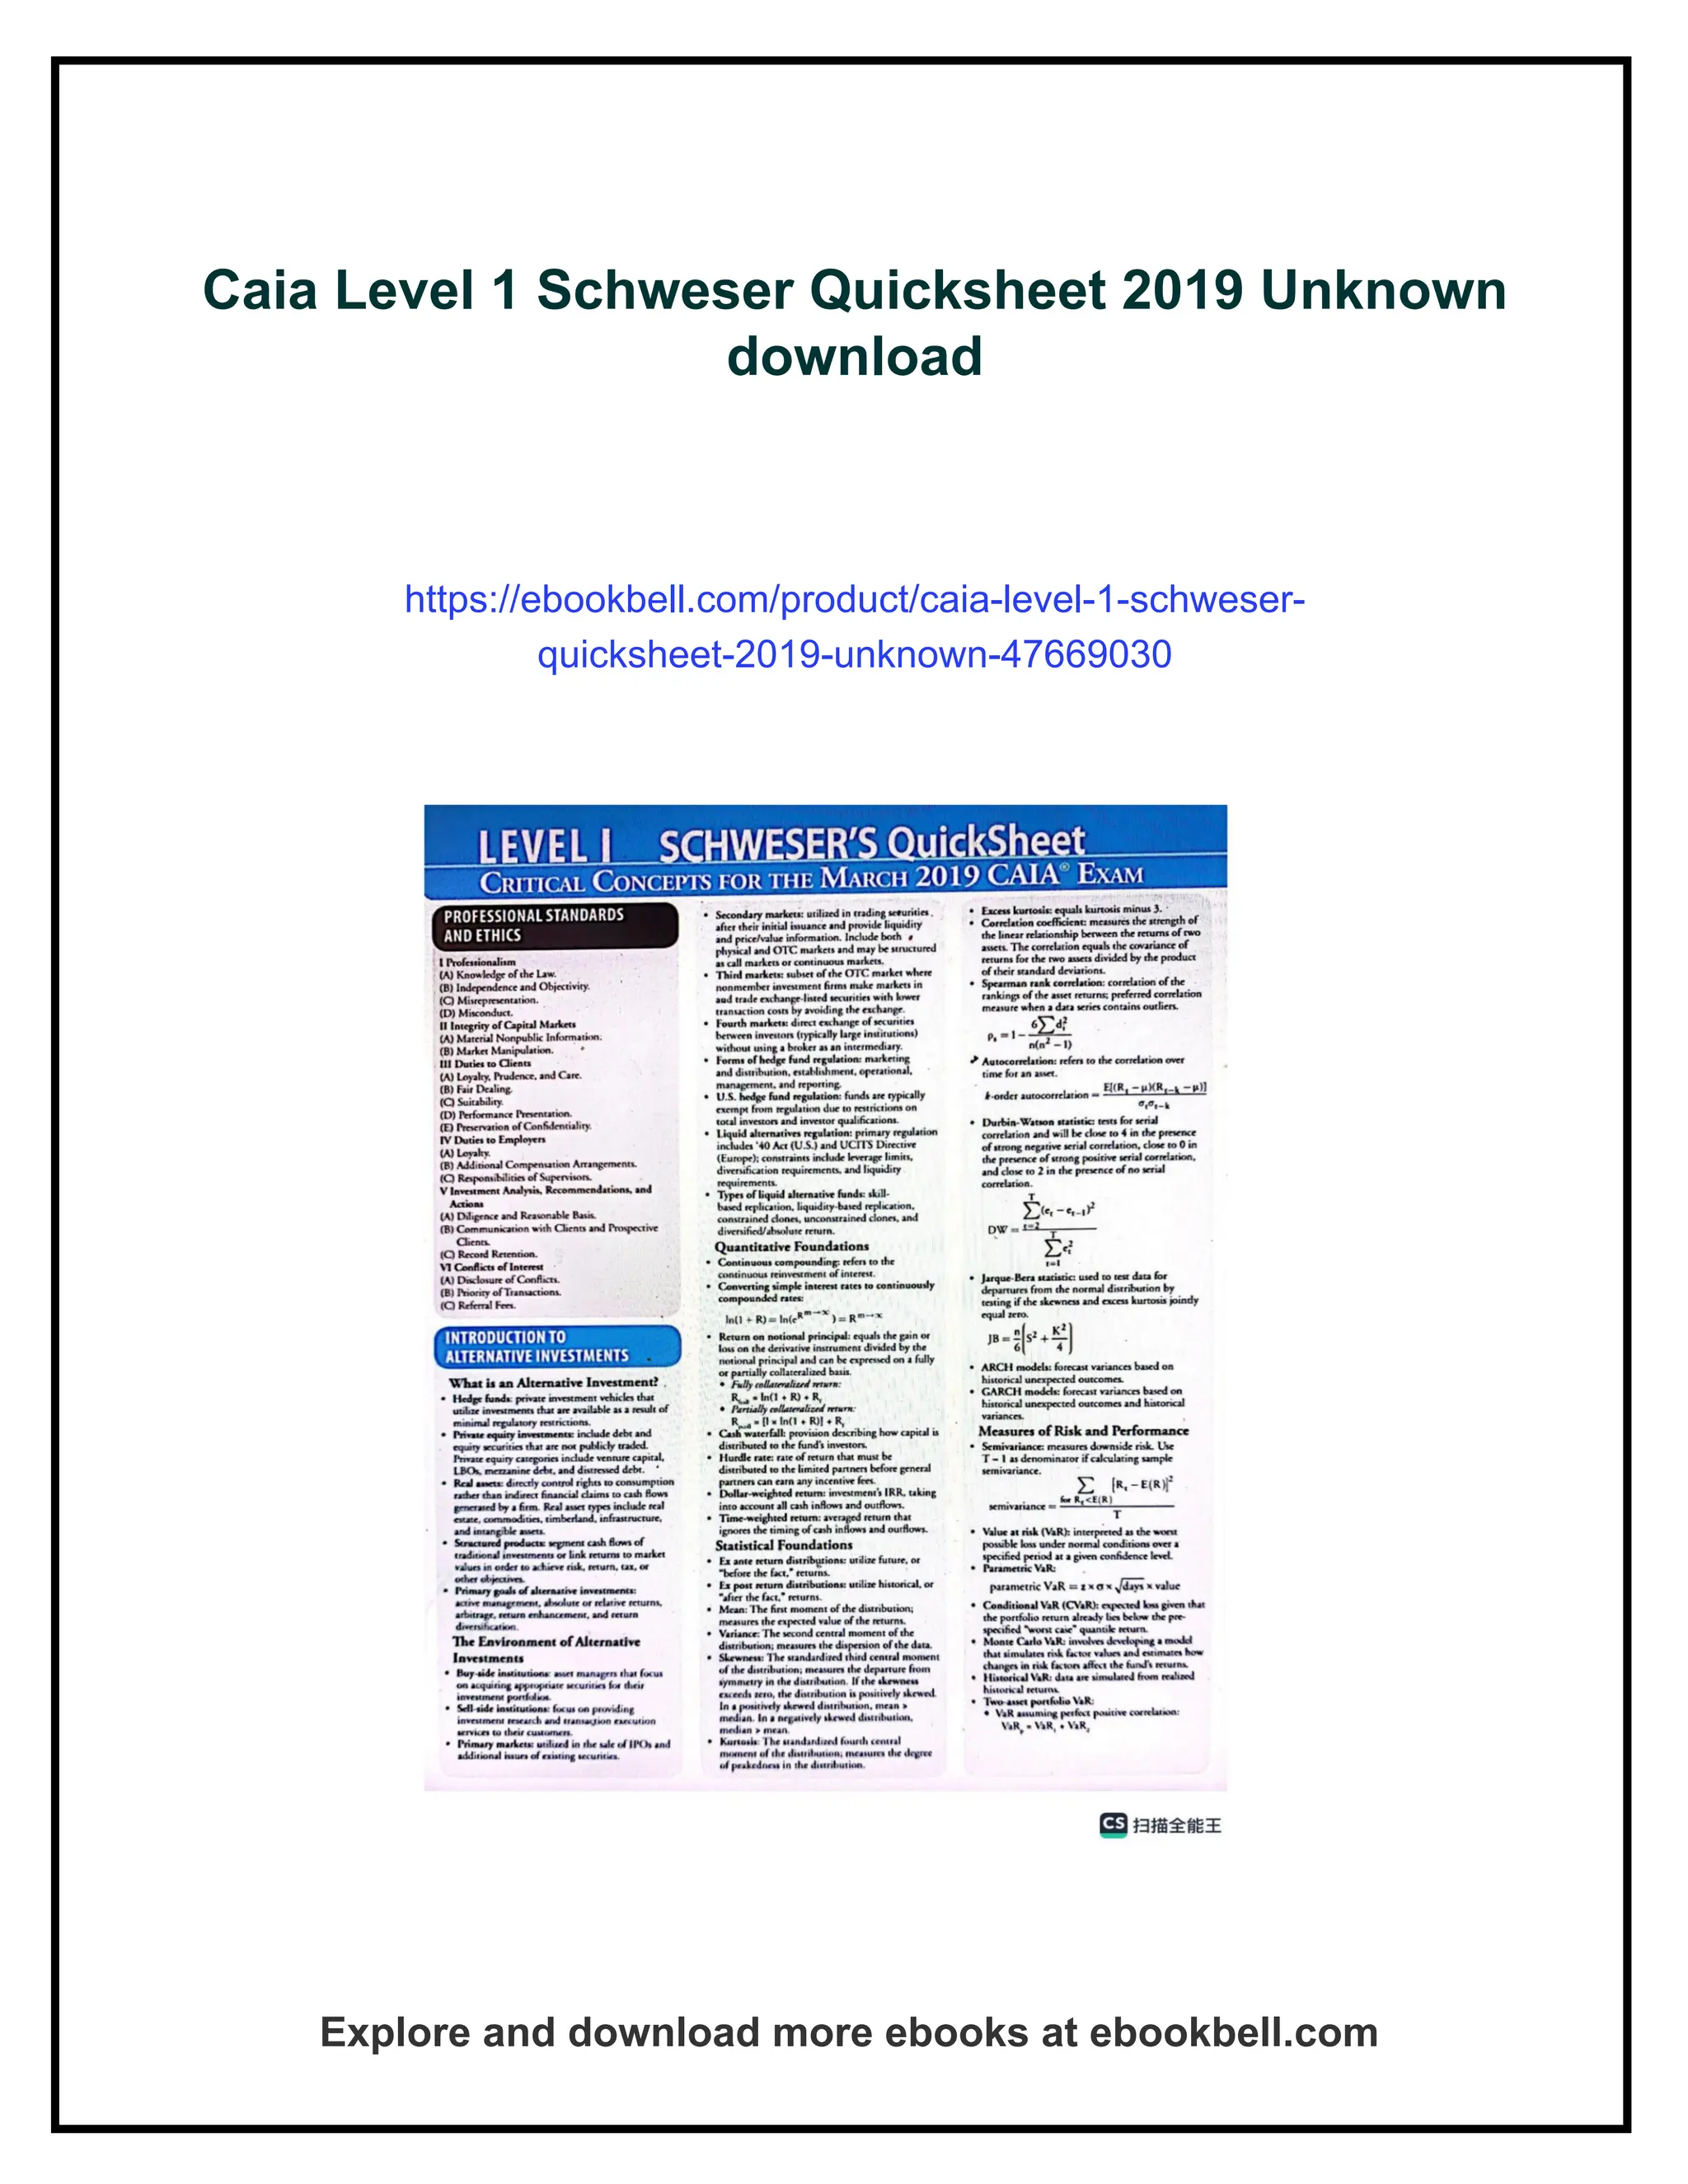
Caia Level 1Schweser Quicksheet 2019 Unknown
download
https://ebookbell.com/product/caia-level-1-schweser-
quicksheet-2019-unknown-47669030
Explore and download more ebooks at ebookbell.com
2.
Here are somerecommended products that we believe you will be
interested in. You can click the link to download.
Modern Mandarin Chinese The Routledge Course Textbook Level 1 2nd
Edition Claudia Ross
https://ebookbell.com/product/modern-mandarin-chinese-the-routledge-
course-textbook-level-1-2nd-edition-claudia-ross-34359656
The Routledge Course In Modern Mandarin Chinese Workbook Level 1
Traditional Characters 1 Spi Pap Claudia Ross
https://ebookbell.com/product/the-routledge-course-in-modern-mandarin-
chinese-workbook-level-1-traditional-characters-1-spi-pap-claudia-
ross-4762978
Aqa Psychology For A Level Year 1 As S Caraflanagan
https://ebookbell.com/product/aqa-psychology-for-a-level-year-1-as-s-
caraflanagan-54855388
Caia Level I An Introduction To Core Topics In Alternative Investments
Wiley Finance 1st Edition Caia Association
https://ebookbell.com/product/caia-level-i-an-introduction-to-core-
topics-in-alternative-investments-wiley-finance-1st-edition-caia-
association-2470574
3.
Caia Level IiAdvanced Core Topics In Alternative Investments 2nd
Edition Caia Association
https://ebookbell.com/product/caia-level-ii-advanced-core-topics-in-
alternative-investments-2nd-edition-caia-association-4690316
Caia Level I Mark J P Anson
https://ebookbell.com/product/caia-level-i-mark-j-p-anson-60977884
Alternative Investments Caia Level I Donald R Chambers Mark J P Anson
https://ebookbell.com/product/alternative-investments-caia-level-i-
donald-r-chambers-mark-j-p-anson-37515550
Alternative Investments Caia Level I 3rd Edition Donald R Chambers
https://ebookbell.com/product/alternative-investments-caia-
level-i-3rd-edition-donald-r-chambers-5481972
Alternative Investments Caia Level Ii 3rd Edition Coll
https://ebookbell.com/product/alternative-investments-caia-level-
ii-3rd-edition-coll-5558164
8. Seventh row:Make 17 single crochets, 1 chain.
9. Eighth row: Put 2 single crochets in the first stitch;
single crochet to end. Make 1 chain.
10. Make 6 more rows of 18 stitches.
11. On the fifteenth row, skip the stitch next to the
last. Make 1 chain.
12. Sixteenth row: Make 17 single crochets and 1
chain.
13. Seventeenth row is the same as the fifteenth row.
14. Eighteenth row is 16 single crochets and 1 chain.
15. Nineteenth row: Put a slip stitch in each of the
first 4 stitches; single crochet to the end of the row,
skipping the next to the last stitch. Chain 1.
16. Twentieth row: Make 11 single crochets and 1
chain.
17. Twenty-first row: Make slip stitch in the first 2
stitches; single crochet to the end of row, skipping next
to the last stitch. Chain 1.
18. Twenty-second row: Make 8 single crochets. Sew
up the sleeve.
With orange floss, put 2 rows of single crochet
around the hand, taking both threads of stitches.
Add 2 rows of black single crochet and 1 row of black
slip stitches.
To Make the Belt:
1. Chain 5.
8.
2. Make 4single crochets. Chain 1 to turn.
3. Taking both threads, make 4 single crochets and 1
chain to turn until the belt is the length desired. (About
28 rows.)
Sew the sleeves in the armholes as in making Teddy
Bear Sweater (see page 133).
Sew buttons in place and make loops as in making
Teddy Bear Sweater.
Sew belt at waist line under arm, sewing a button on
each end.
Sew the collar to the neck of the sweater.
DOLL’S CROCHETED FLOWER BASKET[O]
(See picture opposite page 230)
Material: White or tan crochet cotton No. 10. Steel
crochet hook No. 7.
Directions:
To Make Bottom of Basket:
9.
1. Chain 5;that is, make 5 chain stitches. Join into a
ring with a slip stitch.
2. Chain 5.
3. Make 15 treble crochets in the ring with 1 chain
stitch between each treble crochet. Join the last treble
crochet into the fourth chain stitch (see No. 2) with slip
stitch.
4. Second row: Chain 4. Make 1 double crochet in the
space between the first 2 treble crochets. Chain 2. Make
1 double crochet in next space. Make 2 chain stitches.
Continue in this way around the row. Join (with slip
stitches) the last of the 2 chain stitches into the third
chain of the 4 chain stitches.
5. Third row: Chain 3. Put 2 double crochets in the
first space between first 2 double crochets in previous
row. Make 2 chains. Put 2 double crochets in the next
space. Make 2 chains. Continue around the row, and join
the last chain with the top of the 3 chains.
To make the Scallops:
6. Make 1 single crochet, 3 double crochets, 1 single
crochet in each space between double crochets in the
row below.
To Make the Sides of the Basket:
1. Turn the under or wrong side of the bottom of the
basket toward you. Bend down the scallops under the
thumb.
2. Chain 3.
10.
3. Put hookthrough the top of the first double
crochet made in the second row. (See No. 4, page 246.)
Fasten chain which is on needle with a slip stitch. (See
picture.)
4. Chain
3. Put 2
crochets in
each space
between the
double
crochet in
the second
row. Join last
and first
stitch with
slip stitch.
5. Chain
3.
Put 2
double
crochets in
the space between the first two clusters of double
crochet in the row below. Chain 1.
Continue to end of row. Join with slip stitch.
6. Make 3 more rows in the same way.
7. The next row is made in the same way, except that
2 chains are put between the clusters of stitches.
8. Finish the top of sides with scallops like the ones
on the bottom of the basket. (See No. 6.)
To Make the Handles:
11.
1. Chain 3.
2.Put 4 double crochets at the top of the first two
scallops. (See picture.)
3. Chain 3. Turn. Make 1 double crochet in each of
the 4 double crochets.
4. Repeat No. 3 until handle is about 12 rows long, or
as long as desired.
5. Fasten end to opposite side of basket with slip
stitch.
6. Run ribbon through the spaces in the sixth row of
sides, and tie in a bow.
GIRL’S CROCHETED HAND BAG
(Crazy Stitch)
(See picture opposite page 104)
Material: Heavy mercerized Old Blue crochet cotton,
about No. 5. Steel crochet hook, No. 3.
Directions:
This bag is made with
Crazy Stitch
1. Chain 28 stitches; that is, make 28 chain stitches.
2. In the fourth stitch from needle, put 3 double
crochets.
3. Skip 3 chains and put 1 single crochet, 2 chains, 3
double crochets, in the fourth chain stitch.
12.
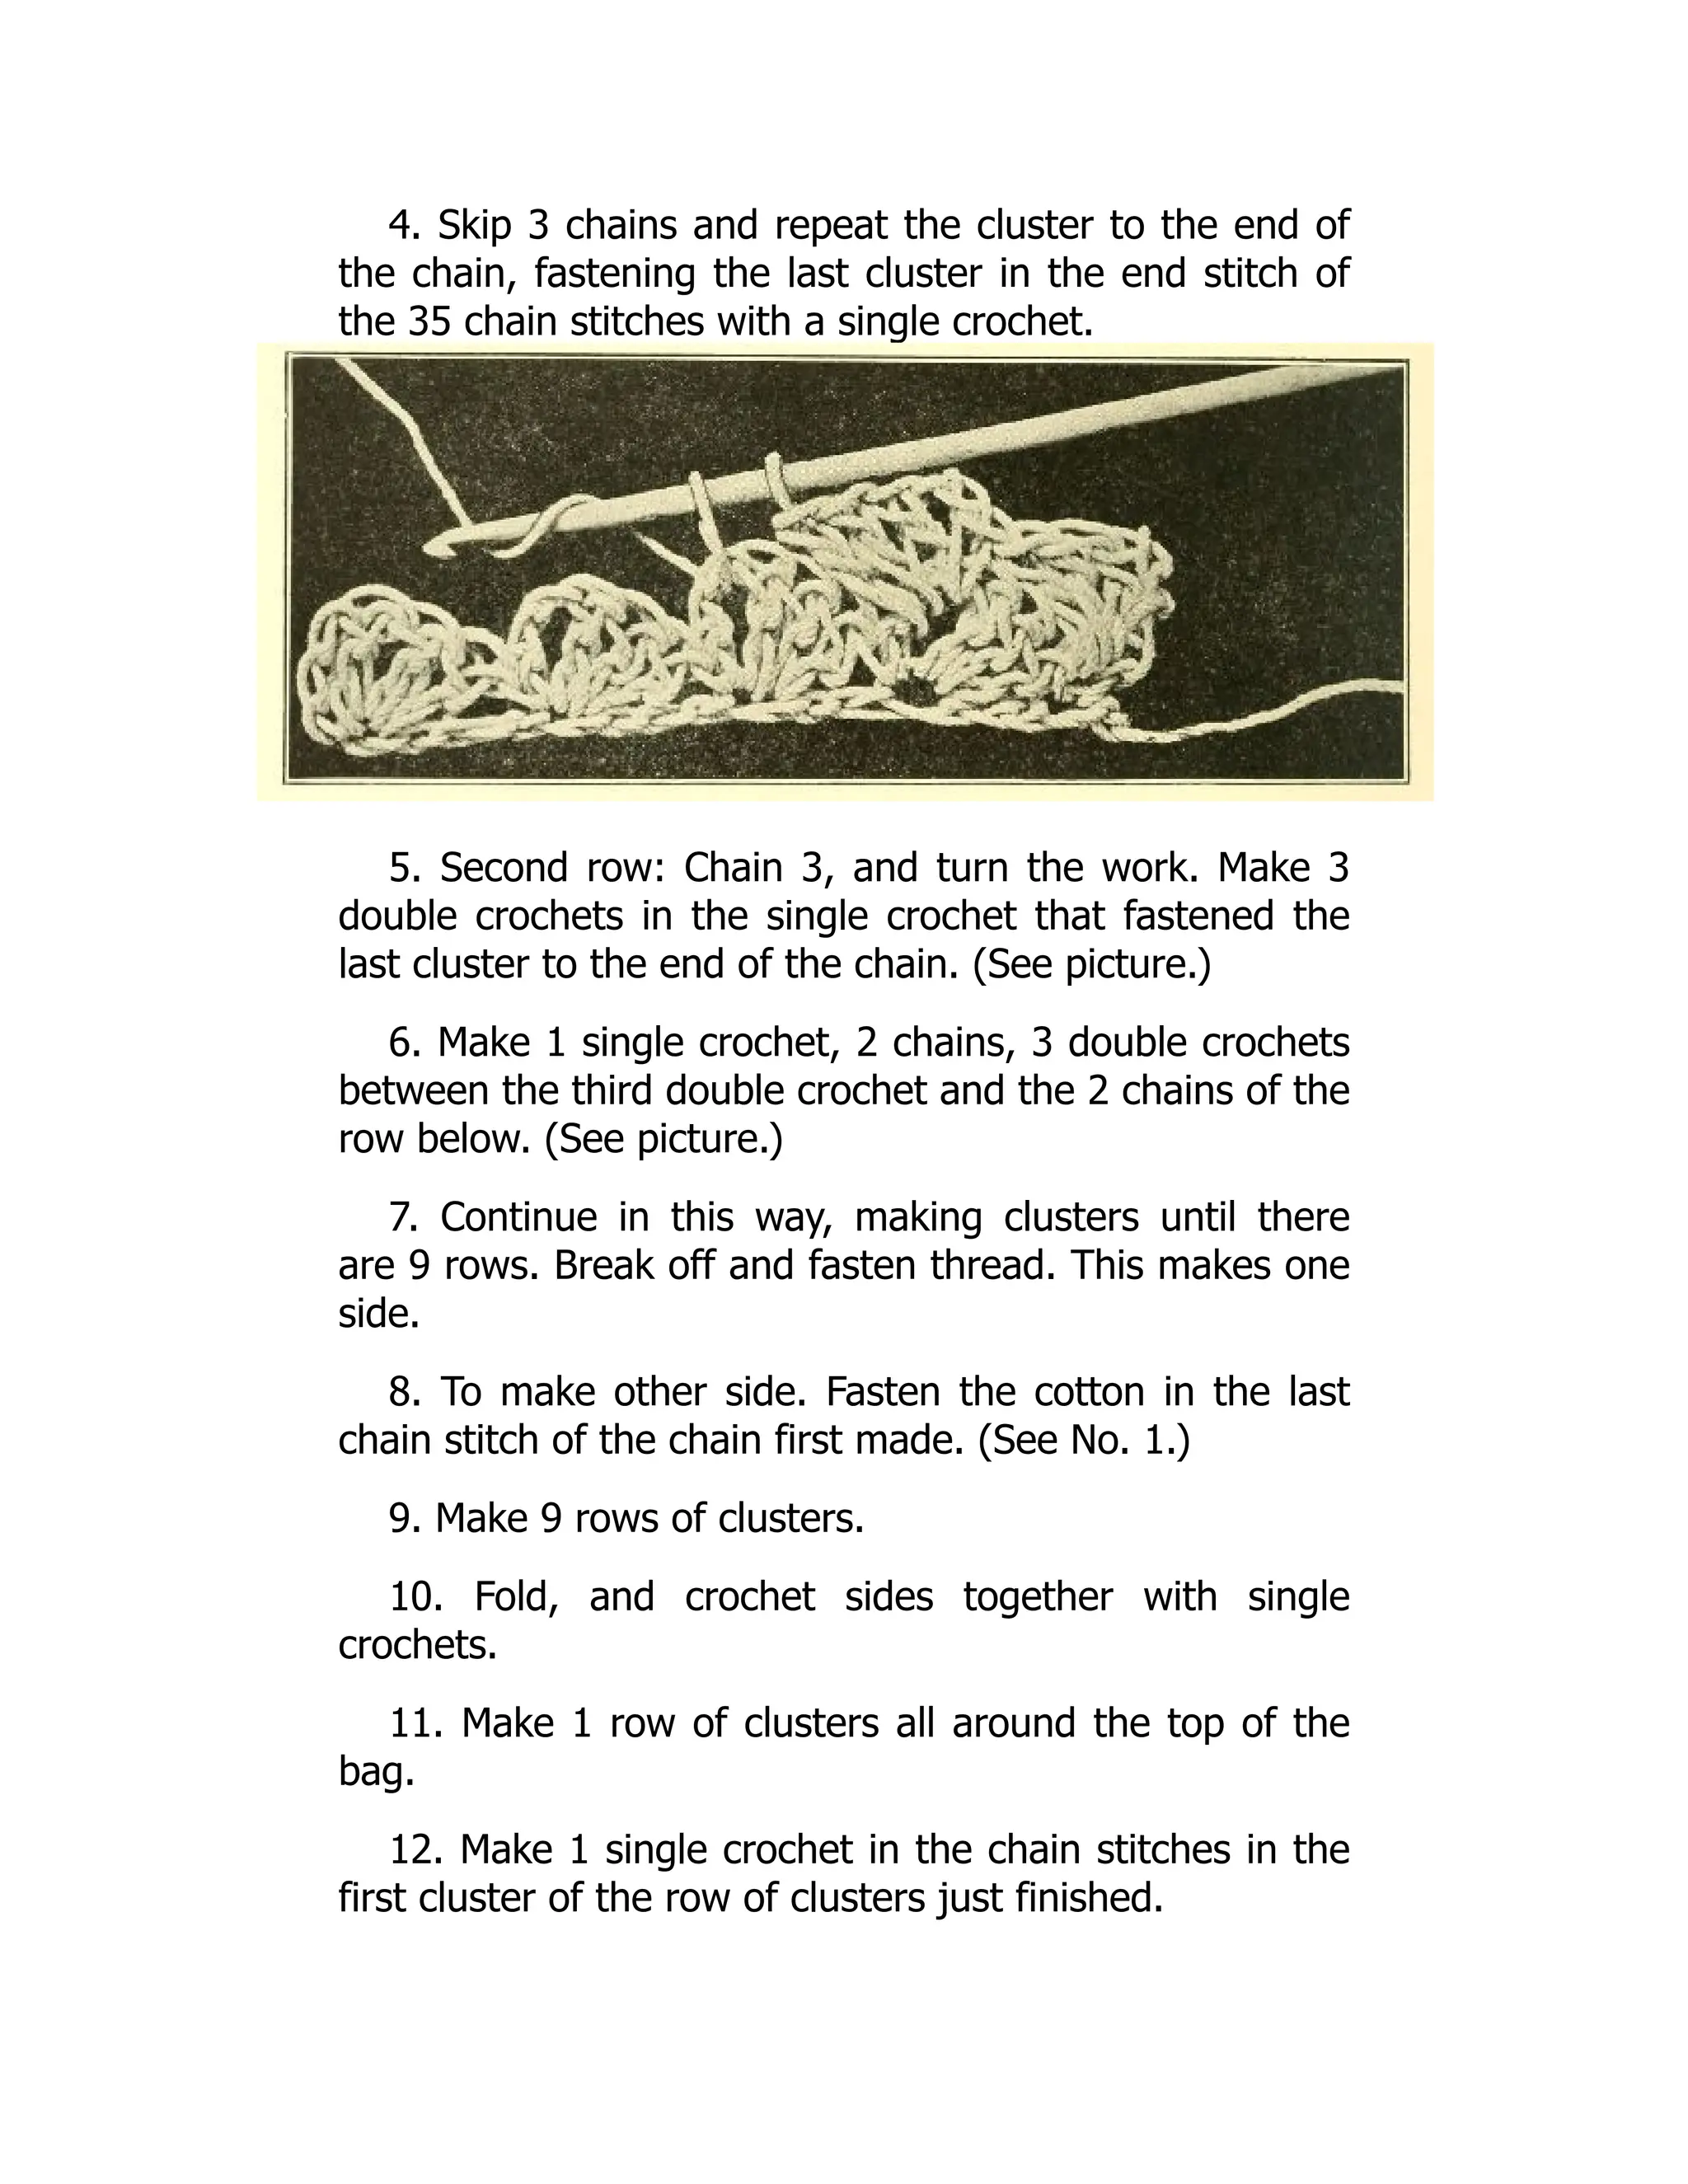
4. Skip 3chains and repeat the cluster to the end of
the chain, fastening the last cluster in the end stitch of
the 35 chain stitches with a single crochet.
5. Second row: Chain 3, and turn the work. Make 3
double crochets in the single crochet that fastened the
last cluster to the end of the chain. (See picture.)
6. Make 1 single crochet, 2 chains, 3 double crochets
between the third double crochet and the 2 chains of the
row below. (See picture.)
7. Continue in this way, making clusters until there
are 9 rows. Break off and fasten thread. This makes one
side.
8. To make other side. Fasten the cotton in the last
chain stitch of the chain first made. (See No. 1.)
9. Make 9 rows of clusters.
10. Fold, and crochet sides together with single
crochets.
11. Make 1 row of clusters all around the top of the
bag.
12. Make 1 single crochet in the chain stitches in the
first cluster of the row of clusters just finished.
13.
13. Make 3double crochets in the single crochets
between the clusters.
14. Put 1 single crochet in the chain of the next
cluster.
15. Repeat Nos. 12, 13, 14 around top.
To Make Runner Spaces:
1. Chain 3.
2. Put 1 double crochet in the first double crochet of
the first scallop. Chain 1.
3. Put 1 double crochet in the third double crochet of
scallop. Continue No. 2 and 3 around top. Join with slip
stitches.
To Make Top Scallops:
1. Make 1 single crochet in the first runner space.
2. Make 2 double crochets in the next space.
3. Make 1 double crochet in the double crochet
between the spaces.
4. Make 2 double crochets in the next space.
5. Make 1 single crochet in the next space. This
makes 1 scallop.
6. Make scallops in this way all around the top.
7. Make 1 single crochet in the top of the first double
crochet of first scallop.
8. Chain 3.
14.
9. Draw aloop through each of the first and second
stitches of scallops, and take the 3 loops off the needle
as one stitch.
10. Repeat Nos. 8 and 9 around the top.
To Make the Runner:
Cut 3 strands of the cotton about 1½ yards long. Lay
side by side and twist as in making trimming for Doll’s
Crocheted Hat, page 209.
Make 2 runners in this way, and tie a knot in one end
of each.
Run them through runner spaces from opposite sides
of bag and tie them in hard knots at the ends.
Cut ends even to look like tassels.
BABY’S CROCHETED BOOTEES
Materials: White four-fold Saxony wool. Pink four-fold
Saxony wool. Bone crochet hook No. 3.
Four small flat pearl buttons.
Directions:
(The work is commenced at “B.”)
1. With white wool chain 34; that is, make 34 chain
stitches.
2. Skip the first chain stitch, and make 1 single
crochet in each of the next 16 chain stitches.
3. Put 3 single crochets in the seventeenth stitch, and
1 single crochet in each of the next 16 chain stitches.
Make 1 chain to turn.
15.
4. Second row:Taking the back thread of the stitch,
make 1 single crochet in each stitch, except the
eighteenth stitch. In the eighteenth stitch put 3 single
crochets. The 2 rows now made from a rib. Make 1 pink
rib, putting 3 single crochets in the middle stitch at the
toe. Make 1 white rib and 1 more pink rib in the same
way. Do not break off the yarn. Just let it hang in back
of the work, and crochet back edges (from A to B)
together with the pink yarn, using slip stitches. Break off
and fasten wool.
To Make Sole:
1. Fasten white yarn at the joining place at the
bottom, holding right side (outside) of bootee toward
you.
2. Make 3 chain stitches. Taking back thread only,
make 1 double crochet in each stitch all around edge of
sock. Join last stitch to the 3 chains with slip stitches.
3. Second row: Chain 3. Make 1 double crochet in
each double crochet of row just made. Join end in same
way.
4. Fold sock from toe to heel with right sides in, and
join the opening in the sole with slip stitch, catching
16.
back threads onlyof opposite stitches.
Break off wool and fasten end. Turn sock right side
out.
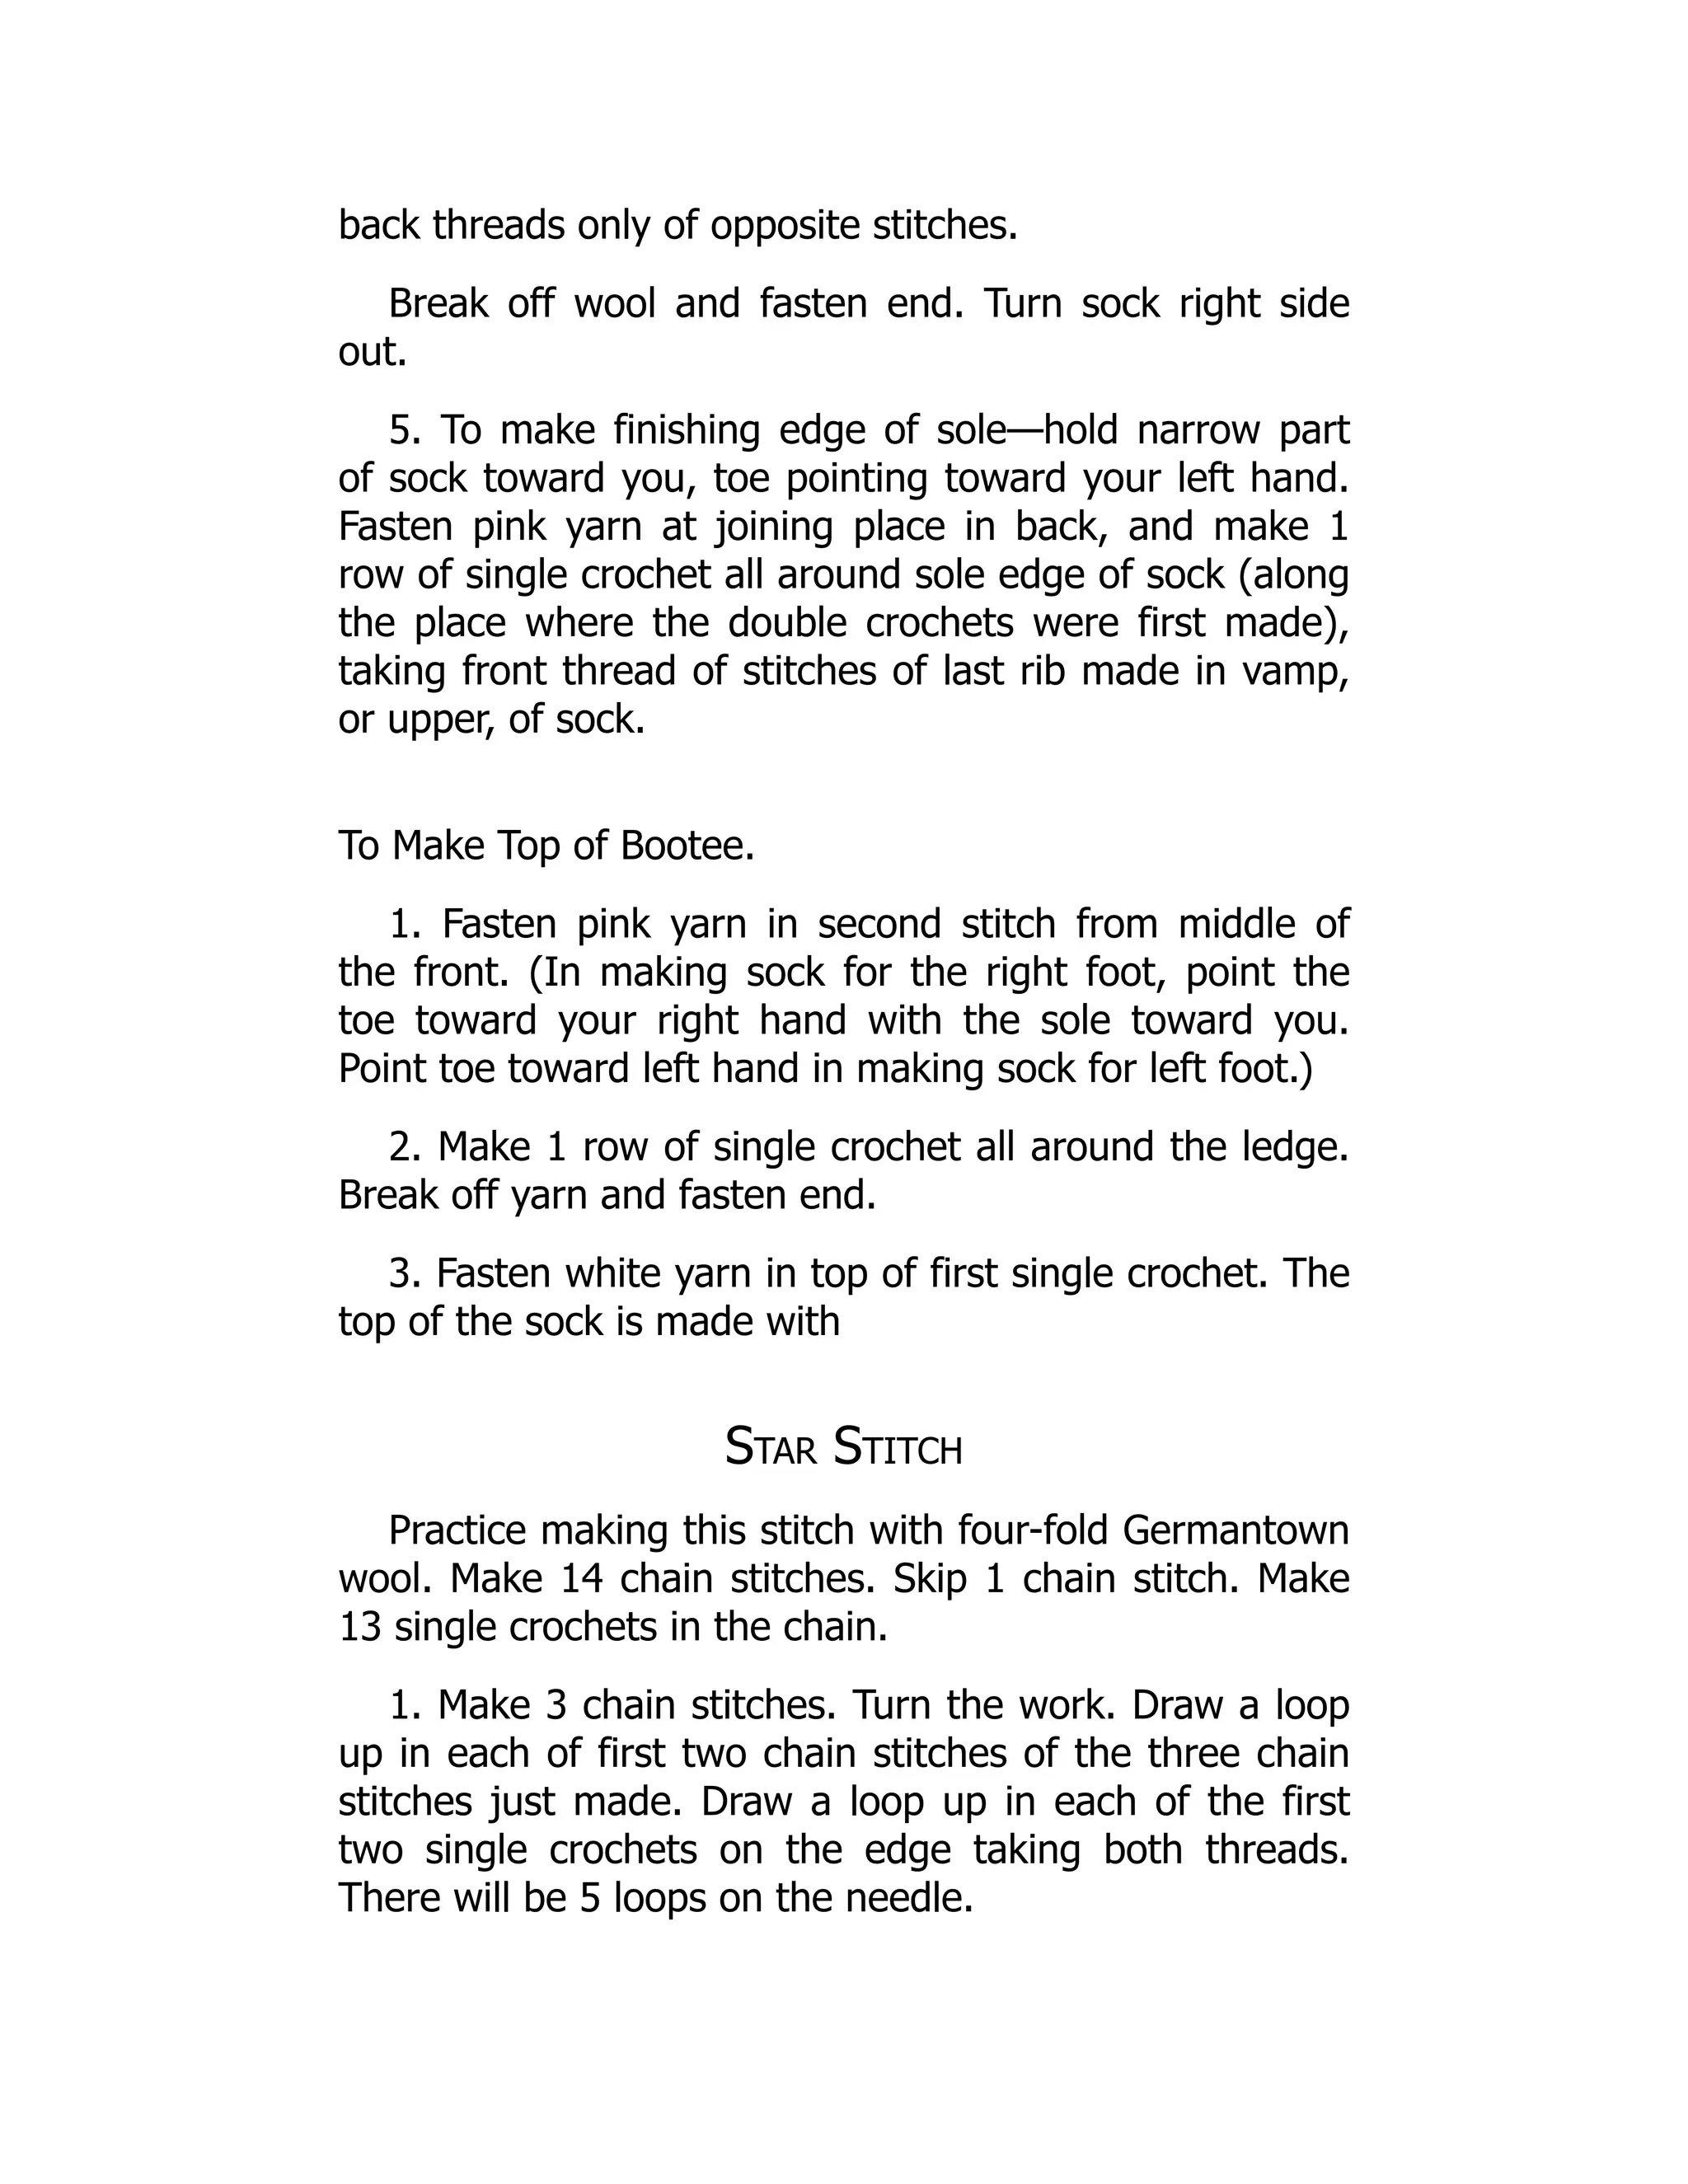
5. To make finishing edge of sole—hold narrow part
of sock toward you, toe pointing toward your left hand.
Fasten pink yarn at joining place in back, and make 1
row of single crochet all around sole edge of sock (along
the place where the double crochets were first made),
taking front thread of stitches of last rib made in vamp,
or upper, of sock.
To Make Top of Bootee.
1. Fasten pink yarn in second stitch from middle of
the front. (In making sock for the right foot, point the
toe toward your right hand with the sole toward you.
Point toe toward left hand in making sock for left foot.)
2. Make 1 row of single crochet all around the ledge.
Break off yarn and fasten end.
3. Fasten white yarn in top of first single crochet. The
top of the sock is made with
Star Stitch
Practice making this stitch with four-fold Germantown
wool. Make 14 chain stitches. Skip 1 chain stitch. Make
13 single crochets in the chain.
1. Make 3 chain stitches. Turn the work. Draw a loop
up in each of first two chain stitches of the three chain
stitches just made. Draw a loop up in each of the first
two single crochets on the edge taking both threads.
There will be 5 loops on the needle.
17.
Wrap the yarnaround the needle, and pull a loop
through all the loops on the needle.
Make 1 chain stitch. This last chain stitch draws all
the loops into a little “eye.”
2. For the second star stitch, pull a loop through the
“eye” of the first star stitch. Pull a loop through the back
thread of the last loop of the first star stitch. (See “A” in
picture below.)
Pull a loop through each of the next 2 single crochets
on edge. This will make 5 loops on the needle. Wrap and
pull yarn through all the loops on the needle at one
time.
Make 1 chain stitch to form the “eye.”
3. Repeat direction No. 2 all around sock. Break off
and fasten yarn.
4. Second row of star stitches. To make the first star
stitch on this row—fasten white yarn into top of first star
stitch and make 3 chains.
Draw a loop through each of 2 chain stitches. Draw a
loop through the “eye” of the star stitch below (the first
one made).
Draw a loop through the next stitch at the top of the
first star stitch, taking up the 2 threads. This makes 5
loops on the needle. Wrap and draw a loop through all 5
loops. Make 1 chain.
5. In making the next stitch, draw up a loop in the
“eye” of the star stitch just made. (See A in picture.)
Draw up a loop in back thread of the last loop of the star
stitch just made. (See B.) Pull a loop through the “eye”
of the next star stitch in the row below. (See C.) Pull a
loop through under the next two threads on the edge of
18.
the row
below.
(See D.)
Pulla
loop
through
the 5
loops on
the
needle.
Make 1
chain
stitch.
Repeat
this direction around the sock.
6. Make another row of white star stitches.
7. Make another row of pink star stitches.
To Make the Scallops:
1. Holding the sole of the sock toward you, fasten the
pink yarn at the opening point (near the lower button in
the picture).
2. Make a row of single crochet along opening edge
to the top.
3. In the corner stitch at the top, make 1 single
crochet and 2 chain stitches and 3 double crochets.
4. Make scallop by direction No. 3 in the “eye” of each
star stitch around the top.
5. Make a row of single crochet along the other edge
of the opening. Break off and fasten yarn.
19.
For Buttonhole Loops:
Fastenpink wool at top edge of the opening, and
working toward the sole, make 2 slip stitches.
Make 2 chain stitches. Skip 2 stitches on the edge
and make 2 slip stitches. Make another loop in the same
way and finish edge of opening with slip stitches. Break
off and fasten yarn.
Fasten all ends securely.
Sew two buttons opposite the loops.
BABY’S CROCHETED BALL
(See picture opposite page 230.)
Material: White four-fold Germantown zephyr, Pink
Germantown zephyr. Bone crochet hook No. 8.
Directions:
1. With pink yarn, chain 5; that is, make 5 chain
stitches.
2. Join into a ring with slip stitches.
3. Put 1 single crochet in the ring.
To Make Curly Stitch:
4. With the stitch now on the needle, put the hook
through the ring, draw the yarn through the ring, and
make 4 chain stitches. Then the stitches on the needle
will look like the picture at top of page 253.
5. Do not wrap, but draw the last chain stitch through
the stitch on the needle.
20.
6. Make 1single crochet in the ring.
7. Repeat Nos. 4 and 5, being sure to have the loop
of chain stitches on the right side of work.
8. Make 5 of
the loops of
chain stitches in
the ring (in all).
9. Second
row: Put 1 single
crochet in the
top of the first
single crochet in the ring and a curly stitch in the next
stitch.[P]
10. To widen.—Put the single crochet and the curly
stitch in the same stitch. This is done in about every
third stitch until the ball is as wide as you wish to make
it.
11. Make 5 rows of pink.
3 rows of white.
2 rows of pink.
This will finish half of the ball.
12. Make another half, and sew the two halves
together, leaving about 2 inches open for filling.
13. Fill with raw cotton. Bury in the cotton several
little brass bells. Or fill with odds and ends of left-over
yarn.
14. Finish sewing together.
21.
CURLY STITCH
LADY’S CROCHETEDNECKLACE
(See picture opposite page 200)
Material: Mercerized cotton, or silk—any color desired,
6 glass beads with large threading holes. Steel crochet
hook No. 7.
Directions:
Make two balls first in this way:
How to Make Button Balls
1. Make 4 chain stitches. Join first and last stitches in
a ring with a slip stitch.
2. Make 2 single crochets in each chain stitch. There
will be 8 stitches. Do not join them. Work round and
round.
3. Make 2 single crochets in each stitch of first row
(16 stitches).
4. Make 6 rows of 16 stitches each, or 96 single
crochets, working round and round.
22.
5. Stuff thisform just made with soft
cotton, filling it until it is firm but not hard.
Then draw in the top of the ball by making
single crochets in every other stitch until the
opening is closed.
Cut off the thread about 5 inches from the
ball, and draw it through the last stitch. Leave
the end hanging.
To Make the Chain:
1. Thread the 6 beads on the cotton and
push them back near the spool.
2. Commencing about 5 inches from the
end of the cotton, make 2 loose chain stitches.
Pull out the loop of the second chain stitch
until it is nearly ½ inch long.
To Make Bead Stitch:
3. Now throw the thread over the crochet needle;
that is, “wrap,” (holding the chain stitch between the
thumb and second finger of the left hand) and put the
hook into the first chain stitch under 2 threads. Throw
the thread over the needle and pull a long loop through
the chain stitches, making it the length of the first drawn
through.
Throw the thread over the crochet needle, or “wrap,”
and draw another loop up on the hook in the same way.
Continue to wrap and draw up loops in this way until
there are 7 loose loops on the crochet needle. (See
picture.) Wrap once again, and draw a loose loop
through all 7 loops already on the needle.
23.
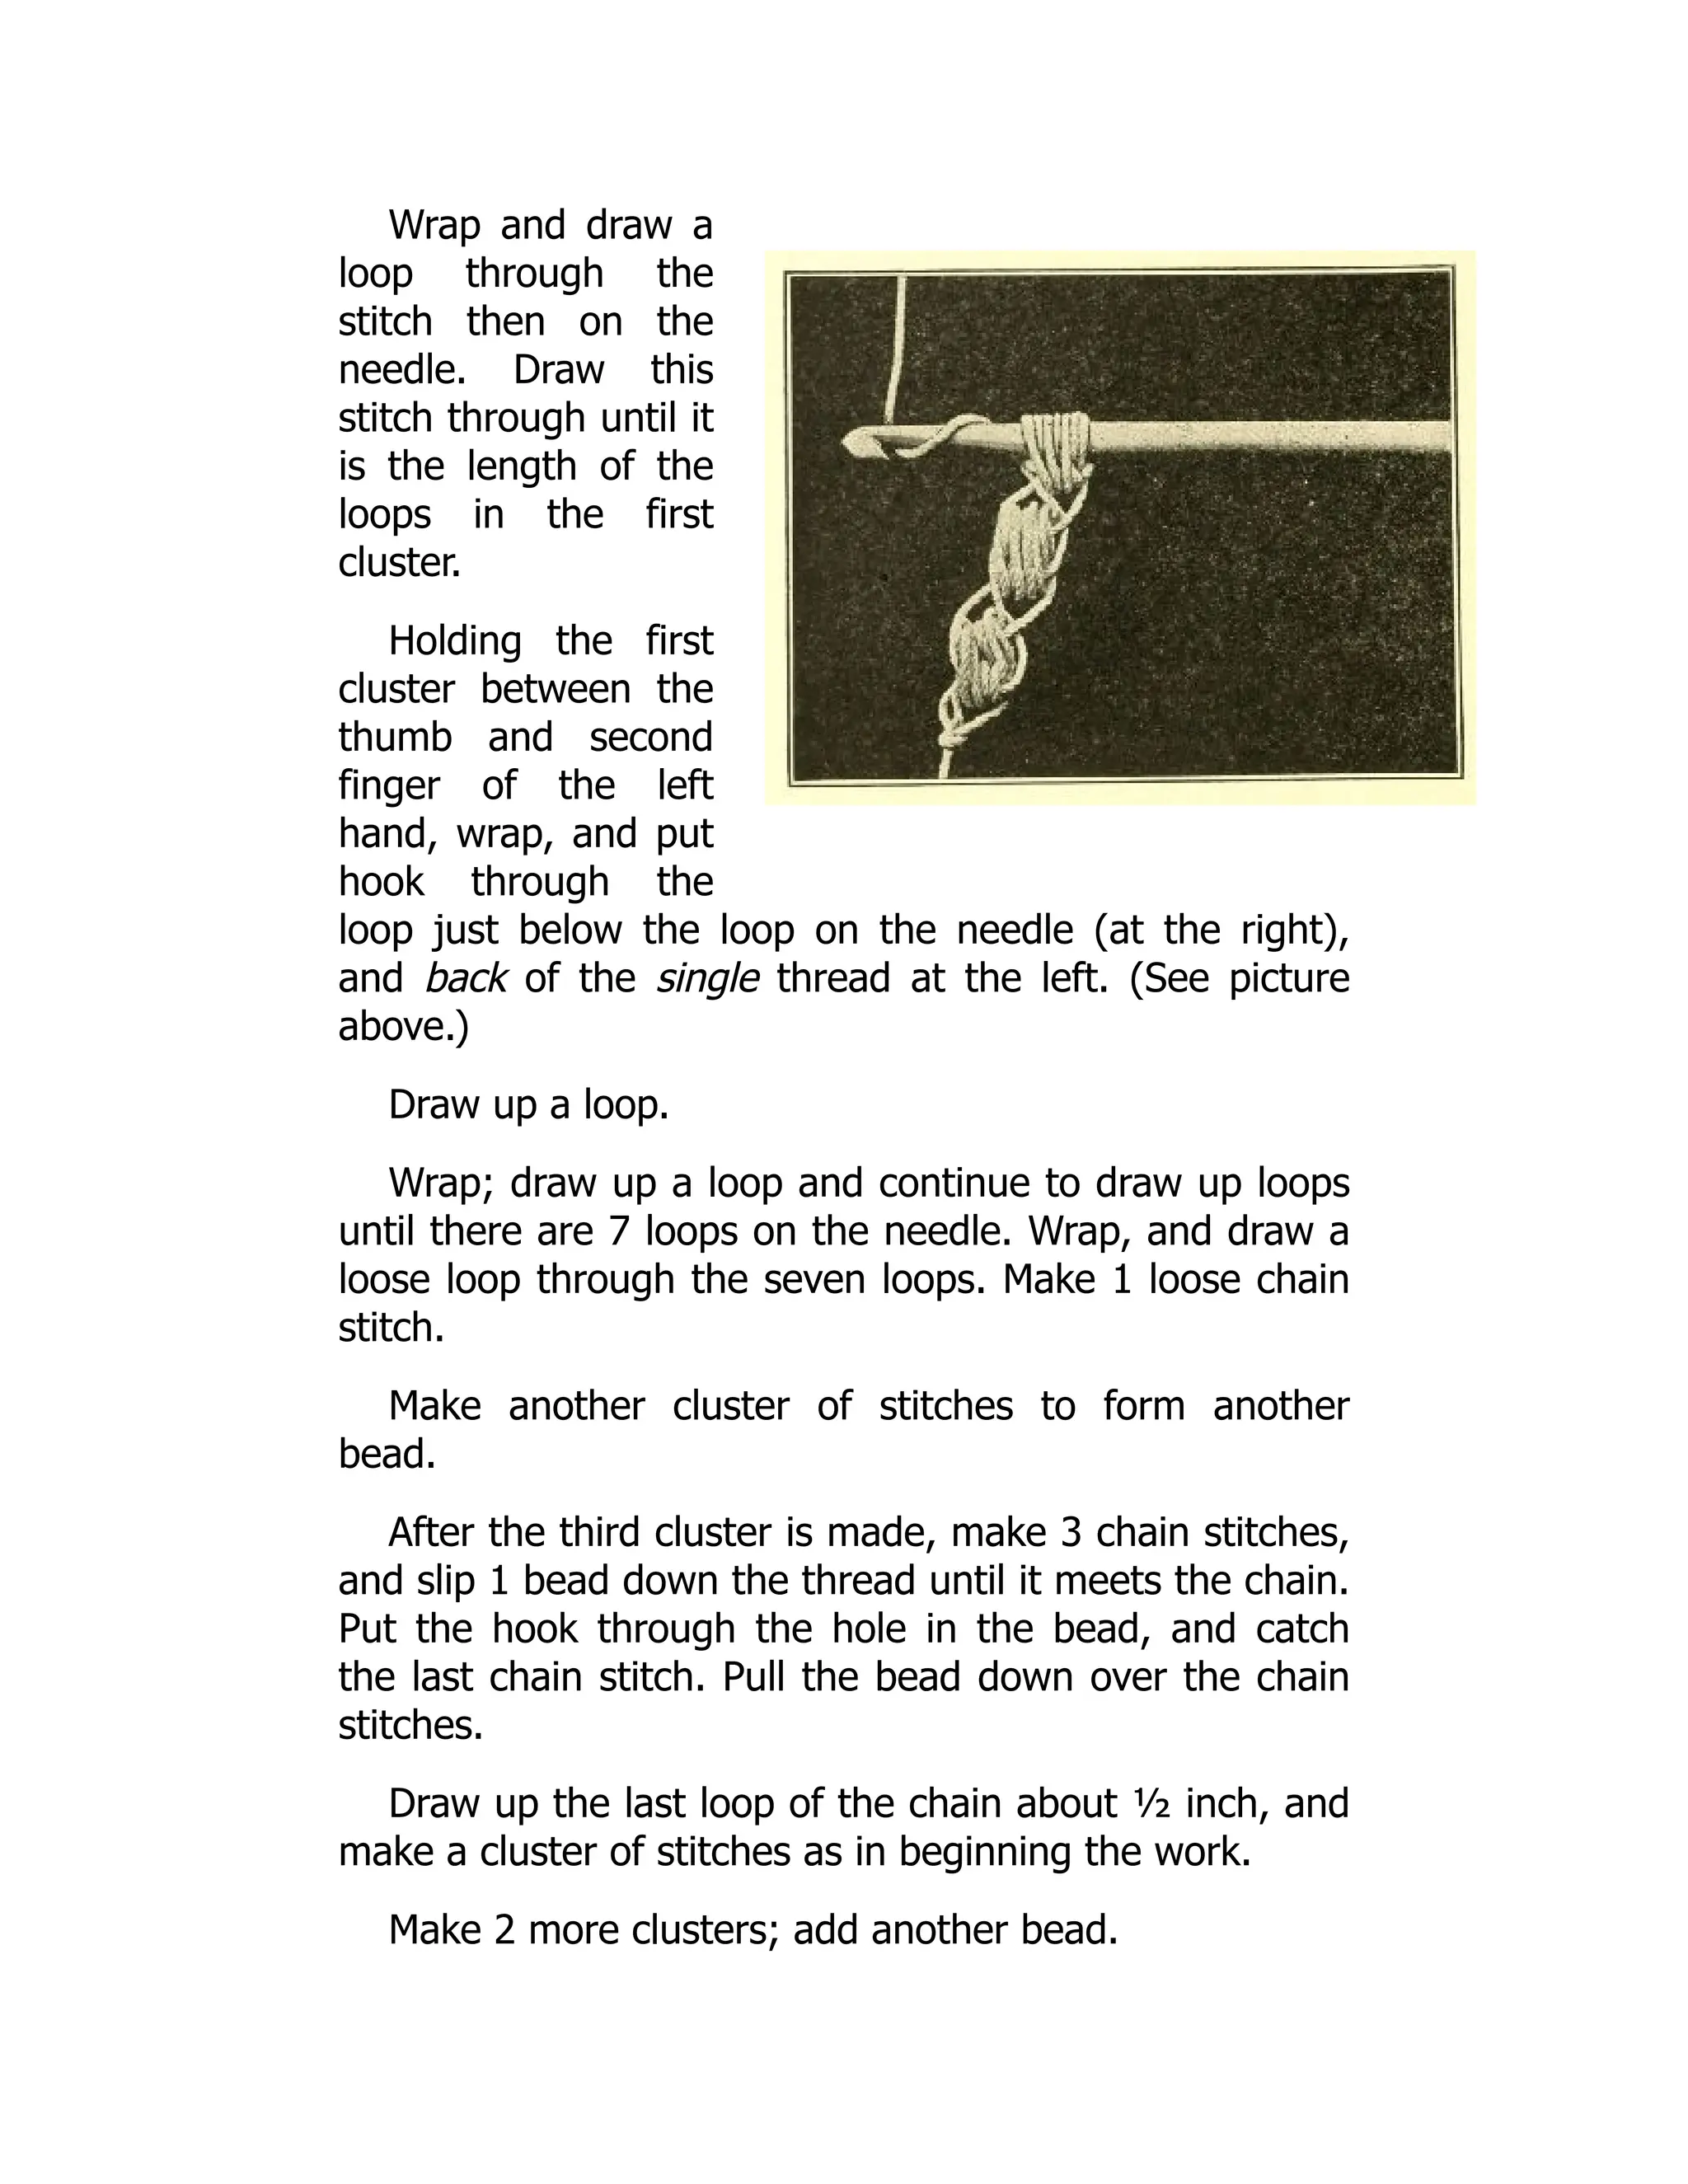
Wrap and drawa
loop through the
stitch then on the
needle. Draw this
stitch through until it
is the length of the
loops in the first
cluster.
Holding the first
cluster between the
thumb and second
finger of the left
hand, wrap, and put
hook through the
loop just below the loop on the needle (at the right),
and back of the single thread at the left. (See picture
above.)
Draw up a loop.
Wrap; draw up a loop and continue to draw up loops
until there are 7 loops on the needle. Wrap, and draw a
loose loop through the seven loops. Make 1 loose chain
stitch.
Make another cluster of stitches to form another
bead.
After the third cluster is made, make 3 chain stitches,
and slip 1 bead down the thread until it meets the chain.
Put the hook through the hole in the bead, and catch
the last chain stitch. Pull the bead down over the chain
stitches.
Draw up the last loop of the chain about ½ inch, and
make a cluster of stitches as in beginning the work.
Make 2 more clusters; add another bead.
24.
Make 2 moreclusters, and add one more bead.
Continue to make clusters until the chain is nearly as
long as desired. Then add the beads as explained above
and make 3 more clusters. Cut off thread about 5 inches
from the end of the work, and make one chain stitch to
fasten end, drawing it all the way through.
To Fasten Balls on Ends of the Chain:
Thread the end of cotton left on the chain into a long-
eyed needle and sew with several stitches to the top of
the ball, running the end well down into the ball to
fasten it securely before cutting it off.
LADY’S CROCHETED PURSE
(See picture opposite page 104)
Material: Fine mercerized blue, or lavender, or pink, or
ecru, or gray, crochet cotton. Steel crochet needle No. 9.
One bone ring, about 1⅛ inch across.
Directions:
1. Chain 8; that is, make 8 chain stitches. Join in ring
with slip stitch.
2. First row: Chain 3. Put 2 double crochets in each
stitch of chains.
Join with slip stitch.
3. Second row: Like the first row.
4. Third row: Chain 3. Make 1 double crochet in the
first stitch of row below. Make 2 double crochets in the
next; 1 double crochet in the next; 2 double crochets in
the next; and so on to the end of row. Join.
25.
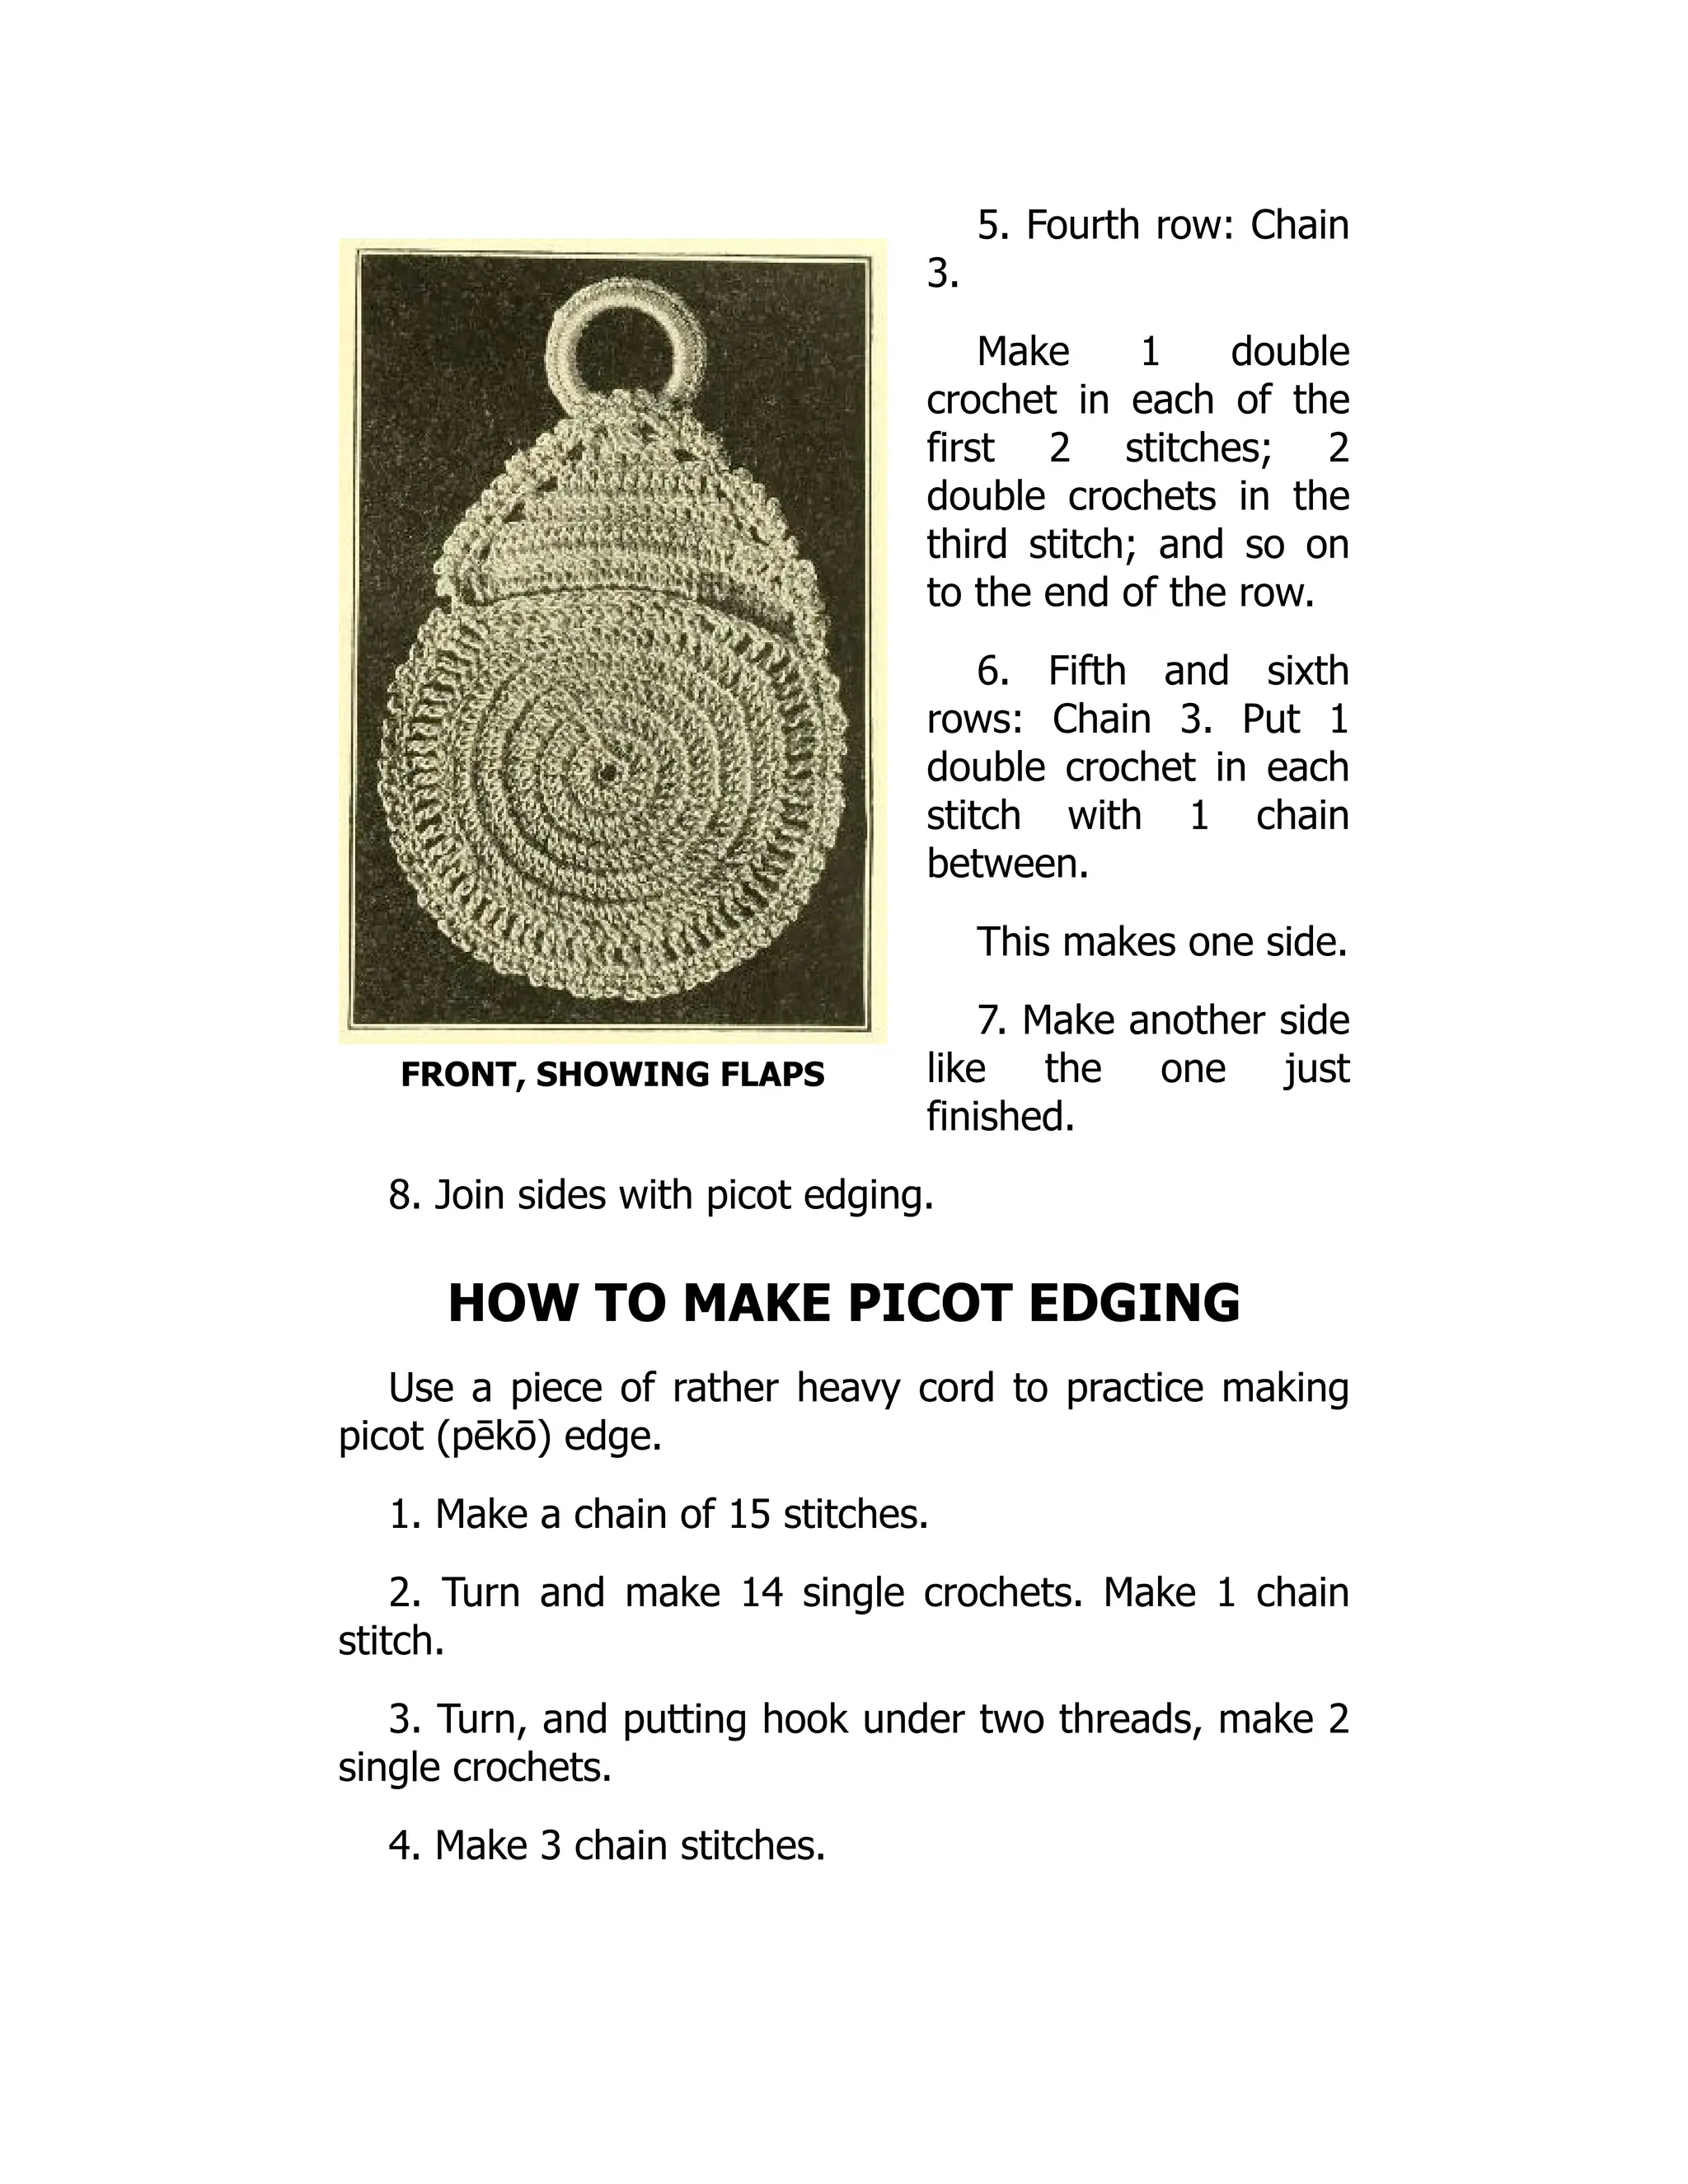
FRONT, SHOWING FLAPS
5.Fourth row: Chain
3.
Make 1 double
crochet in each of the
first 2 stitches; 2
double crochets in the
third stitch; and so on
to the end of the row.
6. Fifth and sixth
rows: Chain 3. Put 1
double crochet in each
stitch with 1 chain
between.
This makes one side.
7. Make another side
like the one just
finished.
8. Join sides with picot edging.
HOW TO MAKE PICOT EDGING
Use a piece of rather heavy cord to practice making
picot (pēkō) edge.
1. Make a chain of 15 stitches.
2. Turn and make 14 single crochets. Make 1 chain
stitch.
3. Turn, and putting hook under two threads, make 2
single crochets.
4. Make 3 chain stitches.
26.
5. Now, pointingthe hook toward the left thumb, put
it through the top loop of the single crochet last made
(where the chain was started), and then put it through
the lower front loop of the single crochet last made.
(See picture, page 256.)
6. Wrap and draw thread (a slip stitch) through all
three loops and on needle. This forms a picot.
7. Make 2 single crochets, and make another picot.
Continue in this way across the row. Now you are ready
to join the sides of the purse together.
8. Hold both sides together with the joinings
touching. Put the crochet hook through the space
between the first 2 stitches on each side. Make 1 single
crochet. Chain 3 and fasten last chain stitch to single
crochet just made with slip stitch as in Nos. 5 and 6.
This makes a picot.
9. Continue to make picot edge, leaving 15 double
crochets without the picot edge—to form an opening.
To Make the Flap:
(See picture on page 255)
1. Chain 3.
2. Put 2 double crochet in each space.
3. Chain 3 to turn. Skip 3 double crochets and put 1
double crochet in each of the 24 stitches. Skip 2 double
crochets and put 1 double crochet in the end double
crochet.
27.
PICOT EDGING
4. Chain3 to turn. Skip 3 double crochet.
Make 1 double crochet in each of 18 double crochets
in lower row. Skip 2 double crochets and put 1 double
crochet in the end double crochet.
5. Chain 3. Skip 3 double crochets. Make 12 double
crochets. Skip 2 double crochets. Make 1 double crochet
on end.
6. Chain 3. Skip 3 double crochets. Make 7 double
crochets. Skip 2 double crochets. Make 1 double crochet
on end.
7. Chain 3. Skip 2 double crochets. Make 3 double
crochets. Skip 2 double crochets. Make 1 double crochet
on end.
Break off and fasten cotton.
8. Put picot edge around the flap in the same way as
you did around the purse. Fasten thread.
Fold flap over into place.
28.
BACK OF PURSE
ToMake the Strings:
1. Holding the back
of the purse toward
you, fasten the cotton
into the fifth space from
the joining point of the
sides.
2. Chain 25. Catch
the twenty-fifth chain
stitch into the bone ring
with a single crochet.
3. Chain 25. Skip 2
spaces on the top of the
purse, and fasten the
twenty-fifth chain into
the third opening with a
single crochet.
4. Make 9 strings of
chain stitches, fastening
them at the ends as explained.
5. Cover the ring with single crochet.
6. Make 25 chain stitches, and fasten last chain stitch
in the place where the strings were started. Fasten
thread.
7. Sew snap fasteners on purse and flap.
DOLL’S KNITTED MUFF
(See picture opposite page 200)
Material: White Angora wool, or Teazle yarn. If Teazle
yarn is used, before sewing the garments up, brush with
29.
a clean stiffbrush to make them furry. Bone knitting
needles No. 2.
Directions:
1. Cast on 15 stitches.
2. Knit 20 ribs (a row across and back makes a rib).
3. Bind off.
4. Sew beginning row and last row of stitches
together, and line muff with satin.
5. Make a long chain of the yarn to use to hang muff
on doll’s neck.
Trim lower edge with fringe. Cut 3½-inch strands of
yarn for making fringe. Draw 2 strands through at a
time.
DOLL’S KNITTED BOA OR STOLE
(See picture opposite page 200)
Material and Needles: The same as for Doll’s Muff.
Directions:
1. Cast on 8 stitches. Knit plain.
2. Increase 1 stitch on each rib at one end only until
there are 14 stitches.
3. Make 42 ribs on the 14 stitches; then
30.
MUFF AND BOA
4.Narrow on one edge by knitting off 2 stitches
together as one, on each rib until there are 8 stitches.
5. Bind off.
6. Trim with fringe same as fringe on muff.
7. Make a 2-inch chain of gold color mercerized cotton
and sew it to each side of the neck of the stole.
8. Make 2 fancy rings like those made on doll’s
sleeveless sweater (see page 189), and sew one over
each place where the gold chain was fastened.
To Make the Trimming Band on Hat
(See picture opposite page 200)
Crochet a chain a little longer than needed to meet
around the band. Put 1 treble crochet into each chain
31.
stitch. (See page228.)
In sewing trimming band on hat, let the treble
crochet puff out, and bring the edges of the band close
together.
The pompon is made in the same way as the
pompons on the Doll’s Crochet Toque or Cap.
DOLL’S KNITTED BREAKFAST SHAWL
(See picture on page 87)
Material: White wool floss and pink mercerized
cotton. Bone knitting needles No. 5.
Directions:
1. With white floss cast on 30 stitches.
2. Knit plain for 50 ribs. (A rib is a row across and
back.)
3. Bind off.
4. Lay 1 strand of floss side by side with 1 strand of
pink cotton, and pick up each stitch along edge for
collar.
32.
5. Knit plain,narrowing at each end (by knitting first
2, and last 2 stitches together as one) until there are 9
ribs.
6. Bind off.
7. Put 1 row of single crochet around edge of collar.
8. Make tassels of the white and pink.
9. Sew a tassel on each corner of the cape.
DOLL’S KNITTED SLEEVELESS SILK SWEATER
(See picture opposite page 230)
Material: Mercerized rose pink cotton No. 3, with
turquoise blue cotton No. 3 for trimming; or crochet silk
No. 3. Bone crochet hook No. 3. Bone knitting needles
No. 3.
Directions:
33.
DOLL’S SILK SWEATER
ToMake the Back:
1. With pink material cast on 36 stitches.
2. Knit 2, purl 2, for 20 rows, slipping off first stitch
on each row.
3. Knit plain for 11 ribs. (A row across and back
makes a rib.)
4. Knit 2 stitches off as one at each end, every other
row, until there are only 28 stitches on the needle.
5. Knit plain until
you have 20 ribs.
6. Bind off.
To Make the Front:
1. Cast on 36
stitches and follow
directions for making
the back until the 11
ribs of plain knitting
are finished.
2. On the twelfth
rib, narrow at each end by knitting first 2 and last 2
stitches together, making 34 stitches on the needle.
3. Slip 17 stitches on to a safety pin, keeping the
remaining stitches on the needle.
4. Narrow by knitting 2 stitches together at each end
every other row until there are 11 stitches; then narrow
only on the neck edge, every other row until there are 8
stitches.
34.
5. Knit ribsof 8 stitches until there are 23 ribs from
the waist line to the shoulder, and bind off.
6. Take the stitches off the safety pin on to the
needle; and make other side like the first.
Sew fronts and back of the sweater together under
arms and on the shoulder lines.
With the blue cotton, put 2 rows of single crochet
around the armholes and neck taking up each stitch.
HOW TO CAST ON STITCHES WITH KNITTING
NEEDLES
1. Make a slip knot on one knitting needle near the
end of the yarn.
2. Knit 1 stitch. (See page 162, To Knit a Stitch.) Do
not take the stitch off the left-hand needle, but stretch
the new stitch (which is on the right-hand needle) and
slip it over the point of the left-hand needle. (See picture
on page 261.) Hold the stitch on the left needle with the
thumb of the left hand.
Continue to make new stitches and slip them on the
left needle until there are the number of stitches
required.[Q]
35.
Welcome to ourwebsite – the perfect destination for book lovers and
knowledge seekers. We believe that every book holds a new world,
offering opportunities for learning, discovery, and personal growth.
That’s why we are dedicated to bringing you a diverse collection of
books, ranging from classic literature and specialized publications to
self-development guides and children's books.
More than just a book-buying platform, we strive to be a bridge
connecting you with timeless cultural and intellectual values. With an
elegant, user-friendly interface and a smart search system, you can
quickly find the books that best suit your interests. Additionally,
our special promotions and home delivery services help you save time
and fully enjoy the joy of reading.
Join us on a journey of knowledge exploration, passion nurturing, and
personal growth every day!
ebookbell.com


![PROFESSIONAL STANDARDS
AND ETHICS
| [ Professionalism
/ (A) Knowledge of the Law.
, (B) Independence and Objectivity.
/ (C) Misrepresentation.
“ (D) Misconduct.
II Integrity of Capital Markers
(A) Material Nonpublic Information:
(B) Marker Manipulation. °
_ Ul Duties to Clients
(A) Loyalty, Prudence, and Care.
(B) Fair Dealing.
(C) Suitability.
(D) Performance Presentation.
(E) Preservation of Confidentiality.
IV Duties to Employers
(A) Loyalty.
(B) Additional Compensation Arrangements.
(C) Responsibilities of Supervisors.
V Investment Analysis, Recommendations, and
Actions
(A) Diligence and Reasonable Basis.
(B) Communication with Clients and Prospective
Clients.
(A) Disclosure of Conflicts,
(B) Priority of Transactions.
(C) Referral Fees.
INTRODUCTION TO
ALTERNATIVE INVESTMENTS
What is an Alternative Investment? .
© Hedge funds: private investment vehicles that
utilize investments that are available as a result of
minimal regulatory restrictions,
* Private equity investments: include debt and
equity securities that are not publicly waded,
Private equity categories include venture capital,
LBOs, mezzanine debt, and distressed debt.‘
© Real assets: directly control rights to consumption
rather than indirect financial claims to cash flows
generated by a firm. Real asset types include real
estate, commodities, rimberland, infrastructure,
and intangible assets.
° Structured products: segment cash flows of
traditional investments or link returns to market
values in order to achieve risk, return, tax, or
© Primary goals of alternative investments:
active management, absolute or relative returns,
arbitrage, return enhancement, and return
diversification.
The Environment of Alternative
Investments
© Buy-side institutions: asset managers that focus
on acquiring appropriate securities for their
investment portfolios.
© Sell-side institutions: focus on providing
investment research and transaction execution
services to their customers.
© Primary markets: utilized in the sale of [POs and
additional issues of existing securities.
LEVEL |SCHWESER’S
Quic
GCrItTICAL CONCEPTS FOR THE MARCH 2019 GAIA” ExaAM
* Secondary markets: utilized in crading seeurities .
after their initial issuance and provide liquidity
and price/value information. Include both ¢
physical and OTC markets and may be structured
as call markets or continuous markets.
© Third markets: subset of the OTC market where
nonmember investment firms make markets in
and trade exchange-listed securities with lower
transaction costs by avoiding the exchange.
© Fourth markets: direct exchange of securities
berween investors (typically large institutions)
without using a broker as an intermediary.
* Forms of hedge fund regulation: marketing
and distribution, establishment, operational,
management, and reporting,
* U.S. hedge fund regulation: funds are typically
exempt from regulation due to restrictions on
toral investors and investor qualifications.
* Liquid alternatives regulation: primary regulation
includes ‘40 Act (U.S.) and UCIT Directive
(Europe); constraints include leverage limits,
diversification requirements, and liquidity
requirements,
* Types of liquid alternative funds: skill-
based replication, liquidity-based replication,
constrained ¢lones, unconstrained clones, and
diversified/absolute remrn.
Quantitative Foundations
* Continuous compounding: refers to the
continuous reinvestment of interest.
* Converting simple interest rates to continuously
| compounded rates:
In() + R)a: InfeR Ye RO
® Return on notional principal: equals the gain or
‘Joss on che derivative instrument divided by the
notional principal and can be expressed on a fully
or partially collateralized basis.
© Fully collareralized return:
Ryu # inl + R) + Ry
* Partially collateralized return:
© Rog = lx In(1 + RY +R, |
+, Cash waterfall: provision describing how capital is
distributed to the fund's investors,
© Hurdle rate: rate of return that must be
distributed to the limited partners before general
rtners can earn any incentive fees,
* Dollar-weighted return: investment’s IRR, taking
into account all cash inflows and outflows.
* Time-weighted retum: averaged rerum that
ignores the timing of cash inflows and outflows.
Statistical Foundations
* Ex ante return distriburions: urilize furure, or
“before the fact,” teturns. I
¢ Ex post return distributions: utilize historical, or
“after the fact,” returns.
© Mean: The first moment of the distribution;
measures the expected value of the returns.
* Variance: The second central moment of the
distribution; measures the dispersion of the data.
© Skewness: The standardized third central moment
of the distribution; measures the departure from
symmetry in the distribution. If the skewness
exceeds zero, the distribution is positively skewed.
In a positively skewed distribution, mean >
median, In a negatively skewed distribution,
median » mean,
© Kurtosis: The standardized fourth central
moment of the distribution; measures the degree
of peakedness in the distribution,
kSheet_
vs} nena ido
© Excess kurtosis:
equals kurtosis minus 3."
* Correlation coefficient: measures the strength of
the linear relationship berween the retums of rwo |
assets. The correlation equals the covariance of —
returns for the two assets divided by the product
of their standard deviations. Sais
* Spearman rank correlation: correlation of the
rankings of the asset returns; preferred correlation
measure when a data series contains outliers.
6) d?
p= 1- Sud
n(n* —1)
? Autocorrelation: refers to the correlation over
time for an asset.
, E{(R, —p)(R,_, —p)]
0,0;
k-order autocorrelation =
© Durbin- Watson statistic: tests for serial
correlation and will be close to 4 in the presence
of strong negative serial correlation, close to 0 in
the presence of strong positive serial correlation,
and close to 2 in the presence of no serial
correlation.
val
* Jarque-Bera statistic: used to test data for
departures from the normal distribution by
testing if the skewness and excess kurtosis joindy
equal zero.
tle,Re
JB ose]
* ARCH models: forecast variances based on
historical unexpected outcomes.
* GARCH models: forecast variances based on
historical unexpected outcomes and historical
variances,
Measures of Risk and icieeeanice
* Semivariance: measures downside risk. Use
T = 1 as denominator if calculating sample
semivariance, 3
ye [R-ERI
for Ry <E(R)
T
¢ Value at risk (VaR): interpreted as the worst
ible loss under normal conditions over a
specified period at a given confidence level.
© Parametric VaR:
parametric VaR = 2x0x Vdays x value
* Conditional VaR (CVaR): expected loss given that
the portfolio return already lies below the pre-
specified “worst case” quantile recurn.
© Monte Carlo VaR: involves developing a model
that simulates risk factor values and estimates how
changes in risk factors affect the fund's returns.
© Historical VaR: data are simulated from realized
historical revuras.
© Two-asset portfolio VaR:
@ VaR assuming perfect positive correlation:
VaR, = VaR, + VaR,
semivariance =
HBSHEE](https://image.slidesharecdn.com/23834515-250522022310-e9547858/75/Caia-Level-1-Schweser-Quicksheet-2019-Unknown-5-2048.jpg)


![2. Make 4 single crochets. Chain 1 to turn.
3. Taking both threads, make 4 single crochets and 1
chain to turn until the belt is the length desired. (About
28 rows.)
Sew the sleeves in the armholes as in making Teddy
Bear Sweater (see page 133).
Sew buttons in place and make loops as in making
Teddy Bear Sweater.
Sew belt at waist line under arm, sewing a button on
each end.
Sew the collar to the neck of the sweater.
DOLL’S CROCHETED FLOWER BASKET[O]
(See picture opposite page 230)
Material: White or tan crochet cotton No. 10. Steel
crochet hook No. 7.
Directions:
To Make Bottom of Basket:](https://image.slidesharecdn.com/23834515-250522022310-e9547858/75/Caia-Level-1-Schweser-Quicksheet-2019-Unknown-8-2048.jpg)


![6. Make 1 single crochet in the ring.
7. Repeat Nos. 4 and 5, being sure to have the loop
of chain stitches on the right side of work.
8. Make 5 of
the loops of
chain stitches in
the ring (in all).
9. Second
row: Put 1 single
crochet in the
top of the first
single crochet in the ring and a curly stitch in the next
stitch.[P]
10. To widen.—Put the single crochet and the curly
stitch in the same stitch. This is done in about every
third stitch until the ball is as wide as you wish to make
it.
11. Make 5 rows of pink.
3 rows of white.
2 rows of pink.
This will finish half of the ball.
12. Make another half, and sew the two halves
together, leaving about 2 inches open for filling.
13. Fill with raw cotton. Bury in the cotton several
little brass bells. Or fill with odds and ends of left-over
yarn.
14. Finish sewing together.](https://image.slidesharecdn.com/23834515-250522022310-e9547858/75/Caia-Level-1-Schweser-Quicksheet-2019-Unknown-20-2048.jpg)


![5. Knit ribs of 8 stitches until there are 23 ribs from
the waist line to the shoulder, and bind off.
6. Take the stitches off the safety pin on to the
needle; and make other side like the first.
Sew fronts and back of the sweater together under
arms and on the shoulder lines.
With the blue cotton, put 2 rows of single crochet
around the armholes and neck taking up each stitch.
HOW TO CAST ON STITCHES WITH KNITTING
NEEDLES
1. Make a slip knot on one knitting needle near the
end of the yarn.
2. Knit 1 stitch. (See page 162, To Knit a Stitch.) Do
not take the stitch off the left-hand needle, but stretch
the new stitch (which is on the right-hand needle) and
slip it over the point of the left-hand needle. (See picture
on page 261.) Hold the stitch on the left needle with the
thumb of the left hand.
Continue to make new stitches and slip them on the
left needle until there are the number of stitches
required.[Q]](https://image.slidesharecdn.com/23834515-250522022310-e9547858/75/Caia-Level-1-Schweser-Quicksheet-2019-Unknown-34-2048.jpg)