1. CA-9.6 Lab on Drupal CMS
Class –IMCA-5
Lab Manual
Assignment: - How to Create a Custom Block
1 Logged in as an administrator navigate to Administer ➪ Structure ➪ Blocks
2 Click Add block at the top of the page.
3. Enter the following information
➤ Block description: My first custom block
➤ Block title: Drupal rocks!
➤ Block body:
<strong>Drupal rocks!</strong>
4 Under Region settings place the block into the left region for the Garland theme
5. Click Save block leaving all other options at their defaults.
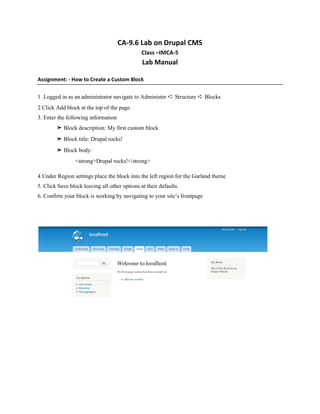
6. Confirm your block is working by navigating to your site’s frontpage
2. Assignment: - How to Use PHP to Control Block Visibility
1 Log in as an administrator and enable the PHP filter module at Administer ➪ Configuration and
modules ➪ Modules.
2. Configure your custom block by navigating to the Block administration page at Administer ➪
Structure ➪ Block and clicking configure to the far right of the “My first custom block” block.
3. Under Page specific visibility settings choose Show if the following PHP code returns true
and enter the following code:
<?php
if (date(“a”,time())==”pm”)
{
return TRUE;
}
else
{
return FALSE;
}
?>
3. Assignment: - How to Add a New Link to the Main Menu
1. Log in as an administrator and navigate to
Administer ➪ Structure ➪ Menus.
2. To the right of Main menu click Add Link.
3. On the Create link page type in the following information
➤ Menu link title: My first article
➤ Path: node/1
➤ Description: My first Drupal article
➤ Enabled: checked
4. Assignment: - How to Create a Custom Path for the About Page
1. Enable the path module.
➤ Log in as an administrator and navigate to Administer ➪ modules ➪ Modules.
➤ Check the box to the left of the Path module and click Save configuration at the bottom of the
page.
2. Navigate to Administer ➪ modules ➪URL aliases.
3. Click Add alias at the top of the page and enter the following information
➤ Existing system path: node/2
➤ Path alias: about
When user navigates to http://localhost/about they will see http://localhost/node/2.
5. Assignment: - How to Adding an Image Field to your Gossip Content
1. Navigate to the Content types page (Structure ➪ Content types).
2. Click edit to the right of the Gossip content type.
3. Click Manage fields then under Add new field enter the following information
➤ Label: Got a pic?
➤ Field name: gossip_image
➤ Type of data to store: Image
➤ Form element to edit the data: Image
4. Click Save.
5. On the field settings page select Public fi les. Optionally upload a default image to help keep your
theme looking consistent should the user not provide a picture.
6. Assignment: - How to Modify the Display Settings of Your Image Field
1. Navigate to your Gossip content type at Structure ➪ content types then click edit to the far right.
2. Choose Display fields on the edit page as shown in Figure
3. Note that the screen is split into two sides; Teaser (left) and Full node (right).
4. Set the Teaser to:
➤ Label: Hidden
➤ Format: Image “black-n-white-thumbnails” linked to content.
5. Set the Full node:
➤ Label: Hidden
➤ Format: Image “large” linked to file.
6. Click Save.
7. Verify the results by navigating to the teaser of a Gossip content type (for example by promoting one to
the frontpage) and also to the Full page.
7. Assignment: - How to Add a CCK Field to Your Gossip Content Type
1. Navigate to your Gossip content type at Structure ➪ Content types, click edit then manage fields.
2. Add a new field with the following information:
➤ Label: How accurate would you say this gossip is?
➤ Field name: accuracy
➤ Type of date to store (field type): List
➤ Form element to edit the data: Select list
3. Click Save at the bottom of the page.
4. On the next page under the Allowed values list type in the text
5. Click Save field settings at the bottom of the page. At this point use a different browser to navigate to
the Add content page.
6. On the Manage fields page of your Gossip content type click on the Select link under Widget. Change
the widget type to Checkboxes/radio buttons
8. Assignment: - How to Enabling Comment Moderation
1. Ensure the Comment module is enabled at Administer ➪ Modules.
2. Assign the following permissions, as shown in Figure, by navigating to Administer ➪
Configuration ➪ Permissions Post Comments to the Anonymous User role. Post Comments and
Post comments Without Approval to the Authenticated User role.
3. Ensure that commenting is enabled for the Gossip Content Type. Navigate to Administer ➪ Structure
➪ Content types, then click edit to the far right of the Gossip content type. Under comment settings
ensure that Open is selected as shown in Figure
4. Create a new Gossip node by clicking Add content in the Navigation menu then Gossip in the content
type list.
9. 5. Add a comment on the newly created node by clicking Add New Comment at the bottom of the node,
as shown in Figure.
The comment should appear immediately on the website as your user account is granted the Post
comments without approval permission. If it does not appear immediately review the permissions from
step 2. Add a comment as an anonymous user to ensure everything is setup correctly.
6. Log out and navigate back to the node you just created.
7. Add a new comment to the page.
The comment will not appear on the page as the anonymous user was granted the Post comments
permission.
Continue on to approve the comment.
8. Log in as an administrator and navigate to Administer ➪ Content ➪ Comments.
9. Click the Approval queue tab (see Figure).
10. Check the box next to the newly created comment then choose Published Selected Comments from
the dropdown and click Update.
10. Assignment: - How to Import an RSS Feed
1. With the Aggregator module enabled navigate to Configuration ➪ Web services — Feed
aggregator.
2. Begin by adding a feed. First click Add feed as shown in Figure1 then enter the following information
as shown in Figure2.
➤ Title: WSJ
➤ URL: http://online.wsj.com/xml/rss/3_7011.xml
➤ Update interval: 6 hours
➤ News items in block: 3
3. Click Save.
The Aggregator configuration page you should name contains something similar to Figure
4 . Click update items to retrieve the latest headlines from the RSS feed.
Drupal will automatically update the headlines every six hours as indicated by the Update interval.
11. Assignment: - How to Enabling User Account Moderation
In the top navigation bar, choose Configuration ➪ Account Settings, as shown in Figure
2. In the Registration and Cancellation section, select Visitors, But Administrator Approval Is Required,
as shown in Figure
3. Click the Save Configuration button at the bottom of the page.
12. Assignment: - How to Unblocking New User Accounts
1. Log out of your website. Create a new user account by clicking Create New Account under the
User Login block as shown in Figure, or by manually navigating to http://localhost/user.
2. With a new user account created, log in with your Administrator account.
3. Navigate to People by clicking People in the top Administration menu.
4. Select the newly created user account, select Unblock the Selected Users, and then click Update, as
shown in Figure
13. Assignment: - How to Customizing Your Welcome E-mail
1 . Navigate to Configuration ➪ Account Settings.
2. At the bottom of the page under Emails, select Welcome (No Approval Required).
3. Type in the following information:
Hey there [user:name], and welcome to our community. Please click the link below to verify
your e-mail address and enable your account. We look forward to seeing you around the
community.
[user:one-time-login-url]
For security reasons, this URL can only be used once. Once you have logged in, you can
modify your password and other account settings at [user:edit-url].
See you around the community!
4. Click the Save Configuration button at the bottom of the page.
14. Assignment: - How to Creating a New Role & Assigning Permissions to a Role
Creating a New Role
1. Log in with your Administrator account and navigate to Configuration ➪ Roles (under People and
Permissions).
2. Enter Web Editor in the text box at the bottom of the screen and then click the Add Role button,
as shown in Figure
Assigning Permissions to a Role
1. Navigate to the permissions page with one of the following two methods:
➤ Choose Configuration ➪ Permissions.
➤ On the Roles page, click Edit Permissions to the right of the role.
Note that using the Roles ➪ Permissions method de-clutters the Permission page by showing only a
single role, as demonstrated in Figure
2. On the Permission page, assign the Create Article Content and Edit Any Article Content permissions to
the Web Editor
role, as shown in Figure
3. Click the Save Permissions button at the bottom of the page.