The document provides instructions for building traditional casing for new windows. It describes building casing for both a vinyl window with a new sill and an aluminum window that reused the original wood sill. The instructions include details on installing the windows, building wood trim boards for the sides, sill and top with angled cuts, using treated pine wood, and caulking to seal joints. Tools used include drills, saws and nail guns, with materials being treated lumber, nails and caulk.
The document discusses various building materials and components used in construction including:
1) An air barrier housewrap that controls air infiltration.
2) Soffit vents that allow air transfer into attics to aid ventilation.
3) Ridge vents that ventilate hot air out of attics.
4) Gable vents that allow air flow into and out of attic spaces.
This visual dictionary provides concise definitions and illustrations of common construction terms. It includes entries on topics like air barriers, attic ventilation, backhoes, batter boards, brick bonds, bulldozers, concrete joints, concrete masonry units, doors, electrical components, framing elements, front end loaders, gypsum board, heat pumps, insulation, lintels, mortar, oriented strand board, plumbing, plywood, rebar, roof drainage, roof materials, roof shapes, roof terms, stone, vapor retarders, waterproofing, weepholes, welded wire fabric and windows. Each entry concisely defines the term and provides a clear visual example.
The Story of Wall Paneling is what you’re Looking for Has Just Gone Viral!awipanels
Wall paneling For the main restroom I proposed that they run with Aquatile. This is divider framing that has the look and feel of fired tile, yet without the support of cleaning grout that accompanied genuine earthenware tile. This embellished tileboard is dampness evidence and comes in differing tile shapes and sizes and really has the look of artistic tile.
The document provides definitions and descriptions of various construction materials and components. It describes items like plasterboard, roof vents, bricks, doors, windows, framing materials, insulation, plumbing fixtures, roofing materials, and masonry terms. Dimensions and purposes of materials are given, such as rebar with a diameter of 5/8" to grip concrete.
This visual dictionary provides definitions and illustrations of common building and construction terms. It includes entries on air barriers, attic ventilation components, backhoes, batter boards, brick bonds and arches, building materials like concrete masonry units and gypsum board, doors, electrical components, framing elements, insulation types, plumbing fixtures, rebar, roofing materials and components, siding, stonework, vapor retarders, waterproofing, windows, and other construction terms. Each entry concisely defines the term and shows an example photo for reference.
This document discusses tiny homes and simple living. It provides background on the Tiny House Blog community project and the benefits of living in a tiny home such as saving money, freedom from debt and stuff, and having more time. Several websites providing information on tiny homes and tiny house construction are also listed.
The document defines and describes various construction materials and elements. It provides descriptions of air barrier paper, framing elements like anchor bolts and sole plates, roofing materials like clay tiles and metal panels, windows like single hung and casement, and masonry patterns like random ashlar and coursed rubble. It also defines mechanical systems and insulation used in buildings.
Award-winning Cedar Homes - Captivating Interior Designscedardesigns
Award-winning Cedar Homes - Captivating Interior Designs
Take a peek and step inside to see the creativity of some of our proud custom cedar homeowners
This document discusses using Twitter in education. It provides examples of how teachers and students can use Twitter, including for class discussions, feedback, following experts, and investigating topics. Students in one study reported that Twitter helped reduce their anxiety in the target language and allowed them to ask questions. The document provides suggestions for how teachers can incorporate Twitter, such as prompting initial tweets, developing course-specific practices, and having students discuss themselves or content in class or beyond.
The newsletter provides information about upcoming events for the North Texas Coaches, including the June 9th PRISM awards event celebrating organizations that have benefited from coaching. It also announces three LinkedIn workshops in September, November and December to help coaches learn how to use LinkedIn effectively. The newsletter closes by listing additional upcoming chapter meetings and reminding members to renew their ICF global membership.
This document discusses the importance of air bricks and ventilation under wooden ground floors to prevent moisture buildup and rot. It recommends installing air bricks spaced every 1800mm around the exterior walls. Blocking air bricks can cause damp, mold, and dry rot issues over time. The document provides guidance on installing new air bricks or extending existing vents that may have been blocked by additions like conservatories. It also discusses addressing creaking floors caused by deteriorated wall plates supporting the floor joists.
Mobile is becoming a powerful marketing medium. Traditional media like print is declining while mobile usage is rising. Mobile advertising is growing through new formats like mobile applications and location-based services. A key trend is the emergence of the mobile wallet which allows users to make payments and transfer funds directly from their phones, as seen with the successful M-Pesa system in Africa.
Redwood siding has superior dimensional stability compared to other domestic softwoods, resulting in minimal warping, cupping, checking and nail popping over the life of a structure. It absorbs and retains finishes better than most other woods due to its open cellular structure. Redwood heartwood is naturally resistant to decay and insects. Properly specifying, storing, handling, and installing redwood siding ensures optimal performance and longevity.
This document provides instructions for fitting a toilet and bidet. It outlines the steps to remove the old toilet, including disconnecting pipes and removing mounting hardware. It describes how to install the new toilet, including assembling the siphon and lever, connecting to pipes, and ensuring it is level. Safety precautions like protective equipment and turning off water are advised. Proper installation of supply pipes, waste pipes, and electrical bonding is also covered.
Changing taps requires basic plumbing skills and agility to work in cramped spaces. Key steps include turning off the water supply, removing old taps which may be difficult due to inaccessibility, cleaning the area, and fitting new taps along with any required connectors or pipes. Proper installation ensures a good seal and that taps function correctly by flushing out debris and checking for leaks.
The document provides instructions for building a window for a shed. It includes a list of materials needed which are inexpensive and readily available. The instructions describe how to measure and cut the glass, build the frame with mitered corners, add a dado groove for the glass, assemble the frame around the glass with silicone caulk, optionally add grids, and mount the completed window with hinges. Safety glasses should be worn when using power tools to cut materials for the frame.
Windows come in all different shapes and sizes, here's your guide to everything you need to know about the different window styles, treatment designs, and cleaning tips. Here at Paramount Builders, we want to help provide you with the highest-quality products and services to make your dream home.
The document provides step-by-step instructions for installing window blinds. It begins by having the reader measure the window frame to determine the appropriate blind size. Next, it describes marking locations on the frame for mounting brackets and drilling holes to secure the brackets. Further steps include attaching the blind's head rail to the brackets, connecting the valance, and securing the tilt wand. The instructions aim to guide the reader through properly measuring, mounting, and setting up their window blinds.
The document provides instructions for veneering a small cabinet panel with Honduran mahogany. It describes preparing the materials, which include mahogany veneer and plywood, as well as tools for gluing and pressing the veneer. The instructions explain gluing the veneer to the panel using a roller, pressing it, and then removing excess veneer using a chisel across the grain and a table saw with the grain to create a finished panel.
The document provides instructions for veneering a small cabinet panel with Honduran mahogany. It describes preparing the materials, which include mahogany veneer and plywood, as well as special veneering glue. It outlines the gluing process of applying an even coat of glue to the board and pressing the veneer until dry. Finally, it explains removing excess veneer around the edges first with a chisel across the grain, then with a table saw along the grain to achieve straight cuts and the final dimensions.
The document provides instructions for veneering a small cabinet panel using Honduras mahogany veneer. It describes preparing the materials, including the mahogany veneer and beech frame. It then outlines the gluing process using a special veneer glue and roller, pressing the panel overnight, and removing excess veneer using chisels and a table saw. The detailed steps and accompanying diagrams provide a concise tutorial for veneering a small woodworking project.
Typical Problems with Vertical Sliding Sash WindowsStephen Davies
Regular checks on vertical sliding sash windows each season will ensure that you are not heading for trouble. Any sign of damage will usually only need a nip and tuck with minor repair work like replacing the epoxy resin or running a knife along the frame if it sticks.
Ridge vents, soffit vents, and gable vents allow air flow through attics to prevent moisture buildup. Air barrier paper is applied to sheathing to prevent air and vapor from entering. A backhoe excavates earth using a digging bucket on an arm, while a bulldozer pushes earth using a large blade. Batter boards are placed as guides for surveying, excavation, and grading to outline a building.
Double glazing windows provide insulation benefits. They have two panes of glass with a sealed gas space between them to prevent heat transfer. This keeps homes warmer in winter and cooler in summer while reducing energy costs. Proper installation requires safety equipment and tools like glass lifters, framing moulds, draught strips, and glazing bars or packers to seal the window and hold the panes securely in place. Measuring tools are also needed to ensure proper fitting of replacement windows.
This document provides instructions for making a medieval castle out of paper and cardboard. It lists the necessary materials, which include cereal boxes, glue, bathroom tissue tubes, and printed templates. The instructions guide the reader through cutting out and assembling the various castle parts, including walls, towers, and a gatehouse. Additional tips suggest reinforcing the base and adding decorative elements like flags and a moat. Finally, some fun facts are shared about real medieval castle features that the paper model represents, such as rounded towers and crenellated battlements.
Taking a new look at stained glass. Old and new interpretations for using in residential, commerical settings as well as sacred places. Preserving and restoring stained glass.
The document discusses various examples of detachable connections used in different fields including furniture, fashion, boats, and bicycles. Many of the examples utilize folding, collapsing, or disassembling designs to allow for compact storage and portable transportation. A wide range of detachable connection methods are presented, such as hinges, buckles, zippers, hook-and-loop fasteners, screws, and other joining techniques.
Facing Windows Problems? Install New Construction Energy Efficient Vinyl Windows. Order Windows at Wholesale Price and Get Factory direct Windows Online Today!
This document provides instructions for replacing an old doorknob with a new one. It explains that removing the old doorknob only requires a screwdriver and that the new doorknob installs with screws. The instructions are in 7 steps: remove the cover plate, remove mounting screws, remove the latch, install the new latch, place the new doorknob and set screws by hand, then tighten with a drill. Additional questions are asked and answered about removing doors from hinges and preventing doorknob damage.
This document provides instructions for building a simple Federal-style mantel. It begins with an overview of the mantel's design elements, which are typical of early 19th century rural farmhouses. The mantel has classical proportions featuring columns supporting a beam and roof. The instructions then cover choosing materials like lumbercore plywood instead of solid wood for stability. It details assembling the foundation boards, laminating plinth blocks, and installing moldings. Finally, it describes the step-by-step process of installing the mantel parts like the architrave, pilasters, and cove molding blocking. Precutting molding bands for tight miters is recommended.
Similar to Building traditional casing for new windows (15)
PVC downpipes can handle heavy rainfall if installed correctly. The document provides instructions on measuring the roof area served by each downpipe based on roof pitch. It also describes how to assemble and install the downpipes using pipe clips to attach them to the wall. Downpipes should be solvent welded together except where they connect to the rainwater head. Basic maintenance involves an annual cleaning with soapy water.
The document provides instructions for hanging wallpaper, including necessary tools, planning wallpaper placement, how to get started, common obstacles, and tips for a better finish. Key steps include using a plumb line to ensure straight hanging, cutting pieces of wallpaper to align the pattern before hanging, pasting and hanging one piece at a time, and trimming edges neatly around obstacles like doors and light fixtures. Tips suggest checking paste for vinyl paper, removing air bubbles while wet, and being careful with seam rollers and paste application.
This document provides instructions for constructing a simple garden pond. It lists the necessary tools and materials, which include a spade or shovel, concrete mixer, polythene sheet, fine builders mix, cement, and flat stones. The instructions explain how to mark and dig the pond area, lay the polythene liner and stones, pour and level the concrete, and fill the pond. Additional tips are provided for pond construction in colder climates. The document also describes how to make and use a simple bucket and hose water level tool to check heights and ensure levelness during construction.
The document provides instructions for building a low garden retaining wall along an existing fence to transform a dull yard. It details materials needed like treated wood posts and boards. Instructions include laying out the perimeter, digging post holes, setting posts in concrete, fixing retaining boards and capping, bracing the fence posts, and installing drainage before backfilling. Building the retaining wall can create an exciting new garden space.
This document provides instructions for building a raised formal pond using railway sleepers. The pond is a simple rectangle measuring approximately 8 feet by 4 feet and 1 foot deep. Materials needed include a pond liner, fabric insulation, 3 railway sleepers, fasteners, sand, and timber or slabs for the coping around the top of the pond. The instructions are presented in 5 steps: 1) prepare the base and lay the sleepers, 2) add sand and liner insulation, 3) install the pond liner and fill with water, 4) add an overflow pipe and coping, and 5) finish with plants or a fountain.
This document provides instructions for building a wood deck. It discusses preliminary planning considerations like intended use, location, and local building codes. Key parts of deck construction are then outlined in steps, including laying out the deck area, installing footings and posts, adding beams and joists, and finishing with decking and railings. Tables are included to help select proper lumber sizes for beams, posts, joists, and railings based on design factors like wood type and span distances. Safety equipment and tools are also listed.
There are two popular types of lighting circuits. The loop circuit runs power from the consumer unit to the first ceiling rose, then through the switch and back to the ceiling rose before moving on to the next. The junction box circuit runs power from the consumer unit to the first junction box, with the switch interrupting the live wire between boxes. Usually 1mm squared cable is used for lighting circuits, which can support up to 12 100W bulbs over 95 meters. Circuits are split between floors to avoid total darkness if a fuse blows. Homeowners must follow regulations carefully and have any new circuit work checked by an electrician when selling.
1. Basic home security involves securing doors and windows by checking they are locked before bed or leaving the house. An intruder alarm or smoke detector provides additional protection.
2. Most burglaries are opportunistic, so taking security measures like installing quality locks, using timers for lights/appliances when away, and not openly sharing travel plans can help deter intruders. Contact your local police for specific security advice.
3. Windows of various types can be better secured by installing locks, bolts or bars that require a key to open. Instructions are included with security devices or ask for advice on the best options.
Electric heat guns have largely replaced paraffin and bottled gas blowlamps for stripping paint due to being less dangerous and more convenient. Heat guns work by blowing hot air across a heating element through a nozzle. They have temperature and airflow settings and are useful for tasks like paint stripping, drying, and heat shrinking. Safety precautions must be taken when using heat guns due to the high temperatures involved.
The document provides instructions for hanging wallpaper, including calculating the amount of wallpaper needed, preparing the walls, determining the hanging order, marking and cutting lengths, pasting and hanging the lengths, trimming, and hanging into corners and recesses. Key steps include measuring the room, calculating rolls needed, filling any holes or cracks, starting in a corner and working away, cutting lengths to fit adding extra for trimming, pasting one length at a time and smoothing onto the walls, and trimming edges.
The document provides instructions for hanging an internal door. Some key points:
1) Doors often need to be trimmed to fit the opening as houses can shift over time. It is best to start with a square frame and cut the door to fit rather than adapting the frame.
2) Common internal door sizes are listed in both metric and imperial measurements. Doors can also be purchased as "door blanks" and customized.
3) When hanging the door, mark where it will be cut by holding it in the frame. Always leave the cutting line so the door is not cut too small. Hinges are typically 7 inches from the top and bottom.
4) Chisel out recesses
This document outlines the anatomy and specifications for a handrail, including:
(1) The boundary joist must be treated timber and attached to joists with bolts and plates for strength and stability.
(2) Balusters connect the boundary joist to other rails with bolts positioned 25mm from the top and bottom, and their size depends on the rail and baluster spacing.
(3) A top rail is fixed to balusters with nails, with more nails used for larger baluster spans, and must be at least 1000mm high.
UPVC fascias, soffits, and bargeboards provide a low-maintenance alternative to wood. Any services in the existing fascia will need to be relocated by specialists before installation. Proper scaffolding is recommended for safety when working at height. Ventilated soffit boards improve roof ventilation and should be considered when replacing soffit. Thorough preparation of existing wood elements and roofing felt is important for a long-lasting installation.
This document provides advice on properly caring for and protecting timber structures like decks, cladding, sheds and furniture. It discusses the importance of using the right products suited for each application, as many products on the market are ineffective or inappropriate. It specifically recommends the Owatrol line of wood care products. It outlines steps for treating new wood, including using Seasonite to allow the wood to weather gradually while preventing damage. It also discusses options for maintaining or changing the appearance of wood over time.
This document provides guidelines for avoiding hiring an unqualified or dishonest builder, known as a "cowboy builder". It recommends producing a work specification, getting recommendations and multiple quotes, checking references, agreeing on payments and guarantees, and drafting a written contract. Being thorough in selecting a builder and maintaining communication during the project can help ensure the work is done correctly and minimize risks.
The document provides safety tips for do-it-yourself projects. It lists numerous "do's" such as always wearing appropriate protective gear, reading instructions, securing workpieces, and using caution with power tools. Several "don'ts" are also outlined, like never operating power tools under the influence, using damaged tools, or cutting loose materials that could fly off. Safety should always be the top priority for any home project.
Ron installed a new insulated floor system in his workshop to make it less cold. He used Dricore subflooring panels, which are composed of compressed wood flakes and have a moisture barrier. The panels interlock without glue using tongue-and-groove joints. This creates a floating floor that can expand and contract without being attached to the concrete. Ron cut and installed the panels, filling gaps with shims as needed. He then installed G-floor garage flooring over the top, which rolls out without adhesive. The new insulated floor system helped warm up Ron's workshop.
The document provides guidelines for building light garden wall foundations, including those on sloping ground. Foundations should be at least 3 times the width of a half brick wall or twice the width of a full brick wall. When digging trenches for foundations on a slope, the trenches should be cut horizontally in steps to accommodate the slope. Retaining walls should be no more than 4 times as tall as they are thick to provide stability.
1) To properly fix items to plasterboard walls, you need to use specialized fixings rather than ordinary wall plugs, as plasterboard is too soft for wall plugs to grip securely.
2) The strongest fixing is the Redidrive, which involves drilling a small pilot hole and screwing a plastic anchor into the hole to provide an anchoring point for screws.
3) Other effective fixings include plastic toggles, hollow wall anchors, spring toggles, and hammer-in anchors, which all work by expanding behind the plasterboard for a secure grip. Heavier items are best fixed with Redidrives or attached to wall studs.
Lathe and plaster walls are difficult to securely fix items to due to their flexible nature over time. Cutting out a section of the lathe and plaster between studs and securing a timber batten provides a solid surface for fixing. The batten should be sealed with PVA and staples before filling gaps around the edges. With the right materials, the batten can be disguised or made into a decorative feature.
SATTA MATKA DPBOSS KALYAN MATKA RESULTS KALYAN CHART KALYAN MATKA MATKA RESULT KALYAN MATKA TIPS SATTA MATKA MATKA COM MATKA PANA JODI TODAY BATTA SATKA MATKA PATTI JODI NUMBER MATKA RESULTS MATKA CHART MATKA JODI SATTA COM INDIA SATTA MATKA MATKA TIPS MATKA WAPKA ALL MATKA RESULT LIVE ONLINE MATKA RESULT KALYAN MATKA RESULT DPBOSS MATKA 143 MAIN MATKA KALYAN MATKA RESULTS KALYAN CHART
The Enigmatic Gemini: Unveiling the Dual Personalitiesmy Pandit
Explore the fascinating world of the Gemini Zodiac Sign, where duality reigns supreme. Discover the personality traits, important dates, and horoscope insights that define the ever-curious and communicative Gemini.
Cover Story - China's Investment Leader - Dr. Alyce SUmsthrill
In World Expo 2010 Shanghai – the most visited Expo in the World History
https://www.britannica.com/event/Expo-Shanghai-2010
China’s official organizer of the Expo, CCPIT (China Council for the Promotion of International Trade https://en.ccpit.org/) has chosen Dr. Alyce Su as the Cover Person with Cover Story, in the Expo’s official magazine distributed throughout the Expo, showcasing China’s New Generation of Leaders to the World.
AI Transformation Playbook: Thinking AI-First for Your BusinessArijit Dutta
I dive into how businesses can stay competitive by integrating AI into their core processes. From identifying the right approach to building collaborative teams and recognizing common pitfalls, this guide has got you covered. AI transformation is a journey, and this playbook is here to help you navigate it successfully.
Dpboss Satta Matta Matka Kalyan Chart Indian MatkaDpboss Matka
dpboss,Sattamatka,satta,matka,satta matka,kalyan weekly chart.kalyan chart. Kalyan jodi chart.kalyan penal chart.kalyan today.kalyan open.fix satta, fix fix fix Satta matka nambar,Sattamatka Win Provide The Best strategy to win a lot of money and Get Best Satta Matka Tips On Every Market & Fix Fix Fix Satta Namber, Satta Matka, Kalyan Matka, Matka Guessing, Satta Matka Result, and Matka Bazar. Satta Bazar, Matka Game, Kalyan Panel Chart, Sattaking143 Number Weekly Jodi, Matka Guessing Final Ank Open Close. Fix Fix FixSatta Nambar prabhat satta. Kalyan panel chart 2020–2010 Kalyan Night Chart, Indian Satta King Satta. Matka Result, Fix Matka, Satta Market, Matka Market, Matka, sattamatka, main ratan panel chart, mumbai panel chart. Milan panel chart, Matka one, simple matka guessing, param matka guessing trick 143 surya alex, satta, Dpboss, sattamatka, boss matka, matka boss,Satta Boss Tara Matka, Rajdhani Night Chart, and Golden Dubai Matka.Sattamatka Madhur Satta, Fastest Matka Satka Batta. Matka 420 Matka Boss, Kalyan Wapka Mobi Site 100 Tricks,Kalyan Night Panel Chart. Milan night panel chart, time bazar khiladi 420. Sona matka 111 420, boss 440, matka india net, weekly Indian Satta fix ank otg. Satta Matka Cool Tag- matka result, matka guessing, satta matta matka 143, dpboss, matka guessing fix Jodi, matka guessing 143, matka guessing dpboss, kalyan chart, Fix fix 3 ank today, Fix fix 3 ank 143, kalyan chart, kalyan final, kalyan open fix pana, fix fix 3 ank 4 ank, fix fix 3 ank time bazar, kalyan chart fix open to close Fix fix 3 ank kalyan, Fix fix 3 ank chart, fix fix fix open, 100 fix ank, , kalyan fix open 143, kalyan fix open guessing, kalyan open, kalyan 100 fix open today,
SATTA MATKA DPBOSS KALYAN MATKA RESULTS KALYAN CHART KALYAN MATKA MATKA RESULT KALYAN MATKA TIPS SATTA MATKA MATKA COM MATKA PANA JODI TODAY BATTA SATKA MATKA PATTI JODI NUMBER MATKA RESULTS MATKA CHART MATKA JODI SATTA COM INDIA SATTA MATKA MATKA TIPS MATKA WAPKA ALL MATKA RESULT LIVE ONLINE MATKA RESULT KALYAN MATKA RESULT DPBOSS MATKA 143 MAIN MATKA KALYAN MATKA RESULTS KALYAN CHART
Revolutionizing Surface Protection Xlcoatings Nano Based SolutionsExcel coatings
Excelcoating Transforming surface protection with their cutting-edge, eco-friendly nano-based coatings. This presentation delves into their innovative product lineup, including Excel CoolCoat for roof cooling, Excel NanoSeal for cement surfaces, Excel StayCool for UV-filtering glass, Excel StayClean for solar panels, Excel CoolTile for heat-reflective tiles, and Excel InsulX for film insulation.
SATTA MATKA DPBOSS KALYAN MATKA RESULTS KALYAN CHART KALYAN MATKA MATKA RESULT KALYAN MATKA TIPS SATTA MATKA MATKA COM MATKA PANA JODI TODAY BATTA SATKA MATKA PATTI JODI NUMBER MATKA RESULTS MATKA CHART MATKA JODI SATTA COM INDIA SATTA MATKA MATKA TIPS MATKA WAPKA ALL MATKA RESULT LIVE ONLINE MATKA RESULT KALYAN MATKA RESULT DPBOSS MATKA 143 MAIN MATKA KALYAN MATKA RESULTS KALYAN CHART
"𝑩𝑬𝑮𝑼𝑵 𝑾𝑰𝑻𝑯 𝑻𝑱 𝑰𝑺 𝑯𝑨𝑳𝑭 𝑫𝑶𝑵𝑬"
𝐓𝐉 𝐂𝐨𝐦𝐬 (𝐓𝐉 𝐂𝐨𝐦𝐦𝐮𝐧𝐢𝐜𝐚𝐭𝐢𝐨𝐧𝐬) is a professional event agency that includes experts in the event-organizing market in Vietnam, Korea, and ASEAN countries. We provide unlimited types of events from Music concerts, Fan meetings, and Culture festivals to Corporate events, Internal company events, Golf tournaments, MICE events, and Exhibitions. 𝐓𝐉 𝐂𝐨𝐦𝐬 provides unlimited package services including such as Event organizing, Event planning, Event production, Manpower, PR marketing, Design 2D/3D, VIP protocols, Interpreter agency, etc.
⭐ 𝐅𝐞𝐚𝐭𝐮𝐫𝐞𝐝 𝐩𝐫𝐨𝐣𝐞𝐜𝐭𝐬:
➢2024 GROUNDBREAKING CEREMONY OF SK LEAVEO PLANT
➢2024 BAEKHYUN [Lonsdaleite] IN HO CHI MINH
➢2024 CHILDREN ART EXHIBITION 2024: BEYOND BARRIERS
➢SUPER JUNIOR-L.S.S. THE SHOW : Th3ee Guys in HO CHI MINH
➢WOW K-Music Festival 2023
➢ Winner [CROSS] Tour in HCM
➢ Super Show 9 in HCM with Super Junior
➢ HCMC - Gyeongsangbuk-do Culture and Tourism Festival
➢ Korean Vietnam Partnership - Fair with LG
➢ Korean President visits Samsung Electronics R&D Center
➢ Vietnam Food Expo with Lotte Wellfood
➢ Daewon Pharm Year End Party
➢ Giant Lantern Festival in Ha Noi with Gamuda Land
➢ Light Festival 2019 in HCMC with Phu My Hung Corp
(etc)
"𝐄𝐯𝐞𝐫𝐲 𝐞𝐯𝐞𝐧𝐭 𝐢𝐬 𝐚 𝐬𝐭𝐨𝐫𝐲, 𝐚 𝐬𝐩𝐞𝐜𝐢𝐚𝐥 𝐣𝐨𝐮𝐫𝐧𝐞𝐲. 𝐖𝐞 𝐚𝐥𝐰𝐚𝐲𝐬 𝐛𝐞𝐥𝐢𝐞𝐯𝐞 𝐭𝐡𝐚𝐭 𝐬𝐡𝐨𝐫𝐭𝐥𝐲 𝐲𝐨𝐮 𝐰𝐢𝐥𝐥 𝐛𝐞 𝐚 𝐩𝐚𝐫𝐭 𝐨𝐟 𝐨𝐮𝐫 𝐬𝐭𝐨𝐫𝐢𝐞𝐬."
SATTA MATKA DPBOSS KALYAN MATKA RESULTS KALYAN CHART KALYAN MATKA MATKA RESULT KALYAN MATKA TIPS SATTA MATKA MATKA COM MATKA PANA JODI TODAY BATTA SATKA MATKA PATTI JODI NUMBER MATKA RESULTS MATKA CHART MATKA JODI SATTA COM INDIA SATTA MATKA MATKA TIPS MATKA WAPKA ALL MATKA RESULT LIVE ONLINE MATKA RESULT KALYAN MATKA RESULT DPBOSS MATKA 143 MAIN MATKA KALYAN MATKA RESULTS KALYAN CHART
KALYAN CHART SATTA MATKA DPBOSS KALYAN MATKA RESULTS KALYAN MATKA MATKA RESULT KALYAN MATKA TIPS SATTA MATKA MATKA COM MATKA PANA JODI TODAY BATTA SATKA MATKA PATTI JODI NUMBER MATKA RESULTS MATKA CHART MATKA JODI SATTA COM INDIA SATTA MATKA MATKA TIPS MATKA WAPKA ALL MATKA RESULT LIVE ONLINE MATKA RESULT KALYAN MATKA RESULT DPBOSS MATKA 143 MAIN MATKA KALYAN MATKA RESULTS KALYAN CHART
L'indice de performance des ports à conteneurs de l'année 2023SPATPortToamasina
Une évaluation comparable de la performance basée sur le temps d'escale des navires
L'objectif de l'ICPP est d'identifier les domaines d'amélioration qui peuvent en fin de compte bénéficier à toutes les parties concernées, des compagnies maritimes aux gouvernements nationaux en passant par les consommateurs. Il est conçu pour servir de point de référence aux principaux acteurs de l'économie mondiale, notamment les autorités et les opérateurs portuaires, les gouvernements nationaux, les organisations supranationales, les agences de développement, les divers intérêts maritimes et d'autres acteurs publics et privés du commerce, de la logistique et des services de la chaîne d'approvisionnement.
Le développement de l'ICPP repose sur le temps total passé par les porte-conteneurs dans les ports, de la manière expliquée dans les sections suivantes du rapport, et comme dans les itérations précédentes de l'ICPP. Cette quatrième itération utilise des données pour l'année civile complète 2023. Elle poursuit le changement introduit l'année dernière en n'incluant que les ports qui ont eu un minimum de 24 escales valides au cours de la période de 12 mois de l'étude. Le nombre de ports inclus dans l'ICPP 2023 est de 405.
Comme dans les éditions précédentes de l'ICPP, la production du classement fait appel à deux approches méthodologiques différentes : une approche administrative, ou technique, une méthodologie pragmatique reflétant les connaissances et le jugement des experts ; et une approche statistique, utilisant l'analyse factorielle (AF), ou plus précisément la factorisation matricielle. L'utilisation de ces deux approches vise à garantir que le classement des performances des ports à conteneurs reflète le plus fidèlement possible les performances réelles des ports, tout en étant statistiquement robuste.
SATTA MATKA DPBOSS KALYAN MATKA RESULTS KALYAN CHART KALYAN MATKA MATKA RESULT KALYAN MATKA TIPS SATTA MATKA MATKA COM MATKA PANA JODI TODAY BATTA SATKA MATKA PATTI JODI NUMBER MATKA RESULTS MATKA CHART MATKA JODI SATTA COM INDIA SATTA MATKA MATKA TIPS MATKA WAPKA ALL MATKA RESULT LIVE ONLINE MATKA RESULT KALYAN MATKA RESULT DPBOSS MATKA 143 MAIN MATKA KALYAN MATKA RESULTS KALYAN CHART INDIA MATKA KALYAN SATTA MATKA 420 INDIAN MATKA SATTA KING MATKA FIX JODI FIX FIX FIX SATTA NAMBAR MATKA INDIA SATTA BATTA
Unlocking WhatsApp Marketing with HubSpot: Integrating Messaging into Your Ma...Niswey
50 million companies worldwide leverage WhatsApp as a key marketing channel. You may have considered adding it to your marketing mix, or probably already driving impressive conversions with WhatsApp.
But wait. What happens when you fully integrate your WhatsApp campaigns with HubSpot?
That's exactly what we explored in this session.
We take a look at everything that you need to know in order to deploy effective WhatsApp marketing strategies, and integrate it with your buyer journey in HubSpot. From technical requirements to innovative campaign strategies, to advanced campaign reporting - we discuss all that and more, to leverage WhatsApp for maximum impact. Check out more details about the event here https://events.hubspot.com/events/details/hubspot-new-delhi-presents-unlocking-whatsapp-marketing-with-hubspot-integrating-messaging-into-your-marketing-strategy/
SATTA MATKA DPBOSS KALYAN MATKA RESULTS KALYAN CHART KALYAN MATKA MATKA RESULT KALYAN MATKA TIPS SATTA MATKA MATKA COM MATKA PANA JODI TODAY BATTA SATKA MATKA PATTI JODI NUMBER MATKA RESULTS MATKA CHART MATKA JODI SATTA COM INDIA SATTA MATKA MATKA TIPS MATKA WAPKA ALL MATKA RESULT LIVE ONLINE MATKA RESULT KALYAN MATKA RESULT DPBOSS MATKA 143 MAIN MATKA KALYAN MATKA RESULTS KALYAN CHART
japanese language course in delhi near meheyfairies7
Next is the Nihon Language Academy in East Delhi, renowned for its comprehensive curriculum and interactive teaching methods. They boast a faculty of experienced educators with a blend of both Indian and Japanese nationals. The academy provides extensive support for JLPT exam preparation along with personalized tutoring sessions if needed. Nihon Language Academy also arranges exchange programs with partner institutes in Japan, which provides students an opportunity to experience Japanese culture and language first-hand.
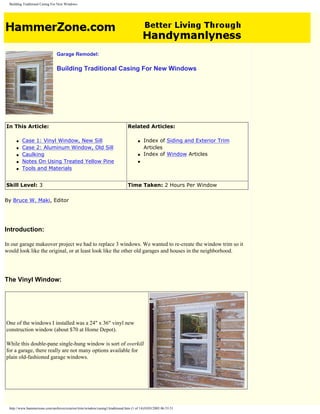
1. Building Traditional Casing For New Windows
Garage Remodel:
Building Traditional Casing For New Windows
In This Article: Related Articles:
q Case 1: Vinyl Window, New Sill q Index of Siding and Exterior Trim
q Case 2: Aluminum Window, Old Sill Articles
q Caulking q Index of Window Articles
q Notes On Using Treated Yellow Pine q
q Tools and Materials
Skill Level: 3 Time Taken: 2 Hours Per Window
By Bruce W. Maki, Editor
Introduction:
In our garage makeover project we had to replace 3 windows. We wanted to re-create the window trim so it
would look like the original, or at least look like the other old garages and houses in the neighborhood.
The Vinyl Window:
One of the windows I installed was a 24" x 36" vinyl new
construction window (about $70 at Home Depot).
While this double-pane single-hung window is sort of overkill
for a garage, there really are not many options available for
plain old-fashioned garage windows.
http://www.hammerzone.com/archives/exterior/trim/window/casing1/traditional.htm (1 of 14)10/03/2005 06:53:51
2. Building Traditional Casing For New Windows
The window installation was basic:
q Prepare the rough opening, allowing for a 1/4" gap all around. Lay two shims on the sill.
q Apply some caulk to the back side of the window flange.
q Set the window in the opening.
q Drive one 2" roofing nail at the top right corner.
q Adjust the window position so it was level across the top.
q Drive another nail at the top left corner
q Measure the diagonals to make sure the window was square.
q Drive nails in the bottom, side and top flanges to secure the window.
q Smooth out any excess caulk that oozed out from behind the flange.
Carpentry On The Cheatin' Side Of Town:
I drove some deck screws into the siding, but I
left the heads sticking out about 1/8" (red
arrows). This is the same thickness as the
flange on the vinyl window.
These screw heads will act as a standoff, to hold
the casing away from the wall and prevent the
casing from resting on an angle.
More screw heads at the top.
http://www.hammerzone.com/archives/exterior/trim/window/casing1/traditional.htm (2 of 14)10/03/2005 06:53:51
3. Building Traditional Casing For New Windows
I made a window sill from treated pine. This
was simply a piece of knot-free 2x4 that I ripped
at a 10 degree angle on my table saw.
I installed the sill with the angled surface against
the wall, so the entire piece sloped downward
slightly. This will help shed water.
Note that the sill extends over 4 inches beyond
the sides of the window, to accommodate the
side casing.
Of course, this sill is a fake. In the old days the sill would extend back under the sash (the movable part of
the window).
The window with the faker-sill attached at the bottom.
I installed 1x4 treated pine on the sides. The
lower edge of this piece was cut at the same 10
degree angle, so it mated with the sloped sill.
I just nailed these boards with a 2-inch
pneumatic finish nailer. Later I added some 2½"
stainless steel ring-shank siding nails, which
hold extremely well.
http://www.hammerzone.com/archives/exterior/trim/window/casing1/traditional.htm (3 of 14)10/03/2005 06:53:51
4. Building Traditional Casing For New Windows
The side casing extends to the top of the vinyl
frame.
Sometimes the best way to cut a board like this
is to make the angled cut for the bottom end,
set the board in place, and mark the top cut
where the board meets the top of the vinyl.
After both side pieces of casing were installed,
I installed the top casing, also 1x4 treated pine.
Note how there is primer behind the casing. Prior to installing these boards I scraped off the old paint in the
scalloped grooves, sanded the wood clean, and applied primer. This is just a precaution in case water gets
behind the trim someday. Primed wood is less able to absorb water.
Also, you can see some streaks of primer near the edges of these trim boards. I primed the backs and sides of
these boards prior to cutting. This is another technique I employ to reduce the chances of water getting into
the wood if the caulking fails someday. I know from experience (and from reading) that moisture going into
and out of the wood is a major cause of paint failure. Sealing all sides of the wood (even pressure treated
wood) helps reduce moisture absorption. I now this sounds wacko, but the extra time involved is trivial.
I nailed on the top cap. This is a piece of clear,
straight-grained 1x4 treated pine that I ripped
on my table saw, with a 10 degree angle on both
edges.
I sanded all surfaces with a random orbital
sander, and slightly rounded-off the corners so
they wouldn't be so sharp.
http://www.hammerzone.com/archives/exterior/trim/window/casing1/traditional.htm (4 of 14)10/03/2005 06:53:51
5. Building Traditional Casing For New Windows
The completed casing, ready for priming and painting.
Case 2: Aluminum Window, Full Sill
The east side of the garage, before the makeover. Those windows have been
boarded up for years.
One of these windows wasn't even installed straight. All we could figure
was... the original carpenters must have drank a lot of liquor at lunchtime...
nothing else could explain this pathetic sloppiness.
http://www.hammerzone.com/archives/exterior/trim/window/casing1/traditional.htm (5 of 14)10/03/2005 06:53:51
6. Building Traditional Casing For New Windows
On the inside I pried off anything that looked related to the original window
installation.
On the outside I carefully pried off the trim, thinking that I might want to
reuse it.
I pried away the casing a bit and cut the nails with my
reciprocating saw.
http://www.hammerzone.com/archives/exterior/trim/window/casing1/traditional.htm (6 of 14)10/03/2005 06:53:51
7. Building Traditional Casing For New Windows
The casing was removed easily.
Only the original window sill remained. I decided to reuse the
sills on these two windows
I pried on the sill to see how it was nailed in place.
They had nailed through the vertical face of the sill, into the
studs on either side of the window.
I removed the paint from around the window opening. I used
the Metabo power paint remover for the flat surfaces, and a
scraper for the grooves.
http://www.hammerzone.com/archives/exterior/trim/window/casing1/traditional.htm (7 of 14)10/03/2005 06:53:51
8. Building Traditional Casing For New Windows
After the sill was stripped and sanded, I installed two angled
blocks for the sill to rest on. I was careful to make sure that the
sill would end up level, because the window will rest on this
sill.
These were just 2x6 scraps cut at a 10 degree angle and
screwed onto the studs.
The sill had not been fastened down yet.
I coated the back sides of the sill with primer,
installed it, and then painted the remaining
surfaces with primer.
I also dabbed some primer on the bare surfaces
around the window opening. Just in case.
http://www.hammerzone.com/archives/exterior/trim/window/casing1/traditional.htm (8 of 14)10/03/2005 06:53:51
9. Building Traditional Casing For New Windows
I installed the window.
After applying a bead of caulking all around the back of the
flange, I just set the aluminum-framed window into the
opening, resting it on the sill.
I installed one screw in a top corner, then I measured the
diagonals to make sure the frame was square.
Then I drove in screws all around the perimeter.
Where possible I used screws with a low-profile head, so they wouldn't
interfere with the casing.
Note how this metal window frame has a channel shape. This may be
intended to act like vinyl siding J-channel, to cover the ends of vinyl siding..
I also caulked all the gaps where the scalloped part of the siding met the window flange. This will deter leaks
and discourage bugs from nesting in there.
Using a brad nailer, I attached some 1/4" thick strips of wood around
the perimeter of the window.
These are spacers, but they will also be visible, so I laid them out
carefully so they would line up with the edges of the 1x4 trim boards.
http://www.hammerzone.com/archives/exterior/trim/window/casing1/traditional.htm (9 of 14)10/03/2005 06:53:51
10. Building Traditional Casing For New Windows
I installed the side casings and then the top casing.
The bottom end of the side casings were cut at a 10 degree angle to
match the window sill.
There were some small pits in the old sill, which I later filled with
polyester resin (essentially Bondo) followed by the final coat of
paint.
I installed the top cap.
(Okay, I cheated... this picture is from the other window, but
it's the same idea)
Where Siding Meets Casing:
http://www.hammerzone.com/archives/exterior/trim/window/casing1/traditional.htm (10 of 14)10/03/2005 06:53:51
11. Building Traditional Casing For New Windows
I applied caulking all over the place, especially between the window frame
and the wood casing.
The red arrows point to seams that I later caulked with
siliconized acrylic latex caulk.
The top seam is critical. Ideally I would install an aluminum Z-
flashing over this gap, with one leg of the Z-flashing going
under the next higher siding board.
But... that wasn't possible.
Where the scalloped siding met wood trim, I applied a liberal
dab of caulk and smoothed it with my finger. But often one
application isn't enough.
http://www.hammerzone.com/archives/exterior/trim/window/casing1/traditional.htm (11 of 14)10/03/2005 06:53:51
12. Building Traditional Casing For New Windows
I just let the caulk harden for an hour and then applied more to
fill in any holes.
Finally...
The completed project. These are the two
aluminum windows that I installed over the
original sills.
That's the vinyl window with the fake sill, to the right of the red door.
It's a bit bigger than the aluminum windows.
http://www.hammerzone.com/archives/exterior/trim/window/casing1/traditional.htm (12 of 14)10/03/2005 06:53:51
13. Building Traditional Casing For New Windows
Some notes about using treated wood:
Pressure treated yellow pine is an inexpensive and very durable wood. If the paint ever fails, I'm certain the
wood will last many years before it begins to rot. But treated yellow pine is a tricky material to work with,
especially for finish carpentry, because it can warp very badly. They don't call it "Banana Wood" for
nothing.
Since pressure treated wood is soaked in a water-based chemical solution, the boards are often very wet
when purchased. Boards that appear straight at the store often look like hockey sticks or airplane propellers
in a few days.
Thin lumber can usually be forced to lay flat, and it will stay there if fastened well. I don't consider
common nails to be good fasteners. Ring-shank nails or deck screws are good fasteners for holding warp-
prone wood in place.
But my usual approach is to just be lazy. I often buy the materials far ahead of time and store them in a
warm, dry place. It always seems to take a couple of weeks longer than planned before I get around to
using the wood, so the wet pine ends up drying out. If the wood is going to warp, it will warp while it's
drying in my shop. Then I can choose the best boards for the most critical trim pieces. Of course, this
means that I usually need to buy extra materials, because some boards won't be usable for visible trim, but
even the worst boards get used somewhere.
Yes guys, there is a good side to procrastination. Letting the lumber dry makes good sense.
Tools Used: Materials Used:
q Cordless Drill/Driver q Lumber, Pressure Treated, 1x4x8'
q Basic Carpentry Tools q Lumber, Pressure Treated, 2x4x8'
q Miter Saw q Ring-Shank Siding Nails
q Table Saw q Deck Screws
q Finish Nail Gun q Siliconized Acrylic Latex Caulking
Back To Top Of Page
Read our Disclaimer.
Search Page
Home What's New Project Archives H.I. World
http://www.hammerzone.com/archives/exterior/trim/window/casing1/traditional.htm (13 of 14)10/03/2005 06:53:51