


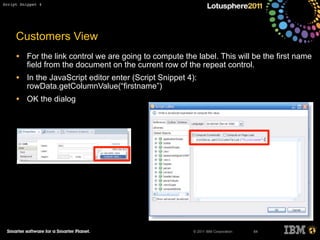

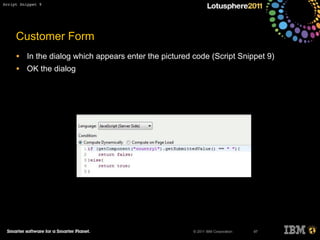
)|[0-9][A-HJKPS-UW]) [0-9][ABD-HJLNP-UW-Z]{2})
http://en.wikipedia.org/wiki/Postcodes_in_the_United_Kingdom#Validation
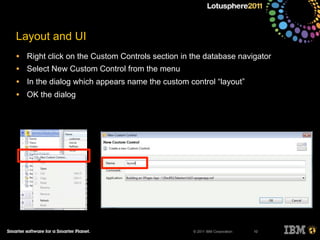
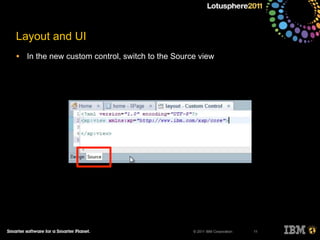
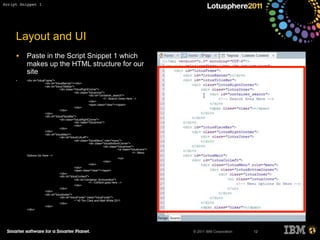
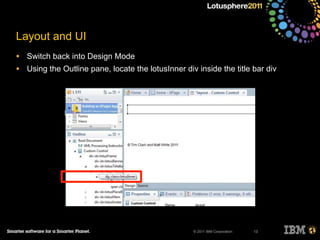
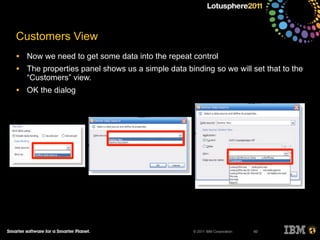
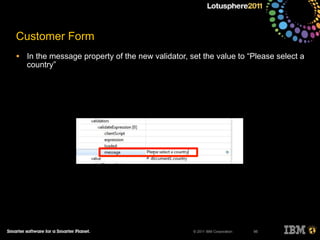
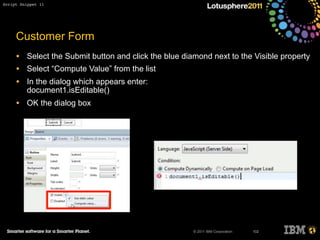
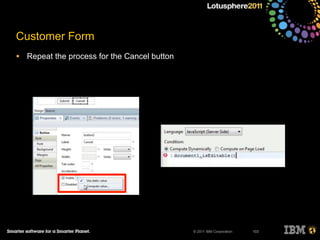
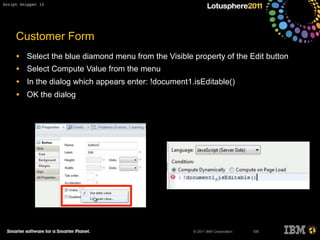
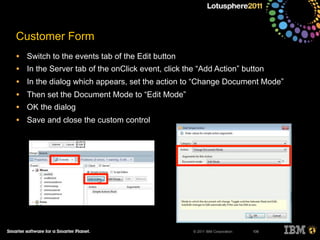
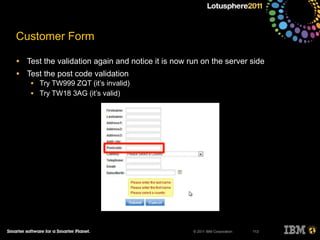
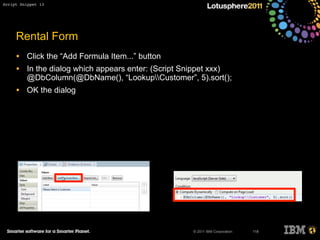
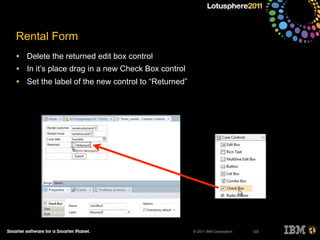
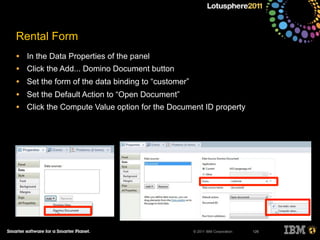
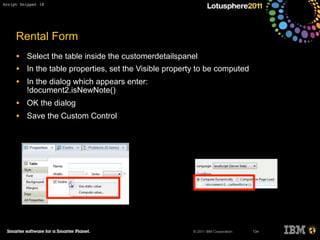
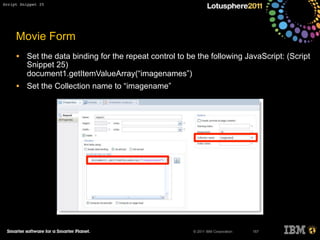
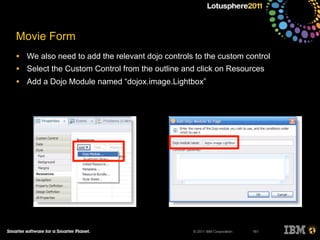
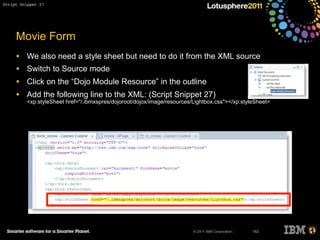
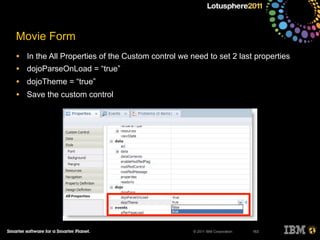
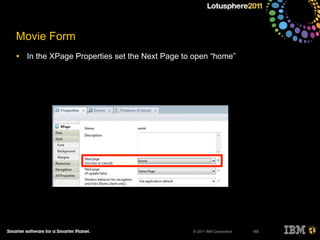
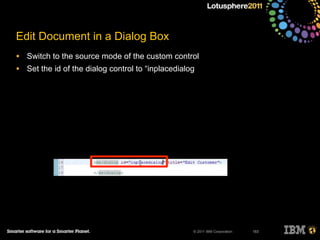
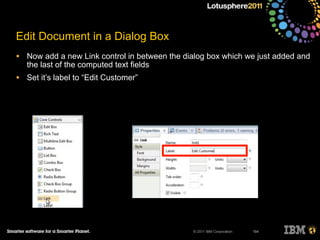
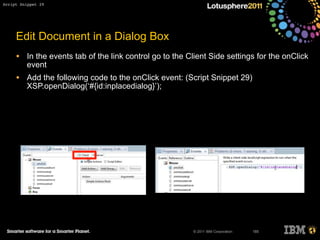
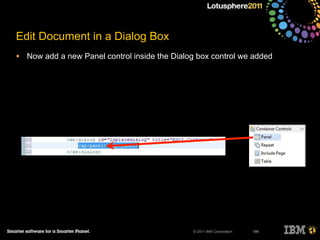
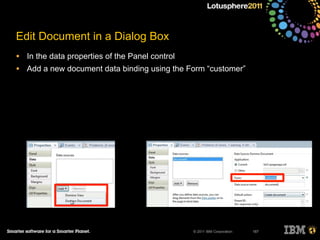
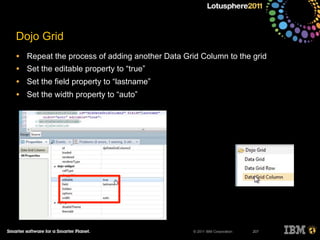
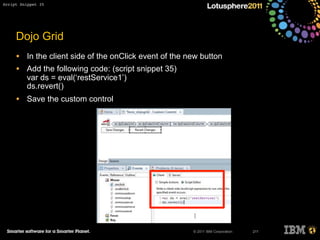
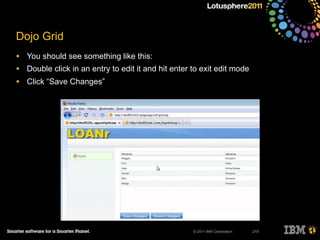
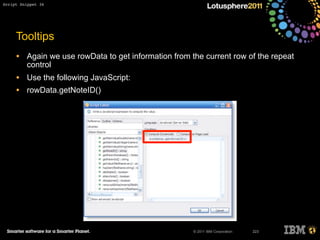
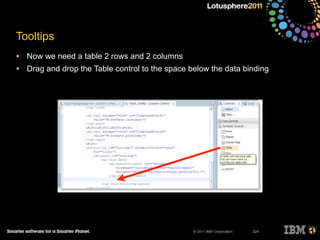
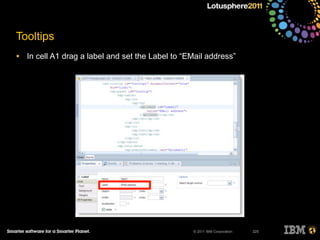
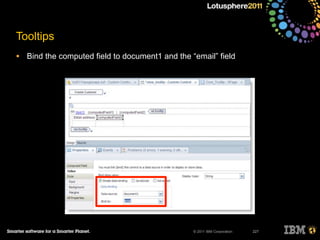
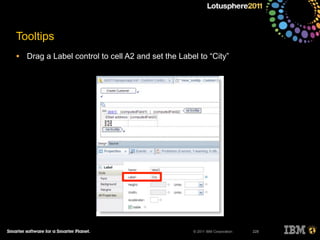
• In the message property set the value to “Please enter a valid post code”
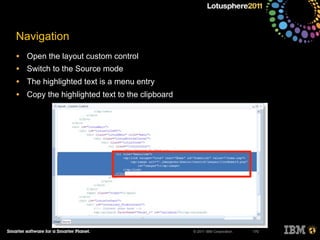
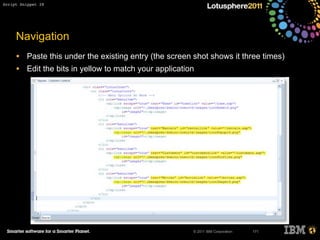
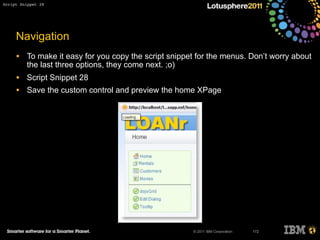
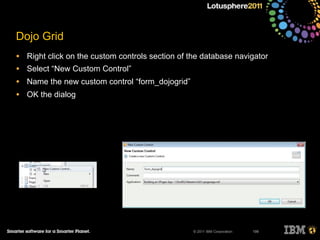
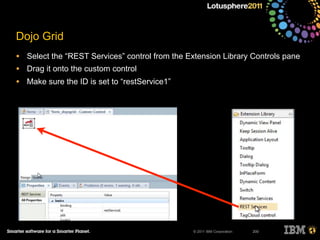
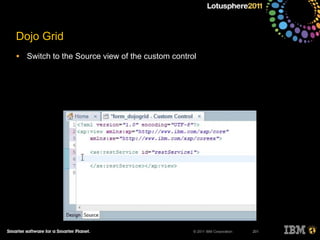
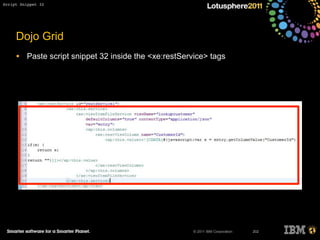
99
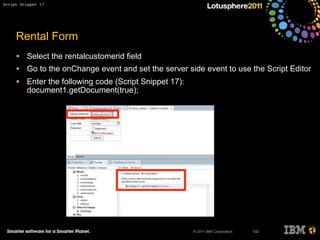
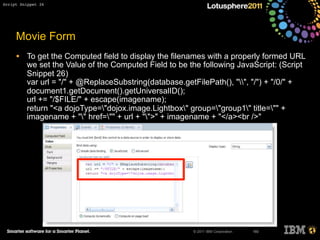
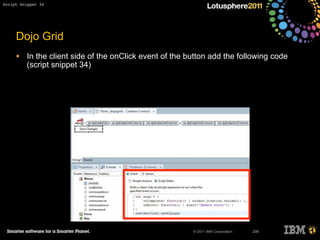
Script Snippet 10](https://image.slidesharecdn.com/show106-buildinganxpagesapp-130425052700-phpapp01/85/XPages101-Building-an-XPages-app-Lotusphere-2011-99-320.jpg)


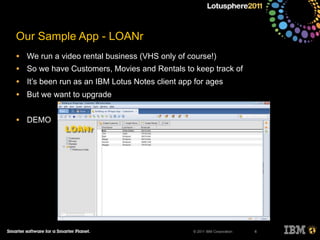
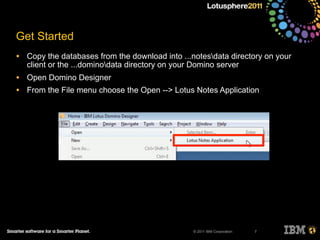
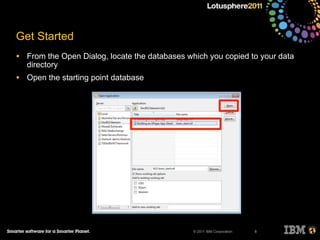
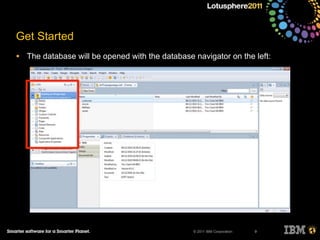
This document provides an overview and agenda for a presentation on building a simple application using XPages. It introduces the presenters and describes the sample loan tracking application being demonstrated. The presentation will cover setting up the initial database structure, adding a user interface with OneUI, creating views to display and enter data, navigation features, and using the Extension Library. Attendees are encouraged to download the presentation materials and code snippets for follow along.


