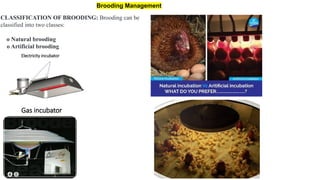
CLASSIFICATION OF BROODING:Brooding can be
classified into two classes:
o Natural brooding
o Artificial brooding
Electricity incubator
Gas incubator
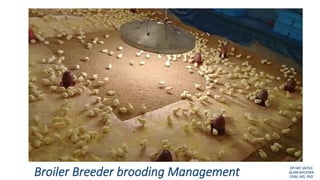
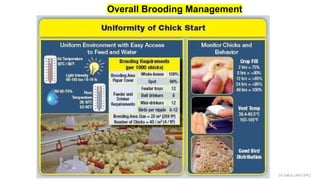
Brooding Management
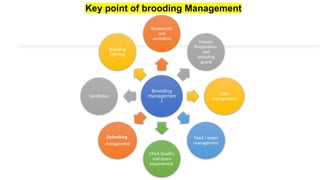
Key point ofbrooding Management
Brooding
managemen
t
Biosecurity
and
sanitation
Houses
Preparation
and
brooding
guard
Litter
management
Feed / water
management
Chick Quality
and space
requirement
Debeaking
management
Ventilation
Brooding
Lighting
5.
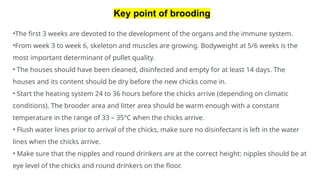
•The first 3weeks are devoted to the development of the organs and the immune system.
•From week 3 to week 6, skeleton and muscles are growing. Bodyweight at 5/6 weeks is the
most important determinant of pullet quality.
• The houses should have been cleaned, disinfected and empty for at least 14 days. The
houses and its content should be dry before the new chicks come in.
• Start the heating system 24 to 36 hours before the chicks arrive (depending on climatic
conditions). The brooder area and litter area should be warm enough with a constant
temperature in the range of 33 – 35°C when the chicks arrive.
• Flush water lines prior to arrival of the chicks, make sure no disinfectant is left in the water
lines when the chicks arrive.
• Make sure that the nipples and round drinkers are at the correct height: nipples should be at
eye level of the chicks and round drinkers on the floor.
Key point of brooding
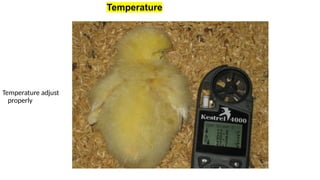
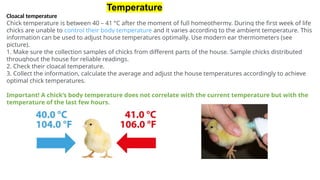
Cloacal temperature
Chick temperatureis between 40 – 41 °C after the moment of full homeothermy. During the first week of life
chicks are unable to control their body temperature and it varies according to the ambient temperature. This
information can be used to adjust house temperatures optimally. Use modern ear thermometers (see
picture).
1. Make sure the collection samples of chicks from different parts of the house. Sample chicks distributed
throughout the house for reliable readings.
2. Check their cloacal temperature.
3. Collect the information, calculate the average and adjust the house temperatures accordingly to achieve
optimal chick temperatures.
Important! A chick’s body temperature does not correlate with the current temperature but with the
temperature of the last few hours.
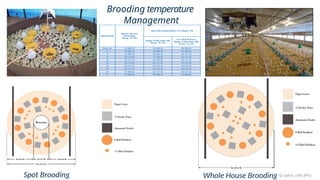
Temperature
8.
Dr Safiul, UMS(FPL)
The temperature should be between 34 – 36 °C for the first
few days.
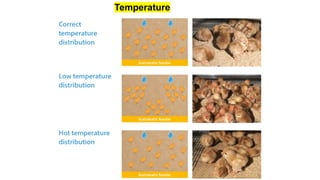
Correct temperature: Chicks will be well distributed and
active.
Low temperature: Chicks will group together, and sound
stressed.
High temperature: Chicks will group in the coldest places, are
inactive and pant.
Pasted vents may indicate a too high or too low temperature.
After two or three days, decrease the temperature by 0.5 °C
every day.
Be aware that the best indicator is chick behavior.
Check the flock every time you change your settings.
If the house temperature is not uniform, take corrective
measures by changing heaters and ventilation parameters.
Temperature recommendation
Temperature
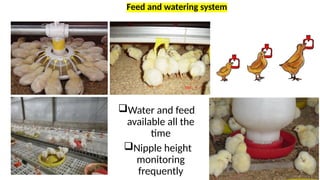
Feed and wateringsystem
Drinker lines should be flushed and sanitized prior to bird arrival.
The water quality, purity, and temperature must be checked in advance.
Water should be within the correct temperature range (65–75ºF;18–24ºC).
Contaminated water can spread disease and cause diarrhea, leading to dehydration and death in younger flocks.
All chicks must be able to eat and drink immediately on placement in the house.
Monitor the water consumption and Avoid water spillage by the chicks as this will maintain litter quality
Ideally, the chicks should be placed at the farm and provided water and feed in less than 8 hours from time of hatch. Longer
delays could lead to dehydration and chick weight shrinkage
If the chicks have been in transport for a long period (3 hrs. up), providing water for the first 3 or 4 hours, and then providing
feed is suggested.
The chicks should be encouraged to consume water as soon as possible and remind to add some sort of sweetener
substance, like sugar to the water (4% solution) for the first few hours of life. The sugar helps to replenish the depleted
energy in the chicks and can also may loosen up the impacted intestine and prepare the gut linings for the incoming feed.
After the addition of sugar, it is recommended to add a vitamin supplement to the water for the first three days of life, to
boost the chicks' vitality.
13.
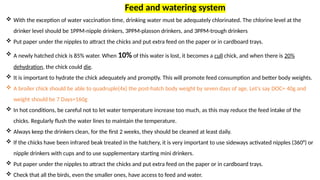
With theexception of water vaccination time, drinking water must be adequately chlorinated. The chlorine level at the
drinker level should be 1PPM-nipple drinkers, 3PPM-plasson drinkers, and 3PPM-trough drinkers
Put paper under the nipples to attract the chicks and put extra feed on the paper or in cardboard trays.
A newly hatched chick is 85% water. When 10% of this water is lost, it becomes a cull chick, and when there is 20%
dehydration, the chick could die.
It is important to hydrate the chick adequately and promptly. This will promote feed consumption and better body weights.
A broiler chick should be able to quadruple(4x) the post-hatch body weight by seven days of age. Let's say DOC= 40g and
weight should be 7 Days=160g
In hot conditions, be careful not to let water temperature increase too much, as this may reduce the feed intake of the
chicks. Regularly flush the water lines to maintain the temperature.
Always keep the drinkers clean, for the first 2 weeks, they should be cleaned at least daily.
If the chicks have been infrared beak treated in the hatchery, it is very important to use sideways activated nipples (360°) or
nipple drinkers with cups and to use supplementary starting mini drinkers.
Put paper under the nipples to attract the chicks and put extra feed on the paper or in cardboard trays.
Check that all the birds, even the smaller ones, have access to feed and water.
Feed and watering system
14.
Dr Safiul, UMS(FPL)
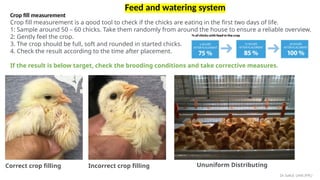
Crop fill measurement
Crop fill measurement is a good tool to check if the chicks are eating in the first two days of life.
1: Sample around 50 – 60 chicks. Take them randomly from around the house to ensure a reliable overview.
2: Gently feel the crop.
3. The crop should be full, soft and rounded in started chicks.
4. Check the result according to the time after placement.
If the result is below target, check the brooding conditions and take corrective measures.
Correct crop filling Incorrect crop filling Ununiform Distributing
Feed and watering system
15.
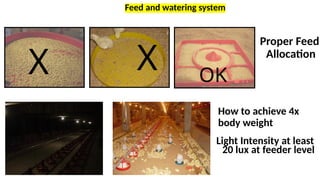
How to achieve4x
body weight
Proper Feed
Allocation
X X OK
Light Intensity at least
20 lux at feeder level
Feed and watering system
16.
Supplemental feedersshould be filled and placed in the brooding area in a proper ratio (e.g. with box lids – 1/100 chicks).
If the mixing of chicks from different age breeder flocks is unavoidable, chicks should be grouped by breeder age as much as
possible
To monitor adequate energy intake and monitoring the clean up time, feed amount, physical feed forms, nutrient density,
ingredients quality and texture.
Any change of clean up time possible causes should be investigated.
Crumbles Pellets Mash
Feed Week
Starter 0~5 weeks
Grower 6~18 weeks
Laying 19~65 weeks
Feeding /Nutrition
Be awarethat temperature and humidity are related. With lower humidity , chicks may dehydrate or damage
their respiratory tract.
High humidity causes problem of wet litter
A layer of 4-5 cm of suitable litter material (saw dust) should be spread con floor as bedding material in deep
litter system of rearing.
Minimum need 3-5 air exchange/h. Increase ammonia (25 ppm normal) level in brooder house leading to
irritation of eye.
Humidity and good ventilation
19.
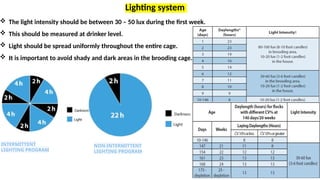
The lightintensity should be between 30 – 50 lux during the first week.
This should be measured at drinker level.
Light should be spread uniformly throughout the entire cage.
It is important to avoid shady and dark areas in the brooding cage.
Lighting system
INTERMITTENT
LIGHTING PROGRAM
NON-INTERMITTENT
LIGHTING PROGRAM
20.
Special care shouldbe provided to the chicks in the days following beak treatment:
Monitor water intake. It will be reduced for 2 or 3 days but then the previous intake should be
recovered. Reducing the water pressure in the nipple drinker lines could be useful.
Use additional drinkers if necessary.
Increase the house temperature until the chicks seem comfortable.
Increase the feed level in the feeders.
Add Vitamin K to the diet or drinking water a few days before and after beak treatment.
Debeaking management
21.
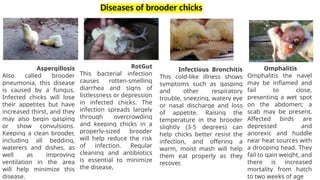
Diseases of brooderchicks
Aspergillosis
Also called brooder
pneumonia, this disease
is caused by a fungus.
Infected chicks will lose
their appetites but have
increased thirst, and they
may also begin gasping
or show convulsions.
Keeping a clean brooder,
including all bedding,
waterers and dishes, as
well as improving
ventilation in the area
will help minimize this
disease.
RotGut
This bacterial infection
causes rotten-smelling
diarrhea and signs of
listlessness or depression
in infected chicks. The
infection spreads largely
through overcrowding
and keeping chicks in a
properly-sized brooder
will help reduce the risk
of infection. Regular
cleaning and antibiotics
is essential to minimize
the disease,
Infectious Bronchitis
This cold-like illness shows
symptoms such as gasping
and other respiratory
trouble, sneezing, watery eye
or nasal discharge and loss
of appetite. Raising the
temperature in the brooder
slightly (3-5 degrees) can
help chicks better resist the
infection, and offering a
warm, moist mash will help
them eat properly as they
recover.
Omphalitis
Omphalitis the navel
may be inflamed and
fail to close,
presenting a wet spot
on the abdomen; a
scab may be present.
Affected birds are
depressed and
anorexic and huddle
near heat sources with
a drooping head. They
fail to gain weight, and
there is increased
mortality from hatch
to two weeks of age