The document is a service manual that provides maintenance and repair procedures for Bobcat loaders. It outlines important safety information and contains sections on preventative maintenance, inspection forms, and technical specifications for the hydraulic, transmission, and other systems. Regular maintenance is important to ensure safe operation and correct any issues. Inspections should be properly completed and documented.
Railways Harbors Tunneling and Airports Module 4 complete presentation as per VTU Syllabus
Air transport has the following characteristics:
1. Unbroken Journey: Air transport provides unbroken journey over land and sea. It is the fastest and quickest means of transport.
2. Rapidity: Air transport had the highest speed among all the modes of transport
3. Expensive: Air transport is the most expensive means of transport. There is huge investment in purchasing aero planes and constructing of aerodromes.
4. Special Preparations: Air transport requires special preparations like wheelers links, meteorological stations, flood lights, searchlights etc.
Institute:- Agragami college
Name:- Amal Tom
Class:- 4th Semester BBA Aviation.
Roll No:- G1811009 OR 09
Subject:- Aviation
Topic:- Airport Planning.and Design
www.jetlinemarvel.net
Labour Laws and Financial Aspects of Construction Project _ Unit 3 _ Construc...Shrikant Kate
Labour Laws and Financial Aspects of Construction Project _ Unit 3 _ Construction Management _ Final Year (BE) _ Department of Civil Engineering _ TAE _ SPPU _ by Shrikant R. Kate
Labour laws and financial aspects of construction projects Labour laws. studies,
Need and importance of labour laws, study of some important labour laws associated with construction sectorworkmans compensation act 1923
Building and other construction workers act 1996, child labour act, interstate migrant workers act Financial aspects of construction projects.
Capital investments: importance and difficulties, means of finance,
Working capital requirements, project cash flow projections and statements, project balance sheet
Profit loss account statements.
“The Tustin Hangars: Titans of History” is a comprehensive history of the two blimp hangars at the former U.S. Navy and Marine Corps air station in Tustin, California. The hangars were built early in World War II to house manned blimps or, in Navy terminology, non-rigid lighter-than-air (LTA) airships.
The student will learn the determination of internal forces in different structures and the kind of forces distribution due to external & internal effects .He will also learn about the structures deformation due to these effects .
This presentation briefly explains about important factors affecting the design and plan of Airports.
Topics Covered: Introduction, AAI, Features of planes affecting the design of airports, size of airport, site selection for airport, visual aids, difficulries in planning an airport.
Structural systems in high rise building and analysis methodsDP NITHIN
This presentation is about the structural systems in tall buildings and also consists of overview of methods of analysis in tall buildings like linear and non linear seismic analysis.
In this presentation, we have discussed a very important feature of BMW X5 cars… the Comfort Access. Things that can significantly limit its functionality. And things that you can try to restore the functionality of such a convenient feature of your vehicle.
5 Warning Signs Your BMW's Intelligent Battery Sensor Needs AttentionBertini's German Motors
IBS monitors and manages your BMW’s battery performance. If it malfunctions, you will have to deal with an array of electrical issues in your vehicle. Recognize warning signs like dimming headlights, frequent battery replacements, and electrical malfunctions to address potential IBS issues promptly.
Things to remember while upgrading the brakes of your carjennifermiller8137
Upgrading the brakes of your car? Keep these things in mind before doing so. Additionally, start using an OBD 2 GPS tracker so that you never miss a vehicle maintenance appointment. On top of this, a car GPS tracker will also let you master good driving habits that will let you increase the operational life of your car’s brakes.
"Trans Failsafe Prog" on your BMW X5 indicates potential transmission issues requiring immediate action. This safety feature activates in response to abnormalities like low fluid levels, leaks, faulty sensors, electrical or mechanical failures, and overheating.
What Exactly Is The Common Rail Direct Injection System & How Does It WorkMotor Cars International
Learn about Common Rail Direct Injection (CRDi) - the revolutionary technology that has made diesel engines more efficient. Explore its workings, advantages like enhanced fuel efficiency and increased power output, along with drawbacks such as complexity and higher initial cost. Compare CRDi with traditional diesel engines and discover why it's the preferred choice for modern engines.
𝘼𝙣𝙩𝙞𝙦𝙪𝙚 𝙋𝙡𝙖𝙨𝙩𝙞𝙘 𝙏𝙧𝙖𝙙𝙚𝙧𝙨 𝙞𝙨 𝙫𝙚𝙧𝙮 𝙛𝙖𝙢𝙤𝙪𝙨 𝙛𝙤𝙧 𝙢𝙖𝙣𝙪𝙛𝙖𝙘𝙩𝙪𝙧𝙞𝙣𝙜 𝙩𝙝𝙚𝙞𝙧 𝙥𝙧𝙤𝙙𝙪𝙘𝙩𝙨. 𝙒𝙚 𝙝𝙖𝙫𝙚 𝙖𝙡𝙡 𝙩𝙝𝙚 𝙥𝙡𝙖𝙨𝙩𝙞𝙘 𝙜𝙧𝙖𝙣𝙪𝙡𝙚𝙨 𝙪𝙨𝙚𝙙 𝙞𝙣 𝙖𝙪𝙩𝙤𝙢𝙤𝙩𝙞𝙫𝙚 𝙖𝙣𝙙 𝙖𝙪𝙩𝙤 𝙥𝙖𝙧𝙩𝙨 𝙖𝙣𝙙 𝙖𝙡𝙡 𝙩𝙝𝙚 𝙛𝙖𝙢𝙤𝙪𝙨 𝙘𝙤𝙢𝙥𝙖𝙣𝙞𝙚𝙨 𝙗𝙪𝙮 𝙩𝙝𝙚 𝙜𝙧𝙖𝙣𝙪𝙡𝙚𝙨 𝙛𝙧𝙤𝙢 𝙪𝙨.
Over the 10 years, we have gained a strong foothold in the market due to our range's high quality, competitive prices, and time-lined delivery schedules.
What Does the Active Steering Malfunction Warning Mean for Your BMWTanner Motors
Discover the reasons why your BMW’s Active Steering malfunction warning might come on. From electrical glitches to mechanical failures and software anomalies, addressing these promptly with professional inspection and maintenance ensures continued safety and performance on the road, maintaining the integrity of your driving experience.
Core technology of Hyundai Motor Group's EV platform 'E-GMP'Hyundai Motor Group
What’s the force behind Hyundai Motor Group's EV performance and quality?
Maximized driving performance and quick charging time through high-density battery pack and fast charging technology and applicable to various vehicle types!
Discover more about Hyundai Motor Group’s EV platform ‘E-GMP’!
Why Is Your BMW X3 Hood Not Responding To Release CommandsDart Auto
Experiencing difficulty opening your BMW X3's hood? This guide explores potential issues like mechanical obstruction, hood release mechanism failure, electrical problems, and emergency release malfunctions. Troubleshooting tips include basic checks, clearing obstructions, applying pressure, and using the emergency release.
Comprehensive program for Agricultural Finance, the Automotive Sector, and Empowerment . We will define the full scope and provide a detailed two-week plan for identifying strategic partners in each area within Limpopo, including target areas.:
1. Agricultural : Supporting Primary and Secondary Agriculture
• Scope: Provide support solutions to enhance agricultural productivity and sustainability.
• Target Areas: Polokwane, Tzaneen, Thohoyandou, Makhado, and Giyani.
2. Automotive Sector: Partnerships with Mechanics and Panel Beater Shops
• Scope: Develop collaborations with automotive service providers to improve service quality and business operations.
• Target Areas: Polokwane, Lephalale, Mokopane, Phalaborwa, and Bela-Bela.
3. Empowerment : Focusing on Women Empowerment
• Scope: Provide business support support and training to women-owned businesses, promoting economic inclusion.
• Target Areas: Polokwane, Thohoyandou, Musina, Burgersfort, and Louis Trichardt.
We will also prioritize Industrial Economic Zone areas and their priorities.
Sign up on https://profilesmes.online/welcome/
To be eligible:
1. You must have a registered business and operate in Limpopo
2. Generate revenue
3. Sectors : Agriculture ( primary and secondary) and Automative
Women and Youth are encouraged to apply even if you don't fall in those sectors.
Symptoms like intermittent starting and key recognition errors signal potential problems with your Mercedes’ EIS. Use diagnostic steps like error code checks and spare key tests. Professional diagnosis and solutions like EIS replacement ensure safe driving. Consult a qualified technician for accurate diagnosis and repair.
What Does the PARKTRONIC Inoperative, See Owner's Manual Message Mean for You...Autohaus Service and Sales
Learn what "PARKTRONIC Inoperative, See Owner's Manual" means for your Mercedes-Benz. This message indicates a malfunction in the parking assistance system, potentially due to sensor issues or electrical faults. Prompt attention is crucial to ensure safety and functionality. Follow steps outlined for diagnosis and repair in the owner's manual.
2. MAINTENANCE SAFETY
WARNING
Instructions are necessary before operating or servicing machine. Read and
understand the Operation & Maintenance Manual, Operator’s Handbook and
signs (decals) on machine. Follow warnings and instructions in the manuals
when making repairs, adjustments or servicing. Check for correct function after
adjustments, repairs or service. Untrained operators and failure to follow
instructions can cause injury or death. W-2003-0903
Never service the Bobcat Skid-
Steer Loader without instructions.
Have good ventilation when
welding or grinding painted
parts.
Wear dust mask when grinding
painted parts. Toxic dust and gas
can be produced.
Avoid exhaust fume leaks which
can kill without warning. Exhaust
system must be tightly sealed.
Stop, cool and clean engine of
flammable materials before
checking fluids.
Never service or adjust loader
with the engine running unless
instructed to do so in the
manual.
Avoid contact with leaking
hydraulic fluid or diesel fuel
under pressure. It can penetrate
the skin or eyes.
Never fill fuel tank with engine
running, while smoking or when
near open flame.
Disconnecting or loosening any
hydraulic tubeline, hose, fitting,
component or a part failure can
cause lift arms to drop. Do not go
under lift arms when raised
unless supported by an
approved lift arm support device.
Replace it if damaged.
Keep body, jewelry and clothing
away from moving parts,
electrical contact, hot parts and
exhaust.
Wear eye protection to guard
from battery acid, compressed
springs, fluids under pressure
and flying debris when engines
are running or tools are used.
Use eye protection approved for
type of welding.
Keep rear door closed except for
service. Close and latch door
before operating the loader.
Never work on loader with lift
arms up unless lift arms are held
by an approved lift arm support
device. Replace if damaged.
Never modify equipment or add
attachments not approved by
Bobcat Company.
Lead-acid batteries produce
flammable and explosive gases.
Keep arcs, sparks, flames and
lighted tobacco away from
batteries.
Batteries contain acid which
burns eyes or skin on contact.
Wear protective clothing. If acid
contacts body, flush well with
water. For eye contact flush well
and get immediate medical
attention.
Use the correct procedure to lift or
lower operator cab.
Cleaning and maintenance are
required daily.
Maintenance procedures which are given in the Operation & Maintenance Manual can be performed by the owner/
operator without any specific technical training. Maintenance procedures which are not in the Operation & Maintenance
Manual must be performed ONLY BY QUALIFIED BOBCAT SERVICE PERSONNEL. Always use genuine Bobcat
replacement parts. The Service Safety Training Course is available from your Bobcat dealer.
MSW01-0805
WRONG
B-6590
WRONG
B-16102
B-6580
WRONG
B-16102
B-6589
WRONG
B-15280
WRONG
B-15231
WRONG
B-11799
B-10731a
CORRECT
B-12365
CORRECT
B-7469
CORRECT
Safety Alert Symbol: This symbol with a warning statement, means: “Warning, be alert! Your safety is
involved!” Carefully read the message that follows.
4. 1––3
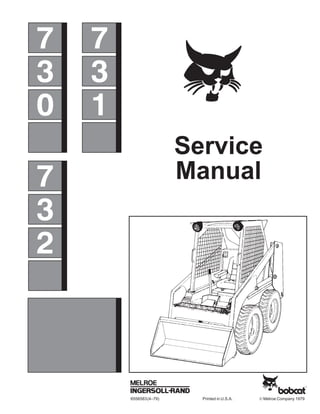
730, 731, 732 Loader
Service Manual
FOREWORD
This manual is for the Bobcat loader mechanic. It provides necessary servicing and adjustment
procedures for the Bobcat loader and its component parts and systems. Refer to the Operator’s
Manual for operating instructions, starting procedure, daily checks, etc.
A general inspection of the following items must be made after the loader has had service or repair:
1. Check that the ROPS/FOPS
(Including sidescreens) is in
good condition and is not
modified.
2. Check that ROPS mounting
hardware is tightened and is
Melroe approved.
3. The seat belt must be correctly
installed, functional and in
good condition.
4. The seat bar and pedal
interlocks must be correctly
adjusted, clean and lubricated.
5. Machine signs must be legible
and in the correct location.
6. Steering levers and foot pedals
must return to neutral.
7. Check for correct function of
the work lights and travel lights.
8. The parking brake must
function correctly.
9. Enclosure door latches must
open and close freely.
10. Bob–Tach wedges and linkages
must function correctly and be in
good condition.
11. Safety treads must in good
condition.
12. Check for correct function of
indicator lamps (Optional on
some models).
13. Check hydraulic fluid level,
engine oil level and fuel supply.
14. Inspect for fuel, oil or hydraulic
fluid leaks.
15. Lubricate the loader.
16. Check the condition of the
battery and cables.
5. 1––2
730, 731, 732 Loader
Service Manual
17. Inspect the air cleaner for
damage or leaks. Check the
condition of the element.
18. Check the electrical charging
system.
19. Check tires for wear and
pressure.
20. Inspect for loose or broken
parts or connections.
21. Operate the loader and check
all functions.
Recommend to the owner that all
necessary corrections be made
before the machine is returned to
service.
7. 1 PREVENTIVE MAINTENANCE
1–1 INTRODUCTION
1–1.1 Symbols
This notice identifies important
procedures which must be followed
to prevent damage to the loader.
IMPORTANT
This safety alert symbol indicates
important safety messages in this
manual. Be alert to the possibility of
personal injury and carefully read
the message that follows this
symbol.
WARNING
1–1.2 Serial Number Identification
It is important to make correct reference to the serial number of the loader when
making repairs or ordering parts. It is possible that the present machines do not
use all the same parts as earlier machines; or it is possible that different
procedures are used for service or repair.
1–1.3 Loader Serial Number
The loader serial number plate location is on the inside of the left upright, above
the grill (Fig. 1–1).
Explanation of serial number:
XXXX M XXXXX
Production Sequence (Series)
Plant Location
Model, Engine Version
1–1.4 Engine Serial Number
730 Wisconsin: (Fig. 1–2) The engine serial number location is on the engine
shroud on the left side of engine. Use all numbers when ordering parts for this
engine.
731 Deutz: (Fig. 1–3) The engine serial number location is on the right side of
cylinder block. Use all numbers when ordering parts for this engine.
732 Ford: (Fig. 1–4) The engine serial number location is on the right side of the
valve cover. Use all numbers when ordering parts for this engine.
B–02249
Fig. 1–3 Engine Serial Number (731)
B–02796
Fig. 1–4 Engine Serial Number (732)
B–02120
Fig. 1–2 Engine Serial Number (730)
B–02674R
Fig. 1–1 Loader Serial Number
Loader Serial
Number
–1–1–
730, 731, 732 Loader
Service Manual
8. 1. For adjustment and inspection after first work period.
2. To correct wrong maintenance and operating methods.
3. For demonstration of correct service procedures to customer.
All items on the 30–hour inspection form (Fig. 1–6) must be completed by the
dealer’s mechanic, according to specifications in this manual.
When the 30 hour inspection has been completed, the form must be signed by (1)
the mechanic that completed the inspection, (2) the dealer, and (3) the owner or
operator.
One copy of the completed form is to be mailed to:
CLARK EQUIPMENT COMPANY
MELROE DIVISION–SERVICE DEPARTMENT
GWINNER, NORTH DAKOTA 58040
One copy is for the owner and one copy is for the dealer.
1–1.5 Pre–Delivery Inspection
The purpose of the pre–delivery
inspection is to make sure that the
loader is in correct operation
condition when it comes to the dealer
and before delivery to the customer.
The pre–delivery inspection also lets
the factory know when something is
wrong with the loader so that the
problem can be corrected and
prevented in the future.
All items on the inspection form (Fig.
1–5) must be completed according to
specifications in this manual.
One copy of the completed form is to
be mailed to:
CLARK EQUIPMENT COMPANY
MELROE DIVISION–SERVICE DEPT.
GWINNER, NORTH DAKOTA 58040
The other copy is for the dealer.
1–1.6 30 Hour Inspection
The 30–hour inspection must be
completed soon after the first 30
hours of operation.
The purpose of the 30–hour
inspection is:
–1–2–
730, 731, 732 Loader
Service Manual
Fig. 1–5 Pre–Delivery Inspection
Fig. 1–6 30–Hour Inspection
9. Engine Air Cleaner Clean dust cup. Check condition of system. Check
condition indicator.
Engine Cooling System Check coolant level. Add coolant when level is low.
Remove debris from the radiator grill area.
Tires Check air pressure & check for damage.
Wheel Nuts Tighten nuts 115 ft.–lbs. (155 Nm) torque.
Engine Oil Check and add oil as needed.
All Pivot Points Add lubricant to all fittings.
Engine Cooling Inlet Check rear door grill & blower inlets for restriction of
air flow. Clean cooling fins & blower housing when
necessary.
Indicators, etc. Check for correct operation of all.
Operator Cab Check condition of cab & bolts
Seat Belt Check condition of strap, buckle &replaceifdamaged.
Hydraulic Fluid Check & add recommended fluid as needed.
Safety Signs (Decals) Check for damaged decals or decals that are gone.
Replace as needed.
Engine Oil & Filter Change the oil & the filter.
Control Pedals & Steering Add grease to fittings until extra grease shows.
Battery Check water level & cables.
Hydraulic Tubes & Hoses Check for damage or leaks. Replace as needed.
V–Belts Check tension & make adjustments.
Crankcase Breather Clean breather cap every oil change.
Bob–Tach Check locking levers & wedges for condition &
operation.
Parking Brake Check operation & adjust as needed.
Chaincase Fluid Check fluid level & add as needed.
Hydraulic Filter Make replacement of filter element.
Engine Cylinder Head Bolts Tighten to correct torque after first 100 hours & adjust
the valves as needed.
Engine Air Cleaner Check system for leaks. Replace element when
condition indicator shows red.
Crankcase Breather Remove breather & clean.
Governor Check oil level in the reservoir.
Main Frame Upright Check the torque of the bolts that hold the
transmission assembly to the upright.
Steering Lever Pivots Grease pivot points.
Spark Arrestor Muffler Remove the plug & clean the spark chamber.
Engine Fuel Filter Replace the filter element.
Starting Motor Remove, clean & service as needed.
Engine Fuel Filter (Inline) Replace the element.
Main Fuel Filter Make replacement of the element. Vent air from the
fuel system after changing element.
40 Micron Filter Replace the filter in the port block.
Universal Joint Grease u–joint
Engine Compression The minimum compression reading must be at least
75% of maximum compression reading.
Chaincase Make replacement of fluid.
Hydraulic System Make replacement of fluid & filter. Replace cap.
ITEM SERVICE REQUIRED 8–10 50 100 250 1000
SERVICE SCHEDULE HOURS
Revised Aug. 83
1–2 SERVICE SCHEDULE
Maintenance work must be done at regular intervals. Failure to do so will result
in damage to the Bobcat loader or the engine. The service schedule is a guide for
correct maintenance of the Bobcat loader. DO NOT change this service schedule
unless the frequency of service is increased when the Bobcat loader is operated
in very hot, cold, dusty or corrosive conditions.
DO NOT work on the loader with
the lift arms in a raised position
without support. Use the lift
arm stops or other methods.
MODEL
730 731 732 300 500
–1–3–
730, 731, 732 Loader
Service Manual
10. 1–3 ENGINE SERVICE (General)
1–3.1 Engine Oil and Filter (Fig.
1–7 thru Fig. 1–10)
Oil Specification:
730 and 732: Use a good quality oil
which has API Service Classification
SE.
731: Use a good quality oil which has
API Service Classification CC or CD.
Use oil of correct SAE viscosity for
temperature conditions at the time of
starting; not for the highest
temperature expected during the
working day.
Revised Nov. 83
Engine Oil
Filter Drain Plug
Oil Fill Cap
C–02256
Fig. 1–7 Engine Servicing (730)
B–03965
Fig. 1–8 Engine Servicing (731)
B–03963
Oil Fill
Cap
Oil Filter
Dipstick
–1–4–
730, 731, 732 Loader
Service Manual
11. Checking Oil:
Engine must be stopped to check oil level. Check oil level every 4 hours for the
first 50 hours of operation. After the first 50 hours of operation, check oil levelevery
day (8–10 hours). Oil level must be kept between the “MIN” and “MAX” marks on
the dipstick.
Adding Oil:
Remove oil fill cap and add enough oil of the correct specification and viscosity to
make oil level near the “MAX” on the dipstick.
Replacement Oil and Filter:
1. Stop the engine.
2. Remove the drain plug when engine is hot.
3. Let oil flow for several minutes.
4. Remove filter.
5. Install drain plug.
6. Clean area around filter base.
7. Put clean oil on gasket of new filter and install new filter. Tighten filter by hand
only.
8. Fill with 4 quarts (3,79 l) of oil of the correct specification and viscosity.
SAE 10W
C°–34 –29 –23 –18 –13 –7 –1 +4 +10 +15 +21 +27 +32 +38 +43 +49 +54 +60
⎧°–30 –20 –10 0 +10 +20 +30 +40 +50 +60 +70 +80 +90 +100 +110 +120 +130+140
SAE 30W
SAE 20W–20
SAE 5W–30
SAE 15W–40
SAE 10W–30–40
TEMPERATURE RANGE ANTICIPATED BEFORE NEXT OIL CHANGE
(GASOLINE: USE API CLASSIFICATION SE)
(DIESEL: USE API CLASSIFICATION CD)
RECOMMENDED SAE VISCOSITY NUMBER
(LUBRICATION OILS FOR ENGINE CRANKCASE)
–1–5–
730, 731, 732 Loader
Service Manual
B–02663R
Fig. 1–9 Checking Crankcase Oil (732)
Dipstick
Oil Fill
Minimum
Maximum
B–02335
B–02658
Fig. 1–10 Engine Oil Filter Location (732)
Oil Filter
Crankcase
Drain
12. DO NOT put fuel in tank while near
open flames or sparks. DO NOT
SMOKE while putting fuel in tank.
WARNING
1–3.2 Crankcase Breather
730 Wisconsin: The crankcase
breather is a closed system. The
breather system must be cleaned
every 500 hours.
732 Ford: (Fig. 1–12) The crankcase
breather is also the oil fill cap. Clean
the breather cap with solvent every
time you replace engine oil.
731 Deutz: (Fig. 1–11) The
crankcase breather is located on the
right side of cylinder block. Clean the
breather assembly every 500 hours.
1–3.3 Air Cleaner System
The air cleaner system must be kept
clean and free from defects for good
engine performance and long service
life.
Service air cleaner as follows:
1. Remove and clean dust cup
every day (Fig. 1–13).
2. Do not remove element unless
replacement is necessary.
(When condition indicator
shows red.)
NOTE: Be sure (1) gasket
surfaces are clean before
installing new element
and (2) be sure gasket is in
correct place.
3. Inspect complete air cleaner
system and make replacement
of any parts with defects. Be
sure hose connections are
tight.
4. Check running operation of air
cleaner system as follows:
a. Start engine and run at idle.
b. Close air inlet on air cleaner. The engine speed must become slower then
stop.
c. If the engine does not stop, the system has a leak. Inspect, and make
repairs as necessary.
1–3.4 Fuel System (730, 732)
Use only “regular” gasoline with an octane rating of 90–94. DO NOT USE
UNLEADED GASOLINE.
1. Engine must be stopped, ignition off and engine cool before putting fuel in
tank.
2. Remove fuel cap (Fig. 1–14) and fill tank with clean fuel using an approved
safety container.
3. Put fuel in the tank ONLY when the machine is in a large open area (outside
or a large building).
A–01601
Fig. 1–11 Crankcase Breather (731)
C–01024R
Fig. 1–13 Air Cleaner Assembly
Gasket
Element Rubber
Baffle
Dust Cup
–1–6–
730, 731, 732 Loader
Service Manual
B–02677
Fig. 1–12 Crankcase Breather (732)
Breather
Cap
B–02654R
Fig. 1–14 Fuel Filling Location
Fuel Cap
13. 4. Use only clean fuel.
5. Install fuel cap after filling. Be sure cap is tight.
Fuel Filter (Inline)
A fuel filter is located on the right side of the machine near the fuel tank outlet (Fig.
1–10).
The fuel filter must be checked every 300 hours.
To check or make replacement of fuel filter:
1. Turn fuel valve off (Fig. 1–15).
2. Loosen hose clamp and remove hose from inlet end of fuel filter.
3. Connect a short piece of hose to the outlet end of fuel filter and turn fuel valve
on.
4. If fuel goes through the filter, it does not need replacement. If fuel does not
go through filter, make replacement.
5. When installing new fuel filter, loosen both hose clamps to remove filter.
6. Install fuel filter with arrow toward carburetor (Fig. 1–15) and be sure fittings
are tight.
1–3.4a Fuel System (731)
See Section 7 for 731 fuel system maintenance.
Fuel Pump
730: The fuel pump is located on top
of the cylinder block and under the
intake manifold. Repair parts are not
available for the fuel pump. If the fuel
pump does not operate correctly,
replacement must be made.
732: The fuel pump is located on the
left side of the engine above the
starter. Repair parts are not available
for the fuel pump. If the fuel pump
does not operate correctly,
replacement must be made.
Carburetor
730: The carburetor is located in the
center of the engine on top of the
intake manifold.
732: The carburetor is located on the
left side of the engine, above and
behind the fuel pump. Repair kits are
available for the carburetor.
730: Carburetor Adjustment (Fig.
1–16).
Adjust the idle screw for the best low
speed operation.
The engine must idle at 1125 to 1150
RPM.
Repair kits are available for this
carburetor.
C–02319
Fig. 1–16 Carburetor Adjustment (730)
Idle Adjustment
Needle
Throttle
Stop Screw
–1–7–
730, 731, 732 Loader
Service Manual
B–02191R
Fig. 1–15 Fuel Filter and Valve(730, 731)
Filter
Element
Valve
14. 732: Carburetor Adjustment (Fig.
1–17)
The only adjustments to the carburetor
are: (1) idle adjusting needle and (2)
throttle idle adjustment.
Idle Adjusting Needle
1. Turn needle all the way in. DO
NOT use force, it will cause
damage to the needle.
2. Turn the needle out
(counterclockwise) about 1–1/2
turns, then start engine.
3. If engine does not run smoothly,
turn needle out until it does.
Throttle Idle Adjustment
1. Start the engine.
2. Hold governor speed change lever against the stop.
3. Make adjustment to throttle idle screw until engine runs 750–850 RPM.
1–3.5 Engine Cooling System
730 and 731: These engines are cooled with air. Be sure cooling fins on cylinder
heads are kept clean.
732: Check coolant level at the coolant recovery tank (Fig. 1–18). The tank must
be 1/3 full when cold. Also, when engine is cold, check to see that radiator is full.
Do not remove radiator cap when
engine is hot.
W–2011–1285
Removing Coolant From System
(732)
1. Disconnect wire from temperature
switch.
2. Remove the temperature switch
located on the right side of the
engine block.
3. After all coolant has come out,
install switch and connect wire to
switch.
Revised Nov. 83
B–03965
Fig. 1–19 Belt Tension Adjustment (731)
1/2”
(12,7 mm)
A–02499
Fig. 1–17 Carburetor (732)
Idle Adjustment
Needle
–1–8–
730, 731, 732 Loader
Service Manual
B–02672R
Fig. 1–18 Coolant Recovery Tank
Cap
15. 1–3.6 Engine Electrical System (730,
731 & 732)
The Bobcat has a 12 volt, negative
ground, alternator charging system.
General service of the electrical system
is as follows:
1. The factory battery is
maintenance free. Batteries that
are not maintenance free must
have electrolyte checked every 50
hours.
2. Check battery cables to see that
both are clean and tight. Remove
corrosion with soda and water
solution. Put grease on cable ends
to prevent further corrosion.
3. a. 730: The 730 Bobcat has a
flywheel type alternator. Check wires for damage condition.
b. 731, 732: Check alternator belt tension. Make adjustment for belt
movement with 5 lbs. (2,27 kg) force (Fig. 1–19 & Fig. 1–20) as shown.
c. 732: Check governor belt tension. Make adjustment for belt movement
with 5 lbs. (2,27 kg) force (Fig. 1–20) as shown.
4. The 730, 731, 732 Bobcats have two fuses located in the instrument panel
(Fig. 1–21).
If any fuse is bad, it is caused by an overload in the electrical system. Check for
a broken wire or broken insulation.
Using extra battery as an aid in starting:
If it is necessary to use an extra battery as an aid in starting, it must be correctly
connected to the Bobcat electrical system as follows:
Protect eyes, skin and clothing from
ACID.
WARNING
1. Fasten one end of cable to positive (+) connector of Bobcat battery.
2. Fasten the other end of the same cable to positive (+) connector of extra
battery.
3. Use second cable and fasten one end of the negative (–) connector of extra
battery.
4. Fasten the other end of second cable to engine block. Fasten to block as far
away from battery as possible to prevent sparks near battery.
DO NOT USE AUTOMATIC
TRANSMISSION FLUID!
WARNING
B–02661
Fig. 1–20 Belt Tension Adjustment (732)
1/2” Movement
1/4” Movement
–1–9–
730, 731, 732 Loader
Service Manual
16. E–01240
Fig. 1–21 ROPS Electrical System
Front Lights
Rear Light Key
Switch
Voltmeter
Fuses
Fuel Gauge
Engine
Warning Light
Hour Meter
Transmission
Warning Light
Light Switch
Fuel Sender
Switch
–1–10–
730, 731, 732 Loader
Service Manual
17. DO NOT USE AUTOMATIC
TRANSMISSION FLUID!
Installing New Battery
1. Remove battery cables.
2. Mark cables for correct installation on new battery.
3. Thoroughly clean new battery connectors and ends of cable.
4. Put new battery in same position as old one was in. Fasten battery in place.
5. Be sure cable ends do not touch anything except battery connectors.
6. Tighten cables.
NOTE: Connect ground cable (–) last to avoid sparks.
1–3.7 Ignition System (730 & 732)
The basic items of the ignition system are coil, distributor and spark plugs.
Every 200 hours, check condition of points and make replacement of spark plugs.
Making Adjustment of Spark Plug Gap
1. Remove wires from spark plugs.
2. Remove spark plugs.
3. Remove carbon deposits from spark point.
4. Set spark plug gap. See Section 8 for correct gap.
5. Install spark plugs and wires.
Making Adjustment of Point Gap
1. Turn engine until rubbing block is on high point of cam.
2. Put correct thickness feeler gauge (See Section 8–Technical Data) between
contact points.
3. Loosen adjustment screw. Move breaker arm contact until correct gap is
given. Tighten screws again.
1–4 HYDRAULIC FLUID AND FILTER
Fluid
Check level of hydraulic fluid every 50 hours (Fig. 1–22).
1. Lower the lift arms and tilt the Bob–Tach backwards. Stop the engine.
2. Turn lower check valve counterclockwise.
3. If hydraulic fluid comes from valve, fluid level is satisfactory.
4. If fluid does not come from valve, turn lower valve clockwise until tight. Turn
upper valve counterclockwise and fill reservoir (See below for oil
specifications. DO NOT OVERFILL.) until fluid comes from upper valve.
Turn valve clockwise until tight.
Use only SAE 10W–30 or 10W–40 oil which has an API classification of SE.
Revised Dec. 96
IMPORTANT
–1–11–
730, 731, 732 Loader
Service Manual
B–02673
Fig. 1–22 Checking Hydraulic Fluid
Lower Check
Valve
Upper Check
Valve
18. Filter
Make replacement of hydraulic filter every 100 hours.
1. Remove hydraulic filter (Fig. 1–23).
2. Thoroughly clean surface where filter gasket will make contact.
3. Put clean oil on gasket of new filter.
4. Install new filter and tighten hand tight.
5. Start the engine and inspect for leaks.
1–5 TRANSMISSION AND DRIVE SYSTEM
Drive Chains
The drive chains need replacement only when one becomes broken. (See 4–1.2
for replacement of drive chains.)
Brakes
Check brakes for correct operation
every 50 hours.
Make adjustment to brakes as follows:
(Fig. 1–24)
1. Put brake pedal in open position.
2. Check pedal and linkage for
freeplay.
3. There must be 1/4” (6,35) of
freeplay between the spacer and
the nut at the rear end of linkage
(Fig. 1–27). See Section 4 for
brake pad replacement and
complete installation of brakes.
Fluid
Check transmission fluid level every
100 hours.
1. Put Bobcat on a level surface.
2. Remove check plug (Fig. 1–25) located at the front of the transmission
housing.
3. If fluid does not come out of check hole, add fluid through hole until it comes
out.
NOTE: See Page 1–11 for correct transmission fluid.
4. Install check plug.
Make replacement of transmission fluid every 1000 hours.
1–6 TIRES
Check tires regularly for wear, damage and correct pressure. (Correct pressure
to 45–50 psi (310–340 kPa).
C–02366
Fig. 1–24 Brake Linkage Adjustment
1/4” Spacer
Tool
B–02665
Fig. 1–23 Hydraulic Oil Filter
Oil Filter
C–02037
Fig. 1–25 Chaincase Check Fill Plug
Plug
–1–12–
730, 731, 732 Loader
Service Manual
19. Tire Rotation
Tire rotation is necessary to be sure
of even wear. Make tire rotation from
front to rear, rear to front as shown in
figure 1–26.
When new tires are installed, install
two new tires at the same time and
put both on the same side of Bobcat.
DO NOT put fluid (ballast) in the
tires on this loader.
Check wheel bolts regularly and make sure all are tight. (See Section 8 for torque
specifications.)
1–7 LOADER LUBRICATION
Regular lubrication of the loader is important for good performance. Make
lubrication at intervals according to 1–2 “SERVICE INTERVALS” on Page 1–3.
Figure 1–27 shows the location of grease fittings on the 730 series Bobcat.
Use a good quality lithium based, multi–purpose grease.
Also put lubricant on the seat rails (Fig. 1–28).
1–8 BOB–TACH AND PIVOT PINS
The Bob–Tach must be checked
regularly for condition and wear (See
1–2 “SERVICE INTERVALS” on
page 1–3).
When levers are in “locked” position
(Fig. 1–29), the wedges must go
through the holes in the frame of the
attachment.
Make replacement of bent or broken
wedges.
All pivot points (Lift arm, Bob–Tach
and cylinders) use pins which are
held in place by lockbolts (Fig. 1–30).
Check lockbolt nuts to be sure all are
tight.
D–01380
Fig. 1–29 Bob–Tach
B–02135R
Fig. 1–28 Seat Rail Lubrication
A–02659
Fig. 1–30 Pivot Pin Lockbolts
6557316
Fig. 1–27 Lubrication Points
HYDRAULIC
RESERVOIR
CHAIN CASE
TRANSMISSION
OIL FILTER
COOLANT GREASE
GREASE
–1–13–
730, 731, 732 Loader
Service Manual
C–01965R
Fig. 1–26 TireRotation
20. 1–9 THE ENGINE MUFFLER
The muffler on the engine of the 730 loader (S/N 12002 & Below) can come loose,
because there is a failure of the studs at the manifold. Replace the studs and nuts
which fasten the muffler to the manifold (Fig. 1–31, Items 1 & 2). Tighten the nuts
to 14–18 ft.–lbs. (19–24 Nm) torque. (See the Parts Book or Microfiche for the
correct part number).
Added June 79 –1–14–
730, 731, 732 Loader
Service Manual
E–01179
Fig. 1–31 Engine MufflerInstallation
1
2
21. HYDRAULIC
SYSTEM
–2––1–
730, 731, 732 Loader
Service Manual
HYDRAULIC SYSTEM
CONTROL PEDAL 2–10 2–33
. . . . . . . . . . . . . . . . . . . . . . . . . . . . . . . . . . . .
HYDRAULIC CONTROL VALVE 2–3 2–3
. . . . . . . . . . . . . . . . . . . . . . . .
HYDRAULIC/HYDROSTATIC
RESERVOIR 2–7 2–31
. . . . . . . . . . . . . . . . . . . . . . . . . . . . . . . . . . . . . . . .
HYDRAULIC PUMP 2–4 2–15
. . . . . . . . . . . . . . . . . . . . . . . . . . . . . . . . . . .
HYDRAULIC SYSTEM INFORMATION 2–2 2–2
. . . . . . . . . . . . . . . . . .
LIFT CYLINDERS 2–5 2–19
. . . . . . . . . . . . . . . . . . . . . . . . . . . . . . . . . . . . .
OIL COOLER 2–8 2–32
. . . . . . . . . . . . . . . . . . . . . . . . . . . . . . . . . . . . . . . . .
10 MICRON FILTER 2–9 2–33
. . . . . . . . . . . . . . . . . . . . . . . . . . . . . . . . . . .
TILT CYLINDER 2–6 2–25
. . . . . . . . . . . . . . . . . . . . . . . . . . . . . . . . . . . . . .
TROUBLESHOOTING 2–1 2–1
. . . . . . . . . . . . . . . . . . . . . . . . . . . . . . . . .
Paragraph Page
Number Number
W–1006
Instructions are necessary before doing
maintenance and specified service on this
loader. See all instructions and warnings in
the manual. Check warnings at the
beginning of the preventive maintenance
section. After doing service always check
for correct function of loader.
Safety glasses or goggles are always
needed for eye protection from electric
arcs from shorts or welding, battery acid,
compressed springs, fluids under
pressure, and flying debris or loose
material when engines are running or tools
are used. Use eye protection approved for
type of welding. Failure to obey warnings
can cause injury or death.
WARNING
W–1035
Diesel fuel or hydraulic fluid under
pressure can penetrate the skin or eyes.
Fluid leaks under pressure may not be
visible. Use a piece of cardboard or wood
to find leaks but do not use bare hand.
Wear safety goggles. If fluid enters skin or
eyes, get immediate medical attention.
WARNING
Revised Nov. 83
22.
23.
24. Suggest:
If the above button click is invalid.
Please download this document
first, and then click the above link
to download the complete manual.
Thank you so much for reading