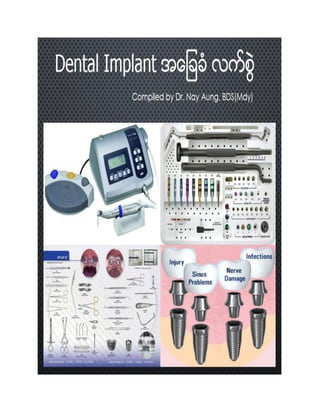
Basic dental implant handbook 20180325
•
0 likes•85 views

basic dental implant handbook for beginners

Recommended
Recommended
More Related Content
More from Nay Aung
More from Nay Aung (20)
Basic dental implant handbook 20180325
- 2. သြားႏွင့္ခံတြင္းဆရာ၀န္မ်ားအတြက္ dental implant အေျခခံလက္စြဲ အခန္း (၁) History and Introduction of Oral Implantology ၁။ ယေန႔ သြားႏွင့္ခံတြင္းေဆးပညာေလာကမွာ dental implant နည္းပညာဟာ အလ်င္အျမန္တိုးတက္ေနပါတယ္။ implant ကို အရိုးထဲမွာ သြားအျမစ္အေနနဲ႔ အစားထိုးထည့္ၿပီး အေပၚကေန artificial crown စြပ္ေပးျခင္းျဖင့္ သြားမရိွတဲ့သြားေနရာမွာ သြားစိုက္ႏိုင္ခဲ့ပါတယ္။ implant fixture နဲ႔ artificial crown ကို ဆက္ေပးထားတာကေတာ့ abutment ျဖစ္ပါတယ္။ ၂။ dental implant ကို ထိေရာက္ေအာင္ျမင္ေစတဲ့ အခ်က္ (၄)ခ်က္ သိပၸံပညာမွာ ေပၚထြက္လာခဲ့ပါတယ္။ အဲ့ဒါေတြကေတာ့ - Two basic biomaterials (Titanium and Aluminum oxide) - The application of CT to develop jaw bone models for sub-periosteal implants - The concept of osseointegration - Biological or transmucosal seal of the gingival tissues around the implant neck တို႔ ျဖစ္ပါတယ္။ ၃။ dental implant concept ကုိ ေရွးေခတ္ကတည္းက အီဂ်စ္လူမ်ဳိးေတြ အသံုးျပဳခဲ့တာ ေတြ႔ရပါတယ္။ ဆံုးရႈံးသြားတဲ့သြားေနရာမွာ တန္ဖိုးရိွတဲ့သတၱဳေတြ၊ ေက်ာက္ေတြနဲ႔ အစားထိုးခဲ့တာ ေတြ႔ရပါတယ္။ ယေန႔ေခတ္သစ္မွာေတာ့ 1940 ခုႏွစ္၀န္းက်င္ကစၿပီး dental implant ကုိ ေဆးကုသမႈေပးရာမွာ အသံုးျပဳေနၾကပါတယ္။ စတင္အသံုးျပဳခ်ိန္မွာ အသံုးမျပဳသင့္ေၾကာင္း ေ၀ဖန္တာေတြလည္း ႀကံဳေတြ႔ခဲ့တာေတြ႔ရပါတယ္။ ၄။ ၁၉၅၁ ခုႏွစ္မွာ Mr. Linkow က American Academy of Implant Dentistry ဖြဲ႔စည္းဖို႔လွဳ႕ံေဆာ္ခဲ့သလို အဲ့ဒီႏွစ္အစပိုင္းမွာပဲ Dr. Branemark ကလည္း implant နဲ႔ဆိုင္တဲ့ သုေတသနကို ဆြီဒင္မွာ ျပဳလုပ္ေနခဲ့ပါတယ္။ ဂ်ပန္ႏိုင္ငံမွာေတာ့ Mr. Kawahara က ceramic implant ကို ၁၉၇၀ ခုႏွစ္အစပိုင္းမွာ တီထြင္ေနခဲ့ပါတယ္။ ယေန႔ Contemporary Oral Implantology ကို Harvard တကၠသိုလ္မွာက်င္းပတဲ့ 1978 conference မွာ အစျပဳခဲ့ၾကပါတယ္။
- 3. ၅။ titanium implant ကိုေတာ့ Dr. Branemark ဦးေဆာင္တဲ့အဖြဲ႔ကေန စတင္အသံုးျပဳခဲ့တာေတြ႔ရပါတယ္။ သုေတသနအမ်ားအျပားကလည္း titanium implant ဟာ အရိုးထဲမွာထည့္ဖို႔ သင့္တင့္ေၾကာင္းေဖၚထုတ္ႏိုင္ခဲ့ပါတယ္။ (Implant can exist within dynamic epithelial and osseous systems.) ၆။ 1981-2 ခုႏွစ္မွာ cylindrical type implant ကို အေမရိကန္မွာ စတင္အသံုးျပဳခဲ့ၾကပါတယ္။ hydroxyapatite coated implant ကိုေတာ့ ၁၉၈၄ ခုႏွစ္မွာ စတင္မိတ္ဆက္ခဲ့ပါတယ္။ ၇။ အထက္မွာ ေျပာခဲ့သလုိပဲ အရိုးထဲမွာထည့္တဲ့အပိုင္းကို implant fixture လုိ႔ေခၚၿပီး crown ေနရာမွာ အစားထိုးတဲ့အပိုင္းကိုေတာ့ prosthesis လုိ႔ေခၚပါတယ္။ ၈။ dental implant ေတြကို အမ်ဳိးမ်ဳိးခြဲျခားသတ္မွတ္ႏိုင္ပါတယ္။ shape; place of anchorage; composition; and coatings စတာေတြေပၚမူတည္ၿပီး သတ္မွတ္တာပါ။ ေယဘုယ်အားျဖင့္ - endosseous implants - subperiosteal implants - transosseous implants ဆိုပီး ခြဲျခားၾကတာ ေတြ႕ရပါတယ္။ ယေန႔ေခတ္မွာေတာ့ endosseous implants ကို အသံုးအမ်ားဆံုးျဖစ္ပါတယ္။ ထပ္ပီးခြဲမယ္ဆုိရင္ေတာ့ shape; function; surgical treatment; and surface treatment အေပၚမူတည္ၿပီး အမ်ဳိးမ်ဳိးအုပ္စုငယ္ေလးေတြ သတ္မွတ္ႏိုင္ပါတယ္။
- 4. ၉။ ပံုမွန္သြားစုိက္တာထက္ Implant treatment က ဘာပိုေကာင္းလဲဆိုရင္ - increase in bone anchored support - prevent bone resorption - maintain healthy teeth (ေဘးသြားအေကာင္းေတြကို bur နဲ႔တိုက္ပစ္စရာမလို) စတာေတြ ျဖစ္ပါတယ္။
- 6. အခန္း (၂) ေအာင္ျမင္ေသာ ကုသမႈအတြက္ အေျခခံအခ်က္မ်ား ၁။ dental implant treatment ေအာင္ျမင္ဖို႔ good planning and meticulous technique ရိွဖိုလိုပါတယ္။ ကုသမႈၿပီးဆံုးတဲ့အခ်ိန္မွာ ဘယ္လိုရလဒ္လိုခ်င္ပါသလဲ။ အဲ့ဒီလိုခ်င္တဲ့ရလဒ္အတြက္ ႀကိဳတင္ျပင္ဆင္မႈအဆင့္ဆင့္ (good planning)လုပ္ရပါမယ္။ meticulous technique ဆိုတာက ခြဲစိတ္မႈစြမ္းရည္နဲ႔ မိမိအသံုးျပဳမယ့္ implant system အေၾကာင္းကိုလည္း ေသခ်ာေလ့လာထားရပါမယ္။ ၂။ လူနာက က်န္းမာေရးေကာင္းမြန္ရပါမယ္ (The patient should be medically fit to undergo the surgery.)။ implant တစ္ေခ်ာင္း၊ႏွစ္ေခ်ာင္းထည့္တာက minor surgery နဲ႔တူၿပီး 5 ေခ်ာင္း၊ 6 ေခ်ာင္းထည့္တာနဲ႔အမွ် ပိုၿပီး ဂရုစိုက္ဖို႔လိုအပ္ပါတယ္။ ကုသမႈအေၾကာင္း လူနာကို ေသခ်ာရွင္းျပထားရမွာျဖစ္သလို informed consent ယူထားဖို႔ လိုအပ္ပါတယ္။ ၃။ surgical stent နဲ႔ လိုအပ္တဲ့ radiographs ေတြ ေသခ်ာျပင္ဆင္ေလ့လာပါ။ ကုသမႈေပးမယ့္ သြားဆရာ၀န္အေနနဲ႔ စိုက္မယ့္ implant အေရအတြက္၊ အရြယ္အစား၊ စိုက္မည့္ေနရာတို႔ကို ရွင္းရွင္းလင္းလင္း သိျမင္ထားရပါမယ္။ ကုသမႈအတြက္ ေလ့က်င့္ထားမႈရိွရမွာျဖစ္သလို ျဖစ္လာႏိုင္တဲ့ အေျခအေနအရပ္ရပ္ကိုလည္း ေျဖရွင္းႏိုင္ရမွာျဖစ္ပါတယ္။ medical contraindications ေတြ၊ intraoral contraindications ေတြ၊ psychological contraindications ေတြရိွပါက ေသခ်ာေလ့လာဆန္းစစ္သံုးသပ္ၿပီးမွ လိုအပ္သလို ကုသမႈေပးသင့္ပါတယ္။ ၄။ implant surgery အမ်ားစုကုိ ထံုေဆးျဖင့္ ေဆာင္ရြက္ႏိုင္ပါတယ္။ လူနာတစ္ခ်ဳိ႔ကိုေတာ့ sedation or general anesthesia ေပးၿပီး ကုသႏိုင္ပါတယ္။ အရမ္းစိုးရိမ္တတ္တဲ့လူနာေတြကိုေတာ့ မခြဲခင္ တစ္နာရီအလိုမွာ benzodiazepine 5 - 20 mg ေပးႏိုင္ပါတယ္။ ၅။ ကုသမႈေပးဖို႔ သန္႔ရွင္းသပ္ရပ္ၿပီး ေရာဂါပိုးမကူးစက္ႏိုင္တဲ့ ေနရာနဲ႔ ပစၥည္းေတြ လိုပါတယ္ (sterile technique)။ မခြဲခင္မွာ 0.2% chlorhexidine mouthwash နဲ႔ပါးလုပ္က်င္းေစၿပီး ခံတြင္းပတ္ပတ္လည္ကို betadine နဲ႔သန္႔ရွင္းေပးရပါမယ္။ အေျခခံလိုအပ္တဲ့ပစၥည္းေတြ၊ surgical drape kit ၊ implant packaging ၊ sterile physiologic saline solution ၊ reduction gear angled handpiece system with both external and internal irrigation ၊ disposable plastic sleeve for motor and cord ၊ handpiece ၊ drills ၊ irrigation unit စတာေတြကို ေသခ်ာျပင္ဆင္ရပါမယ္။
- 7. ၆။ implant flap design အမ်ဳိးမ်ဳိးရိွသည့္အနက္ mid-crestal incision ကို အေျခအေနအားလံုးမွာ အသံုးျပဳႏိုင္ပါတယ္။ ျမင္ကြင္းပိုရွင္းေအာင္၊ လုပ္ရတာ က်ယ္က်ယ္၀န္း၀န္းျဖစ္ေအာင္ vertical relieving incisions လုပ္ႏိုင္ပါတယ္။ ၇။ stage I surgery ဆိုတာက implant fixture ကို အရိုးထဲ ထည့္တဲ့ procedure ျဖစ္ပါတယ္။ တိတိက်က်နဲ႔ လိုအပ္တာထက္ ထိခိုက္မႈမရိွေစဘဲ implant ကို ထည့္ရပါမယ္ (exacting, non-traumatic preparation of the recipient site, and a specific insertion protocol) ။ ထည့္သြင္းစဥ္းစားရမယ့္အခ်က္ေတြကေတာ့ quality and quantity of bone ၊ the load demand on the final prosthesis တို႔ ျဖစ္ပါတယ္။ drill နဲ႔ ေဖာက္ေနတုန္းမွာ copious saline irrigation လုပ္ရပါမယ္။ ၈။ မိမိအသံုးျပဳတဲ့ implant system အရ drill မ်ားကို အစီစဥ္အတိုင္း အသံုးျပဳပါ။ လိုအပ္ပါက countersink နဲ႔ bone tap ကို အသံုးျပဳပါ။ implant ကို သတ္မွတ္ထားတဲ့ 15-20 RPMs အတိုင္းထည့္ပီးပါက cover screw နဲ႔ ပိတ္ပါ။ suture လုပ္ပါ။ ၉။ stage II sugery ကို healing ရၿပီးေနာက္ mandible မွာ ၃ လမွ ၄ လ၊ maxilla မွ ၄လ မွ ၅ လ အခ်ိန္မွာ လုပ္ႏုိင္ပါတယ္။ - Cover screw is exposed after removal of overlying bone or soft tissue - cover screw driver is used to remove cover screw from implant - Selection of proper sized abutment for transmucosal connection - Abutment placed into implant and secured with abutment screw - Small or large healing caps used to prevent debris collection in threaded portion of abutment screw - Surgical dressing during healing phase ၁၀။ Post-operative care After implant surgery, patients should be warned to expect: - Some swelling and possibly bruising - Some discomfort which can usually be controlled with oral analgesics - Some transitory disturbance in sensation if surgery has been close to a nerve. They should be advised: - In most circumstances, not to wear dentures over the surgical area for at least 1 week (possibly 2 weeks) to avoid loading the implants and the possibility of disrupting the sutures - To use analgesics and ice packs to reduce swelling and pain - To keep the area clean by using chlorhexidine mouthwash 0.2% for 1 minute twice daily - Not to smoke. ၁၁။ amoxicillin 250 mg တစ္ေန႔ သံုးႀကိမ္၊ ၅-၇ ရက္ ေပးႏိုင္ပါတယ္။ amoxicillin နဲ႔မတည့္ရင္ ေဆးေျပာင္းေပးပါ။
- 9. အခန္း (၃) dental implant imaging modalities - - - - - - - - - - - - - - - - - - - - - - - - - - - - - ၁။ dental implant imaging modalities အမ်ုိးမ်ဳိးရိွသည့္အနက္ Cone-beam computed tomography (CBCT) ကို အသံုးျပဳျခင္းဟာ အေကာင္းဆံုးလို႔ ဆိုထားပါတယ္။ ၂။ ေအာင္ျမင္တဲ့ကုသမႈတိုင္းအတြက္ လိုအပ္တာေလးေတြက - The successful outcome of any implant procedure depends on a series of patient-related and procedure dependent parameters, including general health conditions, biocompatability of the implant material, the feature of the implant surface, the surgical procedure, and the quality and quantity of the local bone. (Turkyilmaz et al., 2007) ၃။ အရင္ေခတ္ကေတာ့ periapical radiographs နဲ႔ panoramic images ေလာက္ပဲသံုးပီး implant treatment ေပးခဲ့ၾကပါတယ္။ CT, CBCT ေတြေပၚလာေတာ့ အဲ့ဒါေတြသံုးၿပီး treatment plan ဆြဲမွ treatment ေပးမွ ပိုမိုတိက်အႏၱရာယ္ကင္းေၾကာင္း သံုးသပ္လာၾကပါတယ္။ အထူးသျဖင့္ complex reconstruction case ေတြမွာ CT, CBCT ေတြကို သံုးသင့္ပါတယ္။ ၄။ ideal imaging technique ဆိုသည္မွာ - The ideal imaging technique for dental implant care should have several essential characteristics, including the ability to visualize the implant site in the mesiodistal, buccolingual and superioinferior dimensions; the ability to allow reliable, accurate measurements; a capacity to evaluate trabecular bone density and cortical thickness; reasonable access and cost to the patient and minimal radiation risk (Benson & Shetty, 2009).
- 10. ၅။ imaging techniques အားလံုးမွာ ေကာင္းက်ဳိး၊ ဆိုးက်ဳိးေလးေတြ ရိွတယ္လို႔ဆိုပါတယ္။ The objectives of the preoperative implant imaging include all necessary surgical and prosthetic information to determine the quantity, quality and angulations of bone; selection of the potential implant sites, and to verify absence of pathology. However, there is no ideal imaging technique in the field of oral implantology that would be acceptable for all patients. All imaging techniques have inherent advantages and disadvantages (Resnik et al. 2008). ၆။ သင့္ေတာ္တဲ့ radiographic modality ေအာက္ပါအခ်က္ေတြကို ၾကည့္ပီး ေရြးခ်ယ္ပါတယ္။ - အနည္းဆံုး ဓါတ္ေရာင္ျခည္ပမာဏ - ကုန္က်စရိတ္အနည္းဆံုး - sufficient diagnostic information for treatment planning ၇။ အသံုးမ်ားတဲ့ imaging technique ေတြကေတာ့ - Intraoral radiography - Panoramic radiography - Computed tomography (CT) - Cone-beam computed tomography (CBCT) တို႔ျဖစ္ၾကပါတယ္။ CBCT
- 11. အခန္း (၄) Assessment of bone quality and quantity in implant treatment ၁။ အရိုးရဲ႕ quality and quantity ကို သိဖို႔ အလြန္အေရးႀကီးပါတယ္။ Several factors, such as implant geometry, preparation technique, and quality and quantity of local bone influence primary stability; primary implant stability is one of the main factors influencing implant survival rates. (Friberg et al., 1991; Meredith, 1998, Turkyilmaz & McGlumphy, 2008).
- 13. အခန္း (၅) Theories about Dental Implant ၁။ Theory of osseointegration = dental implant ရဲ႕မ်က္ႏွာျပင္မွာရိွတဲ့ titanium oxide နဲ႔ အရိုးဟာ connective tissue အလႊာ ၾကားမခံဘဲ တိုက္ရိုက္ေပါင္းစပ္ႏိုင္တယ္လို႔ ၁၉၅၀ ႏွစ္မ်ားမွာ ပညာရွင္Per-Ingvar Brånemark ဆိုခဲ့ပါတယ္။ A direct structural and functional connection between ordered, living bone and the surface of a load-carrying implant (Brånemark, 1985) ၂။ Weiss theory of fibro-osseous integration = Weiss theory states that there is a fibro-osseous ligament formed between the implant and the bone and this ligament can be considered as the equivalent of the periodontal ligament. He defends the presence of collagen fibres at the bone- implant interface. He interpreted it as the peri-implantal ligament with an osteogenic effect. He advocates the early loading of the implant. ၃။ Complementary procedures 1.BONE GRAFTING FOR IMPLANTS = Bone grafting is done when the bone is too narrow or too short to place an adequate sized implant. Bone grafting helps to increase the width and/or height of bone.
- 14. 2.SINUS LIFT = Our sinuses are located in close proximity to the upper posterior jaw bone. In some cases, the sinus floor "dips" down, causing that area to lose bone height. If the bone height is not adequate for an implant, then a "sinus lift" procedure is necessary in order to increase bone height. ၄။ ပညာရပ္တစ္ခုေလ့လာရာမွာ principles and practice တစ္ျပိဳင္နက္ ေလ့လာႏိုင္ရင္ေတာ့ ပိုထိေရာက္မႈ ရိွပါလိမ့္မယ္။ ပံုမွန္ implant စိုက္မယ့္ သြားဆရာ၀န္တစ္ေယာက္အေနနဲ႔မဟုတ္ဘဲ dental implant ကို အထူးျပဳေလ့လာမယ့္ပညာရွင္ျဖစ္ခ်င္တယ္ဆိုရင္ေတာ့ ေလ့လာစရာေတြက အမ်ားႀကီးရိွေနပါတယ္။ ၅။ osseointegration process အေၾကာင္း ေလ့လာေစခ်င္ပါတယ္။ အေသးစိတ္မဟုတ္ေပမယ့္ အၾကမ္းဖ်င္းေဖၚျပေပးလိုက္ပါတယ္။ Stages of Bone Healing and Osseointegration: Cell Kinetics and Tissue Remodeling - The osseointegration process observed after implant insertion can be compared to bone fracture healing. - In the case of a bone fracture, any bone wounding leads to an inflammatory reaction with bone resorption and subsequently the activation of growth factors and attraction by chemotaxis of osteo- progenitor cells to the site of the lesion.
- 15. - The differentiation toward osteoblasts will lead to a reparative bone formation, will lead to fusion of both ends. - In the case of an implant insertion into a prepared hole, this will lead to bone apposition onto the implant surface if the latter is nontoxic. - Logically, a certain immobility of the implant surface toward the bone should be maintained. - A mild inflammatory response, as triggered by movements or appropriate electrical stimuli, may enhance the bone-healing response, but above a certain threshold, this is detrimental. - Micromotion at the bone-implant interface beyond 150 μm results in fibrous encapsulation instead of osseointegration (Szmukler-Moncler et al. 1998) ၆။ Steps of osseointegration - First, woven bone is quickly formed in the gap between the implant and the bone. - Second, after several months this is progressively replaced by lamellar bone under the load stimulation. - Third, a steady is reached after about l.5 years. - Woven bone grows fast, up to 100 um per day, and in all directions. It is characterized by a random orientation of its collagen fibrils, high cellularity which means that the bone is low biomechanical capacity, and thus occlusal load should be controlled. - After 1 to 2 months, under the effect of load, the woven bone surrounding the implant will slowly transform into lamellar bone.
- 16. အခန္း (၆) Loading protocols in Implant Dentistry ၁။ လူနာအားလံုး သြားကုသမႈခံယူတဲ့အခါ အျမန္ၿပီးေ္ျမာက္ခ်င္ၾကပါတယ္။ ျဖစ္ႏိုင္ရင္ ေၾကာ္ျငာေတြထဲမွာ ေတြ႔သလို တစ္ရက္တည္းနဲ႔ အခ်ိန္ ဘယ္ႏွစ္နာရီေလာက္နဲ႔ ပီးေအာင္လုပ္ေပးလို႔မရဘူးလားဆိုပီး ေတာင္းဆိုတတ္ၾကပါတယ္။ ၂။ immediate loading ကို restoring the implant in occlusal contact within 48 hours of implant placement ဆိုပီး သတ္မွတ္ထားပါတယ္။ လူနာအတြက္ ေကာင္းက်ဳိးေတြကေတာ့ - reduced overall treatment time - reduced number of visits to clinicians - comfort during the healing period - improved esthetic and phonetic aspects တို႔ ရိွလာတယ္လို႔ ဆိုပါတယ္။ ၃။ immediate restoration or immediate provisionalization ဆိုတာက immediate loading နဲ႔ ဆင္တူသလိုရိွပါတယ္။ ဒါေပမယ့္ functional occlusion မျဖစ္ေအာင္ ထားသင့္တယ္လို႔ ဆိုၾကပါတယ္။ အဲ့ဒီႏွစ္ခုကို အတူတူတြဲပီး ေျပာေလ့ရိွေပမယ့္ သီးျခားစဥ္းစားၿပီး လူနာကို ကုသမႈေပးရပါမယ္။ ၄။ (၄၈)နာရီကေန (၃)လအတြင္းဆိုရင္ Early loading လို႔ သတ္မွတ္ပါတယ္။ လူနာတစ္ေယာက္ခ်င္းစီရဲ႕ အေျခအေနအားလံုးကို သံုးသပ္ပီး loading protocol ကုိ သတ္မွတ္ရမွာျဖစ္ပါတယ္။ ၅။ esthetically critical areas ေတြမွာ immediate loading ထက္ conventional and early loading protocols ေတြက ပိုေကာင္းတယ္လို႔ ဆိုၾကပါတယ္။ ၆။ လူနာတစ္ဦးခ်င္းစီရဲ႕ occlusal funcation and parafunctional forces ေတြကို ေသခ်ာသံုးသပ္ၿပီး ကုသမႈေပးရပါမယ္။ ၇။ Successful osseointegration depends on several factors: - Suitability of the implant material - Careful site preparation - Adequate stabilization of the implant ၈။ shortened loading protocols ေတြကို စဥ္းစားတဲ့အခါ သတိထားရမွာေတြက - Amount of primary bone contact/primary stability - Quantity and quality of bone at the implant site - Pace of bone formation around the implant ၉။ သုေတသနေတြကေတာ့ ေအာင္ျမင္မႈအတိုင္းအတာကို အမ်ဳိးမ်ဳိးတင္ျပေနၾကမွာျဖစ္လို႔ မိမိတို႔ကုသမႈေပးရမယ့္လူနာအေျခအေန၊ hard and soft tissue အေျခအေနေတြကို ေသခ်ာသံုးသပ္ၿပီးမွ ကုသမႈအတြက္ loading protocol ကို ဆံုးျဖတ္ႏိုင္ၾကမွာျဖစ္ပါတယ္။ သြားဆရာ၀န္ရဲ႔ ကၽြမ္းက်င္မႈကလည္း အေရးပါလွပါတယ္။
- 18. အခန္း (၇) Cement retention Vs Screw retention ၁။ implant crown prosthesis ကို cement retention သို႔မဟုတ္ screw retention လုပ္ရာမွာ ဘယ္ဟာ ပိုေကာင္းလဲလို႔ ေမးေလ့ရိွၾကပါတယ္။ ေသေသခ်ာခ်ာ အသံုးျပဳမယ္ဆိုရင္ေတာ့ အဲ့ဒီႏွစ္ခုထဲက ႀကိဳက္ရာကို အသံုးျပဳလို႔ရပါတယ္။ ၂။ cement retained prostheses ရဲ႕ ေကာင္းက်ဳိးေတြကေတာ့ ေအာက္ပါအတိုင္းျဖစ္ပါတယ္။ - Simplicity - Familiarity - Idealize occlusal contacts (Occlusal contacts are not affected by the screw access channel.) - Esthetics (Porcelain occlusal surfaces can be developed.) - Reduces risk of porcelain chipping and fractures associated with the screw access channel. ၃။ cement retained prostheses ရဲ႕ မေကာင္းတဲ့အခ်က္ေတြကေတာ့ ေအာက္ပါအတိုင္းျဖစ္ပါတယ္။ - requires precise margin placement - requires a meticulous technique - prosthesis is not easily retrieved - recurrent loss of retention when retention and resistance form the abutment is suboptimal. တို႔ျဖစ္ပါတယ္။ အထူးသျဖင့္ ပိုေနတဲ့ cement ေတြကို ေသခ်ာဖယ္မထုတ္မိရင္၊ ဒါမွမဟုတ္ cement ေၾကာင့္ incomplete seating of the crown ျဖစ္ႏိုင္ၿပီး အက်ဳိးဆက္အေနနဲ႔ peri-implant mucositis; peri- implantitis စတာေတြ ျဖစ္ႏိုင္ပါတယ္။
- 19. ၄။ အဓိကျပသနာ (၂)ႏွစ္ခုကေတာ့ - impaction of cement subgingivally during cementation - incomplete seating of the crown တို႔ျဖစ္ၿပီး အဲ့ဒီႏွစ္ခုေၾကာင့္ peri-implantitis ျဖစ္ေစႏိုင္ပါတယ္။ Peri-implantitis = An inflammatory process affecting the tissues around an osseointegrated implant in function, accompanied by bone loss. ၅။ peri-implantitis ျဖစ္ရျခင္းရဲ႕ 80 ရာခို္င္ႏႈန္းဟာ subgingival accumulation of cement ေၾကာင့္လုိ႔ ဆိုထားပါတယ္။ 80% of cases of peri-implantitis are secondary to subgingival cement accumulations. (Wilson, 2009) ။ ခက္တာက cement margin က subgingival မွာဆိုရင္ ပိုေနတဲ့ cement ေတြကို ဖယ္ထုတ္ဖို႔က မျဖစ္ႏိုင္ေလာက္ေအာင္ပါပဲ။ If the cement margin is subgingival, it is not possible to remove all the cement (Linkevicius et al, 2013) ။ implant surface မွာ cement က ကပ္ေနပီဆိုရင္ ဖယ္ထုတ္ဖို႔ ေတာ္ေတာ္ခက္ပါတယ္။ ၆။ အဲ့ဒီေတာ့ cement ကို အသံုးျပဳမယ္ဆိုရင္ - cement ကို လိုသေလာက္ပဲ အသံုးျပဳပါ။ အမ်ားႀကီး မထည့္ပါနဲ႔။ - prefabricated abutment ေတြကို မသံုးပါနဲ႔။ - Use customized abutments with supra-gingival margins in the posterior quadrants, especially when there are significant undercuts and concavities associated with the abutment. ၇။ screw retained prosthesis ေတြ အေနနဲ႔ကေတာ့ - Retrievability (ျပန္သံုး ျပန္ျပင္လို႔ ရႏိုင္ပါတယ္)။ - Avoid trapping cement subgingivally (cement မသံုးေတာ့ cement က်န္ေနမွာ မပူရေတာ့ပါ၊ peri- implantitis ျဖစ္ဖို႔ နည္းသြားပါတယ္) - Carry restoration more subgingivally ( ideal emergence profile and contour ရႏိုင္ၿပီး ေရွ႔သြားေတြမွာဆိုရင္ ပိုလွေအာင္ လုပ္ေပးႏိုင္ပါတယ္) You can extend the porcelain margins deeper subgingivally.
- 20. အခန္း (၈) Implant therapy in the Esthetic Zone ၁။ bone and soft tissue loss မ်ားေလေလ ideal esthetic result ရဖို႔ ခက္ေလေလပါပဲ။ gingival and papillary architecture အေကာင္းဆံုးျဖစ္ဖို႔ အဖက္ဖက္က စဥ္းစားပီး ကုသမႈေပးရမွာျဖစ္ပါတယ္။ ၂။ Factors affecting aesthetic outcome ေတြကေတာ့ - patient selection and smile line - tooth position - root position of the adjacent teeth - biotype of the periodontium and tooth shape - bone anatomy of the implant site - position of the implant တို႔ ျဖစ္ပါတယ္။ ၃။ ေရွ႔သြားတစ္ေခ်ာင္းထဲစိုက္တဲ့အခါ ကြက္လပ္ေနရာလြတ္က က်ယ္လြန္းေနရင္ implant ရဲ႕ crown က ရိွသင့္တာထက္ ပုိႀကီးသြားမွာျဖစ္လို႔ လွမွာ မဟုတ္ေတာ့ပါဘူး။ (excessive mesiodistal space in the region requiring implant restoration) ၄။ မိမိစိုက္မယ့္ သြားရဲ႔ ေဘးတစ္ဖက္တစ္ခ်က္မွာရိွတဲ့ သြားအျမစ္ေတြရဲ႕ တည္ရိွပံုေၾကာင့္ implant ထည့္ရတာ ခက္သြားတာ၊ ထည့္မရတာလည္း ျဖစ္တတ္ပါတယ္။
- 21. ၅။ biotype of periodontium က ပါးလြန္းေနရင္ implant ကုိ palatal ဘက္တိုးပီး ထည့္ေလ့ရိွပါတယ္။ ၆။ implant ထည့္တဲ့ေနရာက free gingival margin က apical migration ျဖစ္တတ္လို႔ သတိထားဖို႔လိုပါတယ္။ ၇။ လိုအပ္ရင္ bone graft လည္း ထည့္ပါ။ ၈။ implant ထည့္တဲ့အခါ ေဘးသြားေတြကေန 1.5 - 2 mm လြတ္ေနသင့္ပါတယ္။ facio-lingual bone ကေတာ့ စိုက္မယ့္ implant ရဲ႕diameter ထက္ အနည္းဆံုး 1mm ပိုရိွေနရပါမယ္။ ၉။ စိတ္ကူးနဲ႔ crown ရဲ႕ curvature ေလးကို ျမင္ၾကည့္ၿပီး implant ကို palatal ဘက္တိုးပီး ထည့္ပါ။ ၁၀။ facial bone wall ရဲ႕ height and thickness; interproximal area မွာရိွတဲ့ alveolar crest ရဲ႕ bone height ေတြက free gingival margin နဲ႔ peri-implant papillae အေပၚမွာ အက်ဳိးသက္ေရာက္မႈရိွပါတယ္။ ၁၁။ buccal ဘက္မွာ dehiscence မျဖစ္ေအာင္၊ palatal ဘက္မွာ ridge lap မျဖစ္ေအာင္ ဂရုစိုက္ရပါမယ္။ ၁၂။ mesio-distal အေနနဲ႔ စဥ္းစားမယ္ဆိုရင္ ျဖစ္တတ္တာေတြက - decreased papillary height - restoration problems - poor embrasure form and emergence profile - long contact zone တို႔ျဖစ္ပါတယ္။ ၁၃။ Apico-coronal implant placement မွာ ပိုတာ၊ လိုတာေတြအတြက္ေၾကာင့္ - restoration က free gingival margin ရဲ႔ အျပင္ဘက္ေရာက္ေနတာ - difficulty in impression making - difficulty in instrumentation - tissue impengingment ေတြျဖစ္ႏိုင္ပါတယ္။
- 22. အခန္း (၉) dental implant surface အေၾကာင္း သိေကာင္းစရာမ်ား ၁။ dental implant surface ကို အမ်ဳိးမ်ဳိးစမ္းသပ္ထုတ္လုပ္ေနတာ ေတြ႕ရပါတယ္။ အဓိကအေနနဲ႔ကေတာ့ Osseointegration ပိုေကာင္းလာေစဖို႔ျဖစ္ပါတယ္။ smooth; machined; acid-etched နဲ႔ coated ဆိုပီး (၄)မ်ဳိးခြဲျခားထားတာ ေတြ႕ရပါတယ္။ ၂။ smooth surface ရိွတဲ့ implant ထက္ active or rough surface ရိွတဲ့ implant က osseointegration rate ပိုေကာင္းေစတယ္လို႔ သုေတသနေတြက ေဖၚျပၾကပါတယ္။ ယခုေနာက္ပိုင္း hydroxyapatite coated surface အမ်ဳိးအစားေတြ အသံုးမ်ားလာတာ ေတြ႔ရပါတယ္။ ၃။ bone အမ်ဳိးအစားေတြထဲက human low density bone ထဲမွာ surface modification လုပ္ထားတဲ့ implant ကို ထည့္ျခင္းျဖင့္ bone-implant-contact(BIC)ကို ပိုမိုေကာင္းေစေၾကာင္း ေတြ႔ရိွရပါတယ္။ ဒါေပမယ့္ healing period အတြင္းမွာ implant ပတ္ပတ္လည္ရိွတဲ့ bone density တိုးတက္လာျခင္းသိပ္မရိွလို႔ ေရရွည္မွာ ေအာင္ျမင္ႏိုင္ပါ့မလားဆိုၿပီး ေမးခြန္းထုတ္ေနၾကပါတယ္။ ၄။ large porous-coated surface ရိွတဲ့ implant ေတြသံုးရင္ bone penetration into the implant surface ေၾကာင့္ ပိုေကာင္းမလားဆိုပီး စမ္းသပ္ေနၾကတာလည္း ေတြ႕ရပါတယ္။ ၅။ cell adherence and proliferation ေကာင္းဖို႔အတြက္လည္း sand blasted and acid-etched လုပ္ထားတဲ့ implant surface ကို ထုတ္ထားတာ ေတြ႔ရပါတယ္။
- 23. ၆။ low density bone; short implants in posterior areas; overloading in hard-biters ေတြမွာ loosening of implants ပိုျဖစ္ႏိုင္တဲ့အတြက္ ပိုမိုဂရုျပဳေစလိုပါတယ္။ ၇။ implant ေအာင္ျမင္ဖို႔ ဂရုစိုက္ရမယ္အခ်က္ေတြ အမ်ားႀကီးရိွတဲ့အနက္ မိမိသံုးမယ္ implant ရဲ႕ surface အေၾကာင္း ပိုမိုသိရိွထားပါက မ်ားစြာအက်ဳိးရိွႏိုင္ပါတယ္။ ၈။ ပံုေလးေတြကို ၾကည့္လိုက္ရင္ implant surface အေၾကာင္း ပိုမိုနားလည္သေဘာေပါက္လာမွာပါ။ ၉။ dental implant အေပၚမွာ negative effect သက္ေရာက္ေစႏိုင္တဲ့ အခ်က္ေလးေတြလည္း အနည္းငယ္ေဖၚျပခ်င္ပါတယ္ - compromised blood supply - compromised oxygen supply (e.g. after radiotherapy, hyperbaric oxygen therapy - loss of blood clot stability - microbial contamination of the surgical site - temperature of more than 47 degree Celsius for a minute တို႔ျဖစ္ပါတယ္။ ၁၀။ Profilometer ဆိုတာကေတာ့ dental implant ရဲ႕ surface roughness တိုင္းတဲ့ကိရိယာျဖစ္ပါတယ္။ ၁၁။ implant biomechanics-rigidity of bone-implant interface တိုင္းဖို႔ အသံုးျပဳတဲ့ကိရိယာေလးေတြကေတာ့ Periotest နဲ႔ Ostell ဆိုပီး ေစ်းကြက္မွာ ေတြ႔ရပါတယ္။
- 24. အခန္း (၁၀) immediate implant placement အေၾကာင္း Immediate implant placement အေၾကာင္း ၁။ သြားႏႈတ္ပီးရင္ ေမးရိုးအရြယ္အစား (height & width) က သြားႏႈတ္လိုက္တဲ့ေနရာမွာ ပိုေသးငယ္သြားတာ ေတြ႔ရပါတယ္။ bone resorption rate ဟာ ပထမတစ္ႏွစ္အတြင္းမွာ အမ်ားဆံုးျဖစ္တယ္လို႔ ဆိုၾကပါတယ္။ ႏႈတ္လိုက္ရတဲ့သြားေနရာက အရိုးရဲ႕ annual resorption rate ဟာ ႏွစ္စဥ္ 0.5% to 1% ရိွတယ္လို႔ဆိုပါတယ္။ သြားႏႈတ္ၿပီး ပထမ (၃)လအတြင္းမွာ extraction socket က သင့္တင့္တဲ့အရိုးပမာဏရရိွပါတယ္။ - Following an extraction there is a 25% decrese in the width of the alveolar bone during first year and an average 4mm decrease in height during the first year following multiple extractions (Carlson 1967) - Tatum and Misch have observed a 40%—60% decrease in alveolar bone width after the first 2-3 years post extraction. ၂။ Traditional Branemark Protocols မွာေတာ့ သြားႏႈတ္ပီး တစ္ႏွစ္ေလာက္ေစာင့္၊ ပီးမွ implant treatment စလုပ္၊ implant fixture ထည့္ပီး ၃ လ - ၆ လ ေလာက္ေနမွ restoration စလုပ္။ ဆိုေတာ့ လူနာအေနနဲ႔ သြားမရိွဘဲေနရာတဲ့အခ်ိန္က ၁ ႏွစ္၊ ၂ ႏွစ္ေလာက္ ၾကာသြားတတ္ပါတယ္။ ၃။ ယေန႔ ကုသမႈေပးရာမွာ သြားႏႈတ္ပီး ဘယ္အခ်ိန္မွာ implant ထည့္သင့္လဲဆိုတာကို extraction socket ရဲ႕ hard and soft tissues အေျခအေန၊ implant လုပ္မယ့္ ေနရာ၊ လူနာရဲ႕ အေျခအေနနဲ႔ဆႏၵေပၚမွာ မူတည္ၿပီး ဆံုးျဖတ္ၾကတာ ေတြ႔ရပါတယ္။ အဲ့ဒီေတာ့ treatment ကုိ သြားႏႈတ္ပီးပီးခ်င္း လုပ္တာရိွသလို၊ soft tissue healing ရမွ (သို႔) hard tissue healing ရမွလည္း လုပ္ၾကပါတယ္။ ၄။ သြားႏႈတ္ပီး immediate implant placement လုပ္တာ ဘာေတြေကာင္းလဲဆိုရင္ - Patients acceptability - Reduces treatment time - Socket as a guide for determination of parallelism and alignment
- 25. - Surgeon can position the implant more favorably than the original position - Facilitates final restoration and minimizes need for severely angled abutments - Implants in extraction sites can be placed in the same position as the extracted teeth ၅။ ဘယ္လိုအေနအထားမ်ဳိးမွာ ခ်က္ခ်င္းလုပ္သင့္လဲဆိုေတာ့ သြားႏႈတ္တဲ့အခ်ိန္မွာ little or no bone loss ျဖစ္ရမယ္။ ေရွာင္ရမယ့္အေနအထားေတြကေတာ့ - Presence of pus - lack of bone beyond the apex - close proximity to anatomical vital structures - clinical conditions preventing primary closure ၆။ Treatment sequence and planning protocol - clinical examination - radiographic examination - fabrication of surgical guide - surgical and prosthetic phase - maintenance
- 26. အခန္း (၁၁) Maxillary sinus lift surgery အေၾကာင္း သိေကာင္းစရာမ်ား ၁။ posterior edentulous maxilla မွာ implant စိုက္ေတာ့မယ္ဆိုရင္ အထူးသတိျပဳရမွာက maxillary sinus နဲ႔ လက္က်န္ ေမးရိုးပမာဏျဖစ္ပါတယ္။ အထူးသျဖင့္ alveolar bone height ဟာ 10 mm ထက္နည္းခဲ့ရင္ - inlay type ridge augumentation - direct OR indirect sinus lift procedure တို႔ထဲက တစ္ခုခုနဲ႔ ကုသမႈေပးႏိုင္ပါတယ္။ ၂။ ၁၉၈၆ ခုႏွစ္မွာ Mr. Tatum က modified caldwell luc approach ဆိုပီး maxillary sinus lift surgery ကို implant treatment အတြက္ အသံုးျပဳခဲ့ပါတယ္။ အဲ့ဒါကို direct sinus lift procedure လုိ႔ေခၚပါတယ္။ ၃။ osteotome ကို အသံုးျပဳၿပီး crest of the alveolar ridge ကေန sinus lift လုပ္တာကို indirect sinus lift procedure လုိ႔ေခၚပါတယ္။ ၄။ maxillary sinus ရဲ႔ anatomy ကို ေပးထားတဲ့ပံုေလးေတြမွာ ၾကည့္ရႈ႕ႏိုင္ပါတယ္။ - U shaped osteotomy of the maxillary sinus ၅။ partially freed-up bone segment ေလးကို maxillary sinus ထဲ ျဖည္းျဖည္းခ်င္း အသာအယာ မတင္လိုက္ၿပီး ျဖစ္ေပၚလာတဲ့ ေနရာလြတ္ထဲကုိ bone graft ေတြနဲ႔ ျဖည့္ပါမယ္။ ပံုမွန္ဆိုရင္ေတာ့ ၆ လ ၾကာၿပီးေနာက္ implant စိုက္ပါမယ္။ sinus lift surgery နဲ႔အတူ implant ကို တစ္ခါတည္းစိုက္မယ္ဆိုရင္ေတာ့ bone height ဟာ အနည္းဆံုး 4 - 5 mm ရိွရပါမယ္။
- 27. ၆။ အသံုးျပဳႏိုင္တဲ့ bone graft အမ်ဳိးအစားအေတြကေတာ့ - autologous - autogenous - xenograft - allograft ၇။ sinus lift surgery အတြက္ ေရွာင္သင့္တဲ့အေျခအေနေတြကေတာ့ - sinus infection - tumors or pathologic growth in sinus - severe allergic rhinitis - chronic topical steroid use - radiation therapy - excessive tobacco use - psychologic/mental impairment တို႔ျဖစ္ပါတယ္။ ၈။ လက္ရိွသုေတသနေတြကေတာ့ bone graft အမ်ဳိးမ်ဳိး၊ growth factors အမ်ဳိးမ်ဳိးကို အသံုးျပဳၿပီး စမ္းသပ္ေနၾကသလို stem cell အသံုးၿပဳၿပီး bone regeneration ကို ပိုေကာင္းေအာင္လုပ္ႏိုင္မလားဆိုပီး စမ္းသပ္ေနၾကတာလည္း ေတြ႕ရပါတယ္။
- 28. အခန္း (၁၂) Anatomical considerations in Dental Implants ၁။ Maxilla မွာဆိုရင္ (က) Maxillary arch morphology - morphology ကို masticatory forces ေတြက လႊမ္းမိုးမႈရိွတယ္။ Maxillary posterior teeth ေတြက buccally inclined (5 - 10 degrees) ျဖစ္ေနၿပီး mandibular teeth ေတြကေတာ့ lingually inclined ျဖစ္ပါတယ္။ (ခ) Maxillary sinus - သြားမရိွတဲ့ေနရာမွာ maxillary sinus က က်ယ္လိုက္လာပါတယ္။ အရိုးရဲ႕ periosteum နဲ႔ maxillary sinus ကို sinus epithelium (schneiderian membrance) အလႊာပါးပါးေလးနဲ႔ျခားထားပါတယ္။ crest of ridge ကေန sinus ထိ အကြာအေကြးကို subantral space (SA) လုိ႔ေခၚပါတယ္။ SA 1 ကေန SA 4 ထိ သတ္မွတ္ထားပါတယ္။ (ဂ) Muscle attachments - Baccinator muscle; Levator Labii Superioris; Levator Anguli Oris တို႔ရိွၿပီး မထိခိုက္မိေအာင္ ဂရုစို္က္ဖို႔လိုပါတယ္။ ထိခိုက္မိပါက - improper masticatory function; accumulation of food; improper speech နဲ႔ facial expression အေပၚမွာ သက္ေရာက္မႈရိွႏိုင္ပါတယ္။ (ဃ) Innervation of Maxilla - sinus augmentation လုပ္တဲ့အခါမွာ posterior superior alveolar nerve ကို မထိခိုက္ေအာင္ ဂရုစိုက္သင့္ပါတယ္။ - Maxillary sinus disorders ေတြမွာ infra-orbital foramen နဲ႔ဆက္စပ္ေနတတ္လို႔ infra-orbital nerve က ေရာင္ရမ္းေနတတ္ပါတယ္။ improper placement of implant ေၾကာင့္ ထိခိုက္မိၿပီး parasthesia ျဖစ္ႏိုင္ပါတယ္။ - တျခား nerves ေတြကိုလည္း မထိခိုက္ေအာင္ ဂရုစိုက္ရပါမယ္။ (င) Blood supply - flap reflection; implant placement; grafting procedure; ridge augmentation စသည္တို႔လုပ္ေနစဥ္မွာ blood supply ေပးတဲ့ artery ေတြကို ေသခ်ာဂရုစိုက္ရပါမယ္။
- 29. ၂။ Mandible မွာဆိုရင္ (က) Mandibular arch morphology - maxilla ထက္ပိုၿပီး မာပါတယ္ - The palpation of this region is necessary before implant placement to determine shape of ridge and extent of submandibular fossa. (ခ) Mandibular canal - first molar ရဲ႕ distal မွာ canal က အနိမ့္ဆံုးေနရာမွာ တည္ရိွေနလို႔ implant ထည့္ဖို႔ စိတ္ခ်ရတဲ့ေနရလို႔ ေျပာႏိုင္ပါတယ္။ (ဂ) Symphysis region (ဃ) Muscle attachments - muscle ေတြကို မထိေအာင္ ဂရုစိုက္ရပါမယ္။ - genioglossus muscle ကို tubercles ကေန ခြာမိရင္ complete retrusion of tongue ျဖစ္ၿပီး airway obstruction ရႏိုင္ပါတယ္။ (င) Innervation of Mandible (စ) Blood supply - During implant placement procedures, one must avoid injury to the arteries and specially should be careful in the anterior region as there is anatomosis from the opposite site. ၃။ anatomical structures ေတြနဲ႔ ပတ္သက္ၿပီး ေသေသခ်ာခ်ာသိထားရင္ implant placement ကို အခက္အခဲမရိွလုပ္ႏိုင္ေစပါလိမ့္မယ္။ flap လွန္တိုင္း ေသခ်ာဂရုစိုက္ပါ။ No uncontrolled forces should be applied. Clean and patient surgery is the key to success.
- 30. အခန္း (၁၃) Dental Implants အမ်ဳိးအစားမ်ား ခြဲျခားျခင္း ၁။ based on Implant Designs - endosteal (ramus frame; root form; blade form) အသံုးအမ်ားဆံုးကေတာ့ root form ျဖစ္ပါတယ္။ - subperiosteal - transosteal - intramucosal ၂။ based on attachment mechanism of the implants - osseointegration (described by Branemark) *Direct contact between the bone and the surface of the loaded implant *Bio-active material that stimulates the formation of bone can also be used - fibro-integration (proposed by Dr. Charles Wiess) *Complete encapsulation of the implant with soft tissues *Soft tissue interface could resemble the highly vascular periodontal fibers of natural dentition
- 31. ၃။ based on macroscopic body design of the implant - cylinder - thread - plateau - perforated - solid - hollow or vented ၄။ based on the surface of the implant - smooth - machined - textured - coated (သုေတသန အမ်ားအျပားလုပ္ပီး ေလ့လာေနတာ ေတြ႕ရပါတယ္)
- 32. ၅။ based on the implant material - metallic - ceramic & ceramic coated - polymer - carbon compound မွတ္ခ်က္။ ။အမ်ဳိးအစားတစ္ခုခ်င္းစီရဲ႕ ေကာင္းက်ဳိးဆိုးက်ဳိးကို သိခ်င္ရင္ အင္တာနက္မွာ ရွာေဖြဖတ္ရႈပါ။ ယေန႔ေခတ္မွာ ကုမၸဏီအလိုက္ dental implant အမ်ဳိးမ်ဳိးကို တီထြင္ထုတ္လုပ္ေနၾကတာျဖစ္လို႔ မိမိအသံုးျပဳမည့္ implant system ၏ ေကာင္းက်ဳိး၊ဆိုးက်ဳိးမ်ားကို ေသခ်ာေလ့လာၿပီး သံုးစြဲသင့္ပါတယ္။ ျဖစ္ႏိုင္ရင္ ျမန္မာျပည္မွာ အလြယ္တကူ၀ယ္ယူရရိွႏိုင္မယ့္ implant အမ်ဳိးအစားကို သံုးသင့္ပါတယ္။ ေလာေလာဆယ္ ျမန္မာျပည္မွာ သံုးေနတဲ့ implant system ေတြကေတာ့ - Straumann (Switzerland); Hahn tapered implants (USA); Arrow Implant (Japan) - Dentium (Korea); Osstem (Korea); Megagen (Korea) - Astra tech (Densply) - Ankers (Taiwan); Tione (Taiwan); ARDS system (Israel) တို႔ျဖစ္ေၾကာင္း သိရပါတယ္။ မည္သည့္ implant စနစ္ကို ေရြးခ်ယ္သင့္သလဲဆိုရင္ လူနာရဲ႕ေရြးခ်ယ္မႈ၊ ေစ်းႏႈန္း၊ လိုအပ္သေလာက္ လိုအပ္ေနခ်ိန္မွာ ပစၥည္းအလြယ္တကူ ၀ယ္ယူရရိွႏို္င္မႈ၊ ျမန္မာခံတြင္းခပ္က်ဥ္းက်ဥ္းေတြနဲ႔ ကိုက္ညီတဲ့ drill, insertion tool, impression coping ေတြရရိွႏိုင္တဲ့ brand ေတြကို ေရြးခ်ယ္သင့္တယ္လို႔ သိရပါတယ္။ ျမန္မာ့ သြားႏွင့္ခံတြင္းေဆးေကာင္စီနဲ႔ FDA အသိအမွတ္ျပဳ brand ေတြကို အသံုးျပဳသင့္ပါတယ္။
- 33. အခန္း (၁၄) Implant therapy in the Geriatric Patient ၁။ အသက္ႀကီးတဲ့လူနာေတြမွာ က်န္းမာေရးအေျခအေနက တစ္ဦးနဲ႔တစ္ဦးမတူၾကပါ။ dental implant failure ကေတာ့ multi-factorial problem ျဖစ္ပံုရၿပီး အသက္အရြယ္ၾကီးတာတစ္ခုတည္းေၾကာင့္လို႔ေတာ့ ေသခ်ာမေျပာႏိုင္ပါဘူး။ အသက္ႀကီးတဲ့လူေတြလည္း implant treatment ယူႏိုင္ပါတယ္။ ေယဘုယ်အားျဖင့္ ေျပာရမယ္ဆိုရင္ အရိုးနဲ႔တစ္ရွဴးေတြက ေရရွည္မွာ osseointegration ကို ျဖစ္ေစႏိုင္မွာပါ။ အသက္အရြယ္ႀကီးတဲ့သူေတြမွာ ျဖစ္တတ္တဲ့ အရိုးပြေရာဂါ၊ ဆီးခ်ဳိေရာဂါ၊ implant စိုက္မယ့္ေနရာက အရိုးရဲ႕ quality and quantity ေတြကလည္း ေအာင္ျမင္တဲ့ကုသမႈအတြက္ ပိုအေရးႀကီးတာ ေတြ႔ရပါတယ္။ အသက္ႀကီးတဲ့သူေတြမွာ အနာက်က္ေႏွးတာလည္း ျဖစ္တတ္ပါတယ္။ ေလာေလာဆယ္ သုေတသနေတြအရေတာ့ အသက္ႀကီးေပမယ့္ ကုသမႈေပးႏိုင္ပါတယ္။ ၂။ အသက္ႀကီးတာအျပင္ တျခား prognostic risk factors for dental implants ေတြကေတာ့ - compromised general health (e.g., osteoporosis) - smoking - implant location (e.g., maxilla, posterior), - bone quality and quantity in the recipient site, - implant length and immediate loading of the implant တို႔ျဖစ္ပါတယ္။ ၃။ ကုသမႈမေပးခင္ ထည့္သြင္းစဥ္းစားေနၾကတဲ့အခ်က္ေတြကေတာ့ - Chronological age - Systemic factors အေနနဲ႔ကေတာ့ Physiologic aging နဲ႔ pathologic aging (diabetes mellitus; osteoporosis and estrogen status) - Quality and quantity of available bone - Adaptation and maintenance တို႔ျဖစ္ပါတယ္။
- 34. ၄။ Determinants of aging ေတြကေတာ့ genetics; environmental exposure; lifestyle; psychosocial factors ေတြျဖစ္ပါတယ္။ အသက္အရြယ္ႀကီးရင့္တဲ့သူေတြမွာ ေယဘူယ်အားျဖင့္ ျဖစ္တတ္တာေတြကေတာ့ tissue dessication; decreased elasticity; diminished reparative capacity; altered cell permeability တို႔ျဖစ္ပါတယ္။ အသက္ႀကီးေလေလ oral hard and soft tissue changes ေတြရိွတဲ့အတြက္ ကုသမႈေပးတဲ့အခါ ေသခ်ာဂရုစိုက္ဖို႔ လိုအပ္ပါတယ္။ ၅။ implant ထုတ္တဲ့ကုမၸဏီေတြကေတာ့ အသက္ႀကီးတဲ့သူေတြပုိမ်ားလာလို႔မို႔ implant ေတြပိုေရာင္းလာရမယ္၊ ကုသမႈပိုေပးလာရလိမ့္မယ္လို႔ ခန္႔မွန္းထားၾကပါတယ္။
- 35. အခန္း (၁၅) Bone graft, membrance နဲ႔ regeneration factors မ်ားအေၾကာင္းအႏွစ္ခ်ဳပ္ဇယားမ်ား
- 37. အထက္မွာ ေဖၚျပထားတဲ့ bone graft, membrane နဲ႔ growth factors ေတြဟာ periodontal treatment နဲ႔ dental implant treatment ေပးရာမွာ ေလ့လာထားရမယ့္အေၾကာင္းအရာေတြ ျဖစ္ပါတယ္။ resorption ရေနတဲ့ alveolar ridge ေတြနဲ႔ maxillary sinus lift surgery ေတြမွာ bone graft ေတြ၊ membrane ေတြ၊ growth factors ေတြသံုးၿပီး implant ကုသမႈေပးၾကပါတယ္။
- 38. အခန္း (၁၆) Implant assisted Vs Implant supported Fixed Vs Removable overlay dentures IN MAXILLA အေၾကာင္းမိတ္ဆက္ ၁။ implant assisted prosthesis မွာ occlusion force ေတြကို implant နဲ႔ mucoperiosteum ေပၚမွာ က်ေရာက္ေစပါတယ္။ implant အေပၚမွာ removable overdenture တပ္ဆင္အသံုးျပဳျခင္းျဖစ္ပါတယ္။ ၂။ implant supported prosthesis မွာ occlusion force ေတြဟာ implant ေပၚမွာ က်ေရာက္ပါတယ္။ implant အေပၚမွာ fixed partial dentures or removable overlay dentures တပ္ဆင္အသံုးျပဳျခင္းျဖစ္ပါတယ္။ ၃။ edentulous maxilla နဲ႔လူနာအမ်ားစုမွာ implant assisted overlay dentures ေတြ တပ္ဆင္အသံုးျပဳေစရျခင္းရဲ႕အေၾကာငး္ေတြကေတာ့ - bone quality and quantity - resorptive patterns - maxillomandibular relations - sinus architecture - esthetics/ lip support
- 39. - phonetics - hygiene access and patient compliance - cost - predictability of surgical interventions ၄။ edentulous maxilla resorption ေၾကာင့္ pseudo class III jaw relation ျဖစ္ေနတဲ့အခါ removable overlay denture ေတြအသံုးျပဳျခင္းျဖင့္ extended and contoured denture flanges ေၾကာင့္ ပိုေကာင္းတဲ့ lip support and facial contours ကိုိ ရရိွေစပါတယ္။ ၅။ fixed (သို႔) Removalbe အသံုးျပဳျခင္းဟာ masticatory function အရ ျခားနားျခင္း မရိွပါဘူး။ fixed prostheses ေတြက သန္႔ရွင္းေရးလုပ္ဖို႔ေတာ့ ခက္ပါလိမ့္မယ္။ လူနာက ကိုယ္တိုင္သန္႔ရွင္းေရးေသခ်ာမလုပ္ႏိုင္ဘူးဆိုရင္ removable overdenture က ပိုသင့္ေတာ္ပါတယ္။ ေစ်းႏႈန္းကို ၾကည့္မယ္ဆိုရင္လည္း fixed prostheses က ႏွစ္ဆ၊သံုးဆေလာက္ ပိုမ်ားပါလိမ့္မယ္။ ေစ်းႏႈန္းအနည္းအမ်ားကို အစဥ္လုိက္ေျပာရမယ္ဆိုရင္ fixed prosthesis > implant supported overlay dentures > implant assisted overlay dentures ျဖစ္ပါတယ္။ ၆။ implant assisted overlay dentures ေတြရဲ႕ ေကာင္းက်ဳိးေတြကေတာ့ - phonetics - hygiene access - favorable biomechanics - better lip contours - cost တို႔ျဖစ္ပါတယ္။ ၇။ prosthodontic designs and procedures ေတြကုိေတာ့ သက္ဆိုင္ရာစာအုပ္ေတြမွာ ဖတ္ရႈၾကည့္ေစခ်င္ပါတယ္။ ေလာေလာဆယ္မွာေတာ့ implant အေရအတြက္ကိုလည္း အနည္းဆံုးအေနအထားထိ ေလွ်ာ့ခ်ႏိုင္ေအာင္ သုေတသနလုပ္ေနၾကတာေတြ႔ရပါတယ္။ edentulous maxilla မွာ အသံုးအမ်ားဆံုး implant အေရအတြက္ကေတာ့ ၆ ေခ်ာင္း (သို႔) ၄ ေခ်ာင္း ျဖစ္ပါတယ္။
- 40. အခန္း (၁၇) Risk factors and Contraindications for Implant therapy ၁။ Diabetes Mellitus ဆီးခ်ဳိေရာဂါကို ေသေသခ်ာခ်ာကုသမႈမရိွတဲ့လူနာေတြမွာ healing မေကာငး္တာ၊ infections ၀င္လြယ္တာေတြ ျဖစ္တတ္ပါတယ္။ ဆီးခ်ဳိေရာဂါကို ေသေသခ်ာခ်ာကုသမႈခံယူေနတဲ့လူနာအေနနဲ႔ dental implant ကုသမႈကို ခံယူႏိုင္ပါတယ္။ ပံုမွန္က်န္းမာေနတဲ့လူနာနဲ႔ ယွဥ္ရင္ ေအာင္ျမင္မႈရာခိုင္နႈန္းက အနည္းငယ္နဲပါတယ္။ ဆီးခ်ဳိေရာဂါရွင္ေတြမွာ reduced tissue turnover and impaired tissue perfusion ေၾကာင့္ tissue integrity ပိုနဲသြားလို႔ late failure of dental implant ျဖစ္တတ္ပါတယ္။ ၂။ Bone Metabolic Disease ရိွတဲ့လူနာေတြ (ဥပမာ- Osteoporosis အရိုးပြေရာဂါ) မွာ decreased mineral density ျဖစ္ေနတာမို႔ implant ကုသေအာာင္ျမင္ႏိုင္မႈရာခိုင္ႏႈန္း ပိုနဲတတ္ပါတယ္။ အထူးသျဖင့္ poor-quality, loose trabecular bone ေတြမွာ osseointegration ရဖို႔ ပိုခက္တာ ေတြ႔ရပါတယ္။ တစ္ခ်ဳိ႔သုေတသနပညာရွင္ေတြကေတာ့ အရိုးပြေရာဂါရိွတဲ့လူနာေတြမွာ osseointegration ရေအာင္၊ ပိုေကာင္းေအာင္ implant loading ကို ေနာက္က်လုပ္သင့္တယ္လို႔ဆိုၾကပါတယ္။ အသက္ (၅၀) ေက်ာ္အမ်ဳိးသားေတြ၊ ေသြးဆံုးၿပီးအမ်ဳိးသမီးေတြမွာ ႏွစ္စဥ္ အရိုးပမာဏ (1%-2%)ေလွ်ာ့နည္းသြားတတ္ၿပီး အသက္ပိုႀကီးလာရင္ (5%-8%)ထိ ေလွ်ာ့နည္းသြားတတ္တယ္လို႔ဆိုပါတယ္။ ယေန႔ေခတ္မွာ အသက္ႀကီးတဲ့ လူနာေတြ (osteopenia; osteoporosis ရိွတဲ့လူနာေတြ) ပိုမ်ားလာေနတာျဖစ္လုိ႔ implant success rate ကို ႀကီးႀကီးမားမားလႊမ္းမိုးမႈရိွေနမွာပါ။ ၃။ ေဆးေသာက္ေနရတဲ့လူနာေတြ အထူးသျဖင့္ steroids နဲ႔ bisphosphonates ေသာက္ေနရတဲ့လူနာေတြမွာ immunosuppression နဲ႔ impaired wound healing ေၾကာင့္ သတိထားကုသမႈေပးဖို႔ လိုအပ္ပါတယ္။
- 41. BRONJ လုိ႔ေခၚတဲ့ bisphophonate-related osteonecrosis of the jaw ျဖစ္တတ္ပါတယ္။ intravenous (IV) bisphosphonate therapy ကုသမႈခံယူထားတဲ့လူနာေတြ၊ oral bisphosphonate therapy (၃)ႏွစ္နဲ႔အထက္ ခံယူထားတဲ့လူနာေတြမွာ implant ကုသေပးမႈကို ေရွာင္တာ အေကာင္းဆံုးလို႔ ဆိုပါတယ္။ ၄။ immune compromise and Immune Suppression ရိွတဲ့လူနာေတြကို implant ကုသမႈေပးဖို႔ မလြယ္ကူပါဘူး။ ေဆးေသခ်ာေသာက္ပီး normal immune function ကို ထိန္းထားႏိုင္ရင္ေတာ့ ကုသမႈေပးႏိုင္ပါတယ္။ T cell counts အရမ္းက်ေနတဲ့ HIV, AIDS လူနာေတြကို ကုသမႈမေပးတာ ပိုေကာင္းပါတယ္။ ၅။ ဓါတ္ေ၇ာင္ျခည္ပမာဏ 60 Gy အထက္ ထိထားတဲ့လူနာေတြမွာ ခြဲစိတ္ကုသမႈလုပ္ရင္ အနာေကာင္းေကာငး္မက်က္ဘဲ soft tissue dehiscence ရၿပီး osteoradionecrosis (ORN) ရတတ္ပါတယ္။ မျဖစ္မေန ခြဲစိတ္ကုသမႈေပးရမယ္ဆိုရင္ hyperbaric oxygen (HBO) ေပးၿပီး ကုသပါက ေအာင္ျမင္မႈရာခိုင္ႏႈန္းပိုမ်ားတတ္တယ္လို႔ ဆိုပါတယ္။ ၆။ psychologic and mental conditions ဆိုးရြားတဲ့လူနာေတြအေနနဲ႔ ကုသမႈကို ေသခ်ာနားမလည္သလို ေဆာင္ရန္ ေရွာင္ရန္ေတြကို ေသခ်ာလိုက္မလုပ္ႏိုင္ပါက ကုသမႈမေပးတာ အေကာင္းဆံုးလို႔ ဆိုၾကပါတယ္။ ၇။ Habits and Behavioral considerations အေနနဲ႔ ေဆးလိပ္ေသာက္၊ သြားႀကိတ္တတ္၊ အရက္နဲ႔ေဆး၀ါးမီွ၀ဲတဲ့သူေတြမွာ implant success rate ပိုနည္းတတ္ပါတယ္။ ေဆးလိပ္အလြန္အကၽြံေသာက္ရင္ white blood cells အေပၚမွာ အက်ဳိးေသာက္ေရာက္မႈရိွသလို vasoconstriction, wound healing impairment, osteoporosis ေတြ ပိုျဖစ္တတ္ပါတယ္။ ေဆးလိပ္ျဖတ္လိုက္မယ္ဆိုရင္ေတာ့ success rate ပိုေကာင္းလာႏိုင္ပါတယ္။ သြားႀကိတ္တတ္တဲ့လူနာေတြမွာ osseointegration failure ရတတ္လို႔ သတိထားရပါမယ္။ narrow occlusal table with flat cusp angles, protected occlusion, regular use of mouth guards တို႔ လုပ္ေပးသင့္ပါတယ္။ ေဆးနဲ႔အရက္အလြန္အကၽြံသံုးစြဲတဲ့လူနာေတြဟာ ကုသမႈကို ပူးေပါင္းေဆာင္ရြက္ႏိုင္ဖို႔ မေသခ်ာတဲ့အတြက္ implant treatment ေပဖို႔ မသင့္ေလွ်ာ္တာ ေတြ႔ရပါတယ္။ အစားအေသာက္ေသခ်ာမစားတတ္တဲ့သူေတြျဖစ္လို႔ အာဟာရခ်ုိ႕တဲ့ေနတတ္ၿပီး impaired organ function ရိွေနတတ္ပါတယ္။ healing မေကာင္းႏိုင္ပါဘူး။ ေဆးျပတ္၊ အရက္ျပတ္မွ ကုသမႈေပးတာ အေကာင္းဆံုးျဖစ္ပါတယ္။
- 42. အခန္း (၁၈) criteria အတိုအထြာေလးမ်ားမွ တဆင့္ ေလ့လာျခင္း Success criteria အပါအ၀င္ criteria မ်ုိးစံု သတ္မွတ္ေဖၚျပေလ့ရိွရာ ေဖၚျပပါ အခ်က္မ်ားကို ဘာ့ေၾကာင့္ သတ္မွတ္ေၾကာင္း ထပ္ဆင့္ေလ့လာပါက ပိုမိုအက်ဳိးရိွမည္ျဖစ္ပါသည္။ Dental implant treatment မွာ စာေတြ႔အျပင္ လက္ေတြ႔ကၽြမ္းက်င္မႈအထူးလိုအပ္သည္ျဖစ္ရာ ျဖစ္ႏိုင္ပါက ေအာက္ပါအခ်က္မ်ားကို လုပ္ေဆာင္သင့္ပါသည္။ - ကၽြမ္းက်င္သူမ်ားထံ တပည့္ခံသင္ၾကားျခင္း၊ လူနာကုသရာတြင္ assistant အျဖစ္ ကူညီေဆာင္ရြက္ျခင္း။ နားမလည္သည့္အရာမ်ားကို ေမးျမန္းျခင္း၊ မိမိကိုယ္တုိင္စာဖတ္ၿပီး သိေအာင္လုပ္ျခင္း။ ကၽြမ္းက်င္သူမွ ႀကီးၾကပ္လွ်က္ မိမိကိုယ္တိုင္ ကုသမႈေဆာင္ရြက္ျခင္း။ - Hands-on course မ်ား တက္ေရာက္ျခင္း။ lecture talk မ်ား နားေထာင္ျခင္း။ - Youtube, Live CD/DVD စသည္တို႔မွ ကုသမႈမ်ား၊ lecture talk မ်ား ၾကည့္ရႈနားေထာင္ျခင္း။
- 43. အခန္း (၁၉) Ridge Augmentation in Implant Dentistry အေၾကာင္း
- 47. အခန္း (၂၀) Basics of clinical diagnosis in Implant Dentistry အေၾကာင္း
- 48. Fig. Clinical Diagnostic Aspect in Implant Dentistry ***You also should do the clinical assessment of the failing tooth.
- 49. အခန္း (၂၁) The factors to be considered while placing an implant in immediate extraction socket
- 50. အခန္း (၂၂) Failures in Implants အေၾကာင္း Table 1: Various complications occurring in implant placement Table 2: Various factors associated with increased failure rates
- 51. အခန္း (၂၃) One stage Vs Two Stage Treatment in Dental Implant အေၾကာင္း ၁။ လူနာေတြကေတာ့ ျမန္ျမန္နဲ႔ေကာင္းေကာင္း ကုသမႈကို ခံယူခ်င္ၾကပါတယ္။ ကုသမႈေပးမယ့္ ဆရာ၀န္ေတြ အေနနဲ႔ကေတာ့ ေအာက္မွာ ေဖၚျပထားတဲ့ ေကာင္းက်ဳိး၊ဆိုးက်ဳိးမ်ားအေပၚမူတည္ၿပီး ကုသမႈေပးတာ ေတြ႔ရပါတယ္။
- 52. အခန္း (၂၄) လက္ေတြ႕ေလ့က်င့္တတ္ေျမာက္ရမည့္ အေျခခံမ်ား ၁။ soft tissue flap မ်ား လွန္ျခင္း၊ suture လုပ္ျခင္း။ ၂။ intra-oral and extra-oral auto autogenous grafts မ်ား ယူျခင္း။ လိုအပ္ပါက bone grafts and membrance မ်ား အသံုးျပဳျခင္း။ ၃။ မိမိအသံုးျပဳမည့္ implant system အလိုက္ drills မ်ား အဆင့္ဆင့္အသံုးျပဳၿပီး implant ထည့္ျခင္း။ ၄။ impression taking procedures ၅။ prosthesis delivery ၆။ ပိုမိုရႈပ္ေထြးခက္ခဲေသာ case မ်ားကို တဆင့္တက္လုပ္ႏိုင္ေစရန္ လိုအပ္ေသာကၽြမ္းက်င္မႈမ်ားကို အျမဲေလ့လာေလ့က်င့္ေနရန္။ လိုအပ္ပါက team approach ျဖင့္ ေဆာင္ရြက္ရန္။ အခန္း (၂၅) Soft tissue management in Dental Implant အေၾကာင္း ၁။ soft tissue grafts နဲ႔ management အေၾကာင္း ေလ့လာရန္။ အခန္း (၂၆) Removal of failed implant အေၾကာင္း
- 53. အခန္း (၂၇) Treatment of Peri-implant diseases ၁။ peri-implant diseases မ်ားကို ကုသရန္အတြက္ protocol အမ်ဳိးမ်ဳိးသတ္မွတ္ထားၾကရာ ကုသမႈေပးမည့္ ဆရာ၀န္၏ ကၽြမ္းက်င္မႈႏွင့္ လူနာအေျခအေနေပၚမူတည္ကာ လိုအပ္သလို ေဆာင္ရြက္ႏိုင္ပါသည္။ ေနာက္ဆံုးေပၚ သုေတသနႏွင့္ ကုထံုးမ်ားကို စဥ္ဆက္မျပတ္ေလ့လာသင္ယူေနသင့္ပါသည္။
- 54. အခန္း (၂၈) Dental Implant (Prosthetic Part) soft tissue healing ရၿပီးေနာက္ အေပၚက cover screw ဖယ္ထားတဲ့ အေနအထားပါ။ ဒီအဆင့္ေရာက္ဖို႔က ပထမဆံုး appointment မွာ implant surgery လုပ္၊ အရိုးထဲကို implant ထည့္၊ implant ကို cover screw နဲ႔ပိတ္၊ ပီးရင္ suture လုပ္ထား။ အမ်ားအားျဖင့္ ႏွစ္ပတ္ေလာက္ၾကာတဲ့အခါ soft tissue healing ရသြားပါလိမ့္မယ္။ hard tissue (bone) healing ရဖို႔ကေတာ့ ပိုၾကာပါတယ္။ soft tissue healing ရတဲ့အခ်ိန္မွာ cover screw ေပၚက soft tissue ကို ျဖတ္ထုတ္ၿပီး abutment screw တပ္ၾကပါတယ္။ soft tissue နဲ႔ abutment နဲ႔ ေနသားက်ေအာင္ တစ္ပတ္မွႏွစ္ပတ္ခန္႔ ေစာင့္ရပါမယ္။ ပီးရင္ေတာ့ တပ္ထားတဲ့ abutment screw ကို ဖယ္လိုက္တဲ့အခါ အခု ပံုမွာ ျပထားတဲ့အဆင့္ေရာက္ၿပီျဖစ္ပါတယ္။ အခုထည့္ထားတဲ့ဟာကို Impression coping လို႔ေခၚပါတယ္။ impression coping က ပံုစံအမ်ဳိးမ်ဳိးရိွၿပီး abutment ပံုစံ impression coping ကုိ သံုးတဲ့အခါ အေပၚကေန plastic impression coping တဆင့္ထပ္တပ္ပါတယ္။ ယခုပံုမွာ ျပထားတာကေတာ့ abutment ပံုစံမဟုတ္ပါ။ အေပၚကလည္း plastic impression coping ထပ္မတပ္ပါ။
- 55. အရိုးထဲမွာ ရိွတဲ့ implant နဲ႔ အေပၚက impression coping ကို screw နဲ႔ တြဲလိုက္ပါတယ္။ အထက္မွာ ေျပာခဲ့သလို abutment ပံုစံ impression coping ကို သံုးရင္ အေပၚက plastic impression coping ထပ္တပ္ပါမယ္။ ယခု procedure မွာ မတပ္ပါ။ ပံုယူၿပီးေနာက္ impression ကို ျပန္ခြာတဲ့အခါ လြယ္ကူေအာင္၊မကပ္ေအာင္ ointment လိမ္းေပးပါ။ ပံုယူၿပီးလို႔ ျပန္ခြာတဲ့အခါ impression tray နဲ႔ impression coping + screw တြဲေနေအာင္ open tray က အေပါက္ေနရာေတြမွာ ဖေယာင္းနဲ႔ပိတ္ထားပါမယ္။ ပံုယူတဲ့အခါ ဖေယာင္းကို ေဖါက္ထြက္သြားမွာ ျဖစ္ပါတယ္။ တစ္ခ်ဳိ႔ကေတာ့ ဖေယာင္းနဲ႔မပိတ္ဘဲ ပံုယူၾကၿပီး impression material setting လာၿပီးတဲ့ေနာက္ အေပါက္ေနရာက impression material ေတြကို ဖယ္လိုက္ၿပီး polymer+monomer ေဖ်ာ္ၿပီး tray နဲ႔ impression coping ကုိ တြဲၾကပါတယ္။
- 56. ပံုယူထားတဲ့ အေနအထားပါ။ impression material ေတြ setting လာၿပီးေနာက္ ျပန္ခြာလိုက္ပါတယ္။ ေနာက္တစ္ဆင့္အေနနဲ႔ impression analog တပ္ပါမယ္။ stone model ေလာင္းပါမယ္။ ခြာလိုက္တဲ့အခ်ိန္မွာ ဒီလိုပံုစံနဲ႔ stone model ရပါလိမ့္မယ္။ lab က technician က က်န္တဲ့အပိုင္းကို ဆက္လက္တာ၀န္ယူေဆာင္ရြက္ပါလိမ့္မယ္။ open tray method နဲ႔ closed tray method အနည္းငယ္ကြာဟမႈရိွပါတယ္။ အဆင္ေျပသလို modified လုပ္ၿပီး ေဆာင္ရြက္ႏိုင္ပါတယ္။
- 58. သစြားျသမမစ္တုမစြားးထတြားးတသသမႈ လးစရထွုချ ုခအသမနစြား – – – – – – – – – – – – – – – – – – – ခဒးစ္စ Branemark း မ္ငစသမထ္စဆးစ ခဲ့္ခဲ့ု နထအစးခအ ယခအ႔ခ ္စုးထ dental implant ပညစရပစဟစ ုလွနငစုျသမအစ္ထတြား္းစလစ္စခ္႔ရပ္ယစ္။ ုသမစုသမစ္ီးငစၾးံဆသမႈခ္ြ၊ ရထွပီြားသစြားimplant မအမစခ္းထတ ုးြားျပျပငစချပစငစြားလခသမႈခ္ ုသမနစြားႀးီြား ျပလတပစ ခဲ့ၾးြ၊ ျပလတပစခအၾးဆချ မစပ္ယစ္။ လအစသမနစြားုခအအခ႔လညစြား လးစ ံသခဘစးနလစၾးပီြား ဒီးတသသမႈးထတ ပထတသမထတလတထလစြားလစၾး္စ ခ္႔ျသမငစ္ႏိုထတငစပ္ယစ္။ ဒီခအ႔ခ ္စသမွစဆထတရငစ ဒီပညစု္းစ လထတုပစ္ခဲ့ အညစြားပညစြ၊ု္္စပညစခ္ ု နထအစအခ႔ုသမွန ္ထတြား္းစလစ္စ ုသမနစြားုသထပပခ္။ diagnostic imaging မအမစခ္ြ၊ implant design ခ္ြ၊ implant materials ခ္ြ၊ ခမနြားးးစသမွစ ရရထွ္ႏိုထတငစ္ခဲ့ ခအစးစဆံတြားခပုးေပၚ implant systems ခ္ြ၊ treatment planning လတပစရစသမွစ လယစလယစးးုသံတြားျပလတထ႔ရ္ခဲ့ software ခ္ြ၊ implant abutments အခ႔ ပ္စသးစ္ခဲ့ ုသမစချပစငစြားလခသမႈခ္ြ၊ implant-abutment connection ပထတ ပထတသမထတခးစငြားစသမအစခုစငစ ႀးထြားမစြား္ီးငစလစၾး္စခ္ုျပငစ implant rehabilitation အခ႔ လးစရထွသစြား္ႏိုွငစဲ့ ံ္ငစြားလအစခ္ရခ႔ ု းစု ခခ္းထတ ုးြားခးစငစြားသမအစခုစငစခဆစငစရးစ္ႏိုထတငစ ထတ႔ ႀးထြားမစြားခအၾး္စ သထ္ႏိုထတငစပ္ယစ္။ diagnostic imaging းထတ ုသံတြား နရစသမွစ implant းညစဲ့ ထတ႔ုဆငစချပသမချပသထ ထတ႔ု္းစ pre-prosthetic implant imagingြ၊ းညစဲ့ပီြား္စအခ႔ ုဆငစချပသမချပ နးစ နငစြားသထ္ႏိုထတငစ ထတ႔ surgical and interventional implant imagingြ၊ းညစဲ့ပီြားခအစးစ ျ မစခပုးေပၚ္ထတြား္းစသမႈ-ဆတ္စယတ္စသမႈခ္းထတ ခလဲ့လစ္ႏိုထတငစ ထတ႔ post-prosthetic implant imaging ္ထတ႔းထတ ခဆစငစရးစၾးခလဲ့ရထွပ္ယစ္။ သမလတပစ ငစ ႀးထ္ငစရထတးစၾးညစဲ့းစြား္ခဲ့ု္းစ implant းညစဲ့သမယစဲ့ခအရစး ုရထတြားရခ႔ ပသမစဏြ၊ ုရညစြားုခသြားြ၊ ုရထတြားရခ႔ရထွခအ္ခဲ့ုခအုးစြားအခ႔လစြားရစ္ထတ႔းထတ သထရထွ္ႏိုထတငစသလထတ ုခရြားႀးီြား္ခဲ့ုစရံတခၾးစခ္းထတ သမးထ ထတးစခမ ထတ႔အခ႔ းညစဲ့သမယစဲ့ခအရစသမွစ ခရစာရထွသမရထွႀးထ္ငစသထရထွ္ႏိုထတငစသမွစျ မစပ္ယစ္။ post-prosthetic implant imaging လတပစျ ငစြားုစြားျ ငဲ့စ implant ပ္စပ္စလညစသမွစရထွ္ခဲ့ ုရထတြားပသမစဏုချပစငစြားုလခြ၊ osseointergraton, mineralization or bone volume ုချ ုခအခ္းထတ သံတြားသပစ္ႏိုထတငစသမွစျ မစပ္ယစ္။ မထ္စ၀ငစမစြားလထတ႔ ုခသြားမထ္စခလဲ့လစ နငစရငစ zonography, tomography, computed tomography, Tuned aperture computed tomography, cone beam computed tomography(Fan beam type, cone beam type), interactive computed tomography ုခၾးစငစြားးထတ ုခသြားမထ္စခလဲ့လစ္ႏိုထတငစပ္ယစ္။ dental implant designs သမွစလညစြား ုသမနထြားသမနထြားျပလတပစလစၾး္စ ခ္႔ရပ္ယစ္။ mini dental implants (MDIs), small diameter implants (SDIs), narrow body implants (NBIs) ုမရထွသျ ငစဲ့္ီးငစလစၾးသလထတ diameter ုသမနထြားသမနထြားြ၊ length ုသမနထြားသမနထြားရထွ္ခဲ့ implant သမနထြားမံတးထတ ၀ယစယုသံတြားျပ္ႏိုထတငစပ္ယစ္။ transitional implants, one-piece implants, short dental implants ုခၾးစငစြားခလြားခ္ ရွစ ္စၾးညစဲ့ၾးပ္။ implant materials ုပထတငစြားသမွစလညစြား ုသမနထြားမံတခုစငစ ုသံတြားျပခအၾး္စ ခ္႔ရပ္ယစ္။ implant surface သမနးစ္ႏိုွစျပငစးထတ blasting လတပစးစြားျ ငစြားြ၊ blasting and acid-etching လတပစးစြားျ ငစြားြ၊ fluoride surface treatment လတပစျ ငစြားြ၊ anodized surface ျ မစခမျ ငစြားြ၊ laser etching and micro arch oxidation ျပလတပစျ ငစြားြ၊
- 59. surface coating: Ti plasma spray ခဆစငစရးစးစြားျ ငစြားြ၊ hydroxyapatite coating ုသံတြားျပျ ငစြားြ၊ nanotitania coating ျပလတပစျ ငစြား္ထတ႔ုျပငစ dental implant အခ႔ု္ biologically active drugs သမနစြားျ မစ္ခဲ့ bisphosphonates, simvastatin, gentamycin ္ထတ႔းထတ ပြား္ခုသံတြားျပ ထတ႔ၾးထြားမစြားခအၾး္စ ခ္႔ရထွရပ္ယစ္။ zirconia implants သမနစြားအခ႔ poly etheretherketone (PEEK) implants သမနစြားးထတလညစြား ုသံတြားျပခအၾးပ္ယစ္။ ခမနြားးးစသမွစ ုးြားခရပအစြားမစြားခအ္ခဲ့ implant system ခ္းလညစြား ုးြားသမသမစြားသမံသမႈခ္ ု နထအစအခ႔ုသမွန ျပလတပစခအၾးပ္ယစ္။ biohorizons system သမွစ Laser-LOK technology ုသံတြားျပခအသလထတ Nobel Biocare system သမွလညစြား NobelReplaceTM Tapered Groovy Implant ဆထတ္ခဲ့ သစြားုျသမမစအခ႔ဆငစ္္ခဲ့implantပံတမံခလြားခ္းထတ းတ္စလတပစခအၾးပ္ယစ္။ ဒဲ့ုျပငစ The NobelSpeedyTM implant, NobelSpeedyTM replace, NobelSpeedyTM Groovy, NobelActiveTM Implant, NobelPerfectTM, The NobelPerfectTM One-Piece Implant, NobelDirect Implant မသျ ငစဲ့ သမနထမံတခုစငစ းတ္စခအၾးပ္ယစ္။ Astra Tech Implant system သမွ OsseoSpeedTM, MicroThreadTM, Conical Seal DesignTM မ္စခ္ းတ္စခအသလထတ Straumann system သမွလညစြား Straumann SLActive Implant, Straumann Roxolid Implant ္ထတ႔းထတ ္ီးငစးစြားပ္ယစ္။ Treatment planning ု္းစ software ုပထတငစြားးထတ ၾးညစဲ့လထတးစသမယစဆထတရငစလညစြား SimPlant software, NobelGuide, NobelClinician Software ္ထတ႔အခ႔ု္ CAM/CAM software ုသမနထြားသမနထြားရထွပ္ယစ္။ Implant abutment အခ႔ပ္စသးစရငစခ္စဲ့ angled abutments, UCLA abutment, Ceramic abutments, Ceradapt abutment, Multi-unit abutment ္ထတ႔ုခၾးစငစြားခ္းထတ ခလဲ့လစးစြားသငစဲ့ပ္ယစ္။ implant-abutment interface ဟစ implant ခုစငစျသမငစသမႈု္းစ ုးြားုခရြားပပ္ယစ္။ ဒဲ့ခၾးစငစဲ့ external helix, internal helix, Morse Taper မသျ ငစဲ့ ုသံတြားခအၾးပ္ယစ္။ Osseotite Certain, 3i implant innovations ခ္ြ၊ platform switching ျပလတပစသမႈခ္ုခၾးစငစြားးထတလညစြား အစြားလညစးစြားသငစဲ့ပ္ယစ္။ All on Four, Zygoma Implants မ္စခ္ ခပုးေပၚးးစ ခဲ့ပီြားျ မစသလထတ လးစရထွသတခ္သအလတပစခအ္ခဲ့ one implant with overdenture ုးထ္ထတြား္းစလစ္စးထတ သထရထွခလဲ့လစ္ႏိုထတငစပ္ယစ္။ အထာံတြား နပစုခအအခ႔ ချပစရသမယစဆထတရငစ လအစု္းစ ုခးစငစြားဆံတြားအခ႔ ခုစငစျသမငစသမႈရစ ထတငစ္ႏိုႈအစြားုျသမငစဲ့ဆံတြားရရထွ ထတ႔ု္းစ bioengineering and biomedical fields းခအ ုသမနထြားသမနထြား္ီးငစၾးံဆးတ္စလတပစမသမစြားသပစခအ္စသမထတ႔ ္းယစးထတ ုစြားရမရစပ္။ သစြားဆရစ၀အစသမနစြားုခအအခ႔လညစြား ခ ္စခပုးေပၚမအမစခ္ြ၊ အညစြားပညစခ္းထတ သမနးစချ သမျပ္စခမစငစဲ့ၾးညစဲ့ခလဲ့လစၾး ထတ႔ ္ထတးစ္အစြား နငစပ္ယစ္။