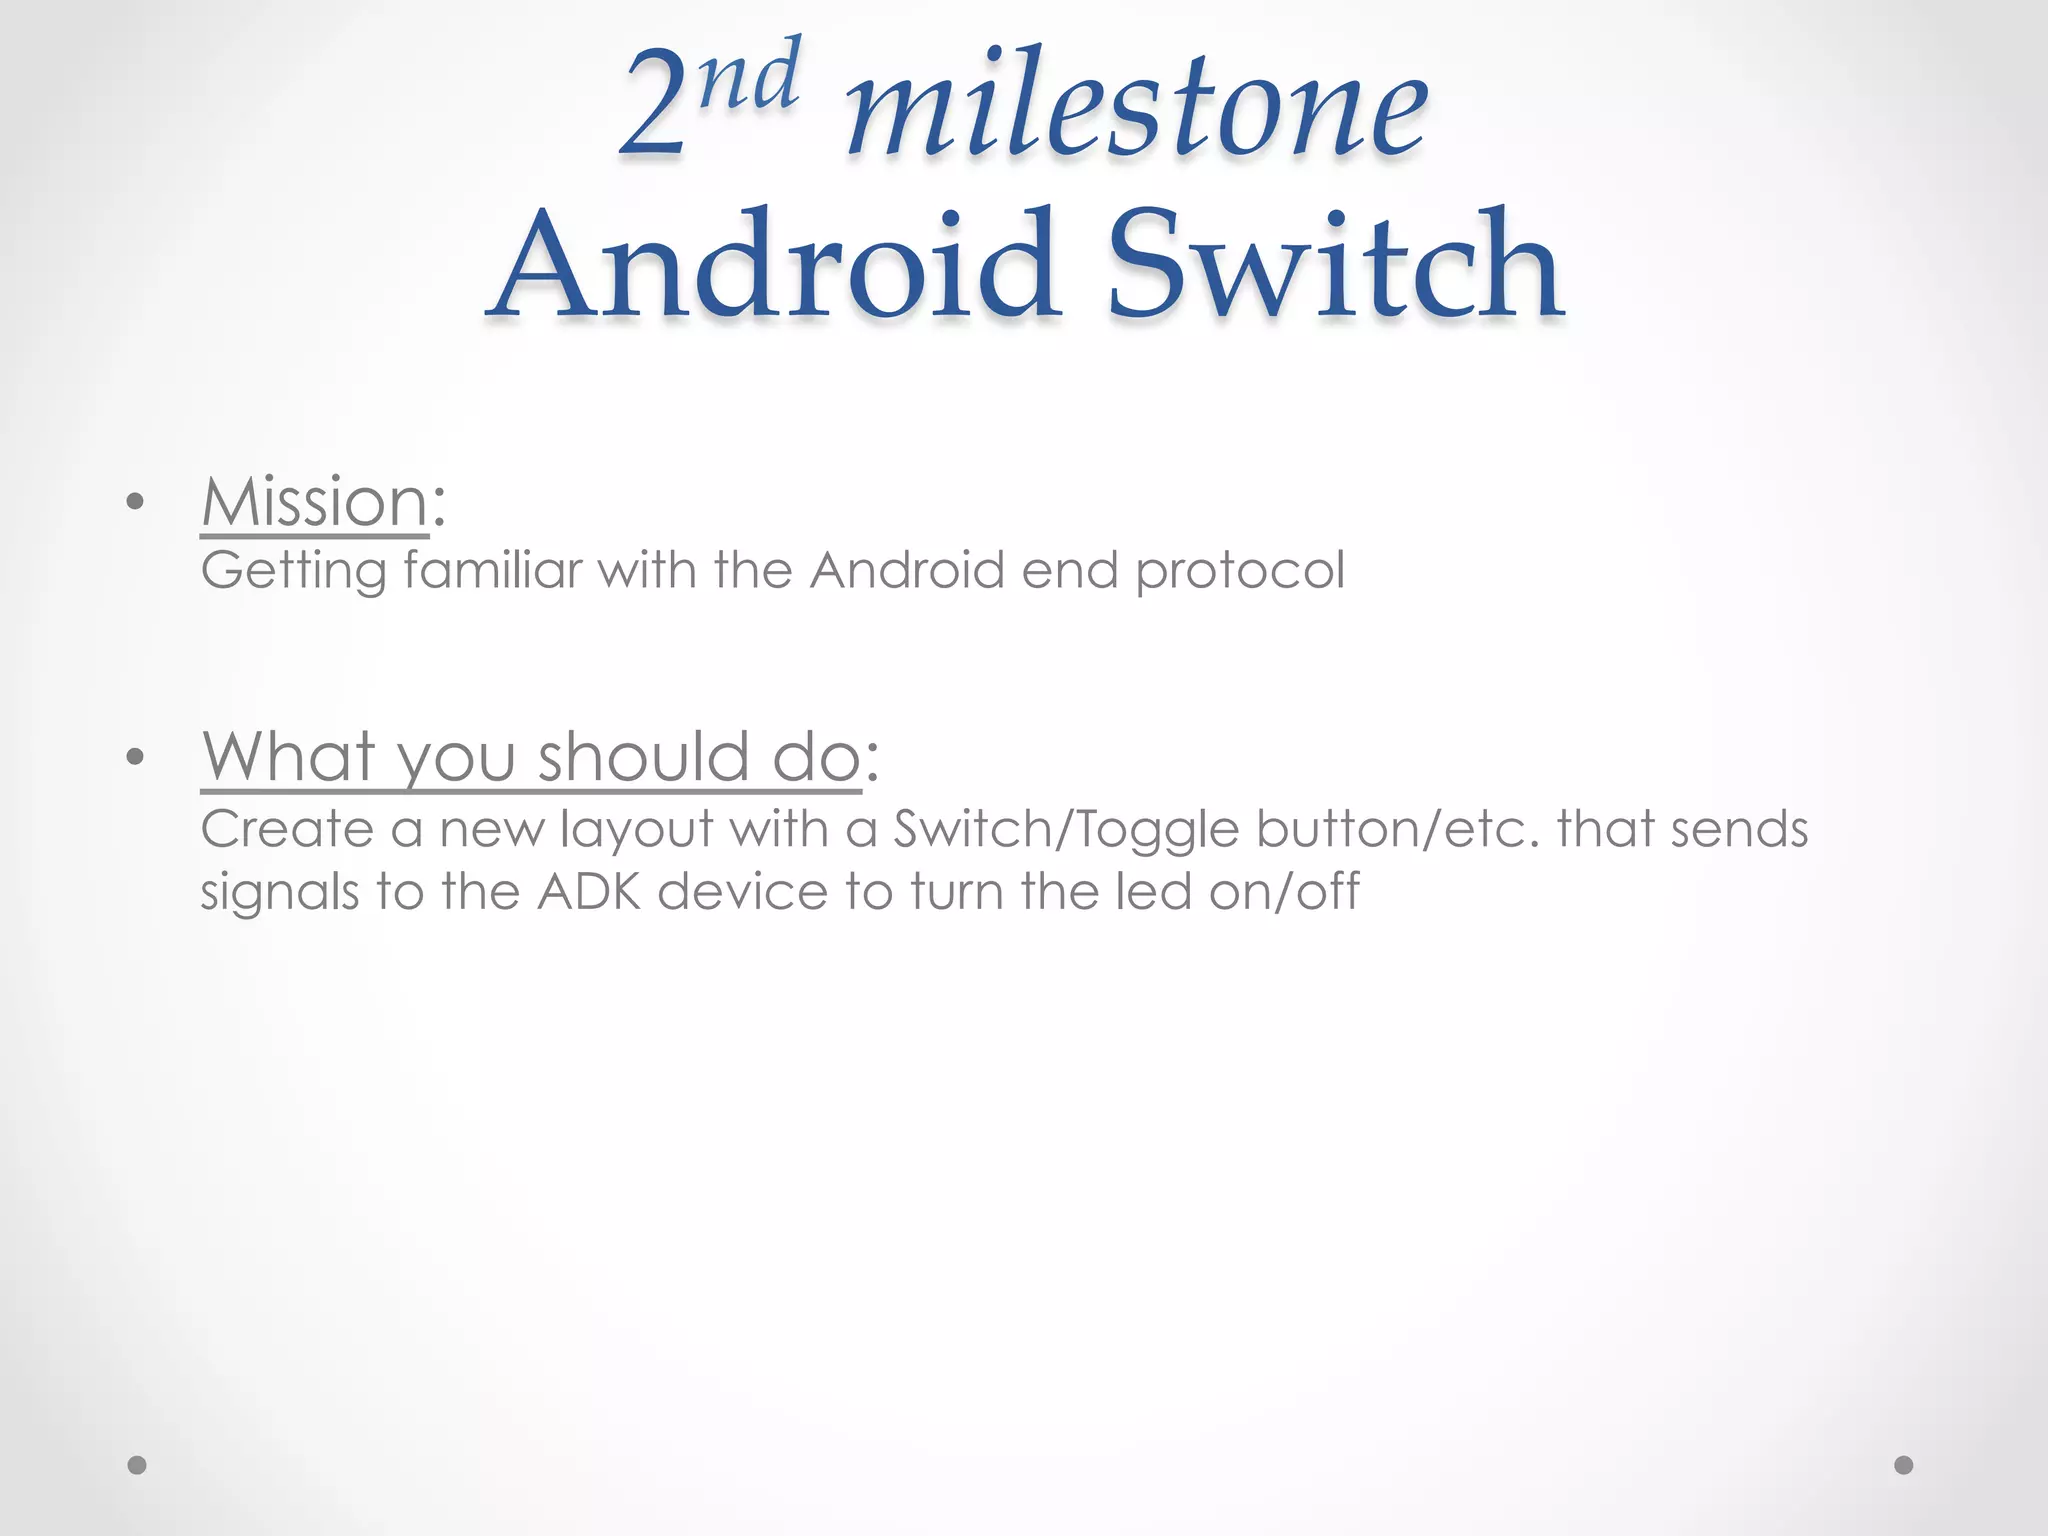
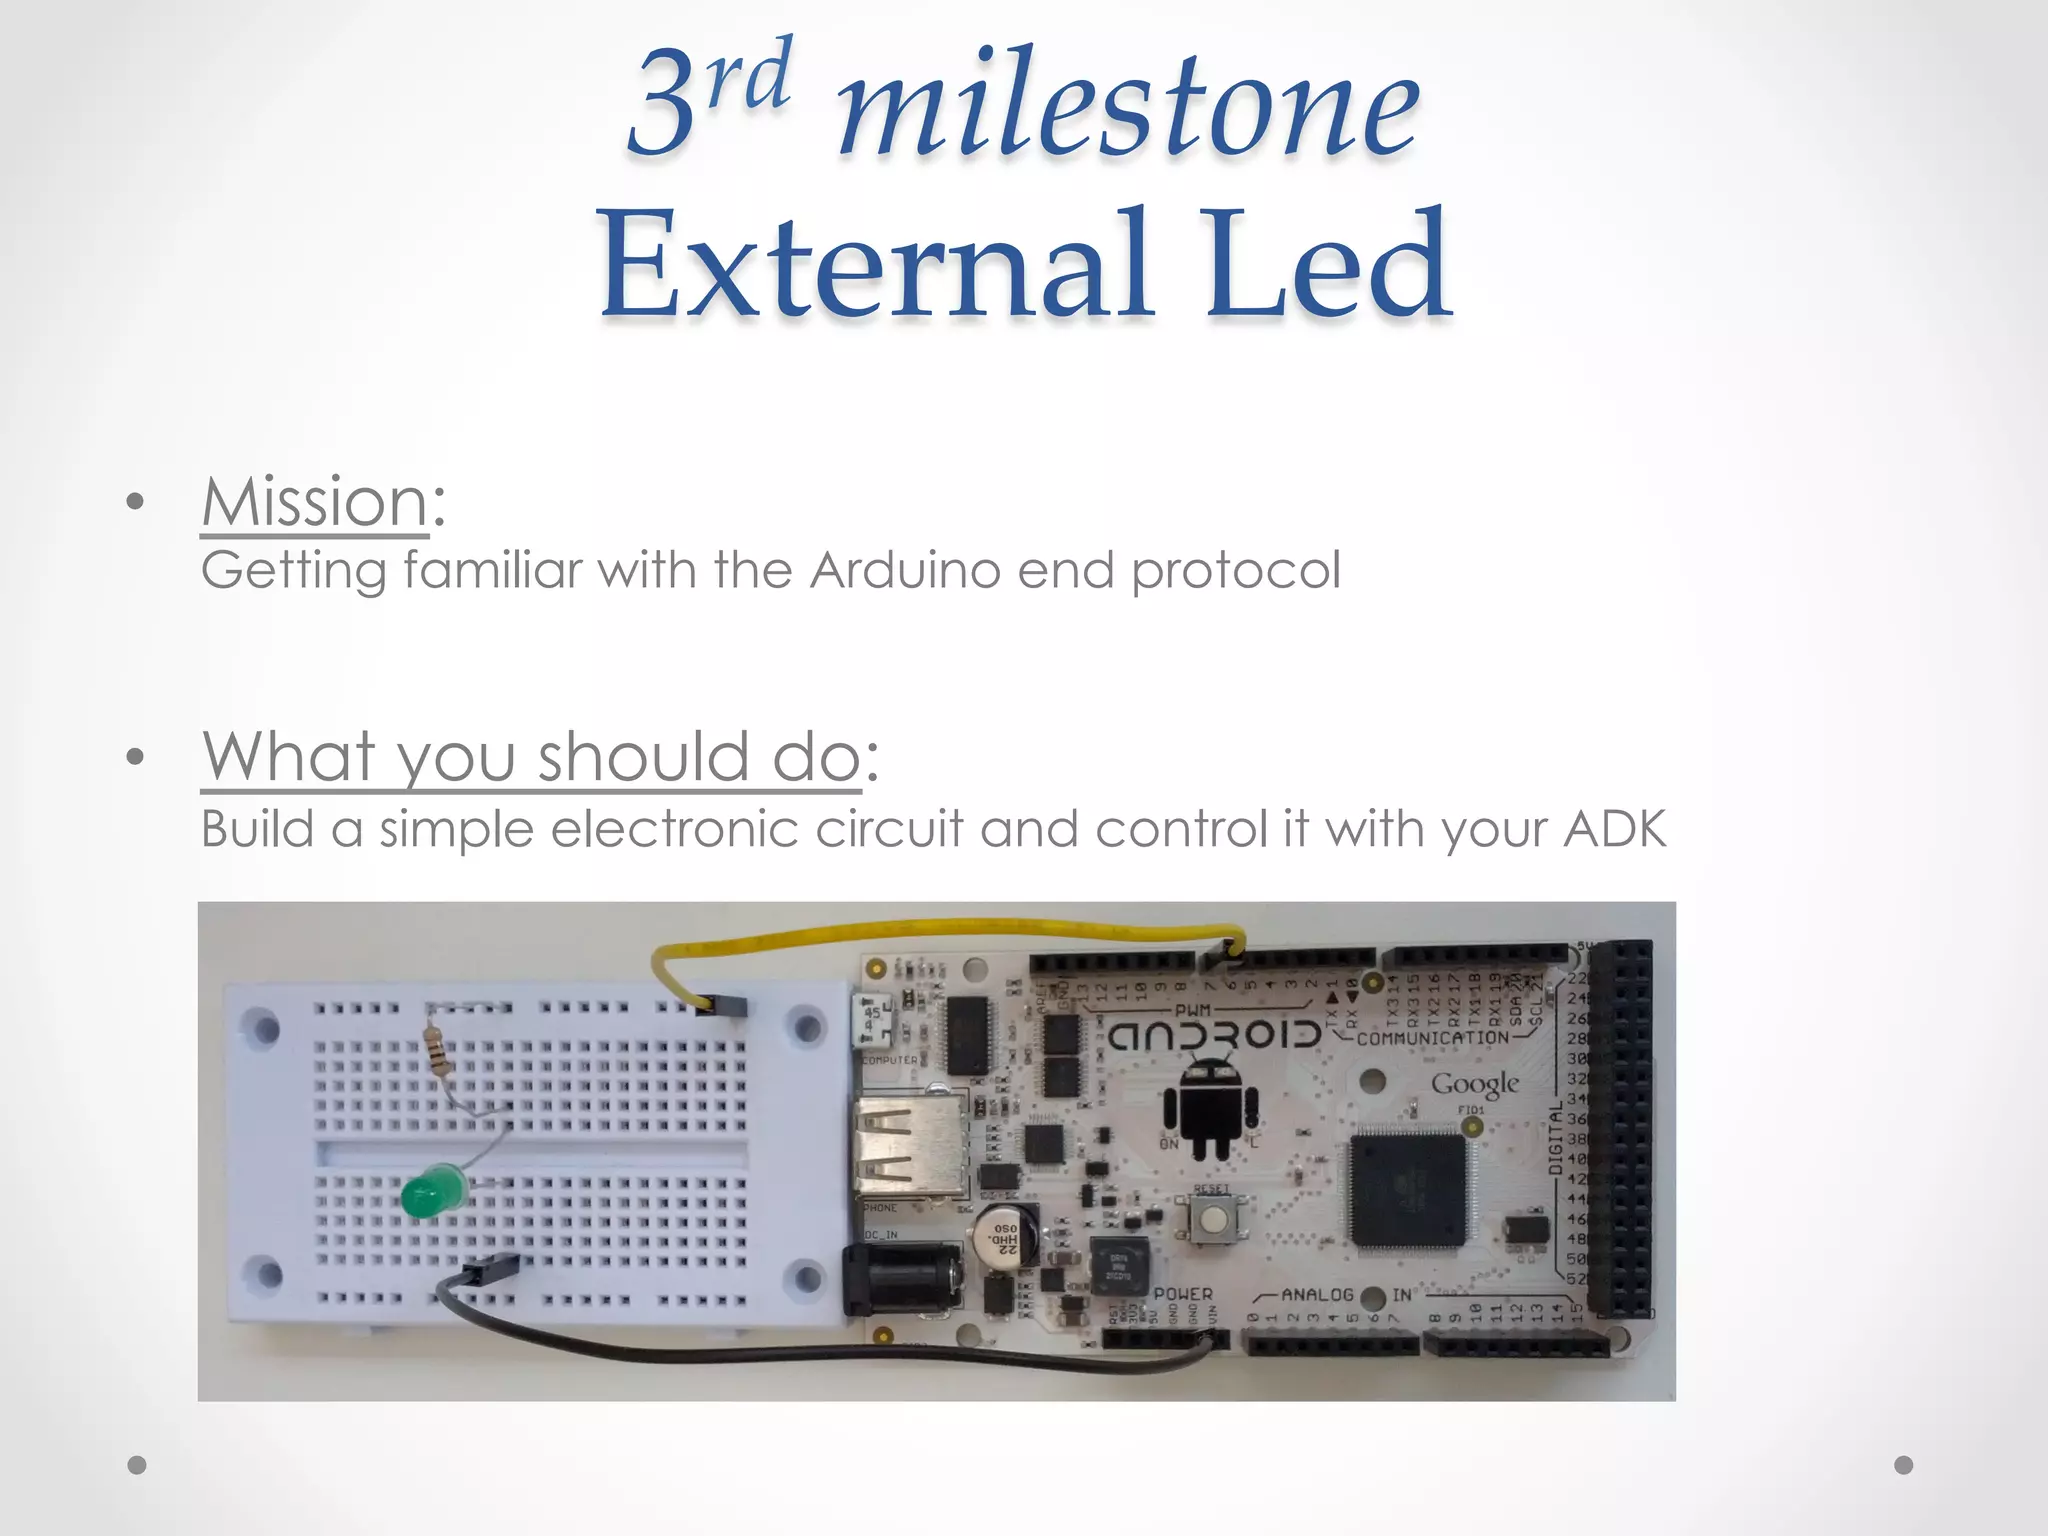
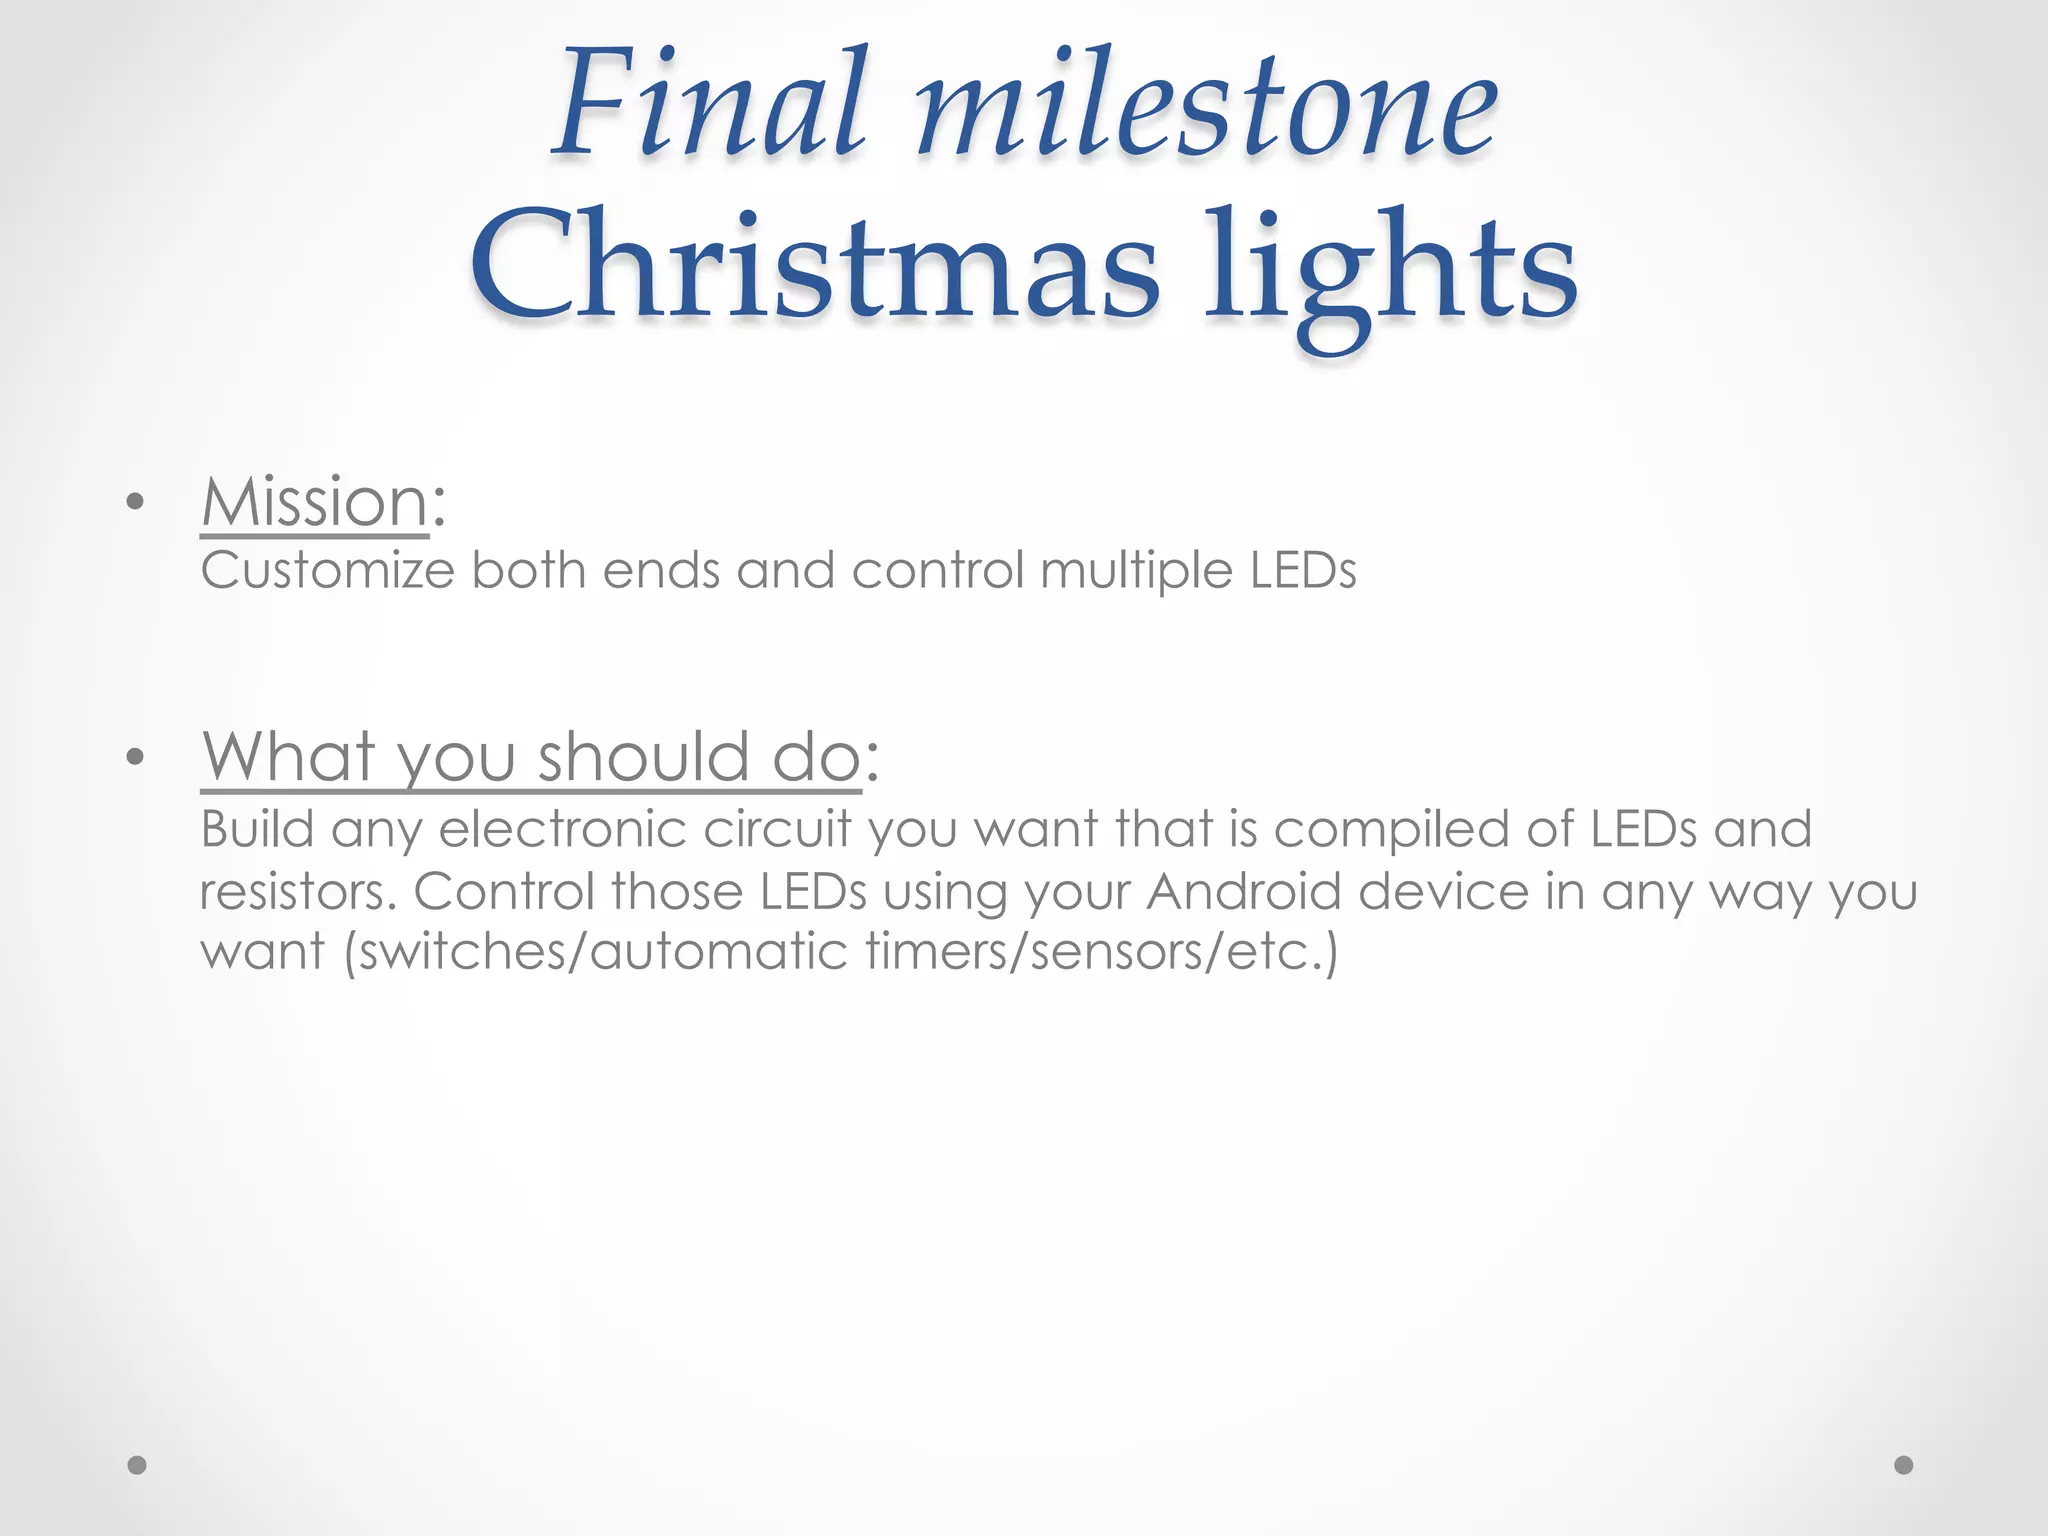
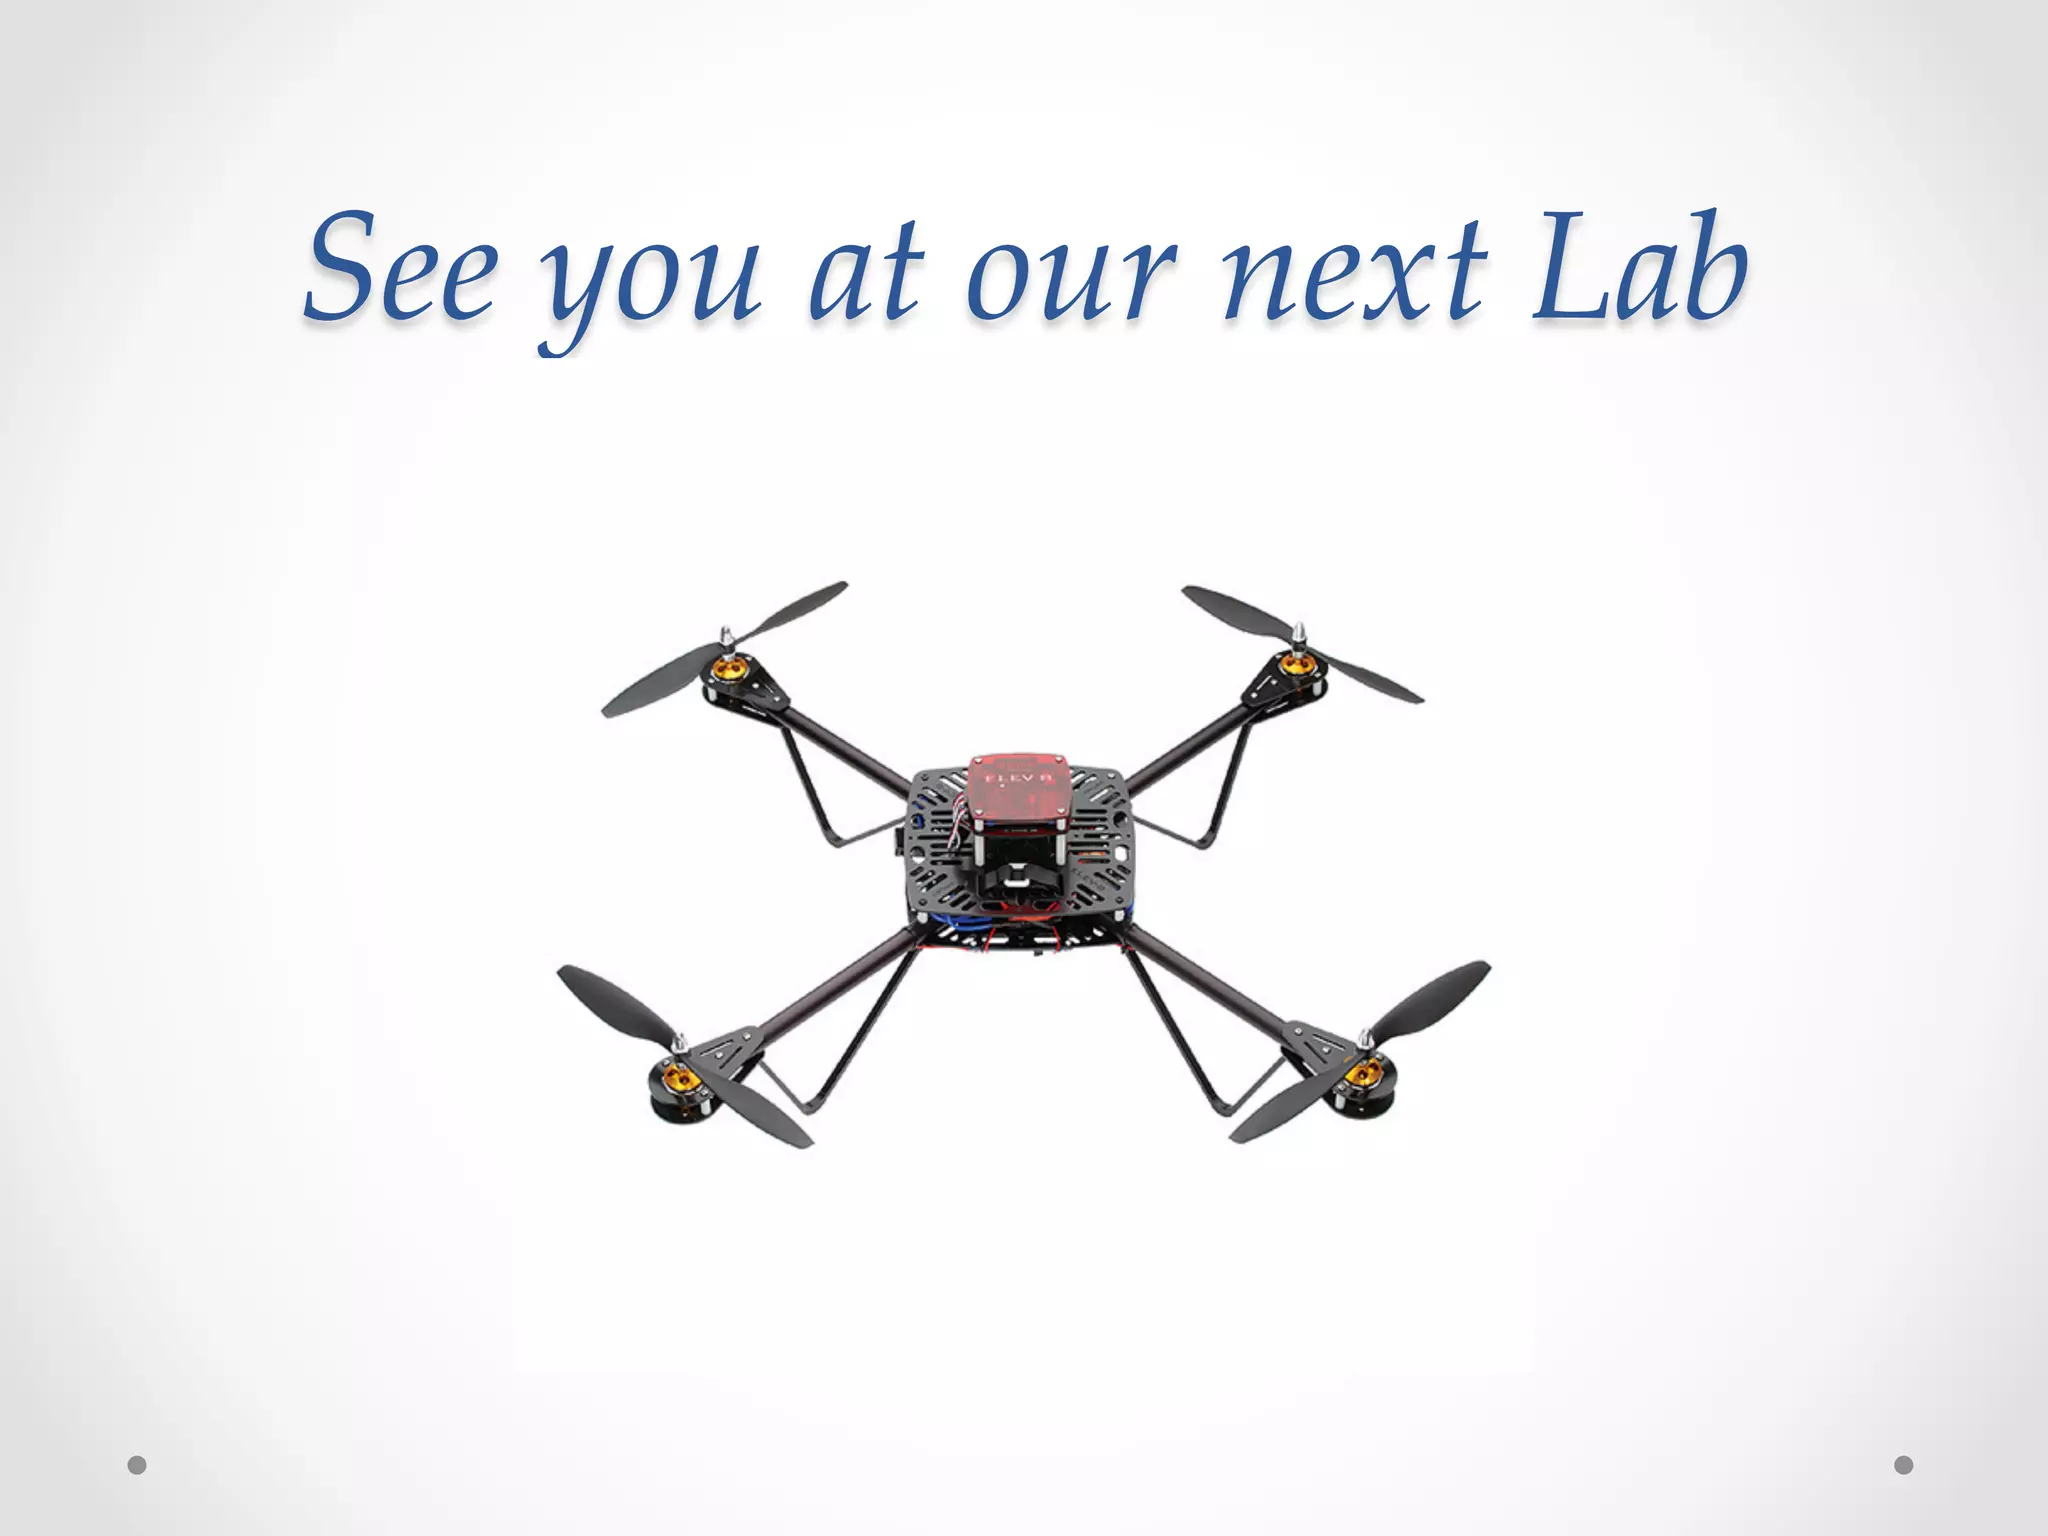
The document covers a presentation on the Accessory Development Kit (ADK), detailing topics such as its communication protocol, technical environment setup, and a lab outline for hands-on coding sessions. It includes milestones involving integrated blinking LEDs, Android-controlled switches, external LEDs, and customizing circuits with multiple LEDs. The presentation aims to facilitate communication between Android devices and ADK hardware through practical projects.
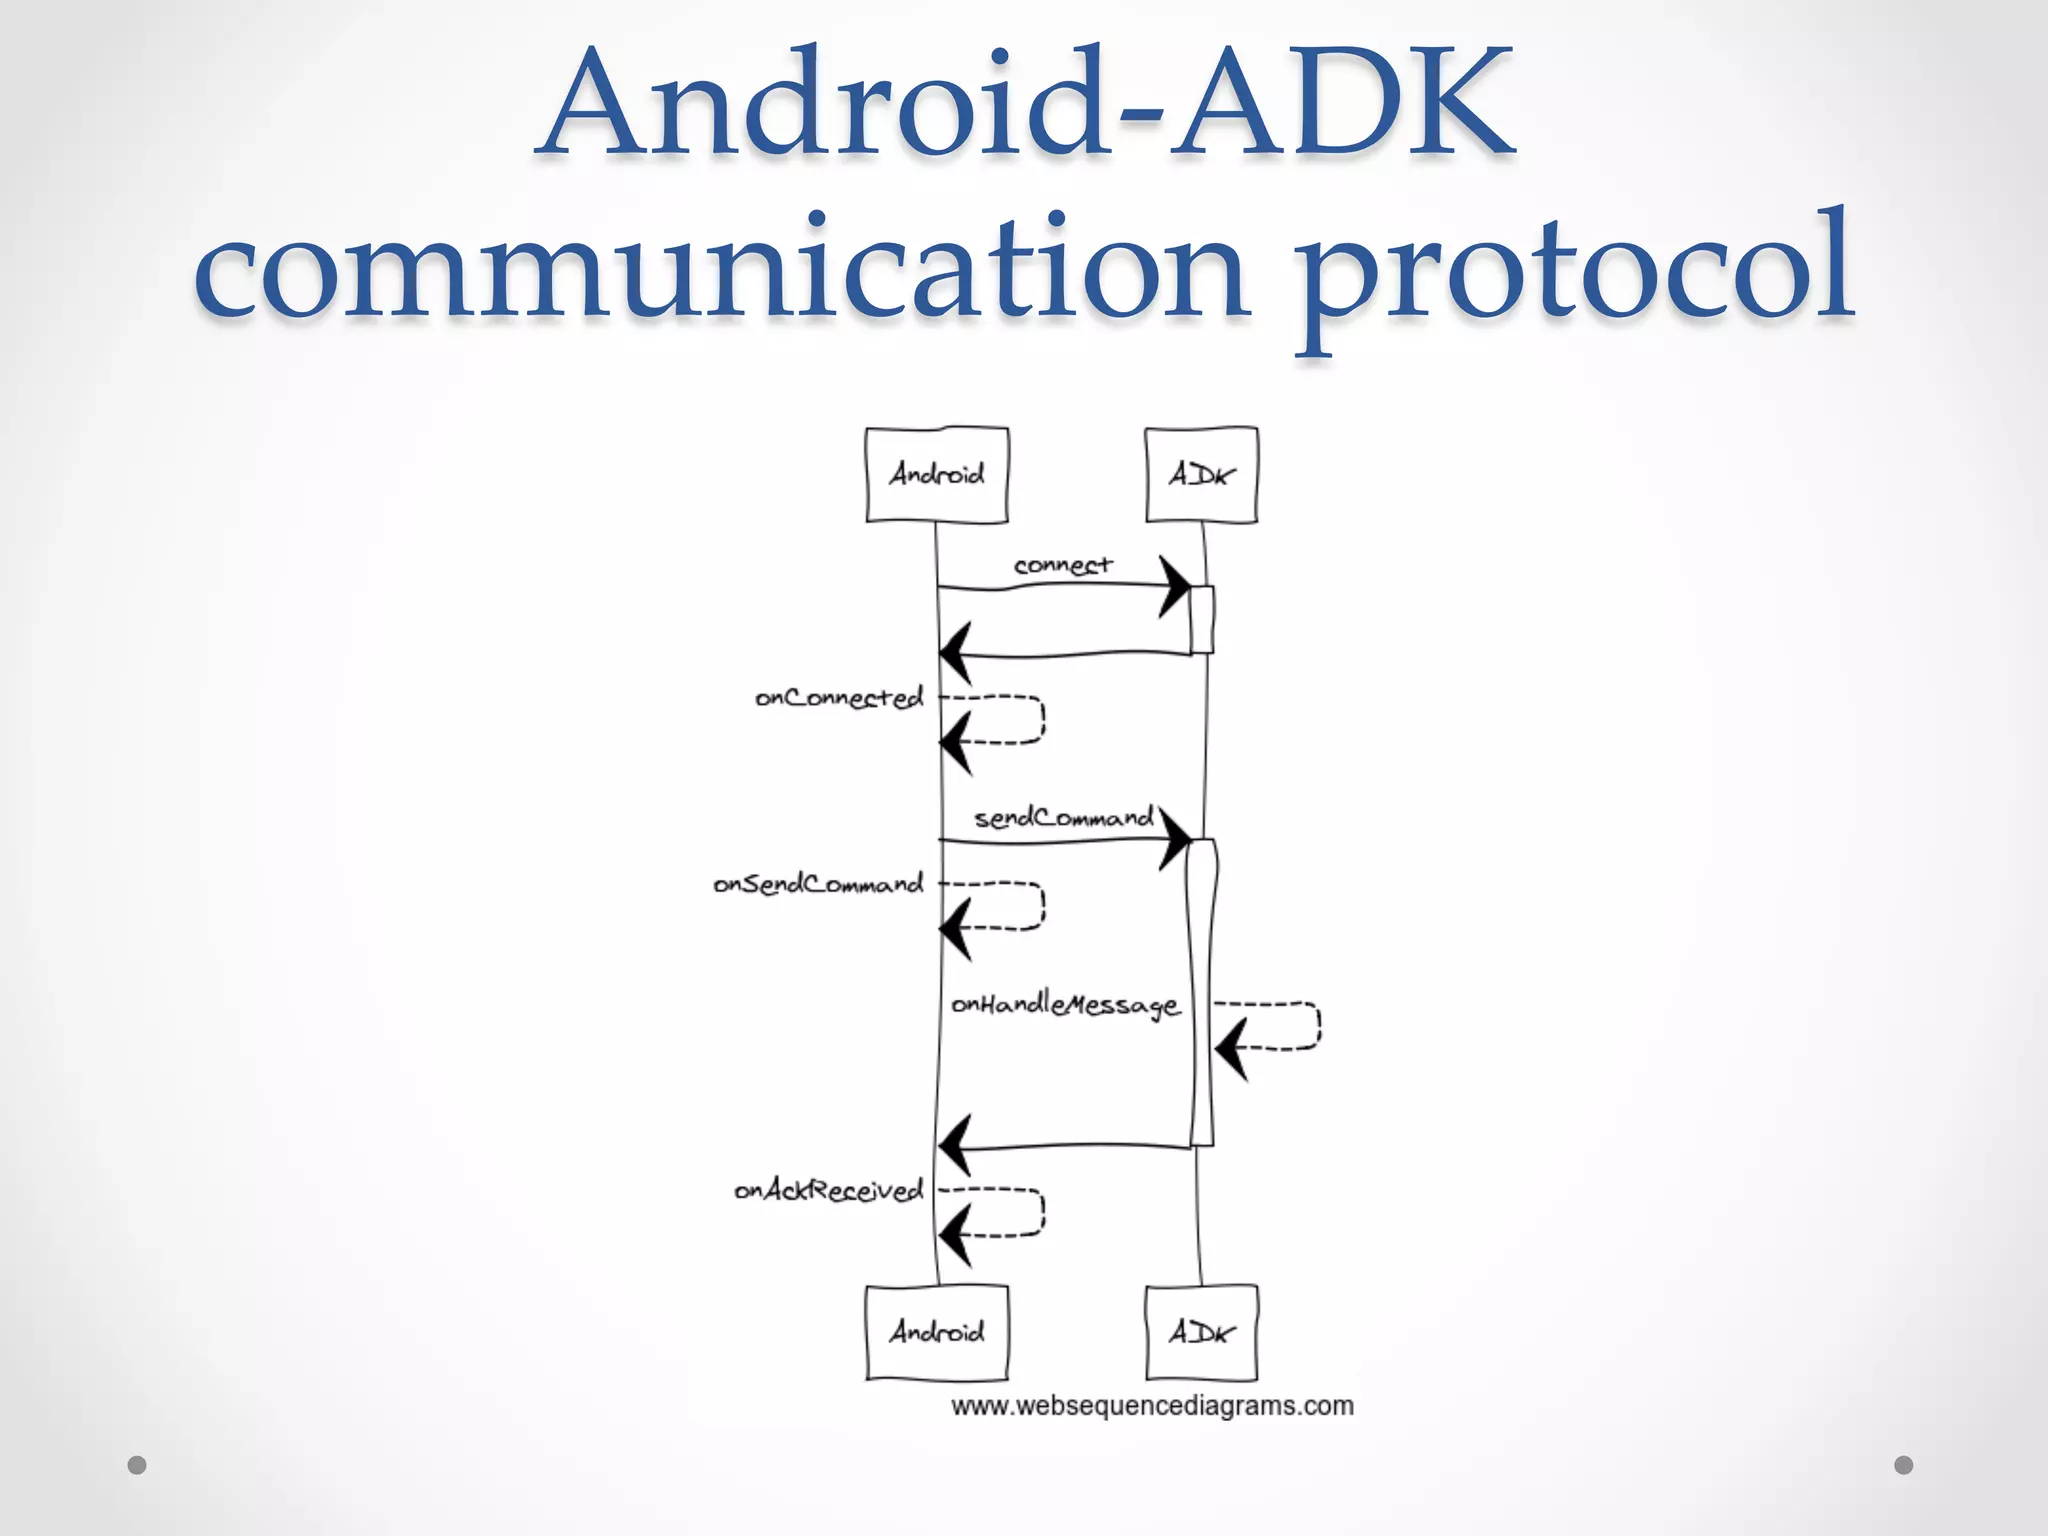
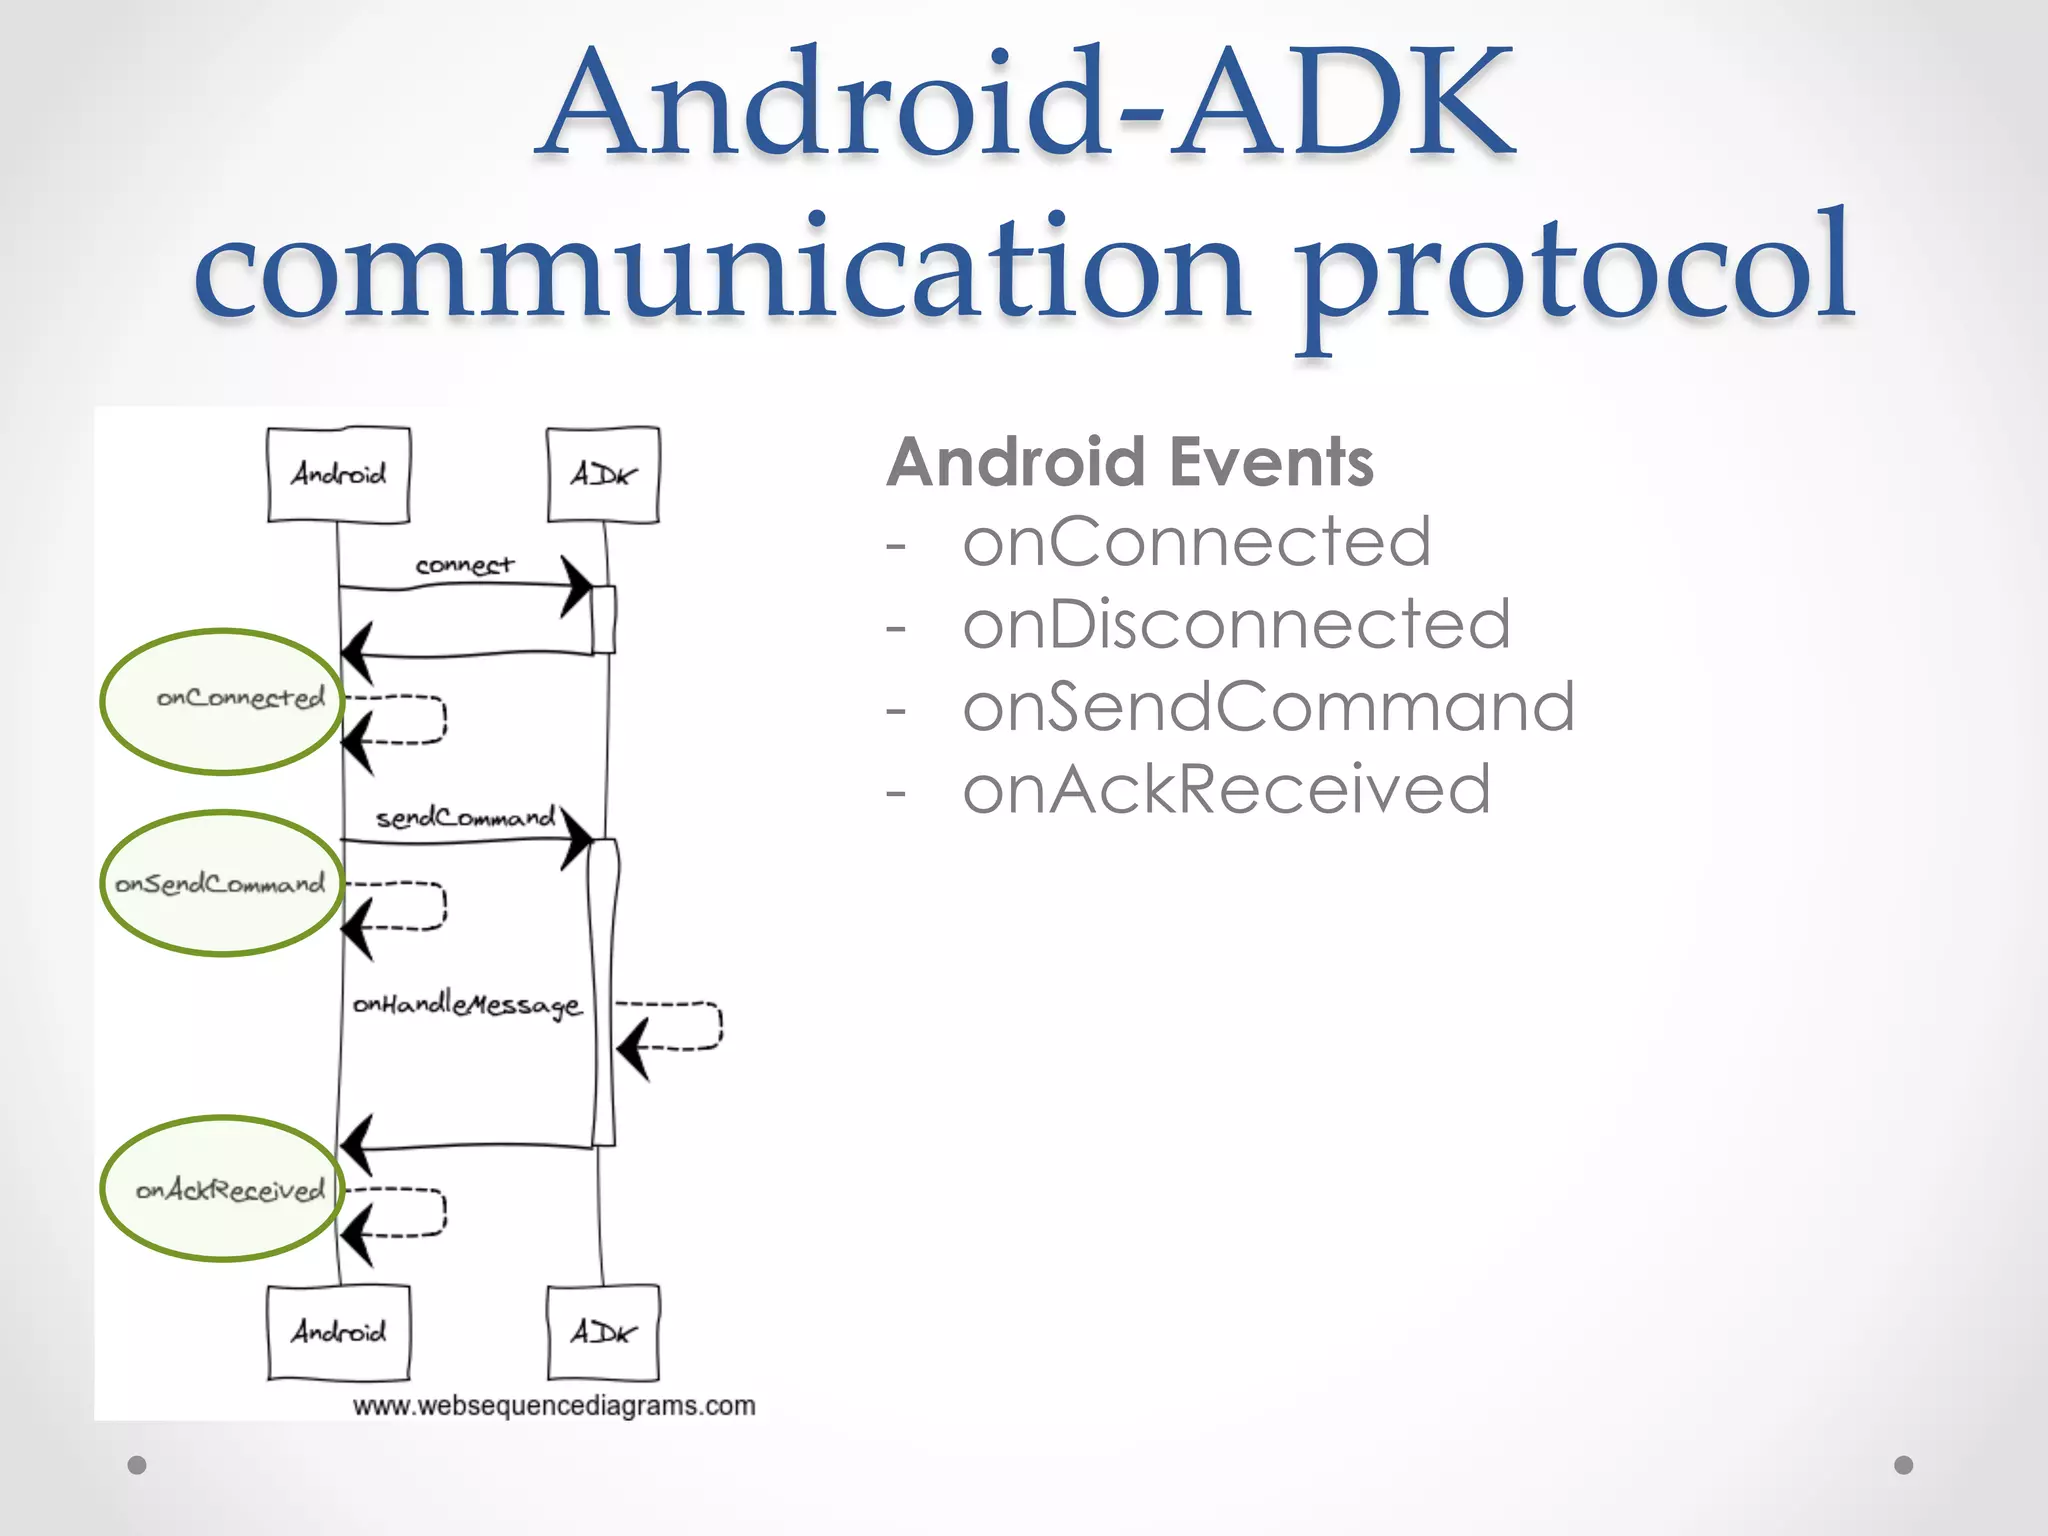
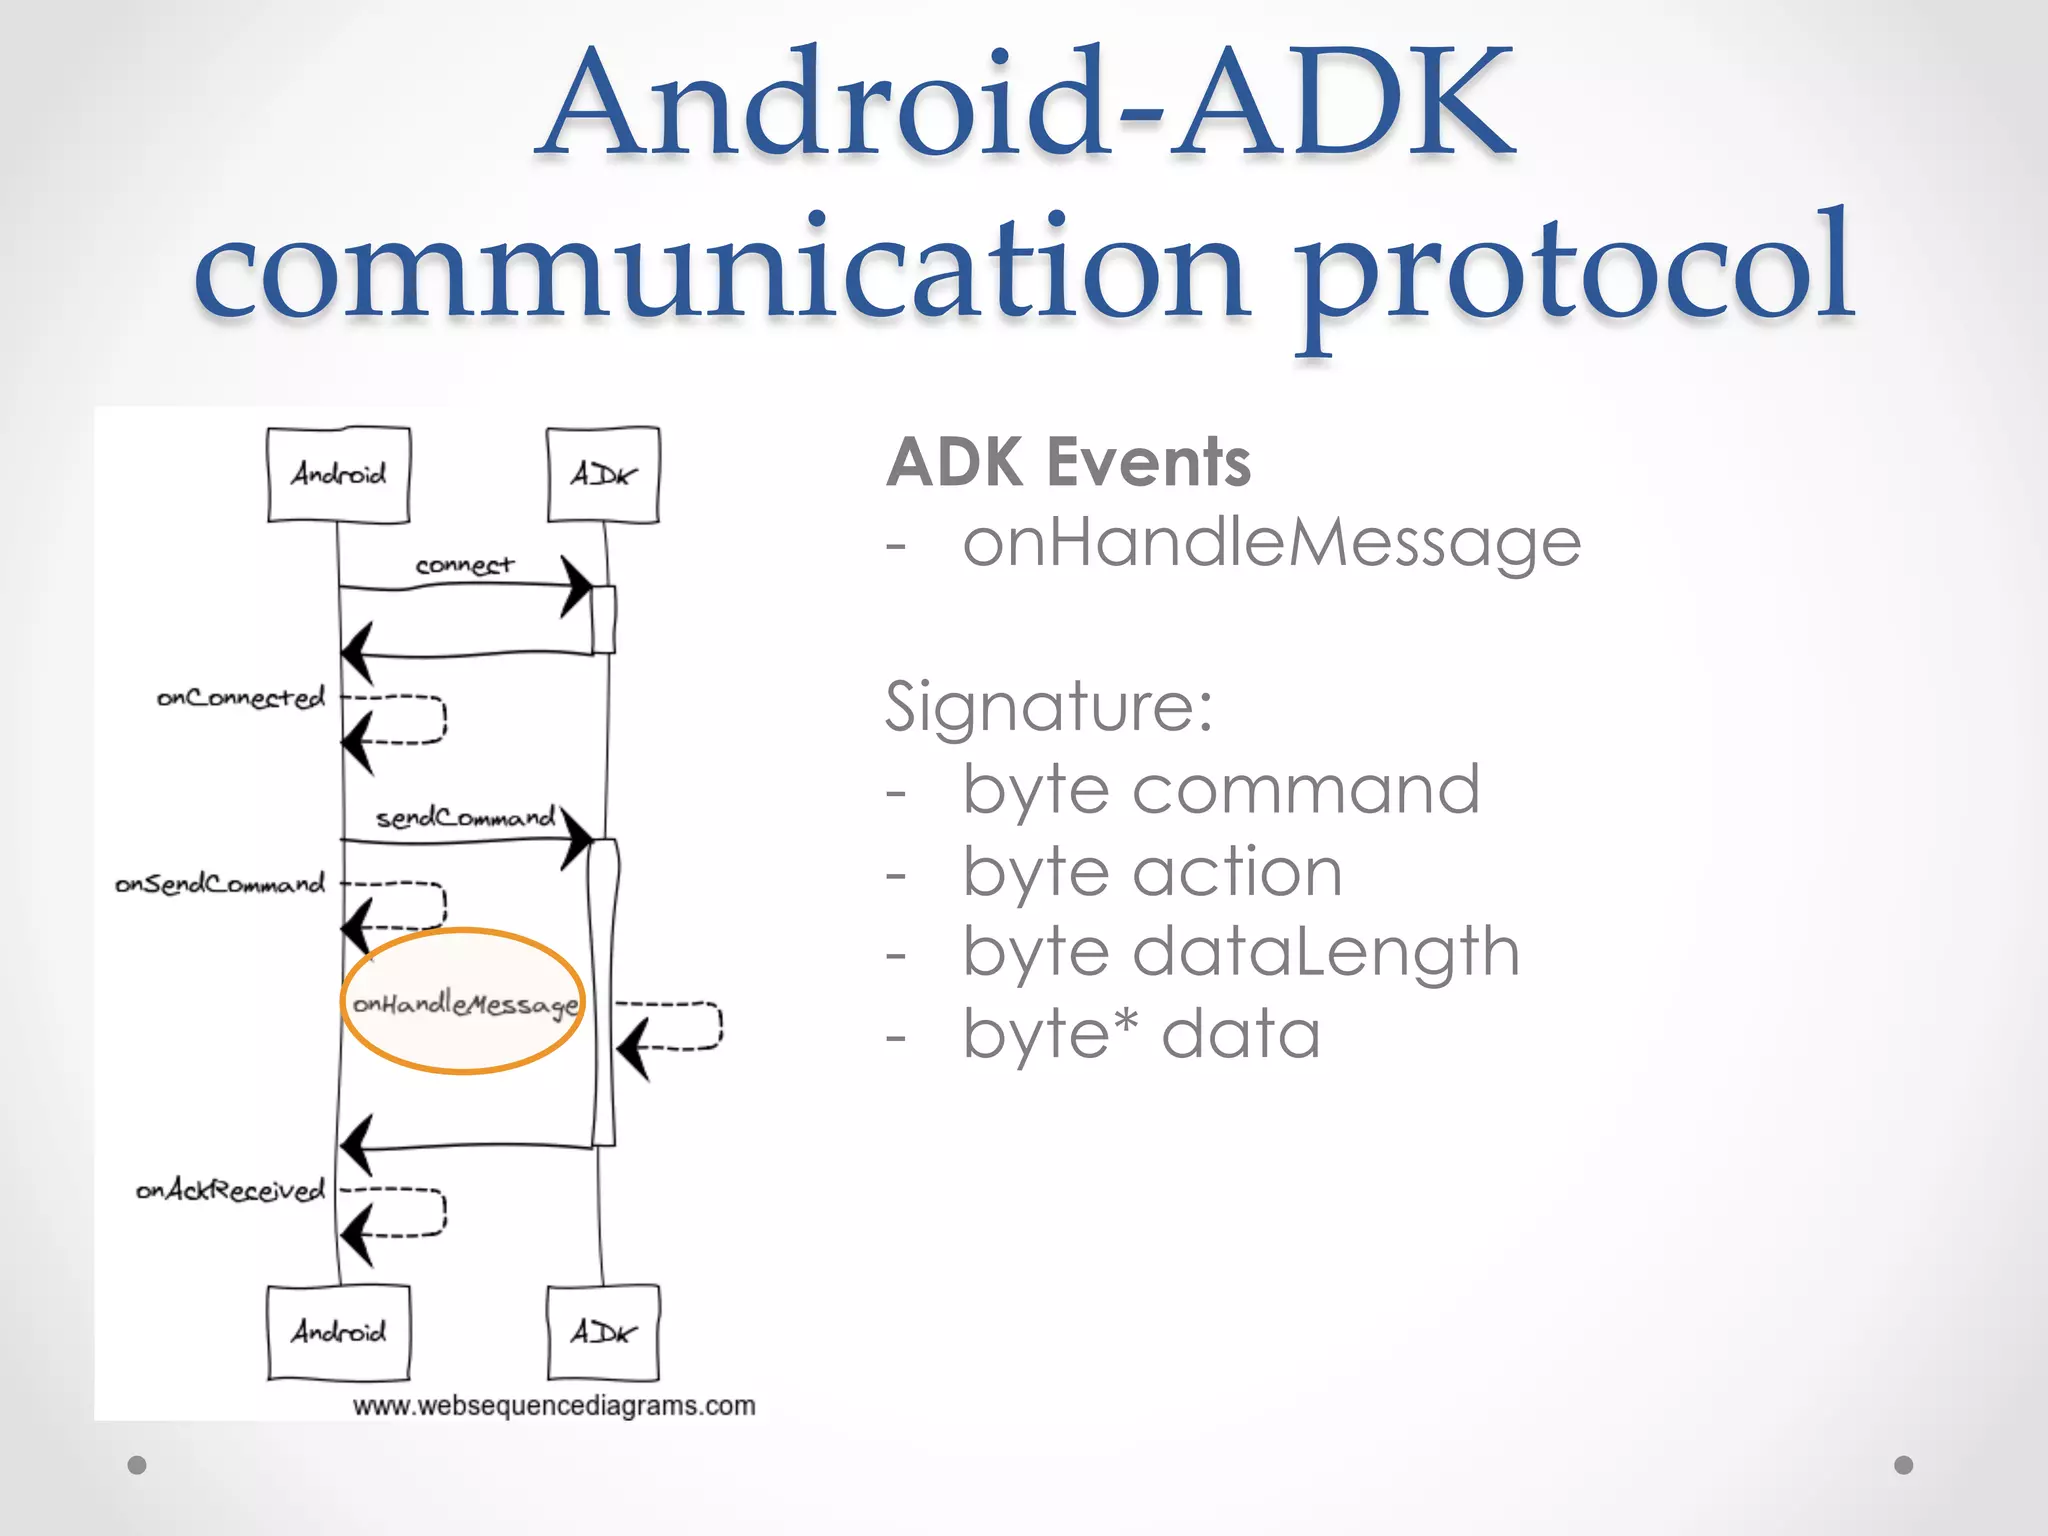
![Android-‐‑ADK
communication protocol
Android Communication API
- sendCommand
Accepts:
- byte command
- byte action
- byte[] data](https://image.slidesharecdn.com/adk-101-130217234046-phpapp02/75/Adk-101-9-2048.jpg)
![Technical environment
• Requirements
o Android device running 2.3.4 or higher (not all custom ROMs are supported)
o USB cable
o Laptop with:
• Android SDK (including platform 2.3.3, API level or higher)
• Arduino IDE for ADK 2011
• Arduino IDE for ADK 2012
• Arduino libs –
copy these libraries to [arduino_installation_folder]/libraries/
• Eclipse + Android plugin / Intellij / etc.
• Lab’s git repository
o https://github.com/amirlazarovich/codelab-adk-leds](https://image.slidesharecdn.com/adk-101-130217234046-phpapp02/75/Adk-101-13-2048.jpg)
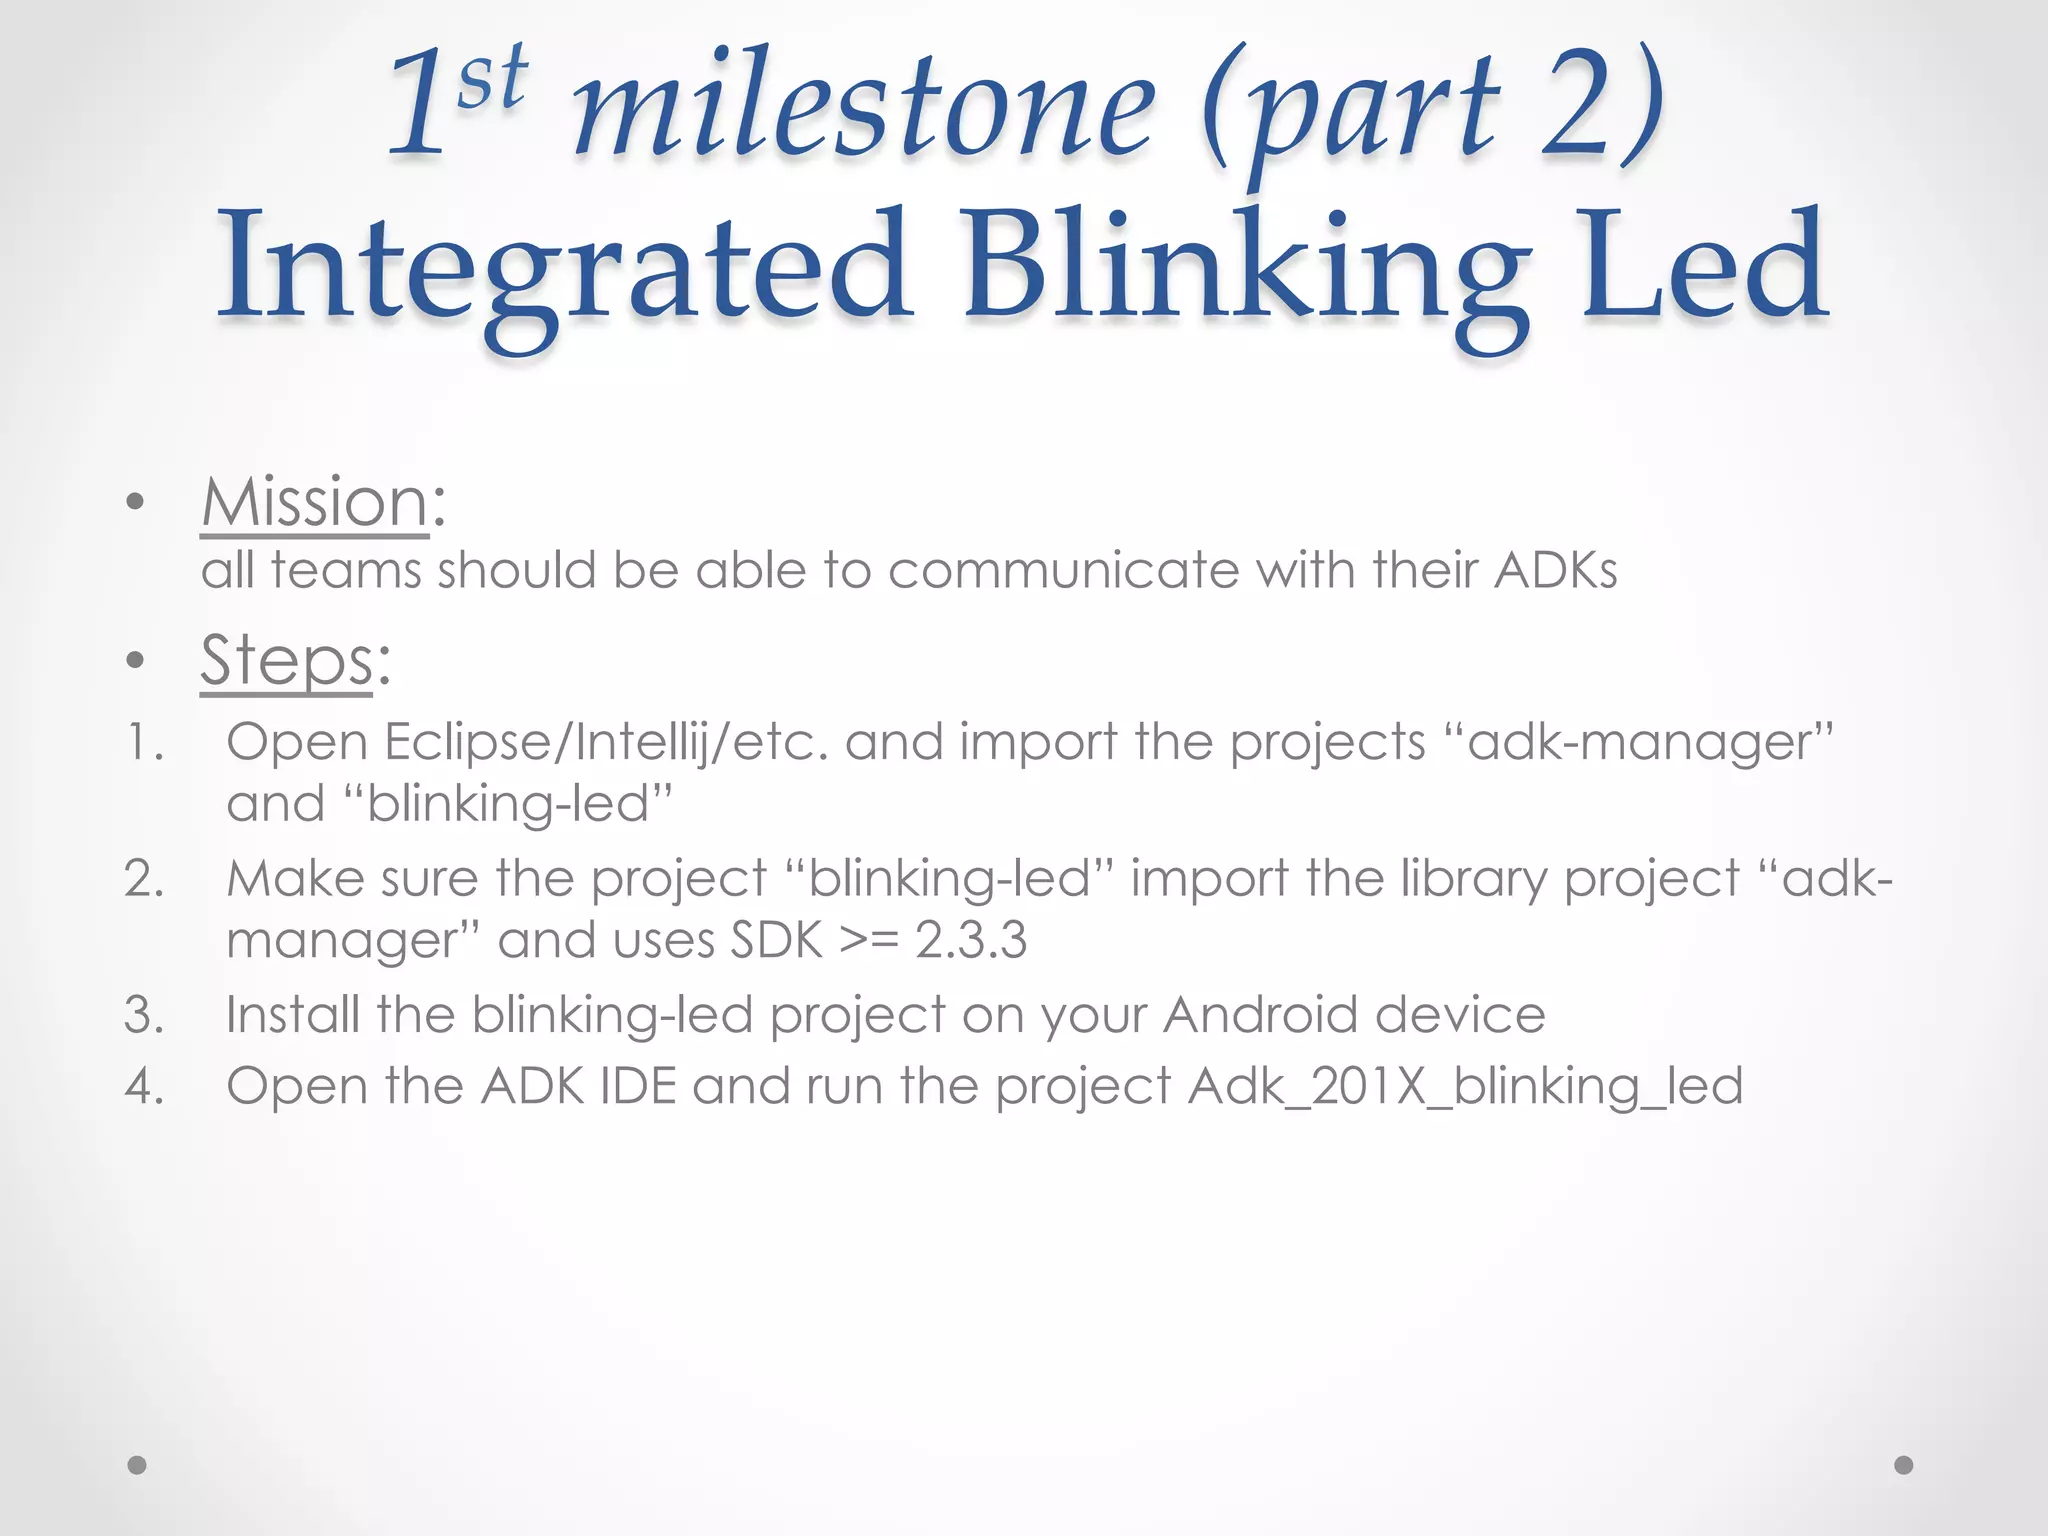
![1 st milestone (part 1)
Integrated Blinking Led
• Mission:
all teams should be able to communicate with their ADKs
• Steps:
1. git clone git@github.com:amirlazarovich/codelab-adk-leds.git
2. Copy the Arduino libraries from [cloned directory]/Arduino/libs to
[Arduino installation folder]/libraries/
3. Open the Arduino IDE and select the correct board: tools-board-
[Arduino mega 2560 or Mega ADK] or [ADK 2012] (depending on
your ADK model)
4. Now select the correct usb serial-port: tty.usbserial***
5. Run the example project: file – examples – basics - blink](https://image.slidesharecdn.com/adk-101-130217234046-phpapp02/75/Adk-101-15-2048.jpg)


![Vibe Coding vs. Spec-Driven Development [Free Meetup]](https://cdn.slidesharecdn.com/ss_thumbnails/vibecodingvsspecdrivendevelopment-251209105622-43f455e7-thumbnail.jpg?width=640&height=640&fit=bounds)


![Coded Agents – with UiPath SDK + LangGraph [Virtual Hands-on Workshop]](https://cdn.slidesharecdn.com/ss_thumbnails/codedagentsdeck-251215155422-5497c599-thumbnail.jpg?width=640&height=640&fit=bounds)


