Download to read offline


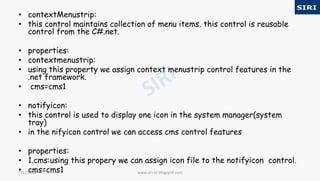


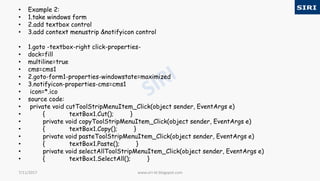


This document discusses how to create Windows applications in C# using Visual Studio. It describes several controls that are available for building the user interface, including common controls, container controls, menu controls, and data bound controls. It provides examples of using context menus and notifyicon controls with other UI elements like text boxes. The context menu can be assigned to multiple controls and used to trigger actions like changing colors or cutting/copying text.