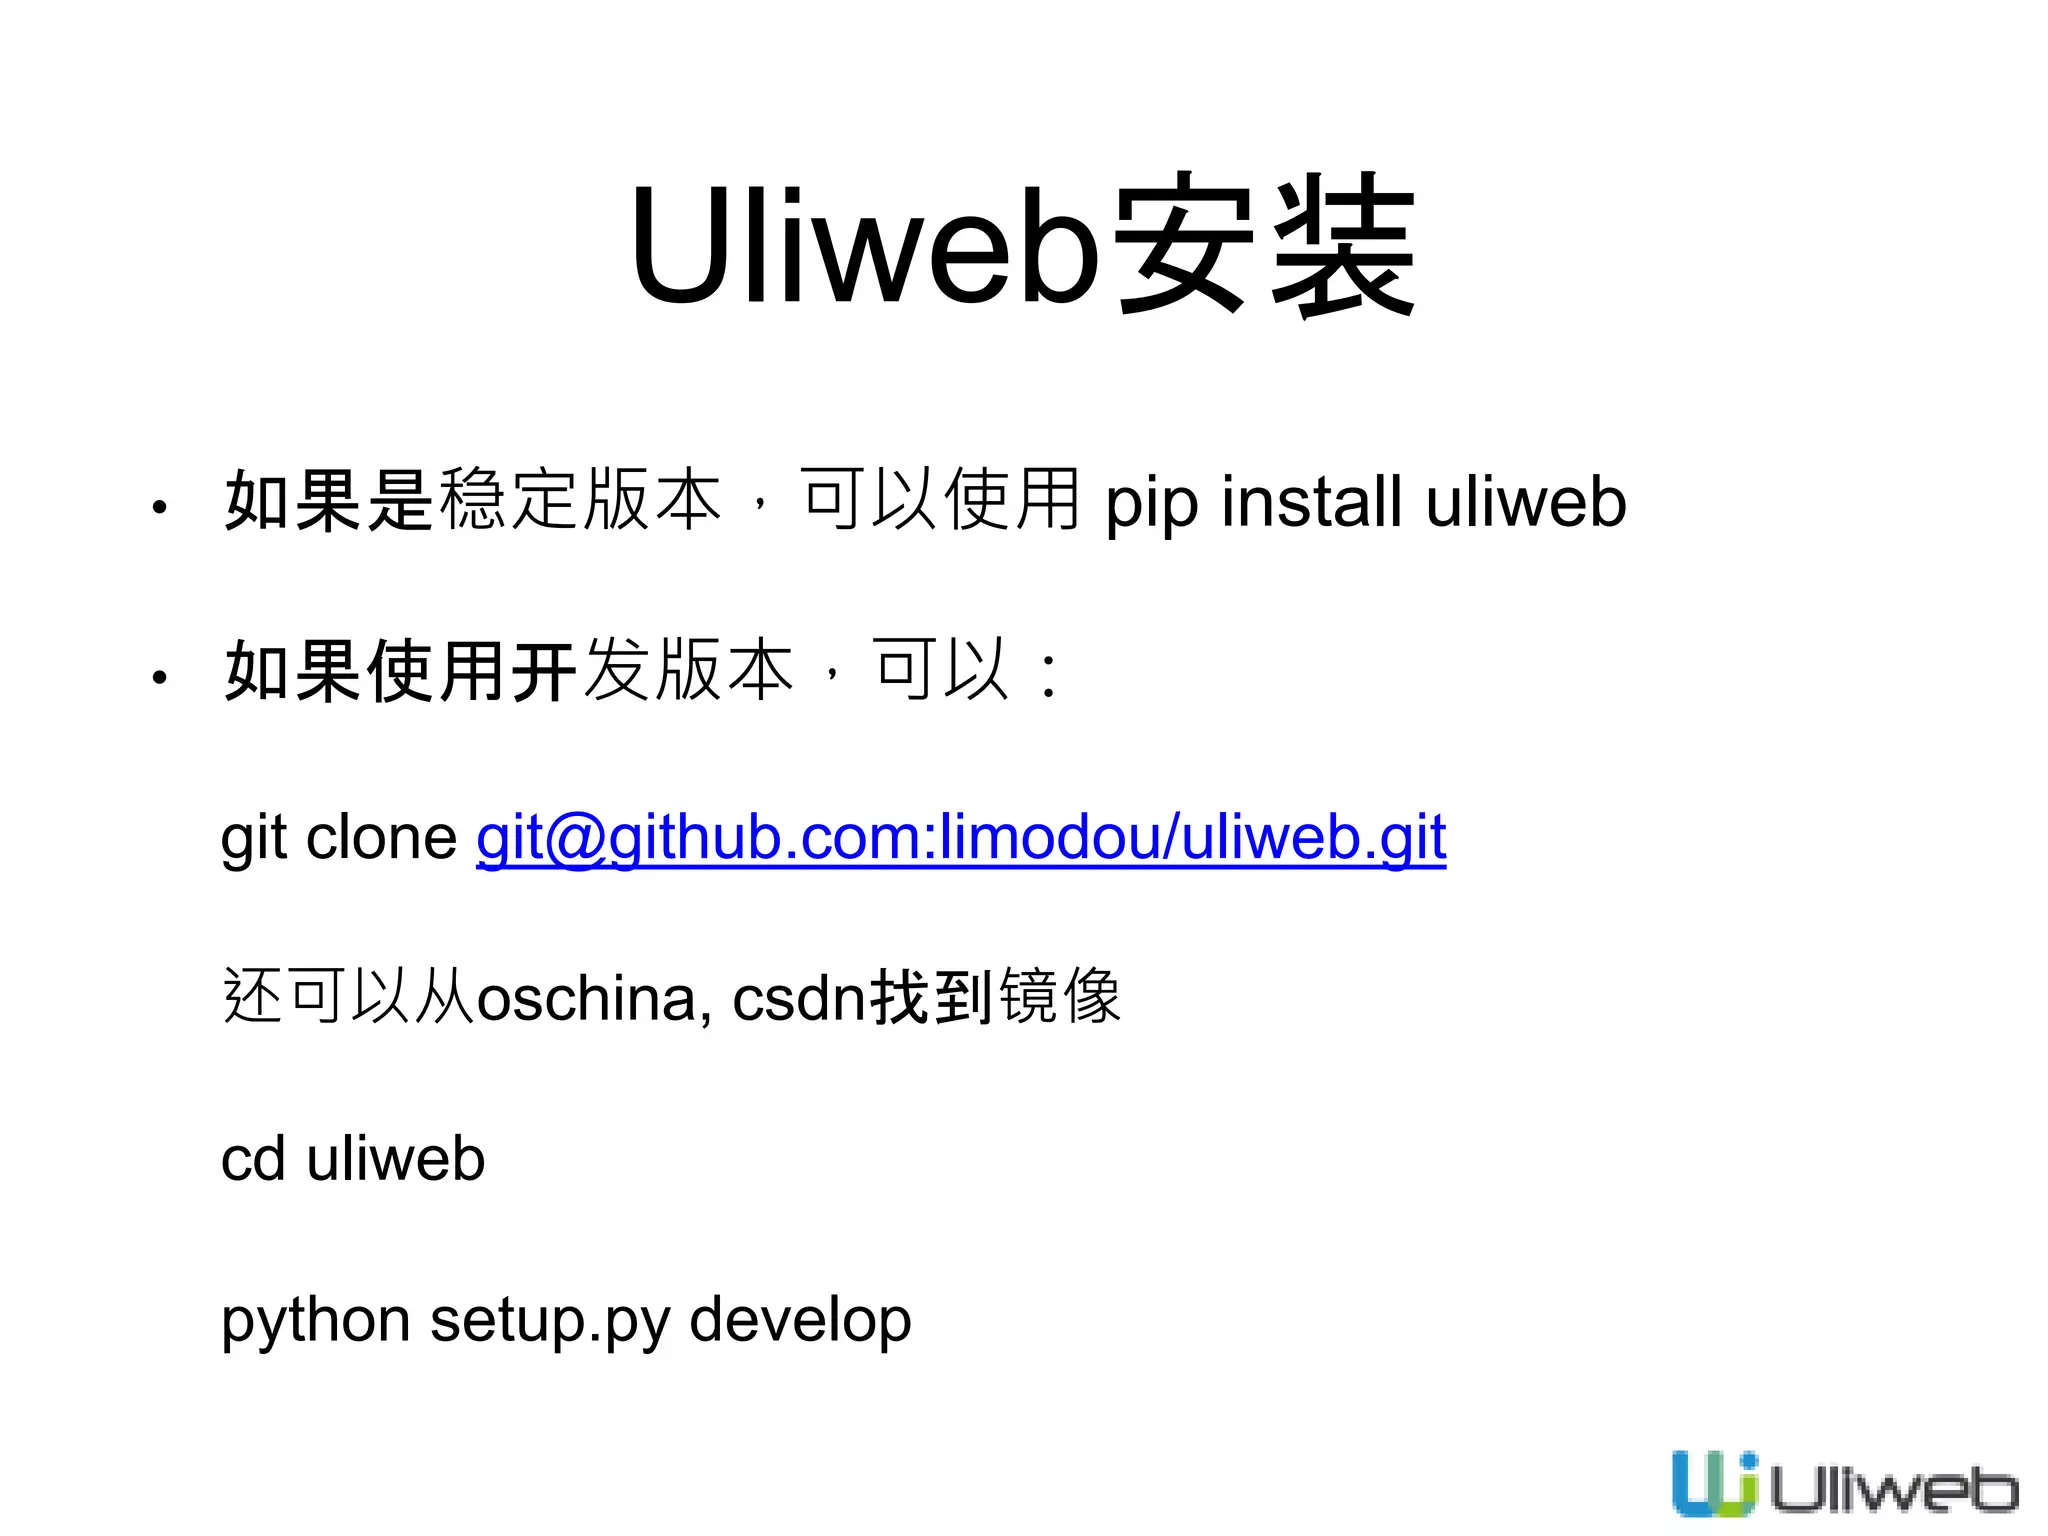
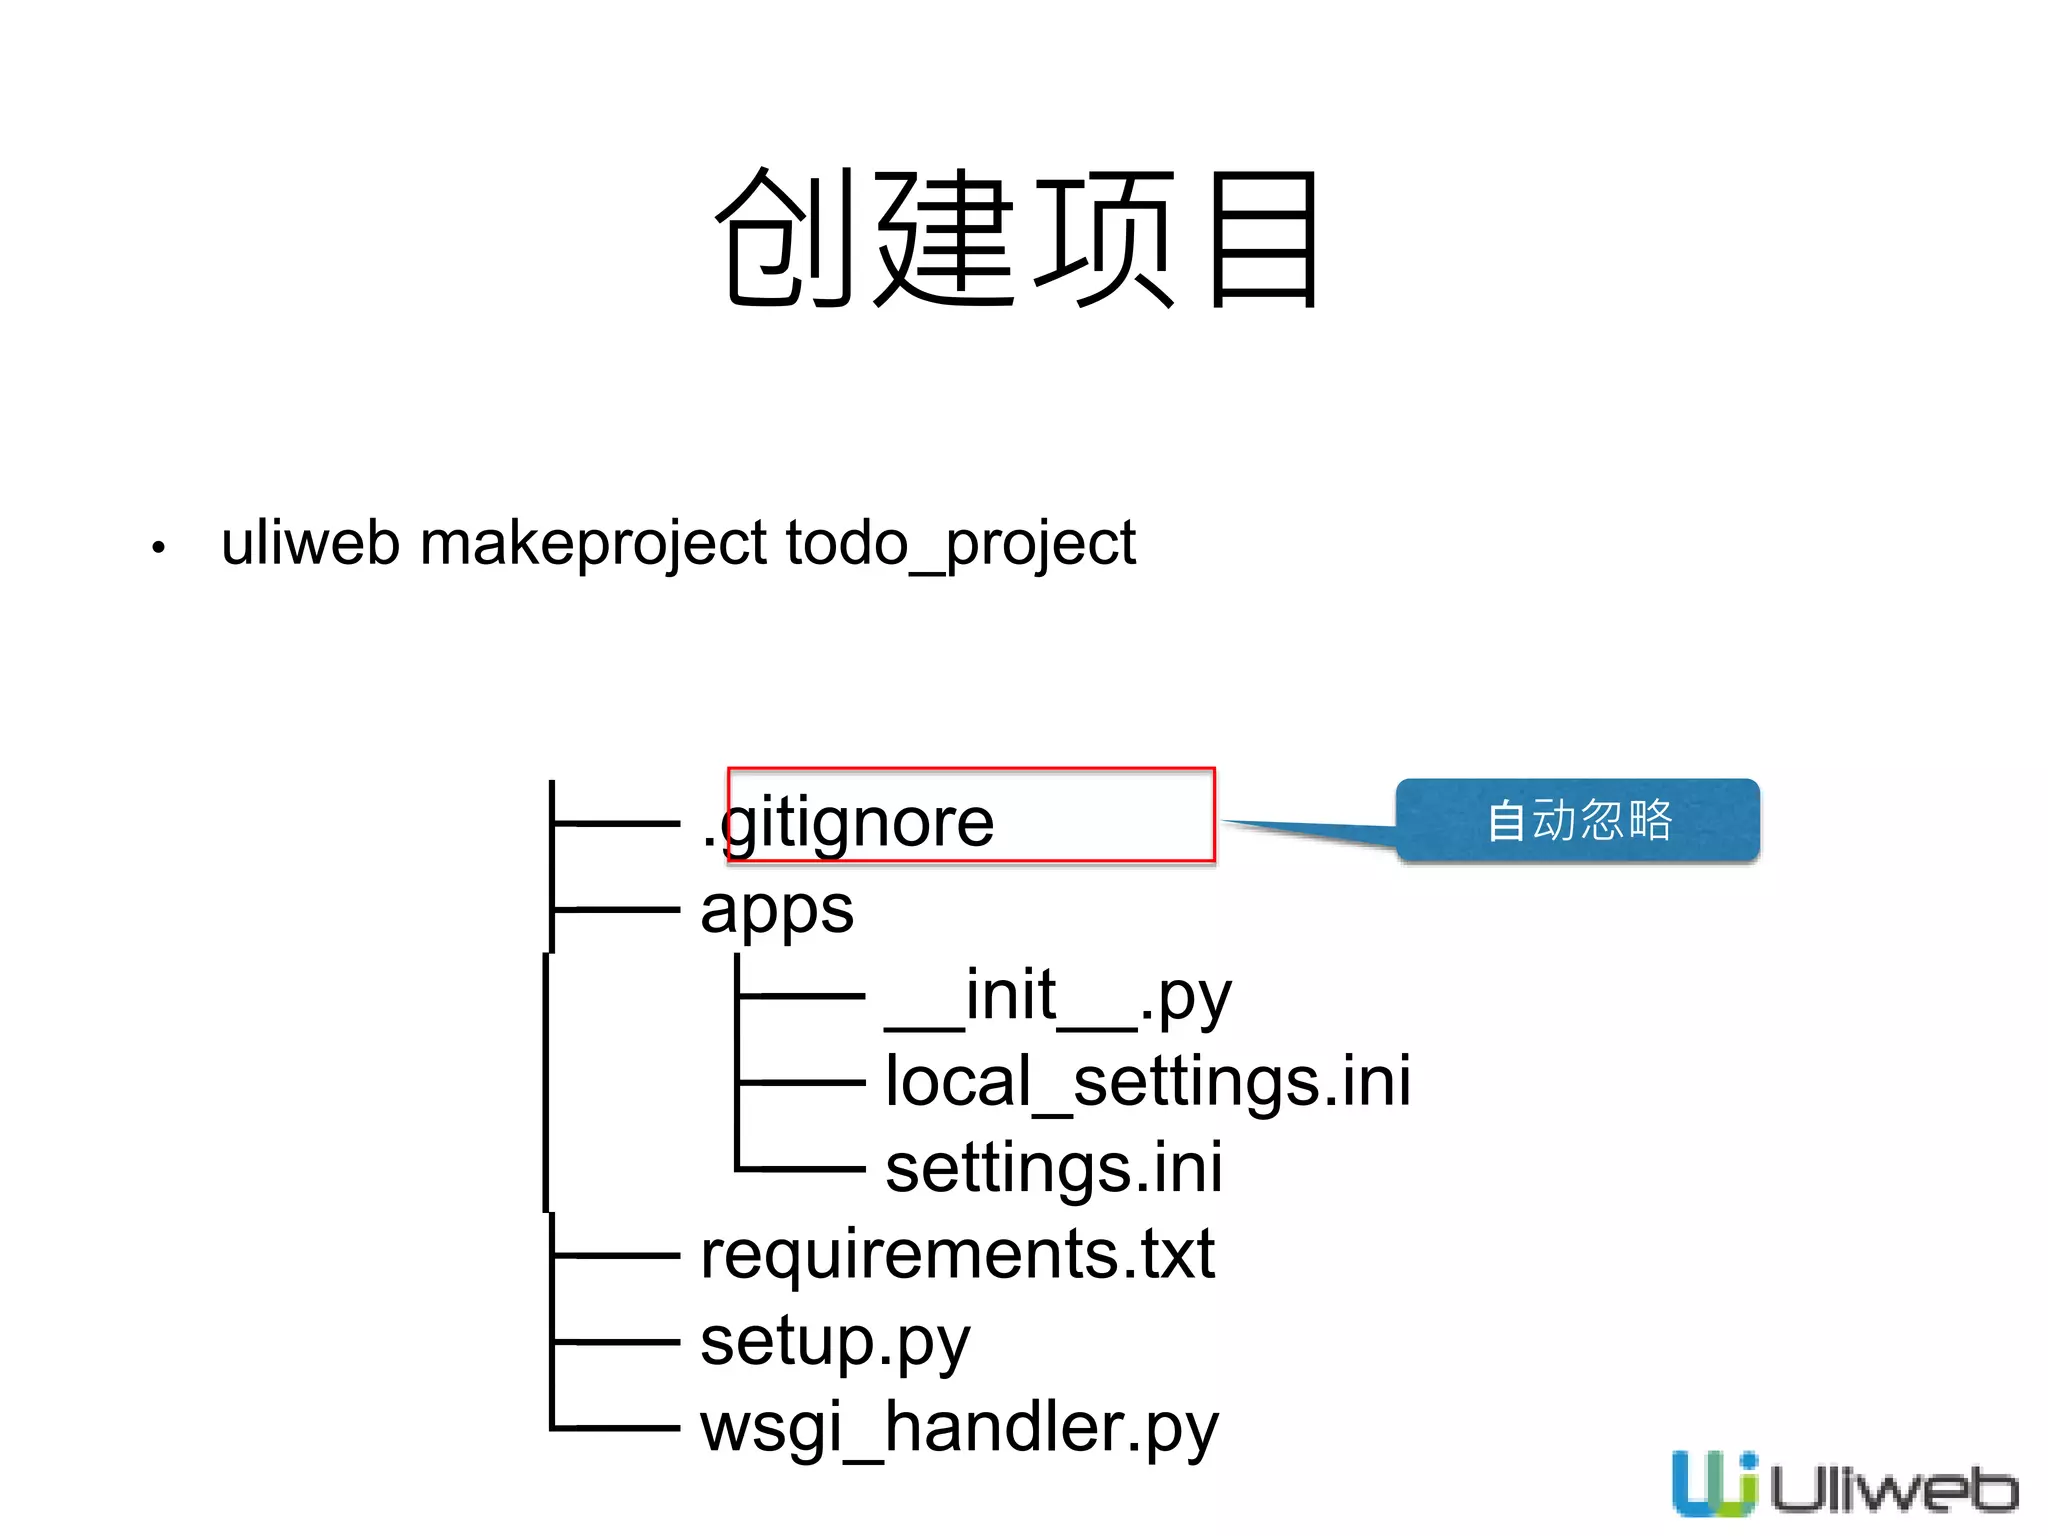
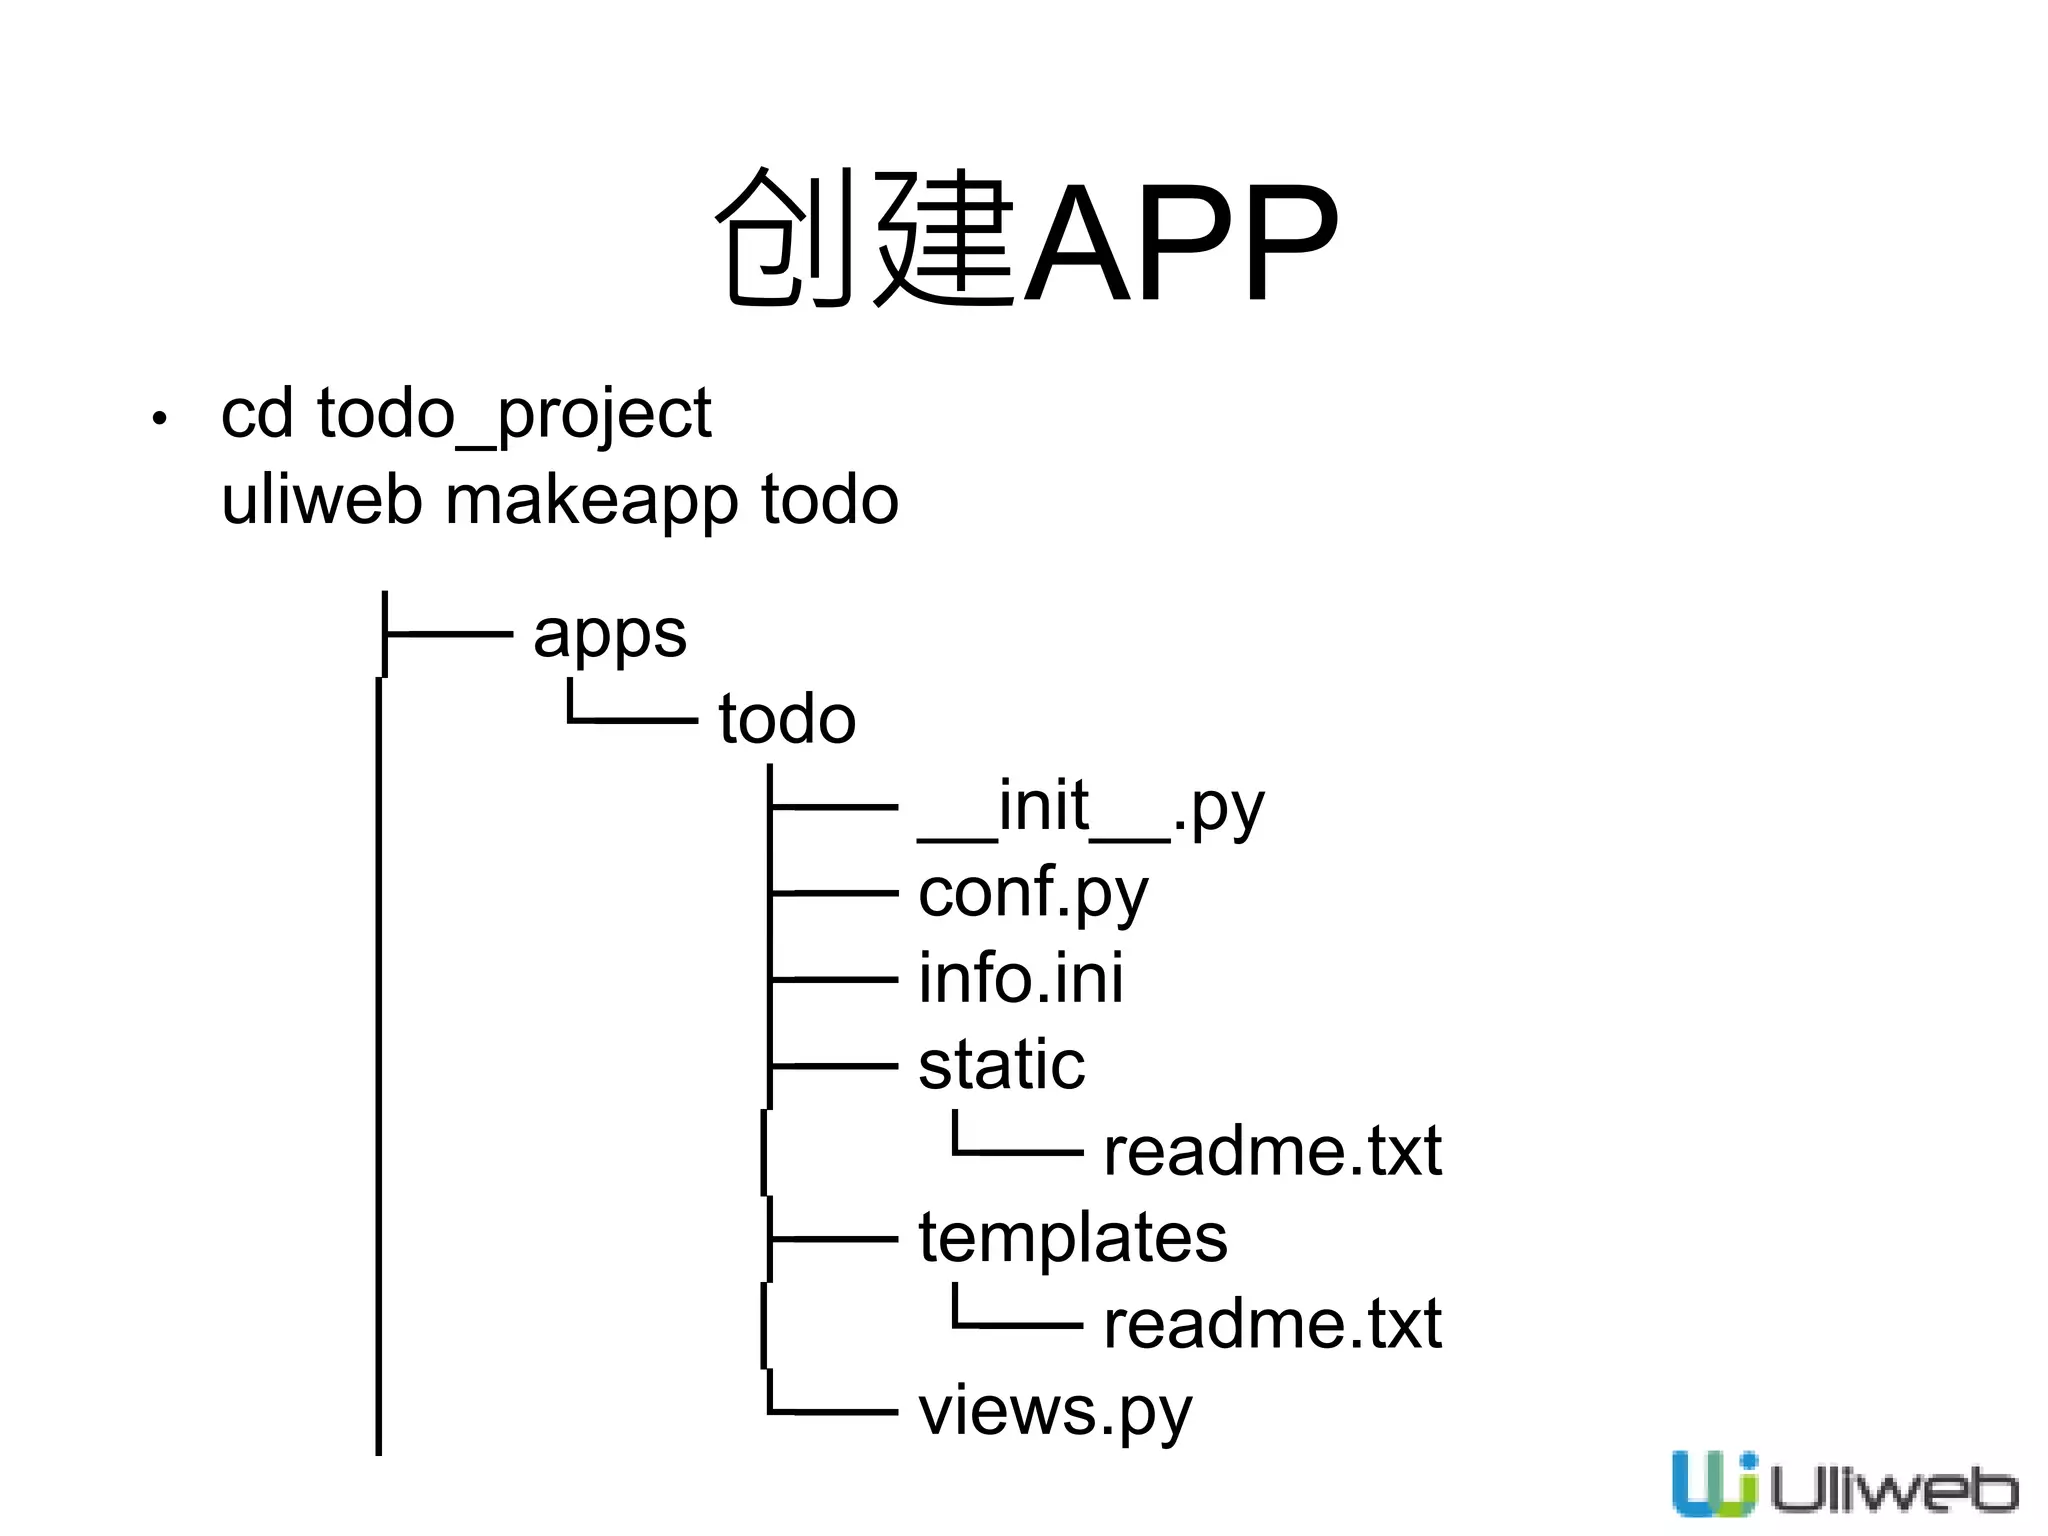
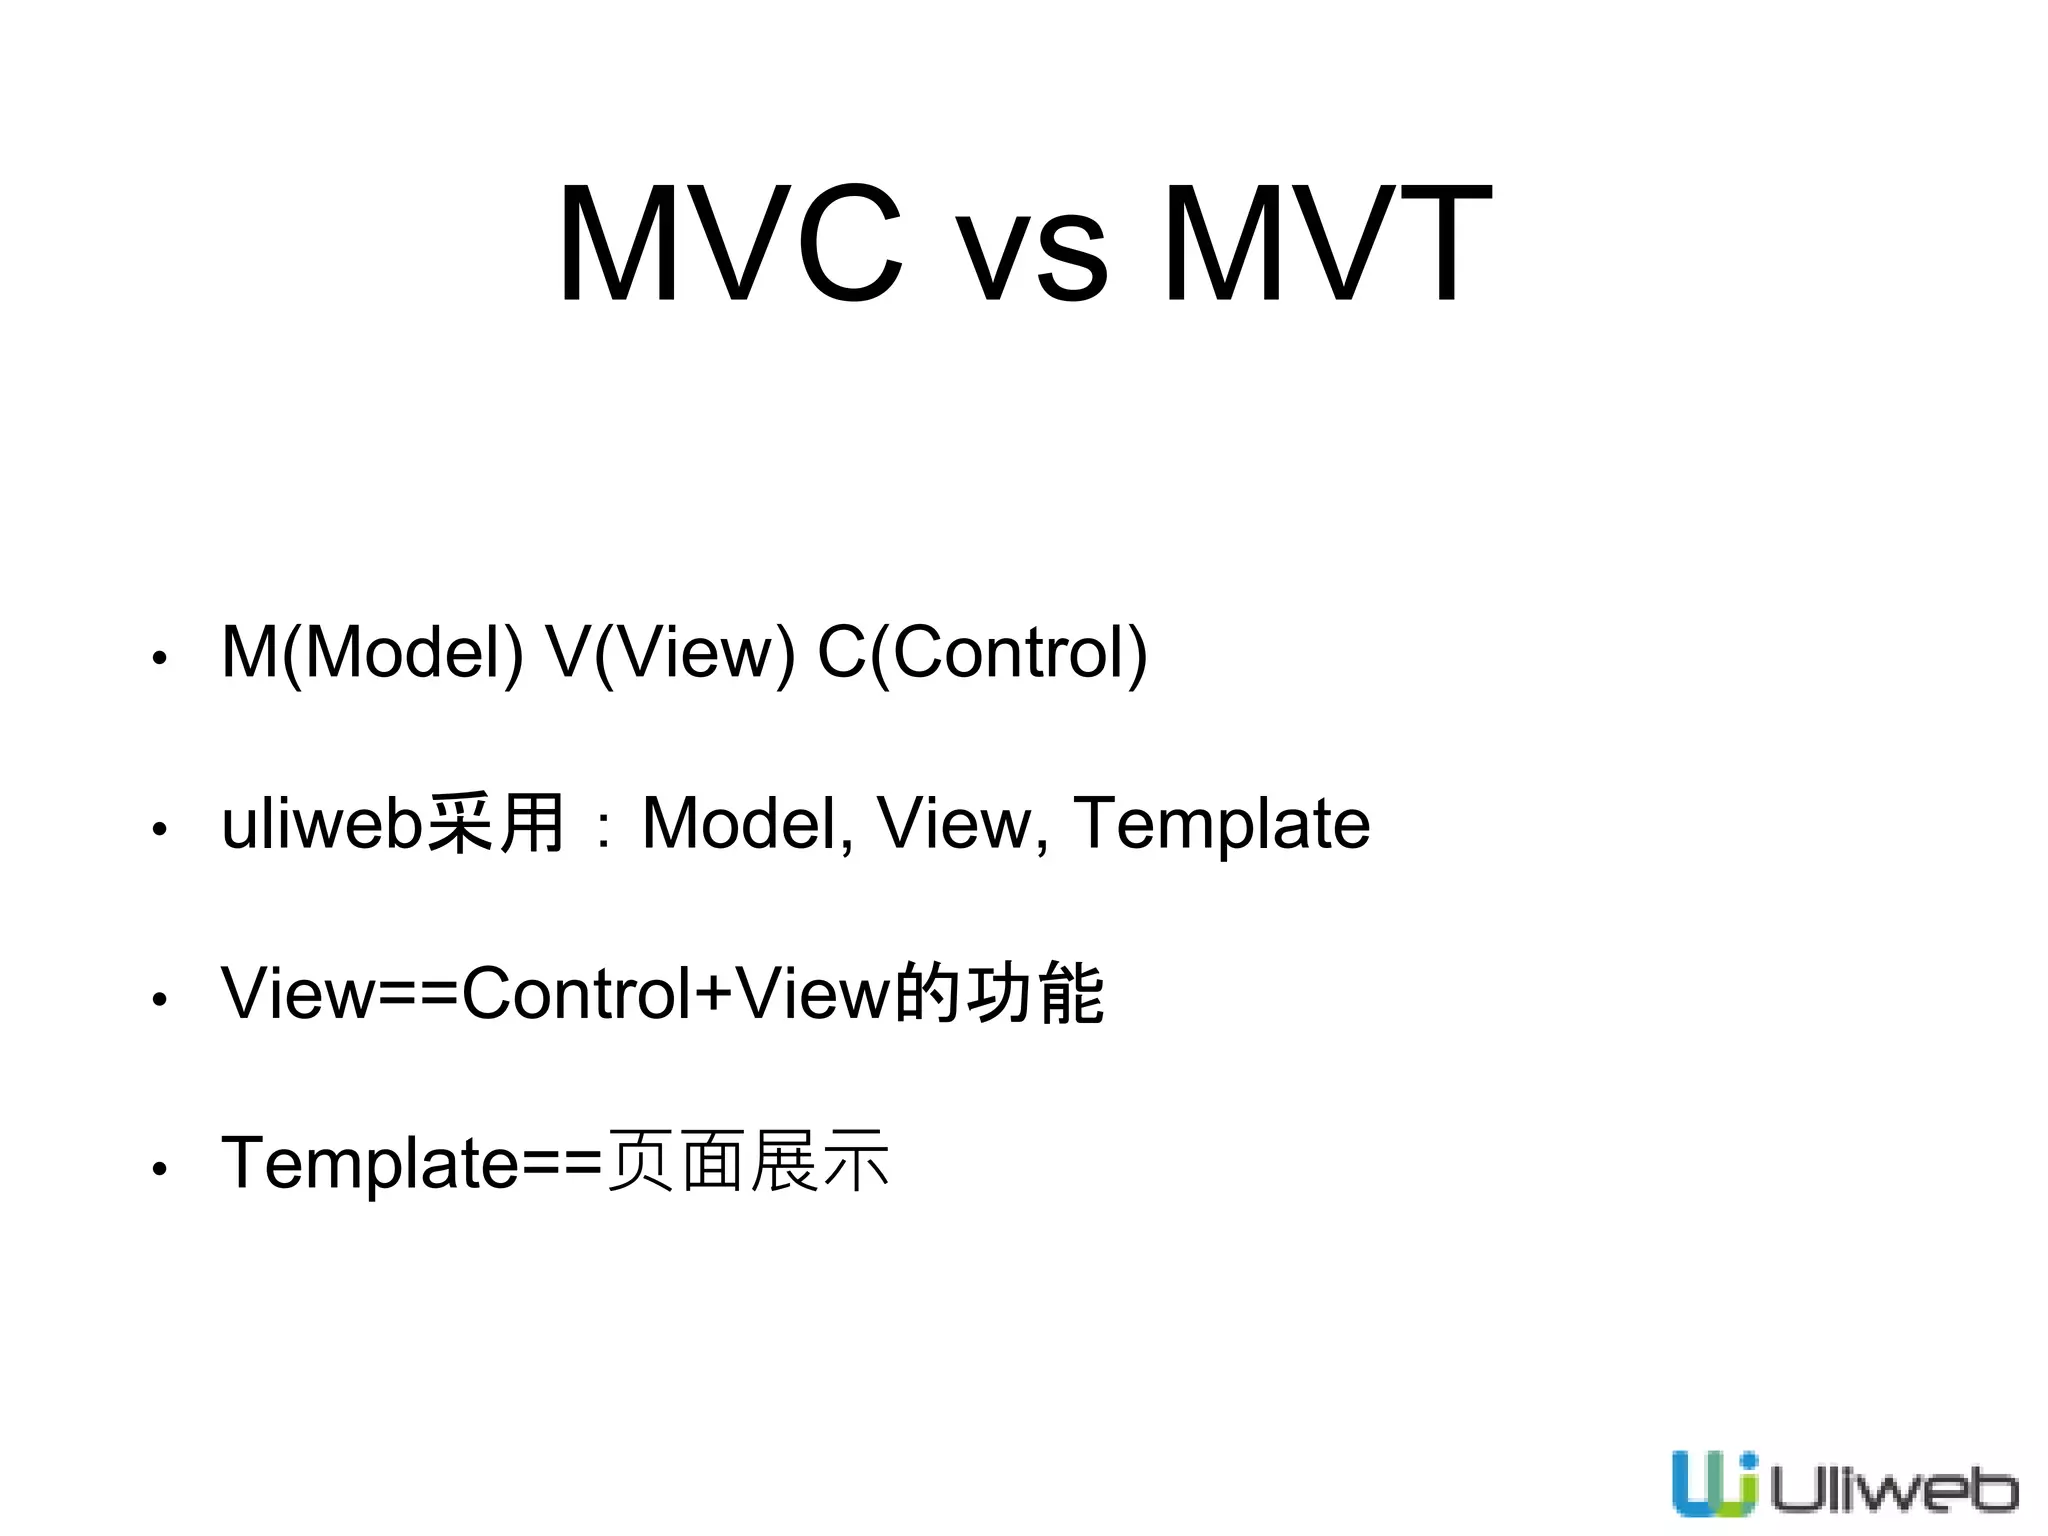
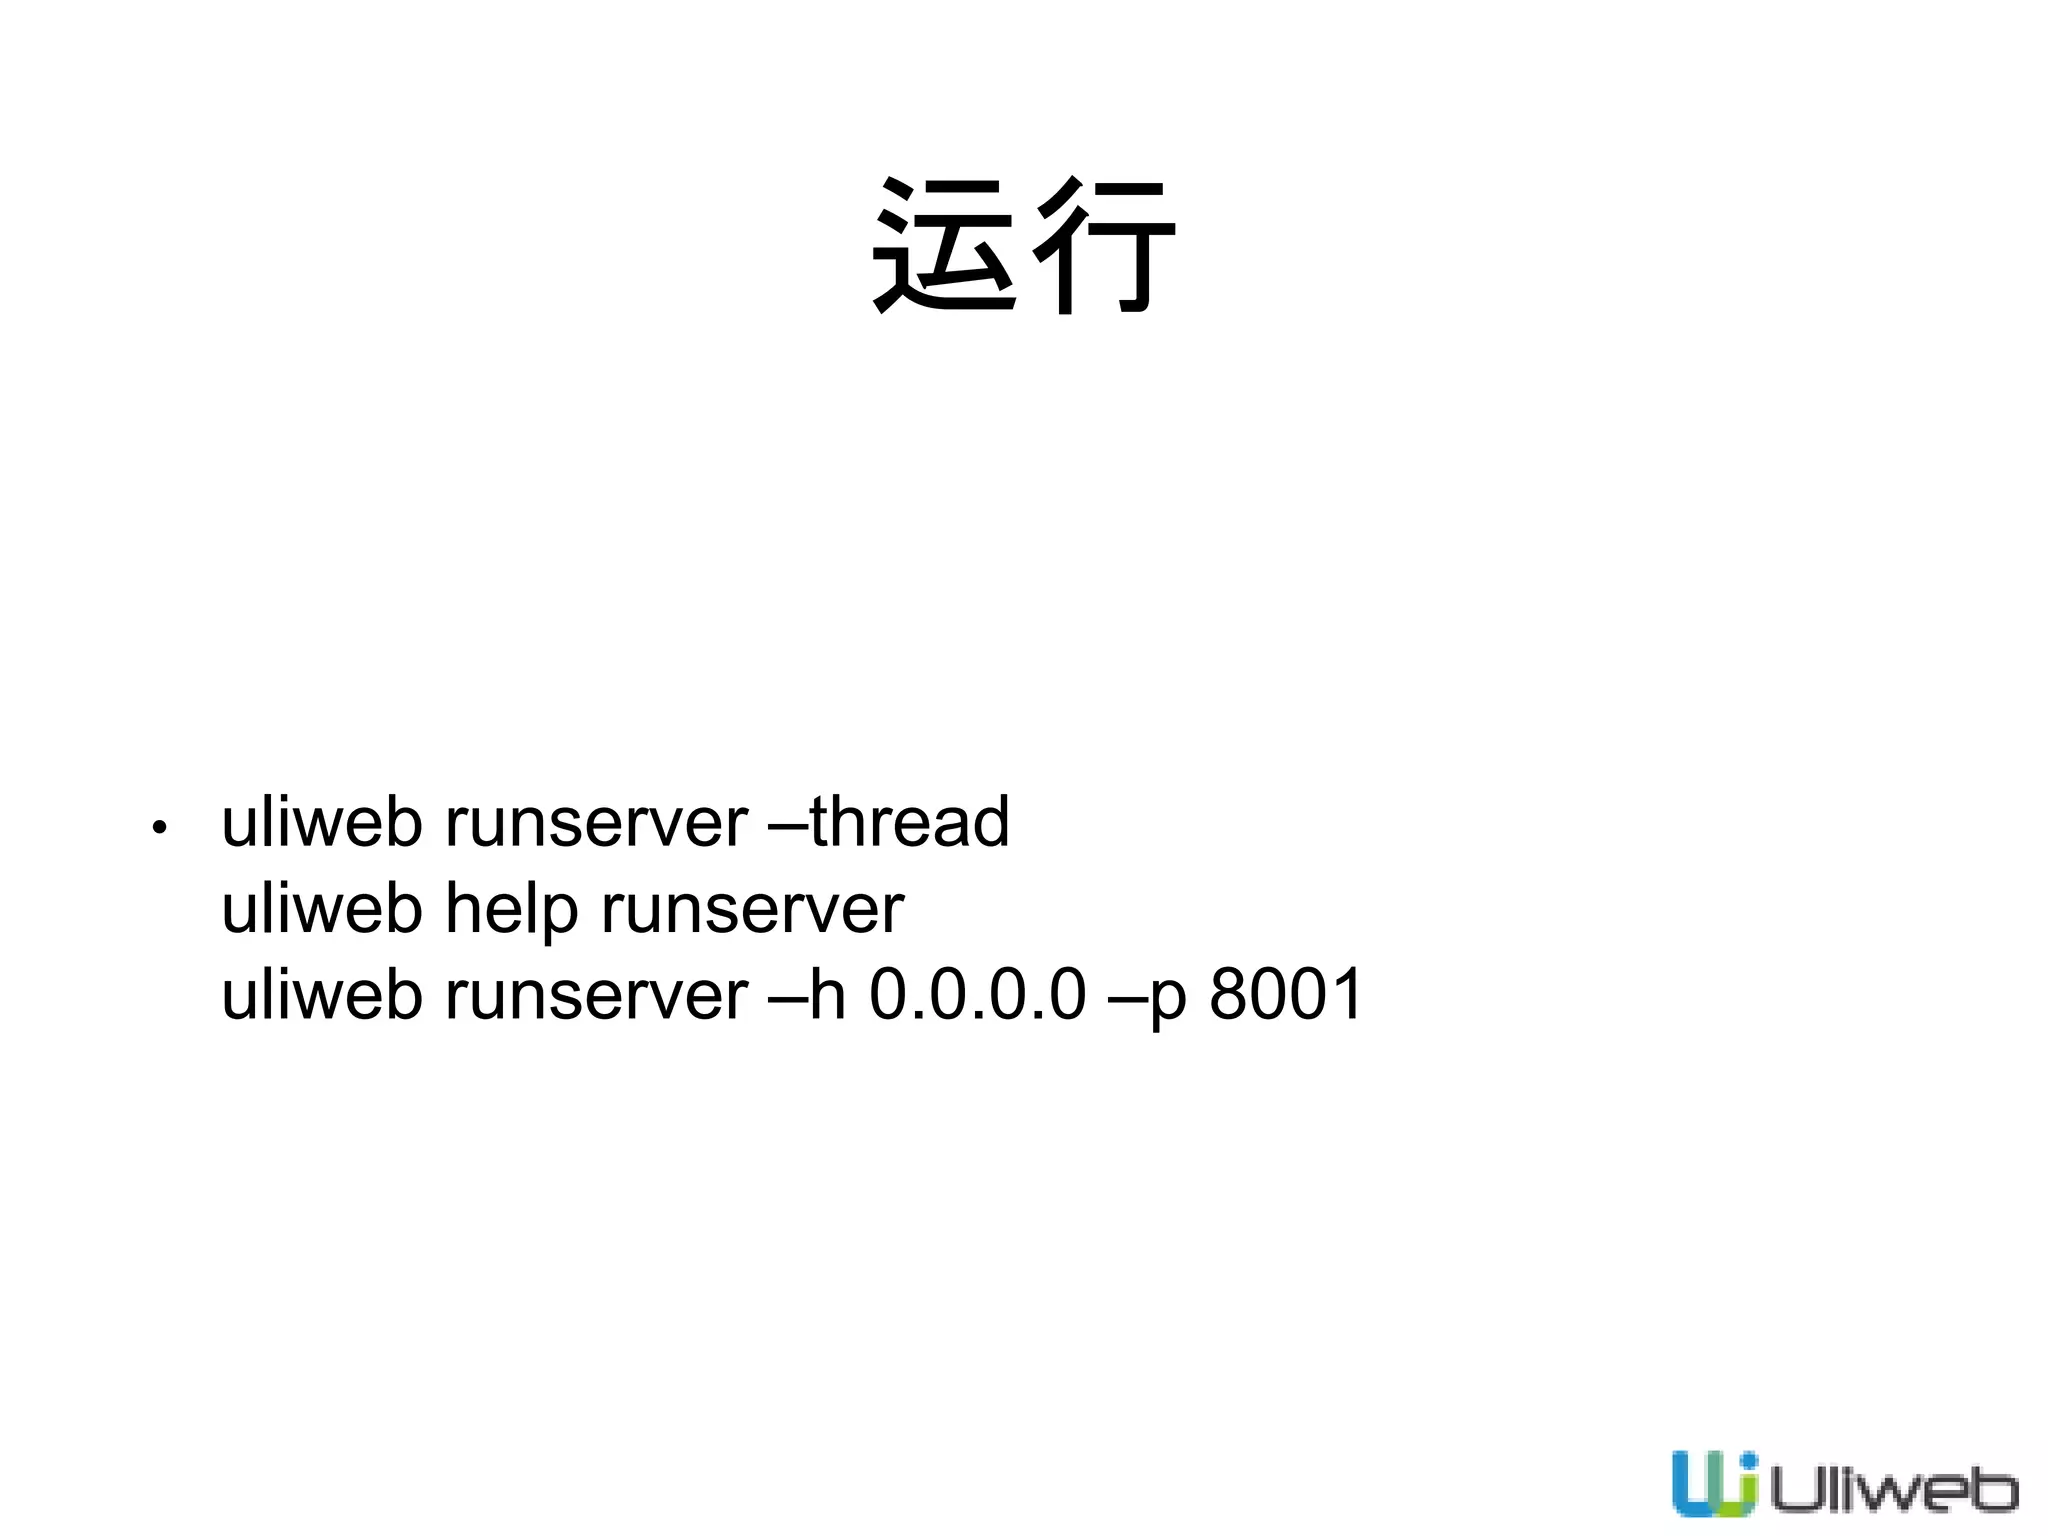
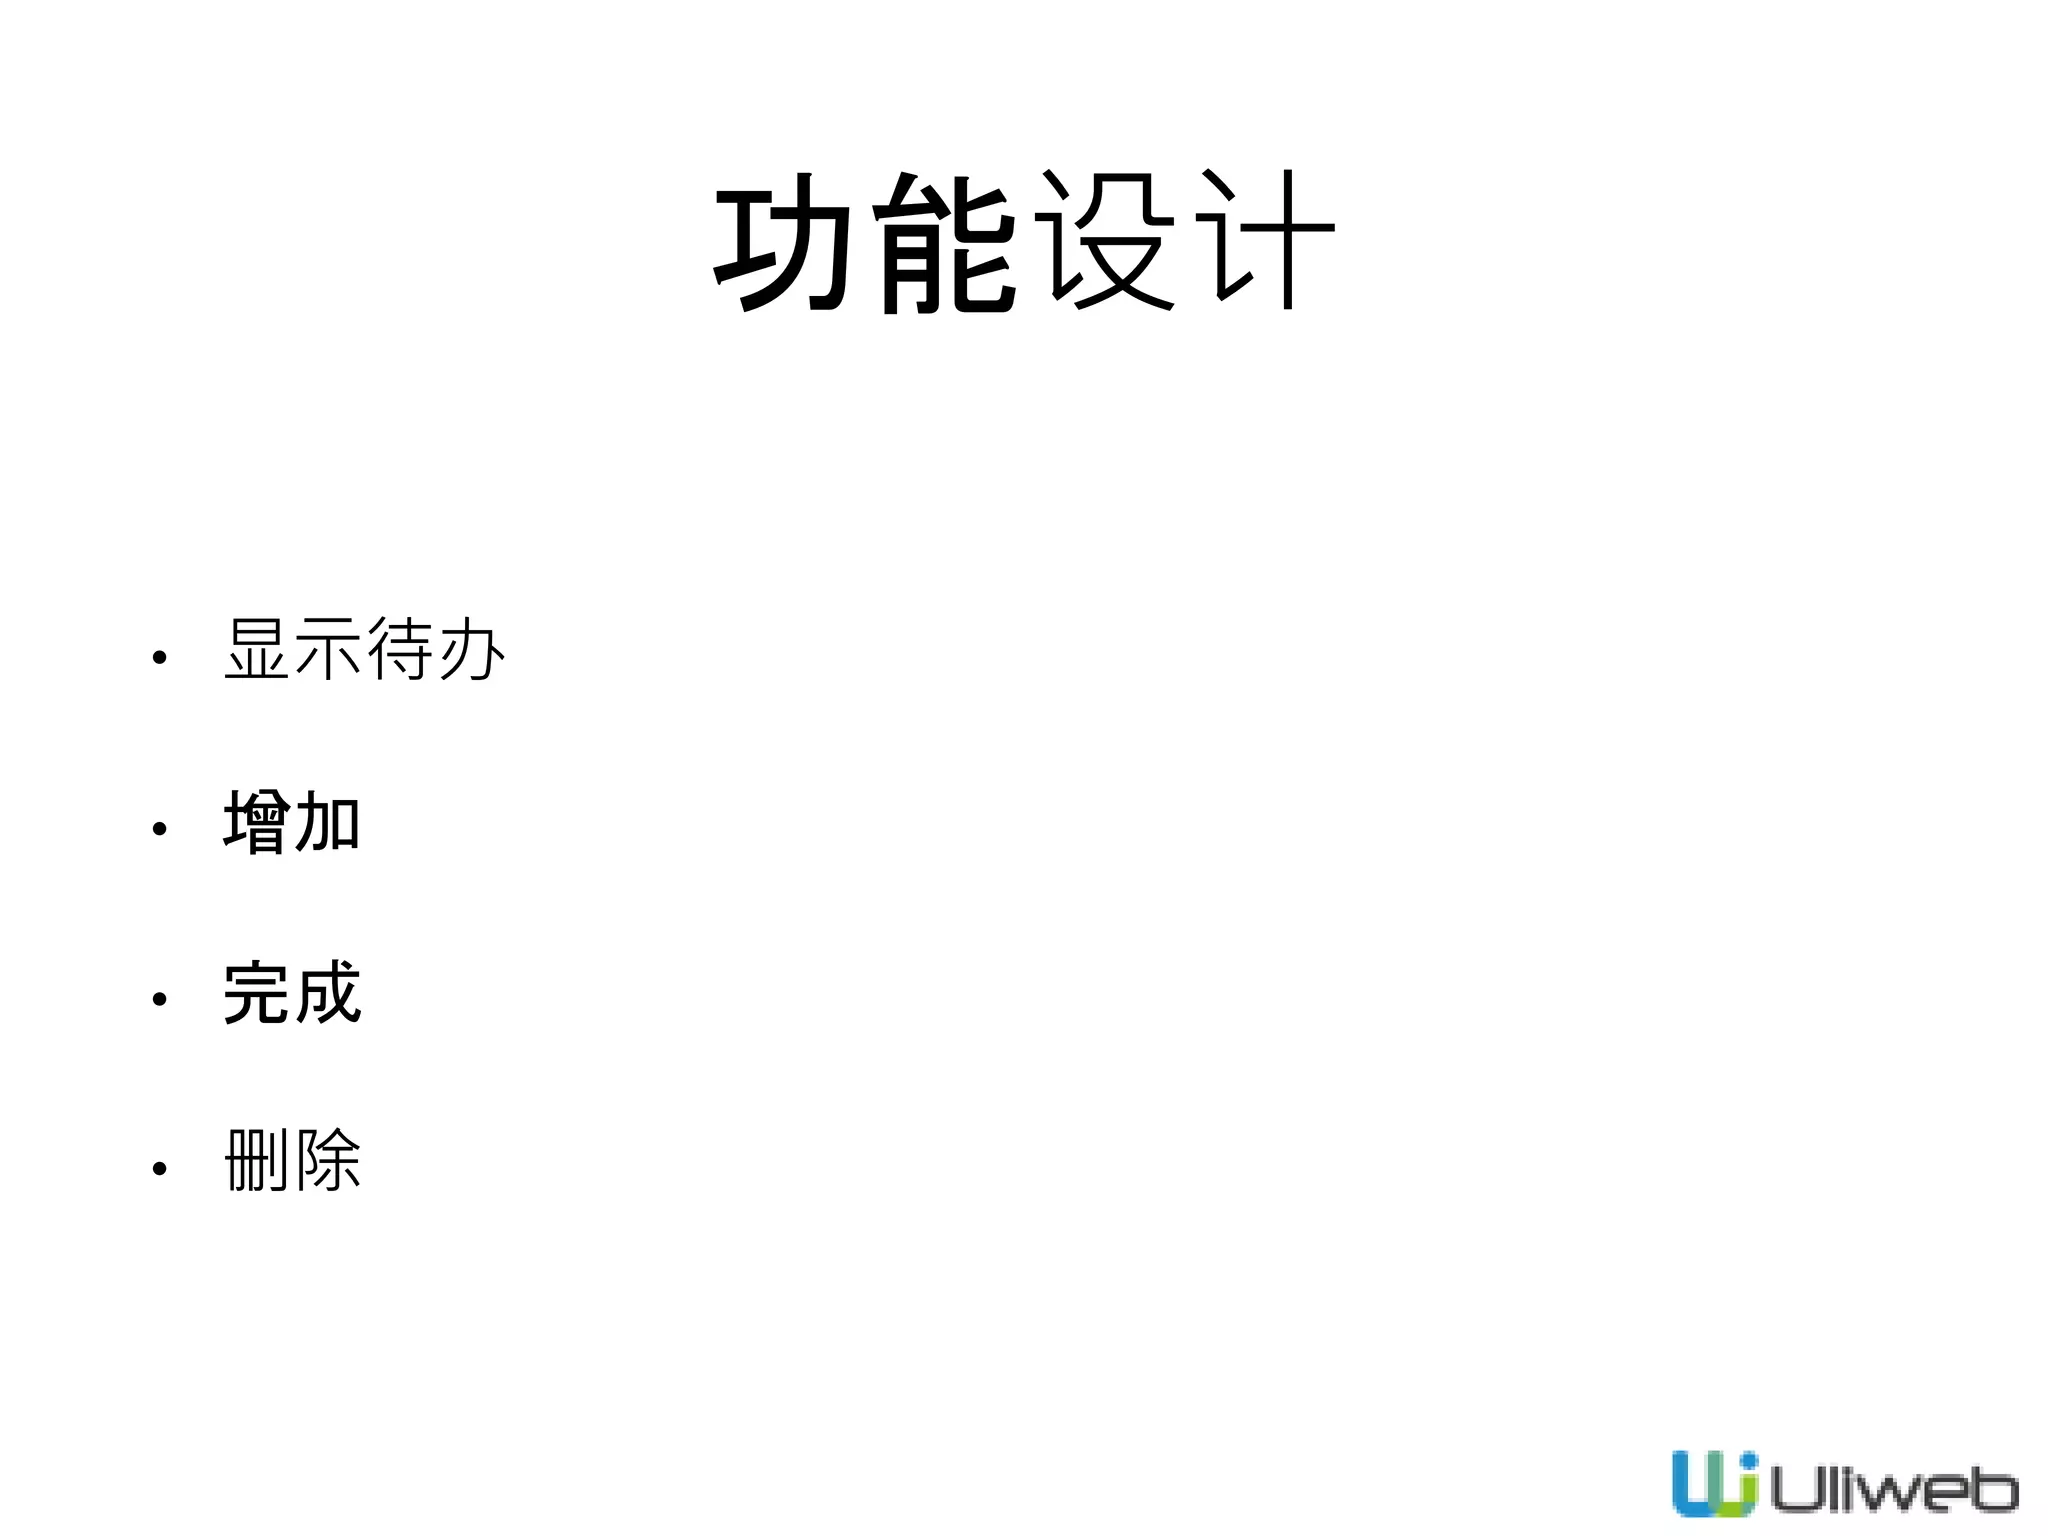
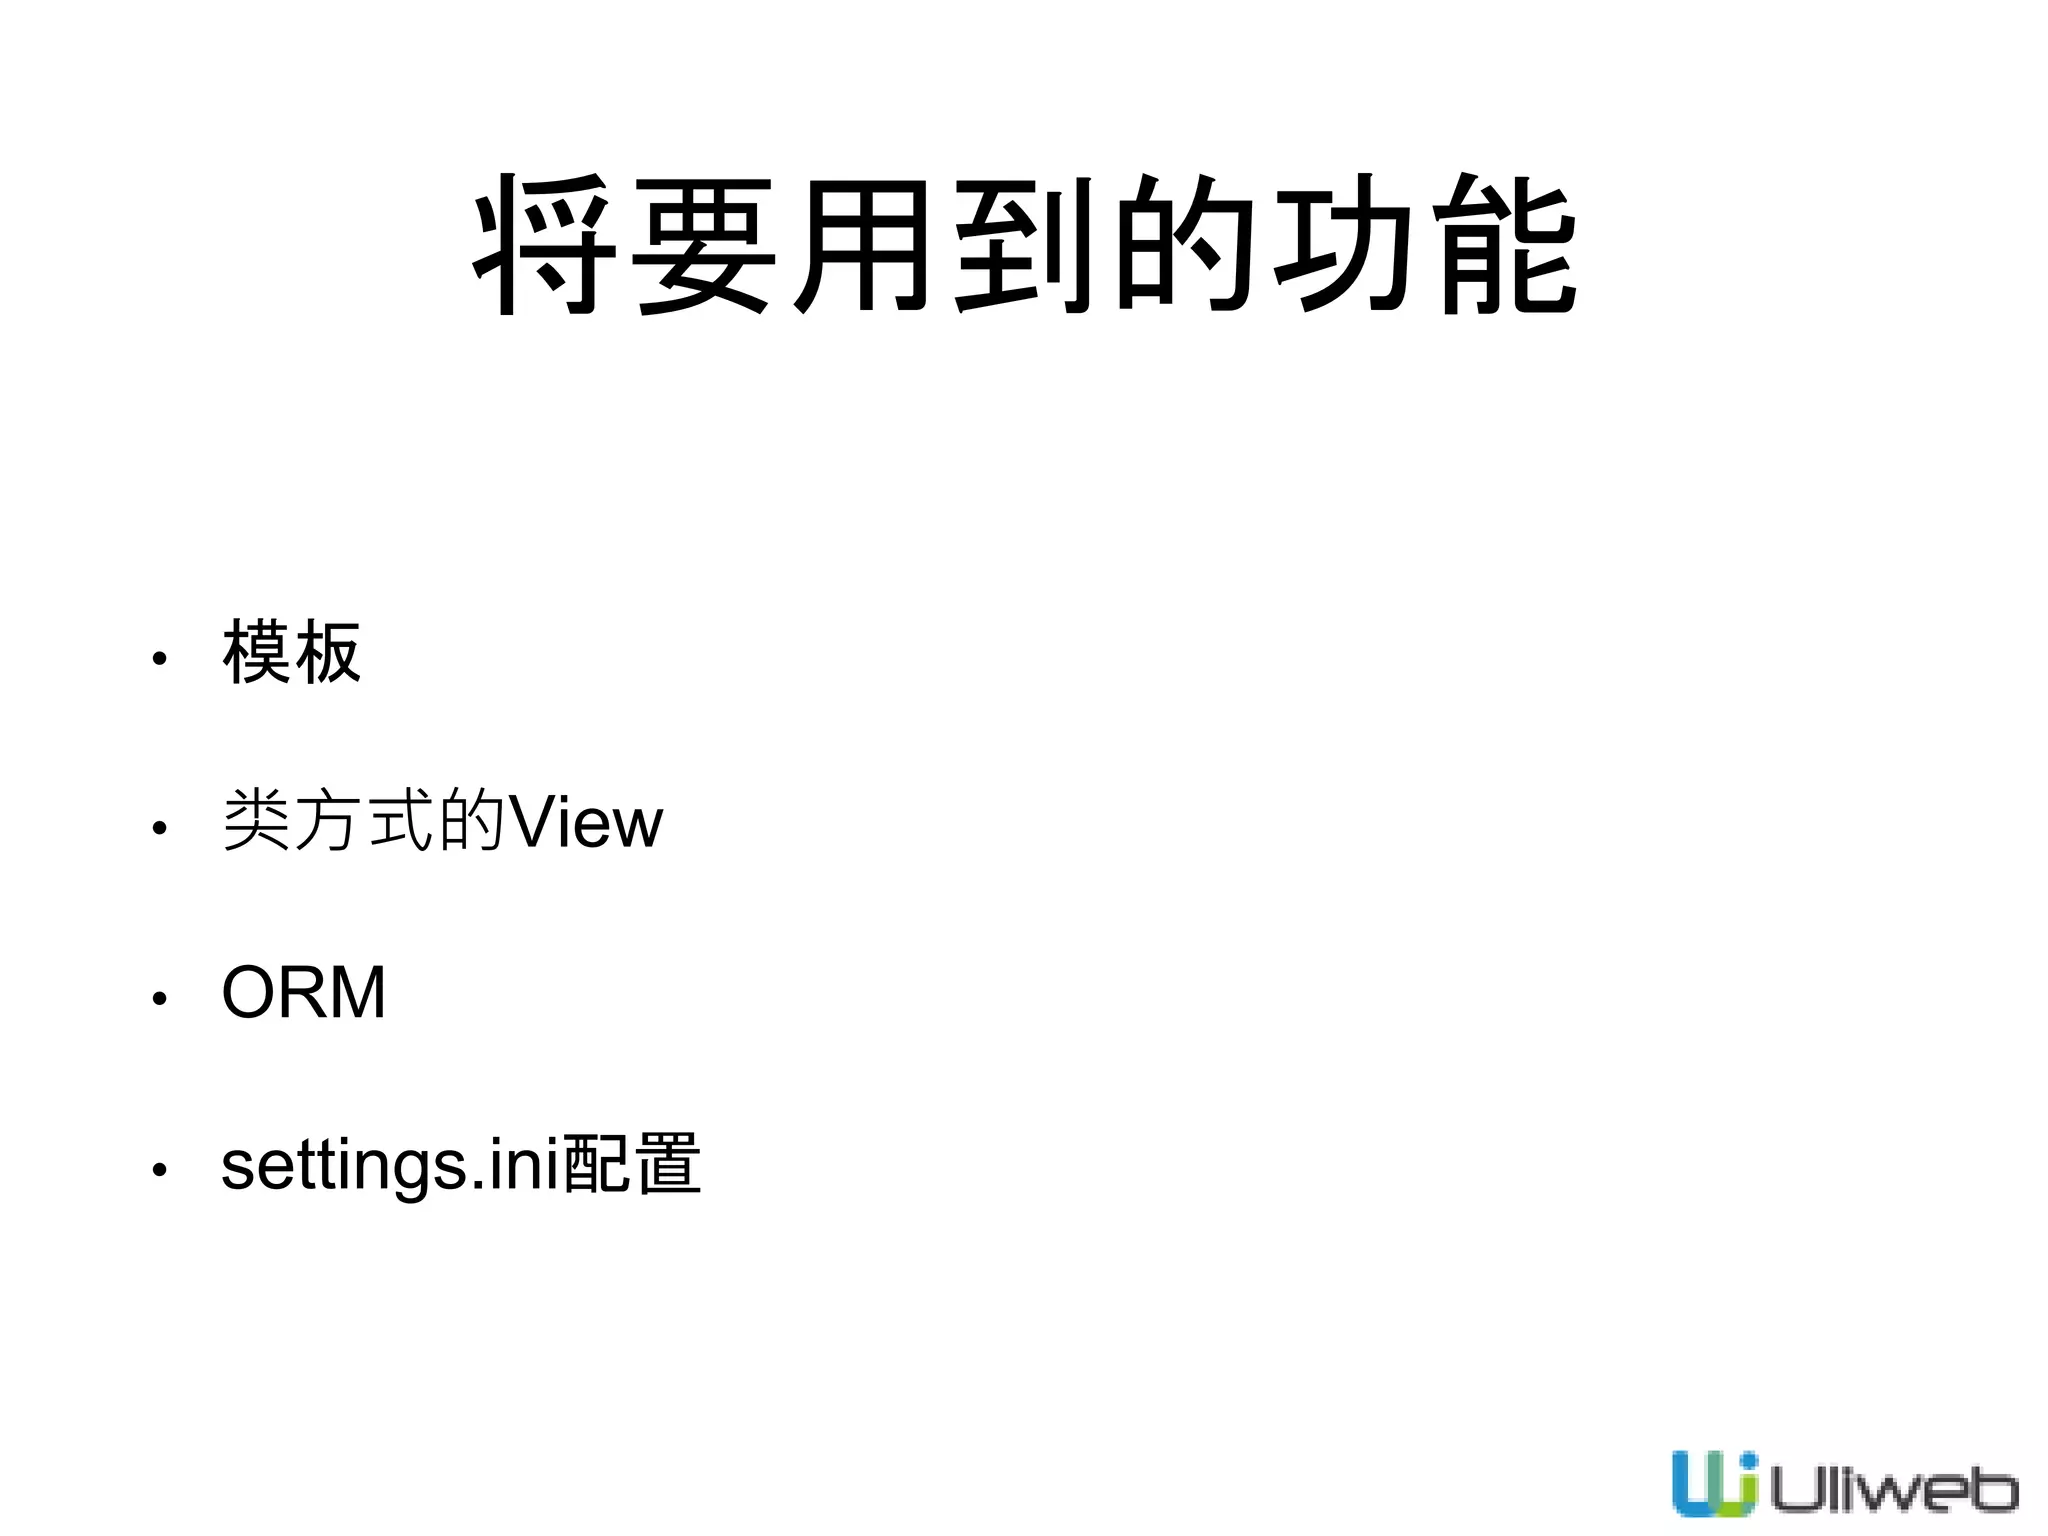
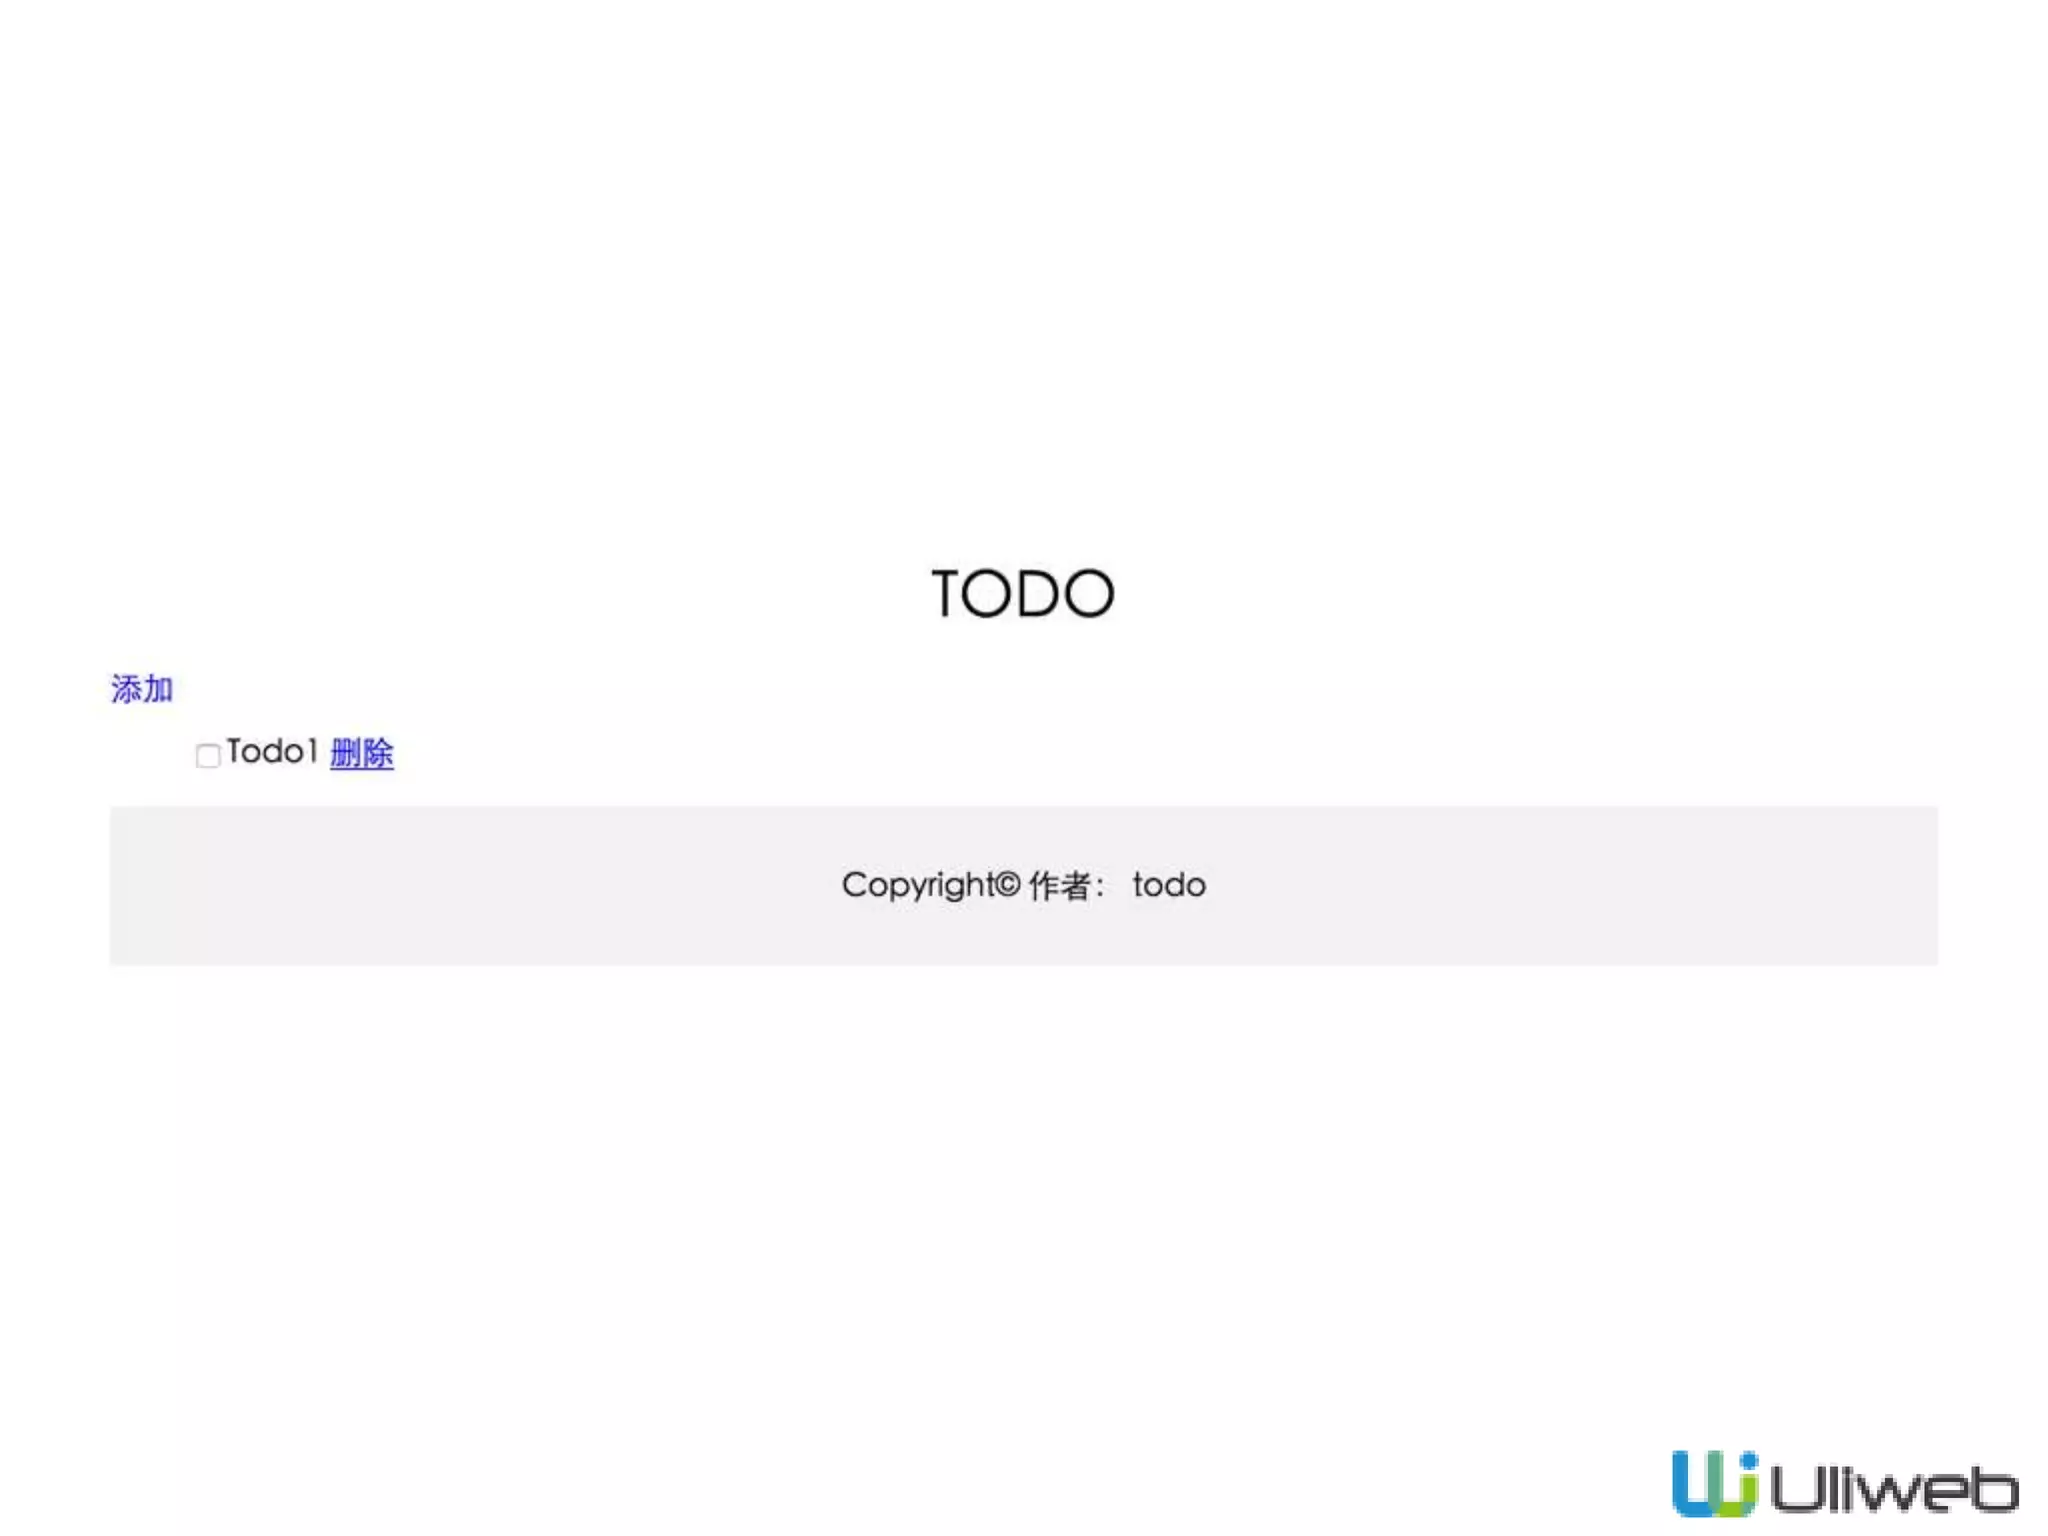
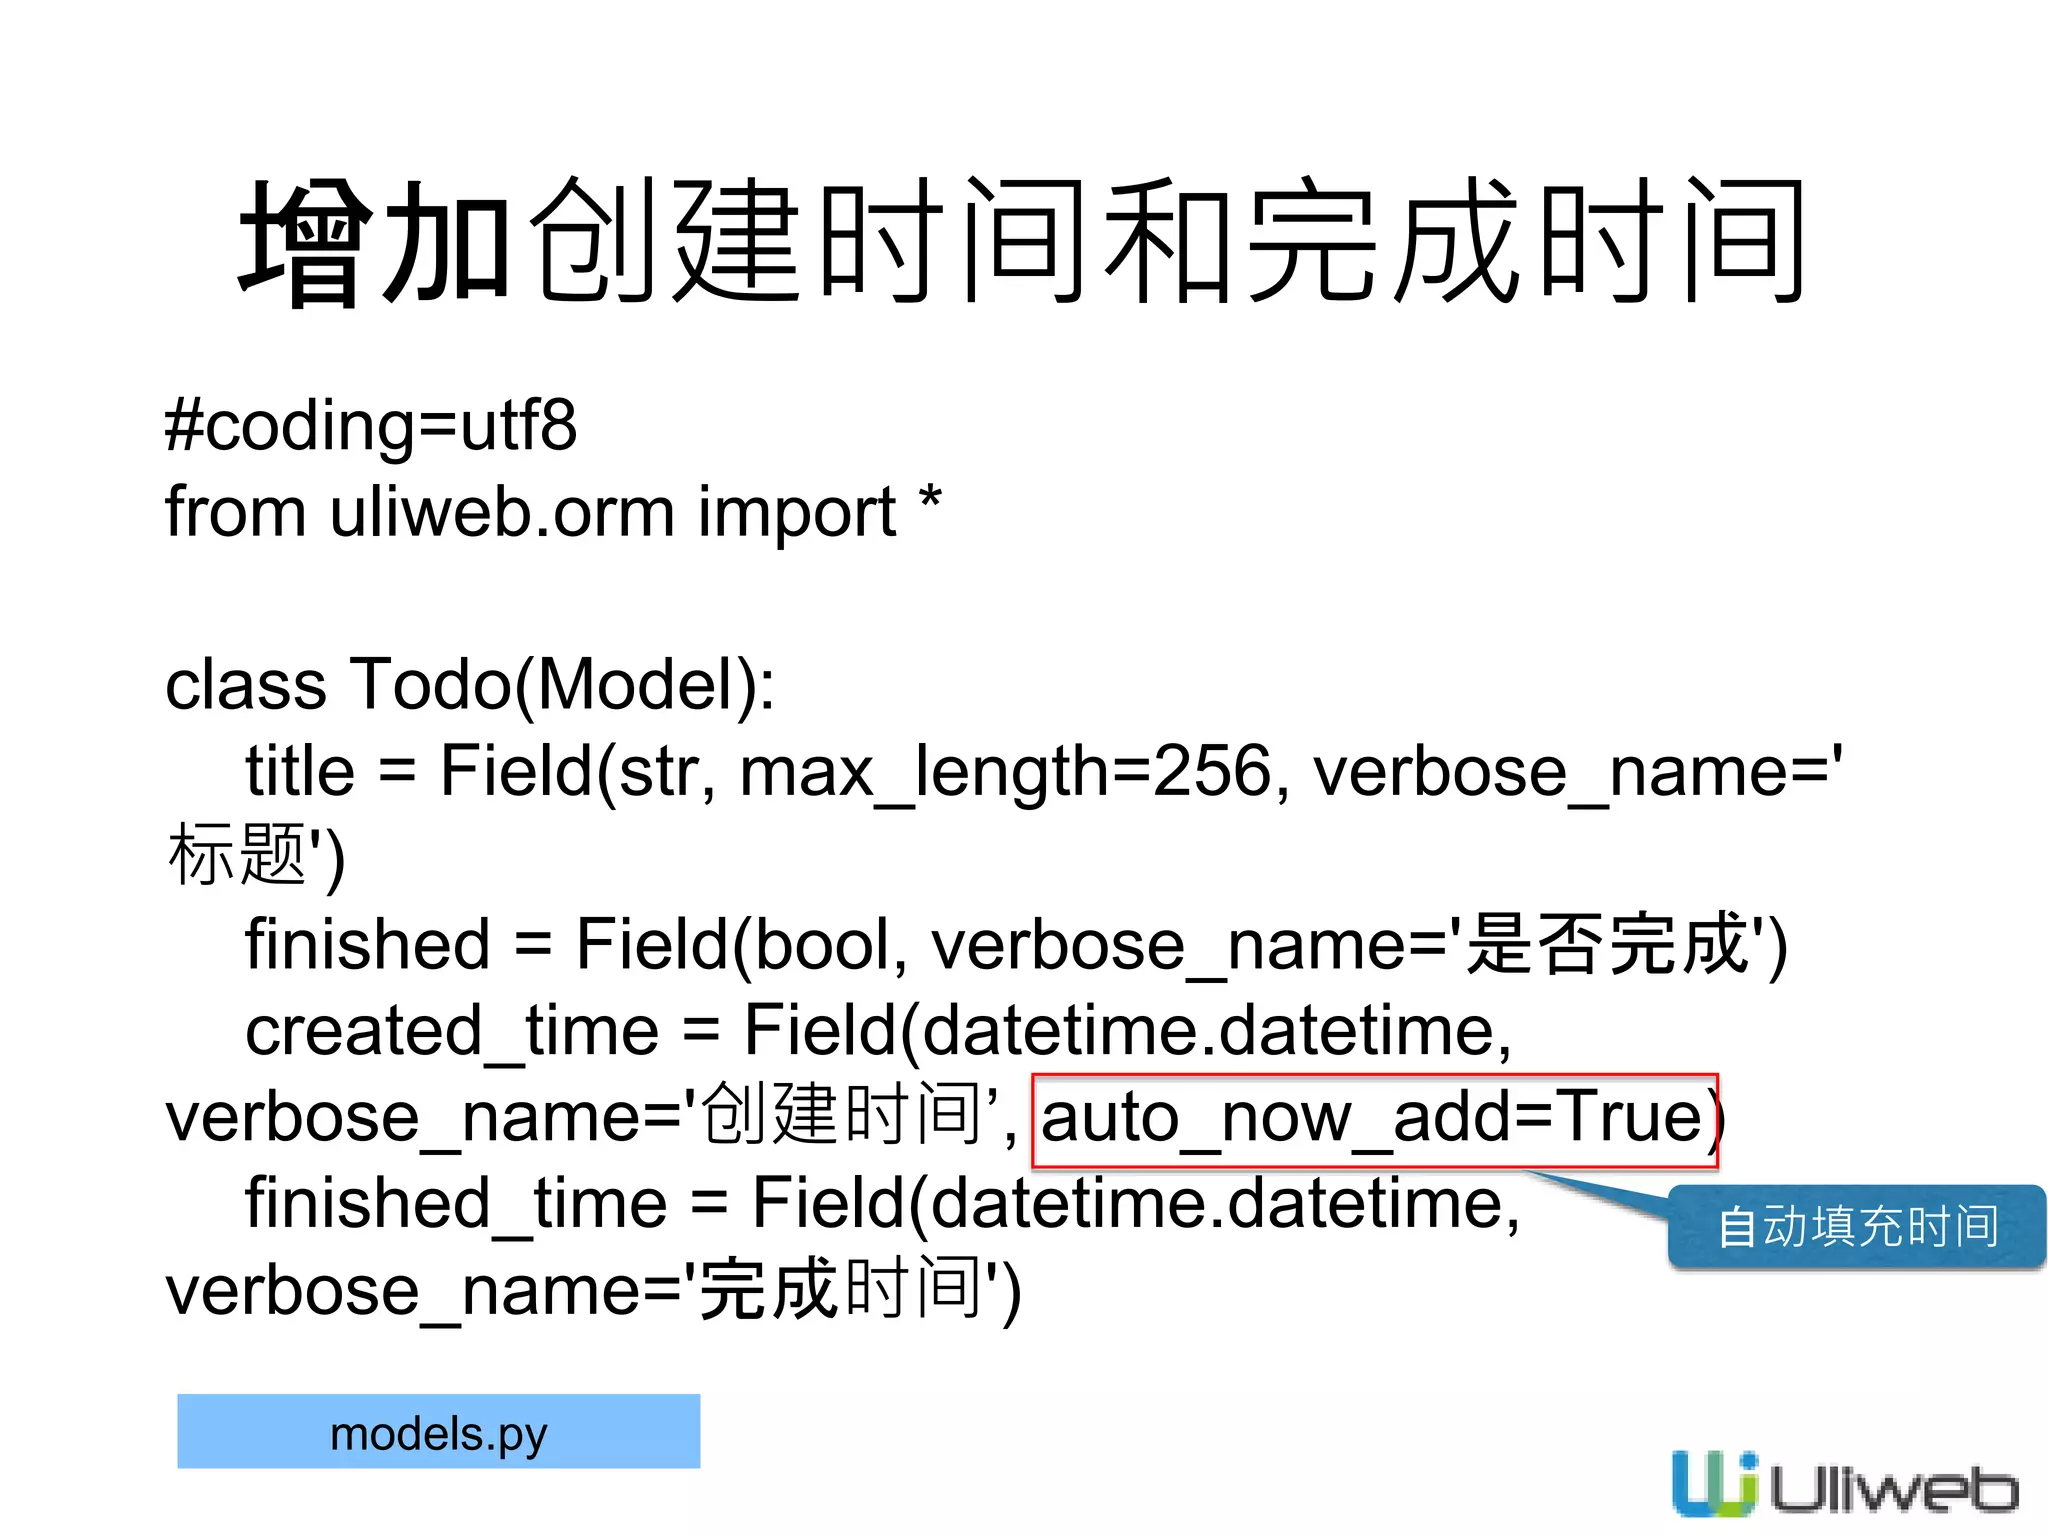
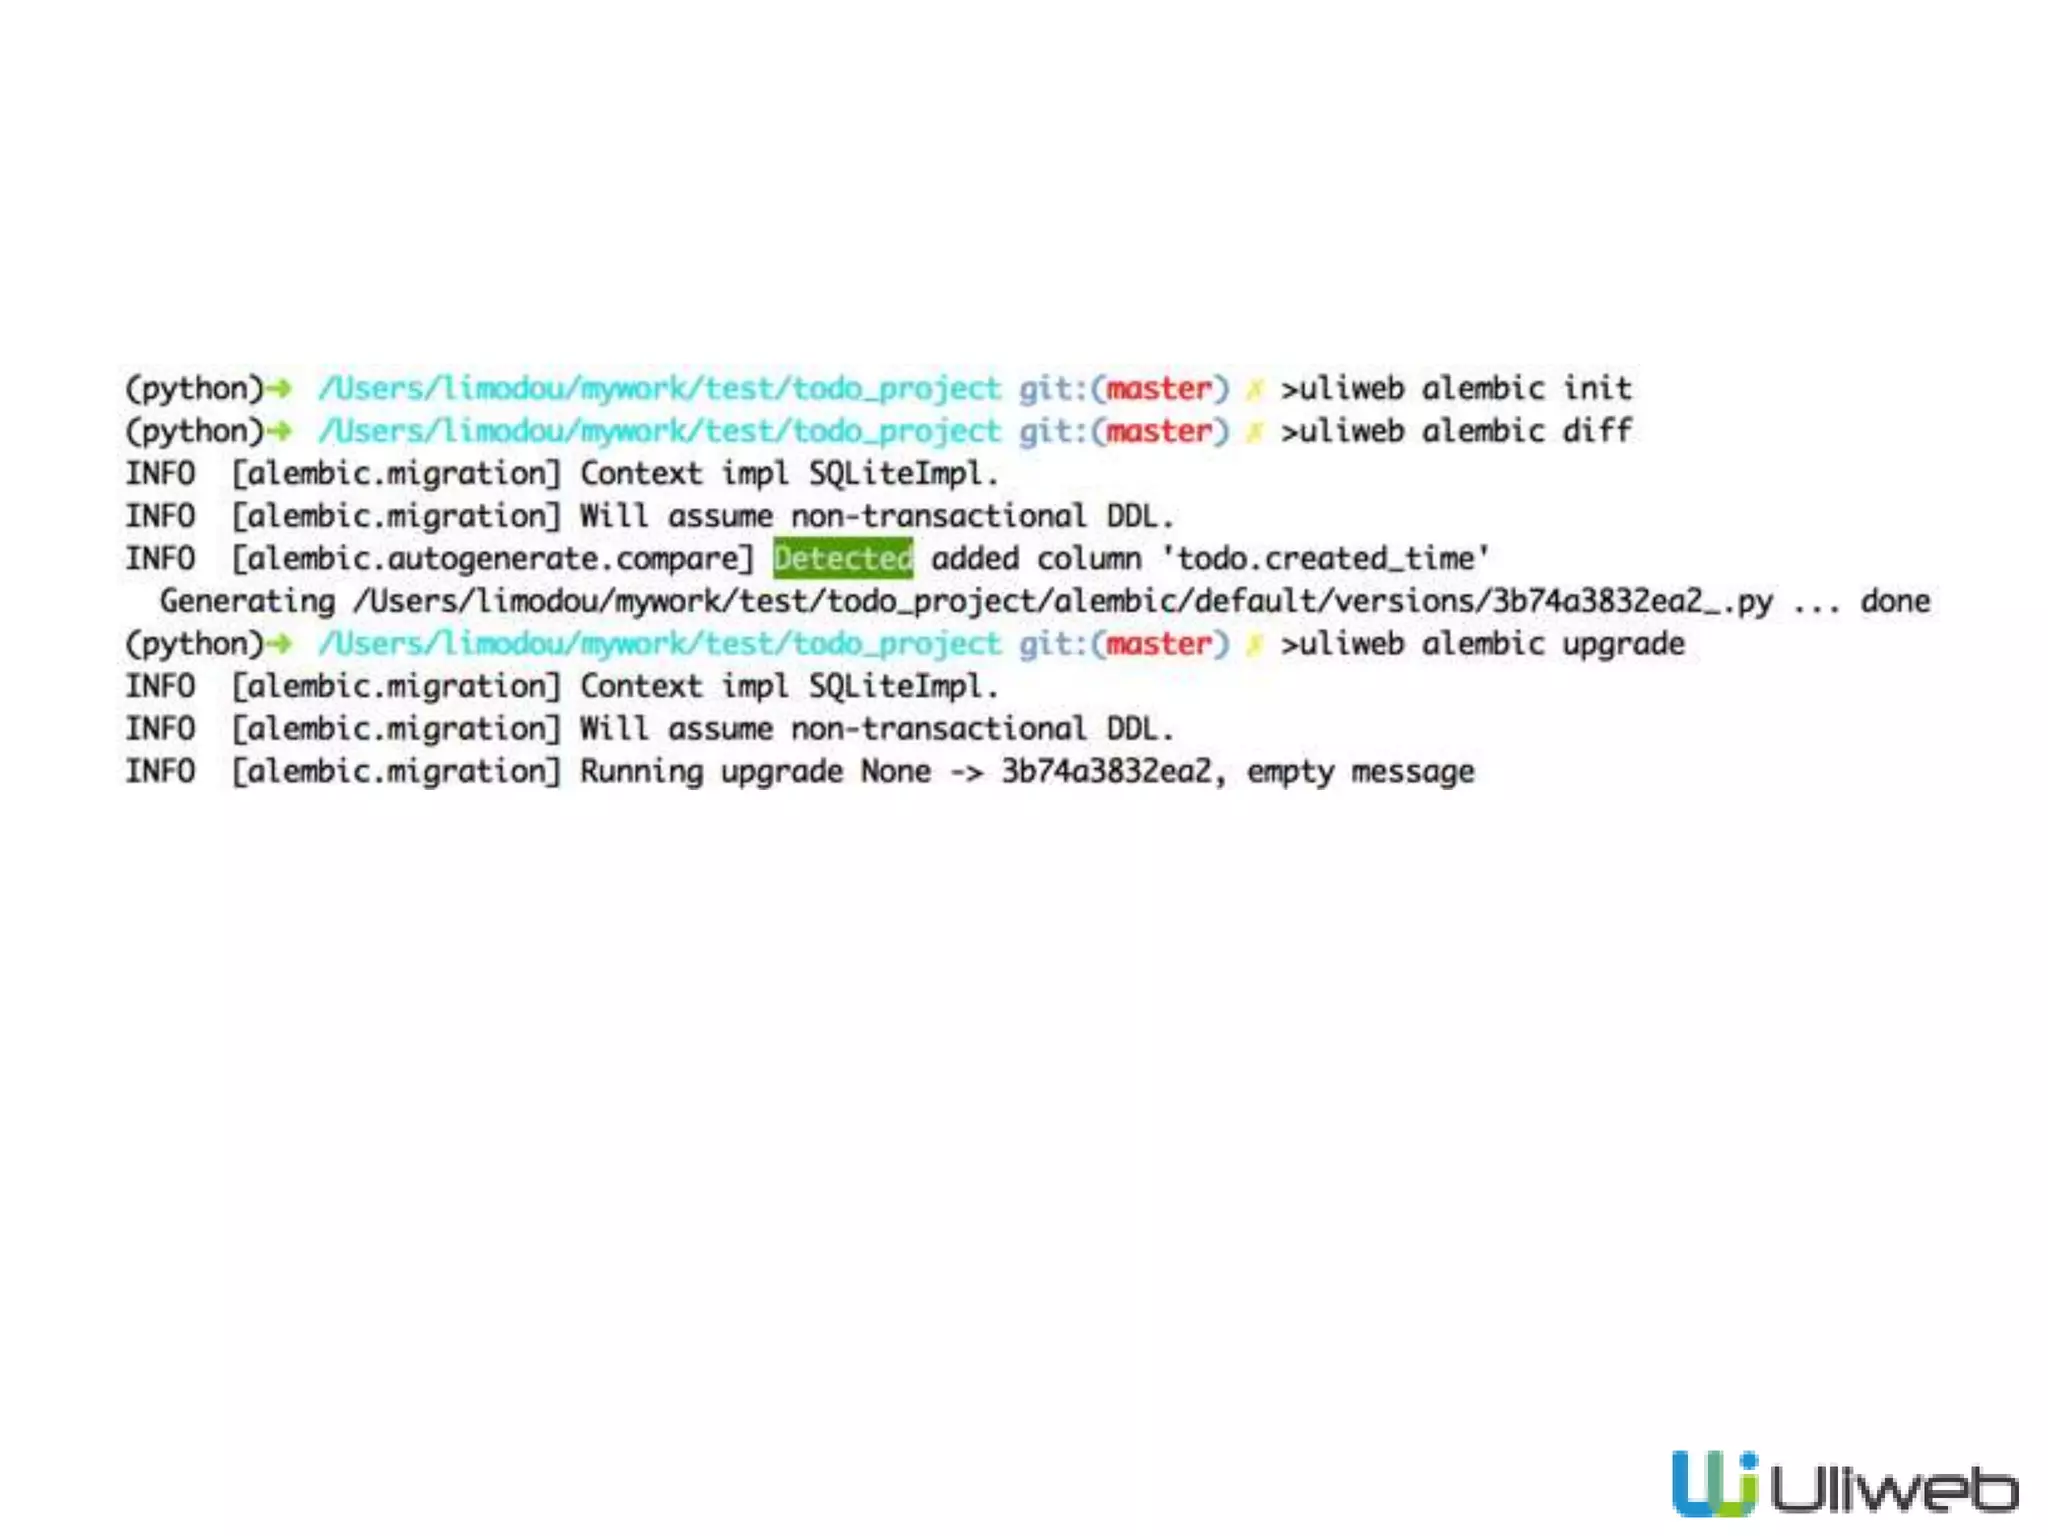
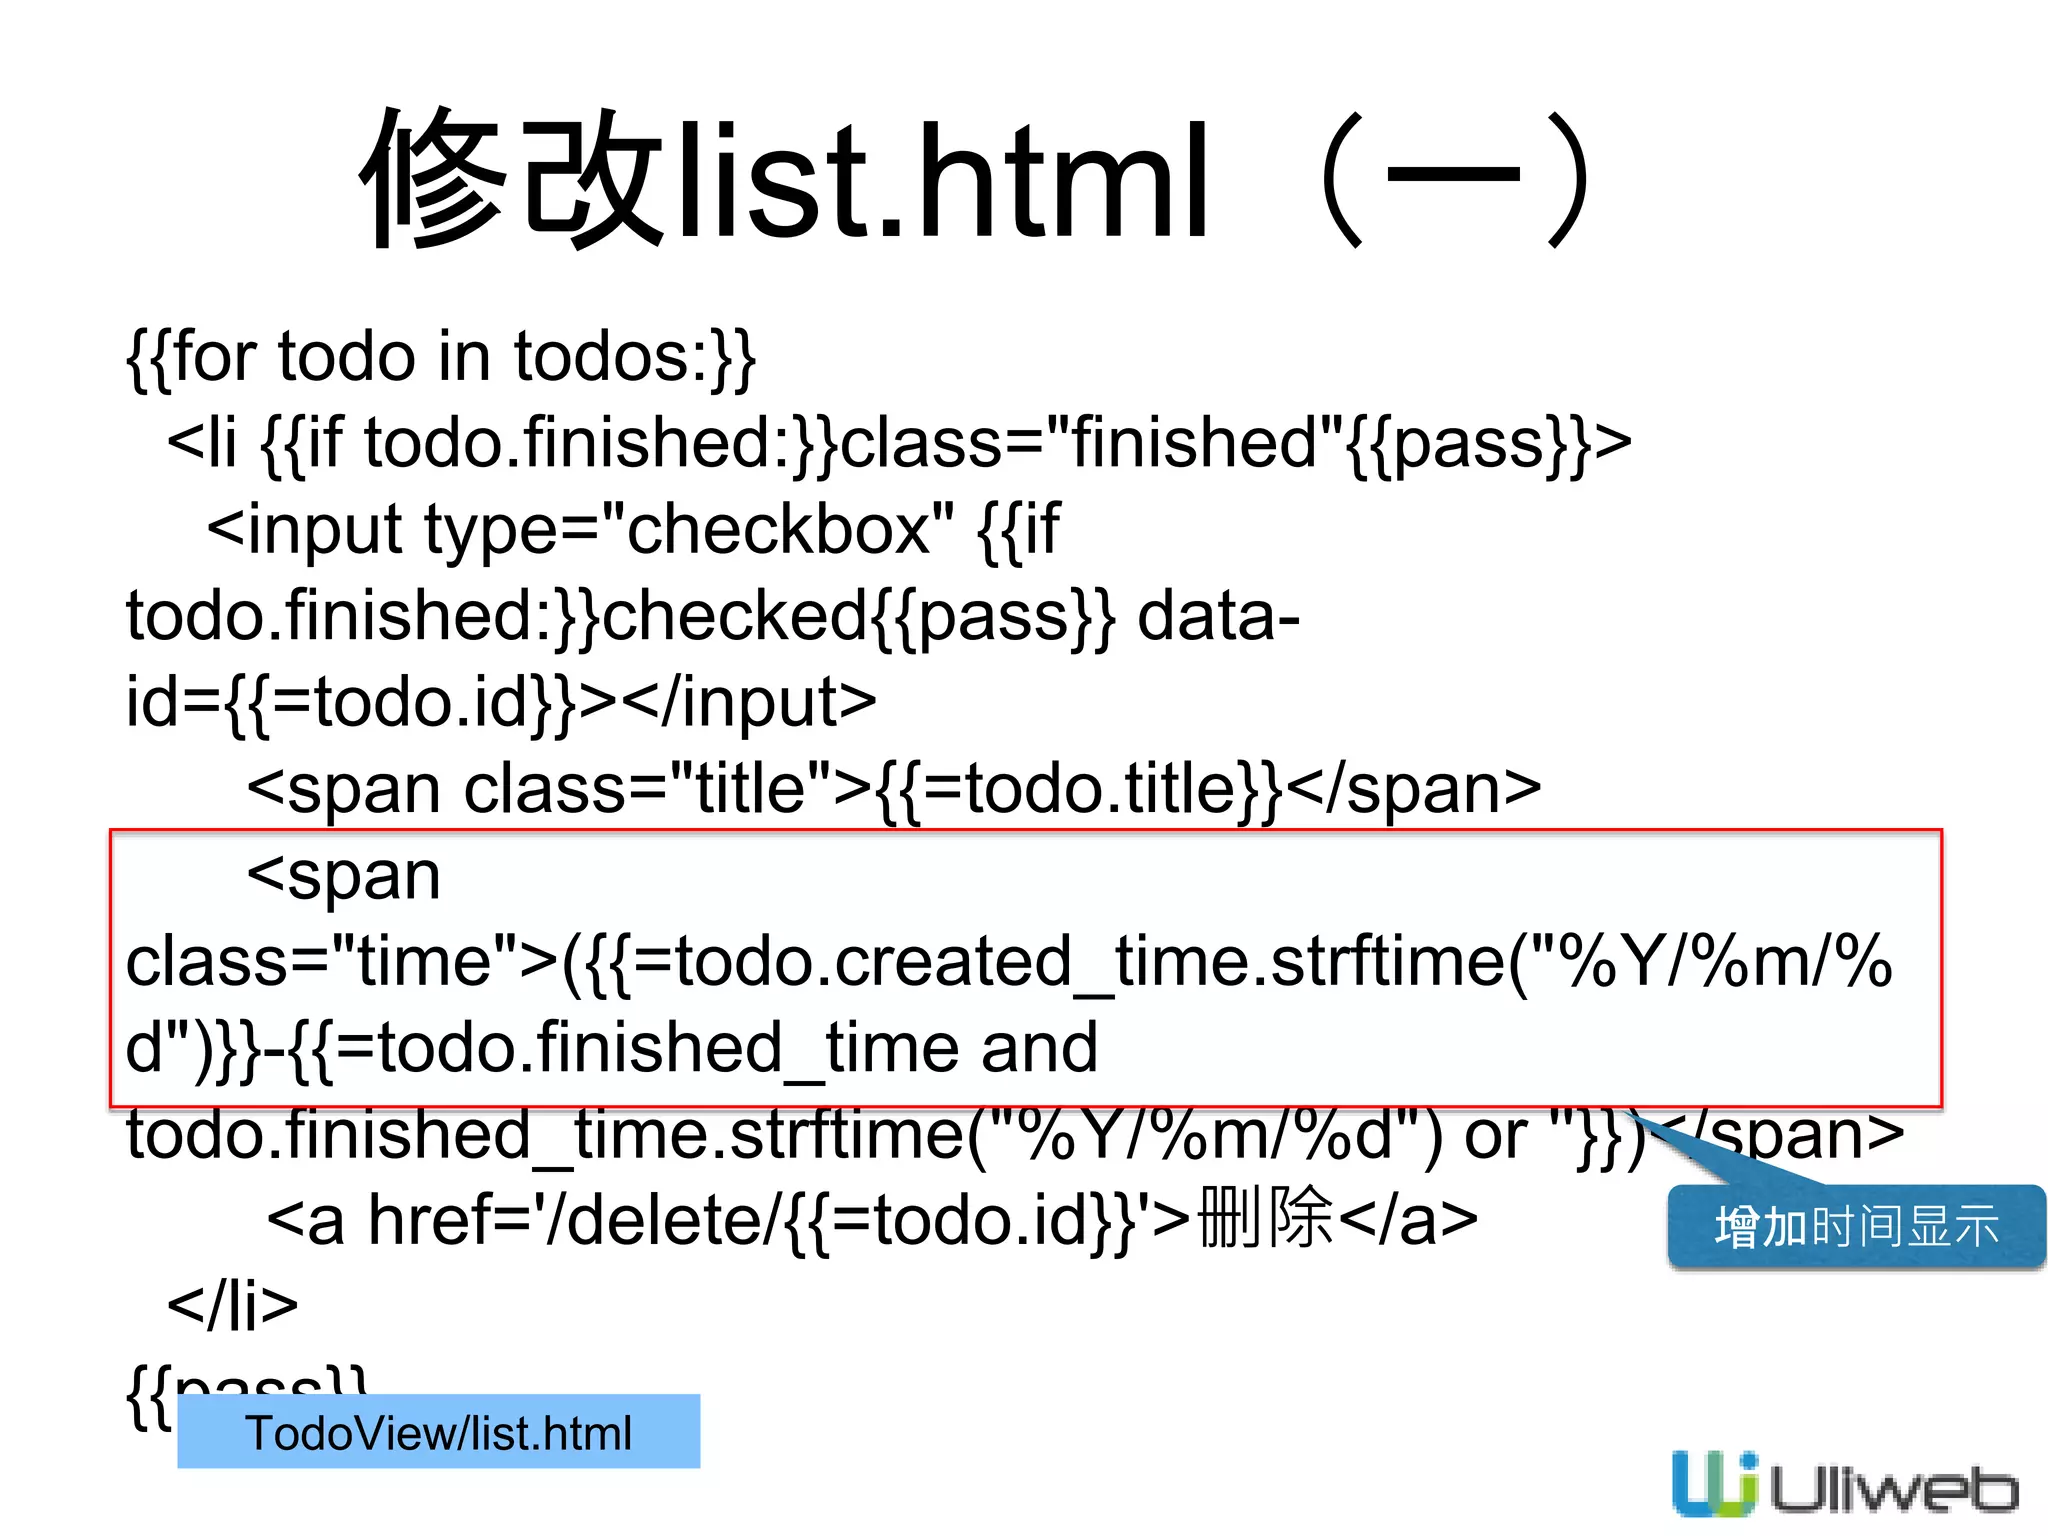
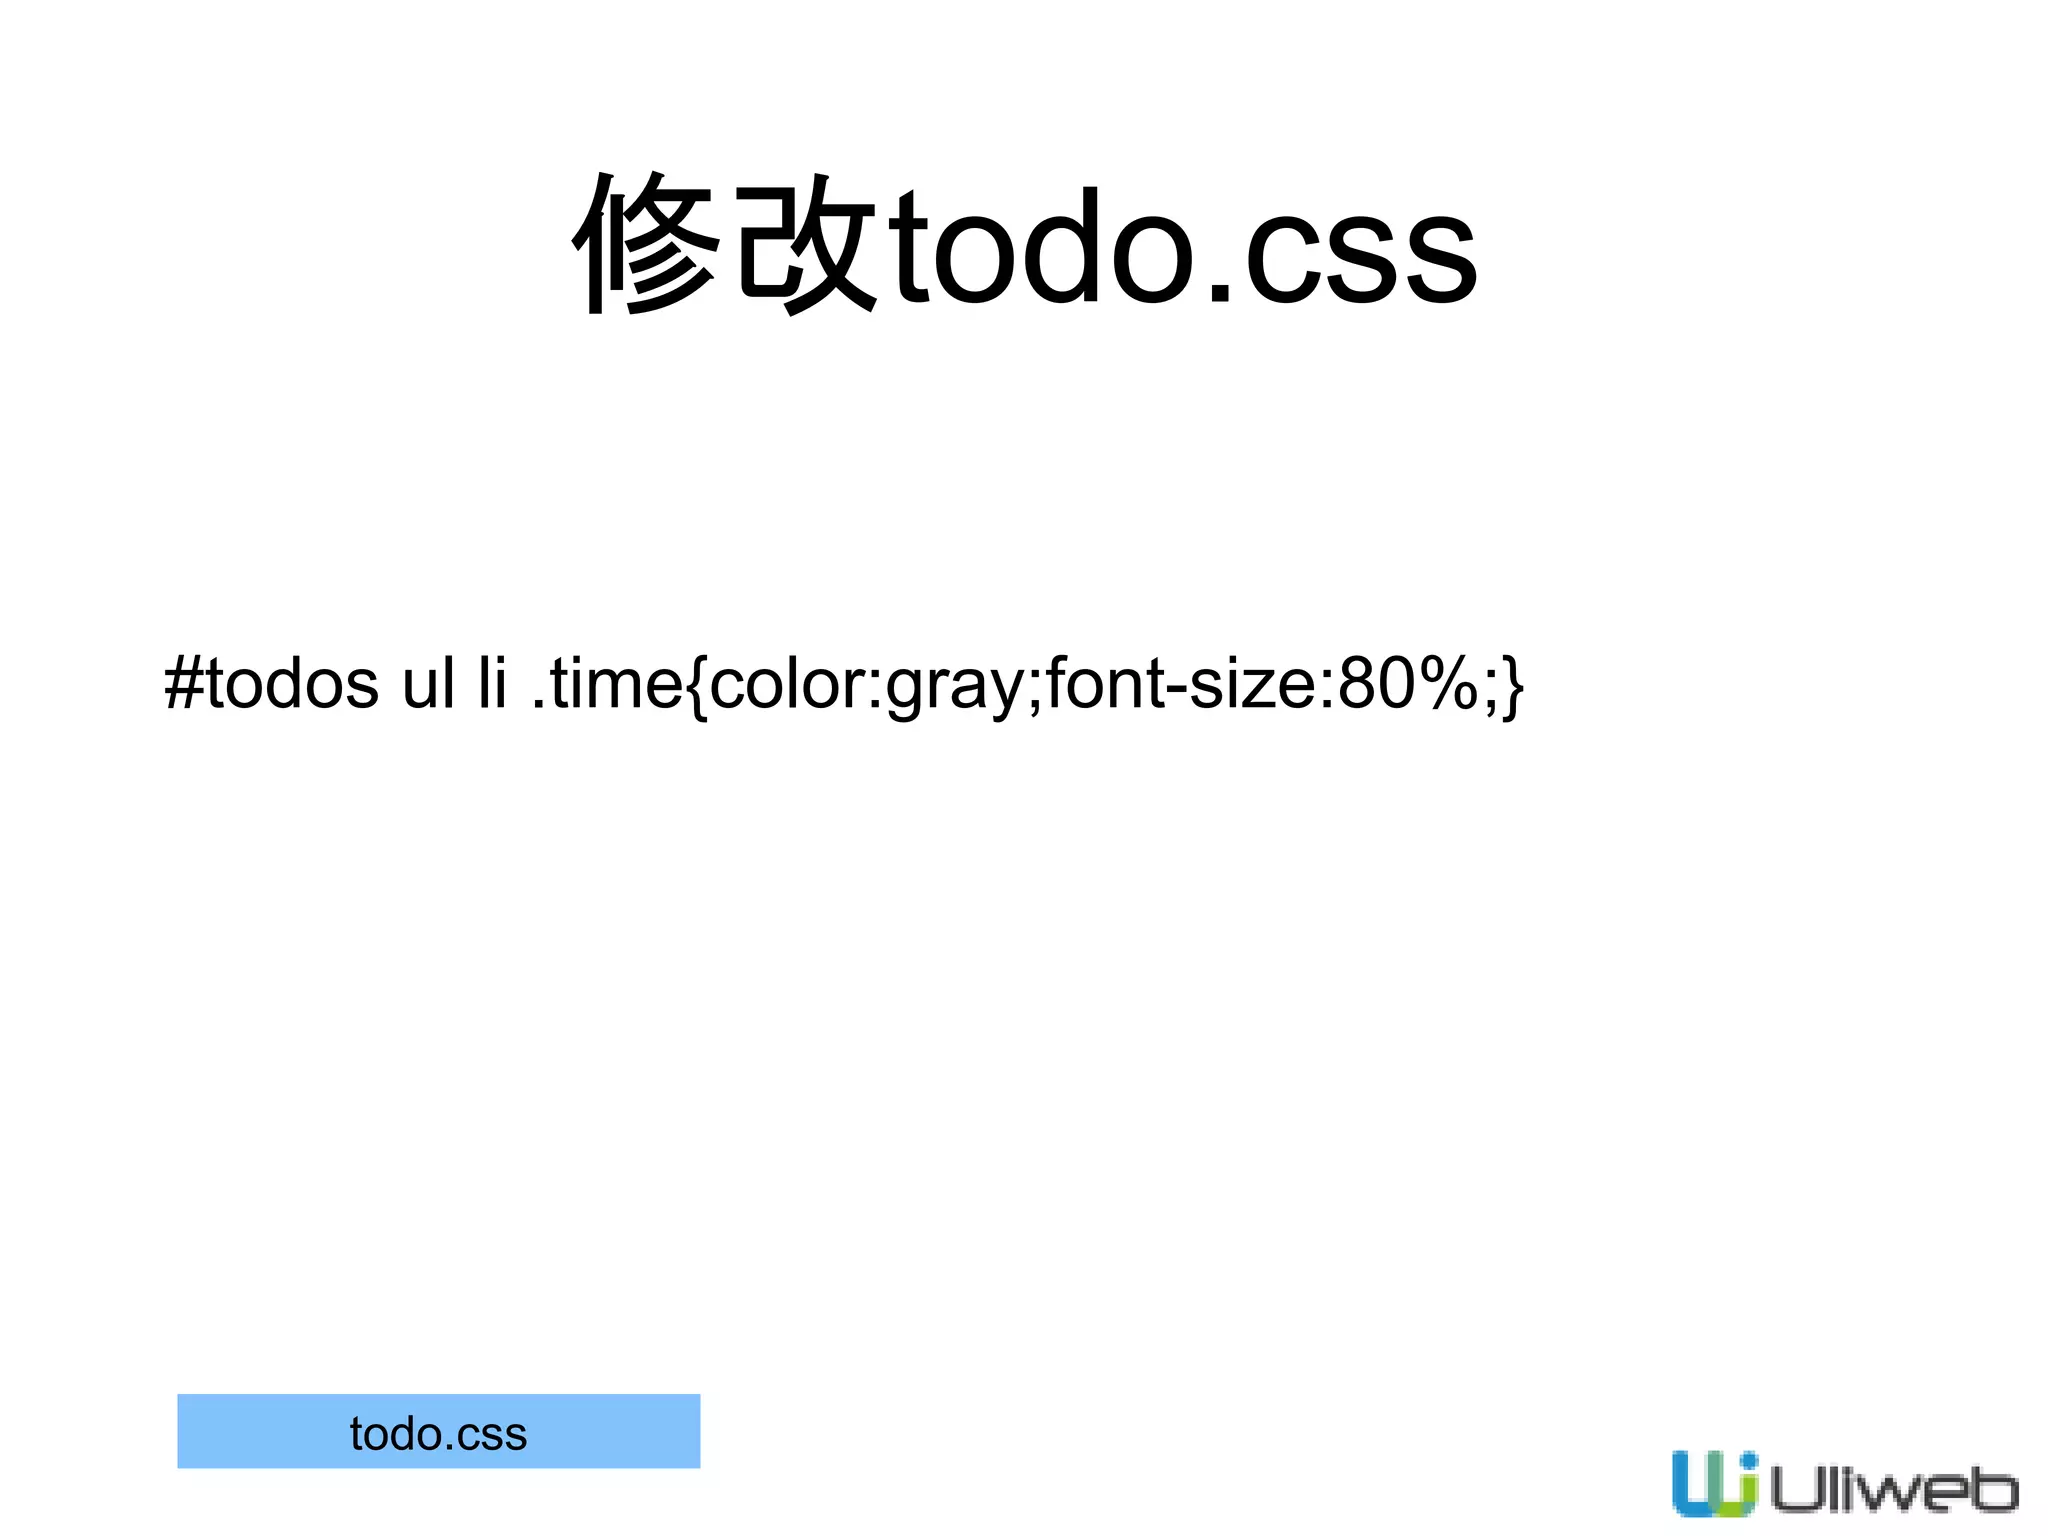
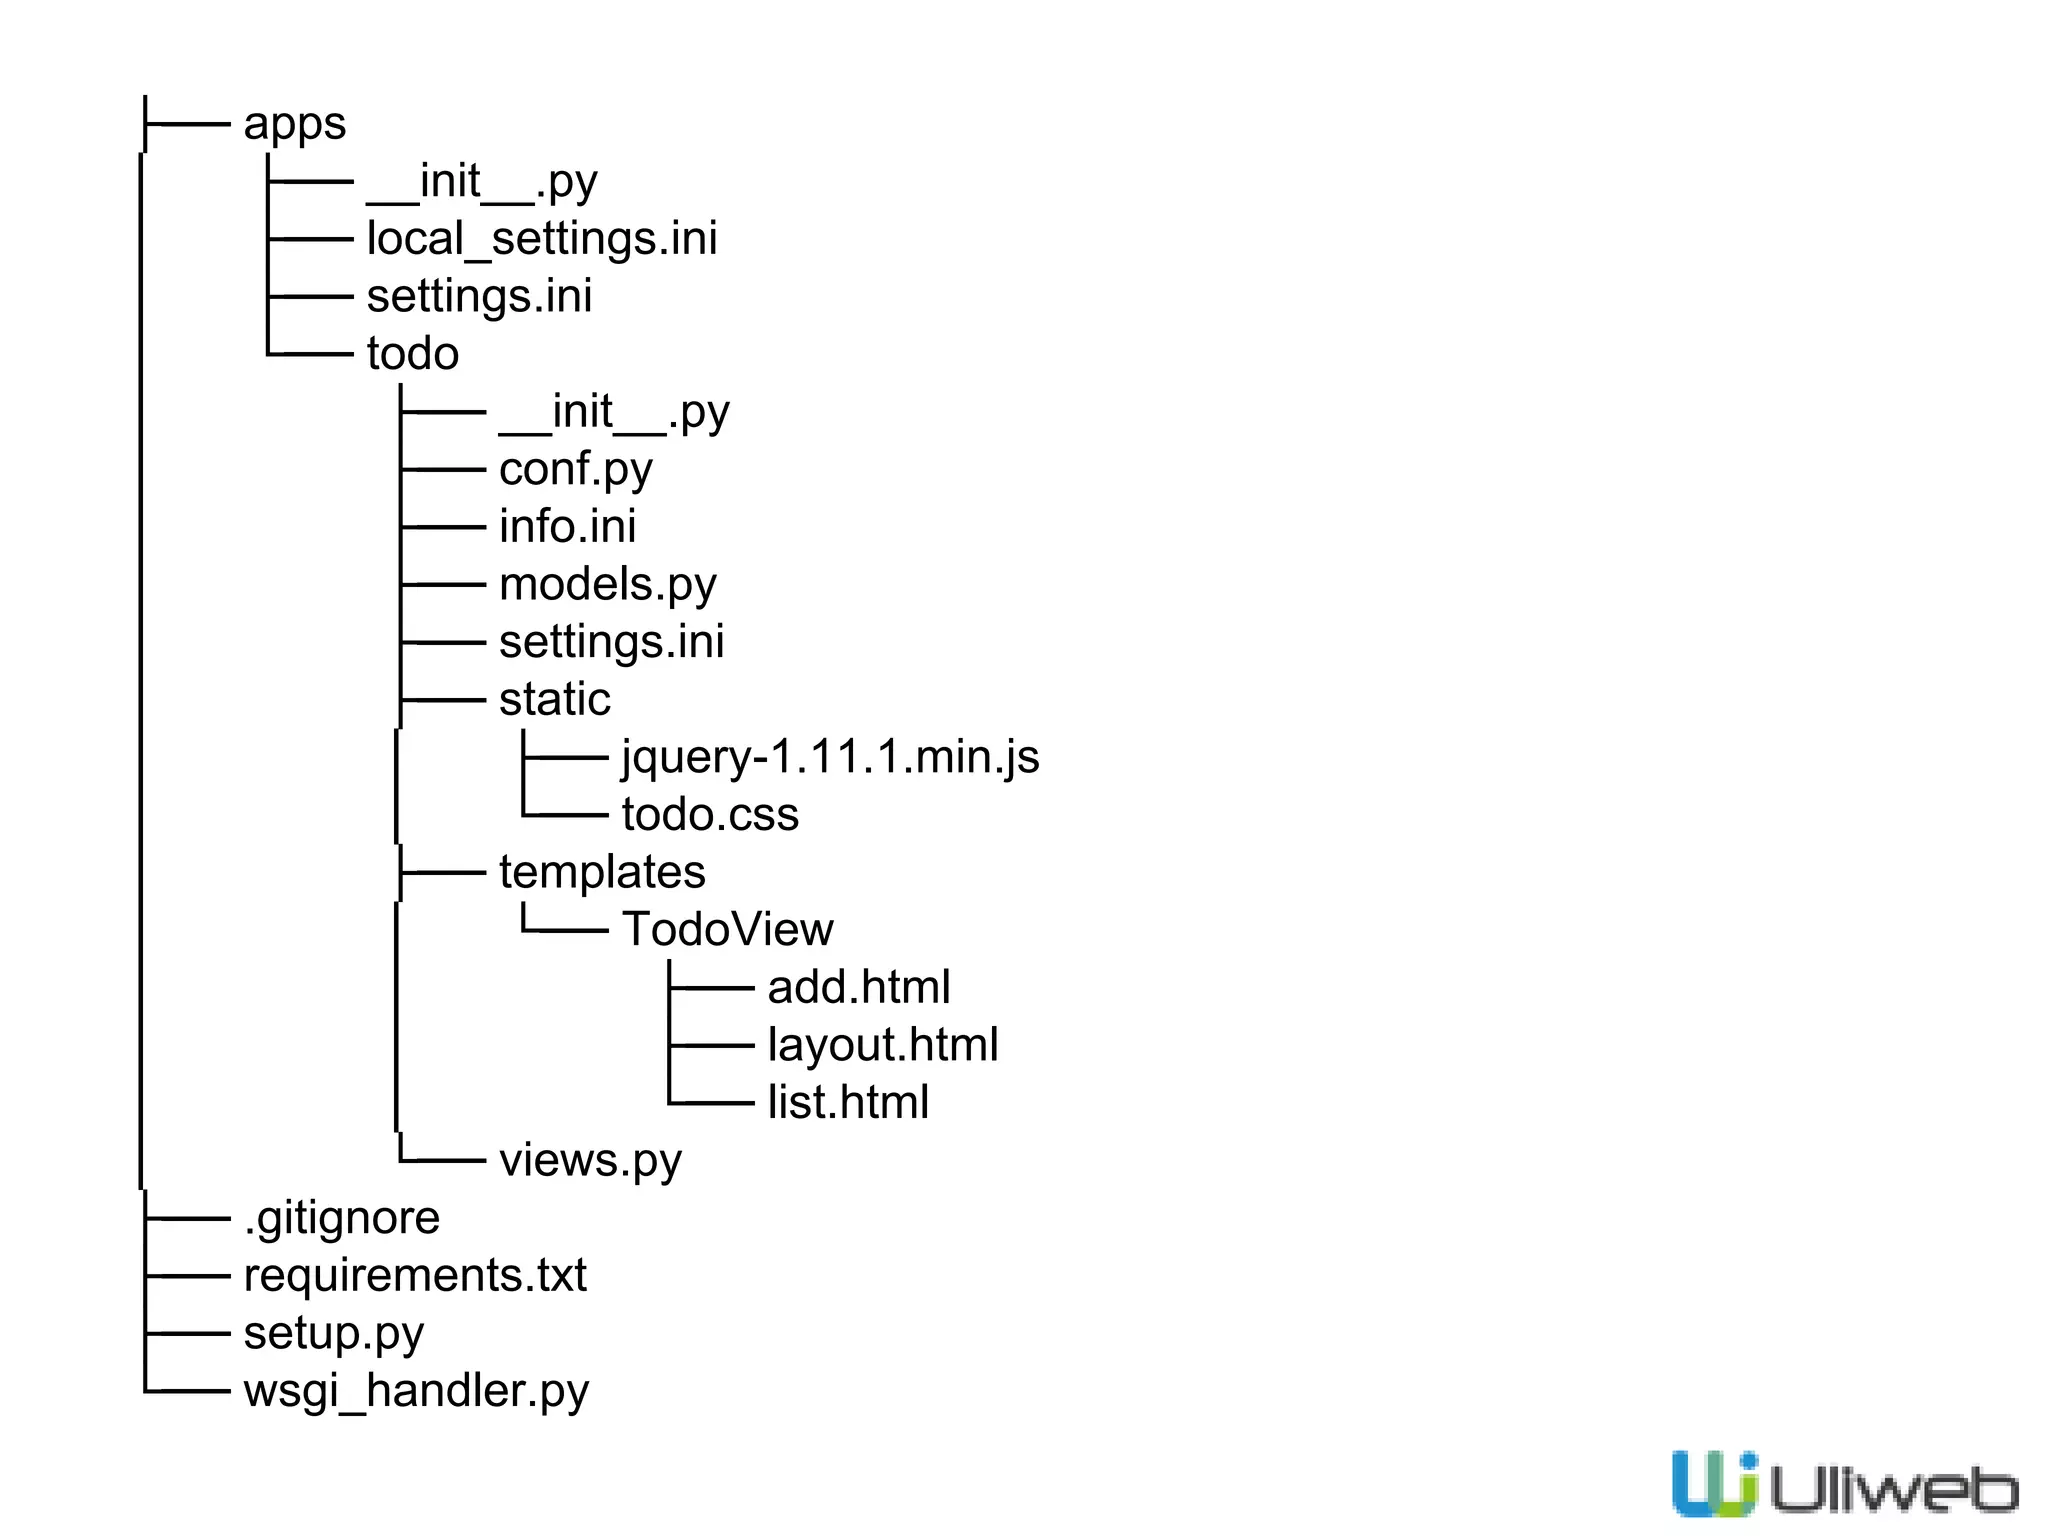
此文档是关于使用Uliweb开发一个待办事项程序的指南,包括环境配置、项目和应用程序的创建、MVC结构、数据库模型设置、基本功能实现等步骤。文档详细描述了如何编写视图、模板、处理表单,以及如何实现待办事项的添加、删除和状态更新功能。最终效果是一个支持基础CRUD操作的Web应用。


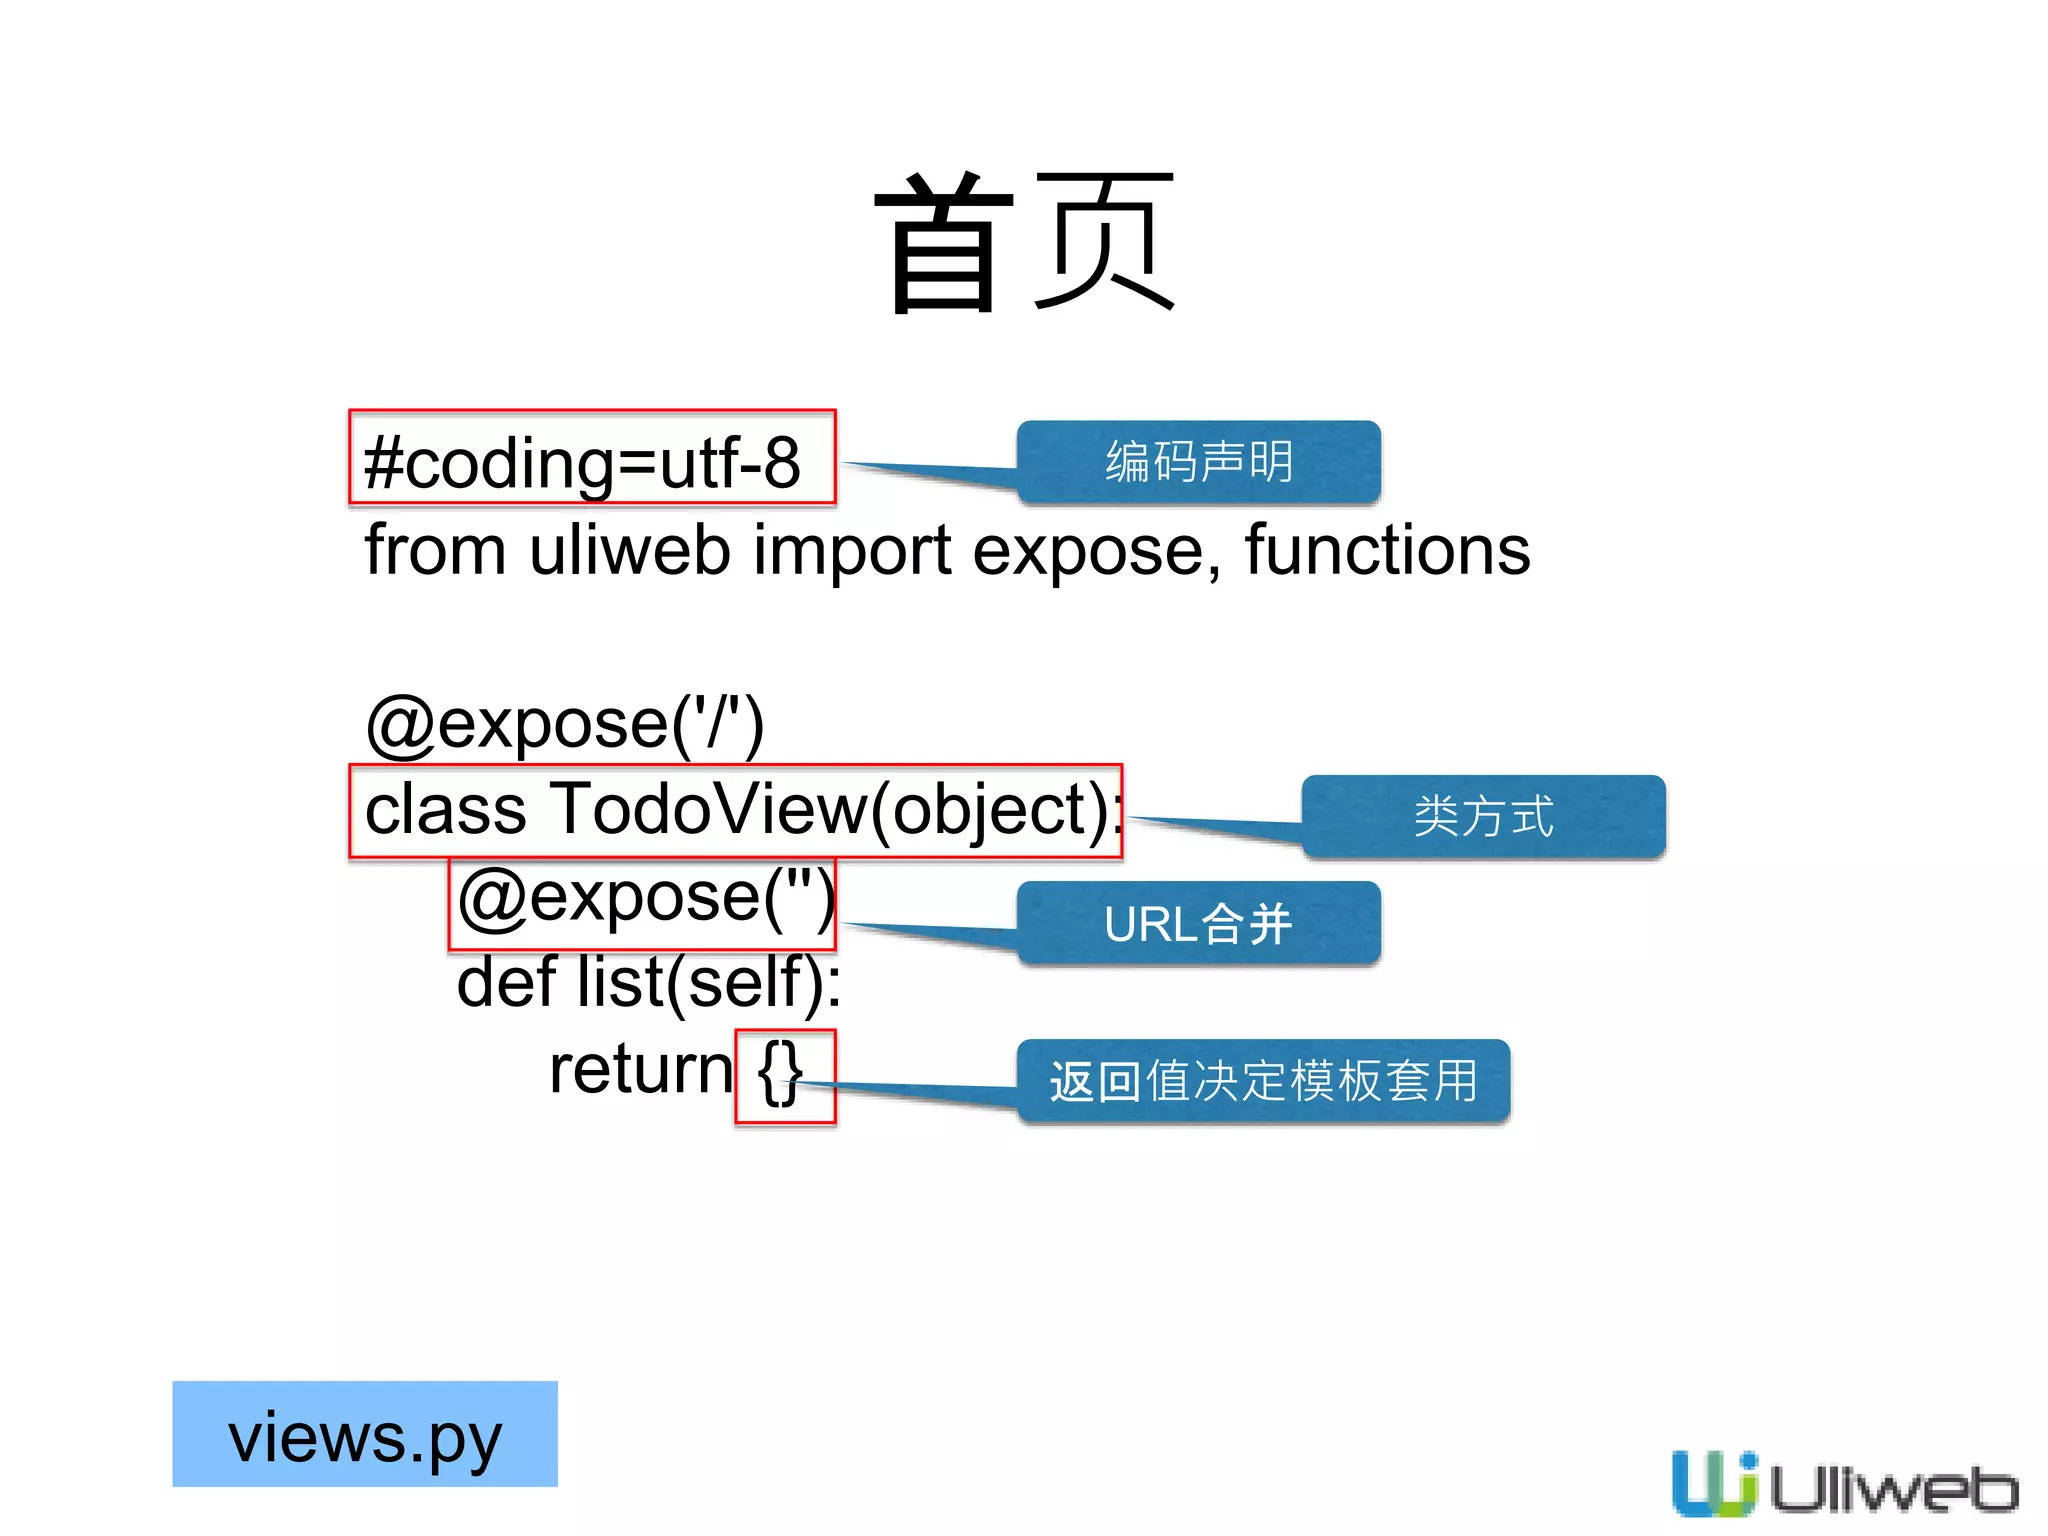
![views.py
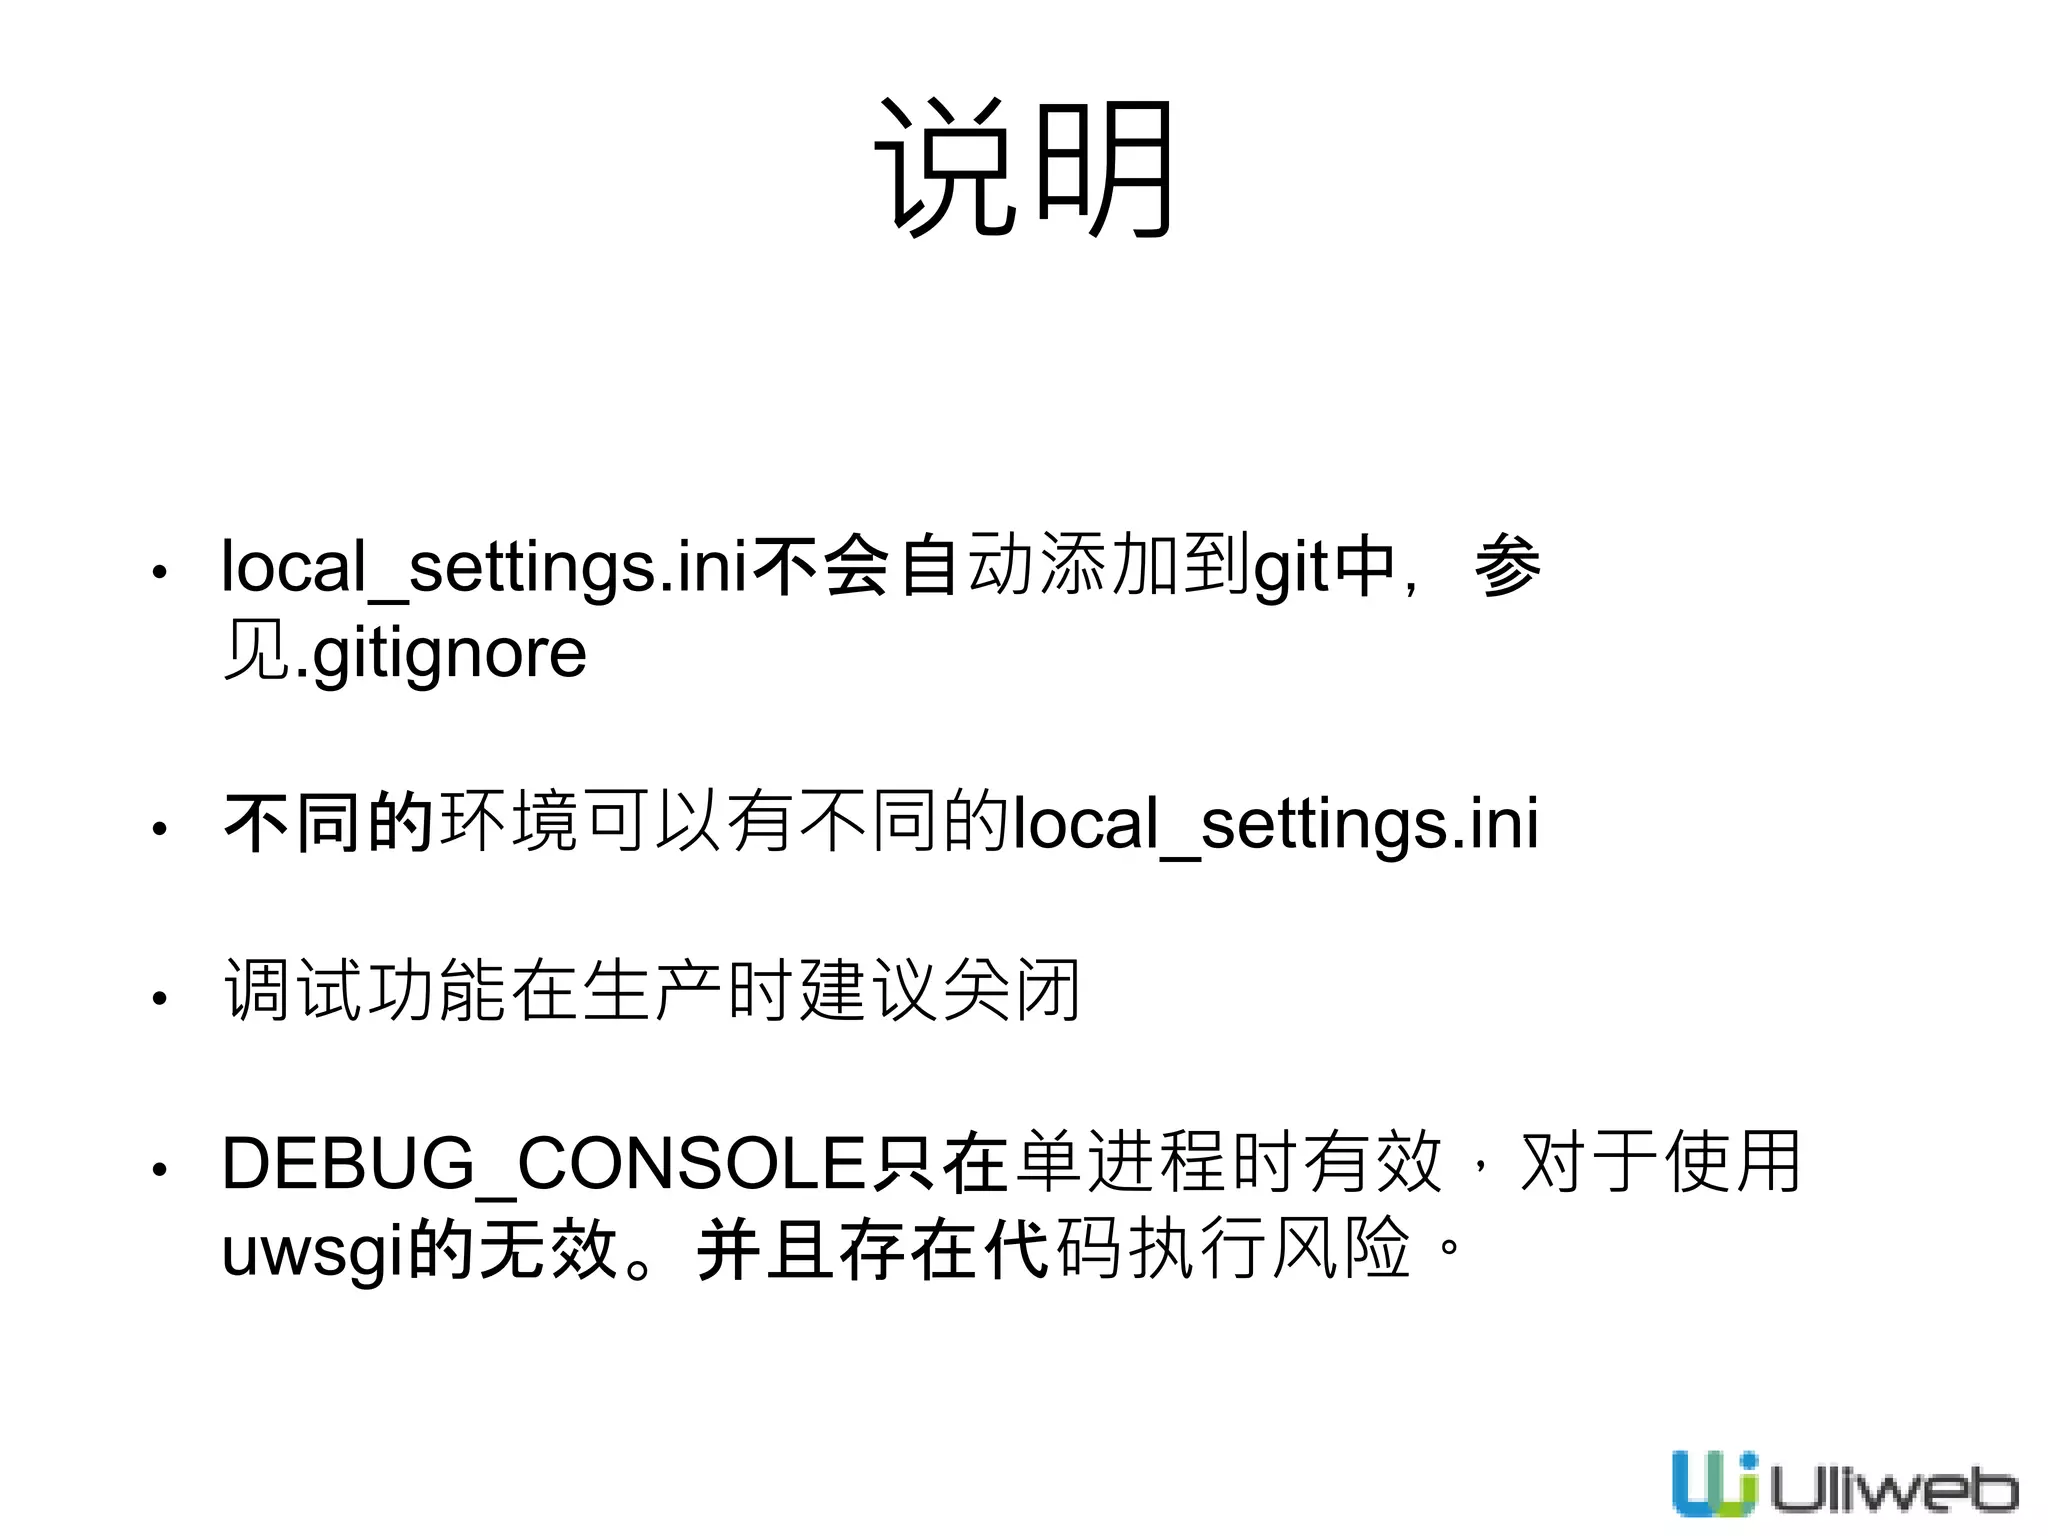
[GLOBAL]
DEBUG = False
DEBUG_CONSOLE = False
DEBUG_TEMPLATE = False
INSTALLED_APPS = [
'uliweb.contrib.staticfiles',
'uliweb.contrib.template',
# 'uliweb.contrib.upload',
'uliweb.contrib.orm',
# 'uliweb.contrib.session',
# 'uliweb.contrib.cache',
# 'uliweb.contrib.auth',
'uliweb.contrib.i18n',
# 'uliweb.contrib.flashmessage',
'todo',
]
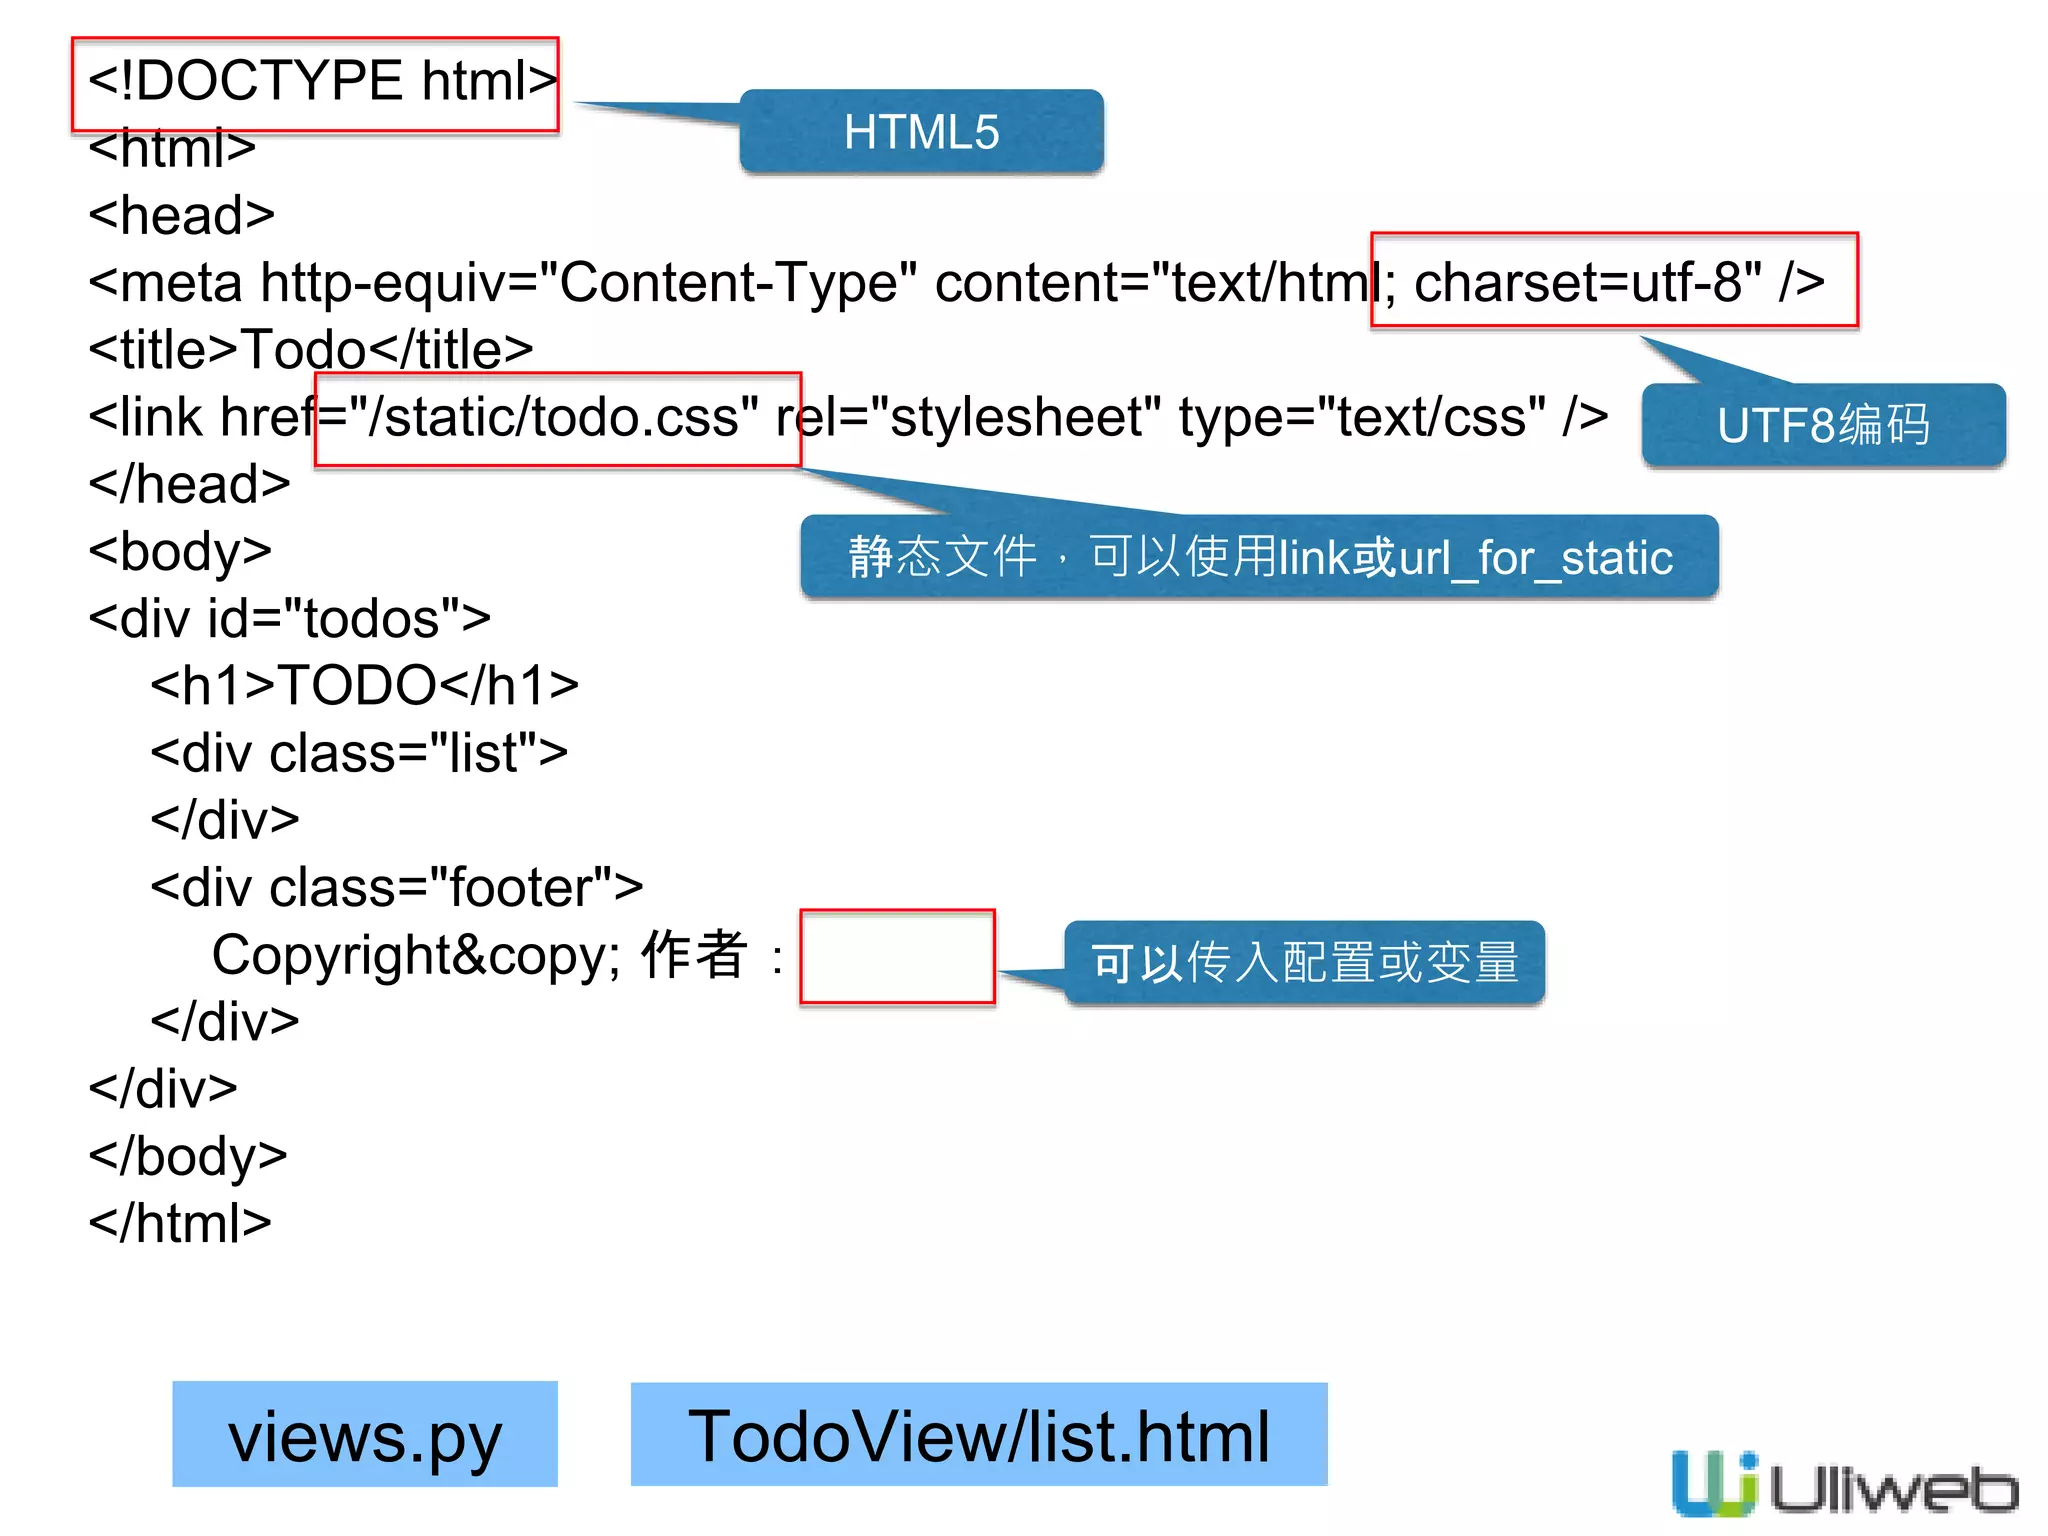
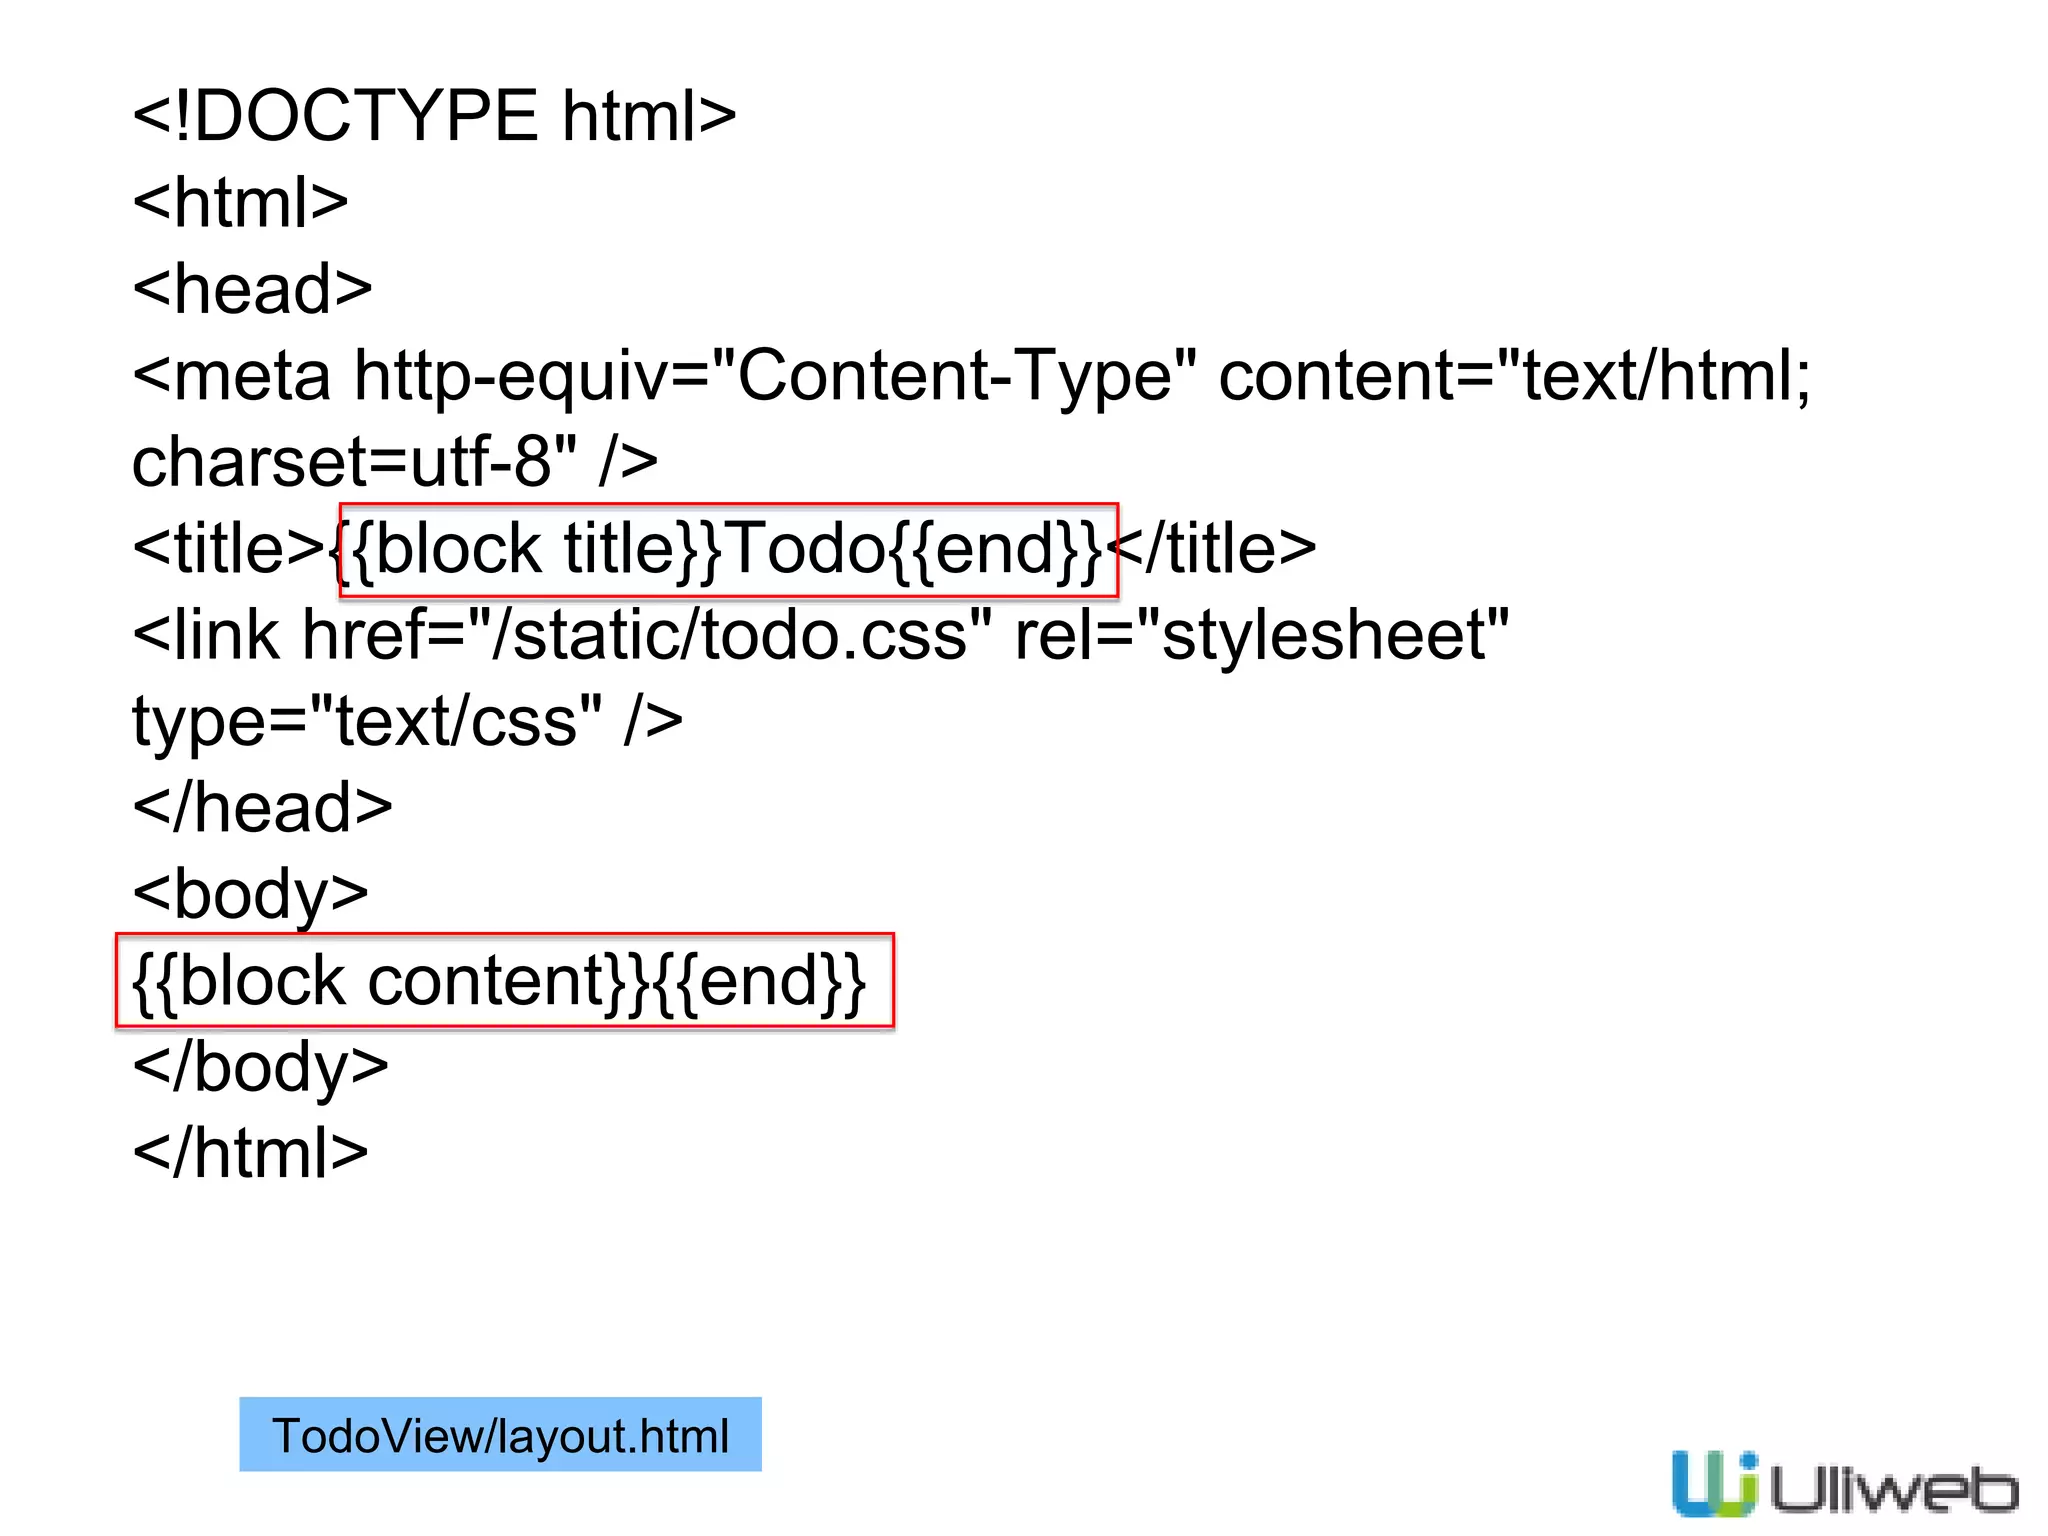
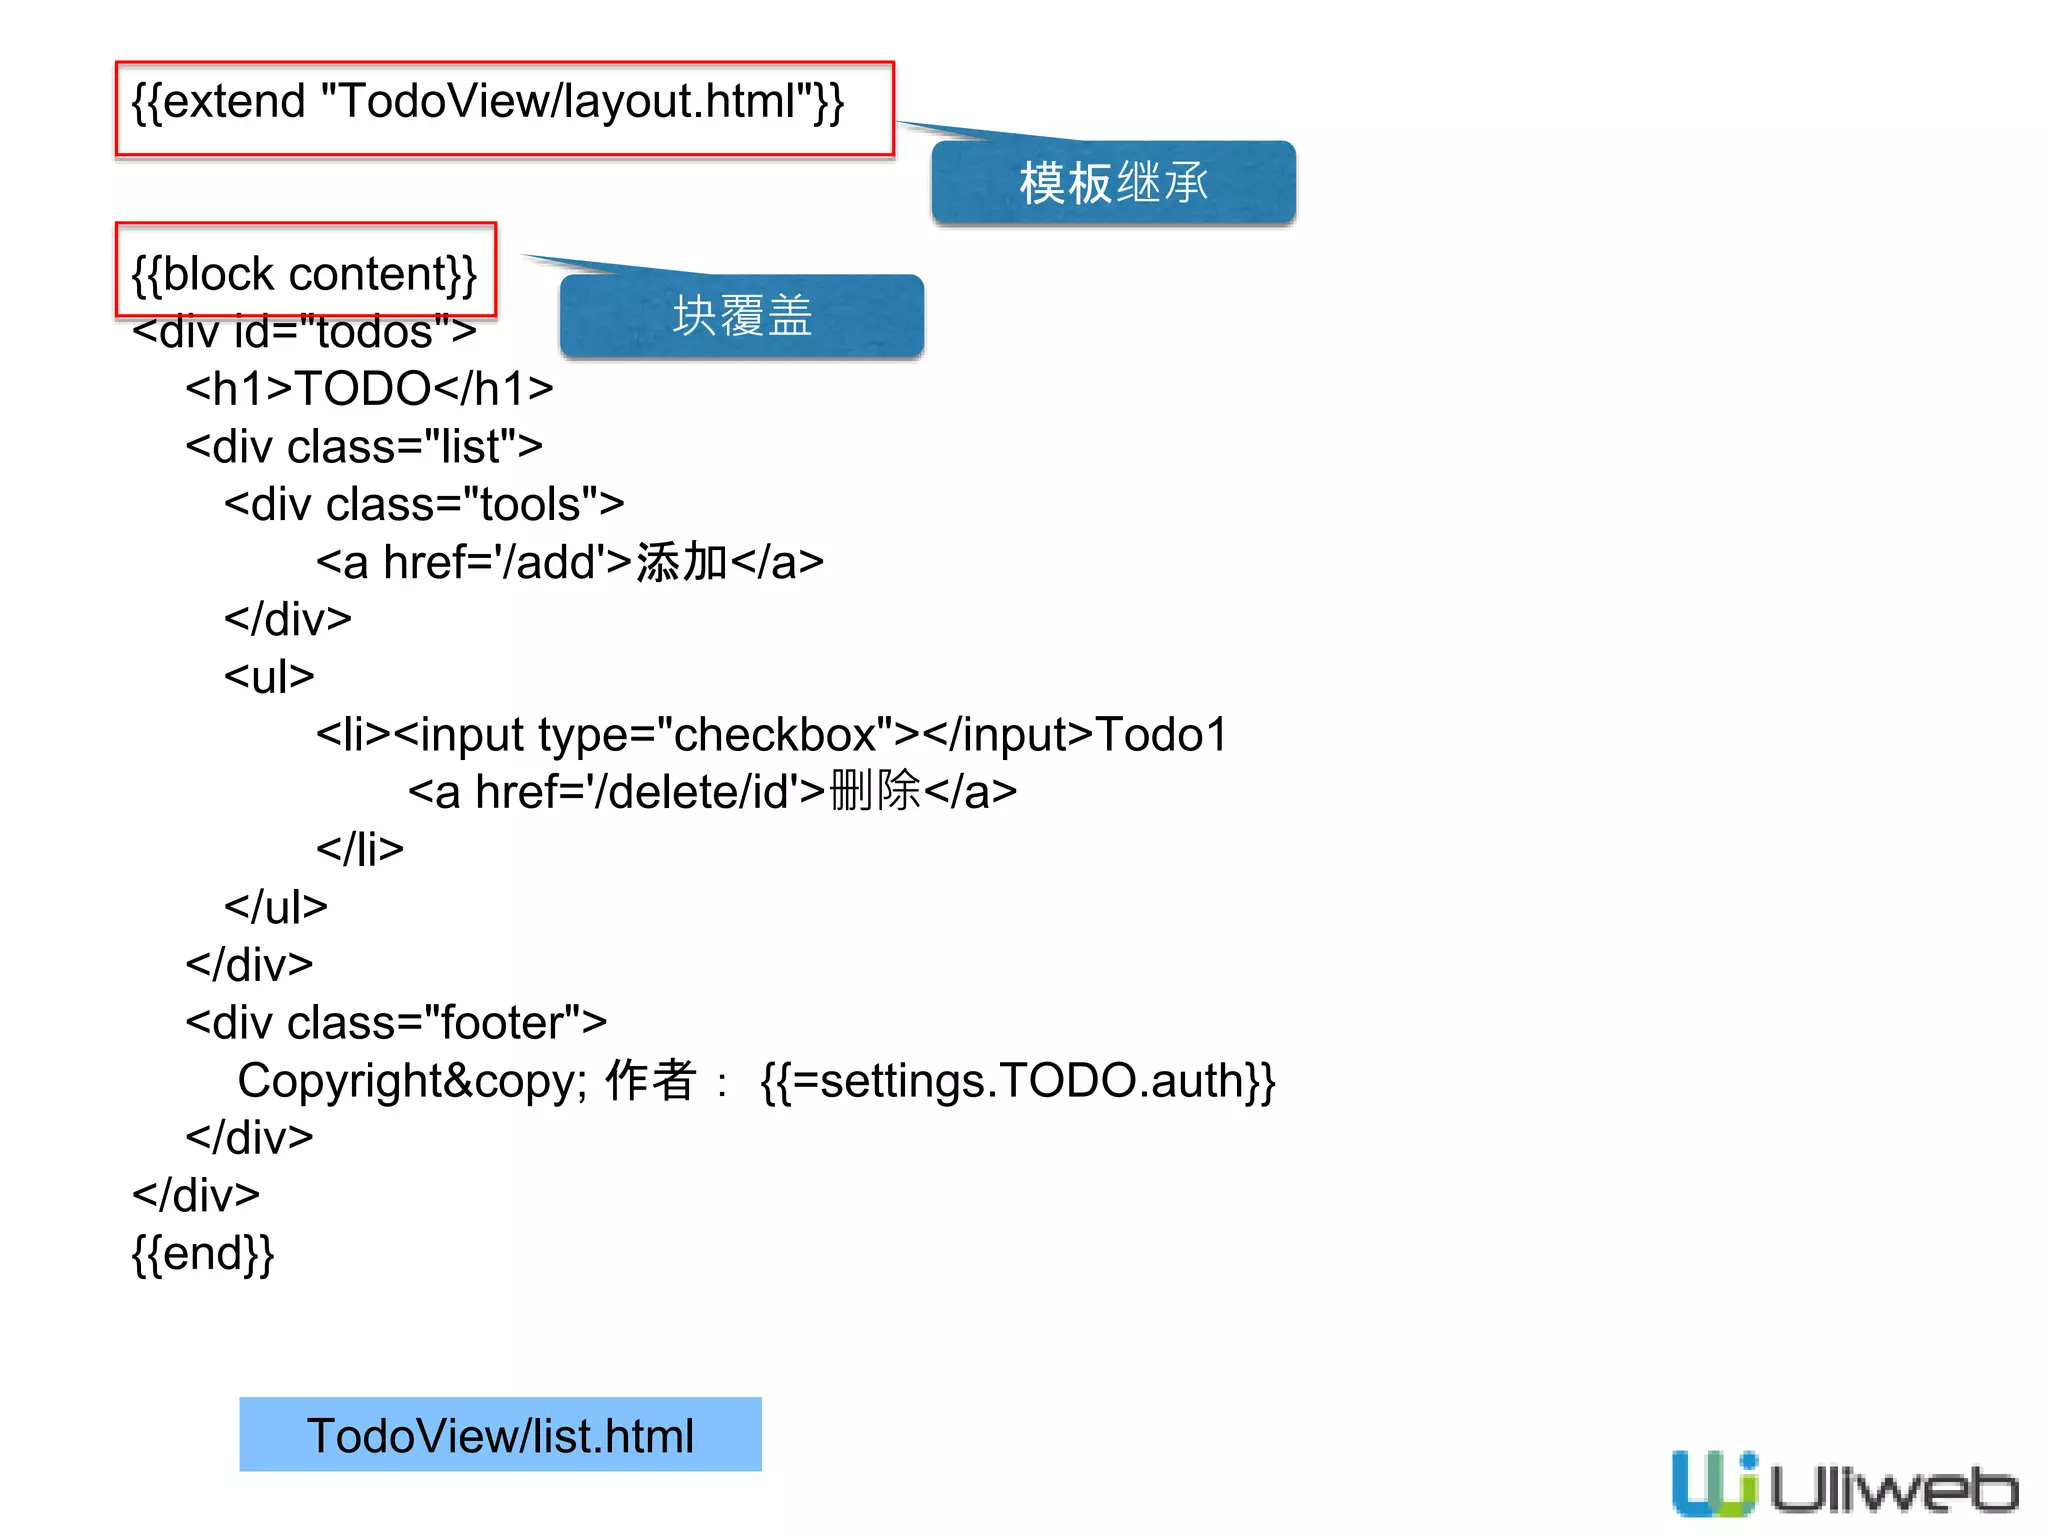
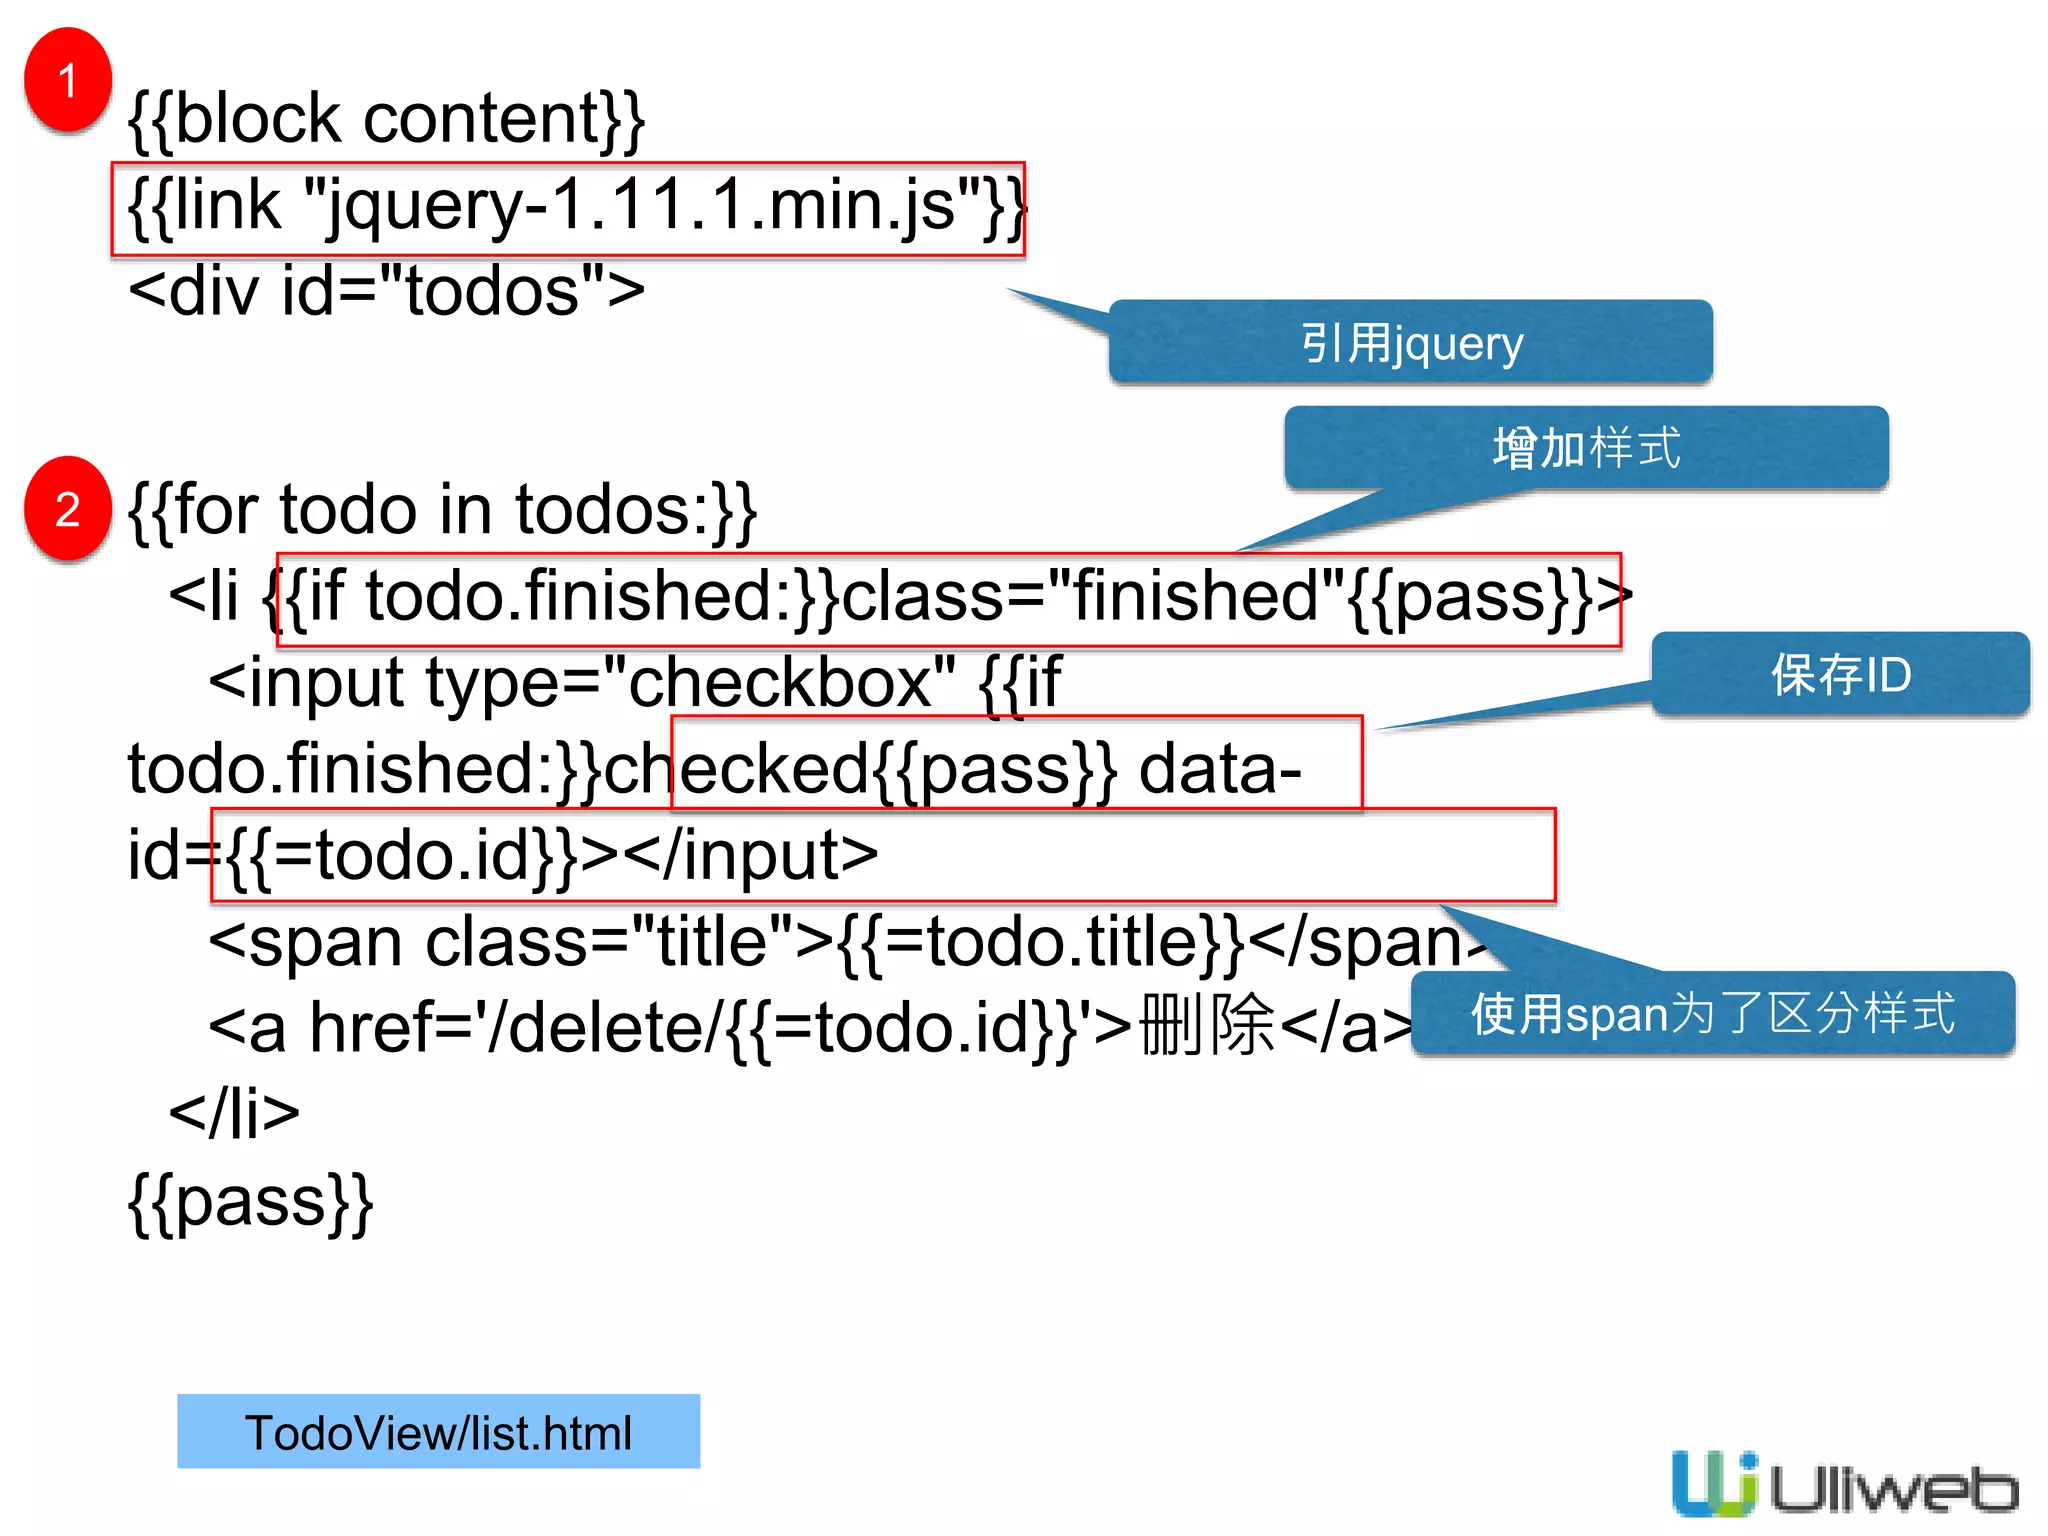
TodoView/list.html
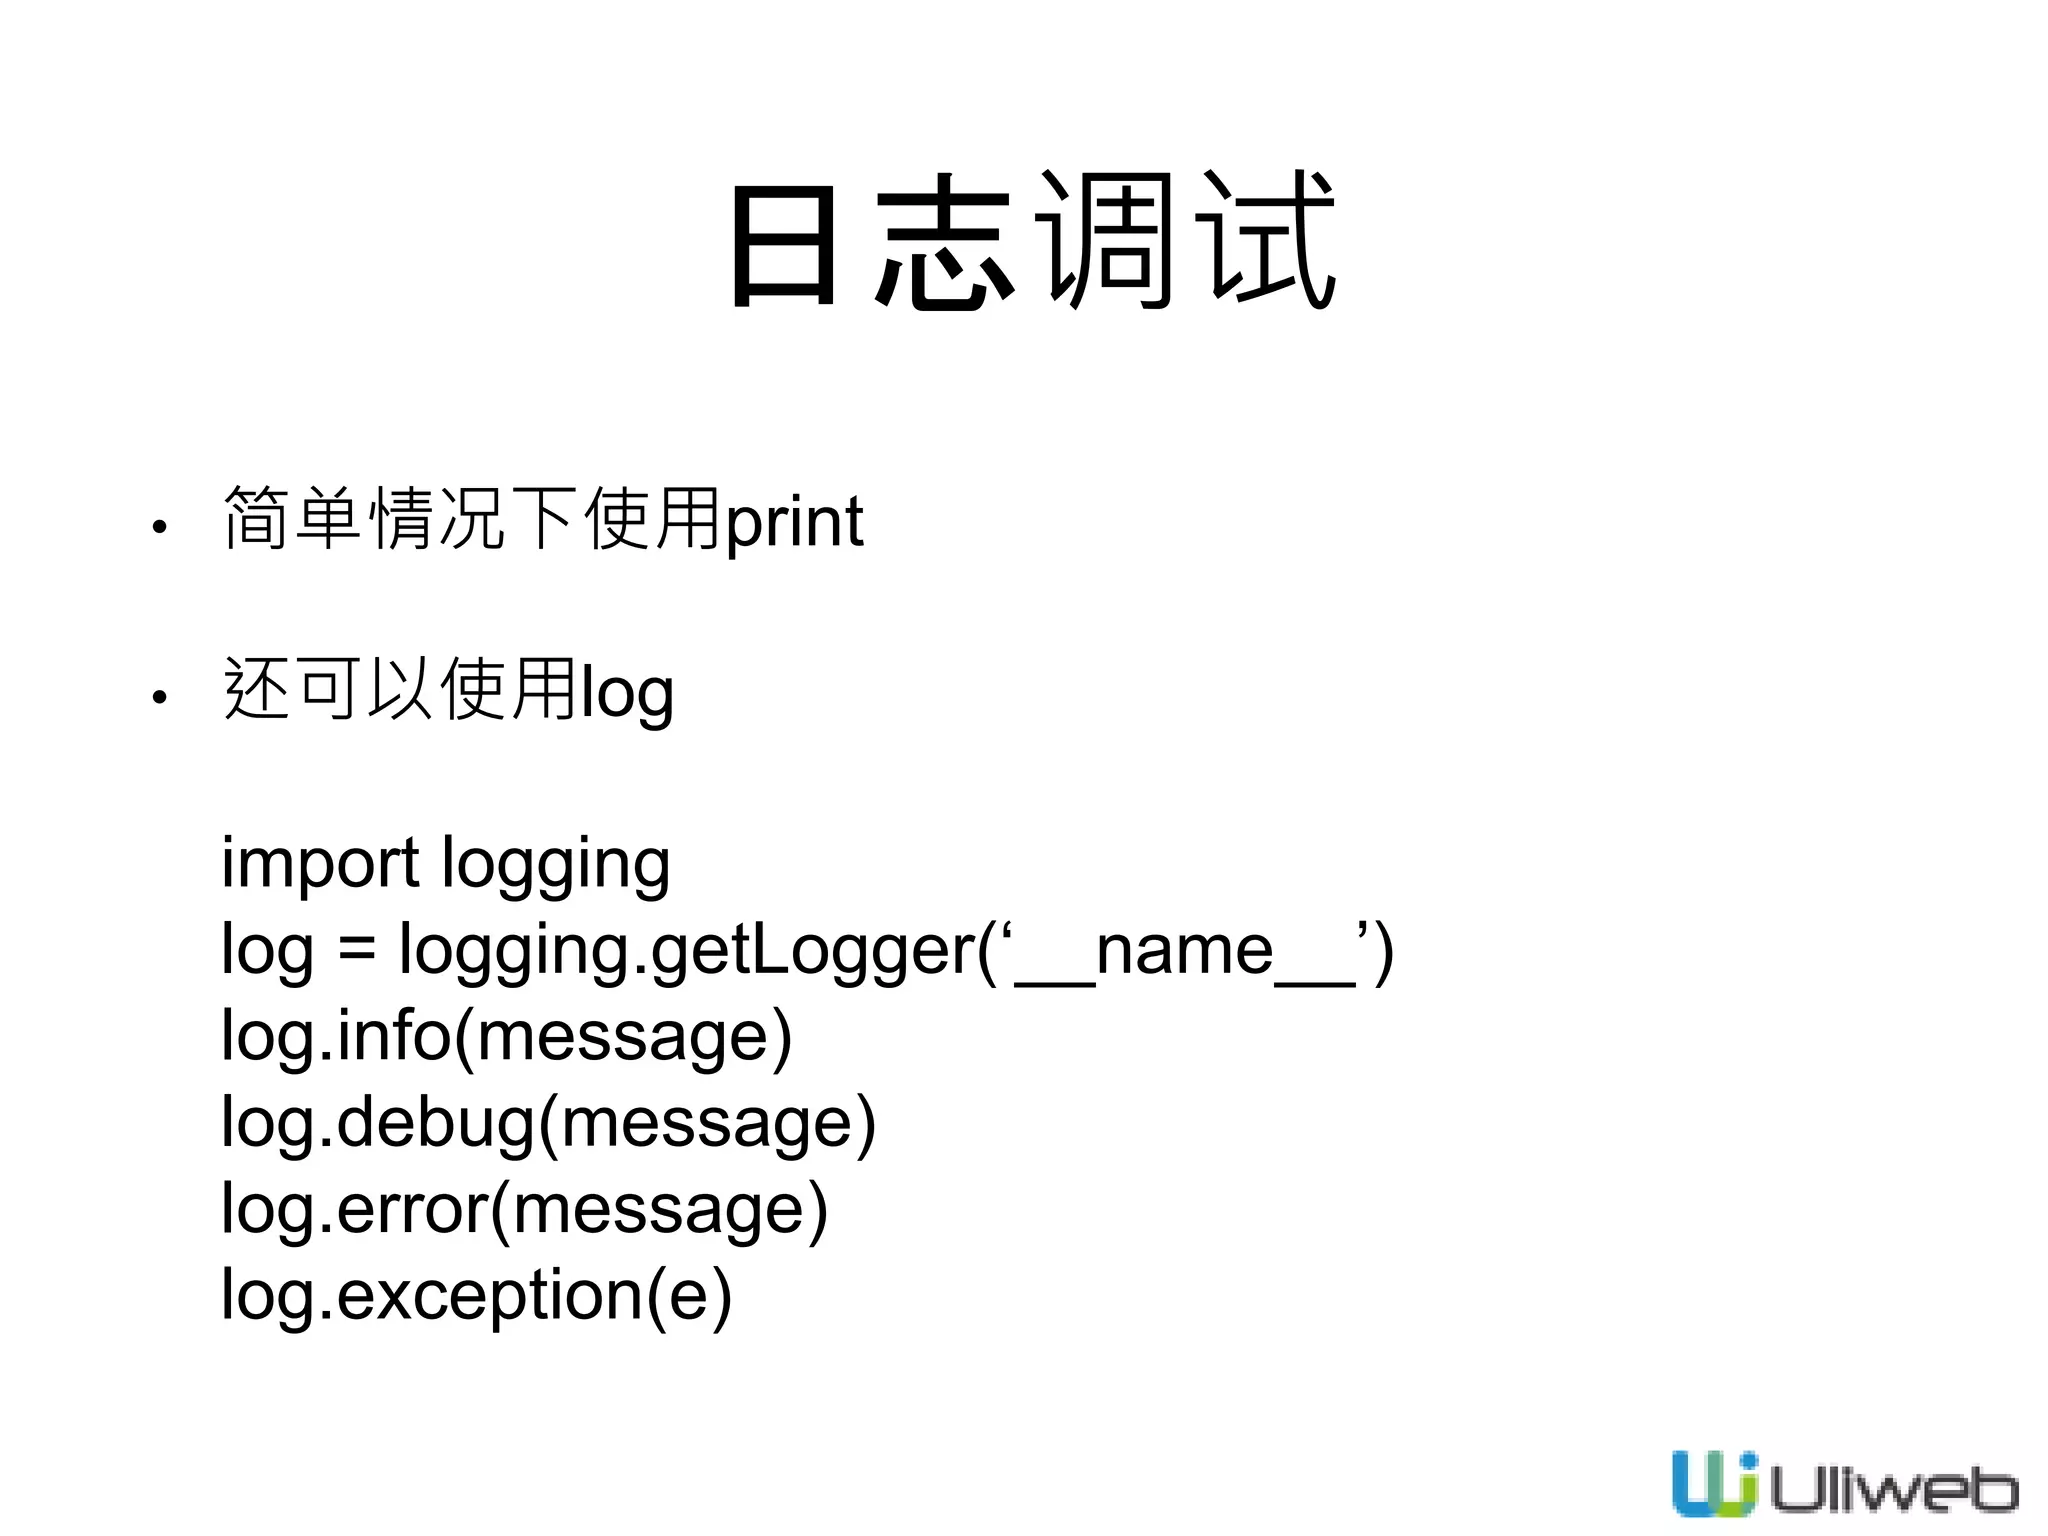
调试相关
ORM
国际化
静态文件
USE, LINK
settings.ini](https://image.slidesharecdn.com/02-150213191459-conversion-gate01/75/02-uliweb-14-2048.jpg)
![关于local_settings.ini
[GLOBAL]
DEBUG = True
DEBUG_CONSOLE = True
DEBUG_TEMPLATE = False
[GLOBAL]
DEBUG = False
DEBUG_CONSOLE = False
DEBUG_TEMPLATE = False
settings.ini](https://image.slidesharecdn.com/02-150213191459-conversion-gate01/75/02-uliweb-26-2048.jpg)
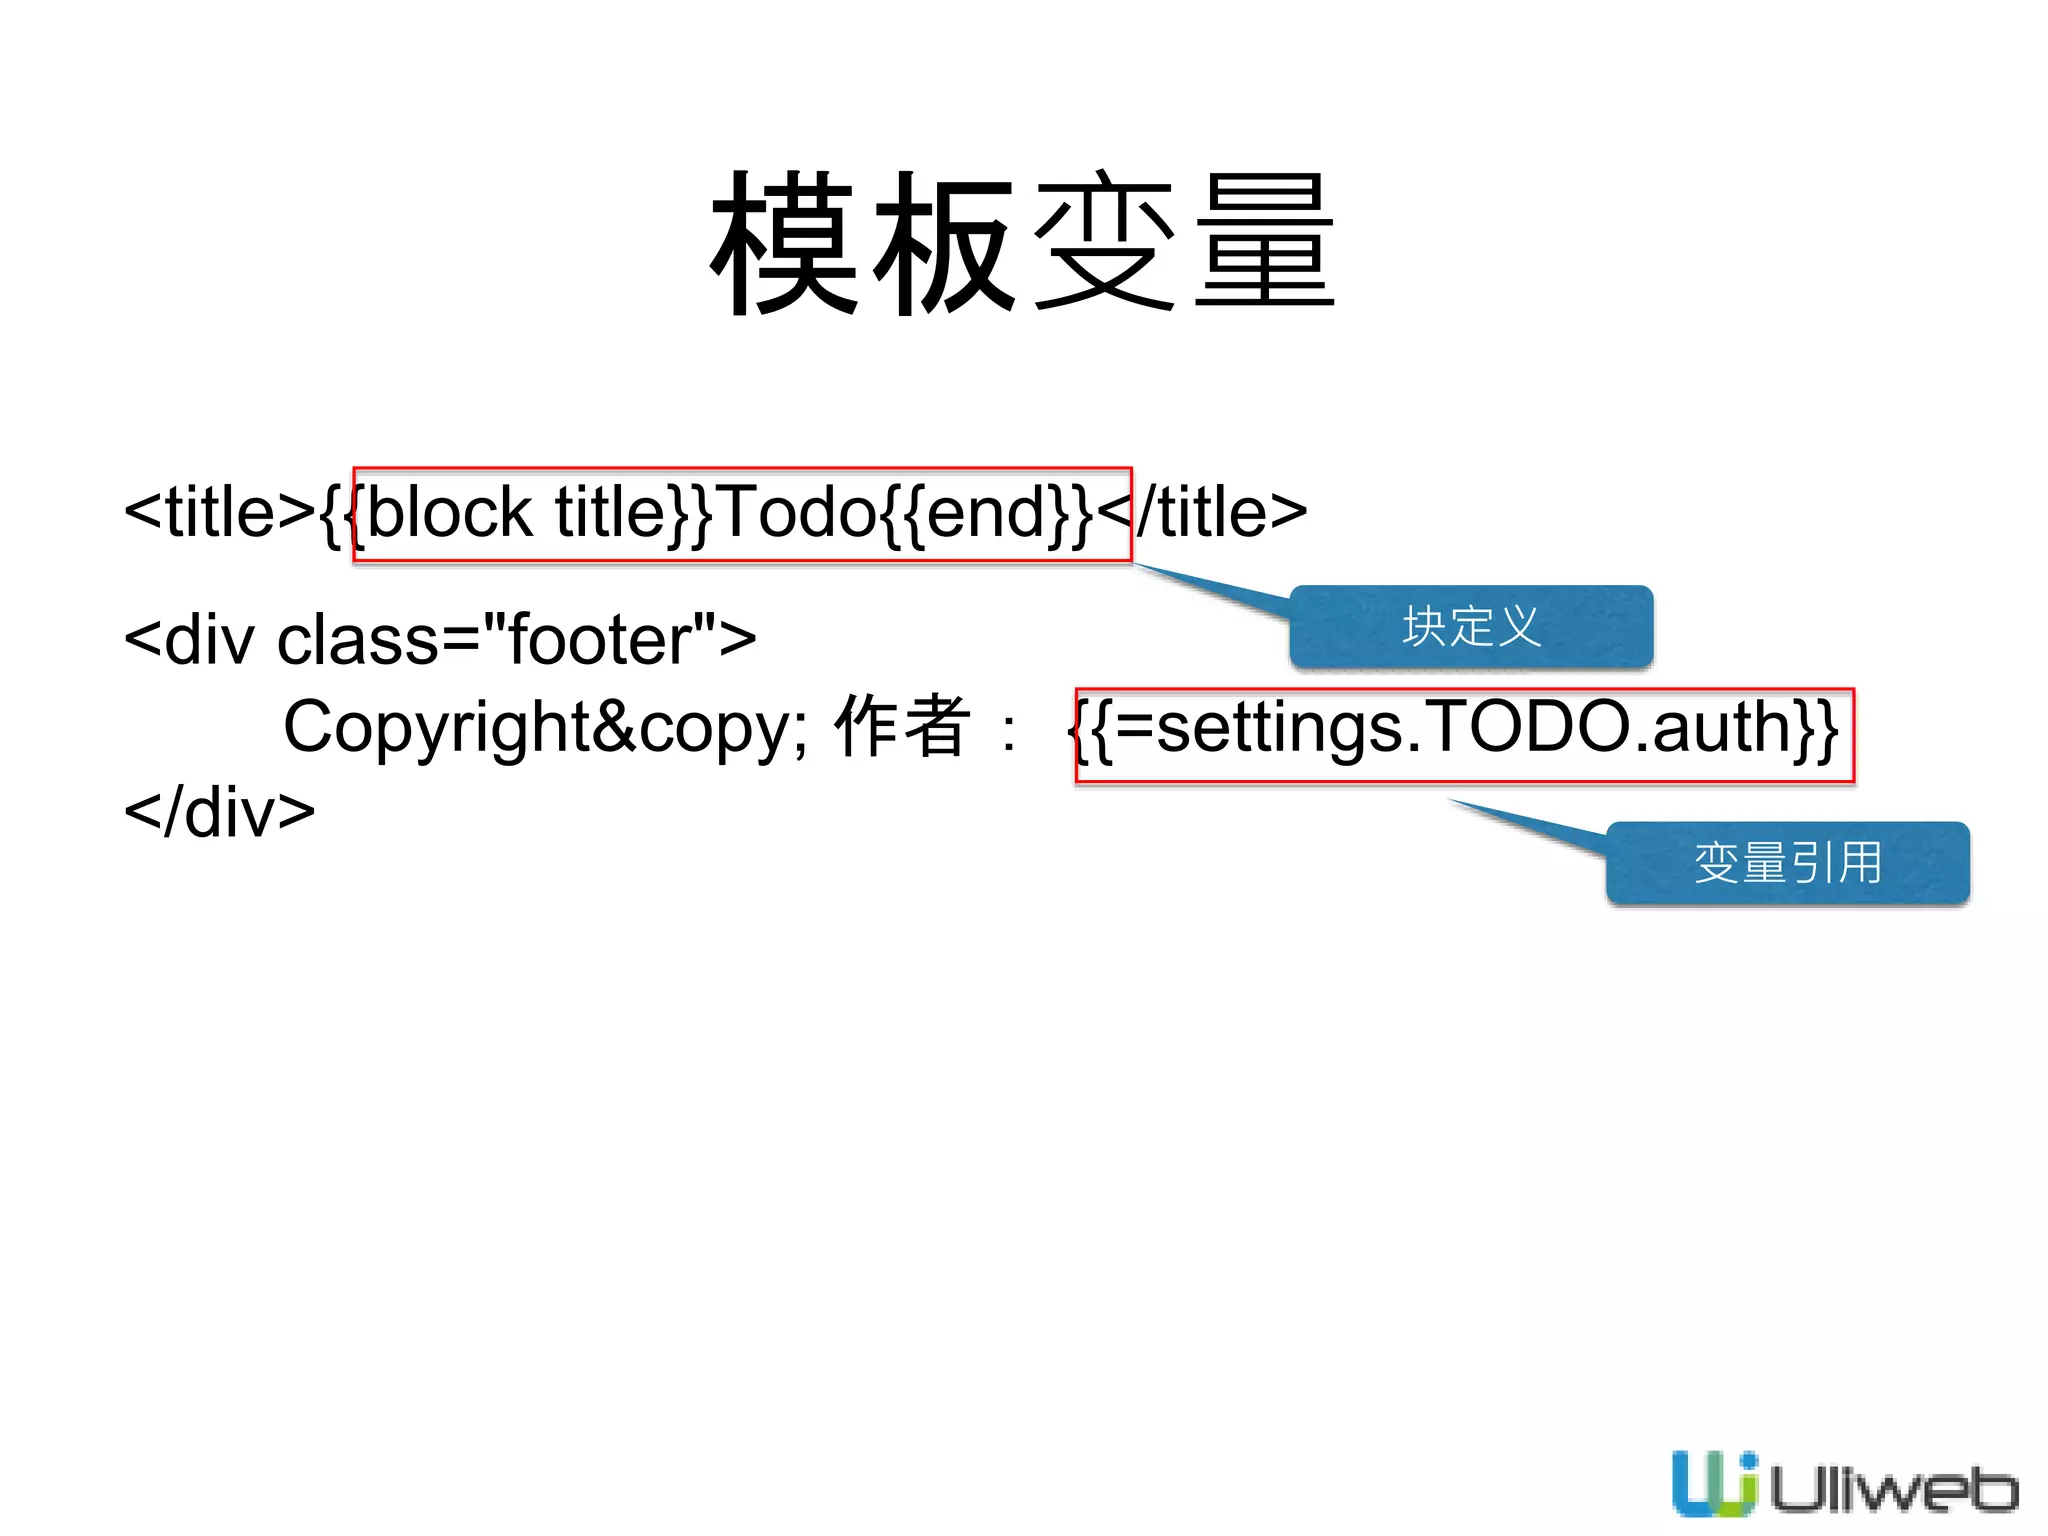
![添加todo/settings.ini
[TODO]
auth = 'todo'](https://image.slidesharecdn.com/02-150213191459-conversion-gate01/75/02-uliweb-30-2048.jpg)
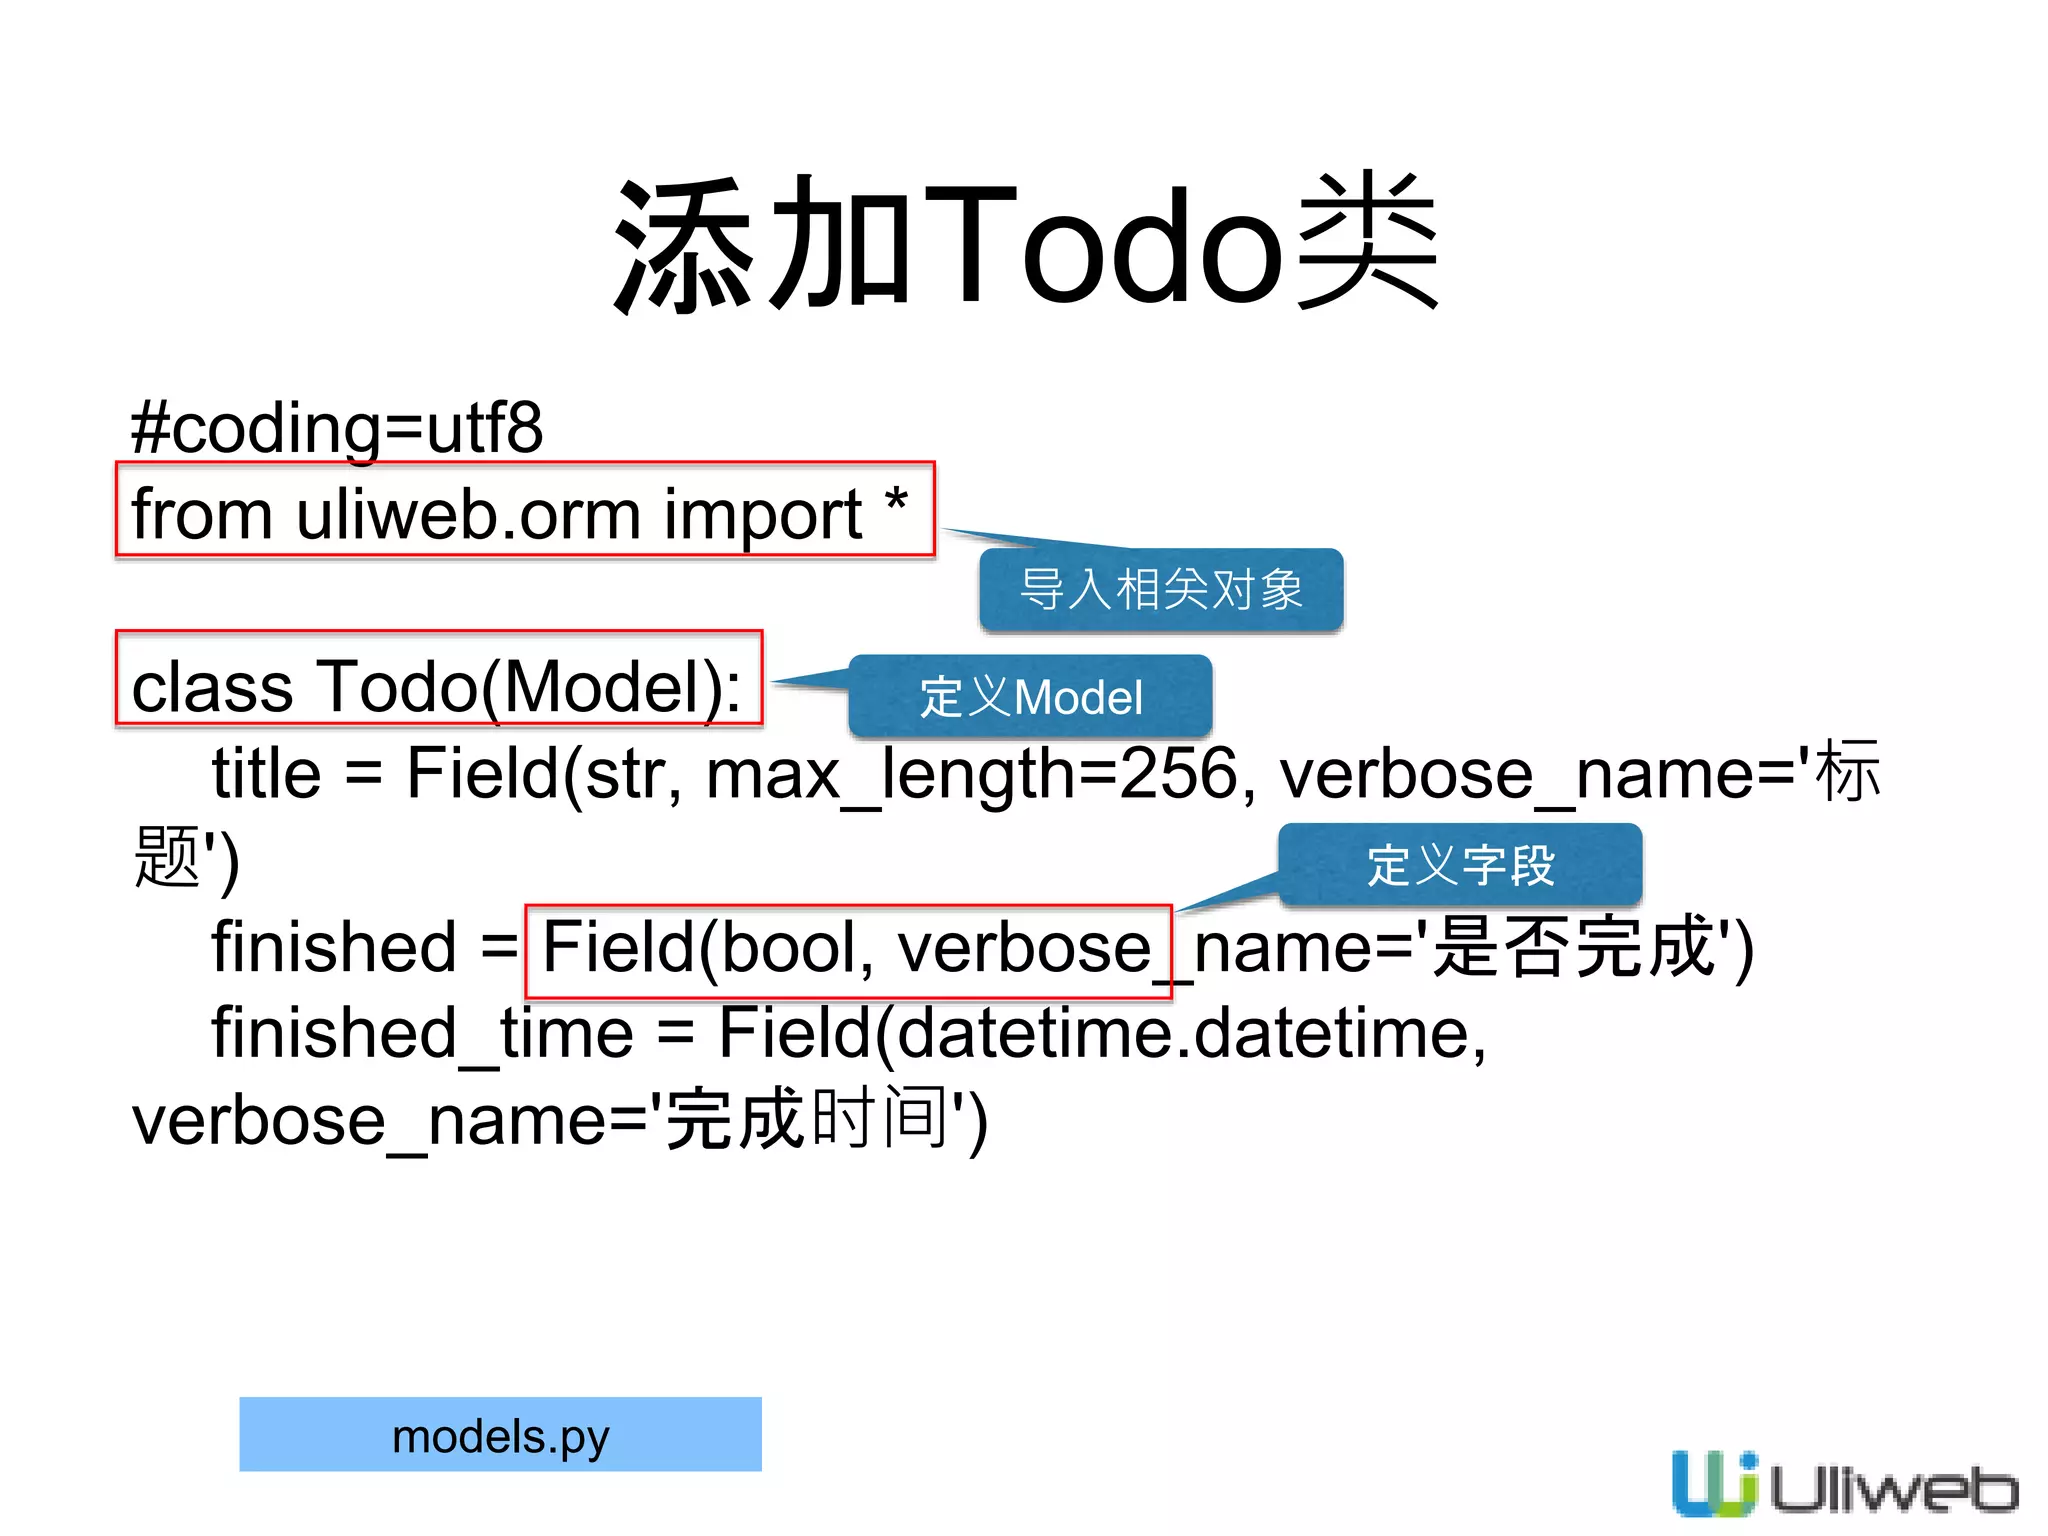
![模型管理
• 在app下创建models.py,添加相关的Model类
• 在app/settings.ini下添加[MODELS]配置信息
• 使用uliweb syncdb或uliweb alembic来更新数据库
• 使用。。。](https://image.slidesharecdn.com/02-150213191459-conversion-gate01/75/02-uliweb-37-2048.jpg)
![配置settings.ini
[TODO]
auth = 'todo'
[MODELS]
todo = 'todo.models.Todo'
建议小写 Model路径
todo/settings.ini](https://image.slidesharecdn.com/02-150213191459-conversion-gate01/75/02-uliweb-39-2048.jpg)

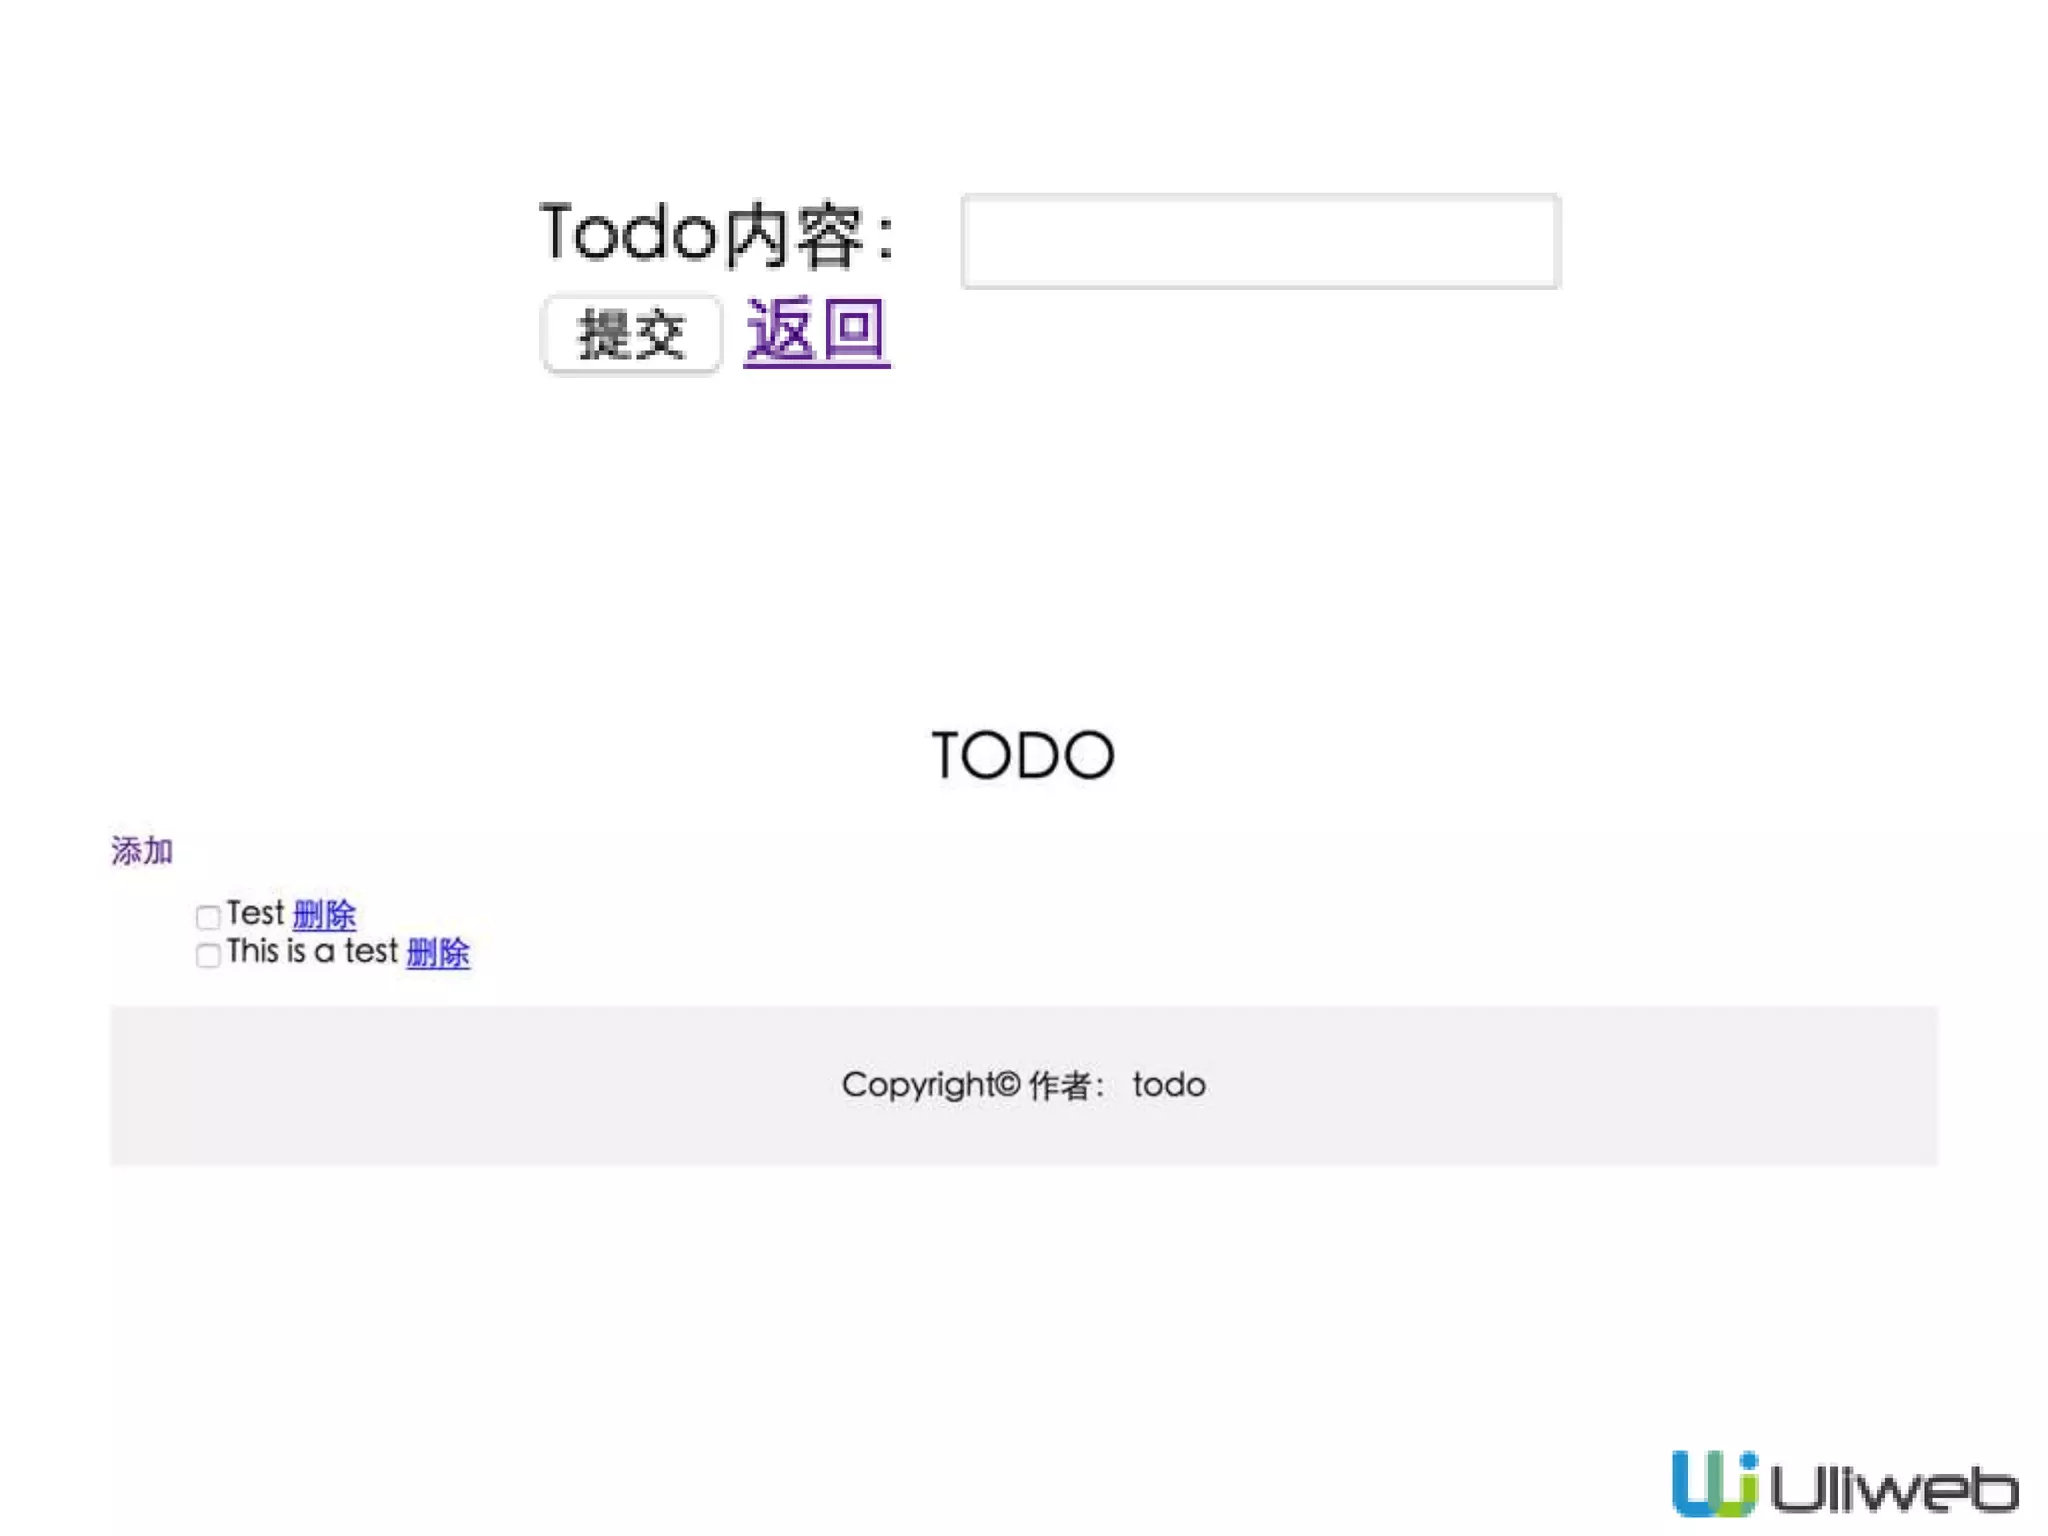
![添加todo
def add(self):
if request.method == 'GET':
return {}
else:
todo = self.model(title=request.POST['title'])
todo.save()
return redirect(url_for(TodoView.list))
区分请求方法
没有expose,自动生成
创建实例
保存生效
重定向 反向获取URL
views.py](https://image.slidesharecdn.com/02-150213191459-conversion-gate01/75/02-uliweb-48-2048.jpg)
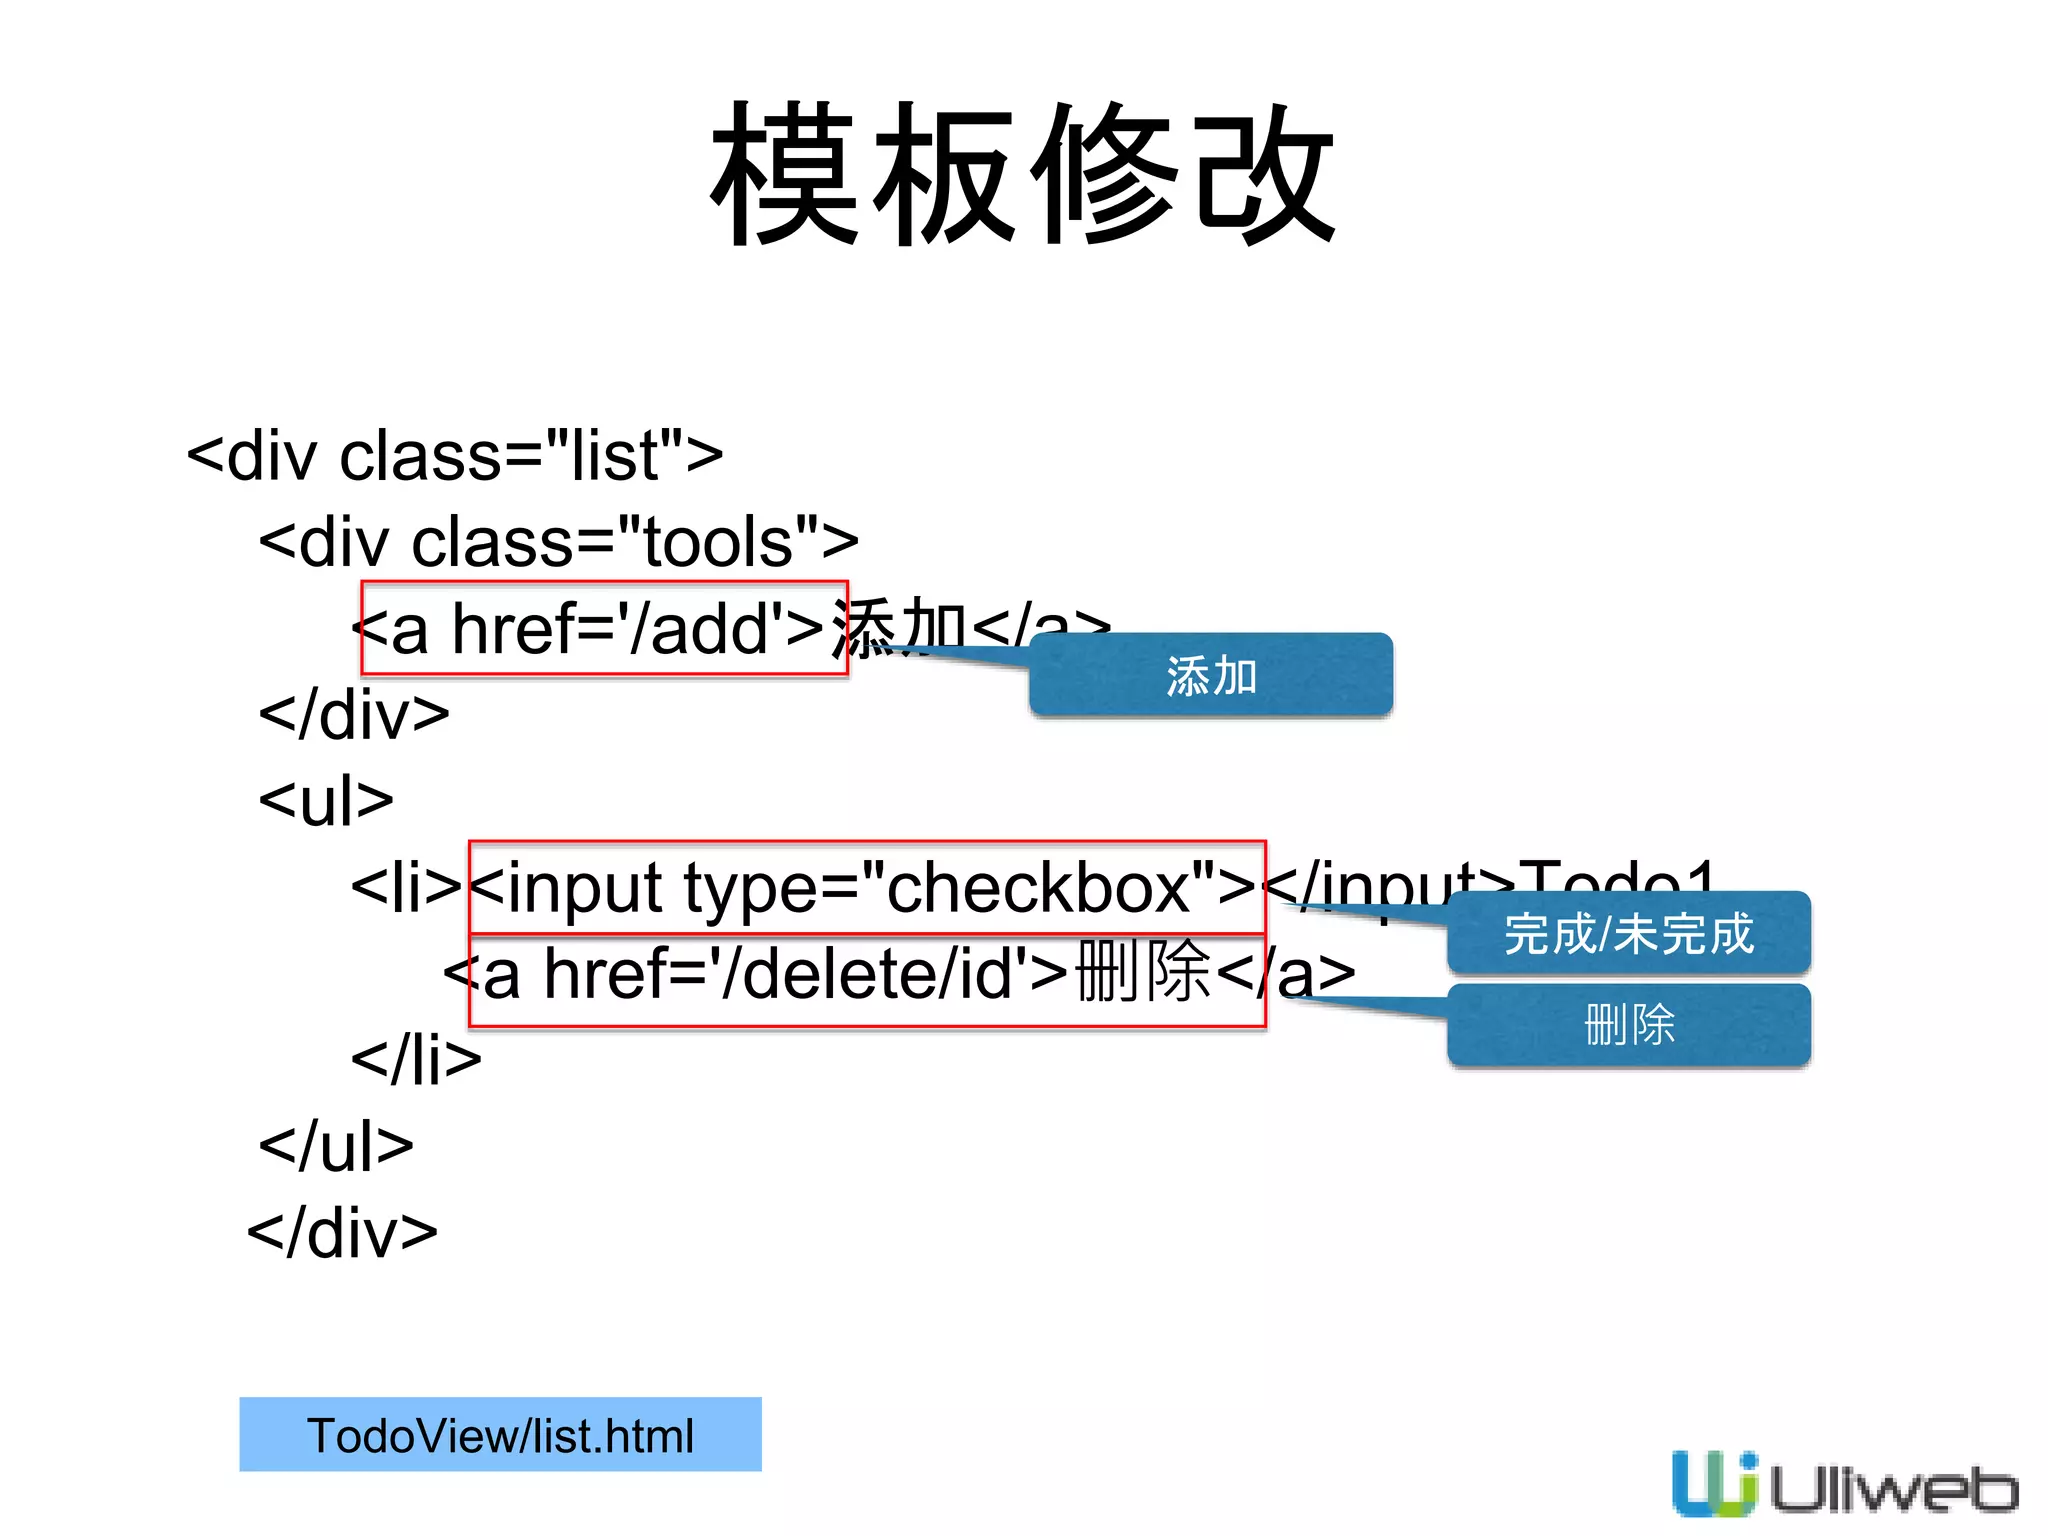
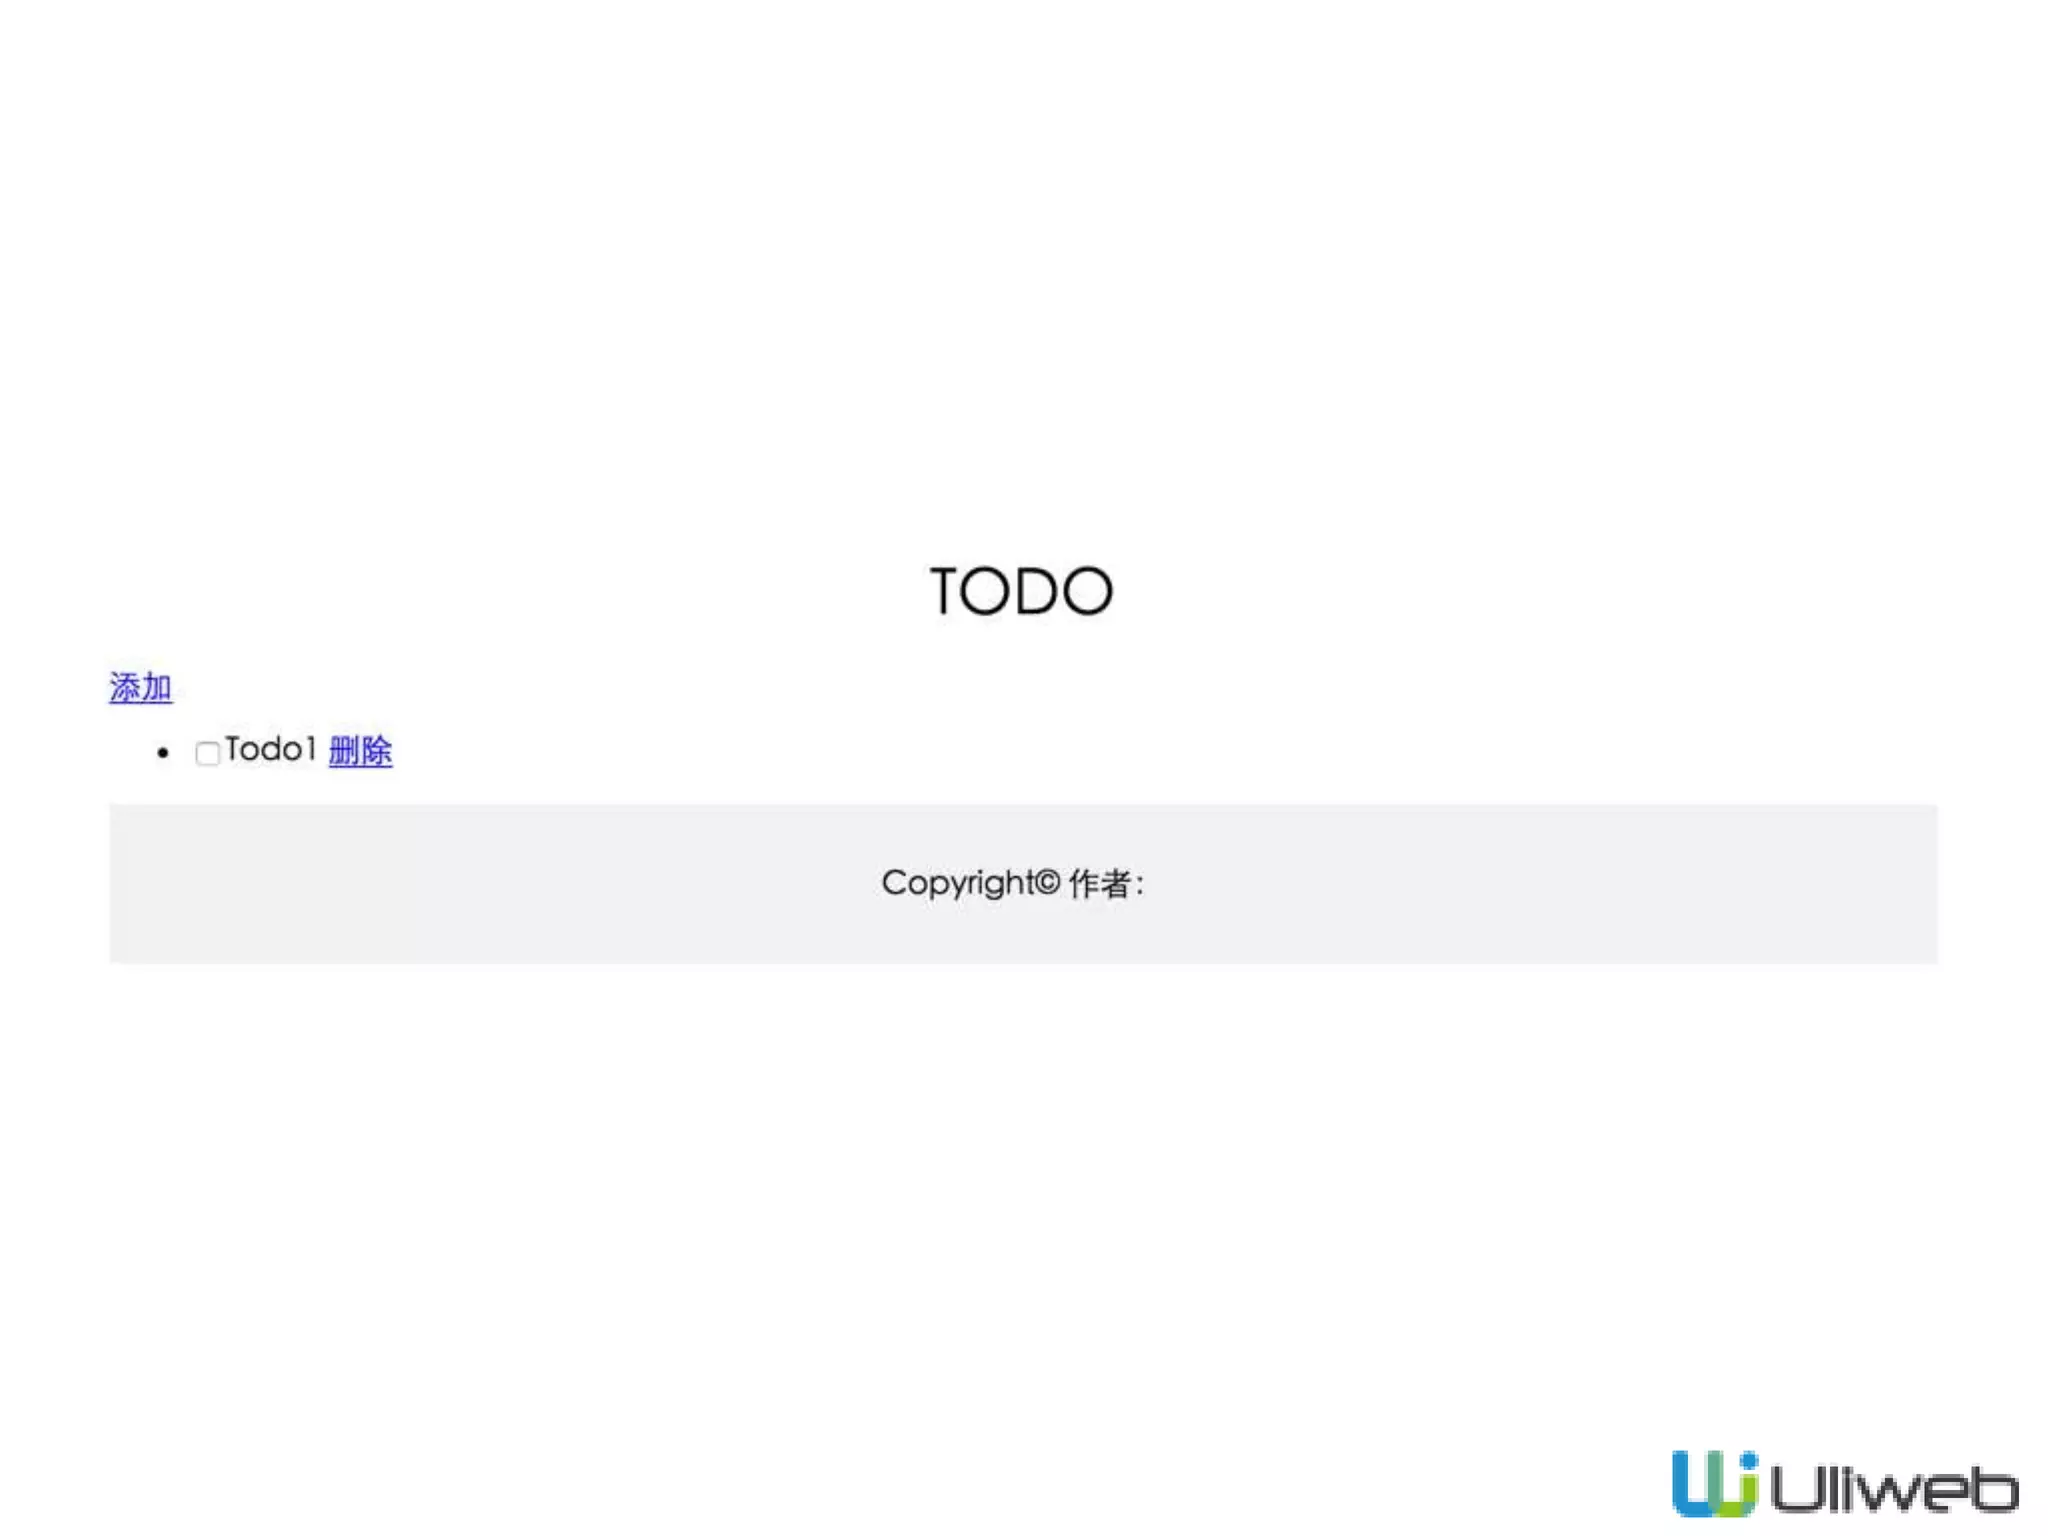
![TodoView/list.html
<script>
$(function(){
$('#todos :checkbox').click(function(e){
var $this = $(this);
var checked = $this.is(':checked');
var id = $this.data('id');
var parent = $($this.parents('li')[0]);
$.post('/update', {id:id, finished:checked}).success(function(r){
if(r.success){
if(checked)
parent.addClass('finished');
else
parent.removeClass('finished');
}else{
alert(r.message);
}
});
});
});
</script>
3
后台交互](https://image.slidesharecdn.com/02-150213191459-conversion-gate01/75/02-uliweb-56-2048.jpg)
![更新完成状态
def update(self):
from uliweb.utils improt date
id = request.POST['id']
finished = request.POST['finished'] == 'true'
todo = self.model.get(int(id))
todo.finished = finished
if finished:
todo.finished_time = date.now()
else:
todo.finished_time = None
todo.save()
return json({'success':True})
views.py
填写当前时间](https://image.slidesharecdn.com/02-150213191459-conversion-gate01/75/02-uliweb-58-2048.jpg)

![修改list.html(二)
$.post('/update', {id:id, finished:checked}).success(function(r){
if(r.success){
if(checked)
parent.addClass('finished');
else
parent.removeClass('finished');
var time = parent.find('.time');
var t = time.text().split('-');
t[1] = r.finished_time;
time.text(t.join('-')+') ');
}else{
alert(r.message);
}
});
TodoView/list.html
更新完成时间](https://image.slidesharecdn.com/02-150213191459-conversion-gate01/75/02-uliweb-64-2048.jpg)
![修改update
def update(self):
from uliweb.utils import date
id = request.POST['id']
finished = request.POST['finished'] == 'true'
todo = self.model.get(int(id))
todo.finished = finished
if finished:
todo.finished_time = date.now()
finished_time = todo.finished_time.strftime('%Y/%m/%d')
else:
todo.finished_time = None
finished_time = ''
todo.save()
return json({'success':True, 'finished_time':finished_time})
views.py
处理完成时间](https://image.slidesharecdn.com/02-150213191459-conversion-gate01/75/02-uliweb-66-2048.jpg)


![[Modern Web 2016] 讓你的 PHP 開發流程再次潮起來](https://cdn.slidesharecdn.com/ss_thumbnails/modernize-your-php-workflow-160824071317-thumbnail.jpg?width=640&height=640&fit=bounds)