How to configure the basic OSPF?
•
0 likes•9 views

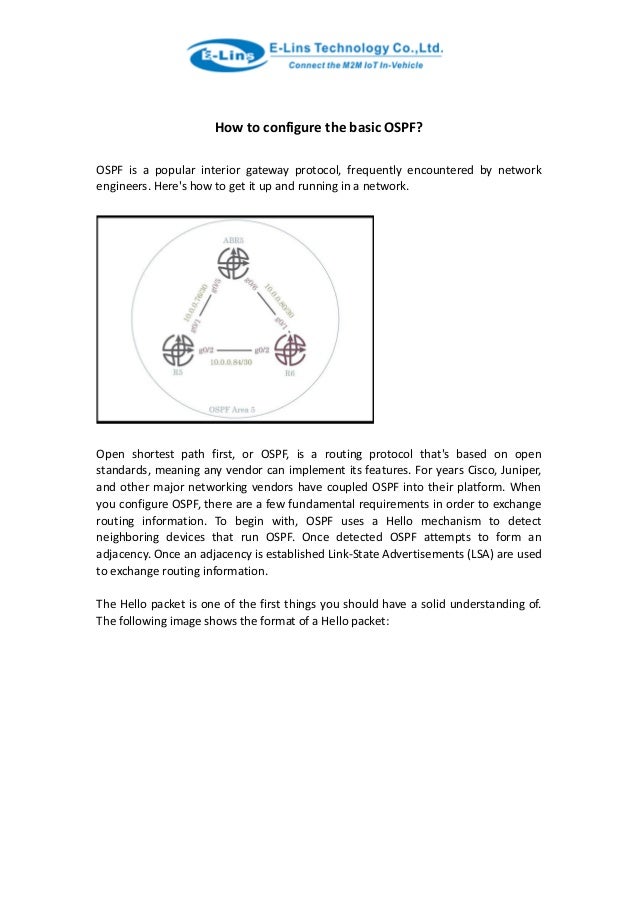
OSPF is a popular interior gateway protocol, frequently encountered by network engineers. Here's how to get it up and running in a network.

Recommended
More Related Content
Similar to How to configure the basic OSPF?
Similar to How to configure the basic OSPF? (20)
Recently uploaded
Recently uploaded (20)
How to configure the basic OSPF?
- 1. How to configure the basic OSPF? OSPF is a popular interior gateway protocol, frequently encountered by network engineers. Here's how to get it up and running in a network. Open shortest path first, or OSPF, is a routing protocol that's based on open standards, meaning any vendor can implement its features. For years Cisco, Juniper, and other major networking vendors have coupled OSPF into their platform. When you configure OSPF, there are a few fundamental requirements in order to exchange routing information. To begin with, OSPF uses a Hello mechanism to detect neighboring devices that run OSPF. Once detected OSPF attempts to form an adjacency. Once an adjacency is established Link-State Advertisements (LSA) are used to exchange routing information. The Hello packet is one of the first things you should have a solid understanding of. The following image shows the format of a Hello packet:
- 2. This packet is used by the Hello protocol, which is responsible for establishing and maintaining neighbor relationships. The Hello protocol also ensures that communication between neighbors is bidirectional. These packets get sent out of an interface where OSPF is enabled on a periodic basis. If a router receives a packet and sees its own address listed it knows that bidirectional communication exists. Once bidirectional communication is established a Designated Router (DR) is selected if on a multiaccess network. We're not going to cover that process in this article, however we highlight it because it's an integral part of OSPF. After two devices neighbor up, they synchronize Link-State databases. To configure basic OSPF to form a neighbor adjacency on a Elins router perform the following: 1.Identify the network interfaces that should run OSPF. 2.Identify the OSPF area 3.Issue the required commands to enable OSPF Let's assume the following topology in which we are using OSPF area 5 and ABR5 and R5 are pre-configured for us. We need to enable OSPF on R6. Start by entering OSPF configuration mode. You'll need to identify OSPF by a process ID. In this case, it's 1. R6>en R6#conf t Enter configuration commands, one per line. End with CNTL/Z.
- 3. R6(config)#router ospf 1 R6(config-router)# Next, issue the network statement for each interface that should run OSPF. According to our network topology we will enable OSPF on interface g0/1 and g0/2. The network statement format is as follows: network X.X.X.X W.W.W.W area A In this syntax, the X.X.X.X indicates the network address. The W.W.W.W is the wildcard mask. The A is the area ID. R6(config-router)#network 10.0.0.80 0.0.0.3 area 5 R6(config-router)#network 10.0.0.84 0.0.0.3 area 5 R6(config-router)# A simple way to identify the wildcard mask is to subtract the subnet mask in the last octet from 255. In this case 255 - 252 - 3 so our wildcard mask is going to end in .3. We now need to verify that OSPF has neighbored up and synchronized databases. To do so, issue the show ip ospf neighbors command. R6#sh ip ospf neighbor ` Neighbor ID Pri State Dead Time Address Interface` 192.168.0.10 1 FULL/DR 00:00:35 10.0.0.85 GigabitEthernet0/2` 192.168.0.9 1 FULL/BDR 00:00:31 10.0.0.81 GigabitEthernet0/1` R6#` As you can tell, we are receiving OSPF routes. In fact, we are receiving more routes to destinations that we don't see in our topology. This is because we are only focusing on a small part of the topology. What we don't see is that ABR5 is connected to several other routers forming a backbone and exchanging routes between other areas. This obviously leads to more questions about OSPF, however, as it stands we have configured basic OSPF and can now route traffic on R6. Visit E-Lins Technology for more details!