
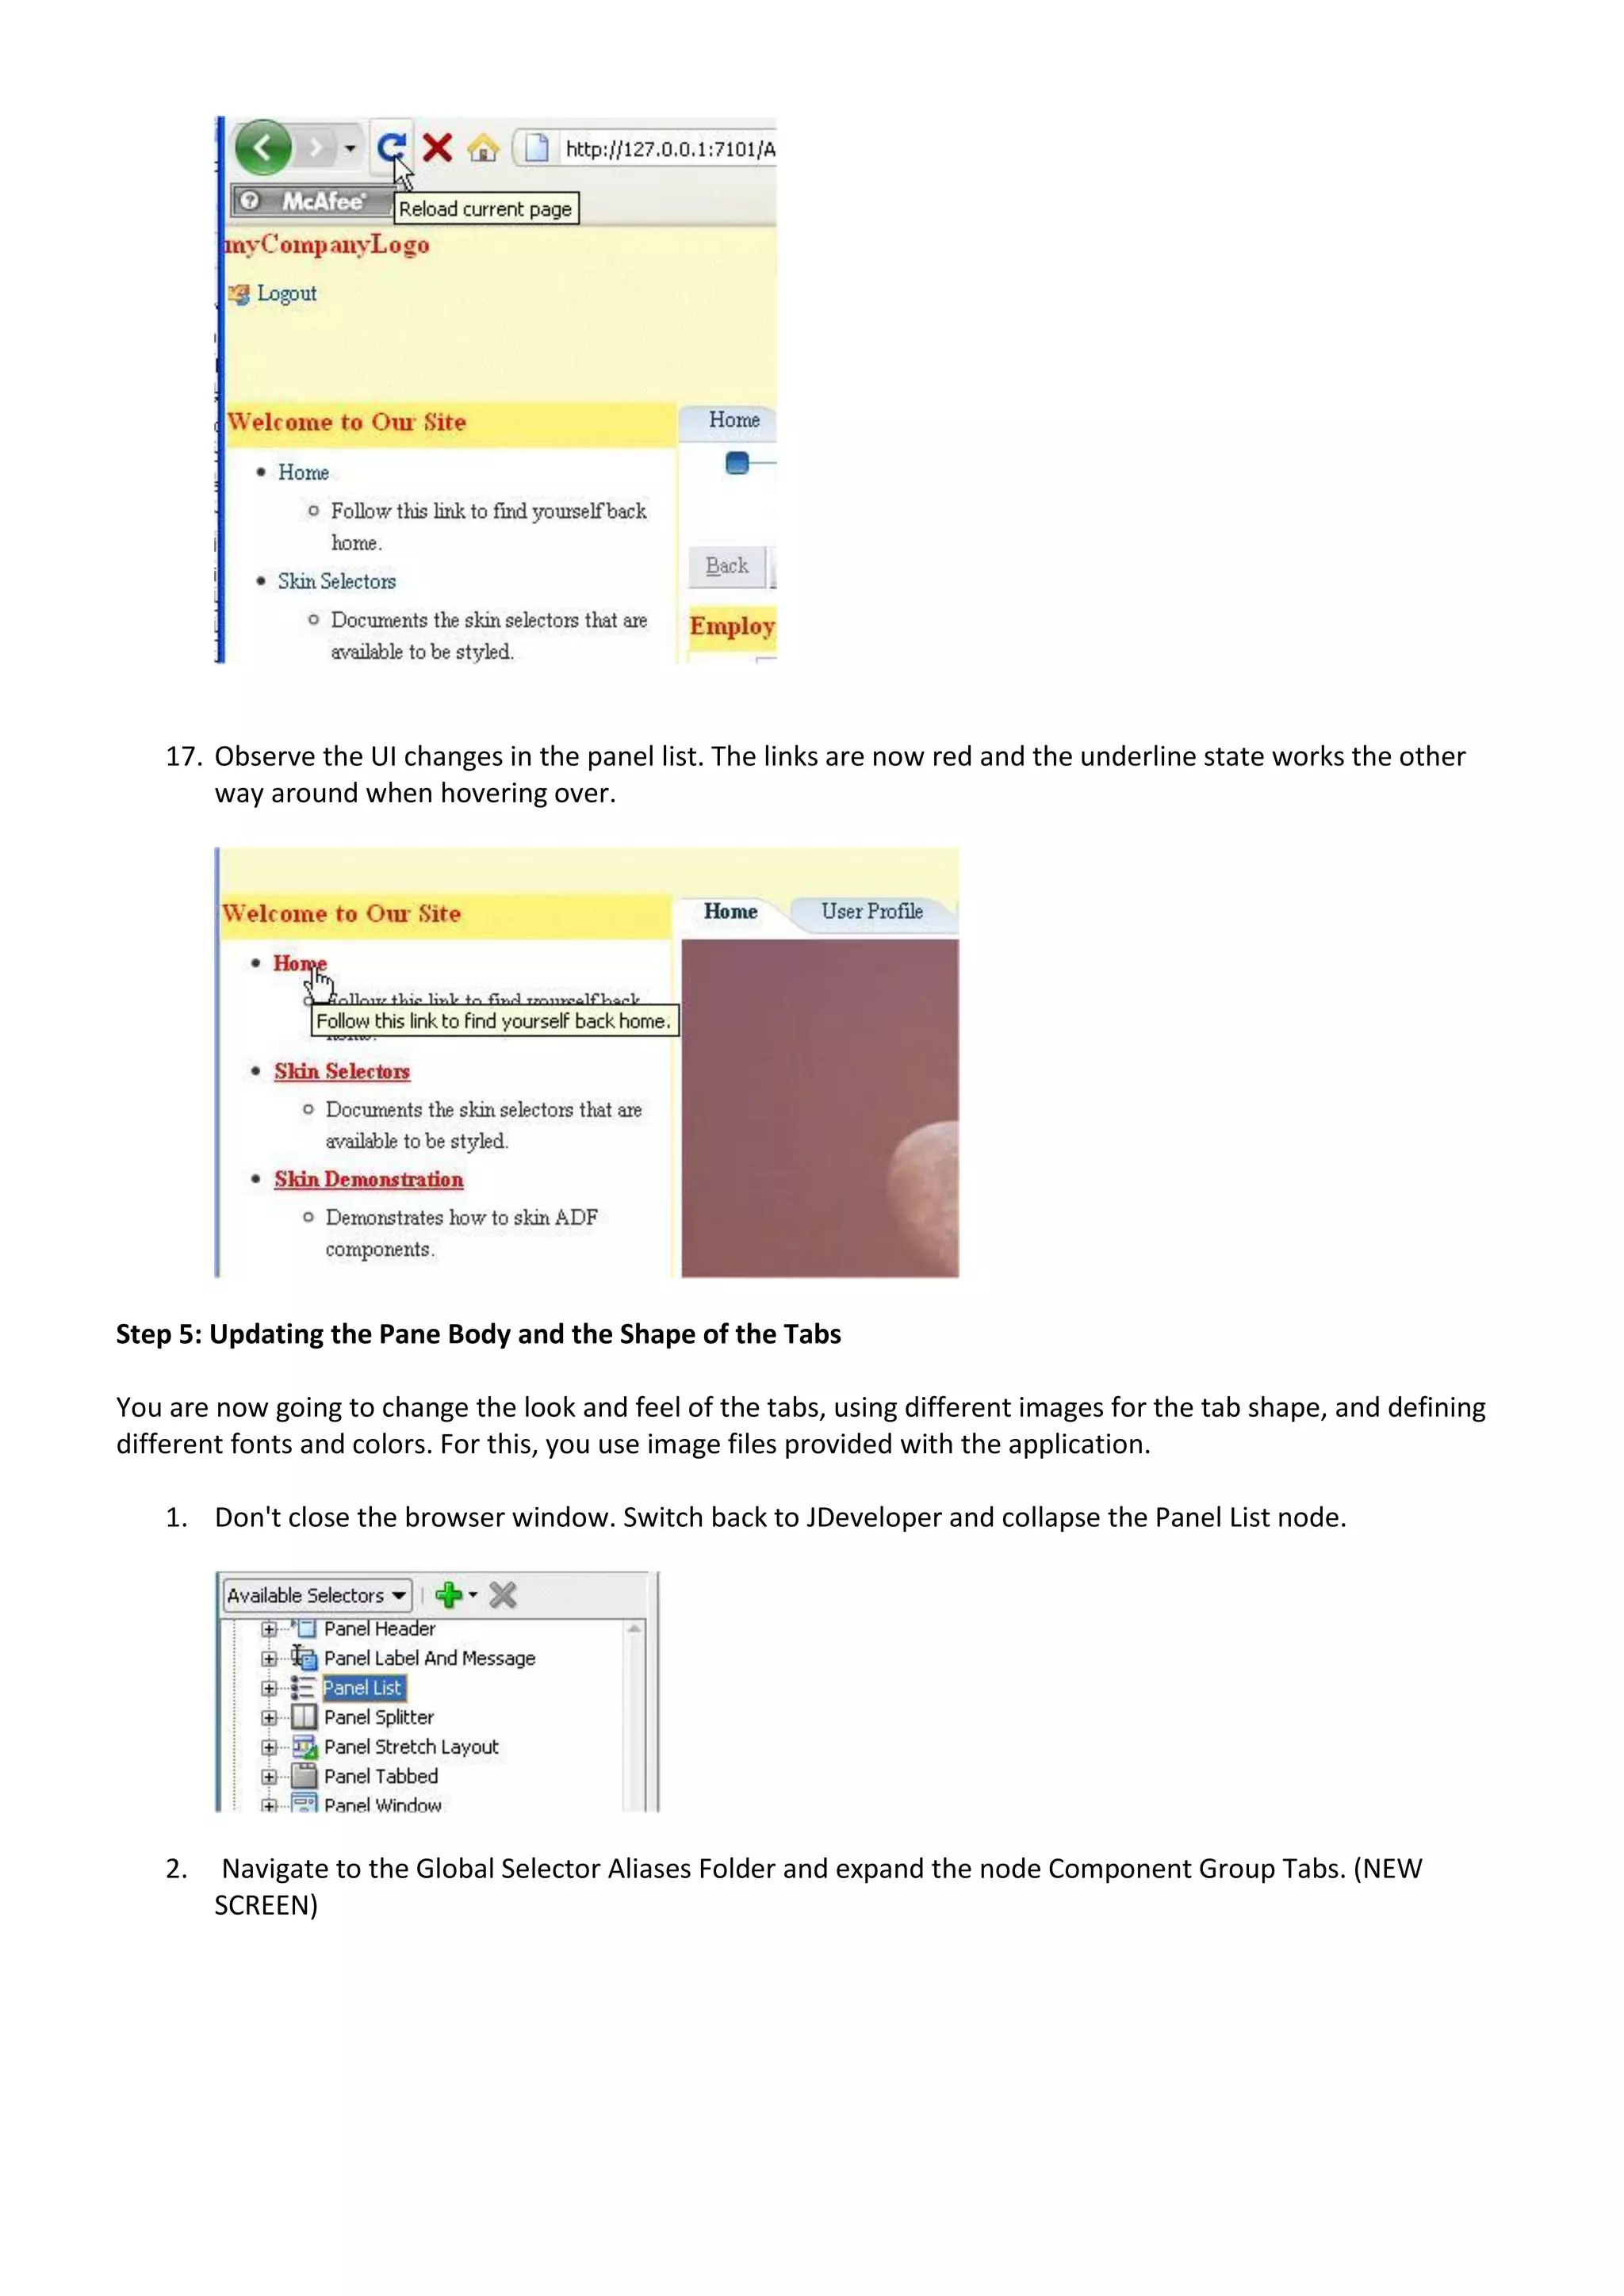
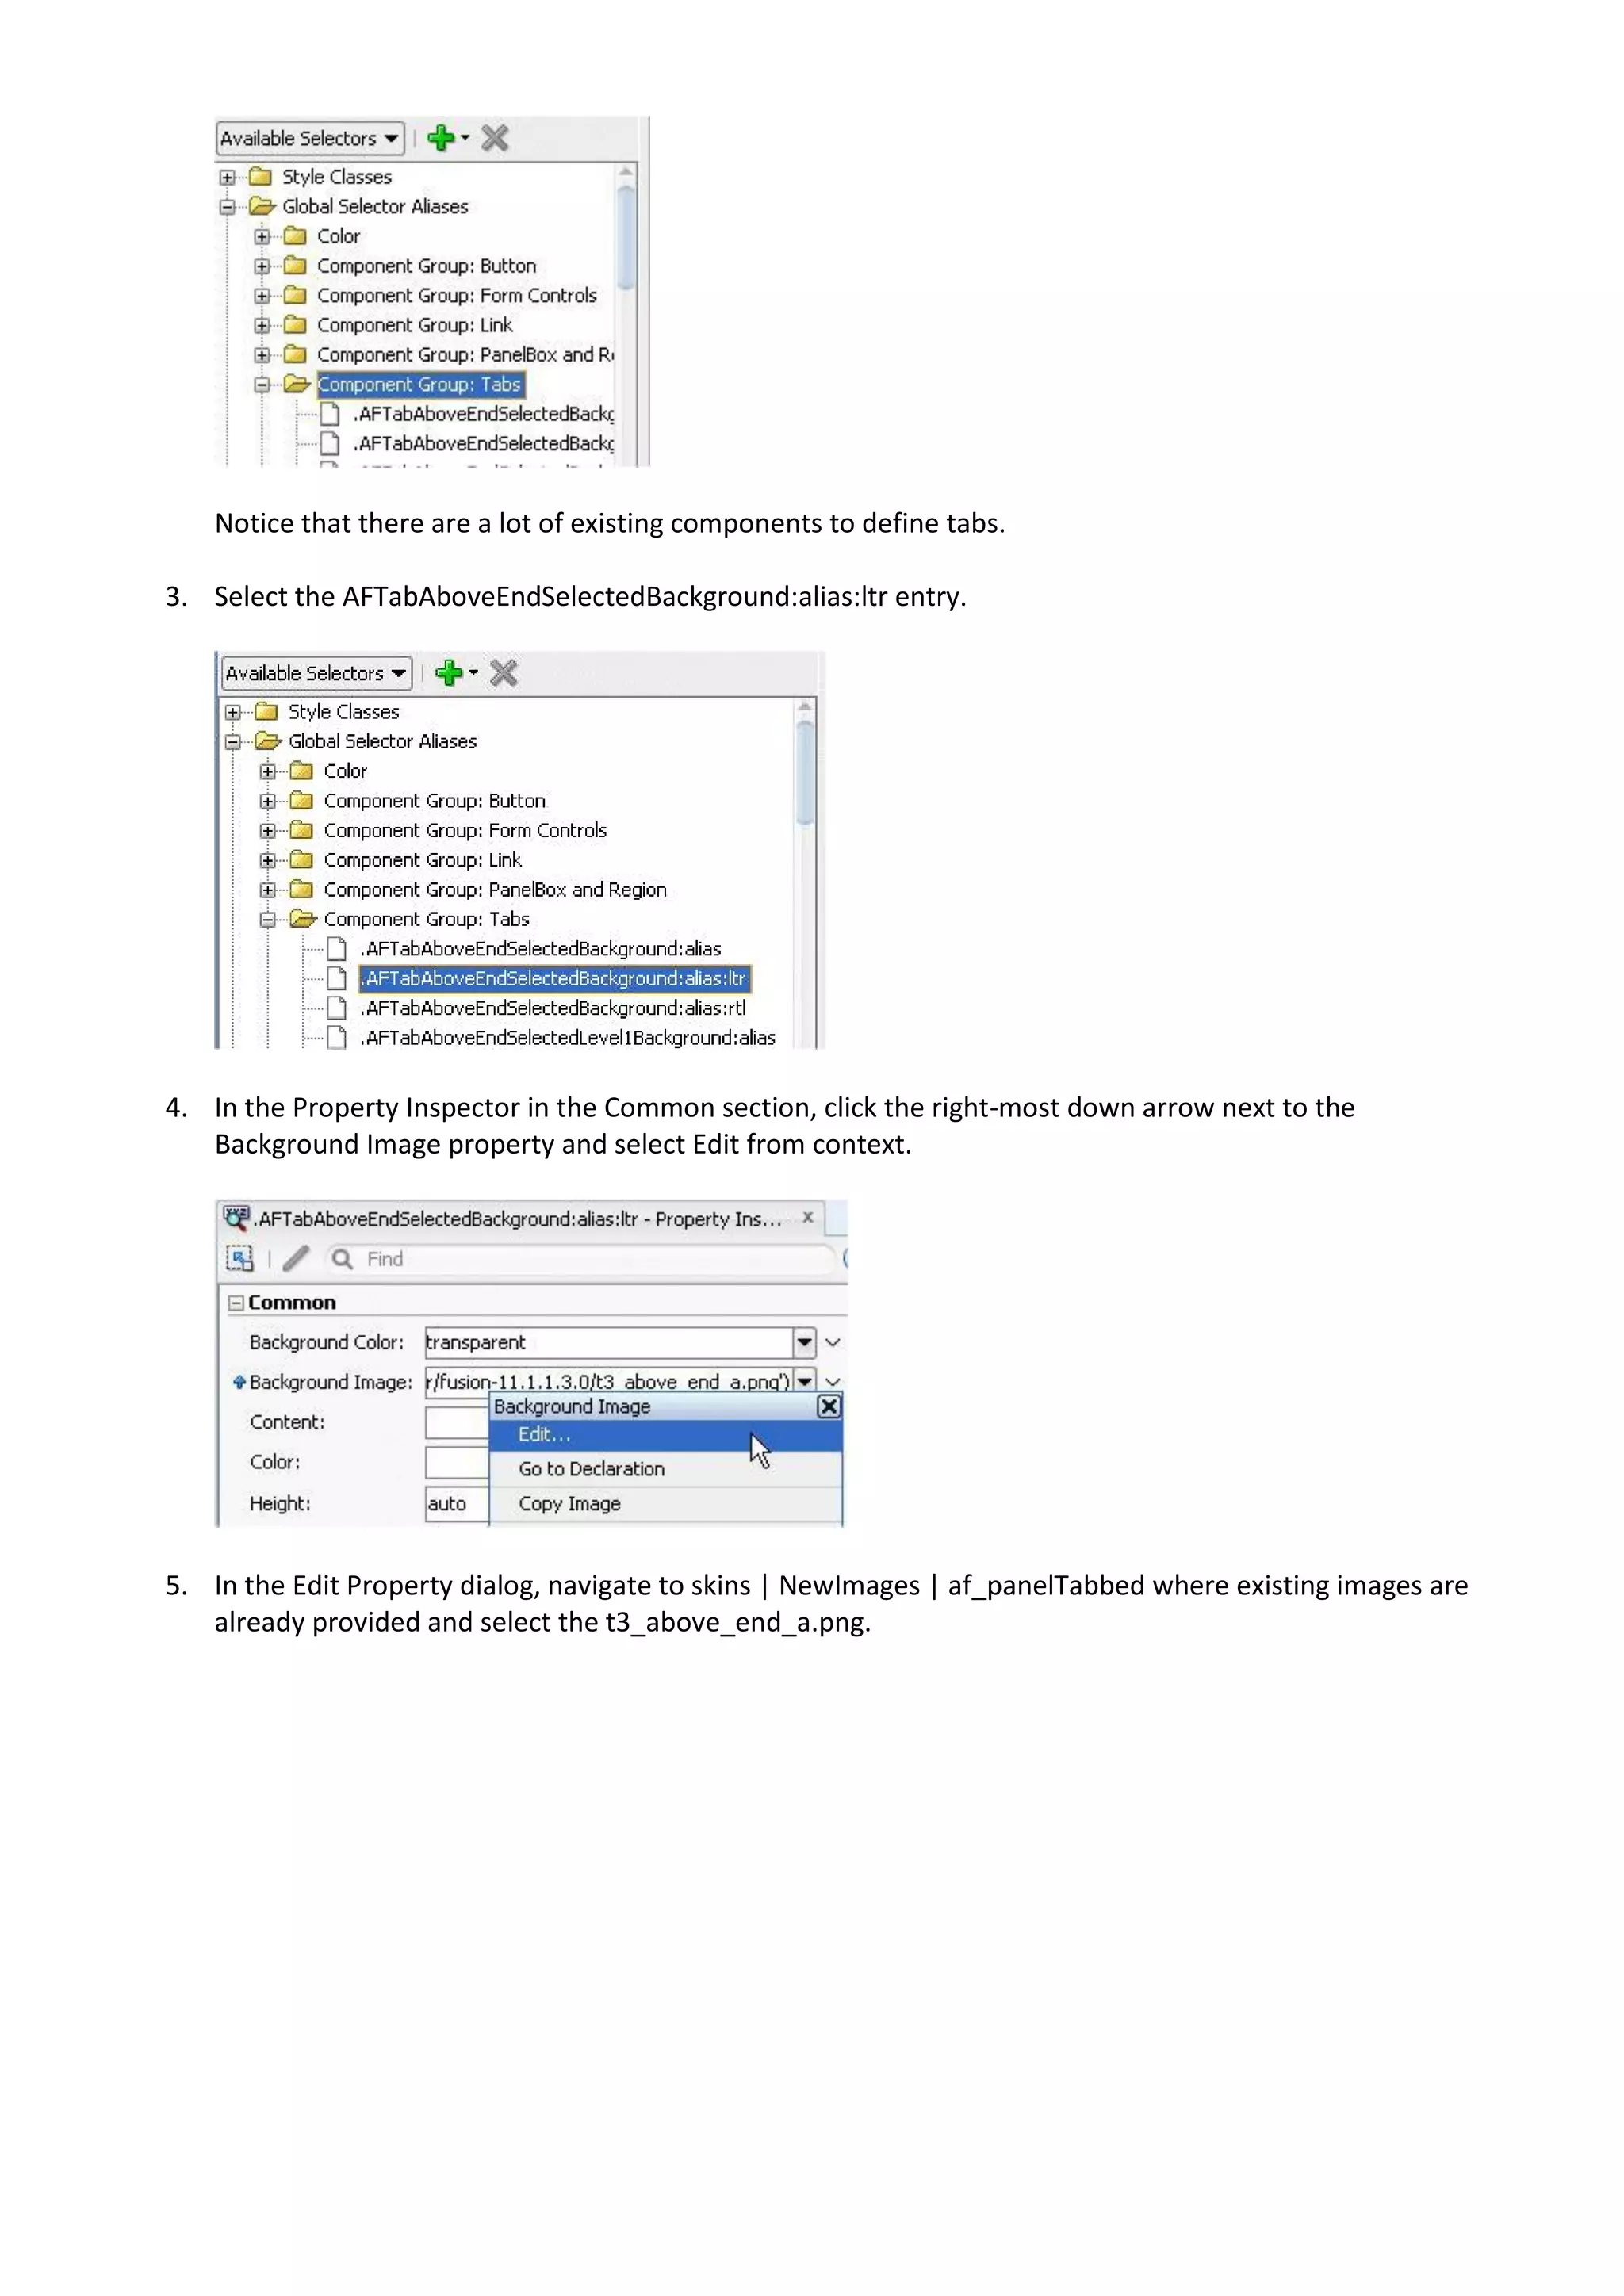
![14. To be able to see the new look and feel defined for the tabs, you need to press the Ctrl key and click the
reload button at the same time (In case the [Ctrl] + [Reload] action does not refresh the page, re-run the
home page from JDeveloper). Observe the new rendering of your page. Click the Employees Overview
tab to see the look and feel of active versus unselected tabs.
15. Switch back to JDeveloper. Now you need to update the text color of the link in the tabs to better match
our styling. Navigate to the af|panelTabbed node and click the Source tab.
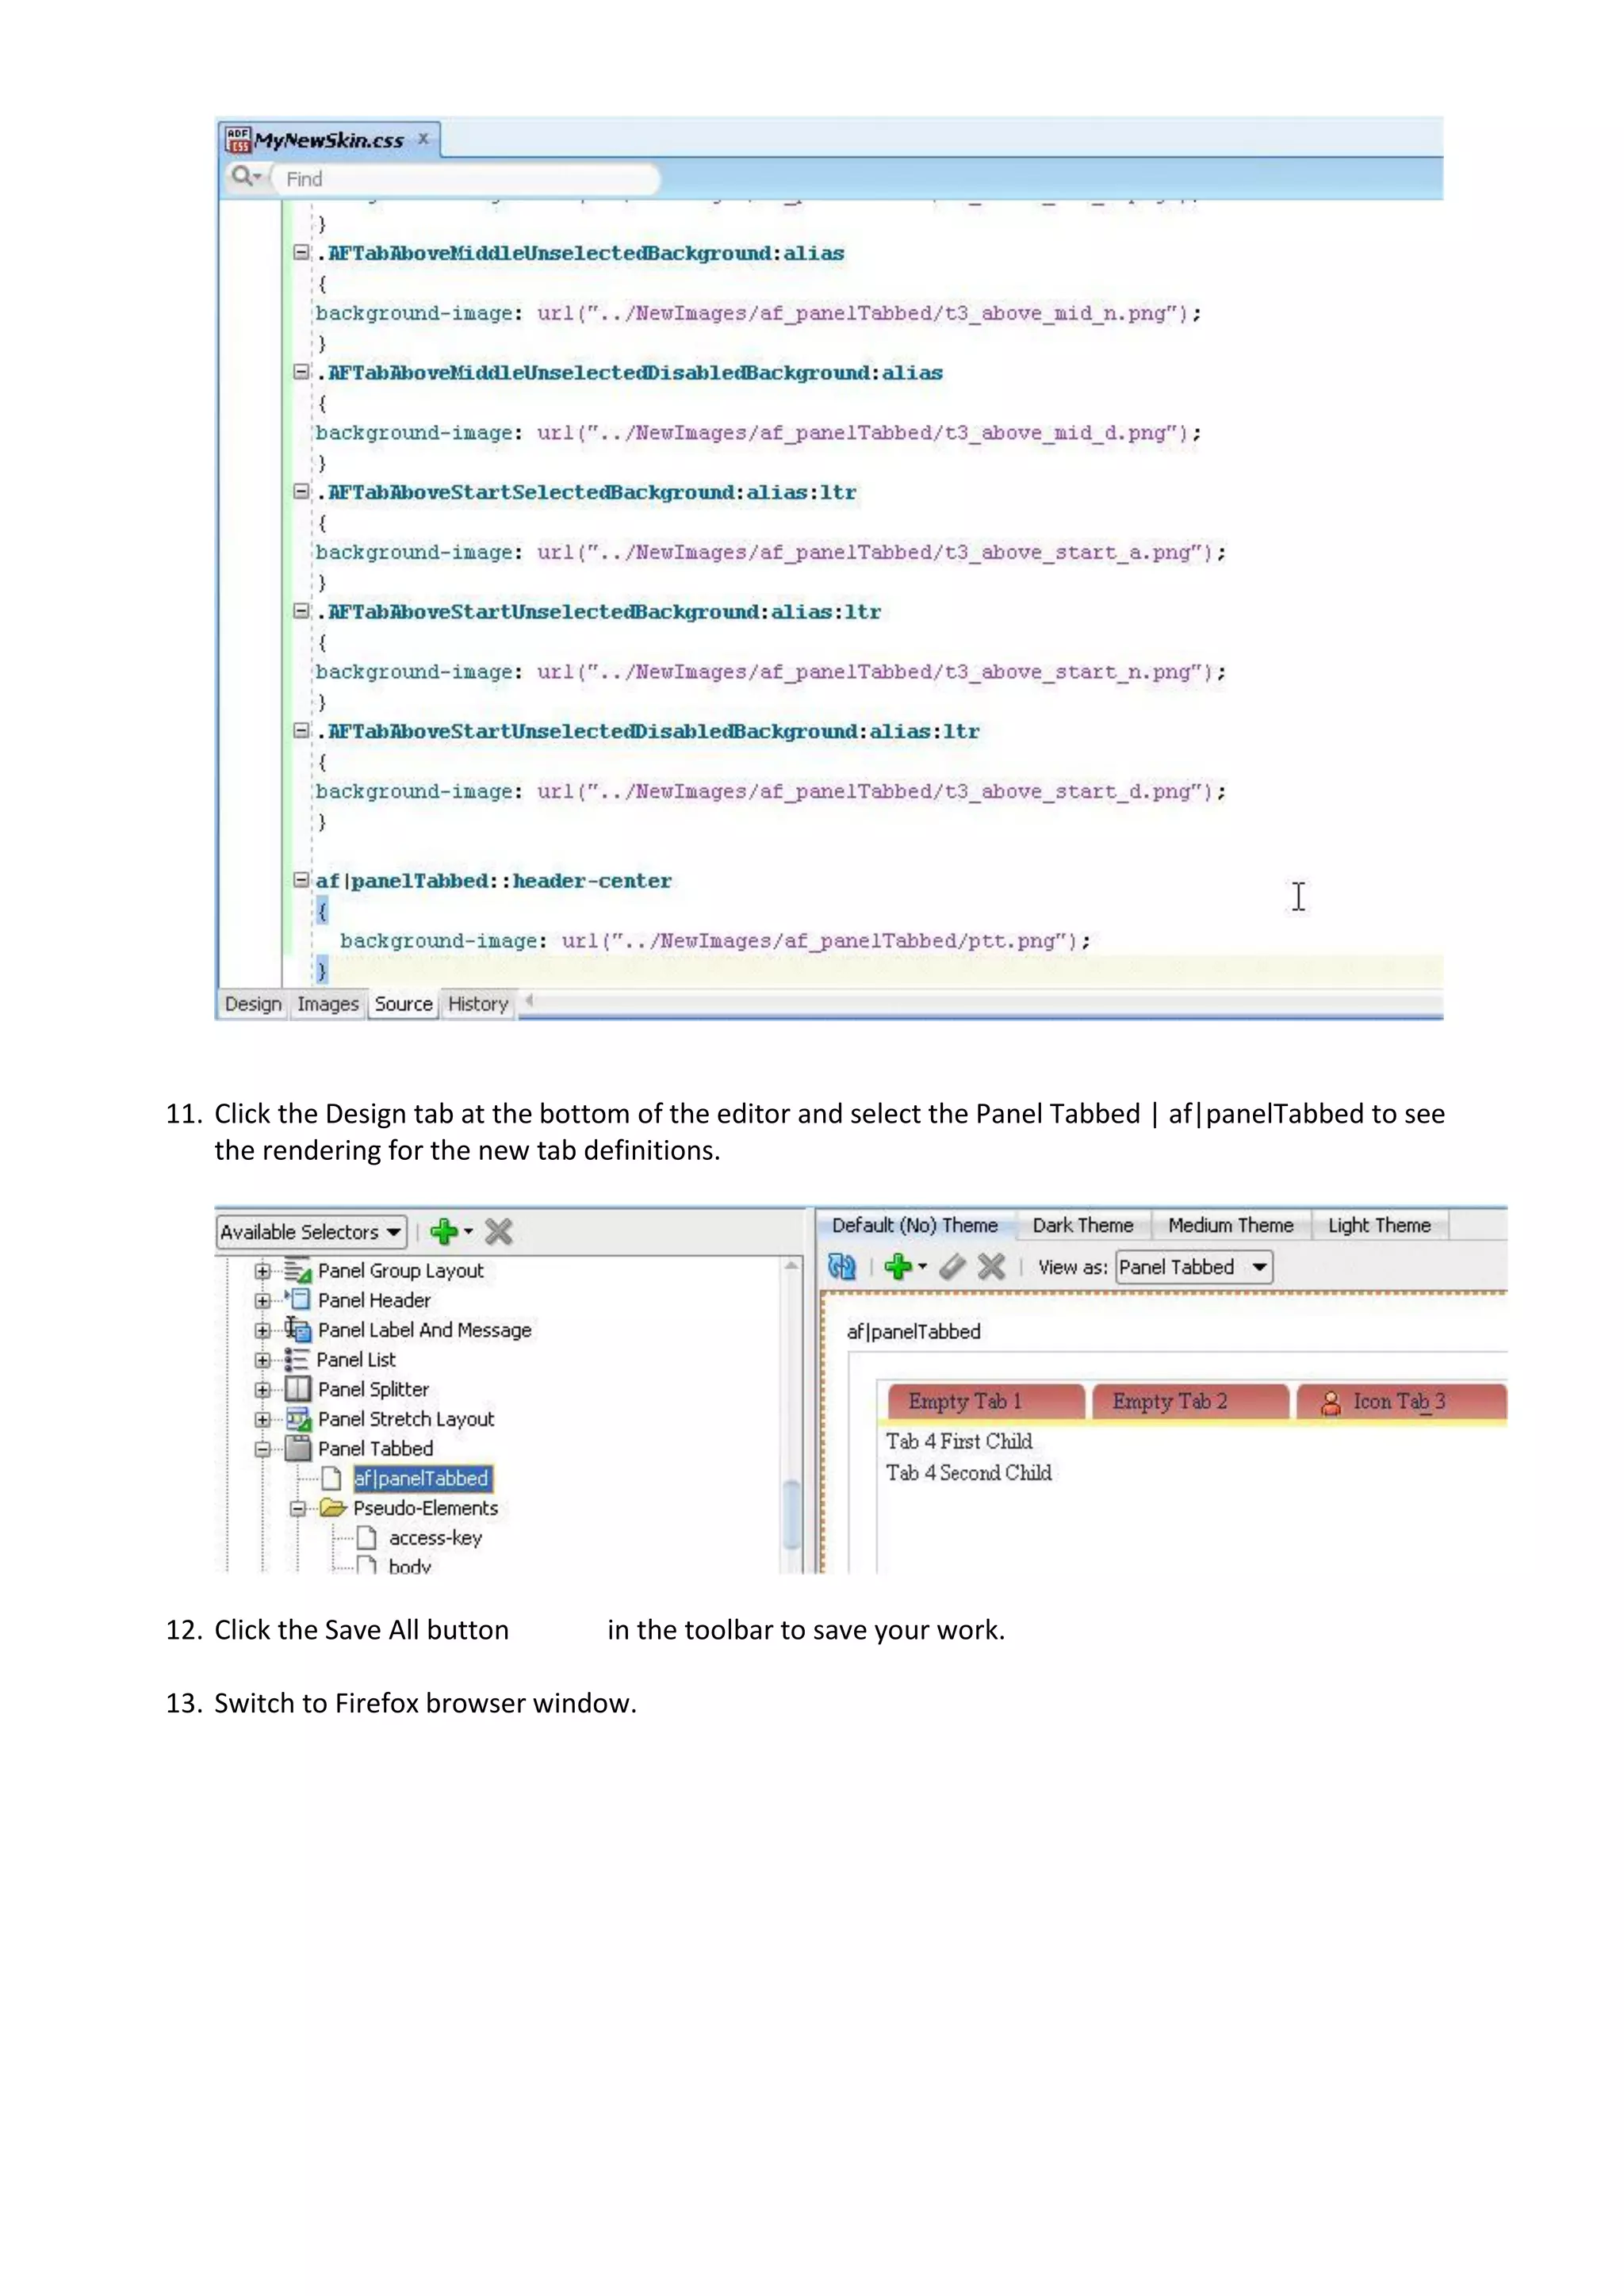
16. Enter the following statements at the bottom of the code to define the new tab aspect.
af|panelTabbed::header-center
{ background-image: url("../NewImages/af_panelTabbed/ptt.png"); }
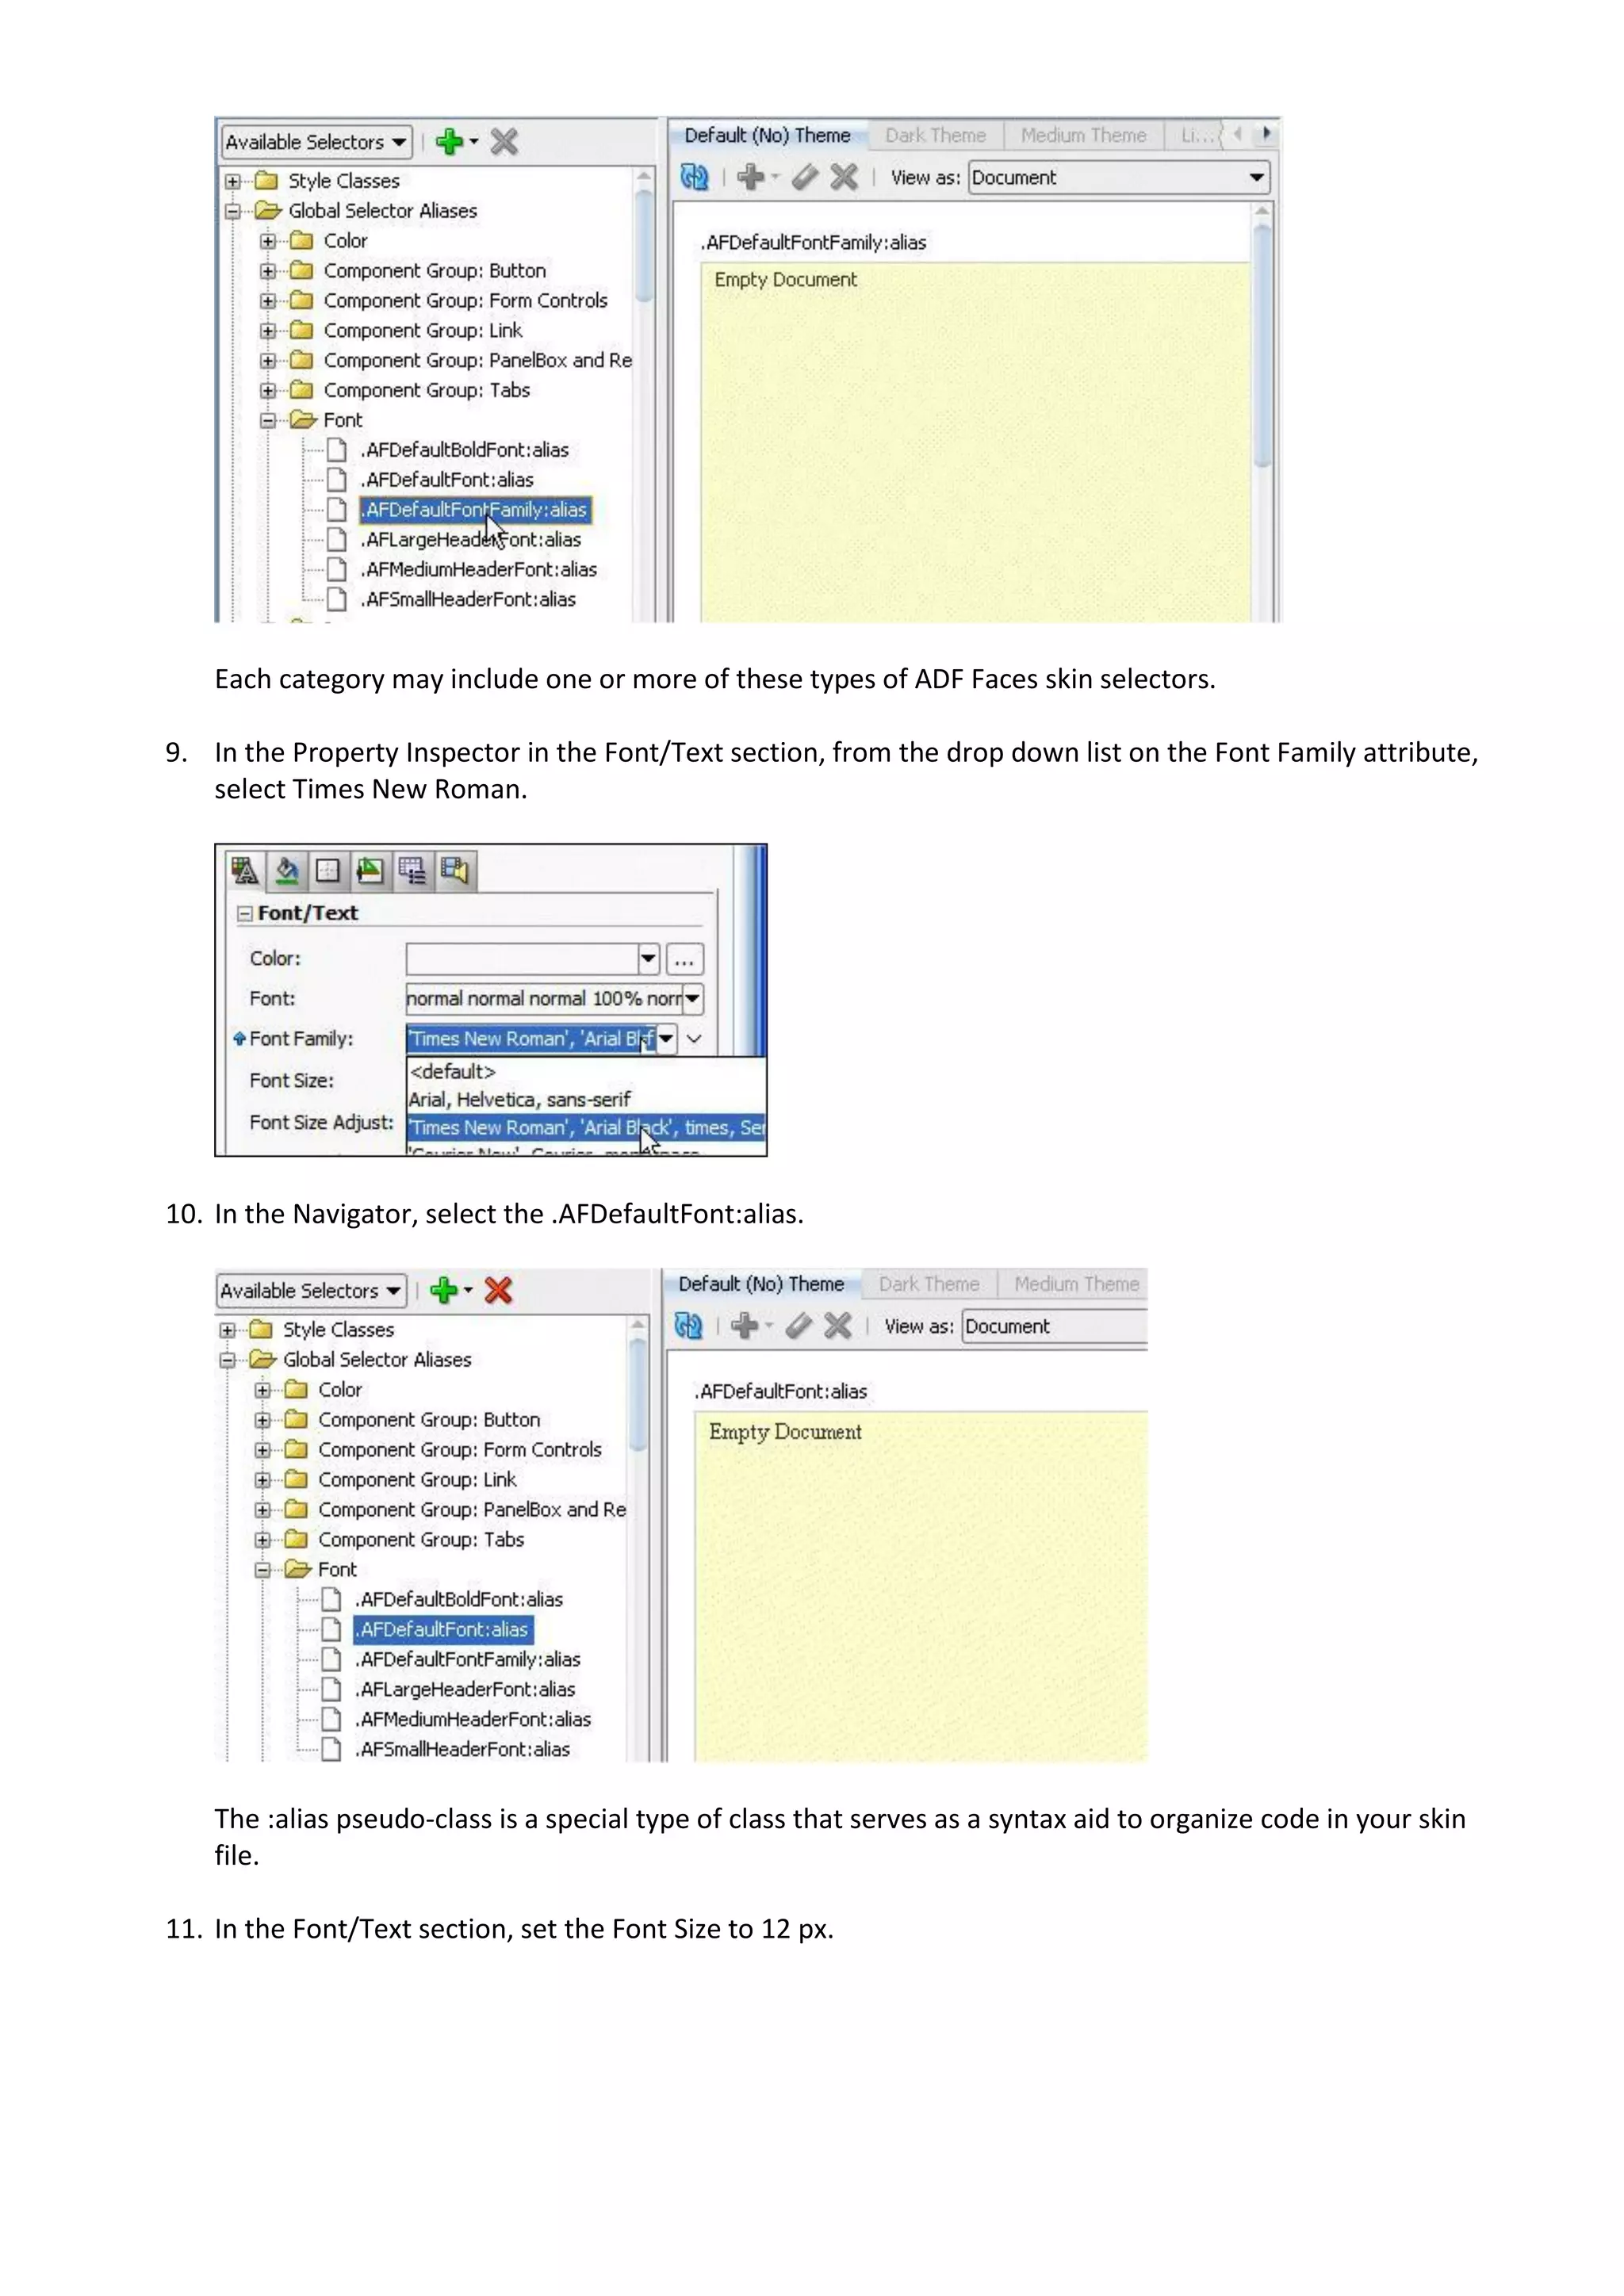
af|panelTabbed::tab af|panelTabbed::tab-text-link
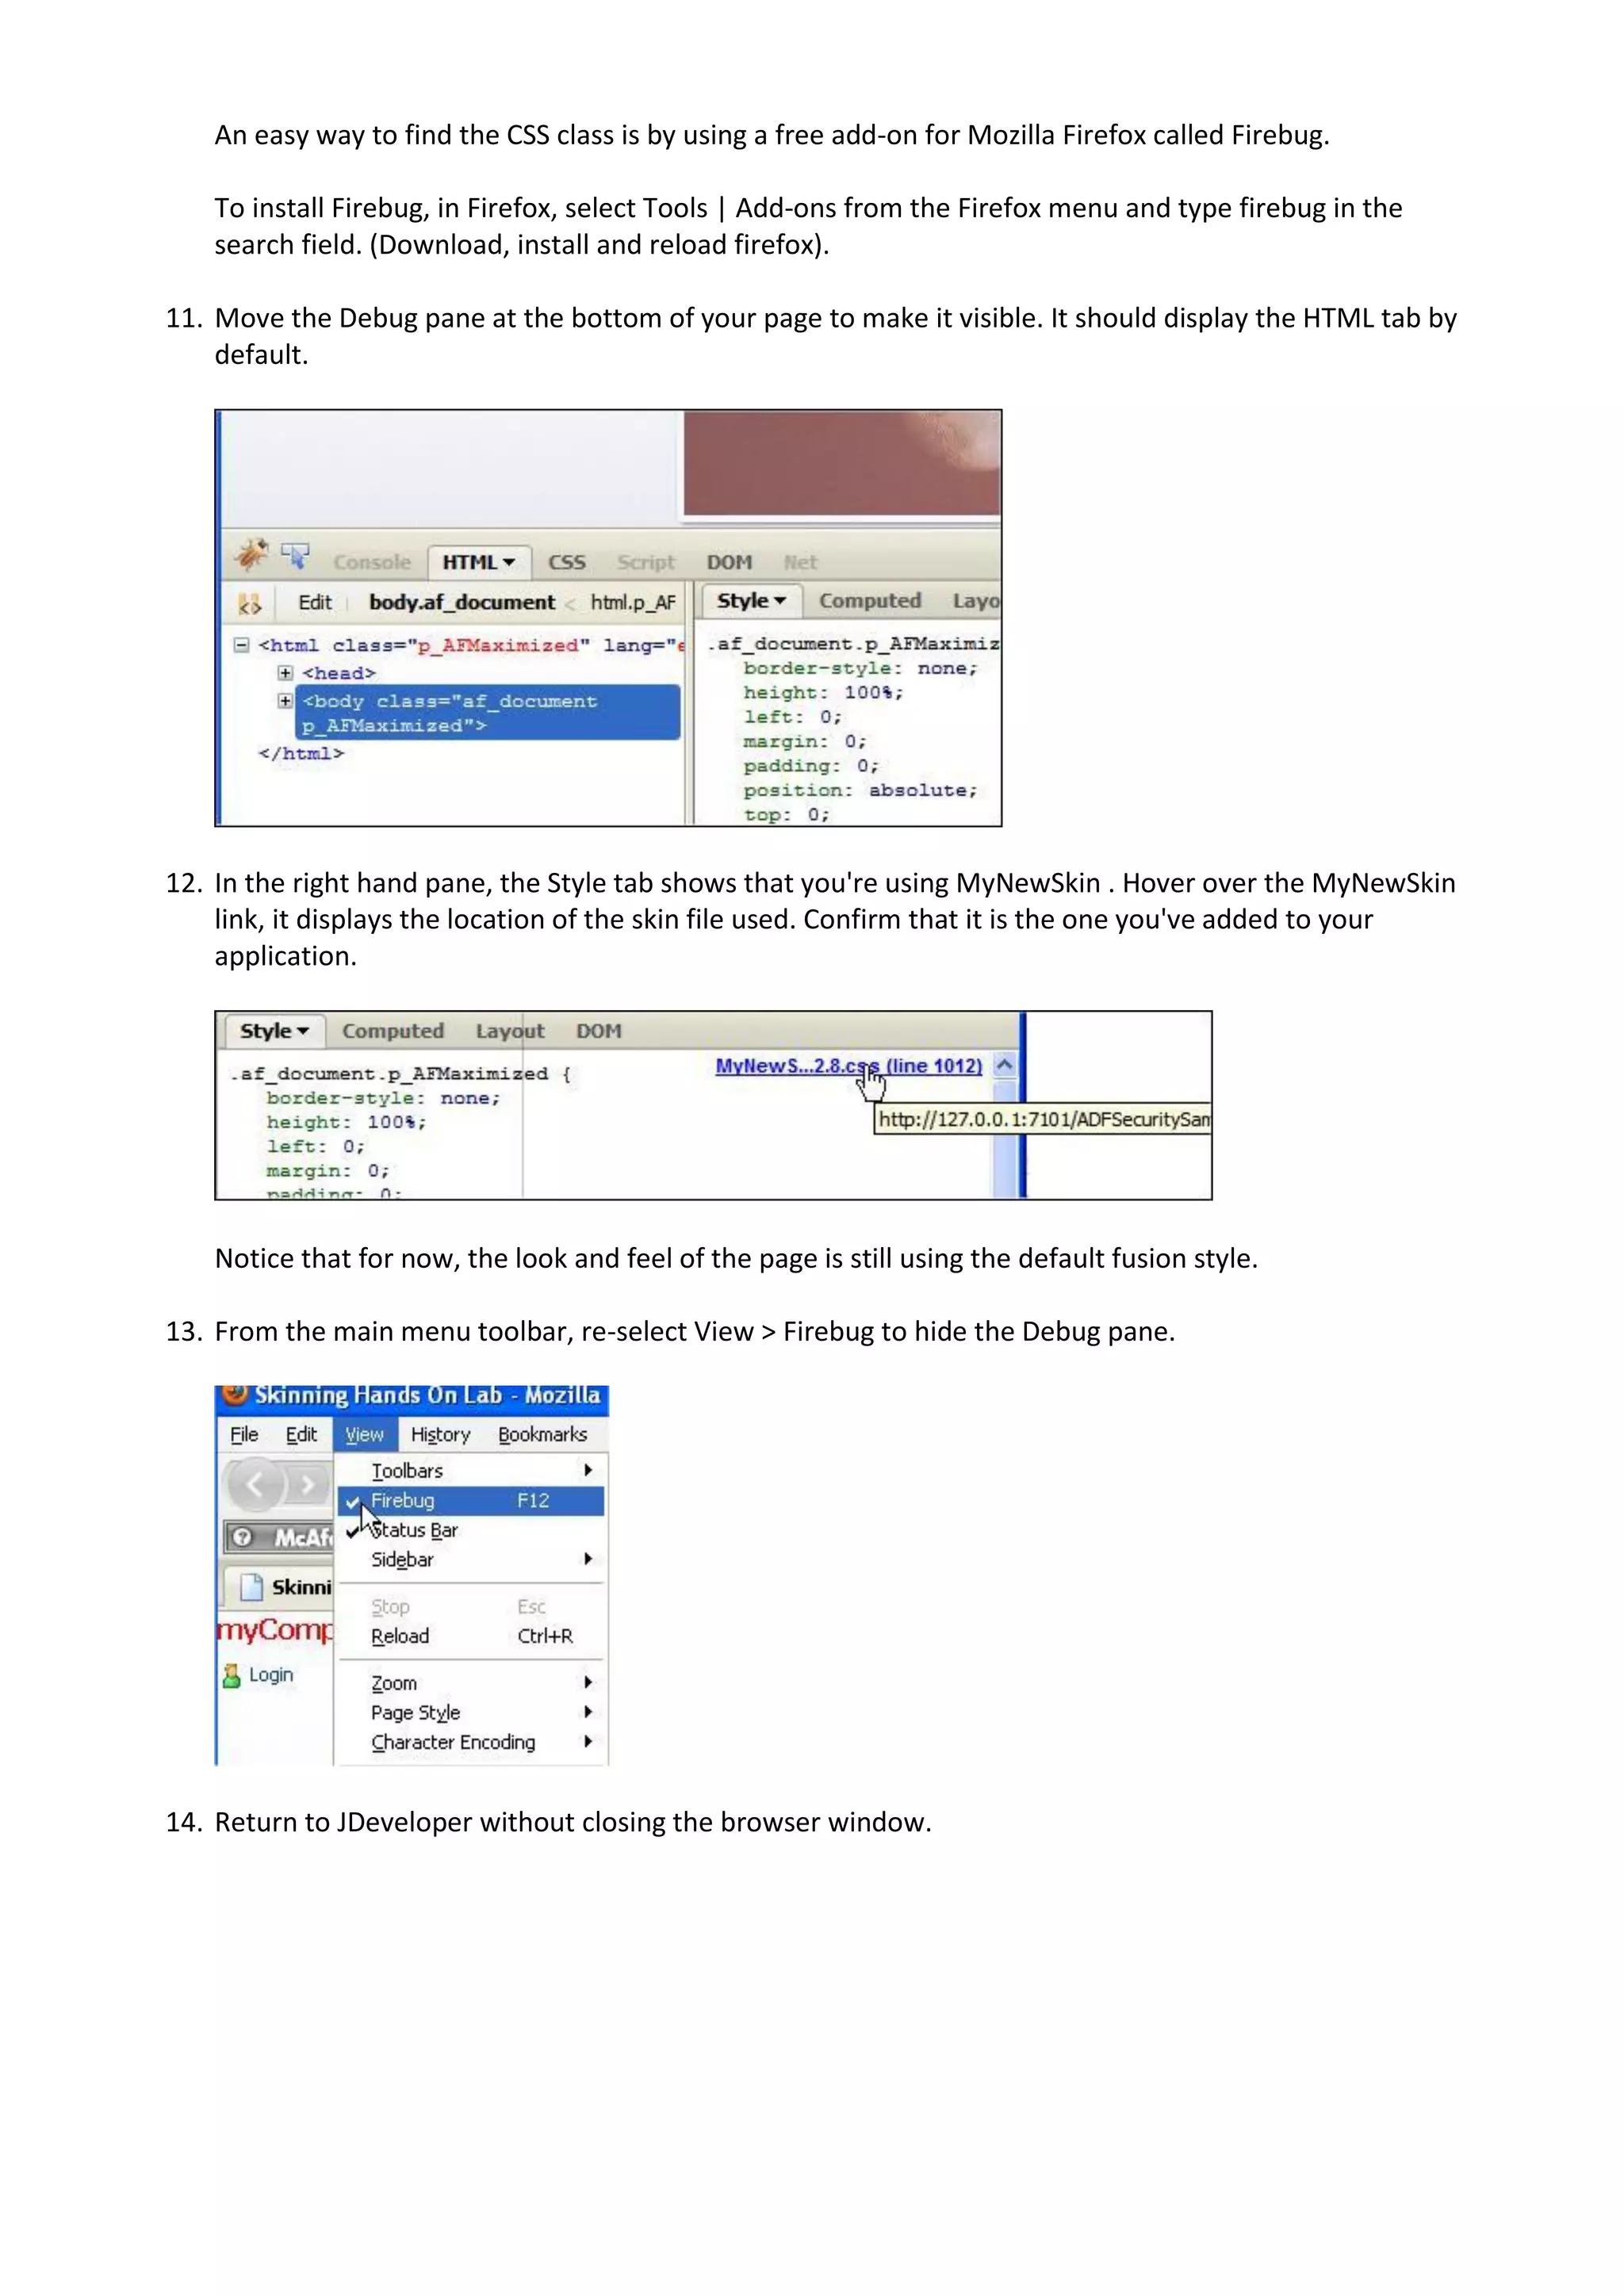
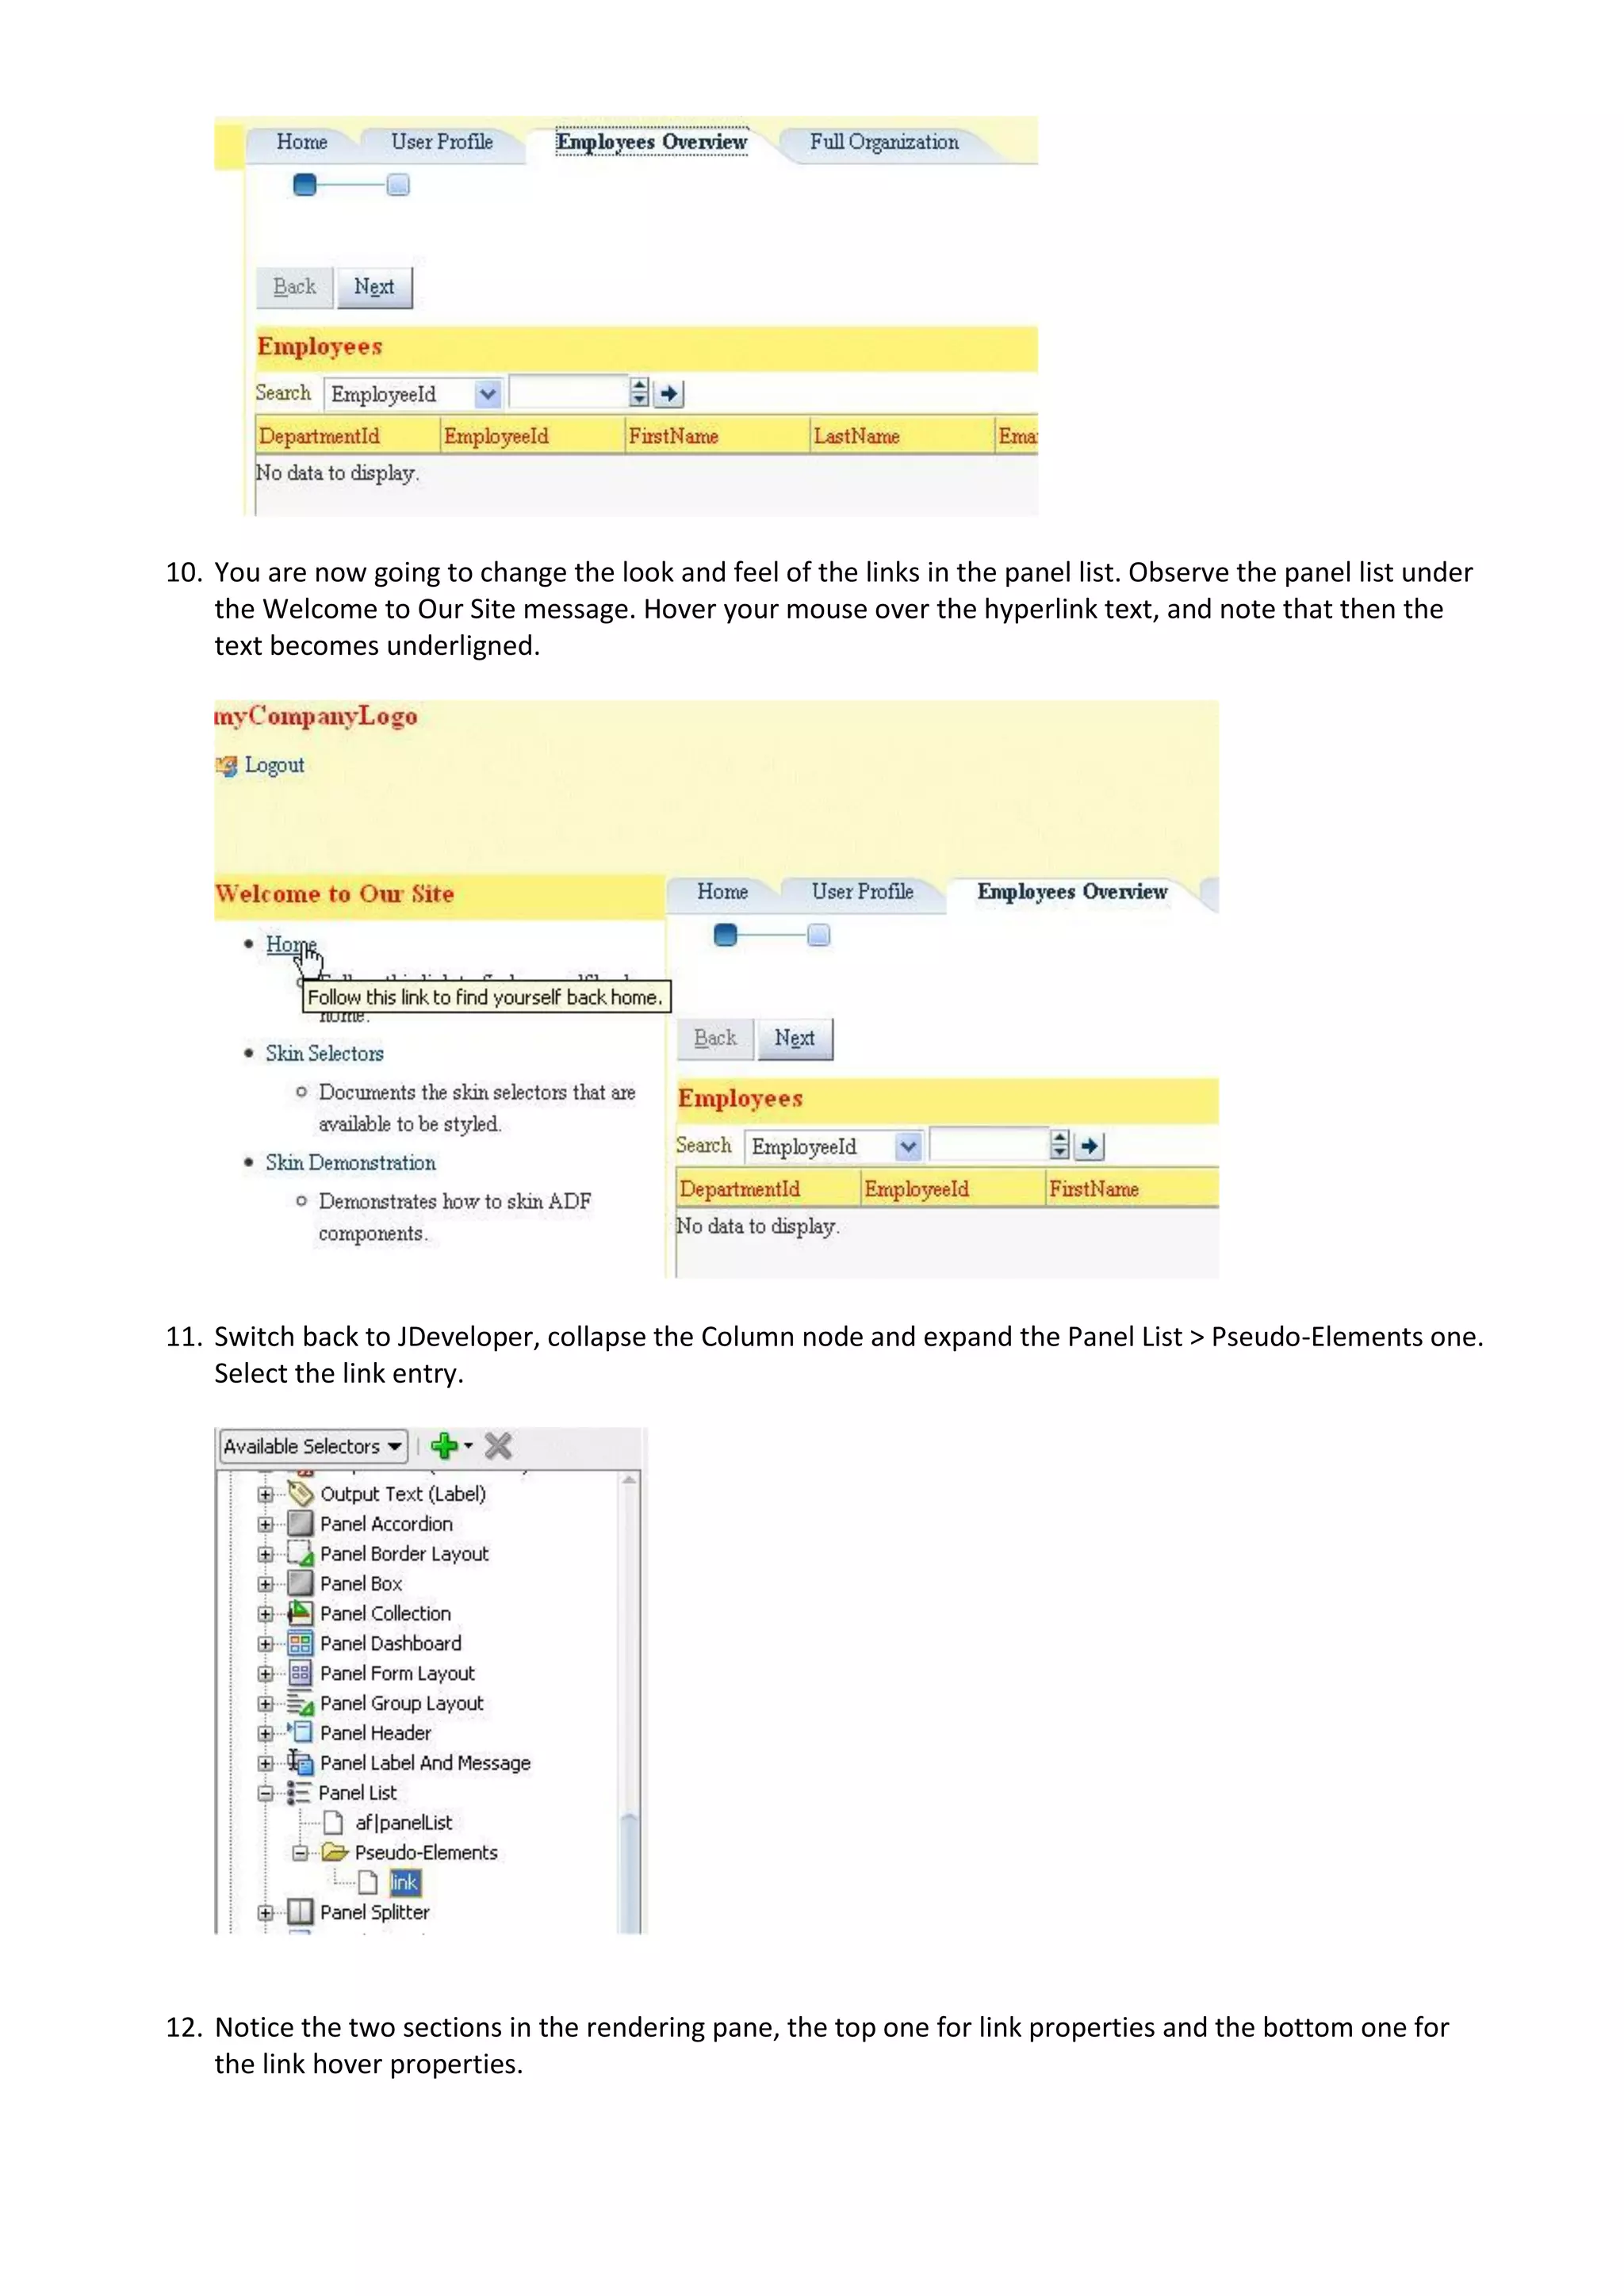
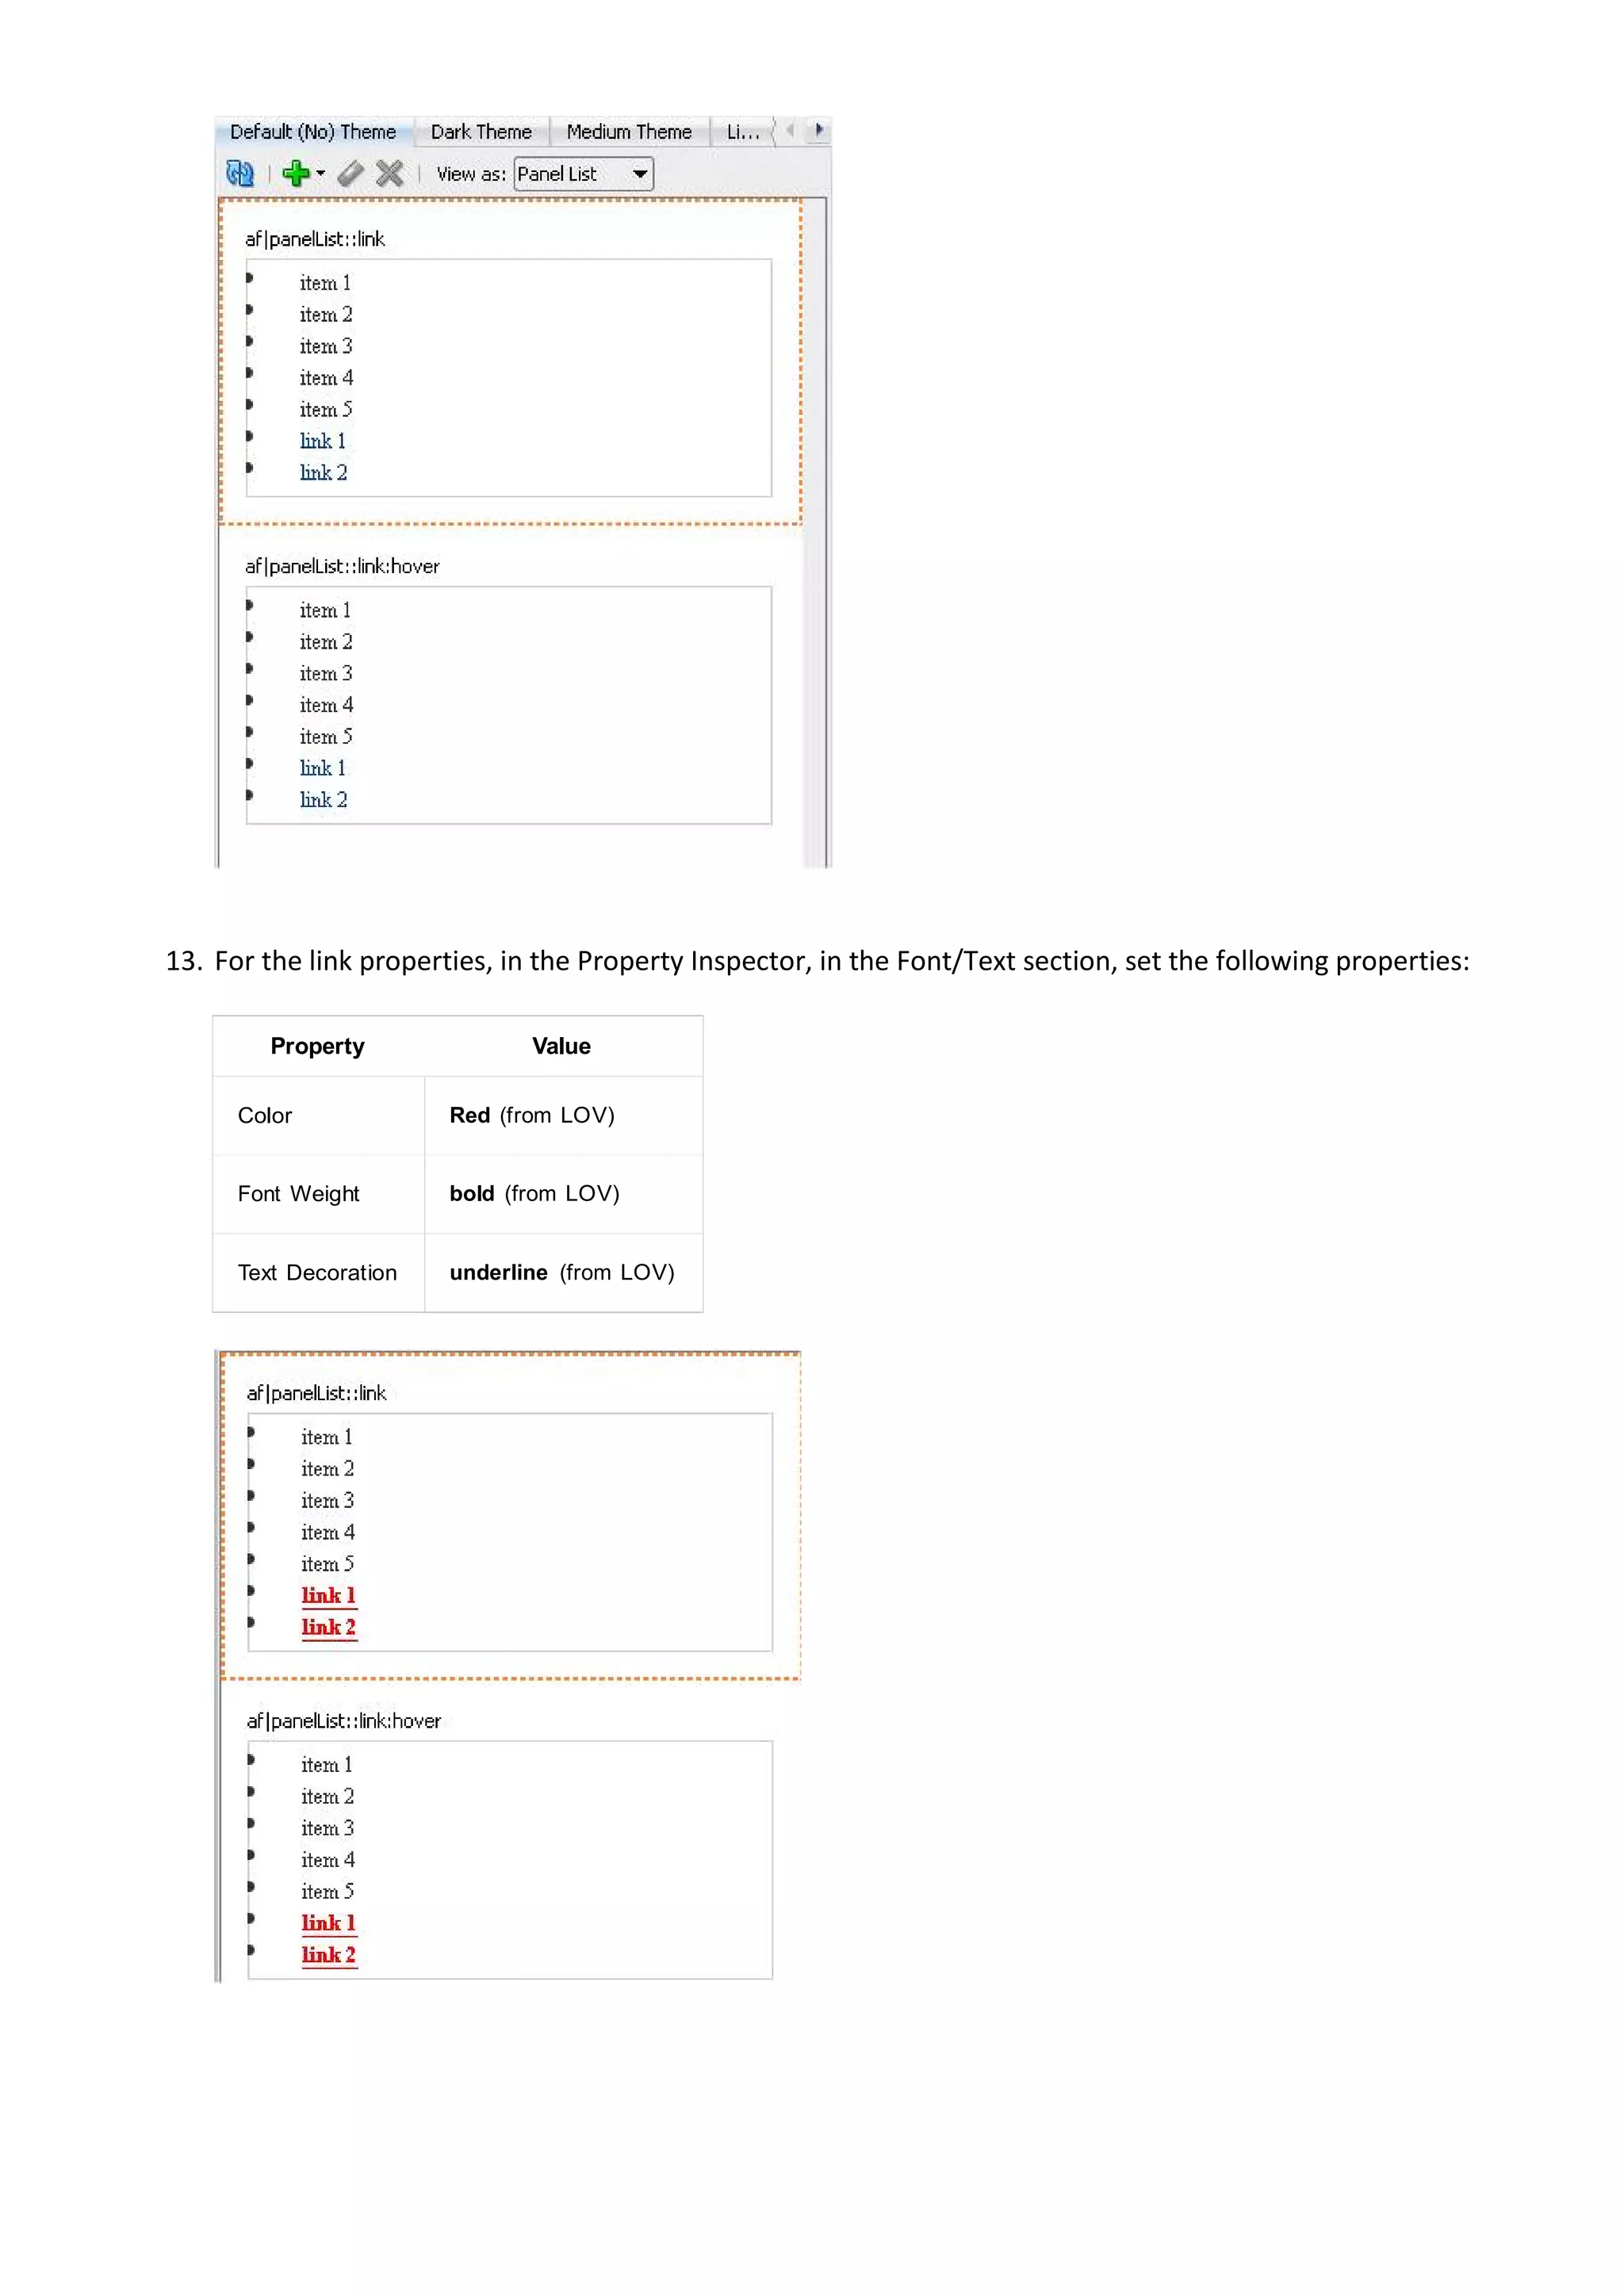
{ color: white; font-weight: bold; }
af|panelTabbed::tab:selected af|panelTabbed::tab-text-link { color:red; font-weight: bold; }
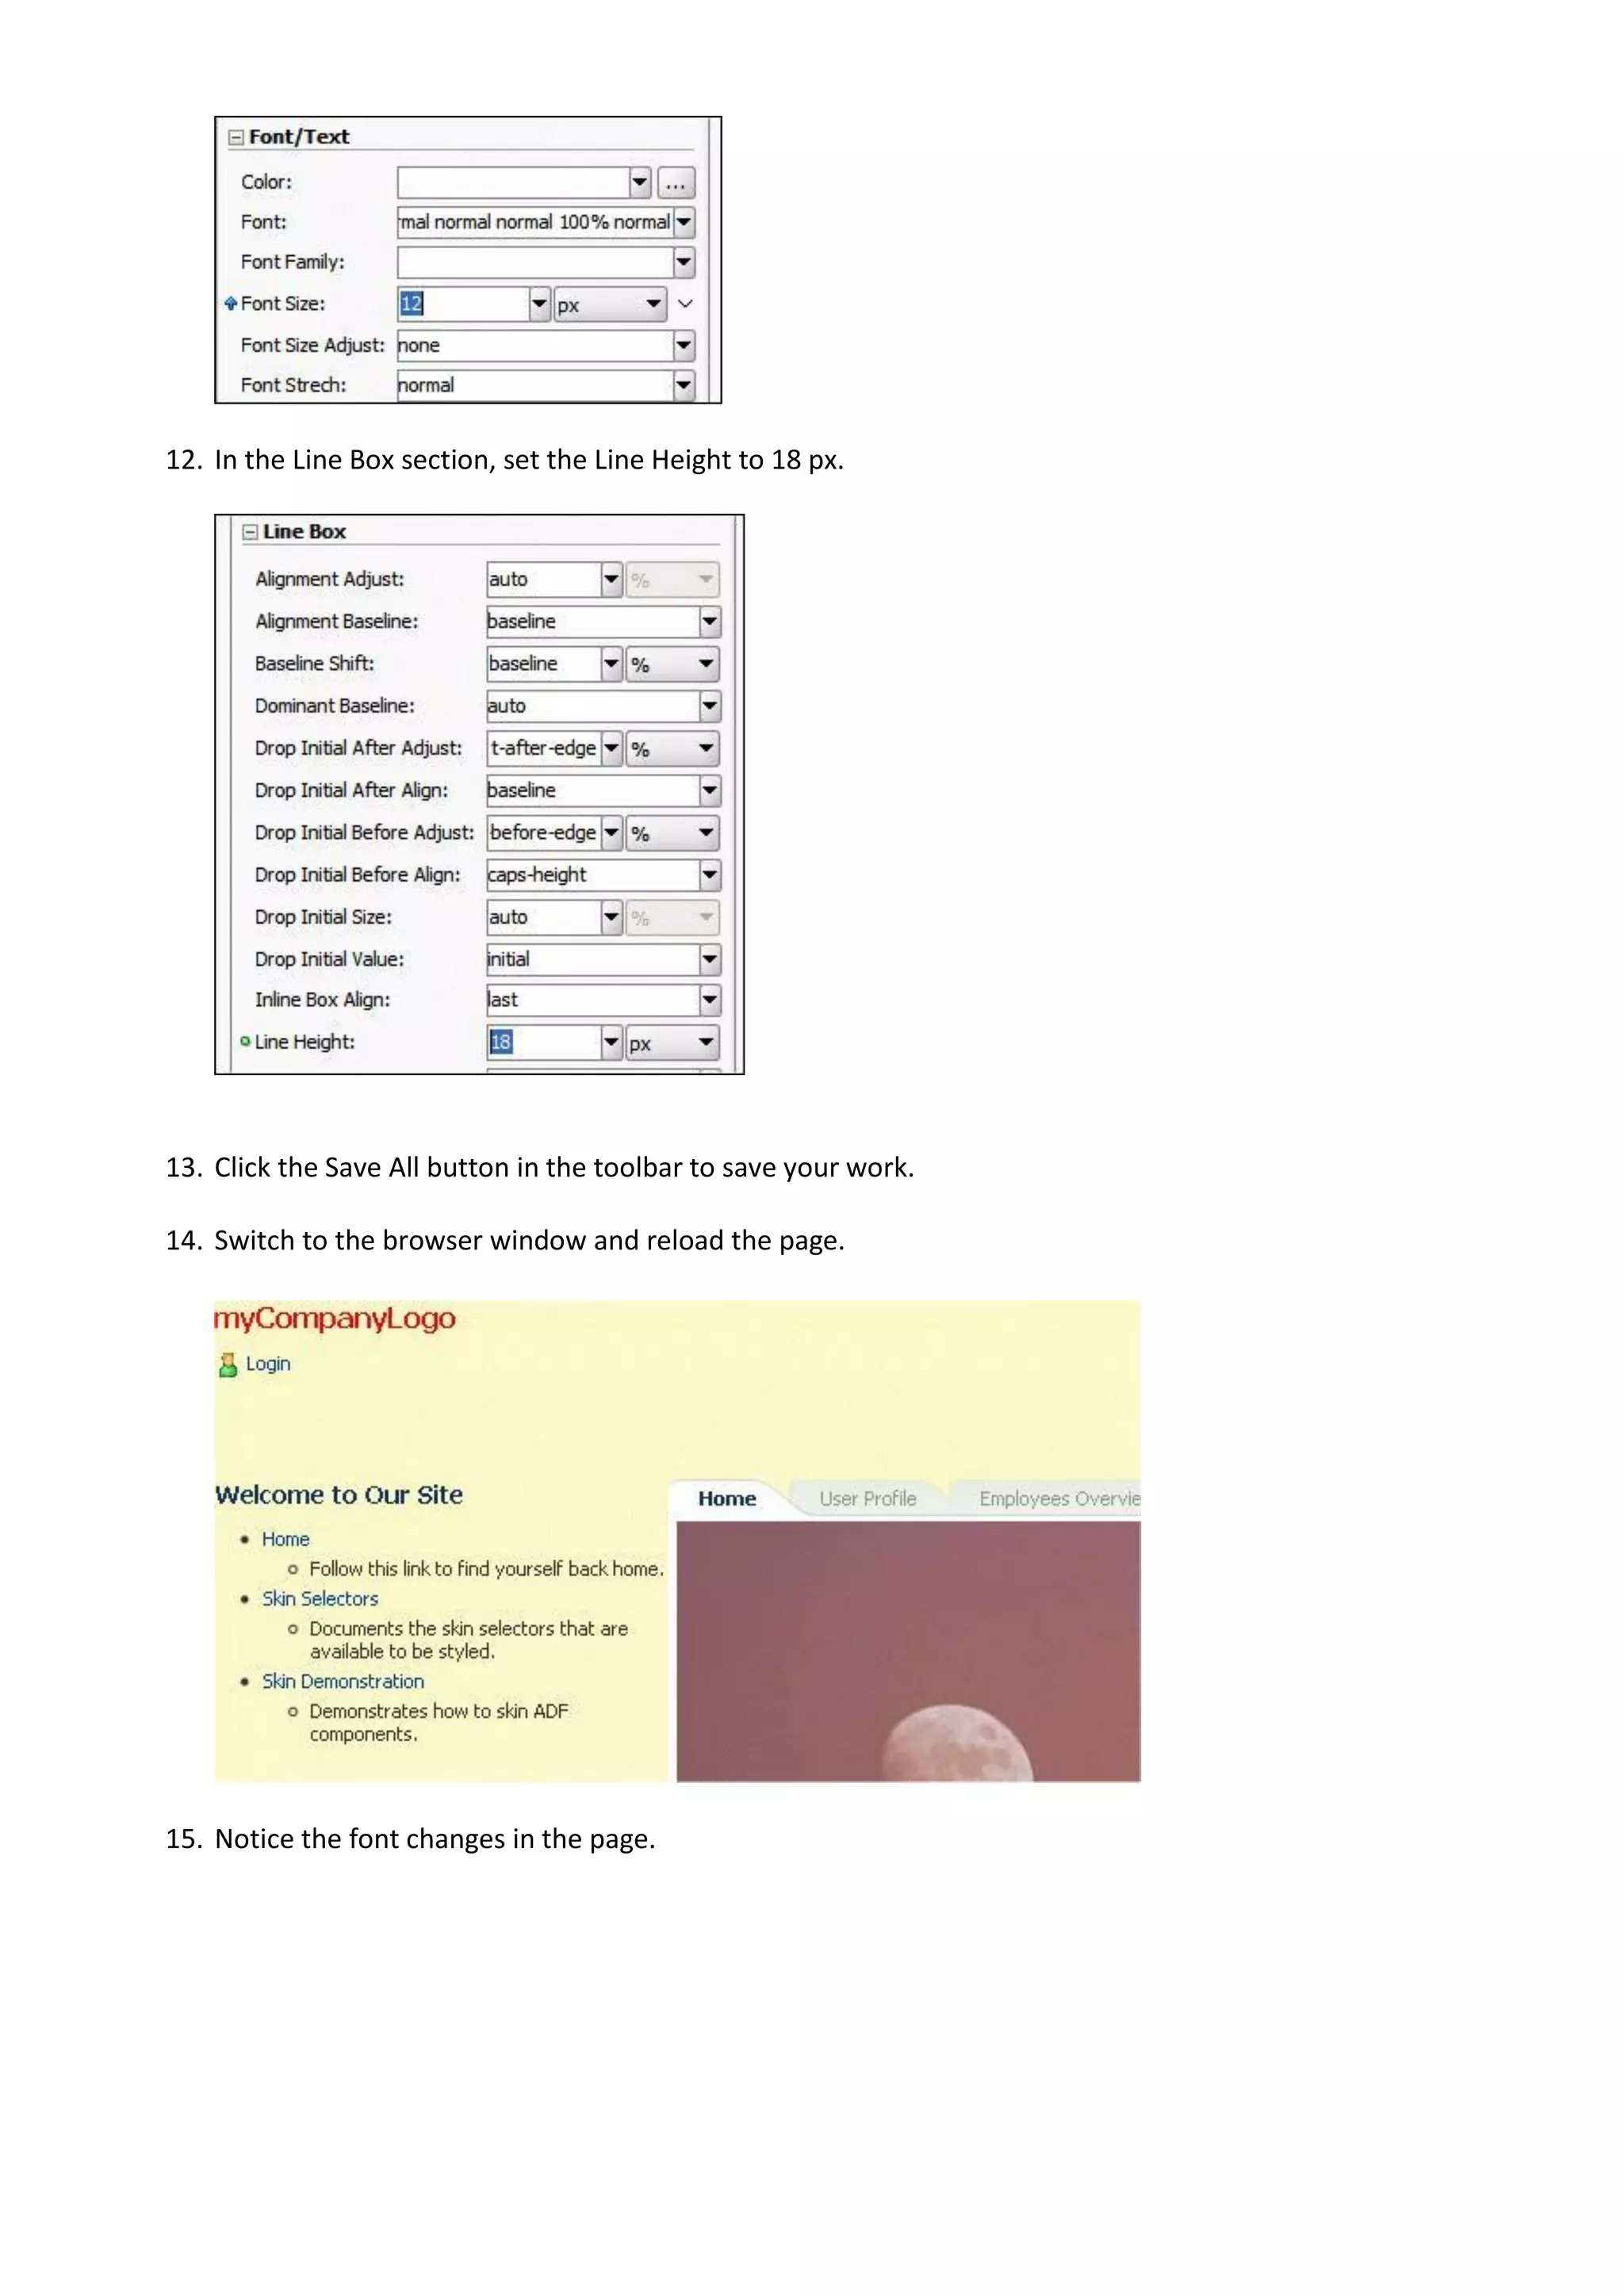
af|panelTabbed::tab:hover af|panelTabbed::tab-text-link { color:white; }
af|panelTabbed::tab:selected:hover af|panelTabbed::tab-text-link { color:red }](https://image.slidesharecdn.com/oracleadf11gadfskinningtutorial-121027103559-phpapp01/75/Oracle-ADF-11g-Skinning-Tutorial-32-2048.jpg)


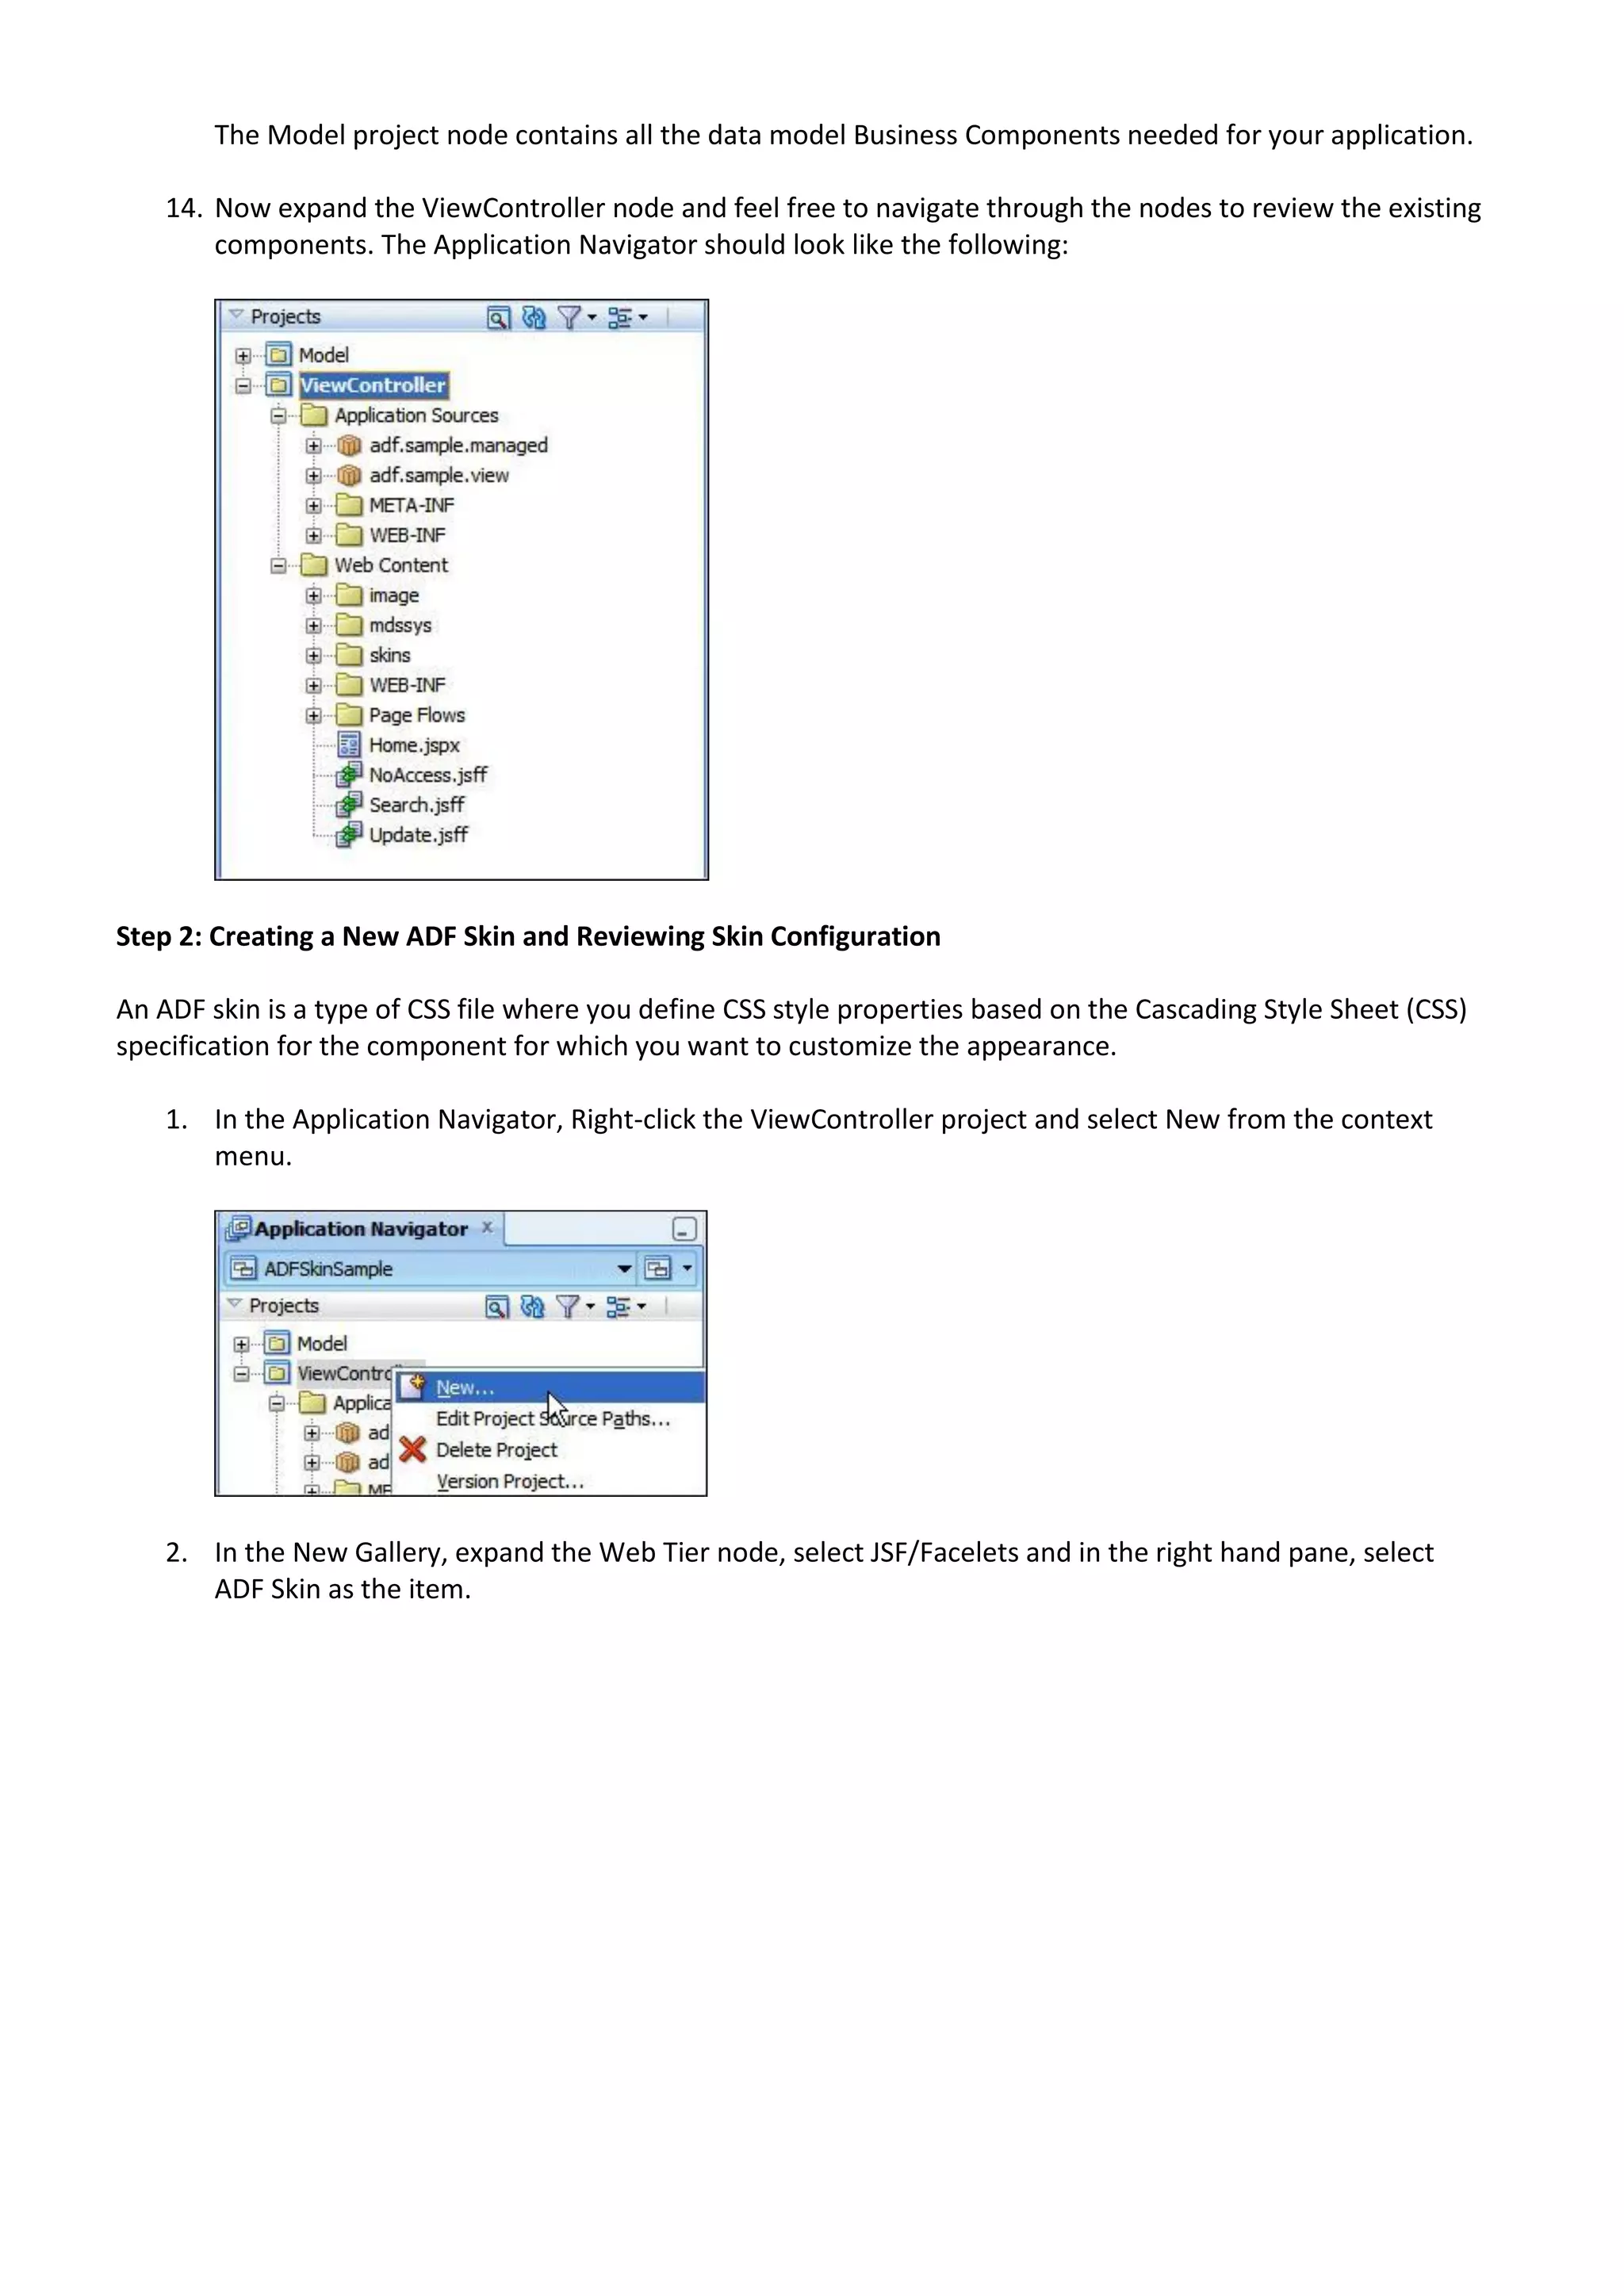
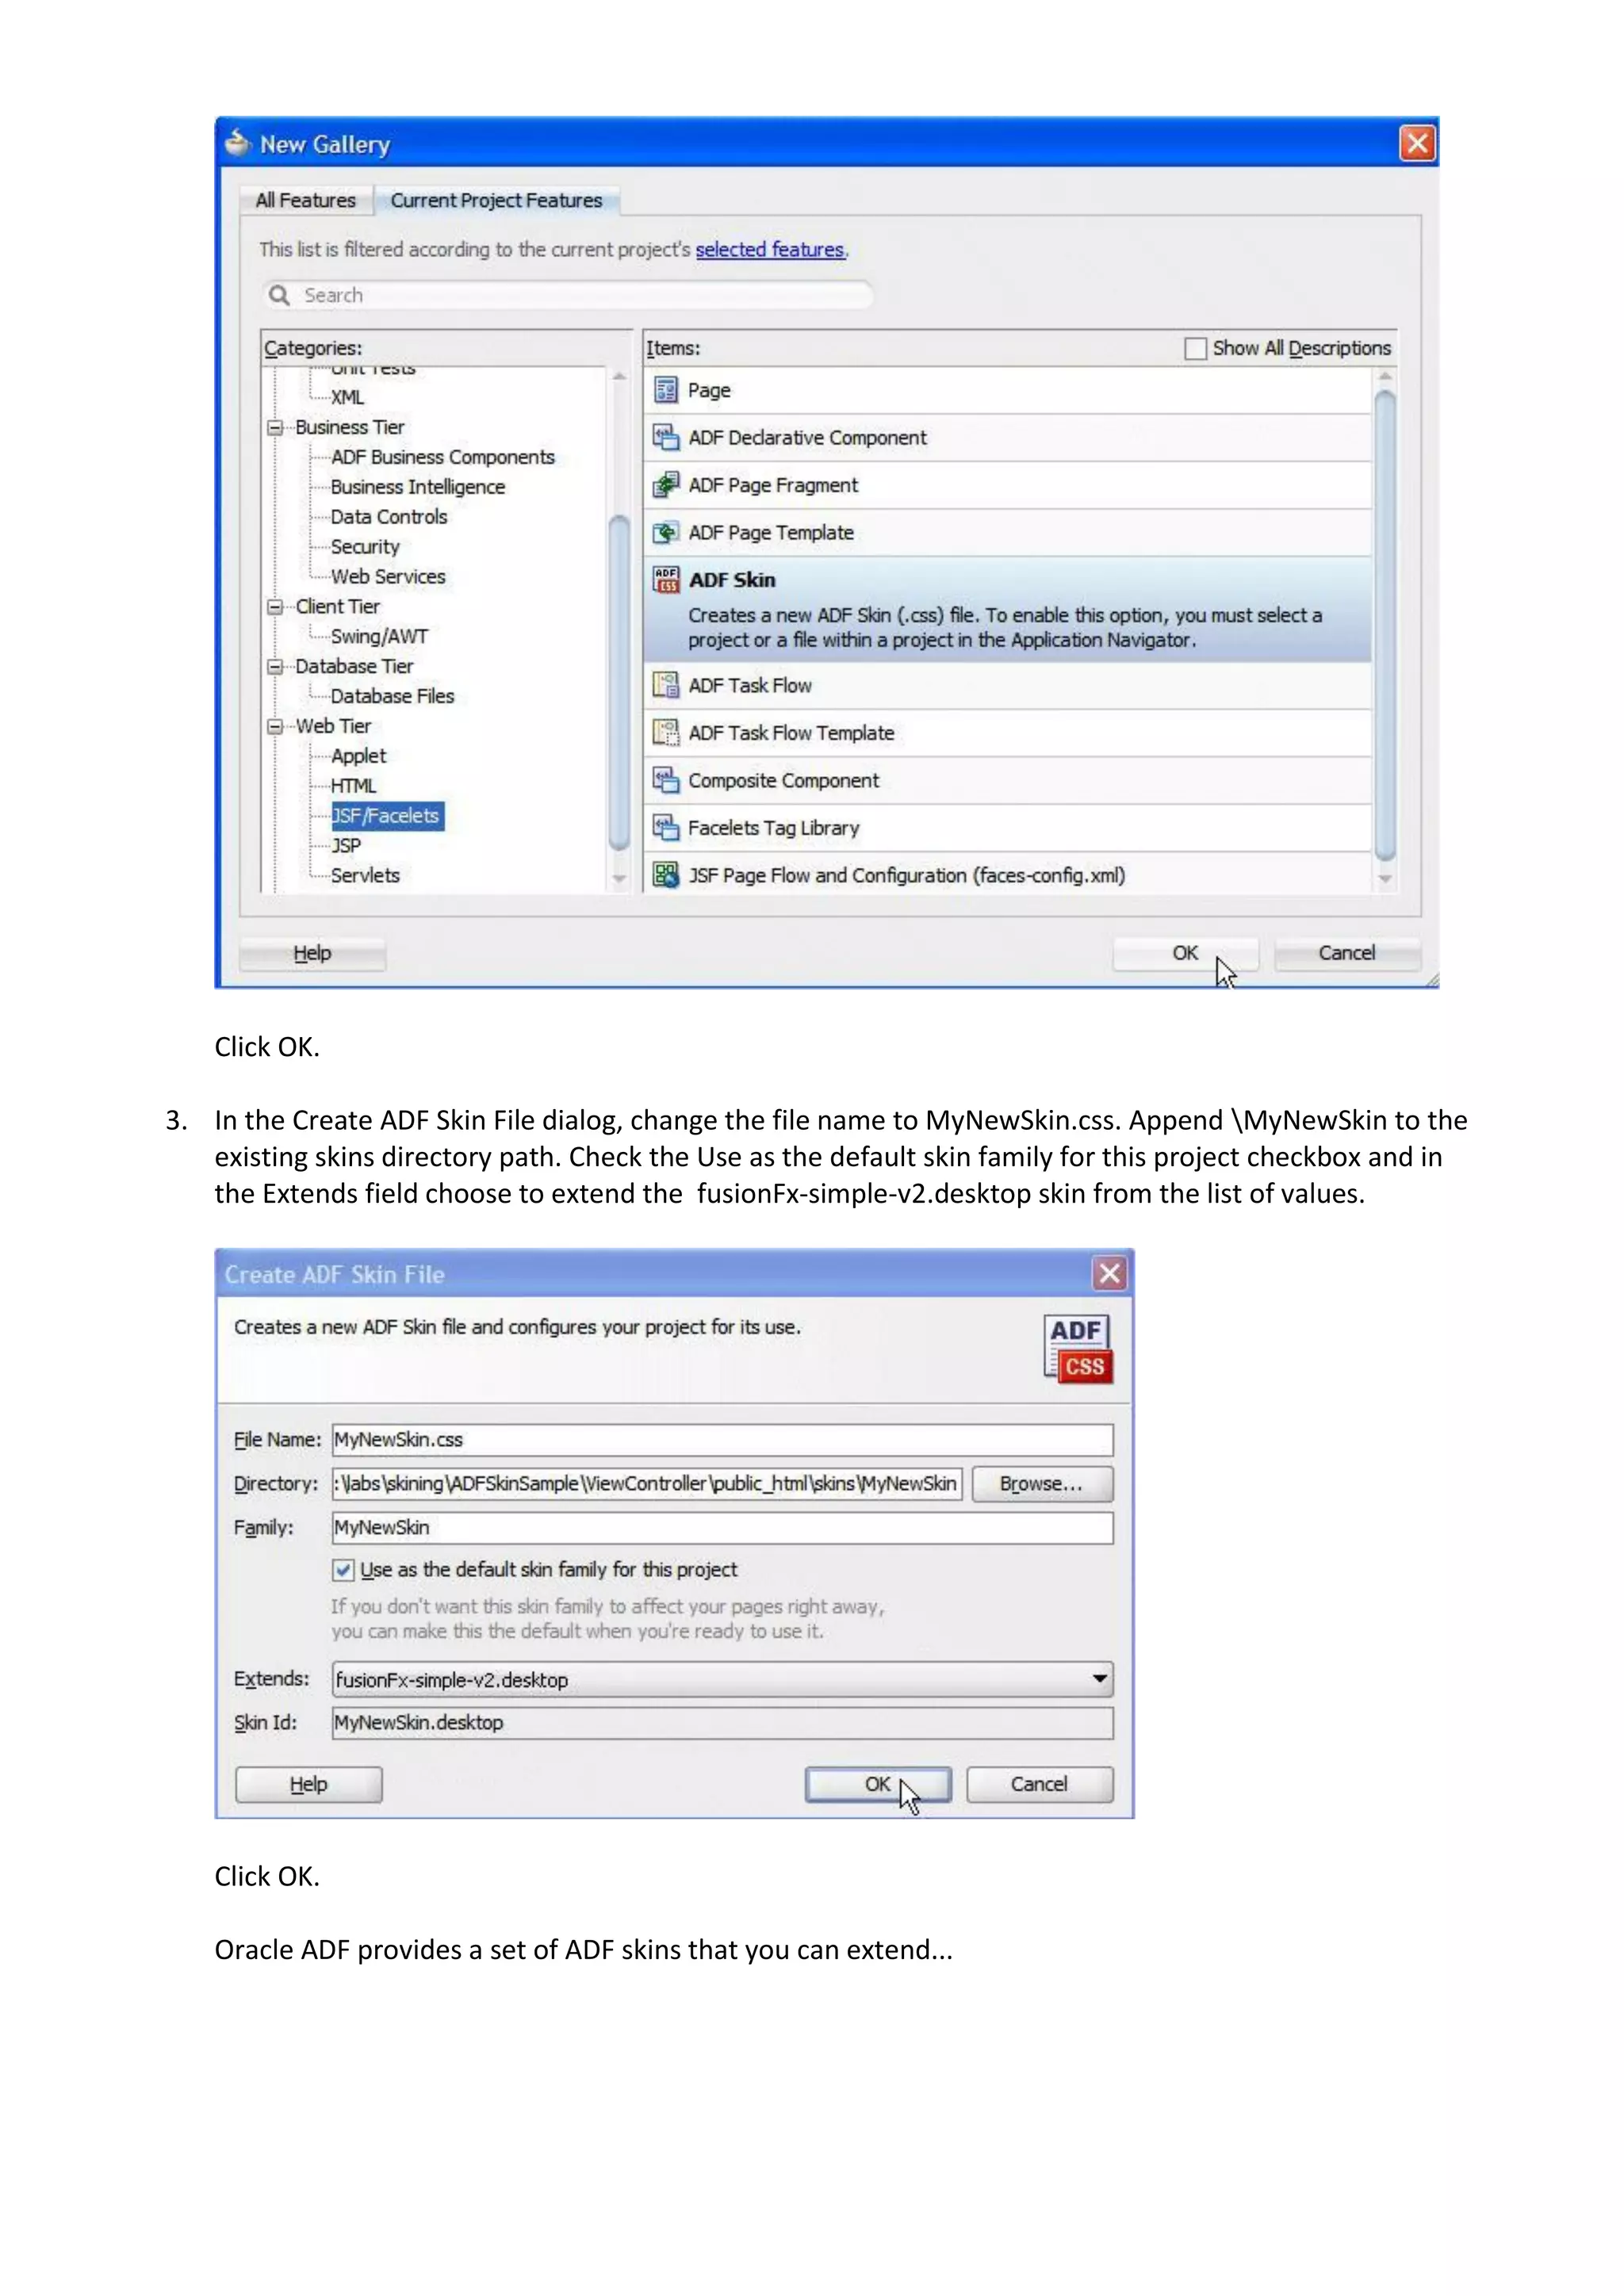
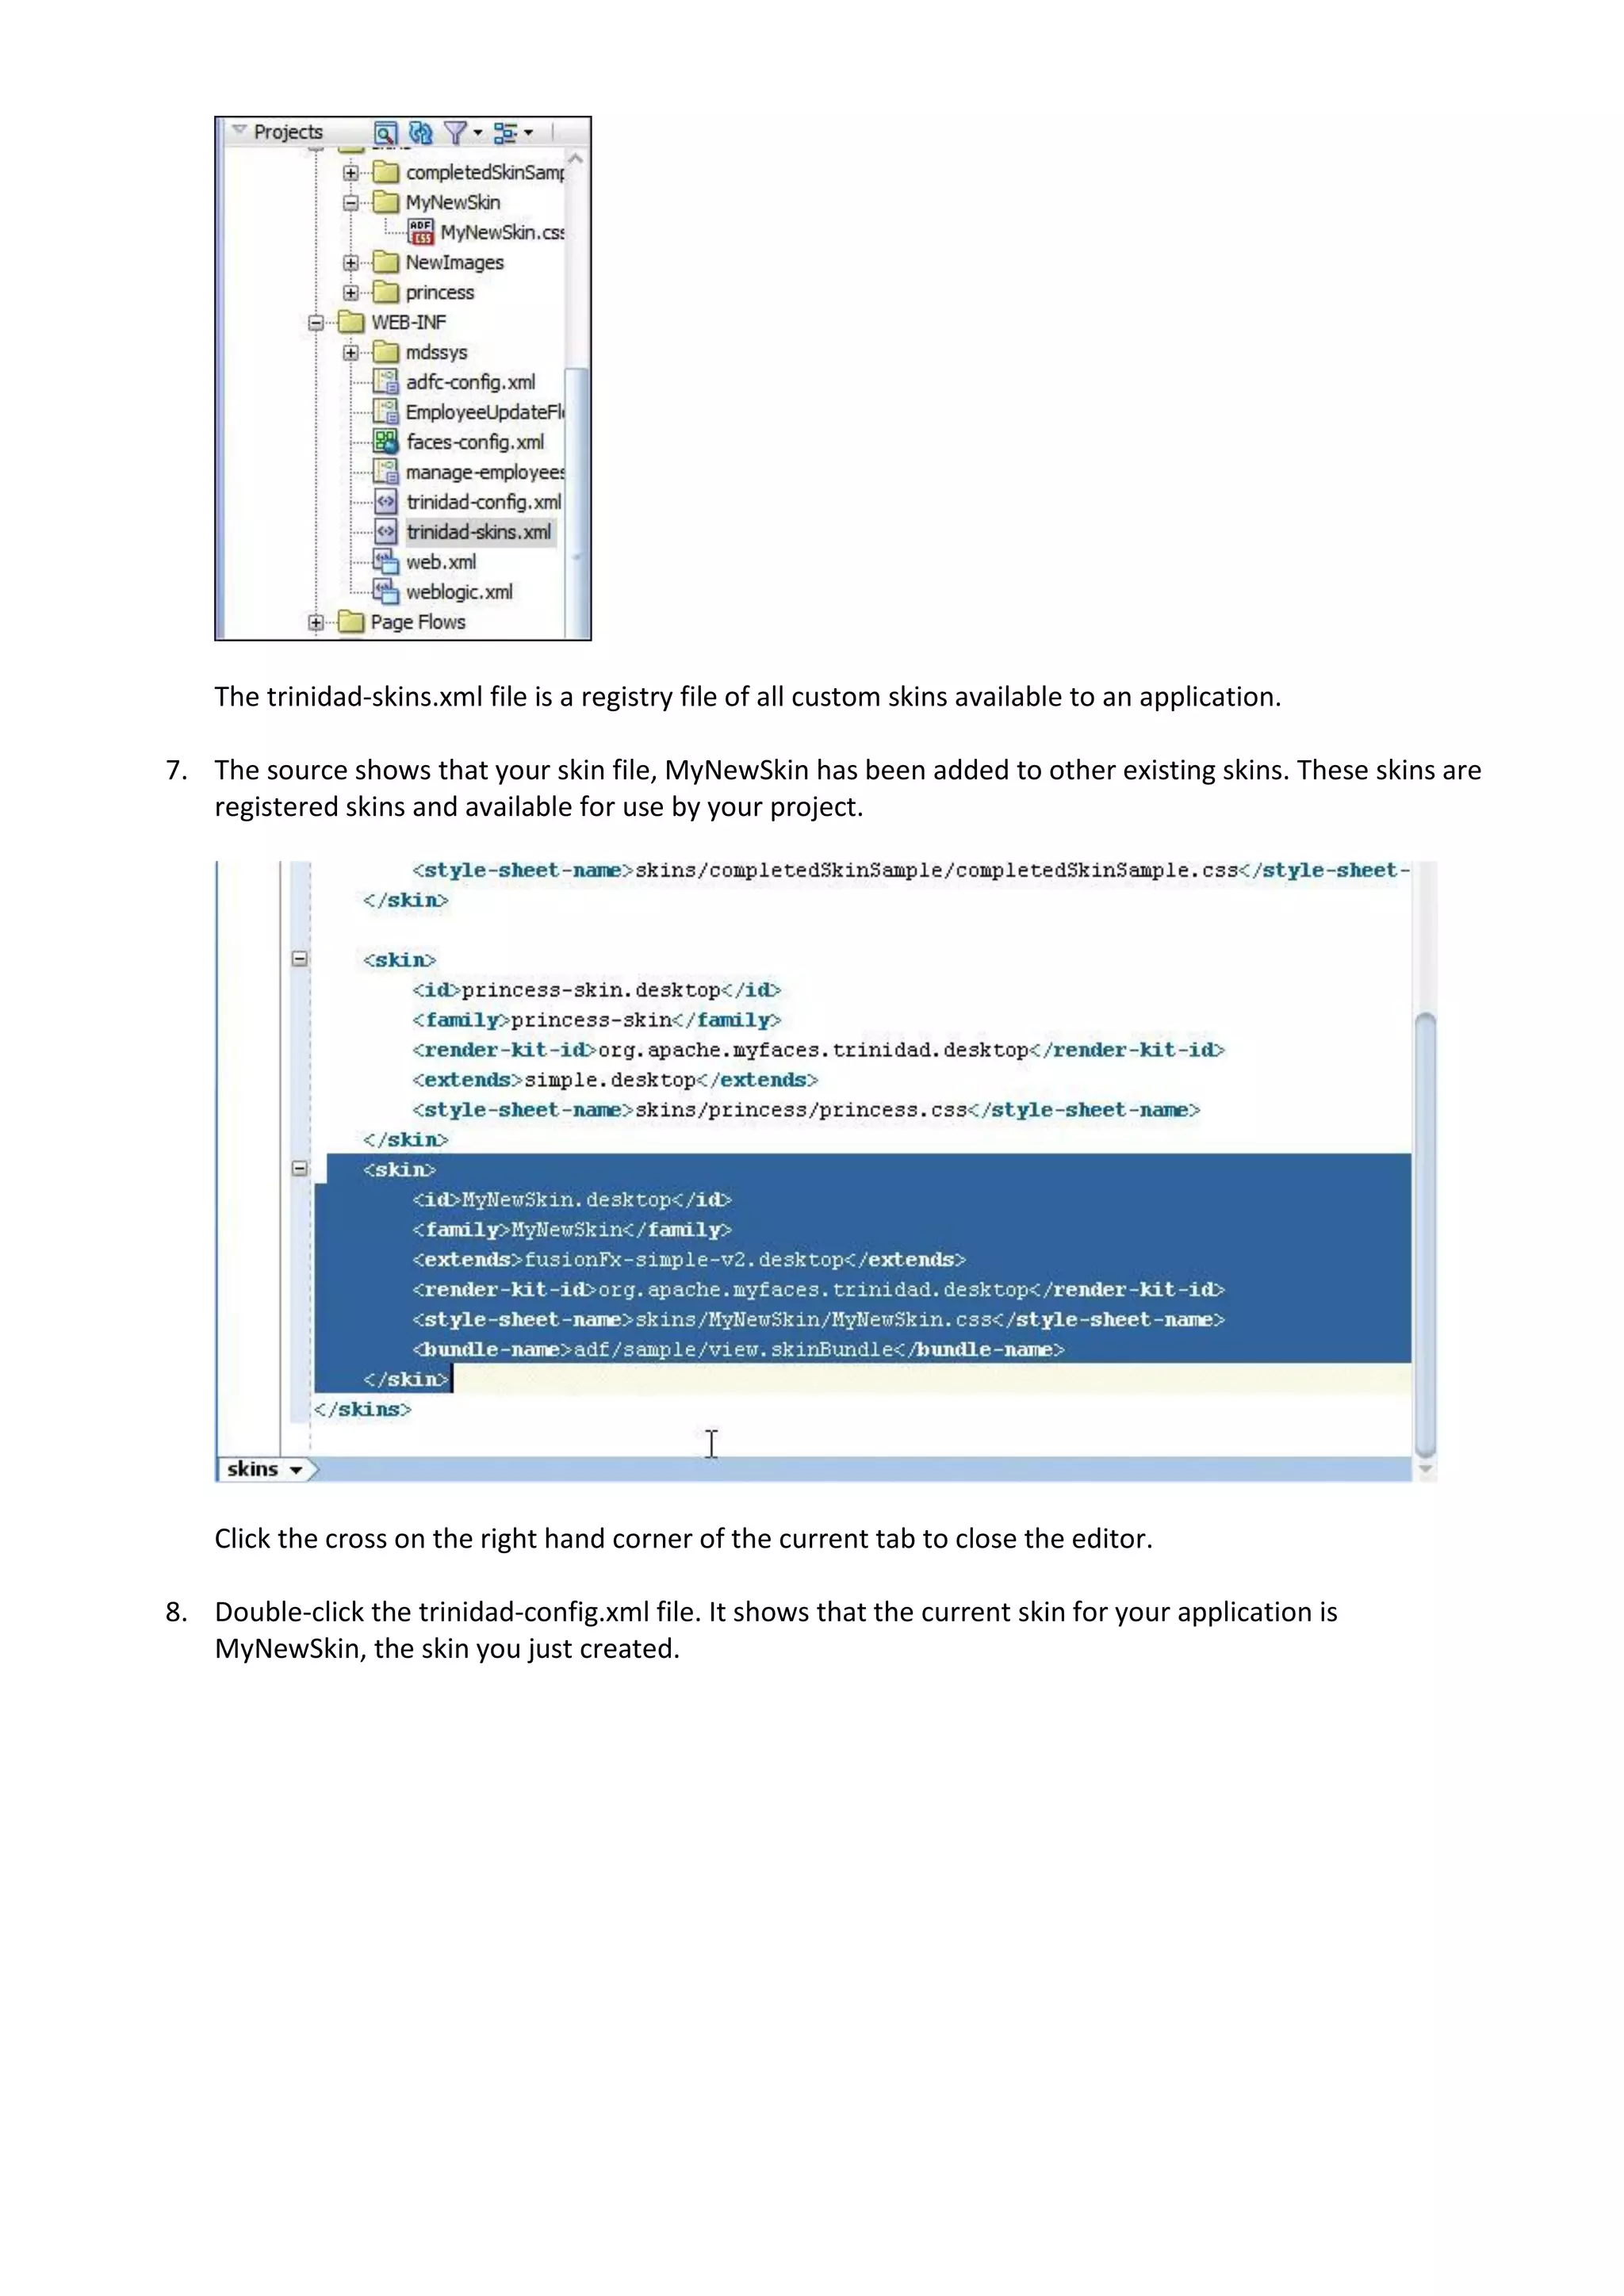
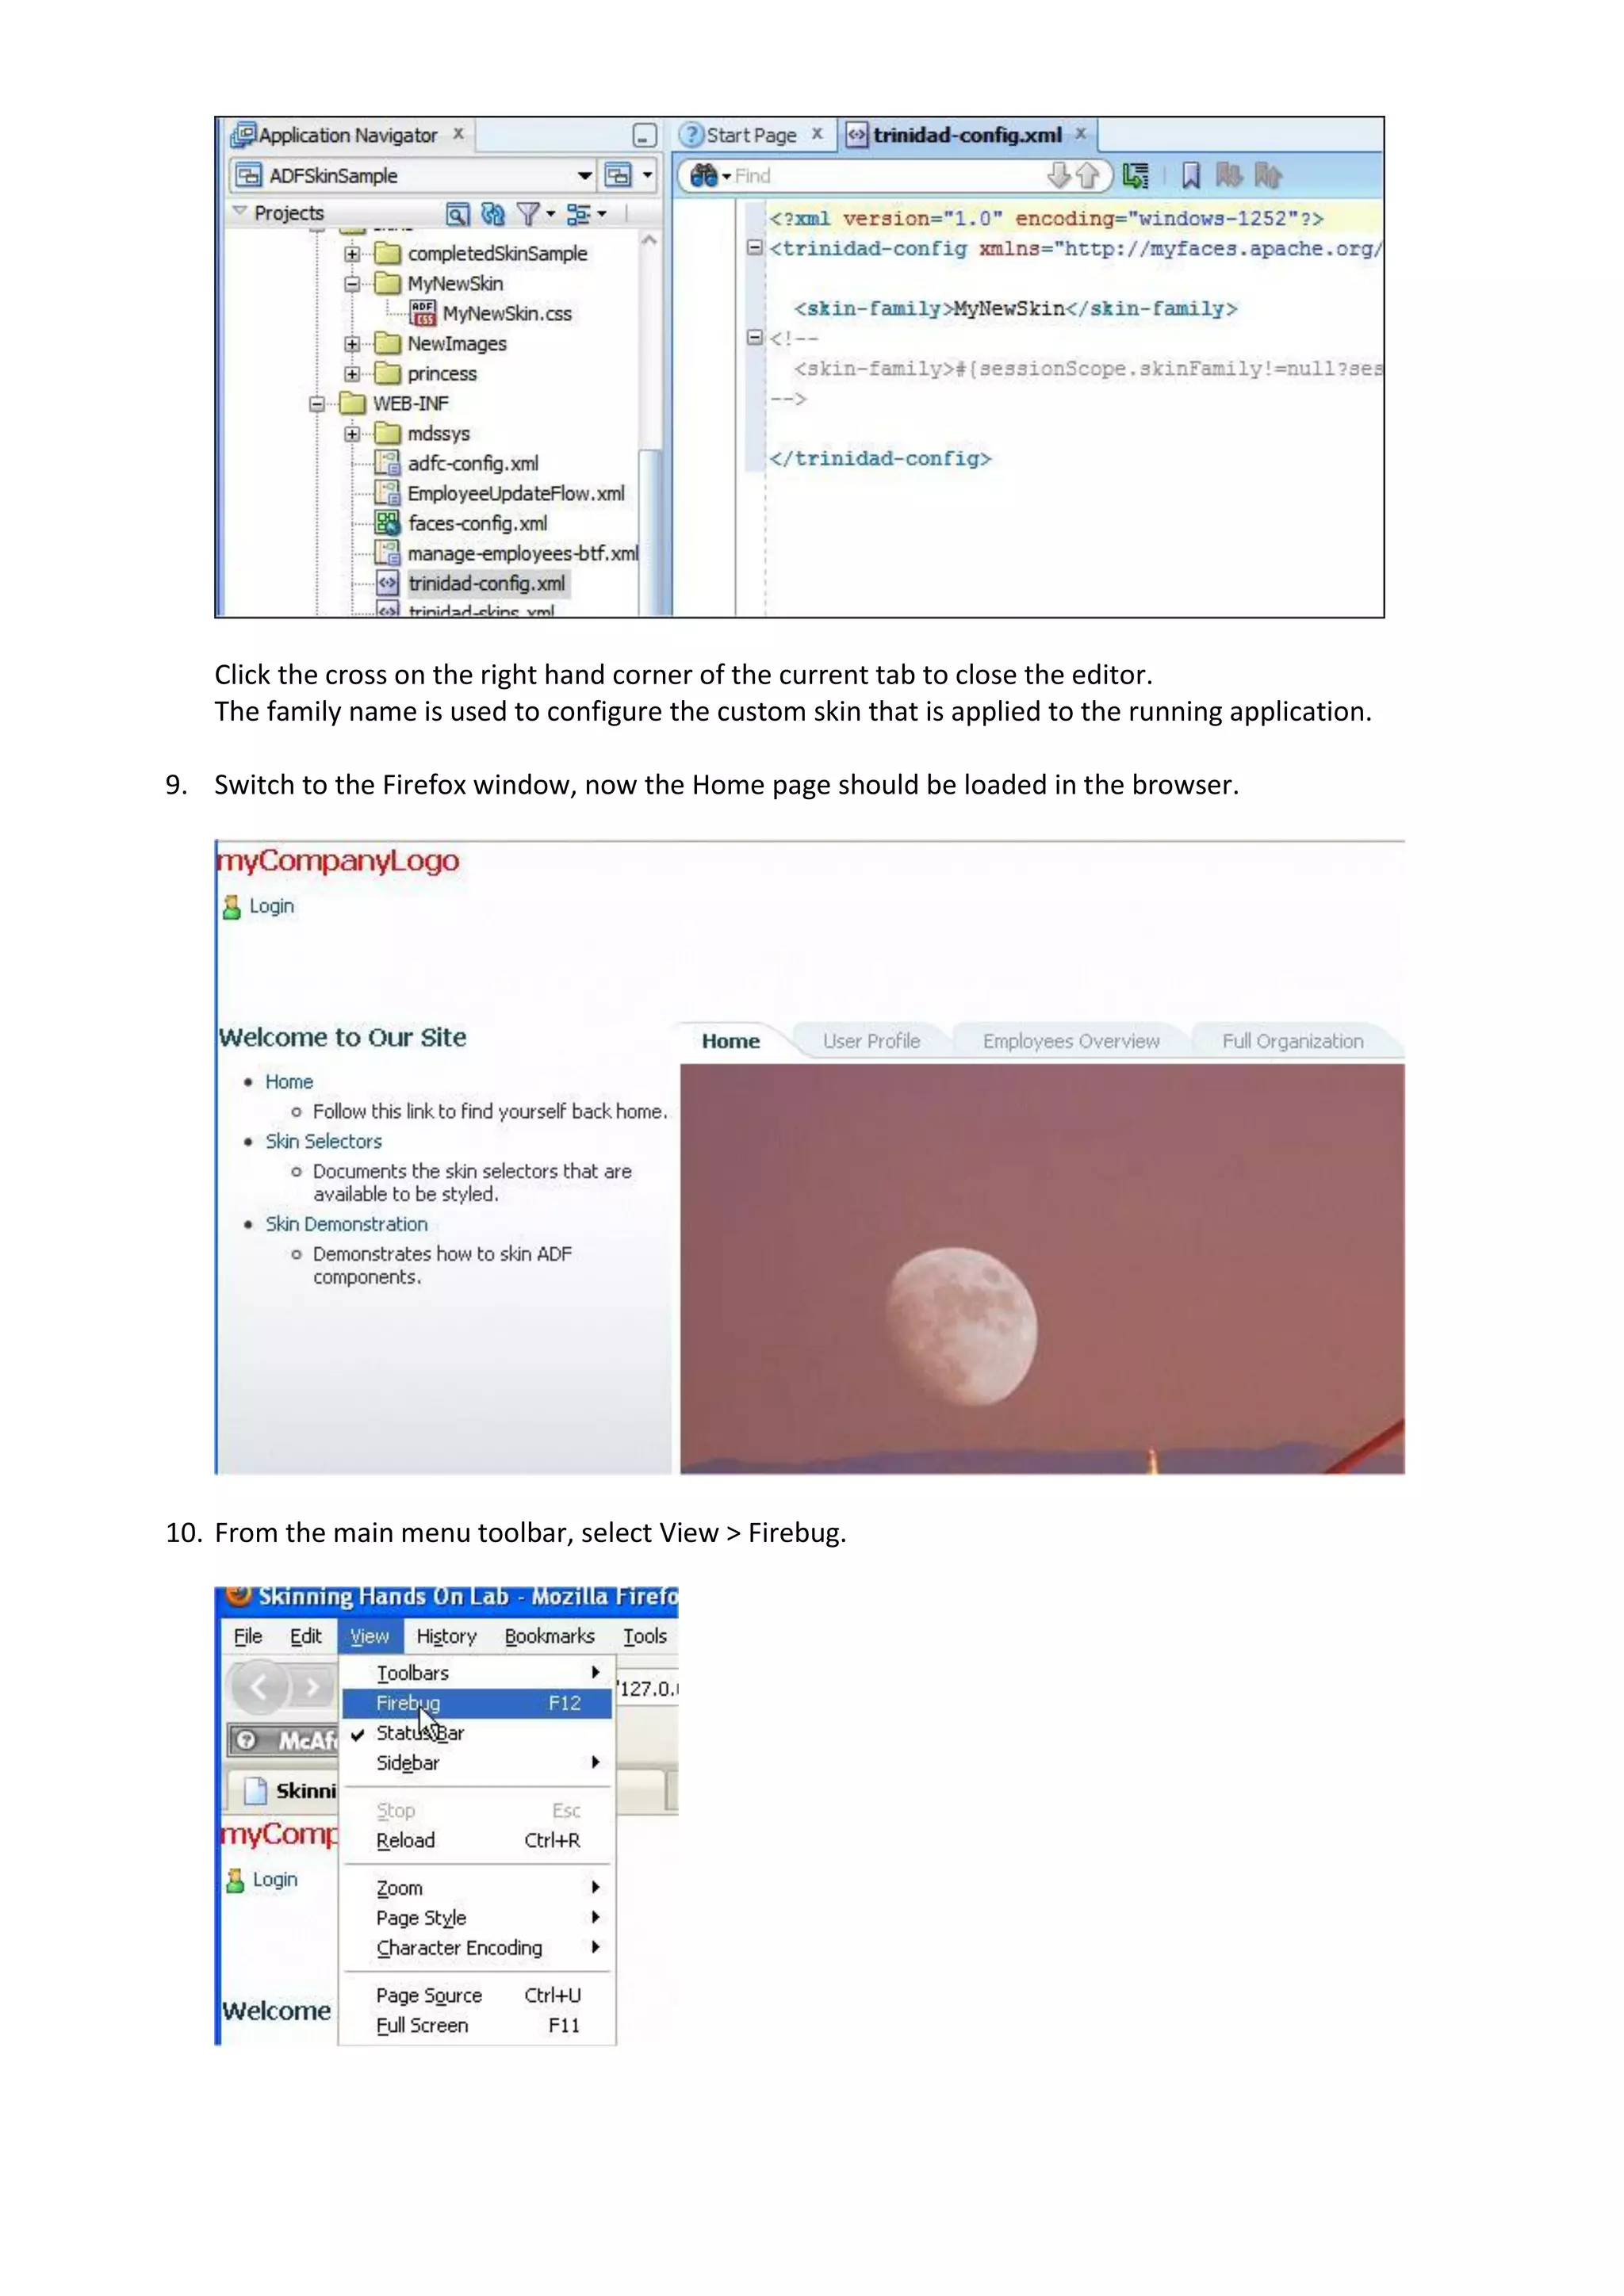
This document is a tutorial for Oracle ADF 11g developers focusing on creating a custom CSS skin to modify the look and feel of an application. It provides step-by-step instructions on setting up the development environment, creating a new ADF skin, and customizing various UI elements like backgrounds, fonts, and tables. Additionally, it explains how to implement dynamic skin changes for enhancing user experience.