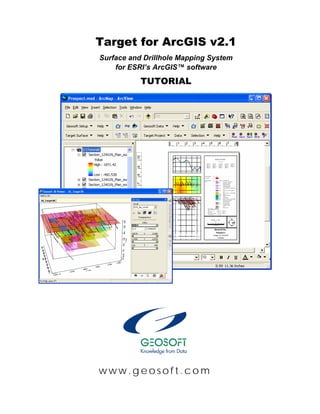
SlideShare a Scribd company logo
1 of 108
Download to read offline
w w w . g e o s o f t . c o m
Target for ArcGIS v2.1
Surface and Drillhole Mapping System
for ESRI’s ArcGIS™ software
TUTORIAL
The software described in this manual is furnished under license and may
only be used or copied in accordance with the terms of the license.
Manual release date: 8/3/2006.
Written by, Nancy Whitehead. Please send comments or questions to
info@geosoft.com
Copyright © Geosoft Inc. 2006. All rights reserved. No part of this
publication may be reproduced, stored in a retrieval system or transmitted, in
any form, or by any means, electronic, mechanical, photo-copying, reading, or
otherwise, without prior consent from Geosoft Inc.
Program Copyright© Geosoft Inc. 2006. All rights reserved.
Geosoft and Oasis montaj are registered trademarks of Geosoft Inc.
GEOSOFT, Oasis are trademarks of Geosoft Inc.
Windows®, and Windows NT™ are either registered trademarks or
trademarks of Microsoft Corporation.
Geosoft Incorporated
8th
Floor
85 Richmond St. W.
Toronto, Ontario
M5H 2C9
Canada
Tel: (416) 369-0111
Fax: (416) 369-9599
Web Site: www.geosoft.com
E-mail: info@geosoft.com
Contents
Geosoft License Agreement 1
Finding More Help Information 3
Contacting Technical Support 3
Target for ArcGIS 4
Overview of Target for ArcGIS Capabilities 4
Integrated Database and Streamlined Menus and Toolbars 5
Tutorial 1: Getting Started 7
Before you begin… 7
Installing Target for ArcGIS 8
Displaying Target for ArcGIS Toolbars 8
Using the Target for ArcGIS toolbars 9
Installing Geosoft’s eLicense 13
Using the Geosoft License Manager 14
Opening Geosoft Database Window 17
Spreadsheet Window 18
Profile Window 18
Database Tools 19
Tutorial 2: Using Gridding and Contouring Tools 21
Before you begin… 21
Gridding using Minimum Curvature Gridding 21
Adding Data and Assigning a Projection 21
Gridding Data using the Minimum Curvature Method 23
Contouring using Geosoft’s Contouring Tool 25
Plotting Contours 26
Tutorial 3: Target for ArcGIS Drillhole Tools 28
Before you begin… 28
Access the drillhole menus 28
Starting a New Project 29
Naming a Drillhole Project 30
Importing Data 30
Current X and Y Channels 31
Importing Data Files 31
Importing Data 33
Importing Collar Data 33
Importing Survey Data 38
Importing Geochemical Assay Data 39
Importing Geological Data 41
Saving your Databases 42
Quality Control and Quality Assurance Tests 42
Tutorial 4: Quick Maps and Shape Files 45
Quick Maps 45
Shape Files 45
Quick Map - Load to separate data frames 46
Quick Map - Load to a Single Layer 47
Loading Quick-Maps and Shape Files at the same time 47
Frame/Layer Control for Stacked Sections and Strip Logs 48
Tutorial 5: Plan Maps and Data Integration 49
Before you begin… 49
Quick Display of the Plan Map 49
Data Integration 51
Displaying a Grid 51
Hiding groups on a Map 54
Tutorial 6: Section Maps and Data Interpretation 55
Selecting Holes 55
Selecting Holes using the Hole Selection Tool 56
Verifying Selected Drillholes 58
Creating a Drillhole Section Map 59
Section Plots 59
Tutorial 7: Strip Logs 72
Creating a Strip Log Plot 72
Tutorial 8: Target 3D 78
Working with the Target 3D Tool 78
Selecting an Area of Interest 78
Create a 3D Voxel Grid 79
Creating a Target 3D Map 80
Working in the 3D View 89
Accessing the 3D Tool 89
Target 3D Tool 89
Geosoft 3D Viewer 90
Add to 3D… Menu 90
View/Group Manager Tool 90
3D Tool 91
Appendix 1: Setting Target for ArcGIS Preferences 94
Appendix 2: Projections 98
Appendix 3: Setting QA/QC Options 99
QA/QC – Collar data options 99
QA/QC - Dip-azimuth survey options 100
QA/QC – East-North survey options 100
QA/QC – From-To data options 101
QA/QC – Point data options 102
1
Geosoft License Agreement
GEOSOFT agrees to supply the Licensed Program(s) as specified in my purchase order. Geosoft shall grant me a non-
transferable, non-exclusive license to use the Licensed Program(s), subject to the Terms and Conditions herein contained.
Should there be a separate signed agreement between you and Geosoft, or between your company and Geosoft, pertaining to
the licensed use of this software, that agreement shall take precedence over the terms of this agreement.
1. DEFINITIONS:
In this Agreement:
"Licensed Program(s)" means the actual copy of all or any portion of Geosoft’s proprietary software technology, computer
software code, components, dynamic link libraries (DLLs) licensed through the Geosoft license server, including any
modifications, improvements or updates provided by GEOSOFT.
“Effective Date” is the date the Geosoft license is installed. This date is recorded by the Geosoft License server when the
Licensed Program(s) is installed.
"Services" means the Services described on Section 4.
"Termination" means the occurrences contemplated by Section 6 and 7.
2. LICENSE:
GEOSOFT grants to me a non-transferable and non-exclusive license to use the Licensed Program(s) for my own purposes
whereby the Licensed Program(s) are being used only by myself, on one computer, at any one time.
Title and all intellectual property rights in and to the License Program(s), including, without limitation, copyright, trade secrets
and trade marks, shall remain with GEOSOFT. I agree to refrain from raising any objection or challenge to such intellectual
property rights, or from assisting or causing or permitting other(s) to do so, during the term of the Agreement and thereafter
I may not assign this Agreement or any part thereof or sub-license the rights granted herein, or lend, rent, time-share, sell or
lease the software without the prior written consent of GEOSOFT.
I may not attempt to reverse engineer, de-compile or disassemble the software.
I may not make any attempt to circumvent the License Manager that controls the access to the software use.
3. TERM:
The Term of this Agreement shall commence on the Effective Date and shall continue until termination, as described in Section
6.
4. SERVICES:
(i) According to the terms of my initial purchase, GEOSOFT shall make available to me, without additional fees such
corrections and improvements to the Licensed Program(s) as may be generally incorporated into the Licensed Program(s) by
GEOSOFT. (Normally this will be for a period of twelve (12) months).
(ii) GEOSOFT has a strong commitment to customer service and product support. GEOSOFT offers me, subject to applicable
Service Charge(s), continuing support in the form of email or telephone advice and other assistance in problem diagnosis and
the correction of errors or faults in the Licensed Program(s) during the life of this License. When a problem occurs which
appears to be related to errors or faults in the Licensed Program(s), I may contact GEOSOFT and GEOSOFT will make an
honest effort to solve the problem. However, GEOSOFT cannot guarantee service results or represent or warrant that all errors
or program defects will be corrected. Also it is to be noted that each Licensed Program is designed to operate on a Windows
NT (sp 6 or later), Windows 2000 or Windows XP platform.
(iii) Further, if I request service relating to the modification of the Licensed Program(s) to meet a particular need or to conform
with a particular operating environment, GEOSOFT may, at its discretion, modify the Licensed Program(s) to meet these
particular needs, subject to applicable Services Charge(s). However, all intellectual property or other rights which may arise
from such modifications shall reside with GEOSOFT.
5. PROTECTION AND SECURITY OF LICENSED PROGRAM
I agree that all additions, modifications, revisions, updates and extensions to the Licensed Program(s) shall be subject to all of
the terms and conditions in this agreement.
I acknowledge that all copies of the Licensed Program(s), provided by GEOSOFT or made by me pursuant to this Agreement,
including, without limitation, translations, compilations, partial copies, modifications, derivative materials and/or updated
materials, are proprietary, and the property of GEOSOFT, and may not be distributed to any other persons, without
GEOSOFT’s prior written consent.
I will not provide or otherwise make the Licensed Program(s) available to anyone in any form without GEOSOFT's prior written
consent.
2
6. TERMINATION:
This agreement shall terminate upon the termination date, if any, specified in your purchase agreement with Geosoft.
This agreement may be terminated only upon thirty-days prior written notice to GEOSOFT.
GEOSOFT may terminate this Agreement upon prior written notice effective immediately if I fail to comply with any of the terms
and conditions of this Agreement.
This Agreement shall terminate automatically upon the institution, or consenting to the institution of proceedings in insolvency
or bankruptcy, or upon a trustee in bankruptcy or receiver being appointed for me/us for all or a substantial portion of my/our
assets.
7. EVENTS UPON TERMINATION:
I shall forthwith discontinue use of the Licensed Program(s), on the day Termination shall occur and agree not to resume such
use in the future without written authorization from GEOSOFT.
I shall uninstall and remove all software from my computer. Within thirty days after Termination, I shall destroy all physical and
digital copies of the Licensed Program(s). This obligation relates, without limitation, to all copies in any form, including
translations, compilations, derivatives and updated materials, whether partial or complete, and whether or not modified or
merged into other materials as authorized herein.
8. WARRANTY:
GEOSOFT does not warrant that the functions contained in the Licensed Program will meet my requirements or will operate in
the combinations which may be selected for use by me, or that the operation of the Licensed Program will be uninterrupted or
error free or that all program defects will be corrected.
Each Licensed Program shall be furnished to me in accordance with the terms of this Agreement. No warranties, either
express or implied, are made to me regarding the Licensed Program.
THE FOREGOING WARRANTIES ARE IN LIEU OF ALL OTHER WARRANTIES, EXPRESSED OR IMPLIED, INCLUDING,
BUT NOT LIMITED TO, THE IMPLIED WARRANTIES OR MERCHANTABILITY AND FITNESS FOR A PARTICULAR
PURPOSE.
9. LIMITATION OF REMEDIES
I agree to accept responsibility for the use of the programs to achieve my intended results, and for the results obtained from
use of said Program(s). I therefore accept complete responsibility for any decision made based on my use of the
aforementioned Licensed Program(s).
In no event shall GEOSOFT be liable for any damages arising from performance or non-performance of the Licensed
Program(s), or for any lost profits, lost savings or other consequential damages, even if GEOSOFT has been advised of the
possibility of such damages, or for any claim against me by any other party.
10. GENERAL:
I agree that this Agreement is a complete and exclusive statement of the agreement with GEOSOFT.
This Agreement supersedes all previous Agreements with respect to the Licensed Programs, with the exception of a current
signed Technical Service Agreements.
GEOSOFT is not responsible for failure to fulfill its obligations under the Agreement due to causes beyond its control.
Should any part of This Agreement for any reason be declared invalid, such declaration shall not affect the remaining portion
which shall remain in full force and effect as if this Agreement had been executed without the invalid portion thereof.
The relationship between the parties is that of independent contractors. Nothing contained in this Agreement shall be deemed
to constitute or create a partnership, association, joint venture or agency.
The provision of this Agreement shall be binding upon me and GEOSOFT and my respective successors and permitted
assigns.
This Agreement will be governed by the laws of the Province of Ontario and applicable laws of Canada.
11. YEAR 2000:
The Licensed Programs have been tested to conform to DISC PD2000 1:1998 Year 2000 Conformity Requirements
(www.bsi.org.uk/disc/year2000/2000.html), with the exception of clause 3.3.2, paragraph b. Section 3.3.2 paragraph b) requires
that inferences for two-digit year dates greater than or equal to 50 imply 19xx, and those with a value equal to or less than 50
imply 20xx. The Licensed Programs will recognize all two digit years as 19xx. This is to prevent errors importing historical data
that pre-dates 1950. All dates that follow 1999 must use four digit dates in the Licensed Programs.
3
Finding More Help Information
There are several other functions included in the basic Oasis montaj help system that
may be useful to your work. The entire documentation for the system is available
through the online help system. This electronic library of information enables us to
constantly update the information and provide you with the most up-to-date
information available.
The best way to find information in this system is to use the Search tab to perform a
full-text search of all help topics. If you still can’t find the information you’re looking
for, the Online Books help system contains complete Geosoft manuals and tutorials
in Adobe PDF format.
Contacting Technical Support
The list below provides contact information for Geosoft Technical Support around the
world.
North America
Geosoft Inc.,
85 Richmond St. W., 8th Floor
Toronto, Ont.,
Canada
M5H 2C9
Tel +1 (416) 369-0111
Fax +1 (416) 369-9599
Email: tech@geosoft.com
Europe and North Africa
Geosoft Europe Ltd.
20/21 Market Place, First Floor
Wallingford, Oxfordshire
United Kingdom
OX10 OAD
Tel: +44 1491 835 231
Fax: +44 1491 835 281
Email: tech.eu@geosoft.com
South America
Geosoft Latinoamerica Ltda.
Praça Floriano 51 / 19º Andar
CEP: 20031-050, Centro
Rio de Janeiro, RJ, Brasil
Tel: (55-21) 2532-0140
Fax: (55-21) 2532-7197
Email: tech.sa@geosoft.com
Australia and Southeast Asia
Geosoft Australia Pty. Ltd
350 Hay Street
Subiaco, WA
Australia, 6008
Tel +61 (8) 9382 1900
Fax +61 (8) 9382 1911
Email: tech.au@geosoft.com
South and Central Africa
Geosoft Africa Ltd.
Buren Building, Second Floor
Kasteelpark Office Park
c/o Nossob & Jochemus Streets
Erasmuskloof X3, Pretoria
Tel: +27 12 347 4519
Fax: +27 12 347 6936
Email: tech.za@geosoft.com
4 Target for ArcGIS
Target for ArcGIS
Target™ for ArcGIS is a surface and drillhole mapping extension to ESRI’s
ArcGIS™ software that simplifies the visualization and analysis of subsurface
drillhole and borehole geology data within your ESRI GIS environment. Built on the
same technology as Geosoft’s industry-leading Oasis montaj™ MAPS (Mapping
and Processing System) software, Target adds powerful spatial data processing
capabilities and 3D viewing to your GIS.
Using Target for ArcGIS, explorationists working in ArcGIS can better manage drill
projects, from initial planning to the evaluation stage. Key features include:
• Rapid processing and analysis of high volume surface and drillhole data
• Timely and accurate generation of drillhole plans and sections
• Simplified visualization and analysis of drillhole and borehole data using the
subsurface 3D viewer
• Efficient production of high quality maps for interpretation and target definition
• Effective exploration project generation and management
Overview of Target for ArcGIS Capabilities
The Target for ArcGIS application provides project and field
geologists/geophysicists with an easy-to-use and comprehensive data processing and
presentation solution for surface drillhole data. This software package enables
geoscientists to manage drill projects from the planning to the evaluation stage.
The Target for ArcGIS application is organized around an integrated database and
streamlined menus and toolbars that provide the following surface and drillhole
capabilities within ESRI’s ArcView:
• Subsurface 3D viewer: Functionality for viewing sub-surface data in three
dimensions within ArcGIS simplifies the visualization and analysis of subsurface
drillhole and borehole geology data within an ESRI environment
• Data Import: User-friendly Import Wizards enable you to import both surface
and drillhole data from different data sources, including ASCII, ODBC and
Metech’s acQuire. Import data from CAD and GIS packages such as
Microstation, DXF formats and MapInfo. Data validation on import ensures the
integrity of any sub-surface information you generate.
• Drillhole plans and sections: Easily create and recreate drillhole sections and
plans in minutes, using dialogs with sensible default settings. Routinely visualize
thousands of drillholes at a time.
• Powerful data processing: Target includes Geosoft’s Oasis montaj™ powerful
processing engine for working with large volume spatial data. It provides
industry-standard technology for processing large volumes of exploration data for
target generation.
Target for ArcGIS 5
• Dynamic data linking: Analyze and interrogate your drillhole data in real time
via dynamically linked sections, plans and database views.
• 3D drillhole visualization: Interactive tab dialogs make it easy to create and
customize 3D views of grids and profile data. View borehole traces and grid data
from different angles in 3 dimensions to spot the relationship between surface and
sub-surface features. Display multiple grids horizontal grids stacked vertically, in
3D space. Zoom, pan and rotate objects in the 3D environment, using an
interactive 3D dialog. Print and export 3D views to include them in your reports
• Voxels and other 3D enhancements: A "Voxel" is another word for a 3-
dimensional grid, and is created using Geosoft’s 3D Kriging gridding method.. A
Voxels menu is provided on the Target 3D toolbar and provides the tools for
creating, displaying, processing, manipulating, and converting Voxels (3D grids).
Other 3D enhancements include, support for some of the common mine planning
formats including, Surpac DTM and Datamine Wireframe models and the ability
to use vertical (and horizontal) exaggeration in 3D views.
• Surface mapping: Utilizing function rich gridding routines, grids and contour
maps can be created using point sample datasets (eg. streams, soils, rocks,
geophysical data) from a variety of raw data sources (ASCII, Excel, Access, and
acQuire). Easy-to-use design wizards simplify the creation of grids and contours.
• Surface and Drillhole data Integration: Combine drillhole data with all other
surface data and information to create detailed, integrated surface and subsurface
maps.
• Strip Log and Compositing: Create scaled graphical strip log display of selected
holes or the entire drillhole project with Target’s strip log feature. Utilize up to 32
graphical fields to display down hole data. Using the Strip Log feature, geologists
can better manage and visualize their drill projects, from initial planning to the
evaluation stage.
• Professional map production: The software provides a full featured dynamic
contouring algorithm with gradient feathering and extensive labeling control for
professional quality presentation results. Quickly create multiple and varied types
of maps, including gridded maps, surface maps, posted value maps, and sub-
location maps.
Integrated Database and Streamlined Menus and Toolbars
The Target for ArcGIS system is organized around an integrated database and
streamlined menus and toolbars that guide you through the following tasks:
• Geosoft setup including, default settings, licensing, database window display, and
access to DAP.
• Surficial gridding (minimum curvature and kriging) and contouring.
• Drillhole project definition and editing.
6 Target for ArcGIS
• Data import and export. Quickly import collar, survey, and hole assay data, in
both numeric and text formats, via Excel, ASCII and OBDC-compliant database
wizards.
• Optional manual data entry and editing of individual drillholes.
• Rock code table selection and editing.
• Hole selection. Select all holes, no holes, select by name, by list, use the
interactive drillhole selection tool, or use a saved configuration.
• Plan plotting. Use intelligent defaults for automatic plotting or customize settings.
• Section plotting (and stacked section plotting). Intelligent defaults can be used for
automatic plotting or you can set your own customized settings.
• Striplog plotting, including full data legend.
• Target 3D mapping including creating and displaying 3D Voxel Models
• Integration of other surface and subsurface data.
Tutorial 1: Getting Started 7
Tutorial 1: Getting Started
In mineral exploration, the initial focus of any exploration program is to identify
potential targets for drilling. After potential targets are determined, the project moves
into a “proving” phase led by a geologist experienced in obtaining and interpreting
drillhole data. A complete drilling program will acquire many types of data ranging
from hole location (i.e. collar details), surveys (i.e. 3-Dimensional orientation),
geologic rock types and descriptions, drill hole geochemical assays and borehole
geophysical logs.
To set the stage for a successful subsurface data acquisition program, the geologist
requires knowledge and experience plus effective tools that facilitate organization,
planning and most importantly, visualization and plotting of data in 3 dimensions. A
3-dimensional perspective is essential to evaluating geologic structure of mineralized
and host rocks as well as determining the continuity of host and mineralized rocks. In
this context, drill programs rely on surface plan maps and subsurface cross-section
maps to acquire the 3-D perspective required to prove potential targets.
The Target™ for ArcGIS system was developed to provide the geologist with:
• Minimum curvature and Krigrid (statistical) gridding routines as well as
Geosoft’s comprehensive contouring tool
• Organizational tools (consisting of versatile, self-contained databases and rock
code management)
• Quality Control tools (including QA/QC tests on each of the five different data
types; Collar Data, Dip/Azimuth Survey, Easting-Northing Survey, From-To
Data, and Point Data).
• Planning tools (such as plan maps and section outlines)
• Visualization and plotting tools (including comprehensive plan plots and section
plots in any orientation)
Before you begin…
In this section, we will guide you through the key steps necessary to install and begin
working with the Target for ArcGIS system. The procedures in this section will show
you how to:
• Install the Target for ArcGIS system (page 8)
• Display the Target for ArcGIS toolbars (page 8)
• Install the Geosoft eLicense (page 12)
• Open the Geosoft Database Window (page 17)
This tutorial uses sample data provided on the Target for ArcGIS CD ROM. Before
you begin, save the files to a working directory, such as D:Tutorial.
8 Tutorial 1: Getting Started
Installing Target for ArcGIS
Target for ArcGIS is installed from the Target for ArcGIS CD-ROM. Please note
that your installation procedure will vary slightly depending on the operating system
you are using. If you are installing on Windows NT, you must install while logged in
as Administrator.
Once you have successfully installed this program you can begin working with
Geosoft’s Target for ArcGIS software application.
INSTALLING TARGET FOR ARCGIS
1. Insert the Target for ArcGIS CD into your CD-ROM drive. The InstallShield
Wizard Setup dialog is displayed and tells you that the system is preparing the
installation.
2. When ready, the program displays the Geosoft Target for ArcGIS – InstallShield
Wizard Welcome screen. To continue, follow the directions on the screens that
appear.
3. When the "Installation is complete" message appears, click [Finish]. The Target
for ArcGIS software has been installed on your computer.
Note: To install the latest version of the Target for ArcGIS tutorial and data files
visit, www.geosoft.com/downloads/index.asp and download Target for
ArcGIS Tutorial and Data. Save these files to a working directory, such
as D:Tutorial.
Displaying Target for ArcGIS Toolbars
Once you have installed the Target for ArcGIS software and opened ArcMap, you
will need to display the Geosoft Target for ArcGIS toolbars; Geosoft, Geosoft
Database, Target Surface, Target Drillhole and Target 3D. The toolbars can then be
docked in suitable locations.
DISPLAYING THE TARGET FOR ARCGIS TOOLBARS:
1. Start ArcMap.
2. On the View menu, select Toolbars and then select (check) the Geosoft toolbar
option ( ). The Geosoft toolbar will be displayed.
3. Repeat Step 2 above to display the Geosoft Database, Target Surface, Target
Drillhole and Target 3D toolbars.
Tutorial 1: Getting Started 9
4. The Geosoft Target for ArcGIS toolbars can then be docked in the ArcMap menu
area (top, bottom or sides) by dragging each toolbar and dropping them at the
desired location.
Using the Target for ArcGIS toolbars
Once you have opened ArcMap and displayed the four floating Geosoft Target for
ArcGIS toolbars, they can be docked in suitable locations.
Geosoft toolbar
Short-cut Buttons
Includes:
Geosoft Setup Help
• Internet Settings
• Settings
• Advanced Settings
• License …
- Show computer ID
- View eLicense
- Setup eLicense
- Update eLicense
- Park eLicense
- Transfer eLicense
- Lock eLicense
- Unlock eLicense
Show/Hide Geosoft Database Window
Get data using Geosoft DAP client
Get data using Geosoft DAP for v6.1
Import Geosoft Map as layer(s)
Geosoft 3D Viewer for selected layer
10 Tutorial 1: Getting Started
Geosoft Database toolbar
Includes:
Geosoft Data Help
• Open Geosoft database
• Close database
• Close all databases
• Commit Geosoft database changes
• Save database as
• Discard Geosoft database changes
• Save working view
• Get Saved view
• Edit metadata
• Edit audit log
• Utilities …
- Search/replace
- Expression
- Expression file
- Edit a file
• Maintenance …
- Details
- Verify
- Defragment
- Grow
- Repair
• Coordinates …
- Change X/Y coordinates
- Set projection
- New projected
- Long,Lat - > Local X,Y
- Local X,Y - > Long,Lat
• Gridding …
- Minimum Curvature
- Kriging
- Grid Info
- Copy/convert grids
- Re-grid a grid
Short-cut Buttons
Show/Hide Geosoft Database Window
Open Geosoft database
Commit Geosoft database changes
Discard Geosoft database changes
Goto first line/group in Geosoft Database
Goto last Line/Group in Geosoft Database
Goto Previous Line/Group in Geosoft
Database
Goto Next Line/Group in Geosoft
Database
Create new Line/Group in Geosoft
Database
Delete current Line/Group in Geosoft
Database
Target Surface toolbar
Short-cut Buttons
Includes:
Target Surface Help
• Grid Info
• Copy/convert grids
• Re-grid a grid
• Import data
- acQuire point data
- Geosoft Database
Minimum curvature gridding from table
in current document
Kriging gridding from table in current
document
Create contours from grid on disk
Tutorial 1: Getting Started 11
Target Drillhole toolbar
Includes:
Target Project
• New Project
• Open Project
• Close Project
• Save Database
• Refresh Databases
• Seuset Project
• Preferences
Data
• Import …
- Text file
- XLS/Database
- ODBC Database
- acQuire drillhole data
- LAS file
• Export …
- CSV file
- Access database
- LAS file
- SHP file
• Set Projection
• QA/QC
• Composite Database
• New drillhole
• Edit drillhole
• Delete drillhole
• Remove unregistered holes
• Sort holes
• Edit rock codes
• Edit structure codes
• Refresh Extents
• Refresh XYZ
• Utilties …
- Search/replace
- Expression
- Expression file
- Edit a file
• Maintenance …
- Details
- Verify
- Defragment
- Grow
- Repair
Selection
• Select All holes
• Deselect All holes
• By name or name mask
• From List
• By collar table data
• Using Shape file
• Selection tool
• Select data by code
• Select data by range
• Reset mask channel
• Load selections
• Save selections
Short-cut Buttons
Generate Target Plan Plot
Generate Target Section Plot
Generate Target Stacked Section Plot
Generate Target Strip Log Plot
12 Tutorial 1: Getting Started
Trace Target Section into current data frame
Generate Target 3D Plot
Geosoft 3D Viewer for selected layer
Show/Hide Geosoft Database Window
Shadow Cursor Tool
Shadow Cursor Tool with data linking
Target 3D
Short-cut Buttons
Includes:
Voxels Help
• Grid Voxel
• Voxel grid info
• Voxel math
• Voxel topography clip
• Copy/convert grids…
- Geosoft Database to Geosoft
- GOCAD to Geosoft
- UBC to Geosoft
- XYZ to Geosoft
- Datamine to Geosoft
- Voxel to Geosoft database
- Geosoft to GOCAD
- Geosoft to UBC
- Geosoft to XYZ
Grid Voxel from current database
Generate Target 3D Plot
Geosoft 3D Viewer for selected layer
Help
• Help Topics
• Email Geosoft Tech support
• Frequently asked questions
• Target for ArcGIS tutorial
• Geosoft User forums
• Geosoft Website
• Geosoft Technical connection
• Check for updates
• About Target for ArcGIS
Help Topics
Provides access to the Target for ArcGIS online help system. There are several functions included in
the Target for ArcGIS help system that may be useful to your work. The entire documentation for the
system is available through the online help system. This electronic library of information enables us to
Tutorial 1: Getting Started 13
constantly update the information and provide you with the most up-to-date information available.
The best way to find information in this system is to use the Search tab to perform a full-text search of
all help topics.
Installing Geosoft’s eLicense
To enable Target for ArcGIS you must install a valid Geosoft eLicense using the
Geosoft License Manager. With Geosoft’s lectronic licensing (eLicensing) model
licenses are now handled by the Geosoft license server. This system enables licenses
to be moved between machines online, via email or if necessary by disk. Geosoft’s
eLicensing management system offers many tangible and real benefits, including:
• Regular upgrades and fixes. We release multiple upgrades a year (with interim
patches when possible). You can only access these with a valid eLicense.
• Transfer eLicense from office to home computer without re-installing all software
• Add new products to your eLicense instantly
• Evaluate products easily - for 30 days
• Easy to manage "1 user - 1 license" model
• Reduces costs by eliminating unauthorized use
• Rent modules for specific time periods
• The eLicensing technology also enables us to add extra services and products on a
regular basis.
It may take some time to get used to the system and there are some restrictions that
apply:
• Licenses are keyed to individual PCs. Therefore; you must park the eLicense to
switch computers
• Must park eLicense before changing Operating System (for a new hard drive, for
example)
Note: If you have any problems with your eLicensing please contact your local
Geosoft Technical Support representative
www.geosoft.com/contact/index.asp.
TO INSTALL ELICENSE:
1. On the Geosoft toolbar, select Geosoft Setup, and then select License|Setup
license. The Geosoft License Manager will be displayed.
14 Tutorial 1: Getting Started
2. In the "License Key" box, enter your 8-digit alphanumeric license key (provided
with your CD-ROM) and click the [Internet] button. Geosoft’s license server will
retrieve your license from our Internet server and download it to your computer.
3. When the license has been successfully installed all of the software you are
licensed for will now be accessible to you.
Note: The Target for ArcGIS eLicense can also be installed directly from the
Windows “Start” menu (i.e. on the Start menu, select
Programs|Geosoft|Target for ArcGIS|License|Setup. The Geosoft License
Manager will be displayed. Enter your 8-digit “License Key” and click the
[Internet] button. Your license will be retrieved from the Geosoft license
server and downloaded to your computer.
Using the Geosoft License Manager
The following Geosoft License Manager options enable you to manage your
eLicense:
• Install eLicense – Installs your eLicense, using your ‘license key’, from the
Geosoft license server (page 13)
• Show computer ID – Displays your computer ID which is a unique alpha-
numeric string that identifies your computer and is used to link your Geosoft
eLicense to your computer. The Computer ID is also used to transfer your
eLicense to another computer (page 15)
• View eLicense – Displays your eLicense information which you can view at any
time to see what applications or tools you are licensed for (page 15).
Tutorial 1: Getting Started 15
• Update eLicense – Updates your eLicense (i.e. access additional extensions or
add-on tools) by first contacting your local Geosoft representative and then
simply connecting to the Geosoft license server (page 15).
• Park eLicense – Parks (moves) your eLicense onto the Geosoft license server,
enabling it to be retrieved later (page 16).
• Transfer eLicense – Transfers eLicense from one computer to another (e.g. from
your desktop to a laptop or visa-versa), using the “Computer ID” (page 16).
• Lock eLicense – Locks eLicense on the current computer (page 17).
• Unlock eLicense – Unlocks eLicense from the computer using the ‘License key’
(page 17).
TO SHOW YOUR COMPUTER ID:
1. On the Geosoft Setup menu, select License|Show Computer ID. The Geosoft
License Manager dialog will be displayed.
2. The alpha-numeric ID displayed in this window is your Computer ID.
3. Click the [OK] button to close the window.
TO VIEW YOUR ELICENSE:
1. On the Geosoft Setup menu select, License|View License. Your eLicense is
displayed in your default web browser.
2. The eLicense includes your License Key, Computer ID, User Name, Company,
Support Expiry date, Software build date and other items as well as a list of your
licensed products.
3. Close the window when you have finished viewing your eLicense.
TO UPDATE YOUR ELICENSE:
1. Contact your local Geosoft representative about adding additional extensions or
add-on tools.
2. Connect to the Internet.
3. On the Geosoft Setup menu select, License|Update License. Your eLicense is
updated with the new licensed products.
16 Tutorial 1: Getting Started
TO PARK (MOVE) ELICENSE FROM YOUR COMPUTER TO THE GEOSOFT LICENSE SERVER:
1. Connect to the Internet.
2. On the Geosoft Setup menu select, License/Park License. The Geosoft License
Manager dialog will be displayed.
3. This is a warning message that tells you that parking a license places your license
on the Geosoft license server so that it may be installed on a different computer
for your own personal use. Your license is non-transferable, and use of the license
by anyone but you may be a violation of your license agreement.
4. It then asks you if you are sure you want to park your license? Click the [Yes]
button. Your license is uploaded to the Geosoft license server, to be downloaded
at a later time, and all licensed products will be removed.
5. Once the license is parked, it can be installed on another computer. For
information on installing your Geosoft eLicense, see page 12.
Note: If you do not have access to the Internet, your eLicense can be transferred
in a file using the Transfer License process.
TO TRANSFER YOUR ELICENSE:
1. Open ArcMap and display the Geosoft toolbar on your licensed computer.
2. On the Geosoft Setup menu, select License|Transfer License. The Geosoft License
Manager dialog is displayed.
3. In the "Target Computer ID" box, enter the computer ID of the target computer
(the computer you wish to transfer the license to) and click the [OK] button.
Note: Target for ArcGIS must be installed on the target computer to retrieve the
“Computer ID”, which can be viewed from the Start menu by selecting
Programs|Geosoft|Target for ArcGIS|License|View computer ID.
4. The file OasisMontaj_Transfer.geosoft_license file will be created in your C:
directory.
5. Move this file via media (diskette, CD, USB drive) or network to the target
computer.
6. Using Explorer locate the file (OasisMontaj_Transfer.geosoft_license) on the
target computer, right-click and from the popup menu, select Install License.
Your licensed products will be installed.
Tutorial 1: Getting Started 17
Note: If you have access to the Internet, Parking your eLicense (page 16) is the
quickest and easiest method of moving your eLicense.
TO LOCK YOUR ELICENSE:
1. Connect to the Internet.
2. On the Geosoft Setup menu select, License|Lock License. The Geosoft License
Manager dialog is displayed.
3. This is a warning message that asks, are you sure you want to LOCK the license
on this computer? You will no longer be able to move or manage the license until
it is unlocked using the license key.
4. Click the [Yes] button and the license will be locked on your computer until you
unlock it using the license key.
TO UNLOCK YOUR ELICENSE:
1. Connect to the Internet.
2. On the Geosoft Setup menu select, License|UnLock License. The Geosoft License
Manager dialog is displayed.
3. In the "License Key" box, enter your 8-digit alphanumeric license key (provided
when you "Locked" your license) and click the [Internet] button.
4. Geosoft’s license server will unlock your license and enable you to move and
manage it again.
Opening Geosoft Database Window
The Geosoft Database Window is a special window within ArcMap that is used to
create and view Geosoft’s unique three-dimensional database structure. The Database
Window is specifically designed to enable users to access drillhole data using the
organized and self-contained spreadsheet tab windows. These windows offer a direct
interface to your data and enable you to perform a variety of tasks, including:
• Display a view of the data in numerical or profile format
• Display database statistics
• Apply mathematical expressions to data
• Process and display resulting data
• Analyze data using built-in Geosoft eXecutable functionality
18 Tutorial 1: Getting Started
Spreadsheet Window
The data visible in the “Spreadsheet window” represents only some of the column
(channel). This differs from a conventional spreadsheet program, in that what you
see on the screen is the data. The Spreadsheet window only displays those parts of
the data that you choose to display.
In general, you may have as many lines and channel in your database as you require
(i.e. there is no limit). You are also free to display the columns in any order or
remove them from the window whenever you like.
Profile Window
The data profile view is your "graphical window" to the Geosoft database. You can
display profiles of one or more variables in your database simply by selecting the
channel, right clicking and from the popup menu select Show Profile.
The profile appears directly below its corresponding database in a profile window.
You can have up to five "panes" with 32 variables in each window.
Profile windows are linked dynamically to their corresponding database. When you
select a value or range of values in either the database or profile window respectively,
they are also highlighted in the other window. Right click inside the profile window
to view the Profile menu.
Tutorial 1: Getting Started 19
Database Tools
The following database short-cut tools are available to assist in navigating through
the Geosoft database.
Show/Hide Geosoft Database Window
Use this button to Show/Hide the Geosoft Database
Window.
Open Geosoft database
Use this button to open a previously defined Geosoft
database.
Commit Geosoft database changes
Use this command to commit changes in the current
Geosoft database.
Discard Geosoft database changes
Use this command to discard changes in the current
Geosoft database.
Go to First line/group in Geosoft database
Use this command to show the data and profiles for the
first (starting) line/group in your Geosoft database.
Go to Last line/group in Geosoft database
Use this command to show the data and profiles for the
last (final) line/group in your Geosoft database.
Go to Previous line/group in Geosoft database
Use this command to show the data and profiles for the
previous line/group in your database.
Go to Next line/group in Geosoft database
Use this command to show the data and profiles for the
next (following) line/group in your database.
Create new line/group in Geosoft database
Use this command to create a new line/group in your
Geosoft database. The Create Line dialog is displayed
that enables you to specify the line/group parameters.
Delete current line/group in Geosoft database
Use this command to delete the current selected
line/group in your Geosoft database.
20 Tutorial 1: Getting Started
As well as these short-cut tools, there are also a number of database tools available on
the Geosoft Data menu, for more information see page 10.
For more information on these or any Target for ArcGIS options, click the [Help]
button on the dialog of interest, or select Help|Help Topics from any of the Geosoft
toolbars.
Tutorial 2: Using Gridding and Contouring Tools 21
Tutorial 2: Using Gridding and Contouring Tools
The Target for ArcGIS system includes two gridding options, Minimum Curvature
Gridding and Kriging and a contour option that provides the ability to create Contour
layers from gridded data. The procedures in this section will show you how to:
• Add data and assign a projection (page 21)
• Grid data using Minimum Curvature method (page 23)
• Plot contours (page 26)
Before you begin…
This tutorial uses sample data provided on the Target for ArcGIS CD ROM. Before
you begin this tutorial, copy the tutorial data file (surface_geochemistry.csv) to a
working directory, such as D:Tutorial.
Gridding using Minimum Curvature Gridding
To perform minimum curvature gridding, you must supply X, Y and Data fields,
Output grid name and Grid cell size (optional). In addition, you also have a variety of
options, including the ability to:
• Specify data limits and clipping
• Grid the original data or log of the data (using cut-offs or a data range)
• Specify desampling values (for low-pass filtering) and blanking distance (for
removing values beyond a certain distance)
• Specify the tolerance to which the minimum curvature surface must match the
data points. The default is 1.0% of the Z range of the data. Also specify the
percentage of points that must meet the tolerance for the iterations for the
current processing step to stop
• Specify the maximum number of iterations to allow
• Adjust the tension to produce a true minimum curvature grid or to increase the
tension to reduce overshooting problems in unconstrained, sparse areas
The Minimum curvature gridding algorithm generates a grid file (*.grd) and grid
report file (rangrid.log).
Adding Data and Assigning a Projection
Target for ArcGIS enables you to grid shape files, event layers and table files.
However, in order for the resulting grid to have a projection, you must grid either a
shape file or an Event layer that already has a projection assigned to it. The grid will
adopt the projection of the source data. ArcMap will not let you assign a projection to
a table, so any grid created from an XY data table, i.e. not an Event theme or shape
file, will not have a projection assigned to it.
22 Tutorial 2: Using Gridding and Contouring Tools
TO ADD DATA AND ASSIGN A PROJECTION:
1. Open ArcMap. On the Tools menu, select Add XY Data. The Add XY Data dialog
is displayed.
2. Using the Browse button ( ) locate the (surface_geochemistry.csv) file.
3. Using the dropdown lists, Specify the fields for the X and Y coordinates as shown
above. Click the [Edit…] button, lower right of the dialog box, and the Spatial
Reference Properties dialog is displayed.
4. Click the [Select] button, the Browse for Coordinate System dialog is displayed.
Then select the following, Projected Coordinate Systems|UTM|Wgs 1984|WGS
1984 UTM Zone 20N.prj and click the [Add] button to return to the Spatial
Reference Properties dialog.
5. Click the [OK] button to apply the projection to the XY data and return to the
Add XY Data dialog. Click the [OK] button to add the XY Event data
(surface_geochemistry.csv Events) to the layer.
Tutorial 2: Using Gridding and Contouring Tools 23
Note: The added XY Event data (surface_geochemistry.csv Events) only exists
in the current map document. To save the layer as a separate file, you must
export as a shape file.
6. In the Table of Contents (TOC) window, select (highlight) the layer
(surface_geochemistry.csv Events), right click and from the popup menu, select
Data|Export Data. The Export Data dialog is displayed.
7. Specify the export parameters to save the layer as a shape file in your working
directory and click the [OK] button. The ArcMap dialog is displayed.
8. This dialog asks if you would like to add the exported data to the map as a layer.
Click [Yes] and the file Export_surface_geochemistry.shp will be saved in your
working directory and displayed as a layer on your current map.
Gridding Data using the Minimum Curvature Method
The Minimum Curvature gridding method fits a minimum curvature surface to the
data points. A minimum curvature surface is the smoothest possible surface that will
fit the given data values.
TO GRID USING THE MINIMUM CURVATURE METHOD:
1. On the Target Surface toolbar, click the Geosoft Minimum Curvature Gridding
Tool button ( ). The Select Table to Grid dialog is displayed.
24 Tutorial 2: Using Gridding and Contouring Tools
2. In the Available tables in current document box, select
(surface_geochemistry.csv Events) and click the [OK] button. The Minimum
Curvature Gridding of attribute using feature positions in layer dialog is
displayed.
3. Using the Attribute to grid dropdown lists, select (Au). In the Name of new grid
file box, specify (Au_surface). The Grid cell size can be left to the intelligent
default value. Click the [Help] button for more information on Grid cell size or
any other Minimum Curvature Gridding parameter.
4. To access the advanced parameters, click the [Advanced>] button or to accept the
intelligent defaults, click the [OK] button. The data will be gridded, saved in your
working directory and displayed in the data frame.
5. By default, ArcMap displays the grid using a grey scale colour ramp. To change
this, click on this grey scale colour bar in the Table of Contents window. The
Select Colour Ramp dialog is displayed. Using the dropdown list, select any of
the available colour ramps.
Tutorial 2: Using Gridding and Contouring Tools 25
6. Click the [OK] button to apply the colour to the grid. (Note that, to change the
colour scheme so that the high values are displayed in red and low values in blue,
check ( ) the Invert box.)
Contouring using Geosoft’s Contouring Tool
To create a contour layer, you must supply the input grid file, specify contouring
option and up to 8 contouring levels. In addition, you also have a variety of options,
including the ability to:
26 Tutorial 2: Using Gridding and Contouring Tools
• Make a layer for display in the ArcMap window
• Make a shape file with Z attributes (*.SHP) for use in ArcMap
• Contour options including; smoothing, suppression, suppression density
(mm), annotations, labelling, etc
• Line styles including; line colour and weight, line styles (solid, dashed etc.)
and line labels
Plotting Contours
Contours refer to the lines drawn at specified intervals or multiples of intervals on
your map based on a gridded dataset. After you create a grid, you may want to
contour your data and display these contours on your map. In Target for ArcGIS,
contouring is specially designed to handle the very large dynamic data ranges that
characterize spatial data sets.
TO CREATE A CONTOUR PLOT
1. Select the Create Contours from grid on disk button ( ) on the Target Surface
toolbar. The Create a contour plot of a grid dialog will be displayed.
2. Using the [Browse] button, locate the Input grid file (Au_surface.grd).
3. Using the Output Type dropdown list, select (shape file) and then suing the
Contouring option dropdown list, select (multiples of levels). Then you can
specify the Interval level(s) starting with the smallest level at the top (Note that,
you can also leave the levels to the intelligent defaults).
Tutorial 2: Using Gridding and Contouring Tools 27
4. Click the [Options] button and set the parameters as required and click the [OK]
button to return to the Create a contour plot of a grid dialog.
5. Click the [Line Styles] button and set the line style parameters as required,
clicking the [Next>] button as required. Then click the [Finish] button to return
to the Create a contour plot of a grid dialog.
6. Click the [Next>] button and the Contour: Create a shape file as output dialog is
displayed.
7. Save the shape file as (Au_contour.shp). The contour shape file will be created,
saved in your working directory and displayed in the data frame.
28 Tutorial 3: Target for ArcGIS Drillhole Tools
Tutorial 3: Target for ArcGIS Drillhole Tools
In this section, we will guide you through the key steps necessary to start a new
drillhole project and import and verify geological and geochemical data. The
procedures in this chapter will show you how to:
• Access the drillhole menus (page 28)
• Start a new project (page 29)
• Import data (page 30)
• Apply quality control and quality assurance tests to data (page 42)
Before you begin…
This tutorial uses sample data provided on the Target for ArcGIS CD ROM. Before
you begin, save the files (Collar.csv, Assay.csv, Survey.csv, Geology.csv) to a
working directory, such as D:Tutorial.
Access the drillhole menus
The Target for ArcGIS drillhole menu options and plotting tools can be found on the
Target Drillhole and Target 3D toolbars. For more information on the Target toolbars
and the menu and plotting tools available, see page 9.
Note: The drillhole system uses a special window within ArcMap to create and
view Geosoft’s unique three-dimensional databases. The Geosoft Database
Window is specifically designed to enable users to access their drillhole
data using organized and self-contained spreadsheet tab windows.
TO OPEN THE GDB WINDOW:
1. Select the Show Geosoft Database Window button ( ). The Geosoft Database
Window will be displayed.
Tutorial 3: Target for ArcGIS Drillhole Tools 29
2. As we have not imported drillhole data into the project the window displays the
“No Geosoft Databases Loaded” message.
Starting a New Project
The Target for ArcGIS drillhole system has been developed using Geosoft’s unique
three-dimensional database structure. These databases are linked by a common
project name that provides easier data management.
When you start a new drillhole project the "Collar" database is created and displayed
in the GDB Window. Each individual ‘data type’ will have its own databases. The
common project name links the databases. For example, separate databases for collar,
survey, assay, and geology are created and linked by project.
In a project named "Prospect" the following databases could be created:
• Prospect_Collar.gdb (collar information)
• Prospect_Survey.gdb (hole dip-azimuth survey information)
• Prospect_Geology.gdb (geology information – The “Geology” label is user specified)
30 Tutorial 3: Target for ArcGIS Drillhole Tools
• Prospect_Assays.gdb (assay information - the "Assay" label is user-specified)
Note: When the Target for ArcGIS system is used, it scans the open project for
all the databases currently loaded in the project to see which data is
available. If you close one of the project databases, it will not be visible to
the system and will not be used when processing your data. While working
with a Target for ArcGIS project, if you wish to “hide” one of the
databases, minimize it instead of closing it in order that Target for ArcGIS
can continue to access it.
Naming a Drillhole Project
The drillhole project name will be added, as a prefix, to all of your project databases
(collar, survey, assay, geology, and other types of related information).
TO NAME A DRILLHOLE PROJECT:
1. On the Target Drillhole toolbar, select Target Project|New project. The Drillhole
- New Project dialog is displayed.
2. Specify a New project name as (Prospect). The current default project directory
is displayed in the Project Directory box. If this is incorrect, click the [Directory]
button to specify the correct working project directory (i.e. D:Tutorial).
3. You can specify the Maximum holes as (500) and you can leave the Maximum
data fields per dataset to the default value of (100). We recommend that you
specify a number that is representative of the final estimated project size. This
strategy ensures that you have enough space available in your project while not
consuming excessive storage space.
4. Click the [OK] button. The collar database with the project name that you
specified is displayed.
Importing Data
The Drill Hole Import Wizard guides you through the import process, and
automatically displays your data in a Spreadsheet window. The spreadsheet window
Tutorial 3: Target for ArcGIS Drillhole Tools 31
is similar to Excel in appearance with specialized Earth Science capabilities,
including built-in data manipulation tools.
The purpose of this tutorial is to help you become aware of the key components and
capabilities of the Target for ArcGIS import process to prepare you for plotting your
results in plan and section maps. In this exercise, you will be importing collar, survey,
geochemical assay, and geology data.
Current X and Y Channels
The Target for ArcGIS system has implemented “current" X and Y (and Z) channels.
This feature enables users to select the channels that they would like to use as the
current X and Y (and Z) channels (for example, East, North, and Relative Level).
Markers have been added to the channel header to indicate which channels are
currently defined to be the "current" X, Y (and Z) channels. The markers are little
rectangles on the right side of the header cell, and contain "x", "y" (or "z") in reversed
display (like the triangle protection symbol on the left). The "z" will be used in
Target for ArcGIS databases, where DH_EAST = "x", DH_NORTH = "y" and
DH_RL = "z".
Importing Data Files
During drilling, the geologist acquires and integrates data from different sources and
formats, including:
• Drillhole locations - Collar information containing (at a minimum) Hole ID,
Easting, Northing and Relative Level (Elevation). Note, that in the data example
below, the Azimuth, Dip, and Depth are also included in the collar file.
32 Tutorial 3: Target for ArcGIS Drillhole Tools
• Surveys – (Optional) Hole deviation information in either Hole ID, Depth,
Azimuth, Dip format or Hole ID, Depth, Easting, Northing, Elevation format.
Note that, a survey file is only required if a hole has actually been surveyed and
the dip and azimuth change at depth.
• From to Data – From-To data is data acquired over specified depth intervals
down the hole; for example, at a 1 m interval with a measurement starting at 0 m
and extending to 139 m. In this tutorial, we will import two types of From-To
data: a geochemical assay dataset and a geological rock codes dataset.
• Point Data – Point data is data acquired in discrete measurements made at a
specific depth, for instance 85.6 m. In this example, a Geophysical property log
(borehole geophysics) in Single Point data format.
The Target for ArcGIS system automatically detects the type of data that is being
imported, which can be any of the above.
Tutorial 3: Target for ArcGIS Drillhole Tools 33
There are two ways to define drillholes and add data to your project in Target for
ArcGIS:
• Import data already stored in CSV/text or XLS/database data format. A common
example is a geochemical assay file, which is commonly delivered to you on disk
or via email by an assay laboratory in Excel XLS format. Depending on project
needs, you may also initially have geological data, collar data or survey data in
text or data files.
• Manually enter data. If you are performing a grassroots exploration project, you
may only have one or two holes to work with initially. In this case, you may just
want to add some basic collar location or projected survey information to your
project.
In this part of the tutorial, we will work through the import process of collar, survey,
assays and geology data from CSV files. The purpose is to demonstrate standard data
formats and show how Target for ArcGIS handles each of these situations.
Importing Data
The Target for ArcGIS system enables the import of data stored in CSV/text or
XLS/database data format.
In this section, we will work through the import process of collar, survey, assays and
geology data from CSV format files. The purpose is to demonstrate standard data
formats and show how Target for ArcGIS handles each of these situations.
Importing Collar Data
When entering data in Target for ArcGIS, you must start with collar data. The system
creates a unique collar database that you can use to view all drillholes in the project at
a glance. You can also plot an initial plan map showing all holes for review purposes.
A collar file must exist before survey or assay data can be imported, and before plans
and sections can be created.
TO IMPORT COLLAR DATA:
1. On the Data menu, select Import, and then select Text file. The Drill Hole –
ASCII Import dialog is displayed.
34 Tutorial 3: Target for ArcGIS Drillhole Tools
2. Using the Browse button ( ), select the Collar.csv file from your working
directory and click the [Wizard] button. The Drill Hole Import Wizard dialog is
displayed.
3. Note that the system has determined that the Data Input format is ASCII Data
and has intuitively predicted that the Types of Data to import is Hole Collar
Data.
Tip: The Target for ArcGIS Drill Hole Import Wizard enables you to easily import
data from any ASCII spreadsheet or data file. The Import Wizard supports
both Delimited and Fixed Field ASCII files. The Import Wizard also imports
Microsoft Excel Comma Seperated Value (CSV), Comma Delimited,
White Space Delimited and Tab Delimited data files. The window at the
bottom of the dialog box shows the file that is being imported. For more
information about the Drill Hole Import Wizard settings click the [Help]
button on the individual Wizard dialog boxes.
4. Use the horizontal scroll bar to see all of the fields in the file or simply click the
[Next>] button. The system displays the second dialog box in the Drill Hole
Import Wizard.
Tutorial 3: Target for ArcGIS Drillhole Tools 35
5. In this case, the system has determined that the File Type containing the data is
Delimited (i.e. separated by commas).
6. In the four fields in the middle of the dialog box specify which line in the file
contains the data headings (i.e. channel names), data units (“m” or “ft” etc.),
which line to begin importing data and the number of lines to display in the
preview window.
7. Click the [Next>] button. The system displays the third dialog box in the Drill
Hole Import Wizard.
36 Tutorial 3: Target for ArcGIS Drillhole Tools
8. Specify the Column delimiters as Microsoft Excel CSV for the type of character
used to separate the column text. In this case, the system displays the data in
columns by drawing lines in the preview window indicating the way in which it is
preparing to import your data.
9. Click the [Next>] button to continue. The system displays the fourth and final
dialog box in the Drill Hole Import Wizard.
Tutorial 3: Target for ArcGIS Drillhole Tools 37
10. The Import Wizard has scanned your data and determined the type of data with
which you are working (i.e. Channel Type). It is always good practice to review
your data to ensure that the wizard has selected the correct columns. The
Parameters area in the dialog box shows the name and type of data of the column
highlighted in the preview window.
Note: The Data Type of Database Fields that contain alphanumeric data (for
example, sample numbers, rock codes etc.) must be classified as String.
11. Click the [Finish] button. The system imports the data (Collar.csv) and displays
it in the spreadsheet window.
12. At this point, we recommend that you examine the database carefully. Start by
confirming that all columns of data in the original CSV file are present in the
database.
Note: If you have problems with your data file, the system will attempt to open
an ASCII file (dhimp_collar.log) and display a list of warnings or errors.
If you have not yet configured a text editor in your system, you may be
prompted for one. In this case, search your system for your text editor (i.e.
Notepad), which can be located in the Windows directory.
38 Tutorial 3: Target for ArcGIS Drillhole Tools
Importing Survey Data
Various types of surveys (acid, gyroscope, magnetic orientation, etc.) can be used to
record hole depth (depth measured from the drillhole collar). For Target for ArcGIS,
you can use survey data in one of two forms:
Before importing data, you must make sure that you have all fields as shown in one of
these configurations (i.e. these fields are required on import).
By convention:
• Depth is the distance measured into the hole from the collar, increasing from zero.
• Azimuth is in degrees, increasing positively in a clockwise sense from North (i.e.
N is 0 degrees, E is 90 degrees).
• Depth, Easting, Northing and Elevation are in the same units as default units set
in Data|Set Projection dialog. To change the units, click the [Modify] button.
TO IMPORT SURVEY DATA:
1. On the Data menu, select Import|Text file. The Drill Hole – Ascii Import Wizard
dialog is displayed.
2. Using the Browse button ( ), select the Survey.csv file from your working
directory and click the [Wizard] button. The system scans the file and displays
the first of four dialog boxes from the Drill Hole Import Wizard. Note that the
system has determined that the Data Input Format is ASCII Data. The Types of
Data to import should default to Dip-Azimuth Survey.
Hole Depth Azimuth Dip
Hole Depth Easting Northing Elevation
Tutorial 3: Target for ArcGIS Drillhole Tools 39
3. Continue clicking the [Next>] button and work your way through the remaining
three dialog boxes. Watch the sequence of screens and note the differences from
the Collar Import procedure.
4. In the final dialog box click the [Finish] button. The system imports the data
(Survey.csv) and displays it in the spreadsheet window.
Importing Geochemical Assay Data
Geochemical assay data are typically acquired by obtaining core or rotary drill
samples over specific depth ranges (From-To ranges) and sending samples to an
assay laboratory. Numerical results are typically returned from the laboratory in
electronic format and can be imported quickly into the system. Before import, you
must make sure that your data files contain the following information – HOLE ID,
FROM, TO and a series of ASSAY results.
TO IMPORT GEOCHEMICAL DATA:
1. On the Data menu, select Import|Text file. The Drill Hole – Ascii Import Wizard
dialog is displayed.
40 Tutorial 3: Target for ArcGIS Drillhole Tools
2. Using the Browse button ( ), select the Assay.csv file from your working
directory and click the [Open] button. The system returns you to the Drill Hole –
ASCII Import Wizard dialog box and displays the file name you wish to import.
3. Click the [OK] button. The system scans the file and displays the first of five
dialog boxes from the Drill Hole Import Wizard. Note that the system has
determined that the Data Input Format is ASCII Data. The Types of Data to
import should default to From-To Data.
4. Continue clicking the [Next>] button while watching the sequence of dialog
boxes and the differences from the previous import procedures.
Note: When importing Assay data all elements are assigned the Class ‘Assay’
(Channel Type). Standards and Duplicates are also identified, enabling
Chimera Geochemistry users to extract the information using the normal
Chimera tools.
Tutorial 3: Target for ArcGIS Drillhole Tools 41
5. Before the import is complete, the system displays a fifth dialog box. The purpose
of this dialog box is to enable you to specify a unique name or description for
your data. The name chosen will be appended to the corresponding holes in the
database for easier access and recognition of your data.
6. Specify a Data Name for this data and click the [Finish] button. The system
imports the data (Assay.csv) and displays it in the spreadsheet window.
Importing Geological Data
The system provides a versatile environment for adding a wide variety of geological
parameters ranging from rock codes, extended text descriptions, alteration types,
contact data such as fractures or faults, and other core log information that is
important in your drilling project.
In general, this type of information consists of text but you can also add numerical
values, for instance, if you want to retain numeric codes for statistical purposes or
you want to run your own advanced classification strategies in Target for ArcGIS.
TO IMPORT GEOLOGICAL DATA:
1. Repeat the steps in the procedure above, using the Geology.csv file.
2. You are now ready to begin working with your data. If this was a real project,
more results can always be added later just as easily with the Import Wizard.
42 Tutorial 3: Target for ArcGIS Drillhole Tools
Saving your Databases
It is always a good habit to save changes you make to your databases, including new
databases.
TO SAVE YOUR DATABASES:
1. Select the database you want to save, by selecting the Database Tab (as shown
below).
2. On the Geosoft Database toolbar, select Geosoft Data|Commit Geosoft database
changes. Note that, you can also select the short-cut button ( ). The Save
Changes dialog is displayed.
3. Click the [Yes] button and the database will be saved to your working directory.
4. Repeat this process until all databases have been saved. Note that you can use the
“Arrow” buttons on the database tab to select the next database.
Quality Control and Quality Assurance Tests
The Target for ArcGIS system provides the tools to enable you to perform Quality
Control and Quality Assurance tests on each of the five different data types (Collar
Data, Dip/Azimuth Survey, Easting-Northing Survey, From-To Data, and Point
Data).
The Drill hole - QAQC tools dialog asks you to select the type of data to perform the
QA/QC tests on. For each data type there are different sets of options you can
enable/disable using the [Options] button.
The individual QA/QC tests are run automatically during data import. Each test
produces its own log file; e.g. Collars (Collars.log), From-To (FromToData.Log), All
data (QAQC.log). If no problems are found you receive a message such as: "No
problems were detected with the Dip-Azimuth Survey data."
For more detailed information on the options available for each data type see,
Appendix 3: Setting QA/QC Options page 99.
Tutorial 3: Target for ArcGIS Drillhole Tools 43
TO RUN THE QA/QC TEST:
1. On the Data menu, select QAQC. The Drill hole - QAQC tools dialog is
displayed.
2. From the Data Type to QAQC dropdown list, select the data type you want to
perform the QA/QC test on. To see the list of options that the select data type will
use for testing, click the [Options] button. In this case, the QA/QC – Collar data
options dialog is displayed.
3. Once you have modified your test options, click the [<Back] button to return to
the Drill hole - QAQC tools dialog.
4. Click the [OK] button to run the test. If no errors are found the Drill hole QA/QC
dialog will be displayed telling you that no errors were detected.
5. Click the [OK] button to close the Drill hole QA/QC dialog.
44 Tutorial 3: Target for ArcGIS Drillhole Tools
Note: If you run this test on a data type that you do not have in your current
project, for example in this case “Easting-Northing survey” you will be
prompted with the Drill hole QA/QC dialog telling you “No East-North
survey data exists in this Target for ArcGIS project” and, if you run this
test on a data type that has some errors the data log file will be displayed in
your workspace, displaying the problem samples.
Tutorial 4: Quick Maps and Shape Files 45
Tutorial 4: Quick Maps and Shape Files
The Target for ArcGIS plotting tools provide two types of output, ready-to-print
maps and Shape files. The ready-to-print maps contain pre-defined annotations,
legends, as well as pre-attributed plotting objects. The Shape file output includes
database (DBF) files populated with attribute information related to the plotted
feature.
Quick Maps
The “Quick-Map” enables the user to pre-define colours, patterns, line-types, etc.
using the tabbed dialogs. However, the “Quick-Map” is limited in that there is no
“GIS” type interface using the “Identify” cursor, and the normal GIS attribute and
labeling tools are not available for modifying the created plot. Modifications are not
allowed; if changes are required the user must create a new plot.
Shape Files
The Shape file output enables the user to create Shape files (SHP) for both Plan and
Section plots. Shape files are created for a variety of the plotted features, including
the following:
• Hole Traces • Bar Plots • Profiles (down the holes)
• Collars • Posted Text • Structural ticks
• Bottoms • Posted Values • Section topography
• Crossing Points • Numeric Bands • Section gridded data profiles
• Depths • Text Bands •
• Pierce Points • Rock Code Bands •
Each of these SHP files includes database (DBF) files populated with attribute
information related to the plotted feature. Some of the features noted above create
more than one SHP file; for instance topography is output both as a series of point
features along the section line, which can be interrogated to determine the local
elevation, and as a single line feature, which can be more easily attributed to user
tastes for plotting.
Shape files can be loaded automatically into the current data frame, or manually input
by the user using the regular import tools in ArcMap. When imported to the same
data frame as corresponding Quick-Map plan or section, the shape files overlay the
map precisely and provide an instant “GIS” style interrogation of the Quick-Map
features. [Note: This is not true for sections with vertical exaggerations not equal to
46 Tutorial 4: Quick Maps and Shape Files
1 – the transformations required to display these Quick-Maps also prevents the
correct implementation of data linking.]
The Target for ArcGIS plotting tools provide two types of output, ready-to-print
maps and Shape files. Users can select to plot a Quick-Map, Shape File, or both at the
same time (at least one must be selected). Users are also provided with the option of
loading Plan maps and Section plots to a single data frame or to separate data frames.
Quick Map - Load to separate data frames
For Plan Maps, the following frame names are created, depending on the trace type
selected under the “Hole Traces” tab.
• PlanC – Collars only
• PlanT – Full hole traces
• PlanRLZP – Pierce point plots at level “RL”, e.g. Plan-20ZP is a pierce plot at
a relative level -20.
• PlanRLZC – Collars in a horizontal slice centred at level “RL”; e.g. Plan-20C.
• PlanRLZT – Hole traces in a horizontal slice centred at level “RL”; e.g. Plan-
20T.
Levels are rounded to the nearest integer value.
The same names are used to create the layers, with the optional addition of the Layer
Name Tag, so a collars plot with the “T1” tag would produce the following frame and
layer:
The following example shows the difference between selecting “Load to current data
frame” and “Load to separate data frames”. A series of 4 pierce-point plots are
produced, at elevations from -30 to 0. The layer tag “T1” is used.
Tutorial 4: Quick Maps and Shape Files 47
Loading to separate frames: Loading to an existing frame:
(Note that, the frame has been
manually named “Pierce Plots”)
Section plots are handled in an analogous manner. Section frames and layers are
named based on the section reference location, at the section centre. The first letter is
always “S”, for Section. North-South sections are named using the local easting (e.g.
S12000E, while East-West sections are named using the local northing (e.g. S9200N).
Angled sections use either the local northing or easting, depending on which is more
perpendicular to the section azimuth. Locations are rounded to the nearest integer
value. Layers can be created in the current frame, or in individual frames as
demonstrated above for plan maps. Section layers can also include Name Tags.
Note that care must be taken not to load a section to an existing plan data frame, or
vice-versa, because the coordinates are incompatible.
Quick Map - Load to a Single Layer
When Quick-Maps are loaded to a single layer the “subsidiary” views within the map
are re-projected into the “master” view. For example, if a section is created with a top
plan, profiles and legend, the top plan portion, the individual data profiles and the
legend are all re-projected and merged into the section view. This means that the
coordinates one gets when placing the cursor over the plan portion are actually still
the section coordinates, and data linking is not possible between the plan plot and
data, just between the section and the data. The same can be said for the plan map
plots. All subsidiary views (e.g. top section, legend) are merged into the plan view.
Loading Quick-Maps and Shape Files at the same time
When you create multiple sections or plans, and shape files at the same time, and
when you check the Shape Files box to “Load to current data frame”, the shape files
are automatically loaded to the correct data frame:
48 Tutorial 4: Quick Maps and Shape Files
The “Shape file” lines, symbols and patterns plot on top of the “Quick-Map” layers.
Because of the nature of the frames created for Quick-Maps, if you choose to Auto-
load the shape files without also creating the Quick-Maps, the “one frame per
section” rule is not followed, and all the shape files will be placed into the same,
current data frame.
In other words, if you want to get Shape files from multiple sections to go into
individual data frames, you must also have the “Quick-Map output” box checked.
Frame/Layer Control for Stacked Sections and Strip Logs
There is no Shape file output for the Stacked Section Plot, or for the Strip Log plot.
Tutorial 5: Plan Maps and Data Integration 49
Tutorial 5: Plan Maps and Data Integration
Plan maps provide surface views of drillhole collars, co-ordinates, positioning grids,
drillhole traces and other information, such as the title block and a list of the holes. In
the Target for ArcGIS system, plan maps represent an important organizational and
navigational tool that enables you to quickly display drillhole collars and evaluate
drilling progress, display drillhole traces to help establish subsurface drilling
coverage, and construct drillhole sections.
This chapter will show you how to:
• Quick display of the plan map (page 49)
• Data integration (page 51)
Before you begin…
This tutorial uses sample data provided on the Target for ArcGIS CD ROM. Before
you begin, save the files to a working directory, such as D:Tutorial.
Quick Display of the Plan Map
In this exercise, we will quickly construct a plan map showing all drillhole coverage
in the project so far.
TO CREATE PLAN MAP:
1. On the Target Drillhole toolbar, select the Generate Target Plan Plot button
( ). The Target Plan Generation initial parameters dialog is displayed.
2. Select the initial plotting extents for the plan map (Use default/previous
parameters) and click the [OK] button to continue.
Note: If you select Define extents using rectangle tool, you will notice that the
cursor changes as you move over the data frame window ( ), using this
tool, select the area of interest.
3. The Output tab of the Plan Map Parameters dialog is displayed.
50 Tutorial 5: Plan Maps and Data Integration
4. In the Frame/Layer Name Tag box, specify (Prospect). Check the Quick-map
output box. Note that at least one data output (Quick-Map or Shape File) must be
checked. Then, select the Load to current data frame radio button.
5. The Plan Map Parameters dialog includes intelligent defaults that enable quick
plan map creation. You can accept the remaining defaults, and click the [OK]
button. The PlanC_Prospect map is displayed in your Table of Contents and your
Data frame. For more information on the Plan Map Parameters click the [Help]
button on the individual tab dialogs.
Note: For organizational purposes you may want to specify the Layer Name Tag
the same as the "Project" name. The following naming conventions are
used for plan maps. In the following examples, the second example is the
map name with the optional tag "_tag".
Collar Maps: "PlanC.map" or "PlanC_tag.map"
Pierce Point Maps: "P1000ZP.map" or "P1000ZP_tag.map". The reference
elevation appears in the map name.
Full Trace Maps: "PlanT.map" or "PlanT_tag.map".
If the map already exists (but is not displayed), you are asked whether to
overwrite it.
Tutorial 5: Plan Maps and Data Integration 51
6. To zoom in on your Data Frame, on the ArcMap View menu, select Zoom Data
and then select Fixed Zoom In (or the appropriate menu item to view your data).
Data Integration
The ability to quickly and easily integrate multi-disciplinary data into your plan (and
section) maps is one of the advanced visualization capabilities of the Target for
ArcGIS system. For example, you may have a magnetic grid supplied by a
Geophysicist, or a topography grid that you want to place on your plan view for
comparison with your drillholes.
Displaying a Grid
In this exercise, you will be working with the previously created grid
(Au_surface.grd) and a topography grid file (topo.grd) and a magnetic grid file
(mag.grd).
52 Tutorial 5: Plan Maps and Data Integration
TO DISPLAY A GRID:
1. In the Table of Contents window select (check) the Au surface grid previously
created in this tutorial (Au_surface.grd). The Au_surface grid will be displayed
in the Data frame.
2. To add another grid file, using the Add Data button ( ) locate and select the
magnetic grid (mag.grd) and click the [Add] button. The magnetic is added to the
Table of Contents and displayed in the Data frame. To change the default grey
colour scale, click on the colour ramp and from the dropdown list, select an
appropriate colour range. Your map should look similar to below (don’t forget to
check the Invert option):
Tutorial 5: Plan Maps and Data Integration 53
3. To add another grid file, using the Add Data button ( ) locate and select the
topography grid (topo.grd) and click the [Add] button. The topography grid is
added to the Table of Contents and displayed in the Data frame. To change the
default grey colour scale, click on the colour ramp and from the dropdown list,
select an appropriate colour range. Your map should look similar to below:
54 Tutorial 5: Plan Maps and Data Integration
Note: To zoom in and out on your data frame on the View menu, select Zoom
data and then select the zoom option necessary to view your data.
Hiding groups on a Map
Sometimes, when you have many groups on a map you may not want to display all of
them on your working or final map. The procedure below shows you how to hide a
group (in this case a grid file) displayed in your map.
TO HIDE GROUPS ON A MAP:
1. In the Table of Contents window deselect (uncheck) the topography grid
(topo.grd) and the magnetic grid (mag.grd). The topography and magnetic grids
are removed from the Data frame.
Tutorial 6: Section Maps and Data Interpretation 55
Tutorial 6: Section Maps and Data Interpretation
Section maps provide cross sectional views of drillhole traces, co-ordinates, reference
grids, assay values and geological units. In the Target for ArcGIS system, section
maps represent an important tool that enables you to display drillhole traces to help
establish subsurface drilling coverage and visualize the geology and related
geochemistry beneath the surface.
In this chapter, we will guide you through the following procedures:
• Select drillholes for viewing (page 55)
• Create drillhole section map (page 59)
Selecting Holes
A key requirement for the geologists and geochemists that are evaluating and
presenting drillhole data is the ability to select various combinations of drillholes for
optimal visualization and plotting. The Target for ArcGIS system provides a
comprehensive set of options for performing this task. The basic methods of hole
selections are listed below.
• Selecting (or Deselecting) All Holes: Enables quick development of master plan
maps or resetting of drillholes prior to making new selections.
• Selecting Holes by Name (or Name Mask): Enables batch selection of multiple
holes with systematic drillhole identifiers. Requires standard drillhole naming
scheme for identifying related holes. For information on Name Mask parameters,
click the [Help] button on the Select holes by name dialog.
• Selecting Holes by List: Enables custom selection of single or multiple holes via
a list of all the holes in the database. Requires pre-existing knowledge of holes.
• Selecting Holes by Collar Table Data: Enables users to select holes based on
values in a channel in the collar table.
• Selecting Holes using Shape File: Enables users to select holes based on an area
described in a polygon shape file.
• Selecting Holes by Selection Tool (Area): Enables rapid visual selection of
single or multiple holes by using a polygon defining tool to select holes along
regular or irregular sections, on a plan map. Useful for quick evaluation of project
data.
In addition, the system also enables you to select data by code and ranges (using
mask channels) and save and load your selections.
• Select Data by Code: Enables you to create or update a mask channel based
on values matched from any channel.
• Select Data by Range: Enables you to set the mask channel depending on
whether values in a specified channel are within a specified range.
56 Tutorial 6: Section Maps and Data Interpretation
• Reset Mask Channel: Enables you to initialize or re-initialize the mask
channel value, or to create a new mask channel.
• Save and/or Load Selections: Enables you to save the current hole
selections, or load previous hole selections from a selection file (*.sel).
Selecting Holes using the Hole Selection Tool
In this exercise, you will be selecting holes by area using the Hole Selection Tool.
The Hole Selection Tool enables interactive selection of single or multiple holes
using a dialog that displays a plan view of the drillhole survey area. This tool
enables you to view “all holes”, “selected holes” and holes including “full traces”
or “labels”.
TO SELECT HOLES USING THE HOLE SELECTION TOOL:
1. On the Target Drillhole toolbar, select Selection|Selection Tool. The Hole
Selection Tool dialog is displayed.
Tutorial 6: Section Maps and Data Interpretation 57
2. Using this tool you can select “All holes”, “Selected holes” and holes that include
“Full Traces” or “Hole Labels”.
3. The drill hole plan view area can be modified using the Zoom In button ( ), the
Zoom Out button ( ) and the Zoom Data Extents button ( ).
4. Using the Selection Tools you can select the [Select All] or [Select None]
buttons, or depending on the Selection Mode you can Select/Deselect single holes
( ), Select/Deselect using rectangle tool ( ) or Select/Deselect using polygon
tool ( ).
5. For this tutorial we will select the 19 drillholes in the centre of the survey area
along 124000N (AXE001, AXE003, AXE005, AXE007, AXE009, SKC238,
SKC239, SKC247, SKC251, SKC254, SKC268, SKR016, SKR017, SKR018,
SKR019, SKR020, SKR021, SKR022, SKR023).
6. To do this, first deselect all holes by clicking the [Select None] button. Then set
the Selection Mode to (Select) and using the Select/Deselect using rectangle tool
select the drillholes as shown in the image below.
58 Tutorial 6: Section Maps and Data Interpretation
7. When finished click the [OK] button and 19 drillholes in the centre of the survey
area will be selected for plotting.
Verifying Selected Drillholes
There are a variety of methods available in the Target for ArcGIS system to
determine the holes selected. In this exercise, we will use the Select Holes from
List.
TO VERIFY SELECTED DRILLHOLES:
1. On the Selection menu, select From list. The Select Holes from List tool is
displayed.
Tutorial 6: Section Maps and Data Interpretation 59
2. Using this tool you can scroll down through the list of drill holes in the Selected
and Not Selected lists to verify that the correct holes have been selected.
3. Using the arrow button select or deselect additional drillholes as needed.
4. Click [OK] to exit the dialog.
Creating a Drillhole Section Map
In the Target for ArcGIS system, section maps represent an important tool that
enables you to display drillhole traces to help establish subsurface drilling coverage
and visualize the geology and related geochemistry beneath the surface.
Section Plots
Target for ArcGIS section plot options are provided in easy-to-use tab menus,
enabling quick access to all the settings from a single dialog. The dialog include
sensible defaults; enabling easy creation of drillhole sections.
In this exercise, we will construct a East-West section displaying the nineteen
selected drillhole traces. The drillhole section map will include the following:
• Local topography profile plotted across section
• Geology data displayed along traces using rock code patterns
• Assay data displayed along traces in a bar chart format
• Plan map window containing collar locations and magnetic data grid
• Profile window containing Au assay data profile
60 Tutorial 6: Section Maps and Data Interpretation
TO CREATE A SECTION PLOT:
1. On the Target Drillhole toolbar, click the Generate Target Section plot button
( ). The Target Section|Stacked Section Generation initial parameters dialog
is displayed.
2. Select the initial plotting extents for the section plot (Use default/previous
parameters) and click the [OK] button to continue.
Note: If you select Define E-W (N-S or Angled) section on active data frame, you
will notice that the Number of Selections box is enabled. Specify the
number of section plots to create (each section will be plotted to a separate
map). You will also notice that your cursor changes as you move over the
Data frame (E-W { }, N-S or Angled ), using this tool,
select the area of interest.
3. The Output tab of the Section Parameters dialog is displayed. Select the file
output, Quick-Map, Shape File or both (but at least one must be checked). For
this tutorial check both the (Quick-map Output and Shape File Output).
Tutorial 6: Section Maps and Data Interpretation 61
4. For organizational purposes you may want to specify the Layer Name Tag and the
Filename Tag the same as the "Project" name (i.e. Prospect).
5. To specify the section location parameters, select the Section Location tab.
62 Tutorial 6: Section Maps and Data Interpretation
6. Select Section Azimuth as (E-W) and click the [Default] button to set the
Location and Orientation parameters.
Note: If you select multiple sections each section will be displayed in individual
maps. To plot multiple sections on a single map, see the Stacked Sections
option.
7. To plot a topography profile across the section, select the Topography tab and
select the Plot topography box to enable the topography parameters.
8. Using the [Browse] button, locate and select the topography grid file to use
(topo.grd) to calculate the topographic profile across the section.
9. Click in the Line style box. The Line Attributes tool will be displayed.
Tutorial 6: Section Maps and Data Interpretation 63
10. Use this tool to define the line attributes of the topographic profile. Click the
[OK] button to accept the line attributes and return to the Section Parameters
dialog.
11. To plot geology and assay data along the hole traces in the section, select the
Data tab.
Note: The Plot boxes enable/disable the Data selection dropdown list. This is a
convenient way to select or de-select individual data plots, without
clearing or re-selecting the data from the Data lists.
64 Tutorial 6: Section Maps and Data Interpretation
12. Using the Data dropdown lists, select the data channels available in the current
project you want to plot (As [Assay] and Rock [Geology]).
Note: The selections combine the name of the channel, along with the identifier
for the project database in which the channel is found.
13. Using the Plot Type dropdown lists, select the plotting type the data previously
selected. (Bar plot and Rock code patterns).
Note: Plot Types displayed are based on the data type of the selected Data.
“Numeric” channel selections include; Bar plot, Grid: Kriging, Grid:
Min curvature, Grid: TIN-based, Numeric bands, Post values, Profile
and Structural Ticks. “String or text” channel selections include;
Comments, Post text, Rock code patterns, and Text bands.
14. Click the [Define] button beside the Bar plot Plot Type to define the bar plot
parameters. The Bar Plot Parameters dialog is displayed.
Tutorial 6: Section Maps and Data Interpretation 65
15. Using this dialog, you can define the plotting parameters for the As Assay bar
plot. Select the Pattern fill box, and click in the box to the right. The Pattern
Attributes tool will be displayed.
66 Tutorial 6: Section Maps and Data Interpretation
16. Use this tool to specify the fill attributes of the bar plot. We will leave the rest of
the parameters to the default values. Click [OK] twice to return to the Section
Parameters dialog.
17. Click the [Define] button beside the Rock code patterns Plot Type to define the
rock code parameters. The Pattern Bands – Rock Codes dialog is displayed.
18. In the Plot Parameter box, select Left side (the Bar plot is being plotted on the
right side) and in the Rock Code File box, using the [Browse] button locate and
Tutorial 6: Section Maps and Data Interpretation 67
select the file (Lithology.csv). Then, leaving the remaining parameters to the
default values, click the [OK] button to return to the Section Parameters dialog.
19. To specify the plan map window parameters, select the Plan View tab.
20. To enable the plotting of a Plan view window on the Section Map, select (check)
the Plot plan view box and specify the Trace Style as (Collars). To plot a grid in
the plan view, check the Place raster in plan view box and then using the
[Browse] button locate the file (mag.grd), clicking the [Open] button to return to
the Section Parameters dialog.
21. To specify the profile window parameters, select the Profiles tab.
68 Tutorial 6: Section Maps and Data Interpretation
22. To enable the plotting of a profile window, select the Plot grid data profiles box.
Using the [Browse] button, locate and select the grid file to use (Au_surface.grd)
to calculate the profile across the section. Selecting the Line Type box displays
the Line Attributes dialog and clicking the [Define] button displays the Profile
Options dialog.
Tutorial 6: Section Maps and Data Interpretation 69
23. Use this dialog to specify the profile parameters and click the [OK] button to
return to the Section Parameters dialog.
24. To specify the page layout of the section plot, select the Page Layout tab.
70 Tutorial 6: Section Maps and Data Interpretation
25. To specify the section map layout, click the [Map Layout] button. The Section
Map Layout dialog is displayed.
26. This dialog enables you to specify the layout of your section map. To accept the
layout and return to the Page Layout tab, click the [OK] button.
27. Click the [OK] button on the Section Parameters dialog. The section map
(S12401N_Prospect) is displayed in your Table of Contents and your data frame.
Tutorial 6: Section Maps and Data Interpretation 71
Note: There are many additional section-plotting options that enable you to
include other parameters. As you become more familiar with the system,
we recommend that you experiment with the other options to create a
custom map of your own.
72 Tutorial 7: Strip Logs
Tutorial 7: Strip Logs
Target for ArcGIS strip log options are provided in easy-to-use tab menus, enabling
quick access to all the settings from a single dialog. The dialog includes sensible
defaults; enabling easy creation of strip logs. Using the strip log tab dialog you can
display up to 16 data/graph type selections in each plot.
Creating a Strip Log Plot
In this exercise, we will construct a strip log of drillhole SKC247. The strip log will
include the following data:
• Weathering (Geology) - Post text
• Weathering (Geology) - Rock code patterns
• Rock (Geology) - Post text
• Rock (Geology) - Rock code patterns
• Sample (Assay) Post text
• Au (Assay) Numeric bands
• Au (Assay) Post values
• Altered (Geology) Post text
TO CREATE A STRIP LOG:
1. On the Target Drillhole toolbar, select the Generate Target Striplog plot button
( ). The Output tab of the Strip Log parameters dialog is displayed.
Tutorial 7: Strip Logs 73
2. Specify the Frame/Layer Name Tag as (Prospect) and the remaining parameters
as shown above.
3. Select the Page Layout tab to specify the Holes to plot.
4. In the Holes to plot box, select the Specified hole(s) radio button and from the
hole/mask dropdown list select (SKC247). To Plot Legend check the box and
type your legend text in the appropriate boxes.
5. To specify the hole trace parameters, select the Hole Trace tab.
74 Tutorial 7: Strip Logs
6. Specify the Depth Ticks – tick interval as 10.
7. To plot the geology and assay data along the hole traces in the strip log, select the
Data tab.
Note: The Plot boxes enable/disable the Data selection dropdown list. This is a
convenient way to select or de-select individual data plots, without
clearing or re-selecting the data from the Data lists.
Tutorial 7: Strip Logs 75
8. Using the Data dropdown lists, select the data channels available in the current
Target for ArcGIS project you want to plot (see dialog above).
Note: The selections combine the name of the channel, along with the identifier
for the project database in which the channel is found.
9. Using the Plot Type dropdown lists, select the plotting type for the data.
Note: Plot Types displayed are based on the type of selected data.
10. To specify the legend parameters, select the Legend tab.
76 Tutorial 7: Strip Logs
11. To enable the plotting of a legend, check the Plot Legend box.
12. To enable the plotting of data information, check the Plot data info box and then
select the data information you wish to plot in the legend. In the Size box change
the Right legend width (cm) to (7).
13. Click the [OK] button on the Strip Log Parameters dialog. The strip log map
(SKC247Prospect_Prospect) is displayed in your Table of Contents and your
data frame.
Tutorial 7: Strip Logs 77
78 Tutorial 8: Target 3D
Tutorial 8: Target 3D
The Target 3D tool was developed for the Target for ArcGIS system to enable you to
display drillhole, surface and other data types in an interactive three-dimensional
environment. Drillholes are displayed in their “true” three-dimensional location and
can have up to two different data types plotted along their trace.
Grids created in “sectional” views (e.g., from Target or Interactiv IP applications)
can be displayed directly into the 3D view, in their correct orientation, using
Geosoft’s “on-the-fly” technology. Other grids and images (including bitmaps and
jpegs) can be opened and easily located in any specified orthogonal plane.
3D “Voxel grids” can also be displayed in a 3D drillhole map and modified using the
Target 3D tool. 3D Voxels can be created using the Voxels|Grid Voxel (GRIDVOX
GX) menu item, on the Target 3D toolbar.
Using the Target 3D tool you can interactively control the transparency of the
individual planes, enabling the data to be displayed with a cumulative (light-table)
effect. Data such as MapInfo tables and 2D DXF files can be imported directly into
the 3D environment and drawn on any surface displayed in the current 3D view.
The Target 3D View|Group Manager Tool enables you to toggle on/off individual
groups in the 3D view, enabling changes to the displayed data, without having to
recreate 3D maps.
All data in the Target for ArcGIS environment is dynamically linked; from the
database through cross-section and map through to the 3D environment.
Working with the Target 3D Tool
You can begin creating a Target 3D view once all the appropriate project information
has been imported into your drillhole database. The data files provided for the
previous tutorials will be used in this tutorial.
This tutorial begins with project data (collar, survey, assay, and geology) already
imported into the Target system and the “Plan” map created, opened and displayed.
Selecting an Area of Interest
To begin, we need to select the area that we would like to concentrate on from the
Hole Selection Tool. This will enable us to display only the area of the project that is
of interest to us.
Tutorial 8: Target 3D 79
TO SELECT TARGET 3D DRILL AREA:
1. On the Target Drillhole toolbar, select Selection|Selection Tool. The Hole
Selection Tool dialog is displayed.
2. Use the Hole Selection Tool to define a polygon around the holes in the centre
bottom portion of the drill area to select for plotting, as shown above. If additional
holes need to be added or removed there are a number of methods for doing so
using this tool, for more information click the [Help] button.
3. Click [OK] button and the holes within the defined boundary are selected for
plotting.
Create a 3D Voxel Grid
Users now have the ability to create a 3D Voxel grid, using the 3D Kriging gridding
method, and display the Voxel grid in a 3D Target section map.
In addition to creating and displaying 3D Voxel Models, additional tools are available
enabling users to report and modify information about Geosoft Voxel Models,
Targetfor arcgis tutorial

More Related Content

Similar to Targetfor arcgis tutorial

Similar to Targetfor arcgis tutorial (20)

Eula
EulaEula
Eula
 
Articulate end user license agreement
Articulate end user license agreementArticulate end user license agreement
Articulate end user license agreement
 
C liq manual
C liq manualC liq manual
C liq manual
 
MCC_MME_AWS_CFN_15.0.pdf
MCC_MME_AWS_CFN_15.0.pdfMCC_MME_AWS_CFN_15.0.pdf
MCC_MME_AWS_CFN_15.0.pdf
 
License
LicenseLicense
License
 
License
LicenseLicense
License
 
Use terms retail_windows_8.1_single_language_update_english
Use terms retail_windows_8.1_single_language_update_englishUse terms retail_windows_8.1_single_language_update_english
Use terms retail_windows_8.1_single_language_update_english
 
License
LicenseLicense
License
 
License agreement ver1.3
License agreement ver1.3License agreement ver1.3
License agreement ver1.3
 
Eulax
EulaxEulax
Eulax
 
License uk
License ukLicense uk
License uk
 
License
LicenseLicense
License
 
Remedy IT Initial Submission for the Unified Component Model (UCM) for Distri...
Remedy IT Initial Submission for the Unified Component Model (UCM) for Distri...Remedy IT Initial Submission for the Unified Component Model (UCM) for Distri...
Remedy IT Initial Submission for the Unified Component Model (UCM) for Distri...
 
Logical systems-configuration-guide
Logical systems-configuration-guideLogical systems-configuration-guide
Logical systems-configuration-guide
 
License en notepad
License en   notepadLicense en   notepad
License en notepad
 
Eula
EulaEula
Eula
 
Mslt
MsltMslt
Mslt
 
Storage manager
Storage managerStorage manager
Storage manager
 
License
LicenseLicense
License
 
License
LicenseLicense
License
 

Recently uploaded

UNIT-III FMM. DIMENSIONAL ANALYSIS
UNIT-III FMM.        DIMENSIONAL ANALYSISUNIT-III FMM.        DIMENSIONAL ANALYSIS
UNIT-III FMM. DIMENSIONAL ANALYSISrknatarajan
 
Call Girls in Nagpur Suman Call 7001035870 Meet With Nagpur Escorts
Call Girls in Nagpur Suman Call 7001035870 Meet With Nagpur EscortsCall Girls in Nagpur Suman Call 7001035870 Meet With Nagpur Escorts
Call Girls in Nagpur Suman Call 7001035870 Meet With Nagpur EscortsCall Girls in Nagpur High Profile
 
VIP Call Girls Ankleshwar 7001035870 Whatsapp Number, 24/07 Booking
VIP Call Girls Ankleshwar 7001035870 Whatsapp Number, 24/07 BookingVIP Call Girls Ankleshwar 7001035870 Whatsapp Number, 24/07 Booking
VIP Call Girls Ankleshwar 7001035870 Whatsapp Number, 24/07 Bookingdharasingh5698
 
High Profile Call Girls Nagpur Isha Call 7001035870 Meet With Nagpur Escorts
High Profile Call Girls Nagpur Isha Call 7001035870 Meet With Nagpur EscortsHigh Profile Call Girls Nagpur Isha Call 7001035870 Meet With Nagpur Escorts
High Profile Call Girls Nagpur Isha Call 7001035870 Meet With Nagpur Escortsranjana rawat
 
(SHREYA) Chakan Call Girls Just Call 7001035870 [ Cash on Delivery ] Pune Esc...
(SHREYA) Chakan Call Girls Just Call 7001035870 [ Cash on Delivery ] Pune Esc...(SHREYA) Chakan Call Girls Just Call 7001035870 [ Cash on Delivery ] Pune Esc...
(SHREYA) Chakan Call Girls Just Call 7001035870 [ Cash on Delivery ] Pune Esc...ranjana rawat
 
Online banking management system project.pdf
Online banking management system project.pdfOnline banking management system project.pdf
Online banking management system project.pdfKamal Acharya
 
Processing & Properties of Floor and Wall Tiles.pptx
Processing & Properties of Floor and Wall Tiles.pptxProcessing & Properties of Floor and Wall Tiles.pptx
Processing & Properties of Floor and Wall Tiles.pptxpranjaldaimarysona
 
Top Rated Pune Call Girls Budhwar Peth ⟟ 6297143586 ⟟ Call Me For Genuine Se...
Top Rated  Pune Call Girls Budhwar Peth ⟟ 6297143586 ⟟ Call Me For Genuine Se...Top Rated  Pune Call Girls Budhwar Peth ⟟ 6297143586 ⟟ Call Me For Genuine Se...
Top Rated Pune Call Girls Budhwar Peth ⟟ 6297143586 ⟟ Call Me For Genuine Se...Call Girls in Nagpur High Profile
 
Structural Analysis and Design of Foundations: A Comprehensive Handbook for S...
Structural Analysis and Design of Foundations: A Comprehensive Handbook for S...Structural Analysis and Design of Foundations: A Comprehensive Handbook for S...
Structural Analysis and Design of Foundations: A Comprehensive Handbook for S...Dr.Costas Sachpazis
 
Porous Ceramics seminar and technical writing
Porous Ceramics seminar and technical writingPorous Ceramics seminar and technical writing
Porous Ceramics seminar and technical writingrakeshbaidya232001
 
KubeKraft presentation @CloudNativeHooghly
KubeKraft presentation @CloudNativeHooghlyKubeKraft presentation @CloudNativeHooghly
KubeKraft presentation @CloudNativeHooghlysanyuktamishra911
 
Booking open Available Pune Call Girls Koregaon Park 6297143586 Call Hot Ind...
Booking open Available Pune Call Girls Koregaon Park  6297143586 Call Hot Ind...Booking open Available Pune Call Girls Koregaon Park  6297143586 Call Hot Ind...
Booking open Available Pune Call Girls Koregaon Park 6297143586 Call Hot Ind...Call Girls in Nagpur High Profile
 
Introduction to IEEE STANDARDS and its different types.pptx
Introduction to IEEE STANDARDS and its different types.pptxIntroduction to IEEE STANDARDS and its different types.pptx
Introduction to IEEE STANDARDS and its different types.pptxupamatechverse
 
Russian Call Girls in Nagpur Grishma Call 7001035870 Meet With Nagpur Escorts
Russian Call Girls in Nagpur Grishma Call 7001035870 Meet With Nagpur EscortsRussian Call Girls in Nagpur Grishma Call 7001035870 Meet With Nagpur Escorts
Russian Call Girls in Nagpur Grishma Call 7001035870 Meet With Nagpur EscortsCall Girls in Nagpur High Profile
 
(PRIYA) Rajgurunagar Call Girls Just Call 7001035870 [ Cash on Delivery ] Pun...
(PRIYA) Rajgurunagar Call Girls Just Call 7001035870 [ Cash on Delivery ] Pun...(PRIYA) Rajgurunagar Call Girls Just Call 7001035870 [ Cash on Delivery ] Pun...
(PRIYA) Rajgurunagar Call Girls Just Call 7001035870 [ Cash on Delivery ] Pun...ranjana rawat
 
AKTU Computer Networks notes --- Unit 3.pdf
AKTU Computer Networks notes ---  Unit 3.pdfAKTU Computer Networks notes ---  Unit 3.pdf
AKTU Computer Networks notes --- Unit 3.pdfankushspencer015
 
UNIT-II FMM-Flow Through Circular Conduits
UNIT-II FMM-Flow Through Circular ConduitsUNIT-II FMM-Flow Through Circular Conduits
UNIT-II FMM-Flow Through Circular Conduitsrknatarajan
 

Recently uploaded (20)

UNIT-III FMM. DIMENSIONAL ANALYSIS
UNIT-III FMM.        DIMENSIONAL ANALYSISUNIT-III FMM.        DIMENSIONAL ANALYSIS
UNIT-III FMM. DIMENSIONAL ANALYSIS
 
Call Girls in Nagpur Suman Call 7001035870 Meet With Nagpur Escorts
Call Girls in Nagpur Suman Call 7001035870 Meet With Nagpur EscortsCall Girls in Nagpur Suman Call 7001035870 Meet With Nagpur Escorts
Call Girls in Nagpur Suman Call 7001035870 Meet With Nagpur Escorts
 
VIP Call Girls Ankleshwar 7001035870 Whatsapp Number, 24/07 Booking
VIP Call Girls Ankleshwar 7001035870 Whatsapp Number, 24/07 BookingVIP Call Girls Ankleshwar 7001035870 Whatsapp Number, 24/07 Booking
VIP Call Girls Ankleshwar 7001035870 Whatsapp Number, 24/07 Booking
 
High Profile Call Girls Nagpur Isha Call 7001035870 Meet With Nagpur Escorts
High Profile Call Girls Nagpur Isha Call 7001035870 Meet With Nagpur EscortsHigh Profile Call Girls Nagpur Isha Call 7001035870 Meet With Nagpur Escorts
High Profile Call Girls Nagpur Isha Call 7001035870 Meet With Nagpur Escorts
 
(SHREYA) Chakan Call Girls Just Call 7001035870 [ Cash on Delivery ] Pune Esc...
(SHREYA) Chakan Call Girls Just Call 7001035870 [ Cash on Delivery ] Pune Esc...(SHREYA) Chakan Call Girls Just Call 7001035870 [ Cash on Delivery ] Pune Esc...
(SHREYA) Chakan Call Girls Just Call 7001035870 [ Cash on Delivery ] Pune Esc...
 
Online banking management system project.pdf
Online banking management system project.pdfOnline banking management system project.pdf
Online banking management system project.pdf
 
Processing & Properties of Floor and Wall Tiles.pptx
Processing & Properties of Floor and Wall Tiles.pptxProcessing & Properties of Floor and Wall Tiles.pptx
Processing & Properties of Floor and Wall Tiles.pptx
 
Top Rated Pune Call Girls Budhwar Peth ⟟ 6297143586 ⟟ Call Me For Genuine Se...
Top Rated  Pune Call Girls Budhwar Peth ⟟ 6297143586 ⟟ Call Me For Genuine Se...Top Rated  Pune Call Girls Budhwar Peth ⟟ 6297143586 ⟟ Call Me For Genuine Se...
Top Rated Pune Call Girls Budhwar Peth ⟟ 6297143586 ⟟ Call Me For Genuine Se...
 
Structural Analysis and Design of Foundations: A Comprehensive Handbook for S...
Structural Analysis and Design of Foundations: A Comprehensive Handbook for S...Structural Analysis and Design of Foundations: A Comprehensive Handbook for S...
Structural Analysis and Design of Foundations: A Comprehensive Handbook for S...
 
Porous Ceramics seminar and technical writing
Porous Ceramics seminar and technical writingPorous Ceramics seminar and technical writing
Porous Ceramics seminar and technical writing
 
(INDIRA) Call Girl Aurangabad Call Now 8617697112 Aurangabad Escorts 24x7
(INDIRA) Call Girl Aurangabad Call Now 8617697112 Aurangabad Escorts 24x7(INDIRA) Call Girl Aurangabad Call Now 8617697112 Aurangabad Escorts 24x7
(INDIRA) Call Girl Aurangabad Call Now 8617697112 Aurangabad Escorts 24x7
 
KubeKraft presentation @CloudNativeHooghly
KubeKraft presentation @CloudNativeHooghlyKubeKraft presentation @CloudNativeHooghly
KubeKraft presentation @CloudNativeHooghly
 
Water Industry Process Automation & Control Monthly - April 2024
Water Industry Process Automation & Control Monthly - April 2024Water Industry Process Automation & Control Monthly - April 2024
Water Industry Process Automation & Control Monthly - April 2024
 
Booking open Available Pune Call Girls Koregaon Park 6297143586 Call Hot Ind...
Booking open Available Pune Call Girls Koregaon Park  6297143586 Call Hot Ind...Booking open Available Pune Call Girls Koregaon Park  6297143586 Call Hot Ind...
Booking open Available Pune Call Girls Koregaon Park 6297143586 Call Hot Ind...
 
Introduction to IEEE STANDARDS and its different types.pptx
Introduction to IEEE STANDARDS and its different types.pptxIntroduction to IEEE STANDARDS and its different types.pptx
Introduction to IEEE STANDARDS and its different types.pptx
 
Russian Call Girls in Nagpur Grishma Call 7001035870 Meet With Nagpur Escorts
Russian Call Girls in Nagpur Grishma Call 7001035870 Meet With Nagpur EscortsRussian Call Girls in Nagpur Grishma Call 7001035870 Meet With Nagpur Escorts
Russian Call Girls in Nagpur Grishma Call 7001035870 Meet With Nagpur Escorts
 
DJARUM4D - SLOT GACOR ONLINE | SLOT DEMO ONLINE
DJARUM4D - SLOT GACOR ONLINE | SLOT DEMO ONLINEDJARUM4D - SLOT GACOR ONLINE | SLOT DEMO ONLINE
DJARUM4D - SLOT GACOR ONLINE | SLOT DEMO ONLINE
 
(PRIYA) Rajgurunagar Call Girls Just Call 7001035870 [ Cash on Delivery ] Pun...
(PRIYA) Rajgurunagar Call Girls Just Call 7001035870 [ Cash on Delivery ] Pun...(PRIYA) Rajgurunagar Call Girls Just Call 7001035870 [ Cash on Delivery ] Pun...
(PRIYA) Rajgurunagar Call Girls Just Call 7001035870 [ Cash on Delivery ] Pun...
 
AKTU Computer Networks notes --- Unit 3.pdf
AKTU Computer Networks notes ---  Unit 3.pdfAKTU Computer Networks notes ---  Unit 3.pdf
AKTU Computer Networks notes --- Unit 3.pdf
 
UNIT-II FMM-Flow Through Circular Conduits
UNIT-II FMM-Flow Through Circular ConduitsUNIT-II FMM-Flow Through Circular Conduits
UNIT-II FMM-Flow Through Circular Conduits
 

Targetfor arcgis tutorial

  • 1. w w w . g e o s o f t . c o m Target for ArcGIS v2.1 Surface and Drillhole Mapping System for ESRI’s ArcGIS™ software TUTORIAL
  • 2. The software described in this manual is furnished under license and may only be used or copied in accordance with the terms of the license. Manual release date: 8/3/2006. Written by, Nancy Whitehead. Please send comments or questions to info@geosoft.com Copyright © Geosoft Inc. 2006. All rights reserved. No part of this publication may be reproduced, stored in a retrieval system or transmitted, in any form, or by any means, electronic, mechanical, photo-copying, reading, or otherwise, without prior consent from Geosoft Inc. Program Copyright© Geosoft Inc. 2006. All rights reserved. Geosoft and Oasis montaj are registered trademarks of Geosoft Inc. GEOSOFT, Oasis are trademarks of Geosoft Inc. Windows®, and Windows NT™ are either registered trademarks or trademarks of Microsoft Corporation. Geosoft Incorporated 8th Floor 85 Richmond St. W. Toronto, Ontario M5H 2C9 Canada Tel: (416) 369-0111 Fax: (416) 369-9599 Web Site: www.geosoft.com E-mail: info@geosoft.com
  • 3. Contents Geosoft License Agreement 1 Finding More Help Information 3 Contacting Technical Support 3 Target for ArcGIS 4 Overview of Target for ArcGIS Capabilities 4 Integrated Database and Streamlined Menus and Toolbars 5 Tutorial 1: Getting Started 7 Before you begin… 7 Installing Target for ArcGIS 8 Displaying Target for ArcGIS Toolbars 8 Using the Target for ArcGIS toolbars 9 Installing Geosoft’s eLicense 13 Using the Geosoft License Manager 14 Opening Geosoft Database Window 17 Spreadsheet Window 18 Profile Window 18 Database Tools 19 Tutorial 2: Using Gridding and Contouring Tools 21 Before you begin… 21 Gridding using Minimum Curvature Gridding 21 Adding Data and Assigning a Projection 21 Gridding Data using the Minimum Curvature Method 23
  • 4. Contouring using Geosoft’s Contouring Tool 25 Plotting Contours 26 Tutorial 3: Target for ArcGIS Drillhole Tools 28 Before you begin… 28 Access the drillhole menus 28 Starting a New Project 29 Naming a Drillhole Project 30 Importing Data 30 Current X and Y Channels 31 Importing Data Files 31 Importing Data 33 Importing Collar Data 33 Importing Survey Data 38 Importing Geochemical Assay Data 39 Importing Geological Data 41 Saving your Databases 42 Quality Control and Quality Assurance Tests 42 Tutorial 4: Quick Maps and Shape Files 45 Quick Maps 45 Shape Files 45 Quick Map - Load to separate data frames 46 Quick Map - Load to a Single Layer 47 Loading Quick-Maps and Shape Files at the same time 47 Frame/Layer Control for Stacked Sections and Strip Logs 48
  • 5. Tutorial 5: Plan Maps and Data Integration 49 Before you begin… 49 Quick Display of the Plan Map 49 Data Integration 51 Displaying a Grid 51 Hiding groups on a Map 54 Tutorial 6: Section Maps and Data Interpretation 55 Selecting Holes 55 Selecting Holes using the Hole Selection Tool 56 Verifying Selected Drillholes 58 Creating a Drillhole Section Map 59 Section Plots 59 Tutorial 7: Strip Logs 72 Creating a Strip Log Plot 72 Tutorial 8: Target 3D 78 Working with the Target 3D Tool 78 Selecting an Area of Interest 78 Create a 3D Voxel Grid 79 Creating a Target 3D Map 80 Working in the 3D View 89 Accessing the 3D Tool 89 Target 3D Tool 89 Geosoft 3D Viewer 90 Add to 3D… Menu 90 View/Group Manager Tool 90 3D Tool 91
  • 6. Appendix 1: Setting Target for ArcGIS Preferences 94 Appendix 2: Projections 98 Appendix 3: Setting QA/QC Options 99 QA/QC – Collar data options 99 QA/QC - Dip-azimuth survey options 100 QA/QC – East-North survey options 100 QA/QC – From-To data options 101 QA/QC – Point data options 102
  • 7. 1 Geosoft License Agreement GEOSOFT agrees to supply the Licensed Program(s) as specified in my purchase order. Geosoft shall grant me a non- transferable, non-exclusive license to use the Licensed Program(s), subject to the Terms and Conditions herein contained. Should there be a separate signed agreement between you and Geosoft, or between your company and Geosoft, pertaining to the licensed use of this software, that agreement shall take precedence over the terms of this agreement. 1. DEFINITIONS: In this Agreement: "Licensed Program(s)" means the actual copy of all or any portion of Geosoft’s proprietary software technology, computer software code, components, dynamic link libraries (DLLs) licensed through the Geosoft license server, including any modifications, improvements or updates provided by GEOSOFT. “Effective Date” is the date the Geosoft license is installed. This date is recorded by the Geosoft License server when the Licensed Program(s) is installed. "Services" means the Services described on Section 4. "Termination" means the occurrences contemplated by Section 6 and 7. 2. LICENSE: GEOSOFT grants to me a non-transferable and non-exclusive license to use the Licensed Program(s) for my own purposes whereby the Licensed Program(s) are being used only by myself, on one computer, at any one time. Title and all intellectual property rights in and to the License Program(s), including, without limitation, copyright, trade secrets and trade marks, shall remain with GEOSOFT. I agree to refrain from raising any objection or challenge to such intellectual property rights, or from assisting or causing or permitting other(s) to do so, during the term of the Agreement and thereafter I may not assign this Agreement or any part thereof or sub-license the rights granted herein, or lend, rent, time-share, sell or lease the software without the prior written consent of GEOSOFT. I may not attempt to reverse engineer, de-compile or disassemble the software. I may not make any attempt to circumvent the License Manager that controls the access to the software use. 3. TERM: The Term of this Agreement shall commence on the Effective Date and shall continue until termination, as described in Section 6. 4. SERVICES: (i) According to the terms of my initial purchase, GEOSOFT shall make available to me, without additional fees such corrections and improvements to the Licensed Program(s) as may be generally incorporated into the Licensed Program(s) by GEOSOFT. (Normally this will be for a period of twelve (12) months). (ii) GEOSOFT has a strong commitment to customer service and product support. GEOSOFT offers me, subject to applicable Service Charge(s), continuing support in the form of email or telephone advice and other assistance in problem diagnosis and the correction of errors or faults in the Licensed Program(s) during the life of this License. When a problem occurs which appears to be related to errors or faults in the Licensed Program(s), I may contact GEOSOFT and GEOSOFT will make an honest effort to solve the problem. However, GEOSOFT cannot guarantee service results or represent or warrant that all errors or program defects will be corrected. Also it is to be noted that each Licensed Program is designed to operate on a Windows NT (sp 6 or later), Windows 2000 or Windows XP platform. (iii) Further, if I request service relating to the modification of the Licensed Program(s) to meet a particular need or to conform with a particular operating environment, GEOSOFT may, at its discretion, modify the Licensed Program(s) to meet these particular needs, subject to applicable Services Charge(s). However, all intellectual property or other rights which may arise from such modifications shall reside with GEOSOFT. 5. PROTECTION AND SECURITY OF LICENSED PROGRAM I agree that all additions, modifications, revisions, updates and extensions to the Licensed Program(s) shall be subject to all of the terms and conditions in this agreement. I acknowledge that all copies of the Licensed Program(s), provided by GEOSOFT or made by me pursuant to this Agreement, including, without limitation, translations, compilations, partial copies, modifications, derivative materials and/or updated materials, are proprietary, and the property of GEOSOFT, and may not be distributed to any other persons, without GEOSOFT’s prior written consent. I will not provide or otherwise make the Licensed Program(s) available to anyone in any form without GEOSOFT's prior written consent.
  • 8. 2 6. TERMINATION: This agreement shall terminate upon the termination date, if any, specified in your purchase agreement with Geosoft. This agreement may be terminated only upon thirty-days prior written notice to GEOSOFT. GEOSOFT may terminate this Agreement upon prior written notice effective immediately if I fail to comply with any of the terms and conditions of this Agreement. This Agreement shall terminate automatically upon the institution, or consenting to the institution of proceedings in insolvency or bankruptcy, or upon a trustee in bankruptcy or receiver being appointed for me/us for all or a substantial portion of my/our assets. 7. EVENTS UPON TERMINATION: I shall forthwith discontinue use of the Licensed Program(s), on the day Termination shall occur and agree not to resume such use in the future without written authorization from GEOSOFT. I shall uninstall and remove all software from my computer. Within thirty days after Termination, I shall destroy all physical and digital copies of the Licensed Program(s). This obligation relates, without limitation, to all copies in any form, including translations, compilations, derivatives and updated materials, whether partial or complete, and whether or not modified or merged into other materials as authorized herein. 8. WARRANTY: GEOSOFT does not warrant that the functions contained in the Licensed Program will meet my requirements or will operate in the combinations which may be selected for use by me, or that the operation of the Licensed Program will be uninterrupted or error free or that all program defects will be corrected. Each Licensed Program shall be furnished to me in accordance with the terms of this Agreement. No warranties, either express or implied, are made to me regarding the Licensed Program. THE FOREGOING WARRANTIES ARE IN LIEU OF ALL OTHER WARRANTIES, EXPRESSED OR IMPLIED, INCLUDING, BUT NOT LIMITED TO, THE IMPLIED WARRANTIES OR MERCHANTABILITY AND FITNESS FOR A PARTICULAR PURPOSE. 9. LIMITATION OF REMEDIES I agree to accept responsibility for the use of the programs to achieve my intended results, and for the results obtained from use of said Program(s). I therefore accept complete responsibility for any decision made based on my use of the aforementioned Licensed Program(s). In no event shall GEOSOFT be liable for any damages arising from performance or non-performance of the Licensed Program(s), or for any lost profits, lost savings or other consequential damages, even if GEOSOFT has been advised of the possibility of such damages, or for any claim against me by any other party. 10. GENERAL: I agree that this Agreement is a complete and exclusive statement of the agreement with GEOSOFT. This Agreement supersedes all previous Agreements with respect to the Licensed Programs, with the exception of a current signed Technical Service Agreements. GEOSOFT is not responsible for failure to fulfill its obligations under the Agreement due to causes beyond its control. Should any part of This Agreement for any reason be declared invalid, such declaration shall not affect the remaining portion which shall remain in full force and effect as if this Agreement had been executed without the invalid portion thereof. The relationship between the parties is that of independent contractors. Nothing contained in this Agreement shall be deemed to constitute or create a partnership, association, joint venture or agency. The provision of this Agreement shall be binding upon me and GEOSOFT and my respective successors and permitted assigns. This Agreement will be governed by the laws of the Province of Ontario and applicable laws of Canada. 11. YEAR 2000: The Licensed Programs have been tested to conform to DISC PD2000 1:1998 Year 2000 Conformity Requirements (www.bsi.org.uk/disc/year2000/2000.html), with the exception of clause 3.3.2, paragraph b. Section 3.3.2 paragraph b) requires that inferences for two-digit year dates greater than or equal to 50 imply 19xx, and those with a value equal to or less than 50 imply 20xx. The Licensed Programs will recognize all two digit years as 19xx. This is to prevent errors importing historical data that pre-dates 1950. All dates that follow 1999 must use four digit dates in the Licensed Programs.
  • 9. 3 Finding More Help Information There are several other functions included in the basic Oasis montaj help system that may be useful to your work. The entire documentation for the system is available through the online help system. This electronic library of information enables us to constantly update the information and provide you with the most up-to-date information available. The best way to find information in this system is to use the Search tab to perform a full-text search of all help topics. If you still can’t find the information you’re looking for, the Online Books help system contains complete Geosoft manuals and tutorials in Adobe PDF format. Contacting Technical Support The list below provides contact information for Geosoft Technical Support around the world. North America Geosoft Inc., 85 Richmond St. W., 8th Floor Toronto, Ont., Canada M5H 2C9 Tel +1 (416) 369-0111 Fax +1 (416) 369-9599 Email: tech@geosoft.com Europe and North Africa Geosoft Europe Ltd. 20/21 Market Place, First Floor Wallingford, Oxfordshire United Kingdom OX10 OAD Tel: +44 1491 835 231 Fax: +44 1491 835 281 Email: tech.eu@geosoft.com South America Geosoft Latinoamerica Ltda. Praça Floriano 51 / 19º Andar CEP: 20031-050, Centro Rio de Janeiro, RJ, Brasil Tel: (55-21) 2532-0140 Fax: (55-21) 2532-7197 Email: tech.sa@geosoft.com Australia and Southeast Asia Geosoft Australia Pty. Ltd 350 Hay Street Subiaco, WA Australia, 6008 Tel +61 (8) 9382 1900 Fax +61 (8) 9382 1911 Email: tech.au@geosoft.com South and Central Africa Geosoft Africa Ltd. Buren Building, Second Floor Kasteelpark Office Park c/o Nossob & Jochemus Streets Erasmuskloof X3, Pretoria Tel: +27 12 347 4519 Fax: +27 12 347 6936 Email: tech.za@geosoft.com
  • 10. 4 Target for ArcGIS Target for ArcGIS Target™ for ArcGIS is a surface and drillhole mapping extension to ESRI’s ArcGIS™ software that simplifies the visualization and analysis of subsurface drillhole and borehole geology data within your ESRI GIS environment. Built on the same technology as Geosoft’s industry-leading Oasis montaj™ MAPS (Mapping and Processing System) software, Target adds powerful spatial data processing capabilities and 3D viewing to your GIS. Using Target for ArcGIS, explorationists working in ArcGIS can better manage drill projects, from initial planning to the evaluation stage. Key features include: • Rapid processing and analysis of high volume surface and drillhole data • Timely and accurate generation of drillhole plans and sections • Simplified visualization and analysis of drillhole and borehole data using the subsurface 3D viewer • Efficient production of high quality maps for interpretation and target definition • Effective exploration project generation and management Overview of Target for ArcGIS Capabilities The Target for ArcGIS application provides project and field geologists/geophysicists with an easy-to-use and comprehensive data processing and presentation solution for surface drillhole data. This software package enables geoscientists to manage drill projects from the planning to the evaluation stage. The Target for ArcGIS application is organized around an integrated database and streamlined menus and toolbars that provide the following surface and drillhole capabilities within ESRI’s ArcView: • Subsurface 3D viewer: Functionality for viewing sub-surface data in three dimensions within ArcGIS simplifies the visualization and analysis of subsurface drillhole and borehole geology data within an ESRI environment • Data Import: User-friendly Import Wizards enable you to import both surface and drillhole data from different data sources, including ASCII, ODBC and Metech’s acQuire. Import data from CAD and GIS packages such as Microstation, DXF formats and MapInfo. Data validation on import ensures the integrity of any sub-surface information you generate. • Drillhole plans and sections: Easily create and recreate drillhole sections and plans in minutes, using dialogs with sensible default settings. Routinely visualize thousands of drillholes at a time. • Powerful data processing: Target includes Geosoft’s Oasis montaj™ powerful processing engine for working with large volume spatial data. It provides industry-standard technology for processing large volumes of exploration data for target generation.
  • 11. Target for ArcGIS 5 • Dynamic data linking: Analyze and interrogate your drillhole data in real time via dynamically linked sections, plans and database views. • 3D drillhole visualization: Interactive tab dialogs make it easy to create and customize 3D views of grids and profile data. View borehole traces and grid data from different angles in 3 dimensions to spot the relationship between surface and sub-surface features. Display multiple grids horizontal grids stacked vertically, in 3D space. Zoom, pan and rotate objects in the 3D environment, using an interactive 3D dialog. Print and export 3D views to include them in your reports • Voxels and other 3D enhancements: A "Voxel" is another word for a 3- dimensional grid, and is created using Geosoft’s 3D Kriging gridding method.. A Voxels menu is provided on the Target 3D toolbar and provides the tools for creating, displaying, processing, manipulating, and converting Voxels (3D grids). Other 3D enhancements include, support for some of the common mine planning formats including, Surpac DTM and Datamine Wireframe models and the ability to use vertical (and horizontal) exaggeration in 3D views. • Surface mapping: Utilizing function rich gridding routines, grids and contour maps can be created using point sample datasets (eg. streams, soils, rocks, geophysical data) from a variety of raw data sources (ASCII, Excel, Access, and acQuire). Easy-to-use design wizards simplify the creation of grids and contours. • Surface and Drillhole data Integration: Combine drillhole data with all other surface data and information to create detailed, integrated surface and subsurface maps. • Strip Log and Compositing: Create scaled graphical strip log display of selected holes or the entire drillhole project with Target’s strip log feature. Utilize up to 32 graphical fields to display down hole data. Using the Strip Log feature, geologists can better manage and visualize their drill projects, from initial planning to the evaluation stage. • Professional map production: The software provides a full featured dynamic contouring algorithm with gradient feathering and extensive labeling control for professional quality presentation results. Quickly create multiple and varied types of maps, including gridded maps, surface maps, posted value maps, and sub- location maps. Integrated Database and Streamlined Menus and Toolbars The Target for ArcGIS system is organized around an integrated database and streamlined menus and toolbars that guide you through the following tasks: • Geosoft setup including, default settings, licensing, database window display, and access to DAP. • Surficial gridding (minimum curvature and kriging) and contouring. • Drillhole project definition and editing.
  • 12. 6 Target for ArcGIS • Data import and export. Quickly import collar, survey, and hole assay data, in both numeric and text formats, via Excel, ASCII and OBDC-compliant database wizards. • Optional manual data entry and editing of individual drillholes. • Rock code table selection and editing. • Hole selection. Select all holes, no holes, select by name, by list, use the interactive drillhole selection tool, or use a saved configuration. • Plan plotting. Use intelligent defaults for automatic plotting or customize settings. • Section plotting (and stacked section plotting). Intelligent defaults can be used for automatic plotting or you can set your own customized settings. • Striplog plotting, including full data legend. • Target 3D mapping including creating and displaying 3D Voxel Models • Integration of other surface and subsurface data.
  • 13. Tutorial 1: Getting Started 7 Tutorial 1: Getting Started In mineral exploration, the initial focus of any exploration program is to identify potential targets for drilling. After potential targets are determined, the project moves into a “proving” phase led by a geologist experienced in obtaining and interpreting drillhole data. A complete drilling program will acquire many types of data ranging from hole location (i.e. collar details), surveys (i.e. 3-Dimensional orientation), geologic rock types and descriptions, drill hole geochemical assays and borehole geophysical logs. To set the stage for a successful subsurface data acquisition program, the geologist requires knowledge and experience plus effective tools that facilitate organization, planning and most importantly, visualization and plotting of data in 3 dimensions. A 3-dimensional perspective is essential to evaluating geologic structure of mineralized and host rocks as well as determining the continuity of host and mineralized rocks. In this context, drill programs rely on surface plan maps and subsurface cross-section maps to acquire the 3-D perspective required to prove potential targets. The Target™ for ArcGIS system was developed to provide the geologist with: • Minimum curvature and Krigrid (statistical) gridding routines as well as Geosoft’s comprehensive contouring tool • Organizational tools (consisting of versatile, self-contained databases and rock code management) • Quality Control tools (including QA/QC tests on each of the five different data types; Collar Data, Dip/Azimuth Survey, Easting-Northing Survey, From-To Data, and Point Data). • Planning tools (such as plan maps and section outlines) • Visualization and plotting tools (including comprehensive plan plots and section plots in any orientation) Before you begin… In this section, we will guide you through the key steps necessary to install and begin working with the Target for ArcGIS system. The procedures in this section will show you how to: • Install the Target for ArcGIS system (page 8) • Display the Target for ArcGIS toolbars (page 8) • Install the Geosoft eLicense (page 12) • Open the Geosoft Database Window (page 17) This tutorial uses sample data provided on the Target for ArcGIS CD ROM. Before you begin, save the files to a working directory, such as D:Tutorial.
  • 14. 8 Tutorial 1: Getting Started Installing Target for ArcGIS Target for ArcGIS is installed from the Target for ArcGIS CD-ROM. Please note that your installation procedure will vary slightly depending on the operating system you are using. If you are installing on Windows NT, you must install while logged in as Administrator. Once you have successfully installed this program you can begin working with Geosoft’s Target for ArcGIS software application. INSTALLING TARGET FOR ARCGIS 1. Insert the Target for ArcGIS CD into your CD-ROM drive. The InstallShield Wizard Setup dialog is displayed and tells you that the system is preparing the installation. 2. When ready, the program displays the Geosoft Target for ArcGIS – InstallShield Wizard Welcome screen. To continue, follow the directions on the screens that appear. 3. When the "Installation is complete" message appears, click [Finish]. The Target for ArcGIS software has been installed on your computer. Note: To install the latest version of the Target for ArcGIS tutorial and data files visit, www.geosoft.com/downloads/index.asp and download Target for ArcGIS Tutorial and Data. Save these files to a working directory, such as D:Tutorial. Displaying Target for ArcGIS Toolbars Once you have installed the Target for ArcGIS software and opened ArcMap, you will need to display the Geosoft Target for ArcGIS toolbars; Geosoft, Geosoft Database, Target Surface, Target Drillhole and Target 3D. The toolbars can then be docked in suitable locations. DISPLAYING THE TARGET FOR ARCGIS TOOLBARS: 1. Start ArcMap. 2. On the View menu, select Toolbars and then select (check) the Geosoft toolbar option ( ). The Geosoft toolbar will be displayed. 3. Repeat Step 2 above to display the Geosoft Database, Target Surface, Target Drillhole and Target 3D toolbars.
  • 15. Tutorial 1: Getting Started 9 4. The Geosoft Target for ArcGIS toolbars can then be docked in the ArcMap menu area (top, bottom or sides) by dragging each toolbar and dropping them at the desired location. Using the Target for ArcGIS toolbars Once you have opened ArcMap and displayed the four floating Geosoft Target for ArcGIS toolbars, they can be docked in suitable locations. Geosoft toolbar Short-cut Buttons Includes: Geosoft Setup Help • Internet Settings • Settings • Advanced Settings • License … - Show computer ID - View eLicense - Setup eLicense - Update eLicense - Park eLicense - Transfer eLicense - Lock eLicense - Unlock eLicense Show/Hide Geosoft Database Window Get data using Geosoft DAP client Get data using Geosoft DAP for v6.1 Import Geosoft Map as layer(s) Geosoft 3D Viewer for selected layer
  • 16. 10 Tutorial 1: Getting Started Geosoft Database toolbar Includes: Geosoft Data Help • Open Geosoft database • Close database • Close all databases • Commit Geosoft database changes • Save database as • Discard Geosoft database changes • Save working view • Get Saved view • Edit metadata • Edit audit log • Utilities … - Search/replace - Expression - Expression file - Edit a file • Maintenance … - Details - Verify - Defragment - Grow - Repair • Coordinates … - Change X/Y coordinates - Set projection - New projected - Long,Lat - > Local X,Y - Local X,Y - > Long,Lat • Gridding … - Minimum Curvature - Kriging - Grid Info - Copy/convert grids - Re-grid a grid Short-cut Buttons Show/Hide Geosoft Database Window Open Geosoft database Commit Geosoft database changes Discard Geosoft database changes Goto first line/group in Geosoft Database Goto last Line/Group in Geosoft Database Goto Previous Line/Group in Geosoft Database Goto Next Line/Group in Geosoft Database Create new Line/Group in Geosoft Database Delete current Line/Group in Geosoft Database Target Surface toolbar Short-cut Buttons Includes: Target Surface Help • Grid Info • Copy/convert grids • Re-grid a grid • Import data - acQuire point data - Geosoft Database Minimum curvature gridding from table in current document Kriging gridding from table in current document Create contours from grid on disk
  • 17. Tutorial 1: Getting Started 11 Target Drillhole toolbar Includes: Target Project • New Project • Open Project • Close Project • Save Database • Refresh Databases • Seuset Project • Preferences Data • Import … - Text file - XLS/Database - ODBC Database - acQuire drillhole data - LAS file • Export … - CSV file - Access database - LAS file - SHP file • Set Projection • QA/QC • Composite Database • New drillhole • Edit drillhole • Delete drillhole • Remove unregistered holes • Sort holes • Edit rock codes • Edit structure codes • Refresh Extents • Refresh XYZ • Utilties … - Search/replace - Expression - Expression file - Edit a file • Maintenance … - Details - Verify - Defragment - Grow - Repair Selection • Select All holes • Deselect All holes • By name or name mask • From List • By collar table data • Using Shape file • Selection tool • Select data by code • Select data by range • Reset mask channel • Load selections • Save selections Short-cut Buttons Generate Target Plan Plot Generate Target Section Plot Generate Target Stacked Section Plot Generate Target Strip Log Plot
  • 18. 12 Tutorial 1: Getting Started Trace Target Section into current data frame Generate Target 3D Plot Geosoft 3D Viewer for selected layer Show/Hide Geosoft Database Window Shadow Cursor Tool Shadow Cursor Tool with data linking Target 3D Short-cut Buttons Includes: Voxels Help • Grid Voxel • Voxel grid info • Voxel math • Voxel topography clip • Copy/convert grids… - Geosoft Database to Geosoft - GOCAD to Geosoft - UBC to Geosoft - XYZ to Geosoft - Datamine to Geosoft - Voxel to Geosoft database - Geosoft to GOCAD - Geosoft to UBC - Geosoft to XYZ Grid Voxel from current database Generate Target 3D Plot Geosoft 3D Viewer for selected layer Help • Help Topics • Email Geosoft Tech support • Frequently asked questions • Target for ArcGIS tutorial • Geosoft User forums • Geosoft Website • Geosoft Technical connection • Check for updates • About Target for ArcGIS Help Topics Provides access to the Target for ArcGIS online help system. There are several functions included in the Target for ArcGIS help system that may be useful to your work. The entire documentation for the system is available through the online help system. This electronic library of information enables us to
  • 19. Tutorial 1: Getting Started 13 constantly update the information and provide you with the most up-to-date information available. The best way to find information in this system is to use the Search tab to perform a full-text search of all help topics. Installing Geosoft’s eLicense To enable Target for ArcGIS you must install a valid Geosoft eLicense using the Geosoft License Manager. With Geosoft’s lectronic licensing (eLicensing) model licenses are now handled by the Geosoft license server. This system enables licenses to be moved between machines online, via email or if necessary by disk. Geosoft’s eLicensing management system offers many tangible and real benefits, including: • Regular upgrades and fixes. We release multiple upgrades a year (with interim patches when possible). You can only access these with a valid eLicense. • Transfer eLicense from office to home computer without re-installing all software • Add new products to your eLicense instantly • Evaluate products easily - for 30 days • Easy to manage "1 user - 1 license" model • Reduces costs by eliminating unauthorized use • Rent modules for specific time periods • The eLicensing technology also enables us to add extra services and products on a regular basis. It may take some time to get used to the system and there are some restrictions that apply: • Licenses are keyed to individual PCs. Therefore; you must park the eLicense to switch computers • Must park eLicense before changing Operating System (for a new hard drive, for example) Note: If you have any problems with your eLicensing please contact your local Geosoft Technical Support representative www.geosoft.com/contact/index.asp. TO INSTALL ELICENSE: 1. On the Geosoft toolbar, select Geosoft Setup, and then select License|Setup license. The Geosoft License Manager will be displayed.
  • 20. 14 Tutorial 1: Getting Started 2. In the "License Key" box, enter your 8-digit alphanumeric license key (provided with your CD-ROM) and click the [Internet] button. Geosoft’s license server will retrieve your license from our Internet server and download it to your computer. 3. When the license has been successfully installed all of the software you are licensed for will now be accessible to you. Note: The Target for ArcGIS eLicense can also be installed directly from the Windows “Start” menu (i.e. on the Start menu, select Programs|Geosoft|Target for ArcGIS|License|Setup. The Geosoft License Manager will be displayed. Enter your 8-digit “License Key” and click the [Internet] button. Your license will be retrieved from the Geosoft license server and downloaded to your computer. Using the Geosoft License Manager The following Geosoft License Manager options enable you to manage your eLicense: • Install eLicense – Installs your eLicense, using your ‘license key’, from the Geosoft license server (page 13) • Show computer ID – Displays your computer ID which is a unique alpha- numeric string that identifies your computer and is used to link your Geosoft eLicense to your computer. The Computer ID is also used to transfer your eLicense to another computer (page 15) • View eLicense – Displays your eLicense information which you can view at any time to see what applications or tools you are licensed for (page 15).
  • 21. Tutorial 1: Getting Started 15 • Update eLicense – Updates your eLicense (i.e. access additional extensions or add-on tools) by first contacting your local Geosoft representative and then simply connecting to the Geosoft license server (page 15). • Park eLicense – Parks (moves) your eLicense onto the Geosoft license server, enabling it to be retrieved later (page 16). • Transfer eLicense – Transfers eLicense from one computer to another (e.g. from your desktop to a laptop or visa-versa), using the “Computer ID” (page 16). • Lock eLicense – Locks eLicense on the current computer (page 17). • Unlock eLicense – Unlocks eLicense from the computer using the ‘License key’ (page 17). TO SHOW YOUR COMPUTER ID: 1. On the Geosoft Setup menu, select License|Show Computer ID. The Geosoft License Manager dialog will be displayed. 2. The alpha-numeric ID displayed in this window is your Computer ID. 3. Click the [OK] button to close the window. TO VIEW YOUR ELICENSE: 1. On the Geosoft Setup menu select, License|View License. Your eLicense is displayed in your default web browser. 2. The eLicense includes your License Key, Computer ID, User Name, Company, Support Expiry date, Software build date and other items as well as a list of your licensed products. 3. Close the window when you have finished viewing your eLicense. TO UPDATE YOUR ELICENSE: 1. Contact your local Geosoft representative about adding additional extensions or add-on tools. 2. Connect to the Internet. 3. On the Geosoft Setup menu select, License|Update License. Your eLicense is updated with the new licensed products.
  • 22. 16 Tutorial 1: Getting Started TO PARK (MOVE) ELICENSE FROM YOUR COMPUTER TO THE GEOSOFT LICENSE SERVER: 1. Connect to the Internet. 2. On the Geosoft Setup menu select, License/Park License. The Geosoft License Manager dialog will be displayed. 3. This is a warning message that tells you that parking a license places your license on the Geosoft license server so that it may be installed on a different computer for your own personal use. Your license is non-transferable, and use of the license by anyone but you may be a violation of your license agreement. 4. It then asks you if you are sure you want to park your license? Click the [Yes] button. Your license is uploaded to the Geosoft license server, to be downloaded at a later time, and all licensed products will be removed. 5. Once the license is parked, it can be installed on another computer. For information on installing your Geosoft eLicense, see page 12. Note: If you do not have access to the Internet, your eLicense can be transferred in a file using the Transfer License process. TO TRANSFER YOUR ELICENSE: 1. Open ArcMap and display the Geosoft toolbar on your licensed computer. 2. On the Geosoft Setup menu, select License|Transfer License. The Geosoft License Manager dialog is displayed. 3. In the "Target Computer ID" box, enter the computer ID of the target computer (the computer you wish to transfer the license to) and click the [OK] button. Note: Target for ArcGIS must be installed on the target computer to retrieve the “Computer ID”, which can be viewed from the Start menu by selecting Programs|Geosoft|Target for ArcGIS|License|View computer ID. 4. The file OasisMontaj_Transfer.geosoft_license file will be created in your C: directory. 5. Move this file via media (diskette, CD, USB drive) or network to the target computer. 6. Using Explorer locate the file (OasisMontaj_Transfer.geosoft_license) on the target computer, right-click and from the popup menu, select Install License. Your licensed products will be installed.
  • 23. Tutorial 1: Getting Started 17 Note: If you have access to the Internet, Parking your eLicense (page 16) is the quickest and easiest method of moving your eLicense. TO LOCK YOUR ELICENSE: 1. Connect to the Internet. 2. On the Geosoft Setup menu select, License|Lock License. The Geosoft License Manager dialog is displayed. 3. This is a warning message that asks, are you sure you want to LOCK the license on this computer? You will no longer be able to move or manage the license until it is unlocked using the license key. 4. Click the [Yes] button and the license will be locked on your computer until you unlock it using the license key. TO UNLOCK YOUR ELICENSE: 1. Connect to the Internet. 2. On the Geosoft Setup menu select, License|UnLock License. The Geosoft License Manager dialog is displayed. 3. In the "License Key" box, enter your 8-digit alphanumeric license key (provided when you "Locked" your license) and click the [Internet] button. 4. Geosoft’s license server will unlock your license and enable you to move and manage it again. Opening Geosoft Database Window The Geosoft Database Window is a special window within ArcMap that is used to create and view Geosoft’s unique three-dimensional database structure. The Database Window is specifically designed to enable users to access drillhole data using the organized and self-contained spreadsheet tab windows. These windows offer a direct interface to your data and enable you to perform a variety of tasks, including: • Display a view of the data in numerical or profile format • Display database statistics • Apply mathematical expressions to data • Process and display resulting data • Analyze data using built-in Geosoft eXecutable functionality
  • 24. 18 Tutorial 1: Getting Started Spreadsheet Window The data visible in the “Spreadsheet window” represents only some of the column (channel). This differs from a conventional spreadsheet program, in that what you see on the screen is the data. The Spreadsheet window only displays those parts of the data that you choose to display. In general, you may have as many lines and channel in your database as you require (i.e. there is no limit). You are also free to display the columns in any order or remove them from the window whenever you like. Profile Window The data profile view is your "graphical window" to the Geosoft database. You can display profiles of one or more variables in your database simply by selecting the channel, right clicking and from the popup menu select Show Profile. The profile appears directly below its corresponding database in a profile window. You can have up to five "panes" with 32 variables in each window. Profile windows are linked dynamically to their corresponding database. When you select a value or range of values in either the database or profile window respectively, they are also highlighted in the other window. Right click inside the profile window to view the Profile menu.
  • 25. Tutorial 1: Getting Started 19 Database Tools The following database short-cut tools are available to assist in navigating through the Geosoft database. Show/Hide Geosoft Database Window Use this button to Show/Hide the Geosoft Database Window. Open Geosoft database Use this button to open a previously defined Geosoft database. Commit Geosoft database changes Use this command to commit changes in the current Geosoft database. Discard Geosoft database changes Use this command to discard changes in the current Geosoft database. Go to First line/group in Geosoft database Use this command to show the data and profiles for the first (starting) line/group in your Geosoft database. Go to Last line/group in Geosoft database Use this command to show the data and profiles for the last (final) line/group in your Geosoft database. Go to Previous line/group in Geosoft database Use this command to show the data and profiles for the previous line/group in your database. Go to Next line/group in Geosoft database Use this command to show the data and profiles for the next (following) line/group in your database. Create new line/group in Geosoft database Use this command to create a new line/group in your Geosoft database. The Create Line dialog is displayed that enables you to specify the line/group parameters. Delete current line/group in Geosoft database Use this command to delete the current selected line/group in your Geosoft database.
  • 26. 20 Tutorial 1: Getting Started As well as these short-cut tools, there are also a number of database tools available on the Geosoft Data menu, for more information see page 10. For more information on these or any Target for ArcGIS options, click the [Help] button on the dialog of interest, or select Help|Help Topics from any of the Geosoft toolbars.
  • 27. Tutorial 2: Using Gridding and Contouring Tools 21 Tutorial 2: Using Gridding and Contouring Tools The Target for ArcGIS system includes two gridding options, Minimum Curvature Gridding and Kriging and a contour option that provides the ability to create Contour layers from gridded data. The procedures in this section will show you how to: • Add data and assign a projection (page 21) • Grid data using Minimum Curvature method (page 23) • Plot contours (page 26) Before you begin… This tutorial uses sample data provided on the Target for ArcGIS CD ROM. Before you begin this tutorial, copy the tutorial data file (surface_geochemistry.csv) to a working directory, such as D:Tutorial. Gridding using Minimum Curvature Gridding To perform minimum curvature gridding, you must supply X, Y and Data fields, Output grid name and Grid cell size (optional). In addition, you also have a variety of options, including the ability to: • Specify data limits and clipping • Grid the original data or log of the data (using cut-offs or a data range) • Specify desampling values (for low-pass filtering) and blanking distance (for removing values beyond a certain distance) • Specify the tolerance to which the minimum curvature surface must match the data points. The default is 1.0% of the Z range of the data. Also specify the percentage of points that must meet the tolerance for the iterations for the current processing step to stop • Specify the maximum number of iterations to allow • Adjust the tension to produce a true minimum curvature grid or to increase the tension to reduce overshooting problems in unconstrained, sparse areas The Minimum curvature gridding algorithm generates a grid file (*.grd) and grid report file (rangrid.log). Adding Data and Assigning a Projection Target for ArcGIS enables you to grid shape files, event layers and table files. However, in order for the resulting grid to have a projection, you must grid either a shape file or an Event layer that already has a projection assigned to it. The grid will adopt the projection of the source data. ArcMap will not let you assign a projection to a table, so any grid created from an XY data table, i.e. not an Event theme or shape file, will not have a projection assigned to it.
  • 28. 22 Tutorial 2: Using Gridding and Contouring Tools TO ADD DATA AND ASSIGN A PROJECTION: 1. Open ArcMap. On the Tools menu, select Add XY Data. The Add XY Data dialog is displayed. 2. Using the Browse button ( ) locate the (surface_geochemistry.csv) file. 3. Using the dropdown lists, Specify the fields for the X and Y coordinates as shown above. Click the [Edit…] button, lower right of the dialog box, and the Spatial Reference Properties dialog is displayed. 4. Click the [Select] button, the Browse for Coordinate System dialog is displayed. Then select the following, Projected Coordinate Systems|UTM|Wgs 1984|WGS 1984 UTM Zone 20N.prj and click the [Add] button to return to the Spatial Reference Properties dialog. 5. Click the [OK] button to apply the projection to the XY data and return to the Add XY Data dialog. Click the [OK] button to add the XY Event data (surface_geochemistry.csv Events) to the layer.
  • 29. Tutorial 2: Using Gridding and Contouring Tools 23 Note: The added XY Event data (surface_geochemistry.csv Events) only exists in the current map document. To save the layer as a separate file, you must export as a shape file. 6. In the Table of Contents (TOC) window, select (highlight) the layer (surface_geochemistry.csv Events), right click and from the popup menu, select Data|Export Data. The Export Data dialog is displayed. 7. Specify the export parameters to save the layer as a shape file in your working directory and click the [OK] button. The ArcMap dialog is displayed. 8. This dialog asks if you would like to add the exported data to the map as a layer. Click [Yes] and the file Export_surface_geochemistry.shp will be saved in your working directory and displayed as a layer on your current map. Gridding Data using the Minimum Curvature Method The Minimum Curvature gridding method fits a minimum curvature surface to the data points. A minimum curvature surface is the smoothest possible surface that will fit the given data values. TO GRID USING THE MINIMUM CURVATURE METHOD: 1. On the Target Surface toolbar, click the Geosoft Minimum Curvature Gridding Tool button ( ). The Select Table to Grid dialog is displayed.
  • 30. 24 Tutorial 2: Using Gridding and Contouring Tools 2. In the Available tables in current document box, select (surface_geochemistry.csv Events) and click the [OK] button. The Minimum Curvature Gridding of attribute using feature positions in layer dialog is displayed. 3. Using the Attribute to grid dropdown lists, select (Au). In the Name of new grid file box, specify (Au_surface). The Grid cell size can be left to the intelligent default value. Click the [Help] button for more information on Grid cell size or any other Minimum Curvature Gridding parameter. 4. To access the advanced parameters, click the [Advanced>] button or to accept the intelligent defaults, click the [OK] button. The data will be gridded, saved in your working directory and displayed in the data frame. 5. By default, ArcMap displays the grid using a grey scale colour ramp. To change this, click on this grey scale colour bar in the Table of Contents window. The Select Colour Ramp dialog is displayed. Using the dropdown list, select any of the available colour ramps.
  • 31. Tutorial 2: Using Gridding and Contouring Tools 25 6. Click the [OK] button to apply the colour to the grid. (Note that, to change the colour scheme so that the high values are displayed in red and low values in blue, check ( ) the Invert box.) Contouring using Geosoft’s Contouring Tool To create a contour layer, you must supply the input grid file, specify contouring option and up to 8 contouring levels. In addition, you also have a variety of options, including the ability to:
  • 32. 26 Tutorial 2: Using Gridding and Contouring Tools • Make a layer for display in the ArcMap window • Make a shape file with Z attributes (*.SHP) for use in ArcMap • Contour options including; smoothing, suppression, suppression density (mm), annotations, labelling, etc • Line styles including; line colour and weight, line styles (solid, dashed etc.) and line labels Plotting Contours Contours refer to the lines drawn at specified intervals or multiples of intervals on your map based on a gridded dataset. After you create a grid, you may want to contour your data and display these contours on your map. In Target for ArcGIS, contouring is specially designed to handle the very large dynamic data ranges that characterize spatial data sets. TO CREATE A CONTOUR PLOT 1. Select the Create Contours from grid on disk button ( ) on the Target Surface toolbar. The Create a contour plot of a grid dialog will be displayed. 2. Using the [Browse] button, locate the Input grid file (Au_surface.grd). 3. Using the Output Type dropdown list, select (shape file) and then suing the Contouring option dropdown list, select (multiples of levels). Then you can specify the Interval level(s) starting with the smallest level at the top (Note that, you can also leave the levels to the intelligent defaults).
  • 33. Tutorial 2: Using Gridding and Contouring Tools 27 4. Click the [Options] button and set the parameters as required and click the [OK] button to return to the Create a contour plot of a grid dialog. 5. Click the [Line Styles] button and set the line style parameters as required, clicking the [Next>] button as required. Then click the [Finish] button to return to the Create a contour plot of a grid dialog. 6. Click the [Next>] button and the Contour: Create a shape file as output dialog is displayed. 7. Save the shape file as (Au_contour.shp). The contour shape file will be created, saved in your working directory and displayed in the data frame.
  • 34. 28 Tutorial 3: Target for ArcGIS Drillhole Tools Tutorial 3: Target for ArcGIS Drillhole Tools In this section, we will guide you through the key steps necessary to start a new drillhole project and import and verify geological and geochemical data. The procedures in this chapter will show you how to: • Access the drillhole menus (page 28) • Start a new project (page 29) • Import data (page 30) • Apply quality control and quality assurance tests to data (page 42) Before you begin… This tutorial uses sample data provided on the Target for ArcGIS CD ROM. Before you begin, save the files (Collar.csv, Assay.csv, Survey.csv, Geology.csv) to a working directory, such as D:Tutorial. Access the drillhole menus The Target for ArcGIS drillhole menu options and plotting tools can be found on the Target Drillhole and Target 3D toolbars. For more information on the Target toolbars and the menu and plotting tools available, see page 9. Note: The drillhole system uses a special window within ArcMap to create and view Geosoft’s unique three-dimensional databases. The Geosoft Database Window is specifically designed to enable users to access their drillhole data using organized and self-contained spreadsheet tab windows. TO OPEN THE GDB WINDOW: 1. Select the Show Geosoft Database Window button ( ). The Geosoft Database Window will be displayed.
  • 35. Tutorial 3: Target for ArcGIS Drillhole Tools 29 2. As we have not imported drillhole data into the project the window displays the “No Geosoft Databases Loaded” message. Starting a New Project The Target for ArcGIS drillhole system has been developed using Geosoft’s unique three-dimensional database structure. These databases are linked by a common project name that provides easier data management. When you start a new drillhole project the "Collar" database is created and displayed in the GDB Window. Each individual ‘data type’ will have its own databases. The common project name links the databases. For example, separate databases for collar, survey, assay, and geology are created and linked by project. In a project named "Prospect" the following databases could be created: • Prospect_Collar.gdb (collar information) • Prospect_Survey.gdb (hole dip-azimuth survey information) • Prospect_Geology.gdb (geology information – The “Geology” label is user specified)
  • 36. 30 Tutorial 3: Target for ArcGIS Drillhole Tools • Prospect_Assays.gdb (assay information - the "Assay" label is user-specified) Note: When the Target for ArcGIS system is used, it scans the open project for all the databases currently loaded in the project to see which data is available. If you close one of the project databases, it will not be visible to the system and will not be used when processing your data. While working with a Target for ArcGIS project, if you wish to “hide” one of the databases, minimize it instead of closing it in order that Target for ArcGIS can continue to access it. Naming a Drillhole Project The drillhole project name will be added, as a prefix, to all of your project databases (collar, survey, assay, geology, and other types of related information). TO NAME A DRILLHOLE PROJECT: 1. On the Target Drillhole toolbar, select Target Project|New project. The Drillhole - New Project dialog is displayed. 2. Specify a New project name as (Prospect). The current default project directory is displayed in the Project Directory box. If this is incorrect, click the [Directory] button to specify the correct working project directory (i.e. D:Tutorial). 3. You can specify the Maximum holes as (500) and you can leave the Maximum data fields per dataset to the default value of (100). We recommend that you specify a number that is representative of the final estimated project size. This strategy ensures that you have enough space available in your project while not consuming excessive storage space. 4. Click the [OK] button. The collar database with the project name that you specified is displayed. Importing Data The Drill Hole Import Wizard guides you through the import process, and automatically displays your data in a Spreadsheet window. The spreadsheet window
  • 37. Tutorial 3: Target for ArcGIS Drillhole Tools 31 is similar to Excel in appearance with specialized Earth Science capabilities, including built-in data manipulation tools. The purpose of this tutorial is to help you become aware of the key components and capabilities of the Target for ArcGIS import process to prepare you for plotting your results in plan and section maps. In this exercise, you will be importing collar, survey, geochemical assay, and geology data. Current X and Y Channels The Target for ArcGIS system has implemented “current" X and Y (and Z) channels. This feature enables users to select the channels that they would like to use as the current X and Y (and Z) channels (for example, East, North, and Relative Level). Markers have been added to the channel header to indicate which channels are currently defined to be the "current" X, Y (and Z) channels. The markers are little rectangles on the right side of the header cell, and contain "x", "y" (or "z") in reversed display (like the triangle protection symbol on the left). The "z" will be used in Target for ArcGIS databases, where DH_EAST = "x", DH_NORTH = "y" and DH_RL = "z". Importing Data Files During drilling, the geologist acquires and integrates data from different sources and formats, including: • Drillhole locations - Collar information containing (at a minimum) Hole ID, Easting, Northing and Relative Level (Elevation). Note, that in the data example below, the Azimuth, Dip, and Depth are also included in the collar file.
  • 38. 32 Tutorial 3: Target for ArcGIS Drillhole Tools • Surveys – (Optional) Hole deviation information in either Hole ID, Depth, Azimuth, Dip format or Hole ID, Depth, Easting, Northing, Elevation format. Note that, a survey file is only required if a hole has actually been surveyed and the dip and azimuth change at depth. • From to Data – From-To data is data acquired over specified depth intervals down the hole; for example, at a 1 m interval with a measurement starting at 0 m and extending to 139 m. In this tutorial, we will import two types of From-To data: a geochemical assay dataset and a geological rock codes dataset. • Point Data – Point data is data acquired in discrete measurements made at a specific depth, for instance 85.6 m. In this example, a Geophysical property log (borehole geophysics) in Single Point data format. The Target for ArcGIS system automatically detects the type of data that is being imported, which can be any of the above.
  • 39. Tutorial 3: Target for ArcGIS Drillhole Tools 33 There are two ways to define drillholes and add data to your project in Target for ArcGIS: • Import data already stored in CSV/text or XLS/database data format. A common example is a geochemical assay file, which is commonly delivered to you on disk or via email by an assay laboratory in Excel XLS format. Depending on project needs, you may also initially have geological data, collar data or survey data in text or data files. • Manually enter data. If you are performing a grassroots exploration project, you may only have one or two holes to work with initially. In this case, you may just want to add some basic collar location or projected survey information to your project. In this part of the tutorial, we will work through the import process of collar, survey, assays and geology data from CSV files. The purpose is to demonstrate standard data formats and show how Target for ArcGIS handles each of these situations. Importing Data The Target for ArcGIS system enables the import of data stored in CSV/text or XLS/database data format. In this section, we will work through the import process of collar, survey, assays and geology data from CSV format files. The purpose is to demonstrate standard data formats and show how Target for ArcGIS handles each of these situations. Importing Collar Data When entering data in Target for ArcGIS, you must start with collar data. The system creates a unique collar database that you can use to view all drillholes in the project at a glance. You can also plot an initial plan map showing all holes for review purposes. A collar file must exist before survey or assay data can be imported, and before plans and sections can be created. TO IMPORT COLLAR DATA: 1. On the Data menu, select Import, and then select Text file. The Drill Hole – ASCII Import dialog is displayed.
  • 40. 34 Tutorial 3: Target for ArcGIS Drillhole Tools 2. Using the Browse button ( ), select the Collar.csv file from your working directory and click the [Wizard] button. The Drill Hole Import Wizard dialog is displayed. 3. Note that the system has determined that the Data Input format is ASCII Data and has intuitively predicted that the Types of Data to import is Hole Collar Data. Tip: The Target for ArcGIS Drill Hole Import Wizard enables you to easily import data from any ASCII spreadsheet or data file. The Import Wizard supports both Delimited and Fixed Field ASCII files. The Import Wizard also imports Microsoft Excel Comma Seperated Value (CSV), Comma Delimited, White Space Delimited and Tab Delimited data files. The window at the bottom of the dialog box shows the file that is being imported. For more information about the Drill Hole Import Wizard settings click the [Help] button on the individual Wizard dialog boxes. 4. Use the horizontal scroll bar to see all of the fields in the file or simply click the [Next>] button. The system displays the second dialog box in the Drill Hole Import Wizard.
  • 41. Tutorial 3: Target for ArcGIS Drillhole Tools 35 5. In this case, the system has determined that the File Type containing the data is Delimited (i.e. separated by commas). 6. In the four fields in the middle of the dialog box specify which line in the file contains the data headings (i.e. channel names), data units (“m” or “ft” etc.), which line to begin importing data and the number of lines to display in the preview window. 7. Click the [Next>] button. The system displays the third dialog box in the Drill Hole Import Wizard.
  • 42. 36 Tutorial 3: Target for ArcGIS Drillhole Tools 8. Specify the Column delimiters as Microsoft Excel CSV for the type of character used to separate the column text. In this case, the system displays the data in columns by drawing lines in the preview window indicating the way in which it is preparing to import your data. 9. Click the [Next>] button to continue. The system displays the fourth and final dialog box in the Drill Hole Import Wizard.
  • 43. Tutorial 3: Target for ArcGIS Drillhole Tools 37 10. The Import Wizard has scanned your data and determined the type of data with which you are working (i.e. Channel Type). It is always good practice to review your data to ensure that the wizard has selected the correct columns. The Parameters area in the dialog box shows the name and type of data of the column highlighted in the preview window. Note: The Data Type of Database Fields that contain alphanumeric data (for example, sample numbers, rock codes etc.) must be classified as String. 11. Click the [Finish] button. The system imports the data (Collar.csv) and displays it in the spreadsheet window. 12. At this point, we recommend that you examine the database carefully. Start by confirming that all columns of data in the original CSV file are present in the database. Note: If you have problems with your data file, the system will attempt to open an ASCII file (dhimp_collar.log) and display a list of warnings or errors. If you have not yet configured a text editor in your system, you may be prompted for one. In this case, search your system for your text editor (i.e. Notepad), which can be located in the Windows directory.
  • 44. 38 Tutorial 3: Target for ArcGIS Drillhole Tools Importing Survey Data Various types of surveys (acid, gyroscope, magnetic orientation, etc.) can be used to record hole depth (depth measured from the drillhole collar). For Target for ArcGIS, you can use survey data in one of two forms: Before importing data, you must make sure that you have all fields as shown in one of these configurations (i.e. these fields are required on import). By convention: • Depth is the distance measured into the hole from the collar, increasing from zero. • Azimuth is in degrees, increasing positively in a clockwise sense from North (i.e. N is 0 degrees, E is 90 degrees). • Depth, Easting, Northing and Elevation are in the same units as default units set in Data|Set Projection dialog. To change the units, click the [Modify] button. TO IMPORT SURVEY DATA: 1. On the Data menu, select Import|Text file. The Drill Hole – Ascii Import Wizard dialog is displayed. 2. Using the Browse button ( ), select the Survey.csv file from your working directory and click the [Wizard] button. The system scans the file and displays the first of four dialog boxes from the Drill Hole Import Wizard. Note that the system has determined that the Data Input Format is ASCII Data. The Types of Data to import should default to Dip-Azimuth Survey. Hole Depth Azimuth Dip Hole Depth Easting Northing Elevation
  • 45. Tutorial 3: Target for ArcGIS Drillhole Tools 39 3. Continue clicking the [Next>] button and work your way through the remaining three dialog boxes. Watch the sequence of screens and note the differences from the Collar Import procedure. 4. In the final dialog box click the [Finish] button. The system imports the data (Survey.csv) and displays it in the spreadsheet window. Importing Geochemical Assay Data Geochemical assay data are typically acquired by obtaining core or rotary drill samples over specific depth ranges (From-To ranges) and sending samples to an assay laboratory. Numerical results are typically returned from the laboratory in electronic format and can be imported quickly into the system. Before import, you must make sure that your data files contain the following information – HOLE ID, FROM, TO and a series of ASSAY results. TO IMPORT GEOCHEMICAL DATA: 1. On the Data menu, select Import|Text file. The Drill Hole – Ascii Import Wizard dialog is displayed.
  • 46. 40 Tutorial 3: Target for ArcGIS Drillhole Tools 2. Using the Browse button ( ), select the Assay.csv file from your working directory and click the [Open] button. The system returns you to the Drill Hole – ASCII Import Wizard dialog box and displays the file name you wish to import. 3. Click the [OK] button. The system scans the file and displays the first of five dialog boxes from the Drill Hole Import Wizard. Note that the system has determined that the Data Input Format is ASCII Data. The Types of Data to import should default to From-To Data. 4. Continue clicking the [Next>] button while watching the sequence of dialog boxes and the differences from the previous import procedures. Note: When importing Assay data all elements are assigned the Class ‘Assay’ (Channel Type). Standards and Duplicates are also identified, enabling Chimera Geochemistry users to extract the information using the normal Chimera tools.
  • 47. Tutorial 3: Target for ArcGIS Drillhole Tools 41 5. Before the import is complete, the system displays a fifth dialog box. The purpose of this dialog box is to enable you to specify a unique name or description for your data. The name chosen will be appended to the corresponding holes in the database for easier access and recognition of your data. 6. Specify a Data Name for this data and click the [Finish] button. The system imports the data (Assay.csv) and displays it in the spreadsheet window. Importing Geological Data The system provides a versatile environment for adding a wide variety of geological parameters ranging from rock codes, extended text descriptions, alteration types, contact data such as fractures or faults, and other core log information that is important in your drilling project. In general, this type of information consists of text but you can also add numerical values, for instance, if you want to retain numeric codes for statistical purposes or you want to run your own advanced classification strategies in Target for ArcGIS. TO IMPORT GEOLOGICAL DATA: 1. Repeat the steps in the procedure above, using the Geology.csv file. 2. You are now ready to begin working with your data. If this was a real project, more results can always be added later just as easily with the Import Wizard.
  • 48. 42 Tutorial 3: Target for ArcGIS Drillhole Tools Saving your Databases It is always a good habit to save changes you make to your databases, including new databases. TO SAVE YOUR DATABASES: 1. Select the database you want to save, by selecting the Database Tab (as shown below). 2. On the Geosoft Database toolbar, select Geosoft Data|Commit Geosoft database changes. Note that, you can also select the short-cut button ( ). The Save Changes dialog is displayed. 3. Click the [Yes] button and the database will be saved to your working directory. 4. Repeat this process until all databases have been saved. Note that you can use the “Arrow” buttons on the database tab to select the next database. Quality Control and Quality Assurance Tests The Target for ArcGIS system provides the tools to enable you to perform Quality Control and Quality Assurance tests on each of the five different data types (Collar Data, Dip/Azimuth Survey, Easting-Northing Survey, From-To Data, and Point Data). The Drill hole - QAQC tools dialog asks you to select the type of data to perform the QA/QC tests on. For each data type there are different sets of options you can enable/disable using the [Options] button. The individual QA/QC tests are run automatically during data import. Each test produces its own log file; e.g. Collars (Collars.log), From-To (FromToData.Log), All data (QAQC.log). If no problems are found you receive a message such as: "No problems were detected with the Dip-Azimuth Survey data." For more detailed information on the options available for each data type see, Appendix 3: Setting QA/QC Options page 99.
  • 49. Tutorial 3: Target for ArcGIS Drillhole Tools 43 TO RUN THE QA/QC TEST: 1. On the Data menu, select QAQC. The Drill hole - QAQC tools dialog is displayed. 2. From the Data Type to QAQC dropdown list, select the data type you want to perform the QA/QC test on. To see the list of options that the select data type will use for testing, click the [Options] button. In this case, the QA/QC – Collar data options dialog is displayed. 3. Once you have modified your test options, click the [<Back] button to return to the Drill hole - QAQC tools dialog. 4. Click the [OK] button to run the test. If no errors are found the Drill hole QA/QC dialog will be displayed telling you that no errors were detected. 5. Click the [OK] button to close the Drill hole QA/QC dialog.
  • 50. 44 Tutorial 3: Target for ArcGIS Drillhole Tools Note: If you run this test on a data type that you do not have in your current project, for example in this case “Easting-Northing survey” you will be prompted with the Drill hole QA/QC dialog telling you “No East-North survey data exists in this Target for ArcGIS project” and, if you run this test on a data type that has some errors the data log file will be displayed in your workspace, displaying the problem samples.
  • 51. Tutorial 4: Quick Maps and Shape Files 45 Tutorial 4: Quick Maps and Shape Files The Target for ArcGIS plotting tools provide two types of output, ready-to-print maps and Shape files. The ready-to-print maps contain pre-defined annotations, legends, as well as pre-attributed plotting objects. The Shape file output includes database (DBF) files populated with attribute information related to the plotted feature. Quick Maps The “Quick-Map” enables the user to pre-define colours, patterns, line-types, etc. using the tabbed dialogs. However, the “Quick-Map” is limited in that there is no “GIS” type interface using the “Identify” cursor, and the normal GIS attribute and labeling tools are not available for modifying the created plot. Modifications are not allowed; if changes are required the user must create a new plot. Shape Files The Shape file output enables the user to create Shape files (SHP) for both Plan and Section plots. Shape files are created for a variety of the plotted features, including the following: • Hole Traces • Bar Plots • Profiles (down the holes) • Collars • Posted Text • Structural ticks • Bottoms • Posted Values • Section topography • Crossing Points • Numeric Bands • Section gridded data profiles • Depths • Text Bands • • Pierce Points • Rock Code Bands • Each of these SHP files includes database (DBF) files populated with attribute information related to the plotted feature. Some of the features noted above create more than one SHP file; for instance topography is output both as a series of point features along the section line, which can be interrogated to determine the local elevation, and as a single line feature, which can be more easily attributed to user tastes for plotting. Shape files can be loaded automatically into the current data frame, or manually input by the user using the regular import tools in ArcMap. When imported to the same data frame as corresponding Quick-Map plan or section, the shape files overlay the map precisely and provide an instant “GIS” style interrogation of the Quick-Map features. [Note: This is not true for sections with vertical exaggerations not equal to
  • 52. 46 Tutorial 4: Quick Maps and Shape Files 1 – the transformations required to display these Quick-Maps also prevents the correct implementation of data linking.] The Target for ArcGIS plotting tools provide two types of output, ready-to-print maps and Shape files. Users can select to plot a Quick-Map, Shape File, or both at the same time (at least one must be selected). Users are also provided with the option of loading Plan maps and Section plots to a single data frame or to separate data frames. Quick Map - Load to separate data frames For Plan Maps, the following frame names are created, depending on the trace type selected under the “Hole Traces” tab. • PlanC – Collars only • PlanT – Full hole traces • PlanRLZP – Pierce point plots at level “RL”, e.g. Plan-20ZP is a pierce plot at a relative level -20. • PlanRLZC – Collars in a horizontal slice centred at level “RL”; e.g. Plan-20C. • PlanRLZT – Hole traces in a horizontal slice centred at level “RL”; e.g. Plan- 20T. Levels are rounded to the nearest integer value. The same names are used to create the layers, with the optional addition of the Layer Name Tag, so a collars plot with the “T1” tag would produce the following frame and layer: The following example shows the difference between selecting “Load to current data frame” and “Load to separate data frames”. A series of 4 pierce-point plots are produced, at elevations from -30 to 0. The layer tag “T1” is used.
  • 53. Tutorial 4: Quick Maps and Shape Files 47 Loading to separate frames: Loading to an existing frame: (Note that, the frame has been manually named “Pierce Plots”) Section plots are handled in an analogous manner. Section frames and layers are named based on the section reference location, at the section centre. The first letter is always “S”, for Section. North-South sections are named using the local easting (e.g. S12000E, while East-West sections are named using the local northing (e.g. S9200N). Angled sections use either the local northing or easting, depending on which is more perpendicular to the section azimuth. Locations are rounded to the nearest integer value. Layers can be created in the current frame, or in individual frames as demonstrated above for plan maps. Section layers can also include Name Tags. Note that care must be taken not to load a section to an existing plan data frame, or vice-versa, because the coordinates are incompatible. Quick Map - Load to a Single Layer When Quick-Maps are loaded to a single layer the “subsidiary” views within the map are re-projected into the “master” view. For example, if a section is created with a top plan, profiles and legend, the top plan portion, the individual data profiles and the legend are all re-projected and merged into the section view. This means that the coordinates one gets when placing the cursor over the plan portion are actually still the section coordinates, and data linking is not possible between the plan plot and data, just between the section and the data. The same can be said for the plan map plots. All subsidiary views (e.g. top section, legend) are merged into the plan view. Loading Quick-Maps and Shape Files at the same time When you create multiple sections or plans, and shape files at the same time, and when you check the Shape Files box to “Load to current data frame”, the shape files are automatically loaded to the correct data frame:
  • 54. 48 Tutorial 4: Quick Maps and Shape Files The “Shape file” lines, symbols and patterns plot on top of the “Quick-Map” layers. Because of the nature of the frames created for Quick-Maps, if you choose to Auto- load the shape files without also creating the Quick-Maps, the “one frame per section” rule is not followed, and all the shape files will be placed into the same, current data frame. In other words, if you want to get Shape files from multiple sections to go into individual data frames, you must also have the “Quick-Map output” box checked. Frame/Layer Control for Stacked Sections and Strip Logs There is no Shape file output for the Stacked Section Plot, or for the Strip Log plot.
  • 55. Tutorial 5: Plan Maps and Data Integration 49 Tutorial 5: Plan Maps and Data Integration Plan maps provide surface views of drillhole collars, co-ordinates, positioning grids, drillhole traces and other information, such as the title block and a list of the holes. In the Target for ArcGIS system, plan maps represent an important organizational and navigational tool that enables you to quickly display drillhole collars and evaluate drilling progress, display drillhole traces to help establish subsurface drilling coverage, and construct drillhole sections. This chapter will show you how to: • Quick display of the plan map (page 49) • Data integration (page 51) Before you begin… This tutorial uses sample data provided on the Target for ArcGIS CD ROM. Before you begin, save the files to a working directory, such as D:Tutorial. Quick Display of the Plan Map In this exercise, we will quickly construct a plan map showing all drillhole coverage in the project so far. TO CREATE PLAN MAP: 1. On the Target Drillhole toolbar, select the Generate Target Plan Plot button ( ). The Target Plan Generation initial parameters dialog is displayed. 2. Select the initial plotting extents for the plan map (Use default/previous parameters) and click the [OK] button to continue. Note: If you select Define extents using rectangle tool, you will notice that the cursor changes as you move over the data frame window ( ), using this tool, select the area of interest. 3. The Output tab of the Plan Map Parameters dialog is displayed.
  • 56. 50 Tutorial 5: Plan Maps and Data Integration 4. In the Frame/Layer Name Tag box, specify (Prospect). Check the Quick-map output box. Note that at least one data output (Quick-Map or Shape File) must be checked. Then, select the Load to current data frame radio button. 5. The Plan Map Parameters dialog includes intelligent defaults that enable quick plan map creation. You can accept the remaining defaults, and click the [OK] button. The PlanC_Prospect map is displayed in your Table of Contents and your Data frame. For more information on the Plan Map Parameters click the [Help] button on the individual tab dialogs. Note: For organizational purposes you may want to specify the Layer Name Tag the same as the "Project" name. The following naming conventions are used for plan maps. In the following examples, the second example is the map name with the optional tag "_tag". Collar Maps: "PlanC.map" or "PlanC_tag.map" Pierce Point Maps: "P1000ZP.map" or "P1000ZP_tag.map". The reference elevation appears in the map name. Full Trace Maps: "PlanT.map" or "PlanT_tag.map". If the map already exists (but is not displayed), you are asked whether to overwrite it.
  • 57. Tutorial 5: Plan Maps and Data Integration 51 6. To zoom in on your Data Frame, on the ArcMap View menu, select Zoom Data and then select Fixed Zoom In (or the appropriate menu item to view your data). Data Integration The ability to quickly and easily integrate multi-disciplinary data into your plan (and section) maps is one of the advanced visualization capabilities of the Target for ArcGIS system. For example, you may have a magnetic grid supplied by a Geophysicist, or a topography grid that you want to place on your plan view for comparison with your drillholes. Displaying a Grid In this exercise, you will be working with the previously created grid (Au_surface.grd) and a topography grid file (topo.grd) and a magnetic grid file (mag.grd).
  • 58. 52 Tutorial 5: Plan Maps and Data Integration TO DISPLAY A GRID: 1. In the Table of Contents window select (check) the Au surface grid previously created in this tutorial (Au_surface.grd). The Au_surface grid will be displayed in the Data frame. 2. To add another grid file, using the Add Data button ( ) locate and select the magnetic grid (mag.grd) and click the [Add] button. The magnetic is added to the Table of Contents and displayed in the Data frame. To change the default grey colour scale, click on the colour ramp and from the dropdown list, select an appropriate colour range. Your map should look similar to below (don’t forget to check the Invert option):
  • 59. Tutorial 5: Plan Maps and Data Integration 53 3. To add another grid file, using the Add Data button ( ) locate and select the topography grid (topo.grd) and click the [Add] button. The topography grid is added to the Table of Contents and displayed in the Data frame. To change the default grey colour scale, click on the colour ramp and from the dropdown list, select an appropriate colour range. Your map should look similar to below:
  • 60. 54 Tutorial 5: Plan Maps and Data Integration Note: To zoom in and out on your data frame on the View menu, select Zoom data and then select the zoom option necessary to view your data. Hiding groups on a Map Sometimes, when you have many groups on a map you may not want to display all of them on your working or final map. The procedure below shows you how to hide a group (in this case a grid file) displayed in your map. TO HIDE GROUPS ON A MAP: 1. In the Table of Contents window deselect (uncheck) the topography grid (topo.grd) and the magnetic grid (mag.grd). The topography and magnetic grids are removed from the Data frame.
  • 61. Tutorial 6: Section Maps and Data Interpretation 55 Tutorial 6: Section Maps and Data Interpretation Section maps provide cross sectional views of drillhole traces, co-ordinates, reference grids, assay values and geological units. In the Target for ArcGIS system, section maps represent an important tool that enables you to display drillhole traces to help establish subsurface drilling coverage and visualize the geology and related geochemistry beneath the surface. In this chapter, we will guide you through the following procedures: • Select drillholes for viewing (page 55) • Create drillhole section map (page 59) Selecting Holes A key requirement for the geologists and geochemists that are evaluating and presenting drillhole data is the ability to select various combinations of drillholes for optimal visualization and plotting. The Target for ArcGIS system provides a comprehensive set of options for performing this task. The basic methods of hole selections are listed below. • Selecting (or Deselecting) All Holes: Enables quick development of master plan maps or resetting of drillholes prior to making new selections. • Selecting Holes by Name (or Name Mask): Enables batch selection of multiple holes with systematic drillhole identifiers. Requires standard drillhole naming scheme for identifying related holes. For information on Name Mask parameters, click the [Help] button on the Select holes by name dialog. • Selecting Holes by List: Enables custom selection of single or multiple holes via a list of all the holes in the database. Requires pre-existing knowledge of holes. • Selecting Holes by Collar Table Data: Enables users to select holes based on values in a channel in the collar table. • Selecting Holes using Shape File: Enables users to select holes based on an area described in a polygon shape file. • Selecting Holes by Selection Tool (Area): Enables rapid visual selection of single or multiple holes by using a polygon defining tool to select holes along regular or irregular sections, on a plan map. Useful for quick evaluation of project data. In addition, the system also enables you to select data by code and ranges (using mask channels) and save and load your selections. • Select Data by Code: Enables you to create or update a mask channel based on values matched from any channel. • Select Data by Range: Enables you to set the mask channel depending on whether values in a specified channel are within a specified range.
  • 62. 56 Tutorial 6: Section Maps and Data Interpretation • Reset Mask Channel: Enables you to initialize or re-initialize the mask channel value, or to create a new mask channel. • Save and/or Load Selections: Enables you to save the current hole selections, or load previous hole selections from a selection file (*.sel). Selecting Holes using the Hole Selection Tool In this exercise, you will be selecting holes by area using the Hole Selection Tool. The Hole Selection Tool enables interactive selection of single or multiple holes using a dialog that displays a plan view of the drillhole survey area. This tool enables you to view “all holes”, “selected holes” and holes including “full traces” or “labels”. TO SELECT HOLES USING THE HOLE SELECTION TOOL: 1. On the Target Drillhole toolbar, select Selection|Selection Tool. The Hole Selection Tool dialog is displayed.
  • 63. Tutorial 6: Section Maps and Data Interpretation 57 2. Using this tool you can select “All holes”, “Selected holes” and holes that include “Full Traces” or “Hole Labels”. 3. The drill hole plan view area can be modified using the Zoom In button ( ), the Zoom Out button ( ) and the Zoom Data Extents button ( ). 4. Using the Selection Tools you can select the [Select All] or [Select None] buttons, or depending on the Selection Mode you can Select/Deselect single holes ( ), Select/Deselect using rectangle tool ( ) or Select/Deselect using polygon tool ( ). 5. For this tutorial we will select the 19 drillholes in the centre of the survey area along 124000N (AXE001, AXE003, AXE005, AXE007, AXE009, SKC238, SKC239, SKC247, SKC251, SKC254, SKC268, SKR016, SKR017, SKR018, SKR019, SKR020, SKR021, SKR022, SKR023). 6. To do this, first deselect all holes by clicking the [Select None] button. Then set the Selection Mode to (Select) and using the Select/Deselect using rectangle tool select the drillholes as shown in the image below.
  • 64. 58 Tutorial 6: Section Maps and Data Interpretation 7. When finished click the [OK] button and 19 drillholes in the centre of the survey area will be selected for plotting. Verifying Selected Drillholes There are a variety of methods available in the Target for ArcGIS system to determine the holes selected. In this exercise, we will use the Select Holes from List. TO VERIFY SELECTED DRILLHOLES: 1. On the Selection menu, select From list. The Select Holes from List tool is displayed.
  • 65. Tutorial 6: Section Maps and Data Interpretation 59 2. Using this tool you can scroll down through the list of drill holes in the Selected and Not Selected lists to verify that the correct holes have been selected. 3. Using the arrow button select or deselect additional drillholes as needed. 4. Click [OK] to exit the dialog. Creating a Drillhole Section Map In the Target for ArcGIS system, section maps represent an important tool that enables you to display drillhole traces to help establish subsurface drilling coverage and visualize the geology and related geochemistry beneath the surface. Section Plots Target for ArcGIS section plot options are provided in easy-to-use tab menus, enabling quick access to all the settings from a single dialog. The dialog include sensible defaults; enabling easy creation of drillhole sections. In this exercise, we will construct a East-West section displaying the nineteen selected drillhole traces. The drillhole section map will include the following: • Local topography profile plotted across section • Geology data displayed along traces using rock code patterns • Assay data displayed along traces in a bar chart format • Plan map window containing collar locations and magnetic data grid • Profile window containing Au assay data profile
  • 66. 60 Tutorial 6: Section Maps and Data Interpretation TO CREATE A SECTION PLOT: 1. On the Target Drillhole toolbar, click the Generate Target Section plot button ( ). The Target Section|Stacked Section Generation initial parameters dialog is displayed. 2. Select the initial plotting extents for the section plot (Use default/previous parameters) and click the [OK] button to continue. Note: If you select Define E-W (N-S or Angled) section on active data frame, you will notice that the Number of Selections box is enabled. Specify the number of section plots to create (each section will be plotted to a separate map). You will also notice that your cursor changes as you move over the Data frame (E-W { }, N-S or Angled ), using this tool, select the area of interest. 3. The Output tab of the Section Parameters dialog is displayed. Select the file output, Quick-Map, Shape File or both (but at least one must be checked). For this tutorial check both the (Quick-map Output and Shape File Output).
  • 67. Tutorial 6: Section Maps and Data Interpretation 61 4. For organizational purposes you may want to specify the Layer Name Tag and the Filename Tag the same as the "Project" name (i.e. Prospect). 5. To specify the section location parameters, select the Section Location tab.
  • 68. 62 Tutorial 6: Section Maps and Data Interpretation 6. Select Section Azimuth as (E-W) and click the [Default] button to set the Location and Orientation parameters. Note: If you select multiple sections each section will be displayed in individual maps. To plot multiple sections on a single map, see the Stacked Sections option. 7. To plot a topography profile across the section, select the Topography tab and select the Plot topography box to enable the topography parameters. 8. Using the [Browse] button, locate and select the topography grid file to use (topo.grd) to calculate the topographic profile across the section. 9. Click in the Line style box. The Line Attributes tool will be displayed.
  • 69. Tutorial 6: Section Maps and Data Interpretation 63 10. Use this tool to define the line attributes of the topographic profile. Click the [OK] button to accept the line attributes and return to the Section Parameters dialog. 11. To plot geology and assay data along the hole traces in the section, select the Data tab. Note: The Plot boxes enable/disable the Data selection dropdown list. This is a convenient way to select or de-select individual data plots, without clearing or re-selecting the data from the Data lists.
  • 70. 64 Tutorial 6: Section Maps and Data Interpretation 12. Using the Data dropdown lists, select the data channels available in the current project you want to plot (As [Assay] and Rock [Geology]). Note: The selections combine the name of the channel, along with the identifier for the project database in which the channel is found. 13. Using the Plot Type dropdown lists, select the plotting type the data previously selected. (Bar plot and Rock code patterns). Note: Plot Types displayed are based on the data type of the selected Data. “Numeric” channel selections include; Bar plot, Grid: Kriging, Grid: Min curvature, Grid: TIN-based, Numeric bands, Post values, Profile and Structural Ticks. “String or text” channel selections include; Comments, Post text, Rock code patterns, and Text bands. 14. Click the [Define] button beside the Bar plot Plot Type to define the bar plot parameters. The Bar Plot Parameters dialog is displayed.
  • 71. Tutorial 6: Section Maps and Data Interpretation 65 15. Using this dialog, you can define the plotting parameters for the As Assay bar plot. Select the Pattern fill box, and click in the box to the right. The Pattern Attributes tool will be displayed.
  • 72. 66 Tutorial 6: Section Maps and Data Interpretation 16. Use this tool to specify the fill attributes of the bar plot. We will leave the rest of the parameters to the default values. Click [OK] twice to return to the Section Parameters dialog. 17. Click the [Define] button beside the Rock code patterns Plot Type to define the rock code parameters. The Pattern Bands – Rock Codes dialog is displayed. 18. In the Plot Parameter box, select Left side (the Bar plot is being plotted on the right side) and in the Rock Code File box, using the [Browse] button locate and
  • 73. Tutorial 6: Section Maps and Data Interpretation 67 select the file (Lithology.csv). Then, leaving the remaining parameters to the default values, click the [OK] button to return to the Section Parameters dialog. 19. To specify the plan map window parameters, select the Plan View tab. 20. To enable the plotting of a Plan view window on the Section Map, select (check) the Plot plan view box and specify the Trace Style as (Collars). To plot a grid in the plan view, check the Place raster in plan view box and then using the [Browse] button locate the file (mag.grd), clicking the [Open] button to return to the Section Parameters dialog. 21. To specify the profile window parameters, select the Profiles tab.
  • 74. 68 Tutorial 6: Section Maps and Data Interpretation 22. To enable the plotting of a profile window, select the Plot grid data profiles box. Using the [Browse] button, locate and select the grid file to use (Au_surface.grd) to calculate the profile across the section. Selecting the Line Type box displays the Line Attributes dialog and clicking the [Define] button displays the Profile Options dialog.
  • 75. Tutorial 6: Section Maps and Data Interpretation 69 23. Use this dialog to specify the profile parameters and click the [OK] button to return to the Section Parameters dialog. 24. To specify the page layout of the section plot, select the Page Layout tab.
  • 76. 70 Tutorial 6: Section Maps and Data Interpretation 25. To specify the section map layout, click the [Map Layout] button. The Section Map Layout dialog is displayed. 26. This dialog enables you to specify the layout of your section map. To accept the layout and return to the Page Layout tab, click the [OK] button. 27. Click the [OK] button on the Section Parameters dialog. The section map (S12401N_Prospect) is displayed in your Table of Contents and your data frame.
  • 77. Tutorial 6: Section Maps and Data Interpretation 71 Note: There are many additional section-plotting options that enable you to include other parameters. As you become more familiar with the system, we recommend that you experiment with the other options to create a custom map of your own.
  • 78. 72 Tutorial 7: Strip Logs Tutorial 7: Strip Logs Target for ArcGIS strip log options are provided in easy-to-use tab menus, enabling quick access to all the settings from a single dialog. The dialog includes sensible defaults; enabling easy creation of strip logs. Using the strip log tab dialog you can display up to 16 data/graph type selections in each plot. Creating a Strip Log Plot In this exercise, we will construct a strip log of drillhole SKC247. The strip log will include the following data: • Weathering (Geology) - Post text • Weathering (Geology) - Rock code patterns • Rock (Geology) - Post text • Rock (Geology) - Rock code patterns • Sample (Assay) Post text • Au (Assay) Numeric bands • Au (Assay) Post values • Altered (Geology) Post text TO CREATE A STRIP LOG: 1. On the Target Drillhole toolbar, select the Generate Target Striplog plot button ( ). The Output tab of the Strip Log parameters dialog is displayed.
  • 79. Tutorial 7: Strip Logs 73 2. Specify the Frame/Layer Name Tag as (Prospect) and the remaining parameters as shown above. 3. Select the Page Layout tab to specify the Holes to plot. 4. In the Holes to plot box, select the Specified hole(s) radio button and from the hole/mask dropdown list select (SKC247). To Plot Legend check the box and type your legend text in the appropriate boxes. 5. To specify the hole trace parameters, select the Hole Trace tab.
  • 80. 74 Tutorial 7: Strip Logs 6. Specify the Depth Ticks – tick interval as 10. 7. To plot the geology and assay data along the hole traces in the strip log, select the Data tab. Note: The Plot boxes enable/disable the Data selection dropdown list. This is a convenient way to select or de-select individual data plots, without clearing or re-selecting the data from the Data lists.
  • 81. Tutorial 7: Strip Logs 75 8. Using the Data dropdown lists, select the data channels available in the current Target for ArcGIS project you want to plot (see dialog above). Note: The selections combine the name of the channel, along with the identifier for the project database in which the channel is found. 9. Using the Plot Type dropdown lists, select the plotting type for the data. Note: Plot Types displayed are based on the type of selected data. 10. To specify the legend parameters, select the Legend tab.
  • 82. 76 Tutorial 7: Strip Logs 11. To enable the plotting of a legend, check the Plot Legend box. 12. To enable the plotting of data information, check the Plot data info box and then select the data information you wish to plot in the legend. In the Size box change the Right legend width (cm) to (7). 13. Click the [OK] button on the Strip Log Parameters dialog. The strip log map (SKC247Prospect_Prospect) is displayed in your Table of Contents and your data frame.
  • 83. Tutorial 7: Strip Logs 77
  • 84. 78 Tutorial 8: Target 3D Tutorial 8: Target 3D The Target 3D tool was developed for the Target for ArcGIS system to enable you to display drillhole, surface and other data types in an interactive three-dimensional environment. Drillholes are displayed in their “true” three-dimensional location and can have up to two different data types plotted along their trace. Grids created in “sectional” views (e.g., from Target or Interactiv IP applications) can be displayed directly into the 3D view, in their correct orientation, using Geosoft’s “on-the-fly” technology. Other grids and images (including bitmaps and jpegs) can be opened and easily located in any specified orthogonal plane. 3D “Voxel grids” can also be displayed in a 3D drillhole map and modified using the Target 3D tool. 3D Voxels can be created using the Voxels|Grid Voxel (GRIDVOX GX) menu item, on the Target 3D toolbar. Using the Target 3D tool you can interactively control the transparency of the individual planes, enabling the data to be displayed with a cumulative (light-table) effect. Data such as MapInfo tables and 2D DXF files can be imported directly into the 3D environment and drawn on any surface displayed in the current 3D view. The Target 3D View|Group Manager Tool enables you to toggle on/off individual groups in the 3D view, enabling changes to the displayed data, without having to recreate 3D maps. All data in the Target for ArcGIS environment is dynamically linked; from the database through cross-section and map through to the 3D environment. Working with the Target 3D Tool You can begin creating a Target 3D view once all the appropriate project information has been imported into your drillhole database. The data files provided for the previous tutorials will be used in this tutorial. This tutorial begins with project data (collar, survey, assay, and geology) already imported into the Target system and the “Plan” map created, opened and displayed. Selecting an Area of Interest To begin, we need to select the area that we would like to concentrate on from the Hole Selection Tool. This will enable us to display only the area of the project that is of interest to us.
  • 85. Tutorial 8: Target 3D 79 TO SELECT TARGET 3D DRILL AREA: 1. On the Target Drillhole toolbar, select Selection|Selection Tool. The Hole Selection Tool dialog is displayed. 2. Use the Hole Selection Tool to define a polygon around the holes in the centre bottom portion of the drill area to select for plotting, as shown above. If additional holes need to be added or removed there are a number of methods for doing so using this tool, for more information click the [Help] button. 3. Click [OK] button and the holes within the defined boundary are selected for plotting. Create a 3D Voxel Grid Users now have the ability to create a 3D Voxel grid, using the 3D Kriging gridding method, and display the Voxel grid in a 3D Target section map. In addition to creating and displaying 3D Voxel Models, additional tools are available enabling users to report and modify information about Geosoft Voxel Models,