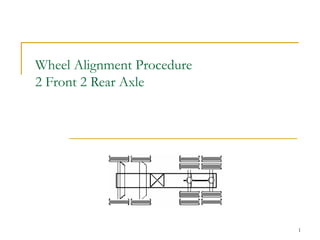
SlideShare a Scribd company logo
1 of 29
1
Wheel Alignment Procedure
2 Front 2 Rear Axle
2
Prepare the vehicle for Wheel Alignment
Setup the vehicle for wheel alignment as per below:
 Park the vehicle in the alignment bay and apply parking brakes
 Choke the wheels
 Check and set the air pressure of all the wheels as per manufacturer’s
specifications.
 Check the play in rear suspension
 Check for play in track rods
 Check for correctness of spring leafs
 Check the play in Kingpin
 Inspect Ball joints for any play
 Inspect bent / damages steering arm
 Report / suggest if any repairs are required
3
WinAlign Program will automatically start once the machine is switched on. The
initial WinAlign Screen will look like the one shown below
 Click on Begin Alignment from the above screen
4
Different Vehicle Configurations will be displayed as shown below. Select the
appropriate vehicle from the below list and proceed.
Select Truck/Tractor: 2 Front, 2 Rear Last Rear Reference and Click OK
5
Work Management Screen will be displayed as shown below. Enter the necessary
Customer information.
 Enter the Customer Information and Click OK
Before After
6
Once you click Ok Vehicle Specification list will be displayed. Select an
appropriate vehicle from this list
 Select the appropriate vehicle and Click OK
7
Optional Vehicle Systems will be displayed. Select the Optional Vehicle System.
 Click OK
8
The Vehicle Specifications for Front Axle 1 will be displayed. Measure and Enter
the Reference Diameter from the vehicle. Reference Diameter is diameter of the
WHEEL (Do Not Enter Rim Diameter)
 Click on Show Next Axle to get the Specifications for Front Axle 2
9
Enter the Total Toe specifications for Front Axle 2
 Click on Mount Sensors
10
Mount the sensors as shown in the below image and Compensate the Sensors
 Click on Continue once the sensors are compensated
11
The readings for Rear Axle 2 will be displayed
 Click on Save Before Measurements
12
Steer Ahead as directed by the program
 Click Ready once the bar graph turns green
13
Thrust Angle Adjustment screen will be displayed as shown below. Follow the
Manufacturers Instructions and Adjust Thrust Angle.
 Click OK once the Thrust Angle Bar Graph Turns Green
14
 Click on Save Before Measurements
15
The readings for Front Axle 1 will be displayed as shown below.
 Click on Measure Caster
16
Complete the Caster measurement by steering left, right and then Steer Ahead
17
Front Axle 1 measurements will be displayed after Caster Measurement as shown
below
 Click on Show Bar Graphs from the above screen
18
Adjust Front Axle 1 Total Toe while ensuring Steer Ahead is 0.
 Click on Steer Ahead from the above screen
19
Steer Ahead to 0 as directe
 Press Ready
20
Shift the sensors from Rear Axle 2 Front Axle 2 as shown in the below picture
and compensate
 Click on Continue once the sensors are compensated
21
Re-steer as directed
 Press Ready
22
The Readings for Front Axle 2 are displayed as shown below.
 Adjust the Total Toe for Front Axle 2
 Adjust the Steer Ahead (Parallelism) for Front Axle 2 as per Manufacturers
Guidelines.
 Click Adjust Parallelism
23
Parallelism reading for Front axle 2 will be displayed as shown below. If the
Parallelism reading is not within the specification, adjust as per manufacturers
guidelines
 Click Ok
24
Ensure Total Toe and Steer Ahead for Front Axle 2 is within specification
 Click on Mount Sensors to proceed further
25
Shift the sensors from Front Axle 1 to Rear Axle 1 and Front Axle 2 to Rear
Axle 2 as shown below and compensate the sensors
 Click Continue once the sensors are compensated
26
The Readings for Rear Axle 1 will be displayed as shown below
 Click on Save Before Measurements
27
Scrub Angle Adjustment screen will be displayed as shown below. Follow the
Manufacturers Instructions and Adjust Scrub Angle.
 Click Ok once Scrub Angle is within Specification
28
 Click on Print to print an alignment report
29
Select Print Summary from the list and Click on Print to print alignment results

More Related Content

What's hot

Suspension Lecture
Suspension  LectureSuspension  Lecture
Suspension Lectureguest252b17
 
Timing belt and pulley performance
Timing belt and pulley performanceTiming belt and pulley performance
Timing belt and pulley performanceBilawal Ahmed
 
3 automotive chassis-design-v2
3 automotive chassis-design-v23 automotive chassis-design-v2
3 automotive chassis-design-v2Anoop Sasidharan
 
FORCE CALCULATION IN UPRIGHT OF A FSAE RACE CAR
FORCE CALCULATION IN UPRIGHT OF A FSAE RACE CARFORCE CALCULATION IN UPRIGHT OF A FSAE RACE CAR
FORCE CALCULATION IN UPRIGHT OF A FSAE RACE CARIAEME Publication
 
Baja sae india suspension design
Baja sae india suspension designBaja sae india suspension design
Baja sae india suspension designUpender Rawat
 
Automotive Body Repair
Automotive Body RepairAutomotive Body Repair
Automotive Body Repaircarlsandburg
 
Wheels and tyres for automobile
Wheels and tyres for automobileWheels and tyres for automobile
Wheels and tyres for automobilesgrsoni45
 
Indian Commercial Vehicle Industry
Indian Commercial Vehicle IndustryIndian Commercial Vehicle Industry
Indian Commercial Vehicle IndustryIFMR
 
Future trends in automobile engineering
Future trends in automobile engineeringFuture trends in automobile engineering
Future trends in automobile engineeringUmama S
 
Vehicle Design construction
Vehicle Design constructionVehicle Design construction
Vehicle Design constructionRajat Seth
 
Vdhs 5-6 steady state handling-rollover
Vdhs 5-6 steady state handling-rolloverVdhs 5-6 steady state handling-rollover
Vdhs 5-6 steady state handling-rolloverDharmendra Jain
 
Design of half shaft and wheel hub assembly for racing car
Design of half shaft and wheel hub assembly for racing carDesign of half shaft and wheel hub assembly for racing car
Design of half shaft and wheel hub assembly for racing carRavi Shekhar
 
Suspension system in automotive engineering
Suspension system in automotive engineeringSuspension system in automotive engineering
Suspension system in automotive engineeringRAHMATULLAH MERCY FEAT
 

What's hot (20)

Suspension Lecture
Suspension  LectureSuspension  Lecture
Suspension Lecture
 
BAJA Transmission
BAJA TransmissionBAJA Transmission
BAJA Transmission
 
Antilock braking system (ABS)
Antilock braking system (ABS)Antilock braking system (ABS)
Antilock braking system (ABS)
 
Timing belt and pulley performance
Timing belt and pulley performanceTiming belt and pulley performance
Timing belt and pulley performance
 
3 automotive chassis-design-v2
3 automotive chassis-design-v23 automotive chassis-design-v2
3 automotive chassis-design-v2
 
FORCE CALCULATION IN UPRIGHT OF A FSAE RACE CAR
FORCE CALCULATION IN UPRIGHT OF A FSAE RACE CARFORCE CALCULATION IN UPRIGHT OF A FSAE RACE CAR
FORCE CALCULATION IN UPRIGHT OF A FSAE RACE CAR
 
Baja sae india suspension design
Baja sae india suspension designBaja sae india suspension design
Baja sae india suspension design
 
Automotive Body Repair
Automotive Body RepairAutomotive Body Repair
Automotive Body Repair
 
Wheels and tyres for automobile
Wheels and tyres for automobileWheels and tyres for automobile
Wheels and tyres for automobile
 
Wheel Balancing
Wheel BalancingWheel Balancing
Wheel Balancing
 
Indian Commercial Vehicle Industry
Indian Commercial Vehicle IndustryIndian Commercial Vehicle Industry
Indian Commercial Vehicle Industry
 
Steering System
Steering SystemSteering System
Steering System
 
Future trends in automobile engineering
Future trends in automobile engineeringFuture trends in automobile engineering
Future trends in automobile engineering
 
Vehicle Design construction
Vehicle Design constructionVehicle Design construction
Vehicle Design construction
 
Vdhs 5-6 steady state handling-rollover
Vdhs 5-6 steady state handling-rolloverVdhs 5-6 steady state handling-rollover
Vdhs 5-6 steady state handling-rollover
 
A.e. unit 1 introduction & vehicle layout
A.e. unit 1 introduction & vehicle layoutA.e. unit 1 introduction & vehicle layout
A.e. unit 1 introduction & vehicle layout
 
Types of Belt Drives
Types of Belt DrivesTypes of Belt Drives
Types of Belt Drives
 
Alignment for car
Alignment for carAlignment for car
Alignment for car
 
Design of half shaft and wheel hub assembly for racing car
Design of half shaft and wheel hub assembly for racing carDesign of half shaft and wheel hub assembly for racing car
Design of half shaft and wheel hub assembly for racing car
 
Suspension system in automotive engineering
Suspension system in automotive engineeringSuspension system in automotive engineering
Suspension system in automotive engineering
 

Viewers also liked

Standar Operasional Prosedur Laboratorium/Bengkel/Workshop Teknik Elektro Pol...
Standar Operasional Prosedur Laboratorium/Bengkel/Workshop Teknik Elektro Pol...Standar Operasional Prosedur Laboratorium/Bengkel/Workshop Teknik Elektro Pol...
Standar Operasional Prosedur Laboratorium/Bengkel/Workshop Teknik Elektro Pol...Aris Suryadi
 
Lumus Lastrapes Jr Resume
Lumus Lastrapes Jr ResumeLumus Lastrapes Jr Resume
Lumus Lastrapes Jr ResumeLumus Lastrapes
 
NAVEEN SUKUMAR PAKIRLA Resume1
NAVEEN SUKUMAR PAKIRLA Resume1NAVEEN SUKUMAR PAKIRLA Resume1
NAVEEN SUKUMAR PAKIRLA Resume1Naveen Sukumar
 
Melissa Peverett formal CV fully updated 21.07.2015-word
Melissa Peverett formal CV fully updated 21.07.2015-wordMelissa Peverett formal CV fully updated 21.07.2015-word
Melissa Peverett formal CV fully updated 21.07.2015-wordMelissa Peverett
 
#wpbar 26/3 - Kom igång med bedrock-ansible
#wpbar 26/3 - Kom igång med bedrock-ansible#wpbar 26/3 - Kom igång med bedrock-ansible
#wpbar 26/3 - Kom igång med bedrock-ansibleOlaf Lindström
 
Cleaning Services Dubai
Cleaning Services DubaiCleaning Services Dubai
Cleaning Services Dubaihomemaids
 
Kitchen Cleaning Service Dubai
Kitchen Cleaning Service DubaiKitchen Cleaning Service Dubai
Kitchen Cleaning Service Dubaihomemaids
 

Viewers also liked (17)

Standar Operasional Prosedur Laboratorium/Bengkel/Workshop Teknik Elektro Pol...
Standar Operasional Prosedur Laboratorium/Bengkel/Workshop Teknik Elektro Pol...Standar Operasional Prosedur Laboratorium/Bengkel/Workshop Teknik Elektro Pol...
Standar Operasional Prosedur Laboratorium/Bengkel/Workshop Teknik Elektro Pol...
 
Lumus Lastrapes Jr Resume
Lumus Lastrapes Jr ResumeLumus Lastrapes Jr Resume
Lumus Lastrapes Jr Resume
 
Texas Private-Public Partnership Model - Clement
Texas Private-Public Partnership Model - ClementTexas Private-Public Partnership Model - Clement
Texas Private-Public Partnership Model - Clement
 
Ablog
AblogAblog
Ablog
 
Cv
CvCv
Cv
 
NAVEEN SUKUMAR PAKIRLA Resume1
NAVEEN SUKUMAR PAKIRLA Resume1NAVEEN SUKUMAR PAKIRLA Resume1
NAVEEN SUKUMAR PAKIRLA Resume1
 
Fontana di trevi
Fontana di treviFontana di trevi
Fontana di trevi
 
Project Report
Project ReportProject Report
Project Report
 
Melissa Peverett formal CV fully updated 21.07.2015-word
Melissa Peverett formal CV fully updated 21.07.2015-wordMelissa Peverett formal CV fully updated 21.07.2015-word
Melissa Peverett formal CV fully updated 21.07.2015-word
 
#wpbar 26/3 - Kom igång med bedrock-ansible
#wpbar 26/3 - Kom igång med bedrock-ansible#wpbar 26/3 - Kom igång med bedrock-ansible
#wpbar 26/3 - Kom igång med bedrock-ansible
 
Cleaning Services Dubai
Cleaning Services DubaiCleaning Services Dubai
Cleaning Services Dubai
 
Feasibility Study
Feasibility StudyFeasibility Study
Feasibility Study
 
Kitchen Cleaning Service Dubai
Kitchen Cleaning Service DubaiKitchen Cleaning Service Dubai
Kitchen Cleaning Service Dubai
 
Vetha manthra
Vetha manthraVetha manthra
Vetha manthra
 
O que um bom líder deve ter?
O que um bom líder deve ter?O que um bom líder deve ter?
O que um bom líder deve ter?
 
imam sharani
imam sharaniimam sharani
imam sharani
 
NaeemCV
NaeemCVNaeemCV
NaeemCV
 

Similar to Wheel Alignment Procedure Guide

Phoenix PWB1530A Auto Entry (Distance and Diameter) Wheel Balancer Manual
Phoenix PWB1530A Auto Entry (Distance and Diameter) Wheel Balancer ManualPhoenix PWB1530A Auto Entry (Distance and Diameter) Wheel Balancer Manual
Phoenix PWB1530A Auto Entry (Distance and Diameter) Wheel Balancer ManualClark Heintz
 
Panoura 18S with Ceph Calibration and Alignment Quick Guide
Panoura 18S with Ceph Calibration and Alignment Quick GuidePanoura 18S with Ceph Calibration and Alignment Quick Guide
Panoura 18S with Ceph Calibration and Alignment Quick GuideDon Vibbert
 
Panoura 18S Pan-Only Calibration and Alignment Quick Guide
Panoura 18S Pan-Only Calibration and Alignment Quick GuidePanoura 18S Pan-Only Calibration and Alignment Quick Guide
Panoura 18S Pan-Only Calibration and Alignment Quick GuideDon Vibbert
 
User manual sw lcd-king-meter technology co.,ltd
User manual sw lcd-king-meter technology co.,ltdUser manual sw lcd-king-meter technology co.,ltd
User manual sw lcd-king-meter technology co.,ltdCory KingMeter
 
User Manual_SW-LCD-U_King-Meter Technology Co.,Ltd
User Manual_SW-LCD-U_King-Meter Technology Co.,LtdUser Manual_SW-LCD-U_King-Meter Technology Co.,Ltd
User Manual_SW-LCD-U_King-Meter Technology Co.,LtdCory KingMeter
 
pulsar_ns200-200-as_users-guide.pdf
pulsar_ns200-200-as_users-guide.pdfpulsar_ns200-200-as_users-guide.pdf
pulsar_ns200-200-as_users-guide.pdfAfriandriWahyudi
 
2000 JEEP CHEROKEE Service Repair Manual
2000 JEEP CHEROKEE Service Repair Manual2000 JEEP CHEROKEE Service Repair Manual
2000 JEEP CHEROKEE Service Repair Manualhjdkmsmeme
 
Jcb 8027 z mini excavator service repair manual sn898000 onwards
Jcb 8027 z mini excavator service repair manual sn898000 onwardsJcb 8027 z mini excavator service repair manual sn898000 onwards
Jcb 8027 z mini excavator service repair manual sn898000 onwardsfjjskedmmemm
 
2006 nissan-frontier
2006 nissan-frontier2006 nissan-frontier
2006 nissan-frontierGene Bagg
 
Jcb 8027 z mini excavator service repair manual sn898000 onwards
Jcb 8027 z mini excavator service repair manual sn898000 onwardsJcb 8027 z mini excavator service repair manual sn898000 onwards
Jcb 8027 z mini excavator service repair manual sn898000 onwardsjkmsedopl
 
JCB 8032Z MINI EXCAVATOR Service Repair Manual SN899000 Onwards
JCB 8032Z MINI EXCAVATOR Service Repair Manual SN899000 OnwardsJCB 8032Z MINI EXCAVATOR Service Repair Manual SN899000 Onwards
JCB 8032Z MINI EXCAVATOR Service Repair Manual SN899000 Onwardsjknjekmds
 
Jcb 8032 z mini excavator service repair manual sn899000 onwards
Jcb 8032 z mini excavator service repair manual sn899000 onwardsJcb 8032 z mini excavator service repair manual sn899000 onwards
Jcb 8032 z mini excavator service repair manual sn899000 onwardsjkmsedopl
 
ATEQ Quickset TPMS Reset Relearn Tool User Manual
ATEQ Quickset TPMS Reset Relearn Tool User ManualATEQ Quickset TPMS Reset Relearn Tool User Manual
ATEQ Quickset TPMS Reset Relearn Tool User ManualTim Miller
 
OBDii365-Guide for VW special function operation
OBDii365-Guide for VW special function operationOBDii365-Guide for VW special function operation
OBDii365-Guide for VW special function operationOBD365
 
Guide for vw_special_function operation
Guide for vw_special_function operationGuide for vw_special_function operation
Guide for vw_special_function operationbuyobdii
 
WI-134-1A Mitutoyo
WI-134-1A MitutoyoWI-134-1A Mitutoyo
WI-134-1A MitutoyoPaul Rouse
 
Chery orinoco m11-service manual
Chery orinoco m11-service manualChery orinoco m11-service manual
Chery orinoco m11-service manualtallerdomingo
 
iOBD2 m fi bt bmw Diagnostic tool user manual
iOBD2 m fi bt bmw Diagnostic tool user manualiOBD2 m fi bt bmw Diagnostic tool user manual
iOBD2 m fi bt bmw Diagnostic tool user manualPat Maike
 
1995 JEEP CHEROKEE, JEEP WRANGLE Service Repair Manual
1995 JEEP CHEROKEE, JEEP WRANGLE Service Repair Manual1995 JEEP CHEROKEE, JEEP WRANGLE Service Repair Manual
1995 JEEP CHEROKEE, JEEP WRANGLE Service Repair Manualjksmemmd
 

Similar to Wheel Alignment Procedure Guide (20)

Phoenix PWB1530A Auto Entry (Distance and Diameter) Wheel Balancer Manual
Phoenix PWB1530A Auto Entry (Distance and Diameter) Wheel Balancer ManualPhoenix PWB1530A Auto Entry (Distance and Diameter) Wheel Balancer Manual
Phoenix PWB1530A Auto Entry (Distance and Diameter) Wheel Balancer Manual
 
Panoura 18S with Ceph Calibration and Alignment Quick Guide
Panoura 18S with Ceph Calibration and Alignment Quick GuidePanoura 18S with Ceph Calibration and Alignment Quick Guide
Panoura 18S with Ceph Calibration and Alignment Quick Guide
 
Panoura 18S Pan-Only Calibration and Alignment Quick Guide
Panoura 18S Pan-Only Calibration and Alignment Quick GuidePanoura 18S Pan-Only Calibration and Alignment Quick Guide
Panoura 18S Pan-Only Calibration and Alignment Quick Guide
 
Teleflex manual
Teleflex manualTeleflex manual
Teleflex manual
 
User manual sw lcd-king-meter technology co.,ltd
User manual sw lcd-king-meter technology co.,ltdUser manual sw lcd-king-meter technology co.,ltd
User manual sw lcd-king-meter technology co.,ltd
 
User Manual_SW-LCD-U_King-Meter Technology Co.,Ltd
User Manual_SW-LCD-U_King-Meter Technology Co.,LtdUser Manual_SW-LCD-U_King-Meter Technology Co.,Ltd
User Manual_SW-LCD-U_King-Meter Technology Co.,Ltd
 
pulsar_ns200-200-as_users-guide.pdf
pulsar_ns200-200-as_users-guide.pdfpulsar_ns200-200-as_users-guide.pdf
pulsar_ns200-200-as_users-guide.pdf
 
2000 JEEP CHEROKEE Service Repair Manual
2000 JEEP CHEROKEE Service Repair Manual2000 JEEP CHEROKEE Service Repair Manual
2000 JEEP CHEROKEE Service Repair Manual
 
Jcb 8027 z mini excavator service repair manual sn898000 onwards
Jcb 8027 z mini excavator service repair manual sn898000 onwardsJcb 8027 z mini excavator service repair manual sn898000 onwards
Jcb 8027 z mini excavator service repair manual sn898000 onwards
 
2006 nissan-frontier
2006 nissan-frontier2006 nissan-frontier
2006 nissan-frontier
 
Jcb 8027 z mini excavator service repair manual sn898000 onwards
Jcb 8027 z mini excavator service repair manual sn898000 onwardsJcb 8027 z mini excavator service repair manual sn898000 onwards
Jcb 8027 z mini excavator service repair manual sn898000 onwards
 
JCB 8032Z MINI EXCAVATOR Service Repair Manual SN899000 Onwards
JCB 8032Z MINI EXCAVATOR Service Repair Manual SN899000 OnwardsJCB 8032Z MINI EXCAVATOR Service Repair Manual SN899000 Onwards
JCB 8032Z MINI EXCAVATOR Service Repair Manual SN899000 Onwards
 
Jcb 8032 z mini excavator service repair manual sn899000 onwards
Jcb 8032 z mini excavator service repair manual sn899000 onwardsJcb 8032 z mini excavator service repair manual sn899000 onwards
Jcb 8032 z mini excavator service repair manual sn899000 onwards
 
ATEQ Quickset TPMS Reset Relearn Tool User Manual
ATEQ Quickset TPMS Reset Relearn Tool User ManualATEQ Quickset TPMS Reset Relearn Tool User Manual
ATEQ Quickset TPMS Reset Relearn Tool User Manual
 
OBDii365-Guide for VW special function operation
OBDii365-Guide for VW special function operationOBDii365-Guide for VW special function operation
OBDii365-Guide for VW special function operation
 
Guide for vw_special_function operation
Guide for vw_special_function operationGuide for vw_special_function operation
Guide for vw_special_function operation
 
WI-134-1A Mitutoyo
WI-134-1A MitutoyoWI-134-1A Mitutoyo
WI-134-1A Mitutoyo
 
Chery orinoco m11-service manual
Chery orinoco m11-service manualChery orinoco m11-service manual
Chery orinoco m11-service manual
 
iOBD2 m fi bt bmw Diagnostic tool user manual
iOBD2 m fi bt bmw Diagnostic tool user manualiOBD2 m fi bt bmw Diagnostic tool user manual
iOBD2 m fi bt bmw Diagnostic tool user manual
 
1995 JEEP CHEROKEE, JEEP WRANGLE Service Repair Manual
1995 JEEP CHEROKEE, JEEP WRANGLE Service Repair Manual1995 JEEP CHEROKEE, JEEP WRANGLE Service Repair Manual
1995 JEEP CHEROKEE, JEEP WRANGLE Service Repair Manual
 

Wheel Alignment Procedure Guide

  • 1. 1 Wheel Alignment Procedure 2 Front 2 Rear Axle
  • 2. 2 Prepare the vehicle for Wheel Alignment Setup the vehicle for wheel alignment as per below:  Park the vehicle in the alignment bay and apply parking brakes  Choke the wheels  Check and set the air pressure of all the wheels as per manufacturer’s specifications.  Check the play in rear suspension  Check for play in track rods  Check for correctness of spring leafs  Check the play in Kingpin  Inspect Ball joints for any play  Inspect bent / damages steering arm  Report / suggest if any repairs are required
  • 3. 3 WinAlign Program will automatically start once the machine is switched on. The initial WinAlign Screen will look like the one shown below  Click on Begin Alignment from the above screen
  • 4. 4 Different Vehicle Configurations will be displayed as shown below. Select the appropriate vehicle from the below list and proceed. Select Truck/Tractor: 2 Front, 2 Rear Last Rear Reference and Click OK
  • 5. 5 Work Management Screen will be displayed as shown below. Enter the necessary Customer information.  Enter the Customer Information and Click OK Before After
  • 6. 6 Once you click Ok Vehicle Specification list will be displayed. Select an appropriate vehicle from this list  Select the appropriate vehicle and Click OK
  • 7. 7 Optional Vehicle Systems will be displayed. Select the Optional Vehicle System.  Click OK
  • 8. 8 The Vehicle Specifications for Front Axle 1 will be displayed. Measure and Enter the Reference Diameter from the vehicle. Reference Diameter is diameter of the WHEEL (Do Not Enter Rim Diameter)  Click on Show Next Axle to get the Specifications for Front Axle 2
  • 9. 9 Enter the Total Toe specifications for Front Axle 2  Click on Mount Sensors
  • 10. 10 Mount the sensors as shown in the below image and Compensate the Sensors  Click on Continue once the sensors are compensated
  • 11. 11 The readings for Rear Axle 2 will be displayed  Click on Save Before Measurements
  • 12. 12 Steer Ahead as directed by the program  Click Ready once the bar graph turns green
  • 13. 13 Thrust Angle Adjustment screen will be displayed as shown below. Follow the Manufacturers Instructions and Adjust Thrust Angle.  Click OK once the Thrust Angle Bar Graph Turns Green
  • 14. 14  Click on Save Before Measurements
  • 15. 15 The readings for Front Axle 1 will be displayed as shown below.  Click on Measure Caster
  • 16. 16 Complete the Caster measurement by steering left, right and then Steer Ahead
  • 17. 17 Front Axle 1 measurements will be displayed after Caster Measurement as shown below  Click on Show Bar Graphs from the above screen
  • 18. 18 Adjust Front Axle 1 Total Toe while ensuring Steer Ahead is 0.  Click on Steer Ahead from the above screen
  • 19. 19 Steer Ahead to 0 as directe  Press Ready
  • 20. 20 Shift the sensors from Rear Axle 2 Front Axle 2 as shown in the below picture and compensate  Click on Continue once the sensors are compensated
  • 22. 22 The Readings for Front Axle 2 are displayed as shown below.  Adjust the Total Toe for Front Axle 2  Adjust the Steer Ahead (Parallelism) for Front Axle 2 as per Manufacturers Guidelines.  Click Adjust Parallelism
  • 23. 23 Parallelism reading for Front axle 2 will be displayed as shown below. If the Parallelism reading is not within the specification, adjust as per manufacturers guidelines  Click Ok
  • 24. 24 Ensure Total Toe and Steer Ahead for Front Axle 2 is within specification  Click on Mount Sensors to proceed further
  • 25. 25 Shift the sensors from Front Axle 1 to Rear Axle 1 and Front Axle 2 to Rear Axle 2 as shown below and compensate the sensors  Click Continue once the sensors are compensated
  • 26. 26 The Readings for Rear Axle 1 will be displayed as shown below  Click on Save Before Measurements
  • 27. 27 Scrub Angle Adjustment screen will be displayed as shown below. Follow the Manufacturers Instructions and Adjust Scrub Angle.  Click Ok once Scrub Angle is within Specification
  • 28. 28  Click on Print to print an alignment report
  • 29. 29 Select Print Summary from the list and Click on Print to print alignment results