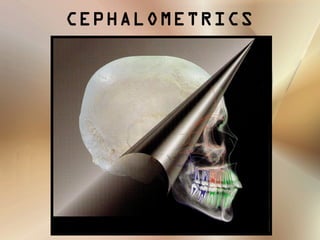
Cephalometrics
•
41 likes•3,345 views

The Indian Dental Academy is the Leader in continuing dental education , training dentists in all aspects of dentistry and offering a wide range of dental certified courses in different formats.for more details please visit www.indiandentalacademy.com

Recommended
More Related Content
What's hot
What's hot (20)
Viewers also liked
Viewers also liked (20)
Similar to Cephalometrics
Similar to Cephalometrics (20)
More from Indian dental academy
More from Indian dental academy (20)
Recently uploaded
Recently uploaded (20)
Cephalometrics
- 2. CONTENTS • HISTORY • TECHNICAL ASPECTS • TRACING TECHNIQUE • CEPHALOMETRIC LANDMARKS • CEPHALOMETRIC ANALYSIS • APPLICATION OF CEPHALOMETRICS www.indiandentalacademy.com
- 3. • ERRORS OF CEPHALOMETRIC MEASUREMENTS • METHODS OF CONTROLLING ERRORS • STANDARDIZATION OF IMAGE GEOMETRY • LIMITATIONS OF CEPHALOMETRICS • DIGITAL CEPHALOMETRY • CONCLUSION www.indiandentalacademy.com
- 4. HISTORY History prior to the advent of radiography begins with the attempts of the scientists to classify the human physiques. Basically it stems from the history of Anthropometry. Human forms have been measured for many reasons 1.To aid self portrayal in - sculpture - drawing - painting 2. To test the relation of physique to health, temperament and behavioral traits. Radiographic cephalometry- Alexander Jacobson www.indiandentalacademy.com
- 8. History of Cephalometric Radiography • In 1895, Prof. Wilhelm Conrad Roentgen made a remarkable contribution to science with the discovery of x-rays. • On December 28, 1895 he submitted a paper “On A New Kind of Rays, A Preliminary Communication” to the Wurzburg Physical Medical Society. www.indiandentalacademy.com
- 9. • Prof. Wilhem Koening & Dr. Otto Walkhoff simultaneously made the first dental radiograph in 1896. • Van Loon; - First to introduce Cephalometrics to orthodontics. - He applied anthropometric procedures in analyzing facial growth by making plaster casts of face in to which he inserted oriented casts of the dentition. www.indiandentalacademy.com
- 11. • Hellman in 1920s used cephalometric techniques and described their value. • The first x- ray pictures of skull in the standard lateral view were taken by A.J.Pacini & Carrera in 1922. • Pacini received a research award from the American Roentgen Ray Society for a thesis entitled “Roentgen Ray Anthropometry of the Skull”. www.indiandentalacademy.com
- 12. • Pacini; Introduced a teleroentgenographic technique for standardized lateral head radiography which proved to be of tremendous use in cephalometry, as well as in measuring growth and dev of face. • Atkinson in 1922 advocated the use of roentgenograms in locating the ‘key ridge’ and the soft tissue relations to the face and the jaws. www.indiandentalacademy.com
- 13. • In 1923 Mc Cowen used profile roentgenograms for orthodontic purposes to visualize the relationship between the hard and soft tissues and to note changes in profile which occur during treatment. • In 1931 cephalometric radiography came to full function when B. Holly Broadbent in USA published methods to obtain standardized head radiographs in the Angle Orthodontist (A new X ray tech & its application to orthodontia). www.indiandentalacademy.com
- 14. • H. Hofrath simultaneously published the same in Fortschritte der Orthodontie in Germany. • The interesting fact is that Broadbent was an Orthodontist, whereas Hofrath was a Prosthodontist. • This development enabled orthodontists to capture the field of cephalometry from the anatomists and anthropologists. www.indiandentalacademy.com
- 15. Broadbent’s contribution 1. Broadbent’s interest in craniofacial growth began with his orthodontic education under E.H. Angle in 1920. 2. He continued to pursue that interest along with his orthodontic practice, working with a leading anatomist J.Wingate Todd 3. During 1920’s he refined the craniostat in to craniometer. 4. That proved to be the first step in the evolution of craniostat in to a radiographic cephalostat. www.indiandentalacademy.com
- 16. • The diagnosing dental deformities by means of planes & angles was first proposed in 1922 by Paul Simon in his book, “Fundamental Principles of a Systematic Diagnosis of Dental Anomalies”. • Although his “Law of the Canines” was later disproved by Broadbent, his theories stimulated Broadbent to apply the principles of craniometry to living subjects. www.indiandentalacademy.com
- 17. • Hofrath’s technique differed from Broadbent’s in that the path of the central ray was not fixed in relation to the head. • In 1937, using serial records of twins; Broadbent showed how growth – or its lack – was the greatest limiting factor in clinical success. • In 1943 he stipulated that eruption of the third molars had no ill effect on the denture, particularly the lower incisors. www.indiandentalacademy.com
- 18. • Brodie, in a landmark study, corroborated Broadbent’s contention that the growth pattern of the normal child’s face develops in an orderly downward and forward fashion and that the pattern, once attained at an early age, did not change. www.indiandentalacademy.com
- 19. Thompson and Brodie in a report on the rest position of the mandible, concluded that: • The morphogenetic pattern of the head was established at a very early age and did not change. • The presence or absence of teeth has little bearing on the form or the rest position of the mandible. • Vertical facial proportions are constant throughout life. www.indiandentalacademy.com
- 20. • Margolis (1943) wrote on the relationship between the inclination of the lower incisor and the incisor- mandibular plane angle. • In 1947 Margolis contributed his maxillo-facial triangle. www.indiandentalacademy.com
- 22. The basic components of the equipment for producing the lateral cephalogram are: 1. An X-ray apparatus 2. An image receptor system 3. A cephalostat Oral Radiology, Principles and interpretation- White and Pharoah (5th edition) www.indiandentalacademy.com
- 23. THE X- RAY APPARATUS The three basic elements that generate that X-ray are: A. Cathode B. Anode C. The electrical power supply. Oral Radiology, Principles and interpretation- White and Pharoah (5th edition) www.indiandentalacademy.com
- 24. CATHODE • Tungsten filament surrounded by a molybednum focusing cup. • Connected to a low voltage & high voltage circuit. • A step down transformer supplies the low voltage circuit with 10V and a high current to heat the filament un till the electrons are emitted. Oral Radiology, Principles and interpretation- White and Pharoah (5th edition) www.indiandentalacademy.com
- 25. STEP UP TRANSFORMERSTEP UP TRANSFORMER • Supplies the high voltage circuit with 65-90kV. • Differential potential accelerates the electrons. • The electron beam is directed by the focusing cup to strike a small target in the anode called focal spot. Oral Radiology, Principles and interpretation- White and Pharoah (5th edition) www.indiandentalacademy.com
- 26. ANODE • Small tungsten block embedded in the copper stem, which stops the accelerated electrons whose kinetic energy causes the production of photons. • Less then 1% is converted to photons, rest is converted to heat. • Although tungsten is a high molecular substance, its thermal resistance is unable to withstand the heat. Oral Radiology, Principles and interpretation- White and Pharoah (5th edition) www.indiandentalacademy.com
- 27. THE IMAGE RECEPTOR SYSTEM It records the final product of X-Rays after they pass through the subject. The extraoral projection like the lateral cephalometric technique, requires a complex image receptor system that consists of : 1. Extraoral film 2. Intensifying screen 3. A cassette 4. A grid & a soft tissue shield www.indiandentalacademy.com
- 28. THE CEPHALOSTAT Ear rod forehead clamp 1.Ear rod 2.Forehead clamp 3.Infra orbital pointer 4.Cassette holder Cassette holder Radiographic cephalometry- Alexander Jacobson www.indiandentalacademy.com
- 29. X-Ray Source position • It is positioned 5 feet(152.4cm) from the subject’s midsagittal plane. Film position To minimize variations in magnification from patient to patient& to obtain consistent measurements on the patient over time, a distance of 15cm is often used. Radiographic cephalometry- Alexander Jacobson www.indiandentalacademy.com
- 30. 15"15"60"60" Source PlaneSource Plane X-ray SourceX-ray Source Patient in Head Positioning Device Patient in Head Positioning Device Mid-Sagittal PlaneMid-Sagittal Plane Film PlaneFilm Plane X-ray Film in Cassette X-ray Film in Cassette 152.4 cms www.indiandentalacademy.com
- 31. PATIENT POSITIONING; • It is based on the same principles that described by the Broadbent. • The patients head is fixed by the two ear rods. • The head which is centered in the cephalostat, is oriented with the Frankfurt plane parallel to the floor & the midsagittal plane vertical & parallel to the cassette. Ear rod LATERAL CEPHALOGRAM Radiographic cephalometry- Alexander Jacobson www.indiandentalacademy.com
- 32. • The standardized Frankfurt plane is achieved by placing the infraorbital pointer at the patients orbit and then adjusting the head vertically until the infraorbital pointer & the two ear rods are at the same levels. • The upper part of the face is supported by the forehead clamp, positioned at the nasion. Ear rod forehead clamp cassette Radiographic cephalometry- Alexander Jacobson www.indiandentalacademy.com
- 33. • Identical to that of lateral ceph except that the Patient is facing the film. • Patient mid saggital plane is perpendicular to the film plane. • FH plane is horizontal. • Canthomeatal line directed upward by 100 . PATIENT POSITIONING; PA CEPHALOMETRIC RADIOGRAPH Radiographic cephalometry- Alexander Jacobson www.indiandentalacademy.com
- 34. Shortcomings of the Frankfurt horizontal plane • Some individuals show a variation of their FH plane to the true horizontal to an extent of 10°. • The landmarks to locate the FH plane on a cephalogram, orbitale & porion, are difficult to locate accurately on the radiographs. Am J Phys. Anthropol. 16: 1956 www.indiandentalacademy.com
- 35. • An alternative to overcome this was to use a functionally derived NHP.According to Morrees & Kean. • It was obtained by the patient standing up & looking directly into the reflection of his/her eyes in a mirror directly ahead in the middle of the cephalostat. • To record the NHP,the ear rods are not used for locking the patient head into a fixed position but serve to place the midsagittal plane at a fixed distance from the film plane. Am J Phys. Anthropol. 16: 1956 www.indiandentalacademy.com
- 37. Tracing supplies and equipments • A lateral cephalogram • Acetate matte tracing paper(.003 inches thick, 8×10 inches) • A sharp 3H drawing pencil or a very fine tipped pen • Masking tape • A few sheets of cardboard (preferably black) and a hollow cardboard tube. Radiographic cephalometry- Alexander Jacobson www.indiandentalacademy.com
- 38. • A protractor and tooth symbol tracing template for drawing the teeth. Also templates for tracing the outlines of ear rods. • Dental casts trimmed to maximum intercuspation of the teeth in occlusion. • Viewbox (variable rheostat desirable but not essential). • Pencil sharpener and a eraser. Radiographic cephalometry- Alexander Jacobson www.indiandentalacademy.com
- 39. Tracing of a Cephalogram • Thorough familiarity with the gross anatomy is required before the tracing. • By convention the bilateral structures (eg, the rami and inferior borders of the mandible) are first traced independently. An average is then drawn by visual approximation, which is represented by a broken line. Radiographic cephalometry- Alexander Jacobson www.indiandentalacademy.com
- 40. Radiographic cephalometry- Alexander Jacobson www.indiandentalacademy.com
- 41. General considerations for the tracing • Start by placing the cephalogram on the viewbox with the patient’s image facing towards the right. • Tape the four corners of the radiograph to the viewbox. • Draw three crosses on the radiographs, two within the cranium and one over the area of the cervical vertebrae (registration crosses). Radiographic cephalometry- Alexander Jacobson www.indiandentalacademy.com
- 42. • Place the matte acetate film over the radiograph and tape it securely. • After firmly affixing the acetate film, trace the three registration crosses. • Print the pt name, record number, age in years and months, the date on which the cephalogram was taken and your name on the bottom left corner of the acetate film. • Begin tracing using smooth continuous pressure. Radiographic cephalometry- Alexander Jacobson www.indiandentalacademy.com
- 43. Stepwise tracing technique 1. Tracing the soft tissue profile, external cranium and the vertebrae, 2. Tracing the cranial base, internal border of the cranium, frontal sinus and the ear rods, 3. Maxilla and related structures including the nasal bone and pterygomaxillary fissure, 4. The mandible. Radiographic cephalometry- Alexander Jacobson www.indiandentalacademy.com
- 45. A landmark is a point which serves as a guide for measurement or construction of planes. They are divided into two types: 1. Anatomic: These represent actual anatomic structure of the skull. 2. Constructed: These have been constructed or obtained secondarily from anatomic structures in the cephalogram. Radiographic cephalometry- Alexander Jacobson www.indiandentalacademy.com
- 46. Requisites for a landmark • Landmark should be easily seen on the roentegenogram, be uniform in outline, and easily reproducible. • Lines and planes should have significant relationship to the growth vectors of specific areas. • Landmark should permit valid quantitative measurement of lines and angles. Radiographic cephalometry- Alexander Jacobson www.indiandentalacademy.com
- 47. • Measurement should have significant relation to the information sought. • Measurements should be amenable to statistical analysis but should preferably not require extensive specialized training in statistical methods. • Following is the list of most commonly used Cephalometric landmarks. Radiographic cephalometry- Alexander Jacobson www.indiandentalacademy.com
- 49. Point A revisited – Jacobson- AJO 1980 Point A cannot be accurately identified in all cephalometric radiographs.. In instances where this landmark is not clearly discernible, an alternative means of estimating the anterior extremity of the maxillary base is shown. Procedure; A point plotted 3.0 mm. labial to a point between the upper third and lower two thirds of the long axis of the root of the maxillary central incisor was found to be a suitable point - (estimated point A) through which to draw the NAE line and one which most closely approximates the true NA plane. www.indiandentalacademy.com
- 52. Cephalometric planes 1. Are derived from at least 2 or 3 landmarks 2. Are used for; - measurements, - separation of anatomic divisions, - definition of anatomic structures of relating parts of the face to one another. www.indiandentalacademy.com
- 53. The various cephalometric planes used are: 1. Horizontal planes 2. Vertical planes www.indiandentalacademy.com
- 54. Sella- Nasion plane: Frankfurt Horizontal plane: (The name is given in the conference of anthropology,held at Frankfurt in1985) www.indiandentalacademy.com
- 56. Mandibular plane: 1.Salzmann took lower border of the mand. 2. Go – Me - Mc Namara - Rakosi - COGS 3. Go – Gn - Steiners’s www.indiandentalacademy.com
- 57. Vertical planes; • Facial plane • Ramal plane • Y- Axis • NA • NB www.indiandentalacademy.com
- 59. Principle of Cephalometric analysis • The goal is to compare the patient with a normal reference group, so that differences between the patient’s actual dentofacial relationships and those expected for his/her racial or ethnic groups are revealed. • First popularized after world war-II in the form of Down’s analysis. www.indiandentalacademy.com
- 60. • The standards developed for the Down’s analysis are still useful but have been largely replaced by newer standards, based on less rigidly selected groups. www.indiandentalacademy.com
- 61. Two basic ways to approach this goals are: • Use of selected linear and angular measurements to establish the appropriate comparisons. eg; Down’s analysis. • Template method: Express the normative data graphically and to compare the patient’s dentofacial form directly. www.indiandentalacademy.com
- 62. MEASUREMENT ANALYSIS HARD TISSUE ANALYSIS • DOWN’S • TWEED’S • WITS APPRAISAL • STEINER’S • Mc NAMARA’S • RAKOSI’S • SCHWARZ • COGS SOFT TISSUE ANALYSIS • HOLDAWAY’S • ARNETT www.indiandentalacademy.com
- 63. - FH plane is used as the reference plane. - It was based on the study of 25 white subjects who had good occlusion and proportional facial skeleton. - This analysis indicates whether the dysplasia is in the facial skeleton or in the dentition or both. DOWN’S ANALYSIS www.indiandentalacademy.com
- 64. TWEED’S ANALYSIS Tweed used three planes to establish a diagnostic triangle, the three planes used in this analysis are: 1. Frankfurt horizontal plane 2. Mandibular plane 3. Long axis of lower incisor www.indiandentalacademy.com
- 66. The values of the angles according to Tweed’s finding are as follows: 1. FMA = 25° 2. FMIA = 65° 3. IMPA = 90° www.indiandentalacademy.com
- 67. STEINER’S ANALYSIS Developed by Cecil.C.Steiner in the 1950’s can be considered the first of the modern cephalometric analysis for two reasons: 1. It displayed measurements in a way that emphasized not just the individual measurements but their interrelationship into a pattern. 2. Specific guide for use of cephalometric measurements in treatment planning. AJO DO-1959 www.indiandentalacademy.com
- 68. Steiner analysis • Skeletal analysis • Dental analysis • Soft tissue analysis AJO DO-1959 www.indiandentalacademy.com
- 74. UI-NA= 220 UI-NA= 4mm DENTAL NA AJO DO-1959 www.indiandentalacademy.com
- 75. LI-NB = 250 LI-NB = 4mm DENTAL NB AJO DO-1959 www.indiandentalacademy.com
- 78. The mean values for Steiner’s analysis are as follows: SNA 82° SNB 80° ANB 2° SND 76° Upper incisor to NA 22° Upper incisor to NA 4mm Lower incisor to NB 25° Lower incisor to NB 4mm interincisal angle 130° MP to SN 32° www.indiandentalacademy.com
- 79. McNAMARA ANALYSIS Divided craniofacial skeletal complex into 5 major sections; 1. Maxilla to cranial base. 2. Maxilla to mandible. 3. Mandible to cranial base. 4. Dentition. 5. Airway. www.indiandentalacademy.com
- 80. NASOLABIAL ANGLE: 1020 MAX TO CRANIAL BASESOFT TISSUE EVALUATION www.indiandentalacademy.com
- 81. Pt A-N Perpendicular: 1.mixed dentition= 0mm 2.adult= 1mm MAX TO CRANIAL BASEHARD TISSUE EVALUATION www.indiandentalacademy.com
- 82. 1. EFF MAX LENGTH MAX TO MANDIBLE 91 117 ANTEROPOSTERIOR 2.EFF MAND LENGTH www.indiandentalacademy.com
- 83. Ans-Me VERTICAL MAX TO MANDIBLE www.indiandentalacademy.com
- 84. Mand plane angle MP-FH: 220 SKELETAL AJO DO-1959 www.indiandentalacademy.com
- 85. Facial axis angle= 900 SKELETAL AJO DO-1959 900 - obtained www.indiandentalacademy.com
- 86. Pog-N Perpen 1. mixed dent (6-8mm) 2.female=(-4- 0) 3.males =(+/- 2) MANDIBLE TO CRANIAL BASE www.indiandentalacademy.com
- 90. WITS APPRAISAL • Indicates antero-posterior disharmonies of the jaws. • It’s a linear measurement, not an analysis • Was developed as a shortcoming to ANB. www.indiandentalacademy.com
- 92. AO- BO 1. Sk Cl-I ; BO 1mm front of AO 2. Sk Cl-II; BO is behind AO 3. Sk Cl-III; BO is ahead of AO www.indiandentalacademy.com
- 93. DRAWBACKS; 1.Value varies with occ plane. 2.Value varies with dist betw points A and B 3.OP is not the actual plane and the left and the right side do not always coinside in a lateral ceph www.indiandentalacademy.com
- 94. RAKOSI JARABAK’S ANALYSIS 1. Cephalometric radiography; Thomas Rakosi. www.indiandentalacademy.com
- 95. Saddle Angle 1230 +/-5 1. Cephalometric radiography; Thomas Rakosi. www.indiandentalacademy.com
- 96. ARTICULAR ANGLE 1430 +/- 6 1. Cephalometric radiography; Thomas Rakosi. www.indiandentalacademy.com
- 97. GONIAL ANGLE Gonial angle =1280 +/-7 U=52-55 l=72-75 1. Cephalometric radiography; Thomas Rakosi. www.indiandentalacademy.com
- 98. SUM OF POST ANGLES 396+/-60 1. Cephalometric radiography; Thomas Rakosi. www.indiandentalacademy.com
- 99. MAND PLANE ANGLE MP-SN=320 1. Cephalometric radiography; Thomas Rakosi. www.indiandentalacademy.com
- 100. ANGLE OF INCLINATION 850 1. Cephalometric radiography; Thomas Rakosi. www.indiandentalacademy.com
- 101. Pn-OP 750 1. Cephalometric radiography; Thomas Rakosi. www.indiandentalacademy.com
- 102. Pn-MP 650 1. Cephalometric radiography; Thomas Rakosi. www.indiandentalacademy.com
- 103. BASAL PLANE ANGLE 250 1. Cephalometric radiography; Thomas Rakosi. www.indiandentalacademy.com
- 104. Ant-Post face Ht 62-65% 1. Cephalometric radiography; Thomas Rakosi. www.indiandentalacademy.com
- 105. Inter-Incisal 1350 1. Cephalometric radiography; Thomas Rakosi. www.indiandentalacademy.com
- 106. UI-SN 1020 +/-2 1. Cephalometric radiography; Thomas Rakosi. www.indiandentalacademy.com
- 107. UI-PP 700 +/-5 1. Cephalometric radiography; Thomas Rakosi. www.indiandentalacademy.com
- 108. LI-MP 900 +/-3 1. Cephalometric radiography; Thomas Rakosi. www.indiandentalacademy.com
- 109. CEPHALOMETRICS FOR ORTHOGNATHIC SURGERY 1. Cephalometric analysis specially designed for the patient who requires maxillofacial surgery. 2. Landmarks and measurements were made which could be altered by common surgical process. J Oral Surgery:vol-36, April 1978 www.indiandentalacademy.com
- 110. 3.The comprehensive appraisal includes all of the facial bones and a cranial base reference. 4. Rectilinear measurements can be readily transferred to a study cast for mock surgery. 5. Critical facial skeletal components are examined. 6. Standards and static's are available for variations in age and sex. 7. Systematised approach to measurements that can be computerised. 8. COGS appraisal describes dental, skeletal and soft tissue variations. J Oral Surgery:vol-36, April 1978 www.indiandentalacademy.com
- 111. 1.Ar-Ptm 2.Ptm-N J Oral Surgery:vol-36,April 1978 CRANIAL BASE Ar- Ptm Ar-N Ptm- N HP www.indiandentalacademy.com
- 112. 1.N-A-Pg(ANGLE) 2.N-A (ll-HP) 3.N-B (ll-HP) 4.N-Pg(ll-HP) J Oral Surgery:vol-36,April 1978 HORIZONTAL(SKELETAL) HP www.indiandentalacademy.com
- 113. 1.N-A-Pg(ANGLE) 2.N-A (ll-HP) 3.N-B (ll-HP) 4.N-Pg(ll-HP) J Oral Surgery:vol-36,April 1978 HORIZONTAL(SKELETAL) HP www.indiandentalacademy.com
- 114. 1.N-ANS(PER-HP) 2.ANS-Gn(PER-HP) 3.PNS-N(PER-HP) 4.MP-HP(ANGLE) 5.UI-NF(PER-NF) 6.U6-NF(PER-NF) 7.LI-NF(PER-NF) 8.L6-NF(PER-NF) J Oral Surgery:vol-36,April 1978 VERTICAL(SKELETAL,DENTAL) HP N-ANS ANS-Gn PNS-N www.indiandentalacademy.com
- 115. 1.N-ANS(PER-HP) 2.ANS-Gn(PER-HP) 3.PNS-N(PER-HP) 4.MP-HP(ANGLE) 5.UI-NF(PER-NF) 6.U6-NF(PER-NF) 7.LI-NF(PER-NF) 8.L6-NF(PER-NF) J Oral Surgery:vol-36,April 1978 VERTICAL(SKELETAL,DENTAL) HP www.indiandentalacademy.com
- 116. 1.PNS-ANS(II-HP) 2.Ar-Go (LINEAR) 3.Go-Pg (LINEAR) 4.B-Pg (II-MP) 5.Ar-Go-Gn(ANGLE) J Oral Surgery:vol-36,April 1978 MAX & MAND HP www.indiandentalacademy.com
- 117. 1.PNS-ANS(II- HP) 2.Ar-Go (LINEAR) 3.Go-Pg (LINEAR) 4.B-Pg (II-MP) 5.Ar-Go- Gn(ANGLE) J Oral Surgery:vol-36,April 1978 HP MAX & MAND www.indiandentalacademy.com
- 118. 1.U OP- HP(ANGLE) 2.L OP- HP(ANGLE) 3.A-B (II- OP) 4.UI-NF(ANGLE) 5.LI-MP(ANGLE) J Oral Surgery:vol-36,April 1978 DENTAL HP www.indiandentalacademy.com
- 119. 1.U OP- HP(ANGLE) 2.L OP- HP(ANGLE) 3.A-B (II- OP) 4.UI-NF(ANGLE) 5.LI-MP(ANGLE) J Oral Surgery:vol-36,April 1978 HP DENTAL www.indiandentalacademy.com
- 120. 1.U OP- HP(ANGLE) 2.L OP- HP(ANGLE) 3.A-B (II- OP) 4.UI-NF(ANGLE) 5.LI-MP(ANGLE) J Oral Surgery:vol-36,April 1978 HP DENTAL www.indiandentalacademy.com
- 121. THE HOLDAWAY SOFT- TISSUE ANALYSIS • The analysis outlines the parameters of soft tissue balance. • Consists of 11 measurements. www.indiandentalacademy.com
- 126. Nose tip to H-line; 12mm max www.indiandentalacademy.com
- 127. Upper sulcus depth;5mm Lower sulcus depth;15mm Lower lip to H- line; 5mm www.indiandentalacademy.com
- 128. Upper lip thickness; 15mm Upper lip stain; within 1mm Soft tissue chin thickness; 10- 12mm www.indiandentalacademy.com
- 129. TEMPLATE ANALYSIS • In the early years of cephalometric analysis, it was recognized that representing the norm in graphical form might make it easier to recognize a pattern of relationship. • In recent years, direct comparisons of patients with templates derived from the various growth studies has become a reliable method of analysis. www.indiandentalacademy.com
- 130. - One of the objectives of any analytic approach is to reduce the practically infinite set of possible cephalometric measurement to a manageably small group that can be compared to the norms and thereby provide useful information. - From the beginning it was recognized that the measurements for comparison with the norms should have several characteristics. www.indiandentalacademy.com
- 131. The following were specifically desired: 1. The measurements should be useful clinically in differentiating patients with skeletal and dental characteristics of malocclusion. 2. The measurement should not be affected by the size of patient:. 3. The measurement should be affected minimally by the age of the patient. www.indiandentalacademy.com
- 132. What is a template? Any individual cephalometric tracing can be represented as a series of coordinate points (x,y) on an grid. Similarly the cephalometric data from any group also could be represented graphically by calculating the average coordinates of each landmark point, and then connecting the points. The resultant average or composite tracing often is referred to as a “template”. www.indiandentalacademy.com
- 133. Male and Female diagnostic templates www.indiandentalacademy.com
- 134. At present two forms of the templates are currently available: • Schematic template (Michigan, Burlington): These show the changing position of selected landmarks with age on a single template. • Anatomically complete template (Broadbent-Bolton, Alabama): These are a different ones for each age. www.indiandentalacademy.com
- 135. Selecting of a template for analysis The first step in template analysis is to pick the correct template from the set of age different ones that represent the reference data. Two things that have to be kept in mind are: • The patient’s physical size • Developmental age. www.indiandentalacademy.com
- 136. The best thing to do is to select the reference template considering the length of the anterior cranial base, which should be same for the patient and the template. After this we move forward or backwards in the template age if the patient is developmentally quite advanced or retarded. www.indiandentalacademy.com
- 137. Doing analysis using a template It is based on a series of superimpositions of the template over a tracing of the patient being analyzed. The sequence of superimpositions follows: 1. Cranial base superimpositions: - This allows the relationship of the maxilla and mandible to the cranium to be calculated. www.indiandentalacademy.com
- 138. - Superimposition being done on SN-plane, registering the patient’s tracing at nasion rather than sella if there is a difference in the anterior cranial base length. - With the cranial base registered, the anteroposterior and vertical position of the maxilla and mandible can be observed. - ANS, ptA for the anterior maxilla, PNS for the posterior maxilla. - PtB, Pog and Gn for the anterior mandible and Go for the posterior mandible are looked for. Eg; 11yr old pat with mand showing age of 6yrs. www.indiandentalacademy.com
- 139. 2. Regional superimposition: - The (second) superimposition is on the maxilla to evaluate the relationship of the maxillary dentition to the maxilla. Template makes the vertical evaluation of the teeth possible which is not possible with the measurement approach. - The (third) superimposition is on the mandible same as that of maxilla www.indiandentalacademy.com
- 141. Advantages of the template analysis • It allows the easy use of the age related samples, • It quickly provides an overall appraisal of the way in which the patient’s dentofacial structures are related unlike the measurement approach in which the focus sometimes shifts to acquiring the numbers themselves. www.indiandentalacademy.com
- 143. Application of cephalometrics • For gross inspection • To describe morphology and growth • To diagnose anomalies • To forecast future relationships • To plan treatment • To evaluate treatment results www.indiandentalacademy.com
- 145. ERRORS OF CEPHALOMETRIC MEASUREMENTS These are grossly divided into three heads : 1. Radiographic projection errors 2. Errors within the measuring system 3. Errors in landmark identification. www.indiandentalacademy.com
- 146. A.RADIOGRAPHIC PROJECTION ERRORS; Occurs during the recording procedure, the object as imaged on a conventional radiographic film is subject to magnification and distortion. www.indiandentalacademy.com
- 147. 1.MAGNIFICATION: • Magnification occurs because the X ray beams are not parallel with all points of the object to be examined. • The magnitude of the enlargement is related to the distances between the focus, the object, and the film. - The use of the long focus-object and the short object-film distances has been recommended in order to minimize such projection errors. - Although long focus objects distances are preferable, a focus-film distance of more than 280 cms does not significantly alter the magnitude of the projection error.www.indiandentalacademy.com
- 148. EFFECT OF FOCUS FILM DISTANCE ON RADIOGRAPHIC MAGNIFICATION www.indiandentalacademy.com
- 149. EFFECT ON OBJECT FILM DISTANCE ON RADIOGRAPHIC MAGNIFICATION AND SHARPNESS www.indiandentalacademy.com
- 150. 2.DISTORTION: Distortion occurs because of different magnifications between different planes. Although most of the landmarks used in cephalometric analyses are located within the mid Sagittal plane, some landmarks and many structures that are useful for superimposition are affected by distortion, owing to their location in a different field of depth. In this instance both linear and angular measurements will be affected. www.indiandentalacademy.com
- 151. 3. DIRECTIONS OF POSSIBLE MISALIGNMENTS OF THE HEAD Z-Vertical axis X-Transverse axis Y-PA axis www.indiandentalacademy.com
- 152. a.Furthermore landmarks and planes not located in the midsagittal plane are usually bilateral giving a dual image on the radiograph. b.The problem of locating bilateral structures can somewhat be compensated by recording the midpoints between these structures. Bilateral structures in the symmetric head position do not superimpose in a lateral cephalogram !! - The fan shaped X-ray beam expands as it passes thus causing a divergence between the images of all bilateral structures except those along the central beam 4.BILATERAL STRUCTURES www.indiandentalacademy.com
- 153. - In order to control errors during radiographic projection, the relationship between the X ray target, the head holder and the film must be fixed. - The metal markers in the ear rods must be aligned and its good practice to include a metal scale of known length to provide permanent evidence of the enlargement of each film. - For special research purposes, projection errors can be reduced by a combination of stereo head films and the use of osseous implants. www.indiandentalacademy.com
- 154. B.ERRORS WITHIN THE MEASURING SYSTEM: The development of computerized equipment for electronic sampling of landmarks has greatly speeded up data collection and processing and has reduced the potential for human measuring errors. The errors with a digitizer has two components: • The error of the digitizing system • The precision with which a marked point on the film or tracing can be identified. - An accuracy of .1mm is desirable without any distortion over the surface of the digitizer.www.indiandentalacademy.com
- 155. Erickson and Solow (1981) have described specific procedures for testing and correcting the digitizers before any routine use in cephalometric research. Errors of scaling can be corrected by setting switches in the control unit of the digitizer or by scaling the incoming x-y coordinates by a software programme. Non-linearlities can be corrected by including certain matrices in the software programme . If these requirements are met , the measurements are more reliable than those obtained by any manual device owing to the superior accuracy of the digitizer. www.indiandentalacademy.com
- 156. C.ERRORS IN LANDMARK IDENTIFICATION: The major source of error in cephalometric has been landmark identification. The factors involved are: • The quality of the radiographic image, • The precision of the landmark definition and the reproducibility of landmark location, • The operator and registration procedure. www.indiandentalacademy.com
- 157. 1.THE QUALITY OF THE RADIOGRAPHIC IMAGE a. Expressed in terms of sharpness/blur and contrast and noise. b. Sharpness is related to blur and contrast c. Blur is the distance of optical density change between the boundaries of a structure and its surroundings. 3 types of unsharpness 1. Geometric unsharpness 2. Motion unsharpness 3. Receptor unsharpness www.indiandentalacademy.com
- 158. Geometric unsharpness Is directly related to the size of the focal spot and the focus film distance. Receptor unsharpness •Depends on the physical properties of the film and the intensifying screen Eg; Combinations of fast films and rare earth intensifying screen have reduced the exposure required, but produces images with poorer definition. www.indiandentalacademy.com
- 159. Motion unsharpness • Movement of the tube, object or the film during exposure results in image blur. - By increasing the current it is possible to reduce the exposure time and thus reduce the effect of movements, - Blur from scattered radiation can be reduced by using a grid at the image receptor end. www.indiandentalacademy.com
- 160. 2.PRECISION OF THE LANDMARK DEFINITION AND THE REPRODUCIBILITY OF LANDMARK LOCATION A clear unambiguous definition of cephalometric landmarks chosen is of utmost importance for cephalometric reliability. • The reference plane to which they are related should accompany definitions of landmarks. • Conditions required to record some landmarks should not be unspecified or ambiguous. (EG: lips in repose/ centric occlusion/ head posture) • Some landmarks can be more reliably located than others. • Geometrically constructed landmarks and landmarks identified as points of change between concavity and convexity are quitewww.indiandentalacademy.com
- 161. •The radiographic complexity of the region also lays an important role making some landmarks more difficult to identify. The most reliably identified landmarks are; (According to Miethke) 1.Incision superior incisal and 2.incision inferior incisal. Landmarks difficult to identify are; 1.Anatomical porion and 2.Landmarks on the condyle. 3.The cusps of the posterior teeth or the lower incisor apex. www.indiandentalacademy.com
- 162. Baumrind and Franz (1971) pointed out that, the impact that errors in landmark location have on angular and linear measurements is a function of three variables: 1. The absolute magnitude of the error in landmark location. 2. The relative magnitude or the linear distance between the landmarks considered for that angular or linear measurement. 3. The direction from which the line connecting the landmarks intercepts the envelops of the error www.indiandentalacademy.com
- 163. The envelope is the pattern of total error distribution. Since cephalometric landmarks have a non-circular envelope of error, the average error introduced in linear measurements will be greater if the line segment connecting them to another point intersects the wider part of the envelope. www.indiandentalacademy.com
- 164. •Errors in landmark identification can be reduced if measurements are replicated and their values averaged. •Consecutive evaluation of one cephalogram at random showed that the localization of a landmark is more exact the second time that at the first judgment. (Miethke 1989) •The more the replications the smaller the impact of random error on the total error becomes. There is however a practical limit for the repeated assessment . •Even for the purpose of scientific research if cross sectional or serial measurements from two groups must be compared, duplicate measurements are sufficient. www.indiandentalacademy.com
- 165. 3. THE OPERATOR AND REGISTRATION PROCEDURE The operator’s alertness , training and his or her working conditions affect the magnitude of the cephalometric error. In cephalometric studies therefore the error level specific to the operator must be established if any meaningful conclusions can be drawn from the data. The most important contribution to improvement in landmark identification are experiences and calibration. In studies that compare two groups of radiographs ,the operator can introduce different types of error or bias.www.indiandentalacademy.com
- 166. One type of operators bias is the operators variability which involves both inter observer variability (disagreement between observers for the identification of a particular landmark) and intra observer variability ( the disagreement within the same observer over time due to changes in his or her identification procedure) A good method to reduce this error consists of calibration and periodic recalibration tests to establish confidence limits of reproducibility for each observer www.indiandentalacademy.com
- 167. Another kind of error can be introduced because of unconscious expectations of the operator when assessing the outcome of the scientific research (that is the outcome of different treatment results) Randomization of record measurements or double blind experimental designs can be used for reducing such bias www.indiandentalacademy.com
- 168. When serial records are being analyzed it has been suggested that all the records of one patient should be traced on the same occasion. This minimizes the error variance within individual observers although it increases the risk of bias. www.indiandentalacademy.com
- 169. METHODS OF CONTROLLING ERRORS A.Taking the radiographs; • The relationships of x-ray target, head holder, and film must be fixed. The metal markers in the ear rods must be aligned, and it is good practice to include a metal scale of known length at the midsagittal plane to provide permanent evidence of the enlargement of each radiograph.2. Every effort must be made to obtain films of high quality as described in the standard texts. 3. Use of an aluminum wedge to improve the definition of the soft tissues and anterior bony structures www.indiandentalacademy.com
- 170. 4. Fast films and rare-earth intensifying screens reduce the exposure greatly but give poorer definition than slower films and high- definition screens. 5. Nevertheless, exposure reduction is of primary importance and attention should be directed to obtaining the best screen/film combination. 6. Minor distortions can arise if the film is not flat, because the cassette does not support it adequately. This can be checked by exposing a test grid which will reveal any serious lack of flatness of the film. www.indiandentalacademy.com
- 171. B. Landmark identification; 1. Tracings should be made on good-quality drafting paper which does not obscure any details. 2. The most important contributions to improvement in landmark identification are experience and calibration. 3. Before any major study is undertaken, particularly if more than one measurer is involved, calibration is of the greatest importance. www.indiandentalacademy.com
- 172. C. Experimental design; • As they are collected, measurements should be checked for "wild" values. • This can be done against previously published standards as the study progresses or against the measurements of the study itself after it has been completed. • Measurements more than 3 standard deviations away from the mean may, indeed, be expressions of normal variation, but often they will be the result of incorrect identification of a point or misreading of an instrument. • Random errors are reduced if measurements are replicated and averaged. If this is to be done, it is the tracings which should be replicated, not the measurements of tracings, because the greatest errors may arise in point identification rather than in measurement.www.indiandentalacademy.com
- 173. 5. The procedure is much less tedious if radiographs are digitized directly. 6. Baumrind and Millersuggested that tracings should be repeated four times, which will halve the random error, but this is too arduous for all but gives the most exacting investigations. 7. An important way of controlling systematic errors is to randomize the order in which the records are measured. Thus, for example, if two groups of cases are being compared, they should be traced in random order and, if possible, in a way that prevents the measurer from knowing to which group any record belongs. www.indiandentalacademy.com
- 174. STANDARDIZATION OF IMAGE GEOMETRY The early cephalometrists recognized the importance of standardized head position if cephalograms were to be measures consistently. All conventional cephalometric analyses are based on the assumptions of standardized and fixed distances between the anode object and film. If they are met, valid comparison can be made between images generated on different cephalostats. If they are not maintained comparisons cannot be made even if they are two radiographs from the same machine. www.indiandentalacademy.com
- 175. Another gap in the conventions is the direction in which the patient is facing. In the USA the left side of the face is positioned closer to the film while in Europe the right side of the face is closer to the film. Obviously either convention is acceptable but care should be taken not to mix conventions in the same subject. It should be kept in mind that the side closer to the film will appear larger. Any image acquired with the ear rods disengaged will be subject to increased measurement errors, because the central beam will inevitably deviate from the porion-porion axis. www.indiandentalacademy.com
- 176. LIMITATIONS OF RADIOGRAPHIC CEPHALOMETRY 1. It gives two dimensional view of a three dimensional object. 2. The reliability of cephalometrics is not always accurate. 3. Standardization of analytical procedures are difficult. 4. Growth pattern not taken into consideration 5. Mean values are based on different population 6. Form and functions not taken into consideration www.indiandentalacademy.com
- 177. The manual technique of tracing a cephalogram is time consuming and tedious. In comparison computerized cephalometry is very fast and takes just 10% of the time a manual tracing requires. Due to direct digitization of the landmarks the process removes human errors except those of landmark identification. In addition to speed computerized cephalometry also facilitates the use of double digitization of landmarks thus significantly increasing the reliability of the analysis. COMPUTERISED CEPHALOMETRIC SYSTEMS: www.indiandentalacademy.com
- 178. Other benefits of this method include: •Easy storage and retrieval of cephalometric values and tracings •Intergration of the cephalometric registrations within an office management computerized sytem. •Combinationof the cephalometric data with patients files photos and dental casts. www.indiandentalacademy.com
- 179. Three possible approaches may be used to perform a cephalometric analysis. 1. The most common method is by manually placing a sheet of acetate over the cephalometric radiograph, tracing salient features, identifying landmarks, and measuring distances and angles between landmark locations. 2. Another approach is computer aided. Landmarks are located manually while these locations are digitized into a computer system. The computer then completes the cephalometric analysis. 3. The third approach is completely automated. The cephalometric radiograph is scanned into the computer. The computer automatically locates landmarks and performs the cephalometric analysis. (Rudolph, Sinclair,AJO 1998) www.indiandentalacademy.com
- 180. Currently, several commercially available systems can perform basic cephalometric analysis tasks. The user locates landmarks manually with a mouse cursor on the display monitor on some systems. Other systems digitize landmark locations on a digitizing pad. In either case a computer algorithm performs a cephalometric analysis by calculating distances and angles between landmark locations. In addition, the algorithm connects these landmarks with line segments to produce a tracing. Some systems are capable of moving the tissues to simulate treatment effects, growth effects, and surgical prediction. Finally, some of these systems also are able to produce a time series of images using landmark locations, not superimposition contours, to register images.www.indiandentalacademy.com
- 181. Generally, these systems do not save time, are expensive, and require technical training. The accuracy of these computer-aided programs has been demonstrated to be similar to that of manual digitization, and because manual landmark identification programs require subjective user point identification, they are limited in scope. In addition, the number of landmarks required are high; this tends to negate any time saved using this method. Although the analysis uses a computer, the process of manual point digitization can be time-consuming and error-prone. www.indiandentalacademy.com
- 182. Automatic Landmark Identification A third approach to cephalometric analysis is completely automated. The cephalometric image is scanned into a computer and both landmark identification and cephalometric analysis are automated. The process has the potential to increase accuracy, provide more efficient use of clinicians' time, and improve our ability to correctly diagnose orthodontic problems. Additionally, this process may provide mathematical descriptions of landmark locations that could be applied to new ways of evaluating cephalometric radiographs to derive clinically important information.www.indiandentalacademy.com
- 183. Digitized cephalometry – Dentofacial planner – Quick ceph image – Por dios – Digigraph – Rocky mountain orthodontics – JIFFY orthodontic evaluation – Prescription planner. www.indiandentalacademy.com
- 184. DIGITAL RADIOGRAPHY • A digital image is a matrix of square pieces or picture elements (pixels), that form a mosaic pattern from wherein original image can be reconstructed for visual display. Analog Image Digital Image • 1) Conventional radiographic 1) a) Light sensitive Image elements to record the image. b) Shades of gray to display the Image • 2) Silver halide grain 2) Light sensitive elements • 3) Randomly dispersed 3) Regular grid of rows and Columns • 4) Continuous Spectrum 4) Numeric and Discrete. www.indiandentalacademy.com
- 185. PIXELS AND VOXELS • Pixel 2-D Digital Images – Composed of Picture elements. • Voxel 3-D Digital Images – Composed of volume elements. PRODUCTION OF DIGITAL IMAGE Analog to Digital conversion (ADC). • Sampling - Small range of voltage values grouped together. • Quantization - Every sampled signal is assigned a value. Pixels are arranged in proper locations and given a shade of gray corresponding to quantization www.indiandentalacademy.com
- 186. Advantages; • It is very fast. • It is only necessary to digitise the points directly on the cephalogram and calculations are done in seconds. • It removes human error • Facilitates use of double digitisation of landmarks, thus increasing reliability. • Easy storage and retrieval of values. • Simultaneous demonstration of anatomical structures of different thickness--i.e., bone and soft tissues--and its lower exposure dose make digital radiography the diagnostic procedure of choice in cephalometrics. • Filmless imaging. • Patient education. • Better treatment planning. www.indiandentalacademy.com
- 187. CONCLUSION • Roentgenographic cephalometrics although a major one-is one of many approaches and considerations in the diagnosis and treatment of an orthodontic patient. • A roentgenographic cephalometric analysis is essentially a technique to be used as a guide in the diagnosis of a case of malocclusion. • Although innumerable controversies exist in the field of cephalometrics, it is still a very significant & effective diagnostic tool. www.indiandentalacademy.com
- 188. A knowledge of what we have done and not done &, particularly, what we have not done, moulds and crystallizes our treatment philosophy & conditions it for better service for those who come to us. Thus making cephalometrics indispensable in clinical practice. www.indiandentalacademy.com
- 189. 1. Radiographic cephalometry- Alexander Jacobson 2. Oral Radiology, Principles and interpretation- White and Pharoah (5th edition) 3. Orthodontic cephalometry; Athanasios. 4. Cephalometric radiography; Thomas Rakosi. 5. Moores and Kean; NHP; Am J Phys. Anthropol. 16: 1956 6. Point A revisited – Jacobson- AJO 1980 7. Cecile Steiner-AO-1959, vol;29, no;1 8. Cecile Steiner- cephalometrics for you and me;AJO DO-1953, vol 39. 9. Soft tissue cephalometric analysis: AJODO- 1999: 116. 10. Cephalometrics for orthognathic surgery: REFERENCE www.indiandentalacademy.com
- 190. 11. A frontal asymmetric analysis: JCO/July 1987 12. A cephalometric analysis based on NHP: JCO 1998; vol 1991, March. 13. Downs. W . F :analysis of dentofacial profile, angle orthod. Vol 26; 1956 14. McNamara;’ a method of cephalometric evaluation; AJODO. 86; 1984 15. Orthodontics in 3 millennia. Chapter 8;AJODO 2006; 129. www.indiandentalacademy.com