1. DT
Process
Journal
Feb
8th
2011
-‐
Marking
out
the
last
third
photoframe
During
today’s
workshop,
I
had
accomplished
many
works
for
creating
my
product.
I
began
working
after
I
put
apron
and
hard
shoes.
I
finished
making
two
photoframes
and
today
I
marked
the
last
third
photoframe
that
would
be
a
mirror.
I
marked
this
one
much
bigger
than
others,
size
of
220
x
240
mm
because
user
should
be
able
to
see
their
face
in
the
mirror.
I
draw
the
side
line
with
tri-‐square
and
metal
ruler
than
draw
the
middle
line
in
that
rectangle
to
make
more
stable
waterdrop
shape.
Pinewood
was
used
for
the
last
third
photoframe
as
usual
because
it
is
strong
enough
that
increases
durabilities
of
the
product.
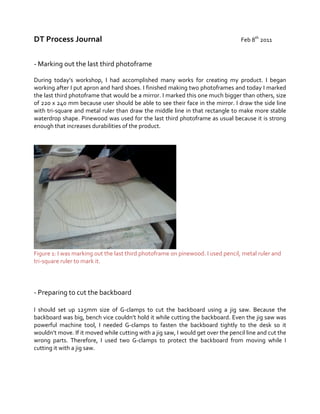
Figure
1:
I
was
marking
out
the
last
third
photoframe
on
pinewood.
I
used
pencil,
metal
ruler
and
tri-‐square
ruler
to
mark
it.
-‐
Preparing
to
cut
the
backboard
I
should
set
up
125mm
size
of
G-‐clamps
to
cut
the
backboard
using
a
jig
saw.
Because
the
backboard
was
big,
bench
vice
couldn’t
hold
it
while
cutting
the
backboard.
Even
the
jig
saw
was
powerful
machine
tool,
I
needed
G-‐clamps
to
fasten
the
backboard
tightly
to
the
desk
so
it
wouldn’t
move.
If
it
moved
while
cutting
with
a
jig
saw,
I
would
get
over
the
pencil
line
and
cut
the
wrong
parts.
Therefore,
I
used
two
G-‐clamps
to
protect
the
backboard
from
moving
while
I
cutting
it
with
a
jig
saw.
2.
Figure
3:
I
was
sticking
two
G-‐clamps
to
cut
the
backboard.
The
clamps
were
firmly
fixed
on
the
backboard
so
protected
the
backboard
from
moving
while
I
cut
it
using
a
jig
saw.
-‐
AOI
/
Learner
Profile
Today’s
process
was
related
to
Approaches
to
Learning.
I
learned
some
safety
rules
dealt
with
jigsaw:
First,
I
needed
to
push
it
down
while
it
was
working.
Second,
I
should
wait
until
the
blade
finally
stopped
moving
when
I
turn
off
the
machine.
With
the
regards
of
Learner
Profile,
I
was
a
communicator
during
the
workshop.
Although
I
used
a
jigsaw
before
in
grade
9,
I
forgot
how
to
work
with
it.
Even
I
was
scared
to
use
it
because
I
could
felt
the
vibration
jigsaw
made
while
it
working.
I
was
able
to
manage
this
difficulty
by
asking
for
teacher’s
help.
Teacher
showed
me
a
demonstration
of
using
a
jigsaw
and
also
he
informed
me
some
safety
rules
that
I
should
obey
when
working
with
a
jigsaw
-‐
Emotion
/
Changes
to
Plan
Today’s
process
was
satisfying
for
me.
As
I
predicted
in
the
flow
chart,
this
trimming
process
took
long
time.
However,
it
took
much
shorter
to
make
the
edge
of
photoframe
smooth.
I
could
move
to
next
process
quicker.
In
addition,
I
was
a
bit
scared
to
use
gig
saw
because
of
its
great
vibration.
Therefore,
today’s
work
was
successful.