
Recommended
More Related Content
Similar to Dt process journal 4
Similar to Dt process journal 4 (15)
Dt process journal 4
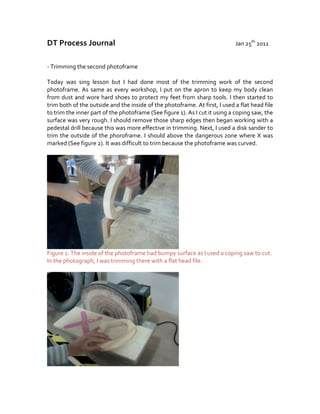
- 1. DT Process Journal Jan 25th 2011 -‐ Trimming the second photoframe Today was sing lesson but I had done most of the trimming work of the second photoframe. As same as every workshop, I put on the apron to keep my body clean from dust and wore hard shoes to protect my feet from sharp tools. I then started to trim both of the outside and the inside of the photoframe. At first, I used a flat head file to trim the inner part of the photoframe (See figure 1). As I cut it using a coping saw, the surface was very rough. I should remove those sharp edges then began working with a pedestal drill because this was more effective in trimming. Next, I used a disk sander to trim the outside of the phoroframe. I should above the dangerous zone where X was marked (See figure 2). It was difficult to trim because the photoframe was curved. Figure 1: The inside of the photoframe had bumpy surface as I used a coping saw to cut. In the photograph, I was trimming there with a flat head file.
- 2. Figure 2: The outside of the photoframe was rough as I cut it with a coping saw. In the image, I was trimming there with a disk sander. -‐ Learner Profile Today I was principled during the workshop. As I had completed making one photoframe, I knew what I should do to create another photoframe. I didn’t waste my time to wait the teacher’s help, and therefore, I could complete the work faster. In addition, I was a communicator. I was able to ask for teacher’s help when I had a difficulty with taking the blade out and putting it inside of the holes. -‐ Emotion / Changes to Plan Today’s process was satisfying for me. As I predicted in the flow chart, this trimming process took long time. However, it took much shorter to make the edge of photoframe smooth. I could move to next process quicker. Therefore, today’s work was successful.