SlideShare a Scribd company logo
1 of 30
Download to read offline
Product: EXCAVATOR
Model: 231D EXCAVATOR 1NK
Configuration: 231D EXCAVATOR 1NK00001-UP (MACHINE) POWERED BY 3208 ENGINE
Disassembly and Assembly
225D & 231D EXCAVATORS VEHICLE SYSTEMS
Media Number -SENR4784-00 Publication Date -01/03/1990 Date Updated -26/10/2004
SENR47840032
Double Pump (Bent-Axis Piston)
SMCS - 5070-015; 5070-016; 5070-010
Remove And Install Double Pump (Bent-Axis Piston)
Always release the oil pressure in the main hydraulic system before
disconnecting or removing any oil lines connected to the main hydraulic
system.
Always lower the bucket to the ground before the performance of any
service work.
1. Drain the oil from the hydraulic tank.
1/25
231D EXCAVATOR 1NK00001-UP (MACHINE) POWERED BY 3208 ENGINE(S...
2021/2/12
https://127.0.0.1/sisweb/sisweb/techdoc/techdoc_print_page.jsp?returnurl=/sis...
NOTE: Identify all hoses and lines. Put caps or plugs on the hoses, lines, and in the ports to keep
foreign material out of the system.
2. Disconnect two hose assemblies from pilot system pump (1). Remove two bolts and pilot
system pump (1).
3. Remove four bolts, loosen a hose clamp and remove tube assembly (2).
4. Disconnect hose assemblies (3), (4) and hose assembly (5) if the machine is equipped with a
hammer or increased lift.
Typical Example
5. Remove the bolts and shield (7). Disconnect the clamp holding cable (6) and move the cable out
of the way.
6. Remove the bolts and brackets (8) and (9).
2/25
231D EXCAVATOR 1NK00001-UP (MACHINE) POWERED BY 3208 ENGINE(S...
2021/2/12
https://127.0.0.1/sisweb/sisweb/techdoc/techdoc_print_page.jsp?returnurl=/sis...
7. Remove four bolts and bracket (10).
8. Fasten link bracket (B) to double pump (11). Position a lift truck directly under double pump
(11). Fasten one end of tool (A) to ratchet assembly (B) and the other end of the lift truck. Remove
the bolts that fasten the double pump to the flywheel housing and use tool (A) and the lift truck to
slowly remove the double pump from the machine. The weight of the double pump is 125 Kg (275
lb).
9. Remove element (12) and hub assembly (13).
NOTE: The following steps are for the installation of the double pump.
10. Install hub assembly (13) and element (12) in the double pump.
3/25
231D EXCAVATOR 1NK00001-UP (MACHINE) POWERED BY 3208 ENGINE(S...
2021/2/12
https://127.0.0.1/sisweb/sisweb/techdoc/techdoc_print_page.jsp?returnurl=/sis...
11. Fasten tool (B) to double pump (11). Position a lift truck under double pump (11). Fasten one
end of tool (A) to the lift truck and the other end to tool (B).
12. Install two 3/8" NC guide pins in the engine flywheel housing. Use the lift truck to move the
double pump into position. Use the guide pins to locate the pump on the flywheel housing. Install
two bolts to hold the pump in position.
13. Install bracket (10) and the four bolts.
14. Install bracket (9) and the remaining bolts.
15. Install bracket (8).
16. Install governor control cable (6) and shield (7).
17. Connect hose assemblies (3), (4) and (5). Install tube assembly (2) and tighten the hose clamps
and the four bolts.
18. Install pilot system pump (1). Connect the two hydraulic hoses.
NOTE: Do not start the engine unless the pump is filled with oil.
19. Fill the double pump with hydraulic oil.
20. Fill the hydraulic tank with oil to the correct level.
NOTICE
Perform Scheduled Oil Sampling on oil wetted compartments after
performing service work to check for contaminants left in the system
following repair. Contaminants put into the system may cause rapid
wear and shortened component life.
Disassemble Double Pump (Bent-Axis Piston)
4/25
231D EXCAVATOR 1NK00001-UP (MACHINE) POWERED BY 3208 ENGINE(S...
2021/2/12
https://127.0.0.1/sisweb/sisweb/techdoc/techdoc_print_page.jsp?returnurl=/sis...
Start By:
a. remove pump
NOTICE
Keep all parts clean from contaminants. Contaminants put into the
system may cause rapid wear and shortened component life.
5/25
231D EXCAVATOR 1NK00001-UP (MACHINE) POWERED BY 3208 ENGINE(S...
2021/2/12
https://127.0.0.1/sisweb/sisweb/techdoc/techdoc_print_page.jsp?returnurl=/sis...
1. Cover all pump openings, and clean the outside of the pump thoroughly.
NOTICE
There are four external adjustment screws on this pump. All four
adjustment screws have protective covers to prevent tampering or
accidental adjustment. The covers will be destroyed and will need to be
replaced if they are removed. The covers should be removed only when
necessary for proper pump disassembly. Changes should be made to
the adjustment screws only by trained personnel or poor vehicle
performance will result.
2. Remove the plastic covers from power adjustment screw (2) and torque adjustment screw (1).
3. Measure the height (dimension X) of torque adjustment screw (1) from the machined surface
under the locking nut to the top of the screw. Record the dimension.
4. Measure the height of power adjustment screw (2) from the pump housing surface to the top of
the screw. Record the dimension.
6/25
231D EXCAVATOR 1NK00001-UP (MACHINE) POWERED BY 3208 ENGINE(S...
2021/2/12
https://127.0.0.1/sisweb/sisweb/techdoc/techdoc_print_page.jsp?returnurl=/sis...
NOTICE
Do not loosen power adjustment screw (2) or the jam nut. Remove only
the threaded sleeve that the power adjustment screw threads into, and
the adjustment will not be lost.
5. Remove the threaded sleeve on power adjustment screw (2). Use a magnet, and remove the
spring and spring seat from the pump housing. When the threaded sleeve is removed, the entire
power adjustment screw assembly can be removed from the pump housing without changing the
adjustment.
6. Loosen the jam nut for torque adjustment screw (1) 1/2 of a revolution. Remove the torque
adjustment screw from the pump housing. The adjustment screw can be replaced into its original
position at assembly by using the measurement that was determined in Step 4.
7. Put alignment marks on control housing (3) and pump housing (5) for correct assembly.
8. Remove twelve bolts (4).
9. Remove control housing (3). It may be necessary to carefully pry the control housing off the
two alignment dowels that are between the two housings.
10. Clean the gasket from control housing (3) and pump housing (5).
11. Put identification marks on control housing (3) and two control plates (6) and (7). Also mark
the control plates to indicate the correct position of the dampening slots.
12. Remove control plates (6) and (7).
7/25
231D EXCAVATOR 1NK00001-UP (MACHINE) POWERED BY 3208 ENGINE(S...
2021/2/12
https://127.0.0.1/sisweb/sisweb/techdoc/techdoc_print_page.jsp?returnurl=/sis...
13. Remove bolt (10), spacer (11), and spring (12) that hold control lever assembly (8) to the
control housing. Remove the spring under the other end of the control lever assembly. Bolt (10)
was installed with thread lock, so it may be difficult to remove.
14. Remove spring seat (9).
15. Remove the control spool and roller assembly (13).
16. Put alignment marks on maximum angle stop housing (14) and the control housing for
assembly purposes.
17. Remove four bolts (15) and maximum angle stop housing (14). Remove the two O-ring seals
from maximum angle stop housing (14).
18. Remove retaining ring (16) from the control spool and roller assembly (13). Remove shaft (17)
and roller bearing (18).
8/25
231D EXCAVATOR 1NK00001-UP (MACHINE) POWERED BY 3208 ENGINE(S...
2021/2/12
https://127.0.0.1/sisweb/sisweb/techdoc/techdoc_print_page.jsp?returnurl=/sis...
19. Remove plugs (19) and (21). Remove the inner and outer pressure averaging valve spools
behind plug (19).
20. Remove two plugs (20). Remove the relief valve and spring behind each plug. Remove the O-
ring seals on plugs (20).
21. Put alignment marks on pressure averaging valve housing (23) and the control housing for
assembly purposes.
There is spring pressure behind pressure averaging valve housing (23)
which may cause the assembly to fly apart when the two bolts are
removed. To prevent possible personal injury, longer bolts should be
used to release the spring pressure.
22. Remove one bolt (22), and install one bolt from tooling (A). Remove bolt (24), and install the
other bolt from tooling (A). Loosen the two bolts from tooling (A) evenly, and release the spring
pressure behind pressure averaging valve housing (23).
23. Remove tooling (A). Remove pressure averaging valve housing (23). Remove the three O-ring
seals from the housing.
24. Remove control spool bushing (25).
25. Remove spring (26).
9/25
231D EXCAVATOR 1NK00001-UP (MACHINE) POWERED BY 3208 ENGINE(S...
2021/2/12
https://127.0.0.1/sisweb/sisweb/techdoc/techdoc_print_page.jsp?returnurl=/sis...
26. Note the location of pilot oil bore hole (27) in the end of the control piston. Put identification
marks on the control piston for assembly purposes.
27. Holding swivel fork (29) in position, remove control piston (28). Remove swivel fork (29).
Piston rings (30) and (31) may break apart during removal from the
pistons. If the rings are to be removed, wear eye protection to prevent
possible personal injury from flying parts.
28. Remove piston rings (30) and (31) from control piston (28).
10/25
231D EXCAVATOR 1NK00001-UP (MACHINE) POWERED BY 3208 ENGINE(...
2021/2/12
https://127.0.0.1/sisweb/sisweb/techdoc/techdoc_print_page.jsp?returnurl=/sis...
29. Remove two cylinder blocks (32) by pulling straight up. When each cylinder block is
removed, the spring collar and the Belleville washers will most likely fall out of the center pin
hole. Make sure that one spring collar (33) and four Belleville washers (34) are retrieved from the
housing when each cylinder block is removed. Check the center pin hole in the cylinder block if
all the parts did not fall out.
30. Remove twenty-eight screws (35). The screws were installed with thread lock. Impact the
screw heads first to break the seal. Remove by using additional leverage on the screwdriver as
shown.
31. Remove the two retainer plates, fourteen pistons (36) and the two center pins from the drive
gear and bearing assembly.
11/25
231D EXCAVATOR 1NK00001-UP (MACHINE) POWERED BY 3208 ENGINE(...
2021/2/12
https://127.0.0.1/sisweb/sisweb/techdoc/techdoc_print_page.jsp?returnurl=/sis...
Piston rings (37) may break apart during removal from the pistons. If
the rings are to be removed, wear eye protection to prevent possible
personal injury from flying parts.
32. Use a screwdriver, and remove piston rings (37) from pistons (36).
33. Using puller (B), remove the drive gear and bearing assembly. Use tooling (B) to remove the
other drive gear and bearing assembly. Remove tooling (B).
34. Remove four bolts (38).
35. Using bolt (C), remove flange (39). Remove the O-ring seal from flange (39).
36. Install puller (D). Remove the auxiliary drive gear and bearings as an assembly. Remove
tooling (D).
12/25
231D EXCAVATOR 1NK00001-UP (MACHINE) POWERED BY 3208 ENGINE(...
2021/2/12
https://127.0.0.1/sisweb/sisweb/techdoc/techdoc_print_page.jsp?returnurl=/sis...
37. Using puller (E) and a press, remove two bearings (41) from gear (40).
38. Using plier (F), remove retaining ring (42). Remove the spacer ring.
39. Put a small pry bar in the slot around the top, and remove cover (43). Remove the O-ring seal
behind cover (43).
40. Remove the lip-type seal from cover (43).
41. Using tool (G), remove retaining ring (44). Remove the spacer ring and the O-ring seal behind
retaining ring (44).
42. Use a small pry bar in the slot around the top, remove cover (45).
43. Install tooling (H) on the idler gear shaft. Use a torch, and heat the idler gear evenly to a
temperature of 80° C (276° F). Remove the idler gear shaft from the gear, and the inner bearing
from the pump housing.
44. Remove the idler gear from the pump housing and the key from the idler gear shaft.
45. Remove the outer bearing from the idler gear shaft and the inner bearing from the pump
housing.
13/25
231D EXCAVATOR 1NK00001-UP (MACHINE) POWERED BY 3208 ENGINE(...
2021/2/12
https://127.0.0.1/sisweb/sisweb/techdoc/techdoc_print_page.jsp?returnurl=/sis...
Assemble Double Pump (Bent-Axis Piston
1. Measure the center pins, spring collar, cylinder block, and control plate to determine the proper
size spring collar that should be used for assembly. For the adjustment procedure, see Testing And
Adjusting Manual, Form No. SENR4708 and Specifications, Form SENR4707.
NOTICE
14/25
231D EXCAVATOR 1NK00001-UP (MACHINE) POWERED BY 3208 ENGINE(...
2021/2/12
https://127.0.0.1/sisweb/sisweb/techdoc/techdoc_print_page.jsp?returnurl=/sis...
To prevent damage to idler gear shaft inner bearing (49), force should
be applied only to the outer race when it is installed.
2. Lower the temperature of lower idler gear shaft roller bearing (49). Using a hammer and a soft
punch, install lower idler gear shaft roller bearing (49).
3. Raise the temperature of upper idler gear shaft bearing (46) to 80° C (176° F). Install it onto
idler gear shaft (50). Make sure the bearing is seated on the shaft and does not bounce back when
it is installed. Allow the bearing and shaft to cool.
4. Install key (47).
5. Raise the temperature of idler gear (48) to 100° C (212° F). Install it in the pump housing with
the shoulder toward lower bearing (49).
6. Align the slot in the idler gear with key (47) on idler gear shaft (50). Using a hammer and soft
punch, install idler gear shaft (50) and upper bearing (46) into the idler gear and the lower bearing
that are in position in the pump housing.
7. Install cover (45). Put O-ring seal (52) on top of the cover and install spacer (51) on top of the
O-ring seal.
15/25
231D EXCAVATOR 1NK00001-UP (MACHINE) POWERED BY 3208 ENGINE(...
2021/2/12
https://127.0.0.1/sisweb/sisweb/techdoc/techdoc_print_page.jsp?returnurl=/sis...
8. Using tool (A), install retaining ring (44).
NOTICE
All piston rings must be installed with the marks toward the flat end of
the piston, or the pump will not operate.
9. The piston rings are spherical and must be installed with the marks toward the flat end of
pistons (36). Using tooling (B), install two piston rings (37) on each piston (36). Rotate the piston
ring end gaps to be 180° apart. Repeat this procedure for the 14 pistons.
10. Install seven pistons (36), center pin (53) and the retaining plate on the drive gear and bearing
assembly. Use 6V1541 Quick Cure Primer on fourteen screws (35) and allow them to dry. Put
9S3263 Thread Lock on fourteen screws (35). Install the screws and tighten to a torque of 6 N·m
(53.4 lb in). Repeat this step for the other drive gear and bearing assembly.
11. The spring collar that was selected in Step 1 should be used at this time. Install spring collar
(33) and four Belleville washers (34) in the order and direction shown. Use 5P960 Multipurpose
Grease to hold them in position. Using a screwdriver, put spring collar (33) and Belleville
washers (34) into the center pin bore of cylinder block (32). Repeat the step for the other cylinder
block.
16/25
231D EXCAVATOR 1NK00001-UP (MACHINE) POWERED BY 3208 ENGINE(...
2021/2/12
https://127.0.0.1/sisweb/sisweb/techdoc/techdoc_print_page.jsp?returnurl=/sis...
12. Coat seven pistons (36), the center pin and the piston bores of the cylinder block with SAE
10W oil. Make sure the Belleville washers stay in the proper position in the cylinder block. Repeat
this step for the other cylinder block.
13. Align seven pistons (36) and the center pin with their respective bores in the cylinder block.
Assemble the unit. The assembled unit is called a rotary group. Repeat this step and assemble the
other rotary group.
NOTICE
The outer diameters of rotary group bearings (54) and the pump
housing bores must be clean and dry when the rotary groups are
installed.
14. Raise the temperature of pump housing (55) to 80° C (176° F). Put the pump housing on wood
blocks so the drive shaft will have clearance when it is installed. Align rotary group gear (57) with
the idler gear. Install the rotary group into the pump housing.
NOTICE
17/25
231D EXCAVATOR 1NK00001-UP (MACHINE) POWERED BY 3208 ENGINE(...
2021/2/12
https://127.0.0.1/sisweb/sisweb/techdoc/techdoc_print_page.jsp?returnurl=/sis...
There are timing marks (56) on two rotary group gears (57) and (58).
The timing marks must be aligned as the rotary groups are installed
into the pump housing.
15. Align the timing mark on rotary group gear (58) with the timing mark on rotary group gear
(57). Install the rotary group into the pump housing with timing marks (56) aligned as shown.
NOTE: Complete Step 16 and Step 17 while the pump housing is still warm to make assembly
easier.
NOTICE
To prevent damage to inner bearing (41), force should be applied only
to the inner race when it is installed onto the gear.
16. Using a hammer and soft punch, install inner bearing (41) onto auxiliary drive gear (40).
17. While pump housing (55) is still warm, install auxiliary drive gear (40) and the inner bearing
into the pump housing.
18. Raise the temperature of outer bearing (59) to 80° C (176° F). Using a hammer and soft
punch, install the bearing onto auxiliary drive gear (40).
18/25
231D EXCAVATOR 1NK00001-UP (MACHINE) POWERED BY 3208 ENGINE(...
2021/2/12
https://127.0.0.1/sisweb/sisweb/techdoc/techdoc_print_page.jsp?returnurl=/sis...
19. Install the O-ring seal on flange (39) and the flange (39) onto the pump housing. Install four
bolts (38) and tighten to a torque of 86 N·m (65 lb ft).
Piston rings (30) and (31) may break apart during installation onto
control piston (28). Use care when expanding the piston rings. Wear eye
protection to prevent possible personal injury from flying parts.
20. Install piston rings (30) and (31).
21. Install swivel fork (29) in control housing (3) with the machined shoulder toward the small
diameter of the control piston. Coat control piston (28) with SAE 10W oil. Install it into the
control cover and the swivel fork. Make sure the control piston is installed correctly with the pilot
oil hole toward the pump housing mounting surface.
19/25
231D EXCAVATOR 1NK00001-UP (MACHINE) POWERED BY 3208 ENGINE(...
2021/2/12
https://127.0.0.1/sisweb/sisweb/techdoc/techdoc_print_page.jsp?returnurl=/sis...
22. Install control spool bushing (25). Install spring (26). Make sure the spring goes against the
machined shoulder of swivel fork (29).
NOTE: Plugs (19) and (21) have an integral seal. If the seals on plugs (19) and (21) need to be
replaced, the entire plug (19) or (21) must be replaced.
23. Install inner pressure averaging valve spool (63) into outer pressure averaging valve spool
(60). Install both valve spools into pressure averaging valve housing (23). Install two plugs (19)
and (21).
24. Install the O-ring seals onto plugs (20). Put two relief valves (62) and springs (61) into plugs
(20). Install them into the pressure averaging valve housing.
25. Using 5P960 Multipurpose Grease, install two O-ring seals (64) on pressure averaging valve
housing (23).
26. Install O-ring seal (65) onto the prsssure averaging valve housing. Put 5P960 Multipurpose
Grease on O-ring seal (65) and the pressure averaging valve housing tube.
20/25
231D EXCAVATOR 1NK00001-UP (MACHINE) POWERED BY 3208 ENGINE(...
2021/2/12
https://127.0.0.1/sisweb/sisweb/techdoc/techdoc_print_page.jsp?returnurl=/sis...
To prevent possible personal injury, do not remove two bolts at the
same time and allow the assembly to fly apart. Remove the long bolts,
and install the standard bolts one at a time to maintain pressure on the
spring.
27. Install pressure averaging valve housing (23) on control housing (3). Using tooling (C),
compress the spring behind the housing. Install standard bolts (22) and (24), one at a time to
maintain the spring compression. Tighten to a torque of 69 N·m (50 lb ft).
28. Install bearing (18) in control spool (13). Install pin (17), and secure it with retaining ring (16).
21/25
231D EXCAVATOR 1NK00001-UP (MACHINE) POWERED BY 3208 ENGINE(...
2021/2/12
https://127.0.0.1/sisweb/sisweb/techdoc/techdoc_print_page.jsp?returnurl=/sis...
29. Use 5P960 Multipurpose Grease, install two O-ring seals (66).
30. Install maximum angle stop housing (14) and four bolts (15). Tighten the bolts to a torque of
86 N·m (65 lb ft).
31. Install control spool and roller assembly (13) into control spool bushing (67).
32. Put 9S3263 Thread Lock on spring seat (9). Install it onto control lever assembly (8).
33. Put 9S3263 Thread Lock on bolt (10). Install bolt (10) with spacer (11), and spring (12) on
control lever assembly (8).
22/25
231D EXCAVATOR 1NK00001-UP (MACHINE) POWERED BY 3208 ENGINE(...
2021/2/12
https://127.0.0.1/sisweb/sisweb/techdoc/techdoc_print_page.jsp?returnurl=/sis...
34. Position spring (66) under the control lever assembly. Install control lever assembly (8)
making sure spring (66) stays in position and the holes in the control lever are aligned with two
dowels (67). Install bolt (10) and tighten to a torque of 10 N·m (90 lb in).
NOTICE
Control plates (6) and (7) must be installed correctly or the pump will
not operate.
35. Using 5P960 Multipurpose Grease, install control plates (6) and (7) on the swivel fork in the
control cover. Make sure the inlet ports are toward the center and dampening slots (68) are
positioned as shown.
NOTICE
The cylinder blocks must be aligned with the control plates or the
pump will be damaged when bolts (4) are tightened.
36. Install gasket (69).
37. Tilt both cylinder blocks to the maximum angle, and install control housing (3). Make sure the
cylinder blocks are aligned with the control plates. If the control housing does not go over the
alignment pins easily, check the cylinder block and control plate alignment.
38. Install twelve bolts (4) and tighten to a torque of 86 N·m (65 lb ft).
23/25
231D EXCAVATOR 1NK00001-UP (MACHINE) POWERED BY 3208 ENGINE(...
2021/2/12
https://127.0.0.1/sisweb/sisweb/techdoc/techdoc_print_page.jsp?returnurl=/sis...
39. Install the O-ring seal, spring (70) and spring seat (71) on power adjustment screw (2).
40. Install power adjustment screw (2) with the spring and spring seat into the pump housing.
Measure the height of the adjustment screw, and compare it with the dimension that was measured
in Step 4 of Disassemble Pump. The dimension should be the same.
41. Install torque adjustment screw (1) and tighten the locking nut so the height of the adjustment
screw is the same dimension that was measured in Step 3 of Disassemble Pump.
NOTE: If the drive shaft is grooved at the seal contact area, shim material up to 1.00 mm (.040
in) maximum thickness may be used between lip-type seal (72) and cover (43).
42. Using tooling (D), install lip-type seal (72) in drive shaft cover (43). Put SAE 10W oil on the
lip of the seal.
24/25
231D EXCAVATOR 1NK00001-UP (MACHINE) POWERED BY 3208 ENGINE(...
2021/2/12
https://127.0.0.1/sisweb/sisweb/techdoc/techdoc_print_page.jsp?returnurl=/sis...
43. Use 5P960 Multipurpose Grease, and install O-ring seal (73).
44. Install tool (E) over the drive shaft to protect the lip-type seal.
45. Install cover (43). It may be necessary to tap the cover into position.
46. Install the spacer ring. Using tool (F), install retaining ring (42).
47. Install the plastic covers on the power adjustment screw and the torque adjustment screw after
the pump has been installed and adjusted on the vehicle.
End By:
a. install pump
25/25
231D EXCAVATOR 1NK00001-UP (MACHINE) POWERED BY 3208 ENGINE(...
2021/2/12
https://127.0.0.1/sisweb/sisweb/techdoc/techdoc_print_page.jsp?returnurl=/sis...
Product: EXCAVATOR
Model: 231D EXCAVATOR 1NK
Configuration: 231D EXCAVATOR 1NK00001-UP (MACHINE) POWERED BY 3208 ENGINE
Disassembly and Assembly
225D & 231D EXCAVATORS VEHICLE SYSTEMS
Media Number -SENR4784-00 Publication Date -01/03/1990 Date Updated -26/10/2004
SENR47840033
Stick And Swing Pilot Control Valve
SMCS - 5452-010
Remove And Install Stick And Swing Pilot Control Valve
Always release the oil pressure in the main hydraulic system before
disconnecting or removing any oil lines connected to the main hydraulic
system.
Always lower the bucket to the ground before the performance of any
service work.
1/2
231D EXCAVATOR 1NK00001-UP (MACHINE) POWERED BY 3208 ENGINE(S...
2021/2/12
https://127.0.0.1/sisweb/sisweb/techdoc/techdoc_print_page.jsp?returnurl=/sis...
1. Remove six screws (2). Remove cover (1) from the control panel and disconnect the wiring
harness for service meter (3).
2. Remove the knob and rubber boot from the control lever.
3. Mark, disconnect and plug six hose assemblies (6).
4. Remove four nuts and bolts (5). Remove control valve (4).
NOTE: Install in reverse order.
2/2
231D EXCAVATOR 1NK00001-UP (MACHINE) POWERED BY 3208 ENGINE(S...
2021/2/12
https://127.0.0.1/sisweb/sisweb/techdoc/techdoc_print_page.jsp?returnurl=/sis...
Product: EXCAVATOR
Model: 231D EXCAVATOR 1NK
Configuration: 231D EXCAVATOR 1NK00001-UP (MACHINE) POWERED BY 3208 ENGINE
Disassembly and Assembly
225D & 231D EXCAVATORS VEHICLE SYSTEMS
Media Number -SENR4784-00 Publication Date -01/03/1990 Date Updated -26/10/2004
SENR47840034
Bucket And Boom Pilot Control Valve
SMCS - 5452-010
Remove And Install Bucket And Boom Pilot Control Valve
Always release the oil pressure in the main hydraulic system before
disconnecting or removing any oil lines connected to the main hydraulic
system.
Always lower the bucket to the ground before the performance of any
service work.
1. Remove the screws and the retainer that hold the floor mat down at the door opening. Fold the
floor mat forward.
1/2
231D EXCAVATOR 1NK00001-UP (MACHINE) POWERED BY 3208 ENGINE(S...
2021/2/12
https://127.0.0.1/sisweb/sisweb/techdoc/techdoc_print_page.jsp?returnurl=/sis...
Suggest:
If the above button click is invalid.
Please download this document
first, and then click the above link
to download the complete manual.
Thank you so much for reading
2. Remove three bolts (1). Turn the seat toward the door.
3. Remove the knob and rubber boot (2). Remove four screws (4) and cover (3).
4. Mark, disconnect and plug hose assemblies (6).
5. Remove the four bolts and control valve (5).
NOTE: Install in reverse order.
2/2
231D EXCAVATOR 1NK00001-UP (MACHINE) POWERED BY 3208 ENGINE(S...
2021/2/12
https://127.0.0.1/sisweb/sisweb/techdoc/techdoc_print_page.jsp?returnurl=/sis...

More Related Content

Similar to Caterpillar Cat 231D EXCAVATOR (Prefix 1NK) Service Repair Manual Instant Download.pdf

Caterpillar Cat 320D2L Excavator (Prefix HDM) Service Repair Manual Instant D...
Caterpillar Cat 320D2L Excavator (Prefix HDM) Service Repair Manual Instant D...Caterpillar Cat 320D2L Excavator (Prefix HDM) Service Repair Manual Instant D...
Caterpillar Cat 320D2L Excavator (Prefix HDM) Service Repair Manual Instant D...ze6074xunong
 
Caterpillar Cat 320D2L Excavator (Prefix HDM) Service Repair Manual Instant D...
Caterpillar Cat 320D2L Excavator (Prefix HDM) Service Repair Manual Instant D...Caterpillar Cat 320D2L Excavator (Prefix HDM) Service Repair Manual Instant D...
Caterpillar Cat 320D2L Excavator (Prefix HDM) Service Repair Manual Instant D...f89siekkmdmm2w
 
Caterpillar Cat 320D2L Excavator (Prefix HDM) Service Repair Manual Instant D...
Caterpillar Cat 320D2L Excavator (Prefix HDM) Service Repair Manual Instant D...Caterpillar Cat 320D2L Excavator (Prefix HDM) Service Repair Manual Instant D...
Caterpillar Cat 320D2L Excavator (Prefix HDM) Service Repair Manual Instant D...yu5676962
 
Caterpillar Cat 320D2L Excavator (Prefix HDM) Service Repair Manual Instant D...
Caterpillar Cat 320D2L Excavator (Prefix HDM) Service Repair Manual Instant D...Caterpillar Cat 320D2L Excavator (Prefix HDM) Service Repair Manual Instant D...
Caterpillar Cat 320D2L Excavator (Prefix HDM) Service Repair Manual Instant D...f8usejkdmmd8i
 
Caterpillar Cat 320D2L Excavator (Prefix HDM) Service Repair Manual Instant D...
Caterpillar Cat 320D2L Excavator (Prefix HDM) Service Repair Manual Instant D...Caterpillar Cat 320D2L Excavator (Prefix HDM) Service Repair Manual Instant D...
Caterpillar Cat 320D2L Excavator (Prefix HDM) Service Repair Manual Instant D...gongfuao7509
 
Caterpillar Cat 320D2L Excavator (Prefix HDM) Service Repair Manual Instant D...
Caterpillar Cat 320D2L Excavator (Prefix HDM) Service Repair Manual Instant D...Caterpillar Cat 320D2L Excavator (Prefix HDM) Service Repair Manual Instant D...
Caterpillar Cat 320D2L Excavator (Prefix HDM) Service Repair Manual Instant D...f8seodkdmdmed3
 
Caterpillar Cat 320D2L Excavator (Prefix HDM) Service Repair Manual Instant D...
Caterpillar Cat 320D2L Excavator (Prefix HDM) Service Repair Manual Instant D...Caterpillar Cat 320D2L Excavator (Prefix HDM) Service Repair Manual Instant D...
Caterpillar Cat 320D2L Excavator (Prefix HDM) Service Repair Manual Instant D...yin9niaojiao
 
Caterpillar Cat 320D2L Excavator (Prefix HDM) Service Repair Manual (HDM00001...
Caterpillar Cat 320D2L Excavator (Prefix HDM) Service Repair Manual (HDM00001...Caterpillar Cat 320D2L Excavator (Prefix HDM) Service Repair Manual (HDM00001...
Caterpillar Cat 320D2L Excavator (Prefix HDM) Service Repair Manual (HDM00001...fusjekkdmdmd2w
 
Caterpillar Cat 320D2L Excavator (Prefix HDM) Service Repair Manual (HDM00001...
Caterpillar Cat 320D2L Excavator (Prefix HDM) Service Repair Manual (HDM00001...Caterpillar Cat 320D2L Excavator (Prefix HDM) Service Repair Manual (HDM00001...
Caterpillar Cat 320D2L Excavator (Prefix HDM) Service Repair Manual (HDM00001...jfkekd9d8di
 
Caterpillar Cat 320D2L Excavator (Prefix HDM) Service Repair Manual (HDM00001...
Caterpillar Cat 320D2L Excavator (Prefix HDM) Service Repair Manual (HDM00001...Caterpillar Cat 320D2L Excavator (Prefix HDM) Service Repair Manual (HDM00001...
Caterpillar Cat 320D2L Excavator (Prefix HDM) Service Repair Manual (HDM00001...udjkskmdm4e
 
Caterpillar Cat 320D2L Excavator (Prefix HDM) Service Repair Manual (HDM00001...
Caterpillar Cat 320D2L Excavator (Prefix HDM) Service Repair Manual (HDM00001...Caterpillar Cat 320D2L Excavator (Prefix HDM) Service Repair Manual (HDM00001...
Caterpillar Cat 320D2L Excavator (Prefix HDM) Service Repair Manual (HDM00001...mtox80484546
 
Caterpillar Cat 320D2L Excavator (Prefix HDM) Service Repair Manual (HDM00001...
Caterpillar Cat 320D2L Excavator (Prefix HDM) Service Repair Manual (HDM00001...Caterpillar Cat 320D2L Excavator (Prefix HDM) Service Repair Manual (HDM00001...
Caterpillar Cat 320D2L Excavator (Prefix HDM) Service Repair Manual (HDM00001...nkikou1545
 
Caterpillar Cat 320D2L Excavator (Prefix HDM) Service Repair Manual Instant D...
Caterpillar Cat 320D2L Excavator (Prefix HDM) Service Repair Manual Instant D...Caterpillar Cat 320D2L Excavator (Prefix HDM) Service Repair Manual Instant D...
Caterpillar Cat 320D2L Excavator (Prefix HDM) Service Repair Manual Instant D...jkdkkdsmmd
 
Caterpillar Cat 320D2L Excavator (Prefix HDM) Service Repair Manual (HDM00001...
Caterpillar Cat 320D2L Excavator (Prefix HDM) Service Repair Manual (HDM00001...Caterpillar Cat 320D2L Excavator (Prefix HDM) Service Repair Manual (HDM00001...
Caterpillar Cat 320D2L Excavator (Prefix HDM) Service Repair Manual (HDM00001...8sjkdkdmdmdm
 
Caterpillar Cat 320D2L Excavator (Prefix HDM) Service Repair Manual Instant D...
Caterpillar Cat 320D2L Excavator (Prefix HDM) Service Repair Manual Instant D...Caterpillar Cat 320D2L Excavator (Prefix HDM) Service Repair Manual Instant D...
Caterpillar Cat 320D2L Excavator (Prefix HDM) Service Repair Manual Instant D...8foskkdjdkdm3e
 
Caterpillar Cat 320D2L Excavator (Prefix HDM) Service Repair Manual (HDM00001...
Caterpillar Cat 320D2L Excavator (Prefix HDM) Service Repair Manual (HDM00001...Caterpillar Cat 320D2L Excavator (Prefix HDM) Service Repair Manual (HDM00001...
Caterpillar Cat 320D2L Excavator (Prefix HDM) Service Repair Manual (HDM00001...fujsekmd9dik
 

Similar to Caterpillar Cat 231D EXCAVATOR (Prefix 1NK) Service Repair Manual Instant Download.pdf (16)

Caterpillar Cat 320D2L Excavator (Prefix HDM) Service Repair Manual Instant D...
Caterpillar Cat 320D2L Excavator (Prefix HDM) Service Repair Manual Instant D...Caterpillar Cat 320D2L Excavator (Prefix HDM) Service Repair Manual Instant D...
Caterpillar Cat 320D2L Excavator (Prefix HDM) Service Repair Manual Instant D...
 
Caterpillar Cat 320D2L Excavator (Prefix HDM) Service Repair Manual Instant D...
Caterpillar Cat 320D2L Excavator (Prefix HDM) Service Repair Manual Instant D...Caterpillar Cat 320D2L Excavator (Prefix HDM) Service Repair Manual Instant D...
Caterpillar Cat 320D2L Excavator (Prefix HDM) Service Repair Manual Instant D...
 
Caterpillar Cat 320D2L Excavator (Prefix HDM) Service Repair Manual (HDM00001...
Caterpillar Cat 320D2L Excavator (Prefix HDM) Service Repair Manual (HDM00001...Caterpillar Cat 320D2L Excavator (Prefix HDM) Service Repair Manual (HDM00001...
Caterpillar Cat 320D2L Excavator (Prefix HDM) Service Repair Manual (HDM00001...
 
Caterpillar Cat 320D2L Excavator (Prefix HDM) Service Repair Manual (HDM00001...
Caterpillar Cat 320D2L Excavator (Prefix HDM) Service Repair Manual (HDM00001...Caterpillar Cat 320D2L Excavator (Prefix HDM) Service Repair Manual (HDM00001...
Caterpillar Cat 320D2L Excavator (Prefix HDM) Service Repair Manual (HDM00001...
 
Caterpillar Cat 320D2L Excavator (Prefix HDM) Service Repair Manual Instant D...
Caterpillar Cat 320D2L Excavator (Prefix HDM) Service Repair Manual Instant D...Caterpillar Cat 320D2L Excavator (Prefix HDM) Service Repair Manual Instant D...
Caterpillar Cat 320D2L Excavator (Prefix HDM) Service Repair Manual Instant D...
 
Caterpillar Cat 320D2L Excavator (Prefix HDM) Service Repair Manual (HDM00001...
Caterpillar Cat 320D2L Excavator (Prefix HDM) Service Repair Manual (HDM00001...Caterpillar Cat 320D2L Excavator (Prefix HDM) Service Repair Manual (HDM00001...
Caterpillar Cat 320D2L Excavator (Prefix HDM) Service Repair Manual (HDM00001...
 
Caterpillar Cat 320D2L Excavator (Prefix HDM) Service Repair Manual Instant D...
Caterpillar Cat 320D2L Excavator (Prefix HDM) Service Repair Manual Instant D...Caterpillar Cat 320D2L Excavator (Prefix HDM) Service Repair Manual Instant D...
Caterpillar Cat 320D2L Excavator (Prefix HDM) Service Repair Manual Instant D...
 
Caterpillar Cat 320D2L Excavator (Prefix HDM) Service Repair Manual (HDM00001...
Caterpillar Cat 320D2L Excavator (Prefix HDM) Service Repair Manual (HDM00001...Caterpillar Cat 320D2L Excavator (Prefix HDM) Service Repair Manual (HDM00001...
Caterpillar Cat 320D2L Excavator (Prefix HDM) Service Repair Manual (HDM00001...
 

More from fiksemdmdme3

Caterpillar Cat 12H Motor Grader (Prefix AMZ) Service Repair Manual Instant D...
Caterpillar Cat 12H Motor Grader (Prefix AMZ) Service Repair Manual Instant D...Caterpillar Cat 12H Motor Grader (Prefix AMZ) Service Repair Manual Instant D...
Caterpillar Cat 12H Motor Grader (Prefix AMZ) Service Repair Manual Instant D...fiksemdmdme3
 
Caterpillar Cat D6T XL TRACK-TYPE TRACTOR (Prefix KMR) Service Repair Manual ...
Caterpillar Cat D6T XL TRACK-TYPE TRACTOR (Prefix KMR) Service Repair Manual ...Caterpillar Cat D6T XL TRACK-TYPE TRACTOR (Prefix KMR) Service Repair Manual ...
Caterpillar Cat D6T XL TRACK-TYPE TRACTOR (Prefix KMR) Service Repair Manual ...fiksemdmdme3
 
Caterpillar Cat D6T TRACK-TYPE TRACTOR (Prefix SMC) Service Repair Manual Ins...
Caterpillar Cat D6T TRACK-TYPE TRACTOR (Prefix SMC) Service Repair Manual Ins...Caterpillar Cat D6T TRACK-TYPE TRACTOR (Prefix SMC) Service Repair Manual Ins...
Caterpillar Cat D6T TRACK-TYPE TRACTOR (Prefix SMC) Service Repair Manual Ins...fiksemdmdme3
 
Caterpillar Cat D7G2 TRACK-TYPE TRACTOR (Prefix C7G) Service Repair Manual In...
Caterpillar Cat D7G2 TRACK-TYPE TRACTOR (Prefix C7G) Service Repair Manual In...Caterpillar Cat D7G2 TRACK-TYPE TRACTOR (Prefix C7G) Service Repair Manual In...
Caterpillar Cat D7G2 TRACK-TYPE TRACTOR (Prefix C7G) Service Repair Manual In...fiksemdmdme3
 
Caterpillar Cat D6T TRACK-TYPE TRACTOR (Prefix PEZ) Service Repair Manual Ins...
Caterpillar Cat D6T TRACK-TYPE TRACTOR (Prefix PEZ) Service Repair Manual Ins...Caterpillar Cat D6T TRACK-TYPE TRACTOR (Prefix PEZ) Service Repair Manual Ins...
Caterpillar Cat D6T TRACK-TYPE TRACTOR (Prefix PEZ) Service Repair Manual Ins...fiksemdmdme3
 
Caterpillar Cat D6T TRACK-TYPE TRACTOR (Prefix HYT) Service Repair Manual Ins...
Caterpillar Cat D6T TRACK-TYPE TRACTOR (Prefix HYT) Service Repair Manual Ins...Caterpillar Cat D6T TRACK-TYPE TRACTOR (Prefix HYT) Service Repair Manual Ins...
Caterpillar Cat D6T TRACK-TYPE TRACTOR (Prefix HYT) Service Repair Manual Ins...fiksemdmdme3
 
Caterpillar Cat D6R III TRACK-TYPE TRACTOR (Prefix GMT) Service Repair Manual...
Caterpillar Cat D6R III TRACK-TYPE TRACTOR (Prefix GMT) Service Repair Manual...Caterpillar Cat D6R III TRACK-TYPE TRACTOR (Prefix GMT) Service Repair Manual...
Caterpillar Cat D6R III TRACK-TYPE TRACTOR (Prefix GMT) Service Repair Manual...fiksemdmdme3
 
Caterpillar Cat D6H XL TRACK-TYPE TRACTOR (Prefix 8KK) Service Repair Manual ...
Caterpillar Cat D6H XL TRACK-TYPE TRACTOR (Prefix 8KK) Service Repair Manual ...Caterpillar Cat D6H XL TRACK-TYPE TRACTOR (Prefix 8KK) Service Repair Manual ...
Caterpillar Cat D6H XL TRACK-TYPE TRACTOR (Prefix 8KK) Service Repair Manual ...fiksemdmdme3
 
Caterpillar Cat D6H TRACK-TYPE TRACTOR (Prefix 4GG) Service Repair Manual Ins...
Caterpillar Cat D6H TRACK-TYPE TRACTOR (Prefix 4GG) Service Repair Manual Ins...Caterpillar Cat D6H TRACK-TYPE TRACTOR (Prefix 4GG) Service Repair Manual Ins...
Caterpillar Cat D6H TRACK-TYPE TRACTOR (Prefix 4GG) Service Repair Manual Ins...fiksemdmdme3
 
Caterpillar Cat 990H Wheel Loader (Prefix BWX) Service Repair Manual Instant ...
Caterpillar Cat 990H Wheel Loader (Prefix BWX) Service Repair Manual Instant ...Caterpillar Cat 990H Wheel Loader (Prefix BWX) Service Repair Manual Instant ...
Caterpillar Cat 990H Wheel Loader (Prefix BWX) Service Repair Manual Instant ...fiksemdmdme3
 
Caterpillar Cat 992C Wheel Loader (Prefix 49Z) Service Repair Manual Instant ...
Caterpillar Cat 992C Wheel Loader (Prefix 49Z) Service Repair Manual Instant ...Caterpillar Cat 992C Wheel Loader (Prefix 49Z) Service Repair Manual Instant ...
Caterpillar Cat 992C Wheel Loader (Prefix 49Z) Service Repair Manual Instant ...fiksemdmdme3
 
Caterpillar Cat CB-534D, CB-534DXW Vibratory Compactor (Prefix GCA) Service R...
Caterpillar Cat CB-534D, CB-534DXW Vibratory Compactor (Prefix GCA) Service R...Caterpillar Cat CB-534D, CB-534DXW Vibratory Compactor (Prefix GCA) Service R...
Caterpillar Cat CB-534D, CB-534DXW Vibratory Compactor (Prefix GCA) Service R...fiksemdmdme3
 
Caterpillar Cat 977L TRACK LOADER (Prefix 64X) Service Repair Manual Instant ...
Caterpillar Cat 977L TRACK LOADER (Prefix 64X) Service Repair Manual Instant ...Caterpillar Cat 977L TRACK LOADER (Prefix 64X) Service Repair Manual Instant ...
Caterpillar Cat 977L TRACK LOADER (Prefix 64X) Service Repair Manual Instant ...fiksemdmdme3
 
Caterpillar Cat 966M Wheel Loader (Prefix R8D) Service Repair Manual Instant ...
Caterpillar Cat 966M Wheel Loader (Prefix R8D) Service Repair Manual Instant ...Caterpillar Cat 966M Wheel Loader (Prefix R8D) Service Repair Manual Instant ...
Caterpillar Cat 966M Wheel Loader (Prefix R8D) Service Repair Manual Instant ...fiksemdmdme3
 
Caterpillar Cat 340 Excavator (Prefix TYH) Service Repair Manual Instant Down...
Caterpillar Cat 340 Excavator (Prefix TYH) Service Repair Manual Instant Down...Caterpillar Cat 340 Excavator (Prefix TYH) Service Repair Manual Instant Down...
Caterpillar Cat 340 Excavator (Prefix TYH) Service Repair Manual Instant Down...fiksemdmdme3
 
Caterpillar Cat 311F LRR Excavator (Prefix LZF) Service Repair Manual Instant...
Caterpillar Cat 311F LRR Excavator (Prefix LZF) Service Repair Manual Instant...Caterpillar Cat 311F LRR Excavator (Prefix LZF) Service Repair Manual Instant...
Caterpillar Cat 311F LRR Excavator (Prefix LZF) Service Repair Manual Instant...fiksemdmdme3
 
Caterpillar Cat 120 MOTOR GRADER (Prefix 10R) Service Repair Manual Instant D...
Caterpillar Cat 120 MOTOR GRADER (Prefix 10R) Service Repair Manual Instant D...Caterpillar Cat 120 MOTOR GRADER (Prefix 10R) Service Repair Manual Instant D...
Caterpillar Cat 120 MOTOR GRADER (Prefix 10R) Service Repair Manual Instant D...fiksemdmdme3
 

More from fiksemdmdme3 (18)

Caterpillar Cat 12H Motor Grader (Prefix AMZ) Service Repair Manual Instant D...
Caterpillar Cat 12H Motor Grader (Prefix AMZ) Service Repair Manual Instant D...Caterpillar Cat 12H Motor Grader (Prefix AMZ) Service Repair Manual Instant D...
Caterpillar Cat 12H Motor Grader (Prefix AMZ) Service Repair Manual Instant D...
 
Caterpillar Cat D6T XL TRACK-TYPE TRACTOR (Prefix KMR) Service Repair Manual ...
Caterpillar Cat D6T XL TRACK-TYPE TRACTOR (Prefix KMR) Service Repair Manual ...Caterpillar Cat D6T XL TRACK-TYPE TRACTOR (Prefix KMR) Service Repair Manual ...
Caterpillar Cat D6T XL TRACK-TYPE TRACTOR (Prefix KMR) Service Repair Manual ...
 
Caterpillar Cat D6T TRACK-TYPE TRACTOR (Prefix SMC) Service Repair Manual Ins...
Caterpillar Cat D6T TRACK-TYPE TRACTOR (Prefix SMC) Service Repair Manual Ins...Caterpillar Cat D6T TRACK-TYPE TRACTOR (Prefix SMC) Service Repair Manual Ins...
Caterpillar Cat D6T TRACK-TYPE TRACTOR (Prefix SMC) Service Repair Manual Ins...
 
Caterpillar Cat D7G2 TRACK-TYPE TRACTOR (Prefix C7G) Service Repair Manual In...
Caterpillar Cat D7G2 TRACK-TYPE TRACTOR (Prefix C7G) Service Repair Manual In...Caterpillar Cat D7G2 TRACK-TYPE TRACTOR (Prefix C7G) Service Repair Manual In...
Caterpillar Cat D7G2 TRACK-TYPE TRACTOR (Prefix C7G) Service Repair Manual In...
 
Caterpillar Cat D6T TRACK-TYPE TRACTOR (Prefix PEZ) Service Repair Manual Ins...
Caterpillar Cat D6T TRACK-TYPE TRACTOR (Prefix PEZ) Service Repair Manual Ins...Caterpillar Cat D6T TRACK-TYPE TRACTOR (Prefix PEZ) Service Repair Manual Ins...
Caterpillar Cat D6T TRACK-TYPE TRACTOR (Prefix PEZ) Service Repair Manual Ins...
 
Caterpillar Cat D6T TRACK-TYPE TRACTOR (Prefix HYT) Service Repair Manual Ins...
Caterpillar Cat D6T TRACK-TYPE TRACTOR (Prefix HYT) Service Repair Manual Ins...Caterpillar Cat D6T TRACK-TYPE TRACTOR (Prefix HYT) Service Repair Manual Ins...
Caterpillar Cat D6T TRACK-TYPE TRACTOR (Prefix HYT) Service Repair Manual Ins...
 
Caterpillar Cat D6R III TRACK-TYPE TRACTOR (Prefix GMT) Service Repair Manual...
Caterpillar Cat D6R III TRACK-TYPE TRACTOR (Prefix GMT) Service Repair Manual...Caterpillar Cat D6R III TRACK-TYPE TRACTOR (Prefix GMT) Service Repair Manual...
Caterpillar Cat D6R III TRACK-TYPE TRACTOR (Prefix GMT) Service Repair Manual...
 
Caterpillar Cat D6H XL TRACK-TYPE TRACTOR (Prefix 8KK) Service Repair Manual ...
Caterpillar Cat D6H XL TRACK-TYPE TRACTOR (Prefix 8KK) Service Repair Manual ...Caterpillar Cat D6H XL TRACK-TYPE TRACTOR (Prefix 8KK) Service Repair Manual ...
Caterpillar Cat D6H XL TRACK-TYPE TRACTOR (Prefix 8KK) Service Repair Manual ...
 
Caterpillar Cat D6H TRACK-TYPE TRACTOR (Prefix 4GG) Service Repair Manual Ins...
Caterpillar Cat D6H TRACK-TYPE TRACTOR (Prefix 4GG) Service Repair Manual Ins...Caterpillar Cat D6H TRACK-TYPE TRACTOR (Prefix 4GG) Service Repair Manual Ins...
Caterpillar Cat D6H TRACK-TYPE TRACTOR (Prefix 4GG) Service Repair Manual Ins...
 
Caterpillar Cat 990H Wheel Loader (Prefix BWX) Service Repair Manual Instant ...
Caterpillar Cat 990H Wheel Loader (Prefix BWX) Service Repair Manual Instant ...Caterpillar Cat 990H Wheel Loader (Prefix BWX) Service Repair Manual Instant ...
Caterpillar Cat 990H Wheel Loader (Prefix BWX) Service Repair Manual Instant ...
 
Caterpillar Cat 992C Wheel Loader (Prefix 49Z) Service Repair Manual Instant ...
Caterpillar Cat 992C Wheel Loader (Prefix 49Z) Service Repair Manual Instant ...Caterpillar Cat 992C Wheel Loader (Prefix 49Z) Service Repair Manual Instant ...
Caterpillar Cat 992C Wheel Loader (Prefix 49Z) Service Repair Manual Instant ...
 
Caterpillar Cat CB-534D, CB-534DXW Vibratory Compactor (Prefix GCA) Service R...
Caterpillar Cat CB-534D, CB-534DXW Vibratory Compactor (Prefix GCA) Service R...Caterpillar Cat CB-534D, CB-534DXW Vibratory Compactor (Prefix GCA) Service R...
Caterpillar Cat CB-534D, CB-534DXW Vibratory Compactor (Prefix GCA) Service R...
 
Caterpillar Cat 977L TRACK LOADER (Prefix 64X) Service Repair Manual Instant ...
Caterpillar Cat 977L TRACK LOADER (Prefix 64X) Service Repair Manual Instant ...Caterpillar Cat 977L TRACK LOADER (Prefix 64X) Service Repair Manual Instant ...
Caterpillar Cat 977L TRACK LOADER (Prefix 64X) Service Repair Manual Instant ...
 
Caterpillar Cat 966M Wheel Loader (Prefix R8D) Service Repair Manual Instant ...
Caterpillar Cat 966M Wheel Loader (Prefix R8D) Service Repair Manual Instant ...Caterpillar Cat 966M Wheel Loader (Prefix R8D) Service Repair Manual Instant ...
Caterpillar Cat 966M Wheel Loader (Prefix R8D) Service Repair Manual Instant ...
 
Caterpillar Cat 340 Excavator (Prefix TYH) Service Repair Manual Instant Down...
Caterpillar Cat 340 Excavator (Prefix TYH) Service Repair Manual Instant Down...Caterpillar Cat 340 Excavator (Prefix TYH) Service Repair Manual Instant Down...
Caterpillar Cat 340 Excavator (Prefix TYH) Service Repair Manual Instant Down...
 
Caterpillar Cat 311F LRR Excavator (Prefix LZF) Service Repair Manual Instant...
Caterpillar Cat 311F LRR Excavator (Prefix LZF) Service Repair Manual Instant...Caterpillar Cat 311F LRR Excavator (Prefix LZF) Service Repair Manual Instant...
Caterpillar Cat 311F LRR Excavator (Prefix LZF) Service Repair Manual Instant...
 
Caterpillar Cat 120 MOTOR GRADER (Prefix 10R) Service Repair Manual Instant D...
Caterpillar Cat 120 MOTOR GRADER (Prefix 10R) Service Repair Manual Instant D...Caterpillar Cat 120 MOTOR GRADER (Prefix 10R) Service Repair Manual Instant D...
Caterpillar Cat 120 MOTOR GRADER (Prefix 10R) Service Repair Manual Instant D...
 
Caterpillar Cat 120 MOTOR GRADER (Prefix 10R) Service Repair Manual Instant D...
Caterpillar Cat 120 MOTOR GRADER (Prefix 10R) Service Repair Manual Instant D...Caterpillar Cat 120 MOTOR GRADER (Prefix 10R) Service Repair Manual Instant D...
Caterpillar Cat 120 MOTOR GRADER (Prefix 10R) Service Repair Manual Instant D...
 

Recently uploaded

Illustrative History and Influence of Board Games - Thesis.pptx
Illustrative History and Influence of Board Games - Thesis.pptxIllustrative History and Influence of Board Games - Thesis.pptx
Illustrative History and Influence of Board Games - Thesis.pptxHenriSandoval
 
一比一原版(Deakin毕业证书)迪肯大学毕业证成绩单留信学历认证
一比一原版(Deakin毕业证书)迪肯大学毕业证成绩单留信学历认证一比一原版(Deakin毕业证书)迪肯大学毕业证成绩单留信学历认证
一比一原版(Deakin毕业证书)迪肯大学毕业证成绩单留信学历认证62qaf0hi
 
如何办理(NCL毕业证书)纽卡斯尔大学毕业证毕业证成绩单原版一比一
如何办理(NCL毕业证书)纽卡斯尔大学毕业证毕业证成绩单原版一比一如何办理(NCL毕业证书)纽卡斯尔大学毕业证毕业证成绩单原版一比一
如何办理(NCL毕业证书)纽卡斯尔大学毕业证毕业证成绩单原版一比一avy6anjnd
 
一比一原版(CCA毕业证书)加利福尼亚艺术学院毕业证成绩单原件一模一样
一比一原版(CCA毕业证书)加利福尼亚艺术学院毕业证成绩单原件一模一样一比一原版(CCA毕业证书)加利福尼亚艺术学院毕业证成绩单原件一模一样
一比一原版(CCA毕业证书)加利福尼亚艺术学院毕业证成绩单原件一模一样zovambe
 
如何办理(Waterloo毕业证书)滑铁卢大学毕业证毕业证成绩单原版一比一
如何办理(Waterloo毕业证书)滑铁卢大学毕业证毕业证成绩单原版一比一如何办理(Waterloo毕业证书)滑铁卢大学毕业证毕业证成绩单原版一比一
如何办理(Waterloo毕业证书)滑铁卢大学毕业证毕业证成绩单原版一比一avy6anjnd
 
在线定制(UBC毕业证书)英属哥伦比亚大学毕业证成绩单留信学历认证原版一比一
在线定制(UBC毕业证书)英属哥伦比亚大学毕业证成绩单留信学历认证原版一比一在线定制(UBC毕业证书)英属哥伦比亚大学毕业证成绩单留信学历认证原版一比一
在线定制(UBC毕业证书)英属哥伦比亚大学毕业证成绩单留信学历认证原版一比一qh1ao5mm
 
如何办理(爱大毕业证书)爱丁堡大学毕业证成绩单留信学历认证真实可查
如何办理(爱大毕业证书)爱丁堡大学毕业证成绩单留信学历认证真实可查如何办理(爱大毕业证书)爱丁堡大学毕业证成绩单留信学历认证真实可查
如何办理(爱大毕业证书)爱丁堡大学毕业证成绩单留信学历认证真实可查huxs9sacp
 
Access to Rural Charging by David Skakel
Access to Rural Charging by David SkakelAccess to Rural Charging by David Skakel
Access to Rural Charging by David SkakelForth
 
Early Production Containment Training.pptx
Early Production Containment Training.pptxEarly Production Containment Training.pptx
Early Production Containment Training.pptxssuser28d124
 
What Does It Mean When Mercedes Says 'ESP Inoperative See Owner's Manual'
What Does It Mean When Mercedes Says 'ESP Inoperative See Owner's Manual'What Does It Mean When Mercedes Says 'ESP Inoperative See Owner's Manual'
What Does It Mean When Mercedes Says 'ESP Inoperative See Owner's Manual'Euromotive Performance
 
Preparing for Transportation Electrification: The Electric Coop Perspective
Preparing for Transportation Electrification: The Electric Coop PerspectivePreparing for Transportation Electrification: The Electric Coop Perspective
Preparing for Transportation Electrification: The Electric Coop PerspectiveForth
 
John Deere Tractors 5415 Diagnostic Repair Service Manual.pdf
John Deere Tractors 5415 Diagnostic Repair Service Manual.pdfJohn Deere Tractors 5415 Diagnostic Repair Service Manual.pdf
John Deere Tractors 5415 Diagnostic Repair Service Manual.pdfExcavator
 
Is Your Mercedes Benz Trunk Refusing To Close Here's What Might Be Wrong
Is Your Mercedes Benz Trunk Refusing To Close Here's What Might Be WrongIs Your Mercedes Benz Trunk Refusing To Close Here's What Might Be Wrong
Is Your Mercedes Benz Trunk Refusing To Close Here's What Might Be WrongMomentum Motorworks
 
出售伯明翰大学毕业证研究生文凭证书原版质量
出售伯明翰大学毕业证研究生文凭证书原版质量出售伯明翰大学毕业证研究生文凭证书原版质量
出售伯明翰大学毕业证研究生文凭证书原版质量kthcah
 
JOHN DEERE 7200R 7215R 7230R 7260R 7280R TECHNICAL SERVICE PDF MANUAL 2680PGS...
JOHN DEERE 7200R 7215R 7230R 7260R 7280R TECHNICAL SERVICE PDF MANUAL 2680PGS...JOHN DEERE 7200R 7215R 7230R 7260R 7280R TECHNICAL SERVICE PDF MANUAL 2680PGS...
JOHN DEERE 7200R 7215R 7230R 7260R 7280R TECHNICAL SERVICE PDF MANUAL 2680PGS...Excavator
 
Things that make the new Nissan Z unique
Things that make the new Nissan Z uniqueThings that make the new Nissan Z unique
Things that make the new Nissan Z uniquejennifermiller8137
 
Effortless Driving Experience Premier Mercedes Sprinter Suspension Service
Effortless Driving Experience Premier Mercedes Sprinter Suspension ServiceEffortless Driving Experience Premier Mercedes Sprinter Suspension Service
Effortless Driving Experience Premier Mercedes Sprinter Suspension ServiceSprinter Gurus
 
Seamless Driving Experience Premier Mini Cooper Clutch Solutions
Seamless Driving Experience Premier Mini Cooper Clutch SolutionsSeamless Driving Experience Premier Mini Cooper Clutch Solutions
Seamless Driving Experience Premier Mini Cooper Clutch SolutionsAbsolute Auto Care Inc
 
如何办理加拿大麦克马斯特大学毕业证(McMaste 毕业证书)毕业证成绩单原版一比一
如何办理加拿大麦克马斯特大学毕业证(McMaste 毕业证书)毕业证成绩单原版一比一如何办理加拿大麦克马斯特大学毕业证(McMaste 毕业证书)毕业证成绩单原版一比一
如何办理加拿大麦克马斯特大学毕业证(McMaste 毕业证书)毕业证成绩单原版一比一8jg9cqy
 
一比一原版伯明翰城市大学毕业证成绩单留信学历认证
一比一原版伯明翰城市大学毕业证成绩单留信学历认证一比一原版伯明翰城市大学毕业证成绩单留信学历认证
一比一原版伯明翰城市大学毕业证成绩单留信学历认证62qaf0hi
 

Recently uploaded (20)

Illustrative History and Influence of Board Games - Thesis.pptx
Illustrative History and Influence of Board Games - Thesis.pptxIllustrative History and Influence of Board Games - Thesis.pptx
Illustrative History and Influence of Board Games - Thesis.pptx
 
一比一原版(Deakin毕业证书)迪肯大学毕业证成绩单留信学历认证
一比一原版(Deakin毕业证书)迪肯大学毕业证成绩单留信学历认证一比一原版(Deakin毕业证书)迪肯大学毕业证成绩单留信学历认证
一比一原版(Deakin毕业证书)迪肯大学毕业证成绩单留信学历认证
 
如何办理(NCL毕业证书)纽卡斯尔大学毕业证毕业证成绩单原版一比一
如何办理(NCL毕业证书)纽卡斯尔大学毕业证毕业证成绩单原版一比一如何办理(NCL毕业证书)纽卡斯尔大学毕业证毕业证成绩单原版一比一
如何办理(NCL毕业证书)纽卡斯尔大学毕业证毕业证成绩单原版一比一
 
一比一原版(CCA毕业证书)加利福尼亚艺术学院毕业证成绩单原件一模一样
一比一原版(CCA毕业证书)加利福尼亚艺术学院毕业证成绩单原件一模一样一比一原版(CCA毕业证书)加利福尼亚艺术学院毕业证成绩单原件一模一样
一比一原版(CCA毕业证书)加利福尼亚艺术学院毕业证成绩单原件一模一样
 
如何办理(Waterloo毕业证书)滑铁卢大学毕业证毕业证成绩单原版一比一
如何办理(Waterloo毕业证书)滑铁卢大学毕业证毕业证成绩单原版一比一如何办理(Waterloo毕业证书)滑铁卢大学毕业证毕业证成绩单原版一比一
如何办理(Waterloo毕业证书)滑铁卢大学毕业证毕业证成绩单原版一比一
 
在线定制(UBC毕业证书)英属哥伦比亚大学毕业证成绩单留信学历认证原版一比一
在线定制(UBC毕业证书)英属哥伦比亚大学毕业证成绩单留信学历认证原版一比一在线定制(UBC毕业证书)英属哥伦比亚大学毕业证成绩单留信学历认证原版一比一
在线定制(UBC毕业证书)英属哥伦比亚大学毕业证成绩单留信学历认证原版一比一
 
如何办理(爱大毕业证书)爱丁堡大学毕业证成绩单留信学历认证真实可查
如何办理(爱大毕业证书)爱丁堡大学毕业证成绩单留信学历认证真实可查如何办理(爱大毕业证书)爱丁堡大学毕业证成绩单留信学历认证真实可查
如何办理(爱大毕业证书)爱丁堡大学毕业证成绩单留信学历认证真实可查
 
Access to Rural Charging by David Skakel
Access to Rural Charging by David SkakelAccess to Rural Charging by David Skakel
Access to Rural Charging by David Skakel
 
Early Production Containment Training.pptx
Early Production Containment Training.pptxEarly Production Containment Training.pptx
Early Production Containment Training.pptx
 
What Does It Mean When Mercedes Says 'ESP Inoperative See Owner's Manual'
What Does It Mean When Mercedes Says 'ESP Inoperative See Owner's Manual'What Does It Mean When Mercedes Says 'ESP Inoperative See Owner's Manual'
What Does It Mean When Mercedes Says 'ESP Inoperative See Owner's Manual'
 
Preparing for Transportation Electrification: The Electric Coop Perspective
Preparing for Transportation Electrification: The Electric Coop PerspectivePreparing for Transportation Electrification: The Electric Coop Perspective
Preparing for Transportation Electrification: The Electric Coop Perspective
 
John Deere Tractors 5415 Diagnostic Repair Service Manual.pdf
John Deere Tractors 5415 Diagnostic Repair Service Manual.pdfJohn Deere Tractors 5415 Diagnostic Repair Service Manual.pdf
John Deere Tractors 5415 Diagnostic Repair Service Manual.pdf
 
Is Your Mercedes Benz Trunk Refusing To Close Here's What Might Be Wrong
Is Your Mercedes Benz Trunk Refusing To Close Here's What Might Be WrongIs Your Mercedes Benz Trunk Refusing To Close Here's What Might Be Wrong
Is Your Mercedes Benz Trunk Refusing To Close Here's What Might Be Wrong
 
出售伯明翰大学毕业证研究生文凭证书原版质量
出售伯明翰大学毕业证研究生文凭证书原版质量出售伯明翰大学毕业证研究生文凭证书原版质量
出售伯明翰大学毕业证研究生文凭证书原版质量
 
JOHN DEERE 7200R 7215R 7230R 7260R 7280R TECHNICAL SERVICE PDF MANUAL 2680PGS...
JOHN DEERE 7200R 7215R 7230R 7260R 7280R TECHNICAL SERVICE PDF MANUAL 2680PGS...JOHN DEERE 7200R 7215R 7230R 7260R 7280R TECHNICAL SERVICE PDF MANUAL 2680PGS...
JOHN DEERE 7200R 7215R 7230R 7260R 7280R TECHNICAL SERVICE PDF MANUAL 2680PGS...
 
Things that make the new Nissan Z unique
Things that make the new Nissan Z uniqueThings that make the new Nissan Z unique
Things that make the new Nissan Z unique
 
Effortless Driving Experience Premier Mercedes Sprinter Suspension Service
Effortless Driving Experience Premier Mercedes Sprinter Suspension ServiceEffortless Driving Experience Premier Mercedes Sprinter Suspension Service
Effortless Driving Experience Premier Mercedes Sprinter Suspension Service
 
Seamless Driving Experience Premier Mini Cooper Clutch Solutions
Seamless Driving Experience Premier Mini Cooper Clutch SolutionsSeamless Driving Experience Premier Mini Cooper Clutch Solutions
Seamless Driving Experience Premier Mini Cooper Clutch Solutions
 
如何办理加拿大麦克马斯特大学毕业证(McMaste 毕业证书)毕业证成绩单原版一比一
如何办理加拿大麦克马斯特大学毕业证(McMaste 毕业证书)毕业证成绩单原版一比一如何办理加拿大麦克马斯特大学毕业证(McMaste 毕业证书)毕业证成绩单原版一比一
如何办理加拿大麦克马斯特大学毕业证(McMaste 毕业证书)毕业证成绩单原版一比一
 
一比一原版伯明翰城市大学毕业证成绩单留信学历认证
一比一原版伯明翰城市大学毕业证成绩单留信学历认证一比一原版伯明翰城市大学毕业证成绩单留信学历认证
一比一原版伯明翰城市大学毕业证成绩单留信学历认证
 

Caterpillar Cat 231D EXCAVATOR (Prefix 1NK) Service Repair Manual Instant Download.pdf

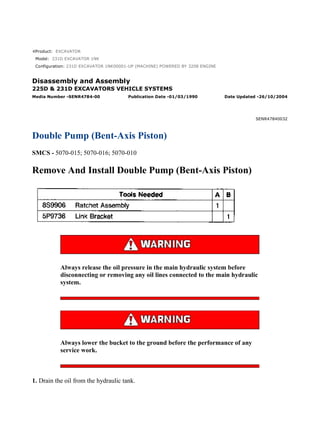
  • 1. Product: EXCAVATOR Model: 231D EXCAVATOR 1NK Configuration: 231D EXCAVATOR 1NK00001-UP (MACHINE) POWERED BY 3208 ENGINE Disassembly and Assembly 225D & 231D EXCAVATORS VEHICLE SYSTEMS Media Number -SENR4784-00 Publication Date -01/03/1990 Date Updated -26/10/2004 SENR47840032 Double Pump (Bent-Axis Piston) SMCS - 5070-015; 5070-016; 5070-010 Remove And Install Double Pump (Bent-Axis Piston) Always release the oil pressure in the main hydraulic system before disconnecting or removing any oil lines connected to the main hydraulic system. Always lower the bucket to the ground before the performance of any service work. 1. Drain the oil from the hydraulic tank. 1/25 231D EXCAVATOR 1NK00001-UP (MACHINE) POWERED BY 3208 ENGINE(S... 2021/2/12 https://127.0.0.1/sisweb/sisweb/techdoc/techdoc_print_page.jsp?returnurl=/sis...
  • 2. NOTE: Identify all hoses and lines. Put caps or plugs on the hoses, lines, and in the ports to keep foreign material out of the system. 2. Disconnect two hose assemblies from pilot system pump (1). Remove two bolts and pilot system pump (1). 3. Remove four bolts, loosen a hose clamp and remove tube assembly (2). 4. Disconnect hose assemblies (3), (4) and hose assembly (5) if the machine is equipped with a hammer or increased lift. Typical Example 5. Remove the bolts and shield (7). Disconnect the clamp holding cable (6) and move the cable out of the way. 6. Remove the bolts and brackets (8) and (9). 2/25 231D EXCAVATOR 1NK00001-UP (MACHINE) POWERED BY 3208 ENGINE(S... 2021/2/12 https://127.0.0.1/sisweb/sisweb/techdoc/techdoc_print_page.jsp?returnurl=/sis...
  • 3. 7. Remove four bolts and bracket (10). 8. Fasten link bracket (B) to double pump (11). Position a lift truck directly under double pump (11). Fasten one end of tool (A) to ratchet assembly (B) and the other end of the lift truck. Remove the bolts that fasten the double pump to the flywheel housing and use tool (A) and the lift truck to slowly remove the double pump from the machine. The weight of the double pump is 125 Kg (275 lb). 9. Remove element (12) and hub assembly (13). NOTE: The following steps are for the installation of the double pump. 10. Install hub assembly (13) and element (12) in the double pump. 3/25 231D EXCAVATOR 1NK00001-UP (MACHINE) POWERED BY 3208 ENGINE(S... 2021/2/12 https://127.0.0.1/sisweb/sisweb/techdoc/techdoc_print_page.jsp?returnurl=/sis...
  • 4. 11. Fasten tool (B) to double pump (11). Position a lift truck under double pump (11). Fasten one end of tool (A) to the lift truck and the other end to tool (B). 12. Install two 3/8" NC guide pins in the engine flywheel housing. Use the lift truck to move the double pump into position. Use the guide pins to locate the pump on the flywheel housing. Install two bolts to hold the pump in position. 13. Install bracket (10) and the four bolts. 14. Install bracket (9) and the remaining bolts. 15. Install bracket (8). 16. Install governor control cable (6) and shield (7). 17. Connect hose assemblies (3), (4) and (5). Install tube assembly (2) and tighten the hose clamps and the four bolts. 18. Install pilot system pump (1). Connect the two hydraulic hoses. NOTE: Do not start the engine unless the pump is filled with oil. 19. Fill the double pump with hydraulic oil. 20. Fill the hydraulic tank with oil to the correct level. NOTICE Perform Scheduled Oil Sampling on oil wetted compartments after performing service work to check for contaminants left in the system following repair. Contaminants put into the system may cause rapid wear and shortened component life. Disassemble Double Pump (Bent-Axis Piston) 4/25 231D EXCAVATOR 1NK00001-UP (MACHINE) POWERED BY 3208 ENGINE(S... 2021/2/12 https://127.0.0.1/sisweb/sisweb/techdoc/techdoc_print_page.jsp?returnurl=/sis...
  • 5. Start By: a. remove pump NOTICE Keep all parts clean from contaminants. Contaminants put into the system may cause rapid wear and shortened component life. 5/25 231D EXCAVATOR 1NK00001-UP (MACHINE) POWERED BY 3208 ENGINE(S... 2021/2/12 https://127.0.0.1/sisweb/sisweb/techdoc/techdoc_print_page.jsp?returnurl=/sis...
  • 6. 1. Cover all pump openings, and clean the outside of the pump thoroughly. NOTICE There are four external adjustment screws on this pump. All four adjustment screws have protective covers to prevent tampering or accidental adjustment. The covers will be destroyed and will need to be replaced if they are removed. The covers should be removed only when necessary for proper pump disassembly. Changes should be made to the adjustment screws only by trained personnel or poor vehicle performance will result. 2. Remove the plastic covers from power adjustment screw (2) and torque adjustment screw (1). 3. Measure the height (dimension X) of torque adjustment screw (1) from the machined surface under the locking nut to the top of the screw. Record the dimension. 4. Measure the height of power adjustment screw (2) from the pump housing surface to the top of the screw. Record the dimension. 6/25 231D EXCAVATOR 1NK00001-UP (MACHINE) POWERED BY 3208 ENGINE(S... 2021/2/12 https://127.0.0.1/sisweb/sisweb/techdoc/techdoc_print_page.jsp?returnurl=/sis...
  • 7. NOTICE Do not loosen power adjustment screw (2) or the jam nut. Remove only the threaded sleeve that the power adjustment screw threads into, and the adjustment will not be lost. 5. Remove the threaded sleeve on power adjustment screw (2). Use a magnet, and remove the spring and spring seat from the pump housing. When the threaded sleeve is removed, the entire power adjustment screw assembly can be removed from the pump housing without changing the adjustment. 6. Loosen the jam nut for torque adjustment screw (1) 1/2 of a revolution. Remove the torque adjustment screw from the pump housing. The adjustment screw can be replaced into its original position at assembly by using the measurement that was determined in Step 4. 7. Put alignment marks on control housing (3) and pump housing (5) for correct assembly. 8. Remove twelve bolts (4). 9. Remove control housing (3). It may be necessary to carefully pry the control housing off the two alignment dowels that are between the two housings. 10. Clean the gasket from control housing (3) and pump housing (5). 11. Put identification marks on control housing (3) and two control plates (6) and (7). Also mark the control plates to indicate the correct position of the dampening slots. 12. Remove control plates (6) and (7). 7/25 231D EXCAVATOR 1NK00001-UP (MACHINE) POWERED BY 3208 ENGINE(S... 2021/2/12 https://127.0.0.1/sisweb/sisweb/techdoc/techdoc_print_page.jsp?returnurl=/sis...
  • 8. 13. Remove bolt (10), spacer (11), and spring (12) that hold control lever assembly (8) to the control housing. Remove the spring under the other end of the control lever assembly. Bolt (10) was installed with thread lock, so it may be difficult to remove. 14. Remove spring seat (9). 15. Remove the control spool and roller assembly (13). 16. Put alignment marks on maximum angle stop housing (14) and the control housing for assembly purposes. 17. Remove four bolts (15) and maximum angle stop housing (14). Remove the two O-ring seals from maximum angle stop housing (14). 18. Remove retaining ring (16) from the control spool and roller assembly (13). Remove shaft (17) and roller bearing (18). 8/25 231D EXCAVATOR 1NK00001-UP (MACHINE) POWERED BY 3208 ENGINE(S... 2021/2/12 https://127.0.0.1/sisweb/sisweb/techdoc/techdoc_print_page.jsp?returnurl=/sis...
  • 9. 19. Remove plugs (19) and (21). Remove the inner and outer pressure averaging valve spools behind plug (19). 20. Remove two plugs (20). Remove the relief valve and spring behind each plug. Remove the O- ring seals on plugs (20). 21. Put alignment marks on pressure averaging valve housing (23) and the control housing for assembly purposes. There is spring pressure behind pressure averaging valve housing (23) which may cause the assembly to fly apart when the two bolts are removed. To prevent possible personal injury, longer bolts should be used to release the spring pressure. 22. Remove one bolt (22), and install one bolt from tooling (A). Remove bolt (24), and install the other bolt from tooling (A). Loosen the two bolts from tooling (A) evenly, and release the spring pressure behind pressure averaging valve housing (23). 23. Remove tooling (A). Remove pressure averaging valve housing (23). Remove the three O-ring seals from the housing. 24. Remove control spool bushing (25). 25. Remove spring (26). 9/25 231D EXCAVATOR 1NK00001-UP (MACHINE) POWERED BY 3208 ENGINE(S... 2021/2/12 https://127.0.0.1/sisweb/sisweb/techdoc/techdoc_print_page.jsp?returnurl=/sis...
  • 10. 26. Note the location of pilot oil bore hole (27) in the end of the control piston. Put identification marks on the control piston for assembly purposes. 27. Holding swivel fork (29) in position, remove control piston (28). Remove swivel fork (29). Piston rings (30) and (31) may break apart during removal from the pistons. If the rings are to be removed, wear eye protection to prevent possible personal injury from flying parts. 28. Remove piston rings (30) and (31) from control piston (28). 10/25 231D EXCAVATOR 1NK00001-UP (MACHINE) POWERED BY 3208 ENGINE(... 2021/2/12 https://127.0.0.1/sisweb/sisweb/techdoc/techdoc_print_page.jsp?returnurl=/sis...
  • 11. 29. Remove two cylinder blocks (32) by pulling straight up. When each cylinder block is removed, the spring collar and the Belleville washers will most likely fall out of the center pin hole. Make sure that one spring collar (33) and four Belleville washers (34) are retrieved from the housing when each cylinder block is removed. Check the center pin hole in the cylinder block if all the parts did not fall out. 30. Remove twenty-eight screws (35). The screws were installed with thread lock. Impact the screw heads first to break the seal. Remove by using additional leverage on the screwdriver as shown. 31. Remove the two retainer plates, fourteen pistons (36) and the two center pins from the drive gear and bearing assembly. 11/25 231D EXCAVATOR 1NK00001-UP (MACHINE) POWERED BY 3208 ENGINE(... 2021/2/12 https://127.0.0.1/sisweb/sisweb/techdoc/techdoc_print_page.jsp?returnurl=/sis...
  • 12. Piston rings (37) may break apart during removal from the pistons. If the rings are to be removed, wear eye protection to prevent possible personal injury from flying parts. 32. Use a screwdriver, and remove piston rings (37) from pistons (36). 33. Using puller (B), remove the drive gear and bearing assembly. Use tooling (B) to remove the other drive gear and bearing assembly. Remove tooling (B). 34. Remove four bolts (38). 35. Using bolt (C), remove flange (39). Remove the O-ring seal from flange (39). 36. Install puller (D). Remove the auxiliary drive gear and bearings as an assembly. Remove tooling (D). 12/25 231D EXCAVATOR 1NK00001-UP (MACHINE) POWERED BY 3208 ENGINE(... 2021/2/12 https://127.0.0.1/sisweb/sisweb/techdoc/techdoc_print_page.jsp?returnurl=/sis...
  • 13. 37. Using puller (E) and a press, remove two bearings (41) from gear (40). 38. Using plier (F), remove retaining ring (42). Remove the spacer ring. 39. Put a small pry bar in the slot around the top, and remove cover (43). Remove the O-ring seal behind cover (43). 40. Remove the lip-type seal from cover (43). 41. Using tool (G), remove retaining ring (44). Remove the spacer ring and the O-ring seal behind retaining ring (44). 42. Use a small pry bar in the slot around the top, remove cover (45). 43. Install tooling (H) on the idler gear shaft. Use a torch, and heat the idler gear evenly to a temperature of 80° C (276° F). Remove the idler gear shaft from the gear, and the inner bearing from the pump housing. 44. Remove the idler gear from the pump housing and the key from the idler gear shaft. 45. Remove the outer bearing from the idler gear shaft and the inner bearing from the pump housing. 13/25 231D EXCAVATOR 1NK00001-UP (MACHINE) POWERED BY 3208 ENGINE(... 2021/2/12 https://127.0.0.1/sisweb/sisweb/techdoc/techdoc_print_page.jsp?returnurl=/sis...
  • 14. Assemble Double Pump (Bent-Axis Piston 1. Measure the center pins, spring collar, cylinder block, and control plate to determine the proper size spring collar that should be used for assembly. For the adjustment procedure, see Testing And Adjusting Manual, Form No. SENR4708 and Specifications, Form SENR4707. NOTICE 14/25 231D EXCAVATOR 1NK00001-UP (MACHINE) POWERED BY 3208 ENGINE(... 2021/2/12 https://127.0.0.1/sisweb/sisweb/techdoc/techdoc_print_page.jsp?returnurl=/sis...
  • 15. To prevent damage to idler gear shaft inner bearing (49), force should be applied only to the outer race when it is installed. 2. Lower the temperature of lower idler gear shaft roller bearing (49). Using a hammer and a soft punch, install lower idler gear shaft roller bearing (49). 3. Raise the temperature of upper idler gear shaft bearing (46) to 80° C (176° F). Install it onto idler gear shaft (50). Make sure the bearing is seated on the shaft and does not bounce back when it is installed. Allow the bearing and shaft to cool. 4. Install key (47). 5. Raise the temperature of idler gear (48) to 100° C (212° F). Install it in the pump housing with the shoulder toward lower bearing (49). 6. Align the slot in the idler gear with key (47) on idler gear shaft (50). Using a hammer and soft punch, install idler gear shaft (50) and upper bearing (46) into the idler gear and the lower bearing that are in position in the pump housing. 7. Install cover (45). Put O-ring seal (52) on top of the cover and install spacer (51) on top of the O-ring seal. 15/25 231D EXCAVATOR 1NK00001-UP (MACHINE) POWERED BY 3208 ENGINE(... 2021/2/12 https://127.0.0.1/sisweb/sisweb/techdoc/techdoc_print_page.jsp?returnurl=/sis...
  • 16. 8. Using tool (A), install retaining ring (44). NOTICE All piston rings must be installed with the marks toward the flat end of the piston, or the pump will not operate. 9. The piston rings are spherical and must be installed with the marks toward the flat end of pistons (36). Using tooling (B), install two piston rings (37) on each piston (36). Rotate the piston ring end gaps to be 180° apart. Repeat this procedure for the 14 pistons. 10. Install seven pistons (36), center pin (53) and the retaining plate on the drive gear and bearing assembly. Use 6V1541 Quick Cure Primer on fourteen screws (35) and allow them to dry. Put 9S3263 Thread Lock on fourteen screws (35). Install the screws and tighten to a torque of 6 N·m (53.4 lb in). Repeat this step for the other drive gear and bearing assembly. 11. The spring collar that was selected in Step 1 should be used at this time. Install spring collar (33) and four Belleville washers (34) in the order and direction shown. Use 5P960 Multipurpose Grease to hold them in position. Using a screwdriver, put spring collar (33) and Belleville washers (34) into the center pin bore of cylinder block (32). Repeat the step for the other cylinder block. 16/25 231D EXCAVATOR 1NK00001-UP (MACHINE) POWERED BY 3208 ENGINE(... 2021/2/12 https://127.0.0.1/sisweb/sisweb/techdoc/techdoc_print_page.jsp?returnurl=/sis...
  • 17. 12. Coat seven pistons (36), the center pin and the piston bores of the cylinder block with SAE 10W oil. Make sure the Belleville washers stay in the proper position in the cylinder block. Repeat this step for the other cylinder block. 13. Align seven pistons (36) and the center pin with their respective bores in the cylinder block. Assemble the unit. The assembled unit is called a rotary group. Repeat this step and assemble the other rotary group. NOTICE The outer diameters of rotary group bearings (54) and the pump housing bores must be clean and dry when the rotary groups are installed. 14. Raise the temperature of pump housing (55) to 80° C (176° F). Put the pump housing on wood blocks so the drive shaft will have clearance when it is installed. Align rotary group gear (57) with the idler gear. Install the rotary group into the pump housing. NOTICE 17/25 231D EXCAVATOR 1NK00001-UP (MACHINE) POWERED BY 3208 ENGINE(... 2021/2/12 https://127.0.0.1/sisweb/sisweb/techdoc/techdoc_print_page.jsp?returnurl=/sis...
  • 18. There are timing marks (56) on two rotary group gears (57) and (58). The timing marks must be aligned as the rotary groups are installed into the pump housing. 15. Align the timing mark on rotary group gear (58) with the timing mark on rotary group gear (57). Install the rotary group into the pump housing with timing marks (56) aligned as shown. NOTE: Complete Step 16 and Step 17 while the pump housing is still warm to make assembly easier. NOTICE To prevent damage to inner bearing (41), force should be applied only to the inner race when it is installed onto the gear. 16. Using a hammer and soft punch, install inner bearing (41) onto auxiliary drive gear (40). 17. While pump housing (55) is still warm, install auxiliary drive gear (40) and the inner bearing into the pump housing. 18. Raise the temperature of outer bearing (59) to 80° C (176° F). Using a hammer and soft punch, install the bearing onto auxiliary drive gear (40). 18/25 231D EXCAVATOR 1NK00001-UP (MACHINE) POWERED BY 3208 ENGINE(... 2021/2/12 https://127.0.0.1/sisweb/sisweb/techdoc/techdoc_print_page.jsp?returnurl=/sis...
  • 19. 19. Install the O-ring seal on flange (39) and the flange (39) onto the pump housing. Install four bolts (38) and tighten to a torque of 86 N·m (65 lb ft). Piston rings (30) and (31) may break apart during installation onto control piston (28). Use care when expanding the piston rings. Wear eye protection to prevent possible personal injury from flying parts. 20. Install piston rings (30) and (31). 21. Install swivel fork (29) in control housing (3) with the machined shoulder toward the small diameter of the control piston. Coat control piston (28) with SAE 10W oil. Install it into the control cover and the swivel fork. Make sure the control piston is installed correctly with the pilot oil hole toward the pump housing mounting surface. 19/25 231D EXCAVATOR 1NK00001-UP (MACHINE) POWERED BY 3208 ENGINE(... 2021/2/12 https://127.0.0.1/sisweb/sisweb/techdoc/techdoc_print_page.jsp?returnurl=/sis...
  • 20. 22. Install control spool bushing (25). Install spring (26). Make sure the spring goes against the machined shoulder of swivel fork (29). NOTE: Plugs (19) and (21) have an integral seal. If the seals on plugs (19) and (21) need to be replaced, the entire plug (19) or (21) must be replaced. 23. Install inner pressure averaging valve spool (63) into outer pressure averaging valve spool (60). Install both valve spools into pressure averaging valve housing (23). Install two plugs (19) and (21). 24. Install the O-ring seals onto plugs (20). Put two relief valves (62) and springs (61) into plugs (20). Install them into the pressure averaging valve housing. 25. Using 5P960 Multipurpose Grease, install two O-ring seals (64) on pressure averaging valve housing (23). 26. Install O-ring seal (65) onto the prsssure averaging valve housing. Put 5P960 Multipurpose Grease on O-ring seal (65) and the pressure averaging valve housing tube. 20/25 231D EXCAVATOR 1NK00001-UP (MACHINE) POWERED BY 3208 ENGINE(... 2021/2/12 https://127.0.0.1/sisweb/sisweb/techdoc/techdoc_print_page.jsp?returnurl=/sis...
  • 21. To prevent possible personal injury, do not remove two bolts at the same time and allow the assembly to fly apart. Remove the long bolts, and install the standard bolts one at a time to maintain pressure on the spring. 27. Install pressure averaging valve housing (23) on control housing (3). Using tooling (C), compress the spring behind the housing. Install standard bolts (22) and (24), one at a time to maintain the spring compression. Tighten to a torque of 69 N·m (50 lb ft). 28. Install bearing (18) in control spool (13). Install pin (17), and secure it with retaining ring (16). 21/25 231D EXCAVATOR 1NK00001-UP (MACHINE) POWERED BY 3208 ENGINE(... 2021/2/12 https://127.0.0.1/sisweb/sisweb/techdoc/techdoc_print_page.jsp?returnurl=/sis...
  • 22. 29. Use 5P960 Multipurpose Grease, install two O-ring seals (66). 30. Install maximum angle stop housing (14) and four bolts (15). Tighten the bolts to a torque of 86 N·m (65 lb ft). 31. Install control spool and roller assembly (13) into control spool bushing (67). 32. Put 9S3263 Thread Lock on spring seat (9). Install it onto control lever assembly (8). 33. Put 9S3263 Thread Lock on bolt (10). Install bolt (10) with spacer (11), and spring (12) on control lever assembly (8). 22/25 231D EXCAVATOR 1NK00001-UP (MACHINE) POWERED BY 3208 ENGINE(... 2021/2/12 https://127.0.0.1/sisweb/sisweb/techdoc/techdoc_print_page.jsp?returnurl=/sis...
  • 23. 34. Position spring (66) under the control lever assembly. Install control lever assembly (8) making sure spring (66) stays in position and the holes in the control lever are aligned with two dowels (67). Install bolt (10) and tighten to a torque of 10 N·m (90 lb in). NOTICE Control plates (6) and (7) must be installed correctly or the pump will not operate. 35. Using 5P960 Multipurpose Grease, install control plates (6) and (7) on the swivel fork in the control cover. Make sure the inlet ports are toward the center and dampening slots (68) are positioned as shown. NOTICE The cylinder blocks must be aligned with the control plates or the pump will be damaged when bolts (4) are tightened. 36. Install gasket (69). 37. Tilt both cylinder blocks to the maximum angle, and install control housing (3). Make sure the cylinder blocks are aligned with the control plates. If the control housing does not go over the alignment pins easily, check the cylinder block and control plate alignment. 38. Install twelve bolts (4) and tighten to a torque of 86 N·m (65 lb ft). 23/25 231D EXCAVATOR 1NK00001-UP (MACHINE) POWERED BY 3208 ENGINE(... 2021/2/12 https://127.0.0.1/sisweb/sisweb/techdoc/techdoc_print_page.jsp?returnurl=/sis...
  • 24. 39. Install the O-ring seal, spring (70) and spring seat (71) on power adjustment screw (2). 40. Install power adjustment screw (2) with the spring and spring seat into the pump housing. Measure the height of the adjustment screw, and compare it with the dimension that was measured in Step 4 of Disassemble Pump. The dimension should be the same. 41. Install torque adjustment screw (1) and tighten the locking nut so the height of the adjustment screw is the same dimension that was measured in Step 3 of Disassemble Pump. NOTE: If the drive shaft is grooved at the seal contact area, shim material up to 1.00 mm (.040 in) maximum thickness may be used between lip-type seal (72) and cover (43). 42. Using tooling (D), install lip-type seal (72) in drive shaft cover (43). Put SAE 10W oil on the lip of the seal. 24/25 231D EXCAVATOR 1NK00001-UP (MACHINE) POWERED BY 3208 ENGINE(... 2021/2/12 https://127.0.0.1/sisweb/sisweb/techdoc/techdoc_print_page.jsp?returnurl=/sis...
  • 25. 43. Use 5P960 Multipurpose Grease, and install O-ring seal (73). 44. Install tool (E) over the drive shaft to protect the lip-type seal. 45. Install cover (43). It may be necessary to tap the cover into position. 46. Install the spacer ring. Using tool (F), install retaining ring (42). 47. Install the plastic covers on the power adjustment screw and the torque adjustment screw after the pump has been installed and adjusted on the vehicle. End By: a. install pump 25/25 231D EXCAVATOR 1NK00001-UP (MACHINE) POWERED BY 3208 ENGINE(... 2021/2/12 https://127.0.0.1/sisweb/sisweb/techdoc/techdoc_print_page.jsp?returnurl=/sis...
  • 26. Product: EXCAVATOR Model: 231D EXCAVATOR 1NK Configuration: 231D EXCAVATOR 1NK00001-UP (MACHINE) POWERED BY 3208 ENGINE Disassembly and Assembly 225D & 231D EXCAVATORS VEHICLE SYSTEMS Media Number -SENR4784-00 Publication Date -01/03/1990 Date Updated -26/10/2004 SENR47840033 Stick And Swing Pilot Control Valve SMCS - 5452-010 Remove And Install Stick And Swing Pilot Control Valve Always release the oil pressure in the main hydraulic system before disconnecting or removing any oil lines connected to the main hydraulic system. Always lower the bucket to the ground before the performance of any service work. 1/2 231D EXCAVATOR 1NK00001-UP (MACHINE) POWERED BY 3208 ENGINE(S... 2021/2/12 https://127.0.0.1/sisweb/sisweb/techdoc/techdoc_print_page.jsp?returnurl=/sis...
  • 27. 1. Remove six screws (2). Remove cover (1) from the control panel and disconnect the wiring harness for service meter (3). 2. Remove the knob and rubber boot from the control lever. 3. Mark, disconnect and plug six hose assemblies (6). 4. Remove four nuts and bolts (5). Remove control valve (4). NOTE: Install in reverse order. 2/2 231D EXCAVATOR 1NK00001-UP (MACHINE) POWERED BY 3208 ENGINE(S... 2021/2/12 https://127.0.0.1/sisweb/sisweb/techdoc/techdoc_print_page.jsp?returnurl=/sis...
  • 28. Product: EXCAVATOR Model: 231D EXCAVATOR 1NK Configuration: 231D EXCAVATOR 1NK00001-UP (MACHINE) POWERED BY 3208 ENGINE Disassembly and Assembly 225D & 231D EXCAVATORS VEHICLE SYSTEMS Media Number -SENR4784-00 Publication Date -01/03/1990 Date Updated -26/10/2004 SENR47840034 Bucket And Boom Pilot Control Valve SMCS - 5452-010 Remove And Install Bucket And Boom Pilot Control Valve Always release the oil pressure in the main hydraulic system before disconnecting or removing any oil lines connected to the main hydraulic system. Always lower the bucket to the ground before the performance of any service work. 1. Remove the screws and the retainer that hold the floor mat down at the door opening. Fold the floor mat forward. 1/2 231D EXCAVATOR 1NK00001-UP (MACHINE) POWERED BY 3208 ENGINE(S... 2021/2/12 https://127.0.0.1/sisweb/sisweb/techdoc/techdoc_print_page.jsp?returnurl=/sis...
  • 29. Suggest: If the above button click is invalid. Please download this document first, and then click the above link to download the complete manual. Thank you so much for reading
  • 30. 2. Remove three bolts (1). Turn the seat toward the door. 3. Remove the knob and rubber boot (2). Remove four screws (4) and cover (3). 4. Mark, disconnect and plug hose assemblies (6). 5. Remove the four bolts and control valve (5). NOTE: Install in reverse order. 2/2 231D EXCAVATOR 1NK00001-UP (MACHINE) POWERED BY 3208 ENGINE(S... 2021/2/12 https://127.0.0.1/sisweb/sisweb/techdoc/techdoc_print_page.jsp?returnurl=/sis...