
Recommended
More Related Content
What's hot
What's hot (20)
Similar to Bread
Similar to Bread (20)
More from abiyotnegu1
Recently uploaded
Recently uploaded (20)
Bread
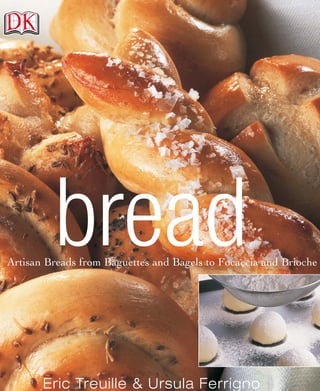
- 1. Eric Treuille & Ursula Ferigno Eric Treuille & Ursula Ferrigno bread Artisan Breads from Baguettes and Bagels to Focaccia and Brioche
- 5. BREAD ERIC TREUILLE & URSULA FERRIGNO Photography by IAN O’LEARY ULTIMATE
- 6. LONDON, NEW YORK, MELBOURNE, MUNICH, and DELHI US TEAM SENIOR EDITOR Barbara Berger RECIPE CONSULTANTS Wesley Martin Barbara Bowman, Gourmetsleuth EDITORIAL CONSULTANT Jane Perlmutter DTP DESIGNER Milos Orlovic EDITORIAL ASSISTANT Phil Poyer UK TEAM MANAGING EDITOR Stephanie Farrow DTP DESIGNER Sonia Charbonnier PROJECT EDITOR Julia Pemberton Hellums SENIOR EDITOR Nicky Graimes EDITOR David Summers PROJECT ART EDITORS Hilary Krag, Gurinder Purewal SENIOR MANAGING EDITOR Krystyna Mayer MANAGING EDITORS Mary Ling, Susannah Marriott MANAGING ART EDITOR Toni Kay DTP DESIGNER Karen Ruane PRODUCTION MANAGER Maryann Webster. Second American Edition 2004 2 4 6 8 10 9 7 5 3 1 Published in the United States by DK Publishing Inc., 375 Hudson Street, New York, New York 10014 Copyright © 2004 Dorling Kindersley Limited Text copyright © 1998 Eric Treuillé and Ursula Ferrigno All rights reserved under International and Pan-American Copyright Conventions. No part of this publication may be reproduced, stored in a retrieval system, or transmitted in any form or by any means, electronic, mechanical, photocopying, recording or otherwise, without prior written permission of the copyright owner. Published in Great Britain by Dorling Kindersley Limited DK Publishing, Inc. offers special discounts for bulk purchases for sales promotions or premiums. Specific, large-quantity needs can be met with special editions, including personalized covers, excerpts of existing guides, and corporate imprints. For more information, contact: Special Markets Department, DK Publishing, Inc., 375 Hudson Street, New York, NY 10014 Fax: 212-689-5254 Cataloging-in-Publication Data is available from the Library of Congress ISBN 0-7566-0370-6 Color reproduction in Italy by GRB Printed and bound by L. Rex Printing Company Ltd, China. Discover more at www.dk.com
- 7. IN T R O D U C T I O N 6 THE FUNDAMENTALS OF BREADMAKING 8 A GA L L E RY O F BR E A D S A tantalizing photographic collection of some of the world’s most mouthwatering breads FR E N C H BR E A D 12 • ITA L I A N BR E A D 14 • BR I T I S H BR E A D 16 • EU R O P E A N BR E A D 18 AM E R I C A N BR E A D 20 • EA S T E R N BR E A D 22 • FE S T I V E BR E A D 24 BA K I N G ES S E N T I A L S A complete illustrated guide to the key ingredients and equipment used in breadmaking WHEAT FLOURS 28 • NONWHEAT FLOURS 30 • IN G R E D I E N T S 32 • EQ U I P M E N T 34 BA S I C TE C H N I Q U E S The essential techniques needed to master the principles of breadmaking HO W T O BE G I N 40 • US I N G A STA RT E R 42 • MI X I N G 44 • KN E A D I N G 46 US I N G AP P L I A N C E S 48 • RI S I N G & PU N C H I N G DO W N 50 • SH A P I N G & PR O O F I N G 52 GL A Z I N G 58 • TO P P I N G 60 • PR E PA R I N G F O R BA K I N G 62 • BA K I N G 64 US I N G A BR E A D MA C H I N E 66 • ST O R I N G & FR E E Z I N G 68 RE C I P E S More than 100 inspiring recipes drawn from breadmaking traditions around the world, from tangy sourdoughs to sumptuous filled Focaccias BA S I C BR E A D S 72 • SO U R D O U G H S & OT H E R BR E A D S US I N G STA RT E R S 84 FL AV O R E D BR E A D S 94 • ENRICHED BREADS 110 • FLAT BREADS 126 QU I C K BR E A D S 138 • FE S T I V E BR E A D S 146 • RE C I P E S US I N G BR E A D 156 PR O B L E M SO LV I N G 162 • GL O S S A RY 164 • IN D E X 165 US E F U L AD D R E S S E S & AC K N O W L E D G M E N T S 168 CONTENTS
- 9. 7 7 In France and in Italy, where we come from, a meal is not a meal without bread. There, bread is taken very seriously. The daily visit to the bakery is a ritual that punctuates the rhythm of life. People choose their bread with special care and patronize the baker of their choice with an almost religious allegiance. It is said that the table is not set until bread is put on it. Bread is used to eat with as much as it is eaten: a piece of bread is used as a kind of secondary fork, and then is used to wipe the plate clean of every last morsel. Indeed, for many, culinary life begins with bread as mothers give their babies a hard crust on which to cut their teeth. All over the world, bread plays an important role in festivals and celebrations, traditions, and superstitions. Eric’s father, like others of his generation, still marks the sign of the cross with the tip of his knife on the base of a loaf before he cuts it. Both of us clearly remember being warned as children not to place a loaf of bread top crust down on the table because it was sure to bring bad luck. We were privileged that our first experiences of making bread came early. Indeed, Eric’s first contact with professional cooking was with bread; during his school vacations, he worked as a mitron—baby baker—at Le Fournil, his uncle’s boulangerie in southwestern France. Ursula remembers the hot summer evenings when her grandmother would light the wood-fired oven on the terrace of their family home in Campania. She recalls the sweet, yeasty fragrance of the seemingly magically growing dough and its soft, springy texture as she formed it into a round, for it was a family tradition that each person shape and top his or her own pizza. When work drew us away from our homes to London, we were puzzled and shocked at the acceptance of mass-produced, inferior bread. It was our natural appreciation of bread with which we were raised that propelled us into baking bread at home for ourselves and then into teaching others how to do the same. Besides providing good food, breadmaking enlivens both your kitchen and your life when it becomes a regular activity. We hope that this book brings the same tremendous pleasure and satisfaction. INTRODUCTION
- 10. 8 8 absorb less liquid than on a dry one. The quantities of liquid given in the recipes can never be more than guidelines. Our mixing technique (see pages 44–45) suggests that you hold back a proportion of liquid and add it as needed. This method acts as a safeguard against overly wet dough and the consequent need to add extra flour, which upsets the balance among flour, salt, and yeast. If you require a little more liquid than stated in the recipe, do not hesitate to add it; your aim is to produce a dough conforming to the consistency specified in the recipe, be it firm, soft, or wet. Observing and understanding the condition of your dough, and what it requires, is the key to successful breadmaking. — I N T R O D U C T I O N — TH E FU N D A M E N TA L S O F BR E A D M A K I N G M AKING BREAD REQUIRES little more than a pair of hands, an oven, and patience. The recipe for success is simple: time and warmth are all it takes to transform a few basic ingredients into a springy, silky dough that bakes to a crackly, crusted loaf. It is like most things— easy when you know how, with practice making perfect. If we had to choose one single phrase that we feel is essential to breadmaking, it would be this: bread is alive. It is a living, growing entity and, above all, the product of its ingredients and its surroundings; it responds, just as we do, to its environment—“treat rising dough as if it were human” advises an old English farmhouse cookbook. While we advocate the use of scales, timers, and thermometers, remember that observation is the baker’s traditional tool. The more you make bread, the better your bread will be. Your mistakes are rarely irreversible (see pages 162–163 for problem solving) or inedible. ES S E N T I A L IN G R E D I E N T S A N D TE C H N I Q U E S Flour is the main ingredient of most breads, accounting for about three-quarters of the finished loaf. The flour you choose will give your bread its individual character. Mass-produced, highly refined brands will make an honest loaf, but we urge you to seek out organic flours from independent mills to experience the taste and texture of truly great homemade bread. The choice of flour affects not only the quality of the baked bread but also the breadmaking process. Flour will absorb more, or less, liquid depending on the variety of wheat that it was made from, the place where it was harvested, and the way in which it was milled. Such variables are compounded by the humidity in the air—on a damp day, flour will
- 11. SU C C E S S F U L BR E A D M A K I N G The golden rule for measuring all baking ingredients is to choose one system and use it for the entire recipe. All spoon measurements are level: 1 teaspoon equals 1 ⁄6 fl oz; 1 tablespoon equals 1 ⁄2 fl oz. All eggs used in the book are large unless otherwise specified. Unsalted butter should always be used for breadmaking unless otherwise specified. Make sure that all the ingredients used are at room temperature; be sure to take eggs, butter, and milk out of the refrigerator in sufficient time. BA K I N G AT HI G H ALT I T U D E S Altitudes above 3,500ft have low atmospheric pressure, which causes bread dough to rise and proof more quickly than is indicated in the book’s recipes. No adjustments are needed to the ingredients, but keep an eye on the dough and do not allow it to increase in volume more than is specified. Breads that rise too quickly will not develop. To prevent this, allow the dough to rise twice (see page 50–51) before shaping. At altitudes over 3,000ft, increase the baking temperature by 59°F. This extra heat is needed to help form the crust in the initial stages of baking and to prevent the bread from over-rising during its final minutes in the oven. — T H E F U N D A M E N TA L S O F B R E A D M A K I N G — TH E IM P O RTA N C E O F TE M P E R AT U R E A warm kitchen is a perfect place for making bread. Ideally, ingredients should be at room temperature before mixing—except the yeast, which should be dissolved at body temperature, 98.6°F. A summer heat wave or a cool pantry must be brought into the equation, and you may find it necessary to use cooler or warmer water to correct the balance—keeping in mind that yeast is killed by temperatures over 130°F. In the days before central heating, people used to take their dough to bed with them! Less eccentric rising spots during cold weather include a warm bathroom, an oven with the pilot light on, and a position near, but not too close to, a radiator, an open fire, or a stove. Choose a glass or plastic bowl for rising dough; metal conducts heat too efficiently, and you may find the dough rising unevenly and drying on the side closest to a nearby heat source. Use temperature to control the baking timetable. Decrease the water temperature and leave the dough in a cool spot in order to slow down the rising process to fit in with your schedule; the refrigerator is ideal for all-day or overnight rising. Remember to allow several hours for the dough to return to room temperature (see page 50). TH E JOY S O F BR E A D M A K I N G Breadmaking works miracles on all levels. The slow, rhythmic kneading is therapeutic, opening up the lungs and rib cage and releasing stresses and strains with gentle efficacy. Watch as the warmth and pressure of your hands bring the yeast to life and transform a few commonplace ingredients into a growing dough. Everybody loves the smell of bread that is being made. The yeasty fragrance of the rising dough permeates the kitchen, only to be superseded by the delicious aroma of the bread baking. Enjoy the process of breadmaking as well as the results.
- 13. A GALLERY OF BREADS A WORLD OF POSSIBILITIES IS REVEALED IN THIS TRULY UNIVERSAL FOOD. A MEAL IS NOT A MEAL WITHOUT BREAD IN COUNTRIES AS DIVERSE AS ITALY, INDIA, MEXICO, AND FRANCE. A VARIETY OF TEXTURES AND TASTES ABOUNDS TO DEFINE THIS GLOBAL CULINARY STAPLE. ILLUSTRATED HERE IS A SELECTION OF BREADS FROM SOME OF THE WORLD’S MOST FAMOUS BREADMAKING TRADITIONS. GALLERY OF BREADS, WHICH CELEBRATES A
- 14. 12 12 12 PA I N D E SE I G L E In France, rye bread originated in mountainous regions, like the Pyrenees and the Vosges, where it was a staple bread. Today, it is more often served in Parisian brasseries, thinly sliced and thickly buttered as an accompaniment to oysters. Recipe page 93. PI S TO L E T S These distinctively shaped rolls are traditional to Belgium and northeastern France, where they are a Sunday breakfast treat. The characteristic indentation along the top of each roll is easily made with the handle of a wooden spoon. Recipe page 79. FR E N C H BR E A D — A G A L L E RY O F B R E A D S — 18TH-CENTURY FRENCH BAKER KNEADS DOUGH IN A WOODEN TROUGH 12 CO U RO N N E B read shapes in France were often designed by the baker to satisfy the needs of his customers; the hole in the middle makes the loaf easy to carry over the arm like a shopping basket. As well as being practical, the loaf’s shape increases the proportion of crust to crumb. Recipe page 85. B READ IS AT THE HEART of the French culinary experience, and once even defined social status—the long, elegant white Baguette was affordable only to stylish city dwellers, and rustic breads, like Pain de Campagne, were staples of life in the country. Today, however, these country-style sourdough breads have captured the imagination of contemporary bakers from New York to Tokyo.
- 15. 13 13 13 13 PA I N D E CA M PA G N E Made throughout France in innumerable shapes and sizes, Pain de Campagne varies by region as well as by baker. All country breads have a thick, dark crust liberally dusted with flour, giving them their characteristic two-tone appearance. Recipe page 85. FO U G A S S E One of the 13 desserts traditional to a Provençal Christmas, Fougasse can now be bought all year round. This decorative branch-shaped bread is flavored and enriched with olive oil. Tasty ingredients are often added to the bread dough—crisp bacon, chopped anchovies, or caramelized onions are very popular. Recipe page 149. — F R E N C H B R E A D — BA G U E T T E Acrackly golden crust and light chewy interior are the signatures of this world- renowned classic bread. The French say it is better to buy two loaves at a time because one is always half eaten by the time it arrives home. Recipe page 79. PA I N TO R D U From the Limousin, a rural region in the center of France, le tordu, the “twist,” is a popular shape. It is favored by bread connoisseurs who prize crust as highly as crumb. Recipe page 85.
- 16. 14 SC H I A C C I ATA C O N L’UVA This Tuscan bread is made to celebrate the grape harvest. It is filled with wine-soaked raisins from the previous year’s harvest and traditionally topped with the new season’s grapes. Recipe page 109. ST RO M B O L I This southern Italian bread is stuffed with mozzarella, fresh herbs, and shallots. During baking, the generous filling erupts out of the indentations made in the bread’s crust. Hence it is named after the volcanic island off the coast of Sicily. Recipe page 106. ITA L I A N BR E A D A N ITALIAN TABLE is not dressed without bread. Renaissance paintings depict tables adorned with baskets of freshly baked bread, and this appealing image is just as current today. Each region of Italy has its own distinctive style of cooking and breadmaking. The food of northern Italy is very rich, and its ingredients reflect the historical wealth of this area. Delicate, light breads are made here. Southern Italian food is the food of a humbler people, and a luscious bread filled with cheese and vegetables serves as a meal in itself. 16TH-CENTURY VENETIAN BAKERY — A G A L L E RY O F B R E A D S — 14
- 17. 15 CI A B AT TA Distinctive to the Emilia Romagna region of Italy, Ciabatta is now baked around the world. It was created as a light, airy textured bread to accompany the region’s rich pasta and meat dishes. Recipe page 90. 15 — I TA L I A N B R E A D — PA N E D I RA M E R I N O Enriched with olive oil and eggs, studded with raisins, and scented with fresh rosemary, this delicious bread is most commonly seen at the Tuscan breakfast table. Recipe page 115. GR I S S I N I TO R I N E S I From the city of Turin, these crispy breadsticks can be made as thin as a pencil or as fat as a cigar. Toppings vary from simple coarse salt to the seed or dried herb of your choice. Recipe page 80.
- 18. 16 16 16 16 16 VI C TO R I A N MILK BREAD Milk is an important ingredient in many British breads. The use of milk in place of water softens both the crumb and the crust. This bread has a velvety texture and a golden smooth exterior. Its fancy scroll shape is typical of the popular Victorian novelty breads. Recipe page 76. BR I T I S H BR E A D W HATEVER THE SHAPE, the typical British loaf has a soft, tender crumb and a crispy rather than crusty exterior, often liberally dusted with flour. Through the centuries, the unerring preference of the British people has been for loaves made with white wheat flour. Historically, fine white bread graced only the tables of the lords of the manor. There were separate guilds for bakers of white and brown breads, and the saying “to know the color of your bread” meant to know your place in society. — A G A L L E RY O F B R E A D S — BAKING DAY IN A 19TH-CENTURY ENGLISH VILLAGE BL O O M E R Half milk and half water are used to make this long, plump loaf, with its crispy crust and light, tender crumb. A typically British shape, this deeply scored loaf dramatically expands, or “blooms,” when baked. Recipe page 76.
- 19. 17 17 17 17 17 GR A N A RY PA N LOA F Granary bread is made with a blend of wheat and rye flours mixed with malted grains. It is the most recent addition to the family of British breads; its slightly sweet, nutty taste and moist texture make this loaf a favorite of both children and adults. Recipe page 73. COT TA G E LOA F The most distinctive British shape, the Cottage Loaf, is made by stacking a small round loaf on top of a larger round and joining them by making a deep impression, traditionally formed with the baker’s elbow. Recipe page 73. IRISH SODA BREAD This everyday Irish bread is traditionally “baked” in a cast-iron pot set over the embers of an open fire. With a cakelike texture, this bread is made without yeast and is best eaten on the day it is baked. Recipe page 141. SC OT S BA P S B aps are soft, flat rolls found all over Great Britain but are mostly associated with Scotland. There they are traditionally eaten at breakfast and called morning rolls or buns. Recipe page 77. — B R I T I S H B R E A D —
- 20. 18 18 18 18 LA N D B ROT T he name of this crusty rye bread translates literally as “bread of the land,” and is one of the few breads baked throughout Germany—a rarity in this intensely regional country that boasts 400 kinds of bread. Recipe page 92. EU RO P E A N BR E A D — A G A L L E RY O F B R E A D S — 19TH-CENTURY GERMAN BAKERY T HE BREADS OF EUROPE fall into two categories – the hearty country breads eaten daily and the lighter, richer, more refined breads reserved for feasts and celebrations. The traditional country breads were rarely made with wheat flour alone but incorporated a common staple of the region: rye in Germany, corn in Portugal, and potatoes in Hungary. Wheat flour was an expensive and precious commodity, and these healthful additions provided nourishing bulk to the everyday European loaf. PU L L A This saffron-colored, cardamom-scented bread wreath is the traditional Christmas loaf of Finland. No longer restricted to festive occasions, Pulla is now baked and eaten all year long. Recipe page 150.
- 21. 19 19 19 19 HU N G A R I A N POTATO BR E A D In Hungary, potatoes are a staple commodity. This traditional bread uses potatoes to add moisture and substance to the loaf, which is subtly spiced with aromatic caraway seeds. Recipe page 103. BROA Originally from the Minho Province in the north of Portugal, this corn bread is now eaten all over the country. Corn grows profusely in Portugal and is used in many of the native dishes. Recipe page 78. — E U R O P E A N B R E A D — PA RT Y B ROT Guests can help themselves to this inviting German bread. It serves as the perfect centerpiece to a party’s buffet table. Recipe page 120.
- 22. 20 P IONEERS AND HOMESTEADERS who settled North America brought with them the breadmaking traditions of their native countries and adapted them to suit the rustic conditions of their new home. Without the system of communal bakeries that had existed in Europe since the Middle Ages, they established an important tradition of home baking that still exists. North America is famous for its unique sourdoughs and quick breads, which are made without the traditional yeast leavens. FA N TA N S Native to New England, these fancy shaped rolls also go by the name Yankee Buttermilk. They have a light and airy texture that complements a hearty stew or roast. Recipe page 121. 20 PA R K E R HO U S E RO L L S Soft rolls are a Sunday dinner staple all over America. This unique shape was created and popularized by the Parker House hotel in Boston during the late 19th century. Recipe page 118. SA N FR A N C I S C O SO U R D O U G H The origins of this bread date back to California’s gold rush. Prospectors carried with them, in a package strapped to their waists, a mixture of flour and water that fermented to produce a leaven for this chewy, tangy bread. Recipe page 86. AM E R I C A N BR E A D 18TH-CENTURY COLONIAL BAKER — A G A L L E RY O F B R E A D S —
- 23. 21 21 21 CI N N A M O N RA I S I N BR E A D Enriched with milk and flavored with an inner whirl of raisins, this bread is an all-American breakfast favorite. Served toasted and topped with butter and cinnamon sugar, it is a fond childhood memory. Recipe page 123. CO R N ST I C K S A heavy skillet was used by early settlers to cook corn bread on the hearth. Here, the batter is baked in a cast-iron mold that forms this quick-bread batter into small ears of corn. Recipe page 142. — A M E R I C A N B R E A D —
- 24. 22 22 PI D E Recognized by its distinctive ridged pattern, golden crust, and topping of nigella seeds, Pide is traditionally prepared for the Muslim festival of Ramadan, when it is eaten to break the fast at sunset. It can be topped with fennel seeds instead of nigella seeds. Recipe page 137. LAVA S H It is said that Lavash originated in Armenia, but it is also eaten throughout Lebanon, Turkey, and Syria. Rolled paper-thin, it is traditionally cooked in a large outdoor oven called a tannur. Recipe page 134. EA S T E R N BR E A D T HE IMPORTANCE OF BREAD in the Middle East cannot be overstated. In the Arab world, bread is revered as a gift from God and the staff of life itself. Honor is asserted with the vow “on my family’s bread, I swear to tell the truth”; contentment expressed by the saying “his water jug is filled, and his bread is kneaded.” Bread is eaten at every meal, from the simplest snack to the grandest banquet, and indeed takes the place of cutlery throughout the region. The most common bread is flat with a hollow pocket in the middle, used for filling with salads, grilled meats, or any of the region’s mouthwatering mezze. — A G A L L E RY O F B R E A D S — MEALTIMES IN THE MIDDLE EAST ALWAYS INCLUDE BREAD
- 25. 23 23 23 BA R B A R I This light, crusty Persian bread, when topped with cheese and fresh herbs, is commonly served for breakfast in Iran. When made with water instead of milk and sprinkled with sugar instead of seeds, the bread becomes a much-loved children’s snack called shirmal. Recipe page 136. PA I N TU N I S I E N W ith a tender crumb and crisp crust, this bread is made with semolina flour. Semolina is produced from durum wheat—a staple of North Africa that is widely used to make bread and couscous, a cracked grain. Recipe page 135. PI TA This soft, oval- or round-shaped bread with a pocketlike hollow in the middle is made all over the region, where it also goes by its Arab name of khubz. Recipe page 134. — E A S T E R N B R E A D —
- 26. 24 24 PA N D E MU E RTO Flavored with orange and anise, this sweet bread is baked on the Mexican Day of the Dead, when families honor their dead by visiting the graves with offerings of flowers and food. Recipe page 152. FE S T I V E BR E A D — A G A L L E RY O F B R E A D S — PREPARING BREAD FOR A 17TH-CENTURY FESTIVITY 24 T HE CUSTOM OF BAKING SPECIAL BREADS to serve at festive celebrations and on religious holidays is an ancient one. In contrast to the plain, hearty loaves that define the traditional “daily bread,” festive breads are usually made with the most expensive and highly prized ingredients— golden butter and eggs, aromatic spices and flavorings, and sweet dried and candied fruits. These ceremonial breads are formed into traditional shapes that have special symbolic meanings. Some are now commonly served throughout the year and not just for an occasion. PA N E T TO N E This rich, golden loaf from Milan is studded with golden raisins and delicately perfumed with citrus peel. Its dome-shaped top is said to resemble the cupolas of the churches of its native Lombardy. Panettone is traditionally enjoyed at Christmas. Recipe page 155.
- 27. 25 25 25 25 BO L O -R E I Rich breads and cakes are traditional in southern Europe to celebrate the feast of the Epiphany, on January 6. This lavishly decorated Kings’ Cake from Portugal is shaped to symbolize the crowns of the Three Kings, who arrived in Bethlehem on this day. Recipe page 154. — F E S T I V E B R E A D — CH A L L A H The golden braided loaf traditional for the Jewish Sabbath is the most familiar shape. It is shown here coiled into a circle to symbolize continuity and baked to celebrate the Jewish New Year, Rosh Hashanah. Recipe page 150.
- 29. 27 BAKING ESSENTIALS F LOUR, WATER, AND YEAST – THESE ARE THE WHEN BROUGHT TOGETHER WITH THE HELP OF YOUR HANDS, A FEW BASIC TOOLS, AND A HOT OVEN, THEY CAN BE TRANSFORMED INTO A WARM, FRAGRANT LOAF. THE BAKING ESSENTIALS ILLUSTRATED IN THIS SECTION REVEAL WHAT BREAD IS: A FEW SIMPLE INGREDIENTS ELEVATED BEYOND THEIR HUMBLE ORIGINS TO BECOME AN EVERYDAY MIRACLE. ESSENTIAL INGREDIENTS OF BREADMAKING.
- 30. 28 28 THE PROTEIN CONTENT OF WHEAT Wheat is divided into several types, according to the “hardness” of the grain. This refers to the protein content of the wheat kernels. The larger the endosperm, the higher the percentage of protein in the milled flour, which allows gluten to form easily when using the flour to make bread. CLEANED WHEAT After passing through a succession of rollers and sieves, the wheat kernels are thoroughly cleaned. ENDOSPERM Four sets of rollers, called break rolls, shear open the grain to expose the white, floury portion of the kernel, or endosperm. CHAFF The outer layer of the broken grain is removed by sieving. REDUCED ENDOSPERM Up to 12 sets of reducing rollers continue to break down the endosperm. DIRT AND IMPURITIES This residue is removed from the wheat and discarded before the cleaned grains are milled. SIEVED WHEAT After sieving, the well-crushed endosperm is the texture of fine powder. future plant. The endosperm, the inner part of the kernel, is full of starch and protein. This high protein content makes wheat ideal for breadmaking. When dough is kneaded, the protein in the flour develops into gluten, an elastic substance that traps the carbon dioxide generated by the leavening agent, allowing the dough to rise. NORTH AMERICAN 10–18 percent protein ENGLISH 10–14 percent protein WHEAT PLANT Harvested in plant form, wheat goes directly from the fields to a mill where the grains are sorted and cleaned before beginning the milling process. F LOUR IS A KEY INGREDIENT in all breads. Wheat flour is by far the most common type used in breadmaking. The wheat kernel consists of three parts: bran, germ, and endosperm. The wheat bran is the husk that encloses the kernel, while the nutritious wheat germ is the seed of the FLOUR Sieving and reduction continue until the type of flour desired is obtained. — B A K I N G E S S E N T I A L S — WH E AT FL O U R S TH E MI L L I N G PRO C E S S
- 31. 29 29 MI X I N G FL O U R S BROWN FLOUR This flour contains most of the wheat grain’s germ but has had some of the bran removed. Therefore, it produces a lighter loaf than does whole-wheat flour. GRANARY FLOUR A combination of whole-wheat, white, and rye flours mixed with soft malted grains, this flour makes a textured loaf with a nutty, naturally sweet flavor. It is found in specialty shops. COARSE SEMOLINA FLOUR This coarse, gritty flour is milled from the endosperm of durum wheat, which is one of the hardest varieties of wheat. Use it in combination with all-purpose flour for making bread. FINE SEMOLINA OR DURUM FLOUR Also referred to as semola di grano duro, this high-gluten flour is made from the endosperm of durum wheat and is ground twice to produce a fine texture that makes it ideal for breadmaking. ALL-PURPOSE FLOUR This multipurpose flour, produced from a blend of hard and soft wheat, can be used for bread and pastries but contains less protein and gluten than bread flour made for breadmaking. BREAD FLOUR This flour is milled from hard wheat and has a higher proportion of gluten than all-purpose flour. This ensures an elastic dough and a lighter loaf. WHOLE-WHEAT FLOUR Made from the complete wheat kernel, this flour makes a fuller flavored, nutritious but denser loaf than all-purpose flour. The extra bran hinders rising. TY P E S O F WH E AT FL O U R — W H E AT F L O U R S — Experimenting with different combinations of wheat and nonwheat flours enables the home baker to create breads with special textures, flavors, and colors. The secret of mixing flours successfully is balance. See the selection of nonwheat flours on pages 30–31 and follow the guidelines given here to get the best results when combining flours: Any mixture must always include some wheat flour. The protein content of wheat flour allows the development of gluten, which is critical for a well-risen bread. Two-thirds bread flour combined with one-third nonwheat flour gives bread optimum volume and texture. The greater the proportion of nonwheat to wheat flour, the more pronounced its effect on the flavor and texture of the bread. If the proportion of nonwheat to wheat flour is increased, the dough will rise more slowly, creating a much denser loaf. Different flours absorb water at varying rates. Sift flours together to ensure an even distribution before adding liquid to them.
- 32. 30 30 — B A K I N G E S S E N T I A L S — NO N W H E AT FL O U R S F OR CENTURIES, VARIOUS DRIED GRAINS and roots have been ground and used to make bread. Most flours and meals—including those made from rye, oats, barley, and corn— are ground from the seeds of cereal plants. The seeds vary in shape and size, but all have a structure similar to that of the wheat kernel and are ground in the same manner. These flours produce breads with different flavors, textures, and nutritional values. Wheat flour, with its high gluten content, is preferable for risen breads. Low-gluten and nongluten flours must be mixed with at least 50 percent wheat flour to make a properly risen bread, but the addition of a few tablespoons of one of these flours will deepen a bread’s flavor. RYE Ground from cleaned grains, rye flour inhibits gluten development. Even a small addition, mixed with wheat flour, adds a distinctive tang to bread. Dark rye flour contributes a strong flavor, while light rye flour is milder and paler. OATS Oats that have been cleaned and hulled are called groats. Pinhead oats are groats that have been cut into several pieces. Oat flour is ground from groats and is gluten-free. It adds rich flavor and texture to a bread. BARLEY Barley seeds with the bran removed are called pearl barley, which is eaten in soups and stews. Barley flour is ground from pearl barley and is gluten-free. Mixed with wheat flour, it adds a sweet, earthy flavor. CORN Dried corn kernels are ground into three textures of meal—coarse, medium (called polenta), and fine. All are gluten- free and have a distinctive corn flavor. PR I N C I PA L CE R E A L GR A I N S FINE MEAL COARSE MEAL KERNELS BARLEY PLANT FLOUR FLOUR PINHEAD OATS GROATS OAT PLANT FLOUR GRAIN RYE PLANT PEARL BARLEY CORN PLANT
- 33. 31 31 LOW-G LU T E N A N D NO N G LU T E N FL O U R S PEOPLE WHO ARE INTOLERANT of wheat or gluten can use low- or nongluten flours to make bread. However, since it is gluten that gives dough its elasticity and strength and allows it to rise, breads made exclusively with the flours shown here and opposite may have a dense, crumbly texture. When used in combination with wheat flour, these flours will contribute extra nutritional value and flavor to a bread. See page 29 for tips on mixing wheat and nonwheat flours. BUCKWHEAT FLOUR Buckwheat flour is ground from the seeds of a plant native to Russia that is not akin to the wheat plant, and is gluten-free. This gray-brown flour has a distinctively bitter flavor. QUINOA FLOUR Quinoa contains more protein than any other grain as well as all eight essential amino acids. It is gluten-free and when mixed with wheat flour is a rich source of nutrients for bread. CORNMEAL FLOUR Most commonly used in American quick and nonyeast breads, this gluten-free flour can be combined with wheat flour to make bread with a gritty, coarse texture and a sweet, corn flavor. BROWN RICE FLOUR Milled from the whole rice grain, brown rice flour is gluten-free. When blended with wheat flour, it contributes a dry texture and a sweet, nutty taste to a bread. CHICKPEA FLOUR Made from ground chickpeas, this flour is gluten-free. Just a small proportion gives a rich flavor to leavened flat breads and other savory dishes. POTATO FLOUR This gluten-free flour is made from cooked, dried, ground potatoes. Used mostly as a thickener, when combined with other flours, it produces a moist crumb in breads. MILLET FLOUR Millet flour is low in gluten, but very rich in protein, vitamins, and minerals, with a distinctively sweet flavor. It is used mostly in combination with wheat flour for bread. — N O N W H E AT F L O U R S — SPELT FLOUR A flour rich in nutrients with a slightly nutty flavor, spelt is low in gluten, but high in protein. This makes it a digestible substitute for wheat flour in breadmaking for the gluten-intolerent.
- 34. — B A K I N G E S S E N T I A L S — IN G R E D I E N TS B READMAKING involves just a few simple ingredients, all of equal importance. Leavens cause a dough to rise by creating bubbles that expand the gluten strands in the dough. This is not possible without the presence LE AV E N S YE A S T S YEAST IS THE COMMONLY USED LEAVEN in breadmaking. It is a living organism that converts the natural sugars in flour to gases. Cake yeast is available from the bakery section of most supermarkets. It should be used within 1–2 days of purchase, since its freshness can be unreliable. Dry and instant yeast are more concentrated and long- lasting; use by their expiration date. INSTANT YEAST Sprinkle into the flour; activate by adding liquid. CAKE YEAST Dissolve in lukewarm water before adding to the flour. CREAM OF TARTAR LI Q U I D S LIQUID IS FUNDAMENTAL to breadmaking. Liquid activates the yeast when it is at the correct temperature, and it gives life to the flour by transforming it into a dough. For a loaf with a very tender crumb, water can be replaced with milk. Buttermilk and yogurt can be used interchangeably to produce a bread with a moist, almost cake-like texture. Extra liquid can be added to a dough when it is needed to achieve the dough consistency specified in a recipe. DRY YEAST Activate in lukewarm water before adding to the flour. WATER The primary liquid used to dissolve yeast and to form a bread dough. MILK Creates a tender crumb when used in place of water. BUTTERMILK Can be made from skim milk and lemon juice (see page 164). YOGURT Adds a tangy flavor and a moist texture to a bread. CHEMICAL LEAVENS These leavens are used as the rising agents in the Quick Bread recipes (see pages 138–145). of liquid, which transforms the flour and yeast into a dough. Sugar encourages the dough to rise, while salt inhibits the process. Enrichments—such as butter, oil, and eggs—allow the baker to vary a bread’s flavor, texture, and appearance. BAKING SODA BAKING POWDER CH E M I C A L LE AV E N S WHEN MOISTENED with liquid, baking powder and baking soda instantly create air bubbles, which act as the leaven in a quick bread batter. This requires the loaf to be baked immediately. Cream of tartar is used in combination with baking soda.
- 35. 33 33 — I N G R E D I E N T S — SALT IS USED in most bread recipes to control the rate of fermentation and to add flavor. The presence of salt in a dough inhibits fermentation, which strengthens the developing gluten. This results in a bread with a stable crumb, a long shelf life, and more taste than breads made without it. SU G A R S SUGAR CAN ACCELERATE the fermentation process of bread dough by providing additional food for an active yeast culture. However, modern yeasts do not need sugar to become active. Sugar is no longer a necessary ingredient in bread recipes, but it is used to enhance a bread’s flavor, texture, and crust color. EN R I C H I N G IN G R E D I E N T S FATS ARE THE PRIMARY enriching ingredients that when used in a bread recipe change the character of the resulting dough. The fat coats the gluten strands, creating a barrier between the flour and the yeast, which slows down both the fermentation and the rising time. In a recipe calling for a large amount of fat, the enriching ingredient or ingredients will be incorporated into the dough after an initial period of rising. In general, breads made with enrichments have a soft, tender crumb and become more cakelike the higher the proportion of butter and eggs added. Select only the best-quality enrichments for breadmaking. FINE SALT Dissolves well and is best for making bread dough. COARSE SALT Sprinkled over an unbaked loaf, this makes a flavorful topping. GRANULATED SUGAR The most commonly used sugar for making bread. MALT EXTRACT Made from malted wheat or barley, this encourages active yeast. HONEY Honey melts well when used for making bread. BUTTER Use only unsalted butter when enriching a bread dough. MOLASSES Adds a sweet, slightly bitter flavor and a dark golden color to bread. VEGETABLE OIL Use a light, neutral oil like sunflower. EGGS Choose fresh eggs with undamaged shells for making enriched doughs. OLIVE OIL Use a high-quality olive oil with a fruity fragrance and distinctive flavor. SA LT S
- 36. 34 34 — B A K I N G E S S E N T I A L S — EQ U I P M E N T T HE EQUIPMENT AND TOOLS required for breadmaking are as simple as the essential ingredients. The basic equipment needed to make most of the breads in this book includes an accurate scale, a measuring cup and spoons, a large glass bowl, a wooden spoon, a dish towel, a baking sheet, a sharp blade, and an oven. The remaining equipment shown will help you tackle additional skills and special recipes. Be sure that you have a large, clean surface to work on that allows you plenty of room to move around; a marble slab, plastic board, or wooden table is best. Although a bare countertop is also fine, avoid tiles because the dough can stick to the grout. MI X I N G A N D RI S I N G CHOOSE GLASS OR PLASTIC bowls and wooden spoons for breadmaking. Metal bowls and spoons react with yeast, creating a metallic aftertaste in a batter. It is also advisable to avoid letting dough rise in metal bowls since they conduct heat, causing dough to rise too quickly. To prevent a dry crust from forming on a dough, cover the bowl with a clean dish towel during rising and proofing. GLASS BOWLS These offer an all-around view and withstand vigorous use. WOODEN SPOON Essential for mixing batter. GLASS JAR Useful for making and storing sourdough starters (see page 43); they should not be sealed. DISH TOWELS Use to cover doughs during rising and proofing and to wrap soft-crusted breads warm from the oven. SCALE An accurate scale is essential for weighing small amounts. MEASURING CUP A cup with clearly marked units is important for measuring liquids. MEASURING SPOONS Always level off ingredients in measuring spoons. ME A S U R I N G BREADMAKING SHOULD BEGIN with careful measuring. For the best results, it is essential that the ingredients are in correct proportion to one another. When following a recipe, it is important to use one system of measurement, either nonmetric or metric, throughout. These are not interchangeable systems. Before using the scale, check that the needle is on zero when it is empty. Never measure dry or wet ingredients over the mixing bowl. When using a measuring cup, always bend down to pour the liquid at eye level.
- 37. 35 35 FOOD PROCESSOR HEAVY-DUTY MIXER PASTRY SCRAPER A pliable, plastic scraper is ideal for handling sticky dough. PASTRY BRUSH An all-purpose boar-bristle brush is best for applying glazes and washes. AP P L I A N C E S ELECTRICAL EQUIPMENT can be useful for mixing and kneading bread doughs. While a food processor ensures thorough mixing and partial kneading of a dough, a heavy-duty mixer allows a baker to develop the full elasticity of a dough through constant kneading for a longer period of time. However, electric mixers and processors can overwork and overheat the dough when set on a high speed. See pages 66–67 for tips on how best to use them. SCISSORS Kitchen scissors can be used to create decorative slashes in dough (see page 62). OT H E R HE L P F U L TO O L S SCALPEL Use to slash the top of a risen dough before baking (see page 62). — E Q U I P M E N T — STRAINER A stainless-steel strainer is best for sifting flours together. INSTANT-READ THERMOMETER Practical for checking water temperature when preparing yeast (see page 41). THERMOMETER CASE BREAD KNIFE A serrated knife will penetrate a hard crust and slice through bread cleanly. ROLLING PINS Wooden cylindrical rolling pins are best for shaping dough.
- 38. OVEN THERMOMETER A thermometer will detect any variations in oven temperature (see page 64). LOAF PAN Pans made of medium-weight metal are most frequently used in this book. BA K I N G AFTER THE INGREDIENTS have been carefully measured and mixed to the proper consistency, the final stages of breadmaking also require the same careful attention. Preheat the oven in advance and use an oven thermometer to check its accuracy. A kitchen timer allows you to keep track of the baking time, as well as the rising and proofing times. Thicker baking pans and trays are best, since they resist buckling in the oven at high heats and prevent loaves from burning on the bottom. KITCHEN TIMER A clearly marked kitchen timer with a loud alarm will ensure accurate baking, rising, and proofing times. TERRA-COTTA TILES Tiles help radiate heat evenly and retain moisture in the oven, producing superior, thick-crusted, free- form breads (see page 63). CORN STICK PAN Each depression in this cast-iron pan shapes a single serving of corn bread. WATER SPRAYER A fine-spray nozzle is advisable for adding moisture to the oven while a bread is baking. Avoid spraying the oven light or heating elements directly (see page 63). — B A K I N G E S S E N T I A L S —
- 39. 37 37 37 WIRE RACK Use a wire rack to cool breads in order to prevent a soggy bottom crust (see page 65). MUFFIN TIN Use a muffin tin with a nonstick surface and deep cups for muffin recipes. FRENCH BAGUETTE TRAY This perforated tray ensures an even heat throughout baking, resulting in a crisp, golden outer crust. BAKING SHEET Use a heavy-duty, nonflexible, metal baking sheet for free- form loaves and rolls. BREAD BOARD Wooden boards are best for slicing bread because they are kind to the serrated blade of a bread knife. BRIOCHE MOLDS The sloping sides of these classic molds induce a maximum final rise and height during baking.
- 41. BASIC TECHNIQUES T HE BASIC TECHNIQUES OF MAKING BREAD ARE SUCCESSFUL BREADMAKING, HOWEVER, REQUIRES TIME AND PATIENCE—TRY NOT TO RUSH EACH STAGE. USE THIS SECTION TO LEARN ABOUT, FEEL, AND OBSERVE THE PROCESSES THAT TRANSFORM BASIC INGREDIENTS INTO A FINISHED LOAF. THIS IS YOUR HANDIWORK; THE JOYS OF MAKING YOUR OWN BREAD BEGIN HERE. NOT COMPLICATED OR DIFFICULT TO FOLLOW.
- 42. 40 40 — B A S I C T E C H N I Q U E S — P RECISE PROPORTIONS and accurate quantities of leavening, water, and flour form the foundation on which all good bread is based. The rising agent, or leaven, is the key to transforming simple ingredients into a risen bread. In this book, yeast, in either dry or cake form, is the most commonly used leaven. HOW TO BE G I N PR E PA R I N G DRY YE A S T Granules will float on the surface and then sink 1Sprinkle dry yeast granules into a small glass bowl containing lukewarm water; let it dissolve for 5 minutes. 2Once the yeast has dissolved, stir the mixture with a wooden spoon. The yeast mixture is now ready to be added to the flour. Foam indicates that the yeast has been activated Yeast is a living organism that feeds on the sugar and starch present in flour to live and grow. The yeast produces carbon dioxide as it grows: this gas causes the bread dough to rise. Once activated in water, yeast will live for 15 minutes before it must be added to flour, the food source it requires to stay alive. ACCURACY IS CRUCIAL when making bread. Measure all the ingredients carefully before you begin. Follow either nonmetric or metric measurements throughout the recipe. These two types of measurement are not interchangeable. For nonmetric, measure by cup, tablespoon, or teaspoon. With flour and other dry ingredients, level the top. For metric, use a clearly marked scale to weigh dry ingredients. With liquid ingredients, put a measuring cup on a flat surface and bend down so that the measure mark is at eye level. PR E PA R I N G T H E YE A S T BOTH DRY AND CAKE YEAST must be dissolved in lukewarm water to activate. This should be done just before adding the yeast to the flour. Avoid using metal bowls or utensils to prepare the yeast. Metal can impart an unpleasant aftertaste to a yeast mixture. PR E PA R I N G IN S TA N T YE A S T TO USE INSTANT YEAST, sprinkle it directly onto the flour. The yeast will activate once the liquid has been added. The standard method of mixing the dough must be followed, since the sponge method (see page 44–45) cannot be used with instant yeast. ME A S U R I N G T H E IN G R E D I E N T S
- 43. 41 41 — H O W T O B E G I N — WAT E R TE M P E R AT U R E The ideal temperature for preparing yeast is 98.6°F. The easiest method for achieving this is to mix two-thirds cold tap water with one-third boiling water. Lukewarm water should be comfortable to the touch, not too hot, but not cool. An instant-read thermometer is a fail-safe method for checking the water temperature (see page 35). As a living organism, yeast is very sensitive to temperature. The temperature of the liquid you use to dissolve the yeast and to make the dough is crucial: too hot, and the yeast is killed; too cool, and its growth is inhibited. Cool water can be helpful when conditions in the kitchen are extremely warm and you wish to slow down the rising process. Adding cool water to the yeast will inhibit the rate of fermentation, allowing the bread to rise at a normal rate when the room temperature is above normal. 2Use a wooden spoon to cream the yeast until it dissolves in the water and forms a smooth, thoroughly blended paste. The yeast mixture is now ready to be added to the flour. PR E PA R I N G CA K E YE A S T 1Use a wooden spoon to crumble the cake yeast in a small, glass bowl and add the water to it. As a general rule, the amount of water added to dissolve the yeast will be about a quarter of the water specified in the recipe.
- 44. 42 42 — B A S I C T E C H N I Q U E S — S TARTERS OFFER AN ALTERNATIVE METHOD of preparing the yeast before mixing the bread dough. A portion of the yeast is prepared and then combined with water and flour. This mixture is then left to ferment for between two hours and five days, which results in a finished bread with an open, airy texture and a superior US I N G A STA RT E R MA K I N G A STA RT E R ANY BREAD CAN BE MADE with a starter. Simply mix some of the flour, water, and yeast together into a thick batter, and let it ferment at room temperature. The proportions of ingredients and the timing depend on the recipe. The timing varies from two hours for a French poolish to thirty-six hours for a fully matured Italian biga (see page 84). 2Cover the bowl with a dish towel, and let the starter ferment at room temperature for the amount of time specified in the recipe. The mixture will begin to bubble and have a mild yeasty fragrance. 3The starter is now ready to be mixed with the remaining ingredients. Add the starter and dissolved yeast to the well formed in the flour. Mix the ingredients as directed in the recipe (see pages 44–45). flavor. Breads made with a starter require planning because additional time is needed to allow the starter to ferment. Once the starter has fermented, it is ready for the mixing step (see pages 44–45). The main difference between the main starter methods described here is time; the ingredients are the same—flour, water, and yeast. 1In a nonmetalic bowl, combine the amount of flour, water, and prepared yeast specified in the recipe. Mix with a wooden spoon to form a thick, yet pliable, batter. The mixture should be thick but not too stiff
- 45. 43 43 — U S I N G A S TA R T E R — CR E AT I N G A N D FE E D I N G A SO U R D O U G H STA RT E R A TRADITIONAL SOURDOUGH STARTER is made with a flour and water paste that is left to ferment by wild airborne yeast. Here some yeast is added to encourage the fermentation process. Once established, a sourdough starter can be kept indefinitely in the refrigerator. The longer a starter is kept, the better the flavor of the baked bread. If you do not make bread regularly, it is important to “feed” the starter every two weeks. To do this, stir, discard half, and replace with an equal amount of water and flour. 1In a large glass jar, sprinkle or crumble the yeast into the water; let it dissolve for 5 minutes. Stir in the amount of flour specified in the recipe. Cover the jar with a dish towel and ferment at room temperature for at least 48 hours and up to 5 days. The starter will become a loose, frothy batter. Use immediately or refrigerate for up to 2 weeks. 2After using a portion of the starter, replace it with an equal amount of flour and water to keep it active for the next time you make bread. For example, if the recipe calls for 1 cup starter, after removing this amount stir 1 cup flour and 1 ⁄2 cup water back into the jar. Ferment at room temperature for 12–24 hours before refrigerating. OL D -D O U G H ME T H O D A piece of “old dough” can also be used as a leavening agent. Instead of making a flour and dissolved yeast batter, simply incorporate a piece of dough saved from a previous batch of plain bread into your new batch. Old dough can be made from scratch (see page 86) and kept wrapped in the refrigerator for up to two days before using or freezing. Alternatively, when making a plain bread remove a walnut-size piece of dough after the rising period. Wrap the dough loosely in waxed paper and foil, allowing room for it to expand, then refrigerate or freeze it. To use the dough, if frozen, thaw it in the refrigerator overnight, then let it rest at room temperature for a minimum of two hours. The fermented starter is ready to use when it has become a loose batter Wrapped properly, old dough will keep in the freezer for up to 6 months
- 46. 44 44 — B A S I C T E C H N I Q U E S — 2Using a wooden spoon, draw in the flour from the sides of the bowl, a little at a time, to combine with the dissolved yeast in the well. Proceed to step 3, opposite. T HE PRIMARY OBJECTIVE of mixing is to combine the basic ingredients into a soft, pliable consistency ready for kneading. The quantity of liquid required will often vary, depending on the type of flour used as well as the level of humidity and temperature on the day of breadmaking. A little less, or a little more, liquid than the recipe states may be required. Add extra liquid 1 tablespoon at a time; it is MI X I N G 1In a large bowl, combine the flour and salt. Use a wooden spoon to form a well. Add the dissolved yeast and any starter (see pages 42–43) to the well. If the recipe requires the ingredients to “sponge,” refer to the method illustrated below. COVER THE BOWL with a dish towel and leave for 20 minutes, or longer if specified in the recipe, until the paste is frothy and has expanded slightly in volume (see left). Proceed to step 3, opposite. FOLLOW STEP 1, above, then draw enough of the flour from the sides of the bowl into the liquid to form a soft paste (see left) when mixed thoroughly. SP O N G E ME T H O D better to err on the side of too soft than too dry. Take note of the consistency of the dough described in each recipe, and add additional liquid accordingly. The sponge method adds a period of fermentation (specified in the recipe) to mixing. This results in a bread with a lighter crumb and a less yeasty flavor. Techniques for mixing added ingredients into the dough are illustrated in the recipe section. ▼ ▼
- 47. 3Gradually pour in half of the remaining liquid while mixing in the flour from the sides of the bowl. As the water is added, the texture of the combined ingredients will change from a crumbly mixture to a shaggy, slightly sticky mass that will begin to come away from the sides of the bowl and form a ball (see below). Add the rest of the water, as needed, to achieve the consistency specified in the recipe. The dough should remain soft and not too dry before it is transferred to a floured surface to knead (see pages 46–47).
- 48. 54 46 — B A S I C T E C H N I Q U E S — E SSENTIAL FOR AN OPEN-TEXTURED, full-flavored bread, kneading performs a crucial function in preparing the dough to rise. First, it completes the mixing process by distributing the activated yeast throughout the dough. Continued kneading then allows the flour’s proteins to develop into gluten, which gives dough the ability to stretch and expand. KN E A D I N G 3Repeat these kneading actions, gently folding, pushing, and rotating the dough continuously for approximately 10 minutes, or until the dough achieves a firm touch, a silky smooth surface, and an elastic texture. Take time to work the dough slowly and firmly, but do not use excessive force. The dough will gradually become more elastic and easier to knead. Shape the dough into a ball for rising (see pages 50–51). 2Use the heel of your working hand to gently push the dough away from you. At the same time, use your other hand to rotate the dough slightly toward you, guiding the dough slowly around in a circle. 1Shape the dough to begin kneading by folding one half over the other, bringing the top half toward you. Keep a little additional flour on the side to lightly dust the dough as you knead should it become difficult to handle. Use this extra flour sparingly. Starches are broken down to feed the yeast, which creates bubbles of carbon dioxide. These bubbles cause the dough to rise. The actions shown are a guide to kneading a basic dough. Specific instructions, such as how to knead a soft, wet dough (see page 88) or how to knead coarse ingredients into a dough (see page 99), are demonstrated in the recipe section. 46
- 49. 55
- 50. 48 48 — B A S I C T E C H N I Q U E S — US I N G AP P L I A N C E S A FOOD PROCESSOR or heavy-duty electric mixer can be used as an alternative to mixing and kneading bread dough by hand. When using a food processor, check the capacity of your machine and, if necessary, divide the ingredients evenly so you can mix and knead the dough in batches. Some kneading by hand US I N G A FO O D PRO C E S S O R 1Before starting, always fit the machine with a plastic dough blade. A metal blade will stress and overheat the dough. 2Put the flour and any other dry ingredients into the work bowl; pulse to mix. With the machine running, pour in the dissolved yeast, followed by half the remaining liquid. If using a starter, as specified in the recipe, add it to the work bowl at this point. 3Add the rest of the water and continue to run the machine until the dough starts to form into a ball. Then let the dough rest in the machine for 5 minutes. Process the dough to knead for another 45 seconds. Turn out onto a lightly floured work surface and continue to knead by hand until smooth and elastic, about 3–5 minutes. Let the dough rise (see pages 50–51). The dough should be firm and sticky before kneading by hand will also be necessary. Bread dough can be made entirely in a heavy-duty electric mixer by using the mixing paddle to mix and the dough hook to knead. Be careful not to overwork the dough —high speeds stress the dough, causing it to rise incorrectly. Make use of the pulse button or low-speed setting on each appliance. HA N D Y TI P S • Use slightly cool water to dissolve the yeast to counterbalance the heat generated by the machine. • When preparing the dough in batches, turn them out onto a lightly floured work surface. Knead them together to form one piece of dough. Continue until smooth and elastic. • Use the pulse button to prevent the machine from overheating the dough. Do not run the machine continuously for more than 30 seconds at a time.
- 51. 49 49 — U S I N G A P P L I A N C E S — US I N G A HE AV Y-D U T Y MI X E R 1Dissolve the yeast or make a starter, as specified in the recipe, and place directly in the mixing bowl. Use the paddle attachment to mix in half the flour on low speed, then add the remaining liquid ingredients to the bowl. 2Once the mixture forms into a loose batter, remove the paddle. Replace it with the dough hook. Add the remaining dry ingredients gradually to the mixer. 3Continue adding the dry ingredients until the dough pulls away from the sides of the bowl. Increase the speed to medium and work the dough until smooth and elastic, about 8–10 minutes. If the dough climbs up the hook, stop the machine, push it back down, and continue. Remove the dough from the mixing bowl to rise (see pages 50–51). HA N D Y TI P S • Use only an electric mixer with a proper dough hook for kneading. A mixer with only paddle and whisk attachments is not equipped for breadmaking. • An electric mixer is particularly helpful for kneading very stiff doughs as well as doughs with enrichments and flavorings added to them. • Check the recipe for the dough consistency required. Add extra water, if needed, 1 tablespoon at a time. The dough will collect around the hook as it is kneaded
- 52. 50 50 — B A S I C T E C H N I Q U E S — RISING & PUNCHING DOWN T HE SPEED OF RISING depends on certain factors, such as temperature and humidity, as well as on the integral elements of a recipe, such as the type of flour and the method of leavening (that is, with or without a starter). On a warm, humid day, dough should rise more quickly than on a cold, dry one. However, the 1Place the kneaded dough in a lightly oiled glass or ceramic bowl large enough to allow the dough to double in size. Metal containers should be avoided since they can conduct heat, causing the dough to rise too quickly. Cover the bowl with a dish towel and let it rise in a cool to normal, draft-free room. 2Allow the dough to rise until doubled in size. For most doughs, this will take 1–2 hours. Whole-wheat breads and enriched breads will take longer to rise. The slower a dough rises, the more chance there is for it to develop flavor and texture. Do not allow the dough to over-rise. Air bubbles will appear on the surface of a completely risen dough RI S I N G T H E DO U G H I N T H E RE F R I G E R AT O R This method allows breadmaking to be split into two stages, and is therefore useful for those with busy schedules. Place the dough in a deep glass bowl that will allow it to expand, brush with oil, and cover tightly with plastic wrap. To achieve a complete rise, refrigerate for at least eight hours. After rising, remove from the refrigerator. Leave it at room temperature for two hours before shaping. RI S I N G exact effect of temperature can be difficult to predict. Rising times become more predictable only after years of experience with the same bread recipes. The novice baker might find it difficult to tell when the dough has doubled in size; use the test described in step 3 to help check the progress. If the dough over-rises, see page 163 for a remedy.
- 53. 51 51 — R I S I N G & P U N C H I N G D O W N — 3To ensure that rising is complete, test the dough by gently pressing with a fingertip. When rising is complete, the indentation made will spring back gradually. If the dough is under-risen, the indentation will spring back at once. If the dough is over-risen, the finger will create a permanent mark that will not spring back at all (see page 163). ONCE THE DOUGH HAS RISEN completely, punch down or deflate the dough by pressing down with your knuckles as demonstrated. Turn the dough out of the bowl onto a lightly floured work surface. FORM THE DOUGH into a ball by cupping your hands gently around it. Apply a light downward pressure to the sides, while simultaneously rotating the dough continuously in a steady clockwise motion. Continue until the dough is formed into an even round shape. This action is called chafing. Some recipes specify an extended chafing time at this point. Otherwise, allow the dough to rest for 5 minutes and then proceed to the shaping step. Cup the dough gently with your hands CH A F I N G PU N C H I N G DOW N
- 54. 52 52 — B A S I C T E C H N I Q U E S — SH A P I N G & PRO O F I N G A FTER THE DOUGH IS PUNCHED DOWN and has rested, it is ready to be shaped. The techniques on the following six pages illustrate how to form the basic loaf shapes that are most frequently called for in the recipe section. Each stage of the shaping process requires careful attention—handle the dough gently and avoid MA K I N G A LO N G LOA F 1Flatten the dough with the lightly floured palm of your hand to expel any gas bubbles. Keep the dough in a round shape by exerting pressure evenly. Take one end of the dough and fold it into the center. Press gently to seal the fold. 2Fold the other half of the dough into the center, so the folds overlap along the middle of the loaf. Gently press along the seam with the lightly floured palm of your hand to seal the two folds. 3Use the thumbs of both hands to create an indentation in the center of the dough. Before bringing the top half toward you, rest your fingertips along the top of the dough and give a firm, short push forward. This action tightens the interior of the dough and gives an even-textured crumb when the bread is baked. Press down into the center of the dough and fold one half over the other overshaping or excessive reshaping. Apply pressure evenly and allow the dough to rest if it begins to resist or tighten. Transfer the shaped loaf to a prepared baking sheet to proof (see page 57). Proofing allows the dough to rise for a final time before baking. Avoid over-proofing the dough; use the recommended test to check the progress.
- 55. 53 53 — S H A P I N G & P R O O F I N G — 4Gently press down with the palm of your hand along the seam to seal the fold. Place the dough seam side down. Press evenly with the palms of both hands and roll the dough backward and forward to achieve the desired length as specified in the recipe. TO MAKE A BAGUETTE, shape the dough as for a long loaf following steps 1–4. With hands placed at either end of the loaf, continue to gently roll the dough, backward and forward, moving both hands outward along the loaf. If the dough resists or tightens, allow it to rest for 5 minutes. Repeat the rolling action until an even thickness and the desired length are achieved. Roll the dough while moving hands outward along the loaf SH A P I N G DO U G H F O R A LO A F PA N Shape the dough as for a long loaf up to step 3, opposite. Place the dough seam side down on the work surface. Use the straightened fingers of both hands to gently roll the dough backward and forward. Continue until the dough is the same length as the pan and is an even thickness. Lift the dough off the work surface. Tuck under the ends and place the dough into the prepared pan, seam side down. MA K I N G A BA G U E T T E Fold the dough to fit the length of the pan
- 56. 54 54 — B A S I C T E C H N I Q U E S — SH A P I N G A RO U N D LOA F 1Gently press your fingers into the base of the rounded dough (see page 51) while holding it with both hands, as you would the steering wheel of a car. Rotate the dough between your cupped hands. As the dough is turned, exert light pressure with the tips of your fingers, while tucking the sides of the dough under what will become the base of the loaf. 2When the dough becomes smooth and rounded, place the base of the loaf face down on a lightly floured work surface. Cup both hands around the dough and rotate it continuously in a steady, clockwise motion (see Chafing, page 51) until a smooth, evenly shaped round is formed. Turn the dough over so that the base is now facing upward and pinch the seam, or “key,” together. Place the loaf “key” side down on a baking sheet.
- 57. 55 55 — S H A P I N G & P R O O F I N G — SH A P I N G A N OVA L LOA F SHAPE THE DOUGH into a round loaf, following the directions given opposite. Place the palms of your hands on either side of the round and gently roll the dough backward and forward, keeping your hands in the same position. Continue to roll the dough until the ends become slightly tapered and the desired shape is achieved. TO SHAPE KNOTTED ROLLS, divide the dough into pieces, each the size of a small lemon. Use the palm of your hand to roll each piece on an unfloured surface to form a rope, 12 inches long and 1 ⁄2 inch thick. Tie each rope into a knot. RO U N D RO L L S KN OT T E D RO L L S FINISHED SHAPE TO SHAPE TWISTED ROLLS, divide the dough into pieces, each the size of a small lemon. Use the palm of your hand to roll each piece on an unfloured surface to form a rope, 12 inches long and 1 ⁄2 inch thick. Twist two of the ropes around each other. TW I S T E D RO L L S TO SHAPE ROUND ROLLS, divide the dough into pieces, each the size of a small lemon. Press down on the pieces to expel any air bubbles. Cup the palm of your hand over each piece and roll it over an unfloured surface until it forms a smooth ball.
- 58. 56 56 — B A S I C T E C H N I Q U E S — SH A P I N G A RI N G 1Shape the dough into a round (see page 54), then flatten the top of the dough with the palm of your hand. Make a hole in the center of the dough: place the heel of your hand in the center of the dough and press down to the work surface. 2Using both hands, lightly push out the dough with straightened fingers and run them around the inside edge of the hole. Apply pressure evenly to stretch the hole to 6 inches across. Keep your fingers straightened and apply pressure evenly FINISHED SHAPE
- 59. 57 57 — S H A P I N G & P R O O F I N G — PRO O F I N G PROOFED DOUGH UNPROOFED DOUGH PROOFING IS REFERRED TO as the final rise. Shaped dough is left to rise until doubled in size (unless otherwise specified in the recipe) on a prepared baking sheet or in a pan just before baking. Proofing is best done in a warm, draft-free place. In an exceptionally cold kitchen, a low oven or one heated with just the pilot light is a good option. Preheat the oven for baking halfway through the proofing time; remove the bread while the oven preheats. Avoid overproofing by testing for doneness; press on the dough lightly with your fingertip. The shaped dough is ready to bake when it feels spongy rather than firm and the indentation made with your fingertip springs back slowly. It is best to put bread in the oven a little early (see page 162). Do not let shaped dough spread or deflate: overproofing can cause the dough to collapse when it is touched or slashed, or when it is placed in a hot oven. BR A I D I N G 1Divide the dough into three pieces and roll each one into a 16-inch-long rope. Line up the ropes at a right angle to the edge of the work surface. Start from the center of the ropes and braid toward yourself, working from left to right. 2Continue braiding the ropes until you reach the end. Press the ends together with your fingers and tuck them neatly under the bottom of the braid. Turn the shaped dough around so that the unbraided end is now facing you. 3Again, working from the center, braid the ropes from left to right until you reach the end. Press the ends together, tuck them neatly under the bottom of the braid to finish. Place the braid on a baking sheet.
- 60. 58 58 — B A S I C T E C H N I Q U E S — GL A Z I N G A DDING THE FINISHING TOUCHES to a bread is usually done after proofing. Glazes can affect the finished taste and texture of the crust as well as the appearance. A glaze is applied either before or after baking, depending on the glaze and the effect desired. Some glazes can be Place the shaped dough on a baking sheet, prepared as directed by the recipe, before applying the glaze PR E PA R I N G A N EG G WA S H 1A basic egg wash will give a shiny, golden look to the crust. It can also be used as an “adhesive” to be applied before any of the toppings described on pages 60–61. To prepare, beat together 1 egg and 1 tablespoon of water or milk, and a pinch of salt. 2Use a clean, soft pastry brush to gently apply the egg wash to the shaped and proofed dough before baking. For an extra golden sheen, allow the first egg- wash coating to dry, then apply a second layer of glaze immediately before baking. Use a clean, soft pastry brush to apply the glaze brushed on both before and after baking. When applying a glaze before baking, be careful not to “glue” the loaf to the rim of the loaf pan or the baking sheet. This not only will make it difficult to remove the loaf from the pan, but can prevent the loaf from expanding fully in the oven.
- 61. 59 59 — G L A Z I N G — GL A Z I N G AF T E R BA K I N G Transfer the loaf or rolls to a wire cooling rack, then apply the prepared glaze using a soft pastry brush while the bread is still warm. Glazes are applied after baking to add flavor to the bread and to soften the texture of the crust. HONEY For a soft, sweet, sticky crust, brush a baked, still-warm bread with honey. Alternatively, try molasses or corn syrup. CORNSTARCH For a chewy crust, brush the dough with a mixture of cornstarch and water that has been cooked until translucent and then cooled. OLIVE OIL For both added flavor and shine, brush the dough with olive oil immediately before and after baking. SALTED WATER For a light shine and a crisp baked crust, brush the dough with lightly salted water immediately before baking. EGG WASH For a shiny, golden-brown crust, brush the dough with the egg wash (see opposite) before baking. MILK For a golden crust, brush the dough with milk before baking. For a slightly sweeter glaze, dissolve a little sugar in warm milk. SOY POWDER AND WATER Make a vegan version of egg wash by using a mixture of soy powder and water. TY P E S O F GL A Z E S – BE F O R E A N D AF T E R BA K I N G
- 62. 60 60 — B A S I C T E C H N I Q U E S — TO P P I N G T OPPINGS OFFER MANY WAYS to finish a bread before baking. If a flavoring has been used to make the dough, then the loaf may be topped with the same ingredient, providing a clue to the hidden flavor inside. Toppings can also be used to complement a bread or simply to USE A FINE MESH STRAINER to lightly dust the shaped dough with flour before and after proofing. This will give the crust a dusty, golden finish. SPRINKLE COARSE TOPPINGS like chopped nuts or grated cheese over the glazed dough (see page 58) after the proofing stage or immediately before baking. SPRINKLE SEEDS or other fine toppings onto a work surface. Gently press the shaped dough into the topping before placing it on a prepared baking sheet to proof. CRACKED WHEAT For a crunchy crust, gently press the shaped dough into a bowl of cracked wheat before placing on a baking sheet to proof. ROLLED OATS To decorate, glaze the shaped dough with an egg wash (see page 58) and sprinkle with rolled oats after proofing. BRAN FLAKES To add texture and fiber, glaze the shaped dough with an egg wash (see page 58) and sprinkle bran flakes over the top after proofing. ME T H O D S O F TO P P I N G TY P E S O F TO P P I N G S – BE F O R E A N D AF T E R BA K I N G BE F O R E A N D AF T E R AF T E R PRO O F I N G BE F O R E PRO O F I N G add a decorative touch. Toppings can be applied at different times: before proofing, the dough can be rolled in the topping; after proofing, the dough must be handled more gently by sprinkling the topping over the dough or using a strainer to create a light dusting.
- 63. 61 61 GRATED CHEESE For a tangy and chewy crust, glaze the shaped dough with an egg wash (see page 58) and sprinkle with grated cheese after proofing. PUMPKIN SEEDS Arrange pumpkin seeds over the top for a flavorful decoration. Gently press them into the shaped dough before proofing. FRESH HERBS Use fresh herbs, such as rosemary and thyme, to add flavor and color. Press them into the shaped dough after proofing. POPPY SEEDS For a crunchy texture, glaze the shaped dough with an egg wash (see page 58) and sprinkle with poppy seeds after proofing. COARSE SALT For a salty, crispy crust, glaze the shaped dough with an egg wash (see page 58) and sprinkle with coarse salt after proofing . GRANULATED SUGAR For a sweet, crackly crust, glaze the shaped dough with an egg wash (see page 58) and sift sugar lightly over it after proofing. WHITE FLOUR To create a dusty, golden finish, sift a light dusting of flour over the shaped dough both before proofing and before baking. PAPRIKA For added spice and color, sprinkle the shaped dough with paprika or another ground spice after proofing. FINE CORNMEAL For color and a crisp texture, glaze the shaped dough with water only (see page 58) and sprinkle with fine cornmeal after proofing. — T O P P I N G —
- 64. 62 62 — B A S I C T E C H N I Q U E S — PR E PA R I N G F O R BA K I N G S LASHING A LOAF before baking has both a functional and a decorative purpose. Cuts made through the surface of the dough allow the bread to rise and expand as it bakes without tearing or cracking along the sides or bottom. The deeper the slashes, the more the bread will open when baked, giving the baked SL A S H I N G T H E LOA F US I N G A BL A D E US I N G SC I S S O R S SL A S H I N G A PA N LOA F A RAZOR-SHARP BLADE is the best tool for making clean, perfect slashes. It is worth investing in a scalpel that allows you to safely hold the blade. Use decisive strokes to make the slashes clean and crisp. Keep the slashes equal in depth and length. A LONG SLASH, about 1 ⁄2 inch deep, will allow a pan loaf to rise and open evenly when baked, without breaking open at the sides. With a firm, steady hand, plunge the blade into the surface of the dough and draw it quickly along the length of the loaf. SHARP SCISSORS are a helpful and effective tool for making decorative slashes. Hold a pair of scissors almost horizontally to cut a Baguette into the Pain d’Epi variation. Cut about three-quarters of the way through the dough, leaving about 2 inches between each cut. Gently place the flaps to alternate sides. QUICK SNIPS with a pair of sharp scissors produce a rough, sculptural cut. This is an effective alternative to using a scapel. loaf a maximum area of crust. It is best to cut the slashes using an extremely sharp blade and quick, firm strokes. If you hesitate as you slash, the dough will stick to the blade and tear. The use of steam in the oven before or during baking produces a moist heat that helps create a glazed, crisp crust on the loaf.
- 65. 63 63 — P R E PA R I N G F O R B A K I N G — AP P LY I N G ST E A M TO T H E OV E N STEAM PLAYS AN IMPORTANT role in many bread recipes, especially those that require a crisp, crusty exterior. It is introduced into the oven before and sometimes during baking. The moisture in the air surrounding the bread in the oven affects both its texture and its appearance. Moisture helps soften the crust during the initial stages of baking. This allows the dough to rise fully and a thin, crisp crust to form. Moisture also helps caramelize the natural sugars in the bread, resulting in a rich, golden brown crust. US I N G A SP R AY E R US I N G IC E CU B E S APPLY STEAM BY PLACING A WIDE DISH filled with ice cubes on the bottom rack or floor of the oven while the oven preheats. Place the loaf in the oven before the ice cubes have completely melted. When the ice cubes have melted, carefully remove the dish from the oven. This should occur within the first 15–20 minutes of the bread’s baking time. US I N G CE R A M I C TI L E S LINE THE BOTTOM RACK of the oven with unglazed ceramic tiles, leaving 2 inches of air space all the way around the tiles and the oven wall to allow for air circulation. The tiles will produce a steady, radiating heat as well as help retain a maximum amount of moisture in the oven. When tiles are used in combination with the applied steam methods shown, and the bread is baked directly on the tiled surface, it will form the crispest crust of the three methods. APPLY STEAM WITH A WATER SPRAYER after placing the loaf in the preheated oven. Mist the oven walls eight to ten times, then repeat the process after 2 minutes and again after 2 minutes more. Shut the door rapidly each time to minimize any heat loss from the oven. Be careful to spray only the sides of the oven, avoiding the oven light, electric heating coils, and oven fan.
- 66. 64 64 — B A S I C T E C H N I Q U E S — BA K I N G B AKING IS THE CULMINATION of the breadmaking process when all your hard work and patience are rewarded. For a successful finished loaf, follow these simple guidelines: use a good thermometer to regulate the temperature of the oven; preheat to the correct temperature before placing the bread BA K I N G STA G E S 1When the bread is placed in the hot oven, the heat turns the moisture in the dough to steam, causing the loaf to rise rapidly in the first 20 minutes of baking. The heat then penetrates the bread, killing the active yeast cells and allowing the exterior crust to form. 2As the exterior crust forms, the natural sugars in the dough caramelize, creating a golden color. The baking time is specified in each recipe. High humidity, however, can sometimes extend the required baking time and must be taken into consideration on the day of baking. The dough’s natural sugars caramelize to give a golden crust GE T T I N G T O KN O W YO U R OV E N Since each oven is different, it is difficult to establish hard-and-fast rules for breadmaking, such as oven shelf position. The only solution is increased familiarity with your oven. Using an oven thermometer before and during baking allows you to observe any variations in temperature and to make adjustments. If you find you have “hot spots” (uneven heat) in your oven, it is important to turn the bread halfway through baking. in the oven to bake; be sure of the exact baking time before beginning; and always use a kitchen timer to keep track of the time. An important key to proficient baking lies in knowing your oven and being able to control its temperature closely—each one is slightly different and has its own peculiarities.
- 67. TE S T I N G F O R DO N E N E S S UNDERCOOKING BREAD IS A common mistake of the novice baker. Bread is indigestible when it has been undercooked, so it is important to test for doneness. A well-baked bread should be golden brown, not too pale or too dark in color. The texture and feel of the bread should be firm to the touch without seeming hard. The best test, however, is to listen to the sound of the baked loaf when it is tapped on the underside. It should sound slightly hollow when it has been properly cooked. SL I C I N G CO O L I N G IT IS IMPORTANT TO ALLOW a freshly baked loaf to cool on a wire rack. As the loaf cools, steam from the middle works its way toward the crust, causing it to soften. Cooling baked bread on a wire rack prevents the bottom crust from becoming damp and soggy. WHEN SLICING BREAD, use a sharp, serrated bread knife and a clean bread board. Bread should be left to cool slightly before slicing. Use a steady, sawing motion across the top of the bread to prevent the weight of the knife from crushing the loaf or tearing the crust.
- 68. 66 66 — B A S I C T E C H N I Q U E S — USING A BREAD MACHINE T HE MANUFACTURER’S INSTRUCTION MANUAL is an invaluable resource for getting the best results from your machine. A bread machine will mix, knead, rise, and bake the loaf, yet machine models vary in the shape and size of loaf they make as well as the way they operate. Some machines have programmable cycles for 1Add the ingredients to the baking cylinder in the order suggested by the instruction manual. This will vary, depending on the machine model you have. The manufacturer’s instructions will tell you what type of yeast to use. Best results are achieved with a yeast made for bread machines, although instant yeast also works. Place the baking cylinder inside the machine, select the setting on the control panel, according to the manual, and press start. making different kinds of bread dough; others offer fewer alternatives. A recipe booklet comes with most models. Master a few of these recipes to familiarize yourself with the way your machine works, its possibilities and its limitations. Use the experience to adapt the recipes in this book following the general guidelines given below. HA N D Y TI P S • Pay attention to the order in which the ingredients are added to the machine—it does make a difference. • Keep the lid open to watch the mixing and kneading cycles, but make sure the lid is shut during rising and baking. • Use the handle of a wooden spoon to remove the kneading paddle from the bottom of the hot finished loaf.
- 69. 67 67 — U S I N G A B R E A D M A C H I N E — 2Check the dough about 10 minutes into the kneading cycle. It should be smooth and soft at this stage (right). If it is too soft, add more flour 1 tablespoon at a time. If it is stiff, add more water 1 tablespoon at a time. Ingredients like nuts and dried fruit should be added in the last few minutes of the kneading cycle. 3When the bread is baked, remove it immediately from the machine and the baking cylinder to prevent a soggy crust. Let it cool on a wire rack. US I N G RE C I P E S F R O M TH I S BO O K Depending on the capacity of your bread machine, many of the basic bread recipes, excluding those using a starter (see pages 84–93), may be mixed and kneaded by your bread machine. Most bread machines use instant yeast, which means eliminating the sponge method from the recipe instructions. Add the ingredients in the order suggested by the manufacturer’s manual, and select the correct machine settings. Remove the dough from the machine after the rising period and before the proofing (final rise) and baking cycles begin. Instead, shape, proof, and bake according to the recipe.
- 70. 68 68 — B A S I C T E C H N I Q U E S — STO R I N G & FR E E Z I N G S OME BREADS ARE BEST EATEN on the day of baking, but most home-baked breads will keep from several days up to a week. As a general rule, storage time depends on the ingredients used and the size of the loaf. A large, thick loaf will usually dry out more slowly than a small, thin one. Breads enriched with oil, butter, STO R I N G BA K E D BR E A D STORE BREAD only after it has cooled. Any residual warmth left in the bread will continue to give off steam, which will condense inside the wrapping or container and cause a stale texture and rapid molding. When the bread has completely cooled, wrap in a clean dry cloth or bread bag and store at room temperature. If stored like this, bread will remain fresh for 3–4 days. Never refrigerate bread; it dehydrates the bread and accelerates staling. A clean, dry cloth bag is the best place to store bread after it has cooled or eggs (see pages 110–125) tend to last longer than plain breads, and those made with a starter (see pages 84–93) also have a longer shelf life. Bread dough can easily be frozen, either before or after rising, which allows greater flexibility in the breadmaking schedule. Baked bread also freezes and defrosts successfully. FR E S H E N I N G STA L E BR E A D Spray the bread lightly with tap water, wrap in foil, and warm in an oven, 400°F, for 10 minutes. Microwave ovens are not recommended for freshening stale bread; microwaving tends to dry out and harden bread.
- 71. 69 69 — S T O R I N G & F R E E Z I N G — FR E E Z I N G UN R I S E N DO U G H FR E E Z I N G BA K E D BR E A D FRESHLY BAKED BREAD can be frozen successfully after it has completely cooled. Wrap the bread in heavy- duty foil, then place it in a plastic freezer bag; expel all the air before sealing. The bread will keep for up to 3 months. WHEN AVAILABLE TIME IS LIMITED, dough can be frozen before rising and shaping. Mix and knead the dough as directed in the recipe. Brush the inside of a plastic freezer bag with oil and place the unrisen dough inside. Expel any air, leaving just enough space for the dough to rise slightly as it freezes. To thaw, place the dough in the refrigerator for 12–24 hours, until it has doubled in size. Remove from the refrigerator and bring the dough to room temperature. Shape, proof, and bake as directed. WHEN IT IS MORE CONVENIENT, the dough can be frozen after shaping. Place the shaped dough on a baking sheet and cover tightly with plastic wrap. Then place the baking sheet in the freezer and leave just until the dough becomes firm. Store the dough in a plastic freezer bag. To thaw, remove the dough from the bag and place it in the refrigerator for 12–24 hours, until it has doubled in size. Remove from the refrigerator and leave at room temperature for 20 minutes. Bake as directed. Use heavy-duty foil to wrap bread before freezing DE F R O S T I N G BR E A D Defrost bread slowly at a cool room temperature for 3–6 hours, or in the refrigerator for 8–10 hours. Bread that is defrosted slowly will retain its freshness for longer. Defrost bread in its wrapping to prevent it from drying out. For breads with a thick crust, crisp them in a low oven before serving. To defrost bread more quickly, place the wrapped loaf in a preheated oven, 400°F, for 45 minutes. FR E E Z I N G SH A P E D DO U G H
- 73. RECIPES M ORE THAN 100 BREADS CAN BE CREATED USING ON A VERY SIMPLE THEME: FLOUR, WATER, LEAVEN, AND TIME. BEGIN WITH THE BASIC AND STARTER BREAD RECIPES, WHICH UTILIZE METHODS ILLUSTRATED IN THE BASIC TECHNIQUES. FLAVORED BREADS PROVIDE AN EXTRA TASTE DIMENSION, WHILE ENRICHED BREADS TRANSFORM BASIC BREAD DOUGH WITH THE ADDITION OF OIL, BUTTER, AND EGGS. QUICK, FLAT, AND FESTIVE BREADS OFFER OTHER DELICIOUS POSSIBILITIES FROM AROUND THE WORLD. THIS RECIPE SECTION. EACH ONE IS A VARIATION
- 74. 72 72 Treat this recipe as a blueprint for the basic method of breadmaking. A wide variety of breads can be created using this simple dough recipe. For a more rustic flavor, substitute 1 ⁄3 cup of whole-wheat, rye, or barley flour for the same amount of unbleached flour. For an extra tender crumb, replace 3 ⁄4 cup of the water with the same amount of yogurt or buttermilk and use it to add to the well in step 3. — R E C I P E S — IN G R E D I E N T S 2 tsp dry yeast 11 ⁄2 cups water 33 ⁄4 cups bread flour, sifted 11 ⁄2 tsp salt 1Sprinkle the yeast into 1 ⁄2 cup of the water in a bowl. Let stand for 5 minutes; stir to dissolve. Mix the flour and salt in a large bowl. Make a well in the center and pour in the dissolved yeast. 2Use a wooden spoon to draw enough of the flour into the dissolved yeast to form a soft paste. Cover the bowl with a dish towel and let the paste “sponge” until frothy, loose, and slightly expanded, about 20 minutes. 3Pour about half of the remaining water into the center of the well. Mix in the flour from the sides of the well. Stir in the reserved water, as needed, to form a firm, moist dough. 4Turn the dough out onto a lightly floured work surface. Knead until smooth, shiny, and elastic, about 10 minutes. 5Put the dough in a clean bowl and cover with a dish towel. Let rise until doubled in size, about 11 ⁄2 –2 hours. Punch down, then let rest for 10 minutes. 6Shape the dough into a long loaf (see pages 52–53), about 14 inches in length. Place the shaped loaf on a floured baking sheet and cover with a dish towel. Proof until doubled in size, about 45 minutes. 7Cut five diagonal slashes, each about 1 ⁄4 inch deep, across the top of the loaf (see page 62). Bake in the preheated oven for 45 minutes, until golden and hollow sounding when tapped underneath. Cool on a wire rack. To begin Sponge method Time: 20 minutes (see page 44) Rising 11 ⁄2–2 hours (see pages 50–51) Proofing 45 minutes (see page 57) Oven temperature 425ºF Baking 45 minutes Steam optional (see page 63) Yield 1 loaf Yeast alternative 1 cake (0.6oz) yeast (see page 41) XII II I III IV V VI VII VI II IX X XI • BA S I C BR E A D S T HE RECIPES IN THIS SECTION require no advanced skills, only your hands, your attention, and your time. They represent the backbone of the book, by utilizing the skills covered in the Basic Techniques section. Read this section (see pages 38–69) first, and you will be able to tackle all the basic bread recipes with ease and confidence. These simple breads give the novice baker the opportunity to experiment, observe the transformation of the ingredients into bread, and gain valuable experience. Later on in the recipe section, other elements—such as starters, flavorings, and enrichments—are added to the basic ingredients of flour, water, and yeast. These additions introduce the baker to new techniques and skills illustrated with the recipes. PA I N OR D I N A I R E PL A I N O R BA S I C WH I T E BR E A D CLASSIC PAIN ORDINAIRE
- 75. — B A S I C B R E A D S — VA R I AT I O N S Cottage Loaf • Make one quantity Pain Ordinaire dough up to step 6. • Shape the bread dough according to the instructions (see left). • Place on a floured baking sheet and cover with a dish towel. Proof until doubled in size, about 45 minutes. Preheat the oven to 425ºF. • Sift a light dusting of flour on the top. Bake as directed in step 7. Petits Pains (Bread Rolls) • Make one quantity Pain Ordinaire dough up to step 6. • Divide the bread dough into eight pieces and shape into smooth, round rolls (see page 55). • Place on a floured baking sheet and cover with a dish towel. Proof until doubled in size, about 30 minutes. Preheat the oven to 425ºF. • Sift a dusting of flour on the top. Use a pair of scissors to snip an “X” in the center of each roll (see page 62). • Bake for 25 minutes, until hollow sounding when tapped underneath. Cool on a wire rack. Granary Pan Loaf • Make one quantity Pain Ordinaire dough up to step 6, replacing the bread flour with the same amount of granary flour (see page 29) in step 1. • Grease an 8 x 4 x 21 ⁄2-inch loaf pan with oil. Shape the dough for a loaf pan (see page 53) and place the dough in the pan, seam side down. • Cover with a dish towel and proof until the dough is 1 ⁄2 inch below the top of the pan, about 30 minutes. • If desired, cut a lengthwise slash (see page 62) for a split pan loaf. Let the dough rise further until it is 1 ⁄2 inch above the top of the pan. Preheat the oven to 425°F. • Brush the top with water and bake in the preheated oven for 20 minutes. Reduce the oven to 400ºF and bake for 15–20 minutes, until hollow sounding when tapped. Turn out onto a wire rack to cool. SH A P I N G A COT TA G E LOA F Divide the dough into 2 ⁄3 and 1 ⁄3. Shape each piece into a round loaf (see pages 54–55). Place the small loaf on top of the large loaf. Plunge two fingers into the centers of the stacked loaves to join them together. HA N D Y TI P S • Use lukewarm water to dissolve the yeast (see page 41). Lukewarm water should be comfortable to the touch, not too hot, but not too cool. • It is important that the dough is soft and not too dry before it is kneaded. Add more water 1 tablespoon at a time, as needed, to achieve the consistency indicated in the recipe. • When kneading the dough, use extra flour sparingly. Work the dough slowly and firmly; it will gradually become more elastic and easier to knead. PETITS PAINS GRANARY PAN LOAF COTTAGE LOAF
- 76. 74 74 — R E C I P E S — CO U N T RY OAT M E A L BR E A D Sometimes called monastery bread, this coarse, crunchy British bread originated in northern England. It is often eaten for breakfast or an afternoon snack, thickly spread with yellow, salted butter and fragrant honey, or with a chunk of cheddar cheese and a glass of beer. IN G R E D I E N T S 2 tsp dry yeast 11 ⁄2 cups water 2 cups whole-wheat flour 1 cup bread flour 11 ⁄2 cups medium oatmeal 11 ⁄2 tsp salt 1 tsp honey rolled oats, for topping 1Sprinkle the yeast into 1 ⁄2 cup of the water in a bowl. Let stand for 5 minutes; stir to dissolve. Mix the flours, oatmeal, and salt in a large bowl. Make a well in the center and pour in the dissolved yeast and the honey. 2Pour about half of the remaining water into the well. Mix in the flour, then stir in the reserved water, as needed, to form a stiff, sticky dough. 3Turn the dough out onto a work surface lightly sprinkled with oatmeal. Knead until smooth and elastic, about 10 minutes. 4Put the dough in a bowl and cover with a dish towel. Let rise until doubled in size, about 11 ⁄2–2 hours. Punch down, then let rest for 10 minutes. Grease an 8 x 4 x 21 ⁄2-inch loaf pan. 5Shape the dough for a loaf pan (see page 53). Place the dough in the pan, seam side down. Cover with a dish towel and proof until doubled in size, about 1 hour. 6Brush the loaf lightly with water and sprinkle the rolled oats over the top. Bake in the preheated oven for 1 hour, until golden brown and hollow sounding when tapped underneath. Turn out onto a wire rack to cool. VA R I AT I O N S Barley Bread • Make one quantity Country Oatmeal Bread dough up to step 6, replacing the flours with 2 cups bread flour, 3 ⁄4 cup barley flour, and 1 cup whole-wheat flour. Preheat the oven to 400°F. • Brush the loaf lightly with water and sprinkle with barley flakes. • Bake in the preheated oven for 1 hour, until golden brown and hollow sounding when tapped underneath. Turn out onto a wire rack to cool. Oatmeal Rolls • Make one quantity Country Oatmeal Bread dough up to step 5. • Divide the dough into 16 equal pieces and shape into smooth, round rolls (see page 55). Place the rolls on two greased baking sheets. Cover with a dish towel and proof until doubled in size, about 30–45 minutes. Preheat the oven to 400°F. • Brush the rolls with water and sprinkle with rolled oats. • Bake in the preheated oven for 20–30 minutes, until golden and hollow sounding when tapped underneath. Cool on a wire rack. Rising 11 ⁄2–2 hours (see pages 50–51) Proofing 1 hour (see page 57) Oven temperature 400ºF Baking 1 hour Steam optional (see page 63) Yield 1 loaf Yeast alternative 1 cake (0.6oz) yeast (see page 41) XII II I III IV V VI VII VI II IX X XI •
- 77. 75 75 75 75 — B A S I C B R E A D S — DA K T Y L A GR E E K VI L L A G E BR E A D This sesame seed-coated bread is traditionally made with “yellow” or “country” flour, a blend of white and whole-wheat flour mixed with finely ground cornmeal. Alternatively, it can be made with just bread flour. In Greece, the bread is commonly known as Daktyla, meaning “fingers,” because it is broken into fingers of bread to eat. To begin Sponge method Time: 20 minutes (see page 44) Rising 11 ⁄2 hours (see pages 50–51) Proofing 1 hour (see page 57) Oven temperature 425ºF Baking 45 minutes Steam optional (see page 63) Yield 1 loaf Yeast alternative 1 cake (0.6oz) yeast (see page 41) XII II I III IV V VI VII VI II IX X XI • IN G R E D I E N T S 2 tsp dry yeast 11 ⁄4 cups water 21 ⁄2 cups bread flour 2 ⁄3 cup whole-wheat flour 1 ⁄2 cup fine cornmeal 1 tsp salt 1 tbsp olive oil 1 tbsp honey 1 tbsp milk, plus extra to glaze sesame seeds, to decorate 1Sprinkle the yeast into 1 ⁄2 cup of the water in a bowl. Let sit for 5 minutes; stir to dissolve. Mix the flours, cornmeal, and salt thoroughly in a large bowl. Make a well in the center and pour in the dissolved yeast. 2Use a wooden spoon to draw enough of the flour into the dissolved yeast to form a soft paste. Cover the bowl with a dish towel and let “sponge” until frothy and risen, 20 minutes. Add the oil, honey, and milk to the sponge. 3Pour about half of the remaining water into the well. Mix in the flour. Stir in the reserved water, as needed, to form a firm, moist dough. 4Turn the dough out onto a lightly floured work surface. Knead until smooth, shiny, and elastic, about 10 minutes. 5Put the dough in a clean bowl and cover with a dish towel. Let rise until doubled in size, about 11 ⁄2 hours. Punch down, then let rest for 10 minutes. 6Divide the dough into six equal pieces. Shape each piece into an oblong; arrange them in a row, just touching, on a floured baking sheet. Cover with a dish towel and proof until doubled in size, about 1 hour. 7Brush the top of the loaf with milk and sprinkle with the sesame seeds. Bake in the preheated oven for 45 minutes, until hollow sounding when tapped underneath. Cool on a wire rack.