SlideShare a Scribd company logo
1 of 24
Download to read offline
DO NOT ATTEMPT TO ASSEMBLE
OR SHOOT THIS PRODUCT UNTIL
YOU HAVE READ THIS
ENTIRE MANUAL. 2/12.v1
Do not allow untrained persons to use this product.
Improper use can result in serious injury to the shooter’s
hand or arm.
Compound Bow
Owner’s Manual
Help you find the best compound bow for the money
Website: http://hunthacks.com/
Thank you for your purchase of a Parker bow.
Each Parker bow is designed, engineered and
manufactured by hunters like you.
Attention to detail and pride in our products drive each of us
at Parker to make the best hunting equipment on the market.
Anytime you have a question, a comment or suggestion
regarding your Parker bow, please give us a call at
(540) 337-5426 or send us an email to
customerservice@parkerbows.com.
We value your experience and ideas, and enjoy sharing in
your success.
For more information on the current product line of Parker
Crossbows and Parker Compound Bows, or to see a color
version of this owners manual visit our website at
http://hunthacks.com/
Good luck and safe shooting!
Page
ANATOMY 4
GETTING STARTED 5
ADJUSTMENTS 6
SET UP 7
MAINTENANCE 8
BOW SAFETY 9
CAM ADJUSTMENTS 13-18
LIFETIME WARRANTY 19
US RETURN AUTHORIZATION 20
EXPORT RETURN AUTHORIZATION 21
IMPORTANT INFORMATION 22
TABLE OF
CONTENTS
(i)
• Congratulations on your purchase of a new Parker Compound bow.
This compound bow has been carefully designed and crafted by
engineers and hunters that are committed to delivering a quality
product that will enhance your experience in the woods.
• As you read this manual there may be terms or descriptions that are
unfamiliar to you. Below is a diagram that will help you understand
the common terminology and parts of a modern hunting compound
bow.
ANATOMY
Quiver
(4)
String
Limb bolt
Grip
Sling
Cam
Arrow rest
Roller cable guard
Limb
Idler wheel
Peep sight
String suppressor
Sight
Riser
Stabilizer mount
Buss Cable
Axle
Shelf
Nock point
Draw stop
Tiller
setting
Draw Module
Opposite side of cam
Peep tubing
Before you begin…
• Empty contents of the box your new Parker Compound bow was
packaged in. Place all contents in a clear and organized space such
as a work bench, tabletop or flat surface where you may inventory
and easily identify all the parts and components of this package.
• If you purchased a Compound bow Outfitter package, be certain
your compound bow has an arrow rest, a peep sight with tubing, a
sling , a sight and a quiver included in your package.
• If any of the outfitter package accessories are missing: first, contact
your dealer where you purchased your Parker compound bow.
The Dealer likely has the missing accessory.
• If they do not have the missing accessory, please contact Parker
Compound Bows at (540)-337-5426. A Parker Customer Service
representative will assist you.
GETTING
STARTED
(5)
WARNING !
Completely familiarize yourself with the Cam
and module diagram prior to usage.
Carefully review the pictures and
instructions before you attempt to adjust or
tune your draw length.
!
COMPOUND BOW
ADJUSTMENTS
DRAW WEIGHT
All Parker bows are set on peak weight at the factory. Draw weight
can be adjusted downward below peak draw weight using a 3/16”
Allen wrench.
Turn each limb bolt clockwise to increase the weight and counter
clockwise to decrease the bow weight. It is very important to adjust
the limb bolts on both limbs equally.
NOTE: Some bow models have a peak weight range of 10 pounds, 15
pounds, and 20 pounds. Be sure to check your bow model for
its appropriate draw weight range, and DO NOT exceed its
LOWER limit.
DRAW LENGTH ADJUSTMENT
Draw length adjustment on most Parker bows are changed with a draw
module that is easily removed from the bow without the aid of a bow
press. However some older models do require the use of a bow press.
On single cam bows, the module is located in the lower cam. (see anatomy)
On two-cam bows, draw length modules are on both the top and bottom
cams. Both modules must be adjusted to the same draw length. To
change the draw length, see specific instructions for each cam system
beginning on page 13.
NOTE: It is important to make sure module screws are tight. Warranty
does not cover module screws that loosen and cause cam or limb
damage. Once you’re a sure of your adjusted draw length, non-
permanent thread locking liquid may be used to secure the module
set screws.
(6)
BOW
SET-UP
INSTALLING A NOCKING POINT
A brass nocking point or a string loop can generally be installed
anywhere from 3/16” to ½” above the 90º point of reference to the
arrows rest. This adjustment eliminates “porpoising”, which is the up
and down motion of the arrow in flight. Experiment with your
nocking point location to achieve the best flight. We recommend
using a string loop for best results.
SETTING CENTER SHOT
Make your center shot adjustment with the same size arrow that you will
be shooting. Put the arrow on the string at the nocking point and visually
align the string with the grip center and the top of the limb. Adjust the
center of the arrow rest to meet this alignment. With proper arrow
selection, this method will work virtually every time with no need for
other tools or devices.
TILLER SETTING
Tiller is a measurement of the distance between the top limb (rear face)
and string as it compares to the same measurement of the bottom limb
(rear face) and string. (See Anatomy). A bow usually shoots best when the
tiller measurements are even. If there is question regarding tiller, tighten
both limbs to their maximum draw weight.
Next, back them off an equal amount of turns, to the bow weight desired.
Measure the tiller, and slightly adjust one limb or the other to achieve
even tiller.
(7)
BOW
MAINTENANCE
Periodic inspection of your compound bow is highly recommended.
Like all equipment, it is subject to wear and should be reviewed prior
to use for adjustments and general service. Be sure to pay particular
attention to wear and abrasion on the strings and cables, damage to
cams, and loosening of the module screws or limb bolts.
STRINGS
Only Parker Brand Strings should be used. It is important for string
length, end servings and string strand count etc...to be to factory
specifications.
Other brand or custom string replacement may result in a loss or gain of
bow weight, improper cam rotation resulting in loss of efficiency, or
over-sized end servings could result in strings slipping out of the cam
grooves. Always inspect your bow for frayed or worn strings and cables.
Replace strings and cables that are damaged as soon as possible. Parker
recommends using a string wax that is silicone based such as ML-6 to
increase string and cable life. With moderate to heavy use, replacing the
string and cables is recommended annually. The correct string and buss
cable lengths insure the proper “Rotation” of the cam to maximize your
bow’s performance and accuracy.
LUBRICATION
Parker Compound bows have self-lubricating bushings and polished
stainless steel axles requiring NO lubrication or maintenance. DO NOT
spray WD-40 or other lubricants on the wheels, axles or other parts or
your compound bow. Lubricants will attract and hold dirt, dust and grit
that will impair the performance, longevity and accuracy of your
compound bow.
(8)
BOW
SAFETY
DRY-FIRE
Definition: Releasing the string of a fully drawn bow without an arrow nocked and
attached to the string.
Never shoot your bow without an arrow on the string. Without the
arrow attached to the string to absorb the stored energy of the bow, a dry-
fire will occur. “Dry-firing” can damage your bow and could cause
personal injury to you or by-standers. If a dry-fire occurs, check
carefully for damage on all visible parts. Especially make sure the
strings are in the cam grooves and idler wheel grove. In most cases, a
dry-fire does not damage the bow, however multiple dry-fire will. Only
a small percentage of bows will require repair from a single dry-fire,
usually a string or cable, or cable slide replacement is all that is
required.
Damage caused to your Parker Compound bow due to
the event of a dry-fire will not be covered under the
warranty.
Parker will replace or repair and damaged parts at
factory cost to our customer as a courtesy.
WARNING!
STOP GO
(9)
SHOOTING YOUR
BOW
If you follow the preceding set-up and maintenance guidelines, your
Parker compound bow is ready to shoot and will provide you with years
of enjoyment .
Arrow size selection is the next most important step towards a proper
performing bow. Parker recommends referring to the popular arrow
manufacturers arrow selection charts that are available at archery dealers
or on their manufacturers web sites.
On the charts, today’s single cams, ARC- cams and 2-plus cams are
considered “Hard cams”. Understanding this will help you select the
proper arrow for your Parker compound bow.
Keep in mind bow weight, arrow length, release or finger style shooting,
type of cam and point weight will all play a role in shaft selection and
your bow’s performance.
The majority of problems experienced by archers can be attributed to
improper arrow shaft selection. After choosing a new compound bow,
selecting the proper “spined” arrow is most important. Where the arrow
shaft selection is borderline between two sizes, we recommend selecting
the heavier (or “stiffer”) spined arrow.
NOTE: If the above provisions are followed, your bow will shoot your
arrows in “good groups”. But normal archers make minor mistakes in
form, grip, release and follow through etc… resulting in not so perfect
shots. This is normal, even for world class archers, so don’t be too quick
to blame your equipment. Keep shooting and enjoy the art of archery
and becoming a master of your bow. Good luck!
(10)
SHOOTING
SAFETY
1. Your Parker Compound bow is a potentially deadly
hunting tool, and should never be handled as a toy. It is
capable of casting an arrow in excess of 500 yards and
harvesting the worlds largest big game. It is important to
always be aware of your background as well as your
backstop material when shooting, so that any arrow that
may miss or pass through your target will not endanger
people, pets, or property down range. Use a quality target
designed for use with modern arrows.
2. Carefully inspect each arrow after every shot for damage.
THIS IS VERY IMPORTANT FOR YOUR SAFETY.
3. Never climb into a treestand while carrying your
compound bow. Always place your compound bow on
the ground in a safe position, then climb into your stand.
After you secure yourself in the treestand with a safety
harness, use a hoist rope attached to your compound bow
to pull your bow up into the stand. It is not safe or
recommended to carry or climb into your treestand with
your bow in hand.
4. As with any bow or crossbow, there is a forward
movement of the limbs when fired. Do not attempt to
shoot your compound bow when the limbs are in
contact with or near an object.
(11)
SHOOTING
SAFETY
5. Do not attempt to shoot your compound bow while in
an awkward or un-natural position. Shooting from
awkward and un-natural positions may distract you
from proper shooting form, increasing the chance of the
string hitting your arm, or losing your balance in the
treestand.
6. Keeping the bow level will greatly improve your
shooting and consistency.
7. We strongly recommend wearing shooting glasses while
practicing or hunting with your compound bow.
DO NOT allow any person who has not read
this compound bow owners manual to shoot
your bow. It is your responsibility to make
sure all persons have been properly trained,
informed, and warned of all the dangers
associated with shooting this compound bow.
! CAUTION
Stabilizer mount
(12)
PYTHON,
INFERNO,
VELOCITY CAM
Draw length adjustment
The Inferno cam is adjustable from 26” – 31”. The Factory setting
is 29” with the “long draw” module installed. The Inferno bow
includes the short draw module for draw lengths of 26” – 28”.
To adjust the draw length to 30” or 31”, first remove the two socket
head screws from the module, and reposition the module to the
desired draw length. Second, loosen the socket head screw on the
draw stop. Reposition it to match the draw length of the module.
(Eg: 30” on the module and 30” on the draw stop)
You can fine tune the valley and let–off of your bow by making
minute adjustments to the draw stop. Experiment with the draw stop
to customize the draw for a precise draw and shooting experience.
To adjust your draw length using the short draw module, remove the
long draw module, and replace it with the short draw module.
Repeating the instructions above, adjust your draw length to the
desired length being sure the draw stop length matches the module
setting. ( Eg: 27” on the module and 27” on the draw stop)
Be certain that the module set screws (2) and draw stop set screw (1) are tight
before you shoot your bow. Periodically inspect them to make sure they have not
vibrated loose. Adding a non-permanent thread locking liquid is advised once you
have correctly adjusted the module to your draw length.
! CAUTION
Socket head screw
on draw stop
Module
Draw
Stop
Socket head screws
on module
(One on each side)
(13)
AMBUSHER
CAM
Draw length adjustment
The Ambusher cam is adjustable from 27” – 30”. The Factory setting
is 29” with the 29” module installed. The Ambusher bow includes the
individual modules for 27”, 28” and 30” draw lengths .
To adjust the draw length to 27”, 28” or 30”, first remove the two
socket head screws from the module, remove the 29” module, and
replace it with one of the alternate draw modules. Re-install the socket
head screws into the module, and be certain they are tight.
Second, loosen the socket head screw on the draw stop. Reposition it
to match the draw length of the module.
(Eg: 28” on the module and 28” on the draw stop)
You can fine tune the valley and let–off of your bow by making
minute adjustments to the draw stop. Experiment with the draw stop
to customize the draw for a precise draw and shooting experience.
Be certain that the module set screws (2) and draw stop set screw (1) are tight
before you shoot your bow. Periodically inspect them to make sure they have not
vibrated loose. Adding a non-permanent thread locking liquid is advised once you
have correctly adjusted the module to your draw length.
! CAUTION
Socket head screw
on draw stop
Socket head screws
on module
Module
Draw
Stop
(14)
WILDFIRE
Extreme
CAM
Draw length adjustment
Be certain that the module set screws (2) and draw stop set screw (1) are tight
before you shoot your bow. Periodically inspect them to make sure they have not
vibrated loose. Adding a non-permanent thread locking liquid is advised once you
have correctly adjusted the module to your draw length.
! CAUTION
Module
The WildFire Extreme cam is adjustable from 26” – 31”. The
Factory setting is 29” with the “long draw” module installed.
The WildFire Extreme cam includes the short draw module for draw
lengths of 26” – 28”.
To adjust the draw length to 30” or 31”, first remove the two socket
head screws from the module, and reposition the module to the
desired draw length. Second, loosen the socket head screw on the
draw stop. Reposition it to match the draw length of the module.
(Eg: 30” on the module and 30” on the draw stop)
To adjust your draw length using the short draw module, remove the
long draw module, and replace it with the short draw module.
Repeating the instructions above, adjust your draw length to the
desired length being sure the draw stop length matches the module
setting. ( Eg: 27” on the module and 27” on the draw stop)
Socket head screws
on module
(One on each side)
Draw
Stop
Socket head screw
on draw stop
(15)
BLAZER
CAM
Draw length adjustment
Be certain that the module set screws (2 per cam) are tight before you shoot your
bow. Periodically inspect them to make sure they have not vibrated loose. Adding a
non-permanent thread locking liquid is advised once you have correctly adjusted
the module to your draw length.
! CAUTION
Rotating
Modules
The Blazer cam is adjustable from 26” – 31”. The Factory setting is
29” on the “rotating” modules installed. To adjust the draw length to
a length other than 29”, first remove the two socket head screws from
each module. Be certain to remove the socket head screws on both
the top and bottom cams. Rotate the modules to the desired draw
length on each cam, and re-install the socket head screws. Be certain
the socket head screws are tight.
Note: The Blazer rotating modules can be adjusted for half inch draw
length increments by placing the scribe marks of the module
between the “whole number” increments of 26” through 31”.
Before you shoot, BE CERTAIN the modules are adjusted identically
to ensure even timing of the cams.
(Eg: 30” on the top module and 30” on the bottom module)
Button head screws
on modules
Bottom
cam
Top
cam
(16)
SIDEKICK
Extreme
CAM
Draw length adjustment
Be certain that the module set screws (2 per cam) are tight before you shoot your
bow. Periodically inspect them to make sure they have not vibrated loose. Adding a
non-permanent thread locking liquid is advised once you have correctly adjusted
the module to your draw length.
! CAUTION
The SideKick Extreme cam is adjustable from 18” – 28”. The
Factory setting is 26” on the “rotating” modules installed. To adjust
the draw length to a length other than 26”, first remove the two
socket head screws from each module. Be certain to remove the
socket head screws on both the top and bottom cams. Rotate the
modules to the desired draw length on each cam, and re-install the
socket head screws. Be certain the socket head screws are tight.
Note: The SideKick Extreme can be adjusted for half inch draw
length increments by moving the string loop ends to the
second post (Inner post) on each cam. The second post is the
post closest to the axle.
Before you shoot, BE CERTAIN the modules are adjusted identically
to ensure even timing of the cams. (Eg: 25” on the top module and 25” on the
bottom module)
Socket head screws
on modules
Bottom
cam
Top
cam
Rotating
Modules
Second post
(17)
BUCKSHOT
Extreme
CAM
Draw length adjustment
Be certain that the module set screws (2 per cam) are tight before you shoot your
bow. Periodically inspect them to make sure they have not vibrated loose. Adding a
non-permanent thread locking liquid is advised once you have correctly adjusted
the module to your draw length.
! CAUTION
The BuckShot Extreme cam is adjustable from 17” – 26”.
The Factory setting is 26” on the “rotating” modules installed.
To adjust the draw length to a length other than 26”, first remove the
two socket head screws from each module. Be certain to remove the
socket head screws on both the top and bottom cams. Rotate the
modules to the desired draw length on each cam, and re-install the
socket head screws. Be certain the socket head screws are tight.
Note: The BuckShot Extreme can be adjusted for half inch draw
length increments by moving the string loop ends to the
second post on each cam. The second post is the post closest
to the axle.
Before you shoot, BE CERTAIN the modules are adjusted identically
to ensure even timing of the cams. (Eg: 25” on the top module and 25” on
the bottom module)
Top
cam
Bottom
cam
Socket head screws
on modules
Rotating
Modules
Second post
(18)
IMPORTANT
INFORMATION
- LIMITED LIFETIME -
WARRANTY
To validate your Limited Lifetime Warranty, your warranty card
must be completed in full and mailed by the purchaser within 15 days
of the purchase date.
OR
Visit our web site at www.parkerbows.com and register your compound
bow warranty on line.
Parker compound bows are warranted for the lifetime of the original purchaser
to be free from defects in material and workmanship. This warranty EXCLUDES
wear on strings, cables, string silencers and bow finish. Damage caused by
mishandling, abuse, dry-firing, modifying the product or shooting the compound
bow with improper spined or underweight arrows is not covered and may void
the warranty. In the “Outfitter” package, the accessories are warranted for 30
days, and may be returned to Parker for replacement.
Any alterations or modifications to your Parker Compound bow will void the
warranty. Alterations could cause damage to the bow or personal injury.
Interchanging parts with other bow models or brands will void the warranty.
Use ONLY Parker brand Strings and cables.
Should your Parker Compound bow need repairs, the dealer where you
purchased our compound bow may be able to complete the work. If this is not
possible, compound bows may be returned to Parker for warranty repair and
service.
The bow owner is responsible for the cost of shipping the bow to Parker,
however Parker will pay the return shipping costs using UPS regular ground
delivery. In unusual circumstances, any shipping cost above the regular ground
delivery rate for expedited service will the responsibility of the owner.
(19)
IMPORTANT
INFORMATION
US
-Warranty Return Process-
DO NOT RETUN ANYTHING TO PARKER BEFORE
CALLING AND OBTAINING A RETURN AUTHORIZATION
NUMBER.
To ensure a prompt return of your compound bow, complete the
following:
1. Contact Parker Customer Service at 540-337-5426 to review your
issues with a trained Parker Technician or to obtain a Return
Authorization Number (RA#).
2. In many situations, we are able to resolve the issue by phone.
However, some issues may not be resolved over the phone and will
require the bow be return to Parker for service. At this time the
Parker Technician will issue a Return Authorization Number (RA#).
Remove all accessories before shipping unless otherwise instructed by
the Parker Technician.
3. Return the bow to Parker at the following address:
4. Please package your bow carefully, wrapping the bow in paper or
foam. Ensure the bow cannot move around in the box and that
there are no loose parts that could shift during delivery and damage
the bow. Include a description of your warranty request, and make
sure you include your name, address, phone number, email address
and the
RA#. DO NOT USE A HARD BOW CASE FOR SHIPPING.
Note: The warranty does not cover damage to the finish.
(20)
Parker Bows
3022 Lee Jackson Hwy.
Staunton, VA 24401
NOTE: The RA# must be boldly and clearly written on the outside
of the shipping container.
Canadian - Technical Assistance, Warranty, Parts and Repair
Dear Parker Customer,
If you find yourself in need of technical assistance or you have a warranty issue, this
page will help you understand your options and allow you to resolve your issues
quickly.
If you need Technical Assistance you can:
1. Direct your questions to the dealer where you purchased your Parker bow, or any
Parker dealer. Most dealers are experts and can help you with any questions.
2. Consult Parker’s website for Technical Tips and Troubleshooting Guides:
Parker website is www.parkerbows.com
3. Direct your questions to the Parker Canadian Distributor. The phone number is 905-
775-4416
4. Direct your questions to Parker Compound Bows by phone (540-337-5426 or email
(customerservice@parkerbows.com).
For Warranty Repair you can:
Have warranty work performed by your dealer. Your local dealer may order parts from
our Canadian Distributor to repair your bow. Please keep in mind that dealers are not
required to offer warranty service and some do not have the facilities or equipment to
complete some types of repairs.
Have warranty work performed by our Canadian Distributor. To obtain warranty
service, please follow these simple instructions:
1. Contact the Canadian Distributor to explain your issue;
2. Obtain a Warranty Return Authorization Number from a technician at the Canadian
Distributor;
3. Ship the bow to the Canadian Distributor for repair along with a note that includes
your: Name, Address, Phone Number and a brief description of the issue you are
experiencing. Once repaired, your bow will be returned to you freight prepaid. You
are responsible for the shipping cost to the Canadian Distributor.
Do not return your bow to the Canadian Distributor without receiving a Warranty
Return Authorization Number; if you do, your package will not be accepted. Do not
return your bow to Parker Compound Bows in the U.S.
Please note that all warranty and service work will be performed by Factory Trained
technicians.
Contact Information for the Parker Canadian Warranty Distributor
Phone Number: 905-775-4416
Shipping Address: Parker Canadian Distributor
Bromley Archery
37 Brownlee Dr. RR# 1
Bradford, Ontario L3Z 2A4
Canadian (Export)
-Warranty Return Process-
(21)
IMPORTANT
INFORMATION
• Should your Parker compound bow need warranty service, it is
advisable to keep a copy of your bow specifications, serial
number and sales information for your own records.
• In the space provided, detail your Parker Compound bow
information and keep this owners manual in a convenient
location, should you need to refer back to it in the future.
Bow model: ___________________________________________
Serial #: ______________________________________________
Bow Weight: __________________________________________
Date purchased: _______________________________________
Purchase price: ________________________________________
Store name: ___________________________________________
NOTES
__________________________________________________________
_____________________________________________________________
_____________________________________________________________
_____________________________________________________________
(22)
WARRANTYREGISTRATIONCARD
Name:_________________________________________________________________Date:_____________________
Address:______________________________________________________________City:______________________
State:______________ZipCode:__________________Phone:_____________________
EmailAddress:_____________________________________________________________________________________
BowModel:__________________________________________________Serial#:_____________________________
StoreName:_______________________________________________________________________________________
City:________________________________________________________State:______________Price:$__________
(1)HowdidyouhearaboutParkerBows?(Circlethosethatapply)
DealerrecommendedFriendRecommendedMagazineAdParkerWebsiteTVshowTVCommercial
(2)WhydidyouchooseParkerBows?BowFeaturesLifetimeWarrantyPricePerformance
Tovalidatewarranty,cardmustbe
completedandmailedbythepurchaser
orstorewithin15daysofpurchasedate.
Warrantyextendstooriginal
purchaseronly
ParkerCompoundBows
P.O.Box105
MintSpring,Virginia24463
Place
Stamp
Here

More Related Content

What's hot

introduction, drawing, calculation for winch design
introduction, drawing, calculation for winch designintroduction, drawing, calculation for winch design
introduction, drawing, calculation for winch designAman Huri
 
Catálogo cabopec 2013 terceira edição.
Catálogo cabopec 2013   terceira edição.Catálogo cabopec 2013   terceira edição.
Catálogo cabopec 2013 terceira edição.Fabio Prado
 
Carbon Brushes Technical Guide
Carbon Brushes Technical GuideCarbon Brushes Technical Guide
Carbon Brushes Technical GuideBari Dominguez
 
Principios operación grúas plumas parte 1
Principios operación grúas plumas parte 1Principios operación grúas plumas parte 1
Principios operación grúas plumas parte 1Crane Care Chile
 
Signed off_ SMAW11 _q1_m3_Laying Out Beads and Carbon Steel Plates_v3.pdf
Signed off_ SMAW11 _q1_m3_Laying Out Beads and Carbon Steel Plates_v3.pdfSigned off_ SMAW11 _q1_m3_Laying Out Beads and Carbon Steel Plates_v3.pdf
Signed off_ SMAW11 _q1_m3_Laying Out Beads and Carbon Steel Plates_v3.pdfJymaerGeromo2
 
Tips: Weld steel pipe in 6G using smaw
Tips: Weld steel pipe in 6G using smawTips: Weld steel pipe in 6G using smaw
Tips: Weld steel pipe in 6G using smawLawrence Lerias
 
2010 Yamaha T25A 25HP OUTBOARD Service Repair Manual
2010 Yamaha T25A 25HP OUTBOARD Service Repair Manual2010 Yamaha T25A 25HP OUTBOARD Service Repair Manual
2010 Yamaha T25A 25HP OUTBOARD Service Repair Manualhjnsemm
 
Manual de serviço xr200 r nx200 cbx200s mskbb931p alimenta
Manual de serviço xr200 r nx200 cbx200s   mskbb931p alimentaManual de serviço xr200 r nx200 cbx200s   mskbb931p alimenta
Manual de serviço xr200 r nx200 cbx200s mskbb931p alimentaThiago Huari
 
Bearing failure and its Causes and Countermeasures
Bearing failure and its Causes and CountermeasuresBearing failure and its Causes and Countermeasures
Bearing failure and its Causes and Countermeasuresdutt4190
 
Kobelco sk500 lc 10 hydraulic excavator (na 2019) service repair manual
Kobelco sk500 lc 10 hydraulic excavator (na 2019) service repair manualKobelco sk500 lc 10 hydraulic excavator (na 2019) service repair manual
Kobelco sk500 lc 10 hydraulic excavator (na 2019) service repair manualfjjsieskekfmmse
 
Bearing failure-analysis
Bearing failure-analysisBearing failure-analysis
Bearing failure-analysismkpq pasha
 
Consejos de seguridad al utilizar eslingas sintéticas
Consejos de seguridad al utilizar eslingas sintéticasConsejos de seguridad al utilizar eslingas sintéticas
Consejos de seguridad al utilizar eslingas sintéticasEslingas Vikingo
 
Manual de serviço cr125 99 motor
Manual de serviço cr125 99 motorManual de serviço cr125 99 motor
Manual de serviço cr125 99 motorThiago Huari
 
Manual de serviço nx150 rodadian
Manual de serviço nx150 rodadianManual de serviço nx150 rodadian
Manual de serviço nx150 rodadianThiago Huari
 

What's hot (20)

introduction, drawing, calculation for winch design
introduction, drawing, calculation for winch designintroduction, drawing, calculation for winch design
introduction, drawing, calculation for winch design
 
Catálogo cabopec 2013 terceira edição.
Catálogo cabopec 2013   terceira edição.Catálogo cabopec 2013   terceira edição.
Catálogo cabopec 2013 terceira edição.
 
Carbon Brushes Technical Guide
Carbon Brushes Technical GuideCarbon Brushes Technical Guide
Carbon Brushes Technical Guide
 
Fasteners Presentation
Fasteners PresentationFasteners Presentation
Fasteners Presentation
 
Principios operación grúas plumas parte 1
Principios operación grúas plumas parte 1Principios operación grúas plumas parte 1
Principios operación grúas plumas parte 1
 
Signed off_ SMAW11 _q1_m3_Laying Out Beads and Carbon Steel Plates_v3.pdf
Signed off_ SMAW11 _q1_m3_Laying Out Beads and Carbon Steel Plates_v3.pdfSigned off_ SMAW11 _q1_m3_Laying Out Beads and Carbon Steel Plates_v3.pdf
Signed off_ SMAW11 _q1_m3_Laying Out Beads and Carbon Steel Plates_v3.pdf
 
MOTOR DIESEL SÉRIE RD
MOTOR DIESEL SÉRIE RDMOTOR DIESEL SÉRIE RD
MOTOR DIESEL SÉRIE RD
 
Tips: Weld steel pipe in 6G using smaw
Tips: Weld steel pipe in 6G using smawTips: Weld steel pipe in 6G using smaw
Tips: Weld steel pipe in 6G using smaw
 
Shaft Lateral Analysis Overview
Shaft Lateral Analysis OverviewShaft Lateral Analysis Overview
Shaft Lateral Analysis Overview
 
2010 Yamaha T25A 25HP OUTBOARD Service Repair Manual
2010 Yamaha T25A 25HP OUTBOARD Service Repair Manual2010 Yamaha T25A 25HP OUTBOARD Service Repair Manual
2010 Yamaha T25A 25HP OUTBOARD Service Repair Manual
 
Manual de serviço xr200 r nx200 cbx200s mskbb931p alimenta
Manual de serviço xr200 r nx200 cbx200s   mskbb931p alimentaManual de serviço xr200 r nx200 cbx200s   mskbb931p alimenta
Manual de serviço xr200 r nx200 cbx200s mskbb931p alimenta
 
Bearing failure and its Causes and Countermeasures
Bearing failure and its Causes and CountermeasuresBearing failure and its Causes and Countermeasures
Bearing failure and its Causes and Countermeasures
 
Kobelco sk500 lc 10 hydraulic excavator (na 2019) service repair manual
Kobelco sk500 lc 10 hydraulic excavator (na 2019) service repair manualKobelco sk500 lc 10 hydraulic excavator (na 2019) service repair manual
Kobelco sk500 lc 10 hydraulic excavator (na 2019) service repair manual
 
Ludeca a practical-guide-to-shaft-alignment
Ludeca a practical-guide-to-shaft-alignmentLudeca a practical-guide-to-shaft-alignment
Ludeca a practical-guide-to-shaft-alignment
 
Bearing failure-analysis
Bearing failure-analysisBearing failure-analysis
Bearing failure-analysis
 
Manual Clipper CM41
Manual Clipper CM41Manual Clipper CM41
Manual Clipper CM41
 
Consejos de seguridad al utilizar eslingas sintéticas
Consejos de seguridad al utilizar eslingas sintéticasConsejos de seguridad al utilizar eslingas sintéticas
Consejos de seguridad al utilizar eslingas sintéticas
 
Manual de serviço cr125 99 motor
Manual de serviço cr125 99 motorManual de serviço cr125 99 motor
Manual de serviço cr125 99 motor
 
Shaft Alignment and Whirling Vibration
Shaft Alignment and Whirling VibrationShaft Alignment and Whirling Vibration
Shaft Alignment and Whirling Vibration
 
Manual de serviço nx150 rodadian
Manual de serviço nx150 rodadianManual de serviço nx150 rodadian
Manual de serviço nx150 rodadian
 

Similar to Parker Bows - Compound Bow Owner's Manual

Instruction Manual | Bushnell Elite Tactical 3.5-21x50 DMR3 | Optics Trade
Instruction Manual | Bushnell Elite Tactical 3.5-21x50 DMR3 | Optics TradeInstruction Manual | Bushnell Elite Tactical 3.5-21x50 DMR3 | Optics Trade
Instruction Manual | Bushnell Elite Tactical 3.5-21x50 DMR3 | Optics TradeOptics-Trade
 
Instructions VORTEX SPITFIRE 3x Prismscope | Optics Trade
Instructions VORTEX SPITFIRE 3x Prismscope | Optics TradeInstructions VORTEX SPITFIRE 3x Prismscope | Optics Trade
Instructions VORTEX SPITFIRE 3x Prismscope | Optics TradeOptics-Trade
 
Instructions SPUHR Ideal Scope Mounting System | Optics Trade
Instructions SPUHR Ideal Scope Mounting System | Optics TradeInstructions SPUHR Ideal Scope Mounting System | Optics Trade
Instructions SPUHR Ideal Scope Mounting System | Optics TradeOptics-Trade
 
Instruction Manual C-MORE Serendipity | Optics Trade
Instruction Manual C-MORE Serendipity | Optics TradeInstruction Manual C-MORE Serendipity | Optics Trade
Instruction Manual C-MORE Serendipity | Optics TradeOptics-Trade
 
Instructions NIKON BDC Reticle Subtensions | Optics Trade
Instructions NIKON BDC Reticle Subtensions | Optics TradeInstructions NIKON BDC Reticle Subtensions | Optics Trade
Instructions NIKON BDC Reticle Subtensions | Optics TradeOptics-Trade
 
LEUPOLD Ballistics Aiming System | Optics Trade
LEUPOLD Ballistics Aiming System | Optics TradeLEUPOLD Ballistics Aiming System | Optics Trade
LEUPOLD Ballistics Aiming System | Optics TradeOptics-Trade
 
Burris Handgun Instruction Manual | Optics Trade
Burris Handgun Instruction Manual | Optics TradeBurris Handgun Instruction Manual | Optics Trade
Burris Handgun Instruction Manual | Optics TradeOptics-Trade
 
Forklift Fork Maintenance: Caliper Guide from Cascade Corporation
Forklift Fork Maintenance: Caliper Guide from Cascade CorporationForklift Fork Maintenance: Caliper Guide from Cascade Corporation
Forklift Fork Maintenance: Caliper Guide from Cascade CorporationForklift Trucks in Minnesota
 
Extreme Flight Extra 300 EXP Instruction Manual
Extreme Flight Extra 300 EXP Instruction ManualExtreme Flight Extra 300 EXP Instruction Manual
Extreme Flight Extra 300 EXP Instruction ManualSri Annas Karuniawan
 
Ballistic Aiming System Manual | Leupold | Optics Trade
Ballistic Aiming System Manual | Leupold | Optics TradeBallistic Aiming System Manual | Leupold | Optics Trade
Ballistic Aiming System Manual | Leupold | Optics TradeOptics-Trade
 
Instructions | Vortex Spitfire AR Red Dot | Optics Trade
Instructions | Vortex Spitfire AR Red Dot | Optics TradeInstructions | Vortex Spitfire AR Red Dot | Optics Trade
Instructions | Vortex Spitfire AR Red Dot | Optics TradeOptics-Trade
 
Instruction Manual C-MORE Railway | Optics Trade
Instruction Manual C-MORE Railway | Optics TradeInstruction Manual C-MORE Railway | Optics Trade
Instruction Manual C-MORE Railway | Optics TradeOptics-Trade
 
Instruction Manual Minelab Musketeer Advantage Metal Detector English Languag...
Instruction Manual Minelab Musketeer Advantage Metal Detector English Languag...Instruction Manual Minelab Musketeer Advantage Metal Detector English Languag...
Instruction Manual Minelab Musketeer Advantage Metal Detector English Languag...Serious Detecting
 
Instruction Manual | Bushnell Elite Tactical 6-36x56 XRS3 | OpticsTrade
Instruction Manual | Bushnell Elite Tactical 6-36x56 XRS3 | OpticsTradeInstruction Manual | Bushnell Elite Tactical 6-36x56 XRS3 | OpticsTrade
Instruction Manual | Bushnell Elite Tactical 6-36x56 XRS3 | OpticsTradeOptics-Trade
 
Riton | x3 | primal | 3-15x44 | instruction | manual
Riton | x3 | primal | 3-15x44 | instruction | manualRiton | x3 | primal | 3-15x44 | instruction | manual
Riton | x3 | primal | 3-15x44 | instruction | manualOptics-Trade
 
Riton | x1 | primal | 3-9x40 | instruction | manual
Riton | x1 | primal | 3-9x40 | instruction | manualRiton | x1 | primal | 3-9x40 | instruction | manual
Riton | x1 | primal | 3-9x40 | instruction | manualOptics-Trade
 
Case cx800 crawler excavator service repair manual
Case cx800 crawler excavator service repair manualCase cx800 crawler excavator service repair manual
Case cx800 crawler excavator service repair manualeudskkejedmm
 
Instruction Manual | Sig Sauer Bravo Sights | Optics Trade
Instruction Manual | Sig Sauer Bravo Sights | Optics TradeInstruction Manual | Sig Sauer Bravo Sights | Optics Trade
Instruction Manual | Sig Sauer Bravo Sights | Optics TradeOptics-Trade
 

Similar to Parker Bows - Compound Bow Owner's Manual (20)

2014 CRW - Best Practices for Wire Rope Installation
2014 CRW - Best Practices for Wire Rope Installation2014 CRW - Best Practices for Wire Rope Installation
2014 CRW - Best Practices for Wire Rope Installation
 
Instruction Manual | Bushnell Elite Tactical 3.5-21x50 DMR3 | Optics Trade
Instruction Manual | Bushnell Elite Tactical 3.5-21x50 DMR3 | Optics TradeInstruction Manual | Bushnell Elite Tactical 3.5-21x50 DMR3 | Optics Trade
Instruction Manual | Bushnell Elite Tactical 3.5-21x50 DMR3 | Optics Trade
 
Instructions VORTEX SPITFIRE 3x Prismscope | Optics Trade
Instructions VORTEX SPITFIRE 3x Prismscope | Optics TradeInstructions VORTEX SPITFIRE 3x Prismscope | Optics Trade
Instructions VORTEX SPITFIRE 3x Prismscope | Optics Trade
 
Instructions SPUHR Ideal Scope Mounting System | Optics Trade
Instructions SPUHR Ideal Scope Mounting System | Optics TradeInstructions SPUHR Ideal Scope Mounting System | Optics Trade
Instructions SPUHR Ideal Scope Mounting System | Optics Trade
 
Instruction Manual C-MORE Serendipity | Optics Trade
Instruction Manual C-MORE Serendipity | Optics TradeInstruction Manual C-MORE Serendipity | Optics Trade
Instruction Manual C-MORE Serendipity | Optics Trade
 
Instructions NIKON BDC Reticle Subtensions | Optics Trade
Instructions NIKON BDC Reticle Subtensions | Optics TradeInstructions NIKON BDC Reticle Subtensions | Optics Trade
Instructions NIKON BDC Reticle Subtensions | Optics Trade
 
LEUPOLD Ballistics Aiming System | Optics Trade
LEUPOLD Ballistics Aiming System | Optics TradeLEUPOLD Ballistics Aiming System | Optics Trade
LEUPOLD Ballistics Aiming System | Optics Trade
 
Burris Handgun Instruction Manual | Optics Trade
Burris Handgun Instruction Manual | Optics TradeBurris Handgun Instruction Manual | Optics Trade
Burris Handgun Instruction Manual | Optics Trade
 
Forklift Fork Maintenance: Caliper Guide from Cascade Corporation
Forklift Fork Maintenance: Caliper Guide from Cascade CorporationForklift Fork Maintenance: Caliper Guide from Cascade Corporation
Forklift Fork Maintenance: Caliper Guide from Cascade Corporation
 
Extreme Flight Extra 300 EXP Instruction Manual
Extreme Flight Extra 300 EXP Instruction ManualExtreme Flight Extra 300 EXP Instruction Manual
Extreme Flight Extra 300 EXP Instruction Manual
 
Ballistic Aiming System Manual | Leupold | Optics Trade
Ballistic Aiming System Manual | Leupold | Optics TradeBallistic Aiming System Manual | Leupold | Optics Trade
Ballistic Aiming System Manual | Leupold | Optics Trade
 
Instructions | Vortex Spitfire AR Red Dot | Optics Trade
Instructions | Vortex Spitfire AR Red Dot | Optics TradeInstructions | Vortex Spitfire AR Red Dot | Optics Trade
Instructions | Vortex Spitfire AR Red Dot | Optics Trade
 
Instruction Manual C-MORE Railway | Optics Trade
Instruction Manual C-MORE Railway | Optics TradeInstruction Manual C-MORE Railway | Optics Trade
Instruction Manual C-MORE Railway | Optics Trade
 
Instruction Manual Minelab Musketeer Advantage Metal Detector English Languag...
Instruction Manual Minelab Musketeer Advantage Metal Detector English Languag...Instruction Manual Minelab Musketeer Advantage Metal Detector English Languag...
Instruction Manual Minelab Musketeer Advantage Metal Detector English Languag...
 
Instruction Manual | Bushnell Elite Tactical 6-36x56 XRS3 | OpticsTrade
Instruction Manual | Bushnell Elite Tactical 6-36x56 XRS3 | OpticsTradeInstruction Manual | Bushnell Elite Tactical 6-36x56 XRS3 | OpticsTrade
Instruction Manual | Bushnell Elite Tactical 6-36x56 XRS3 | OpticsTrade
 
Riton | x3 | primal | 3-15x44 | instruction | manual
Riton | x3 | primal | 3-15x44 | instruction | manualRiton | x3 | primal | 3-15x44 | instruction | manual
Riton | x3 | primal | 3-15x44 | instruction | manual
 
Safe_Rigging.pdf
Safe_Rigging.pdfSafe_Rigging.pdf
Safe_Rigging.pdf
 
Riton | x1 | primal | 3-9x40 | instruction | manual
Riton | x1 | primal | 3-9x40 | instruction | manualRiton | x1 | primal | 3-9x40 | instruction | manual
Riton | x1 | primal | 3-9x40 | instruction | manual
 
Case cx800 crawler excavator service repair manual
Case cx800 crawler excavator service repair manualCase cx800 crawler excavator service repair manual
Case cx800 crawler excavator service repair manual
 
Instruction Manual | Sig Sauer Bravo Sights | Optics Trade
Instruction Manual | Sig Sauer Bravo Sights | Optics TradeInstruction Manual | Sig Sauer Bravo Sights | Optics Trade
Instruction Manual | Sig Sauer Bravo Sights | Optics Trade
 

Recently uploaded

Introduction to Nonprofit Accounting: The Basics
Introduction to Nonprofit Accounting: The BasicsIntroduction to Nonprofit Accounting: The Basics
Introduction to Nonprofit Accounting: The BasicsTechSoup
 
Accessible design: Minimum effort, maximum impact
Accessible design: Minimum effort, maximum impactAccessible design: Minimum effort, maximum impact
Accessible design: Minimum effort, maximum impactdawncurless
 
Kisan Call Centre - To harness potential of ICT in Agriculture by answer farm...
Kisan Call Centre - To harness potential of ICT in Agriculture by answer farm...Kisan Call Centre - To harness potential of ICT in Agriculture by answer farm...
Kisan Call Centre - To harness potential of ICT in Agriculture by answer farm...Krashi Coaching
 
Web & Social Media Analytics Previous Year Question Paper.pdf
Web & Social Media Analytics Previous Year Question Paper.pdfWeb & Social Media Analytics Previous Year Question Paper.pdf
Web & Social Media Analytics Previous Year Question Paper.pdfJayanti Pande
 
BAG TECHNIQUE Bag technique-a tool making use of public health bag through wh...
BAG TECHNIQUE Bag technique-a tool making use of public health bag through wh...BAG TECHNIQUE Bag technique-a tool making use of public health bag through wh...
BAG TECHNIQUE Bag technique-a tool making use of public health bag through wh...Sapna Thakur
 
Student login on Anyboli platform.helpin
Student login on Anyboli platform.helpinStudent login on Anyboli platform.helpin
Student login on Anyboli platform.helpinRaunakKeshri1
 
Separation of Lanthanides/ Lanthanides and Actinides
Separation of Lanthanides/ Lanthanides and ActinidesSeparation of Lanthanides/ Lanthanides and Actinides
Separation of Lanthanides/ Lanthanides and ActinidesFatimaKhan178732
 
Advanced Views - Calendar View in Odoo 17
Advanced Views - Calendar View in Odoo 17Advanced Views - Calendar View in Odoo 17
Advanced Views - Calendar View in Odoo 17Celine George
 
9548086042 for call girls in Indira Nagar with room service
9548086042  for call girls in Indira Nagar  with room service9548086042  for call girls in Indira Nagar  with room service
9548086042 for call girls in Indira Nagar with room servicediscovermytutordmt
 
The basics of sentences session 2pptx copy.pptx
The basics of sentences session 2pptx copy.pptxThe basics of sentences session 2pptx copy.pptx
The basics of sentences session 2pptx copy.pptxheathfieldcps1
 
Measures of Central Tendency: Mean, Median and Mode
Measures of Central Tendency: Mean, Median and ModeMeasures of Central Tendency: Mean, Median and Mode
Measures of Central Tendency: Mean, Median and ModeThiyagu K
 
A Critique of the Proposed National Education Policy Reform
A Critique of the Proposed National Education Policy ReformA Critique of the Proposed National Education Policy Reform
A Critique of the Proposed National Education Policy ReformChameera Dedduwage
 
POINT- BIOCHEMISTRY SEM 2 ENZYMES UNIT 5.pptx
POINT- BIOCHEMISTRY SEM 2 ENZYMES UNIT 5.pptxPOINT- BIOCHEMISTRY SEM 2 ENZYMES UNIT 5.pptx
POINT- BIOCHEMISTRY SEM 2 ENZYMES UNIT 5.pptxSayali Powar
 
Call Girls in Dwarka Mor Delhi Contact Us 9654467111
Call Girls in Dwarka Mor Delhi Contact Us 9654467111Call Girls in Dwarka Mor Delhi Contact Us 9654467111
Call Girls in Dwarka Mor Delhi Contact Us 9654467111Sapana Sha
 
CARE OF CHILD IN INCUBATOR..........pptx
CARE OF CHILD IN INCUBATOR..........pptxCARE OF CHILD IN INCUBATOR..........pptx
CARE OF CHILD IN INCUBATOR..........pptxGaneshChakor2
 
The byproduct of sericulture in different industries.pptx
The byproduct of sericulture in different industries.pptxThe byproduct of sericulture in different industries.pptx
The byproduct of sericulture in different industries.pptxShobhayan Kirtania
 

Recently uploaded (20)

Introduction to Nonprofit Accounting: The Basics
Introduction to Nonprofit Accounting: The BasicsIntroduction to Nonprofit Accounting: The Basics
Introduction to Nonprofit Accounting: The Basics
 
Mattingly "AI & Prompt Design: Structured Data, Assistants, & RAG"
Mattingly "AI & Prompt Design: Structured Data, Assistants, & RAG"Mattingly "AI & Prompt Design: Structured Data, Assistants, & RAG"
Mattingly "AI & Prompt Design: Structured Data, Assistants, & RAG"
 
Accessible design: Minimum effort, maximum impact
Accessible design: Minimum effort, maximum impactAccessible design: Minimum effort, maximum impact
Accessible design: Minimum effort, maximum impact
 
Kisan Call Centre - To harness potential of ICT in Agriculture by answer farm...
Kisan Call Centre - To harness potential of ICT in Agriculture by answer farm...Kisan Call Centre - To harness potential of ICT in Agriculture by answer farm...
Kisan Call Centre - To harness potential of ICT in Agriculture by answer farm...
 
Web & Social Media Analytics Previous Year Question Paper.pdf
Web & Social Media Analytics Previous Year Question Paper.pdfWeb & Social Media Analytics Previous Year Question Paper.pdf
Web & Social Media Analytics Previous Year Question Paper.pdf
 
BAG TECHNIQUE Bag technique-a tool making use of public health bag through wh...
BAG TECHNIQUE Bag technique-a tool making use of public health bag through wh...BAG TECHNIQUE Bag technique-a tool making use of public health bag through wh...
BAG TECHNIQUE Bag technique-a tool making use of public health bag through wh...
 
Student login on Anyboli platform.helpin
Student login on Anyboli platform.helpinStudent login on Anyboli platform.helpin
Student login on Anyboli platform.helpin
 
Separation of Lanthanides/ Lanthanides and Actinides
Separation of Lanthanides/ Lanthanides and ActinidesSeparation of Lanthanides/ Lanthanides and Actinides
Separation of Lanthanides/ Lanthanides and Actinides
 
Advanced Views - Calendar View in Odoo 17
Advanced Views - Calendar View in Odoo 17Advanced Views - Calendar View in Odoo 17
Advanced Views - Calendar View in Odoo 17
 
9548086042 for call girls in Indira Nagar with room service
9548086042  for call girls in Indira Nagar  with room service9548086042  for call girls in Indira Nagar  with room service
9548086042 for call girls in Indira Nagar with room service
 
The basics of sentences session 2pptx copy.pptx
The basics of sentences session 2pptx copy.pptxThe basics of sentences session 2pptx copy.pptx
The basics of sentences session 2pptx copy.pptx
 
Advance Mobile Application Development class 07
Advance Mobile Application Development class 07Advance Mobile Application Development class 07
Advance Mobile Application Development class 07
 
Measures of Central Tendency: Mean, Median and Mode
Measures of Central Tendency: Mean, Median and ModeMeasures of Central Tendency: Mean, Median and Mode
Measures of Central Tendency: Mean, Median and Mode
 
A Critique of the Proposed National Education Policy Reform
A Critique of the Proposed National Education Policy ReformA Critique of the Proposed National Education Policy Reform
A Critique of the Proposed National Education Policy Reform
 
POINT- BIOCHEMISTRY SEM 2 ENZYMES UNIT 5.pptx
POINT- BIOCHEMISTRY SEM 2 ENZYMES UNIT 5.pptxPOINT- BIOCHEMISTRY SEM 2 ENZYMES UNIT 5.pptx
POINT- BIOCHEMISTRY SEM 2 ENZYMES UNIT 5.pptx
 
Call Girls in Dwarka Mor Delhi Contact Us 9654467111
Call Girls in Dwarka Mor Delhi Contact Us 9654467111Call Girls in Dwarka Mor Delhi Contact Us 9654467111
Call Girls in Dwarka Mor Delhi Contact Us 9654467111
 
CARE OF CHILD IN INCUBATOR..........pptx
CARE OF CHILD IN INCUBATOR..........pptxCARE OF CHILD IN INCUBATOR..........pptx
CARE OF CHILD IN INCUBATOR..........pptx
 
Código Creativo y Arte de Software | Unidad 1
Código Creativo y Arte de Software | Unidad 1Código Creativo y Arte de Software | Unidad 1
Código Creativo y Arte de Software | Unidad 1
 
INDIA QUIZ 2024 RLAC DELHI UNIVERSITY.pptx
INDIA QUIZ 2024 RLAC DELHI UNIVERSITY.pptxINDIA QUIZ 2024 RLAC DELHI UNIVERSITY.pptx
INDIA QUIZ 2024 RLAC DELHI UNIVERSITY.pptx
 
The byproduct of sericulture in different industries.pptx
The byproduct of sericulture in different industries.pptxThe byproduct of sericulture in different industries.pptx
The byproduct of sericulture in different industries.pptx
 

Parker Bows - Compound Bow Owner's Manual

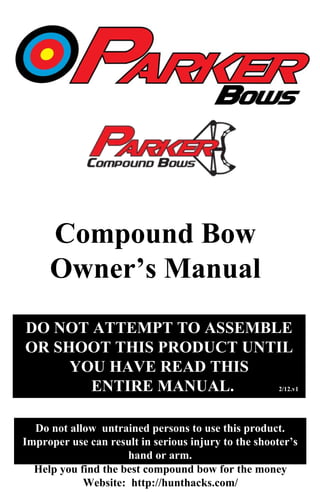
  • 1. DO NOT ATTEMPT TO ASSEMBLE OR SHOOT THIS PRODUCT UNTIL YOU HAVE READ THIS ENTIRE MANUAL. 2/12.v1 Do not allow untrained persons to use this product. Improper use can result in serious injury to the shooter’s hand or arm. Compound Bow Owner’s Manual Help you find the best compound bow for the money Website: http://hunthacks.com/
  • 2. Thank you for your purchase of a Parker bow. Each Parker bow is designed, engineered and manufactured by hunters like you. Attention to detail and pride in our products drive each of us at Parker to make the best hunting equipment on the market. Anytime you have a question, a comment or suggestion regarding your Parker bow, please give us a call at (540) 337-5426 or send us an email to customerservice@parkerbows.com. We value your experience and ideas, and enjoy sharing in your success. For more information on the current product line of Parker Crossbows and Parker Compound Bows, or to see a color version of this owners manual visit our website at http://hunthacks.com/ Good luck and safe shooting!
  • 3. Page ANATOMY 4 GETTING STARTED 5 ADJUSTMENTS 6 SET UP 7 MAINTENANCE 8 BOW SAFETY 9 CAM ADJUSTMENTS 13-18 LIFETIME WARRANTY 19 US RETURN AUTHORIZATION 20 EXPORT RETURN AUTHORIZATION 21 IMPORTANT INFORMATION 22 TABLE OF CONTENTS (i)
  • 4. • Congratulations on your purchase of a new Parker Compound bow. This compound bow has been carefully designed and crafted by engineers and hunters that are committed to delivering a quality product that will enhance your experience in the woods. • As you read this manual there may be terms or descriptions that are unfamiliar to you. Below is a diagram that will help you understand the common terminology and parts of a modern hunting compound bow. ANATOMY Quiver (4) String Limb bolt Grip Sling Cam Arrow rest Roller cable guard Limb Idler wheel Peep sight String suppressor Sight Riser Stabilizer mount Buss Cable Axle Shelf Nock point Draw stop Tiller setting Draw Module Opposite side of cam Peep tubing
  • 5. Before you begin… • Empty contents of the box your new Parker Compound bow was packaged in. Place all contents in a clear and organized space such as a work bench, tabletop or flat surface where you may inventory and easily identify all the parts and components of this package. • If you purchased a Compound bow Outfitter package, be certain your compound bow has an arrow rest, a peep sight with tubing, a sling , a sight and a quiver included in your package. • If any of the outfitter package accessories are missing: first, contact your dealer where you purchased your Parker compound bow. The Dealer likely has the missing accessory. • If they do not have the missing accessory, please contact Parker Compound Bows at (540)-337-5426. A Parker Customer Service representative will assist you. GETTING STARTED (5) WARNING ! Completely familiarize yourself with the Cam and module diagram prior to usage. Carefully review the pictures and instructions before you attempt to adjust or tune your draw length. !
  • 6. COMPOUND BOW ADJUSTMENTS DRAW WEIGHT All Parker bows are set on peak weight at the factory. Draw weight can be adjusted downward below peak draw weight using a 3/16” Allen wrench. Turn each limb bolt clockwise to increase the weight and counter clockwise to decrease the bow weight. It is very important to adjust the limb bolts on both limbs equally. NOTE: Some bow models have a peak weight range of 10 pounds, 15 pounds, and 20 pounds. Be sure to check your bow model for its appropriate draw weight range, and DO NOT exceed its LOWER limit. DRAW LENGTH ADJUSTMENT Draw length adjustment on most Parker bows are changed with a draw module that is easily removed from the bow without the aid of a bow press. However some older models do require the use of a bow press. On single cam bows, the module is located in the lower cam. (see anatomy) On two-cam bows, draw length modules are on both the top and bottom cams. Both modules must be adjusted to the same draw length. To change the draw length, see specific instructions for each cam system beginning on page 13. NOTE: It is important to make sure module screws are tight. Warranty does not cover module screws that loosen and cause cam or limb damage. Once you’re a sure of your adjusted draw length, non- permanent thread locking liquid may be used to secure the module set screws. (6)
  • 7. BOW SET-UP INSTALLING A NOCKING POINT A brass nocking point or a string loop can generally be installed anywhere from 3/16” to ½” above the 90º point of reference to the arrows rest. This adjustment eliminates “porpoising”, which is the up and down motion of the arrow in flight. Experiment with your nocking point location to achieve the best flight. We recommend using a string loop for best results. SETTING CENTER SHOT Make your center shot adjustment with the same size arrow that you will be shooting. Put the arrow on the string at the nocking point and visually align the string with the grip center and the top of the limb. Adjust the center of the arrow rest to meet this alignment. With proper arrow selection, this method will work virtually every time with no need for other tools or devices. TILLER SETTING Tiller is a measurement of the distance between the top limb (rear face) and string as it compares to the same measurement of the bottom limb (rear face) and string. (See Anatomy). A bow usually shoots best when the tiller measurements are even. If there is question regarding tiller, tighten both limbs to their maximum draw weight. Next, back them off an equal amount of turns, to the bow weight desired. Measure the tiller, and slightly adjust one limb or the other to achieve even tiller. (7)
  • 8. BOW MAINTENANCE Periodic inspection of your compound bow is highly recommended. Like all equipment, it is subject to wear and should be reviewed prior to use for adjustments and general service. Be sure to pay particular attention to wear and abrasion on the strings and cables, damage to cams, and loosening of the module screws or limb bolts. STRINGS Only Parker Brand Strings should be used. It is important for string length, end servings and string strand count etc...to be to factory specifications. Other brand or custom string replacement may result in a loss or gain of bow weight, improper cam rotation resulting in loss of efficiency, or over-sized end servings could result in strings slipping out of the cam grooves. Always inspect your bow for frayed or worn strings and cables. Replace strings and cables that are damaged as soon as possible. Parker recommends using a string wax that is silicone based such as ML-6 to increase string and cable life. With moderate to heavy use, replacing the string and cables is recommended annually. The correct string and buss cable lengths insure the proper “Rotation” of the cam to maximize your bow’s performance and accuracy. LUBRICATION Parker Compound bows have self-lubricating bushings and polished stainless steel axles requiring NO lubrication or maintenance. DO NOT spray WD-40 or other lubricants on the wheels, axles or other parts or your compound bow. Lubricants will attract and hold dirt, dust and grit that will impair the performance, longevity and accuracy of your compound bow. (8)
  • 9. BOW SAFETY DRY-FIRE Definition: Releasing the string of a fully drawn bow without an arrow nocked and attached to the string. Never shoot your bow without an arrow on the string. Without the arrow attached to the string to absorb the stored energy of the bow, a dry- fire will occur. “Dry-firing” can damage your bow and could cause personal injury to you or by-standers. If a dry-fire occurs, check carefully for damage on all visible parts. Especially make sure the strings are in the cam grooves and idler wheel grove. In most cases, a dry-fire does not damage the bow, however multiple dry-fire will. Only a small percentage of bows will require repair from a single dry-fire, usually a string or cable, or cable slide replacement is all that is required. Damage caused to your Parker Compound bow due to the event of a dry-fire will not be covered under the warranty. Parker will replace or repair and damaged parts at factory cost to our customer as a courtesy. WARNING! STOP GO (9)
  • 10. SHOOTING YOUR BOW If you follow the preceding set-up and maintenance guidelines, your Parker compound bow is ready to shoot and will provide you with years of enjoyment . Arrow size selection is the next most important step towards a proper performing bow. Parker recommends referring to the popular arrow manufacturers arrow selection charts that are available at archery dealers or on their manufacturers web sites. On the charts, today’s single cams, ARC- cams and 2-plus cams are considered “Hard cams”. Understanding this will help you select the proper arrow for your Parker compound bow. Keep in mind bow weight, arrow length, release or finger style shooting, type of cam and point weight will all play a role in shaft selection and your bow’s performance. The majority of problems experienced by archers can be attributed to improper arrow shaft selection. After choosing a new compound bow, selecting the proper “spined” arrow is most important. Where the arrow shaft selection is borderline between two sizes, we recommend selecting the heavier (or “stiffer”) spined arrow. NOTE: If the above provisions are followed, your bow will shoot your arrows in “good groups”. But normal archers make minor mistakes in form, grip, release and follow through etc… resulting in not so perfect shots. This is normal, even for world class archers, so don’t be too quick to blame your equipment. Keep shooting and enjoy the art of archery and becoming a master of your bow. Good luck! (10)
  • 11. SHOOTING SAFETY 1. Your Parker Compound bow is a potentially deadly hunting tool, and should never be handled as a toy. It is capable of casting an arrow in excess of 500 yards and harvesting the worlds largest big game. It is important to always be aware of your background as well as your backstop material when shooting, so that any arrow that may miss or pass through your target will not endanger people, pets, or property down range. Use a quality target designed for use with modern arrows. 2. Carefully inspect each arrow after every shot for damage. THIS IS VERY IMPORTANT FOR YOUR SAFETY. 3. Never climb into a treestand while carrying your compound bow. Always place your compound bow on the ground in a safe position, then climb into your stand. After you secure yourself in the treestand with a safety harness, use a hoist rope attached to your compound bow to pull your bow up into the stand. It is not safe or recommended to carry or climb into your treestand with your bow in hand. 4. As with any bow or crossbow, there is a forward movement of the limbs when fired. Do not attempt to shoot your compound bow when the limbs are in contact with or near an object. (11)
  • 12. SHOOTING SAFETY 5. Do not attempt to shoot your compound bow while in an awkward or un-natural position. Shooting from awkward and un-natural positions may distract you from proper shooting form, increasing the chance of the string hitting your arm, or losing your balance in the treestand. 6. Keeping the bow level will greatly improve your shooting and consistency. 7. We strongly recommend wearing shooting glasses while practicing or hunting with your compound bow. DO NOT allow any person who has not read this compound bow owners manual to shoot your bow. It is your responsibility to make sure all persons have been properly trained, informed, and warned of all the dangers associated with shooting this compound bow. ! CAUTION Stabilizer mount (12)
  • 13. PYTHON, INFERNO, VELOCITY CAM Draw length adjustment The Inferno cam is adjustable from 26” – 31”. The Factory setting is 29” with the “long draw” module installed. The Inferno bow includes the short draw module for draw lengths of 26” – 28”. To adjust the draw length to 30” or 31”, first remove the two socket head screws from the module, and reposition the module to the desired draw length. Second, loosen the socket head screw on the draw stop. Reposition it to match the draw length of the module. (Eg: 30” on the module and 30” on the draw stop) You can fine tune the valley and let–off of your bow by making minute adjustments to the draw stop. Experiment with the draw stop to customize the draw for a precise draw and shooting experience. To adjust your draw length using the short draw module, remove the long draw module, and replace it with the short draw module. Repeating the instructions above, adjust your draw length to the desired length being sure the draw stop length matches the module setting. ( Eg: 27” on the module and 27” on the draw stop) Be certain that the module set screws (2) and draw stop set screw (1) are tight before you shoot your bow. Periodically inspect them to make sure they have not vibrated loose. Adding a non-permanent thread locking liquid is advised once you have correctly adjusted the module to your draw length. ! CAUTION Socket head screw on draw stop Module Draw Stop Socket head screws on module (One on each side) (13)
  • 14. AMBUSHER CAM Draw length adjustment The Ambusher cam is adjustable from 27” – 30”. The Factory setting is 29” with the 29” module installed. The Ambusher bow includes the individual modules for 27”, 28” and 30” draw lengths . To adjust the draw length to 27”, 28” or 30”, first remove the two socket head screws from the module, remove the 29” module, and replace it with one of the alternate draw modules. Re-install the socket head screws into the module, and be certain they are tight. Second, loosen the socket head screw on the draw stop. Reposition it to match the draw length of the module. (Eg: 28” on the module and 28” on the draw stop) You can fine tune the valley and let–off of your bow by making minute adjustments to the draw stop. Experiment with the draw stop to customize the draw for a precise draw and shooting experience. Be certain that the module set screws (2) and draw stop set screw (1) are tight before you shoot your bow. Periodically inspect them to make sure they have not vibrated loose. Adding a non-permanent thread locking liquid is advised once you have correctly adjusted the module to your draw length. ! CAUTION Socket head screw on draw stop Socket head screws on module Module Draw Stop (14)
  • 15. WILDFIRE Extreme CAM Draw length adjustment Be certain that the module set screws (2) and draw stop set screw (1) are tight before you shoot your bow. Periodically inspect them to make sure they have not vibrated loose. Adding a non-permanent thread locking liquid is advised once you have correctly adjusted the module to your draw length. ! CAUTION Module The WildFire Extreme cam is adjustable from 26” – 31”. The Factory setting is 29” with the “long draw” module installed. The WildFire Extreme cam includes the short draw module for draw lengths of 26” – 28”. To adjust the draw length to 30” or 31”, first remove the two socket head screws from the module, and reposition the module to the desired draw length. Second, loosen the socket head screw on the draw stop. Reposition it to match the draw length of the module. (Eg: 30” on the module and 30” on the draw stop) To adjust your draw length using the short draw module, remove the long draw module, and replace it with the short draw module. Repeating the instructions above, adjust your draw length to the desired length being sure the draw stop length matches the module setting. ( Eg: 27” on the module and 27” on the draw stop) Socket head screws on module (One on each side) Draw Stop Socket head screw on draw stop (15)
  • 16. BLAZER CAM Draw length adjustment Be certain that the module set screws (2 per cam) are tight before you shoot your bow. Periodically inspect them to make sure they have not vibrated loose. Adding a non-permanent thread locking liquid is advised once you have correctly adjusted the module to your draw length. ! CAUTION Rotating Modules The Blazer cam is adjustable from 26” – 31”. The Factory setting is 29” on the “rotating” modules installed. To adjust the draw length to a length other than 29”, first remove the two socket head screws from each module. Be certain to remove the socket head screws on both the top and bottom cams. Rotate the modules to the desired draw length on each cam, and re-install the socket head screws. Be certain the socket head screws are tight. Note: The Blazer rotating modules can be adjusted for half inch draw length increments by placing the scribe marks of the module between the “whole number” increments of 26” through 31”. Before you shoot, BE CERTAIN the modules are adjusted identically to ensure even timing of the cams. (Eg: 30” on the top module and 30” on the bottom module) Button head screws on modules Bottom cam Top cam (16)
  • 17. SIDEKICK Extreme CAM Draw length adjustment Be certain that the module set screws (2 per cam) are tight before you shoot your bow. Periodically inspect them to make sure they have not vibrated loose. Adding a non-permanent thread locking liquid is advised once you have correctly adjusted the module to your draw length. ! CAUTION The SideKick Extreme cam is adjustable from 18” – 28”. The Factory setting is 26” on the “rotating” modules installed. To adjust the draw length to a length other than 26”, first remove the two socket head screws from each module. Be certain to remove the socket head screws on both the top and bottom cams. Rotate the modules to the desired draw length on each cam, and re-install the socket head screws. Be certain the socket head screws are tight. Note: The SideKick Extreme can be adjusted for half inch draw length increments by moving the string loop ends to the second post (Inner post) on each cam. The second post is the post closest to the axle. Before you shoot, BE CERTAIN the modules are adjusted identically to ensure even timing of the cams. (Eg: 25” on the top module and 25” on the bottom module) Socket head screws on modules Bottom cam Top cam Rotating Modules Second post (17)
  • 18. BUCKSHOT Extreme CAM Draw length adjustment Be certain that the module set screws (2 per cam) are tight before you shoot your bow. Periodically inspect them to make sure they have not vibrated loose. Adding a non-permanent thread locking liquid is advised once you have correctly adjusted the module to your draw length. ! CAUTION The BuckShot Extreme cam is adjustable from 17” – 26”. The Factory setting is 26” on the “rotating” modules installed. To adjust the draw length to a length other than 26”, first remove the two socket head screws from each module. Be certain to remove the socket head screws on both the top and bottom cams. Rotate the modules to the desired draw length on each cam, and re-install the socket head screws. Be certain the socket head screws are tight. Note: The BuckShot Extreme can be adjusted for half inch draw length increments by moving the string loop ends to the second post on each cam. The second post is the post closest to the axle. Before you shoot, BE CERTAIN the modules are adjusted identically to ensure even timing of the cams. (Eg: 25” on the top module and 25” on the bottom module) Top cam Bottom cam Socket head screws on modules Rotating Modules Second post (18)
  • 19. IMPORTANT INFORMATION - LIMITED LIFETIME - WARRANTY To validate your Limited Lifetime Warranty, your warranty card must be completed in full and mailed by the purchaser within 15 days of the purchase date. OR Visit our web site at www.parkerbows.com and register your compound bow warranty on line. Parker compound bows are warranted for the lifetime of the original purchaser to be free from defects in material and workmanship. This warranty EXCLUDES wear on strings, cables, string silencers and bow finish. Damage caused by mishandling, abuse, dry-firing, modifying the product or shooting the compound bow with improper spined or underweight arrows is not covered and may void the warranty. In the “Outfitter” package, the accessories are warranted for 30 days, and may be returned to Parker for replacement. Any alterations or modifications to your Parker Compound bow will void the warranty. Alterations could cause damage to the bow or personal injury. Interchanging parts with other bow models or brands will void the warranty. Use ONLY Parker brand Strings and cables. Should your Parker Compound bow need repairs, the dealer where you purchased our compound bow may be able to complete the work. If this is not possible, compound bows may be returned to Parker for warranty repair and service. The bow owner is responsible for the cost of shipping the bow to Parker, however Parker will pay the return shipping costs using UPS regular ground delivery. In unusual circumstances, any shipping cost above the regular ground delivery rate for expedited service will the responsibility of the owner. (19)
  • 20. IMPORTANT INFORMATION US -Warranty Return Process- DO NOT RETUN ANYTHING TO PARKER BEFORE CALLING AND OBTAINING A RETURN AUTHORIZATION NUMBER. To ensure a prompt return of your compound bow, complete the following: 1. Contact Parker Customer Service at 540-337-5426 to review your issues with a trained Parker Technician or to obtain a Return Authorization Number (RA#). 2. In many situations, we are able to resolve the issue by phone. However, some issues may not be resolved over the phone and will require the bow be return to Parker for service. At this time the Parker Technician will issue a Return Authorization Number (RA#). Remove all accessories before shipping unless otherwise instructed by the Parker Technician. 3. Return the bow to Parker at the following address: 4. Please package your bow carefully, wrapping the bow in paper or foam. Ensure the bow cannot move around in the box and that there are no loose parts that could shift during delivery and damage the bow. Include a description of your warranty request, and make sure you include your name, address, phone number, email address and the RA#. DO NOT USE A HARD BOW CASE FOR SHIPPING. Note: The warranty does not cover damage to the finish. (20) Parker Bows 3022 Lee Jackson Hwy. Staunton, VA 24401 NOTE: The RA# must be boldly and clearly written on the outside of the shipping container.
  • 21. Canadian - Technical Assistance, Warranty, Parts and Repair Dear Parker Customer, If you find yourself in need of technical assistance or you have a warranty issue, this page will help you understand your options and allow you to resolve your issues quickly. If you need Technical Assistance you can: 1. Direct your questions to the dealer where you purchased your Parker bow, or any Parker dealer. Most dealers are experts and can help you with any questions. 2. Consult Parker’s website for Technical Tips and Troubleshooting Guides: Parker website is www.parkerbows.com 3. Direct your questions to the Parker Canadian Distributor. The phone number is 905- 775-4416 4. Direct your questions to Parker Compound Bows by phone (540-337-5426 or email (customerservice@parkerbows.com). For Warranty Repair you can: Have warranty work performed by your dealer. Your local dealer may order parts from our Canadian Distributor to repair your bow. Please keep in mind that dealers are not required to offer warranty service and some do not have the facilities or equipment to complete some types of repairs. Have warranty work performed by our Canadian Distributor. To obtain warranty service, please follow these simple instructions: 1. Contact the Canadian Distributor to explain your issue; 2. Obtain a Warranty Return Authorization Number from a technician at the Canadian Distributor; 3. Ship the bow to the Canadian Distributor for repair along with a note that includes your: Name, Address, Phone Number and a brief description of the issue you are experiencing. Once repaired, your bow will be returned to you freight prepaid. You are responsible for the shipping cost to the Canadian Distributor. Do not return your bow to the Canadian Distributor without receiving a Warranty Return Authorization Number; if you do, your package will not be accepted. Do not return your bow to Parker Compound Bows in the U.S. Please note that all warranty and service work will be performed by Factory Trained technicians. Contact Information for the Parker Canadian Warranty Distributor Phone Number: 905-775-4416 Shipping Address: Parker Canadian Distributor Bromley Archery 37 Brownlee Dr. RR# 1 Bradford, Ontario L3Z 2A4 Canadian (Export) -Warranty Return Process- (21)
  • 22. IMPORTANT INFORMATION • Should your Parker compound bow need warranty service, it is advisable to keep a copy of your bow specifications, serial number and sales information for your own records. • In the space provided, detail your Parker Compound bow information and keep this owners manual in a convenient location, should you need to refer back to it in the future. Bow model: ___________________________________________ Serial #: ______________________________________________ Bow Weight: __________________________________________ Date purchased: _______________________________________ Purchase price: ________________________________________ Store name: ___________________________________________ NOTES __________________________________________________________ _____________________________________________________________ _____________________________________________________________ _____________________________________________________________ (22)
  • 23. WARRANTYREGISTRATIONCARD Name:_________________________________________________________________Date:_____________________ Address:______________________________________________________________City:______________________ State:______________ZipCode:__________________Phone:_____________________ EmailAddress:_____________________________________________________________________________________ BowModel:__________________________________________________Serial#:_____________________________ StoreName:_______________________________________________________________________________________ City:________________________________________________________State:______________Price:$__________ (1)HowdidyouhearaboutParkerBows?(Circlethosethatapply) DealerrecommendedFriendRecommendedMagazineAdParkerWebsiteTVshowTVCommercial (2)WhydidyouchooseParkerBows?BowFeaturesLifetimeWarrantyPricePerformance Tovalidatewarranty,cardmustbe completedandmailedbythepurchaser orstorewithin15daysofpurchasedate. Warrantyextendstooriginal purchaseronly