SlideShare a Scribd company logo
1 of 33
Download to read offline
Steel Bridge Design Handbook
U.S.Department of Transportation
Federal Highway Administration
Design for Constructibility
Publication No. FHWA-HIF-16-002 - Vol. 11
December 2015
FOREWORD
This handbook covers a full range of topics and design examples intended to provide bridge
engineers with the information needed to make knowledgeable decisions regarding the selection,
design, fabrication, and construction of steel bridges. Upon completion of the latest update, the
handbook is based on the Seventh Edition of the AASHTO LRFD Bridge Design Specifications.
The hard and competent work of the National Steel Bridge Alliance (NSBA) and prime
consultant, HDR, Inc., and their sub-consultants, in producing and maintaining this handbook is
gratefully acknowledged.
The topics and design examples of the handbook are published separately for ease of use, and
available for free download at the NSBA and FHWA websites: http://www.steelbridges.org, and
http://www.fhwa.dot.gov/bridge, respectively.
The contributions and constructive review comments received during the preparation of the
handbook from many bridge engineering processionals across the country are very much
appreciated. In particular, I would like to recognize the contributions of Bryan Kulesza with
ArcelorMittal, Jeff Carlson with NSBA, Shane Beabes with AECOM, Rob Connor with Purdue
University, Ryan Wisch with DeLong’s, Inc., Bob Cisneros with High Steel Structures, Inc.,
Mike Culmo with CME Associates, Inc., Mike Grubb with M.A. Grubb & Associates, LLC, Don
White with Georgia Institute of Technology, Jamie Farris with Texas Department of
Transportation, and Bill McEleney with NSBA.
Joseph L. Hartmann, PhD, P.E.
Director, Office of Bridges and Structures
Notice
This document is disseminated under the sponsorship of the U.S. Department of Transportation in
the interest of information exchange. The U.S. Government assumes no liability for use of the
information contained in this document. This report does not constitute a standard, specification,
or regulation.
Quality Assurance Statement
The Federal Highway Administration provides high-quality information to serve Government,
industry, and the public in a manner that promotes public understanding. Standards and policies
are used to ensure and maximize the quality, objectivity, utility, and integrity of its information.
FHWA periodically reviews quality issues and adjusts its programs and processes to ensure
continuous quality improvement.
Technical Report Documentation Page
1. Report No. 2. Government Accession No. 3. Recipient’s Catalog No.
FHWA-HIF-16-002 - Vol. 11
4. Title and Subtitle 5. Report Date
Steel Bridge Design Handbook: Design for Constructibility December 2015
6. Performing Organization Code
7. Author(s) 8. Performing Organization Report No.
Roger A. Eaton, PE (HDR) and Calvin Boring (Trumbull Corporation)
9. Performing Organization Name and Address 10. Work Unit No.
HDR, Inc.
11 Stanwix Street
Suite 800
Pittsburgh, PA 15222
11. Contract or Grant No.
DTFH6114D00049
12. Sponsoring Agency Name and Address 13. Type of Report and Period Covered
Office of Bridges and Structures Technical Report
Federal Highway Administration Final Report
1200 New Jersey Avenue, SE December 2014 – November 2015
Washington, D.C. 20590 14. Sponsoring Agency Code
15. Supplementary Notes
The previous version of this Handbook was published as FHWA-IF-12-052 and was developed to be current with the AASHTO
LRFD Bridge Design Specifications, 5th Edition with the 2010 Interims. FHWA-HIF-16-002 was updated in 2015 by HDR,
Inc., to be current with the AASHTO LRFD Bridge Design Specifications, 7th Edition.
16. Abstract
In many cases, bridge designers concern themselves only with checking the stability and member stress levels in the structure for
the in-service condition after erection of the entire superstructure is complete. But many times the critical stress in a particular
component is encountered during the erection of the bridge where large unbraced lengths affect the stability of the partially
completed structure. This module describes typical erection methods and procedures and highlights some of the aspects that
should be considered by the designer. With this basic knowledge, the bridge designer can determine which, if any, of these
aspects are a concern for his/her particular design situation.
17. Key Words 18. Distribution Statement
Steel Bridge, Constructibility, Erection, Construction, , No restrictions. This document is available to the public through
Deck Placement, Fit-up the National Technical Information Service, Springfield, VA
22161.
19. Security Classif. (of this report) 20. Security Classif. (of this page) 21. No of Pages 22. Price
Unclassified Unclassified
Form DOT F 1700.7 (8-72) Reproduction of completed pages authorized
i
Steel Bridge Design Handbook:
Design for Constructibility
Table of Contents
1.0 INTRODUCTION ................................................................................................................. 1
2.0 GENERAL............................................................................................................................. 2
2.1 Equipment........................................................................................................................ 2
2.2 Erection............................................................................................................................ 5
2.3 Site Considerations ........................................................................................................ 13
3.0 DESIGN CONSIDERATIONS ........................................................................................... 15
3.1 Construction Loads ........................................................................................................ 15
3.2 Deck Placement ............................................................................................................. 18
3.3 Stability.......................................................................................................................... 22
3.4 Fit-up.............................................................................................................................. 25
3.5 Erection Engineering and Drawings .............................................................................. 27
4.0 REFERENCES .................................................................................................................... 28
ii
List of Figures
Figure 1 Photograph of a mobile hydraulic crane.......................................................................... 2
Figure 2 Photograph of a mobile lattice boom crane..................................................................... 3
Figure 3 Photograph of a lattice boom crawler crane.................................................................... 3
Figure 4 Photograph of a lattice ringer crane................................................................................. 4
Figure 5 Photograph of a tower crane............................................................................................ 4
Figure 6 Photograph of a timber crane mat ................................................................................... 5
Figure 7 Photograph of a temporary bent ...................................................................................... 6
Figure 8 Photograph showing the use of pier brackets in an I-girder bridge................................. 6
Figure 9 Photograph showing the use of a spreader beam for I-girder erection............................ 7
Figure 10 Photograph showing box girder erection using two crawler cranes.............................. 8
Figure 11 Photograph showing an I-girder bridge launching ........................................................ 8
Figure 12 Photograph showing an I-girder launch with launching nose and cable tie-backs........ 9
Figure 13 Photograph showing cantilever erection of a continuous truss using barge mounted
cranes .............................................................................................................................................. 9
Figure 14 Photograph showing cantilever erection of a continuous truss using derricks............ 10
Figure 15 Photograph of an arch erection using stay towers and cables ..................................... 11
Figure 16 Photograph of an arch bridge erection using the floor system as an erection tie to the
canyon wall ................................................................................................................................... 11
Figure 17 Photograph showing cantilever cable stayed bridge erection using deck mounted
derricks.......................................................................................................................................... 12
Figure 18 Photograph of a suspension bridge erection using cable travelers.............................. 13
Figure 19 Photograph showing SIP forms attached to a top flange in a tension region.............. 18
Figure 20 Photograph of a typical overhang bracket................................................................... 19
Figure 21 Sketch showing a typical overhang bracket and screed application............................ 20
Figure 22 Sketch showing a sample deck placement sequence................................................... 21
Figure 23 Sketches showing a half-width construction staging sequence................................... 22
Figure 24 Photograph showing a temporary top flange stiffening truss...................................... 24
1
1.0 INTRODUCTION
As time has passed, technological advancements and heightened environmental awareness have
led bridge designers to increase the maximum span lengths typically associated with a particular
bridge type. For example, with the introduction of High Performance Steels over the last decade,
steel plate girder bridges are becoming the structure of choice for spans up to 500 feet in length.
The use of these higher strength steels in obtaining such long spans creates the need for designers
to consider additional aspects associated with the construction of the bridge. All too often, bridge
designers concern themselves only with checking the stability and member stress levels in the
structure for the in-service condition after erection of the entire superstructure is complete. But
many times the critical stress in a particular component is encountered during the erection of the
bridge where large unbraced lengths affect the stability of the partially completed structure. This
module describes typical erection methods and procedures and highlights some of the aspects
that should be considered by the designer. With this basic knowledge, the bridge designer can
determine which, if any, of these aspects are a concern for his/her particular design situation.
2
2.0 GENERAL
Bridge erection takes on many forms based on the site, the complexity of the structure, the
availability of equipment, and the expertise of the erection contractor. In the following
paragraphs, basic erection equipment is discussed with specific examples shown for different
bridge types including considerations regarding the access to and topography of the construction
site.
2.1 Equipment
Cranes come in various types and sizes. Each type of crane has specific advantages and
disadvantages depending on numerous variables such as pick weight, pick height and radius,
number of picks, site access, site location, constraints, etc. The following crane types are used in
typical bridge erection:
Mobile hydraulic cranes are used for light- to medium-weight picks up to 650 tons. These cranes
are used where the site is readily accessible via existing roadways, where pick heights are
relatively low, and where crane area is limited. A typical application would be in the replacement
of an existing grade separation bridge. These cranes come in a wide variety of sizes such that the
appropriate crane can be used for the given pick weight and space availability. The set-up and
tear down is quick through the use of telescoping hydraulic outriggers. In addition, the mobility
and reach is versatile due to the telescoping boom and 360 degree rotational capability.
Figure 1 Photograph of a mobile hydraulic crane
Mobile lattice boom cranes are used for light-to medium-weight picks up to 300 tons. These
cranes are used when the site is accessible via existing roadways and where pick heights are
high. Through the use of telescoping hydraulic outriggers and self-assembly capabilities, the set-
up and tear down is quick compared to other crane types, generally one to two days for assembly
of multiple trailer loads. In addition, the reach is versatile with 360 degree rotational capability.
It should be noted that mobile lattice boom cranes and mobile hydraulic cranes cannot move
once the pick is lifted.
3
Figure 2 Photograph of a mobile lattice boom crane
Lattice boom crawler cranes are used for light-to medium-weight picks up to 300 tons. These
cranes are used where the site is typically unfinished terrain and where pick heights are high (up
to 400 feet). A typical application would be in the erection of a new bridge over a stream valley.
These cranes come in a wide variety of sizes such that the appropriate crane can be used for the
given pick weight and height requirements. The set-up and tear-down is long and labor intensive
due to the number of components that must be site-assembled to meet hauling and site access
restrictions. Once assembled, the mobility and reach is versatile with 360 degree rotational
capability. In addition, crawler cranes are able to travel with the load lifted.
Figure 3 Photograph of a lattice boom crawler crane
Lattice ringer cranes are used for heavyweight picks up to 1,400 tons. These cranes are used
where the site is typically unfinished open terrain and where pick heights are high (up to 400
feet). Typically, once assembled the crane is immobile due to the track work used to support the
massive counterweights. A typical application would be the erection of a new bridge over a
wide river or bay where the crane could be mounted onto a barge. By mounting the crane on a
4
barge, it becomes mobile increasing its versatility and ultimately making it more productive. The
set-up and tear-down is long and labor intensive due to the number of components that must be
site-assembled to meet hauling restrictions.
Figure 4 Photograph of a lattice ringer crane
Tower cranes are used for lightweight picks up to 20 tons. These cranes are used where no
mobility is required and excessive vertical heights must be overcome. A typical application
would be in the construction of a tower for a suspension or cable stayed bridge. These cranes
come in a wide variety of sizes to meet the need for a particular height and reach. The setup and
tear-down are extremely long due to the assembly process. Quite often, a separate foundation
must be constructed to support the base of the tower leg. Once in place the crane can be highly
productive in delivering materials to the elevation required. Some models come with self jacking
tower legs that allow the crane to adjust its height as construction progresses.
Figure 5 Photograph of a tower crane
5
Along with these different crane types, various erection accessories are typically used to
maximize the crane’s capabilities and function. Some of these accessories are described in the
following paragraphs.
2.2 Erection
The art of bridge erection has evolved over time to keep pace with technological advancements
in machinery and accessories. Even with today’s advanced computer controlled equipment, the
most important aspect of bridge erection lies in the experience of the personnel performing the
work. Since the objective of safely assembling the structure into its required configuration
remains unchanged, the experience necessary to achieve this goal is paramount to success. The
following paragraphs discuss different rigging schemes that are traditionally used in bridge
erection along with various methods of erection available for I-girder, box girder, truss, arch and
cable supported structures.
The rigging of a member in preparation for erection can take on many forms based on the size,
weight, geometry and capacity of the individual member as well as the size, capacity and
location of the erection crane. In its simplest form, rigging could consist of a single vertical sling
hooked to the crane and attached to the member with a beam clamp or through the use of a wire
rope sling around the member. In a more complex form, rigging could consist of a multi-point
erection frame attached to the member with beam clamps or slings and lifted using multiple
cranes attached at different locations along the frame. With both rigging options, tag lines
attached to the ends of the member are used for hand guidance to ensure safe placement.
Crane mats are series of timber or steel members assembled in sections beneath the crane to
provide a level base to support the crane during lifting operations. Most often large timbers are
used, since they are widely available, inexpensive and easily transported and assembled. If
existing ground conditions are poor (such that proper support of the crane would be marginal),
the use of a more complex system of steel framing or other custom designed site-cast crane pads
could be implemented to span the poor soils.
Figure 6 Photograph of a timber crane mat
Temporary bents are often used in conjunction with cranes to aid in the erection process.
Standard scaffolding is widely available for use in creating these temporary supports. Each
section of scaffolding is assembled into a geometric configuration that can achieve the required
elevation and load carrying capacity needed for each individual situation. Temporary bents are
commonly used where it is necessary to provide support for a longer period of time during
complex erection and when foundation conditions are favorable, due to shallow rock or good
6
soil. Other instances where temporary bents are used include long-span bridge erection,
situations where fit-up will be at the "no load" condition, and site constraints that limit the
placement of cranes. It is important to note that the temporary bent must have the ability to be
lowered once erection is complete to transfer the load to the structure and facilitate removal.
Figure 7 Photograph of a temporary bent
Temporary pier brackets are often used in the erection of water crossings to increase the number
of brace and reaction points provided by the permanent pier. Pier brackets are typically
comprised of a series of steel members assembled into a frame and temporarily attached to the
face of the permanent pier. The configuration can vary greatly based on the geometry of the
permanent pier and the intended function of the bracket. The brackets allow individual members
to be erected onto the pier with the use of a single crane. The erected member is attached to the
permanent bearing and to the pier bracket for stability during the erection of the remaining
portion of the spans.
Figure 8 Photograph showing the use of pier brackets in an I-girder bridge
Hydraulic jacks are often used in combination with the temporary bents and pier brackets to
allow for flexibility in vertical and horizontal location of the erected member. These jacks are
7
readily available in a wide variety of sizes and capacities to meet the requirements of each
particular situation. Some other uses for hydraulic jacks include longitudinally aligning a
continuous multi-span girder bridge with multiple fixed piers to ensure proper bearing/ pier
alignment; aligning the ends of long span continuous trusses and simple span arches to ensure
proper fit-up for the closure members; and launching completed bridges into their final location.
I-girder erection is often accomplished using a single erection crane. Based on the size, weight
and capacity of the girder, the erection crane could use either a single lift point located at the
center of gravity of the member or two lift points centered about the center of gravity utilizing a
spreader beam. Based on the overall size and complexity associated with the bridge erection, the
individual girder erection could incorporate the use of temporary bents, temporary pier brackets
or hold cranes to provide stability to the member until a sufficient number of girder lines are
erected and connected via permanent cross-frames or diaphragms to form a stable system.
Box girder erection is often accomplished using a pair of erection cranes working in tandem
during the lift. The cranes are typically rigged with a spreader beam that contains two beam
clamps each. The beam clamps are attached to the top flanges of the box girder near the ends of
the member. Unlike I-girders, an individual box girder may be stable once it is erected onto its
permanent supports, due its geometry and internal bracing system.
Figure 9 Photograph showing the use of a spreader beam for I-girder erection
8
Figure 10 Photograph showing box girder erection using two crawler cranes
An alternate girder erection method that has been gaining popularity consists of launching the
completely assembled bridge longitudinally across the permanent supports. This method of
erection can be utilized for both I-girder and box girder bridges. To accomplish a girder launch,
the superstructure is assembled on a roller system behind one of the abutments in segments of
sufficient length to maintain stability during the launching. Once a segment is assembled,
hydraulic jacks are used to move the structure across the abutment until it reaches the first pier
support. After the girders are properly aligned on the first pier, additional segments are
assembled on the roller system behind the abutment and the hydraulic jacks advance the structure
until it reaches the next pier. This launching process is continued until the entire structure rests
on its permanent supports. This erection procedure requires minimal equipment to perform, but
the girders must be specifically designed both globally and locally to handle the large forces
generated during the launch. In some cases the erection forces in the girders are minimized
through the use of an erection nose attached to the leading end of the girders, thus reducing the
cantilever length, or through the use of a cable tie-back system attached to the top of the girders
to counteract the cantilever moments. The cable tie-back system is also used to control
deflections of the cantilever end to ensure proper position as each permanent support is reached.
This erection method becomes feasible where the bridge height is excessive or when
environmental and/or topographical constraints limit the access for erection cranes.
Figure 11 Photograph showing an I-girder bridge launching
9
Figure 12 Photograph showing an I-girder launch with launching nose and cable tie-backs
Truss erection methods can vary greatly based on the number of spans, span continuity, site
topography, truss type, etc. Methods that have been used successfully over the years are
cantilever erection for continuous trusses and float-in erection of the completely assembled
bridge for simple spans. The cantilever method of erection for continuous trusses starts with
assembling the sections over an interior pier using temporary bents or pier brackets to stabilize
the panels. Once the initial pier panels are erected, new panels are added to each end in an
alternating fashion until mid-span or the abutment is reached. The same procedure is repeated
again until the ends of the two cantilevers are ready for the installation of the closure pieces.
Erecting a truss in this fashion can be performed using standard erection equipment or traveling
derricks. In addition, erection can proceed simultaneously from each interior pier, and truss
geometry and deflection can be controlled using hydraulic jacks at the temporary supports.
Figure 13 Photograph showing cantilever erection of a continuous truss using barge
mounted cranes
10
Figure 14 Photograph showing cantilever erection of a continuous truss using derricks
Another commonly used method is to assemble truss section components off site, thus, providing
erection of assemblies while filling in smaller members piece by piece with smaller equipment.
Simple span truss erection over navigable water can be performed using a scheme where the
truss is fully erected on barges, usually on temporary bents, and then floated into position and
lifted onto the permanent piers using hydraulics. This method of erection is advantageous where
waterway traffic cannot be impeded, the erection contractor has the heavy lifting equipment on
hand, or where temporary bents are not feasible due to poor foundation material or excessive
water depth.
Arch bridge erection is typically performed using a temporary stay tower located at the spring
line (end pier for tied arches) with stay cables connecting the partially completed arch to the
tower on the leading end and the tower to counterweights or ground anchors on the trailing end.
Erection begins at each spring line and progresses toward the crown. As arch pieces are erected,
additional stay cables are added to provide temporary support until the closure piece is in place
and the arches are self supporting. Arch pieces can be erected into place by cable and winch
systems attached to the leading end of the previous segment or by cranes located beneath the
bridge, if feasible. Using temporary stay towers is the most common erection method since arch
bridges are predominantly used to span deep canyons (true arch) or wide bodies of water (tied
arch).
11
Figure 15 Photograph of an arch erection using stay towers and cables
Another method of true arch erection that has been employed uses the canyon walls to support
the arch as a cantilever. With this method the arch is erected from each spring line
simultaneously towards the crown. As each arch member is erected it is "tied" back into the
canyon wall using a temporary connection. The tie member can be part of the permanent
structure (as shown below) or a temporary member/cable used solely for erection support. Once
the arch is closed and erection complete, the temporary tie members/connections are removed
and the arch is self supporting.
Figure 16 Photograph of an arch bridge erection using the floor system as an erection tie
to the canyon wall
Cable stayed bridge erection is performed utilizing a permanent tower to support all loads during
the assembly of the superstructure. After the majority of the tower construction is completed, the
first superstructure segments are erected directly at the tower using temporary supports attached
to the tower’s cross strut. After the first segment is stabilized, additional members are
cantilevered from each end in an alternating fashion until the location of the first permanent
cable stay is passed. At this point, the first set of stay cables is installed. Alternating cantilever
12
erection of segments continues along with stay cable installation until the end pier or mid-span is
reached. This procedure is repeated for each tower of the bridge. When two adjacent cantilever
ends are completed, the closure pieces are installed and the erection is finished. This erection
method is common, since all of the erection forces are resisted by permanent bridge components.
Only simple beam and winch erection equipment attached to the cantilever ends or deck mounted
derricks are necessary to lift the members into place.
Figure 17 Photograph showing cantilever cable stayed bridge erection using deck mounted
derricks
Suspension bridge erection is performed by using the permanent bridge members for support of
the partially completed superstructure. After the main towers are constructed and the main
suspension cables are strung, the superstructure erection begins at the tower.
One method of erecting the deck members follows the cantilever scheme where members are
erected directly at the tower and attached using temporary supports. After the first members are
stabilized, additional pieces are cantilevered from each end in an alternating fashion until the
location of the first permanent suspender is passed. At this point, the first set of suspenders is
installed to connect the cantilevers to the main cable. Alternating cantilever erection of members
continues along with suspender installation until the end pier or mid-span is reached. This
procedure is repeated for each tower of the bridge. In addition to erecting the pieces as balanced
cantilevers at each individual tower, the erection of the pieces at each tower along the length of
the bridge must be considered relative to each other to maintain the shape of the main suspension
cables. This will prevent large, unbalanced horizontal forces in the main suspension cables at the
towers.
A second method of erecting the deck members is to load the main cables in a manner to try and
mimic the final geometry of the cable. With this method individual pieces are supported from the
main cables at specific locations prior to connecting any of the pieces to each other. After a
sufficient number of pieces are suspended from the main cables, the pieces are connected to each
13
other and the remaining pieces erected. This method of erection is used in extremely long span
suspension bridges to minimize the jacking forces required to erect the closure pieces.
Figure 18 Photograph of a suspension bridge erection using cable travelers
For both methods, only simple beam and winch erection equipment, typically attached to the
main cables (cable travelers), are necessary to lift the members into place.
Since cable-supported structures are typically used for extremely long spans over rivers and open
water, delivery of members for erection is accomplished using barges. The cable travelers are
used to lift roadway sub assemblies into place directly off of barges.
2.3 Site Considerations
Often the most challenging obstacle in the design of a bridge is a result of the geographical
location of the structure. Bridge construction often occurs in heavily populated urban areas
where land use is high or scenic rural areas where environmental issues are of paramount
importance. Since construction in these areas can dramatically affect the final cost of the bridge,
careful consideration must be given to providing adequate access for the contractor and the
equipment necessary to perform the work. In the following paragraphs the issues of contractor
access and equipment areas are discussed.
Contractor access into and out of the construction site can have a dramatic effect on the overall
cost of the project if not properly addressed in the design process. For instance, if a new low-
level bridge is to be constructed over a non-navigable waterway 400 feet in width, the structure
type most often recommended (based on material cost) would be a 3-span continuous girder
bridge having two piers in the water. If environmental constraints due to the sensitive nature of
the waterway allow the contractor access to the pier foundations for only one month out of the
entire year, a more economical solution may be to completely span the waterway with a simple
span truss, thus allowing the contractor unrestricted access to the construction site. Even though
14
the material costs would be greater, the construction time would be greatly reduced and the
contractor’s productivity increased, ultimately reducing his overall cost. For additional
discussion on bridge layout and cost, see the Steel Bridge Design Handbook module titled
Stringer Bridges – Making the Right Choices.
Another scenario could be the replacement of an existing bridge that spans commuter rail lines in
a congested urban area. Again, due to required rail clearances the recommended solution would
be to construct a new multi-span girder bridge based on least material cost. If the commuter rail
line imposes restrictions on the construction times with extreme penalties associated with
violating track outage criteria, the contractor may need to include a large contingency to cover
the potential fines. A more economical solution may be to design a single span structure to limit
the construction work over and adjacent to the rail lines. The entire simple span structure could
be completely erected on the adjacent roadway and lifted into position during a brief off-peak
closure of the rail line. Again, the construction time would be greatly reduced, the contractor’s
risk would decrease, his productivity would increase, and consequently his overall cost would go
down.
Another important consideration deals with equipment and storage areas. If the construction site
has limited open areas within its boundaries, the contractor may need to mobilize the same
equipment numerous times to and from the site as construction progresses. These multiple
mobilization costs could make a longer span or more complex structure more economical than a
structure that is the most economical based on material cost alone.
During the design process the bridge designer must be cognizant of the issues that cause
contractors to increase their cost without adding value. If the bridge designer properly addresses
these potential constraints and adjusts his design to minimize or eliminate their impact, the most
cost effective bridge solution will be realized.
15
3.0 DESIGN CONSIDERATIONS
Various factors must be evaluated by the bridge designer to ensure the constructability of the
bridge. In the following paragraphs, basic design topics dealing with construction loads, deck
placement, stability, and member fit-up are discussed as they relate to construction of the bridge.
In addition, a brief overview of erection engineering and erection drawings is provided. All
assumptions made during the design relating to construction loads and construction methods
should be documented on the drawings for the contractor to use in developing his/her detailed
construction plans.
3.1 Construction Loads
The AASHTO LRFD Bridge Design Specifications, 7th
Edition, (referred to herein as the
AASHTO LRFD (7th
Edition, 2014)) (1) do not completely address the loadings that should be
considered during construction of steel bridges. Requirements for deck placement sequences and
overhang deck brackets are supplied, but other conditions are not. Some general statements are
provided stating that investigations should be made for handling, transportation and erection, but
no quantification is given. Some guidance is provided for the application of load factors for dead
loads, dynamic effects (impact) and wind, but specific load combinations are not explicitly
defined.
Construction loads that would effect the component forces in the bridge during construction
include deck formwork, overhang formwork and brackets, screed rail loads, walkways, handrails,
construction live loads, screed live loads, wind loads on the structure and equipment, and any
other anticipated loads specific to the particular bridge being designed. In addition, permanent
loads, such as the weight of the uncured deck concrete, need to be considered in combination
with the construction loads.
Construction equipment loads can be estimated based on bridge construction methods typically
used by contractors in the region. Construction equipment could consist of power screeds used
for concrete deck placement, work bridges used to support personnel performing deck placement
activities, bridge-mounted erection systems (used more often in large, specialized bridge
construction), bridge-supported concrete delivery systems, etc. The anticipated equipment loads
should be determined for each individual bridge based on bridge type, member size, site location,
etc. For example, a typical I-girder bridge would usually be subjected to only screed and work
bridge loads.
Wind loads during construction can be one of the most critical aspects to evaluate for
conventional girder bridges, since the concrete deck is typically used to transmit these force
effects back to the support locations. Until the deck is placed and cured, the individual girders
must be capable of transmitting these loads back to the supports through lateral flange bending.
If the girders are not capable of resisting the wind loads on their own, a permanent lateral bracing
system or another temporary system designed to resist these loads must be provided. Wind loads
on the uncompleted steel superstructure should be considered by the designer during design, as
well as the contractor’s engineer prior to construction.
16
The magnitude of the wind loads must be evaluated based on site specific data. The specific data
needed to determine appropriate wind loads include the friction velocity, friction length and wind
velocity based on the bridge location and the height of the structure (see Article 3.8.1 of the
AASHTO LRFD (7th
Edition, 2014)). If this data cannot be obtained, the design wind velocity
could be estimated from bridge crossing information. For example, if a typical girder bridge is
being designed over a stream, a design wind velocity of 70 mph may be appropriate for use. On
the other hand, if the same bridge is being designed over an active freeway, a design wind
velocity of 80 mph may be more appropriate.
Once the design wind velocity is determined, the design wind pressure is calculated using
equation (3.8.1.2.1-1) of the AASHTO LRFD (7th
Edition, 2014).
PD=PB VDZ
2
/10,000
Some owners give the minimum design wind pressure to use in the design. One state mandates
the use of 25 psf as a standard and 30 psf for bridges over traffic. Since these values relate to
maximum design wind velocities during construction (after erection), lower values should be
used to evaluate member stress and stability during the erection of the bridge. Reasonable
estimates must be made to correspond with the probable wind velocity during the short erection
timeframe. Typical wind velocity ranges for setting initial girders are 25-50 mph for highway
bridges. Additional information on wind loads can be found in ASCE/SEI 7-05 (2) and
AASHTO’s Guide Design Specifications for Bridge Temporary Works (3).
As necessary during design, temporary and permanent attachments to the bridge should be
evaluated and included in the dead load effects. Examples of various types of temporary
attachments include temporary scaffolding suspended from the bridge, temporary safety lines
and supports, temporary shielding to protect traffic below the bridge, overhang brackets,
temporary hand rails, screed rails, and form work. While it may be difficult to determine the
exact equipment and temporary attachments a contractor may use to construct a bridge, the
designer can estimate these loads based on past practice and experience. Examples of permanent
attachments include inspection walkways and handrails, utilities, etc.
Site considerations that could be evaluated depending on geographic location, in addition to the
wind loads previously described, relate to the effects of ice and snow during construction.
The operational importance of the bridge as it relates to construction should be considered based
on location. For example, if the bridge site is located in a highly populated urban area where
pedestrian and vehicular traffic on or under the bridge will be at risk due to construction
activities, a higher level of safety may be necessary to minimize the potential for injury. The
steps used to account for this in the design could include a blanket increase in the importance
factor (I, see the Steel Bridge Design Handbook module titled Loads and Load Combinations
for additional discussion) that will result in a higher level of safety through the use of greater
loads, or localized provisions incorporated into the design of protection systems adjacent to the
areas of concern. Good engineering judgment must to be used to determine the site-specific
effects associated with each bridge and the appropriate level of design to be performed.
17
Construction live loads should also be considered in evaluating the adequacy of the bridge. This
loading is intended to cover all miscellaneous equipment and personnel that cannot easily be
quantified at the time of design. Often a blanket allowance of 10 psf is used to account for these
loadings.
Load combinations must be evaluated to capture all critical conditions during construction of the
bridge after a thorough determination of all anticipated construction loads is complete. Article
3.4.2 of the AASHTO LRFD (7th
Edition, 2014) calls for the use of Strength Load Combinations
I and III during construction. In evaluating these combinations, engineering judgment must be
exercised to ensure that the maximum feasible forces are being evaluated. Some sample load
combinations are:
γp(DC+DW) + 1.5(CEL+CLL) for STR I
where:
γp is the load factor for dead load 0.9 min and 1.25 max (see the Steel Bridge Design Handbook
module titled Loads and Load Combinations for a detailed explanation).
DC includes all dead load associated with the bridge members and all form work, attachments,
deck, etc.
DW includes all utilities.
CEL includes all construction equipment loads such as screeds, etc.
CLL is the construction live load.
γp(DC+DW) + 1.25 (CEL) + 1.4(WS) for STR III
Where:
WS is the wind on the exposed height of the structure including all forming.
Article 3.4.2 of the AASHTO LRFD (7th
Edition, 2014) also specifies an additional strength limit
state load combination for the investigation of loads applied to fully erected steelwork. A sample
load combination for this additional case is:
1.4(DC) + 1.4(CEL+CLL)
If there are varying stages of structural configuration associated with the design, additional
construction load combinations should be evaluated to ensure that all pertinent conditions are
checked. For example, if the girders behave as simply supported for self weight and continuous
for all other dead and construction loads, then both conditions should be evaluated using the
appropriate loadings and capacities.
18
3.2 Deck Placement
Typically, the most critical stage in the construction of girder bridges occurs during placement of
the concrete deck, since the bridge is being loaded with the majority of its dead load while only
discrete bracing stabilizes the most vulnerable top compression flange components. The
following paragraphs describe typical interior deck forming, standard overhang bracket systems,
deck finishing machines (screeds), deck pouring sequences, and considerations for half-width
construction.
Deck forming between interior girders typically consists of corrugated metal stay-in-place (SIP)
members attached to the top flange of the girders. The SIP forms are supported by angles
attached to the edges of the girders’ top flange using a strapping detail spanning the flange (in
tension and stress reversal areas) or by a direct weld to the flange (in compression areas). The
SIP forms are usually attached to the angles using self tapping screws. Typical SIP forms can be
used with girder spacings up to approximately 14 feet. SIP forms are available in a wide variety
of types and sizes to meet the individual needs associated with each bridge. There are numerous
suppliers of the products, making them widely available for use. For additional information
about SIP forms, see the Steel Deck Institute website at www.sdi.org.
Figure 19 Photograph showing SIP forms attached to a top flange in a tension region
As an alternative to SIP forms, traditional removable formwork can be utilized between the
flanges of the interior girders. Removable formwork usually consists of plywood attached to
timber supports or prefabricated metal forms, either of which would be held in position by
blocking down to the bottom flanges or hangers attached to the top flanges. Although this
method of forming is more labor-intensive, some owners require inspection access to the
underside of the concrete deck or are concerned about consolidation of the concrete in the SIP
form valleys. To mitigate this concern some owners permit the placement of Styrofoam strips in
the valleys. This has an added benefit since it lightens the deck dead load.
Overhang brackets are typically used to support deck forms in the area beyond the edges of the
fascia girders. Standard overhang brackets consist of three steel members connected in a
triangular shape that are suspended from the top flange and supported by the girder web. The
brackets are normally spaced on three to four foot centers along the length of the bridge and
support traditional wood forming. In addition to supporting the form work for the deck overhang,
the brackets usually carry an access walkway and screed rail to allow for deck placement
machinery and personnel. The overhang brackets can create significant lateral flange bending
19
forces in the top and bottom flanges of the fascia girder due to the eccentricity of the loads and
the hanger connection to the flange. Since these lateral flange bending loads can often control the
design of the top flange, the designer must calculate the magnitude of these loads and verify the
capacity of the girder. The AASHTO LRFD (7th
Edition, 2014) provides a method for
determining the lateral flange bending moments in the commentary of Article 6.10.3.4. If the
web depth is such that the bottom of the overhang bracket would likely rest against the web a
significant distance above the flange to web intersection, constructability stiffeners are often
shown on the plans for the fascia girders to resist the bracket loading. The contractor could
choose to thicken the web to avoid the additional stiffeners or perform a refined analysis to
verify the effects on the web, but discussion with the engineer is essential. In addition to the
lateral flange bending effect, the designer must also include all vertical loads associated with the
overhang bracket into the capacity checks for the exterior girders. Detailed information on the
required capacity checks can be found in the AASHTO LRFD (7th
Edition, 2014). For additional
information on overhang brackets and bridge deck formwork, see the AASHTO Construction
Handbook for Bridge Temporary Works (4).
Figure 20 Photograph of a typical overhang bracket
20
Figure 21 Sketch showing a typical overhang bracket and screed application
Deck finishing machine (screed) loads can also have a dramatic effect in the design of the fascia
girders, since the loads are typically supported by the overhang brackets as previously described.
Therefore, an estimate of the machine loads should be performed and included in the capacity
evaluations. A good estimate of the machinery weight can be made by simply selecting an
appropriately sized piece of equipment based on the width of the bridge and the placement
sequence developed for the design. With this information, actual weights can be readily obtained
from local equipment suppliers in the region of the bridge.
A deck placement sequence must be developed by the designer to ensure that the girders are
capable of supporting the applied loads during each stage of placement. In Article 6.10.3.4 of the
AASHTO LRFD (7th
Edition, 2014) and its commentary, explicit direction is given regarding the
type of calculations that must developed. An example of a typical deck placement sequence for a
two-span continuous girder bridge would be as follows: First, place the concrete in the positive
moment portions of the spans leaving a block-out at each end for installation of the expansion
devices (placement 1). Note that all of the concrete in placement 1 must remain plastic until the
pour is complete. Allow the concrete to cure for a specified time or until a certain strength is
obtained (this requirement is usually established by the owner). Second, place the concrete in the
negative moment region over the pier up to the concrete previously placed during Stage 1
(placement 2). Finally, install the expansion devices at each abutment and place concrete in the
21
block-outs (placement 3), thus finishing the concrete deck placement. Construction of the
protective concrete barriers finishes the deck.
Figure 22 Sketch showing a sample deck placement sequence
Half-width staged construction is typical for bridge replacement or rehabilitation projects where
traffic must be maintained on the bridge throughout all construction stages. A simple example
would be the replacement of an existing bridge that carries two 12-foot wide travel lanes, two
12-foot wide outside shoulders, and a single turning lane. The ideal condition would be to
maintain a single lane of traffic in each direction on half of the existing bridge while the other
half is removed and replaced. Once this first stage of construction is complete, traffic would be
transferred onto the new bridge while the remaining portion of the existing bridge is removed
and replaced. The difficulty associated with this procedure lies in the connection of the first half
of the new structure to the second half; particularly how to place the concrete deck in the
connecting region. One method of performing this work is to build most of the second half of the
bridge independently from the first by omitting the cross-frames connecting the two. In doing
this, the second half of the bridge would be erected and the deck placed up to the centerline of
the girder adjacent to the half of the bridge carrying traffic. At this point the cross-frames
connecting the two independent structures into one would be installed, and the closure deck
placement made. Many times the cross-frames connections are prepared only with shop drilled
holes for connection to first half of the bridge. Once the cross-frames are erected and connected
to the first half of the bridge, the bolt holes for the connection to the second half of the bridge are
field drilled. Typically the holes in the cross-frame members are used as a drill template to field
drill the holes in the stiffener plate. Performing the work in this fashion allows for proper fit-up
of the steel girders and reduces the amount of “locked-in” forces carried by the cross-frames
connecting across construction stages.
22
Figure 23 Sketches showing a half-width construction staging sequence
3.3 Stability
Stability of the girders during erection and subsequent construction stages is of primary
importance to the designer since it is typically the driving factor in the selection of cross-frame
spacings, top flange width and lateral bracing requirements. The following paragraphs discuss
stability of girders and how it relates to cross-frames, lateral bracing, temporary bracing, uplift at
supports, bearing selection, and construction staging.
Cross-frames are typically considered secondary bracing members in girder bridges (with the
exception of highly skewed and horizontally curved bridges) where the primary function is to
transmit wind forces from the bottom flange into the concrete deck in the completed bridge and
to provide bracing points for the girder flanges during construction (and in the final configuration
for bottom flanges in the negative moment regions). The AASHTO LRFD (7th
Edition, 2014)
eliminated the limits on maximum spacing for cross-frames found in previous specifications.
Instead, it is up to the designer to establish the spacing and properly design the girders for the
forces accordingly. By removing the arbitrary 25 foot maximum spacing requirement from the
code, it was not the intent of the code writers to have designers place cross-frames at large
distances. Instead, the spacing requirement was removed to allow the designer flexibility in
establishing reasonable equal spacing for the cross-frames (on the order of 20-30 feet) without
the arbitrary maximum that often results in an additional line of cross-frames simply to comply
with the code. Cross-frame spacing is established to avoid flange buckling and limit the amount
of lateral flange bending based on the proportions of the girder and geometric layout of the
bridge.
The configuration of the individual members that make up a cross-frame can take on various
shapes depending on the ratio of the girder spacing to depth. Typical cross-frame configurations
are K-frames, X-frames, solid bent plates, rolled sections, plate girders, inverted K-frames, and
X-frames with horizontal struts. For a more detailed explanation of cross-frames and their
practical uses, see the Steel Bridge Design Handbook module titled Stringer Bridges – Making
the Right Choices.
Once a cross-frame spacing and configuration are determined, the girder’s flange lateral bending
stresses must be checked for construction loads and permanent wind loads to determine if the
23
results are acceptable. If the lateral effects control the design of the flanges, the cross-frame
spacing should probably be reduced to allow for a balance between the vertical and lateral
bending effects. One rule of thumb commonly used is to limit the lateral flange bending stresses
to around 0.5Fy.
Lateral bracing is typically used in longer span structures where the lateral flange bending
stresses and/or lateral deflection cannot be effectively controlled by flange width and cross-frame
spacing. The need for lateral bracing may often be dictated by the client. One owner requires
designs that do not use lateral bracing for spans under 200 feet, allows it to be investigated for
spans between 200 and 300 feet, and requires it on spans over 300 feet. The bracing usually
consists of WT sections and is normally connected directly to either girder flange. The lateral
bracing creates a truss system between adjacent girders with the girder flanges acting as the
chords, and the bracing members and cross-frames acting as the diagonals and "verticals",
respectively. The optimum location (top or bottom flange) and configuration of the bracing has
been debated for years and no explicit conclusions have been determined. The only definitive
observation that can be made is that lateral bracing dramatically increases the lateral stiffness of
the bridge regardless of location and configuration.
Often the largest drawback in the use of lateral bracing is the need to design the bracing
connections for vertical girder bending effects. Frequently, the designer will utilize the bracing
for final wind and construction effects and allow the connections to “slip” for vertical capacity
determination. This is accomplished through the use of oversized holes in the slip critical
connection design. For additional information on lateral bracing considerations, see the Steel
Bridge Design Handbook module titled Stringer Bridges – Making the Right Choices.
Temporary bracing is sometimes utilized to provide stability during the construction of the
bridge. For example, many owners permit the use of temporary external cross-frames between
boxes during the construction of steel tub girder bridges. The advantages of using temporary
cross-frames are that: (1) the aesthetics of the bridge, when viewed from below, are maximized
with the completed bridge having clean, unobstructed lines; (2) the details of the members are
simplified, since they do not need to meet long-term fatigue and maintenance criteria; and (3) the
flexibility given to the contractor regarding erection methods is also maximized. There are also
some drawbacks to the use of temporary cross-frames: (1) the members can be difficult to
remove, since crane access is limited due to the concrete deck being in place; (2) the contractor
must remobilize equipment and personnel to remove the members long after their role on the
project is complete; and (3) if the bridge is redecked in the future, the temporary cross-frames
must be reinstalled. The advantages and disadvantages of using temporary bracing in a situation
such as this must be thoroughly investigated before the decision is made to incorporate its use.
Another situation where temporary bracing could be used is in the erection of long span I-girder
bridges. An example would be the use of a temporary stiffening truss attached to the top flange
of a single I-girder to stabilize it until a second line of girders is erected and attached with cross-
frames to form a stable system. In this instance, the use of the temporary truss allows the
contractor flexibility in the use of the erection equipment to perform girder picks without the
need for addition hold cranes. One drawback to this scenario is the cost associated with
24
fabricating and assembling the truss. Again, the benefit of needing fewer cranes needs to be
weighed against the cost of the additional material.
Figure 24 Photograph showing a temporary top flange stiffening truss
Uplift at support locations can lead to design issues during the construction stages as well as in
the final configuration of the bridge. Typical girder bridges are proportioned to ensure that uplift
does not occur at the support locations in the final configuration. Uplift is usually only a concern
when dealing with bridges that contain sharply skewed supports, tight horizontal curvature, or
incorporate complex bridge types. If a bridge configuration results in uplift, a traditional design
solution is to attach the bridge to the substructure unit using a tension link. Although this
approach has been used successfully for decades, it usually incorporates a fatigue-sensitive detail
into the bridge. As a result, owners now typically require the designer to resist uplift effects
through the use of additional permanent dead load. This can be successfully accomplished by
incorporating full-depth concrete diaphragms over the support location or, if necessary, by
placing permanent counterweights (usually a large volume of concrete) at the support in
question. During the construction of the bridge, uplift can occur at various stages of the erection
process depending on the methods being used. In these situations, the uplift can be resisted
through the use of temporary counterweights positioned over the support or temporary cables
anchored into the foundations. Temporary counterweights are commonly used when bridges are
erected using the “cantilever method” as previously described.
Bearing selection is normally based on the final bridge configuration and the needs associated
with intended long term performance of the bridge. Quite often the result is a single line of fixed
bearings in the bridge with the remainder of the bearings being either free (unrestrained in all
directions) or guided (normally restrained in the transverse direction). During erection of the
bridge, such an arrangement can create complications since the permanent support locations are
normally used to provide stability. Therefore, the permanent bearings are often augmented to
provide the necessary fixity during erection. The type of modification depends on the specific
permanent bearing type used, the type of substructure, the bridge type, the size of the bridge, etc.
Many times a typical girder bridge is outfitted with blocking around the bearing to provide the
necessary support or, if necessary, a system of temporary cables is used to anchor the girder to
the substructure unit. To ensure proper fit-up, a survey of the horizontal and vertical alignment of
the bearings should be made prior to erection.
25
Construction staging must be evaluated by the designer to ensure stability of the bridge during all
phases of the initial deck placement sequence, the conditions anticipated for the proposed future
redecking scheme, and every stage associated with half-width construction. For example, some
owners require five girder lines when four would suffice, specifically to accommodate future
redecking schemes. As previously mentioned, Article 6.10.3 of the AASHTO LRFD (7th
Edition,
2014) describes the explicit method of performing these design checks.
3.4 Fit-up
Fit-up of the steel bridge members is a critical component in the overall success of a project. The
designer must be able to clearly convey to the fabricator and erector the intent of the design as it
relates to bolting and pinning, camber, bolted field splices, and differential deflections. The use
of oversize holes to facilitate fit-up is not recommended. In the following paragraphs some
important aspects relating to these topics are discussed.
Bolting and pinning of connections requires that proper procedures be followed. NCHRP
Synthesis 345, "Steel Bridge Erection Practices" recommends that the procedures might contain
the following:
 Initial pinning and bolting should consist of filling the holes in the connections with 25%
pins and 25% bolts and the bolts at least snug tightened before releasing the crane and
having the adjacent girders erected.
 After the cranes are released, the balance of the holes in the connections should be filled
with snug-tight bolts.
 Final tightening of the bolts to installation tension should not start until a continuous line
or at least adjacent spans have been erected and the vertical and horizontal alignment has
been verified.
 Pins should not be removed from the connection until after the previous step has been
accomplished.
These recommendations are for typical bridges, for large or complex structures the number of
bolts and pins required need to be determined by design for each connection.
Cambers are values prescribed by the bridge type, member size, and geometry for each particular
structure. The cambers are derived by the designer to ensure that the bridge achieves its final
design geometry after all dead loads are applied. A more detailed explanation of cambers for
girder bridges is provided in the Steel Bridge Design Handbook module titled Stringer Bridges –
Making the Right Choices. For other larger bridge types the cambers can have a dramatic effect
on the overall behavior of the bridge. For example, arch bridges must be properly cambered to
ensure that the axis of the arch closely conforms to the dead load thrust line, since this is a
standard assumption in the design of the arch members. If the cambers are incorrect, significant
vertical bending will be generated in the arch rib due to the dead load, subjecting the bridge to
loads that were not accounted for in the design. See Article 6.7.2 of the AASHTO LRFD (7th
Edition, 2014) for camber requirements.
26
Bolted field splices on girder bridges are located to separate the individual girders into
manageable pieces in terms of both size and weight. See the Steel Bridge Design Handbook
module titled Stringer Bridges – Making the Right Choices for a general discussion regarding
splice locations and hauling considerations. The designer should also be cognizant of member
piece weights, since other concerns such as site access could limit the maximum member size. If
member size is limited for concerns other than hauling, additional field splice locations may need
to be designed and incorporated into the design drawings. It should be noted in the design
drawings that field splice locations can be eliminated by the contractor. This will allow the
contractor to tailor the field piece size and number of splice locations to his/her erection scheme,
thus minimizing the cost of the bridge.
Differential defections between adjacent girder lines can result from severe skew, horizontal
curvature, staged construction, or extreme load imbalance. Many of the issues associated with
differential deflections result from lack of communication among the designer, fabricator and
erector.
One way to describe the effect of differential deflection is through the example of a severely
skewed bridge: A two-span multi-girder bridge has a skew angle of 70 degrees between the
center line of supports and a line normal to the bridge centerline. With a skew angle this severe,
the intermediate cross-frames would be detailed perpendicular to the girder webs. Therefore, one
end of a particular cross-frame may be located at the 0.4L point of Girder 1 and the other end at
the 0.5L point of Girder 2, where L is the span length. A comparison of the dead load deflections
at these two locations would show that Girder 2 deflects much more than Girder 1. If the cross-
frames are not properly detailed to account for the differential deflection between Girders 1 and
2, the erector may not be able to properly install the member.
If the girders’ webs are detailed to be vertical under total dead load, then the girders must be
erected with a predetermined twist (out-of-plumbness) such that when the erection is complete
and all dead loads are applied (deck, barriers, etc) the differential deflection between cross-frame
ends will "roll" the girder into its final vertical position. For this condition, the designer must
clearly state on the drawings that the intent is to detail and fabricate the members such that the
webs will be vertical in their total dead load position, and the erector needs to realize that the
girders need to be erected with the predetermined twist.
For curved girders the key element in dealing with differential deflection is to provide consistent
detailing between all components in the bridge. In the Third Edition of the AASHTO LRFD
Bridge Construction Specifications (5) Article 11.8.3.7.1 states, “Unless otherwise specified in
the Contractor’s construction plan, fit-up shall be assumed to be performed under the no-load
condition.” Therefore, unless the design drawings explicitly define a different condition, the
fabricator and erector may construct the bridge as though it is in the no-load condition. Good
engineering judgment must be used in determining the appropriate condition to specify for each
bridge.
Bridges that are both curved and skewed require careful consideration by the designer with
regard to the choice of the detailing method. For additional information regarding detailing of
skewed, curved, and curved and skewed steel girder bridges, the reader should review the paper
published by NSBA, titled Skewed and Curved Steel I-girder Bridge Fit (6). This paper provides
27
a concise summary of detailing choices for these bridge types, and provides recommendations
for the choice of detailing method (fit method) based on the geometric parameters of a bridge.
For additional information on differential deflections see Section 1.6 of the Guidelines for
Design for Constructability document G12.1-2003 by the AASHTO/NSBA Steel Bridge
Collaboration (7). See the Collaboration website at www.aisc.org/contentNSBA.aspx?id=20074
for access to this document.
3.5 Erection Engineering and Drawings
After award of the erection contract, the erector must develop a clear detailed procedure for
assembling the structure. Based on a recent survey of bridge owners, very few require the erector
to develop a detailed erection procedure. But such a formal procedure is a critical step in the
construction of the bridge and should be mandated. If the owner does not have standard
requirements, the designer should develop a contract provision requiring the erector to develop a
plan for each specific project. The procedure must include detailed drawings and written
descriptions for each step necessary to complete the erection. In addition, complete calculations
performed by a registered professional engineer must be developed for each stage of the process
to ensure that the permanent bridge members are not overstressed and stability is maintained.
Provisions for erection procedures and erection drawings can be found in the Second Edition of
the AASHTO LRFD Bridge Construction Specifications (5). In addition, the AASHTO/NSBA
Steel Bridge Collaboration Task Group 10 has developed a document titled Steel Bridge Erection
Guide Specification (8) that covers erection calculations and drawings in greater detail. The latest
information can be found on the Collaboration website at
www.aisc.org/contentNSBA.aspx?id=20074.
28
4.0 REFERENCES
1. AASHTO, (2014). AASHTO LRFD Bridge Design Specifications; 7th
Edition,
AASHTO, Washington D.C.
2. ASCE 7-05, (2006); American Society of Civil Engineers (ASCE 7-05), Minimum
Design Loads for Buildings and Other Structures, ASCE Reston, Virginia.
3. AASHTO, (1995). AASHTO Guide Design Specification for Bridge Temporary Works,
AASHTO, Washington D.C.
4. AASHTO, (1995). AASHTO Construction Handbook for Bridge Temporary Works,
AASHTO, Washington D.C.
5. AASHTO, (2010). AASHTO LRFD Bridge Construction Specifications, Third Edition,
including 2015 Interims, AASHTO, Washington D.C.
6. NSBA (2014). Skewed and Curved Steel I-Girder Bridge Fit, Fit Task Force, NSBA
Technical Subcommittee, NSBA, Chicago, Illinois. August 20, 2014.
7. AASHTO/NSBA, (2003). G12.1-2003: Guidelines for Design for Constructibility,
AASHTO/NSBA Steel Bridge Collaboration.
8. AASHTO/NSBA, (2014). S10.1-2014: Steel Bridge Erection Guide Specification,
AASHTO/NSBA Steel Bridge Collaboration.

More Related Content

Similar to Steel Bridge Design Handbook: Design for Constructibility

FHWA Steel Bridge Design Handbook Volume 14
FHWA Steel Bridge Design Handbook Volume 14 FHWA Steel Bridge Design Handbook Volume 14
FHWA Steel Bridge Design Handbook Volume 14 Walid Alaywan
 
AASHTO Steel Bridge Design Handbook Volume 06 Stringer Bridges
AASHTO Steel Bridge Design Handbook Volume 06 Stringer BridgesAASHTO Steel Bridge Design Handbook Volume 06 Stringer Bridges
AASHTO Steel Bridge Design Handbook Volume 06 Stringer BridgesWalid Alaywan
 
FHWA Steel Bridge Design Handbook Volume 16
FHWA Steel Bridge Design Handbook Volume 16 FHWA Steel Bridge Design Handbook Volume 16
FHWA Steel Bridge Design Handbook Volume 16 Walid Alaywan
 
AASHTO Steel Bridge Design Handbook Volume 05
AASHTO Steel Bridge Design Handbook Volume 05 AASHTO Steel Bridge Design Handbook Volume 05
AASHTO Steel Bridge Design Handbook Volume 05 Walid Alaywan
 
FHWA Steel Bridge Design Handbook Volume 17
FHWA Steel Bridge Design Handbook Volume 17FHWA Steel Bridge Design Handbook Volume 17
FHWA Steel Bridge Design Handbook Volume 17Walid Alaywan
 
AASHTO Steel Bridge Design Handbook Volume 09
AASHTO Steel Bridge Design Handbook Volume 09 AASHTO Steel Bridge Design Handbook Volume 09
AASHTO Steel Bridge Design Handbook Volume 09 Walid Alaywan
 
AASHTO Steel Bridge Design Handbook Volume 04
AASHTO Steel Bridge Design Handbook Volume 04AASHTO Steel Bridge Design Handbook Volume 04
AASHTO Steel Bridge Design Handbook Volume 04Walid Alaywan
 
AASHTO Steel Bridge Design Handbook Volume 01
AASHTO Steel Bridge Design Handbook Volume 01 AASHTO Steel Bridge Design Handbook Volume 01
AASHTO Steel Bridge Design Handbook Volume 01 Walid Alaywan
 
AASHTO Steel Bridge Design Handbook Volume 12
AASHTO Steel Bridge Design Handbook Volume 12 AASHTO Steel Bridge Design Handbook Volume 12
AASHTO Steel Bridge Design Handbook Volume 12 Walid Alaywan
 
FHWA Steel Bridge Design Handbook Volume 19
FHWA Steel Bridge Design Handbook Volume 19 FHWA Steel Bridge Design Handbook Volume 19
FHWA Steel Bridge Design Handbook Volume 19 Walid Alaywan
 
FHWA Steel Bridge Design Handbook Volume18
FHWA Steel Bridge Design Handbook Volume18 FHWA Steel Bridge Design Handbook Volume18
FHWA Steel Bridge Design Handbook Volume18 Walid Alaywan
 
AASHTO Steel Bridge Design Handbook Volume 03
AASHTO Steel Bridge Design Handbook Volume 03 AASHTO Steel Bridge Design Handbook Volume 03
AASHTO Steel Bridge Design Handbook Volume 03 Walid Alaywan
 
AASHTO Steel Bridge Design Handbook Volume 07
AASHTO Steel Bridge Design Handbook Volume 07 AASHTO Steel Bridge Design Handbook Volume 07
AASHTO Steel Bridge Design Handbook Volume 07 Walid Alaywan
 
FHWA Steel Bridge Design Handbook Volume 15
FHWA Steel Bridge Design Handbook Volume 15FHWA Steel Bridge Design Handbook Volume 15
FHWA Steel Bridge Design Handbook Volume 15Walid Alaywan
 
Prestressed Concrete Bridge Design Example.pdf
Prestressed Concrete Bridge Design Example.pdfPrestressed Concrete Bridge Design Example.pdf
Prestressed Concrete Bridge Design Example.pdfSaminSiraj1
 
AISC - Steel Construction Manual-American Institute of Steel Construction (20...
AISC - Steel Construction Manual-American Institute of Steel Construction (20...AISC - Steel Construction Manual-American Institute of Steel Construction (20...
AISC - Steel Construction Manual-American Institute of Steel Construction (20...AlejandraGalvis18
 
STEEL CONSTRUCTION 14TH MANUAL AISC.pdf
STEEL CONSTRUCTION 14TH MANUAL AISC.pdfSTEEL CONSTRUCTION 14TH MANUAL AISC.pdf
STEEL CONSTRUCTION 14TH MANUAL AISC.pdfJessaOpeniano1
 
Steel_construction_manual_fourteenth_edi.pdf
Steel_construction_manual_fourteenth_edi.pdfSteel_construction_manual_fourteenth_edi.pdf
Steel_construction_manual_fourteenth_edi.pdfLuisGoytizolo2
 
LRFD Design Example -Steel Girder Bridge (US Unit).pdf
LRFD Design Example -Steel Girder Bridge (US Unit).pdfLRFD Design Example -Steel Girder Bridge (US Unit).pdf
LRFD Design Example -Steel Girder Bridge (US Unit).pdfSaminSiraj1
 
Structural manual (part 1)
Structural manual (part 1)Structural manual (part 1)
Structural manual (part 1)Adrian Frantescu
 

Similar to Steel Bridge Design Handbook: Design for Constructibility (20)

FHWA Steel Bridge Design Handbook Volume 14
FHWA Steel Bridge Design Handbook Volume 14 FHWA Steel Bridge Design Handbook Volume 14
FHWA Steel Bridge Design Handbook Volume 14
 
AASHTO Steel Bridge Design Handbook Volume 06 Stringer Bridges
AASHTO Steel Bridge Design Handbook Volume 06 Stringer BridgesAASHTO Steel Bridge Design Handbook Volume 06 Stringer Bridges
AASHTO Steel Bridge Design Handbook Volume 06 Stringer Bridges
 
FHWA Steel Bridge Design Handbook Volume 16
FHWA Steel Bridge Design Handbook Volume 16 FHWA Steel Bridge Design Handbook Volume 16
FHWA Steel Bridge Design Handbook Volume 16
 
AASHTO Steel Bridge Design Handbook Volume 05
AASHTO Steel Bridge Design Handbook Volume 05 AASHTO Steel Bridge Design Handbook Volume 05
AASHTO Steel Bridge Design Handbook Volume 05
 
FHWA Steel Bridge Design Handbook Volume 17
FHWA Steel Bridge Design Handbook Volume 17FHWA Steel Bridge Design Handbook Volume 17
FHWA Steel Bridge Design Handbook Volume 17
 
AASHTO Steel Bridge Design Handbook Volume 09
AASHTO Steel Bridge Design Handbook Volume 09 AASHTO Steel Bridge Design Handbook Volume 09
AASHTO Steel Bridge Design Handbook Volume 09
 
AASHTO Steel Bridge Design Handbook Volume 04
AASHTO Steel Bridge Design Handbook Volume 04AASHTO Steel Bridge Design Handbook Volume 04
AASHTO Steel Bridge Design Handbook Volume 04
 
AASHTO Steel Bridge Design Handbook Volume 01
AASHTO Steel Bridge Design Handbook Volume 01 AASHTO Steel Bridge Design Handbook Volume 01
AASHTO Steel Bridge Design Handbook Volume 01
 
AASHTO Steel Bridge Design Handbook Volume 12
AASHTO Steel Bridge Design Handbook Volume 12 AASHTO Steel Bridge Design Handbook Volume 12
AASHTO Steel Bridge Design Handbook Volume 12
 
FHWA Steel Bridge Design Handbook Volume 19
FHWA Steel Bridge Design Handbook Volume 19 FHWA Steel Bridge Design Handbook Volume 19
FHWA Steel Bridge Design Handbook Volume 19
 
FHWA Steel Bridge Design Handbook Volume18
FHWA Steel Bridge Design Handbook Volume18 FHWA Steel Bridge Design Handbook Volume18
FHWA Steel Bridge Design Handbook Volume18
 
AASHTO Steel Bridge Design Handbook Volume 03
AASHTO Steel Bridge Design Handbook Volume 03 AASHTO Steel Bridge Design Handbook Volume 03
AASHTO Steel Bridge Design Handbook Volume 03
 
AASHTO Steel Bridge Design Handbook Volume 07
AASHTO Steel Bridge Design Handbook Volume 07 AASHTO Steel Bridge Design Handbook Volume 07
AASHTO Steel Bridge Design Handbook Volume 07
 
FHWA Steel Bridge Design Handbook Volume 15
FHWA Steel Bridge Design Handbook Volume 15FHWA Steel Bridge Design Handbook Volume 15
FHWA Steel Bridge Design Handbook Volume 15
 
Prestressed Concrete Bridge Design Example.pdf
Prestressed Concrete Bridge Design Example.pdfPrestressed Concrete Bridge Design Example.pdf
Prestressed Concrete Bridge Design Example.pdf
 
AISC - Steel Construction Manual-American Institute of Steel Construction (20...
AISC - Steel Construction Manual-American Institute of Steel Construction (20...AISC - Steel Construction Manual-American Institute of Steel Construction (20...
AISC - Steel Construction Manual-American Institute of Steel Construction (20...
 
STEEL CONSTRUCTION 14TH MANUAL AISC.pdf
STEEL CONSTRUCTION 14TH MANUAL AISC.pdfSTEEL CONSTRUCTION 14TH MANUAL AISC.pdf
STEEL CONSTRUCTION 14TH MANUAL AISC.pdf
 
Steel_construction_manual_fourteenth_edi.pdf
Steel_construction_manual_fourteenth_edi.pdfSteel_construction_manual_fourteenth_edi.pdf
Steel_construction_manual_fourteenth_edi.pdf
 
LRFD Design Example -Steel Girder Bridge (US Unit).pdf
LRFD Design Example -Steel Girder Bridge (US Unit).pdfLRFD Design Example -Steel Girder Bridge (US Unit).pdf
LRFD Design Example -Steel Girder Bridge (US Unit).pdf
 
Structural manual (part 1)
Structural manual (part 1)Structural manual (part 1)
Structural manual (part 1)
 

Recently uploaded

Glass Ceramics: Processing and Properties
Glass Ceramics: Processing and PropertiesGlass Ceramics: Processing and Properties
Glass Ceramics: Processing and PropertiesPrabhanshu Chaturvedi
 
Introduction to Multiple Access Protocol.pptx
Introduction to Multiple Access Protocol.pptxIntroduction to Multiple Access Protocol.pptx
Introduction to Multiple Access Protocol.pptxupamatechverse
 
(ANJALI) Dange Chowk Call Girls Just Call 7001035870 [ Cash on Delivery ] Pun...
(ANJALI) Dange Chowk Call Girls Just Call 7001035870 [ Cash on Delivery ] Pun...(ANJALI) Dange Chowk Call Girls Just Call 7001035870 [ Cash on Delivery ] Pun...
(ANJALI) Dange Chowk Call Girls Just Call 7001035870 [ Cash on Delivery ] Pun...ranjana rawat
 
Call Girls Pimpri Chinchwad Call Me 7737669865 Budget Friendly No Advance Boo...
Call Girls Pimpri Chinchwad Call Me 7737669865 Budget Friendly No Advance Boo...Call Girls Pimpri Chinchwad Call Me 7737669865 Budget Friendly No Advance Boo...
Call Girls Pimpri Chinchwad Call Me 7737669865 Budget Friendly No Advance Boo...roncy bisnoi
 
BSides Seattle 2024 - Stopping Ethan Hunt From Taking Your Data.pptx
BSides Seattle 2024 - Stopping Ethan Hunt From Taking Your Data.pptxBSides Seattle 2024 - Stopping Ethan Hunt From Taking Your Data.pptx
BSides Seattle 2024 - Stopping Ethan Hunt From Taking Your Data.pptxfenichawla
 
Introduction and different types of Ethernet.pptx
Introduction and different types of Ethernet.pptxIntroduction and different types of Ethernet.pptx
Introduction and different types of Ethernet.pptxupamatechverse
 
Sheet Pile Wall Design and Construction: A Practical Guide for Civil Engineer...
Sheet Pile Wall Design and Construction: A Practical Guide for Civil Engineer...Sheet Pile Wall Design and Construction: A Practical Guide for Civil Engineer...
Sheet Pile Wall Design and Construction: A Practical Guide for Civil Engineer...Dr.Costas Sachpazis
 
UNIT-V FMM.HYDRAULIC TURBINE - Construction and working
UNIT-V FMM.HYDRAULIC TURBINE - Construction and workingUNIT-V FMM.HYDRAULIC TURBINE - Construction and working
UNIT-V FMM.HYDRAULIC TURBINE - Construction and workingrknatarajan
 
MANUFACTURING PROCESS-II UNIT-1 THEORY OF METAL CUTTING
MANUFACTURING PROCESS-II UNIT-1 THEORY OF METAL CUTTINGMANUFACTURING PROCESS-II UNIT-1 THEORY OF METAL CUTTING
MANUFACTURING PROCESS-II UNIT-1 THEORY OF METAL CUTTINGSIVASHANKAR N
 
University management System project report..pdf
University management System project report..pdfUniversity management System project report..pdf
University management System project report..pdfKamal Acharya
 
Java Programming :Event Handling(Types of Events)
Java Programming :Event Handling(Types of Events)Java Programming :Event Handling(Types of Events)
Java Programming :Event Handling(Types of Events)simmis5
 
College Call Girls Nashik Nehal 7001305949 Independent Escort Service Nashik
College Call Girls Nashik Nehal 7001305949 Independent Escort Service NashikCollege Call Girls Nashik Nehal 7001305949 Independent Escort Service Nashik
College Call Girls Nashik Nehal 7001305949 Independent Escort Service NashikCall Girls in Nagpur High Profile
 
Online banking management system project.pdf
Online banking management system project.pdfOnline banking management system project.pdf
Online banking management system project.pdfKamal Acharya
 
(ANVI) Koregaon Park Call Girls Just Call 7001035870 [ Cash on Delivery ] Pun...
(ANVI) Koregaon Park Call Girls Just Call 7001035870 [ Cash on Delivery ] Pun...(ANVI) Koregaon Park Call Girls Just Call 7001035870 [ Cash on Delivery ] Pun...
(ANVI) Koregaon Park Call Girls Just Call 7001035870 [ Cash on Delivery ] Pun...ranjana rawat
 
Coefficient of Thermal Expansion and their Importance.pptx
Coefficient of Thermal Expansion and their Importance.pptxCoefficient of Thermal Expansion and their Importance.pptx
Coefficient of Thermal Expansion and their Importance.pptxAsutosh Ranjan
 
Booking open Available Pune Call Girls Pargaon 6297143586 Call Hot Indian Gi...
Booking open Available Pune Call Girls Pargaon  6297143586 Call Hot Indian Gi...Booking open Available Pune Call Girls Pargaon  6297143586 Call Hot Indian Gi...
Booking open Available Pune Call Girls Pargaon 6297143586 Call Hot Indian Gi...Call Girls in Nagpur High Profile
 
The Most Attractive Pune Call Girls Manchar 8250192130 Will You Miss This Cha...
The Most Attractive Pune Call Girls Manchar 8250192130 Will You Miss This Cha...The Most Attractive Pune Call Girls Manchar 8250192130 Will You Miss This Cha...
The Most Attractive Pune Call Girls Manchar 8250192130 Will You Miss This Cha...ranjana rawat
 
Extrusion Processes and Their Limitations
Extrusion Processes and Their LimitationsExtrusion Processes and Their Limitations
Extrusion Processes and Their Limitations120cr0395
 
Booking open Available Pune Call Girls Koregaon Park 6297143586 Call Hot Ind...
Booking open Available Pune Call Girls Koregaon Park  6297143586 Call Hot Ind...Booking open Available Pune Call Girls Koregaon Park  6297143586 Call Hot Ind...
Booking open Available Pune Call Girls Koregaon Park 6297143586 Call Hot Ind...Call Girls in Nagpur High Profile
 

Recently uploaded (20)

Glass Ceramics: Processing and Properties
Glass Ceramics: Processing and PropertiesGlass Ceramics: Processing and Properties
Glass Ceramics: Processing and Properties
 
Introduction to Multiple Access Protocol.pptx
Introduction to Multiple Access Protocol.pptxIntroduction to Multiple Access Protocol.pptx
Introduction to Multiple Access Protocol.pptx
 
(ANJALI) Dange Chowk Call Girls Just Call 7001035870 [ Cash on Delivery ] Pun...
(ANJALI) Dange Chowk Call Girls Just Call 7001035870 [ Cash on Delivery ] Pun...(ANJALI) Dange Chowk Call Girls Just Call 7001035870 [ Cash on Delivery ] Pun...
(ANJALI) Dange Chowk Call Girls Just Call 7001035870 [ Cash on Delivery ] Pun...
 
Call Girls Pimpri Chinchwad Call Me 7737669865 Budget Friendly No Advance Boo...
Call Girls Pimpri Chinchwad Call Me 7737669865 Budget Friendly No Advance Boo...Call Girls Pimpri Chinchwad Call Me 7737669865 Budget Friendly No Advance Boo...
Call Girls Pimpri Chinchwad Call Me 7737669865 Budget Friendly No Advance Boo...
 
BSides Seattle 2024 - Stopping Ethan Hunt From Taking Your Data.pptx
BSides Seattle 2024 - Stopping Ethan Hunt From Taking Your Data.pptxBSides Seattle 2024 - Stopping Ethan Hunt From Taking Your Data.pptx
BSides Seattle 2024 - Stopping Ethan Hunt From Taking Your Data.pptx
 
Introduction and different types of Ethernet.pptx
Introduction and different types of Ethernet.pptxIntroduction and different types of Ethernet.pptx
Introduction and different types of Ethernet.pptx
 
Sheet Pile Wall Design and Construction: A Practical Guide for Civil Engineer...
Sheet Pile Wall Design and Construction: A Practical Guide for Civil Engineer...Sheet Pile Wall Design and Construction: A Practical Guide for Civil Engineer...
Sheet Pile Wall Design and Construction: A Practical Guide for Civil Engineer...
 
UNIT-V FMM.HYDRAULIC TURBINE - Construction and working
UNIT-V FMM.HYDRAULIC TURBINE - Construction and workingUNIT-V FMM.HYDRAULIC TURBINE - Construction and working
UNIT-V FMM.HYDRAULIC TURBINE - Construction and working
 
Water Industry Process Automation & Control Monthly - April 2024
Water Industry Process Automation & Control Monthly - April 2024Water Industry Process Automation & Control Monthly - April 2024
Water Industry Process Automation & Control Monthly - April 2024
 
MANUFACTURING PROCESS-II UNIT-1 THEORY OF METAL CUTTING
MANUFACTURING PROCESS-II UNIT-1 THEORY OF METAL CUTTINGMANUFACTURING PROCESS-II UNIT-1 THEORY OF METAL CUTTING
MANUFACTURING PROCESS-II UNIT-1 THEORY OF METAL CUTTING
 
University management System project report..pdf
University management System project report..pdfUniversity management System project report..pdf
University management System project report..pdf
 
Java Programming :Event Handling(Types of Events)
Java Programming :Event Handling(Types of Events)Java Programming :Event Handling(Types of Events)
Java Programming :Event Handling(Types of Events)
 
College Call Girls Nashik Nehal 7001305949 Independent Escort Service Nashik
College Call Girls Nashik Nehal 7001305949 Independent Escort Service NashikCollege Call Girls Nashik Nehal 7001305949 Independent Escort Service Nashik
College Call Girls Nashik Nehal 7001305949 Independent Escort Service Nashik
 
Online banking management system project.pdf
Online banking management system project.pdfOnline banking management system project.pdf
Online banking management system project.pdf
 
(ANVI) Koregaon Park Call Girls Just Call 7001035870 [ Cash on Delivery ] Pun...
(ANVI) Koregaon Park Call Girls Just Call 7001035870 [ Cash on Delivery ] Pun...(ANVI) Koregaon Park Call Girls Just Call 7001035870 [ Cash on Delivery ] Pun...
(ANVI) Koregaon Park Call Girls Just Call 7001035870 [ Cash on Delivery ] Pun...
 
Coefficient of Thermal Expansion and their Importance.pptx
Coefficient of Thermal Expansion and their Importance.pptxCoefficient of Thermal Expansion and their Importance.pptx
Coefficient of Thermal Expansion and their Importance.pptx
 
Booking open Available Pune Call Girls Pargaon 6297143586 Call Hot Indian Gi...
Booking open Available Pune Call Girls Pargaon  6297143586 Call Hot Indian Gi...Booking open Available Pune Call Girls Pargaon  6297143586 Call Hot Indian Gi...
Booking open Available Pune Call Girls Pargaon 6297143586 Call Hot Indian Gi...
 
The Most Attractive Pune Call Girls Manchar 8250192130 Will You Miss This Cha...
The Most Attractive Pune Call Girls Manchar 8250192130 Will You Miss This Cha...The Most Attractive Pune Call Girls Manchar 8250192130 Will You Miss This Cha...
The Most Attractive Pune Call Girls Manchar 8250192130 Will You Miss This Cha...
 
Extrusion Processes and Their Limitations
Extrusion Processes and Their LimitationsExtrusion Processes and Their Limitations
Extrusion Processes and Their Limitations
 
Booking open Available Pune Call Girls Koregaon Park 6297143586 Call Hot Ind...
Booking open Available Pune Call Girls Koregaon Park  6297143586 Call Hot Ind...Booking open Available Pune Call Girls Koregaon Park  6297143586 Call Hot Ind...
Booking open Available Pune Call Girls Koregaon Park 6297143586 Call Hot Ind...
 

Steel Bridge Design Handbook: Design for Constructibility

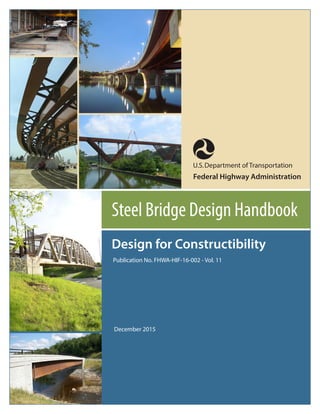
  • 1. Steel Bridge Design Handbook U.S.Department of Transportation Federal Highway Administration Design for Constructibility Publication No. FHWA-HIF-16-002 - Vol. 11 December 2015
  • 2. FOREWORD This handbook covers a full range of topics and design examples intended to provide bridge engineers with the information needed to make knowledgeable decisions regarding the selection, design, fabrication, and construction of steel bridges. Upon completion of the latest update, the handbook is based on the Seventh Edition of the AASHTO LRFD Bridge Design Specifications. The hard and competent work of the National Steel Bridge Alliance (NSBA) and prime consultant, HDR, Inc., and their sub-consultants, in producing and maintaining this handbook is gratefully acknowledged. The topics and design examples of the handbook are published separately for ease of use, and available for free download at the NSBA and FHWA websites: http://www.steelbridges.org, and http://www.fhwa.dot.gov/bridge, respectively. The contributions and constructive review comments received during the preparation of the handbook from many bridge engineering processionals across the country are very much appreciated. In particular, I would like to recognize the contributions of Bryan Kulesza with ArcelorMittal, Jeff Carlson with NSBA, Shane Beabes with AECOM, Rob Connor with Purdue University, Ryan Wisch with DeLong’s, Inc., Bob Cisneros with High Steel Structures, Inc., Mike Culmo with CME Associates, Inc., Mike Grubb with M.A. Grubb & Associates, LLC, Don White with Georgia Institute of Technology, Jamie Farris with Texas Department of Transportation, and Bill McEleney with NSBA. Joseph L. Hartmann, PhD, P.E. Director, Office of Bridges and Structures Notice This document is disseminated under the sponsorship of the U.S. Department of Transportation in the interest of information exchange. The U.S. Government assumes no liability for use of the information contained in this document. This report does not constitute a standard, specification, or regulation. Quality Assurance Statement The Federal Highway Administration provides high-quality information to serve Government, industry, and the public in a manner that promotes public understanding. Standards and policies are used to ensure and maximize the quality, objectivity, utility, and integrity of its information. FHWA periodically reviews quality issues and adjusts its programs and processes to ensure continuous quality improvement.
  • 3. Technical Report Documentation Page 1. Report No. 2. Government Accession No. 3. Recipient’s Catalog No. FHWA-HIF-16-002 - Vol. 11 4. Title and Subtitle 5. Report Date Steel Bridge Design Handbook: Design for Constructibility December 2015 6. Performing Organization Code 7. Author(s) 8. Performing Organization Report No. Roger A. Eaton, PE (HDR) and Calvin Boring (Trumbull Corporation) 9. Performing Organization Name and Address 10. Work Unit No. HDR, Inc. 11 Stanwix Street Suite 800 Pittsburgh, PA 15222 11. Contract or Grant No. DTFH6114D00049 12. Sponsoring Agency Name and Address 13. Type of Report and Period Covered Office of Bridges and Structures Technical Report Federal Highway Administration Final Report 1200 New Jersey Avenue, SE December 2014 – November 2015 Washington, D.C. 20590 14. Sponsoring Agency Code 15. Supplementary Notes The previous version of this Handbook was published as FHWA-IF-12-052 and was developed to be current with the AASHTO LRFD Bridge Design Specifications, 5th Edition with the 2010 Interims. FHWA-HIF-16-002 was updated in 2015 by HDR, Inc., to be current with the AASHTO LRFD Bridge Design Specifications, 7th Edition. 16. Abstract In many cases, bridge designers concern themselves only with checking the stability and member stress levels in the structure for the in-service condition after erection of the entire superstructure is complete. But many times the critical stress in a particular component is encountered during the erection of the bridge where large unbraced lengths affect the stability of the partially completed structure. This module describes typical erection methods and procedures and highlights some of the aspects that should be considered by the designer. With this basic knowledge, the bridge designer can determine which, if any, of these aspects are a concern for his/her particular design situation. 17. Key Words 18. Distribution Statement Steel Bridge, Constructibility, Erection, Construction, , No restrictions. This document is available to the public through Deck Placement, Fit-up the National Technical Information Service, Springfield, VA 22161. 19. Security Classif. (of this report) 20. Security Classif. (of this page) 21. No of Pages 22. Price Unclassified Unclassified Form DOT F 1700.7 (8-72) Reproduction of completed pages authorized
  • 4. i Steel Bridge Design Handbook: Design for Constructibility Table of Contents 1.0 INTRODUCTION ................................................................................................................. 1 2.0 GENERAL............................................................................................................................. 2 2.1 Equipment........................................................................................................................ 2 2.2 Erection............................................................................................................................ 5 2.3 Site Considerations ........................................................................................................ 13 3.0 DESIGN CONSIDERATIONS ........................................................................................... 15 3.1 Construction Loads ........................................................................................................ 15 3.2 Deck Placement ............................................................................................................. 18 3.3 Stability.......................................................................................................................... 22 3.4 Fit-up.............................................................................................................................. 25 3.5 Erection Engineering and Drawings .............................................................................. 27 4.0 REFERENCES .................................................................................................................... 28
  • 5. ii List of Figures Figure 1 Photograph of a mobile hydraulic crane.......................................................................... 2 Figure 2 Photograph of a mobile lattice boom crane..................................................................... 3 Figure 3 Photograph of a lattice boom crawler crane.................................................................... 3 Figure 4 Photograph of a lattice ringer crane................................................................................. 4 Figure 5 Photograph of a tower crane............................................................................................ 4 Figure 6 Photograph of a timber crane mat ................................................................................... 5 Figure 7 Photograph of a temporary bent ...................................................................................... 6 Figure 8 Photograph showing the use of pier brackets in an I-girder bridge................................. 6 Figure 9 Photograph showing the use of a spreader beam for I-girder erection............................ 7 Figure 10 Photograph showing box girder erection using two crawler cranes.............................. 8 Figure 11 Photograph showing an I-girder bridge launching ........................................................ 8 Figure 12 Photograph showing an I-girder launch with launching nose and cable tie-backs........ 9 Figure 13 Photograph showing cantilever erection of a continuous truss using barge mounted cranes .............................................................................................................................................. 9 Figure 14 Photograph showing cantilever erection of a continuous truss using derricks............ 10 Figure 15 Photograph of an arch erection using stay towers and cables ..................................... 11 Figure 16 Photograph of an arch bridge erection using the floor system as an erection tie to the canyon wall ................................................................................................................................... 11 Figure 17 Photograph showing cantilever cable stayed bridge erection using deck mounted derricks.......................................................................................................................................... 12 Figure 18 Photograph of a suspension bridge erection using cable travelers.............................. 13 Figure 19 Photograph showing SIP forms attached to a top flange in a tension region.............. 18 Figure 20 Photograph of a typical overhang bracket................................................................... 19 Figure 21 Sketch showing a typical overhang bracket and screed application............................ 20 Figure 22 Sketch showing a sample deck placement sequence................................................... 21 Figure 23 Sketches showing a half-width construction staging sequence................................... 22 Figure 24 Photograph showing a temporary top flange stiffening truss...................................... 24
  • 6. 1 1.0 INTRODUCTION As time has passed, technological advancements and heightened environmental awareness have led bridge designers to increase the maximum span lengths typically associated with a particular bridge type. For example, with the introduction of High Performance Steels over the last decade, steel plate girder bridges are becoming the structure of choice for spans up to 500 feet in length. The use of these higher strength steels in obtaining such long spans creates the need for designers to consider additional aspects associated with the construction of the bridge. All too often, bridge designers concern themselves only with checking the stability and member stress levels in the structure for the in-service condition after erection of the entire superstructure is complete. But many times the critical stress in a particular component is encountered during the erection of the bridge where large unbraced lengths affect the stability of the partially completed structure. This module describes typical erection methods and procedures and highlights some of the aspects that should be considered by the designer. With this basic knowledge, the bridge designer can determine which, if any, of these aspects are a concern for his/her particular design situation.
  • 7. 2 2.0 GENERAL Bridge erection takes on many forms based on the site, the complexity of the structure, the availability of equipment, and the expertise of the erection contractor. In the following paragraphs, basic erection equipment is discussed with specific examples shown for different bridge types including considerations regarding the access to and topography of the construction site. 2.1 Equipment Cranes come in various types and sizes. Each type of crane has specific advantages and disadvantages depending on numerous variables such as pick weight, pick height and radius, number of picks, site access, site location, constraints, etc. The following crane types are used in typical bridge erection: Mobile hydraulic cranes are used for light- to medium-weight picks up to 650 tons. These cranes are used where the site is readily accessible via existing roadways, where pick heights are relatively low, and where crane area is limited. A typical application would be in the replacement of an existing grade separation bridge. These cranes come in a wide variety of sizes such that the appropriate crane can be used for the given pick weight and space availability. The set-up and tear down is quick through the use of telescoping hydraulic outriggers. In addition, the mobility and reach is versatile due to the telescoping boom and 360 degree rotational capability. Figure 1 Photograph of a mobile hydraulic crane Mobile lattice boom cranes are used for light-to medium-weight picks up to 300 tons. These cranes are used when the site is accessible via existing roadways and where pick heights are high. Through the use of telescoping hydraulic outriggers and self-assembly capabilities, the set- up and tear down is quick compared to other crane types, generally one to two days for assembly of multiple trailer loads. In addition, the reach is versatile with 360 degree rotational capability. It should be noted that mobile lattice boom cranes and mobile hydraulic cranes cannot move once the pick is lifted.
  • 8. 3 Figure 2 Photograph of a mobile lattice boom crane Lattice boom crawler cranes are used for light-to medium-weight picks up to 300 tons. These cranes are used where the site is typically unfinished terrain and where pick heights are high (up to 400 feet). A typical application would be in the erection of a new bridge over a stream valley. These cranes come in a wide variety of sizes such that the appropriate crane can be used for the given pick weight and height requirements. The set-up and tear-down is long and labor intensive due to the number of components that must be site-assembled to meet hauling and site access restrictions. Once assembled, the mobility and reach is versatile with 360 degree rotational capability. In addition, crawler cranes are able to travel with the load lifted. Figure 3 Photograph of a lattice boom crawler crane Lattice ringer cranes are used for heavyweight picks up to 1,400 tons. These cranes are used where the site is typically unfinished open terrain and where pick heights are high (up to 400 feet). Typically, once assembled the crane is immobile due to the track work used to support the massive counterweights. A typical application would be the erection of a new bridge over a wide river or bay where the crane could be mounted onto a barge. By mounting the crane on a
  • 9. 4 barge, it becomes mobile increasing its versatility and ultimately making it more productive. The set-up and tear-down is long and labor intensive due to the number of components that must be site-assembled to meet hauling restrictions. Figure 4 Photograph of a lattice ringer crane Tower cranes are used for lightweight picks up to 20 tons. These cranes are used where no mobility is required and excessive vertical heights must be overcome. A typical application would be in the construction of a tower for a suspension or cable stayed bridge. These cranes come in a wide variety of sizes to meet the need for a particular height and reach. The setup and tear-down are extremely long due to the assembly process. Quite often, a separate foundation must be constructed to support the base of the tower leg. Once in place the crane can be highly productive in delivering materials to the elevation required. Some models come with self jacking tower legs that allow the crane to adjust its height as construction progresses. Figure 5 Photograph of a tower crane
  • 10. 5 Along with these different crane types, various erection accessories are typically used to maximize the crane’s capabilities and function. Some of these accessories are described in the following paragraphs. 2.2 Erection The art of bridge erection has evolved over time to keep pace with technological advancements in machinery and accessories. Even with today’s advanced computer controlled equipment, the most important aspect of bridge erection lies in the experience of the personnel performing the work. Since the objective of safely assembling the structure into its required configuration remains unchanged, the experience necessary to achieve this goal is paramount to success. The following paragraphs discuss different rigging schemes that are traditionally used in bridge erection along with various methods of erection available for I-girder, box girder, truss, arch and cable supported structures. The rigging of a member in preparation for erection can take on many forms based on the size, weight, geometry and capacity of the individual member as well as the size, capacity and location of the erection crane. In its simplest form, rigging could consist of a single vertical sling hooked to the crane and attached to the member with a beam clamp or through the use of a wire rope sling around the member. In a more complex form, rigging could consist of a multi-point erection frame attached to the member with beam clamps or slings and lifted using multiple cranes attached at different locations along the frame. With both rigging options, tag lines attached to the ends of the member are used for hand guidance to ensure safe placement. Crane mats are series of timber or steel members assembled in sections beneath the crane to provide a level base to support the crane during lifting operations. Most often large timbers are used, since they are widely available, inexpensive and easily transported and assembled. If existing ground conditions are poor (such that proper support of the crane would be marginal), the use of a more complex system of steel framing or other custom designed site-cast crane pads could be implemented to span the poor soils. Figure 6 Photograph of a timber crane mat Temporary bents are often used in conjunction with cranes to aid in the erection process. Standard scaffolding is widely available for use in creating these temporary supports. Each section of scaffolding is assembled into a geometric configuration that can achieve the required elevation and load carrying capacity needed for each individual situation. Temporary bents are commonly used where it is necessary to provide support for a longer period of time during complex erection and when foundation conditions are favorable, due to shallow rock or good
  • 11. 6 soil. Other instances where temporary bents are used include long-span bridge erection, situations where fit-up will be at the "no load" condition, and site constraints that limit the placement of cranes. It is important to note that the temporary bent must have the ability to be lowered once erection is complete to transfer the load to the structure and facilitate removal. Figure 7 Photograph of a temporary bent Temporary pier brackets are often used in the erection of water crossings to increase the number of brace and reaction points provided by the permanent pier. Pier brackets are typically comprised of a series of steel members assembled into a frame and temporarily attached to the face of the permanent pier. The configuration can vary greatly based on the geometry of the permanent pier and the intended function of the bracket. The brackets allow individual members to be erected onto the pier with the use of a single crane. The erected member is attached to the permanent bearing and to the pier bracket for stability during the erection of the remaining portion of the spans. Figure 8 Photograph showing the use of pier brackets in an I-girder bridge Hydraulic jacks are often used in combination with the temporary bents and pier brackets to allow for flexibility in vertical and horizontal location of the erected member. These jacks are
  • 12. 7 readily available in a wide variety of sizes and capacities to meet the requirements of each particular situation. Some other uses for hydraulic jacks include longitudinally aligning a continuous multi-span girder bridge with multiple fixed piers to ensure proper bearing/ pier alignment; aligning the ends of long span continuous trusses and simple span arches to ensure proper fit-up for the closure members; and launching completed bridges into their final location. I-girder erection is often accomplished using a single erection crane. Based on the size, weight and capacity of the girder, the erection crane could use either a single lift point located at the center of gravity of the member or two lift points centered about the center of gravity utilizing a spreader beam. Based on the overall size and complexity associated with the bridge erection, the individual girder erection could incorporate the use of temporary bents, temporary pier brackets or hold cranes to provide stability to the member until a sufficient number of girder lines are erected and connected via permanent cross-frames or diaphragms to form a stable system. Box girder erection is often accomplished using a pair of erection cranes working in tandem during the lift. The cranes are typically rigged with a spreader beam that contains two beam clamps each. The beam clamps are attached to the top flanges of the box girder near the ends of the member. Unlike I-girders, an individual box girder may be stable once it is erected onto its permanent supports, due its geometry and internal bracing system. Figure 9 Photograph showing the use of a spreader beam for I-girder erection
  • 13. 8 Figure 10 Photograph showing box girder erection using two crawler cranes An alternate girder erection method that has been gaining popularity consists of launching the completely assembled bridge longitudinally across the permanent supports. This method of erection can be utilized for both I-girder and box girder bridges. To accomplish a girder launch, the superstructure is assembled on a roller system behind one of the abutments in segments of sufficient length to maintain stability during the launching. Once a segment is assembled, hydraulic jacks are used to move the structure across the abutment until it reaches the first pier support. After the girders are properly aligned on the first pier, additional segments are assembled on the roller system behind the abutment and the hydraulic jacks advance the structure until it reaches the next pier. This launching process is continued until the entire structure rests on its permanent supports. This erection procedure requires minimal equipment to perform, but the girders must be specifically designed both globally and locally to handle the large forces generated during the launch. In some cases the erection forces in the girders are minimized through the use of an erection nose attached to the leading end of the girders, thus reducing the cantilever length, or through the use of a cable tie-back system attached to the top of the girders to counteract the cantilever moments. The cable tie-back system is also used to control deflections of the cantilever end to ensure proper position as each permanent support is reached. This erection method becomes feasible where the bridge height is excessive or when environmental and/or topographical constraints limit the access for erection cranes. Figure 11 Photograph showing an I-girder bridge launching
  • 14. 9 Figure 12 Photograph showing an I-girder launch with launching nose and cable tie-backs Truss erection methods can vary greatly based on the number of spans, span continuity, site topography, truss type, etc. Methods that have been used successfully over the years are cantilever erection for continuous trusses and float-in erection of the completely assembled bridge for simple spans. The cantilever method of erection for continuous trusses starts with assembling the sections over an interior pier using temporary bents or pier brackets to stabilize the panels. Once the initial pier panels are erected, new panels are added to each end in an alternating fashion until mid-span or the abutment is reached. The same procedure is repeated again until the ends of the two cantilevers are ready for the installation of the closure pieces. Erecting a truss in this fashion can be performed using standard erection equipment or traveling derricks. In addition, erection can proceed simultaneously from each interior pier, and truss geometry and deflection can be controlled using hydraulic jacks at the temporary supports. Figure 13 Photograph showing cantilever erection of a continuous truss using barge mounted cranes
  • 15. 10 Figure 14 Photograph showing cantilever erection of a continuous truss using derricks Another commonly used method is to assemble truss section components off site, thus, providing erection of assemblies while filling in smaller members piece by piece with smaller equipment. Simple span truss erection over navigable water can be performed using a scheme where the truss is fully erected on barges, usually on temporary bents, and then floated into position and lifted onto the permanent piers using hydraulics. This method of erection is advantageous where waterway traffic cannot be impeded, the erection contractor has the heavy lifting equipment on hand, or where temporary bents are not feasible due to poor foundation material or excessive water depth. Arch bridge erection is typically performed using a temporary stay tower located at the spring line (end pier for tied arches) with stay cables connecting the partially completed arch to the tower on the leading end and the tower to counterweights or ground anchors on the trailing end. Erection begins at each spring line and progresses toward the crown. As arch pieces are erected, additional stay cables are added to provide temporary support until the closure piece is in place and the arches are self supporting. Arch pieces can be erected into place by cable and winch systems attached to the leading end of the previous segment or by cranes located beneath the bridge, if feasible. Using temporary stay towers is the most common erection method since arch bridges are predominantly used to span deep canyons (true arch) or wide bodies of water (tied arch).
  • 16. 11 Figure 15 Photograph of an arch erection using stay towers and cables Another method of true arch erection that has been employed uses the canyon walls to support the arch as a cantilever. With this method the arch is erected from each spring line simultaneously towards the crown. As each arch member is erected it is "tied" back into the canyon wall using a temporary connection. The tie member can be part of the permanent structure (as shown below) or a temporary member/cable used solely for erection support. Once the arch is closed and erection complete, the temporary tie members/connections are removed and the arch is self supporting. Figure 16 Photograph of an arch bridge erection using the floor system as an erection tie to the canyon wall Cable stayed bridge erection is performed utilizing a permanent tower to support all loads during the assembly of the superstructure. After the majority of the tower construction is completed, the first superstructure segments are erected directly at the tower using temporary supports attached to the tower’s cross strut. After the first segment is stabilized, additional members are cantilevered from each end in an alternating fashion until the location of the first permanent cable stay is passed. At this point, the first set of stay cables is installed. Alternating cantilever
  • 17. 12 erection of segments continues along with stay cable installation until the end pier or mid-span is reached. This procedure is repeated for each tower of the bridge. When two adjacent cantilever ends are completed, the closure pieces are installed and the erection is finished. This erection method is common, since all of the erection forces are resisted by permanent bridge components. Only simple beam and winch erection equipment attached to the cantilever ends or deck mounted derricks are necessary to lift the members into place. Figure 17 Photograph showing cantilever cable stayed bridge erection using deck mounted derricks Suspension bridge erection is performed by using the permanent bridge members for support of the partially completed superstructure. After the main towers are constructed and the main suspension cables are strung, the superstructure erection begins at the tower. One method of erecting the deck members follows the cantilever scheme where members are erected directly at the tower and attached using temporary supports. After the first members are stabilized, additional pieces are cantilevered from each end in an alternating fashion until the location of the first permanent suspender is passed. At this point, the first set of suspenders is installed to connect the cantilevers to the main cable. Alternating cantilever erection of members continues along with suspender installation until the end pier or mid-span is reached. This procedure is repeated for each tower of the bridge. In addition to erecting the pieces as balanced cantilevers at each individual tower, the erection of the pieces at each tower along the length of the bridge must be considered relative to each other to maintain the shape of the main suspension cables. This will prevent large, unbalanced horizontal forces in the main suspension cables at the towers. A second method of erecting the deck members is to load the main cables in a manner to try and mimic the final geometry of the cable. With this method individual pieces are supported from the main cables at specific locations prior to connecting any of the pieces to each other. After a sufficient number of pieces are suspended from the main cables, the pieces are connected to each
  • 18. 13 other and the remaining pieces erected. This method of erection is used in extremely long span suspension bridges to minimize the jacking forces required to erect the closure pieces. Figure 18 Photograph of a suspension bridge erection using cable travelers For both methods, only simple beam and winch erection equipment, typically attached to the main cables (cable travelers), are necessary to lift the members into place. Since cable-supported structures are typically used for extremely long spans over rivers and open water, delivery of members for erection is accomplished using barges. The cable travelers are used to lift roadway sub assemblies into place directly off of barges. 2.3 Site Considerations Often the most challenging obstacle in the design of a bridge is a result of the geographical location of the structure. Bridge construction often occurs in heavily populated urban areas where land use is high or scenic rural areas where environmental issues are of paramount importance. Since construction in these areas can dramatically affect the final cost of the bridge, careful consideration must be given to providing adequate access for the contractor and the equipment necessary to perform the work. In the following paragraphs the issues of contractor access and equipment areas are discussed. Contractor access into and out of the construction site can have a dramatic effect on the overall cost of the project if not properly addressed in the design process. For instance, if a new low- level bridge is to be constructed over a non-navigable waterway 400 feet in width, the structure type most often recommended (based on material cost) would be a 3-span continuous girder bridge having two piers in the water. If environmental constraints due to the sensitive nature of the waterway allow the contractor access to the pier foundations for only one month out of the entire year, a more economical solution may be to completely span the waterway with a simple span truss, thus allowing the contractor unrestricted access to the construction site. Even though
  • 19. 14 the material costs would be greater, the construction time would be greatly reduced and the contractor’s productivity increased, ultimately reducing his overall cost. For additional discussion on bridge layout and cost, see the Steel Bridge Design Handbook module titled Stringer Bridges – Making the Right Choices. Another scenario could be the replacement of an existing bridge that spans commuter rail lines in a congested urban area. Again, due to required rail clearances the recommended solution would be to construct a new multi-span girder bridge based on least material cost. If the commuter rail line imposes restrictions on the construction times with extreme penalties associated with violating track outage criteria, the contractor may need to include a large contingency to cover the potential fines. A more economical solution may be to design a single span structure to limit the construction work over and adjacent to the rail lines. The entire simple span structure could be completely erected on the adjacent roadway and lifted into position during a brief off-peak closure of the rail line. Again, the construction time would be greatly reduced, the contractor’s risk would decrease, his productivity would increase, and consequently his overall cost would go down. Another important consideration deals with equipment and storage areas. If the construction site has limited open areas within its boundaries, the contractor may need to mobilize the same equipment numerous times to and from the site as construction progresses. These multiple mobilization costs could make a longer span or more complex structure more economical than a structure that is the most economical based on material cost alone. During the design process the bridge designer must be cognizant of the issues that cause contractors to increase their cost without adding value. If the bridge designer properly addresses these potential constraints and adjusts his design to minimize or eliminate their impact, the most cost effective bridge solution will be realized.
  • 20. 15 3.0 DESIGN CONSIDERATIONS Various factors must be evaluated by the bridge designer to ensure the constructability of the bridge. In the following paragraphs, basic design topics dealing with construction loads, deck placement, stability, and member fit-up are discussed as they relate to construction of the bridge. In addition, a brief overview of erection engineering and erection drawings is provided. All assumptions made during the design relating to construction loads and construction methods should be documented on the drawings for the contractor to use in developing his/her detailed construction plans. 3.1 Construction Loads The AASHTO LRFD Bridge Design Specifications, 7th Edition, (referred to herein as the AASHTO LRFD (7th Edition, 2014)) (1) do not completely address the loadings that should be considered during construction of steel bridges. Requirements for deck placement sequences and overhang deck brackets are supplied, but other conditions are not. Some general statements are provided stating that investigations should be made for handling, transportation and erection, but no quantification is given. Some guidance is provided for the application of load factors for dead loads, dynamic effects (impact) and wind, but specific load combinations are not explicitly defined. Construction loads that would effect the component forces in the bridge during construction include deck formwork, overhang formwork and brackets, screed rail loads, walkways, handrails, construction live loads, screed live loads, wind loads on the structure and equipment, and any other anticipated loads specific to the particular bridge being designed. In addition, permanent loads, such as the weight of the uncured deck concrete, need to be considered in combination with the construction loads. Construction equipment loads can be estimated based on bridge construction methods typically used by contractors in the region. Construction equipment could consist of power screeds used for concrete deck placement, work bridges used to support personnel performing deck placement activities, bridge-mounted erection systems (used more often in large, specialized bridge construction), bridge-supported concrete delivery systems, etc. The anticipated equipment loads should be determined for each individual bridge based on bridge type, member size, site location, etc. For example, a typical I-girder bridge would usually be subjected to only screed and work bridge loads. Wind loads during construction can be one of the most critical aspects to evaluate for conventional girder bridges, since the concrete deck is typically used to transmit these force effects back to the support locations. Until the deck is placed and cured, the individual girders must be capable of transmitting these loads back to the supports through lateral flange bending. If the girders are not capable of resisting the wind loads on their own, a permanent lateral bracing system or another temporary system designed to resist these loads must be provided. Wind loads on the uncompleted steel superstructure should be considered by the designer during design, as well as the contractor’s engineer prior to construction.
  • 21. 16 The magnitude of the wind loads must be evaluated based on site specific data. The specific data needed to determine appropriate wind loads include the friction velocity, friction length and wind velocity based on the bridge location and the height of the structure (see Article 3.8.1 of the AASHTO LRFD (7th Edition, 2014)). If this data cannot be obtained, the design wind velocity could be estimated from bridge crossing information. For example, if a typical girder bridge is being designed over a stream, a design wind velocity of 70 mph may be appropriate for use. On the other hand, if the same bridge is being designed over an active freeway, a design wind velocity of 80 mph may be more appropriate. Once the design wind velocity is determined, the design wind pressure is calculated using equation (3.8.1.2.1-1) of the AASHTO LRFD (7th Edition, 2014). PD=PB VDZ 2 /10,000 Some owners give the minimum design wind pressure to use in the design. One state mandates the use of 25 psf as a standard and 30 psf for bridges over traffic. Since these values relate to maximum design wind velocities during construction (after erection), lower values should be used to evaluate member stress and stability during the erection of the bridge. Reasonable estimates must be made to correspond with the probable wind velocity during the short erection timeframe. Typical wind velocity ranges for setting initial girders are 25-50 mph for highway bridges. Additional information on wind loads can be found in ASCE/SEI 7-05 (2) and AASHTO’s Guide Design Specifications for Bridge Temporary Works (3). As necessary during design, temporary and permanent attachments to the bridge should be evaluated and included in the dead load effects. Examples of various types of temporary attachments include temporary scaffolding suspended from the bridge, temporary safety lines and supports, temporary shielding to protect traffic below the bridge, overhang brackets, temporary hand rails, screed rails, and form work. While it may be difficult to determine the exact equipment and temporary attachments a contractor may use to construct a bridge, the designer can estimate these loads based on past practice and experience. Examples of permanent attachments include inspection walkways and handrails, utilities, etc. Site considerations that could be evaluated depending on geographic location, in addition to the wind loads previously described, relate to the effects of ice and snow during construction. The operational importance of the bridge as it relates to construction should be considered based on location. For example, if the bridge site is located in a highly populated urban area where pedestrian and vehicular traffic on or under the bridge will be at risk due to construction activities, a higher level of safety may be necessary to minimize the potential for injury. The steps used to account for this in the design could include a blanket increase in the importance factor (I, see the Steel Bridge Design Handbook module titled Loads and Load Combinations for additional discussion) that will result in a higher level of safety through the use of greater loads, or localized provisions incorporated into the design of protection systems adjacent to the areas of concern. Good engineering judgment must to be used to determine the site-specific effects associated with each bridge and the appropriate level of design to be performed.
  • 22. 17 Construction live loads should also be considered in evaluating the adequacy of the bridge. This loading is intended to cover all miscellaneous equipment and personnel that cannot easily be quantified at the time of design. Often a blanket allowance of 10 psf is used to account for these loadings. Load combinations must be evaluated to capture all critical conditions during construction of the bridge after a thorough determination of all anticipated construction loads is complete. Article 3.4.2 of the AASHTO LRFD (7th Edition, 2014) calls for the use of Strength Load Combinations I and III during construction. In evaluating these combinations, engineering judgment must be exercised to ensure that the maximum feasible forces are being evaluated. Some sample load combinations are: γp(DC+DW) + 1.5(CEL+CLL) for STR I where: γp is the load factor for dead load 0.9 min and 1.25 max (see the Steel Bridge Design Handbook module titled Loads and Load Combinations for a detailed explanation). DC includes all dead load associated with the bridge members and all form work, attachments, deck, etc. DW includes all utilities. CEL includes all construction equipment loads such as screeds, etc. CLL is the construction live load. γp(DC+DW) + 1.25 (CEL) + 1.4(WS) for STR III Where: WS is the wind on the exposed height of the structure including all forming. Article 3.4.2 of the AASHTO LRFD (7th Edition, 2014) also specifies an additional strength limit state load combination for the investigation of loads applied to fully erected steelwork. A sample load combination for this additional case is: 1.4(DC) + 1.4(CEL+CLL) If there are varying stages of structural configuration associated with the design, additional construction load combinations should be evaluated to ensure that all pertinent conditions are checked. For example, if the girders behave as simply supported for self weight and continuous for all other dead and construction loads, then both conditions should be evaluated using the appropriate loadings and capacities.
  • 23. 18 3.2 Deck Placement Typically, the most critical stage in the construction of girder bridges occurs during placement of the concrete deck, since the bridge is being loaded with the majority of its dead load while only discrete bracing stabilizes the most vulnerable top compression flange components. The following paragraphs describe typical interior deck forming, standard overhang bracket systems, deck finishing machines (screeds), deck pouring sequences, and considerations for half-width construction. Deck forming between interior girders typically consists of corrugated metal stay-in-place (SIP) members attached to the top flange of the girders. The SIP forms are supported by angles attached to the edges of the girders’ top flange using a strapping detail spanning the flange (in tension and stress reversal areas) or by a direct weld to the flange (in compression areas). The SIP forms are usually attached to the angles using self tapping screws. Typical SIP forms can be used with girder spacings up to approximately 14 feet. SIP forms are available in a wide variety of types and sizes to meet the individual needs associated with each bridge. There are numerous suppliers of the products, making them widely available for use. For additional information about SIP forms, see the Steel Deck Institute website at www.sdi.org. Figure 19 Photograph showing SIP forms attached to a top flange in a tension region As an alternative to SIP forms, traditional removable formwork can be utilized between the flanges of the interior girders. Removable formwork usually consists of plywood attached to timber supports or prefabricated metal forms, either of which would be held in position by blocking down to the bottom flanges or hangers attached to the top flanges. Although this method of forming is more labor-intensive, some owners require inspection access to the underside of the concrete deck or are concerned about consolidation of the concrete in the SIP form valleys. To mitigate this concern some owners permit the placement of Styrofoam strips in the valleys. This has an added benefit since it lightens the deck dead load. Overhang brackets are typically used to support deck forms in the area beyond the edges of the fascia girders. Standard overhang brackets consist of three steel members connected in a triangular shape that are suspended from the top flange and supported by the girder web. The brackets are normally spaced on three to four foot centers along the length of the bridge and support traditional wood forming. In addition to supporting the form work for the deck overhang, the brackets usually carry an access walkway and screed rail to allow for deck placement machinery and personnel. The overhang brackets can create significant lateral flange bending
  • 24. 19 forces in the top and bottom flanges of the fascia girder due to the eccentricity of the loads and the hanger connection to the flange. Since these lateral flange bending loads can often control the design of the top flange, the designer must calculate the magnitude of these loads and verify the capacity of the girder. The AASHTO LRFD (7th Edition, 2014) provides a method for determining the lateral flange bending moments in the commentary of Article 6.10.3.4. If the web depth is such that the bottom of the overhang bracket would likely rest against the web a significant distance above the flange to web intersection, constructability stiffeners are often shown on the plans for the fascia girders to resist the bracket loading. The contractor could choose to thicken the web to avoid the additional stiffeners or perform a refined analysis to verify the effects on the web, but discussion with the engineer is essential. In addition to the lateral flange bending effect, the designer must also include all vertical loads associated with the overhang bracket into the capacity checks for the exterior girders. Detailed information on the required capacity checks can be found in the AASHTO LRFD (7th Edition, 2014). For additional information on overhang brackets and bridge deck formwork, see the AASHTO Construction Handbook for Bridge Temporary Works (4). Figure 20 Photograph of a typical overhang bracket
  • 25. 20 Figure 21 Sketch showing a typical overhang bracket and screed application Deck finishing machine (screed) loads can also have a dramatic effect in the design of the fascia girders, since the loads are typically supported by the overhang brackets as previously described. Therefore, an estimate of the machine loads should be performed and included in the capacity evaluations. A good estimate of the machinery weight can be made by simply selecting an appropriately sized piece of equipment based on the width of the bridge and the placement sequence developed for the design. With this information, actual weights can be readily obtained from local equipment suppliers in the region of the bridge. A deck placement sequence must be developed by the designer to ensure that the girders are capable of supporting the applied loads during each stage of placement. In Article 6.10.3.4 of the AASHTO LRFD (7th Edition, 2014) and its commentary, explicit direction is given regarding the type of calculations that must developed. An example of a typical deck placement sequence for a two-span continuous girder bridge would be as follows: First, place the concrete in the positive moment portions of the spans leaving a block-out at each end for installation of the expansion devices (placement 1). Note that all of the concrete in placement 1 must remain plastic until the pour is complete. Allow the concrete to cure for a specified time or until a certain strength is obtained (this requirement is usually established by the owner). Second, place the concrete in the negative moment region over the pier up to the concrete previously placed during Stage 1 (placement 2). Finally, install the expansion devices at each abutment and place concrete in the
  • 26. 21 block-outs (placement 3), thus finishing the concrete deck placement. Construction of the protective concrete barriers finishes the deck. Figure 22 Sketch showing a sample deck placement sequence Half-width staged construction is typical for bridge replacement or rehabilitation projects where traffic must be maintained on the bridge throughout all construction stages. A simple example would be the replacement of an existing bridge that carries two 12-foot wide travel lanes, two 12-foot wide outside shoulders, and a single turning lane. The ideal condition would be to maintain a single lane of traffic in each direction on half of the existing bridge while the other half is removed and replaced. Once this first stage of construction is complete, traffic would be transferred onto the new bridge while the remaining portion of the existing bridge is removed and replaced. The difficulty associated with this procedure lies in the connection of the first half of the new structure to the second half; particularly how to place the concrete deck in the connecting region. One method of performing this work is to build most of the second half of the bridge independently from the first by omitting the cross-frames connecting the two. In doing this, the second half of the bridge would be erected and the deck placed up to the centerline of the girder adjacent to the half of the bridge carrying traffic. At this point the cross-frames connecting the two independent structures into one would be installed, and the closure deck placement made. Many times the cross-frames connections are prepared only with shop drilled holes for connection to first half of the bridge. Once the cross-frames are erected and connected to the first half of the bridge, the bolt holes for the connection to the second half of the bridge are field drilled. Typically the holes in the cross-frame members are used as a drill template to field drill the holes in the stiffener plate. Performing the work in this fashion allows for proper fit-up of the steel girders and reduces the amount of “locked-in” forces carried by the cross-frames connecting across construction stages.
  • 27. 22 Figure 23 Sketches showing a half-width construction staging sequence 3.3 Stability Stability of the girders during erection and subsequent construction stages is of primary importance to the designer since it is typically the driving factor in the selection of cross-frame spacings, top flange width and lateral bracing requirements. The following paragraphs discuss stability of girders and how it relates to cross-frames, lateral bracing, temporary bracing, uplift at supports, bearing selection, and construction staging. Cross-frames are typically considered secondary bracing members in girder bridges (with the exception of highly skewed and horizontally curved bridges) where the primary function is to transmit wind forces from the bottom flange into the concrete deck in the completed bridge and to provide bracing points for the girder flanges during construction (and in the final configuration for bottom flanges in the negative moment regions). The AASHTO LRFD (7th Edition, 2014) eliminated the limits on maximum spacing for cross-frames found in previous specifications. Instead, it is up to the designer to establish the spacing and properly design the girders for the forces accordingly. By removing the arbitrary 25 foot maximum spacing requirement from the code, it was not the intent of the code writers to have designers place cross-frames at large distances. Instead, the spacing requirement was removed to allow the designer flexibility in establishing reasonable equal spacing for the cross-frames (on the order of 20-30 feet) without the arbitrary maximum that often results in an additional line of cross-frames simply to comply with the code. Cross-frame spacing is established to avoid flange buckling and limit the amount of lateral flange bending based on the proportions of the girder and geometric layout of the bridge. The configuration of the individual members that make up a cross-frame can take on various shapes depending on the ratio of the girder spacing to depth. Typical cross-frame configurations are K-frames, X-frames, solid bent plates, rolled sections, plate girders, inverted K-frames, and X-frames with horizontal struts. For a more detailed explanation of cross-frames and their practical uses, see the Steel Bridge Design Handbook module titled Stringer Bridges – Making the Right Choices. Once a cross-frame spacing and configuration are determined, the girder’s flange lateral bending stresses must be checked for construction loads and permanent wind loads to determine if the
  • 28. 23 results are acceptable. If the lateral effects control the design of the flanges, the cross-frame spacing should probably be reduced to allow for a balance between the vertical and lateral bending effects. One rule of thumb commonly used is to limit the lateral flange bending stresses to around 0.5Fy. Lateral bracing is typically used in longer span structures where the lateral flange bending stresses and/or lateral deflection cannot be effectively controlled by flange width and cross-frame spacing. The need for lateral bracing may often be dictated by the client. One owner requires designs that do not use lateral bracing for spans under 200 feet, allows it to be investigated for spans between 200 and 300 feet, and requires it on spans over 300 feet. The bracing usually consists of WT sections and is normally connected directly to either girder flange. The lateral bracing creates a truss system between adjacent girders with the girder flanges acting as the chords, and the bracing members and cross-frames acting as the diagonals and "verticals", respectively. The optimum location (top or bottom flange) and configuration of the bracing has been debated for years and no explicit conclusions have been determined. The only definitive observation that can be made is that lateral bracing dramatically increases the lateral stiffness of the bridge regardless of location and configuration. Often the largest drawback in the use of lateral bracing is the need to design the bracing connections for vertical girder bending effects. Frequently, the designer will utilize the bracing for final wind and construction effects and allow the connections to “slip” for vertical capacity determination. This is accomplished through the use of oversized holes in the slip critical connection design. For additional information on lateral bracing considerations, see the Steel Bridge Design Handbook module titled Stringer Bridges – Making the Right Choices. Temporary bracing is sometimes utilized to provide stability during the construction of the bridge. For example, many owners permit the use of temporary external cross-frames between boxes during the construction of steel tub girder bridges. The advantages of using temporary cross-frames are that: (1) the aesthetics of the bridge, when viewed from below, are maximized with the completed bridge having clean, unobstructed lines; (2) the details of the members are simplified, since they do not need to meet long-term fatigue and maintenance criteria; and (3) the flexibility given to the contractor regarding erection methods is also maximized. There are also some drawbacks to the use of temporary cross-frames: (1) the members can be difficult to remove, since crane access is limited due to the concrete deck being in place; (2) the contractor must remobilize equipment and personnel to remove the members long after their role on the project is complete; and (3) if the bridge is redecked in the future, the temporary cross-frames must be reinstalled. The advantages and disadvantages of using temporary bracing in a situation such as this must be thoroughly investigated before the decision is made to incorporate its use. Another situation where temporary bracing could be used is in the erection of long span I-girder bridges. An example would be the use of a temporary stiffening truss attached to the top flange of a single I-girder to stabilize it until a second line of girders is erected and attached with cross- frames to form a stable system. In this instance, the use of the temporary truss allows the contractor flexibility in the use of the erection equipment to perform girder picks without the need for addition hold cranes. One drawback to this scenario is the cost associated with
  • 29. 24 fabricating and assembling the truss. Again, the benefit of needing fewer cranes needs to be weighed against the cost of the additional material. Figure 24 Photograph showing a temporary top flange stiffening truss Uplift at support locations can lead to design issues during the construction stages as well as in the final configuration of the bridge. Typical girder bridges are proportioned to ensure that uplift does not occur at the support locations in the final configuration. Uplift is usually only a concern when dealing with bridges that contain sharply skewed supports, tight horizontal curvature, or incorporate complex bridge types. If a bridge configuration results in uplift, a traditional design solution is to attach the bridge to the substructure unit using a tension link. Although this approach has been used successfully for decades, it usually incorporates a fatigue-sensitive detail into the bridge. As a result, owners now typically require the designer to resist uplift effects through the use of additional permanent dead load. This can be successfully accomplished by incorporating full-depth concrete diaphragms over the support location or, if necessary, by placing permanent counterweights (usually a large volume of concrete) at the support in question. During the construction of the bridge, uplift can occur at various stages of the erection process depending on the methods being used. In these situations, the uplift can be resisted through the use of temporary counterweights positioned over the support or temporary cables anchored into the foundations. Temporary counterweights are commonly used when bridges are erected using the “cantilever method” as previously described. Bearing selection is normally based on the final bridge configuration and the needs associated with intended long term performance of the bridge. Quite often the result is a single line of fixed bearings in the bridge with the remainder of the bearings being either free (unrestrained in all directions) or guided (normally restrained in the transverse direction). During erection of the bridge, such an arrangement can create complications since the permanent support locations are normally used to provide stability. Therefore, the permanent bearings are often augmented to provide the necessary fixity during erection. The type of modification depends on the specific permanent bearing type used, the type of substructure, the bridge type, the size of the bridge, etc. Many times a typical girder bridge is outfitted with blocking around the bearing to provide the necessary support or, if necessary, a system of temporary cables is used to anchor the girder to the substructure unit. To ensure proper fit-up, a survey of the horizontal and vertical alignment of the bearings should be made prior to erection.
  • 30. 25 Construction staging must be evaluated by the designer to ensure stability of the bridge during all phases of the initial deck placement sequence, the conditions anticipated for the proposed future redecking scheme, and every stage associated with half-width construction. For example, some owners require five girder lines when four would suffice, specifically to accommodate future redecking schemes. As previously mentioned, Article 6.10.3 of the AASHTO LRFD (7th Edition, 2014) describes the explicit method of performing these design checks. 3.4 Fit-up Fit-up of the steel bridge members is a critical component in the overall success of a project. The designer must be able to clearly convey to the fabricator and erector the intent of the design as it relates to bolting and pinning, camber, bolted field splices, and differential deflections. The use of oversize holes to facilitate fit-up is not recommended. In the following paragraphs some important aspects relating to these topics are discussed. Bolting and pinning of connections requires that proper procedures be followed. NCHRP Synthesis 345, "Steel Bridge Erection Practices" recommends that the procedures might contain the following:  Initial pinning and bolting should consist of filling the holes in the connections with 25% pins and 25% bolts and the bolts at least snug tightened before releasing the crane and having the adjacent girders erected.  After the cranes are released, the balance of the holes in the connections should be filled with snug-tight bolts.  Final tightening of the bolts to installation tension should not start until a continuous line or at least adjacent spans have been erected and the vertical and horizontal alignment has been verified.  Pins should not be removed from the connection until after the previous step has been accomplished. These recommendations are for typical bridges, for large or complex structures the number of bolts and pins required need to be determined by design for each connection. Cambers are values prescribed by the bridge type, member size, and geometry for each particular structure. The cambers are derived by the designer to ensure that the bridge achieves its final design geometry after all dead loads are applied. A more detailed explanation of cambers for girder bridges is provided in the Steel Bridge Design Handbook module titled Stringer Bridges – Making the Right Choices. For other larger bridge types the cambers can have a dramatic effect on the overall behavior of the bridge. For example, arch bridges must be properly cambered to ensure that the axis of the arch closely conforms to the dead load thrust line, since this is a standard assumption in the design of the arch members. If the cambers are incorrect, significant vertical bending will be generated in the arch rib due to the dead load, subjecting the bridge to loads that were not accounted for in the design. See Article 6.7.2 of the AASHTO LRFD (7th Edition, 2014) for camber requirements.
  • 31. 26 Bolted field splices on girder bridges are located to separate the individual girders into manageable pieces in terms of both size and weight. See the Steel Bridge Design Handbook module titled Stringer Bridges – Making the Right Choices for a general discussion regarding splice locations and hauling considerations. The designer should also be cognizant of member piece weights, since other concerns such as site access could limit the maximum member size. If member size is limited for concerns other than hauling, additional field splice locations may need to be designed and incorporated into the design drawings. It should be noted in the design drawings that field splice locations can be eliminated by the contractor. This will allow the contractor to tailor the field piece size and number of splice locations to his/her erection scheme, thus minimizing the cost of the bridge. Differential defections between adjacent girder lines can result from severe skew, horizontal curvature, staged construction, or extreme load imbalance. Many of the issues associated with differential deflections result from lack of communication among the designer, fabricator and erector. One way to describe the effect of differential deflection is through the example of a severely skewed bridge: A two-span multi-girder bridge has a skew angle of 70 degrees between the center line of supports and a line normal to the bridge centerline. With a skew angle this severe, the intermediate cross-frames would be detailed perpendicular to the girder webs. Therefore, one end of a particular cross-frame may be located at the 0.4L point of Girder 1 and the other end at the 0.5L point of Girder 2, where L is the span length. A comparison of the dead load deflections at these two locations would show that Girder 2 deflects much more than Girder 1. If the cross- frames are not properly detailed to account for the differential deflection between Girders 1 and 2, the erector may not be able to properly install the member. If the girders’ webs are detailed to be vertical under total dead load, then the girders must be erected with a predetermined twist (out-of-plumbness) such that when the erection is complete and all dead loads are applied (deck, barriers, etc) the differential deflection between cross-frame ends will "roll" the girder into its final vertical position. For this condition, the designer must clearly state on the drawings that the intent is to detail and fabricate the members such that the webs will be vertical in their total dead load position, and the erector needs to realize that the girders need to be erected with the predetermined twist. For curved girders the key element in dealing with differential deflection is to provide consistent detailing between all components in the bridge. In the Third Edition of the AASHTO LRFD Bridge Construction Specifications (5) Article 11.8.3.7.1 states, “Unless otherwise specified in the Contractor’s construction plan, fit-up shall be assumed to be performed under the no-load condition.” Therefore, unless the design drawings explicitly define a different condition, the fabricator and erector may construct the bridge as though it is in the no-load condition. Good engineering judgment must be used in determining the appropriate condition to specify for each bridge. Bridges that are both curved and skewed require careful consideration by the designer with regard to the choice of the detailing method. For additional information regarding detailing of skewed, curved, and curved and skewed steel girder bridges, the reader should review the paper published by NSBA, titled Skewed and Curved Steel I-girder Bridge Fit (6). This paper provides
  • 32. 27 a concise summary of detailing choices for these bridge types, and provides recommendations for the choice of detailing method (fit method) based on the geometric parameters of a bridge. For additional information on differential deflections see Section 1.6 of the Guidelines for Design for Constructability document G12.1-2003 by the AASHTO/NSBA Steel Bridge Collaboration (7). See the Collaboration website at www.aisc.org/contentNSBA.aspx?id=20074 for access to this document. 3.5 Erection Engineering and Drawings After award of the erection contract, the erector must develop a clear detailed procedure for assembling the structure. Based on a recent survey of bridge owners, very few require the erector to develop a detailed erection procedure. But such a formal procedure is a critical step in the construction of the bridge and should be mandated. If the owner does not have standard requirements, the designer should develop a contract provision requiring the erector to develop a plan for each specific project. The procedure must include detailed drawings and written descriptions for each step necessary to complete the erection. In addition, complete calculations performed by a registered professional engineer must be developed for each stage of the process to ensure that the permanent bridge members are not overstressed and stability is maintained. Provisions for erection procedures and erection drawings can be found in the Second Edition of the AASHTO LRFD Bridge Construction Specifications (5). In addition, the AASHTO/NSBA Steel Bridge Collaboration Task Group 10 has developed a document titled Steel Bridge Erection Guide Specification (8) that covers erection calculations and drawings in greater detail. The latest information can be found on the Collaboration website at www.aisc.org/contentNSBA.aspx?id=20074.
  • 33. 28 4.0 REFERENCES 1. AASHTO, (2014). AASHTO LRFD Bridge Design Specifications; 7th Edition, AASHTO, Washington D.C. 2. ASCE 7-05, (2006); American Society of Civil Engineers (ASCE 7-05), Minimum Design Loads for Buildings and Other Structures, ASCE Reston, Virginia. 3. AASHTO, (1995). AASHTO Guide Design Specification for Bridge Temporary Works, AASHTO, Washington D.C. 4. AASHTO, (1995). AASHTO Construction Handbook for Bridge Temporary Works, AASHTO, Washington D.C. 5. AASHTO, (2010). AASHTO LRFD Bridge Construction Specifications, Third Edition, including 2015 Interims, AASHTO, Washington D.C. 6. NSBA (2014). Skewed and Curved Steel I-Girder Bridge Fit, Fit Task Force, NSBA Technical Subcommittee, NSBA, Chicago, Illinois. August 20, 2014. 7. AASHTO/NSBA, (2003). G12.1-2003: Guidelines for Design for Constructibility, AASHTO/NSBA Steel Bridge Collaboration. 8. AASHTO/NSBA, (2014). S10.1-2014: Steel Bridge Erection Guide Specification, AASHTO/NSBA Steel Bridge Collaboration.