Molds and sewing instructions for the most common baby clothes, like playsuit, dress shirts, overol, tailores moldes pants, elastic waist pants, fitting bodice patterns and hooded sweatshirt sleeveless for child, hooded sweatshirt sleeveless pattern,
1. 1
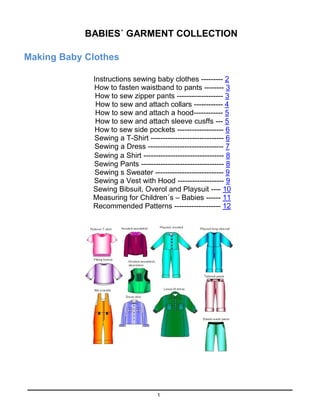
BABIES´ GARMENT COLLECTION
Making Baby Clothes
Instructions sewing baby clothes --------- 2
How to fasten waistband to pants -------- 3
How to sew zipper pants ------------------- 3
How to sew and attach collars ------------ 4
How to sew and attach a hood------------ 5
How to sew and attach sleeve cusffs --- 5
How to sew side pockets ------------------- 6
Sewing a T-Shirt ------------------------------ 6
Sewing a Dress ------------------------------- 7
Sewing a Shirt --------------------------------- 8
Sewing Pants ---------------------------------- 8
Sewing s Sweater ---------------------------- 9
Sewing a Vest with Hood ------------------- 9
Sewing Bibsuit, Overol and Playsuit ---- 10
Measuring for Children´s – Babies ------ 11
Recommended Patterns ------------------- 12
2. 2
Instructions sewing baby clothes
These Great Collection are designed with standard sizes for babies 62-98 cm (2’ to 3’2”) tall.
Includes 11 babies´ garment designed in 7 sizes.
Most of these garments require an intermediate or advanced level of sewing skill. If you do not already
know how to assemble a garment, sew buttonholes, etc., you will need to refer to a general sewing text
as well as these instructions.
Cut out and sew your new garment. This booklet gives you most of the sewing instructions you need,
but always rely on your common sense. We hope you enjoy your new clothes!
MEASUREMENTS
It’s not usually necessary to take measurements for baby clothes. If custom measurements are
required or desired, use the measuring techniques described on the Children’s Measuring Chart,
included in this package.
ABOUT EASE
We do not include an ease chart for the babies’ garments because it should not be necessary to adjust
ease for babies’ clothing. Baby clothes are deliberately designed for a loose fit.
SEWING INSTRUCTIONS
FOLLOW THESE STEPS FOR WORRY-FREE CONSTRUCTION
GENERAL INSTRUCTIONS
When you buy your fabric, ask how much it will shrink when washed. In all cases, when the fabric is
washable and when you are not sure that the fabric won't shrink, it is safe to wash and iron it before
cutting. Don't forget to preshrink lining as well.
Cut pattern pieces on folded fabric, right side of the fabric folded inwards. Make the necessary
marks on the fabric with chalk or pencil. If the fabric is plaid, striped or checkered, align the hem
lines at the same point on the repeating pattern. For sleeves, the repeating pattern should match
where the bottom of the armscye and bottom of sleeve cap meet. Vertical centerline of sleeve
should be placed at a vertical stripe or at center of a plaid square. Jacket, blouse and dress front
center should be placed the same way.
Transfer notch marks from your pattern to the fabric by cutting snips (depth 1/4 inch/5 mm) into
seam allowances. When joining garment pieces, place corresponding notch marks in the two
pieces together.
Cut and iron interfacings onto under collars, facings, waist bands, button extensions and sleeve
cuffs.
If you sew a patch pocket and don't line it, fasten interfacing to it also. Woven interfacing gives the
best results. The macros draw all facings on top of the garment pieces, with dashed lines. If you
want to print them apart from the pieces, use the MOVE command to move them before printing.
Cut lining along with garment patterns without space for facings (but remember to add seam
allowances) and hem seam allowances. Do not cut lining for collars. Lining fabric usually is not as
elastic as garment fabric, so cut it with about 1/8 inch (0.3 cm) wider seam allowances than for the
garment pieces.
Use the longest possible machine stitches for basting. It is quick and the stitches can easily be
removed. (Return to Index)
3. 3
2
es
The macros make the patterns without seam allowances. If you want to add seam allowances, use
PatternMaker's Draw/Offset and Draw/Seam Allowances commands (see the Help file for details).
The suggested seam widths are 3/8 inch (1 cm) for most seams, and 1 - 1/2 inch (4 cm) for hems
and sleeve ends without cuffs. When you are sewing your first garment with PatternMaker
patterns, add extra seam allowance so that you can make corrections to the garment if it should be
necessary.
You will get the best result if you always press seams and darts as you sew. First iron seams or
darts flat without turning them to either direction. Then press them towards center, side seam
towards front. Two-piece sleeve seams are both pressed towards shoulder mark. Use a steam
iron. If you press seams from right side of the fabric, use pressing cloth if necessary.
Edgestitching gives a well-finished look to garment, but only if it is straight and even. Long stitches
of 1/4 inch (4-5 mm) look best in edgestitching. Sew edgestitching only after you have ironed the
seam.
HOW TO FASTEN WAISTBAND to pants
1. Iron interfacing to wrong side of waistband. Overlock edges. Fold waistband lengthwise, right
sides out, and press. Sew one horizontal edge of waistband to garment, right sides together, (1).
Space for button and buttonhole extension extends beyond center front mark at each end of the
band. Garment’s waist should always be slightly larger than waistband. Easestitch garment waist
to fit waistband.
2. Fold waistband lengthwise, right side
inside, and sew across one end (buttonhole
end) (2). Cut corners and turn waistband
right side out. Press seam allowance
upward (raw edges of seam will be inside
waistband when finished).
3. Fold seam allowance of waistband in
about inches (5 cm) from each end but
leave rest of waistband seam allowance
flat (flat mak
it easier to catch when sewing through
from the right side, but leaves the raw edge
on the wrong side of the skirt instead of
tucked into the waistband). Stitch on right
side of garment along first stitch line (4)
called “stitch in the ditch.” Sew button hole
and fasten button.
HOW TO SEW ZIPPER to pants
1. Sew seam to the point where zipper begins and mark zipper’s full length with basting. Press the
seam open. Remove basting stitches.
2. Mark front (or back) centerline with basting (1). Fold one seam allowance of zipper placket at
about ¼” (0.5 cm) distance from front (or back) centerline (2). Sew one zipper edge under the
extended seam allowance (3).
(Return to Index)
4. 4
3. Close zipper placket temporarily with pins on right side of garment (4). On wrong side pin other
zipper edge flat on seam allowance (5). Make certain that the zipper is straight and lies flat at an
even distance from edges of seam allowance. Remove pins from right side. Sew from wrong side
through all thicknesses, across bottom and up the pinned edge of zipper near zipper teeth.
If you want to, you can sew a second row of stitches one presser foot’s distance from the first one
(7). If you are making jeans or other pants that need to be very strong, strengthen bottom of zipper
placket with tight zigzag (bartack) on right side.
For an unnoticeable zipper placket:
Sew zipper directly onto garment seam, placing zipper upside down on a basted seam on wrong
side of garment. The distance between the seam and the zipper stitching is the width of the
presser foot. Basting is removed after sewing. This kind of a zipper is good for a dress back seam
and is also widely used in skirts.
HOW TO SEW AND ATTACH COLLARS
1. For the collar, cut 2 pieces of fabric and 1 piece of interfacing. The under collar piece is on the
inside, hidden by the upper piece, when the garment is completed.
2. Overlock button placket
and front center edges.
Sew front center seam
from hem to where
button placket begins
(1). Fold button
placket inwards along
fold line and sew along
bottom (2) and top (3)
ends from fold line to
front center. Cut seam
allowances diagonally
at point where seam
ends, so that button
placket can be turned
right side out.
3. Turn button placket right side out (4). Place button plackets' front center marks on top of each
other and sew a box at bottom end of placket. Stitch through all layers of fabric.
4. Iron interfacing to under collar. Turn bottom seam allowance of under collar inside and baste (5).
5. Place collar pieces with right sides together and sew along edges (6). Trim seam allowances and
cut corners. Turn right side out.
6. Sew raw edge of upper collar to shell's neck from front center to front center, right sides together.
5. 5
Press seam allowance upwards and pin basted edge of under collar on top of previous seam. Sew.
If you have difficulties in sewing a neat collar, sew basted edge of under collar by hand.
HOW TO SEW AND ATTACH A HOOD
1. The hood piece in the pattern makes one half of the hood. Cut 4 pieces, 2 of garment fabric and 2
of lining fabric. The lining pieces can also be of same or similar fabric, if desired. Sew both outer
pieces together, right sides together (1). Do the same with the lining pieces. Snip the seam
allowance along the curved section at back of hood at intervals of about 3/4 inch or 2 cm (2).
2. The openings for the drawstring are sewn like small buttonholes at right side of hood 3/4 inch (2
cm) from front edge and 1 1/2 inches (4 cm) from bottom edge (3). To strengthen button holes,
iron interfacing to wrong side of fabric before sewing button holes.
3. Turn neck seam allowance of hood lining inwards and baste (4). Place lining and hood right sides
together and sew along front edges (5). Turn hood right side out.
4. Sew hood to neck of shell,right sides together, from center front to center front. Press seam
upwards and pin the basted edge of hood lining onto seam. Sew near edge.
5. Sew a 3/4 inch (2 cm) wide tube for strings at front edge (6).
HOW TO SEW AND ATTACH SLEEVE CUFFS
1. Fold in seam allowance of one long edge of sleeve cuff and baste (1).
(Return to Index)
6. 6
2. Fold cuffs horizontally in two, right sides inside, and sew along ends (2). Note that seam allowance
of one edge has been folded in, but the other is unfolded, so the edges don't meet. Cut seam
allowance diagonally at corners and turn cuffs right side out.
3. Cut slits at ends of sleeves and overlock edges. Turn seam allowances inside and edgestitch on
right side (3). Fold slit with right side inside and sew across bottom of slit (4).
4. Fold ease of sleeve ends into soft pleats near split (5). Sew raw edges of cuffs to sleeve ends with
right side of cuff against wrong side of sleeve. Turn seam allowance inside cuffs and press. Pin
basted edge of cuff onto previous seam and edgestitch from right side.
5. Sew buttonholes and attach buttons to cuffs.
HOW TO SEW SIDE POCKETS
1. Cut 4 pieces for pockets, 2 for
pocket back pieces and 2 for
pocket linings.
2. Place pocket lining piece on the
shell, right sides together. Sew
along pocket mouth (1). Cut seam
allowance diagonally (2).
3. Turn pocket lining to inside and
topstitch pocket mouth (3). Place
pocket back piece under pocket
lining piece edges matching (4).
Sew and overlock along round and
bottom edges. Pocket back piece is attached to side seam when sides are sewn. Be careful not to
sew pocket mouth.
SEWING A T-SHIRT
1. Check that waist, neck and cuff ribbings are of suitable length. The correct length depends on how
elastic the ribbing fabric is.
2. Sew and overlock
shoulder seams with
right sides together (1).
Join sleeves to shell,
right sides together (2).
Overlock. Sew sleeve
seam and side seam
continuously from
sleeve cuff to shell
hem, right sides
together (3). Overlock.
3. Sew ends of waist
ribbing together, to
form a ring. Fold
lengthwise in two,
wrong side inside.
Divide the circumference of the ring into four equal parts and mark them with pins through both
layers on the cut edges. Do the same with the bottom of the shell. Then pin together
corresponding marks and stitch (4), stretching the ribbing to fit. Shell should be inside out now,
and the ribbing is inside it. Sew and overlock. Attach neck and cuff ribbings in the same way.
(Return to Index)
7. 7
SEWING A DRESS
1. The dress illustrated is constructed with a placket in front. Variations can use buttons or a back
closure (zipper or buttons). If you want to put a collar on the dress, use general instructions and
leave out the neck facings.
2. Sew front center seam from
hemline to where the button
placket begins (1). Fold button
placket right side inwards and sew
bottom edge from fold to center
front (2). Cut seam allowances
diagonally here (2).
3. Iron interfacing to pocket pieces
(3). Turn seam allowances
inwards and baste. Topstitch top
of pocket. Sew pockets to their
places on front pieces
simultaneously edgestitching
them. The exact location of the
pockets is a styling decision for
you to make.
4. Sew and overlock shoulder seams
(4) and side seams (5), right sides together. Easestitch sleeve cap with normal seam allowance
(6)
5. Sew and overlock sleeve seams. Turn shell wrong side out and sleeves right side out. Place
sleeves inside shell (7) and match sleeve shoulder marks with shell's shoulder. Pull the ends of the
edgestitching threads to gather ease in. Sew and overlock.
6. Sew front and back neck facing pieces together at the shoulder (8). Place facing on neck of shell,
right sides together. Fold front button placket, right side inwards, under the facing (9). Sew placket
to facing. Snip seam allowances at 3/4 inch (2 cm) intervals and turn facing inwards. Edgestitch
or stitch through seam allowances only near seam.
7. Sew and attach sleeve cuffs according to General Instructions above. Fold hem allowance twice
and sew. Sew buttonholes and fasten buttons to front center.
(Return to Index)
8. 8
SEWING A SHIRT
1. Fold seam allowance at front edges inwards 1/2 inch (1 cm) and baste (1). Fold again with right
side of fabric inside, along
button extension fold line.
Stitch button extension
across top edge from fold
to center front (2). Cut
seam allowances
diagonally (2). Turn
button extension out and
sew along folded seam
allowance edge on wrong
side of fabric.
2. Iron interfacing to pocket
(3). Fold seam
allowances inwards and
topstitch pocket mouth.
Sew pocket in place,
edgestitching it
simultaneously.
3. Sew and overlock shoulder seams, right sides together (4). Join sleeves to shell, right sides
together (5). Overlock. Sew sleeve seam and side seam continuously from sleeve cuff to shell
hem (6). Overlock.
4. Use General Instructions (above) to attach collar and sleeve cuffs. Fold hem allowance twice and
sew. Sew buttonholes and fasten buttons to front center.
SEWING PANTS
1.Sew center seam at crotch from leg to where zipper placket begins (1). Attach zipper according to General
Instructions above (2). Place pocket lining on top of pants pocket corner, right sides together, and sew
(3). Snip seam allowance at intervals of about 3/4 in (2 cm). Turn facing inside and topstitch pocket
mouth twice (4).
2. Sew back waist darts (5). Sew center back seam, with elastic stitches if possible (6). Place front and back
pants on top of each other, right sides together, and sew along side seams (7) and leg seams
continuously from cuff to cuff (8). Fold front pleats soft and pin (9).
3. Attach waist band according to General Instructions above.
4.Fold cuff seam allowances twice and sew. Sew button and buttonhole on waistband.
(Return to Index)
9. 9
PANTS VARIATIONS:
For Pants version 2, (bpants2.mac), omit the zipper and back darts. Sew ends of waistband together
to form a ring. Overlock one long edge and sew other edge to pants waist, right sides together. Press
seam allowance upwards. Fold waist band horizontally in two and sew along previous seam line.
Leave a hole for inserting elastic. After inserting elastic, close hole.
SEWING A SWEATER
(see illustration for T-shirt)
1. Sew side pockets to front pieces according to separate pocket instructions above. For the body of
the sweater, follow the instructions for T-shirt but do not attach ribbings.
2. Sew and attach hood according to General Instructions above. Make small buttonholes in front
piece, on both sides of center front and 2½” (6 cm) from bottom edge. These are the holes for the
drawstring. Strengthen buttonholes by ironing interfacing to wrong side of fabric, then sew
buttonholes. Fold hem allowance inwards 1½” (4 cm) and sew on right side with twin needle to
form a tube for drawstring.
3. Fold sleeve ends inwards and sew on right side with twin needle.
SEWING A VEST WITH HOOD
1. Overlock all edges of yoke pieces for shoulder and neck seams. Do the same with the front piece
edges to which yoke is to be joined. Fold button plackets of front yoke inwards along fold line.
Fold front piece's yoke seam allowances inwards and baste (cut seam allowance diagonally at
corners to allow it to fold). To strengthen the corner to be cut, sew line of stitches around corners
at width of seam allowance from edge. Place yoke pieces on top of each other so that their center
fronts match (=button plackets on top of each other). Then place front piece on top of the yoke.
Baste and sew yoke to front piece, simultaneously edgestitching it.
2. Sew and overlock shoulder and side seams of shell and armscye facings. Place facings onto
armscyes of shell, right sides together. Sew and overlock. Snip the seam allowances at ¾” (2 cm)
intervals. Turn facings inwards and edgestitch. Hand sew facings with small stitches to shell's
shoulder and side seams.
3. Sew and attach hood according to General Instructions above . Make small buttonholes in front
piece, on both sides of center front and 2½ “ (6 cm) from bottom edge. These are the holes for the
drawstring. Strengthen buttonholes by ironing interfacing to wrong side of fabric, then sew
buttonholes. Fold hem allowance inwards 1½ “ (4 cm) and sew on right side with double needle to
form a tube for drawstring. (Return to Index)
10. 10
SEWING BIBSUIT, OVERALL, AND PLAYSUIT
1. Sew front center seam from leg seam to where button placket begins (1). Fold button placket right
side inwards and sew bottom edge from fold to center front (2). Cut seam allowance diagonally
here (3). Turn out. Place button plackets on top of each other, center fronts matching, and sew
over bottom edge though all layers of fabric.
2. Iron interfacing to pocket pieces (4). Turn seam allowances inwards and baste. Topstitch pocket
mouths. Sew pockets to their places on front pieces, simultaneously edgestitching them.
3. Sew back center seam, with elastic stitches if possible (5).
4. Place front and back pieces on top of each other, right sides together. Sew side seams (6). Sew
leg seam continuously from cuff to cuff (7).
5. Sew side seams of facings. Fold button placket along folding line, right sides together. Place
facings on it on overall's neck, right sides together. Sew along top edges continuously from center
front, around shoulder straps and along armscyes to back shoulder straps etc. (8).
6. Snip the seam allowance along the curved section at intervals of about ¾” or 2 cm. Cut corners of
seam allowance. Turn facings and shoulder strips inside and edgestitch. Sew buttonholes to back
shoulder straps and buttons to front shoulder straps. Fold leg ends two times and sew.
7. For patterns with hoods, attach hood according to General Instructions above. Attach sleeves
according to instructions given for T-shirt.
(Return to Index)
11. Measuring for Children's - Babies
You will need:
three pieces of 1” wide elastic
a measuring tape.
The subject should stand straight but relaxed while being
measured. You will receive the best results if the measurements
are taken over underwear.
Place the elastic bands around the chest, waist and hip. Search
carefully for the correct places of these elastic bands. Keep these
elastic bands on their places during the whole measuring
process. Hip elastic is fastened on the level where hip
circumference is maximum. Examine whether it is on the
buttocks (7-8 inches/18-20 cm below the waist) or on top of the
thighs (10-12 inches/25-30 cm below the waist). Vertical
measurements are taken from the bottoms of the bands.
It is important to use the elastic bands throughout all measuring.
Don’t remove the elastic before all necessary measurements
have been taken.
Except for pants' cuff circumference and skirt/dress length, all
measurements are body measurements. DO NOT ADD ANY
EASE to the measurements. The program does it for you.
DO NOT TIGHTEN MEASURING TAPE.
Please, refer to the picture related to this measuring form.
You can use either centimeters or inches. Make your
measurements accurate to the nearest ¼” or ½ cm.
Name: Date:
1 Body height: Measure the full height of the subject.
2 Bust/Chest Circumference: Marked with elastic. Measure around the fullest part of
the chest, keeping the tape high at the back
3 Waist Circumference: Measure waist at the elastic tape
4 Hip Circumference: Measured over the largest part of the subject’s bottom/thighs
(at elastic)
5 Shoulder length: Measure from bottom of neck to shoulder tip. Shoulder tip is found
when you raise the arm to horizontal position and feel where there is hollow/pit
between shoulder and arm bones. Hold child’s arm horizontal, if necessary, to find
this point.
6 Overarm: Arm length from shoulder tip (as described above) to wrist. Bend arm
slightly and measure over outside of elbow.
7 Back Length: Measure from center of back neck to lower edge of waist elastic
8 Inside seam: Measure from crotch to desired cuff length on an existing pair of
pants.
9 Outside seam: Measure from waist over the outside curvature of the hip to the
desired cuff length.
10 Neck Circumference: Measure around lowest part of neck, at the base.
(Return to Index)
12. Recommended patterns
Baby Patterns by sizes
Patterns of Classic Women’s Clothing
Patterns of Classic Men’s Clothing
Patterns of Classic Child Clothing
Patterns of Women Jeans
Pack Total Elite Patterns
CreamodaShop.com
patronaje@creamodashop.com
(Return to Index)