Escorts in Nungambakkam Phone 8250092165 Enjoy 24/7 Escort Service Enjoy Your...
2004 0520 Tx
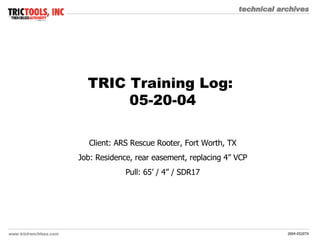
1. TRIC Training Log: 05-20-04 Client: ARS Rescue Rooter, Fort Worth, TX Job: Residence, rear easement, replacing 4” VCP Pull: 65’ / 4” / SDR17
2. We at TRIC Tools have specific requirements for the use and maintenance of our equipment with regard to safety and efficiency on the job. Our written and verbal recommendations coincide with safety regulations set by local, state, and national government agencies. Our clients may have standards over and above industry regulations. However, the safety equipment, apparel, and operating procedures demonstrated by our clients in this presentation may or may not comply with above mentioned government regulations.
3. Facing the pipe ends: Watch for full, even ribbons of shaved material from both mating surfaces. Start blades moving before drawing ends together and keep them spinning as you separate them. Support opposite ends of pipe to help line up ends in fusing machine.
4. Heating the pipe: Make firm, even contact with heating iron, then use neutral pressure. Fusing time and temperatures are also affected by weather.
5. Joining pipe: It is helpful, though not necessary,to have another person to remove the heating iron so the fuser can concentrate on the joint at the moment of connection.
6. Fusing: As the heated pipe ends join, watch the “roll” of hot material as the weld forms two even, opposing rounded beads at the point of connection. Set jig at that point and let pipe set as per manufacturer’s specifications.
9. Cooling: Weld times vary according to ambient temperature and humidity, pipe size, and wall thickness. Refer to manufacturer’s specifications. A good rule of thumb is to wait until weld is only slightly warm when grasped tightly.
10. Preparing the pulling end: Cut a shear wall straight down and wide enough for the pressure plate, eliminating any protruding pipe. Cut down about 6” below pipe at base of pressure plate wall.
12. Lubricating the ram jaws: Use a liberal amount of anti-seize in upper and lower jaw tracks, wherever jaws slide inside their housing on the ram. This is very important.
13. Ready for power: Here metal fencing is used to keep the ram and pulley upright until the power unit can be connected and tension applied.
14. All hands on deck: Moving the fused pipe. Keep in mind which end is more convenient to attach the bursting head with regard to eventual point of entry.
15. Getting in position: Feeding the tail end of the pipe out beyond the property line to position head at entry hole. Flexibility of PE pipe is advantageous both above and below ground!
16. Connection: Attaching the cable to the bursting head.
17. Ready to pull: Securing the clevis bolt with the cotter pin.
18. Entry: Keep an eye on the cable, head, and pipe as pull begins, to assure as smooth, direct, and unrestricted a start as possible.
19. The pull: Pipe moves quickly with a heavy duty power unit.
20. Safety first: Stay out of the pulling hole when the job is in progress.
21. Cable storage: An old tire is an ideal container for the cable.
22. End of the line: Slow down and watch carefully for the clevis sheath to appear.
23. Using the extender cage: Wood cribbing is particularly useful at this point, since the resistance plate is removed for the cage to be used.
24. Arrival: Keep debris away from head and cable to allow clear vision of the clevis sheath at all times. Never allow the clevis sheath to be drawn into the pulley assembly.
29. Bottom end: Leave enough pipe at the point of entry to “bump” towards the pulling end with a sledge hammer. This helps relieve any pipe stretching that may have occurred during the pull, and also assists in coupling connections.
30. Bumping: With the smaller pipe diameters, this is a very useful technique. Here the full length of pipe is being tapped upstream to meet the house cleanout.
31. Perfect union: When possible, bumping eliminates the need for extra couplings.