SlideShare a Scribd company logo
1 of 29
Regions of the United States
Grade: 2nd
Time Frame for Unit: Approx. 7 school days
Graphic Organizer
Subject: United States Geography
Lesson
Number/Title
Time
Frame
Standards Met Activities
1: Find Us on
the Map!
1 hour CCSS.ELA-LITERACY.SL.2.1
Participate in
collaborative
conversations with
diverse partners
about grade 2 topics
and texts withpeers
and adults in small and
larger groups.
CCSS.ELA-LITERACY.SL.2.2
Recount or describe
key ideas or details
from a text read aloud
or information
presentedorallyor
through other media.
CCSS.ELA-LITERACY.SL.2.4
Tell a storyor recount
an experience with
appropriate facts and
relevant, descriptive
details, speaking
audibly in coherent
sentences.
1. Pre-Assessment: Labeling states on a blank
outline map of the United States.
2. Read “Me on the Map” by Joan Sweeney.
3. Discuss prior knowledge about states and
the United States map.
4. Explore classroom map of the United
States; make connections and share stories.
5. As a class, border regions of the states and
label the regions.
6. Short post-assessment:
o Name 3 out of the 7 regions of the
United States.
o Name at least 3 states other than
Wyoming.
o Name 2 states of the US that are not
part of the inland.
2: Regions in
the United
States
1 hour CCSS.ELA-LITERACY.L.2.2.A
Capitalize holidays,
product names, and
geographic names.
1. Have students pull out their filled out
regions map of the United States, discuss
all of the regions and the states in them.
a. For each region, pull out a precut
poster board section of each region.
CCSS.ELA-LITERACY.SL.2.2
Recount or describe
key ideas or details
from a text read aloud
or information
presentedorallyor
through other media.
CCSS.ELA-LITERACY.SL.2.1
I will make a big poster of the
United States map and cut the map
up based on regions, and highlight
each individual region to students
while reviewing.
2. When talking about each of the 48 states,
point out each of the state’s capitals.
a. Discuss what a state capital is.
b. Have students put a red star in each
of the states on their outlines (they
do not need to write the names)
3. Ask a series of questions which relate to the
project: how much rain do you think states
like Arizona get? What about Washington?
Which states do you think would be cold?
Hot?
4. Explain the research project: students will
be put into small groups of 2-3, each group
will be assigned the task of looking up the
states in one of the ___ regions of the
United States, including:
a. States and state capitals
b. Climate/weather in the region
i. Average temperature during
2 contrasting moths
ii. Average precipitation
(Rainfall)
c. Is it near an ocean? Does it bodies
of water in or near it?
d. Does it have mountains?
e. Any interesting facts?
f. Bonus question: Population of each
state, then total population of
region.
5. Once all of that information is collected,
students will record their findings and make
a large poster on their region and present it
to the class.
6. See if there are any questions, clarify if
need be. Have students do a thumbs
up/thumbs down for understanding.
7. Point out that they may use computers,
atlases, or a variety of books in order to
find their information.
8. Once all questions and clarifications are
taken care of, dismiss students into their
groups, and dismiss groups for about 45
minutes of prep work for the research
project.
a. Groups should discuss how they
want to make their poster; draw a
draft of their poster and divide up
jobs for research.
3: Research
and
Composition
1 30-
minute
session
and
Three
1-hour
sessions
CCSS.ELA-LITERACY.RF.2.3
Know and apply grade-
level phonics and word
analysis skills in
decodingwords.
CCSS.ELA-LITERACY.W.2.2
Write
informative/explanatory
texts in which they
introduce a topic, use
facts and definitions to
develop points, and
provide a concluding
statement or section.
CCSS.ELA-LITERACY.W.2.5
With guidance and
support from adults and
peers, focus ona topic
and strengthenwriting
as neededby revising
and editing.
CCSS.ELA-LITERACY.W.2.6
With guidance and
support from adults,
use a variety of digital
tools to produce and
publish writing,
including in
collaborationwith
peers.
CCSS.ELA-LITERACY.W.2.7
Participate inshared
researchand writing
projects (e.g., reada
number of books on a
1. Call all students to the circle; ask if
everyone has met with their research
groups, divided up jobs and developed an
idea of how they want to form their poster.
2. Explain task for the next 3 days:
a. Groups will spend today (the first
day) researching their region and
recording information.
b. On the second day, wrap up
researching information and look at
the draft of their posters; make
changes if necessary.
c. On the final day, make poster: draw
pictures, write information on
posters, discuss who will share what
to the class, and practice speaking.
3. Once the class is dismissed to start
research, pull one group at a time to discuss
their plans on how they will be creating
their poster and make suggestions on how
to better their posters or fairly divide jobs.
4. While students are researching, and all
groups have discussed their plans for their
posters, walk around to answer questions
and assist students in poster design ideas.
5. On the third day, stress that all research
needs to be done and groups need to focus
on creating their posters.
single topic to produce
a report;recordscience
observations)
CCSS.ELA-LITERACY.W.2.8
Recall information
from experiencesor
gather informationfrom
provided sources to
answer a question.
4: Presenting
Regions
1 hour CCSS.ELA-LITERACY.RI.2.7
Explain how specific
images (e.g., a diagram
showing how a
machine works)
contribute to and clarify
a text.
CCSS.ELA-
LITERACY.SL.2.2 (see
lesson #1)
1. Students will be presenting their regions
with their groups. They will share:
a. Their region
b. States in the region and capitals
c. Pictures they drew on their regions
and explaining what the different
pictures mean.
d. Information about the
climate/weather, precipitation, if
there are any mountains or bodies of
water in their region, and interesting
facts.
2. Once each group has presented their
regions, I will tape their posters up on a
blank wall and ask the group to place a big
puzzle piece of their region on a wall next
to the posters, which will form a big map of
the United States.
3. After each group presents, have students
presenters ask audience members if they
have questions, comments or connections
(3).
4. At the end of presentations, and once all the
posters and puzzle pieces have been placed
on a blank wall, hand students back their
original pre-assessment that they completed
on the first day, and ask them to fill in all
the states they know now with a different
color pen/colored pencil and turn it back in.
Pre-Assessment
Before starting the unit, students will be asked to choose one color of colored pencil or
pen and write down the names of as many states on the blank map as possible. They do not need
to write the names perfect, but they should sound out the names of each state and write the name
as best as they can. Once they have completed their outline, students will remain at their seats
until I call them down to the carpet with their outlines, a clipboard and a pencil. On the floor, we
will then talk about some of the states that students were familiar with, and group the states into
regions as a class. This will be demonstrated on an overhead projector. I will make sure that
while I am grouping the states, students are following along with me.
Lesson #1: Find Us on the Map!
Overview: The purpose of this lesson is to familiarize students with the United States map, and
to promote an understanding that all of the states can be separated into groups.
Time Frame: 1 hour
Materials:
 “Me on the Map” by Joan Sweeney
 Copies of blank United States outlines
 Black markers
 Pen or colored pencil (1 color of child’s choice)
 Clipboards
 Pencils
 Large classroom map of the United States of America
Big Ideas/Essential Questions:
 What states make up the United States of America?
 The 48 inland states of the United States can be broken up into geographic regions based
on location.
Content Objectives:
1. By the end of the lesson, students will be able to state 3 out of the 7 regions of states
within the United States with no assistance.
2. By the end of the lesson, students will be able to name at least 3 states in the United
States aside from Wyoming with no assistance.
3. By the end of the lesson, students will be able to name the 2 states (Alaska and Hawaii)
that are not part of the inland, and state their relation to the United States.
Academic Language Objectives:
Standards: Common Core State Standards: Grade 2 English/Language Arts
CCSS.ELA-LITERACY.SL.2.1
Participate incollaborative conversations withdiverse partners about grade 2 topics and
texts with peers and adults in small and larger groups.
CCSS.ELA-LITERACY.SL.2.2
Recount or describe keyideas or details from a text read aloud or informationpresented
orallyor through other media.
CCSS.ELA-LITERACY.SL.2.4
Tell a storyor recount anexperience withappropriate facts and relevant, descriptive details,
speaking audibly in coherent sentences.
Introduction: In order to present the topic of this lesson and ongoing project with my students, I
will gain their attention with an attention getter and say “I have a question for all of you, but first
I need all eyes on me… How many of you know what state we live in (request an all class
callout)? How many of you know what the country we live in is called (request an all class
callout.) Lastly, by a show of quiet hands, how many of you know a state in the United States
other than Wyoming?” After the students have answered these three questions, hand out the pre-
assessment and let the kids know that this will not be graded, but it will be helpful for the course
of our upcoming geography project.
Procedure:
1. Pre-Assessment: This assessment will be of a blank outline of the US map, where
students will be asked to write as many states as they know in one particular color of
pen/marker.
a. Once students have finished their pre-assessment, have them turn it into the turn-
in bin and quietly meet at the circle/carpet.
2. Once all students have joined at the carpet, ask the class if they know what a map is:
a. Maps of cities, treasure maps, etc.
b. The purpose of maps is to show people where something or some place is in
relation to other places.
3. Ask students what they know about our country’s map:
i. Map of the United States
ii. Shows all 50 states in the United States and parts of Canada and Mexico
(which are all connected to make North America)
b. Ask class what a map does for people and how people use it.
4. Introduce and read out loud “Me on the Map” by Joan Sweeney.
a. Before starting the reading, ask students to raise a quiet hand if they could make a
prediction about what they think the book will be about.
5. Review basic information about the book. Have students turn to a partner to discuss these
questions one at a time. For each question, have students switch partners. After about 30
seconds is given for each question to be discussed amongst partners, look for a quiet hand
to choose for an answer
a. Who was the book about?
b. What happened?
6. Regain student attention; ask whole class:
a. Did you notice where the girl lived? (Kansas)
i. How could you tell where she lived?
7. Refer back to original questions about maps and states; inform students that we will be
learning about the United States map and regions of the country.
i. EXTENSION: I would make this entire lesson and the three following
lessons a follow-up project and introduce the idea of drawing maps of
student’s homes, school, and town first, then expand outward to the United
States.
1. I do think I would read this same book again to have students focus
on specifically United States maps and to help transition their
thinking from small home-based maps to larger world scale maps.
8. Pull down classroom map of the United States over the whiteboard.
a. Mention some of the states that kids mentioned, have them point it out on the
map.
b. Have kids state some other states they see on the map that they may have been
familiar with before.
c. Have a few kids share some personal stories relating to family or past experiences
in other states.
9. State to kids that we will be chunking up the United States map into regions as a class,
and that by doing so, we will eventually be working on a project about all of these
regions.
a. Pass out paper to every student with a blank outline of the United States.
i. SEE PICTURE BELOW
b. Have kids grab a black marker or crayon for bordering and a pencil. Give a 1
minute timer to grab materials and clipboard.
c. Differentiated Instruction: have maps pre-bordered and printed for students
with lower performing or poor fine motor skills.
10. Chunk up outline over document camera with class; have class follow along in chunking
up regions and writing the names of regions.
a. Frequently repeat names of regions, and mention border lines many times.
b. Have students do thumbs up/thumbs down if and when ready to move on.
11. Indicate to class that there are the “inland states”, which are the 48 main states that are all
connected to each other, and there are 2 states that are not part of the inland BUT are still
part of the United States (Alaska and Hawaii).
12. See Clean-Up for next step.
13. Transition to the next activity by giving students goal:
a. Put your sheet in your folder
b. Pull out materials for next subject
c. Give me thumbs up when you are ready to roll!
Note: During the lesson, keep an eye out for students who are paying attention, remaining
focused and getting their work done, and allow them to move their pins (behavior management
system) up on the chart. If students are distracted, give one warning then ask students to move
their clips down. (Follow some sort of management plan)
Clean-Up: Once the outline of the United States map has been filled out by all students, instruct
students to place their map outlines in their Social Studies folder, and that we will be returning to
this map for a reference to a project that will be conducted on the next school day. Have students
put away their markers in their appropriate art bins.
Assessment/Evaluation: Provide a short post lesson evaluation to see if students were able to
comprehend as much information as they were given:
o Name 3 out of the 7 regions of the United States
o Name at least 3 states other than Wyoming
o Name 2 states of the US that are not part of the inland
7. This will let me know what more I need to touch on for tomorrow’s lesson.
Closure: In order to reinforce student success, one thing I will do for the next lesson is to show
the kids my outline of the states once more and have them double check that theirs looks like
mine. I will glance over all of theirs for clarification, so that when it comes time to pair students
together for a different region, they will not be confused by which states belong to which region.
Lesson #2: Introduction of Regions Project
Overview: This lesson will allow for students to familiarize themselves with their self-made
regions map of the United States from the previous day, and will introduce students to their
upcoming research project on the regions.
Time Frame: 1 hour
Materials:
 Students self-made regions map of the United States
 Poster paper, markers and tape
 Computers/laptops “on wheels”
 Classroom supply of atlases, maps, and books on the various states
Big Ideas/Essential Questions:
1. Every state in the United States is composed of different cities/towns, climates, and land
formations. Though all the states and regions may differ from one another, all of them
come together to form the United States.
2. What states make up the 7 regions of the United States? (Include Alaska and Hawaii as
outland regions)
3. What do we know about the regions of the United States, what do we want to know, and
what will we learn from our research?
Content Objectives:
1. By the end of this lesson, students will be able to recall previously learned information
about the regions of the United States
2. By the end of this lesson, students will be able to construct a KWL chart about regions of
the United States and document their questions or findings.
3. By the end of this lesson, students will be able to determine specific jobs for each student
in their research group and take part in the early research process.
Academic Language Objectives: Students will be introduced to vocabulary related to
significant places in the United States, as well as terms relevant to their research project criteria:
 Capital (where each states government headquarters is located)
 Precipitation (how much rain a place gets in a certain amount of time)
 Climate (the weather within a region)
 Temperature (how hot or cold a place is)
 Research (looking up information)
Standards: Common Core State Standards for English/Language Arts
 CCSS.ELA-LITERACY.L.2.2.A- Capitalize holidays, product names, and geographic
names.
 CCSS.ELA-LITERACY.SL.2.2- Recount or describe key ideas or details from a text
read aloud or information presented orally or through other media.
 CCSS.ELA-LITERACY.SL.2.1- Participate in collaborative conversations with diverse
partners about grade 2 topics and texts with peers and adults in small and larger groups.
Social Studies Standards, State of California, 2nd grade
http://www.cde.ca.gov/be/st/ss/documents/histsocscistnd.pdf
 2.2 Students demonstrate map skills by describing the absolute and relative locations of
people, places, and environments.
Introduction: Before starting this lesson, search for a large print out map of the United States
from available teacher resources and websites (TeachersPayTeachers, Parent-Teacher stores,
Pinterest, etc) Once the poster has arrived, cut out each region of the United States. This step
would be preferable to have done before the unit is presented in order to have ample time to
prepare and not feel rushed. Find a blank space on an open wall in the room, or clear off the
bulletin board, put a piece of tape behind each region and tape all of the regions together to make
the United States. At the appropriate slotted time for lesson to begin, gain students attention with
any appropriate attention getter (I like to use Hocus Pocus, Everybody Focus). Once you have all
students’ attentions, let students know that it is time to transition into our social studies lesson.
Let students know their next steps: 1) Students will put away their materials from the previous
lesson, 2) Have students pull out their filled out regions map of the United States.
Procedure:
1. When both steps have been completed by the whole class, ask students what they
remember from yesterday’s lesson on regions of the United States.
a. For each region, pull out a precut poster board section of each region. I will make
a big poster of the United States map and cut the map up based on regions, and
highlight each individual region to students while reviewing.
2. Begin a KWL chart on a poster sized piece of paper and place it on the white board.
i. Ask students if they know what a KWL poster is. K represents what the
students Know, W represents what the students Want to know as they
further their research, and the L represents what the students have Learned
as they completed their research. Inform students that we will be using this
poster for the duration of our regions unit, and it will be their jobs to keep
their own documentation of what it is they want to learn and what they
have learned when completing their research. At the end of the unit, we
will gather back together as a class to review the chart and add what we
have learned from our research on the regions.
ii. Inform students that another one of their jobs during their research project
will be to find out information from the W section and present it to the
class.
b. After explaining the purpose of the KWL chart to the class, have students share
their learnings from the previous lesson about regions in the United States, and
write it down on the K (Know) section of the KWL poster. Once all students have
shared their findings, ask them information they want to learn about as we start
this project.
i. Write down W’s on the board that they will be asked to research for their
regions; present these W’s as hypotheticals at first, then circle those W’s
and refer back to them as information that students will need to find out
for their regions. Only write down two or three of the requirements listed
below, and then add in additional requirements later on. Allow students
the chance to wonder if about these topics. If a student wonders about any
additional requirements, write it down on the board and circle it, then let
students know that will be another requirement for their project.
1. Capitals of each state in their region
2. Average temperature during two contrasting months (Winter and
Summer)
3. Climate in the region (including temperature)
4. Major cities (cities with the most amount of people, with lots of
businesses, homes, attractions, or major airports)
a. What would a major city be? Denver, for example.
5. Big attractions (Space Needle, Statue of Liberty, Golden Gate
Bridge, etc)
a. Discuss some other major attractions that students are
familiar with in the United States.
6. Major landforms (mountains, lakes, big rivers, oceans)
a. Discuss oceans that touch the United States, rivers, lakes or
mountains that kids may be familiar with.
3. After starting the KWL chart, redirect students attention back to the W (want to know)
section of the KWL chart and talk about capitals.
a. Each state in the United States (including Alaska and Hawaii) has a capital; the
capital is usually symbolized by a small star on a map to indicate where it is in the
state. Capitals’ are where the government headquarters are; it is where the
governor of the state, legislators, and important people who help to run each state
and all in it work.
b. Ask students if they know what Wyoming’s capital is. (Cheyenne)
c. Ask students if they happen to know the capital of any other states in the United
States? Pull down the classroom map as a resource. Remind students that on a
map, capitals are represented with stars. Have students come up one-by-one to
point out a capital of a state if they volunteer. Call about 5 students, then move
onto the next step (see 4)
4. Ask students about ways that states differ from one another, and why that may be. Leave
the classroom map down during this discussion.
a. Talk about states that may be hotter than others and colder than others
(temperature), which states would get more rain than others (precipitations).
i. Why would Washington get more rain than Arizona? What is one reason
why?
ii. Why do you think states like Wyoming are colder than places like Texas?
b. Ask students if they notice any physical differences on the United States map.
i. Are there differences in color? What do the colors mean?
ii. Which states have a lot of trees? Which states do not have a lot of trees?
Which states have lakes, rivers, touch oceans, etc?
5. Explain the research project: students will be put into small groups of 2-3, each group
will be assigned the task of looking up the states in one of the ___ regions of the United
States, including:
a. Capitals of each state in their region
b. Average temperature during two contrasting months (Winter and Summer)
c. Climate in the region (including temperature)
d. Major cities (cities with the most amount of people, with lots of businesses,
homes, attractions, or major airports)
e. What would a major city be? Denver, for example.
f. Big attractions (Space Needle, Statue of Liberty, Golden Gate Bridge, etc)
g. Discuss some other major attractions that students are familiar with in the United
States.
h. Major landforms (mountains, lakes, big rivers, oceans)
i. Discuss oceans that touch the United States, rivers, lakes or mountains that kids
may be familiar with.
j. Interesting Facts about states/regions
k. Bonus question: Population of each state, then total population of region.
6. Once all of that information is collected, students will record their findings and either
make a poster, or create a PowerPoint presentation with their group.
a. See if there are any questions, clarify if need be. Have students do a thumbs
up/thumbs down for understanding.
b. Point out that they may use computers, atlases, or a variety of books in order to
find their information. Their first step is to find and record information, and their
second step is to create their poster or PowerPoint and add that information.
7. Once all questions and clarifications are taken care of, dismiss students into their groups
to discuss what they need to do for jobs within their groups and look up altogether (which
states will they be researching, what jobs will each person do in their groups, how will
they find out the necessary information, how do we want to present our information, etc)
8. Provide remaining time for groups to assign jobs and begin research.
Notes on Behavior: If students are distracted or not following classroom rules during lessons,
use assigned behavior management system to keep them on task. If students need to have a dance
party break during the lecture, play one song out loud, allow students to dance on the carpet area,
then call them back to their seats and take 4 deep breaths as a class.
Clean-Up: At the end of the hour time slot, students will be asked to place their regions maps
into their Social Studies folder, and to finish writing down any relevant information related to
their research (titles of books, facts, etc) then stick those papers into their Social Studies folders.
Assessment/Evaluation: Students will be asked to name their specific region that they have
been assigned for their research project, and to name all 7 of the regions that make up the United
States. This assessment will take place as a whole class and will be done using the large cut out
map of the United States. Before having students state the name of the region that will be held up
one at a time, students will be asked to give a “thumbs up”, sideways or “thumbs down”
depending on their confidence in being able to name the region of the United States. This short
assessment will give me an idea of kids in the class who may not fully comprehend all the
regions of the United States, and allow me to think of ways to make sure each of those kids are
able to name all of the regions by the end of the unit.
Closure: During the next several days, which are allotted for research to take place, I will make
sure to be walking around the classroom and helping students to answer questions they might
have, find information they need for the project, or assisting with computer troubles. It will be
crucial to make myself available for students during this research process since they will be
asked to look up so much information and will be given the opportunity to use technology in
order to present their findings.
Lesson 3: Research
Overview: This three-day long lesson is intended for students to research their selected regions
of the United States in their groups, and to compose a visually appealing, creative poster or
PowerPoint presentation on their researched region.
Time Frame: 1 30-minute session and Three 1-hour sessions (4 school days)
Materials:
 Computers/laptops “on wheels”
 Atlases, maps, books on states or regions of the United States
 Dictionaries
 Poster paper
 Coloring supplies (crayons, markers, etc)
 Paper and pencil (for documenting findings)
Big Ideas/Essential Questions:
 What states make up specific regions in the United States?
 What makes the regions different from one another?
 What are some interesting facts about each region?
 What are each region’s normal climate/precipitation levels?
 What physical landforms/landmarks are present in each region?
 What is the capital of each state in each region?
Content Objectives:
 Students will be able to generate and present a poster or PowerPoint presentations with
required information about assigned region by the end of the three-day 1-hour period.
 Students will be able to execute their prior technology skills to find information on the
computer or compose a PowerPoint presentation, if they choose to.
 Students will be able to compose a creative poster with required information about
assigned region visible on the poster by the end of the three-day 1-hour period.
 Students will be able to exercise their research skills by finding relevant information on
their region on the internet, or in atlases, maps and/or books in order to compose their
presentation or poster.
 Students will be able to effectively work together to research necessary information for
their poster/presentation, and collaborate on creative ways to compose their
presentation/poster during the duration of the research period.
Academic Language Objectives: During this research period, I will not be assigning any new
vocabulary to students that have not already been presented in previous lessons. During their
research, students will undoubtedly come across new vocabulary terms and will have questions
about them. If they do run across an unfamiliar word, I will supply students with a printed
dictionary and ask them to research the word in the dictionary. If they still have questions about
the unfamiliar word, I will assist students in rephrasing the definition.
Terms that students will review and use during their presentations (content language):
1. Region- a collection of states with similar climates and characteristics
2. Capital- where each state’s government’s headquarters is located
3. Landforms- a natural feature of the Earth’s surface (the Grand Canyon, Salt Lake City,
Mississippi River, etc)
4. Landmarks- physical object or feature that signifies the location of a town (Statue of
Liberty, Seattle Space Needle, Golden Gate Bridge, etc)
5. Precipitation- how much rain a place gets in a certain amount of time
6. Climate- the weather within a region
7. Temperature- how hot or cold a place is
Instructional Language:
 Collaborate- to work together and talk with group mates
o Example: Students will collaborate with group members to determine what
information is relevant for their presentation.
 Relevant- is it important?
o Example: Is this information relevant to the project?
 Generate/compose- make, or put something together
o Example: Students will be asked to compose a creative presentation on their
assigned United States region with their group members.
 Analyze- to examine
o Example: Students will have to analyze the research that they find in order to
determine its relevance.
 Evaluate- graded.
o Example: “I will be evaluating you based on your behavior during this research
time”
Standards: Common Core State Standards, English/Language Arts
 CCSS.ELA-LITERACY.RF.2.3
Know and apply grade-level phonics and word analysis skills in decodingwords.
 CCSS.ELA-LITERACY.W.2.2
Write informative/explanatorytexts inwhich they introduce a topic, use facts and
definitions to developpoints, and provide a concludingstatement or section.
 CCSS.ELA-LITERACY.W.2.5
With guidance and support from adults and peers, focus ona topic and strengthen
writing as needed by revising and editing.
 CCSS.ELA-LITERACY.W.2.6
With guidance and support from adults, use a variety of digital tools to produce and
publish writing, including in collaborationwithpeers.
 CCSS.ELA-LITERACY.W.2.7
Participate insharedresearchand writing projects (e.g., reada number of books on a
single topic to produce a report;recordscience observations)
 CCSS.ELA-LITERACY.W.2.8
Recall informationfrom experiences or gather informationfrom providedsources to
answer a question.
Social Studies Standards, State of Colorado
 Geographic terms and tools are used to describe space and place
o Identify and locate various physical features on a map (DOK 1)
Notes on Behavior: Before students will be dismissed to start working on their projects with
their groups, students will be gathered to the carpet area to have a whole class discussion about
proper care of the materials, and what that looks like. During the research process, if a student
disrespects the materials or objects that they are using, they will follow the classroom
management system and have a personal talk with me on how to respect materials. If students are
demonstrating disrespect for materials more than once, that student will be asked to find a new
method of research that strides away from the method in which they are disrespecting. The
remaining members of the group will be allowed to proceed as normal, and the student finding
research elsewhere will be expected to contribute to their group just as much as before.
Introduction: Students will be asked to clean up materials from the previous activity and to
gather at the carpet. Once students have gathered at the carpet, give a quick quiz: ask students to
name the 7 regions of the United States. Call on one student at a time to name one region, and
form a list of the regions. Once all of the regions have been named, ask a “challenge question”:
ask students if anyone can name any of the states in any of the 7 regions. As states are listed,
write the names on the side of the region name. When the list is complete, place the list on the
white board OR a blank space on the wall for students to use as a review during their research.
Procedure:
Day One:
1. Once the list has been completed, indication a change in topic with students to being to
explain the research project.
a. Explain to students that the reason we have been learning about the regions of the
United States in order to better learn about how our country is separated into
different “puzzle pieces”. Each “puzzle piece”, or region of the United States, has
differences from the others in terms of weather, physical and geographic
landmarks, and number of people in each state.
b. “Your job will be to learn all you can about one region of the United States and
share it with the class.”
2. Explanation of research project:
a. Students will “generate” a creative presentation on their assigned region with a
group of their peers.
i. Generate means to create something.
b. This presentation can either be in PowerPoint format or as a handmade poster.
i. In the presentation of the groups choice, students will need to show the
following information:
1. The name of the region
2. States in the region
3. What the weather/climate is like
4. Average precipitation (rainfall) during 2 contrasting (different)
months
5. Physical landmarks (Space Needle, Golden Gate Bridge, etc)
6. Geographic landmarks (Grand Canyon, Salt Lake, mountain
ranges, oceans, forests, deserts, etc)
ii. “If you decide you want to add additional information, or go above and
beyond the call of duty, here is some additional information that you can
add”:
1. Population of each state
2. Capitals of each state
3. Interesting facts about your region.
iii. “If you decide to find the additional information, that is great, BUT you
should focus on the main parts of information FIRST before doing any
additional research.”
c. In order to find information, students will be allowed to have time on “laptops on
wheels”, iPads or computers in the classroom or computer lab (depending on
availability). They will also have access to books and atlases from the library for
their research.
i. “When we find information from a website or a book, we need to say
“Thank You” to the author” by crediting them for their work.
1. Show example: “If I were to be doing my research on the
Mountain West region of the United States, I could type in
“Mountain West region” into Google (pull up screen and
demonstrate on overhead projector/Smart Board). Once I hit enter
on the search bar, I see that there are a TON of resources available
to me. If I choose to click on a website, look through it, and find
information that I want to use in my presentation, I need to write
down the name of the website, or book/atlas, and make a “Thank
You” page for all the websites/authors whose information I use for
my presentation”
a. During this time, pull up a Microsoft Word document and
label it “Thank You”.
ii. “If I choose to type up my research onto a Word document OR onto a
PowerPoint presentation (pull up link onto laptop as well), I need to
remember to always SAVE my work. What we will do is At the end of
every session, whoever decides to do a PowerPoint presentation will save
their presentations to a classroom flash drive.”
a. Explain a flash drive and what it does.
d. Explain to students expectations of respecting materials.
i. Ask a variety of questions of how we treat materials: do we throw them
around the classroom? Do we pound on the keyboard or the mouse or the
monitor? Do we break the lead off of pencils just so we can sharpen them?
1. How do we treat the materials in our classroom?
a. Call on students with hands quietly raised. This would be a
good time to pull up another piece of paper to create a list
of ways to respect materials and keep available in the
classroom during the research time.
e. Show students behavior assessment. See Appendix __ below.
i. Explain to students that they will be evaluated for all three days on their
behavior and attitudes. Place the assessment under the document camera
to show students what it looks like and how they will be evaluated.
1. “Evaluate means I am going to basically be grading you on how
you are acting during this time.”
ii. If I, or any other teacher, were to catch students disrespecting the
materials, they will be given one warning AND will have a discussion
with myself as to what they were doing and why we cannot do it in the
future. If they are caught a second time, that child will be asked to use
other forms of research for the remainder of the research period. However,
that student will still be expected to contribute to their group members.
3. Review what has been said in shorter phrases for students to remember, create a checklist
for students to use during their research process (See Appendix B).
a. Groups and regions will be assigned.
b. Groups will decide whether they want to make a poster OR a PowerPoint for their
presentation.
i. Note to students that PowerPoints will be a bit trickier to work with
because it is very technical and sometimes hard to fully understand and
work with.
c. Group members will decide what job each member will have:
i. Main Researcher
ii. Main Recorder
iii. Main Decorator
1. Note to students that just because you do not have 2 of the jobs,
you are still required to help with the
researching/recorder/decorating process. This just means that this
individual person is the leader in how each job will be handled.
d. In every group, students will be asked to find the following information:
i. The name of the region
ii. States in the region
iii. What the weather/climate is like
iv. Average precipitation (rainfall) during 2 contrasting (different) months
v. Physical landmarks (Space Needle, Golden Gate Bridge, etc)
vi. Geographic landmarks (Grand Canyon, Salt Lake, mountain ranges,
oceans, forests, deserts, etc)
e. Once information is found, document it/write it down in a notebook or a piece of
paper.
i. Create a “Thank You” page for all the information you have used from
websites or books.
f. Group members will assign speaking parts to each group member, who will share
different bits of their presentation.
g. Once all components have been put together, students will share their product
with myself and get the OK to present to the class.
4. Ask class for questions; emphasize that if students have any confusion to please ask them
now so that the whole class can get clarification. Accept any student questions and
respond appropriately.
5. Once questions have been addressed, assign students to regions by naming off one region
at a time and naming off students for each group.
a. Note: It would be most beneficial to assign groups ahead of time so it will be
easier to eliminate pairs of students who will be easily distracted or slacking.
6. After groups have been assigned, ask groups to get together and decide what method of
presentation they wish to use and jobs that each person will have. Allow about 5 minutes
for group collaboration.
a. “Get together with your groups to collaborate, or discuss, about your project”
b. Tell students to make a list of what their names and regions are, what presentation
they would like to use, and the jobs that each student will have. Once that list has
been created, students will turn it into myself and be dismissed to get a silent
reading book until the next lesson is ready to take place.
Day Two, Three and Four:
1. Ask students to get with their research groups.
a. Let students know that as learners, they will be required to analyze, or heavily
examine, all the information that they find and decide whether or not it is
relevant to their project or not.
b. Go over expectations of behaviors, attitudes and treatment of materials one last
time.
2. Dismiss students to work on their projects with their groups. Be sure to walk around
during this time to examine how students are working together and if they have questions
or need help.
a. Students will be responsible for following the checklist below within their own
groups.
Clean-Up: At the end of each of the three sessions, students will be asked to place any papers
that they may have printed out or written into their Social Studies folder, as well as to save any
documents or PowerPoints onto their student school account or a classroom flash drive. Provide
the flash drive to each group so that they may load their PowerPoints onto the flash drive;
observe the kids as they try to save and where they save the files to. If students have created a
creative poster, have students put away all art supplies (into their own crayon box if it belongs to
them or into the classroom community containers for each type of art material). Create an
accessible, and least distractible, spot in the classroom for students to place their posters. On the
third and final sessions, students will need to review their PowerPoints and posters to make sure
that all the visual effects and information presented, and to make sure that speaking roles have
been evenly assigned.
Modifications/Enrichments: During the research time, students will be required to provide
particular information on their assigned region, including: the states in their assigned region,
climate, average precipitation in two contrasting months of a year, physical landmarks (Space
Needle, Golden Gate Bridge, etc), geographic land features (mountains, deserts, major
lakes/rivers, oceans, forests), and interesting facts about the region. For the groups who want a
challenge problem, they will be asked to find the following information about their region:
 Population of states
 Capitals of each state
 Interesting facts about each state
Additionally, the presentation part requires students to divide speaking roles amongst group
members. I am very much aware that different students have anxiety when it comes to speaking
in the class, so I will interject myself into groups with students who fit that category and suggest
unique roles for those students to do during the presentation. For example, maybe student could
hold the sign and present their region to the class?
If students finish putting their presentations together early, have them practice speaking to a wall
in the classroom or to myself with their assigned roles.
Assessment/Evaluation: During all three sessions, students will be assessed on behavior and
attitude. See Appendix A below. During this time, no other assessment will be given because
students will be engaged in individual learning and researching during these times. Assessment
of information from presentations and personal learning will be given after the fourth lesson.
Closure: The information that students find from the three research days will allow for students
to learn more in depth about different areas of the United States, and eventually learn how the
different regions vary from one another during presentations. During research time, I will make it
a point to make myself available to help students with technical or social problems rather than
grading or doing other work. Respect of materials will be a big thing on the radar and will not be
taken lightly; I do believe that reminders are good strategies for behavior management, but I
want students to really understand that if you cannot respect something, you will not be allowed
to use it.
Appendix A-Behavior Assessment: This assessment will be used as a Y/N assessment.
Name: ________________________________
1. Is student engaged?
2. Is student participating in group research?
3. Does student contribute ideas?
4. Does student respect the materials used for their research?
5. Does student respect group members?
*Students will be shown this assessment before they are dismissed to begin research to know the
expectations of their behavior.
Appendix B: Student Checklist
Region:_____________________________
For each task that is completed, put a checkmark next to the sentence.
1. Group has been assigned a region.
2. Group has decided what kind of presentation they want to make?
a. PowerPoint presentation or poster
3. Group has assigned jobs for each member (please list name of person who has each job):
a. Main Researcher:
b. Main Recorder:
c. Main Decorator:
4. Group has found the following information on their assigned region:
i. The name of the region
ii. States in the region
iii. What the weather/climate is like
iv. Average precipitation (rainfall) during 2 contrasting (different) months
v. Physical landmarks (Space Needle, Golden Gate Bridge, etc)
vi. Geographic landmarks (Grand Canyon, Salt Lake, mountain ranges,
oceans, forests, deserts, etc)
5. Group has created a “Thank You” page
6. Group has put all relevant information onto their presentaitons
7. Group has assigned speaking roles to each group member.
8. Group has OK-ed their presentation with Ms. White
9. Group is ready to present!
Lesson 4: Presenting Our Regions
Overview: Students will present their generated posters or PowerPoints about a specific region
in the United States to the class.
Time Frame: 1 hour
Materials:
 Smart Board/overhead projector
 Laptop with USB port
 Classroom flash drive (for students who created a PowerPoint presentation)
 Puzzle pieces of the United States regions
 Strong tape (to hold up puzzle pieces to a wall)
 Post-assessment quiz
 Student pre-assessment
Big Ideas/Essential Questions:
 What are some similarities and differences between the seven regions of the United
States?
 What are the seven regions that make up the United States?
 What states make up each region of the United States?
 What makes the regions different from one another?
 What are some interesting facts about each region?
 What are each region’s normal climate/precipitation levels?
 What physical landforms/landmarks are present in each region?
 What is the capital of each state in each region?
Content Objectives:
 Students will be able to recall all seven regions of the United States by the end of the
presentations with 100% accuracy.
 Students will be able to demonstrate individual knowledge of their assigned region to the
class, using their creative posters or PowerPoint presentations as guides.
 Students will designate equal responsibilities for each member of their group in terms of
speaking roles.
 Students will demonstrate respectful listening skills by actively listening to each regions
presentation and asking questions and/or making comments and/or connections.
Academic Language Objectives:
Terms that students will review and use during their presentations (content language):
8. Region- a collection of states with similar climates and characteristics
9. Capital- where each state’s government’s headquarters is located
10. Landforms- a natural feature of the Earth’s surface (the Grand Canyon, Salt Lake City,
Mississippi River, etc)
11. Landmarks- physical object or feature that signifies the location of a town (Statue of
Liberty, Seattle Space Needle, Golden Gate Bridge, etc)
12. Precipitation- how much rain a place gets in a certain amount of time
13. Climate- the weather within a region
14. Temperature- how hot or cold a place is
Instructional Language:
 Generate- create
Standards: Common Core State Standards, English/Language Arts, 2nd Grade
 CCSS.ELA-LITERACY.SL.2.1.A
o Follow agreed-upon rules for discussions (e.g., gaining the floor in respectful
ways, listening to others with care, speaking one at a time about the topics and
texts under discussion).
 CCSS.ELA-LITERACY.SL.2.2
o Recount or describe key ideas or details from a text read aloud or information
presented orally or through other media.
 CCSS.ELA-LITERACY.L.2.1
o Demonstrate command of the conventions of standard English grammar and
usage when writing or speaking.
 CCSS.ELA-LITERACY.L.2.2.A
o Capitalize holidays, product names, and geographic names.
 CCSS.ELA-LITERACY.L.2.3
o Use knowledge of language and its conventions when writing, speaking, reading,
or listening.
Social Studies Standards, State of Colorado
 Identify and locate various physical features on a map (DOK 1)
Introduction: Students will be asked to put away materials from previous lesson and join
together at the carpet. When students come to the carpet, discuss the process of the presentations:
Each group will present their regions and the information on their presentations. When they are
finished with their presentations, the class will open up for questions, comments or connections
(no more than 3 per presentation). After the questions, comments and connections, hand the
group their puzzle piece of the United States and ask them to place it on the allotted white
board/wall space in an appropriate position for the other regions to be added. Let students know
that they will be presenting based on a left-to-right sequence, starting with the Pacific North-
West region and ending with the North-East. Ask if there are any questions before presentations
begin.
Procedure:
1. Remind students to be active, respectful listeners to every group that will present. If
students side talk or are doing something that is distracting themselves and others from
learning, students will be asked to follow the assigned classroom management plan.
a. Provide 1 warning to students who are not paying attention, then act on
management plan if it occurs a second time.
i. After the whole class presents, have a talk with the student about what
happened during certain presentations.
2. Ask the first group (Pacific) what kind of presentation they generated (a Powerpoint or a
poster). Students will respond accordingly and will set up their presentations (with
teacher assistance if a PowerPoint). Each group will share the following information,
which should be written on a whiteboard for groups to follow:
a. Name of the region
b. States in the region
a. Capitals of each state in their region
b. Average temperature during two contrasting months (Winter and Summer)
c. Climate in the region (including temperature)
d. Major cities (cities with the most amount of people, with lots of businesses,
homes, attractions, or major airports)
e. What would a major city be? Denver, for example.
f. Big attractions (Space Needle, Statue of Liberty, Golden Gate Bridge, etc)
g. Major geographic landforms (mountains, lakes, big rivers, oceans)
h. Interesting Facts about states/regions
i. Bonus question: Population of each state, then total population of region.
1. All groups will present the same information to the class.
c. When the group has finished presenting their information, the class will be asked
if there are any questions, comments or connections .The group will choose no
more than 3 students to share out their Q/C/C.
d. When Q/C/C is complete, students will put away their presentations and will
place their puzzle piece region on the wall/whiteboard.
3. The remaining groups in the class will present their regions in the following order:
a. The second group (Rocky Mountain)
b. The third group (Southwest)
c. The fourth group (Midwest)
d. The fifth group (Southeast)
e. The sixth group (Northeast)
f. The final group (noncontiguous/Alaska and Hawaii)
4. When all groups have presented their presentations and all puzzle pieces have been
placed on the wall/whiteboard, ask students to think of information for the L section of
their KWL chart. Pull out the chart, review previously K’s (knows) and W’s (want to
know’s) and see if what students knew (or thought they knew) is still true and if their
questions were answered.
a. For every W that is answered, list the answer underneath the question on the
paper in a contrasting color.
5. When the K’s and W’s have been addressed, ask students to raise quiet hands for L’s
(learned information). Write down student answered on the L column. Fill up as must of
the L section as possible for students.
a. For each L that is listed, ask the class if anyone (honestly) knew that beforehand,
and if anyone also learned this information after the presentation as well.
6. After completing the KWL chart, place the poster paper near the puzzle piece regions of
the United States, and ask students to pull out a pencil at their desk.
a. Distribute the post-assessment to each student.
b. Point out to students that the regions of the United States are already drawn out on
the paper; students will just have to label each region of the United States.
c. When students are done with their regions post-assessment, they will be asked to
get out their previously labeled states map of the United States and fill in the
names of states in different regions or correct the names of the regions in a
different colored pen/marker from before.
7. When both papers are complete and done to the best of student’s abilities, students will
turn both papers into myself with their names on it, and will be asked to select a silent
reading book until everyone is finished with both papers.
a. After all students have finished both assessments, ask class to put their silent
reading books away and take out necessary materials for the next subject.
Clean-Up: After students have presented their posters or PowerPoint presentations, they will be
asked to return their posters to the designated area in the classroom where posters have been
held. Those posters will be hung up in the classroom or in the hallway later in the day. Make sure
that every PowerPoint presentation is saved onto a classroom flash drive in case it is necessary to
look at the information on each presentation in the future. When all presentations are tucked
away and saved onto the classroom flash drive, ask provide students with objectives for next
steps to prepare for next lesson.
Modifications/Enrichments: In the event that a student has immense social anxiety and feels
uncomfortable speaking in front of the class, I will discuss a role in which that student could
have during the presentation ahead of time. Once that student and myself discuss an appropriate
speaking role for them, I will assign that role to that student for the group and inform the student
of that role. Additionally, in the event that a student has lacking fine motor skills and cannot
write down the region names or states as part of their post-assessments, those students will be
allowed to provide a quiet verbal assessment with myself during the post-assessment time. When
a student gives an answer, I will write that students answer down on their own assessment paper.
Assessment/Evaluation: In order to determine how well the students have remembered the
names of all of the regions in the United States, each student will be given a blank map of the
United States with the regions already drawn out. When that assessment is done, students will
pull out their pre-assessment paper, in which they previously labeled states and/or regions, and
will complete that map to the best of their abilities in a different color.
Closure: When all groups have had the opportunity to share their presentations and place their
puzzle piece region on the whiteboard/wall space with the other regions, provide objectives for
next steps for next lesson. If I were to redo this assignment in the future, I think I would feel
more confident in assigning it to higher grade levels, such as fifth or sixth grade. I feel like the
younger kids would have a much harder time working with the technology than older kids
would, but I do feel that including technology into this project as an option was a good
accommodation tactic. This assignment could also be altered any grade with various difficulty
levels, requirements and technological accommodations. I think that Kindergarteners and first
graders would struggle a bit more with this kind of project, but I think first graders could do a
similar project on a single state of their choosing with teacher assistance, and older grades could
do reports on single countries of their choosing.
Post Assessment: Students will be given a blank map of the United States and will be asked to
label the seven regions of the United States. In addition, students will also be asked to get out
their previously filled in map of the United States and fill in states that were not recognizable
before this project in a different colored pen/marker. Both will be turned in after the projects and
KWL chart are complete.
Key:

More Related Content

What's hot

This Land Is Whose Land?
This Land Is Whose Land?This Land Is Whose Land?
This Land Is Whose Land?HannahTicoras
 
Dawn Chastain cld lesson plan
Dawn Chastain cld lesson planDawn Chastain cld lesson plan
Dawn Chastain cld lesson planDawn Chastain
 
Exploring ghana l.a. unit
Exploring ghana l.a. unitExploring ghana l.a. unit
Exploring ghana l.a. unitsara meek
 
This Land Is Whose Land? IB Feedback
This Land Is Whose Land? IB Feedback This Land Is Whose Land? IB Feedback
This Land Is Whose Land? IB Feedback HannahTicoras
 
Oakland Lesson Plans - Welcome to Oakland
Oakland Lesson Plans - Welcome to OaklandOakland Lesson Plans - Welcome to Oakland
Oakland Lesson Plans - Welcome to Oaklandbutest
 
Whoarethe frenchkarenbryan (1)
Whoarethe frenchkarenbryan (1)Whoarethe frenchkarenbryan (1)
Whoarethe frenchkarenbryan (1)paw2x
 
JustinLessonDraft Revised
JustinLessonDraft RevisedJustinLessonDraft Revised
JustinLessonDraft RevisedJustin Brown
 
Native americans
Native americansNative americans
Native americanseaton85
 
PPP about Typical Food
PPP about Typical FoodPPP about Typical Food
PPP about Typical FoodJosh Valerin
 
Social studies lesson plan #2
Social studies lesson plan #2Social studies lesson plan #2
Social studies lesson plan #2Tracie Toy
 
Assure Method Unit Plan Microsoft 2007
Assure Method Unit Plan Microsoft 2007Assure Method Unit Plan Microsoft 2007
Assure Method Unit Plan Microsoft 2007Marshall University
 
Culture Presentation
Culture PresentationCulture Presentation
Culture Presentationjasonherold
 
2nd Grade Homeschool Curriculum - Second Grade Homeschool Social Studies - Be...
2nd Grade Homeschool Curriculum - Second Grade Homeschool Social Studies - Be...2nd Grade Homeschool Curriculum - Second Grade Homeschool Social Studies - Be...
2nd Grade Homeschool Curriculum - Second Grade Homeschool Social Studies - Be...<a>My Homeschool Texts</a>
 
Tercer periodo planificacion 3 - nasencio
Tercer periodo   planificacion 3 - nasencioTercer periodo   planificacion 3 - nasencio
Tercer periodo planificacion 3 - nasencioNadia Asencio
 

What's hot (18)

This Land Is Whose Land?
This Land Is Whose Land?This Land Is Whose Land?
This Land Is Whose Land?
 
Dawn Chastain cld lesson plan
Dawn Chastain cld lesson planDawn Chastain cld lesson plan
Dawn Chastain cld lesson plan
 
Exploring ghana l.a. unit
Exploring ghana l.a. unitExploring ghana l.a. unit
Exploring ghana l.a. unit
 
This Land Is Whose Land? IB Feedback
This Land Is Whose Land? IB Feedback This Land Is Whose Land? IB Feedback
This Land Is Whose Land? IB Feedback
 
Oakland Lesson Plans - Welcome to Oakland
Oakland Lesson Plans - Welcome to OaklandOakland Lesson Plans - Welcome to Oakland
Oakland Lesson Plans - Welcome to Oakland
 
Whoarethe frenchkarenbryan (1)
Whoarethe frenchkarenbryan (1)Whoarethe frenchkarenbryan (1)
Whoarethe frenchkarenbryan (1)
 
JustinLessonDraft Revised
JustinLessonDraft RevisedJustinLessonDraft Revised
JustinLessonDraft Revised
 
Native americans
Native americansNative americans
Native americans
 
Tave syllabus 1
Tave syllabus 1Tave syllabus 1
Tave syllabus 1
 
PPP about Typical Food
PPP about Typical FoodPPP about Typical Food
PPP about Typical Food
 
Social studies lesson plan #2
Social studies lesson plan #2Social studies lesson plan #2
Social studies lesson plan #2
 
Cm bracken co 5th ss
Cm bracken co 5th ssCm bracken co 5th ss
Cm bracken co 5th ss
 
Assure Method Unit Plan 2
Assure Method Unit Plan 2Assure Method Unit Plan 2
Assure Method Unit Plan 2
 
Assure Method Unit Plan Microsoft 2007
Assure Method Unit Plan Microsoft 2007Assure Method Unit Plan Microsoft 2007
Assure Method Unit Plan Microsoft 2007
 
Culture Presentation
Culture PresentationCulture Presentation
Culture Presentation
 
2nd Grade Homeschool Curriculum - Second Grade Homeschool Social Studies - Be...
2nd Grade Homeschool Curriculum - Second Grade Homeschool Social Studies - Be...2nd Grade Homeschool Curriculum - Second Grade Homeschool Social Studies - Be...
2nd Grade Homeschool Curriculum - Second Grade Homeschool Social Studies - Be...
 
Tercer periodo planificacion 3 - nasencio
Tercer periodo   planificacion 3 - nasencioTercer periodo   planificacion 3 - nasencio
Tercer periodo planificacion 3 - nasencio
 
World war ii lesson
World war ii lessonWorld war ii lesson
World war ii lesson
 

Viewers also liked

Southwest Region
Southwest RegionSouthwest Region
Southwest Regiondethkev17
 
Southeast Region Powerpoint Presentation
Southeast Region Powerpoint PresentationSoutheast Region Powerpoint Presentation
Southeast Region Powerpoint PresentationShannon Kuchak
 
Regions of the United States
Regions of the United StatesRegions of the United States
Regions of the United StatesMandy Wangs
 
American studies & culture.pptx
American studies & culture.pptxAmerican studies & culture.pptx
American studies & culture.pptxVo Linh Truong
 
Regions Of The United States
Regions Of The United StatesRegions Of The United States
Regions Of The United Statespalmerma
 
US Geography Powerpoint
US Geography PowerpointUS Geography Powerpoint
US Geography Powerpointsc31082
 
Regions of the United States: The Northeast
Regions of the United States: The NortheastRegions of the United States: The Northeast
Regions of the United States: The NortheastJohn Pascoe
 

Viewers also liked (7)

Southwest Region
Southwest RegionSouthwest Region
Southwest Region
 
Southeast Region Powerpoint Presentation
Southeast Region Powerpoint PresentationSoutheast Region Powerpoint Presentation
Southeast Region Powerpoint Presentation
 
Regions of the United States
Regions of the United StatesRegions of the United States
Regions of the United States
 
American studies & culture.pptx
American studies & culture.pptxAmerican studies & culture.pptx
American studies & culture.pptx
 
Regions Of The United States
Regions Of The United StatesRegions Of The United States
Regions Of The United States
 
US Geography Powerpoint
US Geography PowerpointUS Geography Powerpoint
US Geography Powerpoint
 
Regions of the United States: The Northeast
Regions of the United States: The NortheastRegions of the United States: The Northeast
Regions of the United States: The Northeast
 

Similar to Regions of the United States

edTPA - Childhood Lesson Plan Template lesson ALL 3
edTPA - Childhood Lesson Plan Template lesson ALL 3edTPA - Childhood Lesson Plan Template lesson ALL 3
edTPA - Childhood Lesson Plan Template lesson ALL 3Beverly Korsah
 
Designing Curriculum Instruction and AssessmentAssignment1. Ma.docx
Designing Curriculum Instruction and AssessmentAssignment1. Ma.docxDesigning Curriculum Instruction and AssessmentAssignment1. Ma.docx
Designing Curriculum Instruction and AssessmentAssignment1. Ma.docxsimonithomas47935
 
WEEK 6 ENGLISH 9 AND 7 VERY FINAL.docx
WEEK 6 ENGLISH 9 AND 7 VERY FINAL.docxWEEK 6 ENGLISH 9 AND 7 VERY FINAL.docx
WEEK 6 ENGLISH 9 AND 7 VERY FINAL.docxCristyGascoSumpay
 
February 24 Lesson Plan
February 24 Lesson PlanFebruary 24 Lesson Plan
February 24 Lesson PlanShelley Mason
 
Educ 2130 lesson plan for jigsaw activity
Educ 2130 lesson plan for jigsaw activityEduc 2130 lesson plan for jigsaw activity
Educ 2130 lesson plan for jigsaw activitymsceduc
 
Sample Unit #1_Megan Vosk
Sample Unit #1_Megan VoskSample Unit #1_Megan Vosk
Sample Unit #1_Megan VoskMegan Vosk
 
Designing Curriculum Instruction and AssessmentInstructional Les.docx
Designing Curriculum Instruction and AssessmentInstructional Les.docxDesigning Curriculum Instruction and AssessmentInstructional Les.docx
Designing Curriculum Instruction and AssessmentInstructional Les.docxsimonithomas47935
 
Social studies lesson plan #4
Social studies lesson plan #4Social studies lesson plan #4
Social studies lesson plan #4Tracie Toy
 
Lesson Plan on the Impact of Settlement on the Native Americans
Lesson Plan on the Impact of Settlement on the Native AmericansLesson Plan on the Impact of Settlement on the Native Americans
Lesson Plan on the Impact of Settlement on the Native AmericansElisabeth Miller
 
Amanda Wardlow-Cosey (SEI/500) Professional Development Presentation
Amanda Wardlow-Cosey (SEI/500) Professional Development PresentationAmanda Wardlow-Cosey (SEI/500) Professional Development Presentation
Amanda Wardlow-Cosey (SEI/500) Professional Development Presentationawardlow30
 
Classpresentationpatternsoftime2
Classpresentationpatternsoftime2Classpresentationpatternsoftime2
Classpresentationpatternsoftime2guest6ecc33
 
Cascading new knowledge 1
Cascading new knowledge 1Cascading new knowledge 1
Cascading new knowledge 1ro 287
 
Exploring ghana l.a. unit
Exploring ghana l.a. unitExploring ghana l.a. unit
Exploring ghana l.a. unitsara meek
 

Similar to Regions of the United States (20)

edTPA - Childhood Lesson Plan Template lesson ALL 3
edTPA - Childhood Lesson Plan Template lesson ALL 3edTPA - Childhood Lesson Plan Template lesson ALL 3
edTPA - Childhood Lesson Plan Template lesson ALL 3
 
Designing Curriculum Instruction and AssessmentAssignment1. Ma.docx
Designing Curriculum Instruction and AssessmentAssignment1. Ma.docxDesigning Curriculum Instruction and AssessmentAssignment1. Ma.docx
Designing Curriculum Instruction and AssessmentAssignment1. Ma.docx
 
WEEK 6 ENGLISH 9 AND 7 VERY FINAL.docx
WEEK 6 ENGLISH 9 AND 7 VERY FINAL.docxWEEK 6 ENGLISH 9 AND 7 VERY FINAL.docx
WEEK 6 ENGLISH 9 AND 7 VERY FINAL.docx
 
February 24 Lesson Plan
February 24 Lesson PlanFebruary 24 Lesson Plan
February 24 Lesson Plan
 
Unit plan 1
Unit plan 1Unit plan 1
Unit plan 1
 
Assure Method Unit Plan 2
Assure Method Unit Plan 2Assure Method Unit Plan 2
Assure Method Unit Plan 2
 
Assure Method Unit Plan Pdf
Assure Method Unit Plan  PdfAssure Method Unit Plan  Pdf
Assure Method Unit Plan Pdf
 
Assure Method Unit Plan Pdf
Assure Method Unit Plan  PdfAssure Method Unit Plan  Pdf
Assure Method Unit Plan Pdf
 
Educ 2130 lesson plan for jigsaw activity
Educ 2130 lesson plan for jigsaw activityEduc 2130 lesson plan for jigsaw activity
Educ 2130 lesson plan for jigsaw activity
 
Lesson plan
Lesson planLesson plan
Lesson plan
 
Mapsunit
MapsunitMapsunit
Mapsunit
 
Assure Method Unit Plan Pdf 1
Assure Method Unit Plan Pdf 1Assure Method Unit Plan Pdf 1
Assure Method Unit Plan Pdf 1
 
Sample Unit #1_Megan Vosk
Sample Unit #1_Megan VoskSample Unit #1_Megan Vosk
Sample Unit #1_Megan Vosk
 
Designing Curriculum Instruction and AssessmentInstructional Les.docx
Designing Curriculum Instruction and AssessmentInstructional Les.docxDesigning Curriculum Instruction and AssessmentInstructional Les.docx
Designing Curriculum Instruction and AssessmentInstructional Les.docx
 
Social studies lesson plan #4
Social studies lesson plan #4Social studies lesson plan #4
Social studies lesson plan #4
 
Lesson Plan on the Impact of Settlement on the Native Americans
Lesson Plan on the Impact of Settlement on the Native AmericansLesson Plan on the Impact of Settlement on the Native Americans
Lesson Plan on the Impact of Settlement on the Native Americans
 
Amanda Wardlow-Cosey (SEI/500) Professional Development Presentation
Amanda Wardlow-Cosey (SEI/500) Professional Development PresentationAmanda Wardlow-Cosey (SEI/500) Professional Development Presentation
Amanda Wardlow-Cosey (SEI/500) Professional Development Presentation
 
Classpresentationpatternsoftime2
Classpresentationpatternsoftime2Classpresentationpatternsoftime2
Classpresentationpatternsoftime2
 
Cascading new knowledge 1
Cascading new knowledge 1Cascading new knowledge 1
Cascading new knowledge 1
 
Exploring ghana l.a. unit
Exploring ghana l.a. unitExploring ghana l.a. unit
Exploring ghana l.a. unit
 

More from Spenser White

More from Spenser White (6)

Professional Resume
Professional ResumeProfessional Resume
Professional Resume
 
Lesson 1 peer teaching
Lesson 1 peer teachingLesson 1 peer teaching
Lesson 1 peer teaching
 
Theory and Practice Paper
Theory and Practice PaperTheory and Practice Paper
Theory and Practice Paper
 
White_Checkpoint3
White_Checkpoint3White_Checkpoint3
White_Checkpoint3
 
White_Checkpoint2
White_Checkpoint2White_Checkpoint2
White_Checkpoint2
 
White_Checkpoint1
White_Checkpoint1White_Checkpoint1
White_Checkpoint1
 

Regions of the United States

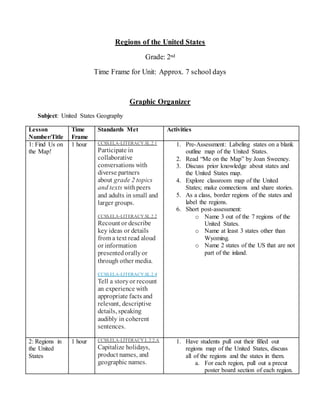
  • 1. Regions of the United States Grade: 2nd Time Frame for Unit: Approx. 7 school days Graphic Organizer Subject: United States Geography Lesson Number/Title Time Frame Standards Met Activities 1: Find Us on the Map! 1 hour CCSS.ELA-LITERACY.SL.2.1 Participate in collaborative conversations with diverse partners about grade 2 topics and texts withpeers and adults in small and larger groups. CCSS.ELA-LITERACY.SL.2.2 Recount or describe key ideas or details from a text read aloud or information presentedorallyor through other media. CCSS.ELA-LITERACY.SL.2.4 Tell a storyor recount an experience with appropriate facts and relevant, descriptive details, speaking audibly in coherent sentences. 1. Pre-Assessment: Labeling states on a blank outline map of the United States. 2. Read “Me on the Map” by Joan Sweeney. 3. Discuss prior knowledge about states and the United States map. 4. Explore classroom map of the United States; make connections and share stories. 5. As a class, border regions of the states and label the regions. 6. Short post-assessment: o Name 3 out of the 7 regions of the United States. o Name at least 3 states other than Wyoming. o Name 2 states of the US that are not part of the inland. 2: Regions in the United States 1 hour CCSS.ELA-LITERACY.L.2.2.A Capitalize holidays, product names, and geographic names. 1. Have students pull out their filled out regions map of the United States, discuss all of the regions and the states in them. a. For each region, pull out a precut poster board section of each region.
  • 2. CCSS.ELA-LITERACY.SL.2.2 Recount or describe key ideas or details from a text read aloud or information presentedorallyor through other media. CCSS.ELA-LITERACY.SL.2.1 I will make a big poster of the United States map and cut the map up based on regions, and highlight each individual region to students while reviewing. 2. When talking about each of the 48 states, point out each of the state’s capitals. a. Discuss what a state capital is. b. Have students put a red star in each of the states on their outlines (they do not need to write the names) 3. Ask a series of questions which relate to the project: how much rain do you think states like Arizona get? What about Washington? Which states do you think would be cold? Hot? 4. Explain the research project: students will be put into small groups of 2-3, each group will be assigned the task of looking up the states in one of the ___ regions of the United States, including: a. States and state capitals b. Climate/weather in the region i. Average temperature during 2 contrasting moths ii. Average precipitation (Rainfall) c. Is it near an ocean? Does it bodies of water in or near it? d. Does it have mountains? e. Any interesting facts? f. Bonus question: Population of each state, then total population of region. 5. Once all of that information is collected, students will record their findings and make a large poster on their region and present it to the class. 6. See if there are any questions, clarify if need be. Have students do a thumbs up/thumbs down for understanding. 7. Point out that they may use computers, atlases, or a variety of books in order to find their information. 8. Once all questions and clarifications are taken care of, dismiss students into their
  • 3. groups, and dismiss groups for about 45 minutes of prep work for the research project. a. Groups should discuss how they want to make their poster; draw a draft of their poster and divide up jobs for research. 3: Research and Composition 1 30- minute session and Three 1-hour sessions CCSS.ELA-LITERACY.RF.2.3 Know and apply grade- level phonics and word analysis skills in decodingwords. CCSS.ELA-LITERACY.W.2.2 Write informative/explanatory texts in which they introduce a topic, use facts and definitions to develop points, and provide a concluding statement or section. CCSS.ELA-LITERACY.W.2.5 With guidance and support from adults and peers, focus ona topic and strengthenwriting as neededby revising and editing. CCSS.ELA-LITERACY.W.2.6 With guidance and support from adults, use a variety of digital tools to produce and publish writing, including in collaborationwith peers. CCSS.ELA-LITERACY.W.2.7 Participate inshared researchand writing projects (e.g., reada number of books on a 1. Call all students to the circle; ask if everyone has met with their research groups, divided up jobs and developed an idea of how they want to form their poster. 2. Explain task for the next 3 days: a. Groups will spend today (the first day) researching their region and recording information. b. On the second day, wrap up researching information and look at the draft of their posters; make changes if necessary. c. On the final day, make poster: draw pictures, write information on posters, discuss who will share what to the class, and practice speaking. 3. Once the class is dismissed to start research, pull one group at a time to discuss their plans on how they will be creating their poster and make suggestions on how to better their posters or fairly divide jobs. 4. While students are researching, and all groups have discussed their plans for their posters, walk around to answer questions and assist students in poster design ideas. 5. On the third day, stress that all research needs to be done and groups need to focus on creating their posters.
  • 4. single topic to produce a report;recordscience observations) CCSS.ELA-LITERACY.W.2.8 Recall information from experiencesor gather informationfrom provided sources to answer a question. 4: Presenting Regions 1 hour CCSS.ELA-LITERACY.RI.2.7 Explain how specific images (e.g., a diagram showing how a machine works) contribute to and clarify a text. CCSS.ELA- LITERACY.SL.2.2 (see lesson #1) 1. Students will be presenting their regions with their groups. They will share: a. Their region b. States in the region and capitals c. Pictures they drew on their regions and explaining what the different pictures mean. d. Information about the climate/weather, precipitation, if there are any mountains or bodies of water in their region, and interesting facts. 2. Once each group has presented their regions, I will tape their posters up on a blank wall and ask the group to place a big puzzle piece of their region on a wall next to the posters, which will form a big map of the United States. 3. After each group presents, have students presenters ask audience members if they have questions, comments or connections (3). 4. At the end of presentations, and once all the posters and puzzle pieces have been placed on a blank wall, hand students back their original pre-assessment that they completed on the first day, and ask them to fill in all the states they know now with a different color pen/colored pencil and turn it back in.
  • 5. Pre-Assessment Before starting the unit, students will be asked to choose one color of colored pencil or pen and write down the names of as many states on the blank map as possible. They do not need to write the names perfect, but they should sound out the names of each state and write the name as best as they can. Once they have completed their outline, students will remain at their seats until I call them down to the carpet with their outlines, a clipboard and a pencil. On the floor, we will then talk about some of the states that students were familiar with, and group the states into regions as a class. This will be demonstrated on an overhead projector. I will make sure that while I am grouping the states, students are following along with me.
  • 6. Lesson #1: Find Us on the Map! Overview: The purpose of this lesson is to familiarize students with the United States map, and to promote an understanding that all of the states can be separated into groups. Time Frame: 1 hour Materials:  “Me on the Map” by Joan Sweeney  Copies of blank United States outlines  Black markers  Pen or colored pencil (1 color of child’s choice)  Clipboards  Pencils  Large classroom map of the United States of America Big Ideas/Essential Questions:  What states make up the United States of America?  The 48 inland states of the United States can be broken up into geographic regions based on location. Content Objectives: 1. By the end of the lesson, students will be able to state 3 out of the 7 regions of states within the United States with no assistance. 2. By the end of the lesson, students will be able to name at least 3 states in the United States aside from Wyoming with no assistance. 3. By the end of the lesson, students will be able to name the 2 states (Alaska and Hawaii) that are not part of the inland, and state their relation to the United States. Academic Language Objectives: Standards: Common Core State Standards: Grade 2 English/Language Arts
  • 7. CCSS.ELA-LITERACY.SL.2.1 Participate incollaborative conversations withdiverse partners about grade 2 topics and texts with peers and adults in small and larger groups. CCSS.ELA-LITERACY.SL.2.2 Recount or describe keyideas or details from a text read aloud or informationpresented orallyor through other media. CCSS.ELA-LITERACY.SL.2.4 Tell a storyor recount anexperience withappropriate facts and relevant, descriptive details, speaking audibly in coherent sentences. Introduction: In order to present the topic of this lesson and ongoing project with my students, I will gain their attention with an attention getter and say “I have a question for all of you, but first I need all eyes on me… How many of you know what state we live in (request an all class callout)? How many of you know what the country we live in is called (request an all class callout.) Lastly, by a show of quiet hands, how many of you know a state in the United States other than Wyoming?” After the students have answered these three questions, hand out the pre- assessment and let the kids know that this will not be graded, but it will be helpful for the course of our upcoming geography project. Procedure: 1. Pre-Assessment: This assessment will be of a blank outline of the US map, where students will be asked to write as many states as they know in one particular color of pen/marker. a. Once students have finished their pre-assessment, have them turn it into the turn- in bin and quietly meet at the circle/carpet. 2. Once all students have joined at the carpet, ask the class if they know what a map is: a. Maps of cities, treasure maps, etc. b. The purpose of maps is to show people where something or some place is in relation to other places. 3. Ask students what they know about our country’s map: i. Map of the United States ii. Shows all 50 states in the United States and parts of Canada and Mexico (which are all connected to make North America) b. Ask class what a map does for people and how people use it. 4. Introduce and read out loud “Me on the Map” by Joan Sweeney. a. Before starting the reading, ask students to raise a quiet hand if they could make a prediction about what they think the book will be about. 5. Review basic information about the book. Have students turn to a partner to discuss these questions one at a time. For each question, have students switch partners. After about 30 seconds is given for each question to be discussed amongst partners, look for a quiet hand to choose for an answer
  • 8. a. Who was the book about? b. What happened? 6. Regain student attention; ask whole class: a. Did you notice where the girl lived? (Kansas) i. How could you tell where she lived? 7. Refer back to original questions about maps and states; inform students that we will be learning about the United States map and regions of the country. i. EXTENSION: I would make this entire lesson and the three following lessons a follow-up project and introduce the idea of drawing maps of student’s homes, school, and town first, then expand outward to the United States. 1. I do think I would read this same book again to have students focus on specifically United States maps and to help transition their thinking from small home-based maps to larger world scale maps. 8. Pull down classroom map of the United States over the whiteboard. a. Mention some of the states that kids mentioned, have them point it out on the map. b. Have kids state some other states they see on the map that they may have been familiar with before. c. Have a few kids share some personal stories relating to family or past experiences in other states. 9. State to kids that we will be chunking up the United States map into regions as a class, and that by doing so, we will eventually be working on a project about all of these regions. a. Pass out paper to every student with a blank outline of the United States. i. SEE PICTURE BELOW b. Have kids grab a black marker or crayon for bordering and a pencil. Give a 1 minute timer to grab materials and clipboard. c. Differentiated Instruction: have maps pre-bordered and printed for students with lower performing or poor fine motor skills. 10. Chunk up outline over document camera with class; have class follow along in chunking up regions and writing the names of regions. a. Frequently repeat names of regions, and mention border lines many times. b. Have students do thumbs up/thumbs down if and when ready to move on. 11. Indicate to class that there are the “inland states”, which are the 48 main states that are all connected to each other, and there are 2 states that are not part of the inland BUT are still part of the United States (Alaska and Hawaii). 12. See Clean-Up for next step. 13. Transition to the next activity by giving students goal: a. Put your sheet in your folder
  • 9. b. Pull out materials for next subject c. Give me thumbs up when you are ready to roll! Note: During the lesson, keep an eye out for students who are paying attention, remaining focused and getting their work done, and allow them to move their pins (behavior management system) up on the chart. If students are distracted, give one warning then ask students to move their clips down. (Follow some sort of management plan) Clean-Up: Once the outline of the United States map has been filled out by all students, instruct students to place their map outlines in their Social Studies folder, and that we will be returning to this map for a reference to a project that will be conducted on the next school day. Have students put away their markers in their appropriate art bins. Assessment/Evaluation: Provide a short post lesson evaluation to see if students were able to comprehend as much information as they were given: o Name 3 out of the 7 regions of the United States o Name at least 3 states other than Wyoming o Name 2 states of the US that are not part of the inland 7. This will let me know what more I need to touch on for tomorrow’s lesson. Closure: In order to reinforce student success, one thing I will do for the next lesson is to show the kids my outline of the states once more and have them double check that theirs looks like mine. I will glance over all of theirs for clarification, so that when it comes time to pair students together for a different region, they will not be confused by which states belong to which region.
  • 10. Lesson #2: Introduction of Regions Project Overview: This lesson will allow for students to familiarize themselves with their self-made regions map of the United States from the previous day, and will introduce students to their upcoming research project on the regions. Time Frame: 1 hour Materials:  Students self-made regions map of the United States  Poster paper, markers and tape  Computers/laptops “on wheels”  Classroom supply of atlases, maps, and books on the various states Big Ideas/Essential Questions: 1. Every state in the United States is composed of different cities/towns, climates, and land formations. Though all the states and regions may differ from one another, all of them come together to form the United States. 2. What states make up the 7 regions of the United States? (Include Alaska and Hawaii as outland regions) 3. What do we know about the regions of the United States, what do we want to know, and what will we learn from our research? Content Objectives: 1. By the end of this lesson, students will be able to recall previously learned information about the regions of the United States 2. By the end of this lesson, students will be able to construct a KWL chart about regions of the United States and document their questions or findings. 3. By the end of this lesson, students will be able to determine specific jobs for each student in their research group and take part in the early research process. Academic Language Objectives: Students will be introduced to vocabulary related to significant places in the United States, as well as terms relevant to their research project criteria:  Capital (where each states government headquarters is located)
  • 11.  Precipitation (how much rain a place gets in a certain amount of time)  Climate (the weather within a region)  Temperature (how hot or cold a place is)  Research (looking up information) Standards: Common Core State Standards for English/Language Arts  CCSS.ELA-LITERACY.L.2.2.A- Capitalize holidays, product names, and geographic names.  CCSS.ELA-LITERACY.SL.2.2- Recount or describe key ideas or details from a text read aloud or information presented orally or through other media.  CCSS.ELA-LITERACY.SL.2.1- Participate in collaborative conversations with diverse partners about grade 2 topics and texts with peers and adults in small and larger groups. Social Studies Standards, State of California, 2nd grade http://www.cde.ca.gov/be/st/ss/documents/histsocscistnd.pdf  2.2 Students demonstrate map skills by describing the absolute and relative locations of people, places, and environments. Introduction: Before starting this lesson, search for a large print out map of the United States from available teacher resources and websites (TeachersPayTeachers, Parent-Teacher stores, Pinterest, etc) Once the poster has arrived, cut out each region of the United States. This step would be preferable to have done before the unit is presented in order to have ample time to prepare and not feel rushed. Find a blank space on an open wall in the room, or clear off the bulletin board, put a piece of tape behind each region and tape all of the regions together to make the United States. At the appropriate slotted time for lesson to begin, gain students attention with any appropriate attention getter (I like to use Hocus Pocus, Everybody Focus). Once you have all students’ attentions, let students know that it is time to transition into our social studies lesson. Let students know their next steps: 1) Students will put away their materials from the previous lesson, 2) Have students pull out their filled out regions map of the United States. Procedure: 1. When both steps have been completed by the whole class, ask students what they remember from yesterday’s lesson on regions of the United States. a. For each region, pull out a precut poster board section of each region. I will make a big poster of the United States map and cut the map up based on regions, and highlight each individual region to students while reviewing. 2. Begin a KWL chart on a poster sized piece of paper and place it on the white board. i. Ask students if they know what a KWL poster is. K represents what the students Know, W represents what the students Want to know as they further their research, and the L represents what the students have Learned as they completed their research. Inform students that we will be using this
  • 12. poster for the duration of our regions unit, and it will be their jobs to keep their own documentation of what it is they want to learn and what they have learned when completing their research. At the end of the unit, we will gather back together as a class to review the chart and add what we have learned from our research on the regions. ii. Inform students that another one of their jobs during their research project will be to find out information from the W section and present it to the class. b. After explaining the purpose of the KWL chart to the class, have students share their learnings from the previous lesson about regions in the United States, and write it down on the K (Know) section of the KWL poster. Once all students have shared their findings, ask them information they want to learn about as we start this project. i. Write down W’s on the board that they will be asked to research for their regions; present these W’s as hypotheticals at first, then circle those W’s and refer back to them as information that students will need to find out for their regions. Only write down two or three of the requirements listed below, and then add in additional requirements later on. Allow students the chance to wonder if about these topics. If a student wonders about any additional requirements, write it down on the board and circle it, then let students know that will be another requirement for their project. 1. Capitals of each state in their region 2. Average temperature during two contrasting months (Winter and Summer) 3. Climate in the region (including temperature) 4. Major cities (cities with the most amount of people, with lots of businesses, homes, attractions, or major airports) a. What would a major city be? Denver, for example. 5. Big attractions (Space Needle, Statue of Liberty, Golden Gate Bridge, etc) a. Discuss some other major attractions that students are familiar with in the United States. 6. Major landforms (mountains, lakes, big rivers, oceans) a. Discuss oceans that touch the United States, rivers, lakes or mountains that kids may be familiar with. 3. After starting the KWL chart, redirect students attention back to the W (want to know) section of the KWL chart and talk about capitals. a. Each state in the United States (including Alaska and Hawaii) has a capital; the capital is usually symbolized by a small star on a map to indicate where it is in the state. Capitals’ are where the government headquarters are; it is where the
  • 13. governor of the state, legislators, and important people who help to run each state and all in it work. b. Ask students if they know what Wyoming’s capital is. (Cheyenne) c. Ask students if they happen to know the capital of any other states in the United States? Pull down the classroom map as a resource. Remind students that on a map, capitals are represented with stars. Have students come up one-by-one to point out a capital of a state if they volunteer. Call about 5 students, then move onto the next step (see 4) 4. Ask students about ways that states differ from one another, and why that may be. Leave the classroom map down during this discussion. a. Talk about states that may be hotter than others and colder than others (temperature), which states would get more rain than others (precipitations). i. Why would Washington get more rain than Arizona? What is one reason why? ii. Why do you think states like Wyoming are colder than places like Texas? b. Ask students if they notice any physical differences on the United States map. i. Are there differences in color? What do the colors mean? ii. Which states have a lot of trees? Which states do not have a lot of trees? Which states have lakes, rivers, touch oceans, etc? 5. Explain the research project: students will be put into small groups of 2-3, each group will be assigned the task of looking up the states in one of the ___ regions of the United States, including: a. Capitals of each state in their region b. Average temperature during two contrasting months (Winter and Summer) c. Climate in the region (including temperature) d. Major cities (cities with the most amount of people, with lots of businesses, homes, attractions, or major airports) e. What would a major city be? Denver, for example. f. Big attractions (Space Needle, Statue of Liberty, Golden Gate Bridge, etc) g. Discuss some other major attractions that students are familiar with in the United States. h. Major landforms (mountains, lakes, big rivers, oceans) i. Discuss oceans that touch the United States, rivers, lakes or mountains that kids may be familiar with. j. Interesting Facts about states/regions k. Bonus question: Population of each state, then total population of region. 6. Once all of that information is collected, students will record their findings and either make a poster, or create a PowerPoint presentation with their group. a. See if there are any questions, clarify if need be. Have students do a thumbs up/thumbs down for understanding.
  • 14. b. Point out that they may use computers, atlases, or a variety of books in order to find their information. Their first step is to find and record information, and their second step is to create their poster or PowerPoint and add that information. 7. Once all questions and clarifications are taken care of, dismiss students into their groups to discuss what they need to do for jobs within their groups and look up altogether (which states will they be researching, what jobs will each person do in their groups, how will they find out the necessary information, how do we want to present our information, etc) 8. Provide remaining time for groups to assign jobs and begin research. Notes on Behavior: If students are distracted or not following classroom rules during lessons, use assigned behavior management system to keep them on task. If students need to have a dance party break during the lecture, play one song out loud, allow students to dance on the carpet area, then call them back to their seats and take 4 deep breaths as a class. Clean-Up: At the end of the hour time slot, students will be asked to place their regions maps into their Social Studies folder, and to finish writing down any relevant information related to their research (titles of books, facts, etc) then stick those papers into their Social Studies folders. Assessment/Evaluation: Students will be asked to name their specific region that they have been assigned for their research project, and to name all 7 of the regions that make up the United States. This assessment will take place as a whole class and will be done using the large cut out map of the United States. Before having students state the name of the region that will be held up one at a time, students will be asked to give a “thumbs up”, sideways or “thumbs down” depending on their confidence in being able to name the region of the United States. This short assessment will give me an idea of kids in the class who may not fully comprehend all the regions of the United States, and allow me to think of ways to make sure each of those kids are able to name all of the regions by the end of the unit. Closure: During the next several days, which are allotted for research to take place, I will make sure to be walking around the classroom and helping students to answer questions they might have, find information they need for the project, or assisting with computer troubles. It will be crucial to make myself available for students during this research process since they will be asked to look up so much information and will be given the opportunity to use technology in order to present their findings.
  • 15. Lesson 3: Research Overview: This three-day long lesson is intended for students to research their selected regions of the United States in their groups, and to compose a visually appealing, creative poster or PowerPoint presentation on their researched region. Time Frame: 1 30-minute session and Three 1-hour sessions (4 school days) Materials:  Computers/laptops “on wheels”  Atlases, maps, books on states or regions of the United States  Dictionaries  Poster paper  Coloring supplies (crayons, markers, etc)  Paper and pencil (for documenting findings) Big Ideas/Essential Questions:  What states make up specific regions in the United States?  What makes the regions different from one another?  What are some interesting facts about each region?  What are each region’s normal climate/precipitation levels?  What physical landforms/landmarks are present in each region?  What is the capital of each state in each region? Content Objectives:  Students will be able to generate and present a poster or PowerPoint presentations with required information about assigned region by the end of the three-day 1-hour period.  Students will be able to execute their prior technology skills to find information on the computer or compose a PowerPoint presentation, if they choose to.  Students will be able to compose a creative poster with required information about assigned region visible on the poster by the end of the three-day 1-hour period.
  • 16.  Students will be able to exercise their research skills by finding relevant information on their region on the internet, or in atlases, maps and/or books in order to compose their presentation or poster.  Students will be able to effectively work together to research necessary information for their poster/presentation, and collaborate on creative ways to compose their presentation/poster during the duration of the research period. Academic Language Objectives: During this research period, I will not be assigning any new vocabulary to students that have not already been presented in previous lessons. During their research, students will undoubtedly come across new vocabulary terms and will have questions about them. If they do run across an unfamiliar word, I will supply students with a printed dictionary and ask them to research the word in the dictionary. If they still have questions about the unfamiliar word, I will assist students in rephrasing the definition. Terms that students will review and use during their presentations (content language): 1. Region- a collection of states with similar climates and characteristics 2. Capital- where each state’s government’s headquarters is located 3. Landforms- a natural feature of the Earth’s surface (the Grand Canyon, Salt Lake City, Mississippi River, etc) 4. Landmarks- physical object or feature that signifies the location of a town (Statue of Liberty, Seattle Space Needle, Golden Gate Bridge, etc) 5. Precipitation- how much rain a place gets in a certain amount of time 6. Climate- the weather within a region 7. Temperature- how hot or cold a place is Instructional Language:  Collaborate- to work together and talk with group mates o Example: Students will collaborate with group members to determine what information is relevant for their presentation.  Relevant- is it important? o Example: Is this information relevant to the project?  Generate/compose- make, or put something together o Example: Students will be asked to compose a creative presentation on their assigned United States region with their group members.  Analyze- to examine o Example: Students will have to analyze the research that they find in order to determine its relevance.  Evaluate- graded. o Example: “I will be evaluating you based on your behavior during this research time”
  • 17. Standards: Common Core State Standards, English/Language Arts  CCSS.ELA-LITERACY.RF.2.3 Know and apply grade-level phonics and word analysis skills in decodingwords.  CCSS.ELA-LITERACY.W.2.2 Write informative/explanatorytexts inwhich they introduce a topic, use facts and definitions to developpoints, and provide a concludingstatement or section.  CCSS.ELA-LITERACY.W.2.5 With guidance and support from adults and peers, focus ona topic and strengthen writing as needed by revising and editing.  CCSS.ELA-LITERACY.W.2.6 With guidance and support from adults, use a variety of digital tools to produce and publish writing, including in collaborationwithpeers.  CCSS.ELA-LITERACY.W.2.7 Participate insharedresearchand writing projects (e.g., reada number of books on a single topic to produce a report;recordscience observations)  CCSS.ELA-LITERACY.W.2.8 Recall informationfrom experiences or gather informationfrom providedsources to answer a question. Social Studies Standards, State of Colorado  Geographic terms and tools are used to describe space and place o Identify and locate various physical features on a map (DOK 1) Notes on Behavior: Before students will be dismissed to start working on their projects with their groups, students will be gathered to the carpet area to have a whole class discussion about proper care of the materials, and what that looks like. During the research process, if a student disrespects the materials or objects that they are using, they will follow the classroom management system and have a personal talk with me on how to respect materials. If students are demonstrating disrespect for materials more than once, that student will be asked to find a new method of research that strides away from the method in which they are disrespecting. The remaining members of the group will be allowed to proceed as normal, and the student finding research elsewhere will be expected to contribute to their group just as much as before. Introduction: Students will be asked to clean up materials from the previous activity and to gather at the carpet. Once students have gathered at the carpet, give a quick quiz: ask students to name the 7 regions of the United States. Call on one student at a time to name one region, and form a list of the regions. Once all of the regions have been named, ask a “challenge question”: ask students if anyone can name any of the states in any of the 7 regions. As states are listed, write the names on the side of the region name. When the list is complete, place the list on the white board OR a blank space on the wall for students to use as a review during their research.
  • 18. Procedure: Day One: 1. Once the list has been completed, indication a change in topic with students to being to explain the research project. a. Explain to students that the reason we have been learning about the regions of the United States in order to better learn about how our country is separated into different “puzzle pieces”. Each “puzzle piece”, or region of the United States, has differences from the others in terms of weather, physical and geographic landmarks, and number of people in each state. b. “Your job will be to learn all you can about one region of the United States and share it with the class.” 2. Explanation of research project: a. Students will “generate” a creative presentation on their assigned region with a group of their peers. i. Generate means to create something. b. This presentation can either be in PowerPoint format or as a handmade poster. i. In the presentation of the groups choice, students will need to show the following information: 1. The name of the region 2. States in the region 3. What the weather/climate is like 4. Average precipitation (rainfall) during 2 contrasting (different) months 5. Physical landmarks (Space Needle, Golden Gate Bridge, etc) 6. Geographic landmarks (Grand Canyon, Salt Lake, mountain ranges, oceans, forests, deserts, etc) ii. “If you decide you want to add additional information, or go above and beyond the call of duty, here is some additional information that you can add”: 1. Population of each state 2. Capitals of each state 3. Interesting facts about your region. iii. “If you decide to find the additional information, that is great, BUT you should focus on the main parts of information FIRST before doing any additional research.” c. In order to find information, students will be allowed to have time on “laptops on wheels”, iPads or computers in the classroom or computer lab (depending on availability). They will also have access to books and atlases from the library for their research.
  • 19. i. “When we find information from a website or a book, we need to say “Thank You” to the author” by crediting them for their work. 1. Show example: “If I were to be doing my research on the Mountain West region of the United States, I could type in “Mountain West region” into Google (pull up screen and demonstrate on overhead projector/Smart Board). Once I hit enter on the search bar, I see that there are a TON of resources available to me. If I choose to click on a website, look through it, and find information that I want to use in my presentation, I need to write down the name of the website, or book/atlas, and make a “Thank You” page for all the websites/authors whose information I use for my presentation” a. During this time, pull up a Microsoft Word document and label it “Thank You”. ii. “If I choose to type up my research onto a Word document OR onto a PowerPoint presentation (pull up link onto laptop as well), I need to remember to always SAVE my work. What we will do is At the end of every session, whoever decides to do a PowerPoint presentation will save their presentations to a classroom flash drive.” a. Explain a flash drive and what it does. d. Explain to students expectations of respecting materials. i. Ask a variety of questions of how we treat materials: do we throw them around the classroom? Do we pound on the keyboard or the mouse or the monitor? Do we break the lead off of pencils just so we can sharpen them? 1. How do we treat the materials in our classroom? a. Call on students with hands quietly raised. This would be a good time to pull up another piece of paper to create a list of ways to respect materials and keep available in the classroom during the research time. e. Show students behavior assessment. See Appendix __ below. i. Explain to students that they will be evaluated for all three days on their behavior and attitudes. Place the assessment under the document camera to show students what it looks like and how they will be evaluated. 1. “Evaluate means I am going to basically be grading you on how you are acting during this time.” ii. If I, or any other teacher, were to catch students disrespecting the materials, they will be given one warning AND will have a discussion with myself as to what they were doing and why we cannot do it in the future. If they are caught a second time, that child will be asked to use
  • 20. other forms of research for the remainder of the research period. However, that student will still be expected to contribute to their group members. 3. Review what has been said in shorter phrases for students to remember, create a checklist for students to use during their research process (See Appendix B). a. Groups and regions will be assigned. b. Groups will decide whether they want to make a poster OR a PowerPoint for their presentation. i. Note to students that PowerPoints will be a bit trickier to work with because it is very technical and sometimes hard to fully understand and work with. c. Group members will decide what job each member will have: i. Main Researcher ii. Main Recorder iii. Main Decorator 1. Note to students that just because you do not have 2 of the jobs, you are still required to help with the researching/recorder/decorating process. This just means that this individual person is the leader in how each job will be handled. d. In every group, students will be asked to find the following information: i. The name of the region ii. States in the region iii. What the weather/climate is like iv. Average precipitation (rainfall) during 2 contrasting (different) months v. Physical landmarks (Space Needle, Golden Gate Bridge, etc) vi. Geographic landmarks (Grand Canyon, Salt Lake, mountain ranges, oceans, forests, deserts, etc) e. Once information is found, document it/write it down in a notebook or a piece of paper. i. Create a “Thank You” page for all the information you have used from websites or books. f. Group members will assign speaking parts to each group member, who will share different bits of their presentation. g. Once all components have been put together, students will share their product with myself and get the OK to present to the class. 4. Ask class for questions; emphasize that if students have any confusion to please ask them now so that the whole class can get clarification. Accept any student questions and respond appropriately. 5. Once questions have been addressed, assign students to regions by naming off one region at a time and naming off students for each group.
  • 21. a. Note: It would be most beneficial to assign groups ahead of time so it will be easier to eliminate pairs of students who will be easily distracted or slacking. 6. After groups have been assigned, ask groups to get together and decide what method of presentation they wish to use and jobs that each person will have. Allow about 5 minutes for group collaboration. a. “Get together with your groups to collaborate, or discuss, about your project” b. Tell students to make a list of what their names and regions are, what presentation they would like to use, and the jobs that each student will have. Once that list has been created, students will turn it into myself and be dismissed to get a silent reading book until the next lesson is ready to take place. Day Two, Three and Four: 1. Ask students to get with their research groups. a. Let students know that as learners, they will be required to analyze, or heavily examine, all the information that they find and decide whether or not it is relevant to their project or not. b. Go over expectations of behaviors, attitudes and treatment of materials one last time. 2. Dismiss students to work on their projects with their groups. Be sure to walk around during this time to examine how students are working together and if they have questions or need help. a. Students will be responsible for following the checklist below within their own groups. Clean-Up: At the end of each of the three sessions, students will be asked to place any papers that they may have printed out or written into their Social Studies folder, as well as to save any documents or PowerPoints onto their student school account or a classroom flash drive. Provide the flash drive to each group so that they may load their PowerPoints onto the flash drive; observe the kids as they try to save and where they save the files to. If students have created a creative poster, have students put away all art supplies (into their own crayon box if it belongs to them or into the classroom community containers for each type of art material). Create an accessible, and least distractible, spot in the classroom for students to place their posters. On the third and final sessions, students will need to review their PowerPoints and posters to make sure that all the visual effects and information presented, and to make sure that speaking roles have been evenly assigned. Modifications/Enrichments: During the research time, students will be required to provide particular information on their assigned region, including: the states in their assigned region, climate, average precipitation in two contrasting months of a year, physical landmarks (Space Needle, Golden Gate Bridge, etc), geographic land features (mountains, deserts, major
  • 22. lakes/rivers, oceans, forests), and interesting facts about the region. For the groups who want a challenge problem, they will be asked to find the following information about their region:  Population of states  Capitals of each state  Interesting facts about each state Additionally, the presentation part requires students to divide speaking roles amongst group members. I am very much aware that different students have anxiety when it comes to speaking in the class, so I will interject myself into groups with students who fit that category and suggest unique roles for those students to do during the presentation. For example, maybe student could hold the sign and present their region to the class? If students finish putting their presentations together early, have them practice speaking to a wall in the classroom or to myself with their assigned roles. Assessment/Evaluation: During all three sessions, students will be assessed on behavior and attitude. See Appendix A below. During this time, no other assessment will be given because students will be engaged in individual learning and researching during these times. Assessment of information from presentations and personal learning will be given after the fourth lesson. Closure: The information that students find from the three research days will allow for students to learn more in depth about different areas of the United States, and eventually learn how the different regions vary from one another during presentations. During research time, I will make it a point to make myself available to help students with technical or social problems rather than grading or doing other work. Respect of materials will be a big thing on the radar and will not be taken lightly; I do believe that reminders are good strategies for behavior management, but I want students to really understand that if you cannot respect something, you will not be allowed to use it. Appendix A-Behavior Assessment: This assessment will be used as a Y/N assessment. Name: ________________________________ 1. Is student engaged? 2. Is student participating in group research? 3. Does student contribute ideas? 4. Does student respect the materials used for their research? 5. Does student respect group members? *Students will be shown this assessment before they are dismissed to begin research to know the expectations of their behavior. Appendix B: Student Checklist
  • 23. Region:_____________________________ For each task that is completed, put a checkmark next to the sentence. 1. Group has been assigned a region. 2. Group has decided what kind of presentation they want to make? a. PowerPoint presentation or poster 3. Group has assigned jobs for each member (please list name of person who has each job): a. Main Researcher: b. Main Recorder: c. Main Decorator: 4. Group has found the following information on their assigned region: i. The name of the region ii. States in the region iii. What the weather/climate is like iv. Average precipitation (rainfall) during 2 contrasting (different) months v. Physical landmarks (Space Needle, Golden Gate Bridge, etc) vi. Geographic landmarks (Grand Canyon, Salt Lake, mountain ranges, oceans, forests, deserts, etc) 5. Group has created a “Thank You” page 6. Group has put all relevant information onto their presentaitons 7. Group has assigned speaking roles to each group member. 8. Group has OK-ed their presentation with Ms. White 9. Group is ready to present!
  • 24. Lesson 4: Presenting Our Regions Overview: Students will present their generated posters or PowerPoints about a specific region in the United States to the class. Time Frame: 1 hour Materials:  Smart Board/overhead projector  Laptop with USB port  Classroom flash drive (for students who created a PowerPoint presentation)  Puzzle pieces of the United States regions  Strong tape (to hold up puzzle pieces to a wall)  Post-assessment quiz  Student pre-assessment Big Ideas/Essential Questions:  What are some similarities and differences between the seven regions of the United States?  What are the seven regions that make up the United States?  What states make up each region of the United States?  What makes the regions different from one another?  What are some interesting facts about each region?  What are each region’s normal climate/precipitation levels?  What physical landforms/landmarks are present in each region?  What is the capital of each state in each region? Content Objectives:  Students will be able to recall all seven regions of the United States by the end of the presentations with 100% accuracy.  Students will be able to demonstrate individual knowledge of their assigned region to the class, using their creative posters or PowerPoint presentations as guides.  Students will designate equal responsibilities for each member of their group in terms of speaking roles.
  • 25.  Students will demonstrate respectful listening skills by actively listening to each regions presentation and asking questions and/or making comments and/or connections. Academic Language Objectives: Terms that students will review and use during their presentations (content language): 8. Region- a collection of states with similar climates and characteristics 9. Capital- where each state’s government’s headquarters is located 10. Landforms- a natural feature of the Earth’s surface (the Grand Canyon, Salt Lake City, Mississippi River, etc) 11. Landmarks- physical object or feature that signifies the location of a town (Statue of Liberty, Seattle Space Needle, Golden Gate Bridge, etc) 12. Precipitation- how much rain a place gets in a certain amount of time 13. Climate- the weather within a region 14. Temperature- how hot or cold a place is Instructional Language:  Generate- create Standards: Common Core State Standards, English/Language Arts, 2nd Grade  CCSS.ELA-LITERACY.SL.2.1.A o Follow agreed-upon rules for discussions (e.g., gaining the floor in respectful ways, listening to others with care, speaking one at a time about the topics and texts under discussion).  CCSS.ELA-LITERACY.SL.2.2 o Recount or describe key ideas or details from a text read aloud or information presented orally or through other media.  CCSS.ELA-LITERACY.L.2.1 o Demonstrate command of the conventions of standard English grammar and usage when writing or speaking.  CCSS.ELA-LITERACY.L.2.2.A o Capitalize holidays, product names, and geographic names.  CCSS.ELA-LITERACY.L.2.3 o Use knowledge of language and its conventions when writing, speaking, reading, or listening. Social Studies Standards, State of Colorado  Identify and locate various physical features on a map (DOK 1) Introduction: Students will be asked to put away materials from previous lesson and join together at the carpet. When students come to the carpet, discuss the process of the presentations: Each group will present their regions and the information on their presentations. When they are finished with their presentations, the class will open up for questions, comments or connections
  • 26. (no more than 3 per presentation). After the questions, comments and connections, hand the group their puzzle piece of the United States and ask them to place it on the allotted white board/wall space in an appropriate position for the other regions to be added. Let students know that they will be presenting based on a left-to-right sequence, starting with the Pacific North- West region and ending with the North-East. Ask if there are any questions before presentations begin. Procedure: 1. Remind students to be active, respectful listeners to every group that will present. If students side talk or are doing something that is distracting themselves and others from learning, students will be asked to follow the assigned classroom management plan. a. Provide 1 warning to students who are not paying attention, then act on management plan if it occurs a second time. i. After the whole class presents, have a talk with the student about what happened during certain presentations. 2. Ask the first group (Pacific) what kind of presentation they generated (a Powerpoint or a poster). Students will respond accordingly and will set up their presentations (with teacher assistance if a PowerPoint). Each group will share the following information, which should be written on a whiteboard for groups to follow: a. Name of the region b. States in the region a. Capitals of each state in their region b. Average temperature during two contrasting months (Winter and Summer) c. Climate in the region (including temperature) d. Major cities (cities with the most amount of people, with lots of businesses, homes, attractions, or major airports) e. What would a major city be? Denver, for example. f. Big attractions (Space Needle, Statue of Liberty, Golden Gate Bridge, etc) g. Major geographic landforms (mountains, lakes, big rivers, oceans) h. Interesting Facts about states/regions i. Bonus question: Population of each state, then total population of region. 1. All groups will present the same information to the class. c. When the group has finished presenting their information, the class will be asked if there are any questions, comments or connections .The group will choose no more than 3 students to share out their Q/C/C. d. When Q/C/C is complete, students will put away their presentations and will place their puzzle piece region on the wall/whiteboard. 3. The remaining groups in the class will present their regions in the following order: a. The second group (Rocky Mountain) b. The third group (Southwest)
  • 27. c. The fourth group (Midwest) d. The fifth group (Southeast) e. The sixth group (Northeast) f. The final group (noncontiguous/Alaska and Hawaii) 4. When all groups have presented their presentations and all puzzle pieces have been placed on the wall/whiteboard, ask students to think of information for the L section of their KWL chart. Pull out the chart, review previously K’s (knows) and W’s (want to know’s) and see if what students knew (or thought they knew) is still true and if their questions were answered. a. For every W that is answered, list the answer underneath the question on the paper in a contrasting color. 5. When the K’s and W’s have been addressed, ask students to raise quiet hands for L’s (learned information). Write down student answered on the L column. Fill up as must of the L section as possible for students. a. For each L that is listed, ask the class if anyone (honestly) knew that beforehand, and if anyone also learned this information after the presentation as well. 6. After completing the KWL chart, place the poster paper near the puzzle piece regions of the United States, and ask students to pull out a pencil at their desk. a. Distribute the post-assessment to each student. b. Point out to students that the regions of the United States are already drawn out on the paper; students will just have to label each region of the United States. c. When students are done with their regions post-assessment, they will be asked to get out their previously labeled states map of the United States and fill in the names of states in different regions or correct the names of the regions in a different colored pen/marker from before. 7. When both papers are complete and done to the best of student’s abilities, students will turn both papers into myself with their names on it, and will be asked to select a silent reading book until everyone is finished with both papers. a. After all students have finished both assessments, ask class to put their silent reading books away and take out necessary materials for the next subject. Clean-Up: After students have presented their posters or PowerPoint presentations, they will be asked to return their posters to the designated area in the classroom where posters have been held. Those posters will be hung up in the classroom or in the hallway later in the day. Make sure that every PowerPoint presentation is saved onto a classroom flash drive in case it is necessary to look at the information on each presentation in the future. When all presentations are tucked away and saved onto the classroom flash drive, ask provide students with objectives for next steps to prepare for next lesson. Modifications/Enrichments: In the event that a student has immense social anxiety and feels uncomfortable speaking in front of the class, I will discuss a role in which that student could have during the presentation ahead of time. Once that student and myself discuss an appropriate
  • 28. speaking role for them, I will assign that role to that student for the group and inform the student of that role. Additionally, in the event that a student has lacking fine motor skills and cannot write down the region names or states as part of their post-assessments, those students will be allowed to provide a quiet verbal assessment with myself during the post-assessment time. When a student gives an answer, I will write that students answer down on their own assessment paper. Assessment/Evaluation: In order to determine how well the students have remembered the names of all of the regions in the United States, each student will be given a blank map of the United States with the regions already drawn out. When that assessment is done, students will pull out their pre-assessment paper, in which they previously labeled states and/or regions, and will complete that map to the best of their abilities in a different color. Closure: When all groups have had the opportunity to share their presentations and place their puzzle piece region on the whiteboard/wall space with the other regions, provide objectives for next steps for next lesson. If I were to redo this assignment in the future, I think I would feel more confident in assigning it to higher grade levels, such as fifth or sixth grade. I feel like the younger kids would have a much harder time working with the technology than older kids would, but I do feel that including technology into this project as an option was a good accommodation tactic. This assignment could also be altered any grade with various difficulty levels, requirements and technological accommodations. I think that Kindergarteners and first graders would struggle a bit more with this kind of project, but I think first graders could do a similar project on a single state of their choosing with teacher assistance, and older grades could do reports on single countries of their choosing.
  • 29. Post Assessment: Students will be given a blank map of the United States and will be asked to label the seven regions of the United States. In addition, students will also be asked to get out their previously filled in map of the United States and fill in states that were not recognizable before this project in a different colored pen/marker. Both will be turned in after the projects and KWL chart are complete. Key: