- VMware Tools is a suite of utilities that enhances performance and enables features for virtual machines. It includes services, device drivers, and user processes.
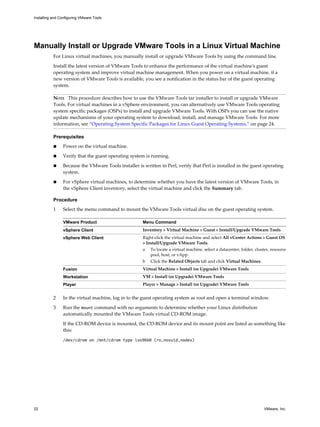
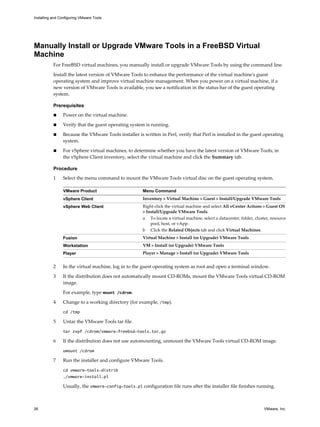
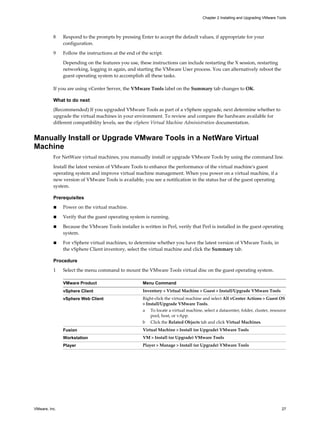
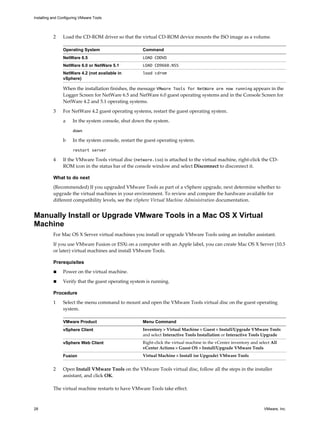
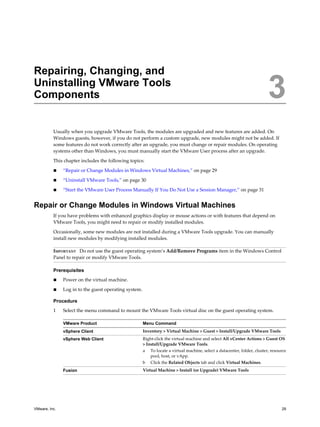
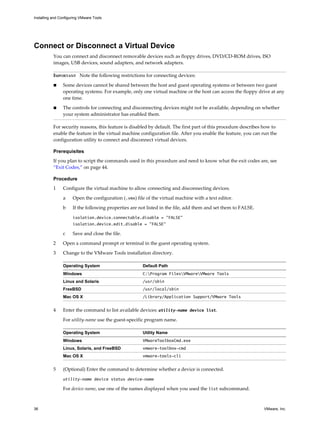
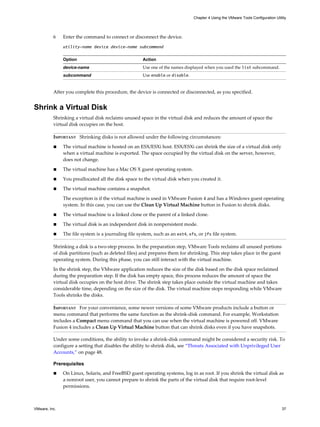
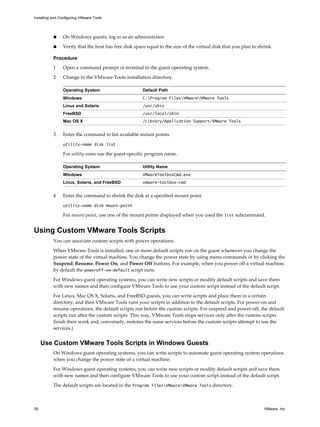
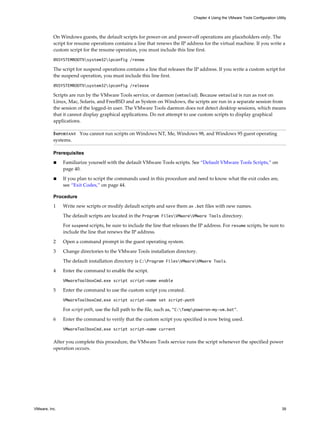
- Installing VMware Tools is recommended for new virtual machines. Upgrading to the latest version provides new features and compatibility.
- Installation and upgrade methods vary by guest operating system but generally involve mounting an ISO image containing the VMware Tools installer.
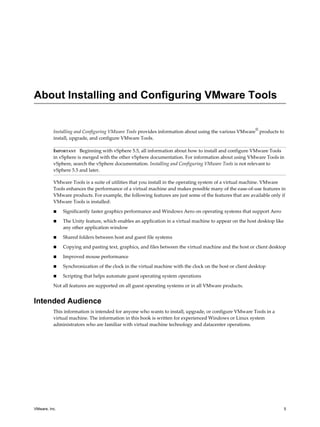


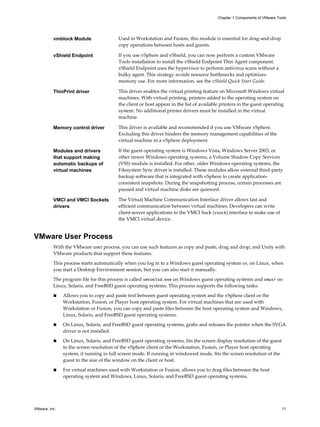

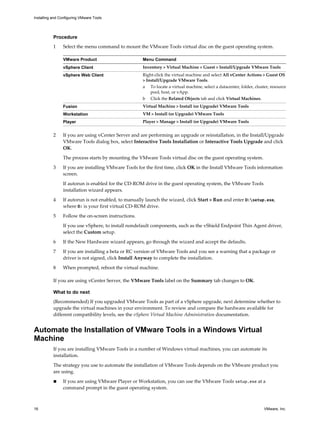


![Using vmwtool to Configure VMware Tools in a NetWare Virtual
Machine
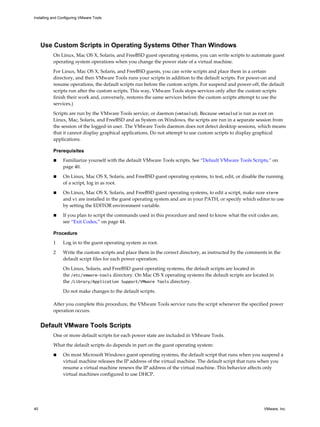
In a NetWare virtual machine, using the system console, you can configure certain virtual machine options
such as time synchronization, CPU idling, and device configuration with VMware Tools. The VMware Tools
command-line program is called vmwtool.
Although you cannot use the VMware Tools configuration utility in a NetWare virtual machine, you can use
the vmwtool command to achieve some of the same functionality. This command has the following syntax:
vmwtool command
For command, you can use the commands and options listed in the following table.
Table 5‑1. vmwtool Commands
vmwtool Command Description
help Displays a summary of VMware Tools commands and options in a
NetWare guest operating system.
partitonlist Displays a list of all disk partitions in the virtual disk and whether or not a
partition can be shrunk.
shrink [partition] Shrinks the listed partitions. If no partitions are specified, all partitions in
the virtual disk are shrunk.
The status of the shrink process appears at the bottom of the system
console.
devicelist Lists each removable device in the virtual machine, its device ID, and
whether the device is enabled or disabled. Removable devices include the
virtual network adapter, CD-ROM, and floppy drives. By default, floppy
drive is not connected when the virtual machine powers on.
disabledevice [device_name] Disables the specified device or devices in the virtual machine. If no device
is specified, all removable devices in the virtual machine are disabled.
enabledevice [device_name] Enables the specified device or devices in the virtual machine. If no device
is specified, all removable devices in the virtual machine are enabled.
synctime [on|off] Lets you turn on or off synchronization of time in the guest operating
system with time on the host operating system. By default, time
synchronization is turned off.
Use this command without any options to view the current time
synchronization status.
idle [on|off] Lets you turn the CPU idler on or off. By default, the idler is turned on. The
CPU idler program is included in VMware Tools for NetWare guest
operating systems.
The idler program is needed because NetWare servers do not idle the CPU
when the operating system is idle. As a result, a virtual machine takes CPU
time from the host regardless of whether the NetWare server software is
idle or busy.
Installing and Configuring VMware Tools
46 VMware, Inc.](https://image.slidesharecdn.com/vmware-tools-installation-configuration-140723052900-phpapp01/85/Vmware-tools-installation-configuration-46-320.jpg)