Host Apache Cassandra databases in your own cloud and save space in your datacenter
•
1 like•95 views

The document discusses testing of Dell EMC PowerEdge FC640 servers running Apache Cassandra databases for private clouds. It finds that a solution using the 14th generation Dell EMC PowerEdge FC640 servers handled over 4.7 times the workload of a previous generation solution using Dell PowerEdge R710 servers, while using half the rack space. This allows supporting more user requests while potentially saving on datacenter expansion costs.

Recommended
Recommended
More Related Content
What's hot
What's hot (20)
Similar to Host Apache Cassandra databases in your own cloud and save space in your datacenter
Similar to Host Apache Cassandra databases in your own cloud and save space in your datacenter (20)
More from Principled Technologies
More from Principled Technologies (20)
Recently uploaded
Recently uploaded (20)
Host Apache Cassandra databases in your own cloud and save space in your datacenter
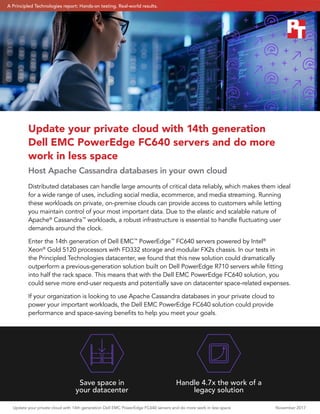
- 1. Update your private cloud with 14th generation Dell EMC PowerEdge FC640 servers and do more work in less space November 2017 Distributed databases can handle large amounts of critical data reliably, which makes them ideal for a wide range of uses, including social media, ecommerce, and media streaming. Running these workloads on private, on-premise clouds can provide access to customers while letting you maintain control of your most important data. Due to the elastic and scalable nature of Apache® Cassandra™ workloads, a robust infrastructure is essential to handle fluctuating user demands around the clock. Enter the 14th generation of Dell EMC™ PowerEdge™ FC640 servers powered by Intel® Xeon® Gold 5120 processors with FD332 storage and modular FX2s chassis. In our tests in the Principled Technologies datacenter, we found that this new solution could dramatically outperform a previous-generation solution built on Dell PowerEdge R710 servers while fitting into half the rack space. This means that with the Dell EMC PowerEdge FC640 solution, you could serve more end-user requests and potentially save on datacenter space-related expenses. If your organization is looking to use Apache Cassandra databases in your private cloud to power your important workloads, the Dell EMC PowerEdge FC640 solution could provide performance and space-saving benefits to help you meet your goals. Update your private cloud with 14th generation Dell EMC PowerEdge FC640 servers and do more work in less space Host Apache Cassandra databases in your own cloud Save space in your datacenter Handle 4.7x the work of a legacy solution A Principled Technologies report: Hands-on testing. Real-world results.
- 2. Update your private cloud with 14th generation Dell EMC PowerEdge FC640 servers and do more work in less space November 2017 | 2 Why use Apache Cassandra in your private cloud? Organizations around the globe continue to turn to the cloud; a recent survey of IT professionals found that 93 percent of their organizations used the cloud in some form—public, private, or hybrid.1 And it’s no wonder why: Cloud computing can improve flexibility, help maximize availability, and even increase security by keeping data in a centralized location rather than on employee devices. Private or hybrid clouds, where critical data stays on premise rather than in third-party hands, can give you more control over your data compared to public cloud models. Apache Cassandra is a NoSQL database platform that is ideal for critical workloads with large datasets because the databases can be replicated across systems and even datacenters for reliability. Cassandra cites Hulu, Instagram, The Weather Channel, eBay, and Intuit as customers.2 Running these large datasets in a private cloud can give your organization high availability, flexibility, and more, but such a setup requires a solid hardware platform that can handle large customer loads. We tested a new solution from Dell EMC to see how well it compared to an older solution running an Apache Cassandra workload, and the results are in. Dell EMC PowerEdge FC640 servers with Intel Xeon Gold 5120 processors handled nearly 5x the work In our datacenter, we set up two Dell EMC PowerEdge FX2s chassis with four Dell EMC PowerEdge FC640 servers powered by Intel Xeon Gold 5120 processors and FD332 storage (Dell EMC PowerEdge FC640 solution) and compared it to a previous-generation solution comprising four Dell EMC PowerEdge R710 servers with onboard storage (legacy solution). Using the Yahoo! Cloud Serving Benchmark (YCSB), we compared the Apache Cassandra performance that the solutions delivered at an acceptable average latency of 2.8 ms for a workload with a 95% read and a 5% write ratio. The Dell EMC PowerEdge FC640 solution completed over 4.7 times the Apache Cassandra distributed database work of the legacy solution, which shows that it could be well suited for running these workloads in the private cloud. By selecting a solution that can handle more operations per second, you could potentially serve more users accessing your workload at once. Or, you can consider the expansion perspective: Having greater capacity to serve users now could slow the need to invest in more hardware in the future as your business continues to grow. See Appendix A for CPU utilization, memory utilization, and disk I/O latency statistics from our test runs. Operations per second Apache Cassandra workload comparison Dell EMC PowerEdge FC640 solution Legacy solution 215,259 44,870 4.7x the work handle About the Yahoo! Cloud Serving benchmark According to Yahoo!, “the goal of the Yahoo Cloud Serving Benchmark (YCSB) project is to develop a framework and common set of workloads for evaluating the performance of different ‘key-value’ and ‘cloud’ serving stores.” The benchmark focuses on Apache HBase and Cassandra, which are both NoSQL databases that are designed to handle large datasets, to give an indication of overall system performance. To learn more about the YCSB, visit https:// research.yahoo.com/news/yahoo- cloud-serving-benchmark.
- 3. Update your private cloud with 14th generation Dell EMC PowerEdge FC640 servers and do more work in less space November 2017 | 3 Save space with a compact design Fight the battle of the datacenter bulge as you invest in your private cloud infrastructure with a sleeker, space- saving design. Each Dell EMC PowerEdge FX2s chassis takes up only 2U of space, meaning our Dell EMC PowerEdge FC640 solution powered by Intel Xeon Gold 5120 processors delivered 215,259 operations per second performance in just 4U of rack space. Compare that to the 8U of rack space the legacy solution used while doing less database work. The Dell EMC PowerEdge FC640 solution delivered 9.5 times the performance per U of the legacy solution. Minimizing your datacenter footprint can also minimize the ongoing space-related costs you incur, including power and cooling, rental, and build‑out costs. The configuration we tested left a slot open in the FX2s chassis. Based on your needs, you could add a third Dell EMC PowerEdge FC640 server or another storage block and see even greater increases in operations per second and performance per rack unit. Operations per second Performance per rack unit Dell EMC PowerEdge FC640 solution Legacy solution 53,814 5,608 9.5x the performance per rack unit About the Dell EMC PowerEdge FC640 solution The Dell EMC PowerEdge FX2s is a modular server platform that can combine servers, storage, and networking into a single 2U chassis. New two-socket, 1U Dell EMC PowerEdge FC640 server blocks feature the new Intel Xeon Gold 5120 processor, up to 2TB of memory, and up to two 240GB SSDs. The 1U Dell EMC PowerEdge FD332 storage modules support both SAS and SATA HDD/SSDs to match your specific performance requirements. To learn more about the Dell EMC PowerEdge FX architecture, visit www.dell.com/en-us/work/shop/cty/ pdp/spd/poweredge-fx. Figure 1: Dell EMC PowerEdge FX2s chassis with two Dell EMC PowerEdge FC640 servers and FD332 storage
- 4. Update your private cloud with 14th generation Dell EMC PowerEdge FC640 servers and do more work in less space November 2017 | 4 Conclusion Critical Apache Cassandra NoSQL databases can offer reliability and flexibility for workloads like media streaming or social media. Running these databases in a private cloud can let you maintain control of your data while giving you the agility and flexibility the cloud provides. In our datacenter, the Dell EMC PowerEdge FC640 solution powered by Intel Xeon Gold 5120 processors dramatically increased performance for Apache Cassandra workloads compared to a legacy solution. By choosing a solution that can do up to 4.7 times the work of the legacy solution, your infrastructure could handle more requests at a time—and we found that the Dell EMC PowerEdge FC640 solution could do all this additional work in less space, which could let you hold off on renting more datacenter space or on building out your existing space as your business grows. 1 “Building Trust in a Cloudy Sky,” accessed October 26, 1017, https://www.mcafee.com/us/resources/reports/restricted/ rp-building-trust-cloudy-sky.pdf. 2 “What is Cassandra?” accessed October 25, 2017, http://cassandra.apache.org/.
- 5. Update your private cloud with 14th generation Dell EMC PowerEdge FC640 servers and do more work in less space November 2017 | 5 Appendix A: Additional results The following charts present the various system utilization statistics we captured during our tests. 0 10 20 30 40 50 60 70 80 90 100 0 7 14 21 27 34 42 49 57 64 71 78 85 92 99 106 113 120 127 135 142 149 156 163 170 178 185 192 199 CPUutilization(%) Seconds CPU utilization Dell EMC PowerEdge FC640 solution Legacy solution 0 0.5 1 1.5 2 2.5 3 3.5 0 7 14 21 27 34 42 49 57 64 71 78 85 92 99 106 113 120 127 135 142 149 156 163 170 178 185 192 199 Milliseconds Seconds Disk I/O latency Dell EMC PowerEdge FC640 solution Legacy solution
- 6. Update your private cloud with 14th generation Dell EMC PowerEdge FC640 servers and do more work in less space November 2017 | 6 0 200 400 600 800 1,000 1,200 0 7 14 21 27 34 42 49 57 64 71 78 85 92 99 106 113 120 127 135 142 149 156 163 170 178 185 192 199 Mbits/s Seconds Network throughput Dell EMC PowerEdge FC640 solution received Dell EMC PowerEdge FC640 solution transmitted Legacy solution received Legacy solution transmitted 0 50 100 150 200 250 0 7 14 21 27 34 42 49 57 64 71 78 85 92 99 106 113 120 127 135 142 149 156 163 170 178 185 192 199 GBytes Seconds Memory usage Dell EMC PowerEdge FC640 solution free memory Dell EMC PowerEdge FC640 solution physical memory Legacy solution free memory Legacy solution physical memory
- 7. Update your private cloud with 14th generation Dell EMC PowerEdge FC640 servers and do more work in less space November 2017 | 7 On October 6, 2017, we finalized the hardware and software configurations we tested. Updates for current and recently released hardware and software appear often, so unavoidably these configurations may not represent the latest versions available when this report appears. For older systems, we chose configurations representative of typical purchases of those systems. We concluded hands-on testing on October 13, 2017. Appendix B: System configuration information Servers Server enclosure configuration information Dell EMC PowerEdge FX2s Number of management modules 1 Management module firmware revision 2.0 CMC module firmware 2.00 Midplane version 1.0 First type of I/O module Vendor and model number Dell EMC PowerEdge FN 410S IOM I/O module firmware revision 9.10 Number of modules 2 Occupied Slots A1, A2 Power supplies Vendor and model number Dell 0W1R7VA00 Number of power supplies 2 Wattage of each (W) 2,000 Cooling fans Number of fans 8 Server configuration information 4x Dell EMC PowerEdge FC640 BIOS name and version Dell 1.0.1 Non-default BIOS settings None Operating system name and version/build number VMware® ESXi™ , 6.5.0, 5969303 Date of last OS updates/patches applied 10/05/2017 Power management policy Performance Processor Number of processors 2 Vendor and model Intel Xeon Gold 5120 Core count (per processor) 14 Core frequency (GHz) 2.20 Stepping 1
- 8. Update your private cloud with 14th generation Dell EMC PowerEdge FC640 servers and do more work in less space November 2017 | 8 Server configuration information 4x Dell EMC PowerEdge FC640 Memory module(s) Total memory in system (GB) 192 Number of memory modules 12 Vendor and model Hynix HMA82GR7AFR8N-VK Size (GB) 16 Type PC4-21300R Speed (MHz) 2,666 Speed running in the server (MHz) 2,444 Storage controller Vendor and model Dell PERC H330 Mini Cache size (GB) N/A Firmware version 25.5.0.0019 Driver version 7.700.50.00 Shared storage #1 Number of drives 2 Drive vendor and model Seagate® ST300MM0006 Drive size (GB) 900 Drive information (speed, interface, type) 10K, 6Gb SAS, HDD Shared storage #2 Number of drives 4 Drive vendor and model Seagate PH0XCRDVTB30073R01T0A00 Drive size (GB) 3,840 Drive information (speed, interface, type) 12Gb SAS, SSD Network adapter Vendor and model Intel Ethernet 10G 2P X710-k bND Number and type of ports 2 x 10GbE Driver version 18.016 Server configuration information 4 x Dell EMC PowerEdge R710 BIOS name and version Dell 6.40 Non-default BIOS settings None Operating system name and version/build number VMware ESXi 6.0.0 build-5572656 Date of last OS updates/patches applied 10/05/2017 Power management policy Performance
- 9. Update your private cloud with 14th generation Dell EMC PowerEdge FC640 servers and do more work in less space November 2017 | 9 Server configuration information 4 x Dell EMC PowerEdge R710 Processor Number of processors 2 Vendor and model Intel Xeon X5670 Core count (per processor) 6 Core frequency (GHz) 2.93 Stepping B1 Memory module(s) Total memory in system (GB) 128 Number of memory modules 8 Vendor and model Hynix HMT42GR7MFR4C-PB Size (GB) 16 Type PC3-12800 Speed (MHz) 1,600 Speed running in the server (MHz) 1,600 Storage controller Vendor and model PERC 6/i Integrated Cache size (GB) 256 MB Firmware version 6.3.3.0002 Driver version megaraid_sas Local storage Number of drives 8 Drive vendor and model Seagate ST9146802SS Drive size (GB) 146 Drive information (speed, interface, type) 10K, 6Gb SAS, HDD Network adapter Vendor and model Intel Ethernet 10Gb 2-port X520 adapter Number and type of ports 2 x 10GbE Driver version ixgbe Cooling fans Vendor and model Dell PFC0612DE Number of cooling fans 5 Power supplies Vendor and model Dell 0VT6G4 Number of power supplies 2 Wattage of each (W) 870
- 10. Update your private cloud with 14th generation Dell EMC PowerEdge FC640 servers and do more work in less space November 2017 | 10 Storage Storage configuration information 1 x Dell EMC PowerEdge FD332 Controller firmware revision 1.0 Number of storage controllers 2 Number of storage shelves 1 Number of drives per shelf 16 Power management policy Performance Drives #1 Number of drives 4 Drive vendor and model number Seagate ST300MM0006 Drive size (GB) 900 Drive information (speed, interface, type) 10K, 6Gb SAS, HDD Drives #2 Number of drives 12 Drive vendor and model number Seagate PH0XCRDVTB30073R01T0A00 Drive size (GB) 3,840 Drive information (speed, interface, type) 12Gb SAS, SSD VM configurations Virtual machine configuration information Cassandra VM (FC640) Cassandra VM (R710) YCSB Driver VM VMware® vSphere® version VMware ESXi™, 6.5.0, 5969303 VMware ESXi, 6.0.0, 5572656 VMware ESXi, 6.5.0, 5969303 vCPU count 4 4 4 Memory (GB) 10 10 10 Virtual disk (GB) 20 (OS), 10 (database), 5 (commitlog) 20 (OS), 10 (database), 5 (commitlog) 20 (OS) Virtual disk controller VMware Paravirtual VMware Paravirtual VMware Paravirtual Virtual NIC VMXNET 3 VMXNET 3 VMXNET 3 OS Red Hat® Enterprise Linux® 7.4 Red Hat Enterprise Linux 7.4 Red Hat Enterprise Linux 7.4
- 11. Update your private cloud with 14th generation Dell EMC PowerEdge FC640 servers and do more work in less space November 2017 | 11 Appendix C: How we tested Configuring Dell EMC PowerEdge FD332 storage sleds for multiple hosts In each FX2s chassis’ CMC interface, we configured the FD332 storage sled to present its storage to both FC640 nodes in the same chassis. We populated bays 0 through 5 and bays 8 through 13. We then created a RAID10 in the BIOS of each FC640 server. 1. In a browser, log into the FX2s CMC interface with administrator credentials. 2. Under Chassis OverviewServer Overview, navigate to the slot housing the FD332 storage sled to be configured. 3. Click the Setup tab. 4. Under Storage Mode, select the Split Dual Host radio button, and click Apply. 5. Repeat steps 1 through 4 for the other FX2s. Installing VMware ESXi 6/6.5 On the Dell EMC PowerEdge R710 servers, we installed VMware ESXi 6.0, and on the Dell EMC PowerEdge FC640 blade servers and R730 infrastructure server, we installed VMware ESXi 6.5. 1. Insert the appropriate vSphere installation media and power on the server, choosing to boot from the installation media. 2. Select the standard vSphere installer and allow the files to copy into memory. 3. At the welcome screen, press F1. 4. At the keyboard language selection screen, press Enter. 5. Enter a password twice for the root user, and press Enter. 6. Choose to install to the onboard virtual disk. 7. Allow the installer to finish installing vSphere, and reboot the server. 8. At the home screen, press F2 and enter your credentials. 9. Select Configure Management Network. 10. Select IP Configuration. 11. Enter your static IP information, and press Enter. 12. Select DNS Configuration. 13. Enter a hostname, and press Enter. 14. Press Esc, and press Y to restart the management network. Installing VMware vCenter Server Appliance Use the following steps to install the vCenter Server Appliance onto an ESXi or vCenter server outside of the testing environment. 1. On a Windows server or VM, locate the installer image VMware-VCSA-all-6.5.0-5973321.iso. 2. Mount the image, navigate to the vcsa folder, and launch VMware-ClientIntegrationPlugin-6.5.0.exe. 3. In the wizard that appears, click Next. 4. Accept the terms of the license agreement, and click Next. 5. Leave the default installation directory, and click Next. 6. Click Install. 7. Click Finish. 8. In the mounted image’s top directory, open vcsa-setup.html. 9. When prompted, click Allow. 10. Click Install. 11. Accept the terms of the license agreement, and click Next. 12. Enter the FQDN or IP address of the host onto which the vCenter Server Appliance will be deployed. 13. Provide a username and password for the system in question, and click Next. 14. To accept the certificate of the host you chose to connect to, click Yes. 15. Select the appropriate datacenter, and click Next. 16. Select the appropriate resource, and click Next. 17. Provide a name and password for the virtual machine, and click Next. 18. Select Install vCenter Server with an Embedded Platform Services Controller, and click Next. 19. Select Create a new SSO domain. 20. Provide a password, and confirm it. 21. Provide an SSO Domain name and SSO Site name, and click Next.
- 12. Update your private cloud with 14th generation Dell EMC PowerEdge FC640 servers and do more work in less space November 2017 | 12 22. Set an appropriate Appliance Size, and click Next. 23. Select an appropriate datastore, and click Next. 24. Select Use an embedded database (PostgreSQL), and click Next. 25. At the Network Settings page, configure the network settings as appropriate for your environment, and click Next. 26. Review your settings, and click Finish. 27. When installation completes, click Close. Configuring networking On each host in the R710 cluster and FC640 cluster, we configured one 10Gb network interface with a VMKernel NIC set up for Management traffic and a virtual port group for VM network traffic, and configured the second 10Gb network interface with a VMKernel NIC set up for vMotion traffic. This allowed plenty of bandwidth for the YCSB workload, as well as high availability for the clusters created in vCenter. We also configured a single 10Gb network interface on the infrastructure R730 for a management traffic VMKernel NIC and VM Network virtual port group. Creating an HA/DRS cluster in vCenter 1. In a browser, navigate to the vCenter Web UI, and log in with administrator credentials. 2. Right-click the vCenter in the Navigator pane, and click New Datacenter… 3. Provide a name, and click OK. 4. Right-click the new datacenter, and click New Cluster… 5. Provide a name, and check the boxes for DRS and vSphere HA. 6. Click OK. 7. Repeat steps 4 through 6 so that there is one cluster for the R710 servers and one cluster for the FC640 servers. 8. Right-click the R710 cluster, and select Add Host… 9. Provide the IP address of the host to be added, and click Next. 10. Confirm any security messages that appear, and click Next. 11. Click Next. 12. Click Finish. Creating the workload virtual machines We created varying numbers of workload VMs for our testing depending on the solution under test. We used 6 VMs per Dell EMC PowerEdge R710 server, and 14 VMs per Dell EMC PowerEdge FC640 server node. Each VM had 4 vCPUs, 12 GB of memory, and a connection to our testing network. Creating the base VM 1. In VMware vCenter, navigate to Virtual Machines. 2. Click Create a new VM. 3. Leave Create a new virtual machine selected, and click Next. 4. Enter a name for the virtual machine, and click Next. 5. Place the VM on a host with available CPUs, and click Next. 6. Select the first the 20GB OS VMDK, and click Next. 7. Click Next. 8. Select Red Hat Enterprise Linux as the guest OS, and click Next. 9. In the Customize Hardware section, make the following changes: yy Increase the vCPUs to 4. yy Increase the VM memory to 12 GB. yy Add a 10GB VMDK for Cassandra data, and select the VMware Paravirtual controller and Thick Provisioned Eager Zeroed. yy Add a 5GB VMDK for Cassandra commitlog, and select the VMware Paravirtual controller and Thick Provisioned Eager Zeroed. 10. Connect the VM to the test network. 11. Click Next. 12. Click Finish. Installing Red Hat Enterprise Linux 7 1. Attach the Red Hat Enterprise Linux 7 installation media, and power on the VM. 2. Select Install or upgrade an existing system, and press Enter. 3. Use the TCP/IP configuration screen to add a static IP address.
- 13. Update your private cloud with 14th generation Dell EMC PowerEdge FC640 servers and do more work in less space November 2017 | 13 4. At the installation welcome screen, click Next. 5. Choose a language, and press Enter. 6. Choose a keyboard layout, and press Enter. 7. Select Basic Storage Devices, and click Next. 8. Enter a hostname and click Next. 9. Select your time zone, and click Next. 10. Enter a root password twice, and click Next. 11. Select Use All Space, and click Next. 12. At the Boot Loader screen, click Next. 13. At the Minimal Selection screen, click Next. 14. After the installation completes, reboot the server. Installing and configuring Cassandra 1. Power on the RHEL 7 VM created to run Cassandra. 2. Provide a static IP address, gateway, and DNS server, and restart the networking service. 3. Run the following: a. yum update b. yum upgrade c. vi /etc/yumm.repos.d/cassandra.repo i. [cassandra] ii. name=Apache Cassandra iii. baseurl=https://www.apache.org/dist/cassandra/redhat/311x/ iv. gpgcheck=1 v. repo_gpgcheck=1 vi. gpgkey=https://www.apache.org/dist/cassandra/KEYS d. sudo yum install cassandra –y e. service cassandra start f. chkconfig cassandra on g. vi /etc/cassandra/conf/cassandra.yaml i. Set seeds = IP_ADDRESS_OF_SEED_VM, using separate seed VMs for each cluster. ii. Set data_directory = /PATH/TO/DATAMOUNT iii. Set commitlog_directory = /PATH/TO/COMMITLOGMOUNT iv. Set listen_address = IP_ADDRESS_OF_CURRENT_VM v. Set rpc_address = IP_ADDRESS_OF_CURRENT_VM h. sudo service Cassandra restart 4. Power off this VM and create clones such that the R710 cluster has 24 Cassandra VMs total, and the FC640 cluster has 56 Cassandra VMs total. Set their IP addresses appropriately. Add new VMs to each cluster by powering them on one at a time, running nodetool status from the first VM in each cluster to see the progress of joining the new VMs to each Cassandra cluster. Installing Yahoo! Cloud Serving Benchmark Clone a RHEL 7 VM onto the R730 infrastructure host, where each YCSB driver VM will reside. 1. Power on a RHEL 7 VM created to run YCSB. 2. Provide a static IP address, gateway, and DNS server, and restart the networking service. curl -O –location https://github.com/brianfrankcooper/YCSB/releases/download/0.12.0/ycsb-0.12.0.tar. gz tar xfvz ycsb-0.12.0.tar.gz cd ycsb-0.12.0 3. Power off this VM, and clone it out for a total of four YCSB VMs. 4. Power them on, and provide each with a unique static IP address.
- 14. Update your private cloud with 14th generation Dell EMC PowerEdge FC640 servers and do more work in less space November 2017 | 14 Creating a Cassandra table for use with YCSB 1. Log into Cassandra Command Line Shell (cqlsh) from one of the Cassandra nodes: cqlsh IP_ADDRESS_OF_CURRENT_VM 2. Create a YCSB keyspace with replication factor equal to 3: cqlsh> create keyspace YCSB WITH REPLICATION = {‘class’ : ‘SimpleStrategy’, ‘replication_factor’: 3 }; 3. Create a table named usertable with 10 columns in the YCSB keyspace: cqlsh> USE ycsb; cqlsh> create table usertable ( y_id varchar primary key, field0 varchar, field1 varchar, field2 varchar, field3 varchar, field4 varchar, field5 varchar, field6 varchar, field7 varchar, field8 varchar, field9 varchar); 4. Populate the usertable table from a YCSB driver VM: /root/ycsb-0.12.0/bin/ycsb load cassandra-cql -p hosts=IP_ADDRESS_OF_CASSANDRA_NODES_ TO_CONNECT_TO -threads NUMBER_OF_THREADS -p fieldcount=10 -p recordcount=RECORD_COUNT -p requestdistribution=DISTRIBUTION_MODEL -P /root/ycsb-0.12.0/workloads/workloadb Performing a YCSB run on the Cassandra database 1. Run the following command from a YCSB driver VM: /root/ycsb-0.12.0/bin/ycsb run cassandra-cql -p hosts=IP_ADDRESS_OF_CASSANDRA_NODES_TO_CONNECT_TO -threads NUMBER_OF_THREADS -p fieldcount=10 -p operationcount=OPERATION_COUNT -p recordcount=RECORD_ COUNT -p requestdistribution=DISTRIBUTION_MODEL -P /root/ycsb-0.12.0/workloads/workloadb > YCSB_ results_workloadb Testing process 1. Create a 30GB Cassandra database (recordcount=30000000): /root/ycsb-0.12.0/bin/ycsb load cassandra-cql -p hos ts=”192.168.0.105,192.168.0.106,192.168.0.107,192.168.0.108” -threads 32 -p fieldcount=10 -p recordcount=30000000 -p requestdistribution=zipfian -P /root/ycsb-0.12.0/workloads/workloadb 2. Run the YCSB benchmark against the Cassandra database with four driver VMs. Start the measurement with four YCSB threads (one on each YCSB driver VM) against the Cassandra database just created. The YCSB threads connect to the IP addresses of four Cassandra VMs (one on each physical FC640 server). We used YCSB/workload-b (95% reads and 5% updates) and the Zipfian distribution model for each test run: /root/ycsb-0.12.0/bin/ycsb run cassandra-cql -p hos ts=”192.168.0.105,192.168.0.106,192.168.0.107,192.168.0.108” -threads thread_count -p fieldcount=10 -p operationcount=400000 -p recordcount=30000000 -p requestdistribution=zipfian -P /root/ycsb-0.12.0/ workloads/workloadb > /root/ycsb-0.12.0/YCSB_results_workloadb_output.txt 2>&1 3. While the test is in progress, monitor and collect ESXTOP statistics (CPU utilization, disk IO latency, network throughput and memory usage) from the FC640 servers. 4. After the test completes, report the overall operations/second and average latency from YCSB test result files. 5. Continue to increase the number of YCSB threads in subsequent runs until CPU utilization is more than 90% on the FC640 servers. We performed the final test runs with 128 threads total (32 per driver) against the R710 cluster, and 620 threads (155 per driver) against the FC640 cluster. 6. Delete the database tables and snapshots after each run. 7. Repeat the process for a total of three test runs, and report the median operations/second and latency results.
- 15. Update your private cloud with 14th generation Dell EMC PowerEdge FC640 servers and do more work in less space November 2017 | 15 Principled Technologies is a registered trademark of Principled Technologies, Inc. All other product names are the trademarks of their respective owners. DISCLAIMER OF WARRANTIES; LIMITATION OF LIABILITY: Principled Technologies, Inc. has made reasonable efforts to ensure the accuracy and validity of its testing, however, Principled Technologies, Inc. specifically disclaims any warranty, expressed or implied, relating to the test results and analysis, their accuracy, completeness or quality, including any implied warranty of fitness for any particular purpose. All persons or entities relying on the results of any testing do so at their own risk, and agree that Principled Technologies, Inc., its employees and its subcontractors shall have no liability whatsoever from any claim of loss or damage on account of any alleged error or defect in any testing procedure or result. In no event shall Principled Technologies, Inc. be liable for indirect, special, incidental, or consequential damages in connection with its testing, even if advised of the possibility of such damages. In no event shall Principled Technologies, Inc.’s liability, including for direct damages, exceed the amounts paid in connection with Principled Technologies, Inc.’s testing. Customer’s sole and exclusive remedies are as set forth herein. This project was commissioned by Dell EMC. Principled Technologies® Facts matter.®Principled Technologies® Facts matter.®