At-Least-Three-People-Are-Needed-To-Handle-A-Baby-54
•
0 likes•206 views
Report
Share
Report
Share
Download to read offline

Recommended
Recommended
Top Rated Pune Call Girls Dhayari ⟟ 6297143586 ⟟ Call Me For Genuine Sex Service At Affordable Rate
Booking Contact Details
WhatsApp Chat: +91-6297143586
pune Escort Service includes providing maximum physical satisfaction to their clients as well as engaging conversation that keeps your time enjoyable and entertaining. Plus they look fabulously elegant; making an impressionable.
Independent Escorts pune understands the value of confidentiality and discretion - they will go the extra mile to meet your needs. Simply contact them via text messaging or through their online profiles; they'd be more than delighted to accommodate any request or arrange a romantic date or fun-filled night together.
We provide -
01-may-2024(v.n)
Top Rated Pune Call Girls Dhayari ⟟ 6297143586 ⟟ Call Me For Genuine Sex Ser...
Top Rated Pune Call Girls Dhayari ⟟ 6297143586 ⟟ Call Me For Genuine Sex Ser...Call Girls in Nagpur High Profile
Model Call Girl Services in Delhi reach out to us at 🔝 9953056974 🔝✔️✔️
Our agency presents a selection of young, charming call girls available for bookings at Oyo Hotels. Experience high-class escort services at pocket-friendly rates, with our female escorts exuding both beauty and a delightful personality, ready to meet your desires. Whether it's Housewives, College girls, Russian girls, Muslim girls, or any other preference, we offer a diverse range of options to cater to your tastes.
We provide both in-call and out-call services for your convenience. Our in-call location in Delhi ensures cleanliness, hygiene, and 100% safety, while our out-call services offer doorstep delivery for added ease.
We value your time and money, hence we kindly request pic collectors, time-passers, and bargain hunters to refrain from contacting us.
Our services feature various packages at competitive rates:
One shot: ₹2000/in-call, ₹5000/out-call
Two shots with one girl: ₹3500/in-call, ₹6000/out-call
Body to body massage with sex: ₹3000/in-call
Full night for one person: ₹7000/in-call, ₹10000/out-call
Full night for more than 1 person: Contact us at 🔝 9953056974 🔝. for details
Operating 24/7, we serve various locations in Delhi, including Green Park, Lajpat Nagar, Saket, and Hauz Khas near metro stations.
For premium call girl services in Delhi 🔝 9953056974 🔝. Thank you for considering us!CHEAP Call Girls in Malviya Nagar, (-DELHI )🔝 9953056974🔝(=)/CALL GIRLS SERVICE
CHEAP Call Girls in Malviya Nagar, (-DELHI )🔝 9953056974🔝(=)/CALL GIRLS SERVICE9953056974 Low Rate Call Girls In Saket, Delhi NCR
Hello, Guys welcome to Manalifun Goa Escort service. Are you want Top call girls in Goa at just ₹10000 then no further anywhere because we have a large number of local beautiful girls. We are a genuine platform to provide unlimited classification escort ads service without any commission. 9316020077
Here many Goa Independent call girls and ladies, publish their ads. Our call girl in Goa is well-known for real sexual fun in Goa. We are not allow any prostitute to work here without checking the details, Firstly all ads check by our team then we publish them here. So don’t hesitate to book Low rate call girls in Goa. 9316020077
Goa call girls: A real wonder in Goa
Who are the best Goa Escort Service provider for Goa call girls
High-Class call girls in Goa escort service for 100% Satisfaction
Choose a trusted call girl service in Goa with Us +91-9316020077
Goa Escorts Provide 100% Client Satisfaction
How Our Goa Call Girls Are Perfect For Instant Satisfaction
100% Guaranteed Goa call girls will make you excited
How to Find Cheap Call Girls in Goa
Our Reliable Escort Service in Goa Local Areas
Goa Escorts (cheap escort service in Goa)
Rate Chart of Goa call girls, (call girl Rate in Goa)
5-star hotel For Goa call girls service
Call girls in Goa are the ideal sex partner for you
BOOK YOUR FAVORITE Goa CALL GIRLS SERVICE WITH US CALL! US NOW~ 9316020077
Best way to Hire call girls in Goa
What’s the cost of escort service in Goa
North Goa Call Girls
Location :-
Baga , Caclangute , Candolim , Anjuna , Panaji Arpora , Vagator , Morjim , Siolim , Mandrem , Arambol , etc.
Vasco , Bambolim , Madgaon, Colva , EtcDesi Bhabhi Call Girls In Goa 💃 730 02 72 001💃desi Bhabhi Escort Goa
Desi Bhabhi Call Girls In Goa 💃 730 02 72 001💃desi Bhabhi Escort Goarussian goa call girl and escorts service
CALL GIRLS IN GOA & ESCORTS SERVICE 9316020077 Door Step Delivery We Offering You 100% Genuine Completed Body And Mind Relaxation With Happy Ending ServiCe Done By Most Attractive Charming Soft Spoken Bold Beautiful Full Cooperative Independent Escort Girls ServiCe In All Star Hotel And Home ServiCe In All Over North Goa-Baga , Calangute , Anjuna , Candolim , Arpora , Vagator , Morjim , Arambol , Mandrem , Mapusa , Siolim , Porvorim , Panaji , Miramar , Dona Paula ,Etc. Goa Also …,
I Have Extremely Beautiful Broad Minded Cute Sexy & Hot Call Girls and Escorts, We Are Located in 3* 4* 5* Hotels in GOA. Safe & Secure High Class Services Affordable Rate 100% Satisfaction, Unlimited Enjoyment. Any Time for Model/Teens Escort in GOA High Class luxury and Premium Escorts ServiCe.
★ CALL US High Class Luxury and Premium Escorts ServiCe We Provide Well Educated, Royal Class Female, High-Class Escorts Offering a Top High Class Escorts Service In the & Several Nearby All Places Of .
★ Get The High Profile, Bollywood Queens , Well Educated , Good Looking , Full Cooperative Model Services. You Can See Me at My Comfortable Hotels or I Can Visit You In hotel Our Service Available IN All SERVICE, 3/4/5 STAR HOTEL , In Call /Out Call Services.24 hrs ,
★ To Enjoy With Hot and Sexy Girls .
★ We Are Providing :-
• Models
• Vip Models
• Russian Models
• Foreigner Models
• TV Actress and Celebrities
• Receptionist
• Air Hostess
• Call Center Working Girls/Women
• Hi-Tech Co. Girls/Women
• Housewife
• Collage Going Girls.
• Travelling Escorts.
• Ramp-Models
• Foreigner And Many More.. Incall & Outcall Available…
• INDEPENDENT GIRLS / HOUSE WIFES
Russian ℂall gIRLS In Goa 9316020077 ℂall gIRLS Service In Goa
Russian ℂall gIRLS In Goa 9316020077 ℂall gIRLS Service In Goarussian goa call girl and escorts service
More Related Content
Recently uploaded
Top Rated Pune Call Girls Dhayari ⟟ 6297143586 ⟟ Call Me For Genuine Sex Service At Affordable Rate
Booking Contact Details
WhatsApp Chat: +91-6297143586
pune Escort Service includes providing maximum physical satisfaction to their clients as well as engaging conversation that keeps your time enjoyable and entertaining. Plus they look fabulously elegant; making an impressionable.
Independent Escorts pune understands the value of confidentiality and discretion - they will go the extra mile to meet your needs. Simply contact them via text messaging or through their online profiles; they'd be more than delighted to accommodate any request or arrange a romantic date or fun-filled night together.
We provide -
01-may-2024(v.n)
Top Rated Pune Call Girls Dhayari ⟟ 6297143586 ⟟ Call Me For Genuine Sex Ser...
Top Rated Pune Call Girls Dhayari ⟟ 6297143586 ⟟ Call Me For Genuine Sex Ser...Call Girls in Nagpur High Profile
Model Call Girl Services in Delhi reach out to us at 🔝 9953056974 🔝✔️✔️
Our agency presents a selection of young, charming call girls available for bookings at Oyo Hotels. Experience high-class escort services at pocket-friendly rates, with our female escorts exuding both beauty and a delightful personality, ready to meet your desires. Whether it's Housewives, College girls, Russian girls, Muslim girls, or any other preference, we offer a diverse range of options to cater to your tastes.
We provide both in-call and out-call services for your convenience. Our in-call location in Delhi ensures cleanliness, hygiene, and 100% safety, while our out-call services offer doorstep delivery for added ease.
We value your time and money, hence we kindly request pic collectors, time-passers, and bargain hunters to refrain from contacting us.
Our services feature various packages at competitive rates:
One shot: ₹2000/in-call, ₹5000/out-call
Two shots with one girl: ₹3500/in-call, ₹6000/out-call
Body to body massage with sex: ₹3000/in-call
Full night for one person: ₹7000/in-call, ₹10000/out-call
Full night for more than 1 person: Contact us at 🔝 9953056974 🔝. for details
Operating 24/7, we serve various locations in Delhi, including Green Park, Lajpat Nagar, Saket, and Hauz Khas near metro stations.
For premium call girl services in Delhi 🔝 9953056974 🔝. Thank you for considering us!CHEAP Call Girls in Malviya Nagar, (-DELHI )🔝 9953056974🔝(=)/CALL GIRLS SERVICE
CHEAP Call Girls in Malviya Nagar, (-DELHI )🔝 9953056974🔝(=)/CALL GIRLS SERVICE9953056974 Low Rate Call Girls In Saket, Delhi NCR
Hello, Guys welcome to Manalifun Goa Escort service. Are you want Top call girls in Goa at just ₹10000 then no further anywhere because we have a large number of local beautiful girls. We are a genuine platform to provide unlimited classification escort ads service without any commission. 9316020077
Here many Goa Independent call girls and ladies, publish their ads. Our call girl in Goa is well-known for real sexual fun in Goa. We are not allow any prostitute to work here without checking the details, Firstly all ads check by our team then we publish them here. So don’t hesitate to book Low rate call girls in Goa. 9316020077
Goa call girls: A real wonder in Goa
Who are the best Goa Escort Service provider for Goa call girls
High-Class call girls in Goa escort service for 100% Satisfaction
Choose a trusted call girl service in Goa with Us +91-9316020077
Goa Escorts Provide 100% Client Satisfaction
How Our Goa Call Girls Are Perfect For Instant Satisfaction
100% Guaranteed Goa call girls will make you excited
How to Find Cheap Call Girls in Goa
Our Reliable Escort Service in Goa Local Areas
Goa Escorts (cheap escort service in Goa)
Rate Chart of Goa call girls, (call girl Rate in Goa)
5-star hotel For Goa call girls service
Call girls in Goa are the ideal sex partner for you
BOOK YOUR FAVORITE Goa CALL GIRLS SERVICE WITH US CALL! US NOW~ 9316020077
Best way to Hire call girls in Goa
What’s the cost of escort service in Goa
North Goa Call Girls
Location :-
Baga , Caclangute , Candolim , Anjuna , Panaji Arpora , Vagator , Morjim , Siolim , Mandrem , Arambol , etc.
Vasco , Bambolim , Madgaon, Colva , EtcDesi Bhabhi Call Girls In Goa 💃 730 02 72 001💃desi Bhabhi Escort Goa
Desi Bhabhi Call Girls In Goa 💃 730 02 72 001💃desi Bhabhi Escort Goarussian goa call girl and escorts service
CALL GIRLS IN GOA & ESCORTS SERVICE 9316020077 Door Step Delivery We Offering You 100% Genuine Completed Body And Mind Relaxation With Happy Ending ServiCe Done By Most Attractive Charming Soft Spoken Bold Beautiful Full Cooperative Independent Escort Girls ServiCe In All Star Hotel And Home ServiCe In All Over North Goa-Baga , Calangute , Anjuna , Candolim , Arpora , Vagator , Morjim , Arambol , Mandrem , Mapusa , Siolim , Porvorim , Panaji , Miramar , Dona Paula ,Etc. Goa Also …,
I Have Extremely Beautiful Broad Minded Cute Sexy & Hot Call Girls and Escorts, We Are Located in 3* 4* 5* Hotels in GOA. Safe & Secure High Class Services Affordable Rate 100% Satisfaction, Unlimited Enjoyment. Any Time for Model/Teens Escort in GOA High Class luxury and Premium Escorts ServiCe.
★ CALL US High Class Luxury and Premium Escorts ServiCe We Provide Well Educated, Royal Class Female, High-Class Escorts Offering a Top High Class Escorts Service In the & Several Nearby All Places Of .
★ Get The High Profile, Bollywood Queens , Well Educated , Good Looking , Full Cooperative Model Services. You Can See Me at My Comfortable Hotels or I Can Visit You In hotel Our Service Available IN All SERVICE, 3/4/5 STAR HOTEL , In Call /Out Call Services.24 hrs ,
★ To Enjoy With Hot and Sexy Girls .
★ We Are Providing :-
• Models
• Vip Models
• Russian Models
• Foreigner Models
• TV Actress and Celebrities
• Receptionist
• Air Hostess
• Call Center Working Girls/Women
• Hi-Tech Co. Girls/Women
• Housewife
• Collage Going Girls.
• Travelling Escorts.
• Ramp-Models
• Foreigner And Many More.. Incall & Outcall Available…
• INDEPENDENT GIRLS / HOUSE WIFES
Russian ℂall gIRLS In Goa 9316020077 ℂall gIRLS Service In Goa
Russian ℂall gIRLS In Goa 9316020077 ℂall gIRLS Service In Goarussian goa call girl and escorts service
Recently uploaded (20)
Russian Escorts Agency In Goa 💚 9316020077 💚 Russian Call Girl Goa
Russian Escorts Agency In Goa 💚 9316020077 💚 Russian Call Girl Goa
Independent Joka Escorts ✔ 8250192130 ✔ Full Night With Room Online Booking 2...
Independent Joka Escorts ✔ 8250192130 ✔ Full Night With Room Online Booking 2...
Nayabad Call Girls ✔ 8005736733 ✔ Hot Model With Sexy Bhabi Ready For Sex At ...
Nayabad Call Girls ✔ 8005736733 ✔ Hot Model With Sexy Bhabi Ready For Sex At ...
↑Top Model (Kolkata) Call Girls Sonagachi ⟟ 8250192130 ⟟ High Class Call Girl...
↑Top Model (Kolkata) Call Girls Sonagachi ⟟ 8250192130 ⟟ High Class Call Girl...
Hotel And Home Service Available Kolkata Call Girls Howrah ✔ 6297143586 ✔Call...
Hotel And Home Service Available Kolkata Call Girls Howrah ✔ 6297143586 ✔Call...
Top Rated Pune Call Girls Dhayari ⟟ 6297143586 ⟟ Call Me For Genuine Sex Ser...
Top Rated Pune Call Girls Dhayari ⟟ 6297143586 ⟟ Call Me For Genuine Sex Ser...
VIP Model Call Girls Koregaon Park ( Pune ) Call ON 8005736733 Starting From ...
VIP Model Call Girls Koregaon Park ( Pune ) Call ON 8005736733 Starting From ...
Borum Call Girls Service ☎ ️93326-06886 ❤️🔥 Enjoy 24/7 Escort Service
Borum Call Girls Service ☎ ️93326-06886 ❤️🔥 Enjoy 24/7 Escort Service
❤Personal Whatsapp Number Keylong Call Girls 8617697112 💦✅.
❤Personal Whatsapp Number Keylong Call Girls 8617697112 💦✅.
CHEAP Call Girls in Malviya Nagar, (-DELHI )🔝 9953056974🔝(=)/CALL GIRLS SERVICE
CHEAP Call Girls in Malviya Nagar, (-DELHI )🔝 9953056974🔝(=)/CALL GIRLS SERVICE
Desi Bhabhi Call Girls In Goa 💃 730 02 72 001💃desi Bhabhi Escort Goa
Desi Bhabhi Call Girls In Goa 💃 730 02 72 001💃desi Bhabhi Escort Goa
Kanpur call girls 📞 8617697112 At Low Cost Cash Payment Booking
Kanpur call girls 📞 8617697112 At Low Cost Cash Payment Booking
𓀤Call On 6297143586 𓀤 Ultadanga Call Girls In All Kolkata 24/7 Provide Call W...
𓀤Call On 6297143586 𓀤 Ultadanga Call Girls In All Kolkata 24/7 Provide Call W...
Call Girls in Barasat | 7001035870 At Low Cost Cash Payment Booking
Call Girls in Barasat | 7001035870 At Low Cost Cash Payment Booking
5* Hotels Call Girls In Goa {{07028418221}} Call Girls In North Goa Escort Se...
5* Hotels Call Girls In Goa {{07028418221}} Call Girls In North Goa Escort Se...
Hotel And Home Service Available Kolkata Call Girls South End Park ✔ 62971435...
Hotel And Home Service Available Kolkata Call Girls South End Park ✔ 62971435...
Model Call Girls In Velappanchavadi WhatsApp Booking 7427069034 call girl ser...
Model Call Girls In Velappanchavadi WhatsApp Booking 7427069034 call girl ser...
Book Sex Workers Available Kolkata Call Girls Service Airport Kolkata ✔ 62971...
Book Sex Workers Available Kolkata Call Girls Service Airport Kolkata ✔ 62971...
Russian ℂall gIRLS In Goa 9316020077 ℂall gIRLS Service In Goa
Russian ℂall gIRLS In Goa 9316020077 ℂall gIRLS Service In Goa
Featured
More than Just Lines on a Map: Best Practices for U.S Bike Routes
This session highlights best practices and lessons learned for U.S. Bike Route System designation, as well as how and why these routes should be integrated into bicycle planning at the local and regional level.
Presenters:
Presenter: Kevin Luecke Toole Design Group
Co-Presenter: Virginia Sullivan Adventure Cycling AssociationMore than Just Lines on a Map: Best Practices for U.S Bike Routes
More than Just Lines on a Map: Best Practices for U.S Bike RoutesProject for Public Spaces & National Center for Biking and Walking
Featured (20)
How to Prepare For a Successful Job Search for 2024
How to Prepare For a Successful Job Search for 2024
Social Media Marketing Trends 2024 // The Global Indie Insights
Social Media Marketing Trends 2024 // The Global Indie Insights
Trends In Paid Search: Navigating The Digital Landscape In 2024
Trends In Paid Search: Navigating The Digital Landscape In 2024
5 Public speaking tips from TED - Visualized summary
5 Public speaking tips from TED - Visualized summary
Google's Just Not That Into You: Understanding Core Updates & Search Intent
Google's Just Not That Into You: Understanding Core Updates & Search Intent
The six step guide to practical project management
The six step guide to practical project management
Beginners Guide to TikTok for Search - Rachel Pearson - We are Tilt __ Bright...
Beginners Guide to TikTok for Search - Rachel Pearson - We are Tilt __ Bright...
Unlocking the Power of ChatGPT and AI in Testing - A Real-World Look, present...
Unlocking the Power of ChatGPT and AI in Testing - A Real-World Look, present...
More than Just Lines on a Map: Best Practices for U.S Bike Routes
More than Just Lines on a Map: Best Practices for U.S Bike Routes
Ride the Storm: Navigating Through Unstable Periods / Katerina Rudko (Belka G...
Ride the Storm: Navigating Through Unstable Periods / Katerina Rudko (Belka G...
Good Stuff Happens in 1:1 Meetings: Why you need them and how to do them well
Good Stuff Happens in 1:1 Meetings: Why you need them and how to do them well
At-Least-Three-People-Are-Needed-To-Handle-A-Baby-54
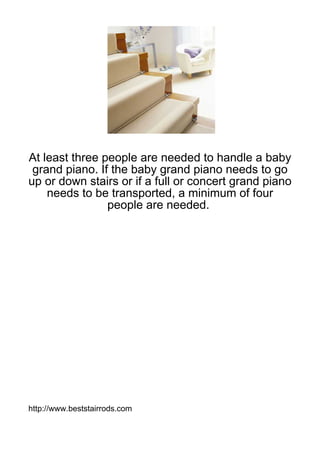
- 1. At least three people are needed to handle a baby grand piano. If the baby grand piano needs to go up or down stairs or if a full or concert grand piano needs to be transported, a minimum of four people are needed. http://www.beststairrods.com
- 2. Always complete a thorough and accurate inventory It may be necessary or preferable to use a visual inventory to adequately describe and show pre-existing damage As various parts are disassembled, please place all hardware in a properly labeled parts bag and then place the parts bag in a "Parts Box" Remove the music rack (lyre) from its track by pulling it toward the keyboard Wrap it in a clean furniture pad Disconnect the lid by removing the hinge pins Have one person wiggle the lid, holding it opposite the hinge, while a second person works the pin loose Please be careful not to damage the wood with the pliers or with the pin itself
- 3. If necessary, cover the jaws of the pliers with a small cloth to help prevent damage to the wood Wrap the lid in a clean furniture pad Remove the prop that holds the lid open and wrap it in a clean furniture pad The prop has a hinge pin and is in two pieces Remove the pedal assembly and wrap it in a clean furniture pad The braces at the rear of the assembly rest in slots at each end When removing the screws, please be careful not to drop the braces In addition, please be especially careful with the push rods so that they will not get bent
- 4. As you face the piano, number the push rods from left to right as "1", "2", and "3", by placing a piece of masking tape with the appropriate number on each rod Note: If masking tape is unavailable, please use correctly labeled parts bags for this purpose When reassembling at destination, please be sure to put the rods in the correct order so that the pedals will work properly Pad the piano by placing a clean rolled furniture pad (stretch wrap the pad to prevent it from unrolling) on the cover of the keyboard to prevent it from flopping open while you handle the piano Cover the top of the piano with two clean furniture pads, neatly folded around the keyboard Use rubber bands to secure the pads Note: Please ensure that the surface of the piano is dust-free before padding it Padding a highly polished surface that is dusty may cause fine scratches, especially on a black lacquer finish
- 5. Position a piano board and attach the straps so that it is ready to receive the piano The raised brace on the piano board should be at the keyboard end of the piano Remove the left front leg by positioning one person underneath the piano at the left end of the keyboard The other two people should support the left front corner The person underneath the piano must turn the retaining block so that the long end points away from the leg The screws, if there are any, should then be removed The "underneath" person should then get out from under the piano before actually removing the leg Be sure to have two people lifting the corner of the piano while the third person removes the leg
- 6. Note: Please be sure to note which legs were removed from which positions since some pianos have legs that are not interchangeable Place the piano on the piano board by lowering the "leg-less" end onto the board Please be sure to lift the entire piano slightly while completing this maneuver to prevent undue pressure on the remaining, attached legs as the piano tips Lift the piano to an upright position on the board Note: Please ensure that the soundboard is secure before lifting Be sure that the piano is centered snugly against the brace at the end of the piano board Note: Never leave the piano unattended Always have at least one person holding the piano steady at all times
- 7. Remove the two remaining legs and wrap them in clean furniture pads These legs are held in place by a "key and slot" arrangement To remove the leg, slide it inward toward the center of the piano until it comes out of the slot Secure the piano to the piano board by bringing the ends of the straps together and fastening them Place folded burlap pads over the furniture pads but under the straps to provide additional protection to the edges of the piano To prevent the strap near the narrow end of the piano from slipping off, tie the loose ends of the two straps together To move the piano over a flat, level surface, tilt the piano and piano board and place a four-wheel dolly under the center of the piano board To move the piano up or down stairs, use the piano board as a skid
- 8. After sufficiently padding the stairs for protection against residence damage, place the keyboard end of the piano toward the bottom of the stairs Attach a hump strap to the top end of the piano board to prevent the piano from slipping To load the piano, leave it on the piano board and place it in a tier as the first base item with the keyboard towards the wall or the http://www.beststairrods.com preceding tier The best place to load the padded lid is between the piano and the preceding tier or between the piano and the wall Now you got all the information " How to move a Baby Grand Piano " Ready for the challenge? If you answer: " Not yet " - Than call the professional Piano movers