
Recommended
More Related Content
What's hot
What's hot (20)
Similar to Editing diary
Similar to Editing diary (20)
Recently uploaded
Recently uploaded (20)
Editing diary
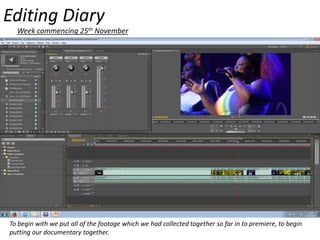
- 1. Editing Diary Week commencing 25th November To begin with we put all of the footage which we had collected together so far in to premiere, to begin putting our documentary together.
- 2. Then we went through our six hours of footage, selecting the sections with best camera angles and also the best sound quality, also considering whether the shot was completely in focus and of a high enough quality to use in our documentary.
- 3. Week commencing 2nd December We then created a separate sequence for all of our good quality sections of filming so that it was easier to see and more continent to begin putting out documentary together.
- 4. We then selected the best clips to create a 30 second montage to open our video, mainly including our footage from the Basement Jaxx concert. For this section we also took care in deciding on an audio track which would be suitable to run through this section, we wanted something up beat and catchy so we selected, Larse, So Long.
- 5. Week commencing 9th December Next we decided to import some achieve footage of one of our interviewee’s Ian Austin, into both our opening sequence and as an introductory section to his interview. We found this footage on YouTube and downloaded it from here.
- 6. To create our title for our documentary, we used Adobe Photoshop. Using a white background and a cut out of our title “produxions”, which we would over lay on to our documentary over some of our video footage. We decided to over lay it on to our achieve footage of Ian Austin, as he would be our first interviewee in the documentary. We cropped and deleted certain sections of the mask so that whilst playing the documentary it would keep flashing on the screen.
- 7. This is how the title appeared on screen, which we decided worked very well so we decided that we would use this similarly later in our documentary to introduce each of our interviewee’s.
- 8. Week commencing 16th December We then inserted our footage of the first interviewee to appear in our documentary, this was going to be Ian Austin. Once the footage was imported we selected the best sections of the interview, cutting and moving the selected sections to start to piecing the main body of the documentary together.
- 9. Similarly to making the title for our documentary, we also used photo shop to create our banners. Using a white background, and the same font text as we had done previously. This is some of the design steps taken during the production of our banner. We selected bright colours as we thought it would be relevant to our theme of house music. We also put our logo in the corner and created a diagonal cut out to make it a little bit more dynamic as this style works best with our documentary. This banner will be updated and used for each of our interviewee’s.
- 10. We then imported the banner so that it would appear over the Ian Austin interview. Next we need to reposition and resize the banner, so that it looks profession and artistic in our documentary.
- 11. This is how the banner appears in our documentary, it will appear every time that Ian Austin is on screen. We will use this in the same style for each of our interviewees. This is how the banner appears in our timeline in premier.
- 12. Week commencing 30th December Similary to how we created our title for our documentary, we used a similar style in creating the introductions to each of our interviewees. Using a white background and a cut out of our their names, which we would over lay on to our documentary over some of our video footage. However, instead of using Photoshop, this time we used Adobe Fireworks.
- 13. We then imported the name mask of each interviewee so that it would appear over some footage of them. Next we need to reposition and resize the mask, so that it covers the full screen and looks profession and artistic in our documentary.
- 14. This is how the title appeared on screen, which we decided worked very well and matched our title, so we decided that we would use this to introduce each of our interviewee’s. This here demonstrated how e cropped and deleted certain sections of the mask so that whilst playing the documentary it would keep flashing on the screen to make it more artistic and relate to our theme more.
- 15. Week commencing 6th January Continued editing our documentary, until we had the complete 5 minutes, using all of our recorded footage banners and masks.
- 16. Week commencing 13th January Now that we have the complete 5 minutes of our documentary, we began our final editing section, were we added transitions and effect to make our documentary flow better and present more professionally. For example this slash slide transition, which we added to the banner.
- 17. These are just a few examples of the effects we have used in our documentary; including cross dissolve, gradient, dip to white and slash slide. This effects bar is in the bottom left hand corner od premier and it is here that all effects are found. You can either search for an effect or find it in the different folders provided.
- 18. Our final part of final editing was focus on sound and getting the sound levels correct. To begin with we went through our different music tracks ensuring that the volume dipped during an interview, so that the interview speaker was predominant, however still ensuring the sound could be heard in the background. This shows how we have achieved this with our sound. We then created several different audio tracks to place each interview on so that we could continue our final editing with the sound.
- 19. Finally, we began adjusting the sound levels and balancing them out so that they were perfectly matched. We did this using the audio mixer in premier, here we can adjust each individual layar of sound that is in our documentary seperatly.