Call Girls South Delhi Delhi reach out to us at ☎ 9711199012
Kieran Dixon's 3D Game Workflow Guide
1. Kieran Dixon 3D game workflow
This workflow details what I am doing while I design a 3D level in terms of looks, style, graphics and
purpose. I am moulding landscape, adding textures and creating other add-ins to this game,
including other, outside textures from the Unity Asset Store, and skyboxes, lighting, and etcetera. I
may or may not add human or animal characters to this, but there will be water, trees, and other
such in-game devices.
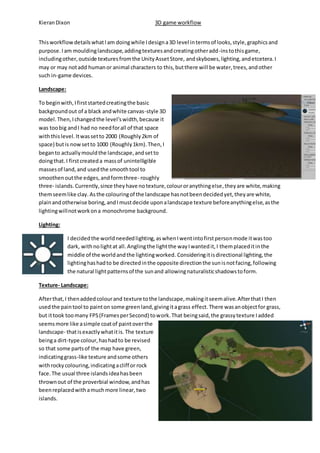
Landscape:
To begin with, I first started creating the basic
background out of a black and white canvas-style 3D
model. Then, I changed the level’s width, because it
was too big and I had no need for all of that space
with this level. It was set to 2000 (Roughly 2km of
space) but is now set to 1000 (Roughly 1km). Then, I
began to actually mould the landscape, and set to
doing that. I first created a mass of unintelligible
masses of land, and used the smooth tool to
smoothen out the edges, and form three- roughly
three- islands. Currently, since they have no texture, colour or anything else, they are white, making
them seem like clay. As the colouring of the landscape has not been decided yet, they are white,
plain and otherwise boring, and I must decide upon a landscape texture before anything else, as the
lighting will not work on a monochrome background.
Lighting:
I decided the world needed lighting, as when I went into first person mode it was too
dark, with no light at all. Angling the light the way I wanted it, I them placed it in the
middle of the world and the lighting worked. Considering it is directional lighting, the
lighting has had to be directed in the opposite direction the sun is not facing, following
the natural light patterns of the sun and allowing naturalistic shadows to form.
Texture- Landscape:
After that, I then added colour and texture to the landscape, making it seem alive. After that I then
used the pain tool to paint on some green land, giving it a grass effect. There was an object for grass,
but it took too many FPS (Frames per Second) to work. That being said, the grassy texture I added
seems more like a simple coat of paint over the
landscape- that is exactly what it is. The texture
being a dirt-type colour, has had to be revised
so that some parts of the map have green,
indicating grass-like texture and some others
with rocky colouring, indicating a cliff or rock
face. The usual three islands idea has been
thrown out of the proverbial window, and has
been replaced with a much more linear, two
islands.
2. Kieran Dixon 3D game workflow
Skybox:
After that I decided to add a skybox- it is basically an object for the sky that creates a look of clouds
and the sun, but does not affect- directly- the world. It indirectly adds an effect based on what I
wanted or added; I added a Dusk/Dawn effect, making it seem as though the sun was lowering/rising
into the world’s sky.
Water:
I added a water texture to the ground, creating a water-like feel to it, and then downloaded a water
pack, allowing me to place flowing water into the world. The water added creates a feel that there is
water that can be swum in, considering that the water itself disappears when underneath the
texture. This will be solved later on through the addition of fog, making the water seem solid and
able to be swam through.
Above the water surface is the water texture, and it is a dark
midnight blue. The water moves at the speed of 20/20/20,
and the texture itself came from the UAS.
Underneath the water is nothing
but the basic terrain, but this can be
fixed with the use of fog.
3. Kieran Dixon 3D game workflow
Terrain Additions:
In addition to the terrrain earlier created, I decided it was too bland, and added in some other
scenes- rocks, mountains, and buildings. Considering the type of map I am creating, and the flow of
consistency with fitting, I want the map to be populated with various buildings, rock formations-fitting
the scenario they are in- and, to an extent, people and animals. I have already decided to use
Unity Asset Store for most of these, but for others I will have to either create my own textures -
unlikely- or find them on the Asset Store.
Buildings:
The first building I added- proper building- was a shanty-type house, which was
placed on my small island, South-Eastern most side of the map. It was downloaded
from the Unity Asset Store, and is free. It, the house, is rather boring looking, but
for the sake of population and the type of map I have, I decided to place it there.
The lighting and fire next to the shanty house is from a campfire pack, which was
previously downloaded from the UAS, and is separate from this. This is the only
building I have managed to get in here, and one of the only buildings and
structures. I did manage to get another structure in here, called Thatched Cottage,
but it, in my opinion, doesn’t look much like a cottage and more of a warehouse,
which was ill-placed.
Trees:
After the buildings, I had an assortment of trees placed into the landscape, some
downloaded from Asset Store, and some just already in the Unity Project editor display.
Most of the trees were used for aesthetical purposes, but some were used practically-wit
hthe landscape the way it is, I figured that having a tree or object placed first and
then forming it around said tree or object would help me a lot.
In depth; Textures:
To go in depth about the textures I dowloaded and added to the landscape; the te xtures were
mostly added to the game through the normal set of texutres already offered
to me from the project, but some were downloaded or came as part of other
things. Most that I used, however, came from the separate texture packs that
came with other downloads. The Campfire Pack, for instance, came with two
different ground textures, and a texture for grass.
This image shows a typical amount of different textures, two of which are
from the Campfire Pack, and one from the normal Unity Project’s assets.
4. Kieran Dixon 3D game workflow
Bridges/Boats:
For the most part, I added wooden bridges downloaded from Unity Asset Store -
originally called ‘Simple Wooden Bridges’- to accompany the oceanic feeling of the side of both
islands, and placed a red, metallic bridge from a downloaded pack called
‘Bridge_Pack’. This bridge, as mentioned, was used to join the islands together, thus
creating a feel of unity between the islands, though I simply used it for the sole
purpose of ability to cross between both islands without the inane use of going
through the water to traverse from one side to the other.
The wooden bridges, however, were used for simple aesthetical reasoning,
therefore providing the islands with a much more linear, island-y feel
to them. By having a bridge act as a dock on one island, and a simple
walkway on another, I have made the island look better- in my opinion.
Alongside the bridges, I downloaded a simple wooden boat to use- for
aesthetical purposes only. This boat, while simple, has been given a
texture, a mesh, and a collision mask, allowing it to be stood on and act as a boat; with the exception
of being able to be useable, of course.
Water tower:
The Water Tower, downloaded from UAS, was simply added because it proved to be
both aesthetically pleasing and practical. It was pleasing due to the old, rusted look it
gave, allowing it to fit in to the background perfectly. It was practical as it added a sense
of being rustic, old, and worn out, giving it and the area around it a feel of being on an
island for ages, having corroded. And, if the area around it is to be populated- to a
degree- it needs to have a supply of water, which the tower provides. It is practical, looks
‘at home’ and provides a feel that it needs to be there.
Fences:
The fences I used are, as nearly everything else I used is,
from Unity Asset Store. This particular fence came as
part of the aforementioned Campfire Pack, and has that
cartoon-type yet realistic feel to it; the texture is on the
cartoon side, while the actual fence itself is on the
realism side, showing that it would look like both
cartoon-styled and modern realism if this were real.
5. Kieran Dixon 3D game workflow
I also have a fence that I neglected to use- hence it not being shown here- and the reason for me not
using it is simple; the fence itself was not needed, because it did not fit with the background. Also,
the fence was too clean, the texture didn’t make it look like a fence at all, and the overa ll feel of the
fence being used didn’t feel right.
Rocks/Stones/Shrubs:
Various types of rocks and stones were added to give the terrain a rough feel to it, showing the
variety provided. Thoug there were little differences in texture and little variety, the rocks were still
textured correctly according to their type and size.
As for the shrubs and grasses, they were added accordingly to the backdrop around them and their
choice of placement. For example, around the stone building, there was a set of shrubs next to the
rock near it, which gave off a sort of barren yet homely feel to it; the shrubs would act as a
decoration of sorts ofor both the rock, the building, and in a sorts, the trees surrounding, making it
seem in place.
6. Kieran Dixon 3D game workflow
Characters/NPC’s:
Once the general terrain was set up and the buildings and trees were set down, I decided to try and
populate the area with a couple of NPCs (Non-Playable characters) and enemies. While I only
succeeded in getting three of these in- one NPC and two enemies- I have re-textured one completely
and another has been moved to a general area near the first enemy. The NPC has been moved to a
safe zone away from the enemies, and near a general area that has buildings and trees.
While it may not look like it, this NPC fits perfectly within this type of map and level.
Since the level is going and already is a survival/fantasy game, the survival part of that
has been done with sparse objects and the terrain being built. Adding characters such as
this- of the fantasy genre type- makes perfect sense and is the greatest way to populate
the map.
This character did come from the Unity Asset Store, but it also has been re-textured.
The file named as Cat_Warrior, the name alone suggests it belongs here, but the look of
said character backs this up perfectly.
This enemy has been placed as two different variants. One has
been the normally textured enemy- named GOBLIN- which is
the green one; whereas the re-textured enemy that I textured
with some standard textures that I got from downloading
Unity.
The enemy below that has been completely retextured- has
the same file name- and has been made darker, as a variation
type of the standard GOBLIN (Goblin).
Extras:
There are a few extra additions that I added to my project, such as Rune stones and magic
particle effects. Said effects were placed within the hole that the rune stone had, giving it
a magical, fantasy-type feel to it. The rune stones and the effects were both taken from
the Unity Asset Store, and added to this.
7. Kieran Dixon 3D game workflow
The rune stone adds a sort of magical feel to it, making it seem as though it were an ancient relic of
some sort. The magic effect only adds to that feel, further backing that up and creating a mystic,
magical effect to both the rune stone and the area around it.
Unity Asset Store (UAS):
The UAS is where I get and already have most of the textures, animations, terrain tools and extra
items I use for the game. With the Unity Asset Store, I need to be logged in firstly, then I need to
have chosen what I want to download. Once you have chosen, it will take you to an option screen of
two choices, to leave the page or download the content.
Once you click download, it will download and allow you to import the file straight to your open
Unity Project.
Conclusion:
With this I conclude my workflow. The game has been completed, and while it may not be
completed to the level of completion I wanted for it, it was done all the same. The game is now
playable through the college server (;Q) drive. There is also evidence of this game being play-tested
for approximately 1.30 minutes.