SlideShare a Scribd company logo
1 of 83
Download to read offline
September 2 0 0 2
Their soul and secrets
by Erwin Puts
Leica M-Lenses
Leica M Lenses [1]
I n t r o d u c t i o n
Secrets revealed
It is well known that Leica M lenses, in spite of
their compact design, deliver imaging performance
with the highest quality. But what are the reasons
behind the fact that, over the many years that new
Leica M lenses have been computed, designed
and produced in an ongoing succession, additional
improvements still continue to be achieved? These
improvements, in the opinions of the advertising
experts at Leica, leave all previous advances far
behind.
In this brochure, Dutch photojournalist Erwin Puts
explains the principles on which the secrets of
Leica M lenses are based and how the extensive
knowhow and the great competence of Leica
optical designers succeed again and again in
achieving ever higher peaks in maximum
performance in their optical systems.
The author also pays special attention to the
popular concern expressed by numerous Leica
users, who wonder whether the „old“ lenses are
superior to current Leica M lenses in terms of
contrast range, contour sharpness and resolving
power. With his knowhow and the experience of
numerous test series, he juxtaposes comparable
lenses and their performances. In addition to
factual explanations, he also presents charts and
measurement curves that have never before been
published in this form. Guidelines for interpreting
these tables and curves make these graphics even
more practical.
Erwin Puts has been making photographs since
1960 and he explored the technical aspects of
photography even while he was studying business
administration. The author has been working with
Leica since 1989, and in a series of more than 30
articles published around the world since 1992, he
discusses the history, technology and the
operation of Leica cameras and lenses. The core of
his work consists of lens test reports that are
conducted with a meticulous thoroughness that is
recognized by his competitors. The work brings
together optical parameters and practical
applications, clarifying the limits of performance
capability, with proper attention to their interplay
with the different types of film materials.
For many readers, this brochure will reveal many
a secret, thus clarifying the reasons for the
performance characteristics of Leica M lenses. We
wish you much enjoyment in reading this
brochure!
Leica Camera AG
Ralph Hagenauer
Marketing Communication
[2] Leica M Lenses
C o n t e n t s
Leica M Lenses [3]
C o n t e n t s
Contents
Introduction 1
The Soul of Leica M-Lenses 4
Core Technologies 12
MTF Analysis: those shapely curves 15
Color Rendition 19
21mm Lenses 20
21mm f/2,8 Elmarit-M 24
21mm f/2,8 Elmarit-M ASPH 25
24mm Lenses 26
24mm f/2,8 Elmarit-M ASPH 29
28mm Lenses 30
28mm f/2,8 Elmarit-M (1979) 32
28mm f/2,8 Elmarit-M (1993) 33
35mm Lenses 34
35mm f/1,4 Summilux-M 37
35mm f/1,4 Summilux-M aspherical 38
35mm f/1,4 Summilux-M ASPH 39
35mm f/2,0 Summicron-M 40
35mm f/2,0 Summicron-M ASPH 41
50mm Lenses 42
50mm f/2,8 Elmar 46
50mm f/2,8 Elmar-M 47
50mm f/2,0 Summicron-M 48
50mm f/2,0 Summicron-M (current) 49
50mm f/1,4 Summilux 50
50mm f/1,4 Summilux-M 51
50mm f/1,2 Noctilux 52
50mm f/1,0 Noctilux-M 53
Tri Elmar-m 1:4/28-35-50 mm ASPH 54
28mm f/4,0 56
35mm f/4,0 57
50mm f/4,0 58
75mm Lenses 60
85mm f/1,5 Summarex-M 62
75mm f/1,4 Summilux-M 63
90mm Lenses 64
90mm f/2,8 Tele Elmarit-M 68
90mm f/2,8 Elmarit-M 69
90mm f/2,0 Summicron-M 70
90mm f/2,0 APO Summicron-M ASPH 71
135mm Lenses 72
135mm f/4,0 Elmar-M 74
135mm f/2,8 Elmarit-M 75
135mm f/3,4 Apo Telyt-M 76
Glossary 78
[4] Leica M Lenses
T h e S o u l o f L e i c a
The soul of Leica M lenses
Ever since Professor Max Berek de-
signed his first lens for the Leica, the 50
mm f/3.5 Anastigmat/Elmax, in 1924,
the optical capabilities of Leica lenses
have been intensively analyzed and dis-
cussed. Some reviewers state that
Leica lenses are the standard against
which others are to be judged. Others
expressed the opinion that, even though
Leica lenses perform very well, they are
basically as good as the products of
other manufacturers. Leica lenses are
also said to have a special kind of im-
age-recording quality that is often com-
pared with three-dimensional rendition
or with pictures that convey a three-di-
mensional impression. This peculiar
“optical fingerprint” is frequently dis-
cussed among Leica aficionados and
collectors. Sometimes it is even claimed
that older Leica lenses have certain
mythical qualities that gradually disap-
peared in newer lenses that were de-
signed later. Then the fact is brought up
that optical design is being performed
more and more by computers, so that
the personal “fingerprint” of the de-
signer is no longer as evident as it once
was.
It is undoubtedly true that Leica lenses
had and have particular characteristics
and qualities that are the very reason for
the fascination and the challenge of
working with these lenses. In my opin-
ion, the question whether a photograph-
er always achieves the best results
when he or she uses a Leica lens is
quite unproductive. Every lens has a
large number of specific qualitites and it
is highly unlikely that every one of these
qualities will always be of the highest
degree.
Behind every Leica lens one can sense
a passionate determination to control
and to eliminate the geometrical aber-
rations that are present in every optical
system. It is true, of course that con-
temporary manufacturers of optical
products can no longer operate without
using sophisticated computer installa-
tions. It is a fact that modern computer
programs can produce new optical de-
signs in accordance with prescribed
specifications nearly without human in-
tervention or control.
The likelihood that a design generated
in that manner is an ideal solution for
the intended purpose is about one in a
billion. And that is the reason why the
creativity of the designer is essential,
even decisive for creating an optical sys-
tem that has optimal performance.
It might seem strange that I wish to
draw attention to the importance of the
creativity and the art of the lens de-
signer as an important factor in optical
design.
The fundamentals of modern optical
design are rooted in mathematical and
physical theories. The widespread appli-
cation of computer-assisted design me-
thods by all manufacturers has fostered
the impression that lens design nowa-
days is a highly automated process.
Leitz was one of the very first optical
manufacturers to use computers to ac-
celerate the extensive and laborious cal-
culations of ray tracing significantly.
That was around 1955. Today the soft-
ware programs used by the “Optisches
Rechenbüro” (optical design depart-
ment) are highly refined proprietary al-
gorithms. Even so, current high per-
formance optical systems could not
have been achieved without a good
measure of intuitive creativity.
In order to understand this soul that is
present in every Leica lens, let us take a
brief look at computation techniques, de-
sign procedures and optical evaluation
techniques. After this small “tour de
force” we will be able to sense and ap-
preciate the “Leica spirit in the glass”.
Let us begin with a basic explanation.
If we take a simple lens, for instance
the good old burning glass, to create an
image of the sun on a piece of paper,
the sun is rendered as a very bright spot
and the paper begins to burn because
the lens causes the sun’s energy to
concentrate in one point. In early times,
a single lens element was the only
means of obtaining an image. For very
small angles of view, like those of a tel-
escope, for instance, one was satisfied
with such an image. Louis Jacques
Mandé Daguerre, who made his very
first photograph in 1839, needed a con-
siderably larger angle of view for his im-
age plate. The image created by a single
lens element was quite sharp in the
center, but very blurred along the peri-
phery. At that time, optical aberrations
were still unknown and better solutions
Leica M Lenses [5]
T h e S o u l o f L e i c a
could only be found by means of experi-
mentation. The phenomenon of the dis-
persion of white light into various spec-
tral colors had been known for a long
time, but now it became a problem in
making Daguerreotypes. The photo-
graphic plate was sensitive to blue light,
but the human eye is more sensitive to
yellow light. That is why it was possible
to use a simple lens element to focus
an image on the ground glass with yel-
low light, but the image formed by blue
light could not be focused at the same
time. It was possible to correct this lon-
gitudinal chromatic aberration by using
two lens elements, each one of a differ-
ent type of glass, so that the dispersion
of one lens was compensated by the
other lens.
The curved surfaces of a lens also
generate a curved image (just as they
did in the old box cameras). But since
the photographic plate was flat, a com-
promise had to be found. This was still
based on knowledge obtained from
experiments. The first opticians and
lens designers disregarded theories,
even though the laws of optics had
been known for a long time. The law of
refraction, which is the foundation of
optical computation, was formulated in
the 17th
century. Every ray of light com-
ing from an object that strikes the glass
lens at a certain angle, is bent in accord-
ance with a known mathematical for-
mula. When this light ray passes
through many lenses, the path of the
ray can be traced clearly and methodi-
cally. When the object is a very distant
one, such as a star in the sky, all the
rays coming from that point light source
will be parallel as they strike the lens,
and they will also converge into a point
after passing through that lens. At least
that is what we hope. As proven by
Daguerre’s lens, this is not the case. Let
us consider two rays of light, one of
which strikes the lens near its edge, the
other at its center. We can then use the
law of refraction and knowledge of the
type of glass to calculate the points
where these rays will strike the image
plane. If all the rays converge into a
point on the image plane, everything
will be in order. If they do not, we have
a problem. The first person who de-
signed a lens using this kind of math-
ematical computation instead of using
experimental methods was Joseph
Petzval. And his portrait lens was clearly
superior to lenses that had been cob-
bled together experimentally. Although
now it was possible to use formulas to
trace rays quantitatively, the knowledge
was still lacking as to why the rays were
bent in this manner and why they did
not reach the ideal or the theoretical lo-
cation of the image point. Around 1850,
Ludwig von Seidel researched the basic
laws of image formation with lenses
and he was the first person to establish
a theory of imaging performance. Aber-
ration (from the Latin “ab” = from, and
“errare” = to stray) literally means “to
stray from the right path”. He discover-
ed that there are seven so-called imag-
ing errors of the third order that are in-
dependent of each other, and which
together cause unsharpness and distor-
tions in the image.
In principle, the next step is still easy.
Now that we know, at least theoretical-
ly, what causes the unsharpnesses in
an image, all we need to do next is to
correct these aberrations. And this is
precisely where the creativity of the op-
tical designer comes in.
There are imaging errors that are caus-
ed by faulty design and there are manu-
facturing errors, both of which affect
the end result (the image on the film)
significantly. The seven Seidel aberra-
tions are divided into three groups: 1 -
sharpness errors: spherical aberration,
coma, astigmatism; 2 - positioning er-
rors: curvature of field and distortion; 3 -
chromatic errors: longitudinal chromatic
[6] Leica M Lenses
T h e S o u l o f L e i c a
aberration and lateral chromatic aberra-
tion.
Every lens has certain characteristics,
such as the type of glass, surface curv-
ature (the radii of its two surfaces).
These characteristics are called “para-
meters” or “degrees of freedom”. The
theory states that each individual de-
gree of freedom can be used for the
correction of an aberration. Conversely,
every degree of freedom is also involv-
ed in all the aberrations. This means
that the optical designer can assign ab-
erration components to every individual
surface.
The significance of the above can be
explained by means of an example. This
example is very important, because it
demonstrates how an optical designer
goes about his task and why creativity
still plays such a large and decisive role
in that task. The seven aberrations can
be corrected with a minimum of eight
independent system parameters (de-
grees of freedom). (The focal length
also has to be taken into account). A tri-
plet (a three-element lens) normally con-
sists of two collective outside elements
(crown glass) and one inside dispersive
element (flint glass). That results in six
radii and two separating distances be-
tween the three elements. At the begin-
ning, the designer selects basic system
parameters, such as types of glass, ele-
ment thicknesses, distances between
elements, and curvatures (radii) of the
glass surfaces. That makes six surfaces
available to the designer, and he or she
can now calculate the amount and kind
of aberrations that each surface contrib-
utes. As an example, we can establish
(in a very simplified manner) that in the
case of the triplet, the radius of the sec-
ond surface (of the first lens element)
contributes spherical aberration and
chromatic aberration, and that the radius
of the third surface contributes coma
and astigmatism.
The optical designer must now decide
how to correct these aberrations. He
might try to change the curvature of the
first lens in such a way as to reduce
spherical aberration. But the curvature
also determines the focal length, which
should not be changed. It may also hap-
pen that a change in the curvature will
reduce spherical aberration, but that the
amount of coma will simultaneously in-
crease. The designer may also choose
to distribute the correction over several
system parameters in order to reduce
the likelihood of increasing other aberra-
tions. When the task of correcting one
particular aberration as much as possi-
ble is assigned to a single system pa-
rameter, there will be a problem in
manufacturing if that very parameter is
not within established tolerances. One
could also find that, if tolerances are too
tight, the manufacturing department
may be unable of staying within those
tolerances.
But let us return to the correction of
aberrations. The optical designer will
keep altering system parameters until
the correction of the seven aberrations
have reached a level where residual
imaging errors are very small. The de-
signer will also strive to correct each ab-
erration by using several degrees of
freedom at the same time. The “bur-
den” of correction will then be distrib-
uted over several surfaces and the en-
tire system will appear more balanced.
The designer can select the types of
glass and the curvatures within certain
limits, but each combination will result
in a different kind of overall correction.
When the triplet has been configured in
such a way that it comes close to meet-
ing specifications, we may find, for in-
stance, that astigmatism has nearly van-
ished from along the edges of the
image, but that it is still quite evident in
the field. Here we encounter a new
problem: The seven Seidel aberrations
are not the only optical aberrations. The
Seidel aberrations are classified as
imaging errors of the third order. Logi-
cally, there are other imaging errors of
higher orders. The most important ones
are the errors of the fifth and seventh
order. These groups of errors are en-
countered only when the apperture is
well corrected.
Theoretically, a very small object point
is also reproduced as a very small image
point. This does not hold true in prac-
tice, because these additional aberra-
tions manifest themselves and spoil the
fun. A point is not reproduced as a
point, but as a small circle with various
levels of brightness. See illustration:
Point spread function. A soon as the di-
ameter of these disks becomes smaller
than a certain size, the higher order ab-
errations become noticeable. This is a
simplified statement, because in reality
these aberrations are always present,
except that they only become notice-
able when the residual errors of the
third order are small.
The example of the triplet, in which
astigmatism is still present in the field,
shows the effect of the higher order ab-
errations. One can use a certain very
well controlled residue of the Seidel ab-
errations to compensate these errors of
the fifth and seventh order. Naturally
this is only possible to a limited extent,
and a triplet will render an acceptable
image quality only when its angle of
view and/or aperture are small.
This statement is very important. A
particular optical system (number and
configuration of lens elements) has a
limited possibility for the correction of
aberrations. In essence this means that,
when a new design is to be made, an
optical designer can only make the right
choices if he or she has considerable
experience and knowledge.
An impossible task?
In earlier times, when there were no
computers, optical designers only had
slide rules and logarithm tables at their
disposal. Ray tracing was straightfor-
ward, but laborious. Normally, the paths
of several rays are traced from an object
point as they travel through the optical
Leica M Lenses [7]
T h e S o u l o f L e i c a
system. These calculations are quite nu-
merous and in the case of oblique rays,
they are also complex. Before the ad-
vent of computers, ray tracing was very
laborious. An experienced mathemati-
cian required two to three months to
calculate a sufficient number of ray
traces through an only mildly complex
optical system, like a triplet, for in-
stance. It is understandable that ap-
proximations were used and that very
complicated calculations were simply
omitted. The resulting optical design
showed inadequate knowledge of the
exact extent of optical aberrations. Still,
one has to recognize that these approxi-
mations helped the designers to deter-
mine the characteristics of many aberra-
tions exactly, and their experience
constitutes valuable background for to-
day’s optical designers at Leica.
All optical designs that are based on
analytical methods are solutions that
can never be exact, and they only repre-
sent approximations of the precise solu-
tion. That is why an actual prototype of
the lens had to be built, so that the prac-
tical performance of the lens could be
tested. Two potential difficulties caused
many problems for the designer: the
lens did not deliver the performance
that was expected, or the manufactur-
ing department complained that the
lens could not be built within the speci-
fied tolerances. In either case the de-
signer had to start all over again.
It was not easy to optimize a design.
Success required much creativity and a
very well developed instinct for the ef-
fects of the aberrations. When one
looks at some of the older designs to-
day, one is compelled to admire the
achievements. An unbiased evaluation
with modern instruments shows that
these famous designs lack refinements,
but that they do have a worthy charac-
ter.
As mentioned above, only proper ray
tracing can produce accurate results.
But that causes a new array of prob-
lems. First, the designer needs a large
number of ray tracings. In the past,
trigonometric formulas and logarithm ta-
bles were used. At Leitz, the chief de-
signer drew a diagram of the proposed
optical system and then instructed each
member of a large group of individual
mathematicians to perform a part of the
ray tracings and to hand the results to a
colleague. At the end of the day or the
week, the chief designer evaluated the
results and planned the next phase of
the lens computation. For all rays that
travel in a flat plane that also contains
the optical axis, the equations for trac-
ing their paths are based on plane ge-
ometry and are relatively easy to use.
Oblique rays require three-dimensional
or solid geometry. The respective equa-
tions, however, are very complex.
Therefore in those days oblique rays
had to be traced by means of approxi-
mation formulas or not at all. Here too,
only a partial knowledge of the perform-
ance of the respective optical system
could be gained.
With the introduction of computers,
the limitations of optical calculations
were lifted, so that the (more exact) nu-
merical method could now be em-
ployed to full advantage. Numerical
methods can be used to achieve better
control of important aberrations and
they can also be used to optimize an
optical system. This wealth of informa-
tion can also entail its own problems.
Did anyone ever tell you that the task of
an optical designer nowadays is easy?
The magnitude of the optical design-
er’s task can be illustrated quite force-
fully. There is a certain relationship be-
tween the number of lens parameters
(such as curvature, thickness, spacing
between elements), i.e. the degrees of
freedom, and the level of correction of
the optical system. With more degrees
of freedom, the optical designer has a
correspondingly greater number of
possibilities of correcting a system.
When a lens designer employs more
lens elements, a higher level of correc-
tion might be achieved. But that entails
significant increases in costs, further-
more the system may become highly
vulnerable to tight production toler-
ances and/or to increases in weight.
Therefore the optical designer needs
to acquire a thorough understanding of
the basic optical potential of a given de-
sign. All systems require optimization
after an initially promising design. When
a design is not suitable for fine-tuning,
the designer is only able to achieve an
inferior product. A six-element 50 mm
f/2 Summicron lens has 10 airglass sur-
faces and radii, six thicknesses (one per
lens element) and four distances be-
tween elements. In addition, each type
of glass has a refractive index and a dis-
persion number. The exact position of
the iris diaphragm must also be deter-
mined. With these 36 parameters (or
degrees of freedom), the designer has
to correct more than 60 (!) different ab-
errations. Every parameter can have ap-
proximately 10,000 distinct values and
more than 6,000 different ray paths
have to be computed for every change
in a parameter.
The 36 degrees of freedom also are
not fully independent. Some need to be
combined, and some are tightly con-
strained by other parameters. Thus the
36 degrees of freedom are in fact re-
duced to only 20, making the task even
more complicated. Given the specified
conditions and considerations, it is not
surprising that hundreds, if not thou-
sands of designs can be generated that
are very close to the desired solution. It
has been estimated that a complete
evaluation of all possible variants of the
six-element Summicron design, using
high speed computers that calculate ray
traces at a rate of 100,000 surfaces per
second, would require 1099
years!
That is obviously impossible. In order
to select the best design from this virtu-
ally infinite number of possibilities, the
designer needs to have intimate knowl-
edge of the effects of all the aberrations
on the quality of the image. He or she
also has to be able to identify those
components of image quality that pro-
vide the necessary characteristics of the
lens system. Today the design process
can keep a small staff busy for up to
two years in order to keep expenses
within an economically viable range.
There is no better way to illustrate the
overriding importance of the art of opti-
cal design that is needed at the start of
a new lens system.
It appears that that the creativity of the
optical designer today is even more im-
portant than it was in the past. And in-
deed it is!
As stated in the description of the
computation of the triplet, an important
task of the lens designer is to assess
the various aberrations and then to un-
dertake the corresponding alterations in
design specifications (radii, thicknesses,
spacings and glass types). It is also
most important that the starting design
type be selected judiciously, so that the
desired correction will even be possible.
[8] Leica M Lenses
T h e S o u l o f L e i c a
The merit function
When there are so many possibilities
for defining and correcting a particular
optical system, the designer has to be
able to sense exactly when the desired
level of correction has been reached.
Computers and optical design software
can easily produce numerical data. They
are able to trace millions of rays within a
short time. The optical designer can use
this information to gain an insight into
the kind and the order of magnitude of
the various aberration components. Af-
ter that, two questions remain to be an-
swered:
- Does the lens that has just been com-
puted meet the requirements? and
- Is there an even better solution?
This is where the art of Leica lens de-
signers becomes evident. It is not only
at Leica that one is familiar with optics
and aberrations, and with the funda-
mental fact that every photographic lens
is a compromise between ideals and re-
ality that incorporates a fine balance of
the many aberrations that have to be
compensated with one another. There
is always a small residual aberration
component in a lens. In the end, it is the
weighting and the method of compen-
sation of the aberration balance that de-
termines how the resulting imaging per-
formance is perceived and accepted by
photographers.
Leica lens designers have a very
strong ambition for developing optical
systems with a particularly high optimi-
zation of the various errors that will re-
duce residual aberrations to their lowest
possible level. If one would claim that a
particular computation is not good
enough, one should have a standard
with which one could compare what
one has and what one wishes to have.
The computing program is of no help in
this case. Imagine that you are in a heli-
copter flying over a hilly landscape and
that you are trying to locate the deepest
valley. You will certainly be able to lo-
cate a valley that is very deep in relation
to its surroundings. But you don’t know
what is beyond the next mountain. An
optimizing program seeks to find a deep
valley and it will certainly find a local low
point. But without overall knowledge of
the entire landscape, one will keep on
searching, never knowing whether one
has really found the deepest valley. One
can only obtain this structural informa-
tion if one knows the peculiarities and
the characteristics of an optical system.
Leica lens designers call this the soul of
a lens. The merit function that one asso-
ciates with a lens must be realistic and
it should elicit the very best perform-
ance from a lens. It should be pointed
out, however, that every lens designer
interprets and defines “the best per-
formance” differently.
We are accustomed to imagining light
rays as individual lines. That makes
sense for the computations. But in real-
ity a flow of energy consisting of the
sum of all the light rays radiated by all
the object points in the direction of the
filmplane will traverse the entire lens.
The complete flow of light strikes the
front lens element and is transmitted
through the optical system. This is
called luminous flux. Knowledge and un-
derstanding of this flow are extremely
important during the design stage of a
lens. Light energy should traverse the
lens smoothly, without much deviation
or resistance. That almost sounds like a
concept of Zen philosophy.
Steps in the design process
When a new lens is to be developed,
the designer normally selects an exist-
ing system and uses it as a start to-
wards an improved design. The con-
straints of dimensions and weight are
particularly important in the case of
Leica M lenses. The first attempt is con-
strained by ancillary specifications such
as physical dimensions. Lenses should
be small and handy, and they should not
obstruct the view through the view-
finder. These characteristics are quite
logical from the user’s point of view, but
they constitute a constraint for the de-
signer. Greater optical performance of-
ten entails a greater physical volume, a
good reason for applying new solutions,
like aspherical lens surfaces in order to
achieve the desired result. Excessive
weight must be avoided, and this limits
the number of elements and the selec-
tion of types of glass. The focal length
and the maximum aperture already dic-
tate the possibilities. The designer has
to find a creative starting point that can
lead to success or that is at least prom-
ising for optimization (finding the deep-
est valley). Here too, there is a philo-
sophical consideration: an optical design
should have a kind of beauty that one
can recognize. There are cross-sections
of lenses that look very daring, and
there are others that possess an optical
beauty. The latter are the best lens de-
signs. Without a good starting premise,
no lens will deliver the performance that
is expected. Optimization will go around
in circles and sometimes no progress
can be made. When there is a starting
premise with which one feels comfort-
able, one can proceed with the next
step, which is the correction of the
Seidel aberrations.
To correct the Seidel aberrations is ba-
sically not very difficult, but we know
that they are also used for influencing
the higher order aberrations. Therefore
Leica M Lenses [9]
T h e S o u l o f L e i c a
one should make a judicious choice of
promising system parameters at the
very beginning, otherwise one can only
achieve the desired result by using
more complex procedures. Every addi-
tional lens element can be used for cor-
recting an aberration, but this also cre-
ates new problems. It will quickly
become apparent that these problems
can become utterly overwhelming. A
typical feature of Leica lenses is their
relatively low number of lens elements.
The 90 mm f/2 Apo-Summicron-M
ASPH. has only five elements and it de-
livers outstanding performance.
The next step is the optimization of
the system: small alterations of the lens
curvatures, the choice of glass types,
spacings and thicknesses are imple-
mented to achieve the desired level of
correction of the aberrations. The last
step is to balance the residual aberra-
tions in relation to one another in such a
way as to achieve the imaging perform-
ance that has been specified.
One of the quiet revolutions at Leica
has been the very close cooperation be-
tween optical and mechanical engi-
neers. There is no benefit in designing a
lens that cannot be manufactured or
that cannot be fabricated with sufficient
accuracy, or that is too expensive to
produce. The optical designer has to be
very creative in this regard. For a lens
that can only reproduce fine structures,
the manufacturing tolerances that are
required are different from those that
are needed for producing a lens that can
clearly reproduce the very finest struc-
tures. That is logical: when one wishes
to record tiny object details on film, one
can tolerate fewer errors than one
would tolerate in recording coarse ob-
ject details. Very tight manufacturing tol-
erances in the assembly stage assure
the possibility of achieving the com-
puted optical performance in every indi-
vidual lens. It is not an easy task to stay
within these tolerances, and it can only
be done if these tolerances have been
worked out in close cooperation by the
optical and mechanical departments.
Leica-specific characteristics of
Leica M lenses
The progress that has been achieved
in the performance of Leica M lenses in
recent times can be explained in the fol-
lowing manner:
The optical design programs have
been improved and they take into ac-
count the latest findings in aberration
theory, optimization and weighting of
imaging performance. Knowledge of the
characteristics of the various types of
glass has also been expanded. The time
has passed when new types of glasses
were introduced in quick succession.
Large suppliers of glass have catalogues
that are quite stable. Leica lens design-
ers would like to have a few additional
exotic glasses created, but it is ques-
tionable whether this will ever happen.
The cooperation between the me-
chanical and optical departments has
been intensified. The input of manufac-
turing engineers to the computation of a
high performance lens is a prerequisite
for a good result.
Leica has extensive experience with
the various aberrations, with their ef-
fects on the photographic image and
with the more complex inter-relations of
these aberrations. Current Leica M lens-
es possess certain outstanding charac-
teristics that can be classified as family
characteristics. The latest Leica M
lenses feature a performance at full ap-
erture that is a quantum leap better than
the performance of their predecessors.
This does not pertain so much to the
performance in the center of the image,
but mostly to its field, i.e. in the image
zones. The overall contrast has also
been considerably and visibly height-
ened. Stray light has been very well
suppressed and this can be verified by
examining the very fine structures in the
image. Older lenses render these tiny
details blurred or they don’t record them
at all, whereas the latest lenses render
them clearly and distinctly, which be-
comes especially evident in large projec-
tion. The fine gradation of highlights and
shadows in light and dark portions
across virtually the entire image area
proves that the important monochro-
matic aberrations, like spherical aberra-
tion, coma and astigmatism have been
extremely well corrected. Brilliant and
delicately shaded colors are rendered
accurately, which is an indication of out-
standing color correction. Chromatic er-
rors that often become noticeable as
peripheral unsharpness are well correct-
ed. Another characteristic is the optimal
aperture in the new lenses, which is al-
ready reached by stopping down only
one stop from full aperture. The old
axiom that states that an aperture of
f/5.6 or f/8 has to be used for achieving
the best performance is no longer valid
so universally. The clarity of the image
is also improved because stray light, i.e.
light energy that does not contribute to
image formation and that is scattered in
the optical system, is controlled effec-
tively.
These general characteristics of the
latest Leica M lenses are clearly dis-
cernible in the photographic image. The
full performance potential of Leica
lenses can only be exploited when the
photographer has a thorough grasp of
his technique. The correction level of
these lenses is of a very high level, and
it can only be fully appreciated when the
demands are high. A good 20 x 25 cm
[10] Leica M Lenses
T h e S o u l o f L e i c a
(8” x 10”) black-and-white print cannot
show all the details that a lens is capa-
ble of reproducing and systemic un-
sharpness in the small details cannot be
seen. But when a greater enlargement
is made, for instance 30 x 40 cm (12” x
16”), the results are much more dra-
matic. Now it is essential that every link
in the performance chain is utilized to
best advantage. In this case the lens be-
comes the most important link in that
chain and the photographer can make
good use of its characteristics.
Unsharpness and sharpness
transition
There is only one plane of sharpness,
and that is the film plane. That means
that a bundle of light rays that comes
from an object point traverses the film
plane like a cone of light. In the ideal
case, the tip of the cone will be located
exactly at the film plane, and the point
that is being reproduced will be ren-
dered as small as possible. The cross
section of the cone on both sides of this
point is larger and the point is repro-
duced as a small disk. This is normally
called the circle of confusion. If the
cone of light is generally narrow, then
the difference in the diameters of the
point and the circles in front of and be-
hind the tip is also small. In that case
the transition from sharpness to
unsharpness is smooth. New Leica M
lenses are corrected in such a way that
they are capable of reproducing the fin-
est structures and details of the object.
That also means that the tips of the light
cones have to be very small and that
they have to subtend a larger angle (see
illustration). The circle of confusion will
be relatively larger (also absolutely
larger) than it was in the previous exam-
ple. A characteristic of current Leica M
lenses is a visually faster transition from
sharpness to unsharpness. This is help-
ful in composing the picture at full aper-
ture, because pictorially important por-
tions of the picture will stand out
distinctly from the background. The cir-
cles of confusion will often appear
somewhat more disturbing, and this
should be taken into account as the pic-
ture is created.
The latest Leica M lenses are not only
superior to their predecessors optically,
they also have a different kind of image
rendition that must be taken into ac-
count when one changes over from an
older to a newer version of a lens. But
that is precisely the fascination and the
beauty of Leica M lenses: one should
become familiar with them and one
should study their “personalities”.
Core technologies
Current Leica M lenses embody a
thorough understanding of, and a sensi-
tivity to issues of geometrical and physi-
cal optics, of mechanical engineering, of
optical fabrication, of glass selection, of
the relationship between residual aber-
rations and image quality. Leica lens de-
signs result from ingenuity, creativity
and from a solid scientific knowledge of
all relevant aspects of an optical sys-
tem. Most important are, of course, the
guiding principles of the great designers
of the Wetzlar era, notably Max Berek,
and the accumulated experience and
insights of his successors. Part of this
knowledge has been incorporated into
current computer programs. There is
one aspect of overriding importance,
however, that cannot be codified into
rules or algorithms: the culture of study-
ing the true image potential of a new
design and the know-how for transform-
ing such a design into a real master-
piece of photographic optics.
Leica lenses are not only highly
corrected, they are also meticulously
crafted works of optical art. They are
honed to deliver a fidelity of reproduc-
tion that reflects the combination of
philosophy and state-of-the-art optical
design that is so unique to Leica de-
signers.
If we were to identify the most impor-
tant tools of Leica designers we would
produce this list:
•aspherical surfaces
•apochromatic correction
•glass selection
•thin film coatings
•engineering of lens mounts.
None of these areas is an exclusive
domain of Leica. In fact, many manufac-
turers around the globe use aspherics,
apochromatic correction and have ac-
cess to the same glass catalogs that
Leica designers use.
When I discussed these topics with
Leica designers, I cited the example
Leica M Lenses [11]
T h e S o u l o f L e i c a
that aspherics technology has been in
use since the thirties and is now in
widespread use by many optical manu-
facturers. They responded with charac-
teristic modesty that they themselves
might know a few things about asphe-
rics that helps them to design lenses
with improved imagery. Let us look at
these tools, some of which are surpris-
ingly old.
Aspherical surfaces.
Most lenses used in photographic op-
tics have spherical surfaces, which
means that the curvature of the sur-
faces has the form of a sphere. The lim-
iting case is a plane or flat surface, i.e. a
sphere with an infinite radius. Spherical
surfaces are relatively easy to make and
ray tracing is also simple (at least con-
ceptually). An asphere (a-sphere) is de-
fined negatively: any surface with a
shape that departs from a sphere is
called an asphere. A spherical surface
has a radius R with the center of the
curvature somewhere on the optical
axis. The radius will define all points
above and below the optical axis. For an
aspherical surface we need more infor-
mation. We define the difference be-
tween the reference sphere and the ac-
tual asphere at several heights above
and below the optical axis and enter
these figures into an equation. The
equation can be very complex, but in its
simpler forms it defines a parabola, or
ellipsoid or hyperbola. An asphere may
have a surface that has several zones of
asphericity, one paraboloid, and another
ellipsoid. The complexity of the surface
should be weighted against the cost of
manufacture and the function within the
overall optical system.
There is a tendency to interpret the
use of aspherical lenses in an optical
system as a sure sign of superior optical
performance. It is not. Some optical
designers can create fabulous designs
by using a particular computer program,
while another person employing the
same program will get moderate
results.
An aspherical surface introduces some
carefully controlled aberrations on top of
the aberrations that result from spheri-
cal surfaces. If you do not have a very
thorough understanding of the basic ab-
errations in the system, the addition of
an aspherical surface may not be suc-
cessful.
A prototypical case would be a lens
with spherical aberration, among several
other aberrations. The designer could
use the spherical system to correct all
aberrations, except the spherical aberra-
tion. Then, by adding an asphere, he or
she can correct the spherical aberration.
The use of aspherical surfaces on mir-
rors and telescopes is very old. Asphe-
rics were already produced in the 18th
century, using trial and error methods.
Therefore they are not new tools for ab-
erration correction.
Aspherics are used when systems
using only spherical surfaces become
very complex, or when systems be-
come too large, and for many more rea-
sons.
Using an aspherical surface gives the
designer an additional degree of free-
dom in the correction of optical sys-
tems, which enables the designer to
build high quality optics quite com-
pactly. The advantages from a correc-
tional perspective are the elimination of
spherical aberration and the correction
of the spherical aberration of the pupil
(distortion). Aspherics can be used to
achieve wider apertures, wider field an-
gles, reduction of weight and volume
(one aspherical surface replaces two
spherical ones). In fact, many optical
and mechanical challenges can be met
with aspherics.
The manufacture of aspherical sur-
faces requires extreme precision. The
aspherical deformations are calculated
to a very small fraction of the wave-
length, but this level of precision is not
attainable in manufacture. The required
precision for high quality optics is 1/4
wavelength of light (that is 1/3000 of
the width of a human hair!). In optical
shop testing, this level of precision can
be approached by using interferograms.
It is very difficult to test aspherics in this
manner and in order to guarantee a pre-
cision of 0.5 micrometer, one needs to
use CNC grinding and polishing equip-
ment.
Leica, however, does use an interfer-
ometer to check the sphericity of
lenses. They employ a compensation
system to adapt the spherical wavefront
from the interferometer to the asphe-
ricity of the lens surface. These com-
pensation systems can consist of a
spherical lens. The most recent method
for a compensation system is the use of
CGH’s (computer generated holo-
grams). Leica is now using this tech-
nique.
The required aspherical form can be
pressed in plastic, or it can be a hybrid
form consisting of a glass lens with a
molded plastic form attached to it or, as
used by Kodak on the disc camera, it
can be a glass lens with pressure-mold-
ed aspherical surfaces.
The 50 mm f/1.2 Noctilux, introduced
in 1966, was the first lens produced by
Leica that had two aspherical surfaces.
In those days, aspherical lens surfaces
were polished to an approximate shape
and then hand-corrected afterwards. As
the level of deformation is very small on
most aspherical surfaces, there is a risk
that the polishing at the end may re-
store the spherical form! Only a very
few workers at Leitz were able to
manually correct the aspherical form,
and even they produced surfaces be-
yond the required shape. This costly and
laborious manufacturing process was
soon abandoned. The potential of the
aspherical surface for vast improve-
ments of the image quality, however,
was too attractive not to pursue. Huy-
gens described its theoretical potential
as early as 1678. Three hundred years
later the manufacture of precision as-
pherics became reality. At first Leica
used a new technique, jointly developed
by Leica, Schott and Hoya. Leica con-
tributed the technology of the molding
tool. This methodology was first em-
ployed in the 35 mm f/1.4 Summilux-M
aspherical (the 21 mm, 24 mm and 35
mm f/2 lenses are all of the Summilux
type). It generates high precision sur-
faces, but the technique is restricted to
lenses with a small radius (about
20mm). Furthermore only a few glass
types can be used that can withstand
the heating, pressing and cooling with-
out adverse effects. This restricts the
choice of glasses and many designers
complain that the more than 100 glass
types now in glass manufacturers’ cata-
logs of the are not sufficient.
The next step is the use of computer-
controlled grinding and polishing ma-
chines that allow the designer freedom
to choose glass types and radius as
needed. In the line of Leica M lenses,
[12] Leica M Lenses
C o r e T e c h n o l o g i e s
the 90 mm f/2 Apo-Summicron-M ASPH
is the first lens to have an aspherical
surface produced by this promising
technique.
The Leica designer always needs more
possibilities for the correction of aberra-
tions. As soon as a certain level of image
quality has been reached and the under-
standing of a lens system has improved,
a higher level of aberrations has to be
dealt with. Therefore the designer needs
more parameters to change and influ-
ence. The demand for ever more exotic
glass types, more lens elements never
ends. Aspherics are a very effective and
elegant technique for the design and con-
struction of complex optical systems.
The theory and technology of asphe-
rics is in its infancy, however, and it is
certainly not as well understood as
spherical technology and correction
theory. Leica designers employ as-
pherics whenever there are clear ad-
vantages for improving image quality,
reduce volume or number of lens ele-
ments or when designs can be created
that would not be possible without the
use of aspherics.
The mere use of aspherics does not
automatically signify a high performance
lens. Sometimes the designer can cre-
ate a lens with spherical surfaces that
theoretically has the same performance
as the aspherical one. It might, how-
ever, be impossible to build that lens
with the required precision and toler-
ances. So when Leica designers employ
aspherical surfaces, it is a well consid-
ered component of the complete lens
design.
Apochromatic correction.
Ernst Abbe computed the first
apochromatic lenses around 1895. In
those days, the field of microscopy was
expanding rapidly and the very high
resolution required for microscopic
lenses demanded that all aberrations be
very small, that is, close to the diffrac-
tion limit. There is always an apochro-
matic error in the photographic image
and this error extends over the whole
image field. Generally it has a lower
magnitude than other aberrations and
so will not be identified separately. The
visible result of the apochromatic error
is a degradation of contrast and a
fuzziness of small image details. One
should look for the apochromatic error
in the center of the image (on axis). On
axis the most disturbing aberrations
have been corrected quite effectively
and so one is left with the more difficult
aberrations, like spherical aberration,
chromatic error of the spherical aberra-
tion and apochromatic error.
What is this apochromatic error? If
polychromatic light enters a glass, it will
be refracted into a number of rays, each
of a different wavelength. Each ray will
follow a slightly different path. The blue
color will be focused closer to the lens
than the red color. The difference in
length between the two locations is
called the longitudinal chromatic aberra-
tion. Because the blue light converges
to a focus closer to the lens, the result-
ing patch on the image plane will also
be larger. This is called lateral chromatic
aberration. One can see this defect as a
series of color fringes around a spot.
The magnitude of the chromatic aber-
ration depends on the Abbe-number,
the refractive index, the focal length and
the field angle. Note that the focal
length is important, which explains why
lenses with long focal lengths need to
be corrected for chromatic aberrations
in particular. The change in focal length
that results from the fact that the refrac-
tive index of a glass is different for dif-
ferent colors is called dispersive power.
As an indication of the very small
magnitudes that are involved, we may
note that the distance between the red
and the blue focal points corresponds to
1/60 to 1/30 of the focal length. This
chromatic variation of index is called dis-
persion. If one would plot the curves for
refractive index versus wavelength for
two different glasses, for example
Schott BK7 and SF2, the curves would
be non-linear and different. Every glass
has its own and unique graph. Crown
glasses have relative low dispersions
and flint glasses relatively high disper-
sions. Overall dispersion defines the
general dispersion characteristic. But if
we are interested in the blue part of the
spectrum we need to study the disper-
sion of the blue part. Two glasses have
different amounts of dispersion and the
shape of the dispersion curve is differ-
ent. So, in addition to the overall disper-
sion, we also need figures for partial dis-
persion, ‘partial’ referring to a part of the
spectrum. If a glass produces a long
blue spectrum it is called a long glass. A
glass with a short blue spectrum is, not
surprisingly, called a short glass. Most
crown glasses are short and most flint
glasses are long. Some glasses do not
conform to this general rule. We have a
few long crowns and short flints. These
‘out of line’ glasses are called glass with
anomalous dispersion.
Most glasses on the glass chart lie
along a straight or slightly curved line,
the so-called normal glass line. The out-
of-line glasses, the ones with anoma-
lous dispersion, are also referred to as
glasses outside the normal line.
Leica M Lenses [13]
C o r e T e c h n o l o g i e s
It is quite easy, at least in principle, to
match two glasses with opposite dis-
persions in order to make sure that at
least two colors (red and blue) will come
to a focus at the same point on the opti-
cal axis. Then we have an achromat,
which is quite often a flint/crown pair.
Other colors of the spectrum (apart
from the blue and red) such as green
and purple will still be out of focus.
These residual errors are called the sec-
ondary spectrum or secondary color.
The apochromatic error is the result of
different partial dispersions or different
proportions of partial aberrations of the
glass types.
Theoretically it should be possible to
get an apochromatic correction by using
three glasses with different dispersions.
But the non-linearity of the dispersion
curve and the partial match of the partial
dispersions will make life hard for the
designer. For the correction of the
apochromatic error, the use of special
glasses outside the normal line may be
advantageous. But these glasses have
properties that make them hard to em-
ploy. They are soft and very difficult to
polish, they may be not available in the
required diameters, and they may also
be very expensive. As a result, design-
ers can attempt to achieve an apochro-
matic correction with normal glasses
(the three-glass-solution). In order to
use such glasses, however, one must
take into account monochromatic er-
rors. Sometimes the designer also en-
counters difficulties in the correction
balance and he may run out of useful
parameters so that he would need a
system that is too complex.
I mentioned earlier that the designer,
when he corrects a system for two
colors, is left with residual chromatic ab-
errations. There is no rule that states
how large this residue should be. Nor is
there any rule that specifies how small
the apochromatic error must be in order
for the lens to be called a true
apochromat.
Pragmatically, all one can say is that
there is a long bandwidth between an
achromat, a semi-apochromat and a true
apochromat. Therefore, any lens with
very small chromatic aberrations can be
called an apochromat, even when the
correction has been accomplished by
using glasses from the normal glass
line.
Leica uses glasses for its apochro-
matic corrections that lie outside the
normal glass line. These glasses are
also known incorrectly as APO-glasses,
which is a misnomer. In reality they are
glasses with anomalous dispersion. The
dispersion curves are non-linear, making
it difficult to compute corrections with
these glasses. The curves will never
match completely, so that some re-
sidual aberrations will be left in the sys-
tem. The residuals left after achromatic
correction are called the secondary
spectrum, and it is no surprise that the
residuals left after apochromatic correc-
tion are called the tertiary spectrum.
Leica designers know the non-linearity
of these glasses very well. The art is to
know what glasses to employ where in
the design. As noted before, glasses
with anomalous dispersion can be found
in the catalogs of Schott, Hoya, Corning
and others, which also list all the glass
characteristics. Using such glasses may
not be unique to Leica. But the knowl-
edge and expertise needed to extract
the most out of these types of glass, in
combination with the creativity and ex-
perience that the designer draws upon
to balance the conflicting characteristics
of the lens system, are part of the core
technology of Leica. The result is a lens
with a very small apochromatic error
that has been balanced with all the
other aberrations and that has been cor-
rected over the entire image area, for
excellent results at full aperture or
stopped down.
Thin-film coating.
Uncoated glass reflects a small part
(4%) of the incident light per surface.
The resulting problem is not so much a
reduction of the transmitted light, but
the increase of stray light. This stray
light is scattered over the image plane,
causing a dull and flat image with lower
contrast.
There are two possible solutions. On
is the application of thin film anti-reflec-
tion lens coatings, invented in 1935 by
Dr. Smakula of Zeiss. The other is the
careful prevention of internal light reflec-
tions by interior mechanical surfaces of
the lens mounts.
The coating technique is basically a
simple process. A very thin interference
layer of a material of lower refractive in-
dex is applied to a glass surface with a
higher refractive index. The actual math-
ematical computations are very com-
plex. The thickness and the refractive in-
dex of a layer must be computed so
that a destructive interference will re-
sult. A single layer coating can be opti-
mized for only one wavelength, usually
green, which is why the surface looks
purple by reflected light. This type of
coating has an optical thickness of 1/4
of the wavelength that is targeted. It is
also called quarter-wave coating. The
coating material is often Magnesium
Fluoride with a refractive index of 1.38.
For glass with a low refractive index a
single coating often suffices. It is not ef-
fective on glasses with higher refractive
indices. With three or more layers, a
more effective broadband low reflection
coating can be achieved. A three-layer
coating produces an anti-reflection
curve with three minima that corre-
spond to the selected wavelengths. The
number of layers can become quite
large (6 to 11 stacks of layers), and they
may be multi-purpose, used for reduc-
tion of reflections in order to improve
transmission and for balancing spectral
transmission.
It can be shown that a four-layer coat-
ing with two different refractive indices
is very effective. The most frequently
used technique of coating a lens is ther-
mal evaporation coating. The coating
material is heated in a vacuum chamber
that contains the lenses to be coated.
The coating vapor is then deposited on
the glass surfaces. The correct thick-
ness of the layer is monitored by a pho-
tometer, but irregularities can occur.
Not all coating materials can be depos-
ited in this manner and sometimes
much higher temperatures are required.
That is when the technique of electron
beam coating is employed. Also in a
high vacuum, the glass is bombarded by
a beam of high-energy electrons, which
forms a layer on the heated glass.
This heating and cooling must be per-
formed very carefully as the glass is
very sensitive to this treatment. The
layer must be deposited on a smooth
and clean surface, as any irregularity will
cause unwanted local reflections. The
cleaning process is very important.
Leica requires that some lenses must
be coated within a few hours after
[14] Leica M Lenses
T h e S o u l o f L e i c a
MTF diagrams:
those seductive curves!
cleaning to ensure that the air does not
affect the surface. After the application
of the aforementioned coating tech-
niques, the lens surfaces are covered
with a layer of a microscopically small
pillar-like structure. The structure of the
surface of this layer is not amorphous,
it consists of rows of very small pointed
pillars, somewhat like rows of nails
with the tips pointed upwards. The re-
sulting coated surface still has a micro-
scopically small roughness.
The complicated and time-consum-
ing processes of cleaning, heating, va-
porization, cooling for many layers inevi-
tably generates errors.
Leica now uses a new technique, de-
veloped in cooperation with Leybold:
the plasma ion-assisted deposition.
(IAD: ion-assisted deposition). With this
technique the heating and cooling
stages are no longer necessary and the
growth of the coating layer is not pillar-
like but amorphous, producing a
smoother surface. The technique basi-
cally consists of bombarding the target,
which consists of the coating material,
with argon ions, setting free atoms that
are deposited on the substrate to form
the coating.
The employment of this technique is
another example of Leica core tech-
nology.
Every aspect of the optical system, be
it glass selection, cleaning of glass sur-
faces, coating, mounting, computation,
or quality control, is scrutinized to find
the best solution to achieve the goal of
high performance optics.
The best and most convincing proof of
performance is, of course, a picture. It
can be in the form of a black-and-white
print, a color print, or a projected image,
which is still the most impressive pres-
entation of Leica photography. In prac-
tice however, there are too many vari-
ables that have to be taken into account
when we compare pictures. We don’t
just compare lenses, we compare the
entire chain of performance. Therefore
we need a standard for the imaging per-
formance of an optical system. In the
past, it was thought that a simple solu-
tion was to use resolving power in lines
per millimeter for these evaluations. But
various problems surfaced, some of a
visual kind, others of a theoretical na-
ture, which made the use of such a
standard unreliable. We are not just in-
terested in reproducing separated lines
but, more important, whether these
lines can actually be seen as clearly
separated lines. That is why an indica-
tion of contrast is needed. The differ-
ence between a bright and a dark band
can be discerned far better when the
contrast between the two bands is sig-
nificant. When we look at a light gray /
dark gray pair of bands instead of a
white and black pair of bands, the differ-
ence is certainly less pronounced.
Residual aberrations that remain in the
lens basically only cause unsharpness in
a picture. By unsharpness we mean that
light rays do not converge into a
miniscule spot, but that they come to-
gether into a slightly larger spot called
circle of confusion, which only means
that contrast is reduced.
Let us imagine a grid that consists of
black and white stripes of equal width.
When such a grid is reproduced by a
lens, diffraction, aberrations and stray
light cause part of the light from the
white stripes to reach the black stripes.
This redistribution of light results in the
reduction of contrast. The narrower the
stripes, the more light from the white
stripes will spill into the black stripes,
further reducing the contrast. A lens
with inadequate correction of aberra-
tions has larger circles of confusion,
which means that contrast will be even
lower, whereas a lens with excellent
correction of aberrations will also have
excellent contrast rendition. Unfortu-
nately the reverse does not hold true, in
that a good contrast rendition does not
necessarily mean a well-corrected lens.
Design begins with a concerted effort to
correct the many aberrations and when
that has been achieved, high contrast is
one of the results. The reverse is not al-
ways true.
The fineness of the grid can be ad-
justed by changing the width of the
stripes. Let us consider stripes with a
width of 1/10 of a millimeter. Therefore
10 such stripes make up 1 millimeter.
This is defined as spatial frequency in
lines per millimeter. In the aforemen-
tioned example, that spatial frequency
amounts to 10 lines/mm. Because one
cannot see black without white, it was
Leica M Lenses [15]
M T F G r a p h s
agreed to use line pairs as a structural
period. Therefore the figures stated in
MTF diagrams, such as 5 or 10 l/mm,
must be interpreted as periods or line
pairs per mm. In other words, 5 lp/mm
means 10 stripes that are alternately
light and dark.
Leica furnishes MTF diagrams for 5,
10, 20 and 40 line pairs or periods (10,
20, 40, 80 light/dark stripes). The more
stripes per millimeter, the finer the de-
tails that can be reproduced.
One often wonders why the finest
structures are limited to these 40 lp/
mm. There have been articles in the
press citing lenses that can record 200
or more lines per millimeter. But now it
has become clear that the number of
lines per mm is interesting only when
stated in conjunction with the respec-
tive contrast. At 200 lines per mm the
contrast is so low that it is virtually im-
possible to distinguish anything at all.
The 40 periods used by Leica as a sen-
sible lower limit result in a dot size of
1/80 mm or 0.0125 mm. It is difficult to
imagine how small that dot is on a 35
mm negative! Take a negative and a
ruler calibrated in millimeters. Then sub-
divide the width of one millimeter into
80 tiny individual units. That gives you
an idea of the performance capability of
today’s lenses. Once we have estab-
lished an understanding of how narrow
such a unit is, then it becomes obvious
that the smallest vibration can spoil the
entire picture. And a small amount of
unsharpness from inaccurate focusing
has a disturbingly large effect when
such small image details are important.
How to read MTF diagrams?
The vertical axis is calibrated in per-
cent of contrast, always based on an
original contrast of 100%. The subject
that is being reproduced is that grid of
light/dark stripes in ever smaller widths
or periods. Every light/dark pair of lines
in the original subject, even if it is very
fine, has an ideal contrast of 100%. This
means that all the light energy comes
from the light stripe, and none at all
from the dark stripe. The lens distrib-
utes this energy over both stripes, thus
reducing the absolute contrast. The
finer the structure, the more that con-
trast is lowered. With 5 lp/mm one can
still achieve a contrast of nearly 100%.
At 40 lp/mm however, one would be
pleased if contrast were as high as
50%.
Thus the reduction of contrast is a
function of spatial frequency. Since the
contrast in an image is an interpretation,
or a transfer (modulation, change) of the
original contrast, the relation between
the original contrast and the reproduced
contrast is called the Modulation Trans-
fer Function, or MTF.
The effect of aberrations is less pro-
nounced in the center of the image than
in the outer parts of that image (i.e. in
the “field”). A standard 35 mm negative
has a diagonal of 43.2 mm. Therefore
the maximum distance from the center
of an image to its outermost corners is
21.6 mm. The performance of a lens
varies between the center of the image
and its field, because there are aberra-
tions that disturb the field more than the
center. That is why the horizontal axis of
an MTF diagram is calibrated in dis-
tances from the center of the image, i.e.
‘0’ represents the center of the image
and ‘21’ (mm) its corner. Therefore ‘12’
indicates the height of a standard hori-
zontal 35 mm frame, and ‘18’ its maxi-
mum width. When one wishes to exam-
ine an MTF diagram more closely, one
should concentrate on the region be-
tween 6 and 15 mm from the center of
the image, because that region contains
the pictorially important part of an im-
age. The central portion of the image,
from 0 to 6 mm from its center, is satis-
factory in most cases.
An MTF diagram thus provides a great
deal of information because it shows
the contrast reduction for different kinds
of image details for the entire 35 mm
format. The 5 lp/mm curve describes
the reproduction of very coarse image
details, the 10 lp/mm curve the repro-
duction of clearly visible details, the 20
lp/mm the reproduction of very fine
structures and the 40 lp/mm curve the
reproduction of the finest details of the
subject.
Low contrast values for 5 and 10
lp/mm indicate a flat image, and high
values for 20 and 40 lp/mm indicate that
fine details of the subject are repro-
duced cleanly and clearly separated.
It should be kept in mind that each dia-
gram is valid for a specific aperture.
When diagrams are available for various
apertures, one can observe the behavior
of performance as the lens is stopped
down. All the MTF diagrams shown
here display the curves for full aperture
and for optimal aperture. The direction
of the stripes is also taken into account.
They can be orientated horizontally or
vertically, and this has an effect on
imaging performance. When the two
curves (tangential = vertical and sagittal
= horizontal) are widely separated, this
often means a blurry reproduction of
figure 1
[16] Leica M Lenses
M T F G r a p h s
subject details. In such cases, a repro-
duction with good contrast is achieved
only when the details are orientated in
the “good” direction.
MTF data therefore provide an accu-
rate and comprehensive description of
the imaging performance of a lens. Nev-
ertheless, it has to be used with cau-
tion. In practice, small differences be-
tween the curves are of negligible
consequence. One should examine the
entire image. One should also keep in
mind that, although these diagrams pro-
vide a very good description of all the
aberrations, they do not cover all the
considerations. Stray light, vignetting,
color correction, distortion, performance
in the close-up range, for instance, can-
not be evaluated by means of MTF dia-
grams. Because the method of creating
these diagrams is not standardized, one
should only compare the data provided
by different manufacturers with great
caution or better yet, not at all if it is not
known whether they were created by
the same method. An important factor
is the quality of the light that is used for
obtaining the measurements. White
light contains a great number of wave-
lengths. Measured values are different
when only three wavelengths are used,
compared to readings obtained with
seven wavelengths. The weighting of
the wavelengths is another influential
factor.
One often wonders whether MTF data
can really describe optical performance
in a way that can be used in practice.
We know that the objects being photo-
graphed are three-dimensional, that
they have depth. Even a wall has a sur-
face texture that has depth. We assume
that the test grids (with the light and
dark stripes) that are used for obtaining
MTF measurements are only two-di-
mensional (i.e. they have height and
width, but no depth), so that they are
not representative of real photographic
subjects.
One should disregard these thoughts.
The transfer of the contrast of the struc-
tural periods (the grid) is a measure of
the optical efficiency and the optical per-
formance of a lens in general. What is
actually measured is how much light en-
ergy from a subject point reaches the
corresponding image point and how the
energy distribution is shaped in the im-
age point (actually the image disc). This
actually shows the effects of the aberra-
tions. These image points can be lo-
cated in the plane of sharpness but also
in front of, or behind that plane, i.e. in
the range of unsharpness. Although the
reproduction of the subject point will be
different, but the principle remains the
same. The aberrations determine the lo-
cation and the shape of the image point,
as well as its energy distribution. Be-
cause points in the range of
unsharpness create the impression of
three-dimensionality, MTF data is also
valid, in principle, for depth perception.
How are MTF measurements
actually obtained?
There are two methods: one method
computes MTF data, the other method
measures MTF values. Basically, there
are no differences, and Leica uses ei-
ther method, whichever is most appro-
priate: the optical design department
computes the MTF values, and the
manufacturing department uses an
MTF-measuring instrument to obtain
MTF data (see the diagrams). Both
methods are based on the same theo-
retical principles, so that their results
should not be different from one an-
other. A variance between the two val-
ues only occurs when the lens assem-
bly department can not conform to
calculated tolerance values.
Let us return to the image point as a
representation of the ideal subject point.
This point source is reproduced as a tiny
disc in which light rays are distributed
within a circle. Most of the rays will con-
verge in the center of this circle, while
some of them are scattered towards
the perimeter of that circle. Light distri-
bution can be described in the form of a
point spread function or spot diagrams
by means of a 3D-diagram (with x-, y-
and z-axes). The x- and y-axes (depth
and width) show the shape of the disc
and the z-axis (height) shows the inten-
sity of the light distribution (see the il-
lustration of a point spread function).
Figure 1 (point spread function) shows
an ideal image point. The width of its
image point spread is small and the
peak is very high. This means that
nearly all the light energy is concen-
trated in a very small circle (like a point).
The actual height of this point reproduc-
tion is 20 µm (twenty thousandths of a
millimeter) and the “point” is 5 µm wide
at its base (five thousandths of a
millimeter)! That means 200 points
within one millimeter, or 100 line pairs
per mm (lp/mm)! Figure 2 shows this
point again, but this time as a cross-sec-
tion. It contains the same information,
shown in a different manner. Figure 3
shows a point spread function with a
different shape. Its base is now approxi-
mately 8 µm wide, and its height is
smaller. This point can be described as
having 62.5 line pairs. This is logical: the
light energy coming from a given sub-
ject point remains the same, but this en-
figure 2
Leica M Lenses [17]
M T F G r a p h s
ergy can be distributed over small circle
with a high peak, or a large circle with a
lower peak. These computer-generated
values and images are based on classic
ray-tracing principles. The computed po-
sition and distribution of the light rays
from the subject point can be used for
generating the point spread function
with mathematical methods.
For actual MTF measurements, an in-
strument is used that is capable of
analyzing the distribution of light across
a narrow slit. This narrow slit is illumi-
nated from behind and a lens images it
on a detector. A synchronous motor
drives a scanner with another slit (which
is much narrower than the rear-illumi-
nated slit) across the width of the illumi-
nated slit. Measurements at the edge of
the slit show the transition from dark to
light. This measurement is shown in
Figure 4. The distribution of light energy
at the edge of the slit has the same
shape as the cross-section of the point
spread function. There is no mathemati-
cal difference between a point and a
line, which is defined as an infinite
number of points in a row.
Using mathematical formulas once
again, one can use the measured light
distribution of the slit (which is a line
image) to arrive at a point image. Con-
versely, it is also possible to derive a
line image from the point spread func-
tion.
One can occasionally read or hear
claims that an MTF diagram derived
from measured values is superior to a
computed MTF diagram, but this should
not be taken very seriously. One should
also consider the fact that at Leica, the
measured version and the computed
version are nearly identical, which is
also a sign that the manufacturing de-
partment is capable of producing what
the optical designers have devised.
In conclusion
MTF diagrams are not intended to re-
place your own practical evaluation of a
lens. Nevertheless it has been proven
that an MTF evaluation comes very
close to a visual and subjective evalua-
tion of a lens. While MTF diagrams can
only be evaluated by someone with a
good fundamental knowledge of optics,
they nevertheless also represent a good
general indication of lens performance.
If personal photographs do not corre-
spond to expectations that are based on
MTF diagrams, one should re-evaluate
one’s own photographic technique. The
entire chain of reproduction especially,
should be analyzed. MTF values repre-
sent pure lens performance, which does
not take into account exposure circum-
stances and material characteristics.
The MTF is an excellent means for com-
paring and evaluating different lenses.
In practice, it is very difficult to evaluate
comparison photographs that have real
expressive power. Small variations in
exposure circumstances have a signifi-
cant effect on the resulting photo-
graphs.
After all, in practice there are a great
many variables in exposure techniques
and also in personal conditions and
evaluations. An individual who only cre-
ates photographs using small apertures,
certainly has different evaluation criteria
than one who frequently uses full aper-
tures. When comparing MTF diagrams,
one should also observe another funda-
mental rule: it is not customary to com-
pare lenses that have different focal
lengths. First of all, the correction of ab-
errations is different. A wide-angle lens
has a greater angle of view, and oblique
light rays have a different weighting
than those in a lens with a longer focal
length, in which chromatic aberrations
have a greater influence. One should
also be aware of the fact that, while all
lenses are described in terms of con-
trast values for 5, 10, 20 and 40 lp/mm,
this data must be correlated with the re-
production ratio. A 28 mm lens repro-
duces an object much smaller than a
135 mm lens, and since the lp/mm val-
ues are valid for the reproduction on the
film, they should be interpreted accord-
ingly.
Personal experience and expectations,
not purely MTF-based considerations,
are the basis for the acceptance of a
newly purchased lens. Even so, at a cer-
tain moment in the decision process,
MTF diagrams provide a very neutral
and objective evaluation of the perform-
ance capability of a lens. MTF is neces-
sary when an objective evaluation of a
lens is wanted, but it is not the only cri-
terion for purchasing a lens: methods
are only as good as the way a photogra-
pher uses them, and information is only
useful when one knows how to inter-
pret the data correctly.
figure 3
[18] Leica M Lenses
C o l o r R e n d i t i o n
Color rendition
The color rendition of a lens is obvi-
ously a very important characteristic
which may take precedence over other
characteristics. The photographer is of-
ten very sensitive to changes in color
transmission when changing lenses, es-
pecially when photographing the same
scene.
Lenses with a yellowish or reddish
color cast are called warm and those
with a bluish cast are called cool.
Some glasses (for example extra
dense flints) contain a large amount of
lead oxide and appear to the eye as pale
yellow. If such a glass is used in a lens,
the resulting color cast will be warm.
The cast can be offset by suitable coat-
ing, but there are limits here.
The notion of color rendition and color
fidelity is a very tricky one. The eye is
hardly an accurate detector of color dif-
ferences as the eye is easily fooled,
partly by its great adaptation powers.
But the existing light changes also. At
12.00 clock on a summer day the sun in
a blue sky may have 10.000 degrees
Kelvin and a few hours later 6.000 de-
grees. The eye may not detect this dif-
ference, but the film does. Films also
differ in their spectral responses.
The imaging chain of existing light,
scene to be photographed, color rendi-
tion of the lens, color response of the
film and the eye, introduces so many
variables that a meaningful discussion
and assessment is difficult.
The International Standards Organiza-
tion has introduced standard #6728,
which is called: “Determination of ISO
color contribution index” (ISO/CCI) in
1983. To start somewhere, the ISO
analyzed 57 typical camera lenses of
high quality in 1979 and used the aver-
age relative spectral transmittance val-
ues as a base figure: the ISO standard
camera lens.
As the typical photographic daylight
the ISO used 5.500 Kelvin, which is also
used by the emulsion industry. This is
the situation when the sun is 40 de-
grees above the horizon in a cloudless
atmosphere. Flashlight is also desig-
nated 5.500 Kelvin, but the spectral dis-
tribution may be different.
For the spectral sensitivity of films,
data from the manufactures for the sen-
sitivity of the blue, green and red sensi-
tive layers were weighted so that a nor-
malized sensitivity per layer could be
established.
The spectral characteristics of a lens
can be evaluated in terms of its total ef-
fect on the several layers of an average
color film. The effect on the blue sensi-
tive layers is called the blue photo-
graphic response of the lens. These re-
sponses can be calculated.
The CCI value is computed by multi-
plying the relative transmittance values
of a lens by the weighted spectral sensi-
tivity values for the blue, green and red
sensitive layers. The total response is
obtained by summation. and will give a
number for blue, one for green, one for
red. To simplify, make the smallest ele-
ment of the three number designations
equal to zero. If a lens has a Color Con-
tribution Index of 0/5/4, this means that
the average color film in standard illumi-
nation sees the lens as providing more
green (5) and more red layer (4) re-
sponse relative to the blue (0) than that
obtained with no lens in the system.
This lens would give a yellow cast.
The ISO however has established that
with the sensitivity data of emulsion
manufacturers, the standard lens should
conform to the 0/5/4 index.
The tolerances are established as
follows.
Blue is 0 with +3 and -4.
Green is 5 with +0 and -2
Red is 4 with +1 and -2.
These tolerances must be derived
from a trilinear graph and not by addi-
tion. Leica lenses are aimed at the CCI
of 0/5/4 and can be considered as neu-
tral in transmission when they are
within the tolerance band.
The following is a list of representative
Leica M lenses and their CCI values.
Values lower than -/5/4 produce a bluish
cast, values above -/5/4 a reddish cast
Elmarit-M 2,8/21 ASPH 0 6 5
Emarit M 2,8/21 0 5 2
Emarit M 24 mm f/2.8 ASPH 0 5 5
Elmarit-M 2,8/28 current 0 5 4
Elmarit-M 2,8/28 previous 0 4 2
Summilux-M 1.4/35 aspherical 0 6 6
Summilux-M 1.4/35 ASPH 0 5 5
Summilux-M 1.4/35 0 4 1
Summicron-M 2/35 ASPH 0 4 3
Noctilux -M 1/50 0 8 6
Sumilux-M 1,4/50 0 5 2
Summicron-M 2/50 0 5 4
Elmar-M 2.8/50 0 6 5
Summilux-M 1.4/75 0 6 3
APO-Summicron-M 2/90 ASPH 0 6 4
Apo-Telyt-M 3.4/135 0 5 4
Elmarit-M 2.8/135 0 6 4
Tri-Elmar 4/28 0 5 3
Tri-Elmar 4/35 0 5 3
Tri-Elmar 4/50 0 5 3
From this list you can get a very good
impression how of close to neutral most
Leica lenses are.
The Summicron-M 2/50 or the Apo-
Telyt 3.4/135 might be considered as
reference lenses. Take pictures with onr
of these lenses and your favorite film.
Then take pictures with other lenses un-
der identical circumstances and on the
same film, preferably slide film, so that
the lab can not introduce additional color
corrections. Then compare the pictures
carefully and try to find differences in
color rendition. This will give you a good
idea of what shifts to expect and what
filters to use, if any, to correct a small
cast.
The difference of 1 point may not be
noticeable.
Leica M Lenses [19]
C o l o r R e n d i t i o n
[20] Leica M Lenses
2 1 m m l e n s e s
21 mm lenses
The optical system with a 90º angle of
view is a comparatively late addition to
the line of Leica lenses. The design of
such an extreme wide-angle lens for the
35 mm format had to contend with
three serious problems. Distortion is the
obvious one. Optical vignetting is the
real villain here. For a lens with a 90º an-
gle of view, peripheral illumination is
only about 25% of axial illumination, as-
suming distortion-free imagery. To beat
this so-called Cosine-Fourth vignetting,
the designer should accept distortion,
but this is not acceptable. An optical
‘trick’ can be used, however, to in-
crease the level of light energy towards
the periphery without increasing distor-
tion. Basically one uses the properties
and relations between the entrance and
exit pupils to accomplish this feat. A
wide aperture is the third villain. Earlier
designs had to be stopped down to f/11
or even smaller apertures to get accept-
able or even usable image quality.
These earlier designs were used on
larger format cameras where the need
for enlargements is less pronounced
than it is in the ‘small negative-big en-
largement’ philosophy of 35 mm pho-
tography. Zeiss gets the credit for being
the first in 1954 to cross this barrier
with its seminal rangefinder-coupled 21
mm f/4 Biogon lens for the Contax cam-
era, that perennial and friendly chal-
lenger of the rangefinder Leica. Leitz in-
troduced its version of a 21mm lens in
1958 in the form of the 21 mm f/4 Leitz
Super-Angulon lens.
At full aperture, this lens features
good performance in the center and, if
the clear rendition of fine details is not
the prime objective, that aperture is
quite usable. The 21mm f/3.4 Leitz Su-
per-Angulon followed in 1963 and it re-
mained in production until 1980. Quite a
long working life. But in those days opti-
cal progress could almost be measured
in generations.
Generally speaking the 21 mm f/3.4
Super Angulon lens is a very good per-
former. It fine qualities are restricted
only by the presence of astigmatism
that reduces overall contrast and the
crisp rendition of fine details at full and
medium apertures.
21 mm f/2.8 Elmarit-M
The first fully Leitz-designed lens for
the demanding 90° angle was intro-
duced in 1980. This lens had to have a
long back focal length (distance from
the rear lens surface to the film plane)
to make room for the M5 exposure me-
tering mechanism. This retrofocus de-
sign requires a totally different type of
correction. Coma, distortion and trans-
verse chromatic aberrations are difficult
to correct. In this case, a bit of distortion
had to be allowed in order to achieve a
higher correction of the other aberra-
tions.
At f/2.8 the light fall-off is slightly less
than that of its predecessor. Flatness of
field is less well corrected than distor-
tion. At full aperture, the on-axis per-
formance (a circle with a diameter of
6mm) produces an image that is slightly
cleaner than that of the Super-Angulon
lens. This generally somewhat higher
contrast results in a clearer delineation
of fine details. Details are quite soft in
the field and in the corners the image.
The general performance of the
Elmarit-M lens is better than that of the
Super-Angulon at f/3.4. This is partly
due to the reduction of astigmatism,
which results in improved rendition of
fine details.
At f/4.0 extremely fine details are vis-
ible with good contrast in the center and
within a 12 mm diameter circle around
the center. From there to the corners
the image details become progressively
softer, but fine details remain within a
detectable range.
Optimum performance is reached at f/
5.6 with extremely fine details now vis-
ible over the entire image area into the
outermost corners. Subject outlines, es-
pecially in the outer zones, have soft
edges, giving an overall impression of a
smooth, somewhat subdued image.
Stopping down to f/11 and smaller aper-
tures diminishes image quality.
Decentering was not measurable.
Generally speaking, this lens is a com-
mendable performer and an improve-
ment over the Super-Angulon lens. In
the field at the wider apertures, image
quality is a bit modest.
Close-up performance
A 21mm lens by nature shows a great
deal of empty foreground, which could
be filled with some objects close to the
lens. The essence of the 21mm focal
length is the surrounding of an interest-
ing object in the foreground by a large
Leica M Lenses [21]
2 1 m m l e n s e s
environmental background. It is of prime
importance to know how the lens be-
haves at distances around 1 meter.
At f/2.8 the corners are noticeably
darker, but vignetting is gone at f/4.
At full aperture the overall contrast is
medium. The Elmarit, however, repro-
duces very fine details just a shade
more crisply than its predecessors.
From f/5.6 the performance becomes
uniform across the entire frame and we
have an excellent image with very fine
crisp details into the corners.
Flare suppression:
The Elmarit-M handles light sources
quite well at full aperture. In strong
backlight the silhouettes of tree
branches are dark (no leaking of light
around the edges) and sharply outlined.
21 mm f/2.8 Elmarit-M ASPH
At full aperture, contrast is high and
extremely fine details are rendered very
crisply from the center to an image
height of 11 mm. That is the coverage
of an image circle of 22mm. From there
to the edges, the contrast decreases a
little but it is still vastly superior to that
of all its predecessors. Astigmatism and
curvature of field are almost fully cor-
rected. Subject outlines and fine details
have very high edge contrast and are
rendered clearly, almost lucidly. In the
outer zones and in the corners this su-
perior performance decreases slightly.
The overall image quality is a quantum
leap forward in relation to all previous
21mm lenses in the Leica stable.
To place it in perspective: the perform-
ance at f/2.8 is better in all respects
than that of the f/3.4 Super-Angulon at f/
5.6.
At f/4 contrast and the clear rendition
of very fine details improve, with the
corners still lagging a bit behind. Overall
contrast is now at its optimum, with ex-
ceptional performance over a large part
of the image field. At f/5.6 overall con-
trast drops a little, but very fine details
are still crisp into the far outer zones.
From f/8 the performance drops ever
so slightly and at f/16 it is noticeably be-
low optimum.
Decentering is not measurable. Overall
assessment: this lens produces out-
standing image quality at full aperture,
which continues to improve as it is
stopped down as far as f/8.
It is by far the best 21mm lens in Leica
history and the only recommended
choice for the person who needs supe-
rior performance from a 21 mm lens
starting at f/2.8.
Close-up performance
Close-up performance at full aperture
is better than that of the Elmarit-M f/2.8,
producing higher overall contrast. More
important, the high level of micro-con-
trast gives a clear rendering of very fine
image details over the entire field, in-
cluding the extreme corners. Even the
performance from the center to the cor-
ners for the complete range of aper-
tures is quite impressive.
Flare suppression:
The Elmarit-M ASPH lens improves on
the performance of its predecessor. The
suppression of halos, especially at full
aperture, can be described as quite ef-
fective.
Distortion
Look at the distortion graphs for the
Elmarit-M and Elmarit-M ASPH lenses.
The curve of the Elmarit looks better as
the distortion at the fringe of the image
area becomes zero, where the ASPH
version shows more distortion. The
abrupt inward curve of the Elmarit, how-
ever, increases the visibility of the dis-
tortion, while the smooth curve of the
ASPH is easier on the eye and it re-
duces the noticeable presence of distor-
tion.
Design considerations
I wish to draw attention to the very
high level of finely tuned aberration cor-
rections in modern Leica lenses. In the
first part of this brochure I mentioned
that any optical system can only be cor-
rected to a certain level and that some
aberrations will always be present as re-
sidual aberrations.
A careful design will not neglect these
aberrations because they will generate
‘noise’ in the system. White light con-
sists of all wavelengths, but photo-
graphically important wavelengths
should be weighted more heavily for ul-
timate image quality. In the preceding
Elmarit lens, slightly lower importance
was assigned to certain wavelengths.
Nowadays a Leica designer will strive to
concentrate all these wavelengths into a
spot that is as small as possible. This is
the case with the 21 mm f/2.8 Elmarit-
M ASPH. One can only see a faint trace
of color residuals of the marginal rays.
Performance at infinity
This is an intriguing topic.
The performance of extremely wide-
angle lenses at infinity is sometimes
discussed as if it were a bit below ex-
pectation when compared to lenses
with smaller angles of view. As I always
use the same scene for a comparison, I
was able to compare the image quality
of a distant scene as recorded with a
28mm Elmarit-M lens (latest generation
and a superb representative of its kind).
The 28mm produces a high-contrast im-
age, with extremely fine details, ren-
dered very crisply. The overall image
also has a clarity and lucidity that is diffi-
cult to quantify.
In direct comparison, 21mm lenses
are softer, they lack the overall clarity
and crisp reproduction of very fine de-
tails. The same amount of details as ob-
[22] Leica M Lenses
2 1 m m l e n s e s
tained with 28mm lenses can be no-
ticed without difficulty, but image de-
tails are slightly ‘fuzzier’.
Optical progress can easily be fol-
lowed in the discussion that follows,
with the 21 mm f/2.8 Elmarit-M ASPH
representing a very high level of
progress. It is the only 21 mm lens that
compares favorably with the 28mm f/
2.8 Elmarit-M.
The Elmarit-M at full aperture shows
very fine details, but it renders them
with slight fuzzy edge contrast and ex-
tremely fine details are lost. One needs
to stop down to f/5.6 in order to render
these extremely fine details with good
separation.
The Elmarit ASPH produces better im-
ages at full aperture. Overall contrast is
higher, and extremely fine details are
just discernible. The ASPH gives a no-
ticeably crisper image at all apertures
and the level of just discernible details is
higher (more details that is). At f/4 per-
formance is as good as the predeces-
sor’s at f/5.6 to f/8.
Is a direct comparison between lenses
of different focal length acceptable?
Not really! The reproduction factor of
the extremely fine details is higher with
a 21 mm than it is with a 28 mm lens.
Even if the grain and the film would al-
low it, the 21 mm image needs a higher
magnification to show the same details
at the same size and therefore it needs
a higher degree of optical corrections at
a higher spatial frequency.
The prerequisites for such an infinity
test are simple: extreme care must be
taken if one wants best quality at infin-
ity: rigid tripod, correct exposure, dis-
tance setting at infinity, low speed film.
The test shows clearly that perform-
ance at infinity with the latest genera-
tions of 21mm lenses is at a very high
level. When comparing results between
different focal lengths one should take
into account the reproduction factor and
all other image-degrading components.
I also conducted a test to ascertain
whether the performance level changes
if one sets the focusing ring just a frac-
tion before the infinity mark, thus using
depth of field to secure good rendition
of details. The drop in performance be-
tween these two settings is clearly vis-
ible. So, if you need the best image
quality at infinity, focus the lens at infin-
ity and forget about depth of field con-
cerns in such cases. We also noted that
image quality will be reduced substan-
tially if the objects at infinity are overex-
posed, which is quite often the case
with small objects (like trees) against
the sky. This behavior is inherent in 35
mm format photography where overex-
posure is one of the most serious
causes of image degradation.
Leica M Lenses [23]
2 1 m m l e n s e sM T F m e a s u r e m e n t
[24] Leica M Lenses
2 1 m m l e n s e s
100
75
50
25
0
0 3 6 9 12 15 18 21
0 3 6 9 12 15 18 21
100
90
80
70
60
50
40
30
20
10
0
-5 -4 -3 -2 -1 0 1 2 3 4 5
0 3 6 9 12 15 18 21
100
90
80
70
60
50
40
30
20
10
0
Full Aperture Optimum Aperture
Summary
VignettingDistortion
[%] [%]
Y' [mm]Y' [mm]
[%]
Y' [mm]Distortion [%]
21mm f/2,8 Elmarit-M
This lens is the first
retrofocus design by
Leica for the M body.
Stopped down to medium
apertures it delivers ex-
cellent image quality over
most of the picture area. .
At full aperture the on
axis performance is very
good, but in the field is
only acceptable.
[2,8] [5,6]
Leica M Lenses [25]
2 1 m m l e n s e s
100
75
50
25
0
0 3 6 9 12 15 18 21
0 3 6 9 12 15 18 21
100
90
80
70
60
50
40
30
20
10
0
-5 -4 -3 -2 -1 0 1 2 3 4 5
0 3 6 9 12 15 18 21
100
90
80
70
60
50
40
30
20
10
0
Full Aperture Optimum Aperture
Summary
VignettingDistortion
[%] [%]
Y' [mm]Y' [mm]
[%]
Y' [mm]Distortion [%]
21mm f/2,8 Elmarit-M ASPH
A truly outstanding lens
and a fine example of
Leica’s drive to design
state-of-the-art lenses. At
full aperture the lens al-
ready provides a high con-
trast image with a crisp
rendition of very fine de-
tails. This performance
improves when stopping
down and extends to the
full picture area.
[2,8] [4,0]
[26] Leica M Lenses
2 4 m m l e n s e s
24 mm lenses
24 mm f/2.8 Elmarit-M ASPH
The gap between 21 mm and 28 mm
focal lengths has long existed in the
range of Leica lenses for Leica cameras
with coupled rangefinders. In the reflex
world the 24 or 25mm focal length has
a longer history. It maybe the renewed
confidence of many users who chose
the Leica M as the top reportage cam-
era that inspired the Leica designers to
compute this focal length for the M se-
ries. One may also note that the M body
favors the design of high quality short
focal length lenses. As a historical re-
mark we may note that Nikon and
Canon rangefinders from the glorious
fifties offered the 25 mm focal length,
thus closing the gap between the 21
and 28 mm focal lengths long ago.
I used an example of the 24 mm f/2.8
Elmarit-M ASPH lens and compared it to
the 25 mm f/4 Voigtländer Snapshot
Skopar lens. The 84º angle of view is
very interesting, but also quite demand-
ing creatively. Close range photography
of single persons or small groups con-
veys an intimacy of close contact. At
the same time you can make a strong
statement about the wider surroundings
where these people are located. Encap-
sulated intimacy might be the approach.
When taking pictures you are naturally
inclined to tilt the camera downwards a
bit in order to include more foreground
in the image. At eye level the 84 degree
angle of view often encompasses too
much horizon. In this position, perspec-
tive distortion of background objects at
the sides of the picture area tends to be
pronounced. This perspective distortion
should be carefully separated from the
optical one. Optically this lens shows
hardly any distortion.
After some use I acquired the habit of
taking pictures from a lower, but level
perspective. Here the unusually good
image quality really shines.
In use its angle of view is quite fasci-
nating. I used it in reportage-style pic-
ture-taking situations and I was able to
get very interesting pictures at close
range. The trick in using this lens is the
selection of subject matter at about 1
and 2 meters (approximately 3 to 6
feet).
If the subject in the foreground
catches the eye because of its nature or
because of its composition, the whole
image will be interesting. In many in-
stances you might be tempted to go for
the grand view. Make sure the fore-
ground space is dominant and full of in-
teresting details.
At full aperture the lens exhibits a very
high contrast image from the center
across the entire field. Only the far cor-
ners drop in contrast and produce soft
details. Over an image circle with a di-
ameter of 12 mm the outlines of subject
shapes and details are delineated with
superb edge contrast and extremely
fine details are rendered crisply and
clearly. In the rest of the field, very fine
details are etched crisply in the emul-
sion with extremely fine details ren-
dered visibly but with softer edges. Ex-
ceedingly fine details are rendered just
above the threshold of visibility, but
with slightly lower contrast.
Going from center to corner the con-
trast of extremely fine details drops
somewhat. While a bit soft at the edges
and of lower contrast, these details are
still clearly visible.
Stopping down to f/4 the contrast in
very fine details improves and the ex-
ceedingly fine details now are clearly
visible. Corners still lag a bit but center
and zonal performance (12 mm image
circle) is at its optimum. This aperture
can be called the optimal aperture. Stop-
ping down to f/5.6 we see that the fin-
est possible details become a bit more
crisp, but the outlines of shapes and de-
tails start to soften faintly. Thus overall
contrast is a bit lower. It is a matter of
priorities which aperture is ideal. I would
say that this lens is at its best at f/4.
At f/8 corners continue to improve
where the center now drops in contrast.
At f/16 the overall image contrast is
lower and very fine details suffer as dif-
fraction sets in.
Close-up performance
At close range (± 70cm, approximately
±28 inches), this excellent performance
is preserved. A wide angle lens like a
24mm is not recommended if its close-
up performance is not the same as its
performance at infinity. As most lenses
are optimized for longer distances, we
need to stop down to f/5,6 to get the
best of performance in the close-up
range.
Flare suppression
and other topics
Flare suppression is perfect. Night pic-
tures with Kodachrome 64 show excel-
lent gradation in strong highlights and
distance point sources are rendered
clearly, without any trace of halo. This
Leica m-lenses-their-soul-and-secrets-en

More Related Content

Similar to Leica m-lenses-their-soul-and-secrets-en

Catalog Leica Hunting 2018 Optics Trade
Catalog Leica Hunting 2018 Optics TradeCatalog Leica Hunting 2018 Optics Trade
Catalog Leica Hunting 2018 Optics TradeOptics-Trade
 
final slides for IODC June, 2023.pptx
final slides for IODC June, 2023.pptxfinal slides for IODC June, 2023.pptx
final slides for IODC June, 2023.pptxDave Shafer
 
Camera Evolution 515
Camera Evolution 515Camera Evolution 515
Camera Evolution 515LMF05
 
Achieving high resolution digital photomicrographs
Achieving high resolution digital photomicrographsAchieving high resolution digital photomicrographs
Achieving high resolution digital photomicrographsLudwig Eckl
 
What i wish everyone knew about
What i wish everyone knew aboutWhat i wish everyone knew about
What i wish everyone knew aboutRashed9410
 
Lesson 3 • Types of Cameras
Lesson 3 • Types of CamerasLesson 3 • Types of Cameras
Lesson 3 • Types of CamerasMarcio Sargento
 
Astrophotography Presentation
 Astrophotography Presentation Astrophotography Presentation
Astrophotography PresentationEdward Hahnenberg
 
Lesson in art part 2 Q1 and Q2 by S. will
Lesson in art part 2 Q1 and Q2 by S. willLesson in art part 2 Q1 and Q2 by S. will
Lesson in art part 2 Q1 and Q2 by S. willYamwill
 
Catalog 2020 | Leica Hunting | Optics Trade
Catalog 2020 | Leica Hunting | Optics TradeCatalog 2020 | Leica Hunting | Optics Trade
Catalog 2020 | Leica Hunting | Optics TradeOptics-Trade
 
How to convert a spherical mirror to a paraboloid mirror
How to convert a spherical mirror to a paraboloid mirrorHow to convert a spherical mirror to a paraboloid mirror
How to convert a spherical mirror to a paraboloid mirrorTrịnh Thanh Tùng
 
Shafer-Maksutov telescope
Shafer-Maksutov telescopeShafer-Maksutov telescope
Shafer-Maksutov telescopeDave Shafer
 
camera,types,working and functionality
camera,types,working and functionalitycamera,types,working and functionality
camera,types,working and functionalityRahat Malik
 
JacoTech Advances In Lenticular Lens Arrays For Visual Display
JacoTech Advances In Lenticular Lens Arrays For Visual DisplayJacoTech Advances In Lenticular Lens Arrays For Visual Display
JacoTech Advances In Lenticular Lens Arrays For Visual DisplayGary A. Jacobsen
 
Catalog | Leica Nature 2018 | Optics Trade
Catalog | Leica Nature 2018 | Optics TradeCatalog | Leica Nature 2018 | Optics Trade
Catalog | Leica Nature 2018 | Optics TradeOptics-Trade
 
Polarising microscope
Polarising microscope Polarising microscope
Polarising microscope parag sonwane
 
Disruptive Innovation and the Leica history
Disruptive Innovation and the Leica historyDisruptive Innovation and the Leica history
Disruptive Innovation and the Leica historyChris Sandström
 
3 4 cameras
3 4 cameras3 4 cameras
3 4 camerasRbk Asr
 

Similar to Leica m-lenses-their-soul-and-secrets-en (20)

Ef lens work_book_2_en
Ef lens work_book_2_enEf lens work_book_2_en
Ef lens work_book_2_en
 
Catalog Leica Hunting 2018 Optics Trade
Catalog Leica Hunting 2018 Optics TradeCatalog Leica Hunting 2018 Optics Trade
Catalog Leica Hunting 2018 Optics Trade
 
Image Sensing and Aquisition
Image Sensing and AquisitionImage Sensing and Aquisition
Image Sensing and Aquisition
 
final slides for IODC June, 2023.pptx
final slides for IODC June, 2023.pptxfinal slides for IODC June, 2023.pptx
final slides for IODC June, 2023.pptx
 
Camera Evolution 515
Camera Evolution 515Camera Evolution 515
Camera Evolution 515
 
Achieving high resolution digital photomicrographs
Achieving high resolution digital photomicrographsAchieving high resolution digital photomicrographs
Achieving high resolution digital photomicrographs
 
What i wish everyone knew about
What i wish everyone knew aboutWhat i wish everyone knew about
What i wish everyone knew about
 
Lesson 3 • Types of Cameras
Lesson 3 • Types of CamerasLesson 3 • Types of Cameras
Lesson 3 • Types of Cameras
 
Astrophotography Presentation
 Astrophotography Presentation Astrophotography Presentation
Astrophotography Presentation
 
Lesson in art part 2 Q1 and Q2 by S. will
Lesson in art part 2 Q1 and Q2 by S. willLesson in art part 2 Q1 and Q2 by S. will
Lesson in art part 2 Q1 and Q2 by S. will
 
Catalog 2020 | Leica Hunting | Optics Trade
Catalog 2020 | Leica Hunting | Optics TradeCatalog 2020 | Leica Hunting | Optics Trade
Catalog 2020 | Leica Hunting | Optics Trade
 
How to convert a spherical mirror to a paraboloid mirror
How to convert a spherical mirror to a paraboloid mirrorHow to convert a spherical mirror to a paraboloid mirror
How to convert a spherical mirror to a paraboloid mirror
 
Shafer-Maksutov telescope
Shafer-Maksutov telescopeShafer-Maksutov telescope
Shafer-Maksutov telescope
 
camera,types,working and functionality
camera,types,working and functionalitycamera,types,working and functionality
camera,types,working and functionality
 
JacoTech Advances In Lenticular Lens Arrays For Visual Display
JacoTech Advances In Lenticular Lens Arrays For Visual DisplayJacoTech Advances In Lenticular Lens Arrays For Visual Display
JacoTech Advances In Lenticular Lens Arrays For Visual Display
 
Catalog | Leica Nature 2018 | Optics Trade
Catalog | Leica Nature 2018 | Optics TradeCatalog | Leica Nature 2018 | Optics Trade
Catalog | Leica Nature 2018 | Optics Trade
 
Polarising microscope
Polarising microscope Polarising microscope
Polarising microscope
 
Disruptive Innovation and the Leica history
Disruptive Innovation and the Leica historyDisruptive Innovation and the Leica history
Disruptive Innovation and the Leica history
 
3 4 cameras
3 4 cameras3 4 cameras
3 4 cameras
 
Photography (1)
Photography (1)Photography (1)
Photography (1)
 

Recently uploaded

Sector 105, Noida Call girls :8448380779 Model Escorts | 100% verified
Sector 105, Noida Call girls :8448380779 Model Escorts | 100% verifiedSector 105, Noida Call girls :8448380779 Model Escorts | 100% verified
Sector 105, Noida Call girls :8448380779 Model Escorts | 100% verifiedDelhi Call girls
 
FULL ENJOY Call Girls In Mahipalpur Delhi Contact Us 8377877756
FULL ENJOY Call Girls In Mahipalpur Delhi Contact Us 8377877756FULL ENJOY Call Girls In Mahipalpur Delhi Contact Us 8377877756
FULL ENJOY Call Girls In Mahipalpur Delhi Contact Us 8377877756dollysharma2066
 
RT Nagar Call Girls Service: 🍓 7737669865 🍓 High Profile Model Escorts | Bang...
RT Nagar Call Girls Service: 🍓 7737669865 🍓 High Profile Model Escorts | Bang...RT Nagar Call Girls Service: 🍓 7737669865 🍓 High Profile Model Escorts | Bang...
RT Nagar Call Girls Service: 🍓 7737669865 🍓 High Profile Model Escorts | Bang...amitlee9823
 
Pooja 9892124323, Call girls Services and Mumbai Escort Service Near Hotel Th...
Pooja 9892124323, Call girls Services and Mumbai Escort Service Near Hotel Th...Pooja 9892124323, Call girls Services and Mumbai Escort Service Near Hotel Th...
Pooja 9892124323, Call girls Services and Mumbai Escort Service Near Hotel Th...Pooja Nehwal
 
Anamika Escorts Service Darbhanga ❣️ 7014168258 ❣️ High Cost Unlimited Hard ...
Anamika Escorts Service Darbhanga ❣️ 7014168258 ❣️ High Cost Unlimited Hard  ...Anamika Escorts Service Darbhanga ❣️ 7014168258 ❣️ High Cost Unlimited Hard  ...
Anamika Escorts Service Darbhanga ❣️ 7014168258 ❣️ High Cost Unlimited Hard ...nirzagarg
 
Booking open Available Pune Call Girls Nanded City 6297143586 Call Hot India...
Booking open Available Pune Call Girls Nanded City  6297143586 Call Hot India...Booking open Available Pune Call Girls Nanded City  6297143586 Call Hot India...
Booking open Available Pune Call Girls Nanded City 6297143586 Call Hot India...Call Girls in Nagpur High Profile
 
8377087607, Door Step Call Girls In Kalkaji (Locanto) 24/7 Available
8377087607, Door Step Call Girls In Kalkaji (Locanto) 24/7 Available8377087607, Door Step Call Girls In Kalkaji (Locanto) 24/7 Available
8377087607, Door Step Call Girls In Kalkaji (Locanto) 24/7 Availabledollysharma2066
 
Editorial design Magazine design project.pdf
Editorial design Magazine design project.pdfEditorial design Magazine design project.pdf
Editorial design Magazine design project.pdftbatkhuu1
 
Escorts Service Nagavara ☎ 7737669865☎ Book Your One night Stand (Bangalore)
Escorts Service Nagavara ☎ 7737669865☎ Book Your One night Stand (Bangalore)Escorts Service Nagavara ☎ 7737669865☎ Book Your One night Stand (Bangalore)
Escorts Service Nagavara ☎ 7737669865☎ Book Your One night Stand (Bangalore)amitlee9823
 
Verified Trusted Call Girls Adugodi💘 9352852248 Good Looking standard Profil...
Verified Trusted Call Girls Adugodi💘 9352852248  Good Looking standard Profil...Verified Trusted Call Girls Adugodi💘 9352852248  Good Looking standard Profil...
Verified Trusted Call Girls Adugodi💘 9352852248 Good Looking standard Profil...kumaririma588
 
Chapter 19_DDA_TOD Policy_First Draft 2012.pdf
Chapter 19_DDA_TOD Policy_First Draft 2012.pdfChapter 19_DDA_TOD Policy_First Draft 2012.pdf
Chapter 19_DDA_TOD Policy_First Draft 2012.pdfParomita Roy
 
UI:UX Design and Empowerment Strategies for Underprivileged Transgender Indiv...
UI:UX Design and Empowerment Strategies for Underprivileged Transgender Indiv...UI:UX Design and Empowerment Strategies for Underprivileged Transgender Indiv...
UI:UX Design and Empowerment Strategies for Underprivileged Transgender Indiv...RitikaRoy32
 
VVIP Pune Call Girls Hadapsar (7001035870) Pune Escorts Nearby with Complete ...
VVIP Pune Call Girls Hadapsar (7001035870) Pune Escorts Nearby with Complete ...VVIP Pune Call Girls Hadapsar (7001035870) Pune Escorts Nearby with Complete ...
VVIP Pune Call Girls Hadapsar (7001035870) Pune Escorts Nearby with Complete ...Call Girls in Nagpur High Profile
 
Escorts Service Basapura ☎ 7737669865☎ Book Your One night Stand (Bangalore)
Escorts Service Basapura ☎ 7737669865☎ Book Your One night Stand (Bangalore)Escorts Service Basapura ☎ 7737669865☎ Book Your One night Stand (Bangalore)
Escorts Service Basapura ☎ 7737669865☎ Book Your One night Stand (Bangalore)amitlee9823
 
Recommendable # 971589162217 # philippine Young Call Girls in Dubai By Marina...
Recommendable # 971589162217 # philippine Young Call Girls in Dubai By Marina...Recommendable # 971589162217 # philippine Young Call Girls in Dubai By Marina...
Recommendable # 971589162217 # philippine Young Call Girls in Dubai By Marina...home
 
AMBER GRAIN EMBROIDERY | Growing folklore elements | Root-based materials, w...
AMBER GRAIN EMBROIDERY | Growing folklore elements |  Root-based materials, w...AMBER GRAIN EMBROIDERY | Growing folklore elements |  Root-based materials, w...
AMBER GRAIN EMBROIDERY | Growing folklore elements | Root-based materials, w...BarusRa
 
Sweety Planet Packaging Design Process Book.pptx
Sweety Planet Packaging Design Process Book.pptxSweety Planet Packaging Design Process Book.pptx
Sweety Planet Packaging Design Process Book.pptxbingyichin04
 
HiFi Call Girl Service Delhi Phone ☞ 9899900591 ☜ Escorts Service at along wi...
HiFi Call Girl Service Delhi Phone ☞ 9899900591 ☜ Escorts Service at along wi...HiFi Call Girl Service Delhi Phone ☞ 9899900591 ☜ Escorts Service at along wi...
HiFi Call Girl Service Delhi Phone ☞ 9899900591 ☜ Escorts Service at along wi...poojakaurpk09
 
Pooja 9892124323, Call girls Services and Mumbai Escort Service Near Hotel Gi...
Pooja 9892124323, Call girls Services and Mumbai Escort Service Near Hotel Gi...Pooja 9892124323, Call girls Services and Mumbai Escort Service Near Hotel Gi...
Pooja 9892124323, Call girls Services and Mumbai Escort Service Near Hotel Gi...Pooja Nehwal
 
Jordan_Amanda_DMBS202404_PB1_2024-04.pdf
Jordan_Amanda_DMBS202404_PB1_2024-04.pdfJordan_Amanda_DMBS202404_PB1_2024-04.pdf
Jordan_Amanda_DMBS202404_PB1_2024-04.pdfamanda2495
 

Recently uploaded (20)

Sector 105, Noida Call girls :8448380779 Model Escorts | 100% verified
Sector 105, Noida Call girls :8448380779 Model Escorts | 100% verifiedSector 105, Noida Call girls :8448380779 Model Escorts | 100% verified
Sector 105, Noida Call girls :8448380779 Model Escorts | 100% verified
 
FULL ENJOY Call Girls In Mahipalpur Delhi Contact Us 8377877756
FULL ENJOY Call Girls In Mahipalpur Delhi Contact Us 8377877756FULL ENJOY Call Girls In Mahipalpur Delhi Contact Us 8377877756
FULL ENJOY Call Girls In Mahipalpur Delhi Contact Us 8377877756
 
RT Nagar Call Girls Service: 🍓 7737669865 🍓 High Profile Model Escorts | Bang...
RT Nagar Call Girls Service: 🍓 7737669865 🍓 High Profile Model Escorts | Bang...RT Nagar Call Girls Service: 🍓 7737669865 🍓 High Profile Model Escorts | Bang...
RT Nagar Call Girls Service: 🍓 7737669865 🍓 High Profile Model Escorts | Bang...
 
Pooja 9892124323, Call girls Services and Mumbai Escort Service Near Hotel Th...
Pooja 9892124323, Call girls Services and Mumbai Escort Service Near Hotel Th...Pooja 9892124323, Call girls Services and Mumbai Escort Service Near Hotel Th...
Pooja 9892124323, Call girls Services and Mumbai Escort Service Near Hotel Th...
 
Anamika Escorts Service Darbhanga ❣️ 7014168258 ❣️ High Cost Unlimited Hard ...
Anamika Escorts Service Darbhanga ❣️ 7014168258 ❣️ High Cost Unlimited Hard  ...Anamika Escorts Service Darbhanga ❣️ 7014168258 ❣️ High Cost Unlimited Hard  ...
Anamika Escorts Service Darbhanga ❣️ 7014168258 ❣️ High Cost Unlimited Hard ...
 
Booking open Available Pune Call Girls Nanded City 6297143586 Call Hot India...
Booking open Available Pune Call Girls Nanded City  6297143586 Call Hot India...Booking open Available Pune Call Girls Nanded City  6297143586 Call Hot India...
Booking open Available Pune Call Girls Nanded City 6297143586 Call Hot India...
 
8377087607, Door Step Call Girls In Kalkaji (Locanto) 24/7 Available
8377087607, Door Step Call Girls In Kalkaji (Locanto) 24/7 Available8377087607, Door Step Call Girls In Kalkaji (Locanto) 24/7 Available
8377087607, Door Step Call Girls In Kalkaji (Locanto) 24/7 Available
 
Editorial design Magazine design project.pdf
Editorial design Magazine design project.pdfEditorial design Magazine design project.pdf
Editorial design Magazine design project.pdf
 
Escorts Service Nagavara ☎ 7737669865☎ Book Your One night Stand (Bangalore)
Escorts Service Nagavara ☎ 7737669865☎ Book Your One night Stand (Bangalore)Escorts Service Nagavara ☎ 7737669865☎ Book Your One night Stand (Bangalore)
Escorts Service Nagavara ☎ 7737669865☎ Book Your One night Stand (Bangalore)
 
Verified Trusted Call Girls Adugodi💘 9352852248 Good Looking standard Profil...
Verified Trusted Call Girls Adugodi💘 9352852248  Good Looking standard Profil...Verified Trusted Call Girls Adugodi💘 9352852248  Good Looking standard Profil...
Verified Trusted Call Girls Adugodi💘 9352852248 Good Looking standard Profil...
 
Chapter 19_DDA_TOD Policy_First Draft 2012.pdf
Chapter 19_DDA_TOD Policy_First Draft 2012.pdfChapter 19_DDA_TOD Policy_First Draft 2012.pdf
Chapter 19_DDA_TOD Policy_First Draft 2012.pdf
 
UI:UX Design and Empowerment Strategies for Underprivileged Transgender Indiv...
UI:UX Design and Empowerment Strategies for Underprivileged Transgender Indiv...UI:UX Design and Empowerment Strategies for Underprivileged Transgender Indiv...
UI:UX Design and Empowerment Strategies for Underprivileged Transgender Indiv...
 
VVIP Pune Call Girls Hadapsar (7001035870) Pune Escorts Nearby with Complete ...
VVIP Pune Call Girls Hadapsar (7001035870) Pune Escorts Nearby with Complete ...VVIP Pune Call Girls Hadapsar (7001035870) Pune Escorts Nearby with Complete ...
VVIP Pune Call Girls Hadapsar (7001035870) Pune Escorts Nearby with Complete ...
 
Escorts Service Basapura ☎ 7737669865☎ Book Your One night Stand (Bangalore)
Escorts Service Basapura ☎ 7737669865☎ Book Your One night Stand (Bangalore)Escorts Service Basapura ☎ 7737669865☎ Book Your One night Stand (Bangalore)
Escorts Service Basapura ☎ 7737669865☎ Book Your One night Stand (Bangalore)
 
Recommendable # 971589162217 # philippine Young Call Girls in Dubai By Marina...
Recommendable # 971589162217 # philippine Young Call Girls in Dubai By Marina...Recommendable # 971589162217 # philippine Young Call Girls in Dubai By Marina...
Recommendable # 971589162217 # philippine Young Call Girls in Dubai By Marina...
 
AMBER GRAIN EMBROIDERY | Growing folklore elements | Root-based materials, w...
AMBER GRAIN EMBROIDERY | Growing folklore elements |  Root-based materials, w...AMBER GRAIN EMBROIDERY | Growing folklore elements |  Root-based materials, w...
AMBER GRAIN EMBROIDERY | Growing folklore elements | Root-based materials, w...
 
Sweety Planet Packaging Design Process Book.pptx
Sweety Planet Packaging Design Process Book.pptxSweety Planet Packaging Design Process Book.pptx
Sweety Planet Packaging Design Process Book.pptx
 
HiFi Call Girl Service Delhi Phone ☞ 9899900591 ☜ Escorts Service at along wi...
HiFi Call Girl Service Delhi Phone ☞ 9899900591 ☜ Escorts Service at along wi...HiFi Call Girl Service Delhi Phone ☞ 9899900591 ☜ Escorts Service at along wi...
HiFi Call Girl Service Delhi Phone ☞ 9899900591 ☜ Escorts Service at along wi...
 
Pooja 9892124323, Call girls Services and Mumbai Escort Service Near Hotel Gi...
Pooja 9892124323, Call girls Services and Mumbai Escort Service Near Hotel Gi...Pooja 9892124323, Call girls Services and Mumbai Escort Service Near Hotel Gi...
Pooja 9892124323, Call girls Services and Mumbai Escort Service Near Hotel Gi...
 
Jordan_Amanda_DMBS202404_PB1_2024-04.pdf
Jordan_Amanda_DMBS202404_PB1_2024-04.pdfJordan_Amanda_DMBS202404_PB1_2024-04.pdf
Jordan_Amanda_DMBS202404_PB1_2024-04.pdf
 

Leica m-lenses-their-soul-and-secrets-en

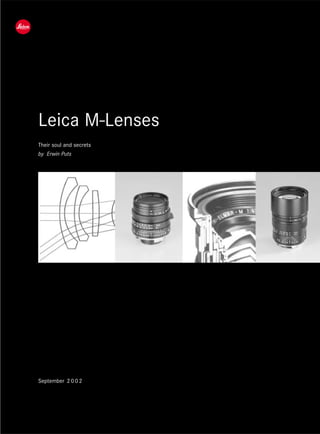
  • 1. September 2 0 0 2 Their soul and secrets by Erwin Puts Leica M-Lenses
  • 2. Leica M Lenses [1] I n t r o d u c t i o n Secrets revealed It is well known that Leica M lenses, in spite of their compact design, deliver imaging performance with the highest quality. But what are the reasons behind the fact that, over the many years that new Leica M lenses have been computed, designed and produced in an ongoing succession, additional improvements still continue to be achieved? These improvements, in the opinions of the advertising experts at Leica, leave all previous advances far behind. In this brochure, Dutch photojournalist Erwin Puts explains the principles on which the secrets of Leica M lenses are based and how the extensive knowhow and the great competence of Leica optical designers succeed again and again in achieving ever higher peaks in maximum performance in their optical systems. The author also pays special attention to the popular concern expressed by numerous Leica users, who wonder whether the „old“ lenses are superior to current Leica M lenses in terms of contrast range, contour sharpness and resolving power. With his knowhow and the experience of numerous test series, he juxtaposes comparable lenses and their performances. In addition to factual explanations, he also presents charts and measurement curves that have never before been published in this form. Guidelines for interpreting these tables and curves make these graphics even more practical. Erwin Puts has been making photographs since 1960 and he explored the technical aspects of photography even while he was studying business administration. The author has been working with Leica since 1989, and in a series of more than 30 articles published around the world since 1992, he discusses the history, technology and the operation of Leica cameras and lenses. The core of his work consists of lens test reports that are conducted with a meticulous thoroughness that is recognized by his competitors. The work brings together optical parameters and practical applications, clarifying the limits of performance capability, with proper attention to their interplay with the different types of film materials. For many readers, this brochure will reveal many a secret, thus clarifying the reasons for the performance characteristics of Leica M lenses. We wish you much enjoyment in reading this brochure! Leica Camera AG Ralph Hagenauer Marketing Communication
  • 3. [2] Leica M Lenses C o n t e n t s
  • 4. Leica M Lenses [3] C o n t e n t s Contents Introduction 1 The Soul of Leica M-Lenses 4 Core Technologies 12 MTF Analysis: those shapely curves 15 Color Rendition 19 21mm Lenses 20 21mm f/2,8 Elmarit-M 24 21mm f/2,8 Elmarit-M ASPH 25 24mm Lenses 26 24mm f/2,8 Elmarit-M ASPH 29 28mm Lenses 30 28mm f/2,8 Elmarit-M (1979) 32 28mm f/2,8 Elmarit-M (1993) 33 35mm Lenses 34 35mm f/1,4 Summilux-M 37 35mm f/1,4 Summilux-M aspherical 38 35mm f/1,4 Summilux-M ASPH 39 35mm f/2,0 Summicron-M 40 35mm f/2,0 Summicron-M ASPH 41 50mm Lenses 42 50mm f/2,8 Elmar 46 50mm f/2,8 Elmar-M 47 50mm f/2,0 Summicron-M 48 50mm f/2,0 Summicron-M (current) 49 50mm f/1,4 Summilux 50 50mm f/1,4 Summilux-M 51 50mm f/1,2 Noctilux 52 50mm f/1,0 Noctilux-M 53 Tri Elmar-m 1:4/28-35-50 mm ASPH 54 28mm f/4,0 56 35mm f/4,0 57 50mm f/4,0 58 75mm Lenses 60 85mm f/1,5 Summarex-M 62 75mm f/1,4 Summilux-M 63 90mm Lenses 64 90mm f/2,8 Tele Elmarit-M 68 90mm f/2,8 Elmarit-M 69 90mm f/2,0 Summicron-M 70 90mm f/2,0 APO Summicron-M ASPH 71 135mm Lenses 72 135mm f/4,0 Elmar-M 74 135mm f/2,8 Elmarit-M 75 135mm f/3,4 Apo Telyt-M 76 Glossary 78
  • 5. [4] Leica M Lenses T h e S o u l o f L e i c a The soul of Leica M lenses Ever since Professor Max Berek de- signed his first lens for the Leica, the 50 mm f/3.5 Anastigmat/Elmax, in 1924, the optical capabilities of Leica lenses have been intensively analyzed and dis- cussed. Some reviewers state that Leica lenses are the standard against which others are to be judged. Others expressed the opinion that, even though Leica lenses perform very well, they are basically as good as the products of other manufacturers. Leica lenses are also said to have a special kind of im- age-recording quality that is often com- pared with three-dimensional rendition or with pictures that convey a three-di- mensional impression. This peculiar “optical fingerprint” is frequently dis- cussed among Leica aficionados and collectors. Sometimes it is even claimed that older Leica lenses have certain mythical qualities that gradually disap- peared in newer lenses that were de- signed later. Then the fact is brought up that optical design is being performed more and more by computers, so that the personal “fingerprint” of the de- signer is no longer as evident as it once was. It is undoubtedly true that Leica lenses had and have particular characteristics and qualities that are the very reason for the fascination and the challenge of working with these lenses. In my opin- ion, the question whether a photograph- er always achieves the best results when he or she uses a Leica lens is quite unproductive. Every lens has a large number of specific qualitites and it is highly unlikely that every one of these qualities will always be of the highest degree. Behind every Leica lens one can sense a passionate determination to control and to eliminate the geometrical aber- rations that are present in every optical system. It is true, of course that con- temporary manufacturers of optical products can no longer operate without using sophisticated computer installa- tions. It is a fact that modern computer programs can produce new optical de- signs in accordance with prescribed specifications nearly without human in- tervention or control. The likelihood that a design generated in that manner is an ideal solution for the intended purpose is about one in a billion. And that is the reason why the creativity of the designer is essential, even decisive for creating an optical sys- tem that has optimal performance. It might seem strange that I wish to draw attention to the importance of the creativity and the art of the lens de- signer as an important factor in optical design. The fundamentals of modern optical design are rooted in mathematical and physical theories. The widespread appli- cation of computer-assisted design me- thods by all manufacturers has fostered the impression that lens design nowa- days is a highly automated process. Leitz was one of the very first optical manufacturers to use computers to ac- celerate the extensive and laborious cal- culations of ray tracing significantly. That was around 1955. Today the soft- ware programs used by the “Optisches Rechenbüro” (optical design depart- ment) are highly refined proprietary al- gorithms. Even so, current high per- formance optical systems could not have been achieved without a good measure of intuitive creativity. In order to understand this soul that is present in every Leica lens, let us take a brief look at computation techniques, de- sign procedures and optical evaluation techniques. After this small “tour de force” we will be able to sense and ap- preciate the “Leica spirit in the glass”. Let us begin with a basic explanation. If we take a simple lens, for instance the good old burning glass, to create an image of the sun on a piece of paper, the sun is rendered as a very bright spot and the paper begins to burn because the lens causes the sun’s energy to concentrate in one point. In early times, a single lens element was the only means of obtaining an image. For very small angles of view, like those of a tel- escope, for instance, one was satisfied with such an image. Louis Jacques Mandé Daguerre, who made his very first photograph in 1839, needed a con- siderably larger angle of view for his im- age plate. The image created by a single lens element was quite sharp in the center, but very blurred along the peri- phery. At that time, optical aberrations were still unknown and better solutions
  • 6. Leica M Lenses [5] T h e S o u l o f L e i c a could only be found by means of experi- mentation. The phenomenon of the dis- persion of white light into various spec- tral colors had been known for a long time, but now it became a problem in making Daguerreotypes. The photo- graphic plate was sensitive to blue light, but the human eye is more sensitive to yellow light. That is why it was possible to use a simple lens element to focus an image on the ground glass with yel- low light, but the image formed by blue light could not be focused at the same time. It was possible to correct this lon- gitudinal chromatic aberration by using two lens elements, each one of a differ- ent type of glass, so that the dispersion of one lens was compensated by the other lens. The curved surfaces of a lens also generate a curved image (just as they did in the old box cameras). But since the photographic plate was flat, a com- promise had to be found. This was still based on knowledge obtained from experiments. The first opticians and lens designers disregarded theories, even though the laws of optics had been known for a long time. The law of refraction, which is the foundation of optical computation, was formulated in the 17th century. Every ray of light com- ing from an object that strikes the glass lens at a certain angle, is bent in accord- ance with a known mathematical for- mula. When this light ray passes through many lenses, the path of the ray can be traced clearly and methodi- cally. When the object is a very distant one, such as a star in the sky, all the rays coming from that point light source will be parallel as they strike the lens, and they will also converge into a point after passing through that lens. At least that is what we hope. As proven by Daguerre’s lens, this is not the case. Let us consider two rays of light, one of which strikes the lens near its edge, the other at its center. We can then use the law of refraction and knowledge of the type of glass to calculate the points where these rays will strike the image plane. If all the rays converge into a point on the image plane, everything will be in order. If they do not, we have a problem. The first person who de- signed a lens using this kind of math- ematical computation instead of using experimental methods was Joseph Petzval. And his portrait lens was clearly superior to lenses that had been cob- bled together experimentally. Although now it was possible to use formulas to trace rays quantitatively, the knowledge was still lacking as to why the rays were bent in this manner and why they did not reach the ideal or the theoretical lo- cation of the image point. Around 1850, Ludwig von Seidel researched the basic laws of image formation with lenses and he was the first person to establish a theory of imaging performance. Aber- ration (from the Latin “ab” = from, and “errare” = to stray) literally means “to stray from the right path”. He discover- ed that there are seven so-called imag- ing errors of the third order that are in- dependent of each other, and which together cause unsharpness and distor- tions in the image. In principle, the next step is still easy. Now that we know, at least theoretical- ly, what causes the unsharpnesses in an image, all we need to do next is to correct these aberrations. And this is precisely where the creativity of the op- tical designer comes in. There are imaging errors that are caus- ed by faulty design and there are manu- facturing errors, both of which affect the end result (the image on the film) significantly. The seven Seidel aberra- tions are divided into three groups: 1 - sharpness errors: spherical aberration, coma, astigmatism; 2 - positioning er- rors: curvature of field and distortion; 3 - chromatic errors: longitudinal chromatic
  • 7. [6] Leica M Lenses T h e S o u l o f L e i c a aberration and lateral chromatic aberra- tion. Every lens has certain characteristics, such as the type of glass, surface curv- ature (the radii of its two surfaces). These characteristics are called “para- meters” or “degrees of freedom”. The theory states that each individual de- gree of freedom can be used for the correction of an aberration. Conversely, every degree of freedom is also involv- ed in all the aberrations. This means that the optical designer can assign ab- erration components to every individual surface. The significance of the above can be explained by means of an example. This example is very important, because it demonstrates how an optical designer goes about his task and why creativity still plays such a large and decisive role in that task. The seven aberrations can be corrected with a minimum of eight independent system parameters (de- grees of freedom). (The focal length also has to be taken into account). A tri- plet (a three-element lens) normally con- sists of two collective outside elements (crown glass) and one inside dispersive element (flint glass). That results in six radii and two separating distances be- tween the three elements. At the begin- ning, the designer selects basic system parameters, such as types of glass, ele- ment thicknesses, distances between elements, and curvatures (radii) of the glass surfaces. That makes six surfaces available to the designer, and he or she can now calculate the amount and kind of aberrations that each surface contrib- utes. As an example, we can establish (in a very simplified manner) that in the case of the triplet, the radius of the sec- ond surface (of the first lens element) contributes spherical aberration and chromatic aberration, and that the radius of the third surface contributes coma and astigmatism. The optical designer must now decide how to correct these aberrations. He might try to change the curvature of the first lens in such a way as to reduce spherical aberration. But the curvature also determines the focal length, which should not be changed. It may also hap- pen that a change in the curvature will reduce spherical aberration, but that the amount of coma will simultaneously in- crease. The designer may also choose to distribute the correction over several system parameters in order to reduce the likelihood of increasing other aberra- tions. When the task of correcting one particular aberration as much as possi- ble is assigned to a single system pa- rameter, there will be a problem in manufacturing if that very parameter is not within established tolerances. One could also find that, if tolerances are too tight, the manufacturing department may be unable of staying within those tolerances. But let us return to the correction of aberrations. The optical designer will keep altering system parameters until the correction of the seven aberrations have reached a level where residual imaging errors are very small. The de- signer will also strive to correct each ab- erration by using several degrees of freedom at the same time. The “bur- den” of correction will then be distrib- uted over several surfaces and the en- tire system will appear more balanced. The designer can select the types of glass and the curvatures within certain limits, but each combination will result in a different kind of overall correction. When the triplet has been configured in such a way that it comes close to meet- ing specifications, we may find, for in- stance, that astigmatism has nearly van- ished from along the edges of the image, but that it is still quite evident in the field. Here we encounter a new problem: The seven Seidel aberrations are not the only optical aberrations. The Seidel aberrations are classified as imaging errors of the third order. Logi- cally, there are other imaging errors of higher orders. The most important ones are the errors of the fifth and seventh order. These groups of errors are en- countered only when the apperture is well corrected. Theoretically, a very small object point is also reproduced as a very small image point. This does not hold true in prac- tice, because these additional aberra- tions manifest themselves and spoil the fun. A point is not reproduced as a point, but as a small circle with various levels of brightness. See illustration: Point spread function. A soon as the di- ameter of these disks becomes smaller than a certain size, the higher order ab- errations become noticeable. This is a simplified statement, because in reality these aberrations are always present, except that they only become notice- able when the residual errors of the third order are small. The example of the triplet, in which astigmatism is still present in the field, shows the effect of the higher order ab- errations. One can use a certain very well controlled residue of the Seidel ab- errations to compensate these errors of the fifth and seventh order. Naturally this is only possible to a limited extent, and a triplet will render an acceptable image quality only when its angle of view and/or aperture are small. This statement is very important. A particular optical system (number and configuration of lens elements) has a limited possibility for the correction of aberrations. In essence this means that, when a new design is to be made, an optical designer can only make the right choices if he or she has considerable experience and knowledge. An impossible task? In earlier times, when there were no computers, optical designers only had slide rules and logarithm tables at their disposal. Ray tracing was straightfor- ward, but laborious. Normally, the paths of several rays are traced from an object point as they travel through the optical
  • 8. Leica M Lenses [7] T h e S o u l o f L e i c a system. These calculations are quite nu- merous and in the case of oblique rays, they are also complex. Before the ad- vent of computers, ray tracing was very laborious. An experienced mathemati- cian required two to three months to calculate a sufficient number of ray traces through an only mildly complex optical system, like a triplet, for in- stance. It is understandable that ap- proximations were used and that very complicated calculations were simply omitted. The resulting optical design showed inadequate knowledge of the exact extent of optical aberrations. Still, one has to recognize that these approxi- mations helped the designers to deter- mine the characteristics of many aberra- tions exactly, and their experience constitutes valuable background for to- day’s optical designers at Leica. All optical designs that are based on analytical methods are solutions that can never be exact, and they only repre- sent approximations of the precise solu- tion. That is why an actual prototype of the lens had to be built, so that the prac- tical performance of the lens could be tested. Two potential difficulties caused many problems for the designer: the lens did not deliver the performance that was expected, or the manufactur- ing department complained that the lens could not be built within the speci- fied tolerances. In either case the de- signer had to start all over again. It was not easy to optimize a design. Success required much creativity and a very well developed instinct for the ef- fects of the aberrations. When one looks at some of the older designs to- day, one is compelled to admire the achievements. An unbiased evaluation with modern instruments shows that these famous designs lack refinements, but that they do have a worthy charac- ter. As mentioned above, only proper ray tracing can produce accurate results. But that causes a new array of prob- lems. First, the designer needs a large number of ray tracings. In the past, trigonometric formulas and logarithm ta- bles were used. At Leitz, the chief de- signer drew a diagram of the proposed optical system and then instructed each member of a large group of individual mathematicians to perform a part of the ray tracings and to hand the results to a colleague. At the end of the day or the week, the chief designer evaluated the results and planned the next phase of the lens computation. For all rays that travel in a flat plane that also contains the optical axis, the equations for trac- ing their paths are based on plane ge- ometry and are relatively easy to use. Oblique rays require three-dimensional or solid geometry. The respective equa- tions, however, are very complex. Therefore in those days oblique rays had to be traced by means of approxi- mation formulas or not at all. Here too, only a partial knowledge of the perform- ance of the respective optical system could be gained. With the introduction of computers, the limitations of optical calculations were lifted, so that the (more exact) nu- merical method could now be em- ployed to full advantage. Numerical methods can be used to achieve better control of important aberrations and they can also be used to optimize an optical system. This wealth of informa- tion can also entail its own problems. Did anyone ever tell you that the task of an optical designer nowadays is easy? The magnitude of the optical design- er’s task can be illustrated quite force- fully. There is a certain relationship be- tween the number of lens parameters (such as curvature, thickness, spacing between elements), i.e. the degrees of freedom, and the level of correction of the optical system. With more degrees of freedom, the optical designer has a correspondingly greater number of possibilities of correcting a system. When a lens designer employs more lens elements, a higher level of correc- tion might be achieved. But that entails significant increases in costs, further- more the system may become highly vulnerable to tight production toler- ances and/or to increases in weight. Therefore the optical designer needs to acquire a thorough understanding of the basic optical potential of a given de- sign. All systems require optimization after an initially promising design. When a design is not suitable for fine-tuning, the designer is only able to achieve an inferior product. A six-element 50 mm f/2 Summicron lens has 10 airglass sur- faces and radii, six thicknesses (one per lens element) and four distances be- tween elements. In addition, each type of glass has a refractive index and a dis- persion number. The exact position of the iris diaphragm must also be deter- mined. With these 36 parameters (or degrees of freedom), the designer has to correct more than 60 (!) different ab- errations. Every parameter can have ap- proximately 10,000 distinct values and more than 6,000 different ray paths have to be computed for every change in a parameter. The 36 degrees of freedom also are not fully independent. Some need to be combined, and some are tightly con- strained by other parameters. Thus the 36 degrees of freedom are in fact re- duced to only 20, making the task even more complicated. Given the specified conditions and considerations, it is not surprising that hundreds, if not thou- sands of designs can be generated that are very close to the desired solution. It has been estimated that a complete evaluation of all possible variants of the six-element Summicron design, using high speed computers that calculate ray traces at a rate of 100,000 surfaces per second, would require 1099 years! That is obviously impossible. In order to select the best design from this virtu- ally infinite number of possibilities, the designer needs to have intimate knowl- edge of the effects of all the aberrations on the quality of the image. He or she also has to be able to identify those components of image quality that pro- vide the necessary characteristics of the lens system. Today the design process can keep a small staff busy for up to two years in order to keep expenses within an economically viable range. There is no better way to illustrate the overriding importance of the art of opti- cal design that is needed at the start of a new lens system. It appears that that the creativity of the optical designer today is even more im- portant than it was in the past. And in- deed it is! As stated in the description of the computation of the triplet, an important task of the lens designer is to assess the various aberrations and then to un- dertake the corresponding alterations in design specifications (radii, thicknesses, spacings and glass types). It is also most important that the starting design type be selected judiciously, so that the desired correction will even be possible.
  • 9. [8] Leica M Lenses T h e S o u l o f L e i c a The merit function When there are so many possibilities for defining and correcting a particular optical system, the designer has to be able to sense exactly when the desired level of correction has been reached. Computers and optical design software can easily produce numerical data. They are able to trace millions of rays within a short time. The optical designer can use this information to gain an insight into the kind and the order of magnitude of the various aberration components. Af- ter that, two questions remain to be an- swered: - Does the lens that has just been com- puted meet the requirements? and - Is there an even better solution? This is where the art of Leica lens de- signers becomes evident. It is not only at Leica that one is familiar with optics and aberrations, and with the funda- mental fact that every photographic lens is a compromise between ideals and re- ality that incorporates a fine balance of the many aberrations that have to be compensated with one another. There is always a small residual aberration component in a lens. In the end, it is the weighting and the method of compen- sation of the aberration balance that de- termines how the resulting imaging per- formance is perceived and accepted by photographers. Leica lens designers have a very strong ambition for developing optical systems with a particularly high optimi- zation of the various errors that will re- duce residual aberrations to their lowest possible level. If one would claim that a particular computation is not good enough, one should have a standard with which one could compare what one has and what one wishes to have. The computing program is of no help in this case. Imagine that you are in a heli- copter flying over a hilly landscape and that you are trying to locate the deepest valley. You will certainly be able to lo- cate a valley that is very deep in relation to its surroundings. But you don’t know what is beyond the next mountain. An optimizing program seeks to find a deep valley and it will certainly find a local low point. But without overall knowledge of the entire landscape, one will keep on searching, never knowing whether one has really found the deepest valley. One can only obtain this structural informa- tion if one knows the peculiarities and the characteristics of an optical system. Leica lens designers call this the soul of a lens. The merit function that one asso- ciates with a lens must be realistic and it should elicit the very best perform- ance from a lens. It should be pointed out, however, that every lens designer interprets and defines “the best per- formance” differently. We are accustomed to imagining light rays as individual lines. That makes sense for the computations. But in real- ity a flow of energy consisting of the sum of all the light rays radiated by all the object points in the direction of the filmplane will traverse the entire lens. The complete flow of light strikes the front lens element and is transmitted through the optical system. This is called luminous flux. Knowledge and un- derstanding of this flow are extremely important during the design stage of a lens. Light energy should traverse the lens smoothly, without much deviation or resistance. That almost sounds like a concept of Zen philosophy. Steps in the design process When a new lens is to be developed, the designer normally selects an exist- ing system and uses it as a start to- wards an improved design. The con- straints of dimensions and weight are particularly important in the case of Leica M lenses. The first attempt is con- strained by ancillary specifications such as physical dimensions. Lenses should be small and handy, and they should not obstruct the view through the view- finder. These characteristics are quite logical from the user’s point of view, but they constitute a constraint for the de- signer. Greater optical performance of- ten entails a greater physical volume, a good reason for applying new solutions, like aspherical lens surfaces in order to achieve the desired result. Excessive weight must be avoided, and this limits the number of elements and the selec- tion of types of glass. The focal length and the maximum aperture already dic- tate the possibilities. The designer has to find a creative starting point that can lead to success or that is at least prom- ising for optimization (finding the deep- est valley). Here too, there is a philo- sophical consideration: an optical design should have a kind of beauty that one can recognize. There are cross-sections of lenses that look very daring, and there are others that possess an optical beauty. The latter are the best lens de- signs. Without a good starting premise, no lens will deliver the performance that is expected. Optimization will go around in circles and sometimes no progress can be made. When there is a starting premise with which one feels comfort- able, one can proceed with the next step, which is the correction of the Seidel aberrations. To correct the Seidel aberrations is ba- sically not very difficult, but we know that they are also used for influencing the higher order aberrations. Therefore
  • 10. Leica M Lenses [9] T h e S o u l o f L e i c a one should make a judicious choice of promising system parameters at the very beginning, otherwise one can only achieve the desired result by using more complex procedures. Every addi- tional lens element can be used for cor- recting an aberration, but this also cre- ates new problems. It will quickly become apparent that these problems can become utterly overwhelming. A typical feature of Leica lenses is their relatively low number of lens elements. The 90 mm f/2 Apo-Summicron-M ASPH. has only five elements and it de- livers outstanding performance. The next step is the optimization of the system: small alterations of the lens curvatures, the choice of glass types, spacings and thicknesses are imple- mented to achieve the desired level of correction of the aberrations. The last step is to balance the residual aberra- tions in relation to one another in such a way as to achieve the imaging perform- ance that has been specified. One of the quiet revolutions at Leica has been the very close cooperation be- tween optical and mechanical engi- neers. There is no benefit in designing a lens that cannot be manufactured or that cannot be fabricated with sufficient accuracy, or that is too expensive to produce. The optical designer has to be very creative in this regard. For a lens that can only reproduce fine structures, the manufacturing tolerances that are required are different from those that are needed for producing a lens that can clearly reproduce the very finest struc- tures. That is logical: when one wishes to record tiny object details on film, one can tolerate fewer errors than one would tolerate in recording coarse ob- ject details. Very tight manufacturing tol- erances in the assembly stage assure the possibility of achieving the com- puted optical performance in every indi- vidual lens. It is not an easy task to stay within these tolerances, and it can only be done if these tolerances have been worked out in close cooperation by the optical and mechanical departments. Leica-specific characteristics of Leica M lenses The progress that has been achieved in the performance of Leica M lenses in recent times can be explained in the fol- lowing manner: The optical design programs have been improved and they take into ac- count the latest findings in aberration theory, optimization and weighting of imaging performance. Knowledge of the characteristics of the various types of glass has also been expanded. The time has passed when new types of glasses were introduced in quick succession. Large suppliers of glass have catalogues that are quite stable. Leica lens design- ers would like to have a few additional exotic glasses created, but it is ques- tionable whether this will ever happen. The cooperation between the me- chanical and optical departments has been intensified. The input of manufac- turing engineers to the computation of a high performance lens is a prerequisite for a good result. Leica has extensive experience with the various aberrations, with their ef- fects on the photographic image and with the more complex inter-relations of these aberrations. Current Leica M lens- es possess certain outstanding charac- teristics that can be classified as family characteristics. The latest Leica M lenses feature a performance at full ap- erture that is a quantum leap better than the performance of their predecessors. This does not pertain so much to the performance in the center of the image, but mostly to its field, i.e. in the image zones. The overall contrast has also been considerably and visibly height- ened. Stray light has been very well suppressed and this can be verified by examining the very fine structures in the image. Older lenses render these tiny details blurred or they don’t record them at all, whereas the latest lenses render them clearly and distinctly, which be- comes especially evident in large projec- tion. The fine gradation of highlights and shadows in light and dark portions across virtually the entire image area proves that the important monochro- matic aberrations, like spherical aberra- tion, coma and astigmatism have been extremely well corrected. Brilliant and delicately shaded colors are rendered accurately, which is an indication of out- standing color correction. Chromatic er- rors that often become noticeable as peripheral unsharpness are well correct- ed. Another characteristic is the optimal aperture in the new lenses, which is al- ready reached by stopping down only one stop from full aperture. The old axiom that states that an aperture of f/5.6 or f/8 has to be used for achieving the best performance is no longer valid so universally. The clarity of the image is also improved because stray light, i.e. light energy that does not contribute to image formation and that is scattered in the optical system, is controlled effec- tively. These general characteristics of the latest Leica M lenses are clearly dis- cernible in the photographic image. The full performance potential of Leica lenses can only be exploited when the photographer has a thorough grasp of his technique. The correction level of these lenses is of a very high level, and it can only be fully appreciated when the demands are high. A good 20 x 25 cm
  • 11. [10] Leica M Lenses T h e S o u l o f L e i c a (8” x 10”) black-and-white print cannot show all the details that a lens is capa- ble of reproducing and systemic un- sharpness in the small details cannot be seen. But when a greater enlargement is made, for instance 30 x 40 cm (12” x 16”), the results are much more dra- matic. Now it is essential that every link in the performance chain is utilized to best advantage. In this case the lens be- comes the most important link in that chain and the photographer can make good use of its characteristics. Unsharpness and sharpness transition There is only one plane of sharpness, and that is the film plane. That means that a bundle of light rays that comes from an object point traverses the film plane like a cone of light. In the ideal case, the tip of the cone will be located exactly at the film plane, and the point that is being reproduced will be ren- dered as small as possible. The cross section of the cone on both sides of this point is larger and the point is repro- duced as a small disk. This is normally called the circle of confusion. If the cone of light is generally narrow, then the difference in the diameters of the point and the circles in front of and be- hind the tip is also small. In that case the transition from sharpness to unsharpness is smooth. New Leica M lenses are corrected in such a way that they are capable of reproducing the fin- est structures and details of the object. That also means that the tips of the light cones have to be very small and that they have to subtend a larger angle (see illustration). The circle of confusion will be relatively larger (also absolutely larger) than it was in the previous exam- ple. A characteristic of current Leica M lenses is a visually faster transition from sharpness to unsharpness. This is help- ful in composing the picture at full aper- ture, because pictorially important por- tions of the picture will stand out distinctly from the background. The cir- cles of confusion will often appear somewhat more disturbing, and this should be taken into account as the pic- ture is created. The latest Leica M lenses are not only superior to their predecessors optically, they also have a different kind of image rendition that must be taken into ac- count when one changes over from an older to a newer version of a lens. But that is precisely the fascination and the beauty of Leica M lenses: one should become familiar with them and one should study their “personalities”. Core technologies Current Leica M lenses embody a thorough understanding of, and a sensi- tivity to issues of geometrical and physi- cal optics, of mechanical engineering, of optical fabrication, of glass selection, of the relationship between residual aber- rations and image quality. Leica lens de- signs result from ingenuity, creativity and from a solid scientific knowledge of all relevant aspects of an optical sys- tem. Most important are, of course, the guiding principles of the great designers of the Wetzlar era, notably Max Berek, and the accumulated experience and insights of his successors. Part of this knowledge has been incorporated into current computer programs. There is one aspect of overriding importance, however, that cannot be codified into rules or algorithms: the culture of study- ing the true image potential of a new design and the know-how for transform- ing such a design into a real master- piece of photographic optics. Leica lenses are not only highly corrected, they are also meticulously crafted works of optical art. They are honed to deliver a fidelity of reproduc- tion that reflects the combination of philosophy and state-of-the-art optical design that is so unique to Leica de- signers. If we were to identify the most impor- tant tools of Leica designers we would produce this list: •aspherical surfaces •apochromatic correction •glass selection •thin film coatings •engineering of lens mounts. None of these areas is an exclusive domain of Leica. In fact, many manufac- turers around the globe use aspherics, apochromatic correction and have ac- cess to the same glass catalogs that Leica designers use. When I discussed these topics with Leica designers, I cited the example
  • 12. Leica M Lenses [11] T h e S o u l o f L e i c a that aspherics technology has been in use since the thirties and is now in widespread use by many optical manu- facturers. They responded with charac- teristic modesty that they themselves might know a few things about asphe- rics that helps them to design lenses with improved imagery. Let us look at these tools, some of which are surpris- ingly old. Aspherical surfaces. Most lenses used in photographic op- tics have spherical surfaces, which means that the curvature of the sur- faces has the form of a sphere. The lim- iting case is a plane or flat surface, i.e. a sphere with an infinite radius. Spherical surfaces are relatively easy to make and ray tracing is also simple (at least con- ceptually). An asphere (a-sphere) is de- fined negatively: any surface with a shape that departs from a sphere is called an asphere. A spherical surface has a radius R with the center of the curvature somewhere on the optical axis. The radius will define all points above and below the optical axis. For an aspherical surface we need more infor- mation. We define the difference be- tween the reference sphere and the ac- tual asphere at several heights above and below the optical axis and enter these figures into an equation. The equation can be very complex, but in its simpler forms it defines a parabola, or ellipsoid or hyperbola. An asphere may have a surface that has several zones of asphericity, one paraboloid, and another ellipsoid. The complexity of the surface should be weighted against the cost of manufacture and the function within the overall optical system. There is a tendency to interpret the use of aspherical lenses in an optical system as a sure sign of superior optical performance. It is not. Some optical designers can create fabulous designs by using a particular computer program, while another person employing the same program will get moderate results. An aspherical surface introduces some carefully controlled aberrations on top of the aberrations that result from spheri- cal surfaces. If you do not have a very thorough understanding of the basic ab- errations in the system, the addition of an aspherical surface may not be suc- cessful. A prototypical case would be a lens with spherical aberration, among several other aberrations. The designer could use the spherical system to correct all aberrations, except the spherical aberra- tion. Then, by adding an asphere, he or she can correct the spherical aberration. The use of aspherical surfaces on mir- rors and telescopes is very old. Asphe- rics were already produced in the 18th century, using trial and error methods. Therefore they are not new tools for ab- erration correction. Aspherics are used when systems using only spherical surfaces become very complex, or when systems be- come too large, and for many more rea- sons. Using an aspherical surface gives the designer an additional degree of free- dom in the correction of optical sys- tems, which enables the designer to build high quality optics quite com- pactly. The advantages from a correc- tional perspective are the elimination of spherical aberration and the correction of the spherical aberration of the pupil (distortion). Aspherics can be used to achieve wider apertures, wider field an- gles, reduction of weight and volume (one aspherical surface replaces two spherical ones). In fact, many optical and mechanical challenges can be met with aspherics. The manufacture of aspherical sur- faces requires extreme precision. The aspherical deformations are calculated to a very small fraction of the wave- length, but this level of precision is not attainable in manufacture. The required precision for high quality optics is 1/4 wavelength of light (that is 1/3000 of the width of a human hair!). In optical shop testing, this level of precision can be approached by using interferograms. It is very difficult to test aspherics in this manner and in order to guarantee a pre- cision of 0.5 micrometer, one needs to use CNC grinding and polishing equip- ment. Leica, however, does use an interfer- ometer to check the sphericity of lenses. They employ a compensation system to adapt the spherical wavefront from the interferometer to the asphe- ricity of the lens surface. These com- pensation systems can consist of a spherical lens. The most recent method for a compensation system is the use of CGH’s (computer generated holo- grams). Leica is now using this tech- nique. The required aspherical form can be pressed in plastic, or it can be a hybrid form consisting of a glass lens with a molded plastic form attached to it or, as used by Kodak on the disc camera, it can be a glass lens with pressure-mold- ed aspherical surfaces. The 50 mm f/1.2 Noctilux, introduced in 1966, was the first lens produced by Leica that had two aspherical surfaces. In those days, aspherical lens surfaces were polished to an approximate shape and then hand-corrected afterwards. As the level of deformation is very small on most aspherical surfaces, there is a risk that the polishing at the end may re- store the spherical form! Only a very few workers at Leitz were able to manually correct the aspherical form, and even they produced surfaces be- yond the required shape. This costly and laborious manufacturing process was soon abandoned. The potential of the aspherical surface for vast improve- ments of the image quality, however, was too attractive not to pursue. Huy- gens described its theoretical potential as early as 1678. Three hundred years later the manufacture of precision as- pherics became reality. At first Leica used a new technique, jointly developed by Leica, Schott and Hoya. Leica con- tributed the technology of the molding tool. This methodology was first em- ployed in the 35 mm f/1.4 Summilux-M aspherical (the 21 mm, 24 mm and 35 mm f/2 lenses are all of the Summilux type). It generates high precision sur- faces, but the technique is restricted to lenses with a small radius (about 20mm). Furthermore only a few glass types can be used that can withstand the heating, pressing and cooling with- out adverse effects. This restricts the choice of glasses and many designers complain that the more than 100 glass types now in glass manufacturers’ cata- logs of the are not sufficient. The next step is the use of computer- controlled grinding and polishing ma- chines that allow the designer freedom to choose glass types and radius as needed. In the line of Leica M lenses,
  • 13. [12] Leica M Lenses C o r e T e c h n o l o g i e s the 90 mm f/2 Apo-Summicron-M ASPH is the first lens to have an aspherical surface produced by this promising technique. The Leica designer always needs more possibilities for the correction of aberra- tions. As soon as a certain level of image quality has been reached and the under- standing of a lens system has improved, a higher level of aberrations has to be dealt with. Therefore the designer needs more parameters to change and influ- ence. The demand for ever more exotic glass types, more lens elements never ends. Aspherics are a very effective and elegant technique for the design and con- struction of complex optical systems. The theory and technology of asphe- rics is in its infancy, however, and it is certainly not as well understood as spherical technology and correction theory. Leica designers employ as- pherics whenever there are clear ad- vantages for improving image quality, reduce volume or number of lens ele- ments or when designs can be created that would not be possible without the use of aspherics. The mere use of aspherics does not automatically signify a high performance lens. Sometimes the designer can cre- ate a lens with spherical surfaces that theoretically has the same performance as the aspherical one. It might, how- ever, be impossible to build that lens with the required precision and toler- ances. So when Leica designers employ aspherical surfaces, it is a well consid- ered component of the complete lens design. Apochromatic correction. Ernst Abbe computed the first apochromatic lenses around 1895. In those days, the field of microscopy was expanding rapidly and the very high resolution required for microscopic lenses demanded that all aberrations be very small, that is, close to the diffrac- tion limit. There is always an apochro- matic error in the photographic image and this error extends over the whole image field. Generally it has a lower magnitude than other aberrations and so will not be identified separately. The visible result of the apochromatic error is a degradation of contrast and a fuzziness of small image details. One should look for the apochromatic error in the center of the image (on axis). On axis the most disturbing aberrations have been corrected quite effectively and so one is left with the more difficult aberrations, like spherical aberration, chromatic error of the spherical aberra- tion and apochromatic error. What is this apochromatic error? If polychromatic light enters a glass, it will be refracted into a number of rays, each of a different wavelength. Each ray will follow a slightly different path. The blue color will be focused closer to the lens than the red color. The difference in length between the two locations is called the longitudinal chromatic aberra- tion. Because the blue light converges to a focus closer to the lens, the result- ing patch on the image plane will also be larger. This is called lateral chromatic aberration. One can see this defect as a series of color fringes around a spot. The magnitude of the chromatic aber- ration depends on the Abbe-number, the refractive index, the focal length and the field angle. Note that the focal length is important, which explains why lenses with long focal lengths need to be corrected for chromatic aberrations in particular. The change in focal length that results from the fact that the refrac- tive index of a glass is different for dif- ferent colors is called dispersive power. As an indication of the very small magnitudes that are involved, we may note that the distance between the red and the blue focal points corresponds to 1/60 to 1/30 of the focal length. This chromatic variation of index is called dis- persion. If one would plot the curves for refractive index versus wavelength for two different glasses, for example Schott BK7 and SF2, the curves would be non-linear and different. Every glass has its own and unique graph. Crown glasses have relative low dispersions and flint glasses relatively high disper- sions. Overall dispersion defines the general dispersion characteristic. But if we are interested in the blue part of the spectrum we need to study the disper- sion of the blue part. Two glasses have different amounts of dispersion and the shape of the dispersion curve is differ- ent. So, in addition to the overall disper- sion, we also need figures for partial dis- persion, ‘partial’ referring to a part of the spectrum. If a glass produces a long blue spectrum it is called a long glass. A glass with a short blue spectrum is, not surprisingly, called a short glass. Most crown glasses are short and most flint glasses are long. Some glasses do not conform to this general rule. We have a few long crowns and short flints. These ‘out of line’ glasses are called glass with anomalous dispersion. Most glasses on the glass chart lie along a straight or slightly curved line, the so-called normal glass line. The out- of-line glasses, the ones with anoma- lous dispersion, are also referred to as glasses outside the normal line.
  • 14. Leica M Lenses [13] C o r e T e c h n o l o g i e s It is quite easy, at least in principle, to match two glasses with opposite dis- persions in order to make sure that at least two colors (red and blue) will come to a focus at the same point on the opti- cal axis. Then we have an achromat, which is quite often a flint/crown pair. Other colors of the spectrum (apart from the blue and red) such as green and purple will still be out of focus. These residual errors are called the sec- ondary spectrum or secondary color. The apochromatic error is the result of different partial dispersions or different proportions of partial aberrations of the glass types. Theoretically it should be possible to get an apochromatic correction by using three glasses with different dispersions. But the non-linearity of the dispersion curve and the partial match of the partial dispersions will make life hard for the designer. For the correction of the apochromatic error, the use of special glasses outside the normal line may be advantageous. But these glasses have properties that make them hard to em- ploy. They are soft and very difficult to polish, they may be not available in the required diameters, and they may also be very expensive. As a result, design- ers can attempt to achieve an apochro- matic correction with normal glasses (the three-glass-solution). In order to use such glasses, however, one must take into account monochromatic er- rors. Sometimes the designer also en- counters difficulties in the correction balance and he may run out of useful parameters so that he would need a system that is too complex. I mentioned earlier that the designer, when he corrects a system for two colors, is left with residual chromatic ab- errations. There is no rule that states how large this residue should be. Nor is there any rule that specifies how small the apochromatic error must be in order for the lens to be called a true apochromat. Pragmatically, all one can say is that there is a long bandwidth between an achromat, a semi-apochromat and a true apochromat. Therefore, any lens with very small chromatic aberrations can be called an apochromat, even when the correction has been accomplished by using glasses from the normal glass line. Leica uses glasses for its apochro- matic corrections that lie outside the normal glass line. These glasses are also known incorrectly as APO-glasses, which is a misnomer. In reality they are glasses with anomalous dispersion. The dispersion curves are non-linear, making it difficult to compute corrections with these glasses. The curves will never match completely, so that some re- sidual aberrations will be left in the sys- tem. The residuals left after achromatic correction are called the secondary spectrum, and it is no surprise that the residuals left after apochromatic correc- tion are called the tertiary spectrum. Leica designers know the non-linearity of these glasses very well. The art is to know what glasses to employ where in the design. As noted before, glasses with anomalous dispersion can be found in the catalogs of Schott, Hoya, Corning and others, which also list all the glass characteristics. Using such glasses may not be unique to Leica. But the knowl- edge and expertise needed to extract the most out of these types of glass, in combination with the creativity and ex- perience that the designer draws upon to balance the conflicting characteristics of the lens system, are part of the core technology of Leica. The result is a lens with a very small apochromatic error that has been balanced with all the other aberrations and that has been cor- rected over the entire image area, for excellent results at full aperture or stopped down. Thin-film coating. Uncoated glass reflects a small part (4%) of the incident light per surface. The resulting problem is not so much a reduction of the transmitted light, but the increase of stray light. This stray light is scattered over the image plane, causing a dull and flat image with lower contrast. There are two possible solutions. On is the application of thin film anti-reflec- tion lens coatings, invented in 1935 by Dr. Smakula of Zeiss. The other is the careful prevention of internal light reflec- tions by interior mechanical surfaces of the lens mounts. The coating technique is basically a simple process. A very thin interference layer of a material of lower refractive in- dex is applied to a glass surface with a higher refractive index. The actual math- ematical computations are very com- plex. The thickness and the refractive in- dex of a layer must be computed so that a destructive interference will re- sult. A single layer coating can be opti- mized for only one wavelength, usually green, which is why the surface looks purple by reflected light. This type of coating has an optical thickness of 1/4 of the wavelength that is targeted. It is also called quarter-wave coating. The coating material is often Magnesium Fluoride with a refractive index of 1.38. For glass with a low refractive index a single coating often suffices. It is not ef- fective on glasses with higher refractive indices. With three or more layers, a more effective broadband low reflection coating can be achieved. A three-layer coating produces an anti-reflection curve with three minima that corre- spond to the selected wavelengths. The number of layers can become quite large (6 to 11 stacks of layers), and they may be multi-purpose, used for reduc- tion of reflections in order to improve transmission and for balancing spectral transmission. It can be shown that a four-layer coat- ing with two different refractive indices is very effective. The most frequently used technique of coating a lens is ther- mal evaporation coating. The coating material is heated in a vacuum chamber that contains the lenses to be coated. The coating vapor is then deposited on the glass surfaces. The correct thick- ness of the layer is monitored by a pho- tometer, but irregularities can occur. Not all coating materials can be depos- ited in this manner and sometimes much higher temperatures are required. That is when the technique of electron beam coating is employed. Also in a high vacuum, the glass is bombarded by a beam of high-energy electrons, which forms a layer on the heated glass. This heating and cooling must be per- formed very carefully as the glass is very sensitive to this treatment. The layer must be deposited on a smooth and clean surface, as any irregularity will cause unwanted local reflections. The cleaning process is very important. Leica requires that some lenses must be coated within a few hours after
  • 15. [14] Leica M Lenses T h e S o u l o f L e i c a MTF diagrams: those seductive curves! cleaning to ensure that the air does not affect the surface. After the application of the aforementioned coating tech- niques, the lens surfaces are covered with a layer of a microscopically small pillar-like structure. The structure of the surface of this layer is not amorphous, it consists of rows of very small pointed pillars, somewhat like rows of nails with the tips pointed upwards. The re- sulting coated surface still has a micro- scopically small roughness. The complicated and time-consum- ing processes of cleaning, heating, va- porization, cooling for many layers inevi- tably generates errors. Leica now uses a new technique, de- veloped in cooperation with Leybold: the plasma ion-assisted deposition. (IAD: ion-assisted deposition). With this technique the heating and cooling stages are no longer necessary and the growth of the coating layer is not pillar- like but amorphous, producing a smoother surface. The technique basi- cally consists of bombarding the target, which consists of the coating material, with argon ions, setting free atoms that are deposited on the substrate to form the coating. The employment of this technique is another example of Leica core tech- nology. Every aspect of the optical system, be it glass selection, cleaning of glass sur- faces, coating, mounting, computation, or quality control, is scrutinized to find the best solution to achieve the goal of high performance optics. The best and most convincing proof of performance is, of course, a picture. It can be in the form of a black-and-white print, a color print, or a projected image, which is still the most impressive pres- entation of Leica photography. In prac- tice however, there are too many vari- ables that have to be taken into account when we compare pictures. We don’t just compare lenses, we compare the entire chain of performance. Therefore we need a standard for the imaging per- formance of an optical system. In the past, it was thought that a simple solu- tion was to use resolving power in lines per millimeter for these evaluations. But various problems surfaced, some of a visual kind, others of a theoretical na- ture, which made the use of such a standard unreliable. We are not just in- terested in reproducing separated lines but, more important, whether these lines can actually be seen as clearly separated lines. That is why an indica- tion of contrast is needed. The differ- ence between a bright and a dark band can be discerned far better when the contrast between the two bands is sig- nificant. When we look at a light gray / dark gray pair of bands instead of a white and black pair of bands, the differ- ence is certainly less pronounced. Residual aberrations that remain in the lens basically only cause unsharpness in a picture. By unsharpness we mean that light rays do not converge into a miniscule spot, but that they come to- gether into a slightly larger spot called circle of confusion, which only means that contrast is reduced. Let us imagine a grid that consists of black and white stripes of equal width. When such a grid is reproduced by a lens, diffraction, aberrations and stray light cause part of the light from the white stripes to reach the black stripes. This redistribution of light results in the reduction of contrast. The narrower the stripes, the more light from the white stripes will spill into the black stripes, further reducing the contrast. A lens with inadequate correction of aberra- tions has larger circles of confusion, which means that contrast will be even lower, whereas a lens with excellent correction of aberrations will also have excellent contrast rendition. Unfortu- nately the reverse does not hold true, in that a good contrast rendition does not necessarily mean a well-corrected lens. Design begins with a concerted effort to correct the many aberrations and when that has been achieved, high contrast is one of the results. The reverse is not al- ways true. The fineness of the grid can be ad- justed by changing the width of the stripes. Let us consider stripes with a width of 1/10 of a millimeter. Therefore 10 such stripes make up 1 millimeter. This is defined as spatial frequency in lines per millimeter. In the aforemen- tioned example, that spatial frequency amounts to 10 lines/mm. Because one cannot see black without white, it was
  • 16. Leica M Lenses [15] M T F G r a p h s agreed to use line pairs as a structural period. Therefore the figures stated in MTF diagrams, such as 5 or 10 l/mm, must be interpreted as periods or line pairs per mm. In other words, 5 lp/mm means 10 stripes that are alternately light and dark. Leica furnishes MTF diagrams for 5, 10, 20 and 40 line pairs or periods (10, 20, 40, 80 light/dark stripes). The more stripes per millimeter, the finer the de- tails that can be reproduced. One often wonders why the finest structures are limited to these 40 lp/ mm. There have been articles in the press citing lenses that can record 200 or more lines per millimeter. But now it has become clear that the number of lines per mm is interesting only when stated in conjunction with the respec- tive contrast. At 200 lines per mm the contrast is so low that it is virtually im- possible to distinguish anything at all. The 40 periods used by Leica as a sen- sible lower limit result in a dot size of 1/80 mm or 0.0125 mm. It is difficult to imagine how small that dot is on a 35 mm negative! Take a negative and a ruler calibrated in millimeters. Then sub- divide the width of one millimeter into 80 tiny individual units. That gives you an idea of the performance capability of today’s lenses. Once we have estab- lished an understanding of how narrow such a unit is, then it becomes obvious that the smallest vibration can spoil the entire picture. And a small amount of unsharpness from inaccurate focusing has a disturbingly large effect when such small image details are important. How to read MTF diagrams? The vertical axis is calibrated in per- cent of contrast, always based on an original contrast of 100%. The subject that is being reproduced is that grid of light/dark stripes in ever smaller widths or periods. Every light/dark pair of lines in the original subject, even if it is very fine, has an ideal contrast of 100%. This means that all the light energy comes from the light stripe, and none at all from the dark stripe. The lens distrib- utes this energy over both stripes, thus reducing the absolute contrast. The finer the structure, the more that con- trast is lowered. With 5 lp/mm one can still achieve a contrast of nearly 100%. At 40 lp/mm however, one would be pleased if contrast were as high as 50%. Thus the reduction of contrast is a function of spatial frequency. Since the contrast in an image is an interpretation, or a transfer (modulation, change) of the original contrast, the relation between the original contrast and the reproduced contrast is called the Modulation Trans- fer Function, or MTF. The effect of aberrations is less pro- nounced in the center of the image than in the outer parts of that image (i.e. in the “field”). A standard 35 mm negative has a diagonal of 43.2 mm. Therefore the maximum distance from the center of an image to its outermost corners is 21.6 mm. The performance of a lens varies between the center of the image and its field, because there are aberra- tions that disturb the field more than the center. That is why the horizontal axis of an MTF diagram is calibrated in dis- tances from the center of the image, i.e. ‘0’ represents the center of the image and ‘21’ (mm) its corner. Therefore ‘12’ indicates the height of a standard hori- zontal 35 mm frame, and ‘18’ its maxi- mum width. When one wishes to exam- ine an MTF diagram more closely, one should concentrate on the region be- tween 6 and 15 mm from the center of the image, because that region contains the pictorially important part of an im- age. The central portion of the image, from 0 to 6 mm from its center, is satis- factory in most cases. An MTF diagram thus provides a great deal of information because it shows the contrast reduction for different kinds of image details for the entire 35 mm format. The 5 lp/mm curve describes the reproduction of very coarse image details, the 10 lp/mm curve the repro- duction of clearly visible details, the 20 lp/mm the reproduction of very fine structures and the 40 lp/mm curve the reproduction of the finest details of the subject. Low contrast values for 5 and 10 lp/mm indicate a flat image, and high values for 20 and 40 lp/mm indicate that fine details of the subject are repro- duced cleanly and clearly separated. It should be kept in mind that each dia- gram is valid for a specific aperture. When diagrams are available for various apertures, one can observe the behavior of performance as the lens is stopped down. All the MTF diagrams shown here display the curves for full aperture and for optimal aperture. The direction of the stripes is also taken into account. They can be orientated horizontally or vertically, and this has an effect on imaging performance. When the two curves (tangential = vertical and sagittal = horizontal) are widely separated, this often means a blurry reproduction of figure 1
  • 17. [16] Leica M Lenses M T F G r a p h s subject details. In such cases, a repro- duction with good contrast is achieved only when the details are orientated in the “good” direction. MTF data therefore provide an accu- rate and comprehensive description of the imaging performance of a lens. Nev- ertheless, it has to be used with cau- tion. In practice, small differences be- tween the curves are of negligible consequence. One should examine the entire image. One should also keep in mind that, although these diagrams pro- vide a very good description of all the aberrations, they do not cover all the considerations. Stray light, vignetting, color correction, distortion, performance in the close-up range, for instance, can- not be evaluated by means of MTF dia- grams. Because the method of creating these diagrams is not standardized, one should only compare the data provided by different manufacturers with great caution or better yet, not at all if it is not known whether they were created by the same method. An important factor is the quality of the light that is used for obtaining the measurements. White light contains a great number of wave- lengths. Measured values are different when only three wavelengths are used, compared to readings obtained with seven wavelengths. The weighting of the wavelengths is another influential factor. One often wonders whether MTF data can really describe optical performance in a way that can be used in practice. We know that the objects being photo- graphed are three-dimensional, that they have depth. Even a wall has a sur- face texture that has depth. We assume that the test grids (with the light and dark stripes) that are used for obtaining MTF measurements are only two-di- mensional (i.e. they have height and width, but no depth), so that they are not representative of real photographic subjects. One should disregard these thoughts. The transfer of the contrast of the struc- tural periods (the grid) is a measure of the optical efficiency and the optical per- formance of a lens in general. What is actually measured is how much light en- ergy from a subject point reaches the corresponding image point and how the energy distribution is shaped in the im- age point (actually the image disc). This actually shows the effects of the aberra- tions. These image points can be lo- cated in the plane of sharpness but also in front of, or behind that plane, i.e. in the range of unsharpness. Although the reproduction of the subject point will be different, but the principle remains the same. The aberrations determine the lo- cation and the shape of the image point, as well as its energy distribution. Be- cause points in the range of unsharpness create the impression of three-dimensionality, MTF data is also valid, in principle, for depth perception. How are MTF measurements actually obtained? There are two methods: one method computes MTF data, the other method measures MTF values. Basically, there are no differences, and Leica uses ei- ther method, whichever is most appro- priate: the optical design department computes the MTF values, and the manufacturing department uses an MTF-measuring instrument to obtain MTF data (see the diagrams). Both methods are based on the same theo- retical principles, so that their results should not be different from one an- other. A variance between the two val- ues only occurs when the lens assem- bly department can not conform to calculated tolerance values. Let us return to the image point as a representation of the ideal subject point. This point source is reproduced as a tiny disc in which light rays are distributed within a circle. Most of the rays will con- verge in the center of this circle, while some of them are scattered towards the perimeter of that circle. Light distri- bution can be described in the form of a point spread function or spot diagrams by means of a 3D-diagram (with x-, y- and z-axes). The x- and y-axes (depth and width) show the shape of the disc and the z-axis (height) shows the inten- sity of the light distribution (see the il- lustration of a point spread function). Figure 1 (point spread function) shows an ideal image point. The width of its image point spread is small and the peak is very high. This means that nearly all the light energy is concen- trated in a very small circle (like a point). The actual height of this point reproduc- tion is 20 µm (twenty thousandths of a millimeter) and the “point” is 5 µm wide at its base (five thousandths of a millimeter)! That means 200 points within one millimeter, or 100 line pairs per mm (lp/mm)! Figure 2 shows this point again, but this time as a cross-sec- tion. It contains the same information, shown in a different manner. Figure 3 shows a point spread function with a different shape. Its base is now approxi- mately 8 µm wide, and its height is smaller. This point can be described as having 62.5 line pairs. This is logical: the light energy coming from a given sub- ject point remains the same, but this en- figure 2
  • 18. Leica M Lenses [17] M T F G r a p h s ergy can be distributed over small circle with a high peak, or a large circle with a lower peak. These computer-generated values and images are based on classic ray-tracing principles. The computed po- sition and distribution of the light rays from the subject point can be used for generating the point spread function with mathematical methods. For actual MTF measurements, an in- strument is used that is capable of analyzing the distribution of light across a narrow slit. This narrow slit is illumi- nated from behind and a lens images it on a detector. A synchronous motor drives a scanner with another slit (which is much narrower than the rear-illumi- nated slit) across the width of the illumi- nated slit. Measurements at the edge of the slit show the transition from dark to light. This measurement is shown in Figure 4. The distribution of light energy at the edge of the slit has the same shape as the cross-section of the point spread function. There is no mathemati- cal difference between a point and a line, which is defined as an infinite number of points in a row. Using mathematical formulas once again, one can use the measured light distribution of the slit (which is a line image) to arrive at a point image. Con- versely, it is also possible to derive a line image from the point spread func- tion. One can occasionally read or hear claims that an MTF diagram derived from measured values is superior to a computed MTF diagram, but this should not be taken very seriously. One should also consider the fact that at Leica, the measured version and the computed version are nearly identical, which is also a sign that the manufacturing de- partment is capable of producing what the optical designers have devised. In conclusion MTF diagrams are not intended to re- place your own practical evaluation of a lens. Nevertheless it has been proven that an MTF evaluation comes very close to a visual and subjective evalua- tion of a lens. While MTF diagrams can only be evaluated by someone with a good fundamental knowledge of optics, they nevertheless also represent a good general indication of lens performance. If personal photographs do not corre- spond to expectations that are based on MTF diagrams, one should re-evaluate one’s own photographic technique. The entire chain of reproduction especially, should be analyzed. MTF values repre- sent pure lens performance, which does not take into account exposure circum- stances and material characteristics. The MTF is an excellent means for com- paring and evaluating different lenses. In practice, it is very difficult to evaluate comparison photographs that have real expressive power. Small variations in exposure circumstances have a signifi- cant effect on the resulting photo- graphs. After all, in practice there are a great many variables in exposure techniques and also in personal conditions and evaluations. An individual who only cre- ates photographs using small apertures, certainly has different evaluation criteria than one who frequently uses full aper- tures. When comparing MTF diagrams, one should also observe another funda- mental rule: it is not customary to com- pare lenses that have different focal lengths. First of all, the correction of ab- errations is different. A wide-angle lens has a greater angle of view, and oblique light rays have a different weighting than those in a lens with a longer focal length, in which chromatic aberrations have a greater influence. One should also be aware of the fact that, while all lenses are described in terms of con- trast values for 5, 10, 20 and 40 lp/mm, this data must be correlated with the re- production ratio. A 28 mm lens repro- duces an object much smaller than a 135 mm lens, and since the lp/mm val- ues are valid for the reproduction on the film, they should be interpreted accord- ingly. Personal experience and expectations, not purely MTF-based considerations, are the basis for the acceptance of a newly purchased lens. Even so, at a cer- tain moment in the decision process, MTF diagrams provide a very neutral and objective evaluation of the perform- ance capability of a lens. MTF is neces- sary when an objective evaluation of a lens is wanted, but it is not the only cri- terion for purchasing a lens: methods are only as good as the way a photogra- pher uses them, and information is only useful when one knows how to inter- pret the data correctly. figure 3
  • 19. [18] Leica M Lenses C o l o r R e n d i t i o n Color rendition The color rendition of a lens is obvi- ously a very important characteristic which may take precedence over other characteristics. The photographer is of- ten very sensitive to changes in color transmission when changing lenses, es- pecially when photographing the same scene. Lenses with a yellowish or reddish color cast are called warm and those with a bluish cast are called cool. Some glasses (for example extra dense flints) contain a large amount of lead oxide and appear to the eye as pale yellow. If such a glass is used in a lens, the resulting color cast will be warm. The cast can be offset by suitable coat- ing, but there are limits here. The notion of color rendition and color fidelity is a very tricky one. The eye is hardly an accurate detector of color dif- ferences as the eye is easily fooled, partly by its great adaptation powers. But the existing light changes also. At 12.00 clock on a summer day the sun in a blue sky may have 10.000 degrees Kelvin and a few hours later 6.000 de- grees. The eye may not detect this dif- ference, but the film does. Films also differ in their spectral responses. The imaging chain of existing light, scene to be photographed, color rendi- tion of the lens, color response of the film and the eye, introduces so many variables that a meaningful discussion and assessment is difficult. The International Standards Organiza- tion has introduced standard #6728, which is called: “Determination of ISO color contribution index” (ISO/CCI) in 1983. To start somewhere, the ISO analyzed 57 typical camera lenses of high quality in 1979 and used the aver- age relative spectral transmittance val- ues as a base figure: the ISO standard camera lens. As the typical photographic daylight the ISO used 5.500 Kelvin, which is also used by the emulsion industry. This is the situation when the sun is 40 de- grees above the horizon in a cloudless atmosphere. Flashlight is also desig- nated 5.500 Kelvin, but the spectral dis- tribution may be different. For the spectral sensitivity of films, data from the manufactures for the sen- sitivity of the blue, green and red sensi- tive layers were weighted so that a nor- malized sensitivity per layer could be established. The spectral characteristics of a lens can be evaluated in terms of its total ef- fect on the several layers of an average color film. The effect on the blue sensi- tive layers is called the blue photo- graphic response of the lens. These re- sponses can be calculated. The CCI value is computed by multi- plying the relative transmittance values of a lens by the weighted spectral sensi- tivity values for the blue, green and red sensitive layers. The total response is obtained by summation. and will give a number for blue, one for green, one for red. To simplify, make the smallest ele- ment of the three number designations equal to zero. If a lens has a Color Con- tribution Index of 0/5/4, this means that the average color film in standard illumi- nation sees the lens as providing more green (5) and more red layer (4) re- sponse relative to the blue (0) than that obtained with no lens in the system. This lens would give a yellow cast. The ISO however has established that with the sensitivity data of emulsion manufacturers, the standard lens should conform to the 0/5/4 index. The tolerances are established as follows. Blue is 0 with +3 and -4. Green is 5 with +0 and -2 Red is 4 with +1 and -2. These tolerances must be derived from a trilinear graph and not by addi- tion. Leica lenses are aimed at the CCI of 0/5/4 and can be considered as neu- tral in transmission when they are within the tolerance band. The following is a list of representative Leica M lenses and their CCI values. Values lower than -/5/4 produce a bluish cast, values above -/5/4 a reddish cast Elmarit-M 2,8/21 ASPH 0 6 5 Emarit M 2,8/21 0 5 2 Emarit M 24 mm f/2.8 ASPH 0 5 5 Elmarit-M 2,8/28 current 0 5 4 Elmarit-M 2,8/28 previous 0 4 2 Summilux-M 1.4/35 aspherical 0 6 6 Summilux-M 1.4/35 ASPH 0 5 5 Summilux-M 1.4/35 0 4 1 Summicron-M 2/35 ASPH 0 4 3 Noctilux -M 1/50 0 8 6 Sumilux-M 1,4/50 0 5 2 Summicron-M 2/50 0 5 4 Elmar-M 2.8/50 0 6 5 Summilux-M 1.4/75 0 6 3 APO-Summicron-M 2/90 ASPH 0 6 4 Apo-Telyt-M 3.4/135 0 5 4 Elmarit-M 2.8/135 0 6 4 Tri-Elmar 4/28 0 5 3 Tri-Elmar 4/35 0 5 3 Tri-Elmar 4/50 0 5 3 From this list you can get a very good impression how of close to neutral most Leica lenses are. The Summicron-M 2/50 or the Apo- Telyt 3.4/135 might be considered as reference lenses. Take pictures with onr of these lenses and your favorite film. Then take pictures with other lenses un- der identical circumstances and on the same film, preferably slide film, so that the lab can not introduce additional color corrections. Then compare the pictures carefully and try to find differences in color rendition. This will give you a good idea of what shifts to expect and what filters to use, if any, to correct a small cast. The difference of 1 point may not be noticeable.
  • 20. Leica M Lenses [19] C o l o r R e n d i t i o n
  • 21. [20] Leica M Lenses 2 1 m m l e n s e s 21 mm lenses The optical system with a 90º angle of view is a comparatively late addition to the line of Leica lenses. The design of such an extreme wide-angle lens for the 35 mm format had to contend with three serious problems. Distortion is the obvious one. Optical vignetting is the real villain here. For a lens with a 90º an- gle of view, peripheral illumination is only about 25% of axial illumination, as- suming distortion-free imagery. To beat this so-called Cosine-Fourth vignetting, the designer should accept distortion, but this is not acceptable. An optical ‘trick’ can be used, however, to in- crease the level of light energy towards the periphery without increasing distor- tion. Basically one uses the properties and relations between the entrance and exit pupils to accomplish this feat. A wide aperture is the third villain. Earlier designs had to be stopped down to f/11 or even smaller apertures to get accept- able or even usable image quality. These earlier designs were used on larger format cameras where the need for enlargements is less pronounced than it is in the ‘small negative-big en- largement’ philosophy of 35 mm pho- tography. Zeiss gets the credit for being the first in 1954 to cross this barrier with its seminal rangefinder-coupled 21 mm f/4 Biogon lens for the Contax cam- era, that perennial and friendly chal- lenger of the rangefinder Leica. Leitz in- troduced its version of a 21mm lens in 1958 in the form of the 21 mm f/4 Leitz Super-Angulon lens. At full aperture, this lens features good performance in the center and, if the clear rendition of fine details is not the prime objective, that aperture is quite usable. The 21mm f/3.4 Leitz Su- per-Angulon followed in 1963 and it re- mained in production until 1980. Quite a long working life. But in those days opti- cal progress could almost be measured in generations. Generally speaking the 21 mm f/3.4 Super Angulon lens is a very good per- former. It fine qualities are restricted only by the presence of astigmatism that reduces overall contrast and the crisp rendition of fine details at full and medium apertures. 21 mm f/2.8 Elmarit-M The first fully Leitz-designed lens for the demanding 90° angle was intro- duced in 1980. This lens had to have a long back focal length (distance from the rear lens surface to the film plane) to make room for the M5 exposure me- tering mechanism. This retrofocus de- sign requires a totally different type of correction. Coma, distortion and trans- verse chromatic aberrations are difficult to correct. In this case, a bit of distortion had to be allowed in order to achieve a higher correction of the other aberra- tions. At f/2.8 the light fall-off is slightly less than that of its predecessor. Flatness of field is less well corrected than distor- tion. At full aperture, the on-axis per- formance (a circle with a diameter of 6mm) produces an image that is slightly cleaner than that of the Super-Angulon lens. This generally somewhat higher contrast results in a clearer delineation of fine details. Details are quite soft in the field and in the corners the image. The general performance of the Elmarit-M lens is better than that of the Super-Angulon at f/3.4. This is partly due to the reduction of astigmatism, which results in improved rendition of fine details. At f/4.0 extremely fine details are vis- ible with good contrast in the center and within a 12 mm diameter circle around the center. From there to the corners the image details become progressively softer, but fine details remain within a detectable range. Optimum performance is reached at f/ 5.6 with extremely fine details now vis- ible over the entire image area into the outermost corners. Subject outlines, es- pecially in the outer zones, have soft edges, giving an overall impression of a smooth, somewhat subdued image. Stopping down to f/11 and smaller aper- tures diminishes image quality. Decentering was not measurable. Generally speaking, this lens is a com- mendable performer and an improve- ment over the Super-Angulon lens. In the field at the wider apertures, image quality is a bit modest. Close-up performance A 21mm lens by nature shows a great deal of empty foreground, which could be filled with some objects close to the lens. The essence of the 21mm focal length is the surrounding of an interest- ing object in the foreground by a large
  • 22. Leica M Lenses [21] 2 1 m m l e n s e s environmental background. It is of prime importance to know how the lens be- haves at distances around 1 meter. At f/2.8 the corners are noticeably darker, but vignetting is gone at f/4. At full aperture the overall contrast is medium. The Elmarit, however, repro- duces very fine details just a shade more crisply than its predecessors. From f/5.6 the performance becomes uniform across the entire frame and we have an excellent image with very fine crisp details into the corners. Flare suppression: The Elmarit-M handles light sources quite well at full aperture. In strong backlight the silhouettes of tree branches are dark (no leaking of light around the edges) and sharply outlined. 21 mm f/2.8 Elmarit-M ASPH At full aperture, contrast is high and extremely fine details are rendered very crisply from the center to an image height of 11 mm. That is the coverage of an image circle of 22mm. From there to the edges, the contrast decreases a little but it is still vastly superior to that of all its predecessors. Astigmatism and curvature of field are almost fully cor- rected. Subject outlines and fine details have very high edge contrast and are rendered clearly, almost lucidly. In the outer zones and in the corners this su- perior performance decreases slightly. The overall image quality is a quantum leap forward in relation to all previous 21mm lenses in the Leica stable. To place it in perspective: the perform- ance at f/2.8 is better in all respects than that of the f/3.4 Super-Angulon at f/ 5.6. At f/4 contrast and the clear rendition of very fine details improve, with the corners still lagging a bit behind. Overall contrast is now at its optimum, with ex- ceptional performance over a large part of the image field. At f/5.6 overall con- trast drops a little, but very fine details are still crisp into the far outer zones. From f/8 the performance drops ever so slightly and at f/16 it is noticeably be- low optimum. Decentering is not measurable. Overall assessment: this lens produces out- standing image quality at full aperture, which continues to improve as it is stopped down as far as f/8. It is by far the best 21mm lens in Leica history and the only recommended choice for the person who needs supe- rior performance from a 21 mm lens starting at f/2.8. Close-up performance Close-up performance at full aperture is better than that of the Elmarit-M f/2.8, producing higher overall contrast. More important, the high level of micro-con- trast gives a clear rendering of very fine image details over the entire field, in- cluding the extreme corners. Even the performance from the center to the cor- ners for the complete range of aper- tures is quite impressive. Flare suppression: The Elmarit-M ASPH lens improves on the performance of its predecessor. The suppression of halos, especially at full aperture, can be described as quite ef- fective. Distortion Look at the distortion graphs for the Elmarit-M and Elmarit-M ASPH lenses. The curve of the Elmarit looks better as the distortion at the fringe of the image area becomes zero, where the ASPH version shows more distortion. The abrupt inward curve of the Elmarit, how- ever, increases the visibility of the dis- tortion, while the smooth curve of the ASPH is easier on the eye and it re- duces the noticeable presence of distor- tion. Design considerations I wish to draw attention to the very high level of finely tuned aberration cor- rections in modern Leica lenses. In the first part of this brochure I mentioned that any optical system can only be cor- rected to a certain level and that some aberrations will always be present as re- sidual aberrations. A careful design will not neglect these aberrations because they will generate ‘noise’ in the system. White light con- sists of all wavelengths, but photo- graphically important wavelengths should be weighted more heavily for ul- timate image quality. In the preceding Elmarit lens, slightly lower importance was assigned to certain wavelengths. Nowadays a Leica designer will strive to concentrate all these wavelengths into a spot that is as small as possible. This is the case with the 21 mm f/2.8 Elmarit- M ASPH. One can only see a faint trace of color residuals of the marginal rays. Performance at infinity This is an intriguing topic. The performance of extremely wide- angle lenses at infinity is sometimes discussed as if it were a bit below ex- pectation when compared to lenses with smaller angles of view. As I always use the same scene for a comparison, I was able to compare the image quality of a distant scene as recorded with a 28mm Elmarit-M lens (latest generation and a superb representative of its kind). The 28mm produces a high-contrast im- age, with extremely fine details, ren- dered very crisply. The overall image also has a clarity and lucidity that is diffi- cult to quantify. In direct comparison, 21mm lenses are softer, they lack the overall clarity and crisp reproduction of very fine de- tails. The same amount of details as ob-
  • 23. [22] Leica M Lenses 2 1 m m l e n s e s tained with 28mm lenses can be no- ticed without difficulty, but image de- tails are slightly ‘fuzzier’. Optical progress can easily be fol- lowed in the discussion that follows, with the 21 mm f/2.8 Elmarit-M ASPH representing a very high level of progress. It is the only 21 mm lens that compares favorably with the 28mm f/ 2.8 Elmarit-M. The Elmarit-M at full aperture shows very fine details, but it renders them with slight fuzzy edge contrast and ex- tremely fine details are lost. One needs to stop down to f/5.6 in order to render these extremely fine details with good separation. The Elmarit ASPH produces better im- ages at full aperture. Overall contrast is higher, and extremely fine details are just discernible. The ASPH gives a no- ticeably crisper image at all apertures and the level of just discernible details is higher (more details that is). At f/4 per- formance is as good as the predeces- sor’s at f/5.6 to f/8. Is a direct comparison between lenses of different focal length acceptable? Not really! The reproduction factor of the extremely fine details is higher with a 21 mm than it is with a 28 mm lens. Even if the grain and the film would al- low it, the 21 mm image needs a higher magnification to show the same details at the same size and therefore it needs a higher degree of optical corrections at a higher spatial frequency. The prerequisites for such an infinity test are simple: extreme care must be taken if one wants best quality at infin- ity: rigid tripod, correct exposure, dis- tance setting at infinity, low speed film. The test shows clearly that perform- ance at infinity with the latest genera- tions of 21mm lenses is at a very high level. When comparing results between different focal lengths one should take into account the reproduction factor and all other image-degrading components. I also conducted a test to ascertain whether the performance level changes if one sets the focusing ring just a frac- tion before the infinity mark, thus using depth of field to secure good rendition of details. The drop in performance be- tween these two settings is clearly vis- ible. So, if you need the best image quality at infinity, focus the lens at infin- ity and forget about depth of field con- cerns in such cases. We also noted that image quality will be reduced substan- tially if the objects at infinity are overex- posed, which is quite often the case with small objects (like trees) against the sky. This behavior is inherent in 35 mm format photography where overex- posure is one of the most serious causes of image degradation.
  • 24. Leica M Lenses [23] 2 1 m m l e n s e sM T F m e a s u r e m e n t
  • 25. [24] Leica M Lenses 2 1 m m l e n s e s 100 75 50 25 0 0 3 6 9 12 15 18 21 0 3 6 9 12 15 18 21 100 90 80 70 60 50 40 30 20 10 0 -5 -4 -3 -2 -1 0 1 2 3 4 5 0 3 6 9 12 15 18 21 100 90 80 70 60 50 40 30 20 10 0 Full Aperture Optimum Aperture Summary VignettingDistortion [%] [%] Y' [mm]Y' [mm] [%] Y' [mm]Distortion [%] 21mm f/2,8 Elmarit-M This lens is the first retrofocus design by Leica for the M body. Stopped down to medium apertures it delivers ex- cellent image quality over most of the picture area. . At full aperture the on axis performance is very good, but in the field is only acceptable. [2,8] [5,6]
  • 26. Leica M Lenses [25] 2 1 m m l e n s e s 100 75 50 25 0 0 3 6 9 12 15 18 21 0 3 6 9 12 15 18 21 100 90 80 70 60 50 40 30 20 10 0 -5 -4 -3 -2 -1 0 1 2 3 4 5 0 3 6 9 12 15 18 21 100 90 80 70 60 50 40 30 20 10 0 Full Aperture Optimum Aperture Summary VignettingDistortion [%] [%] Y' [mm]Y' [mm] [%] Y' [mm]Distortion [%] 21mm f/2,8 Elmarit-M ASPH A truly outstanding lens and a fine example of Leica’s drive to design state-of-the-art lenses. At full aperture the lens al- ready provides a high con- trast image with a crisp rendition of very fine de- tails. This performance improves when stopping down and extends to the full picture area. [2,8] [4,0]
  • 27. [26] Leica M Lenses 2 4 m m l e n s e s 24 mm lenses 24 mm f/2.8 Elmarit-M ASPH The gap between 21 mm and 28 mm focal lengths has long existed in the range of Leica lenses for Leica cameras with coupled rangefinders. In the reflex world the 24 or 25mm focal length has a longer history. It maybe the renewed confidence of many users who chose the Leica M as the top reportage cam- era that inspired the Leica designers to compute this focal length for the M se- ries. One may also note that the M body favors the design of high quality short focal length lenses. As a historical re- mark we may note that Nikon and Canon rangefinders from the glorious fifties offered the 25 mm focal length, thus closing the gap between the 21 and 28 mm focal lengths long ago. I used an example of the 24 mm f/2.8 Elmarit-M ASPH lens and compared it to the 25 mm f/4 Voigtländer Snapshot Skopar lens. The 84º angle of view is very interesting, but also quite demand- ing creatively. Close range photography of single persons or small groups con- veys an intimacy of close contact. At the same time you can make a strong statement about the wider surroundings where these people are located. Encap- sulated intimacy might be the approach. When taking pictures you are naturally inclined to tilt the camera downwards a bit in order to include more foreground in the image. At eye level the 84 degree angle of view often encompasses too much horizon. In this position, perspec- tive distortion of background objects at the sides of the picture area tends to be pronounced. This perspective distortion should be carefully separated from the optical one. Optically this lens shows hardly any distortion. After some use I acquired the habit of taking pictures from a lower, but level perspective. Here the unusually good image quality really shines. In use its angle of view is quite fasci- nating. I used it in reportage-style pic- ture-taking situations and I was able to get very interesting pictures at close range. The trick in using this lens is the selection of subject matter at about 1 and 2 meters (approximately 3 to 6 feet). If the subject in the foreground catches the eye because of its nature or because of its composition, the whole image will be interesting. In many in- stances you might be tempted to go for the grand view. Make sure the fore- ground space is dominant and full of in- teresting details. At full aperture the lens exhibits a very high contrast image from the center across the entire field. Only the far cor- ners drop in contrast and produce soft details. Over an image circle with a di- ameter of 12 mm the outlines of subject shapes and details are delineated with superb edge contrast and extremely fine details are rendered crisply and clearly. In the rest of the field, very fine details are etched crisply in the emul- sion with extremely fine details ren- dered visibly but with softer edges. Ex- ceedingly fine details are rendered just above the threshold of visibility, but with slightly lower contrast. Going from center to corner the con- trast of extremely fine details drops somewhat. While a bit soft at the edges and of lower contrast, these details are still clearly visible. Stopping down to f/4 the contrast in very fine details improves and the ex- ceedingly fine details now are clearly visible. Corners still lag a bit but center and zonal performance (12 mm image circle) is at its optimum. This aperture can be called the optimal aperture. Stop- ping down to f/5.6 we see that the fin- est possible details become a bit more crisp, but the outlines of shapes and de- tails start to soften faintly. Thus overall contrast is a bit lower. It is a matter of priorities which aperture is ideal. I would say that this lens is at its best at f/4. At f/8 corners continue to improve where the center now drops in contrast. At f/16 the overall image contrast is lower and very fine details suffer as dif- fraction sets in. Close-up performance At close range (± 70cm, approximately ±28 inches), this excellent performance is preserved. A wide angle lens like a 24mm is not recommended if its close- up performance is not the same as its performance at infinity. As most lenses are optimized for longer distances, we need to stop down to f/5,6 to get the best of performance in the close-up range. Flare suppression and other topics Flare suppression is perfect. Night pic- tures with Kodachrome 64 show excel- lent gradation in strong highlights and distance point sources are rendered clearly, without any trace of halo. This